1978 Camaro Front Suspension and Brake Upgrade

By Jeff Huneycutt   –   Images by the Author

There’s no doubt that when it comes to the second-gen Camaro, the early years are by far the hottest. It’s been that way for a long time. But as time has gone by, the later years have certainly grown in popularity.

002 1978 camaro full suspension upgrade kit qa1 sway bars shocks
There’s no doubt that the scope of this project is large. We’re basically modernizing and upgrading the entire suspension and braking systems. But it is definitely doable by the average gearhead, and to prove it we’re tackling this project with the car on jackstands.

Normally, second-gen Camaros are divided between the debut models from 1970-74 and the mild, mid-gen refresh that came in the 1975 models with the wraparound rear glass, catalytic converters, and other changes that lasted until the end of the generation in 1981. The good news is that while there are some changes under the skin so that everything on the suspension isn’t interchangeable, the differences are minor enough that it’s relatively easy to make performance components and kits that work well across the entire range from 1970 all the way to 1982.

003 1978 camaro original front suspension disassembled on jack stands
Everything underneath the Camaro was either original equipment or stock replacement, and it all gets ripped out for new hardware from QA1 and Wilwood.

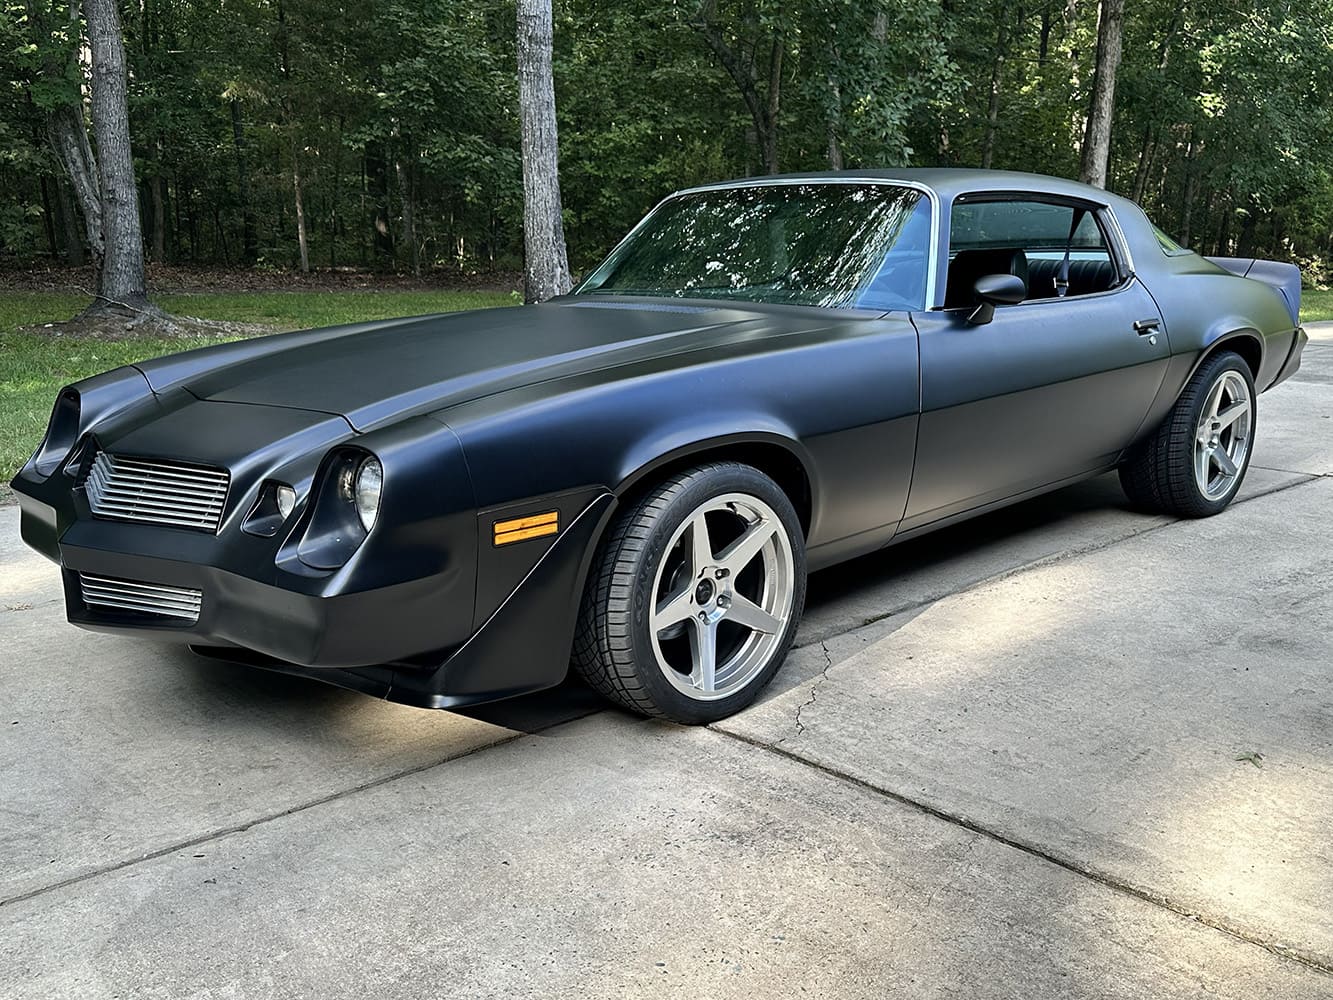
Our project car is a lowly base model 1978. It has a single-stage flat-black paintjob that was a quick and cheap way to cover the mixture of dead silver paint and primer that covered the car when it came into our possession. A while back we built a supercharged 427ci small-block in the pages of the All Chevy Performance Sept. ’23 issue that we plan to put in the car, but with 643 lb-ft of torque and 688 hp, it was way too much for the worn-out Camaro.

004 1978 camaro rear drum brake disassembly axle on jack stands
Here’s the reason why one of the drum brakes would never provide much clamping load. An internal leak kept both the drums and pads coated in brake fluid. We knew the leak was there but with plans to upgrade the drums to discs, we didn’t want to invest the effort to fix it.

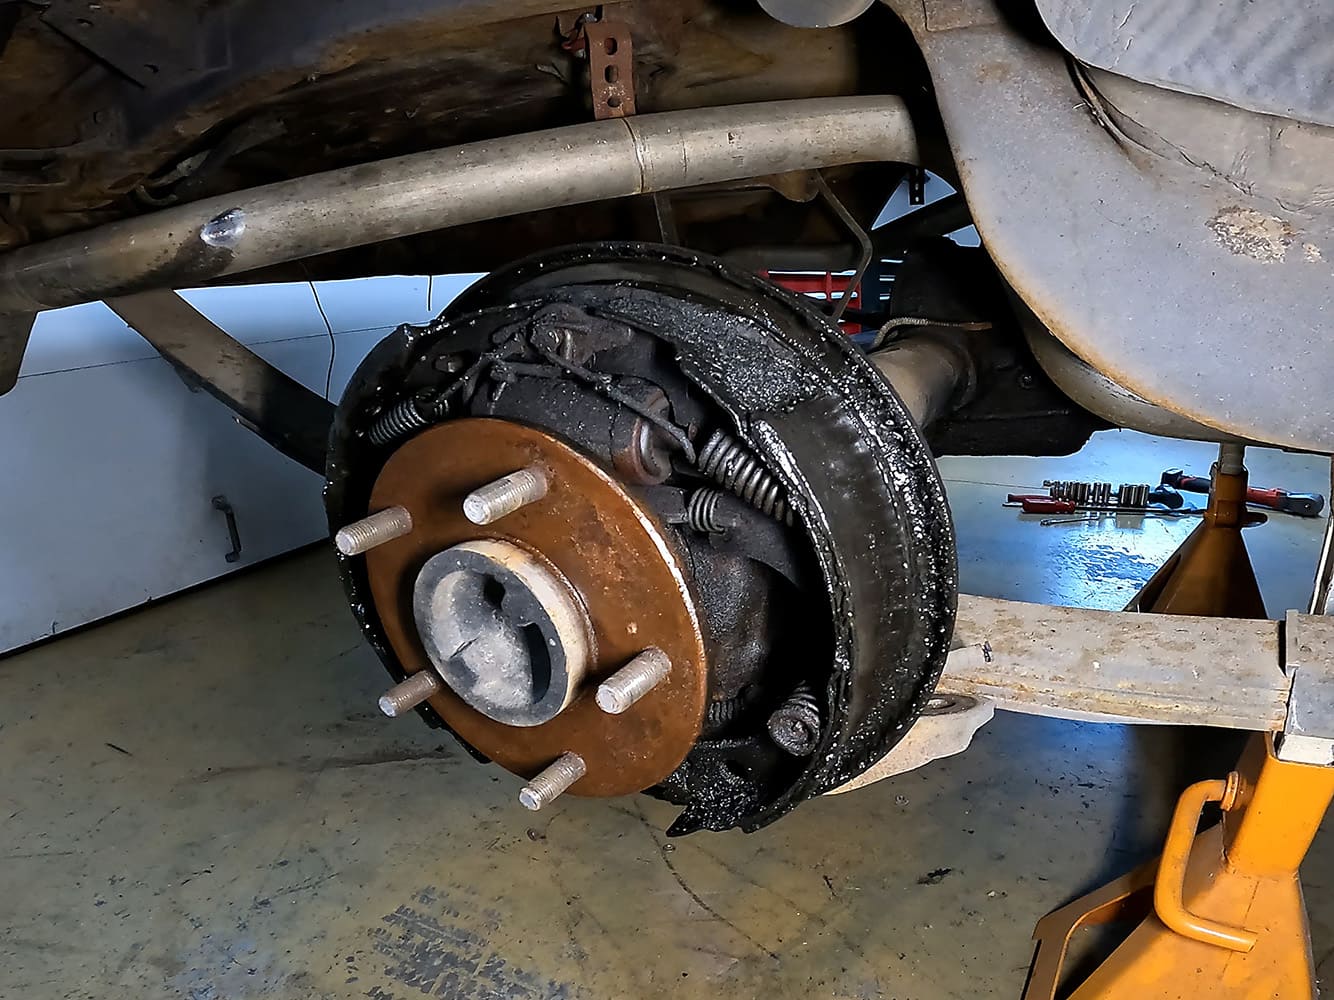
So, the Vortech supercharged small-block was pushed into a corner of the shop and plans put into place to make significant upgrades to the Camaro so that it wasn’t an overpowered death trap. The car was like a lot of Chevrolets that are nearly 50 years old—maintained but basically worn out. Everything with the suspension and brakes was either stock or stock replacement. We’d replaced things like the spindles, rotors, flex lines, and even some hard lines, but we still struggled with leaks and regularly needed to bleed the brakes to keep the pedal firm.

005 1978 camaro matte black with aftermarket wheels parked on driveway
The five-spoke design Rocket Racing Wheels Flares are not only lightweight but look great on the Camaro. They are sized at 18×9 in the front and 18×10 in the rear and wrapped in Continental’s sporty ExtremeContact tires, with a 275 width up front and 285 in the rear. We did have to use a set of 20mm (0.8 inch) spacers to get proper fitment, and the caps on the front had to be popped off to fit with the stock hubs, but that won’t be an issue with the more modern hubs from Wilwood we’ll be installing. If anything, the car sits a bit too high with these short sidewall tires, but the QA1 adjustable coilover shocks will take care of that.

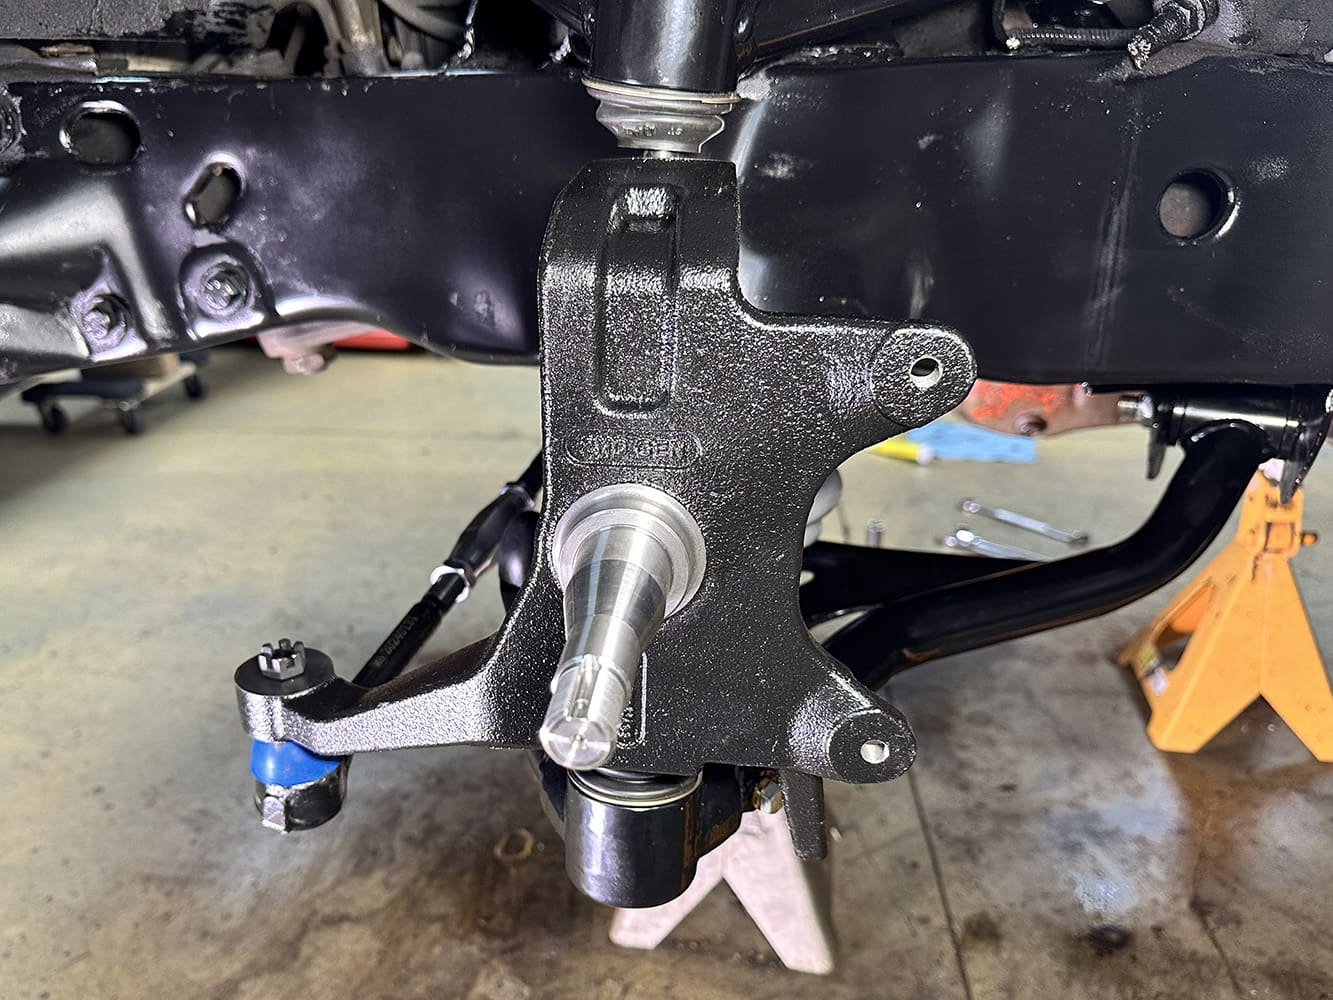
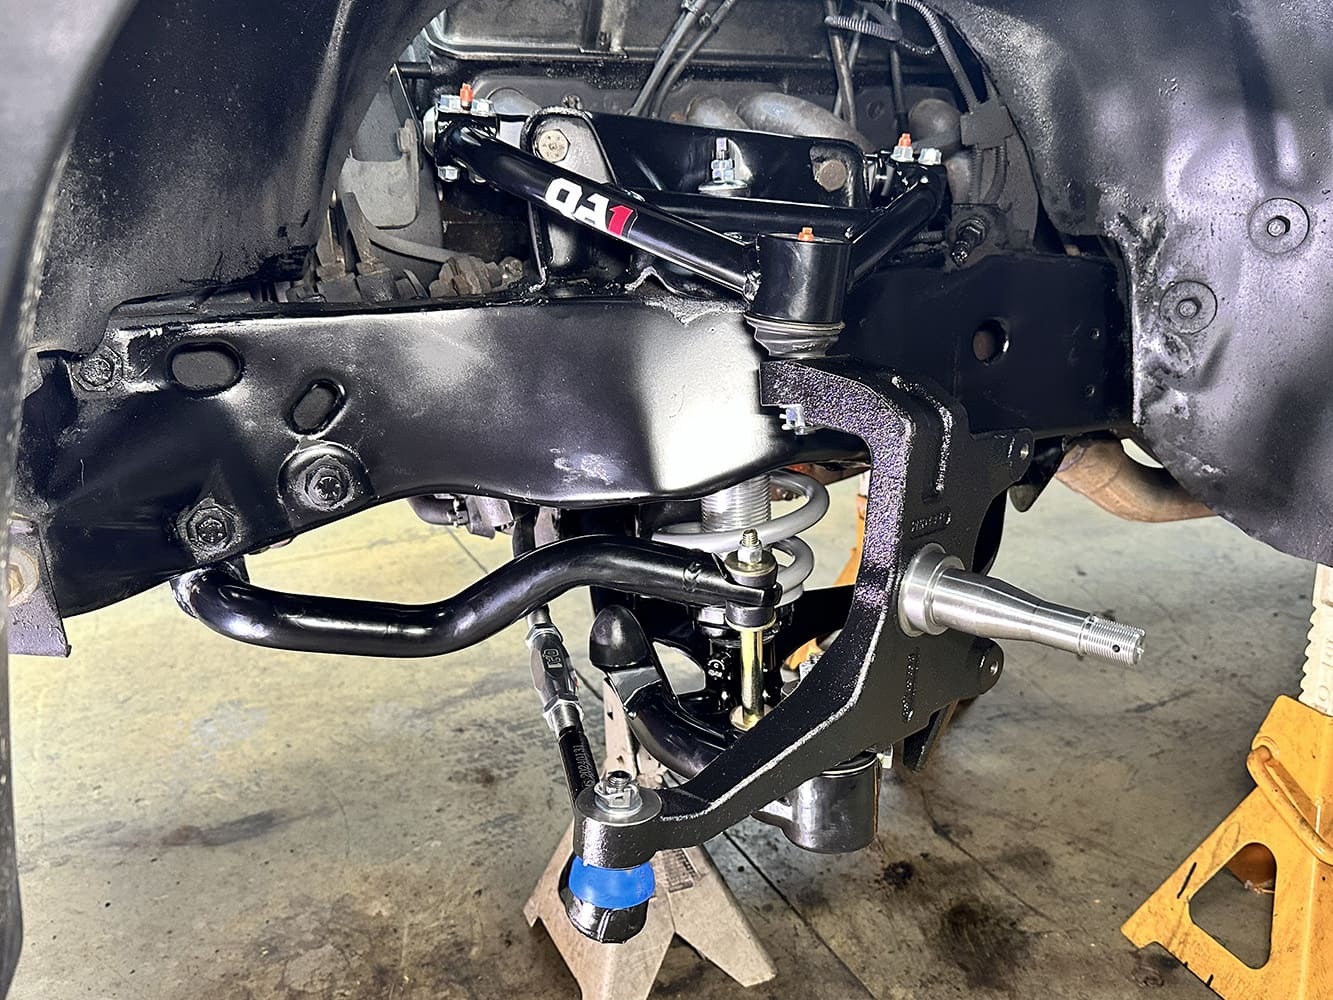
Continuing to invest finances and effort into stock components was just throwing good money after bad, so we made a plan with Wilwood to significantly upgrade the entire braking system. That’s not just a set of six-piston calipers and big-inch rotors. We’ll also be using their new, high-strength drop spindles to lower the front of the car 2 inches, hubs and converting to a manual master cylinder because the 688hp engine won’t be producing much in the way of vacuum.

006 1978 camaro subframe connectors and mounting hardware laid out
The first step in our upgrade is QA1’s subframe connector kit. It is a bolt-in unit and includes high-strength mounting boxes (right) for either leaf springs or the lower arms for the rearend from QA1’s kit. This only works with QA1’s billet aluminum body mounts. Our stock rubber body mounts were rotten, so we were more than happy to trade them out for the aluminum units.

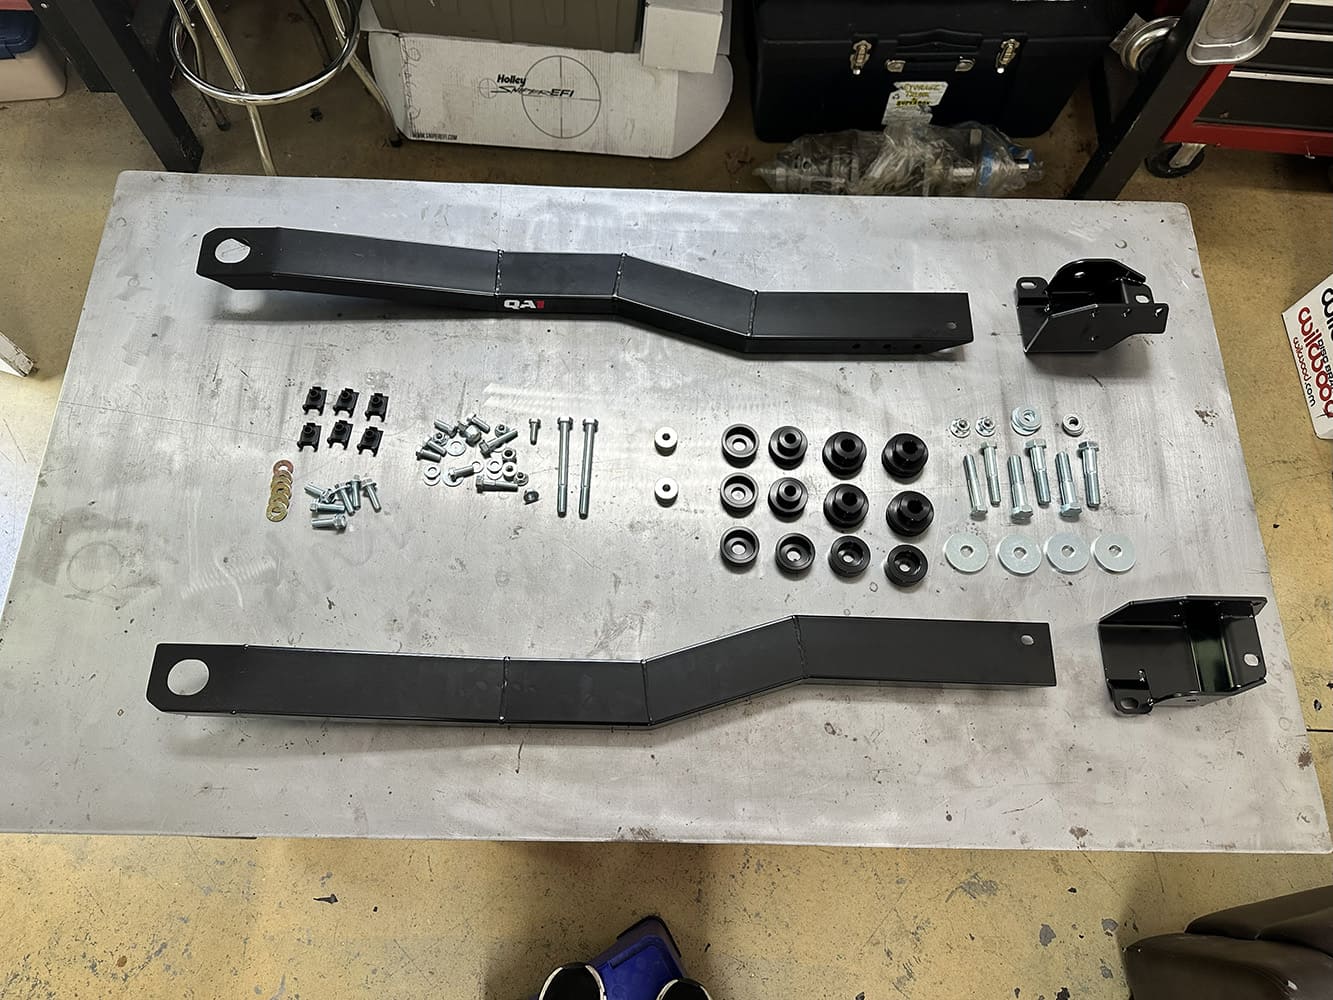
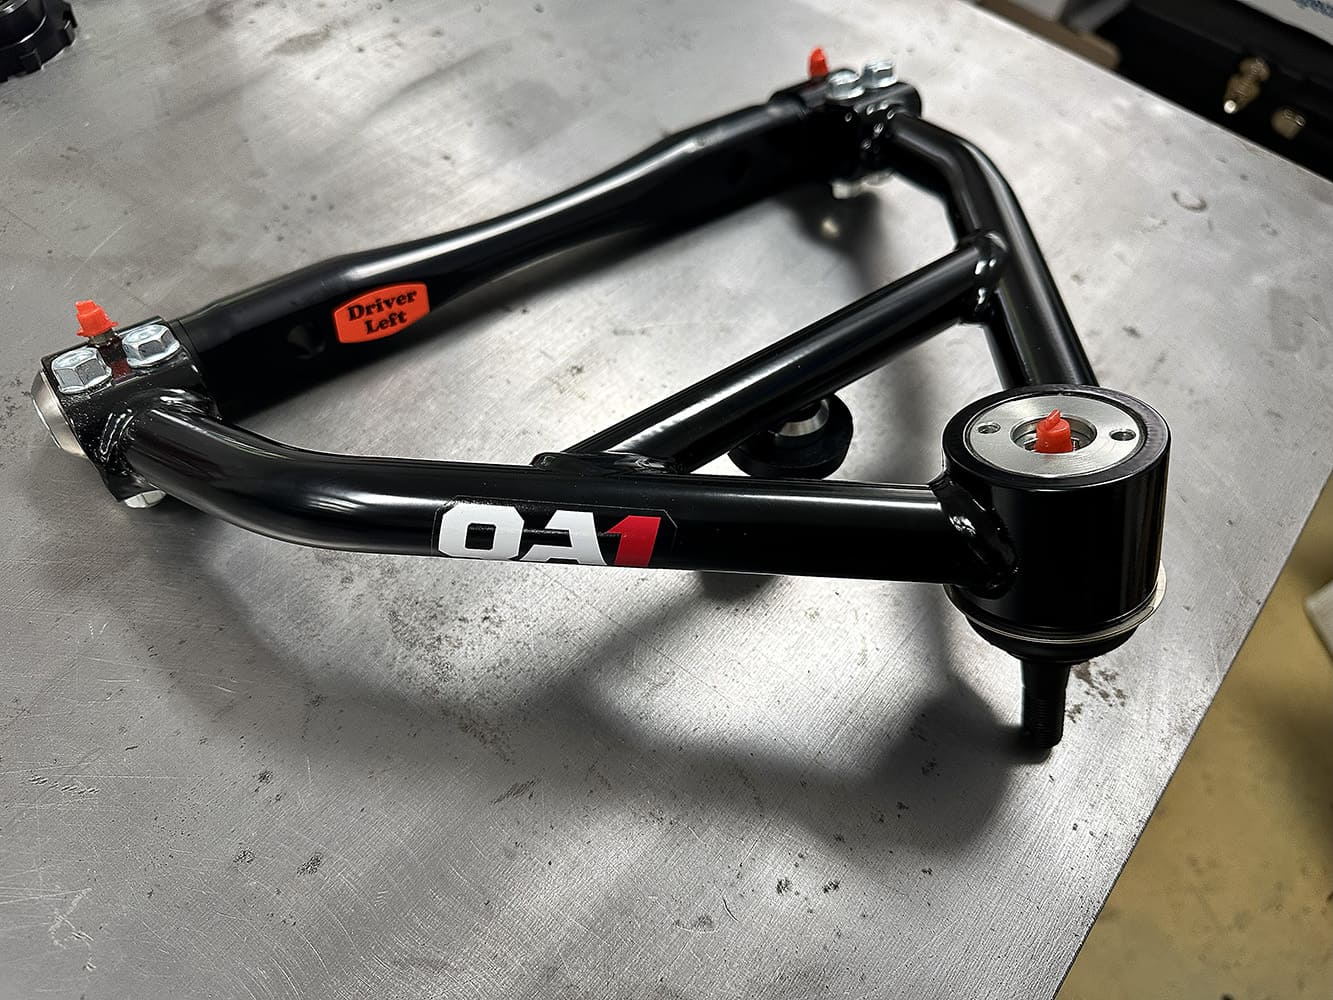
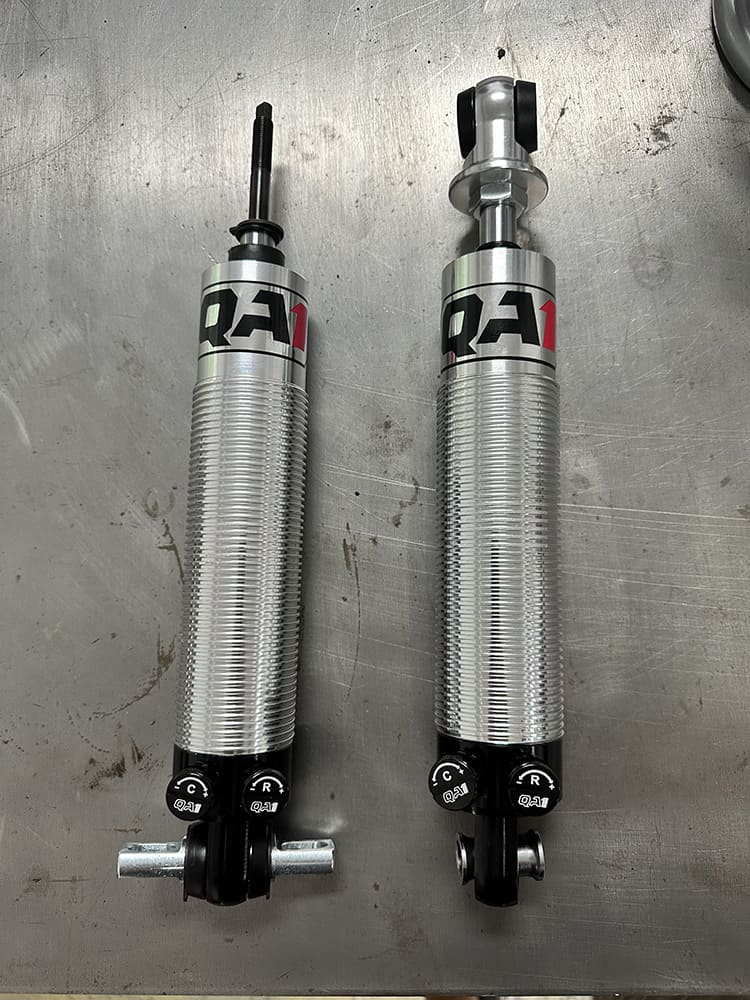
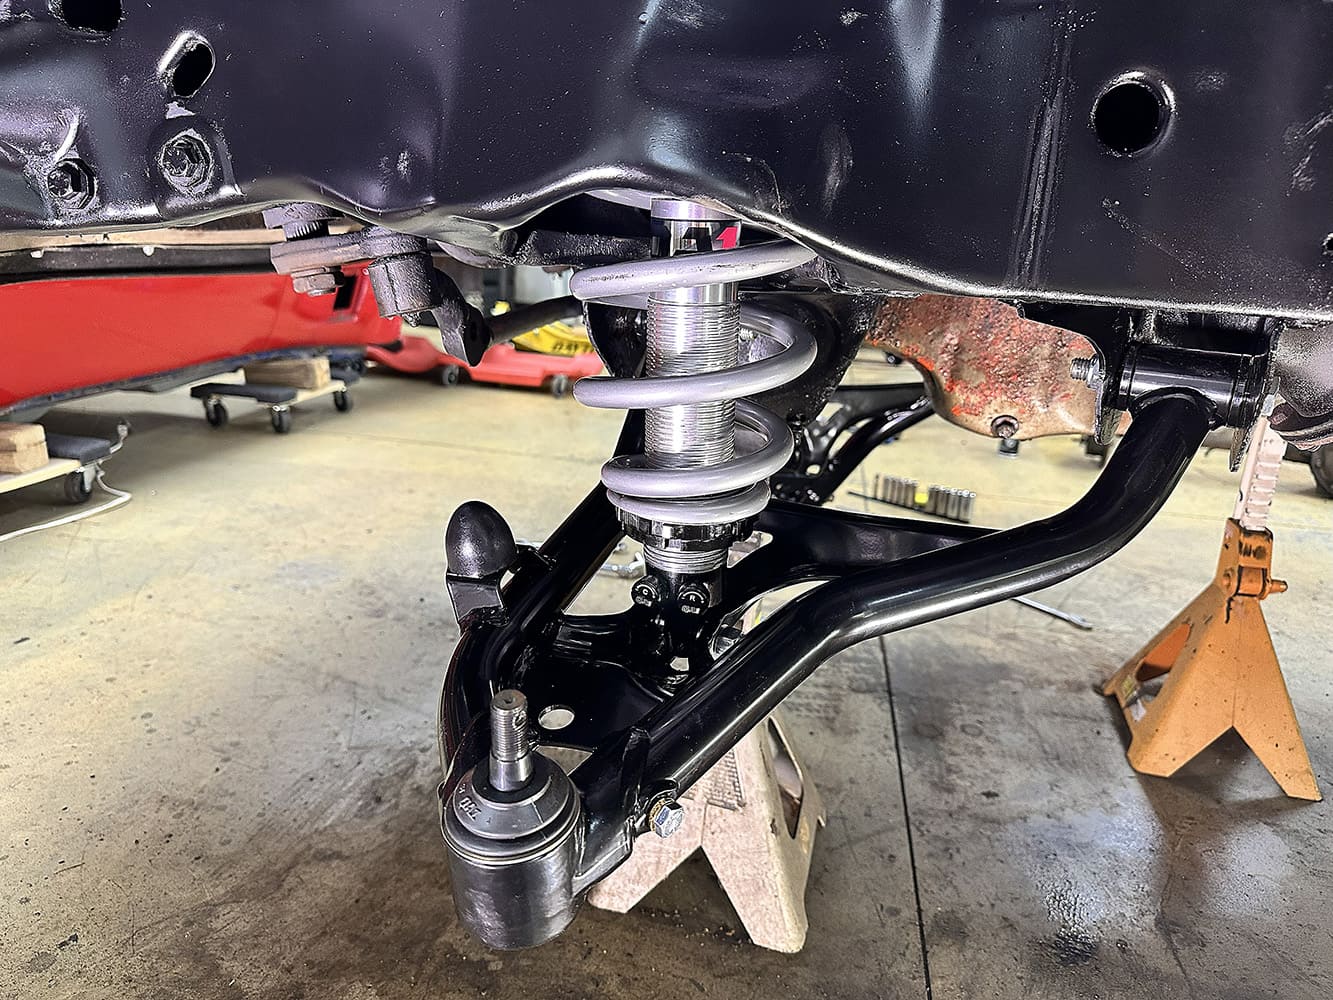
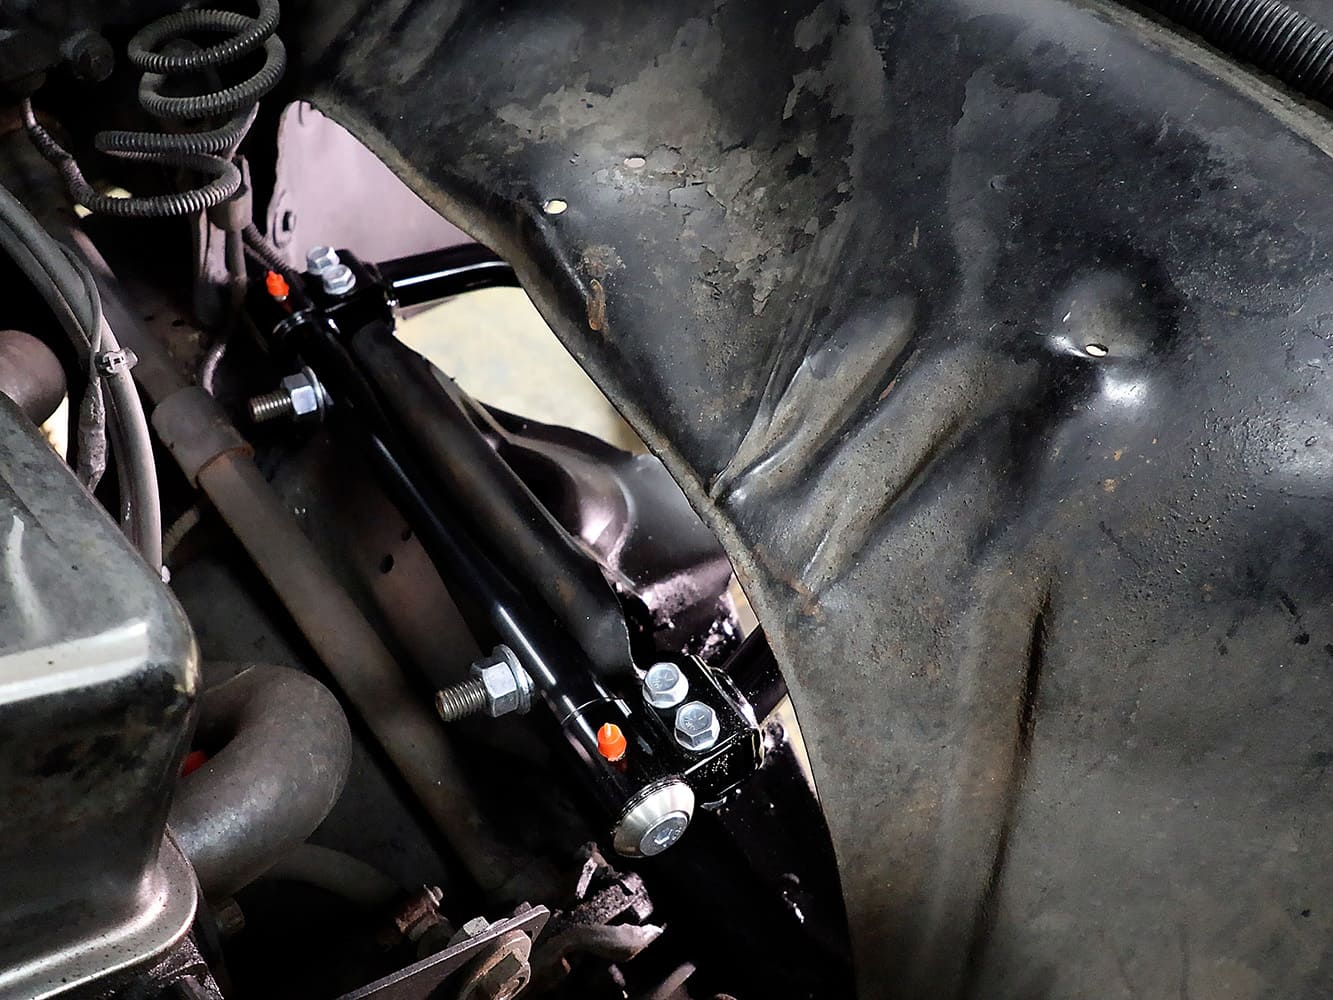
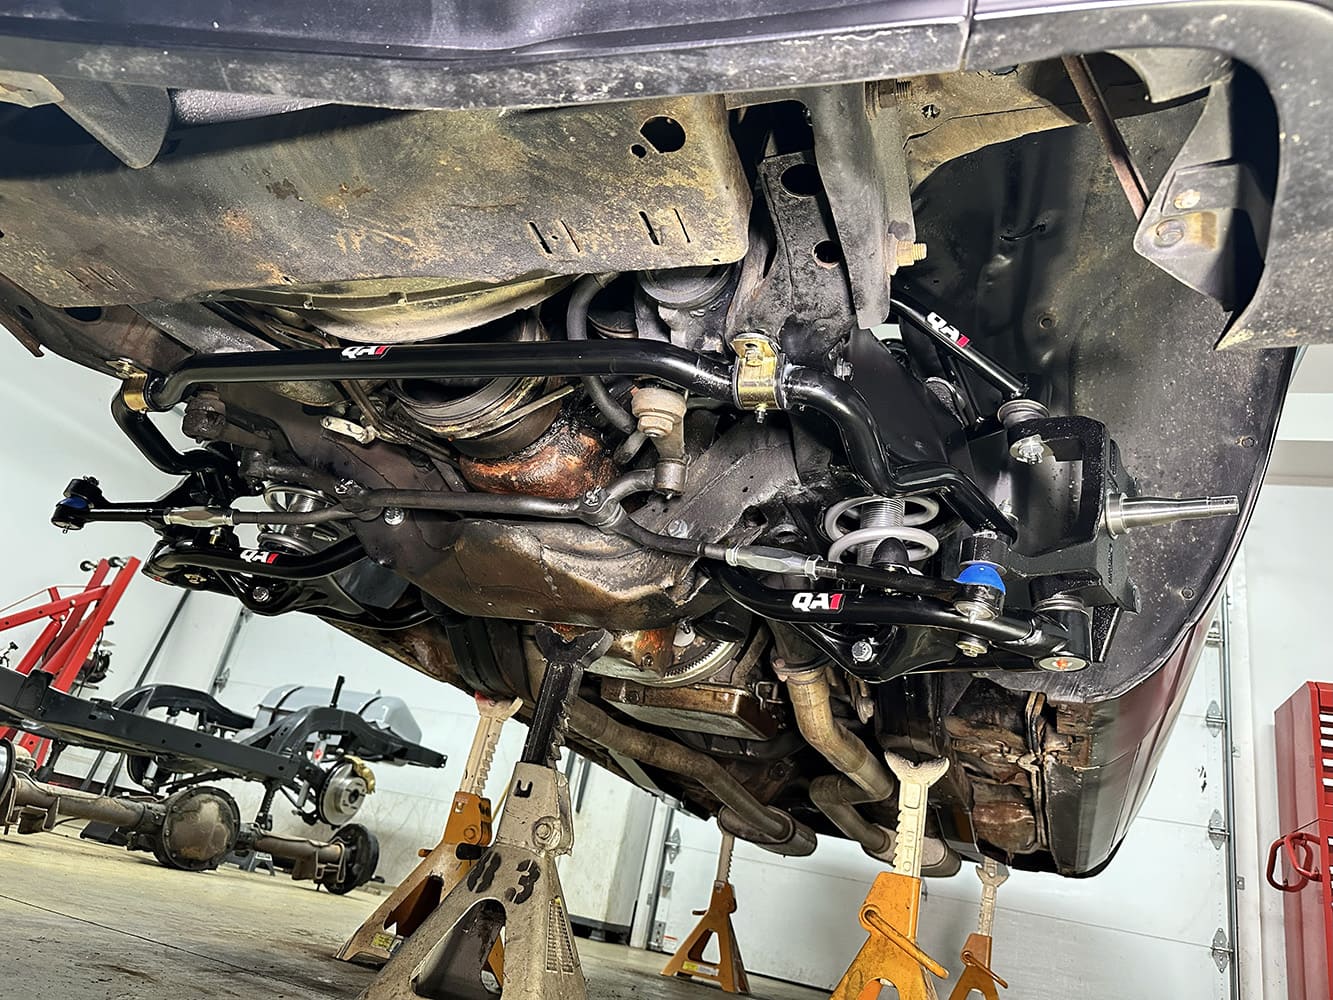
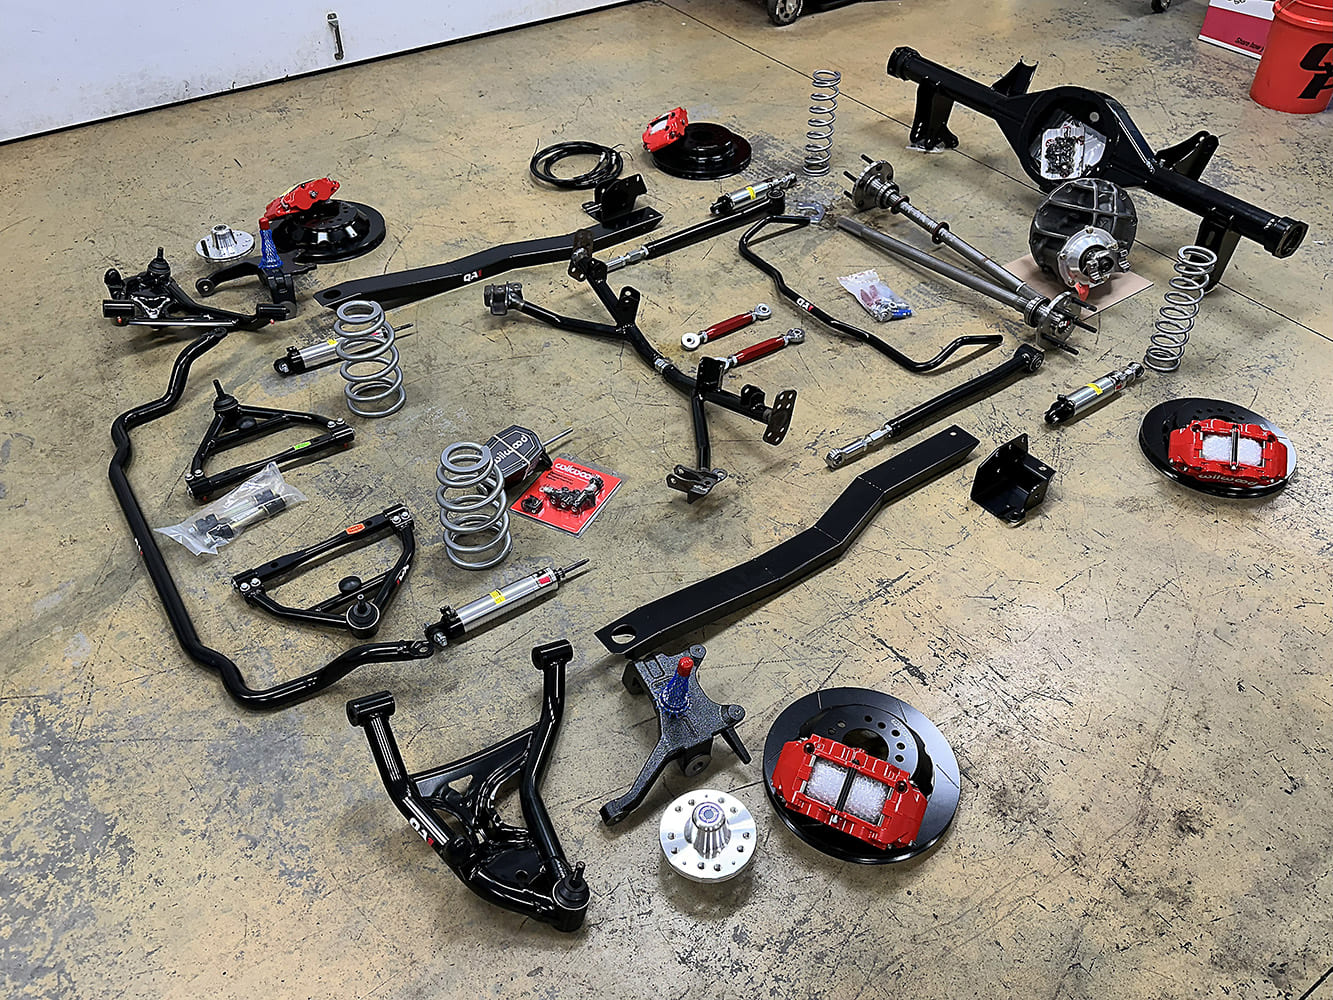
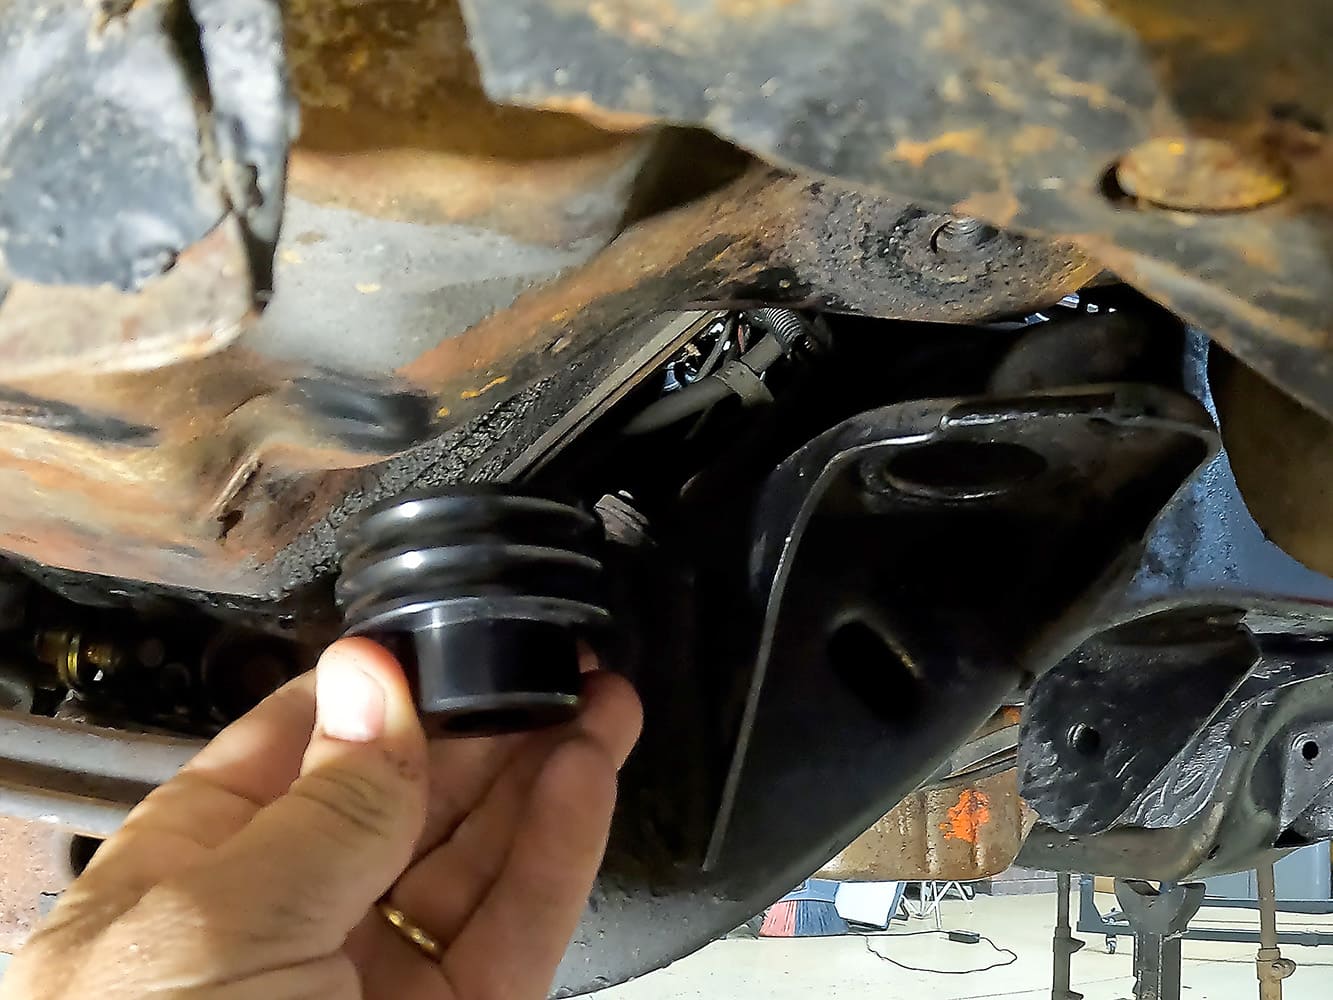
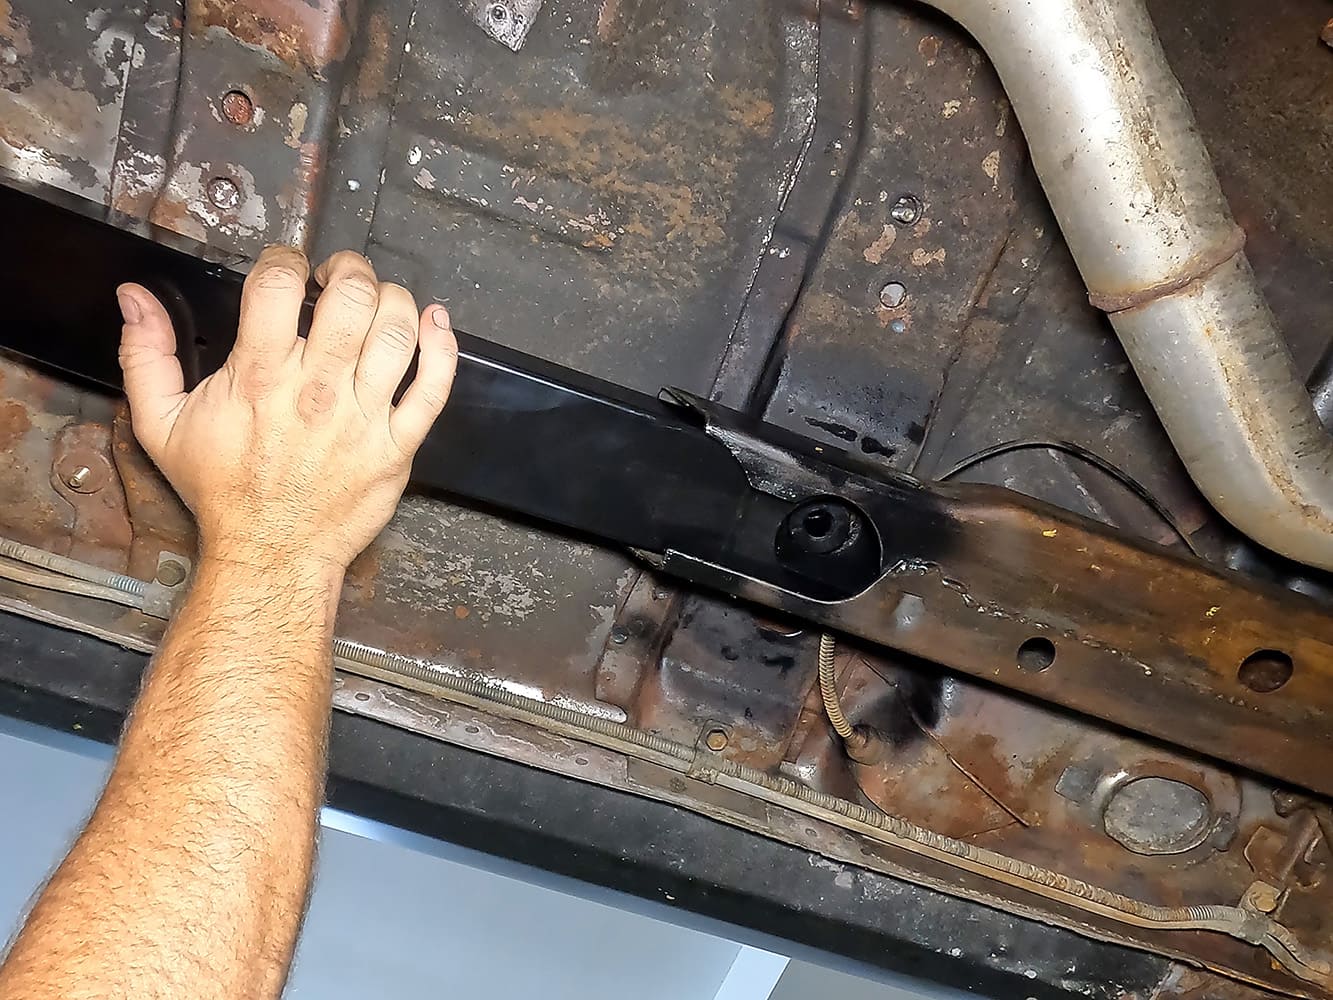
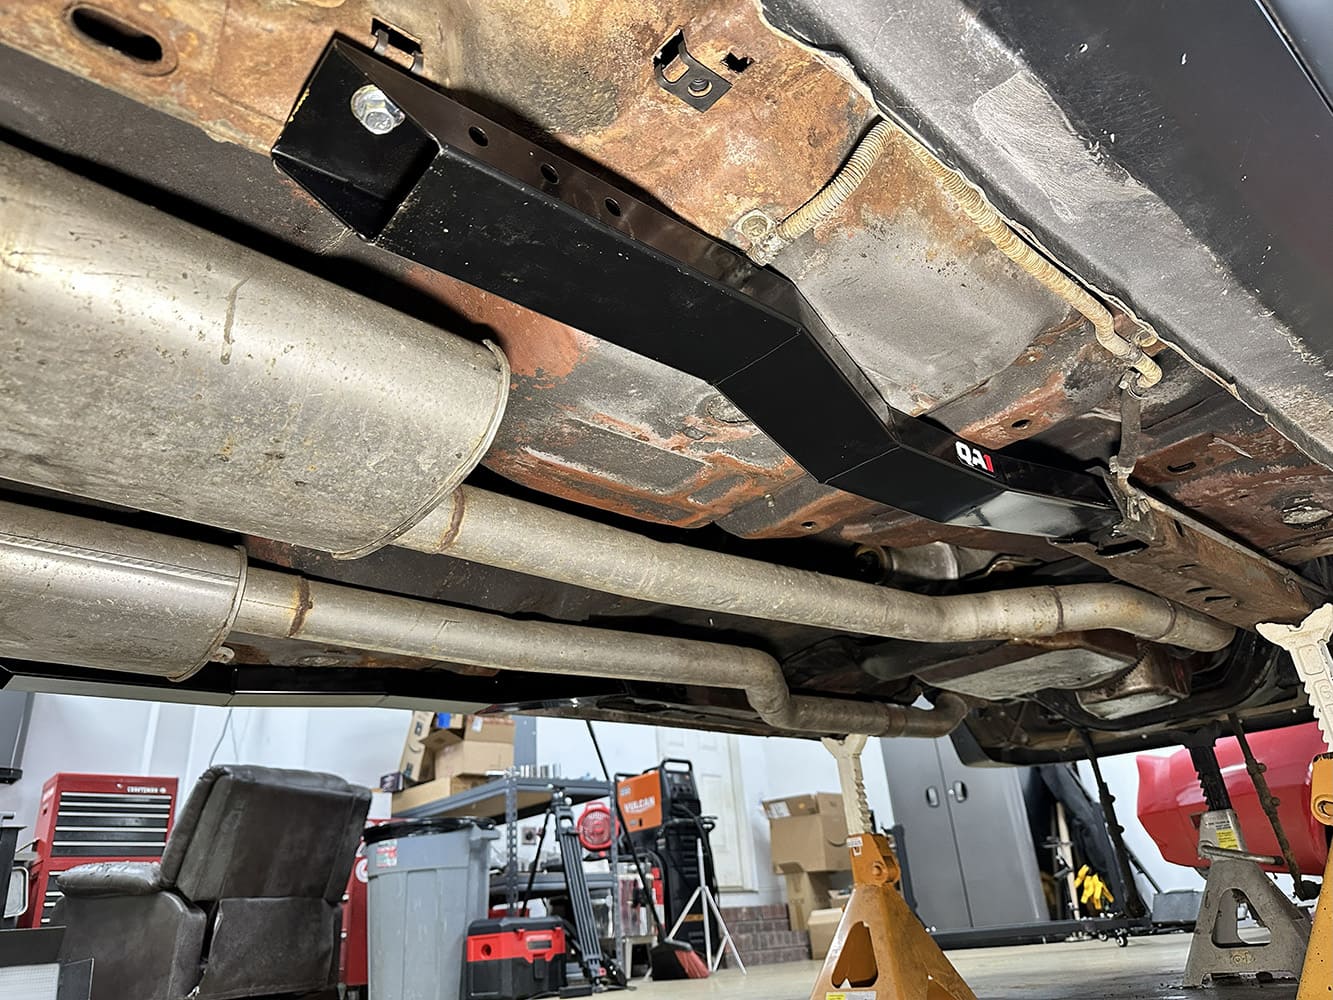
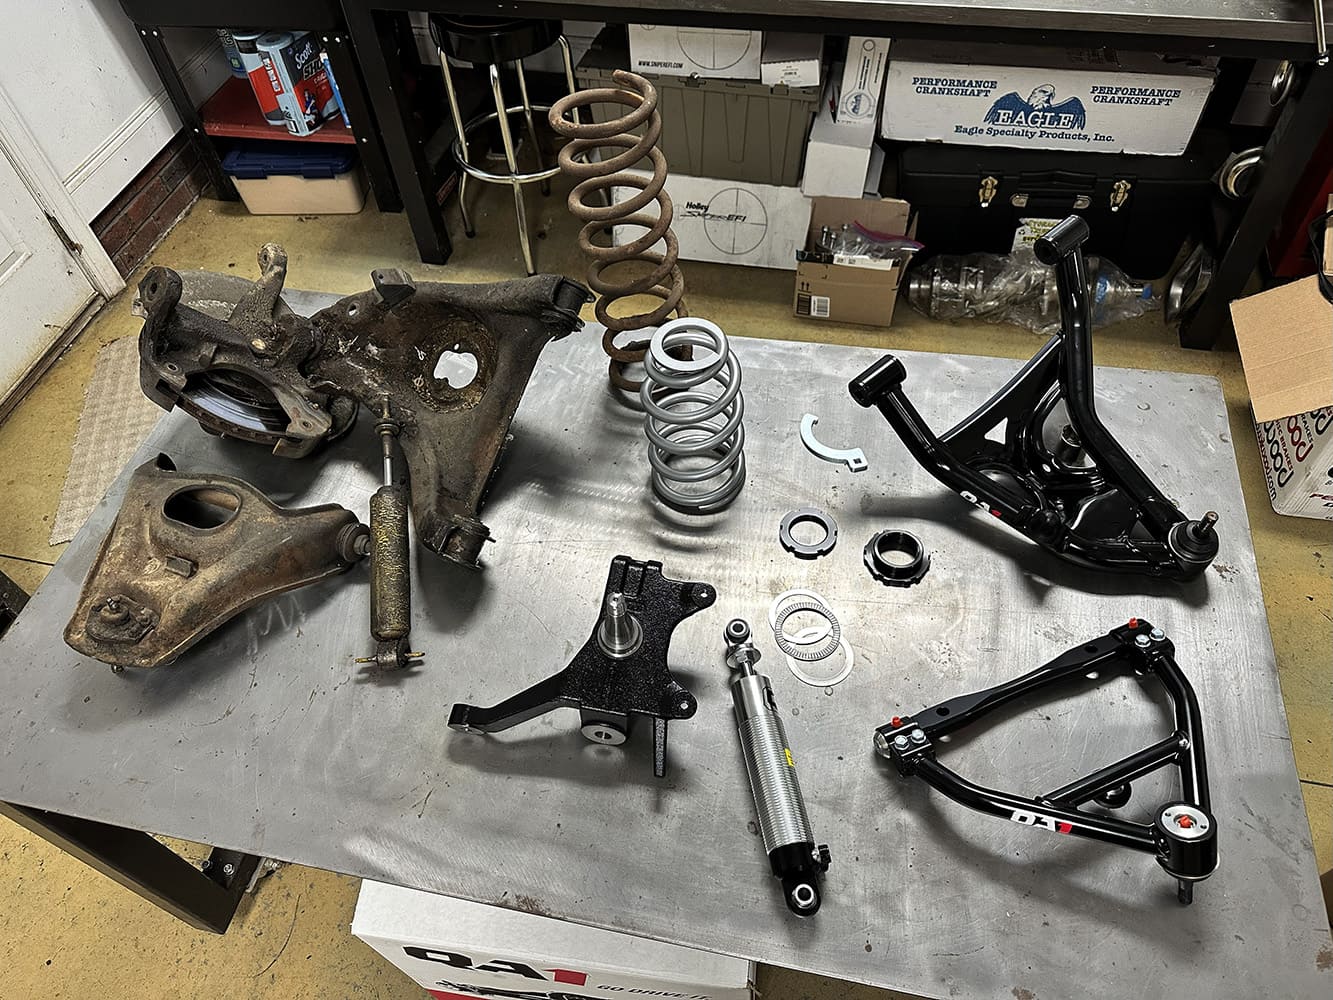
Going hand-in-hand with the brake upgrades, we also wanted to significantly improve the stock suspension. Even if the rubber bushings weren’t entirely rotten and the ball joints absolutely worn out, the stock suspension with its leaf-spring rear was originally designed all the way back in the 1960s. So, we decided to bring the car into the 21st century with QA1’s comprehensive Level 2 handling kit. This setup scraps the car’s entire suspension and replaces it with fabricated upper and lower control arms up front, a four-link suspension in the rear, beefy sway bars front and back, double-adjustable coilover shocks at all four corners, and a 9-inch rearend with stout axles. There is even a pair of stout subframe connectors to help tie the rear suspension to the front subframe and stiffen up the notoriously flexible unibody. The only thing we need to come up with is a centersection and gearset, which we sourced from the experts at Quick Performance. At first the new rearend may seem a bit much, but it was definitely necessary considering the engine will blow up the stock 10-bolt faster than you can say, “Will that thing do a burnout?”

007 1978 camaro polyurethane body mount bushing held near install point
To make sure the body doesn’t shift away from the holes in the subframe when swapping out the mounts, just loosen the bolts on one side. Then remove the bolts on the other so you can lift that side of the body off the subframe and change the mounts. Leave the new bolts loose so you can lift the other side and repeat the process.

Of course, we had to have a little fun with this buildup along the way. We won’t name names, but too many times we read brake install articles (or watched them on YouTube) and then we’re just told the “new brakes are much better” without any numbers to back it up. So, we decided to actually do some brake tests and provide you with actual numbers.

008 1978 camaro subframe connector test fit under chassis floor pan
The forward side of the QA1 subframe connector slides into the opening at the rear of the front subframe and uses the same body mount bolt to secure it.

We took the Camaro to a private asphalt drive with plenty of room to do a 60-to-0 mph braking test after bleeding the brakes and doing everything we could to make the stock setup work as well as possible. Notice we didn’t say “like new” or even “acceptable.” It turns out the left rear would lock up way too early but the other three wheels wouldn’t lock up no matter how hard we mashed the brake pedal. Still, with the stock tires and stock brakes we came up with a stopping distance of 167 feet pretty consistently. That, by the way, was done on a set of P245/60/R15 Futura GLS Super Sport tires of unknown age on the original 15-inch wheels.

009 1978 camaro qa1 subframe connector installed under body
On the other side, the thick steel subframe connectors will bolt to the control arm box in three places and the underside of the Camaro in a fourth. But the lower control arm for the rearend must be installed at the same time, so we’ll leave that for next month.

Obviously, with poorly functioning brakes and a car on old tires this isn’t the most scientific test ever. Fresh from the factory back in 1978 the Camaro almost certainly performed much better than that. But that’s also exactly the point. If they are driven like they should be, old cars gather wear and tear. You can spend your money trying to keep your car properly maintained and functioning as it did when it was new, or, if you aren’t trying to keep a museum piece, you can spend it on upgrading the performance or doing anything else that will improve your enjoyment of your car. In this case, we chose the latter.

010 1978 camaro old vs new control arms and shocks comparison
On the left is the stock front suspension. On the right are the components from QA1, along with Wilwood’s cast 2-inch drop spindle that will replace it. Just the improvement alone from QA1’s double-adjustable coilover shocks would make the kit worth it, but it also isn’t hard to see that the new components will cut weight while also being significantly stronger.

The problem that popped up in our situation is there’s no way the stock 15-inch wheels will fit over the 12.88-inch rotors and six-pot calipers from Wilwood. So just for fun we also mounted up a set of new Continental ExtremeContact tires on our five-spoke Flares from Rocket Racing Wheels. The tires are much bigger, at 265/35R18 for the fronts and 285/35R18 for the rears. This is the wheel and tire combo that we’ll run after all the installs are complete, so this is a more legitimate test comparing before and after with the brakes. This time around, with only one wheel locking up, the braking distance from 60-to-0 dropped to 133 feet. Just by changing the rubber we were able to drop the braking distance 34 feet, but it’s still nothing to write home about. Those numbers will certainly drop again after installing the Wilwood braking system when we have all four corners braking properly and are able to adequately dial in the brake bias. But just as important is the repeatability. The stock brakes can handle only three or four hard stops before dreaded brake fade starts to set in, but the larger Wilwood rotors and calipers can handle many more stops with the same performance and feel time after time.

011 1978 camaro suspension bolt install front subframe hardware alignment upgrade
Often, suspension manufacturers are blamed for shoddy work when the lower control arms won’t fit in the chassis’ mounts. But the truth of the matter is the mounts can often be deformed over the years by overtightening, hitting potholes, and just overall use. That’s the issue we ran into—the lower control arm bushings were just too wide. We used a length of 1/2-inch threaded rod and a couple of nuts and washers in place then opened up the gap with a pair of wrenches so that everything fit the way it should.

There’s a lot going on with this Camaro upgrade project, so we’ll have to take it on in chunks. But the good news is it doesn’t require any fabrication beyond a little welding and can be done in a driveway with basic hand tools. As you can tell from the photos, we are taking on this project in a shop that’s the basic dimensions of your ordinary two-car garage and with the car on jackstands.

Follow along as we give our old Camaro the upgrades it deserves.

Check out this story in our digital edition here.

012 1978 camaro qa1 upper control arm driver side tubular suspension component
The upper control arm is really well designed. For instance, the cross shaft doesn’t need to be as strong as the rest of the arms, which are fabricated from 0.109-wall carbon steel tubing, so it is CNC-machined from aluminum to help cut weight. The low-friction Ultimate Ball Joint is rebuildable and features a longer stud, making it able to handle more aggressive camber settings.
013 1978 camaro qa1 adjustable coilover shocks front suspension performance upgrade
The aluminum-bodied, double-adjustable shocks allow both compression and rebound to be controlled independently. Twenty clicks each mean the shocks can be set to compliance for comfortable road manners and then tightened up for the track or autocross sessions.
014 1978 camaro qa1 coilover and lower control arm front suspension assembly
The coilover system can drop the car’s ride height up to 2 inches. Of course, the 2-inch drop spindles will allow us extra adjustability. The springs for the front are rated at 450 lb/in. Notice that the high-strength lower control arm has an integrated bumpstop on the left side, and that bolt on the right just behind the ball joint is an adjustable steering stop bolt.
015 1978 camaro qa1 upper control arm installed in wheel well view
Here’s a mistake we made you might want to avoid. During teardown we threw away the alignment shims behind the upper control arms thinking the kit would come with new ones. They don’t. The QA1 kit adds more caster and negative camber for improved handling, but it does so through the control arm construction so you can keep (roughly) the same number of alignment shims. If you are installing this kit, keep track of the number and thickness of shims on each upper control arm during teardown so you can keep the alignment at least close on reinstall. Since we are changing so much, our plan was to trailer the car to a local alignment shop anyway, so we aren’t out much.
016 1978 camaro front spindle installation with new qa1 suspension components
This is Wilwood’s 2nd Gen Pro Spindle. Besides lowering the front of the car 2 inches without affecting suspension geometry, the high-strength casting is more rigid than the stock spindle and eliminates GM’s sliding caliper mount so that the upgraded Wilwood calipers can be mounted directly. These are the perfect foundation, which is going to be able to hold up well to a braking system that can exert a ton of stopping torque.
017 1978 camaro qa1 sway bar links tie rod coilover suspension underside
With everything else new, it only made sense to install new inner and outer tie rods on both sides. QA1’s billet tie-rod sleeves are stronger than the stock clamps and make toe adjustments a breeze.
018 1978 camaro full qa1 front suspension install underside wide view
The last thing to be done on the front end is to install the antisway bar. This new unit is constructed from chromoly steel and CNC bent for precision. It is significantly thicker than the stock 0.940-diameter sway bar at 1.375 inches in diameter with 0.1875 wall thickness. It also upgrades the stock rubber bushings and endlink pieces to stiffer polyurethane pieces from Energy Suspension.
019 1978 camaro qa1 control arms spindle coilover passenger side suspension
We’ve got a lot done, but there’s still plenty to go. That includes new lightweight aluminum hubs from Wilwood that we’ll get around to when we install the upgraded brakes. But that will have to wait until we install the brand-new four-link suspension and rearend housing at the back of the car.

sourcebox image

Related Articles

Search Our Site