One of the most important areas of any high-performance ride always leads to the business office, which serves as the hub for monitoring the car’s vitals as well as maintaining its full operational control while also providing plenty of comfort for the occupants. Regardless of whether you’re taking on a full build or simply making updates, it’s a solid idea to think about upgrading your interior components, especially if you’re choosing to up the ante in the horsepower department of your classic Chevy. This can be as simple as opting to add a more-efficient gauge package or replacing a torn dashpad to more involved updates, like adding a new air conditioning system.
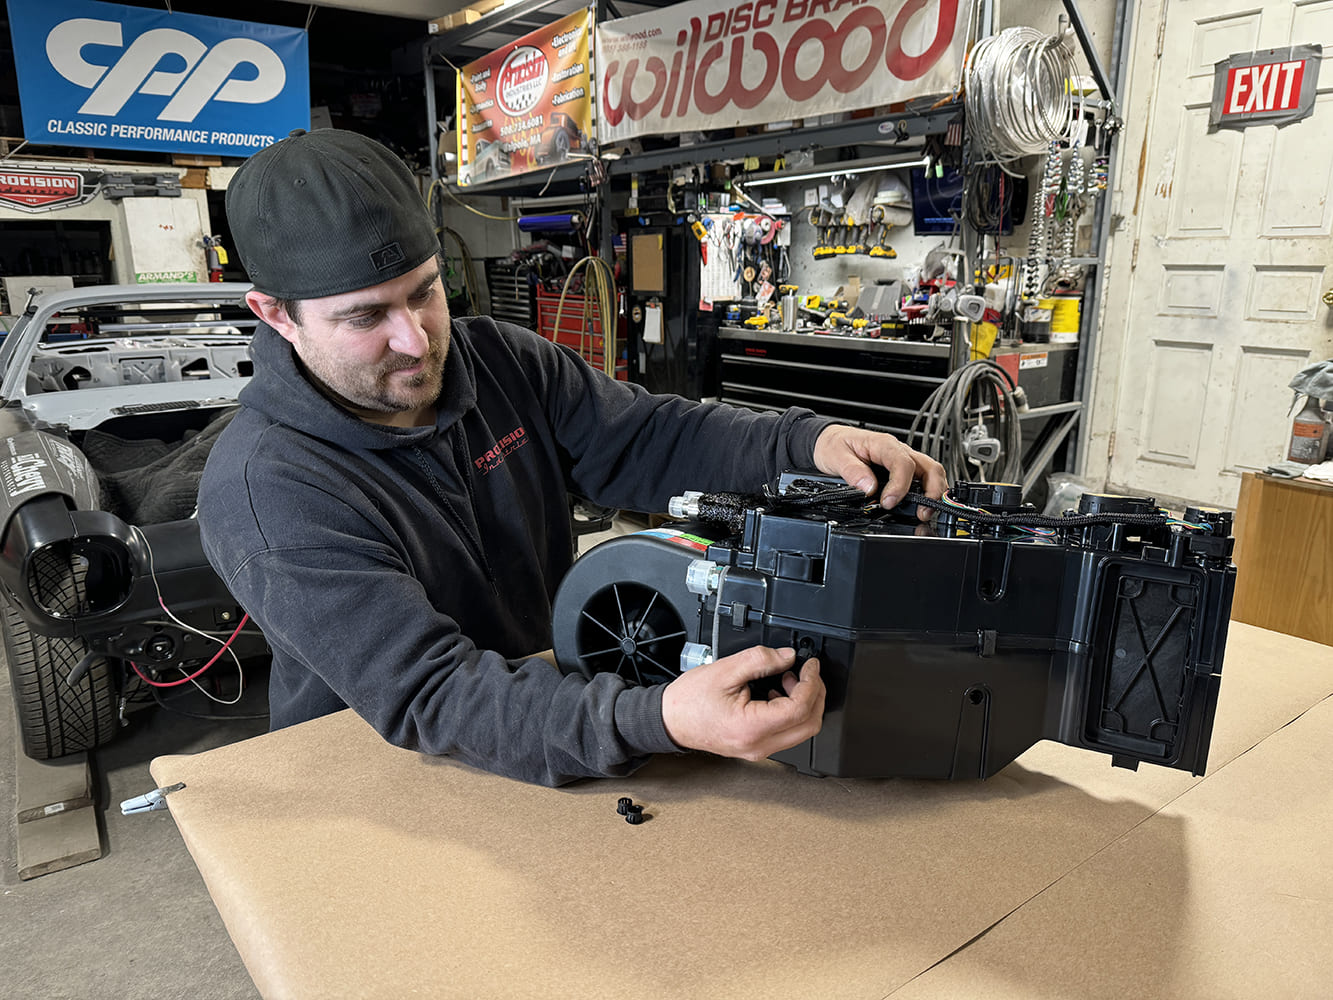
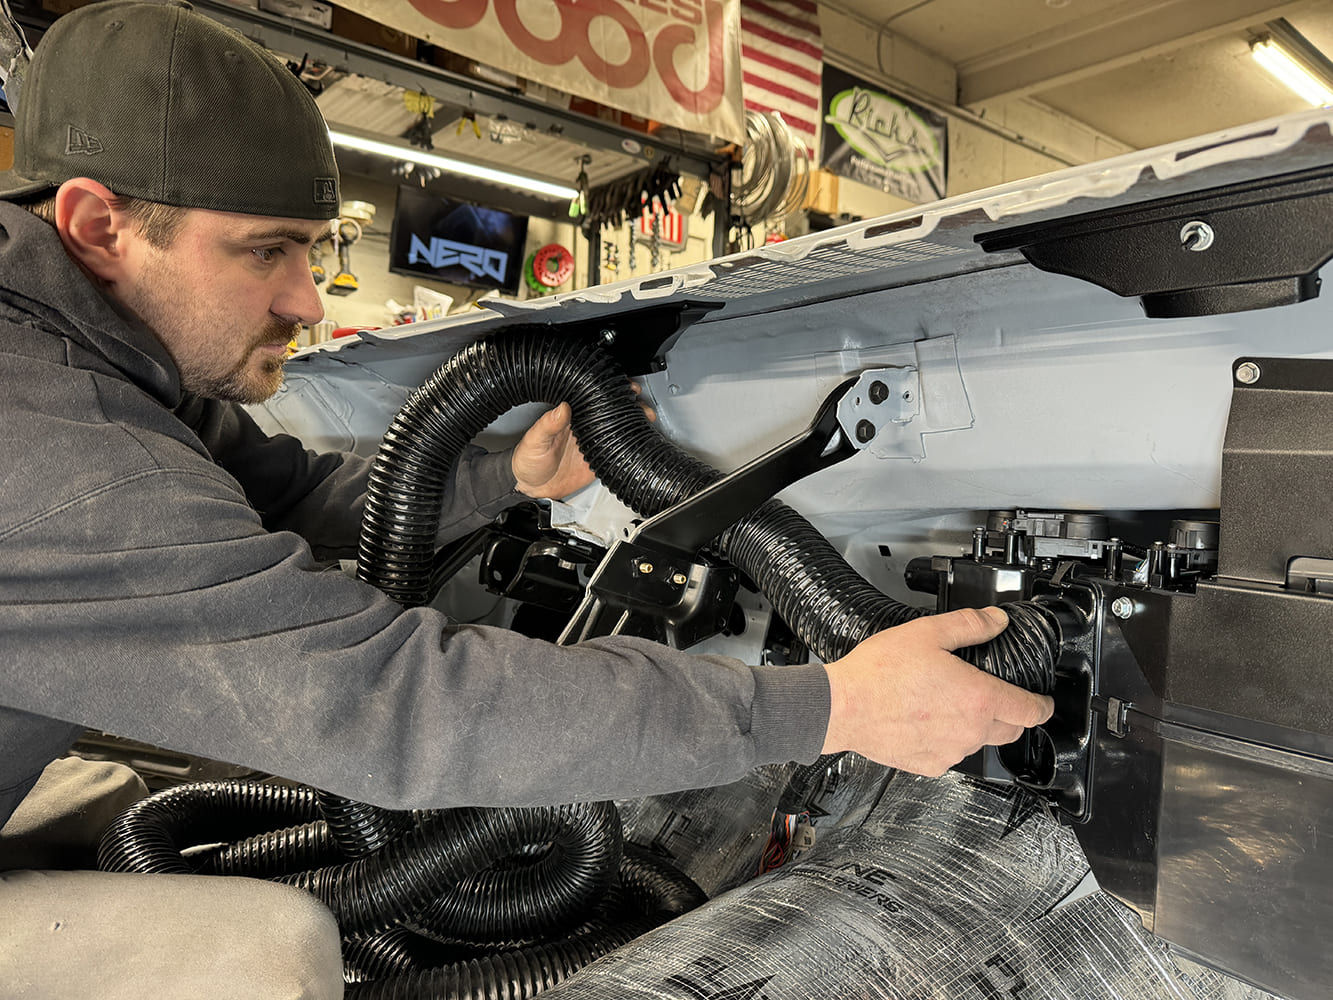
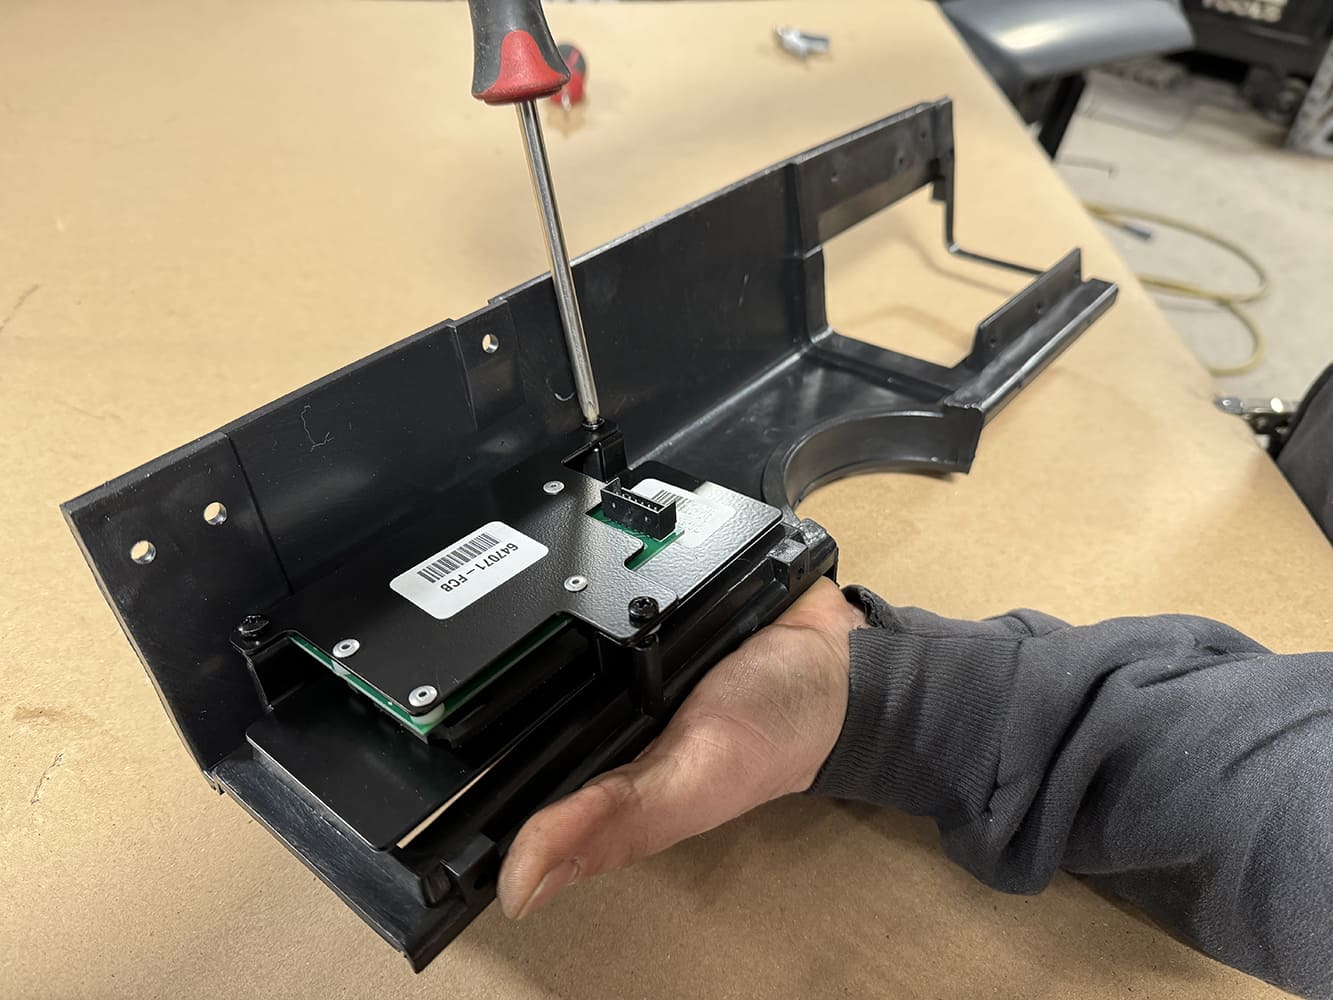
Getting started, Pat O’Brien of Procision Industries unboxed the Vintage Air 1970-78 Camaro with Factory Air Gen 5 SureFit Evaporator kit and began to prepare the Magnum Max module for installation.
Many regular readers of All Chevy Performance will recognize the 1971 Camaro showcased across our pages, having followed its transformation from that of a stripped-out shell. As time has passed, we’ve focused on its suspension, brakes, LS driveline, cooling, exhaust, sheetmetal, wiring, and insulation. Looking deep into the bare interior, it’s time to focus on bringing it back to life with plenty of industry-leading technology to support the newly updated thunder of a 5.3L LC9 LS underhood. We recently followed up at Procision Industries in Taunton, Massachusetts, where shop owner, Pat O’Brien was preparing to move forward by taking on this very subject.
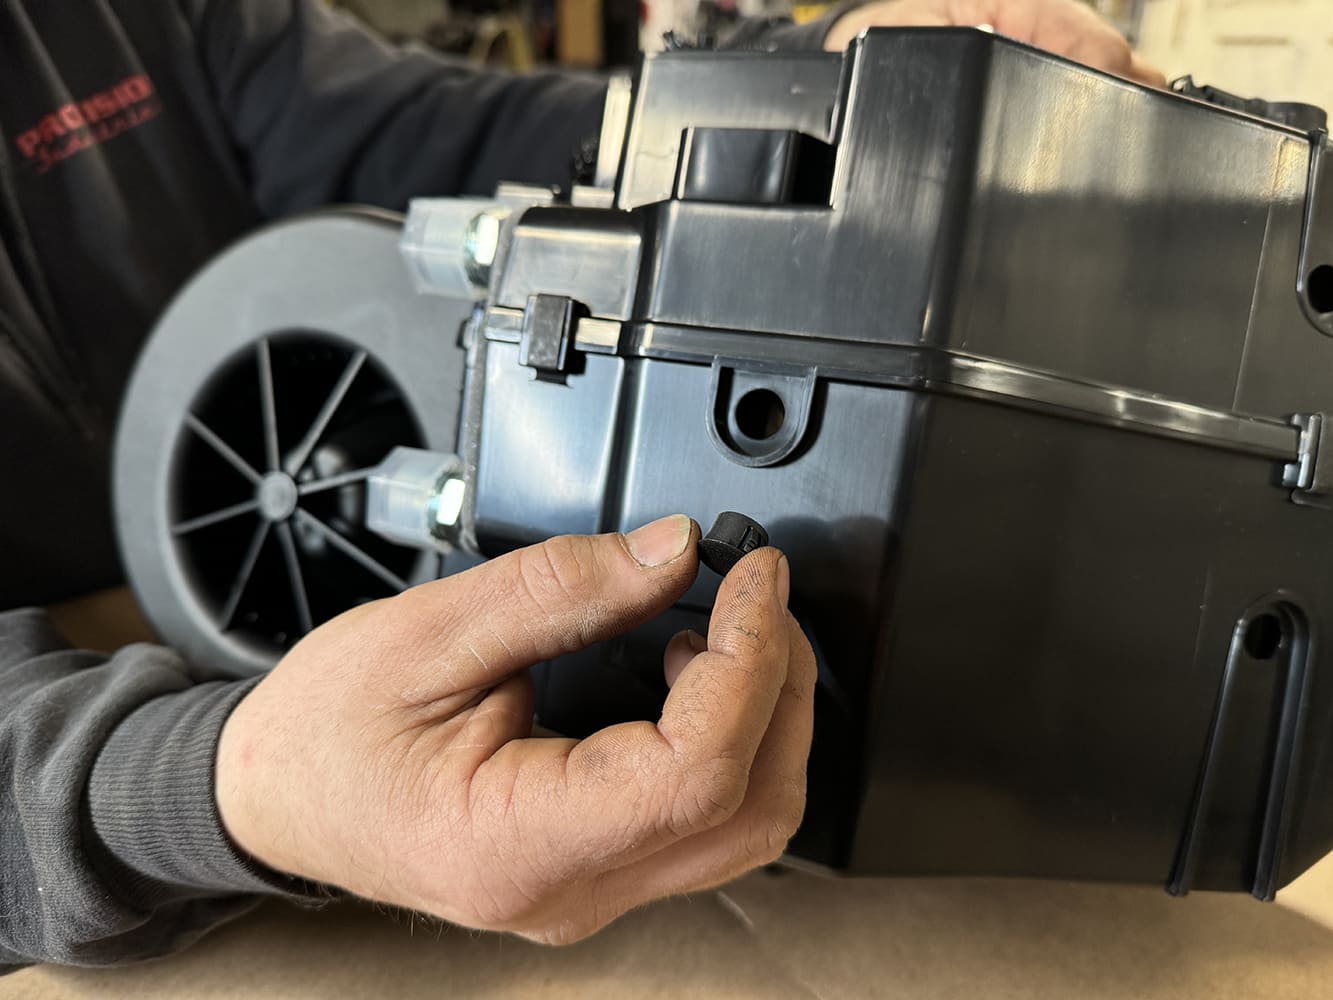
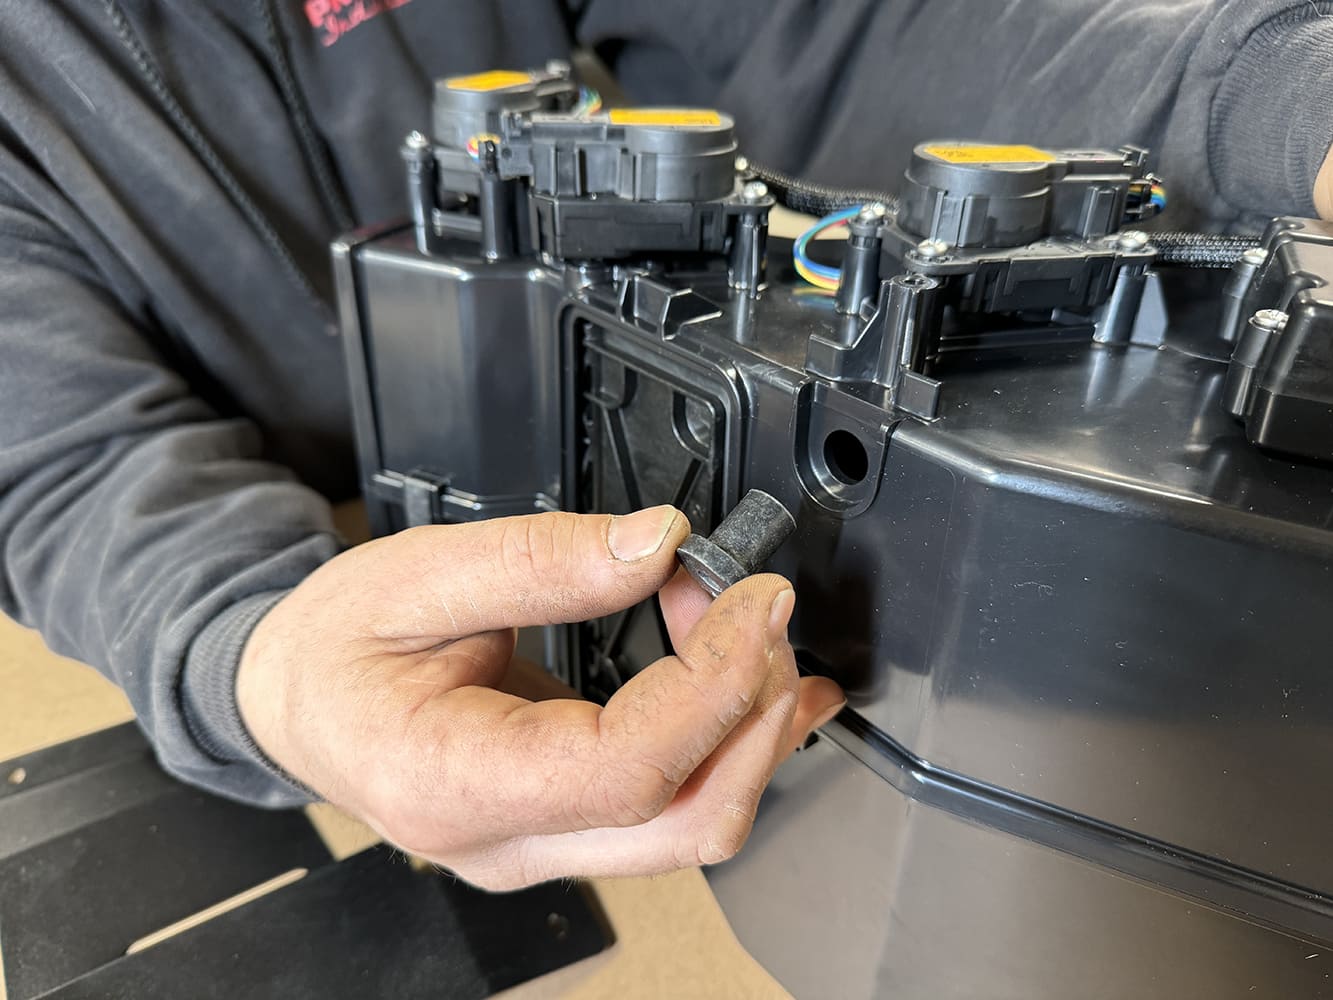
Install the (three) provided ½-inch plugs by pressing them into the back of the evaporator module.
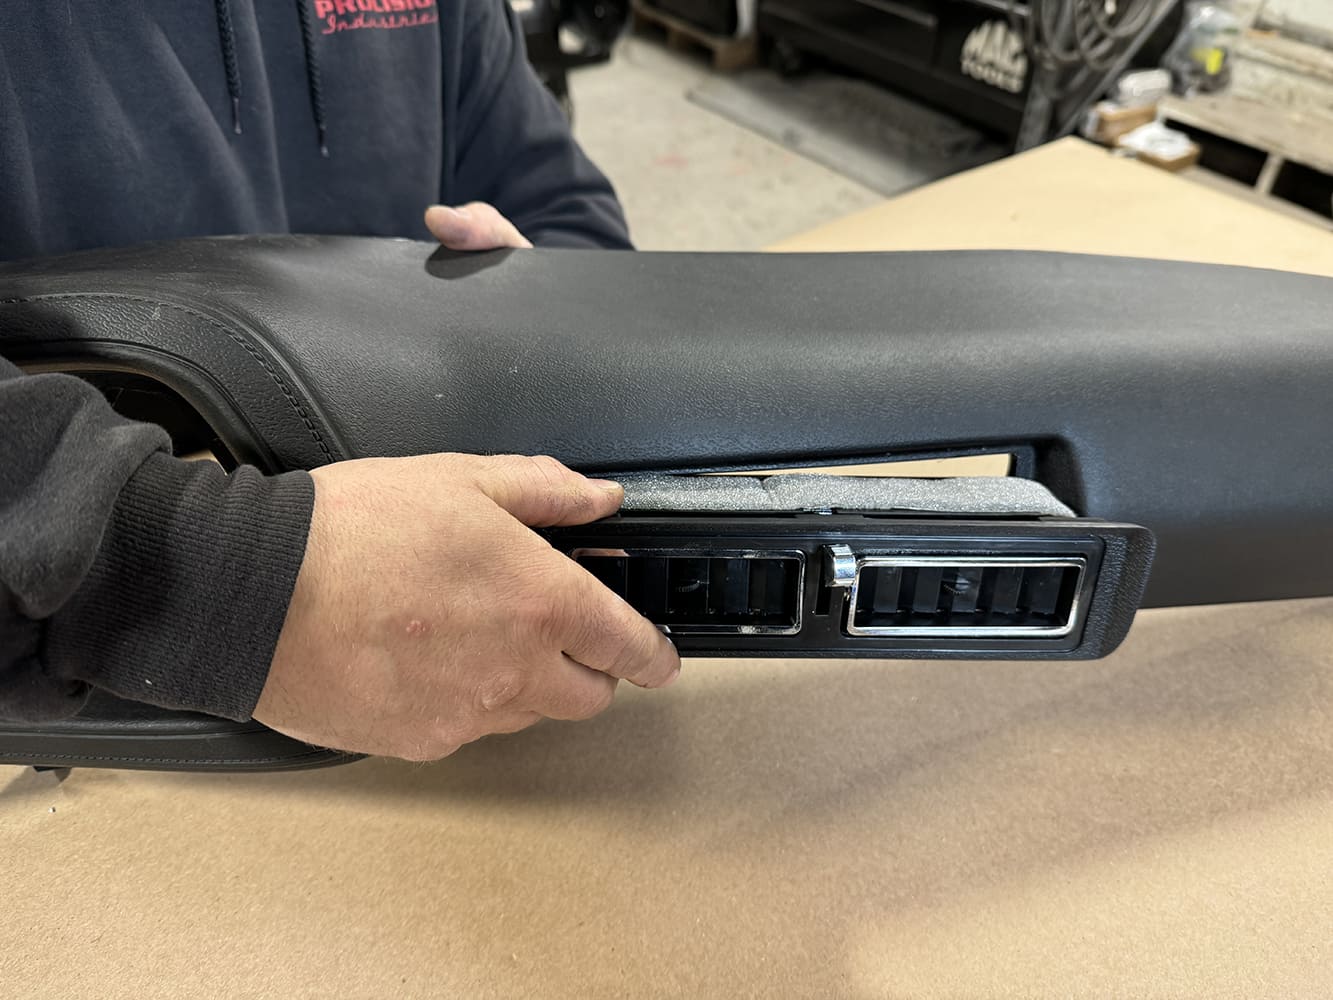
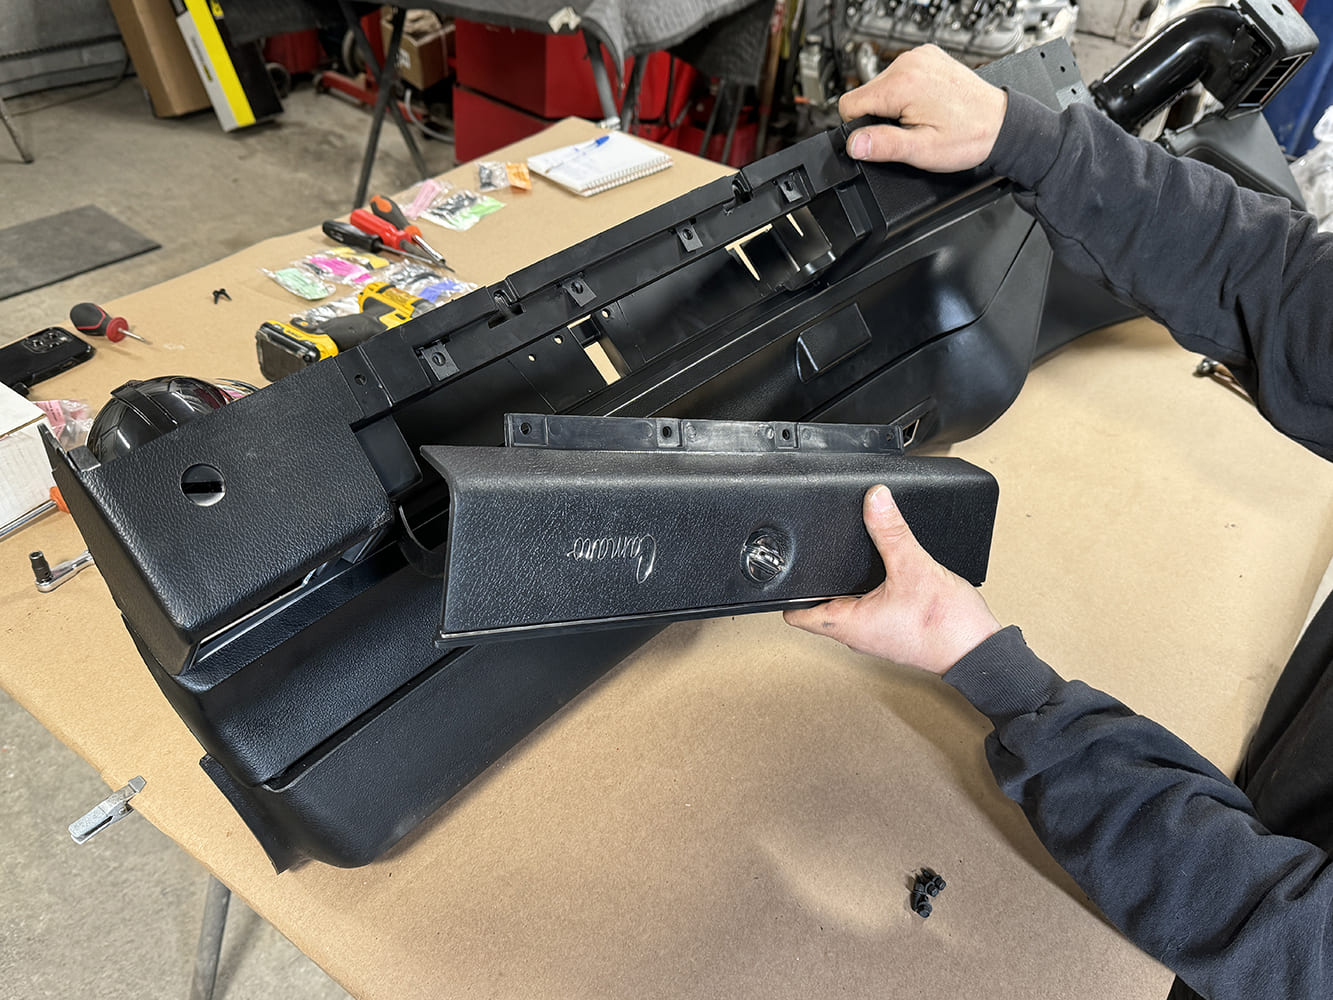
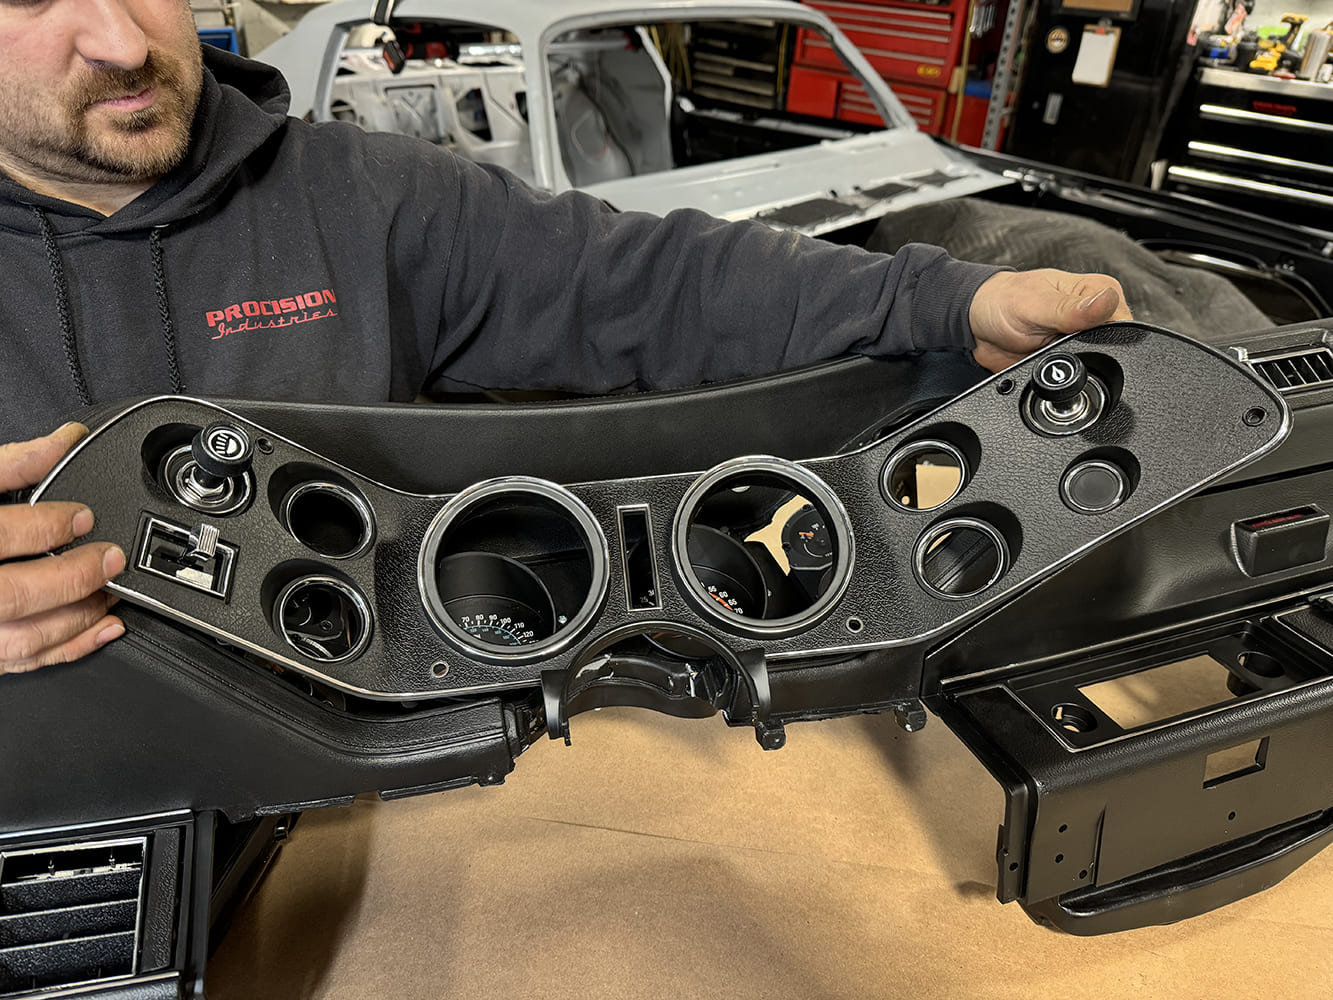
When faced with the daunting task of outfitting a bare interior shell, a call was placed to Classic Industries to look deep into their catalog of offerings, including plenty of parts from OER (Original Equipment Reproduction) to handle the entire dash, including the dashpad, manufactured with the same crisp OE factory lines and molded in color with the correct grain surface. All related plastic components, including the dash instrument carrier bezel and lower dash panels, feature the correct OE grain injection molded in ABS plastic as in the original parts. This would also include all related upper and lower vent assemblies as well to complete the job. Another important offering for the reassembly process came from AMK Products with their Master Interior Fastener Kit for the 1970-71 Camaro (PN 70FN), providing every grouping of hardware masterfully bagged and tagged for each individual component.
Follow by removing the plastic caps and rubber inserts from the heater connections.
With the interior stripped out, it was also the perfect time to follow up on the climate-control system to ensure plenty of comfort in the cabin. For this job, Vintage Air supplied their latest state-of-the-art Gen 5 SureFit Evaporator Kit for the factory-air-equipped 1970-78 second-gen Camaro (PN 564258). It’s one of the most powerful and technologically advanced units available today. Some of the many noteworthy features include an exclusive, fully electronic microprocessor-controlled system that eliminates the need for cables or vacuum connections as well as separate high-capacity A/C and heater coils with blend-air door for rapid vent temperature adjustment and new bolt-in SureFit electronic control panel for all adjustments.
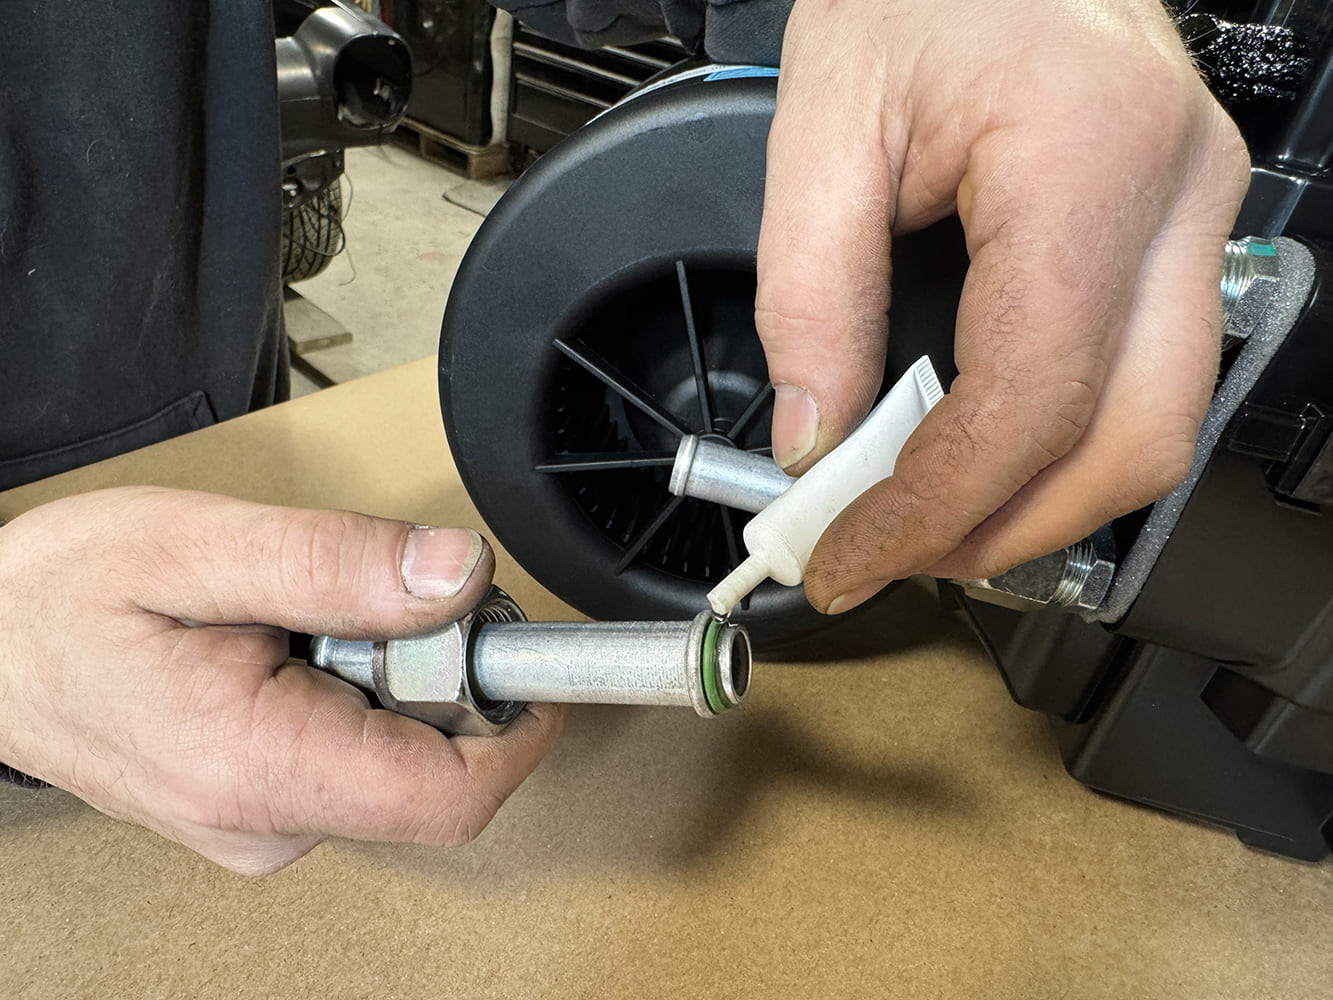
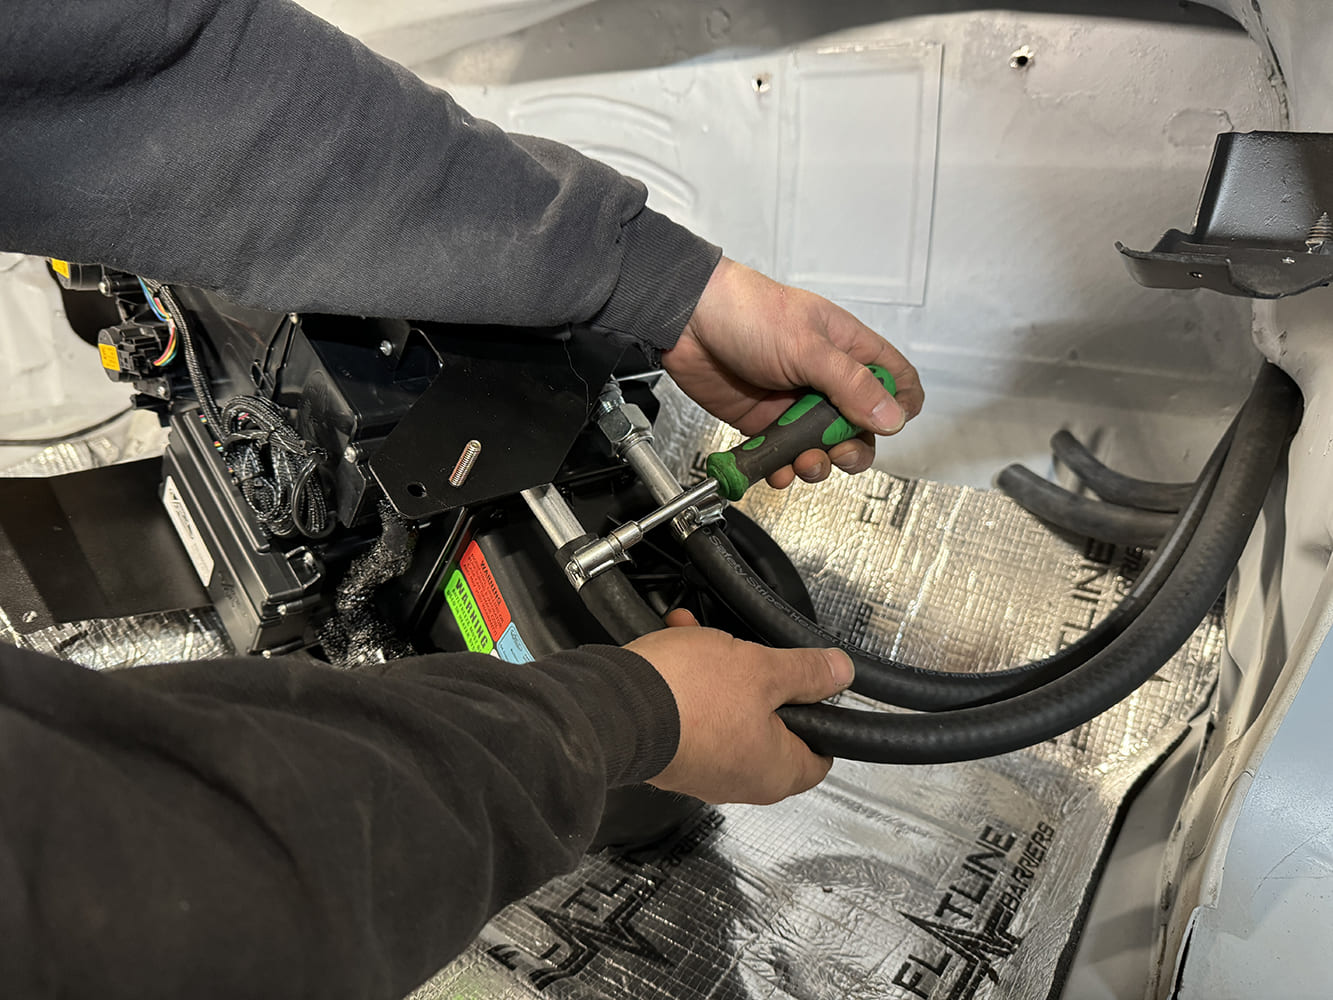
Prepare the upper and lower heater hard lines by first properly seating and lubricating the #10 O-rings with provided refrigerant oil.
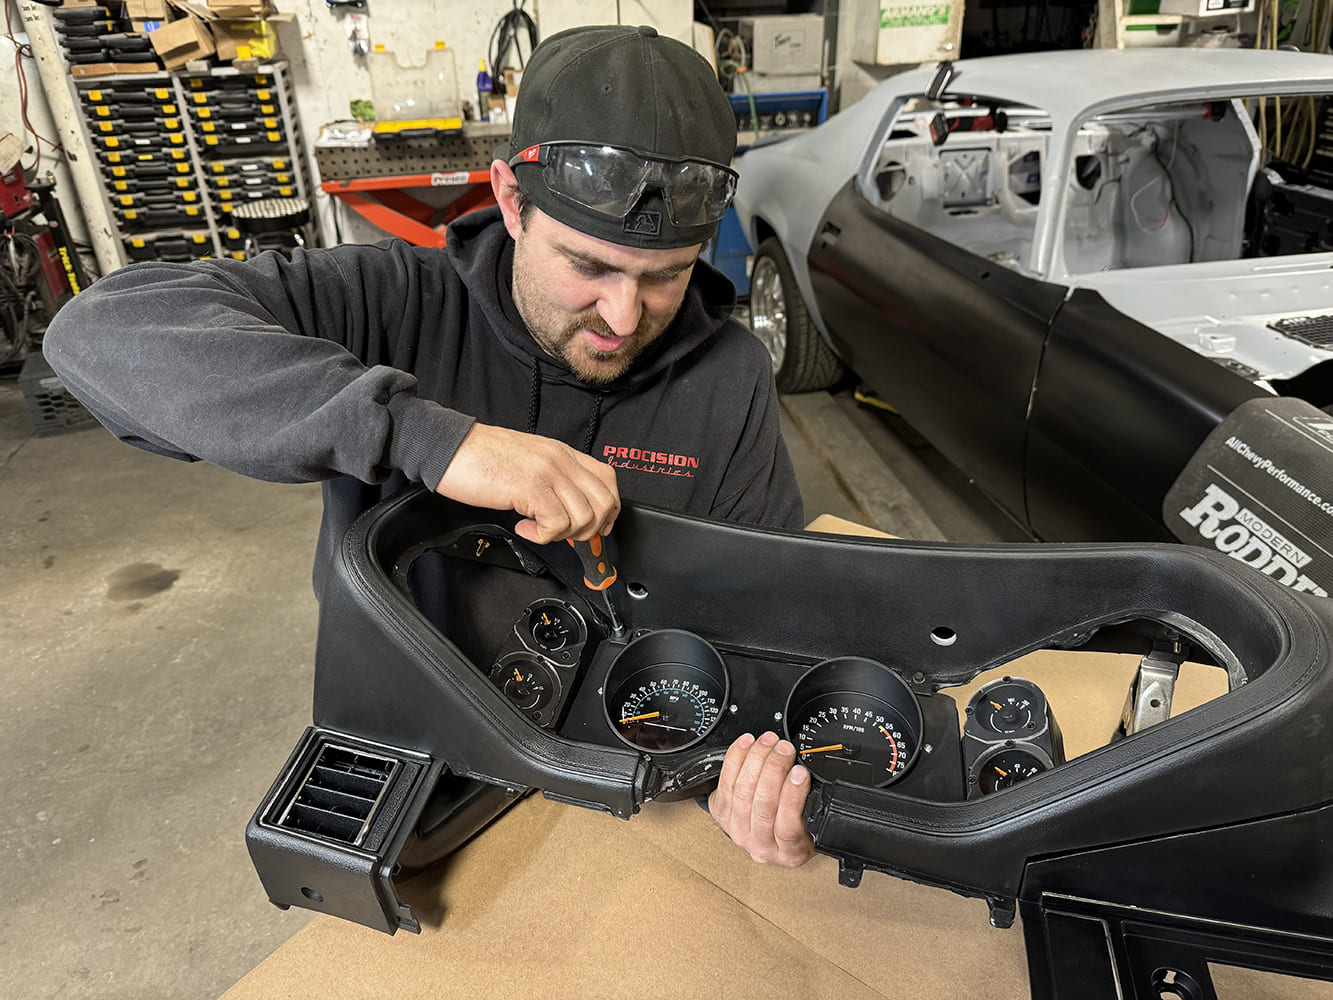
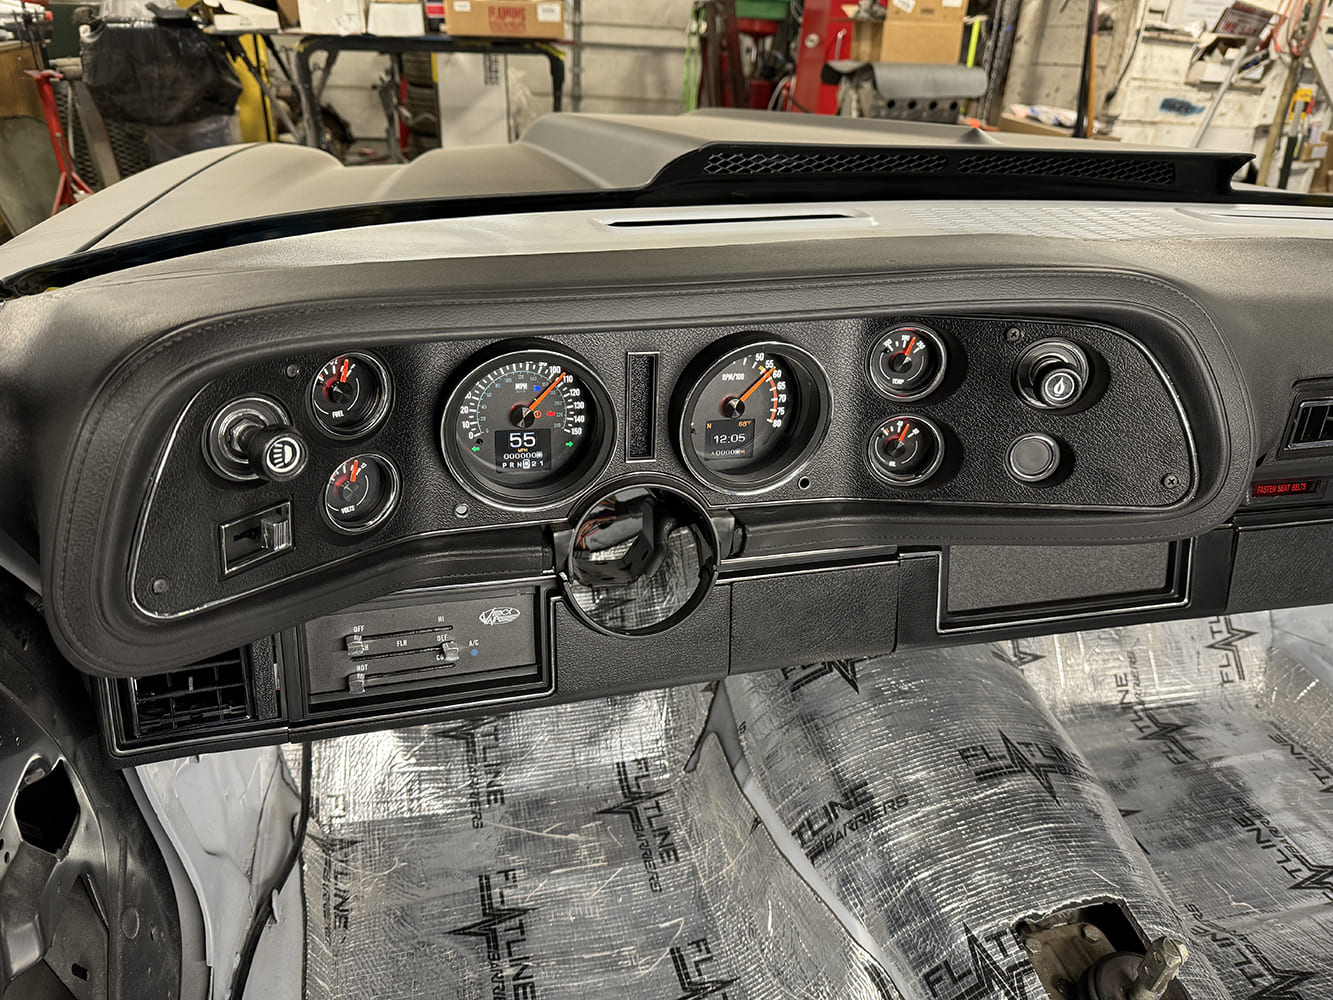
Fusing modern technology with stunning vintage looks, Dakota Digital raised the bar with their latest RTX-Series gauge cluster for the 1970-78 Camaro (PN RTX-70C-CAM-X). Designed to fit within the factory OE or reproduction instrument carrier bezel, they bring monitoring the vitals on your vintage V-8 or modern LS to the next level. Every RTX cluster features a CNC machined housing with fully customizable LED backlighting in over 30 colors, allowing users to set endless unique combinations for the backlight, indicators, and screen. The exclusive, dual TFT high-definition message centers can be programmed to display real-time information, including driving data, mileage, gear selection, and even quarter-mile times, if desired. With the entire assembly powered by a single central control box it makes installation a snap.
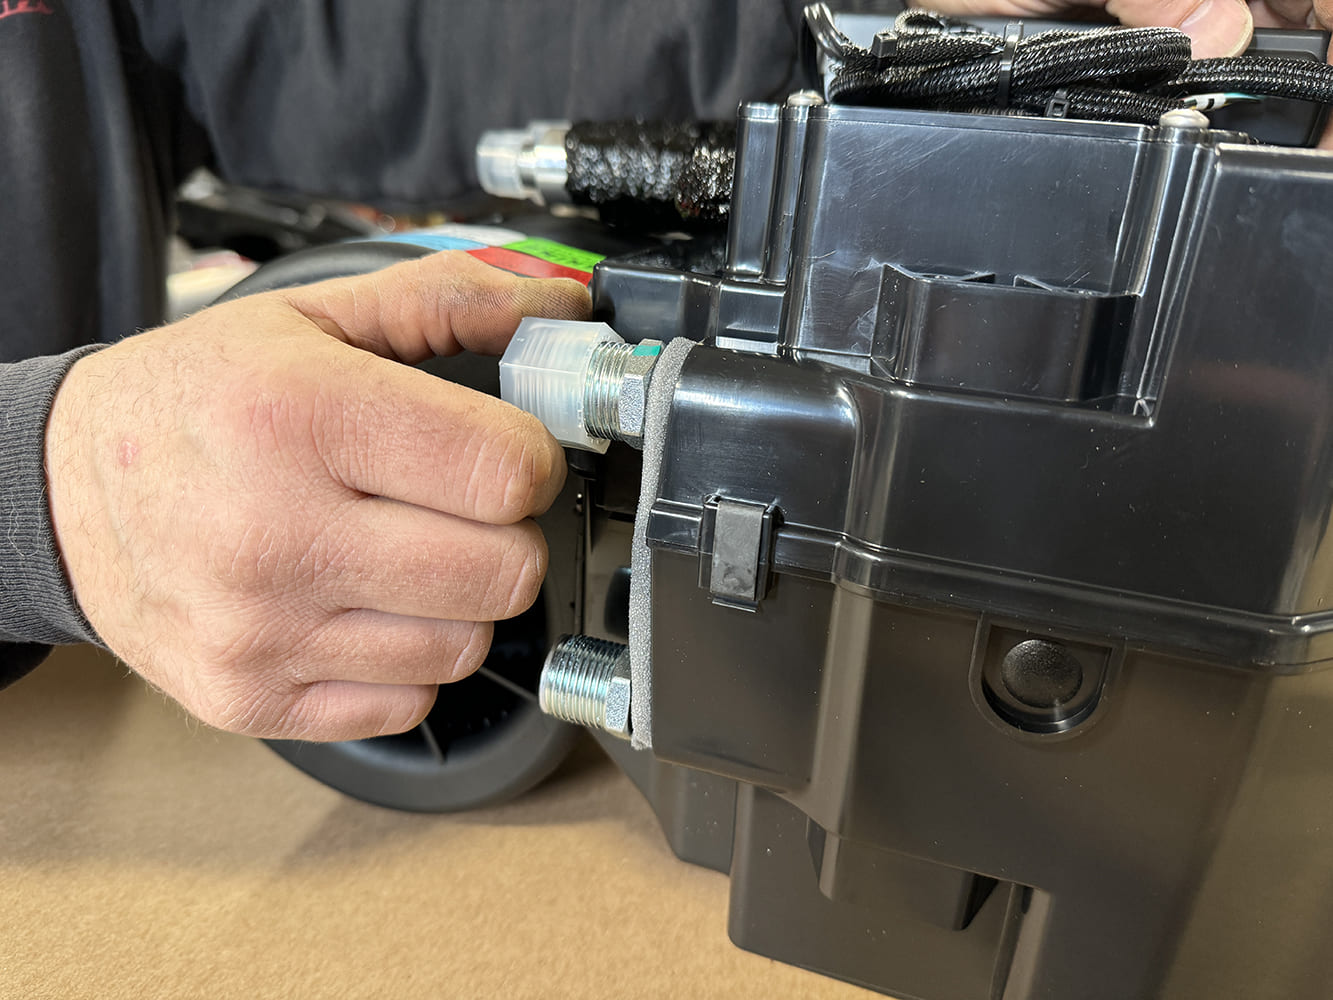
Install upper and lower heater hard lines to the evaporator module with properly lubricated O-rings using 1 1/16 -inch and 7/8-inch open-end wrenches till snug.
Let’s follow along as this second-gen gets closer to the street.
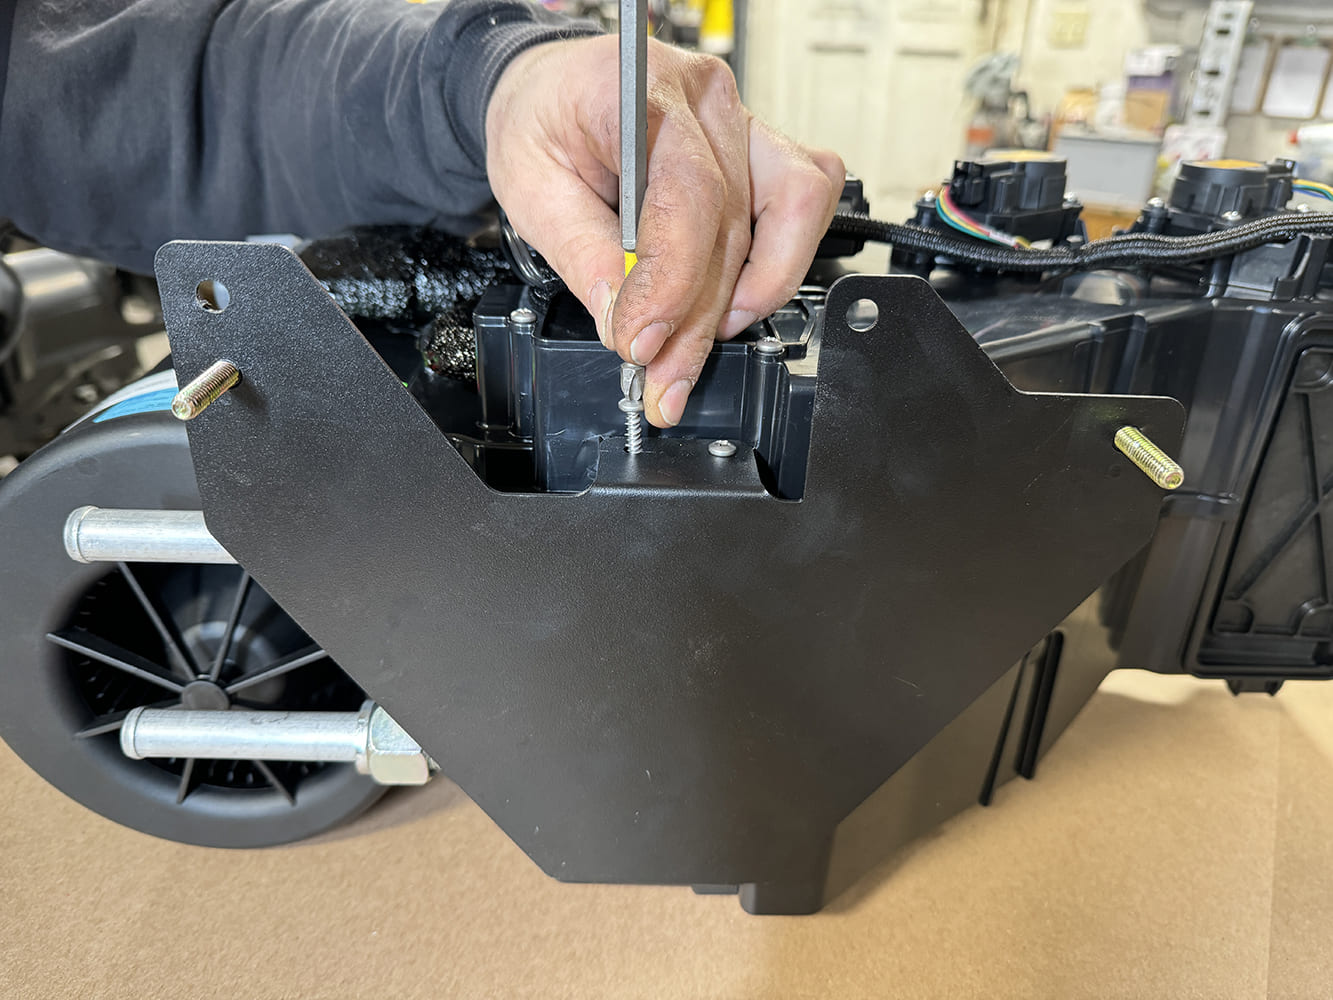
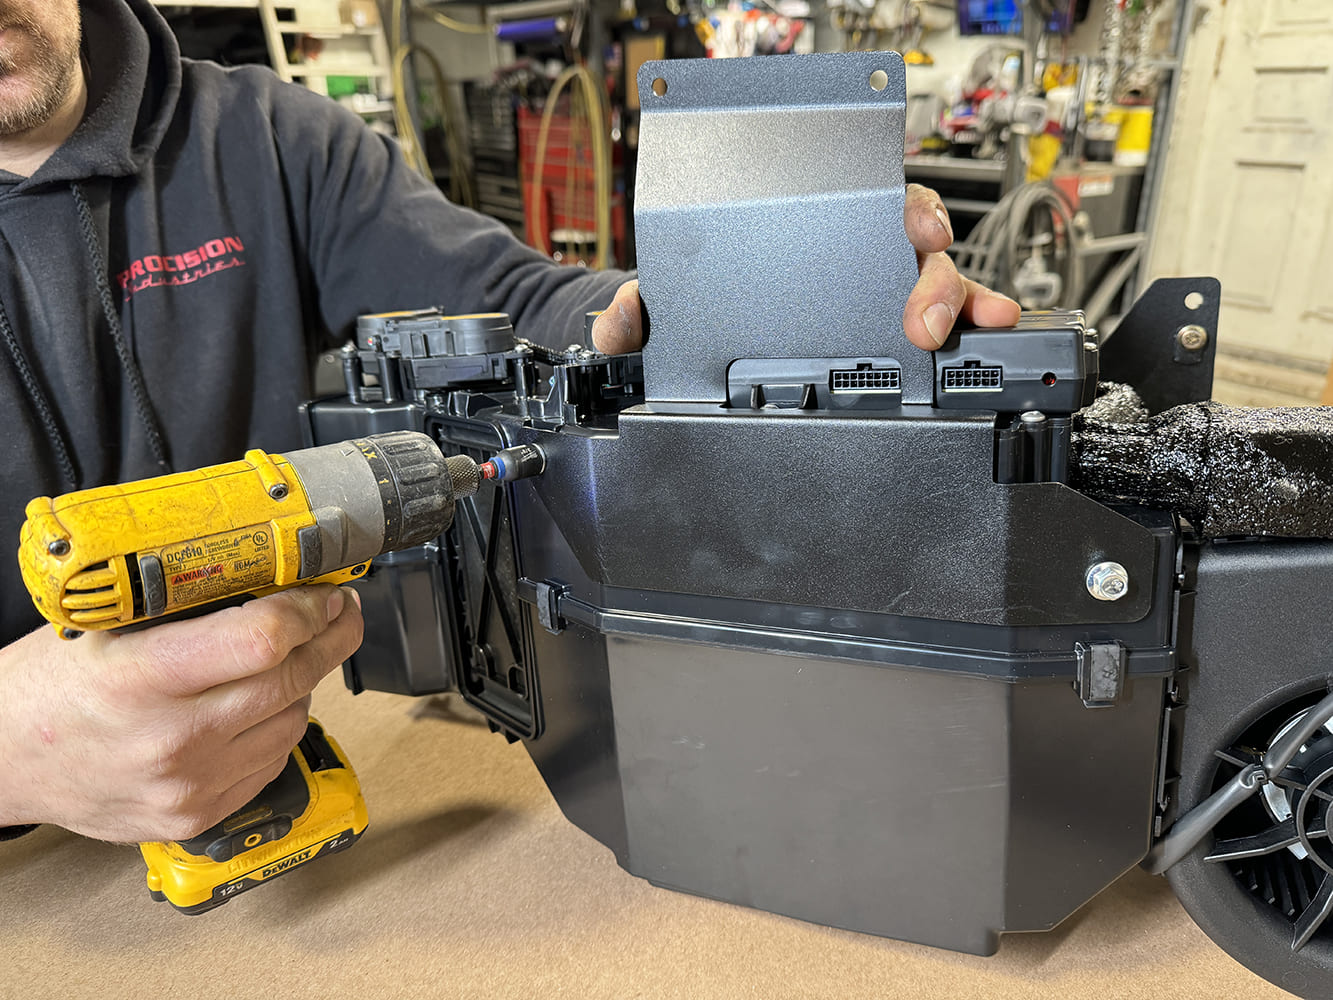
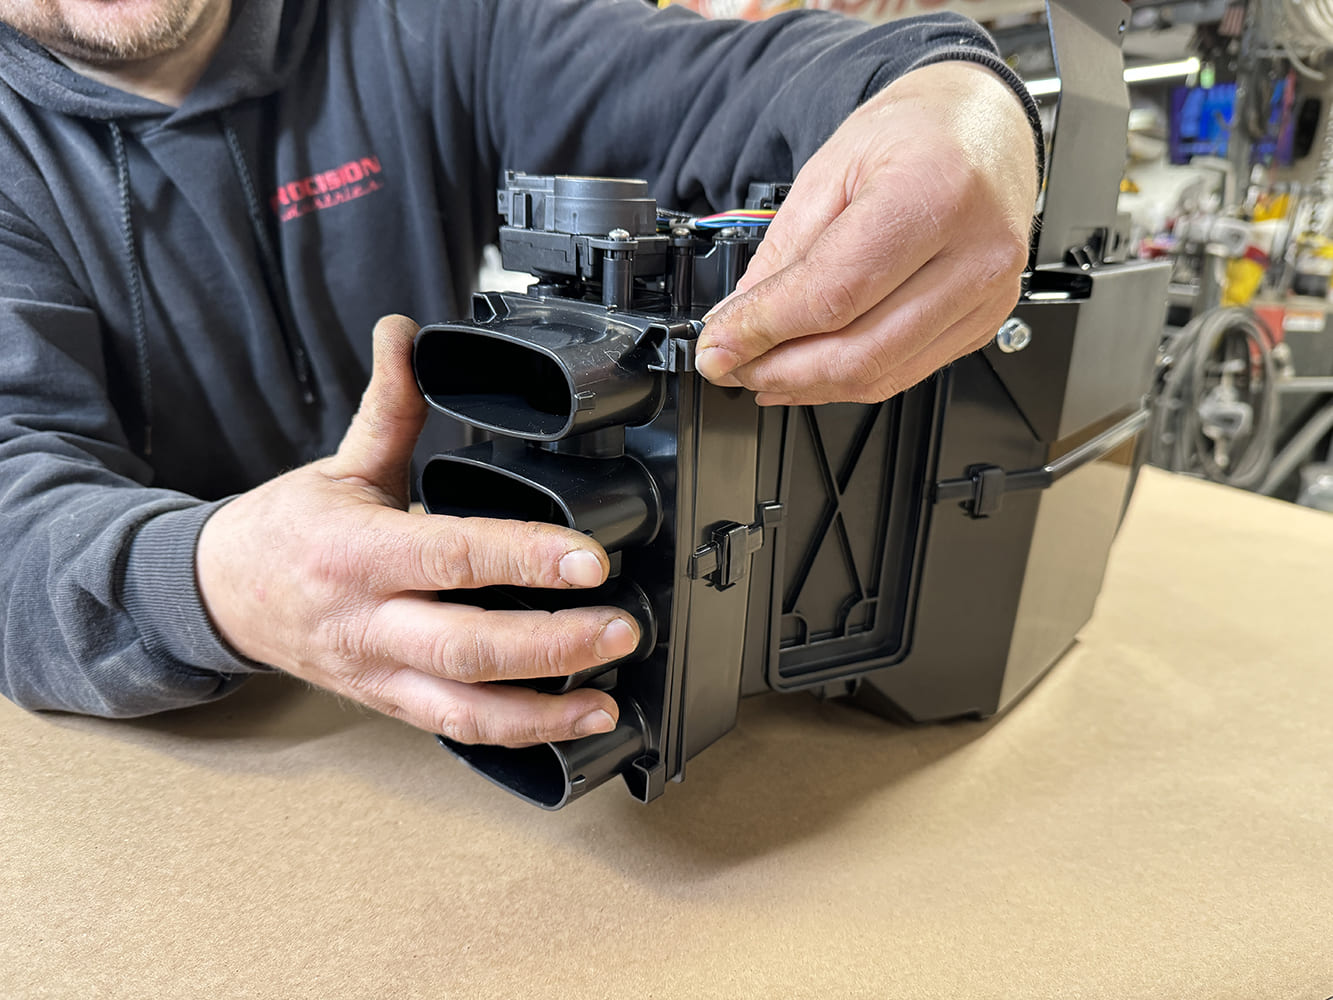
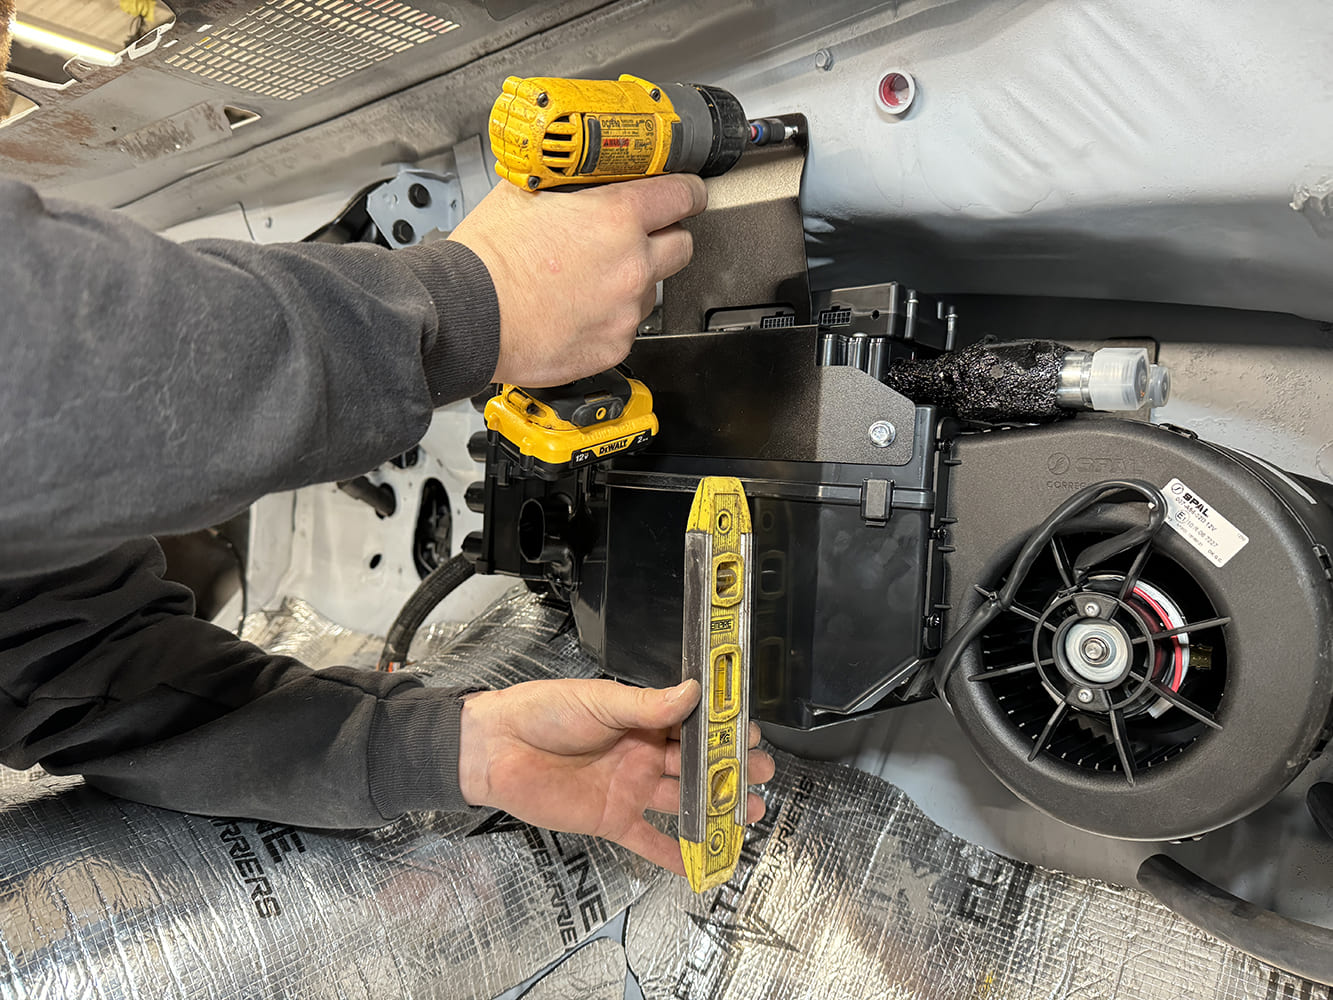
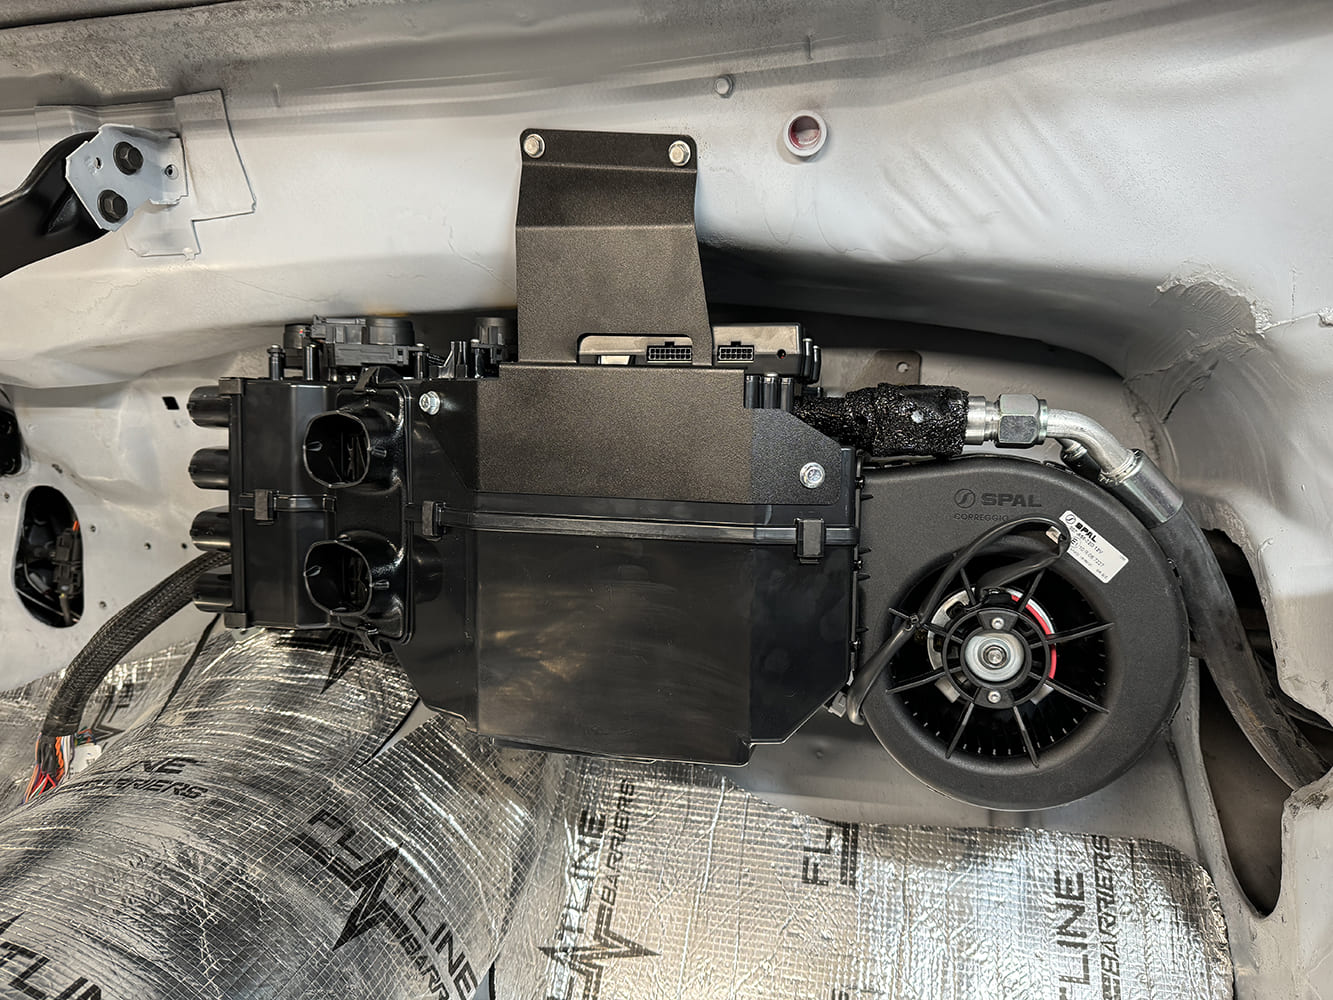
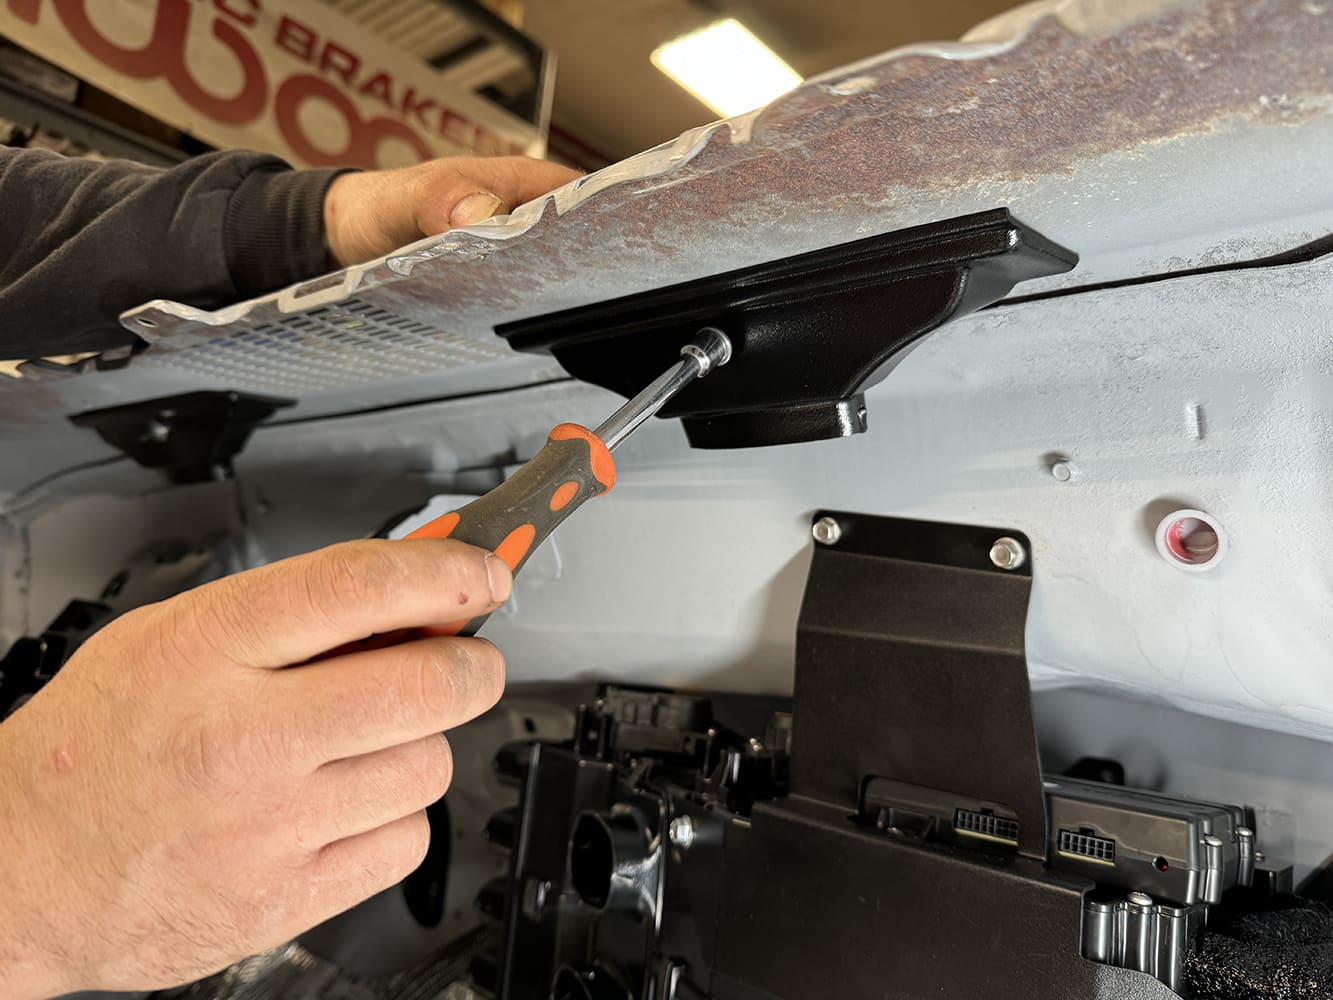
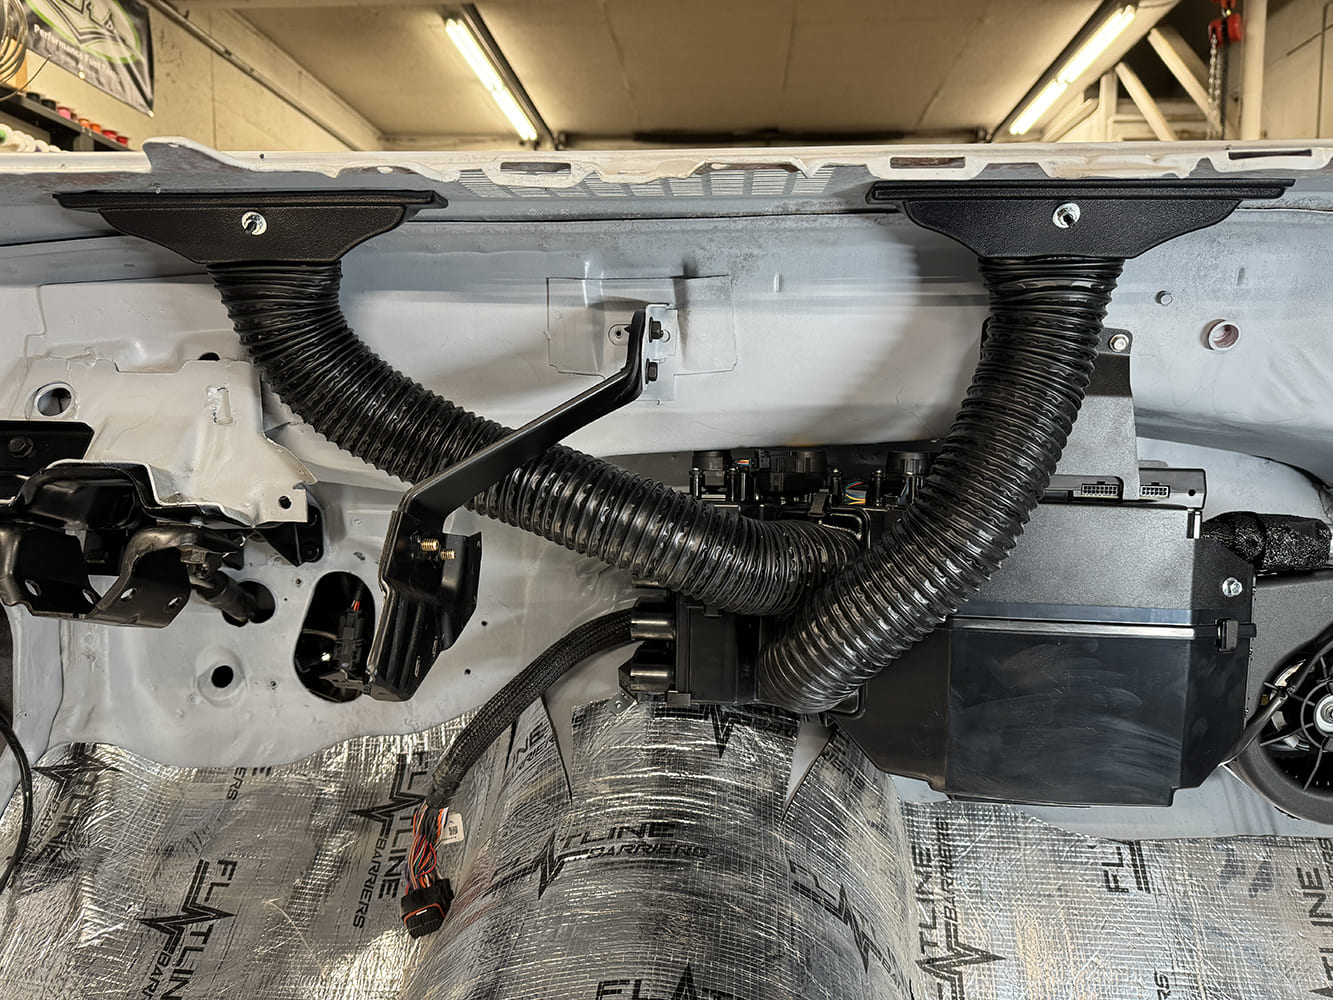
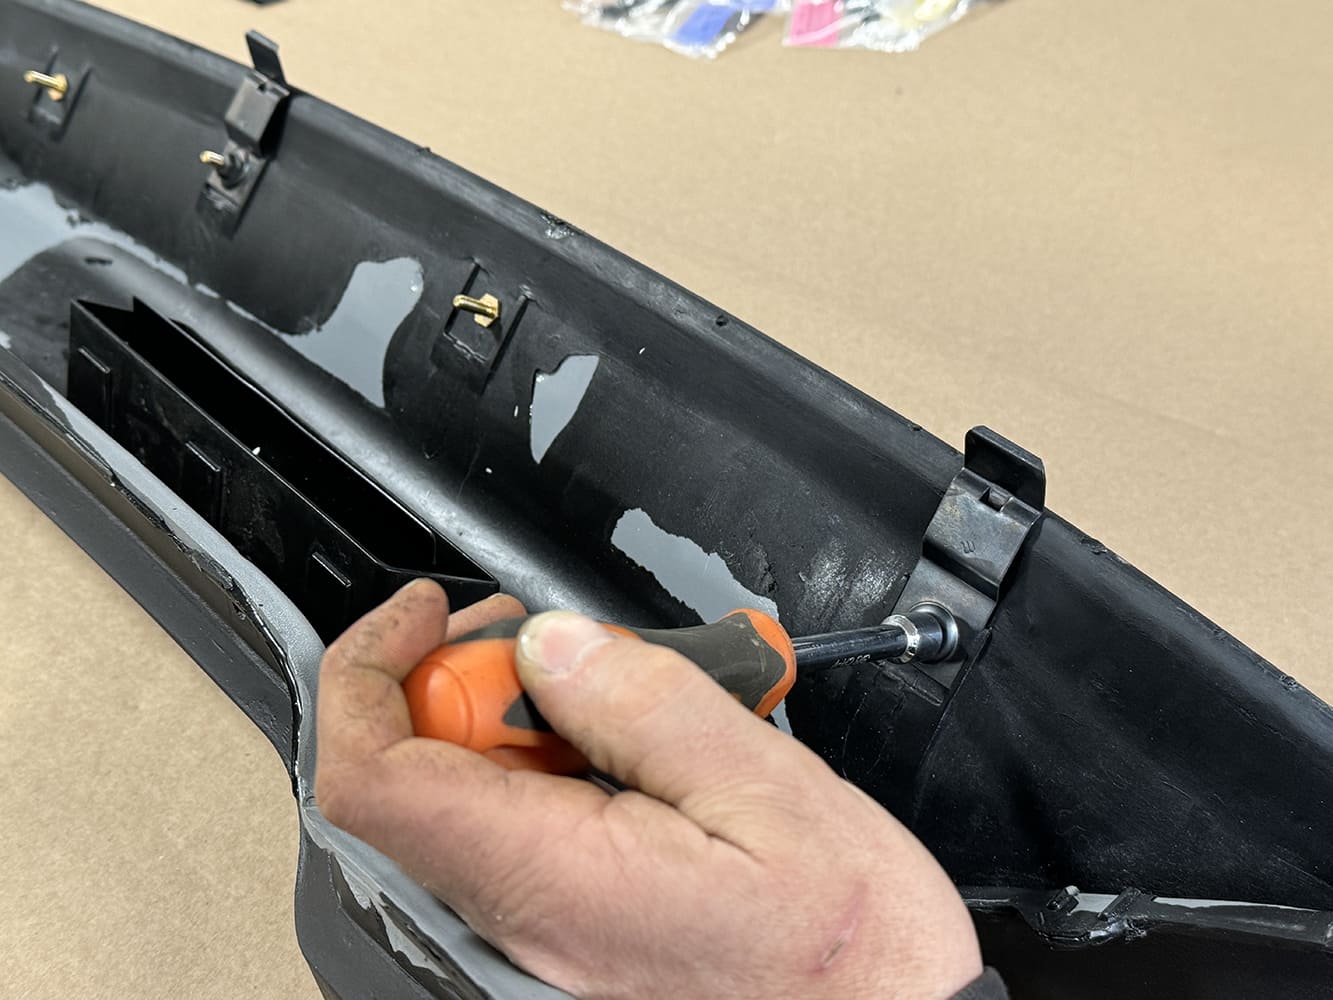
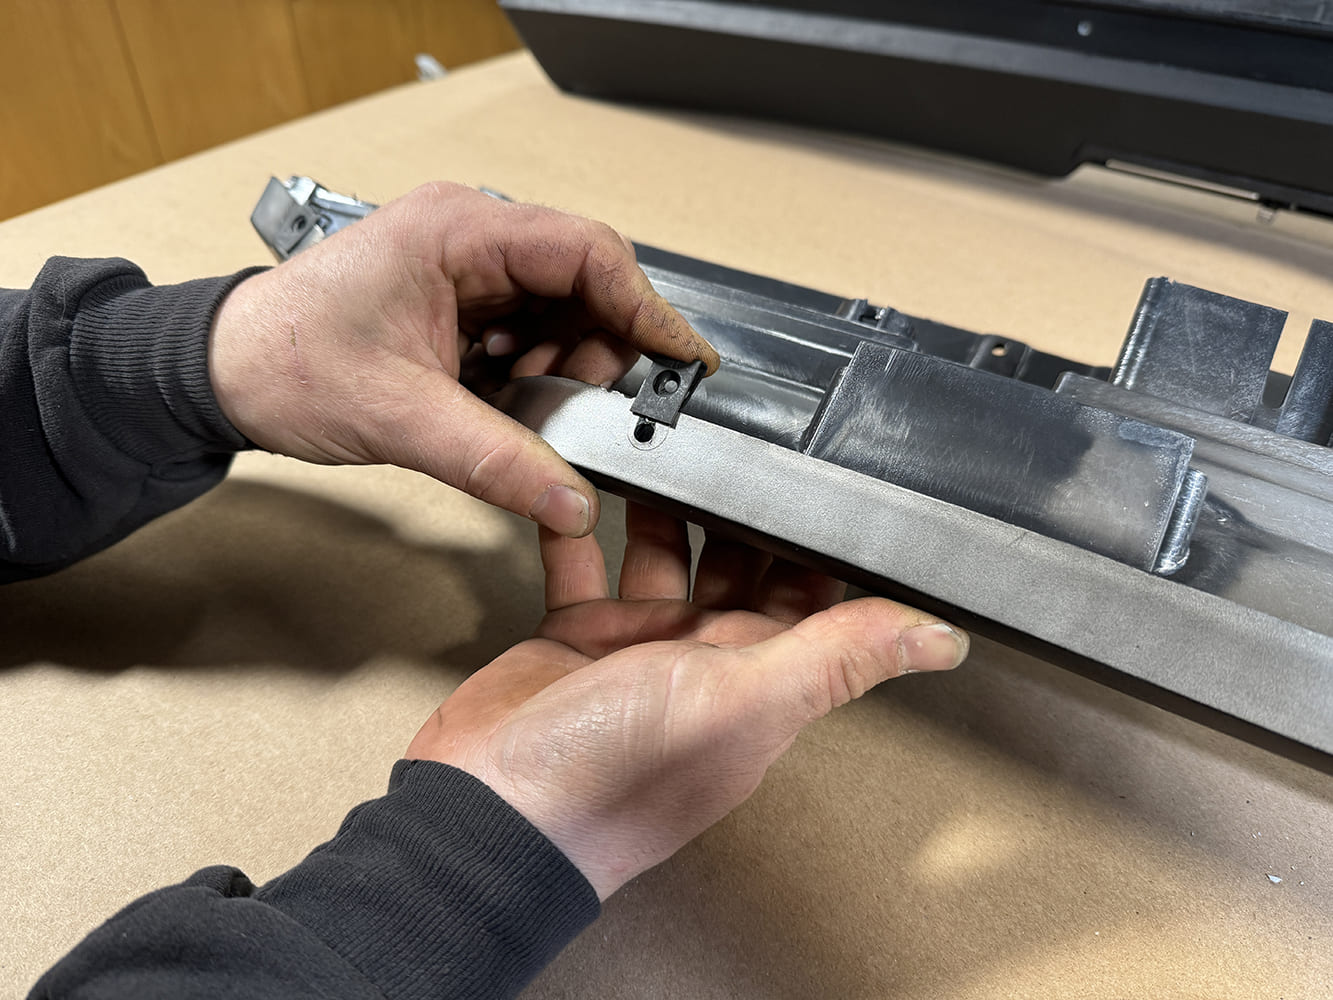
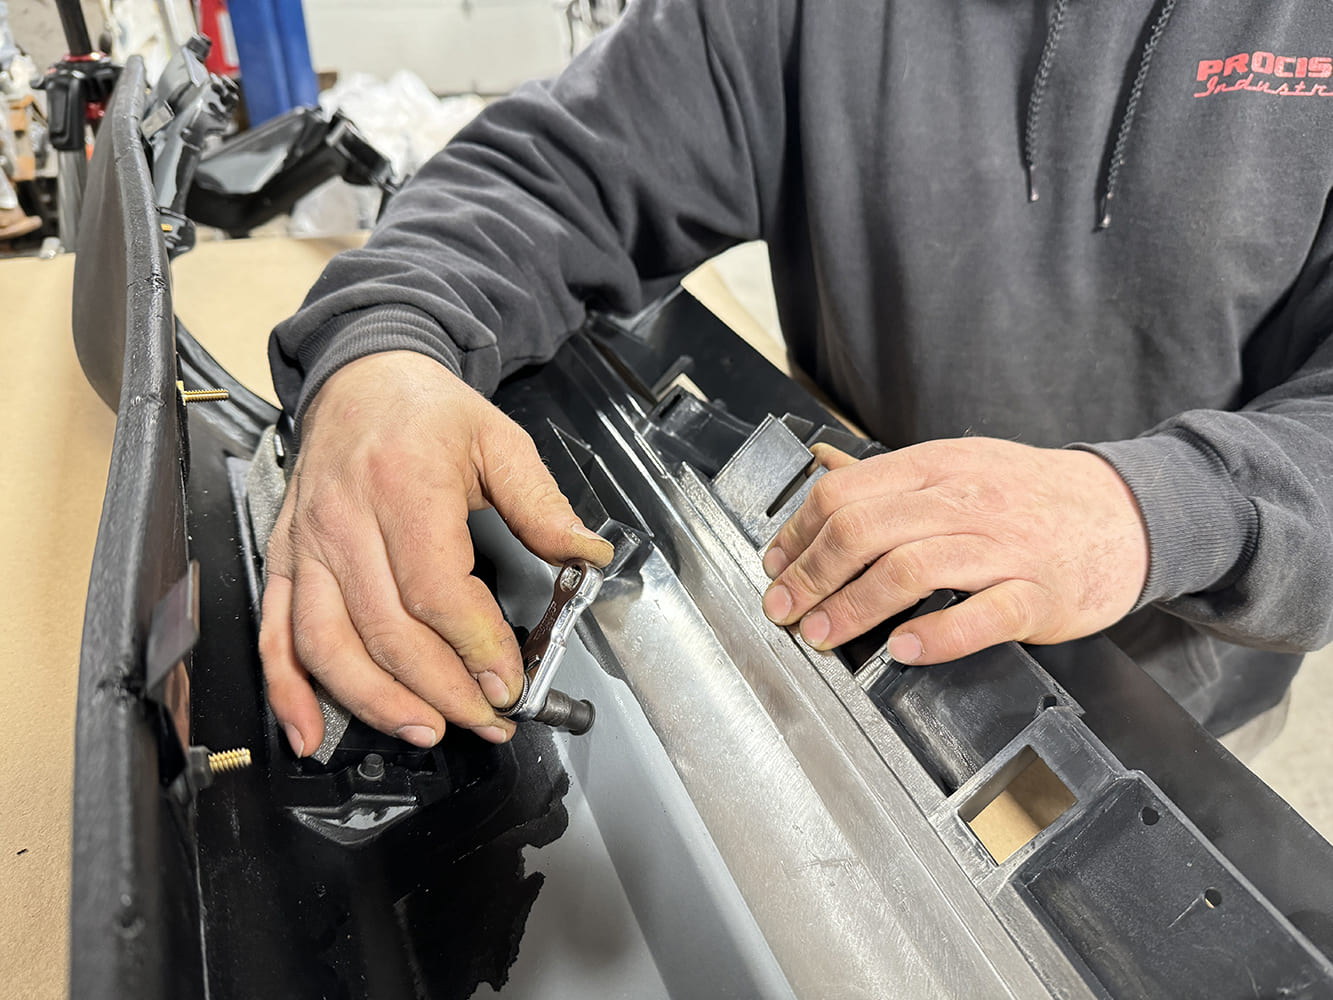
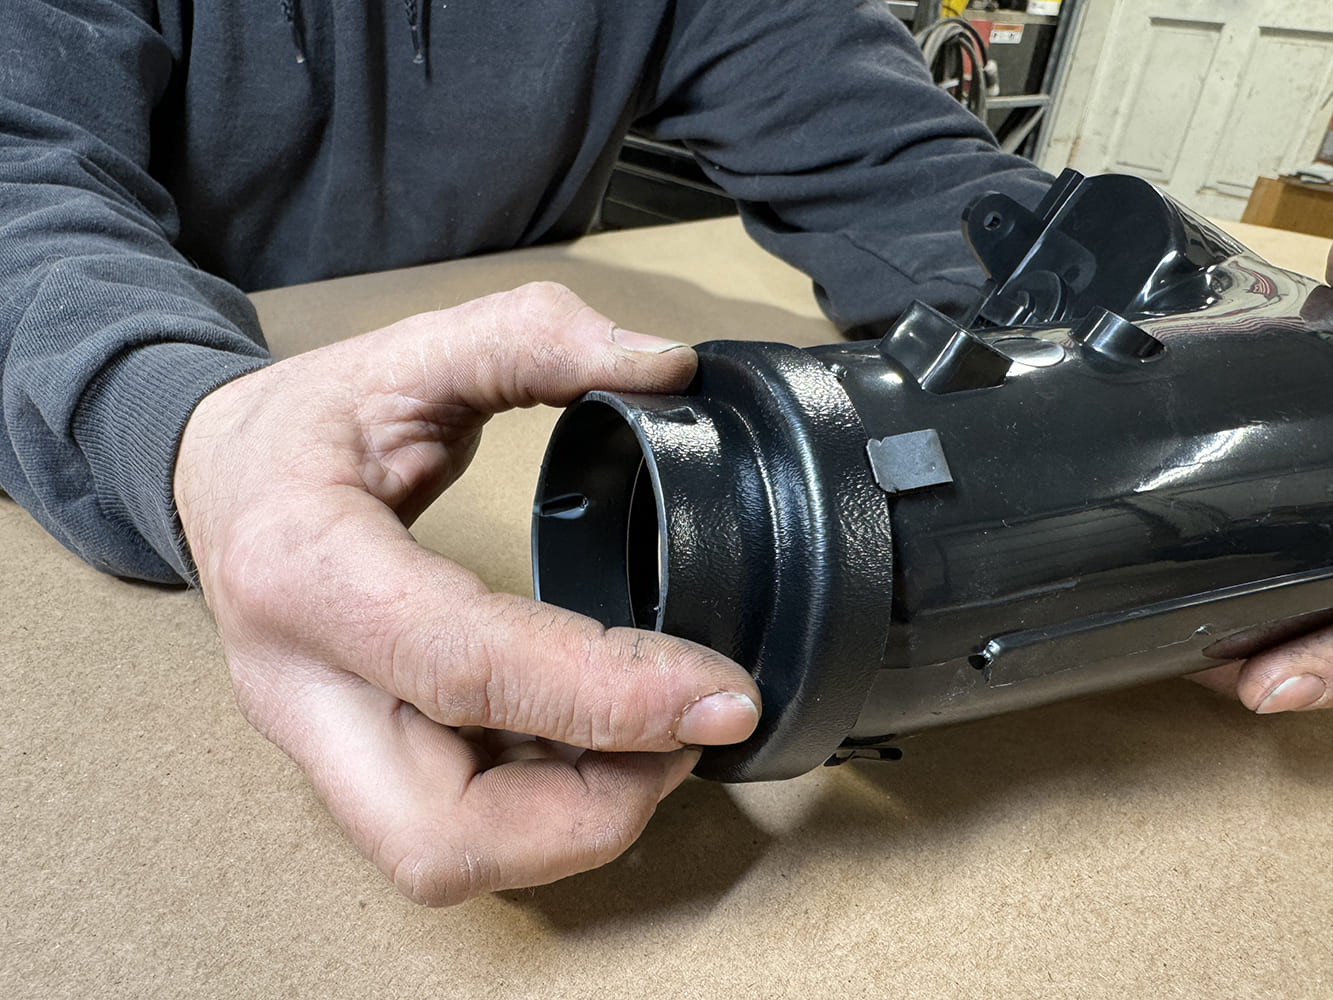
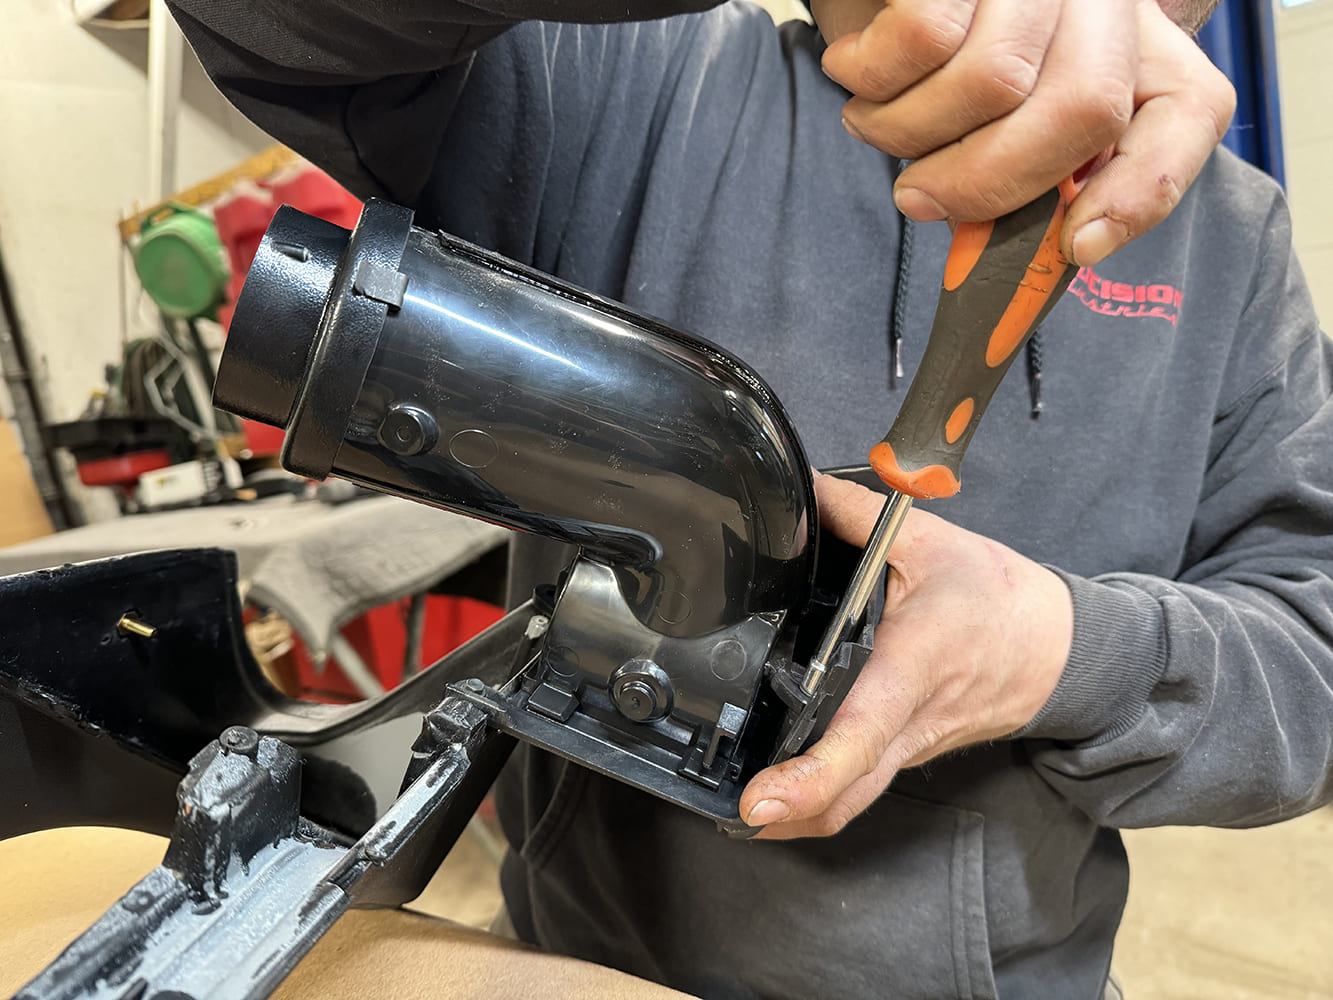
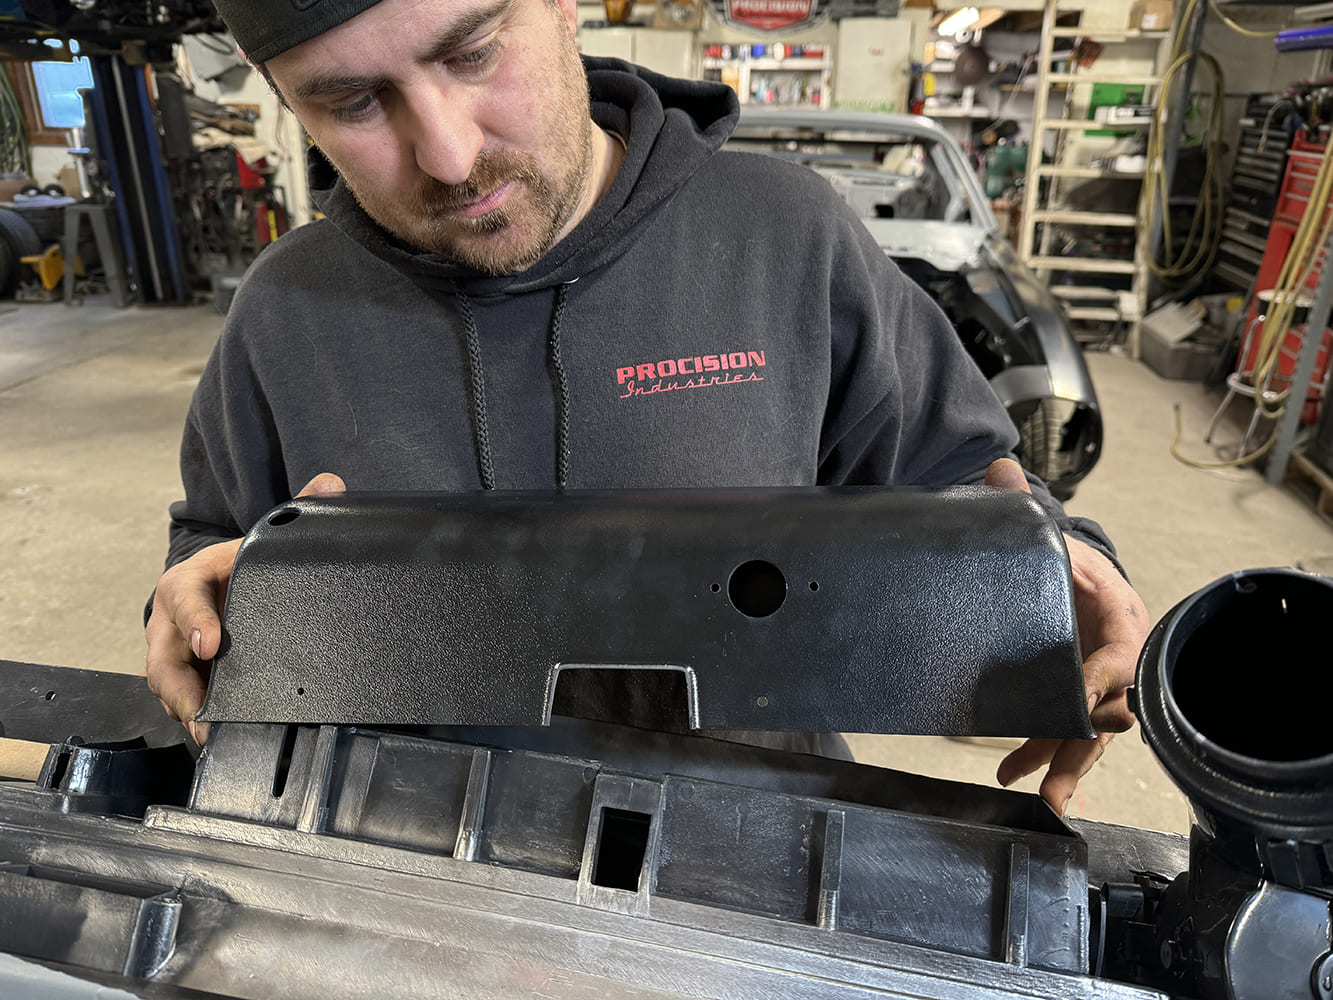
Follow by adding (two) ¼-20 full-threaded studs halfway into the mounting holes on either side of the evaporator firewall bracket. Continue by mounting the bracket to the evaporator module using the provided (four) 5/8-inch screws.Next, install (two) ¼-20 well nuts into the front mounting provisions of the evaporator module.Now install the evaporator module cowl bracket in place using (two) ¼-20 x 1-inch serrated flange bolts into the well nuts.Using the (eight) provided spring clips, install the dash plenum, floor plenum, and two-vent plenum onto the evaporator module. Here, you can see the dash plenum being secured in place with its four vents visible.Since we had previously routed our heater hoses through the passenger side kick panel in a prior article, we continued with the installation of the heater lines to the evaporator module with hose clamps to prepare it for mounting in place.The evaporator module was carefully lifted up under the dashboard area and then located to the modified firewall using the full-length studs. At this time, level the evaporator module front to back and left to right, then secure the firewall bracket in place and the cowl bracket to the cowl using (two) ¾-inch washer head screws.Using properly lubricated #6 and #10 O-rings, the corresponding 45-degree fittings were connected to the block fitting adapter and then covered with the supplied press tape. Now you can see the completed installation of the evaporator module. Note that upon final assembly, the kick panel cover installation, evaporator drain hose, and wiring will be completed at that time.Using the provided hardware, mount the (two) defrost ducts in place to the OEM defrost duct mounting flanges located under the dash.Measure and cut approximately 24 inches of the provided 2 ½-inch duct hose for both the driver and passenger side defrost ducts.Secure both duct hoses in place from the evaporator module to the new defrost ducts under the dash for a nice tidy installation.Begin the assembly of the new OER (Original Equipment Reproduction) dash from Classic Industries starting with the fitment of the center dash louvered vent assembly for air conditioning topped by a foam strip supplied by Vintage Air.Follow by installing the Vintage Air center louver duct hose adapter. Using the (two) mounting holes on the bottom of the adapter as a guide, drill (two) 1/8-inch holes in the bottom of the vent assembly and secure to the vent assembly using the provided hardware.Next, install the upper dashpad retainer clips to the dash screw studs.Secure the OER lower dash panel section, which houses the radio, glovebox, and air vent assemblies in place to the upper dashpad using the (five) retainer clips and screws included in the AMK Products Master Interior Fastener Kit sourced from Classic Industries.
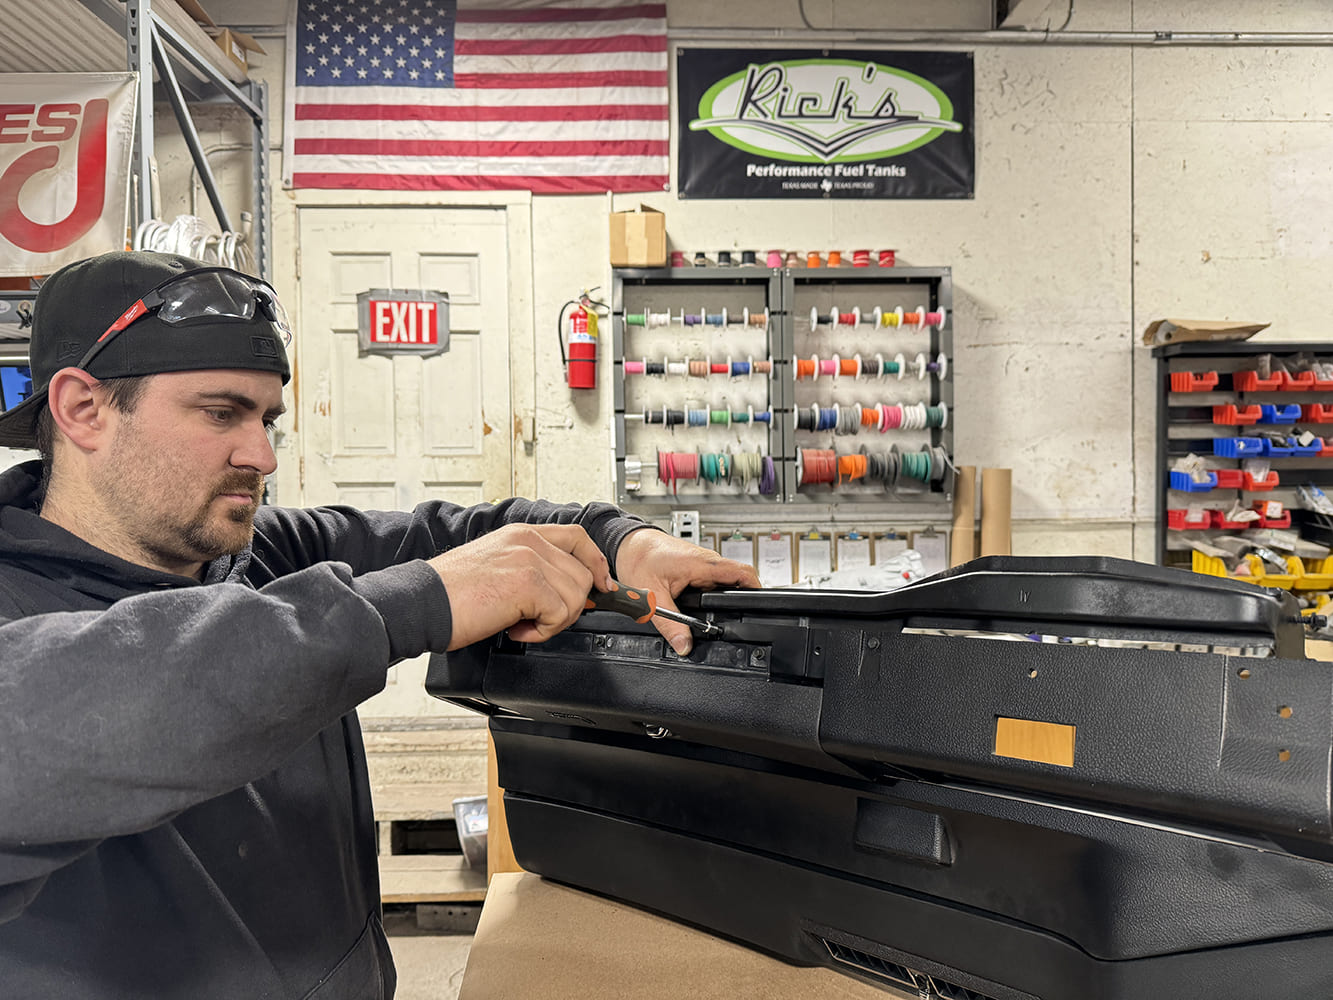
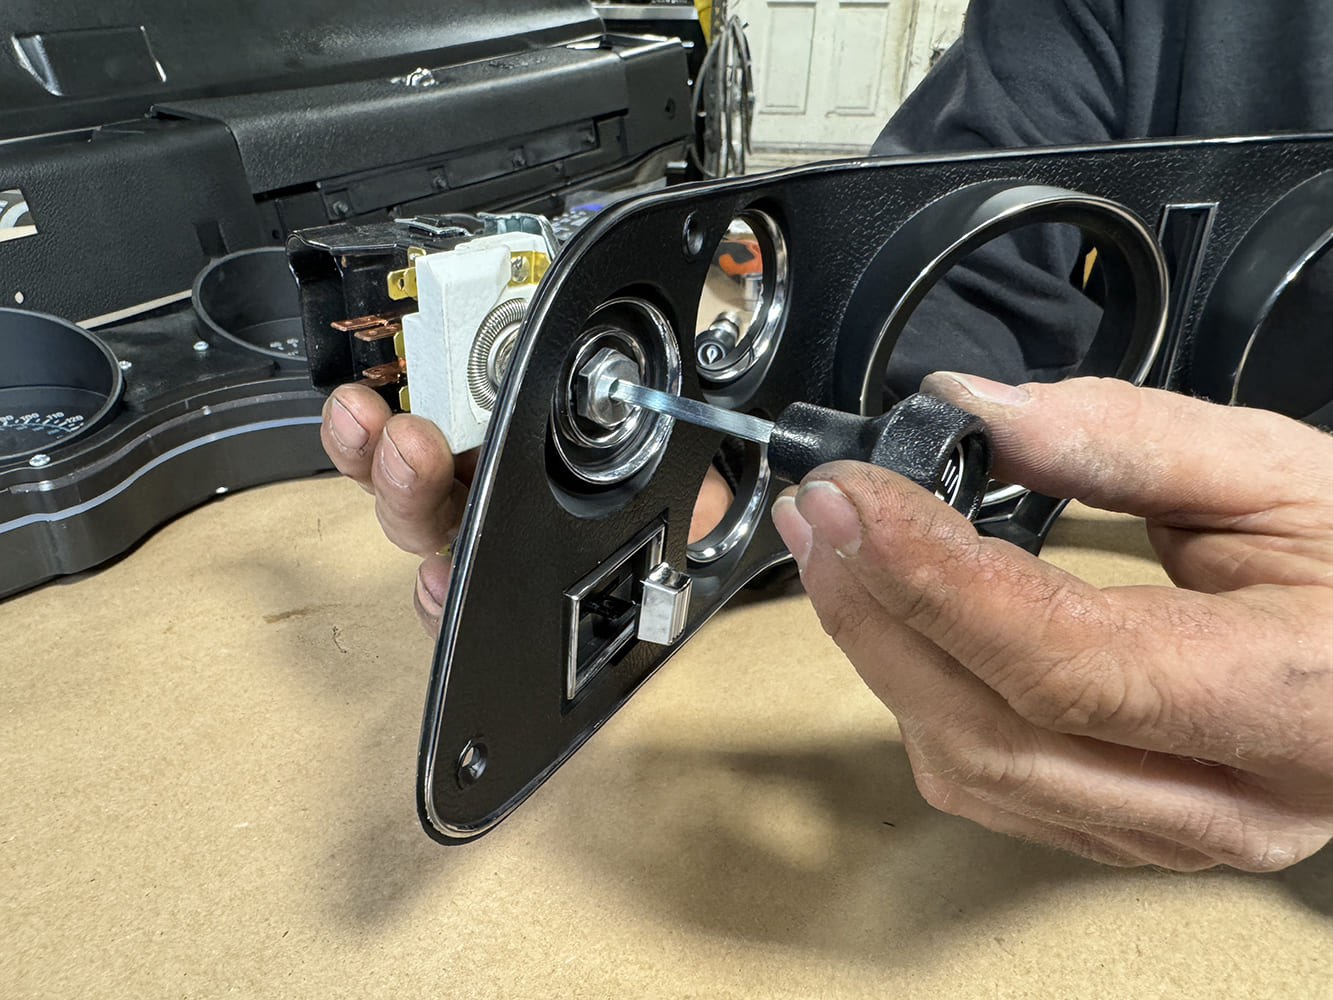
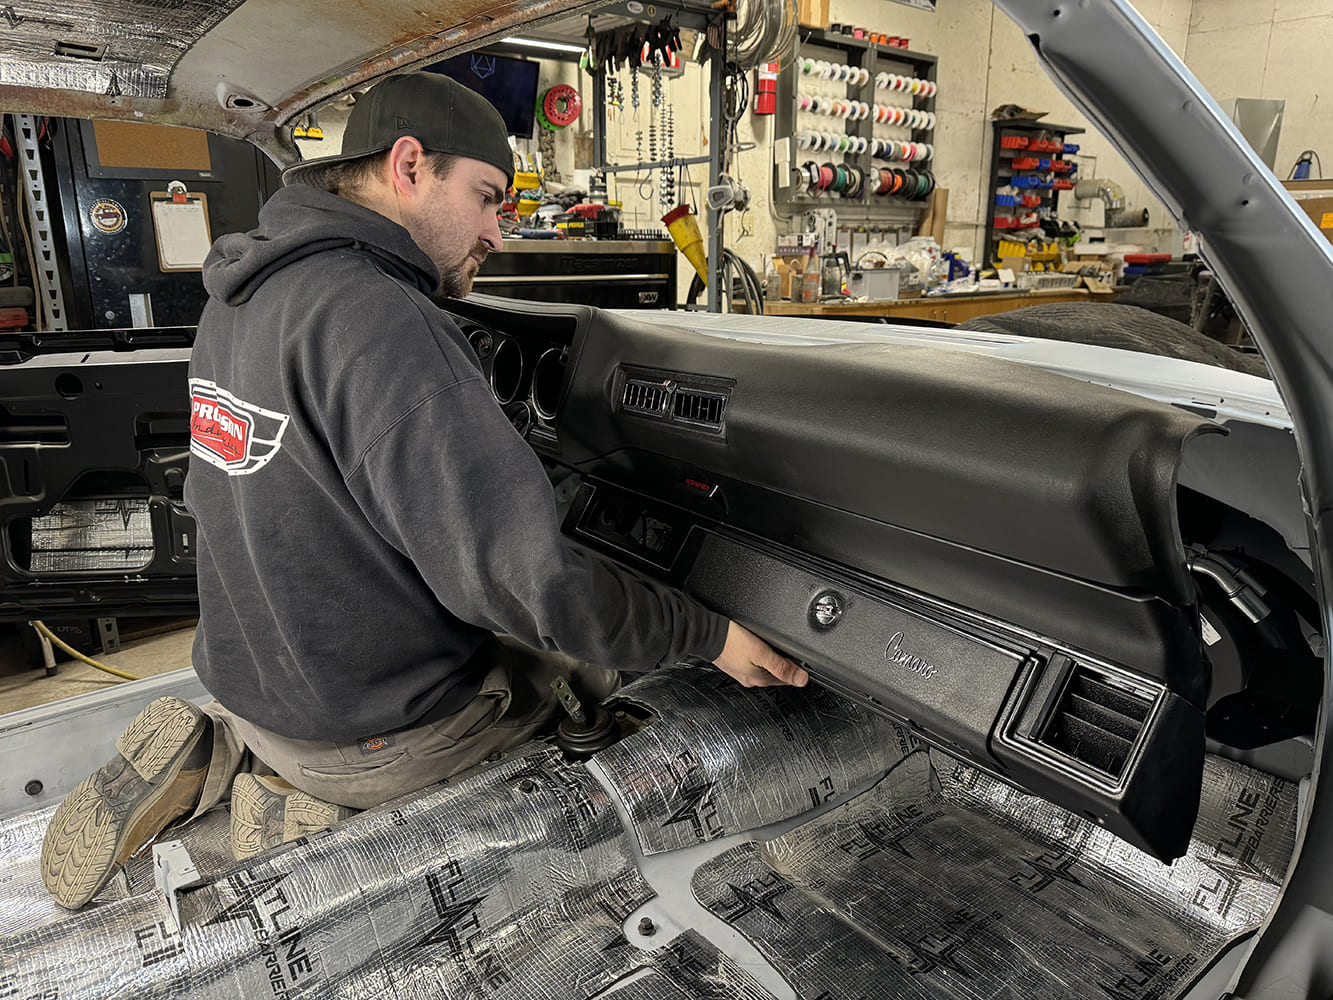
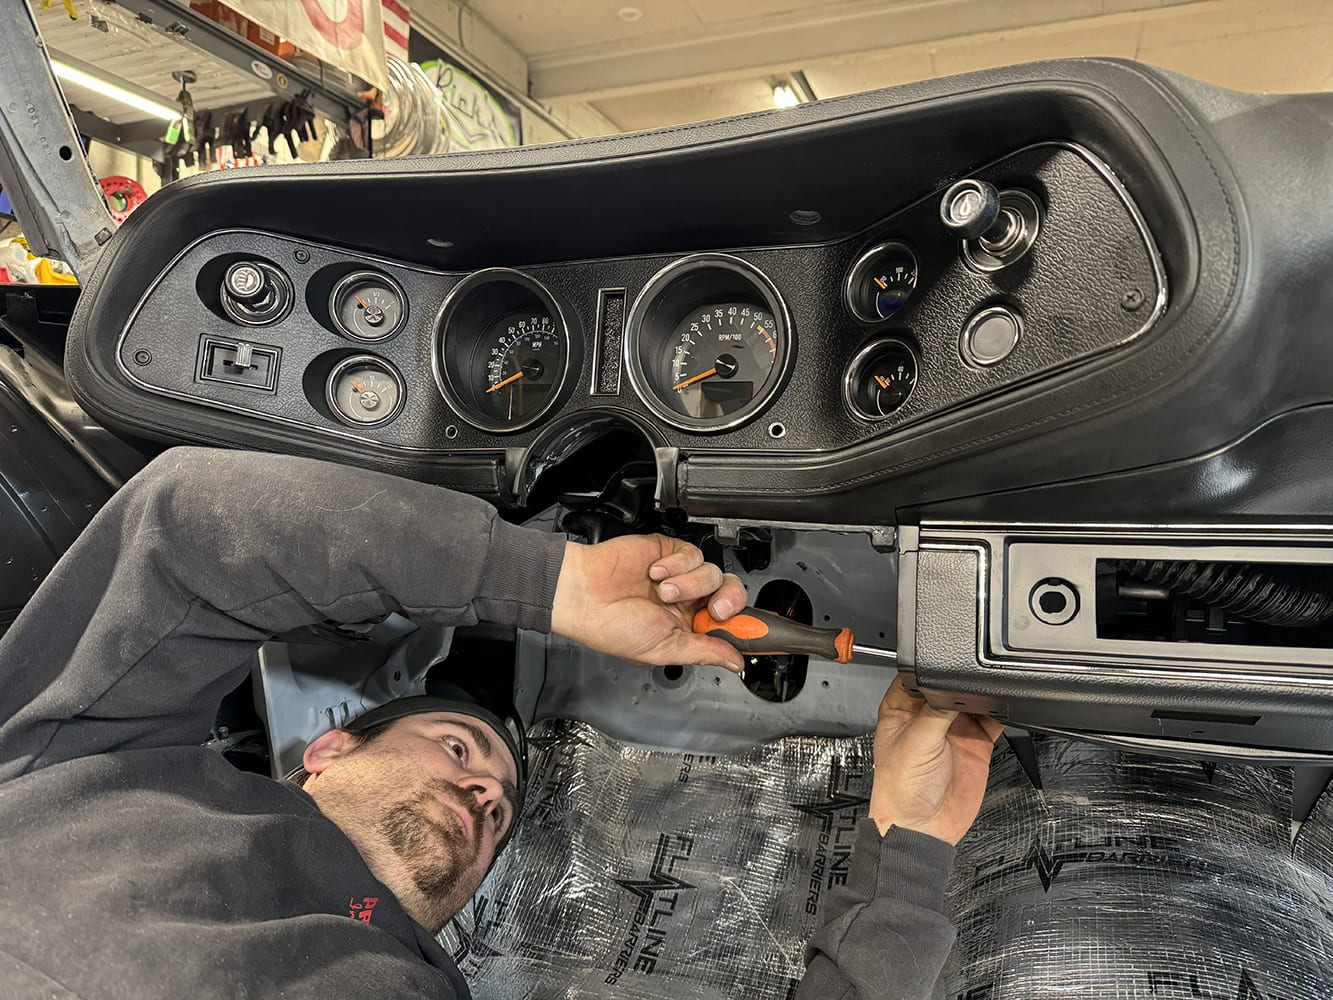
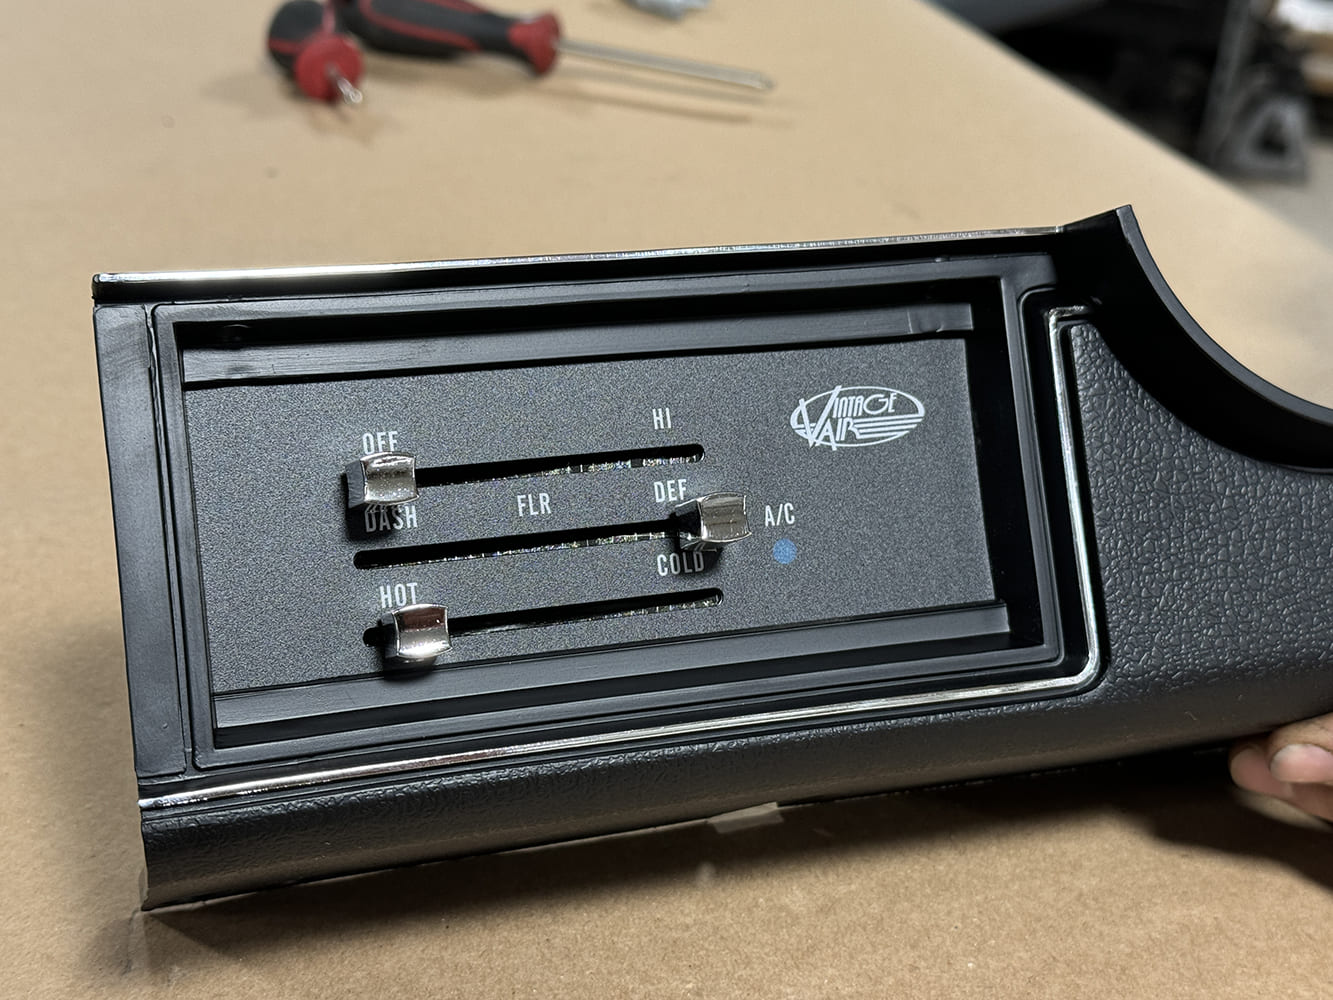
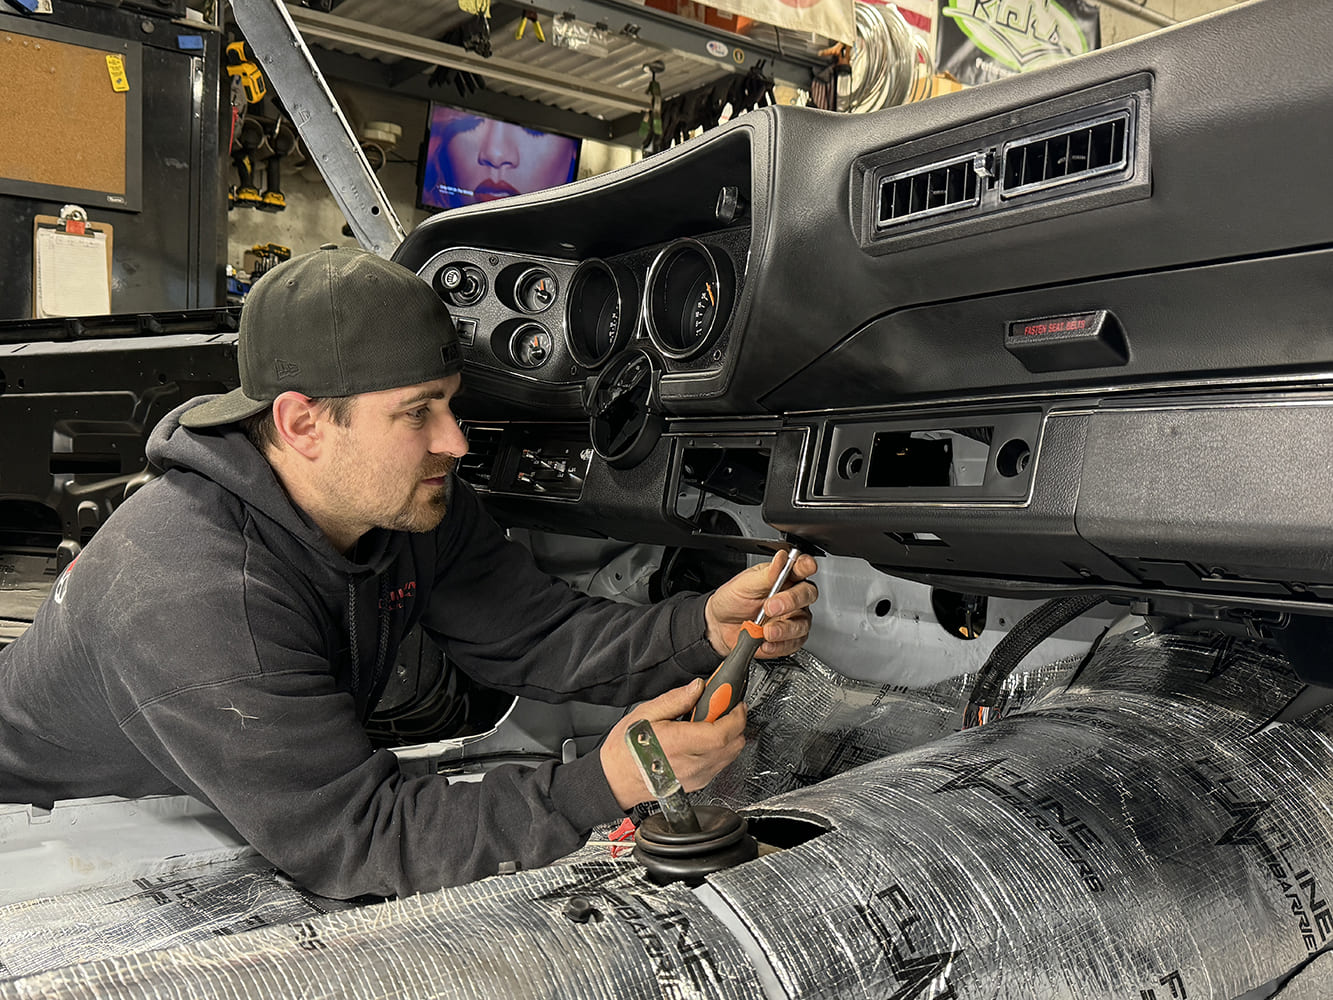
Prepare the OER lower driver and passenger side dash vent assemblies for installation by first adding (three) S-clips to the Vintage Air hose adapter ends and sliding them into place on the inner vent assembly.Follow by installing the completed vent assemblies to the lower driver and passenger sides of the lower dash.The new OER glovebox door was first fitted with a new lock and key set and then installed to the lower dash using hardware from the supplied mounting kit.Vintage Air supplied an updated glovebox that was then installed in place.Finally, the original factory lower dash brace was secured in place, making the unit complete.To begin assembly of the OER dash instrument carrier bezel, O’Brien started with installing a new OER headlight switch followed by the wiper switch and cigarette lighter.The Dakota Digital RTX instrument system was then installed to the upper dash with the supplied original dash hardware showcasing its CNC-machined housing, customizable LED backlighting, and fully electronic internals.The assembled OER dash instrument carrier bezel was then installed to the dash, completing the instrument panel area.O’Brien then carefully lifted the assembled dash and set it into place with the previously installed upper dashpad retainer clips to the top of the cowl, securing them in place with the provided hardware from the AMK kit.Follow by securing the rest of the dash assembly to the firewall support structures.Carefully install the Vintage Air SureFit control panel kit to the left side of the OER lower dash steering column cover with the provided hardware. Note the perfect fitment to the dash just like the factory original controls.
O’Brien wrapped up the job by installing the final piece in place with the lower dash steering column cover using the provided hardware.Here you can see just how nice the fitment is of the complete new OER dash with A/C vents, especially when accented by the cutting-edge Dakota Digital RTX instruments and Vintage Air SureFit control panel.
We use cookies to ensure that we give you the best experience on our website. If you continue to use this site we will assume that you are happy with it.