Our project involves restoring the A-pillar on our 1971 Challenger convertible. The lower A-pillar on the driver side has already been replaced.
By Mark Ehlen – Photography By the MCR Staff
It’s no secret that few untouched E-bodies remain spared from nature’s wrath. Barn finds emerge now and then, but the vast majority of restorable ones are ready for a second go-around. This is beneficial in many ways, as it has prevented them from being parted out and scrapped. However, the downside of many of these cars is that their original restoration was often more akin to collision repair rather than an accurate restoration; the aim of the work was to make them look good but not necessarily correct. Often, correcting them would have required significantly more time, effort, and skill than was available for what might have been seen as minimal additional benefit.
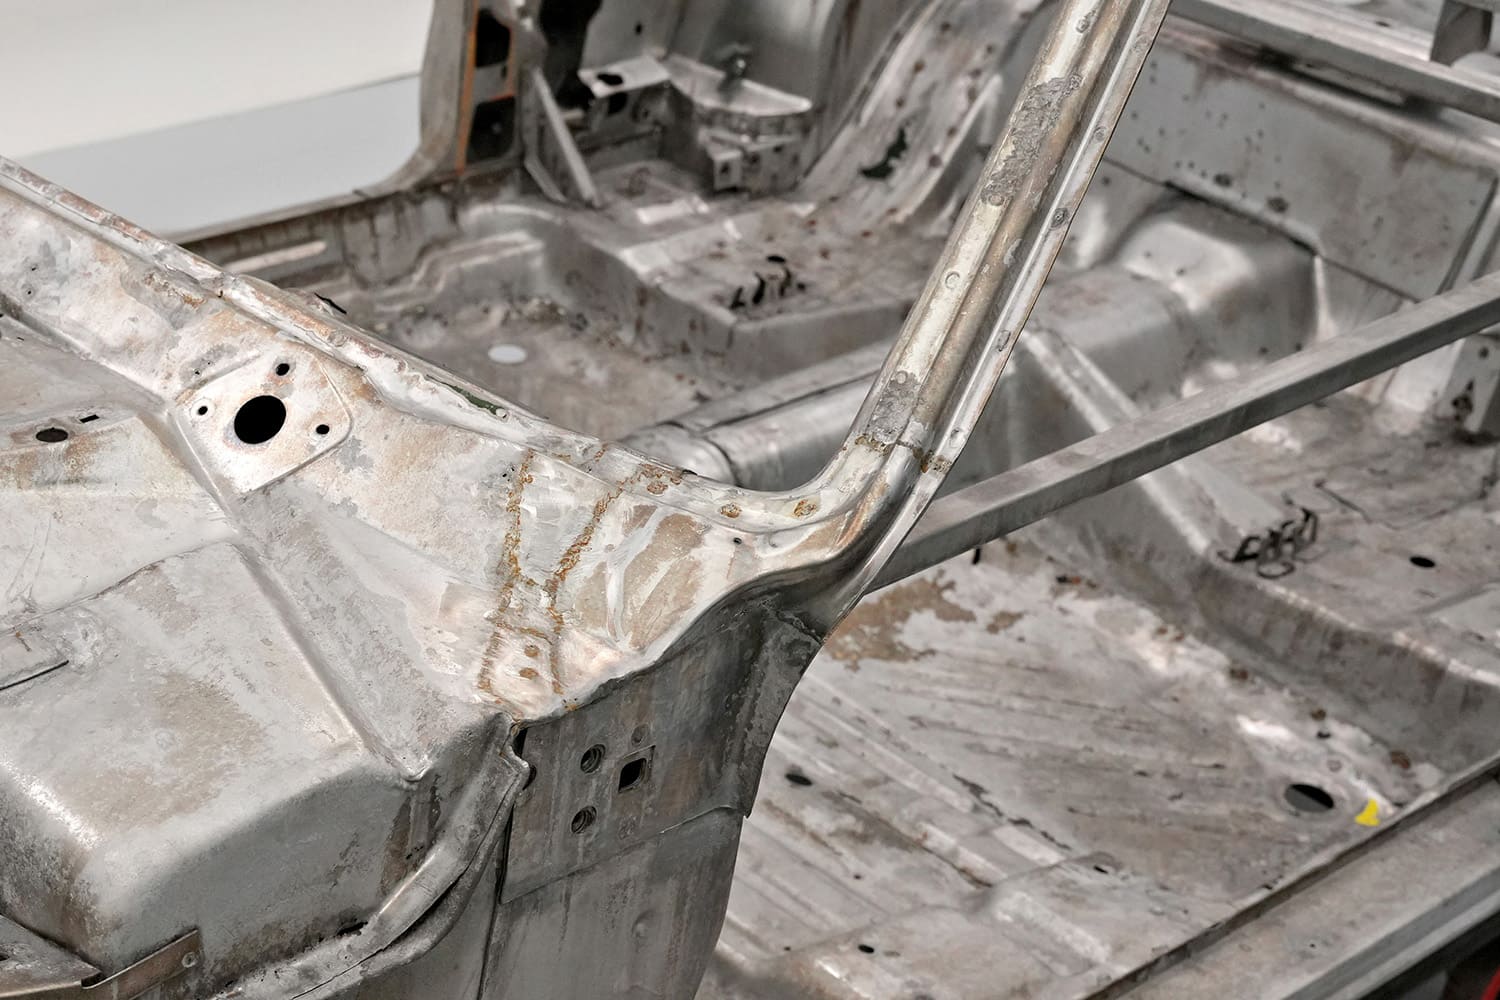
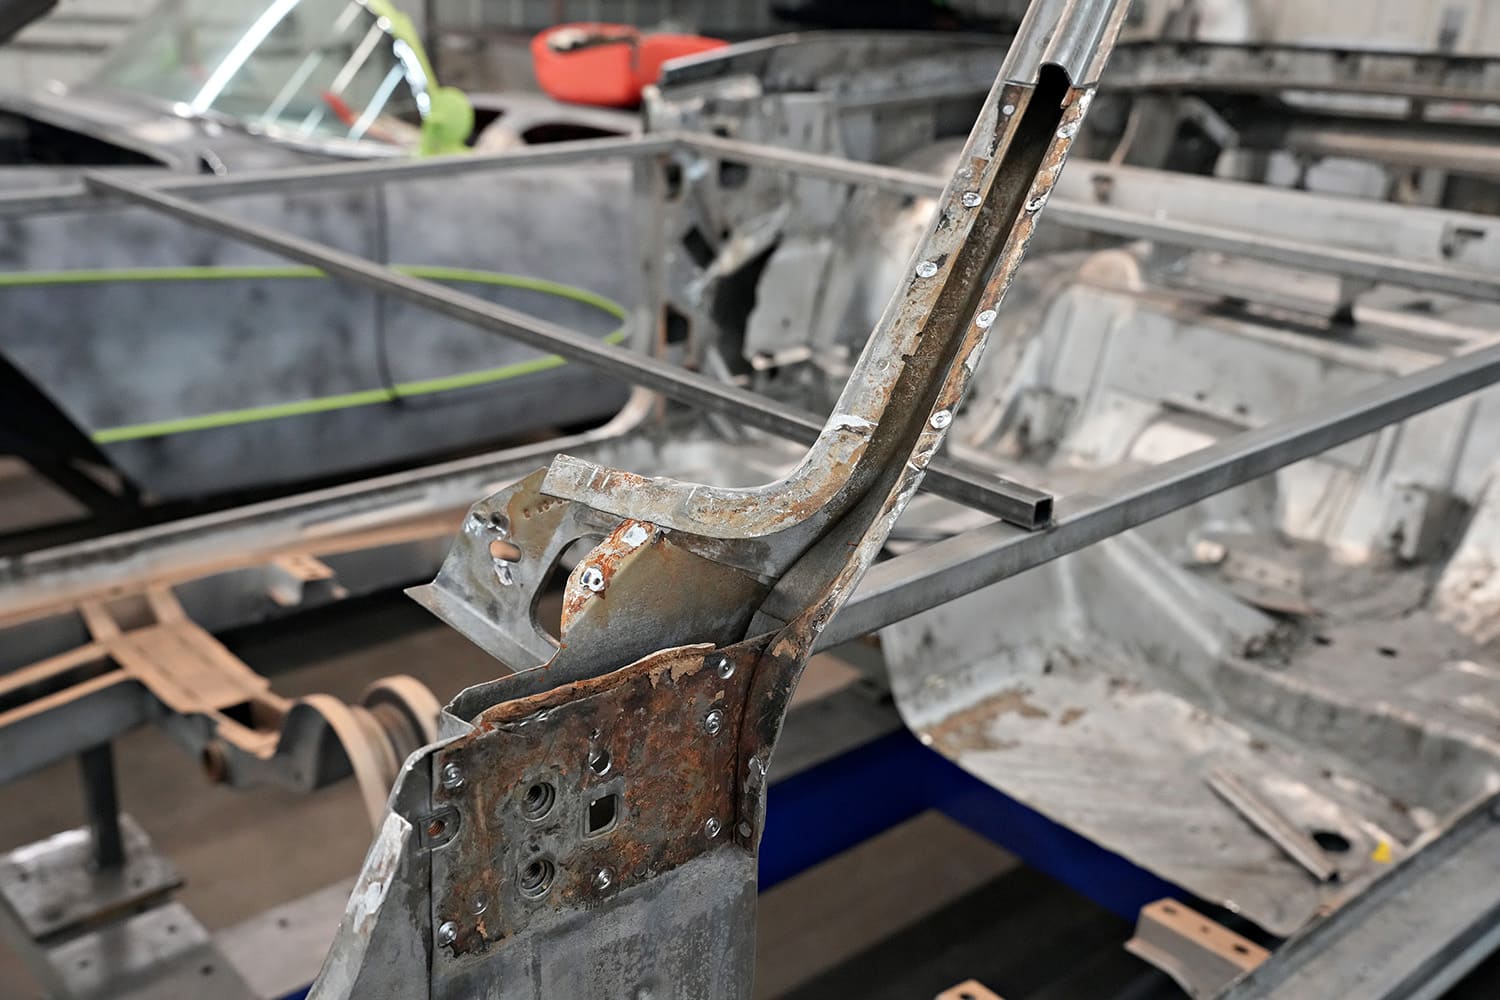
At some point in the past, someone spliced the lower part of this A-pillar over the existing one and attempted to butt weld it to the cowl. This may have served its purpose then, but no reputable restoration shop would even consider leaving it this way.
Muscle Car Restorations (MCR) frequently encounters this situation in their restoration work. Previously repaired areas must now be redone to restore them to factory specifications. Naturally, the rest of the body hasn’t remained unchanged. Sections that may have been perfectly fine during the initial restoration may now require repair.
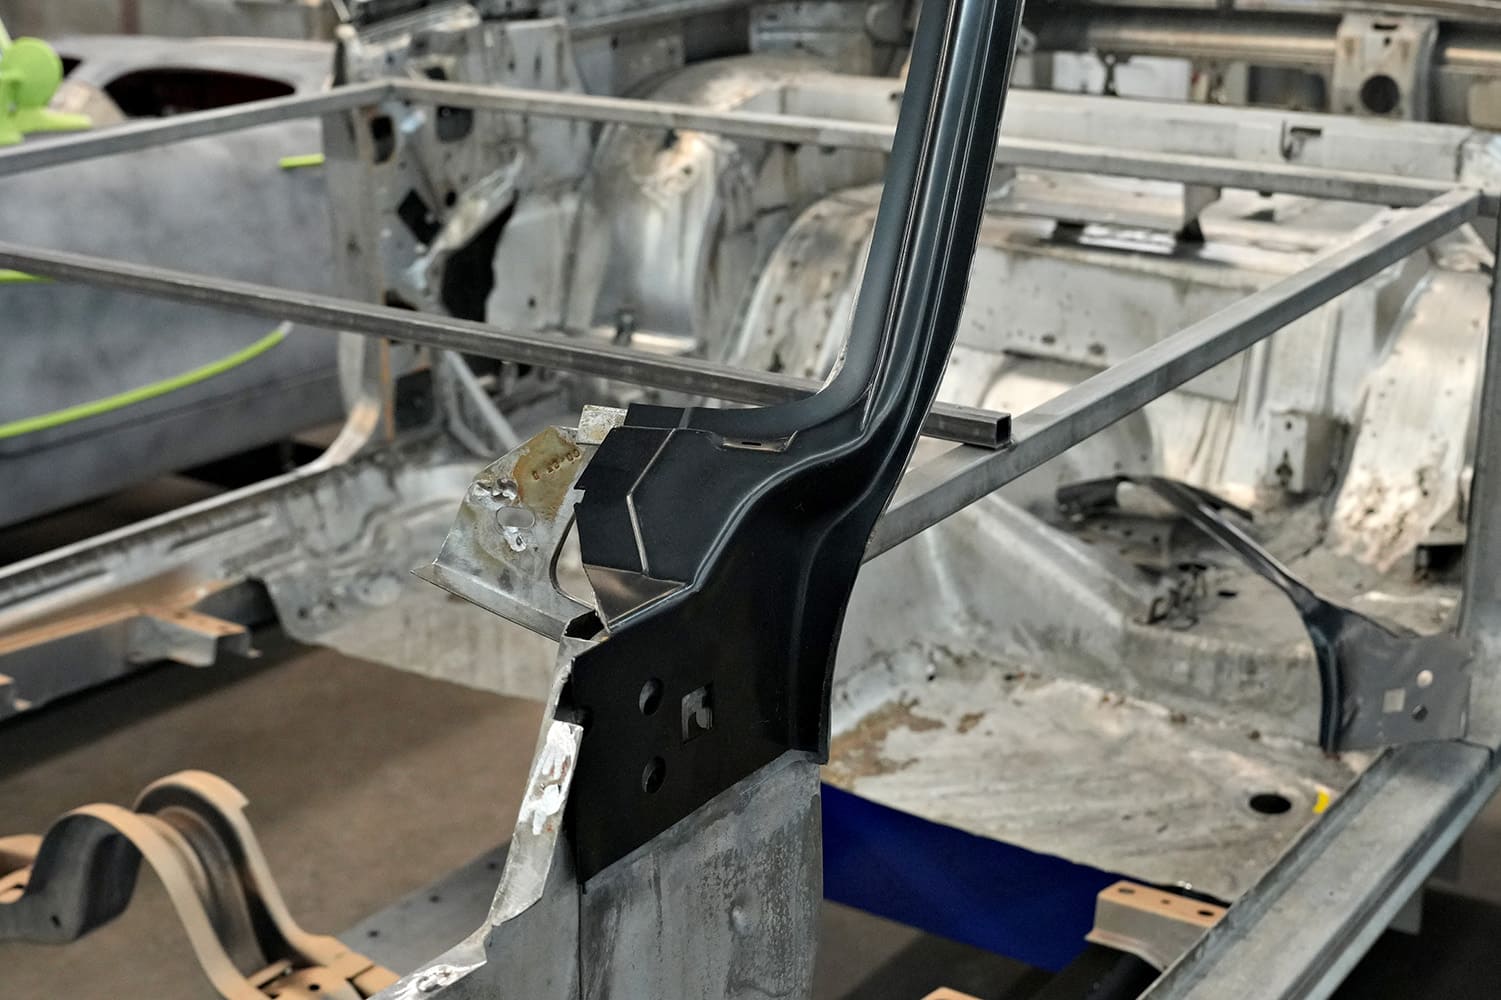
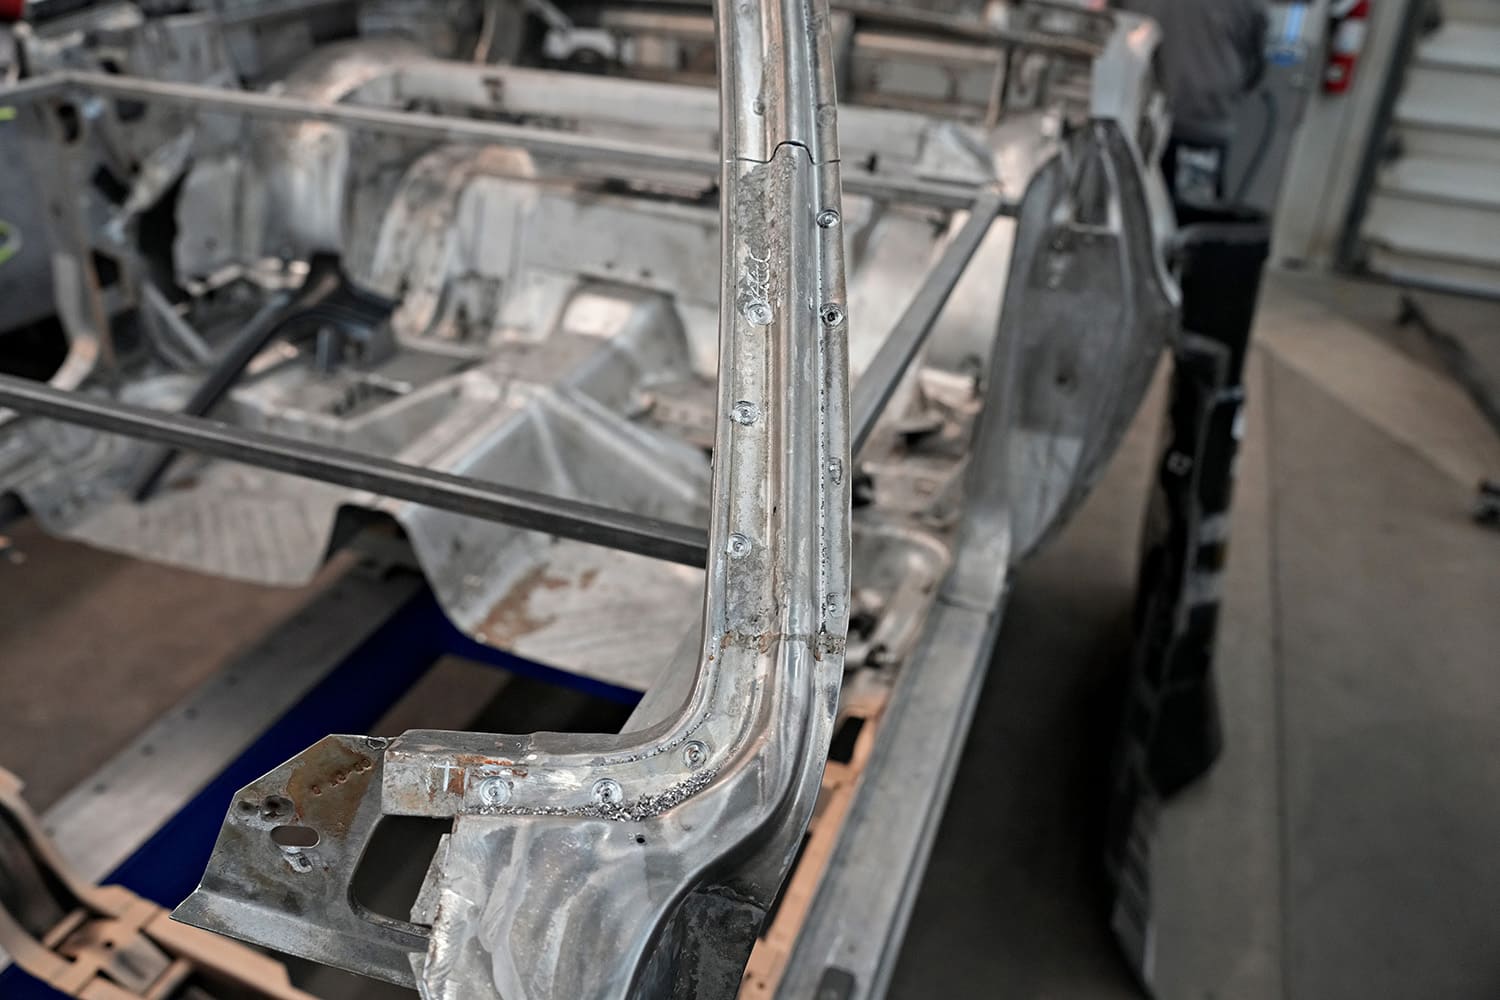
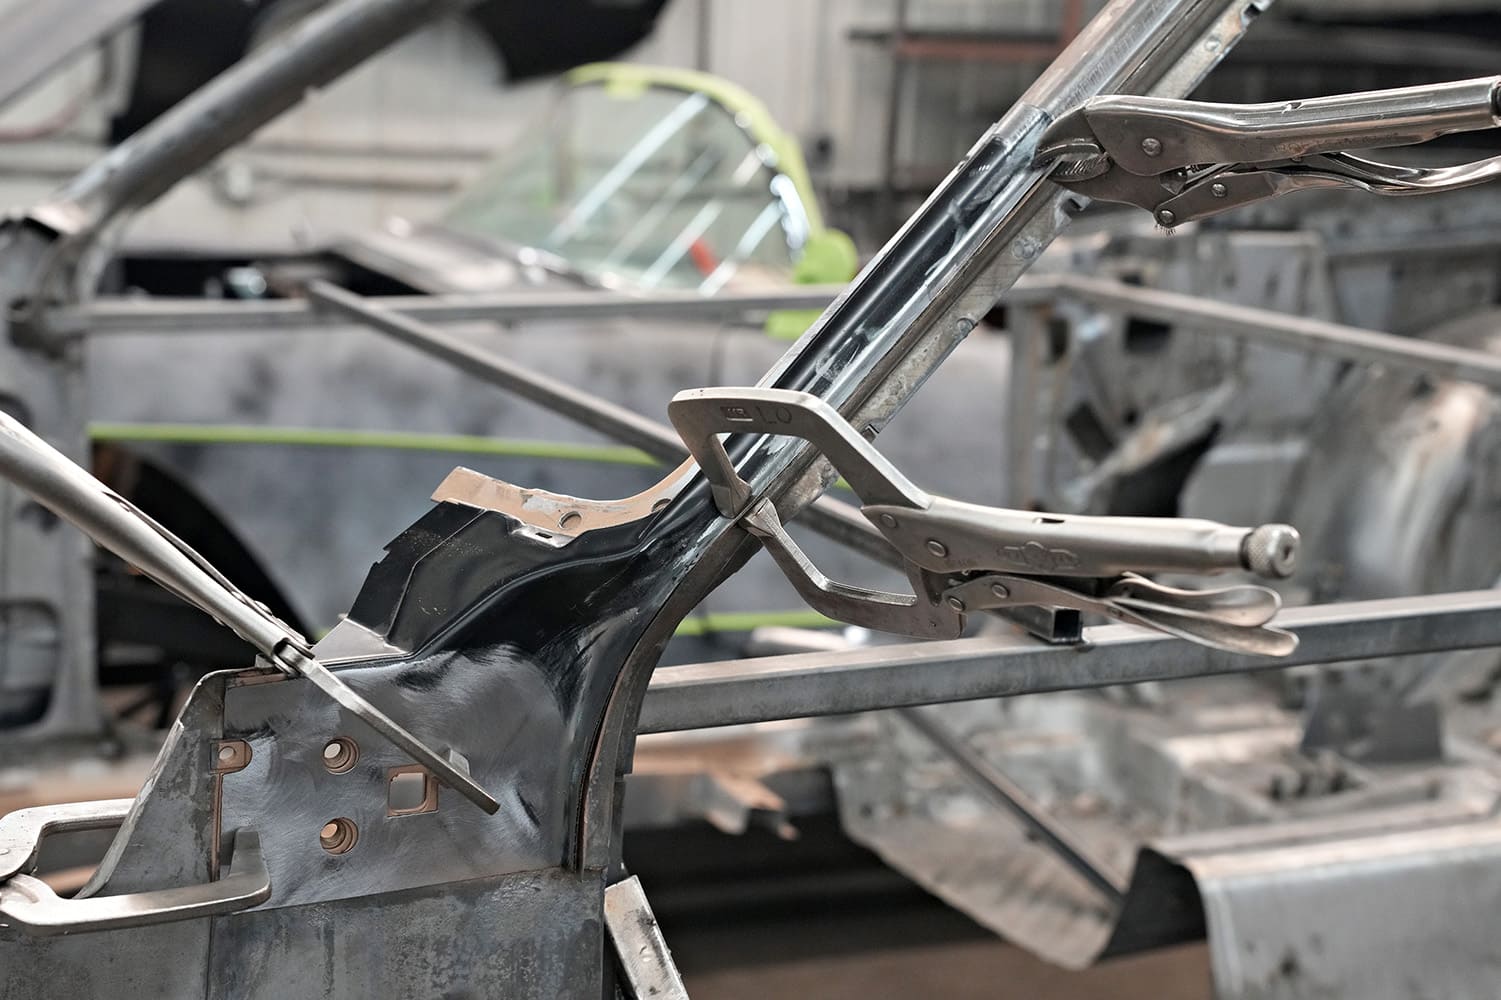
Here, you can see how the A-pillar is meant to fit under the firewall and cowl. Naturally, this is much easier when the firewall and cowl are removed.
A good example of this is the 1971 Challenger convertible. The driver side lower A-pillar had been replaced; the lower corner was welded over part of the old one and then butt-welded to the top cowl to make it appear flush and part of the cowl, which it is not. The firewall and cowl are supposed to sit atop the A-pillar corner, with all three then spot-welded together. This repair served its purpose, was mostly hidden, and was likely undetectable to an untrained eye, but it is incorrect.
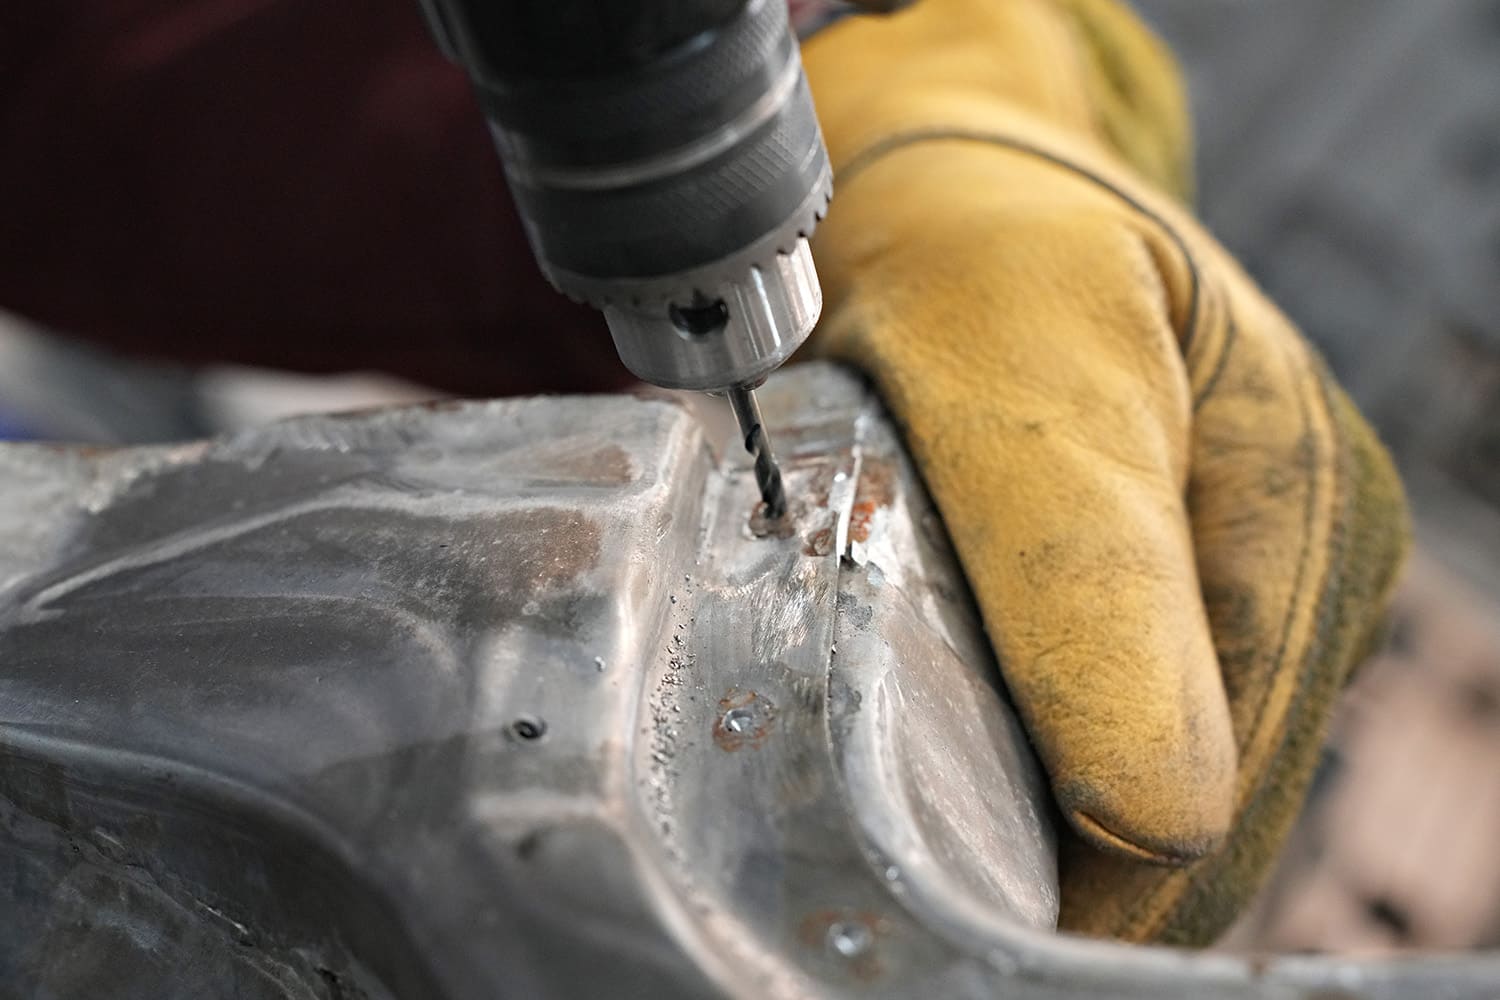
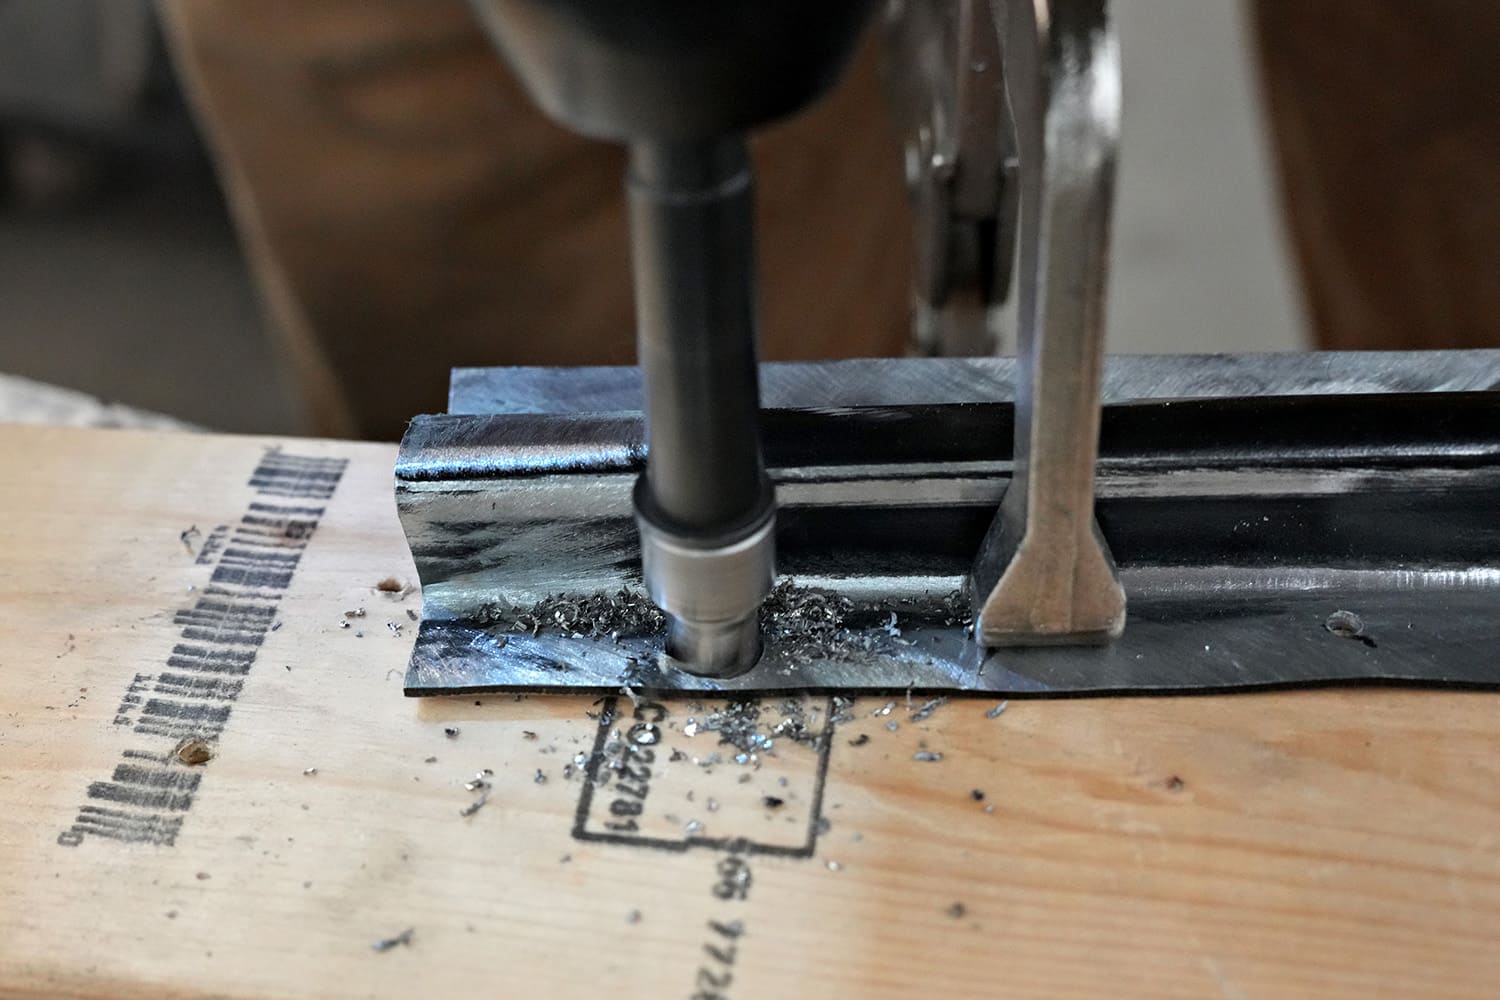
The center of each factory spot weld is identified and gently marked with a 1/8-inch drill to create a locator for the pin in the Rotabroach Cutter.
MCR is also helping in this case by replacing the firewall and cowl, which makes access to the A-pillar corner considerably easier. This repair could have been done without replacing those parts; it would have been slightly trickier. Perhaps that’s why the previous repair was executed as it was.
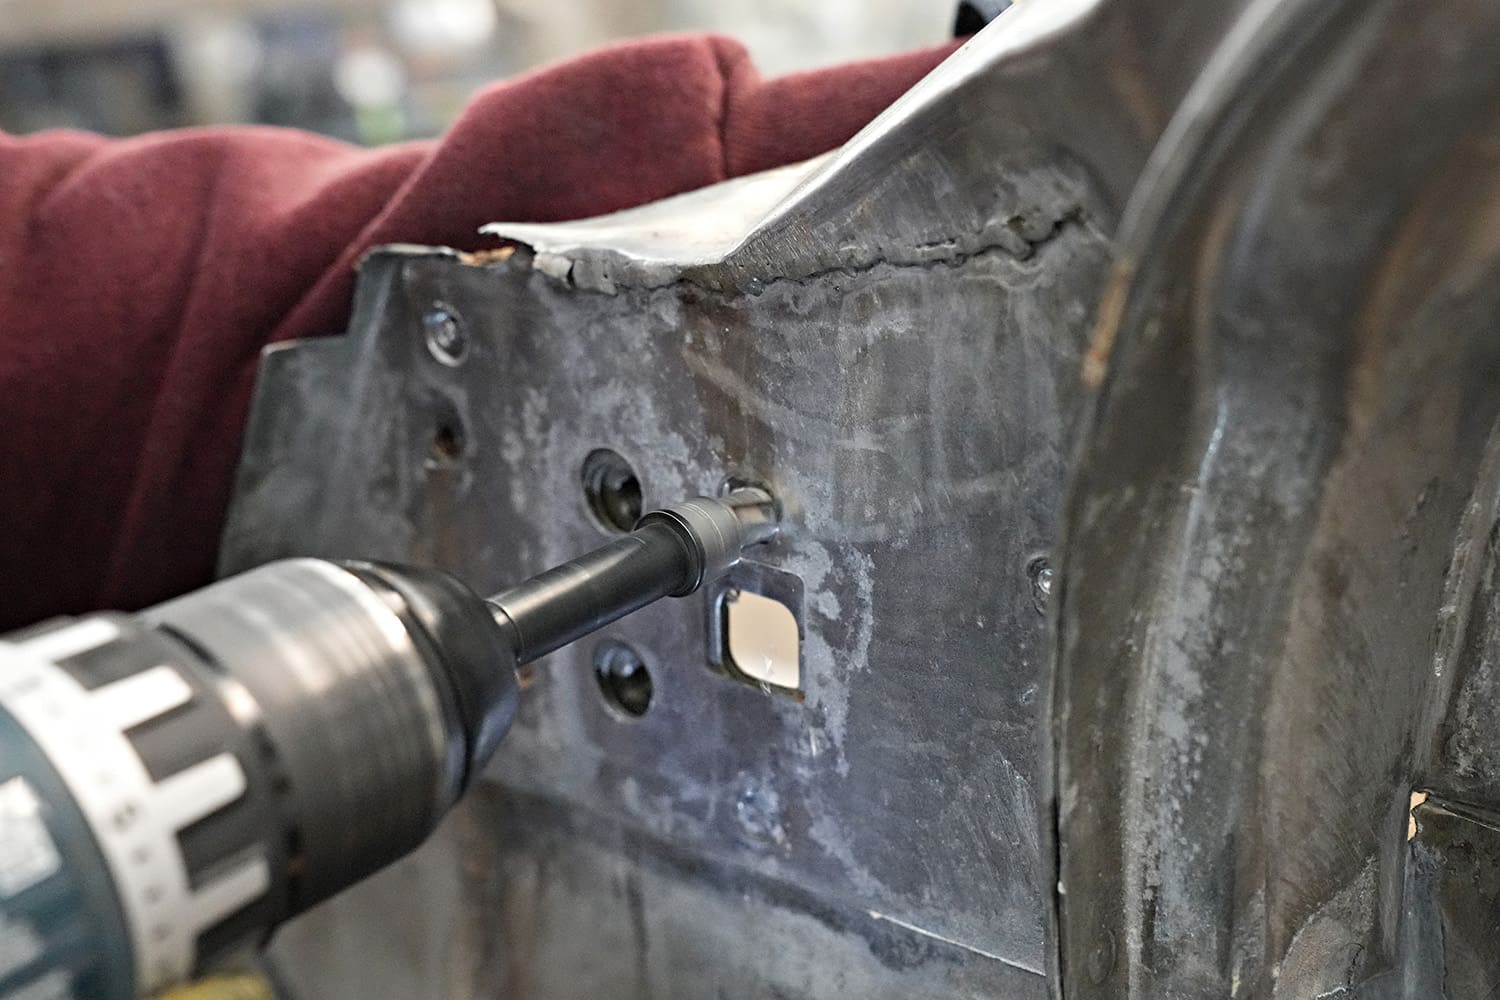
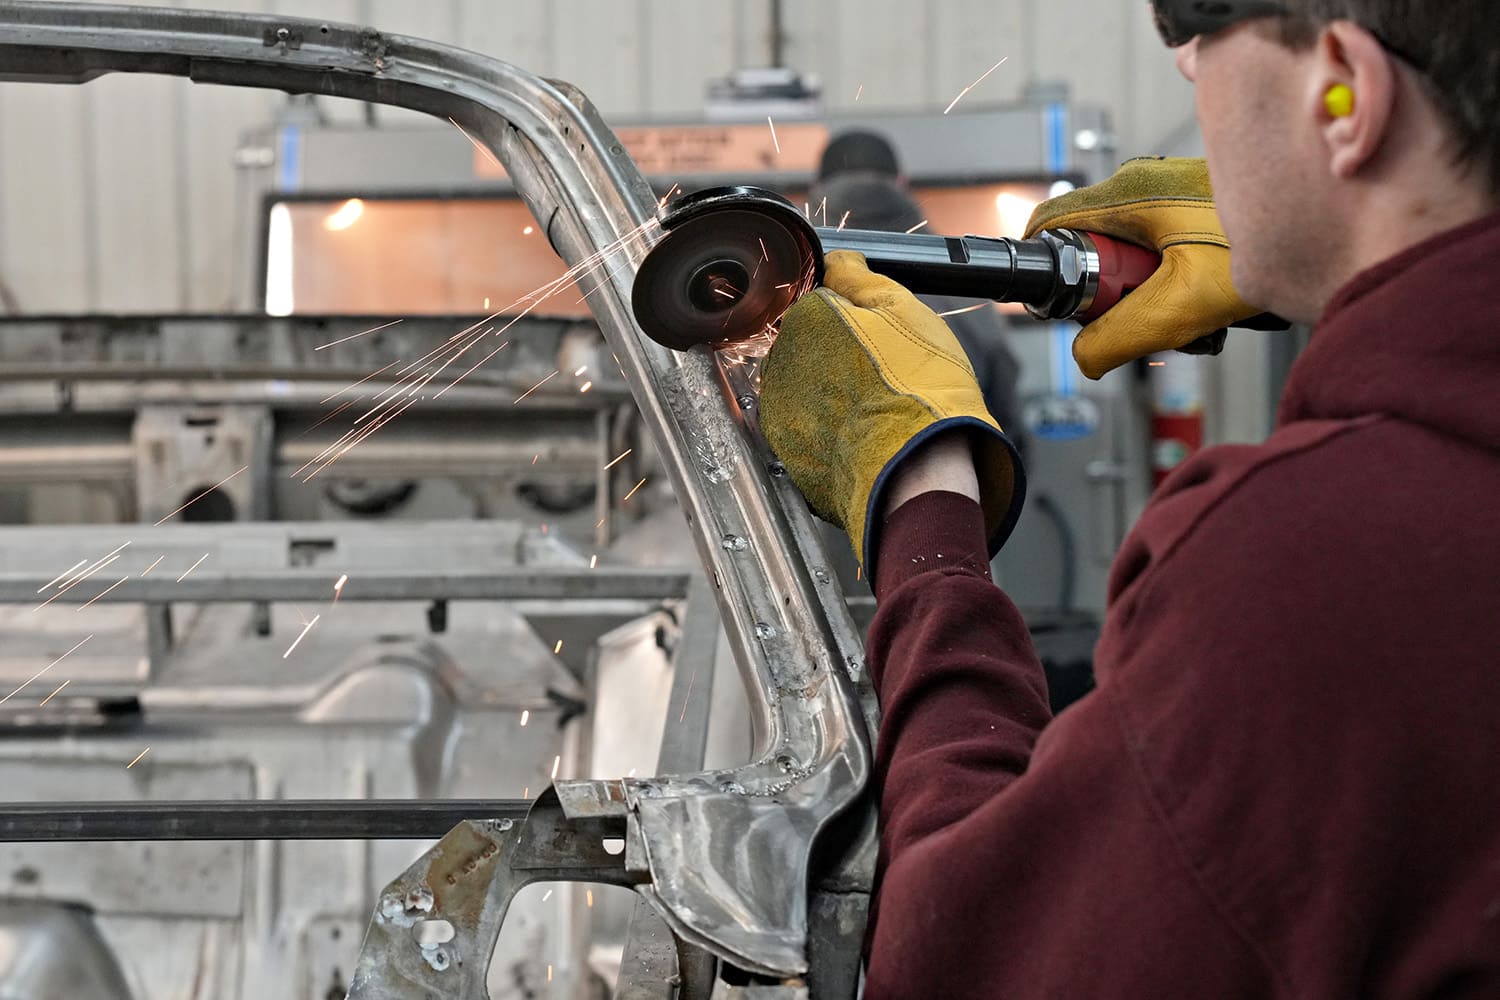
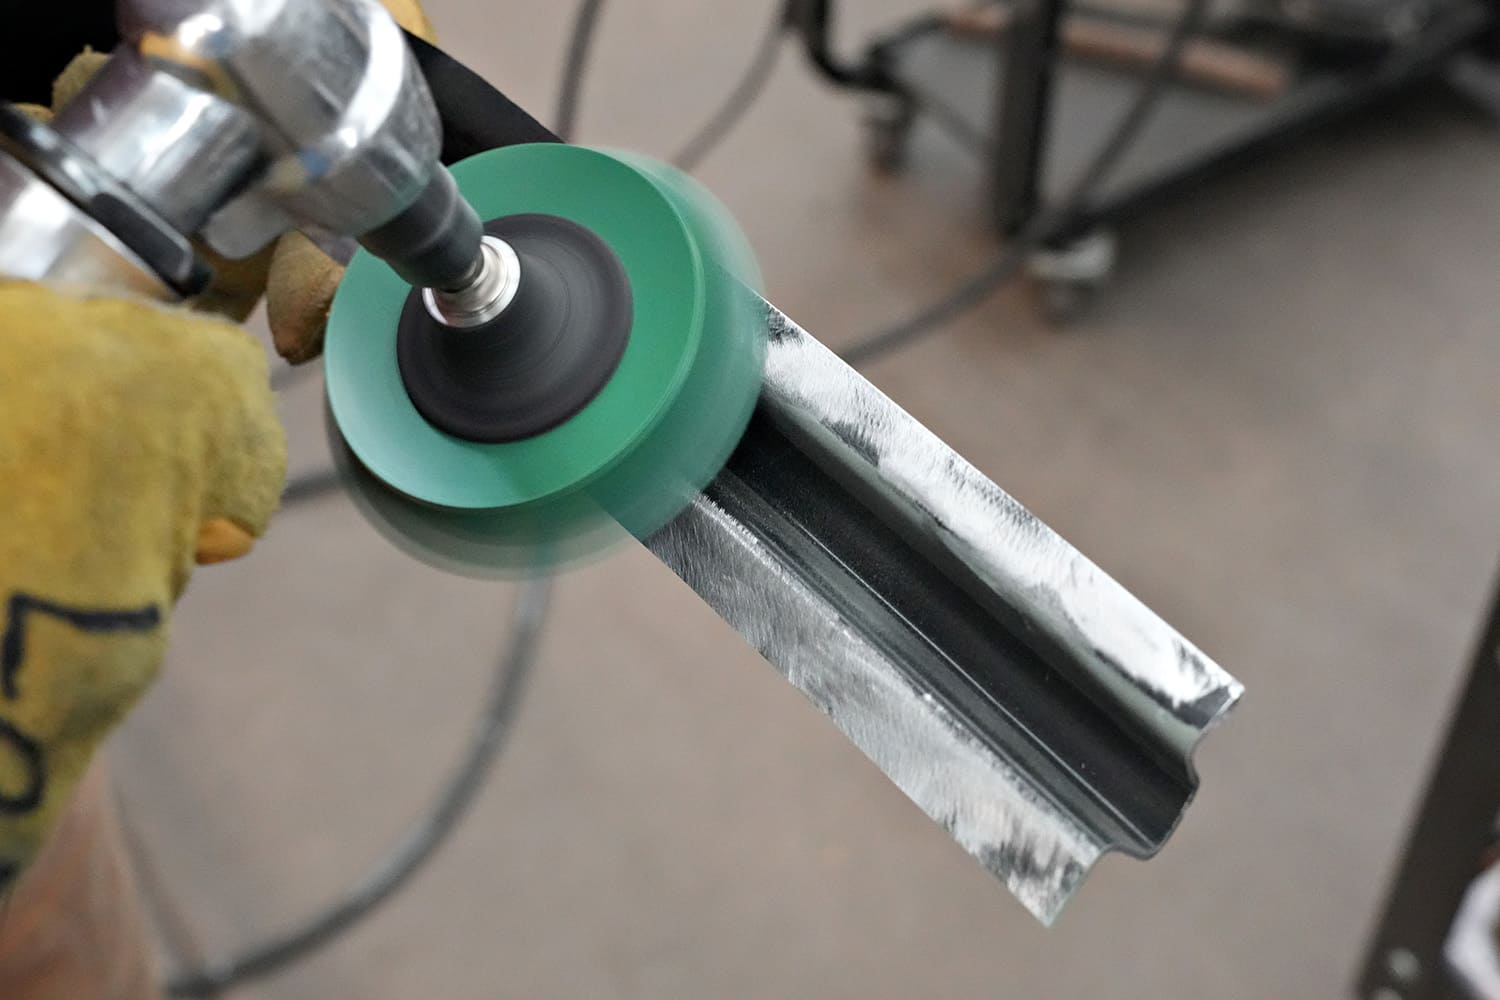
Removing the old spot welds is most effectively accomplished with a 3/8-inch Rotabroach Cutter. Remember where the last A-pillar was cut and welded to the original part.
This project also highlights another common restoration issue: the difference between hardtop and convertible models. Some parts specific to convertibles are currently unavailable, so the same components of the hardtop versions are spliced onto the convertible section.
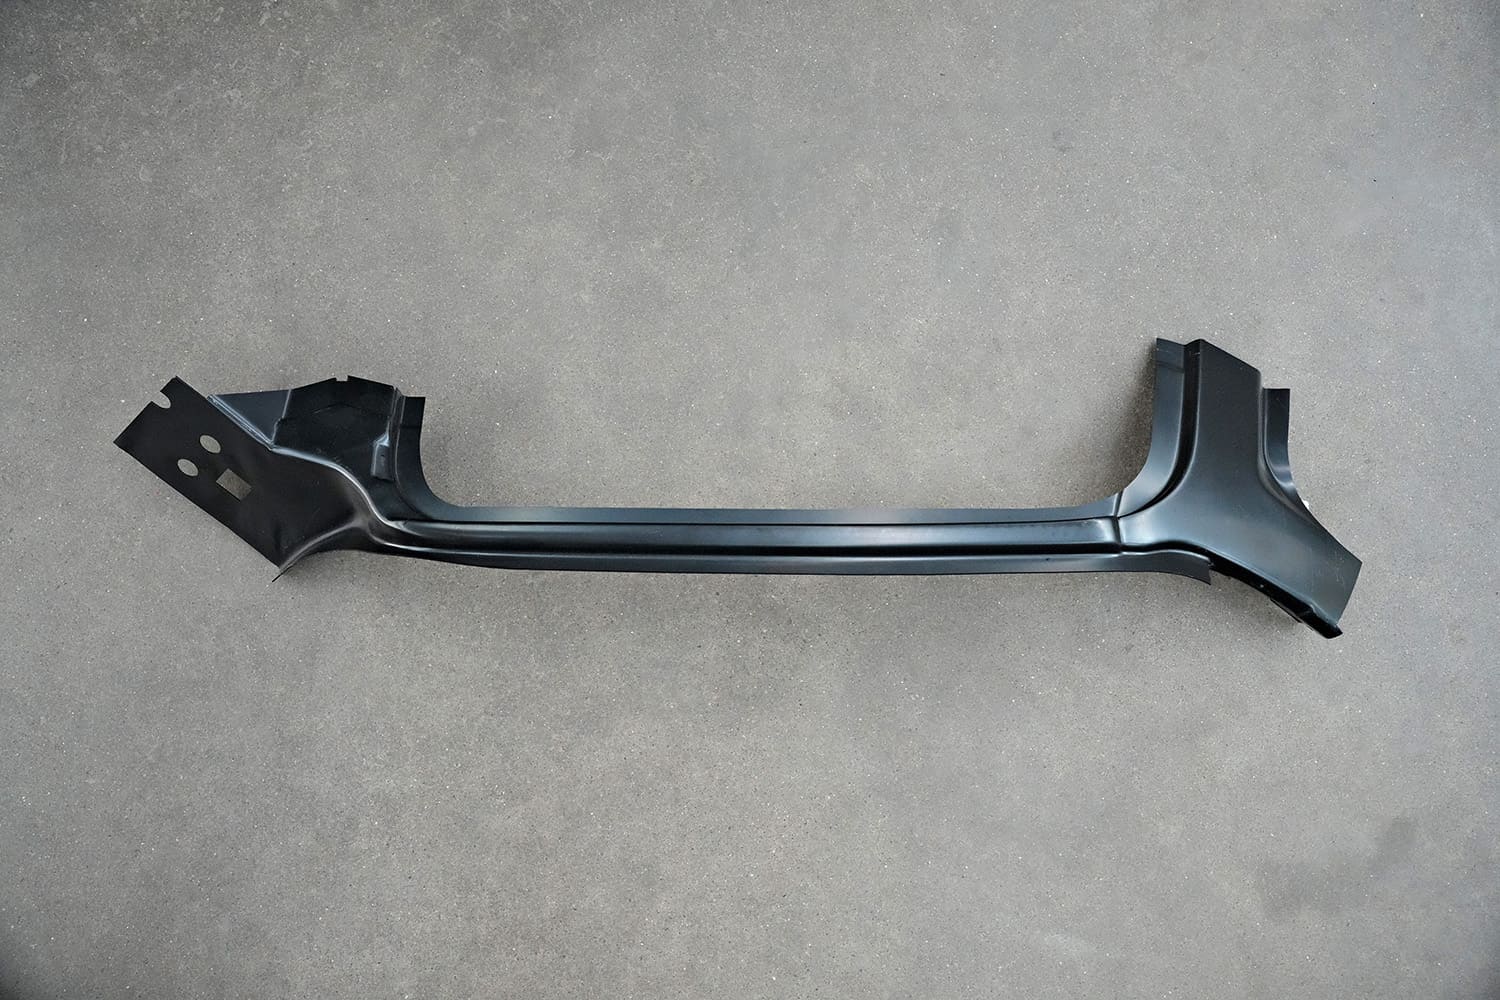
While MCR usually prefers to save as much of the original sheetmetal as-is reasonable and often splices in only the damaged section of a part, in this case, the upper end of the A-pillar on convertibles differs from the hardtop version and is not currently being reproduced. Therefore, MCR can only use the lower section of a new AMD hardtop A-pillar for this repair. That’s all that’s needed.
Since convertible A-pillars are unavailable and the top corner of this one (the part that differs from hardtops) is in good condition, MCR acquired a hardtop version from Auto Metal Direct and spliced in only the area that needed replacement.
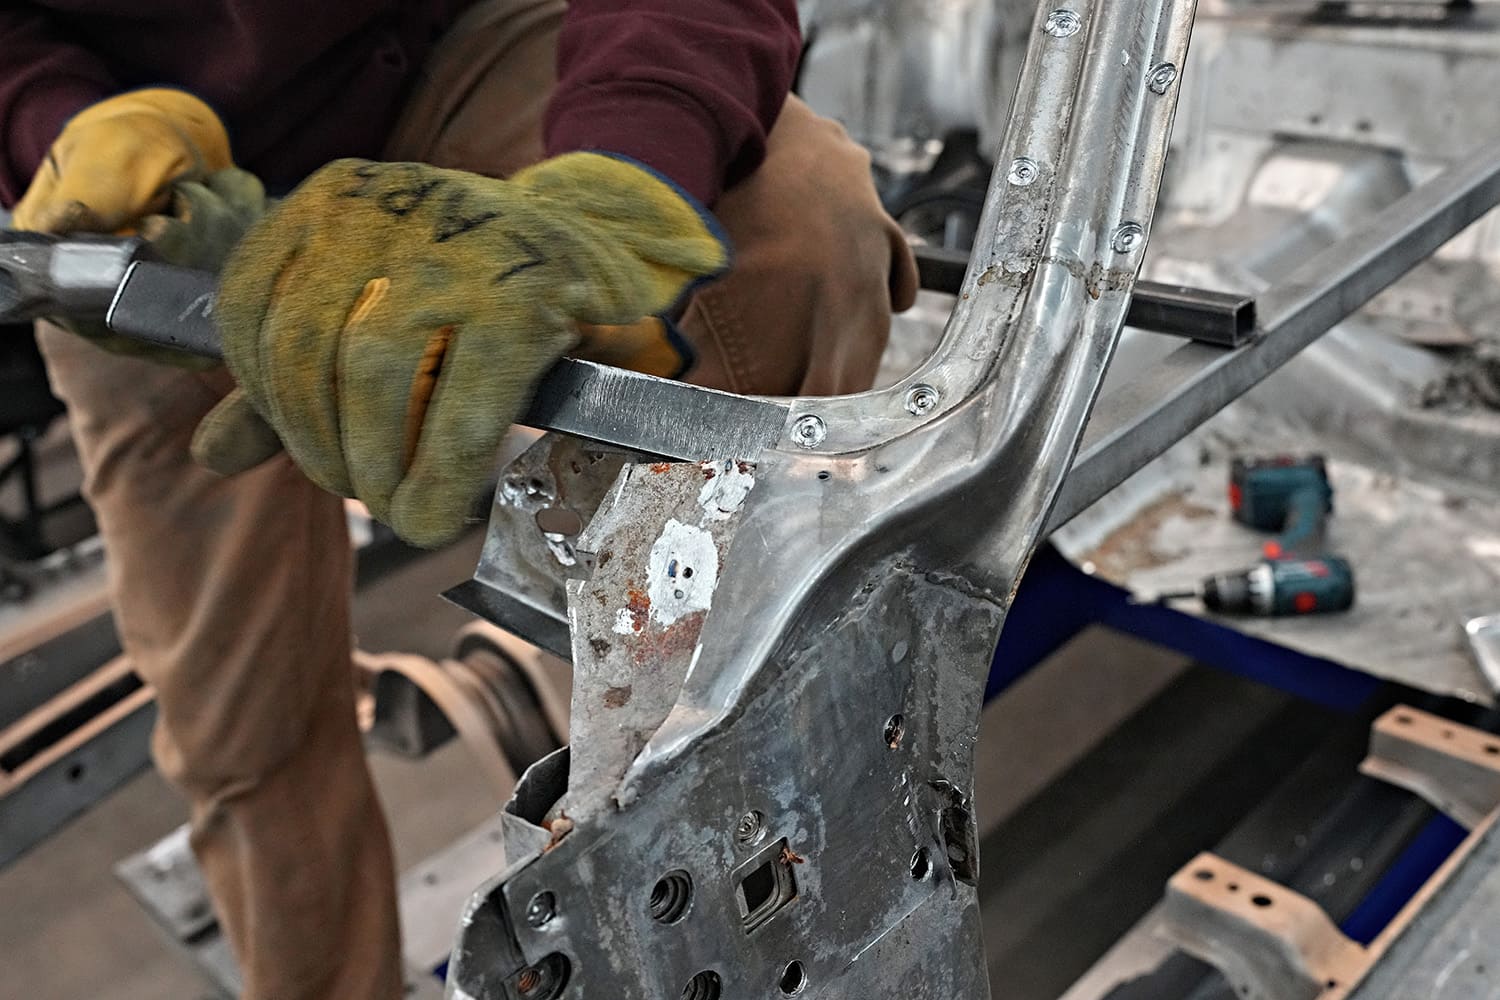
You can clearly see where the last splice was made; however, since there is no damage further up the pillar, MCR will splice in the new part high enough to replace that as well.
This is a common practice with MCR: retaining as much of the original sheetmetal as-is reasonably possible. Only replacing the damaged portions of a panel can minimize the amount of the body shell that needs to be disturbed.
A 60-grit 3M belt file can serve as an effective alternative for breaking spot welds.
In this case, that’s truly the only feasible method for carrying out this repair.
It would be nice if all the spot welds fully cooperated and could come loose freely, but often they need a little persuasion.
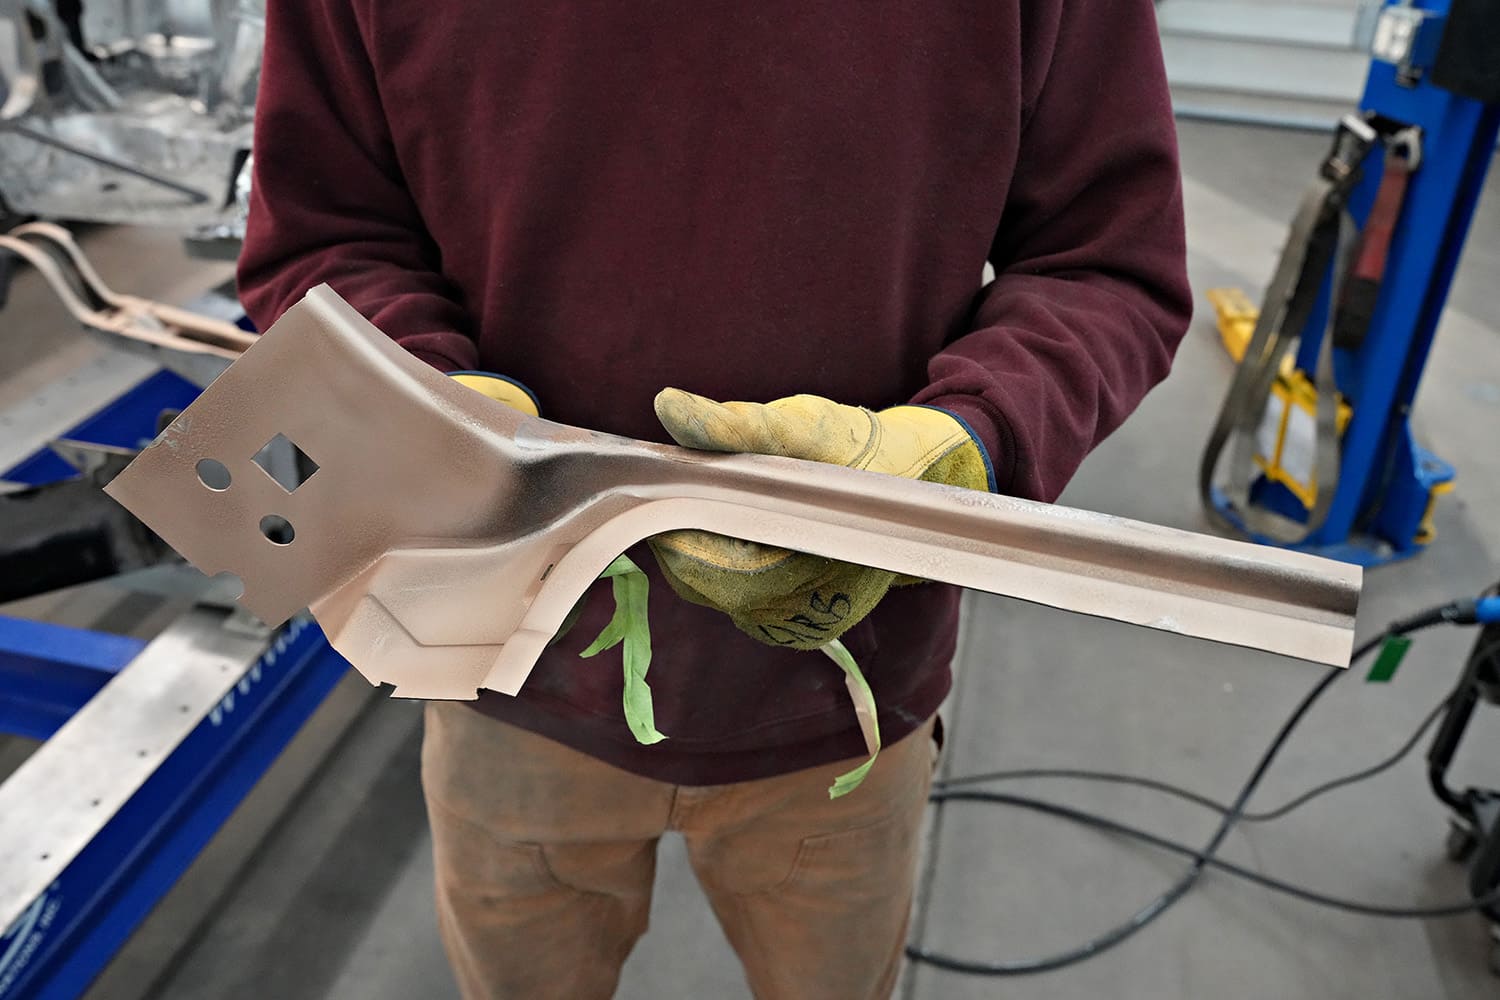
With the old part removed, the next step is to clean the surfaces to prepare them for new welds.
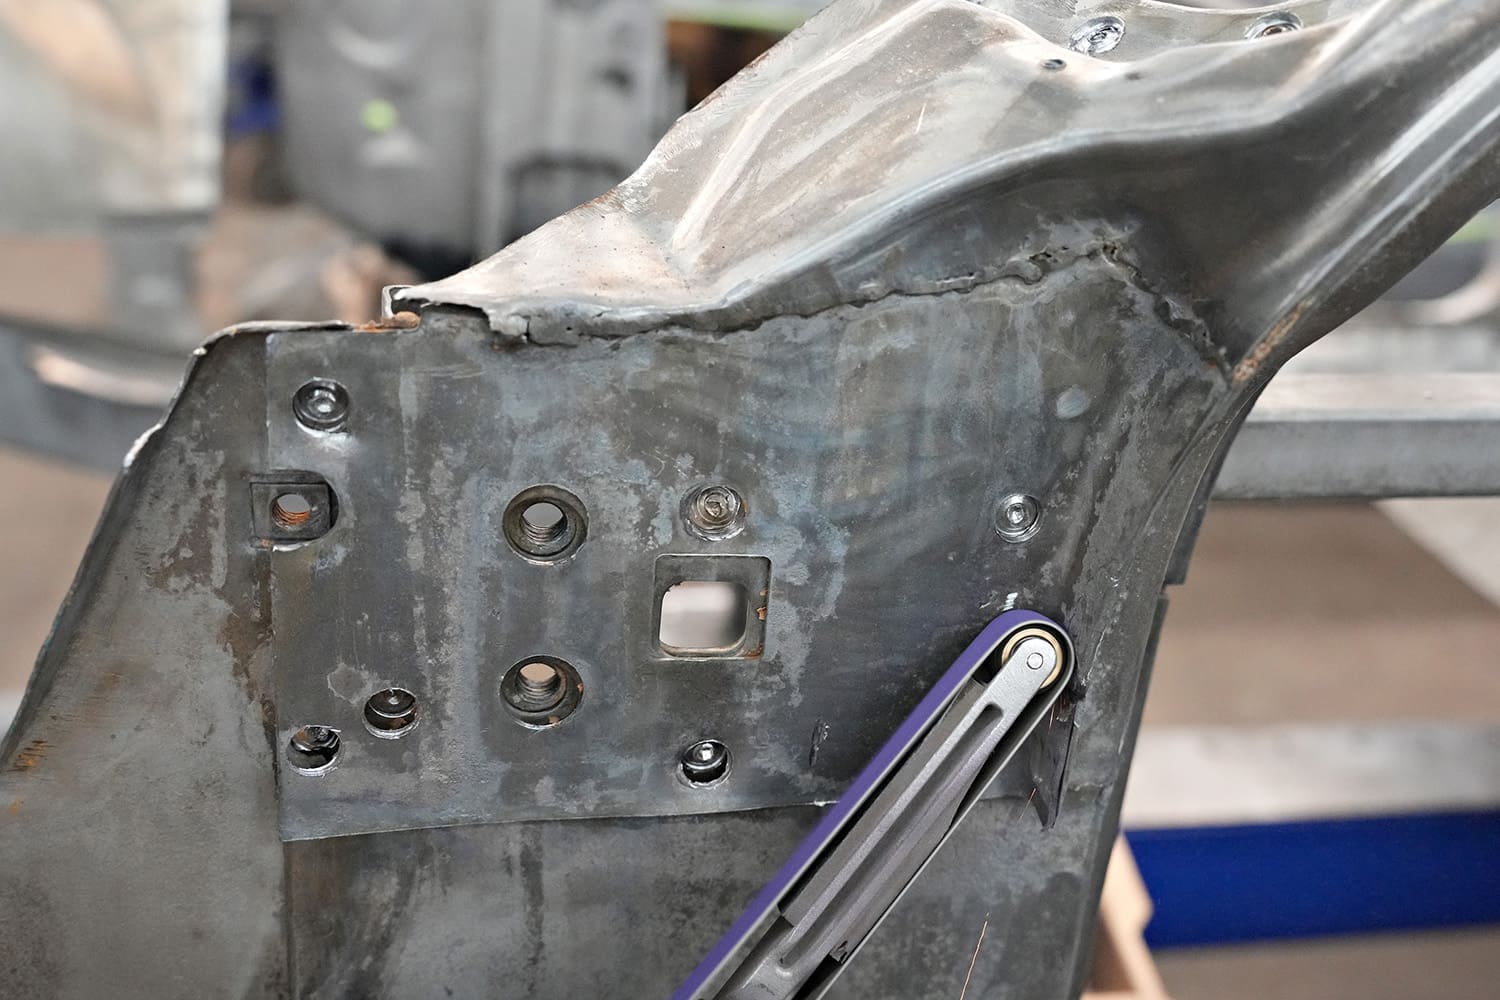
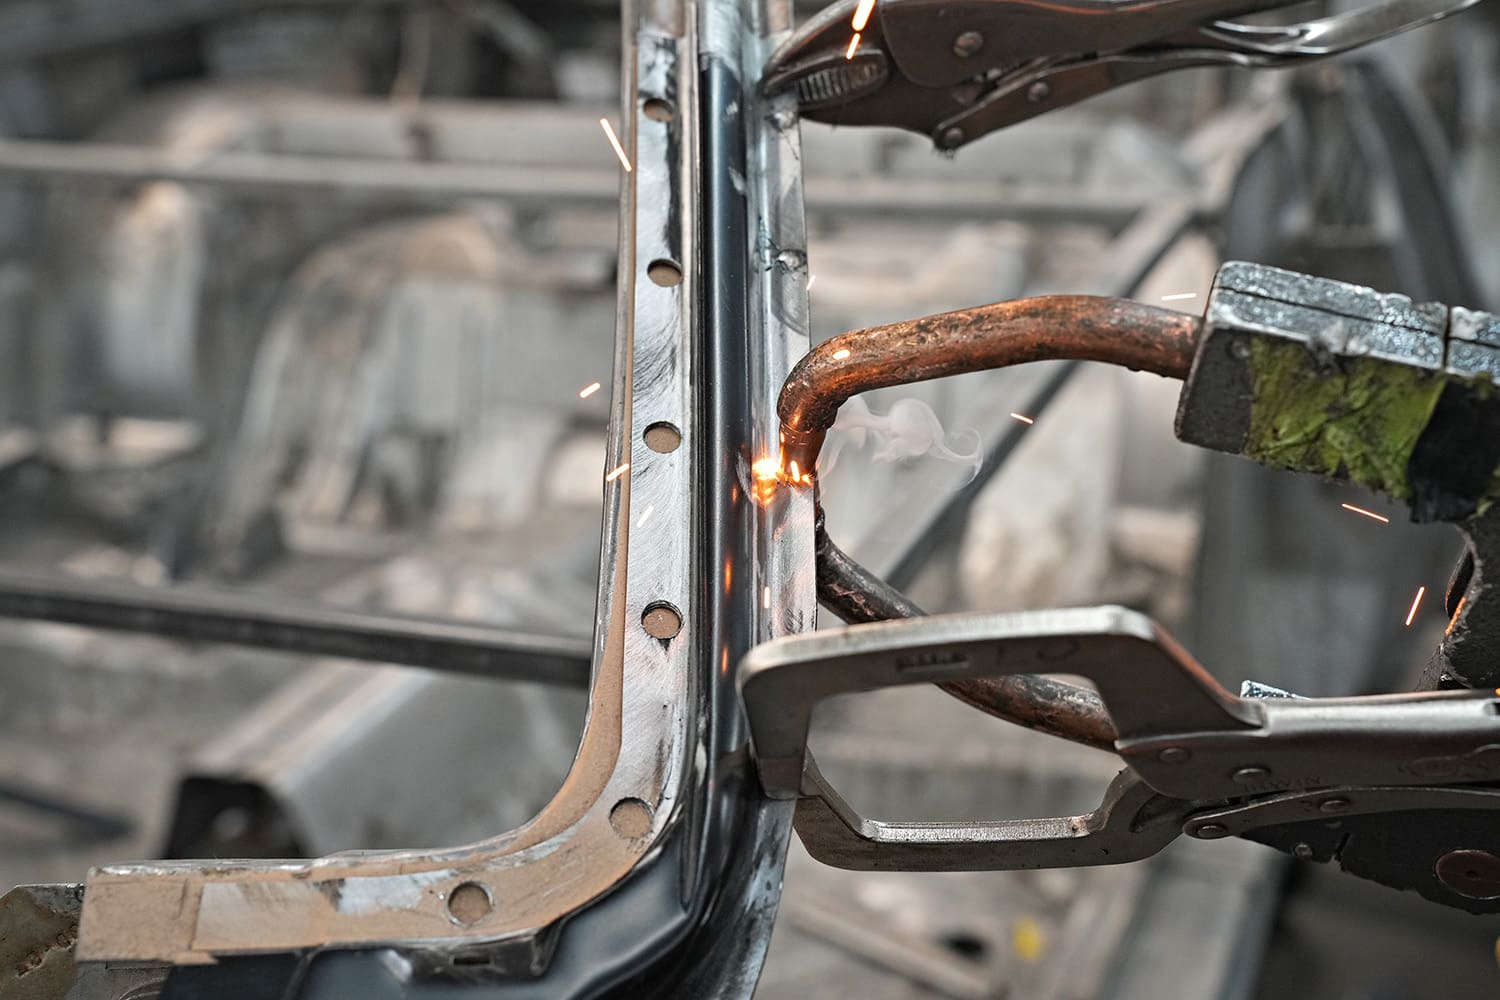
After the surfaces are cleaned, a coat of Copperweld weld-through primer is applied to prevent rust from forming between the welded surfaces. Note that the inboard lip is folded inward, making spot-welding that edge impossible. MCR has found single-sided spot welds unreliable, so plug welds will be used instead.
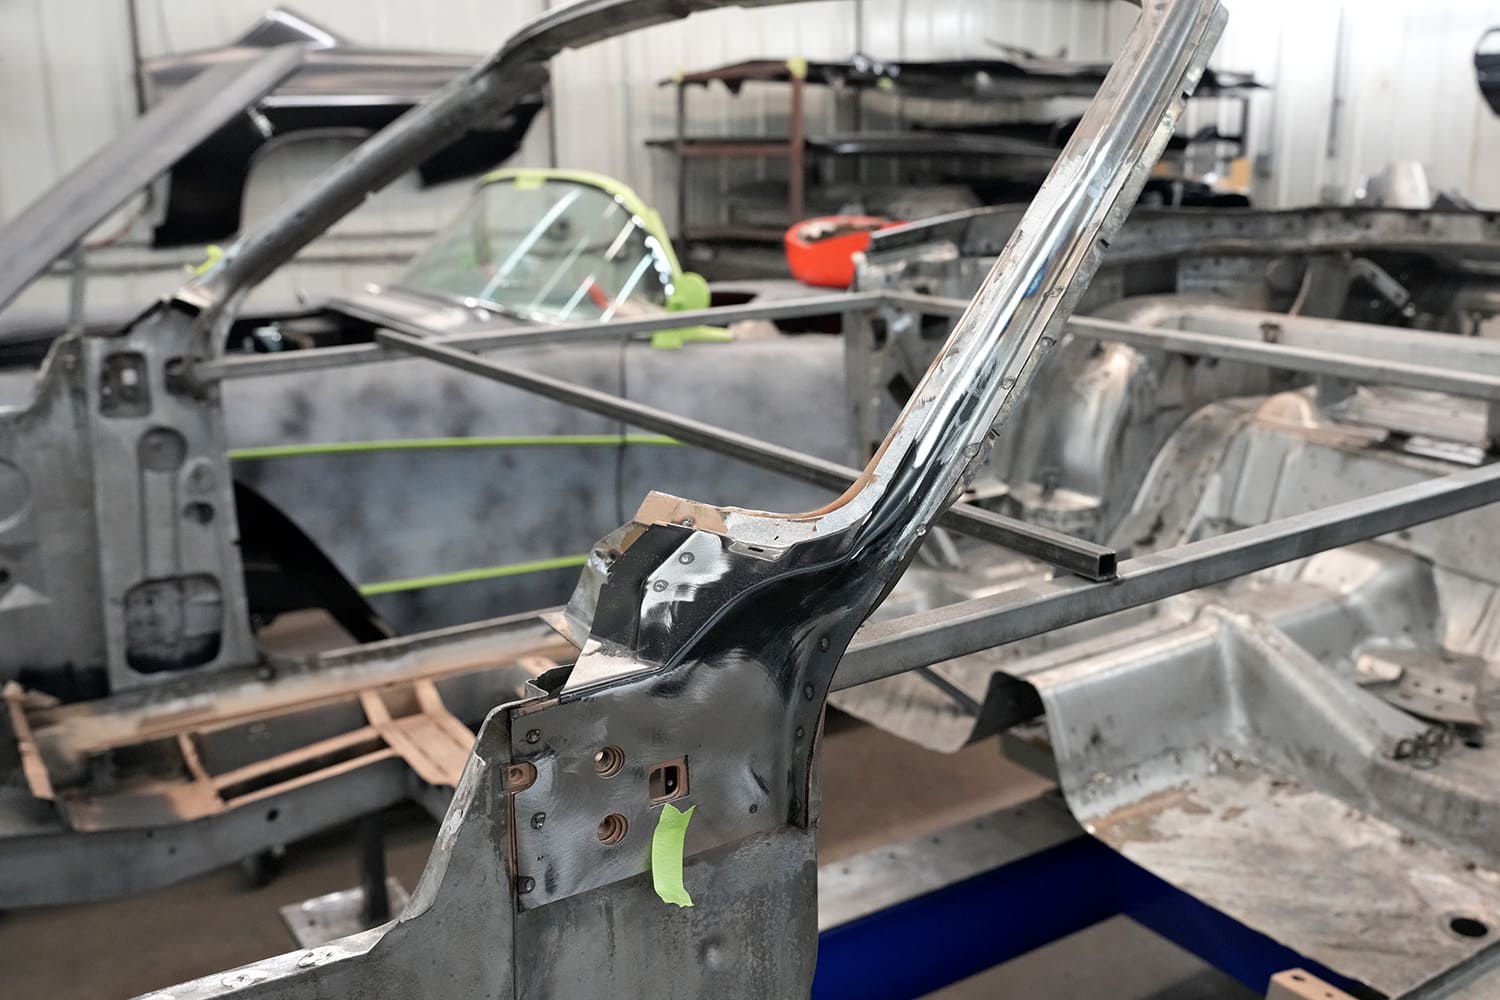
Since a convertible-specific A-pillar is unavailable, MCR will use the lower portion from the hardtop version. If the top corner of the A-pillar is also rust-damaged, MCR will form the necessary part from scratch.With the new AMD part cut to fit, the next step is to remove the e-coat that protects the part from rust in all the weld areas. E-coat interferes with the welding process, and while spot welding can be done through the e-coat, MCR prefers to remove it from all weld areas. A 3M green bristle brush works well for this.A good coat of Copperweld protects surfaces from rust without interfering with spot and plug welds.The Rotabroach Cutter also creates holes of the correct size for performing plug welds.Before starting any welding, ensure that the part is positioned correctly and securely clamped in place. It cannot move at all, or significant problems may arise.MCR uses spot welds whenever possible, however, since there is no access to the weld area on the left, plug welds—a perfectly good alternative—will be necessary. Once ground down, they essentially disappear.This is how the repair should have been completed last time. Now that it’s correct, the new firewall and cowl can be installed next.
We use cookies to ensure that we give you the best experience on our website. If you continue to use this site we will assume that you are happy with it.