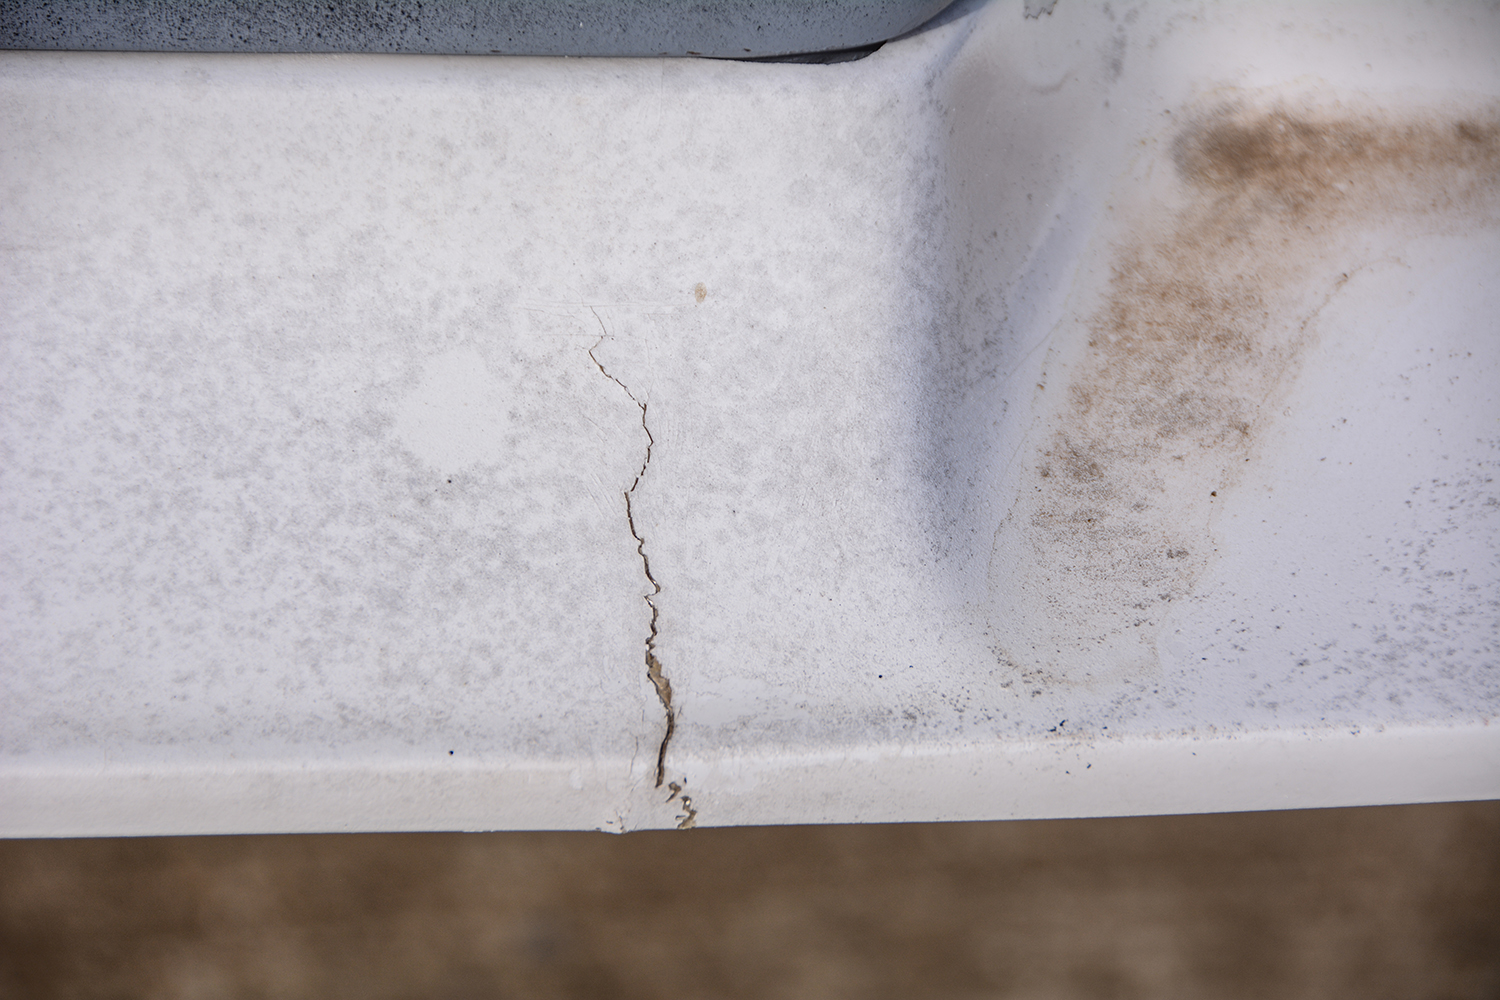
Accidents happen, and we all know that fiberglass body panels can be quite fragile. While fiberglass doesn’t stretch and create dents like metal, it often cracks when too much force is applied. Such is the case with our example, a 1977 Nova with fiberglass replacement bumper filler panels. One of the panels suffered some damage, and the result was a 4-inch crack in the surface. Considering the location of the crack and the fact that it is not a structural component of the car, we knew this would be an easy and affordable fix.
We’re working with a bumper filler panel for a 1977 Nova. This is a fiberglass replacement panel from Classic Industries, and while it is rigid, it suffered a crack.
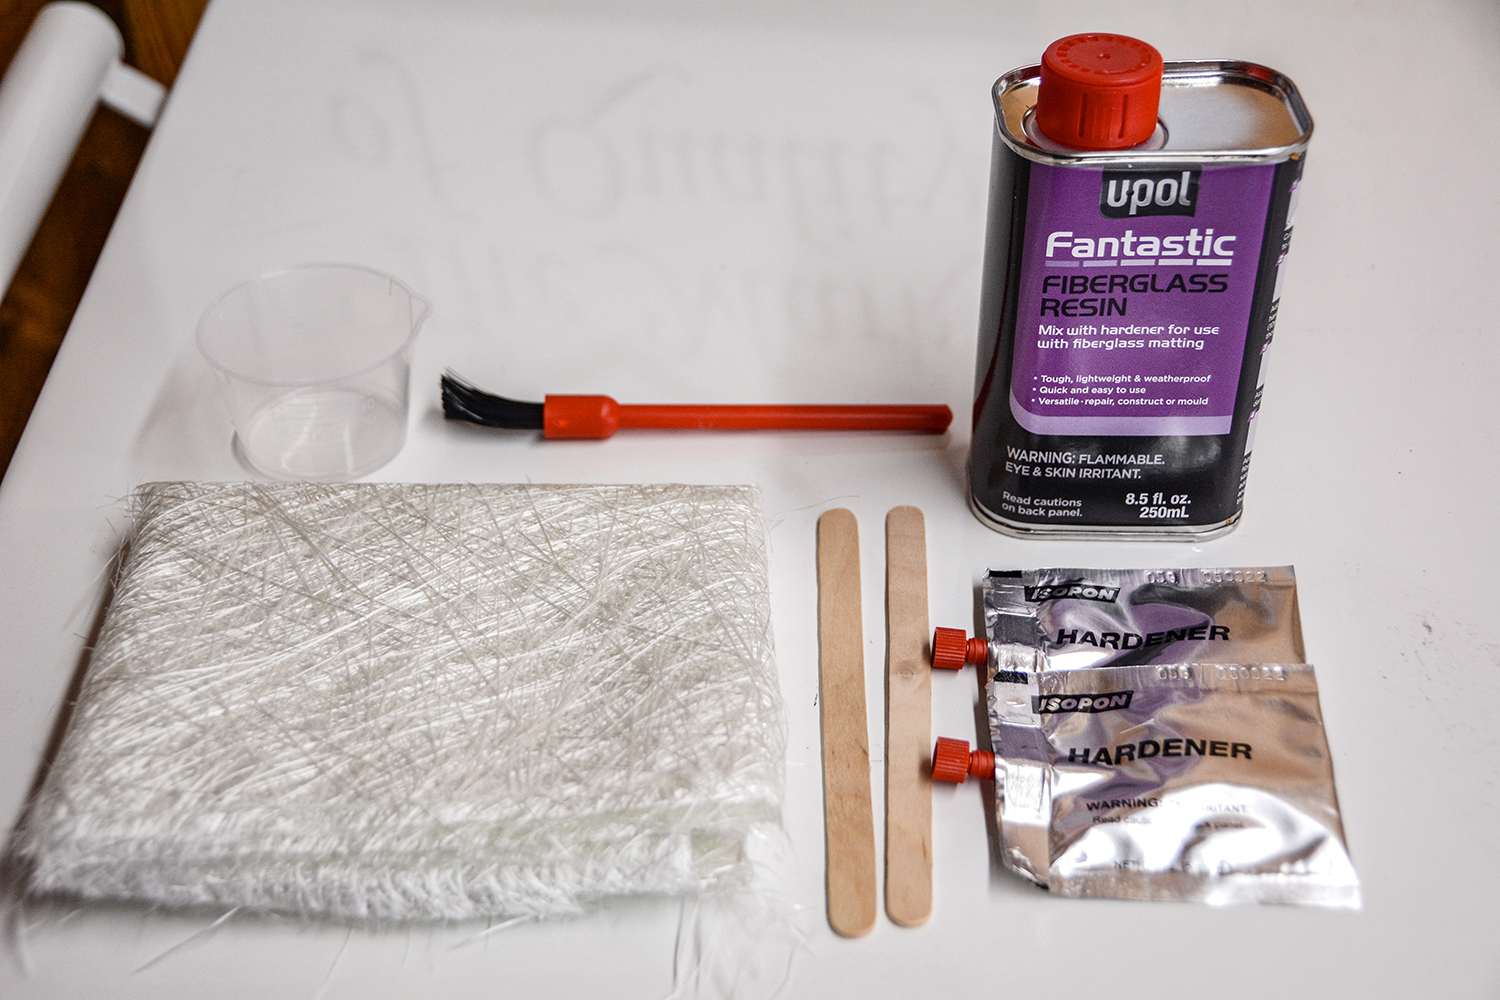
We stopped at the local parts store and grabbed a U-Pol fiberglass repair kit, which comes with everything necessary to repair a crack. In fact, there is enough material in the kit to handle a few of these small jobs. A large quantity of loose weave fiberglass mat is in the kit, and there is a 250ml container of resin, along with two small packets of hardener. A mixing cup, mixing sticks, and application brush are also supplied. For less than $30, you can’t beat the quality of this kit. Of course, additional expenses are needed for body filler, primer, and paint, but the repair kit certainly gets you a long way in the process.
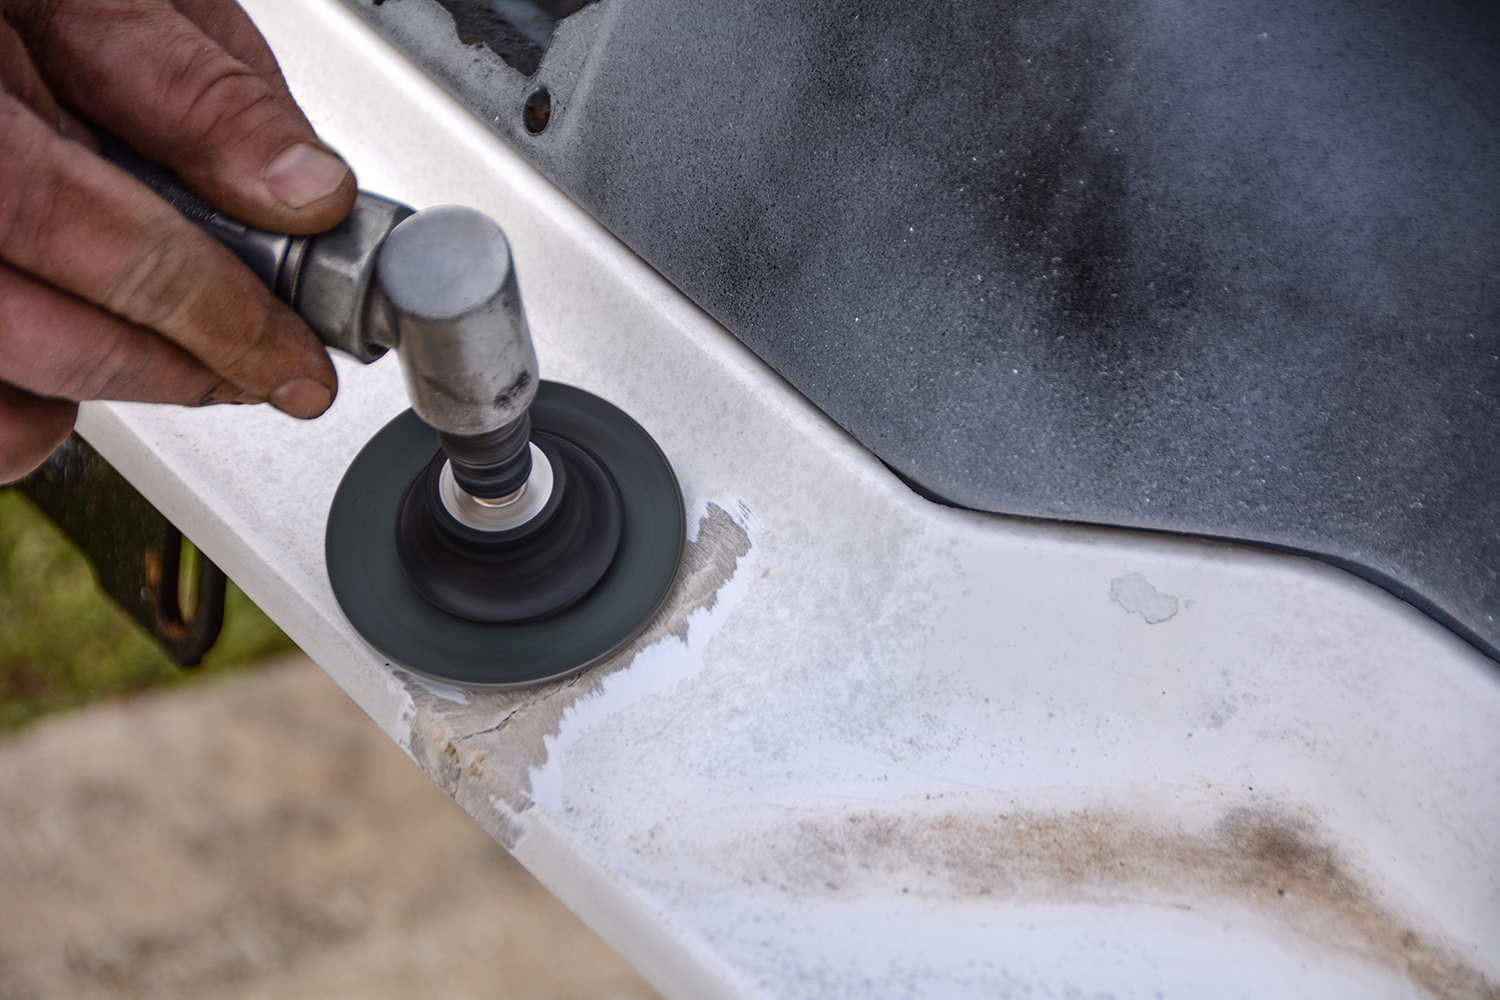
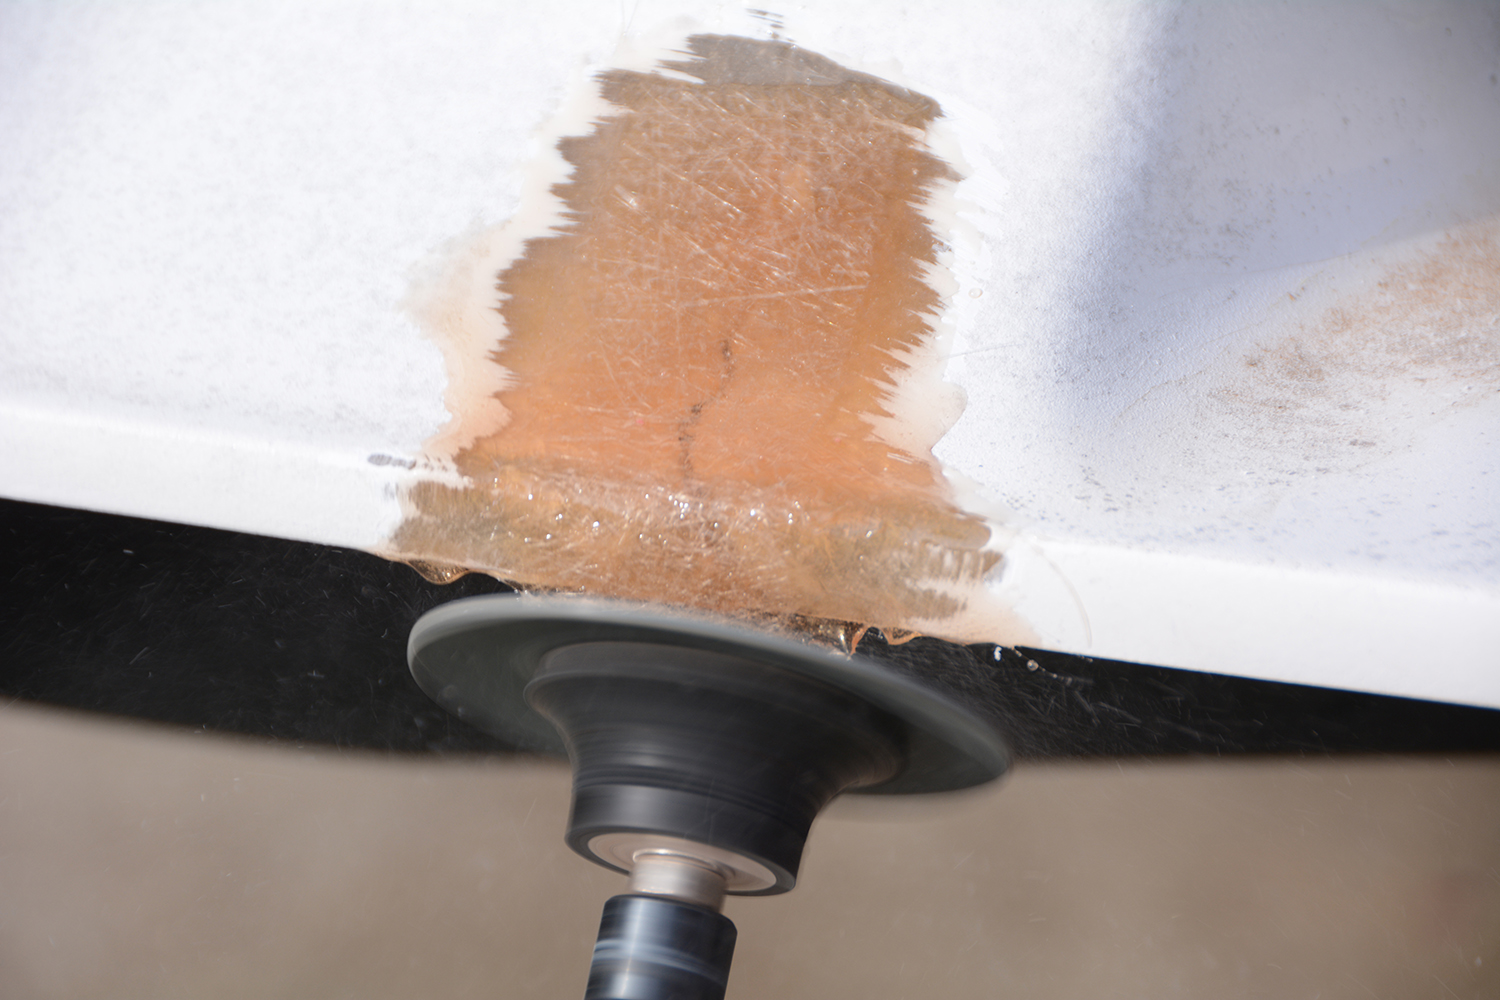
The angle grinder and 36-grit Roloc disc removes material around the crack. When it’s purely cosmetic, and not a structural crack, you can tackle the repair from the top side only.
We spent a couple of evenings on the repair and used tools that most car enthusiasts have in the shop. The angle grinder with 36-grit is essential for quick work, and the dual-action (DA) sander also speeds things up because hand-sanding fiberglass can be arduous and quite itchy. Speaking of itchy, you should wear gloves, eye protection, and a respirator when sanding, grinding, or applying fiberglass (do as we say and not as we do). Follow along with our how-to guide and make easy work out of fiberglass repairs on your project.
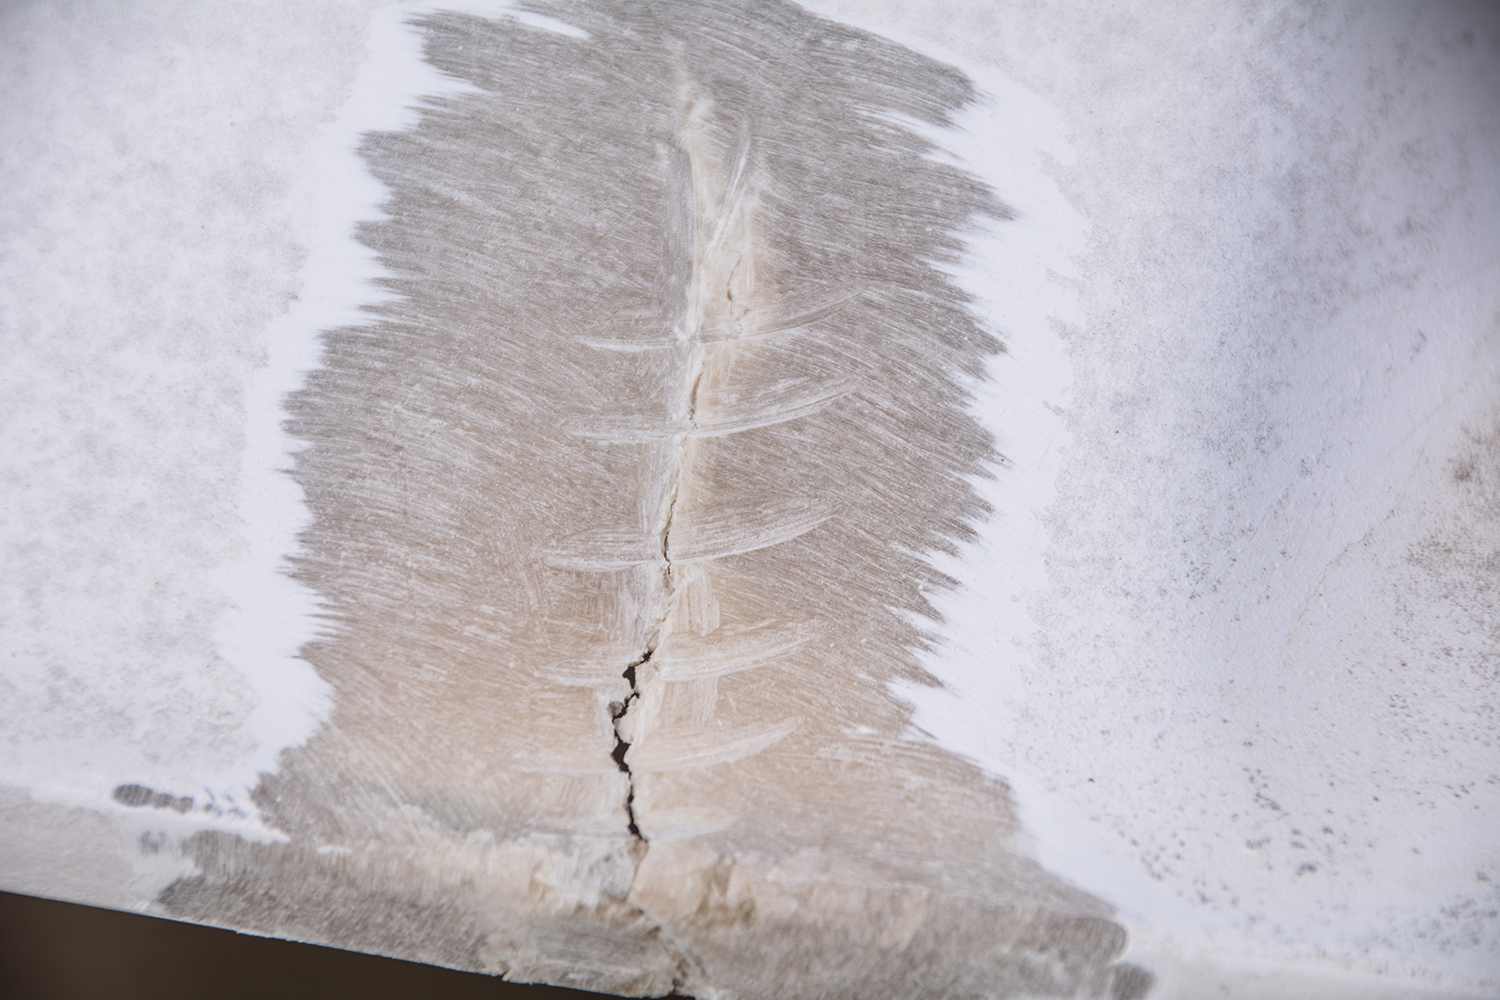
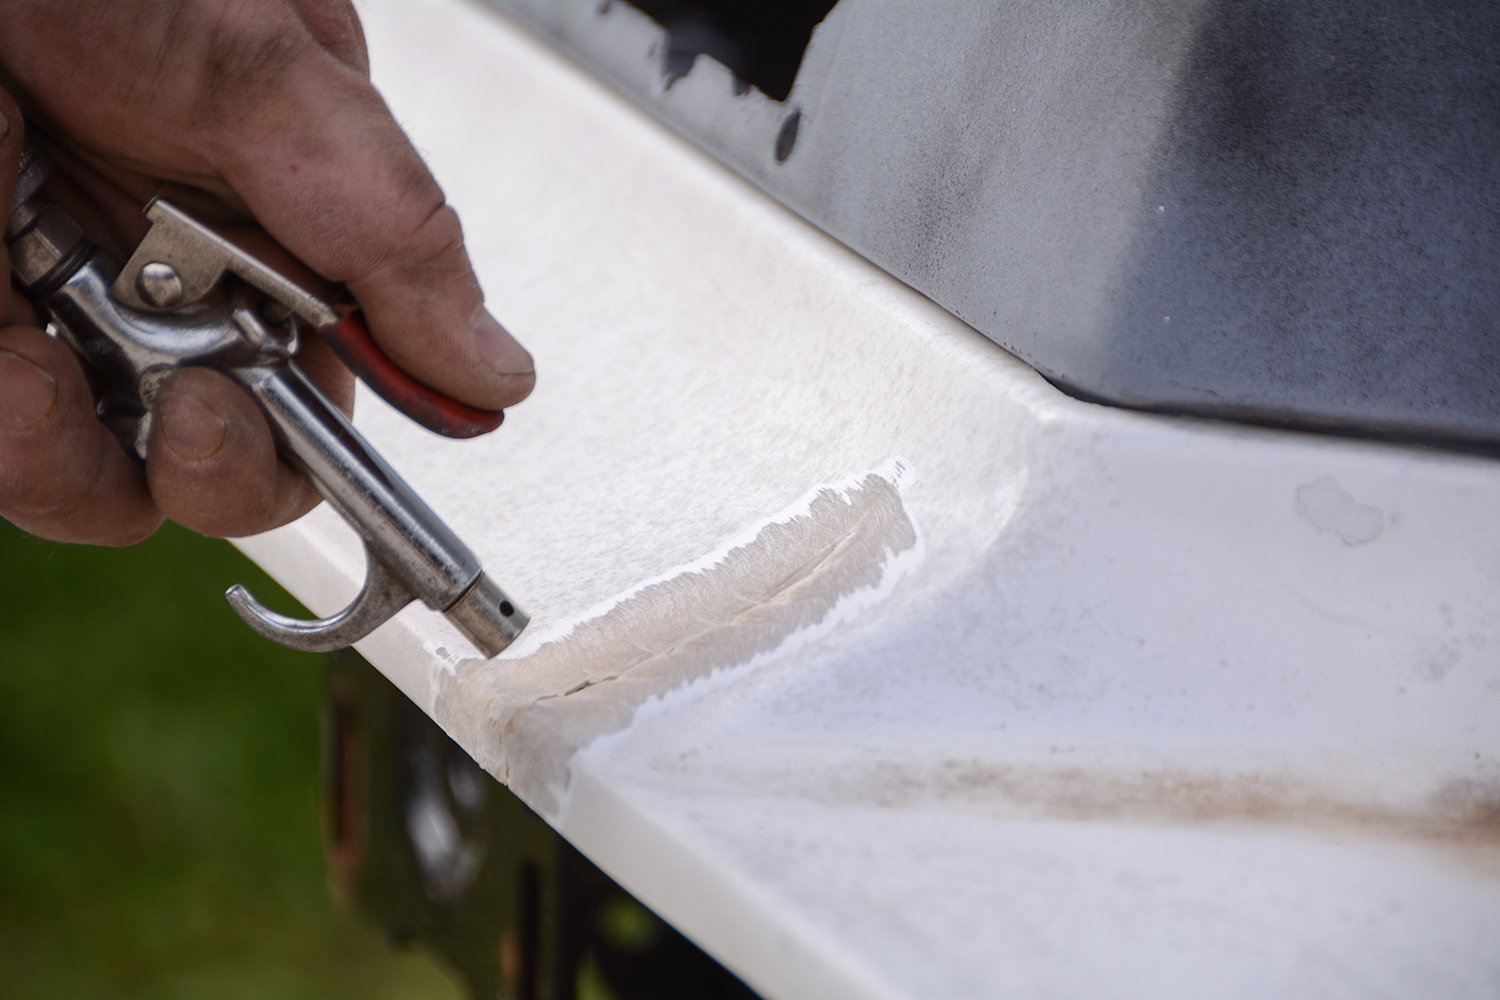
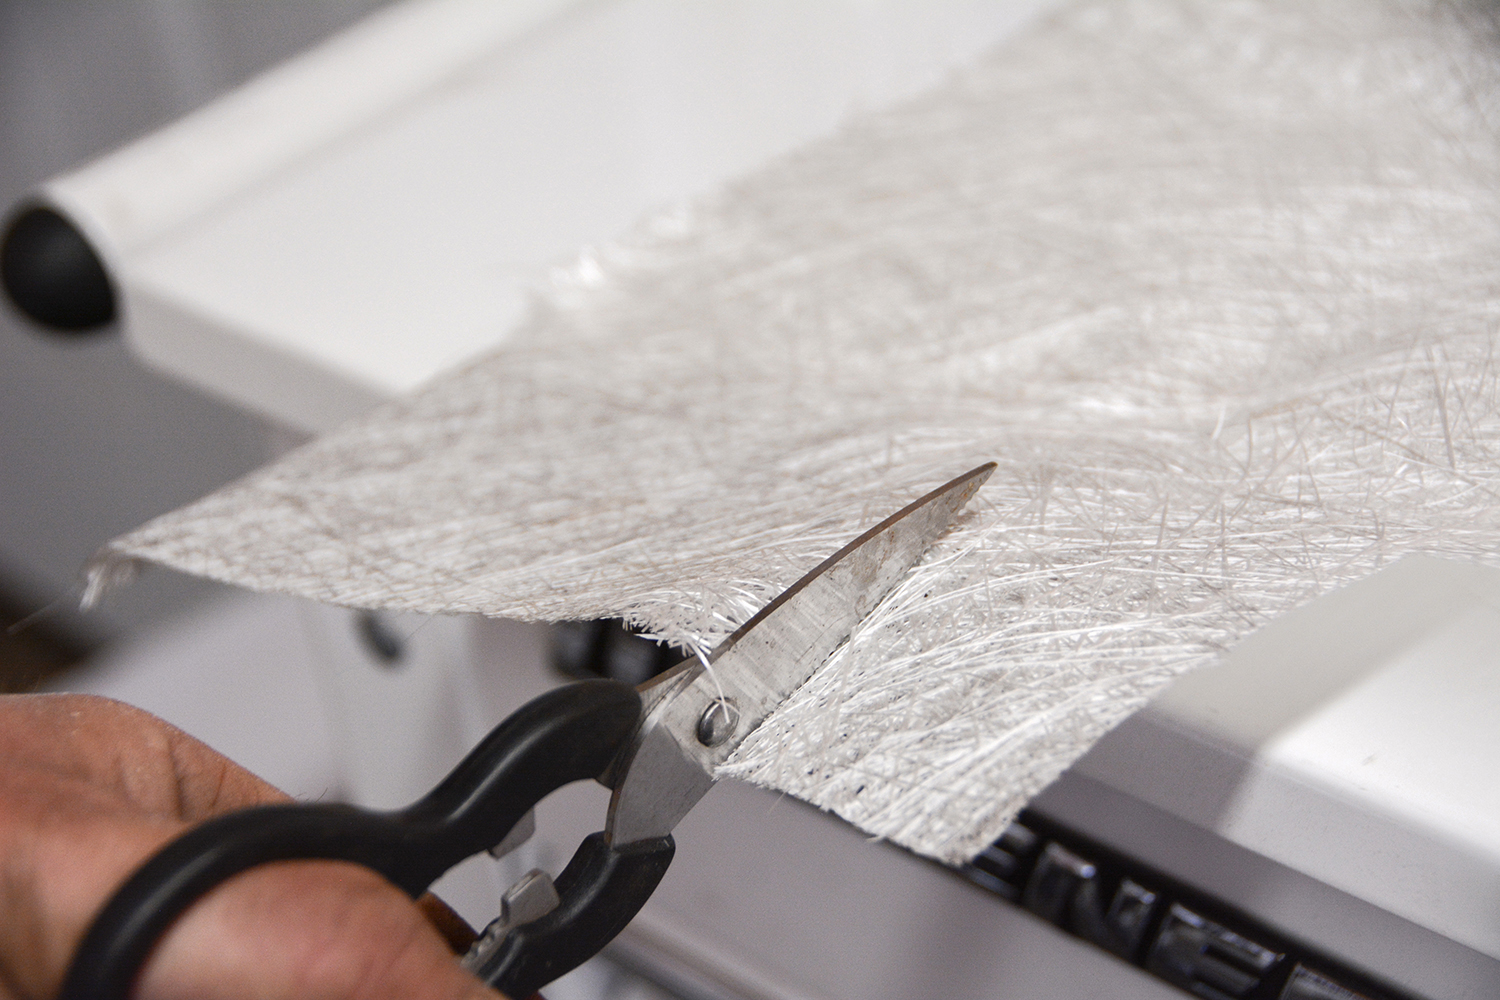
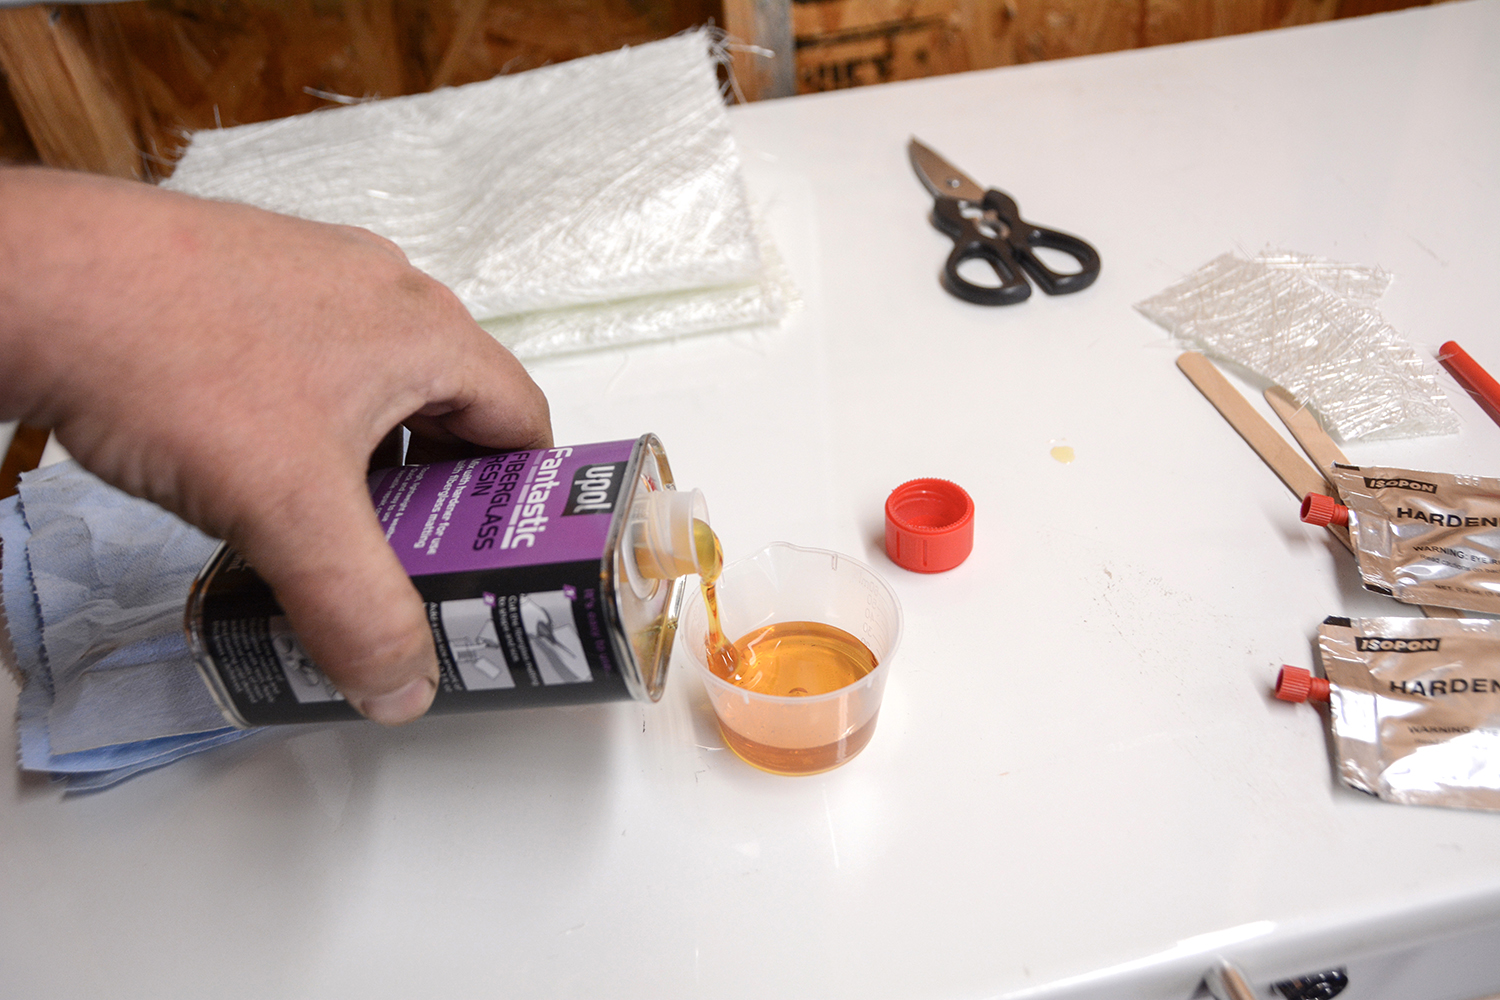
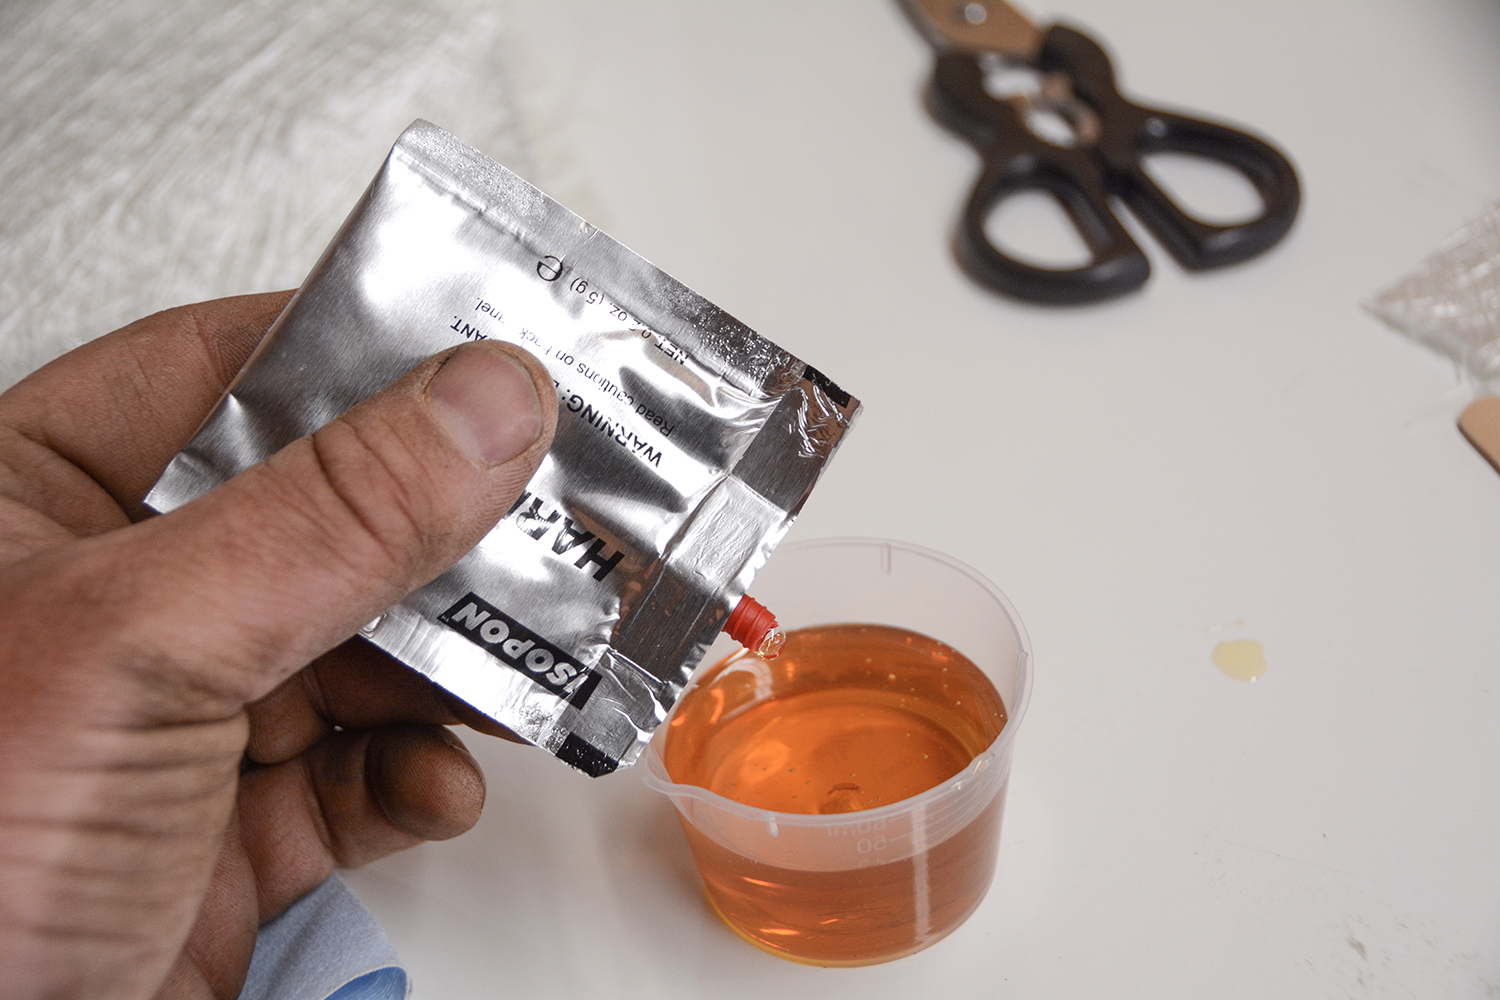
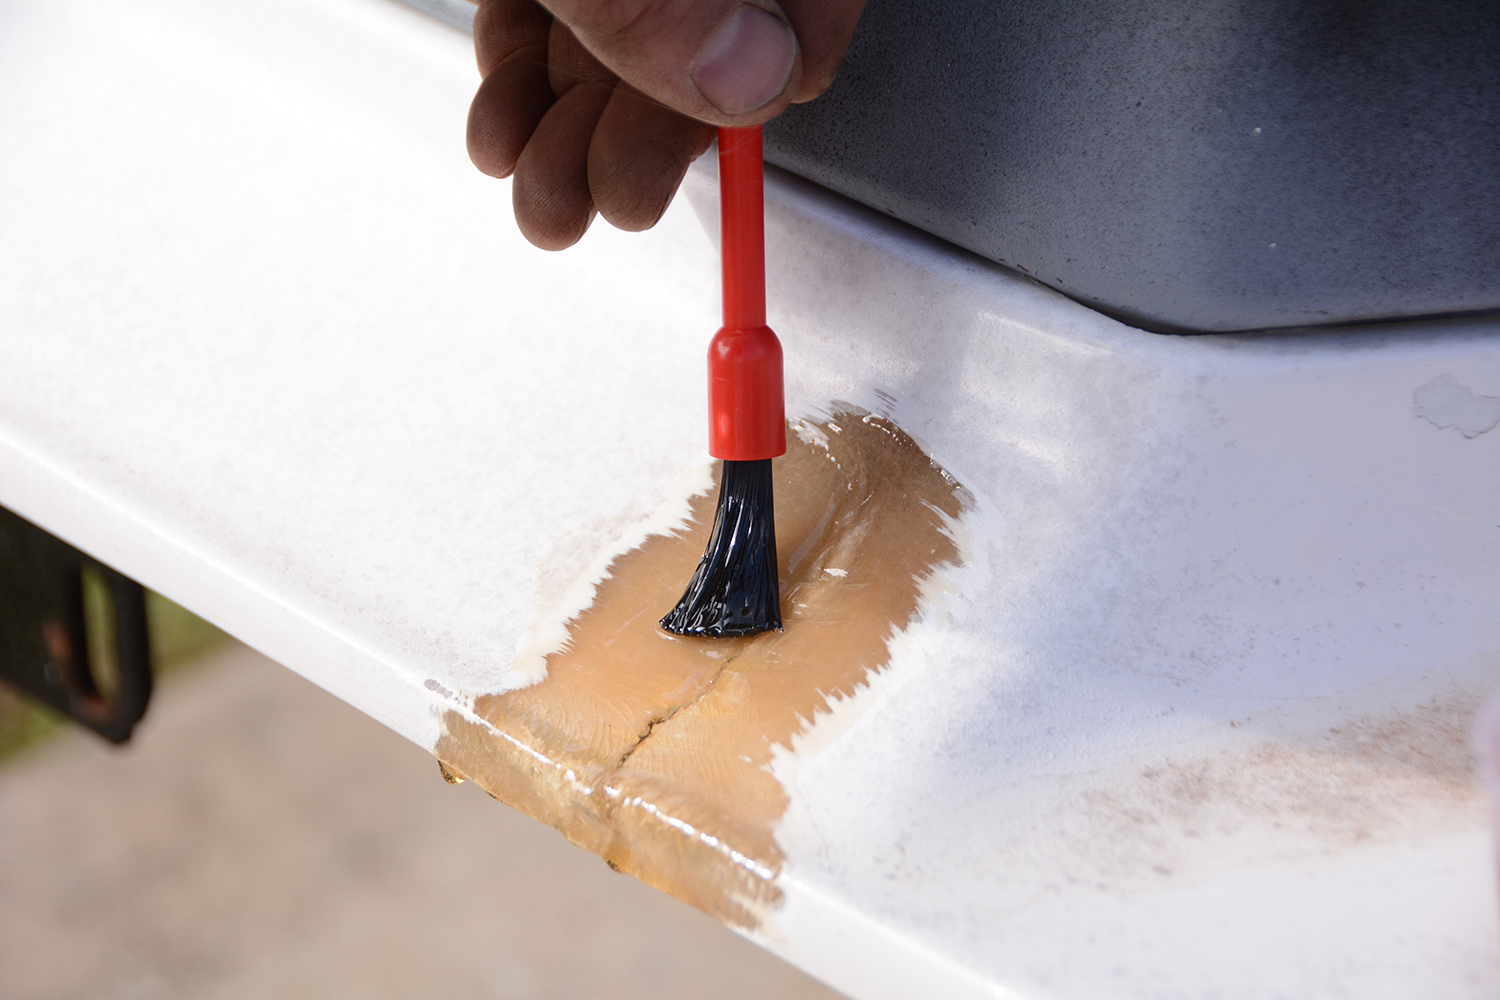
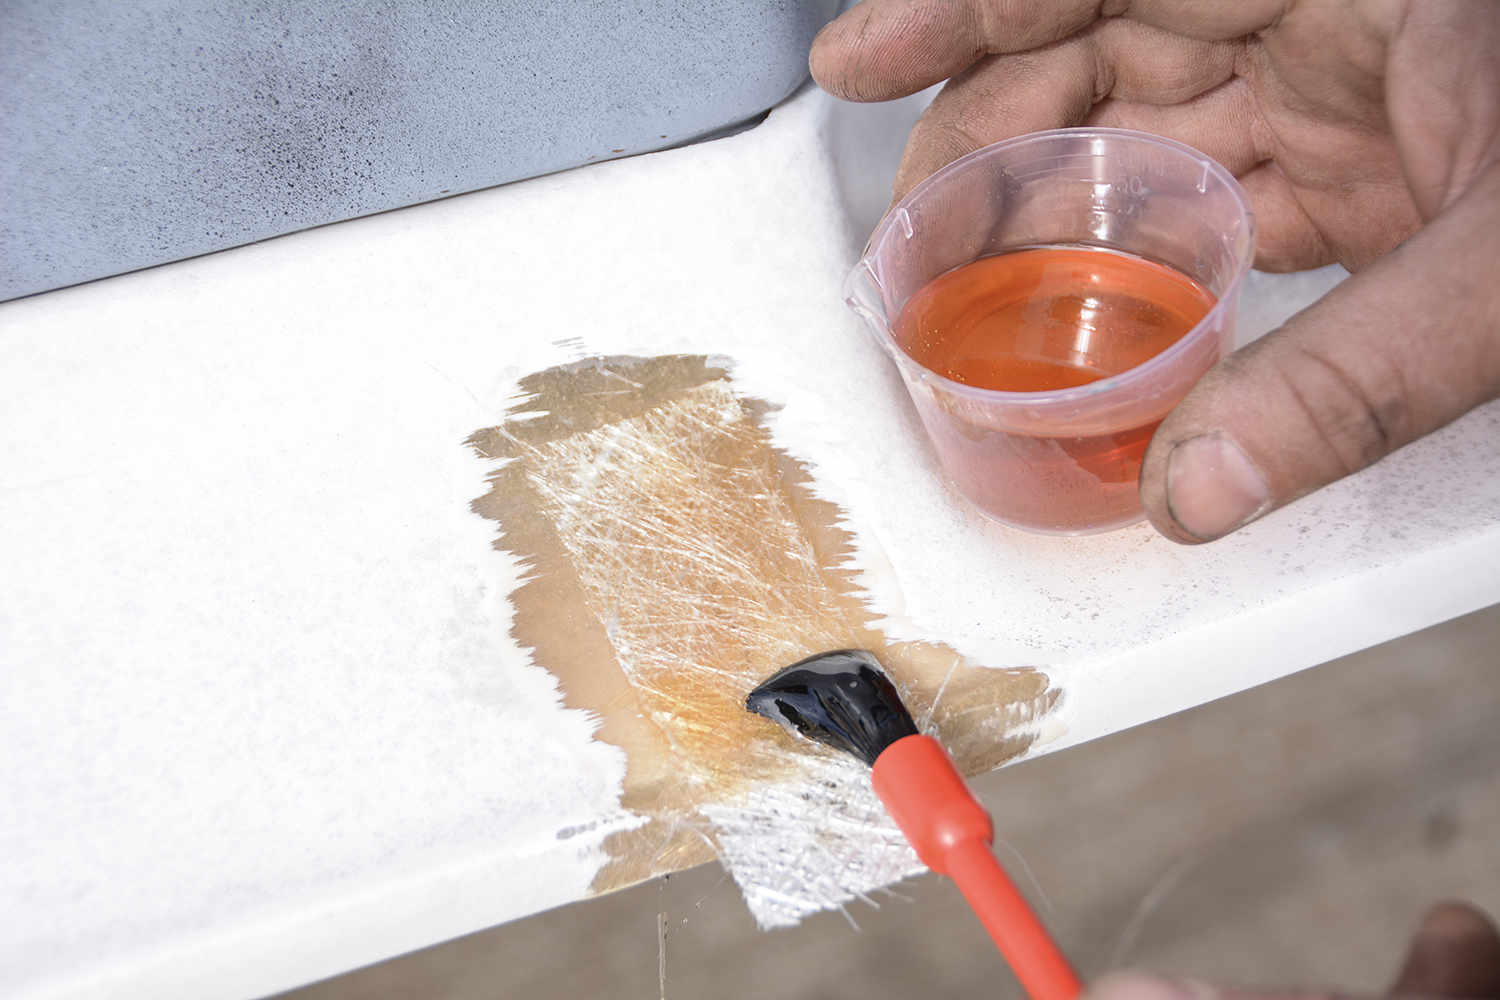
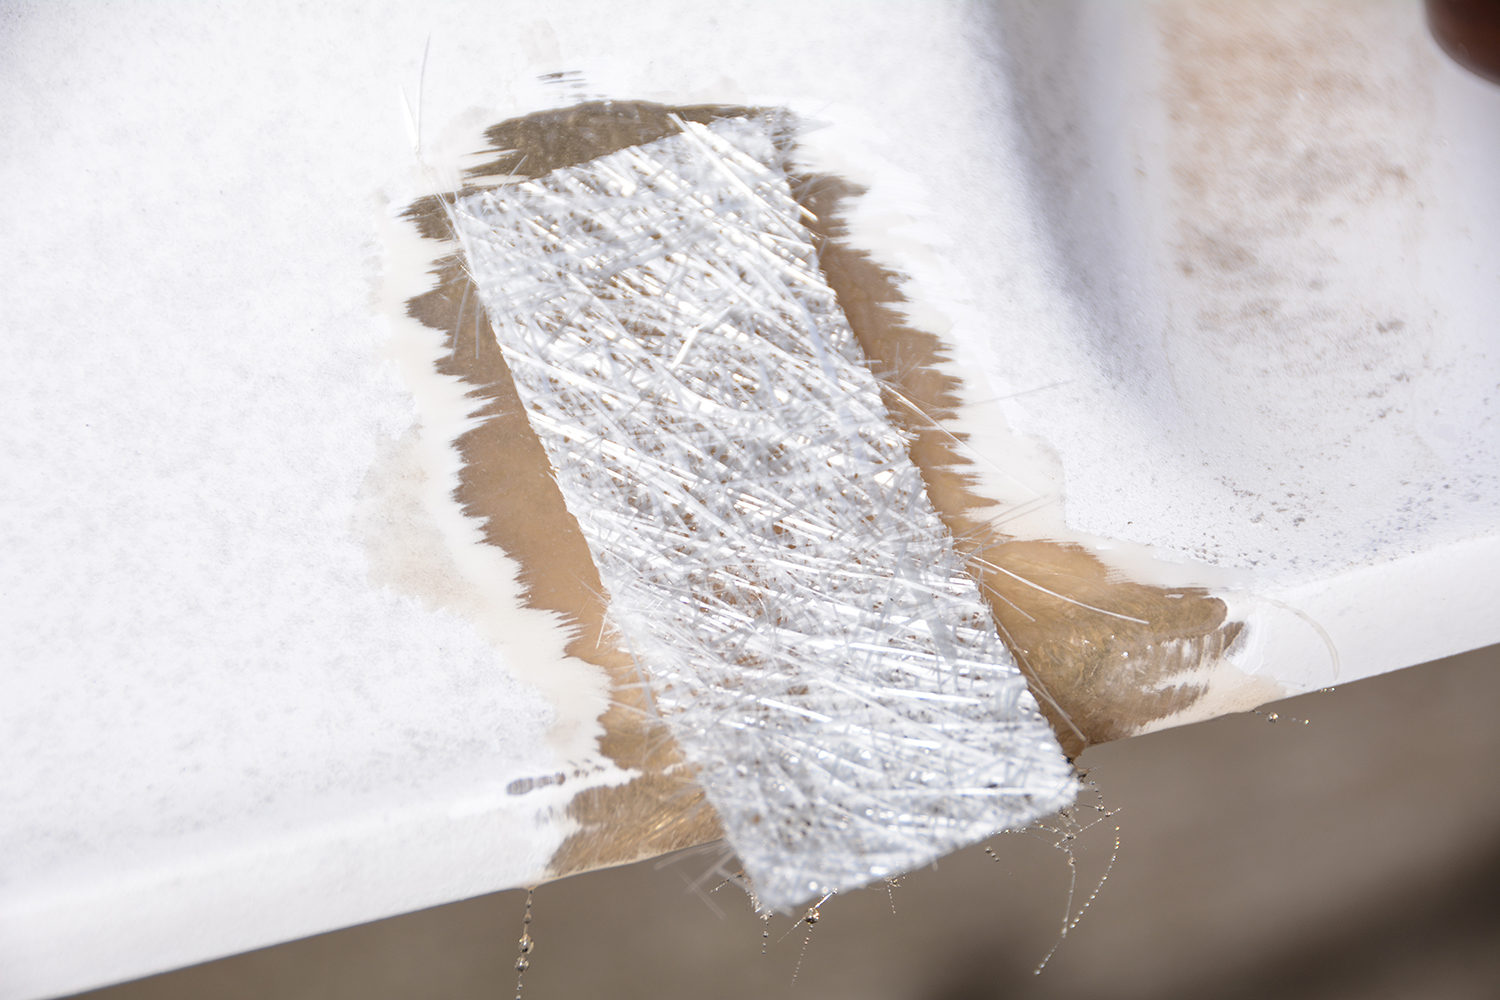
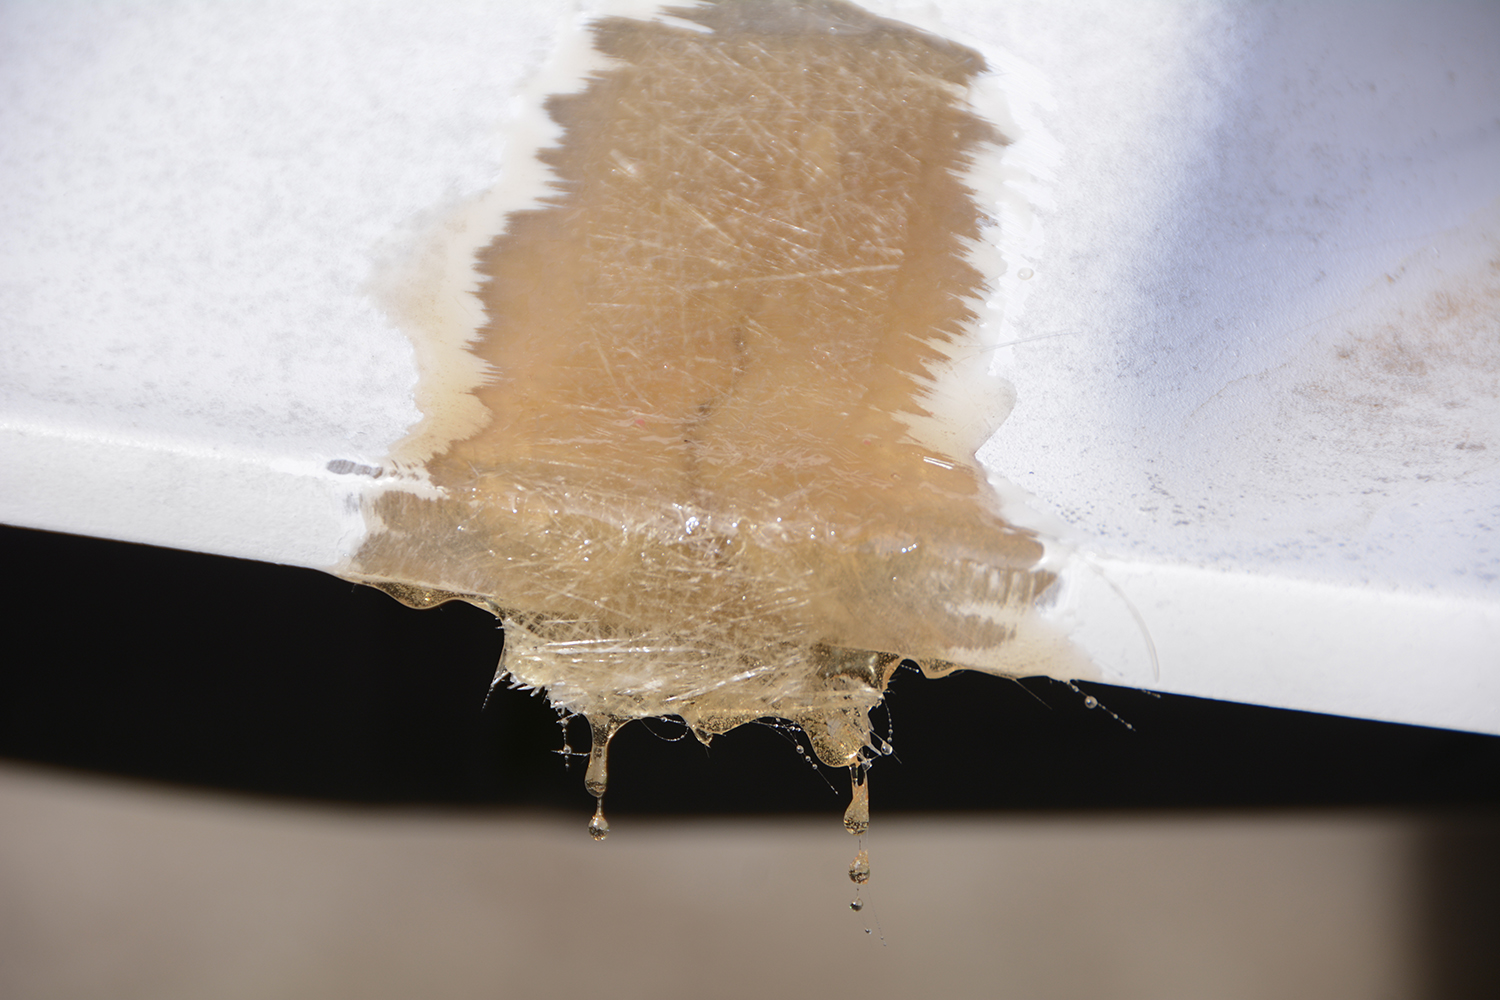
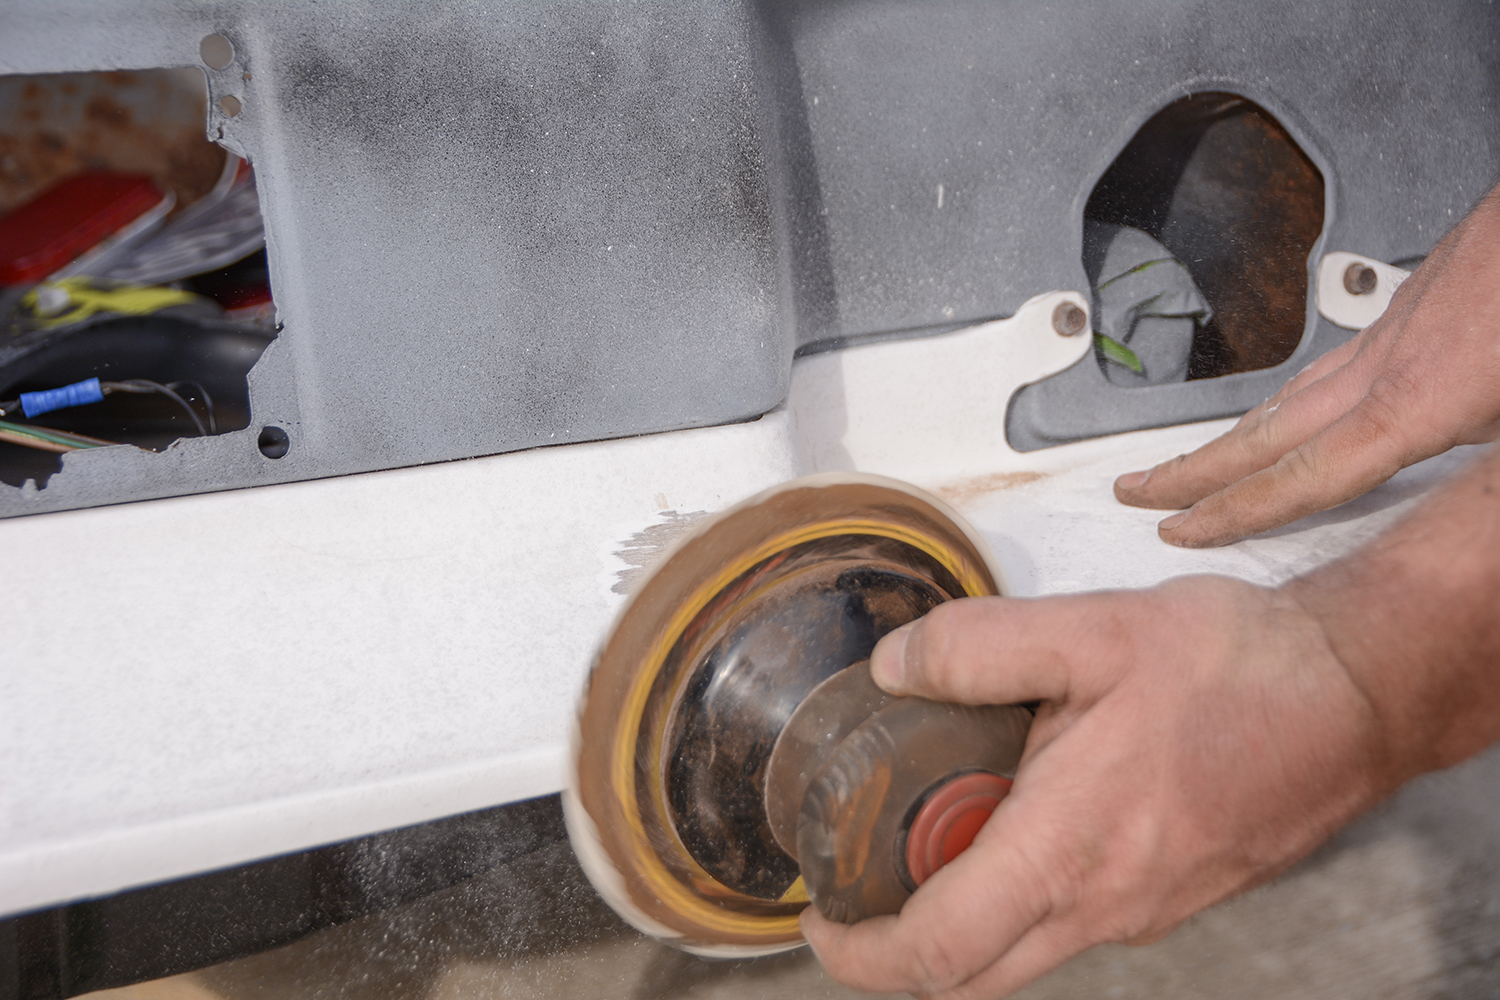
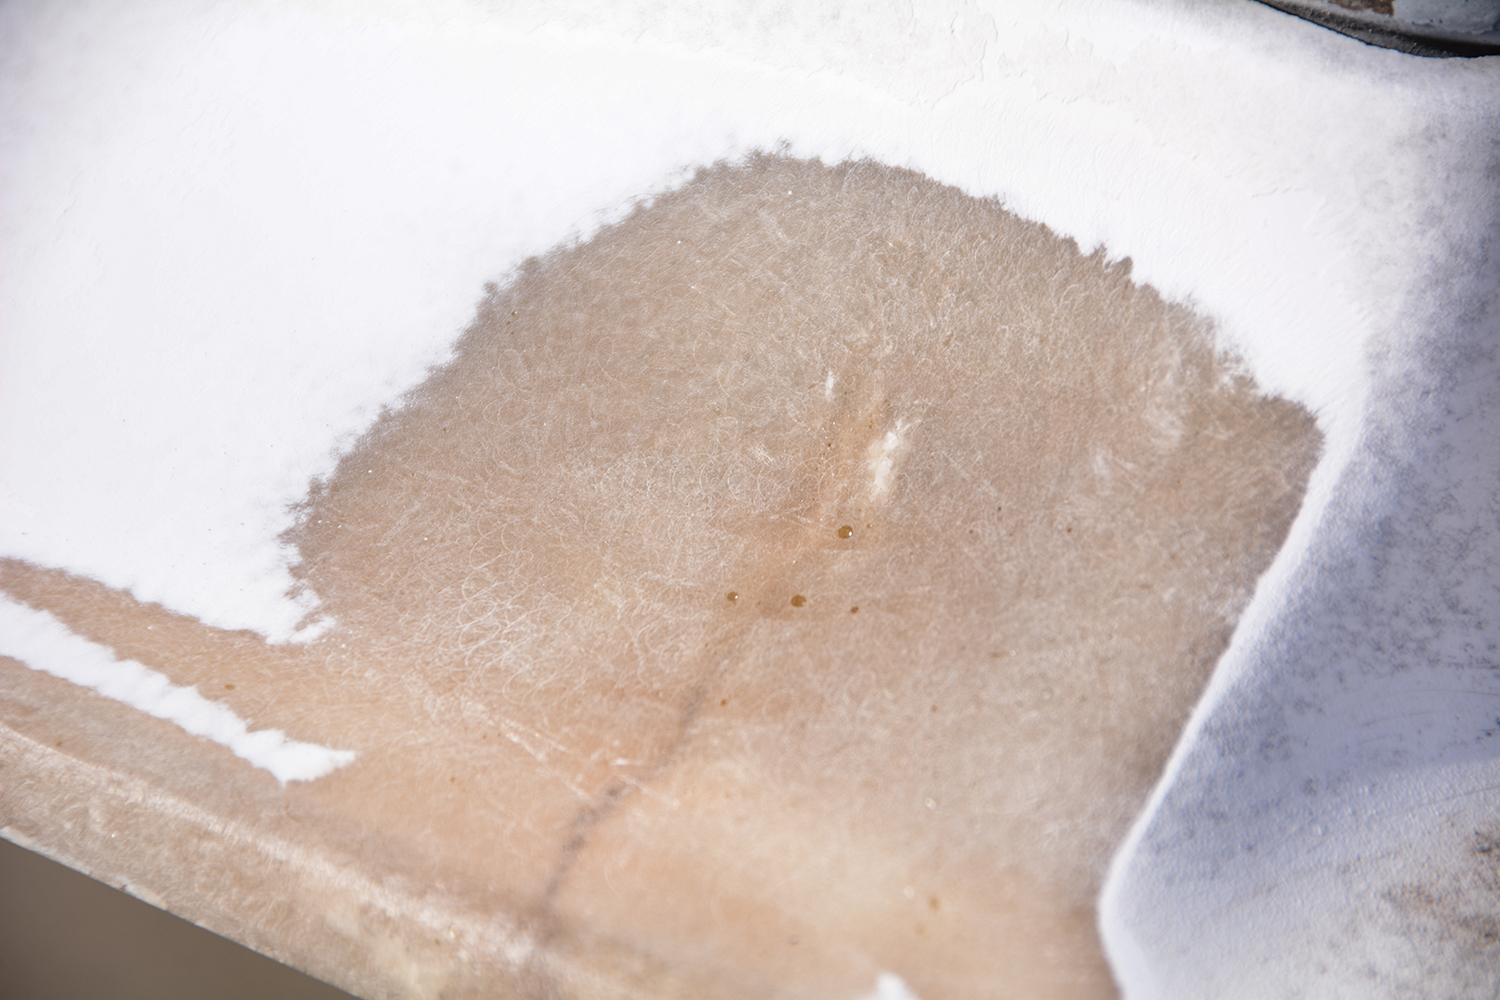
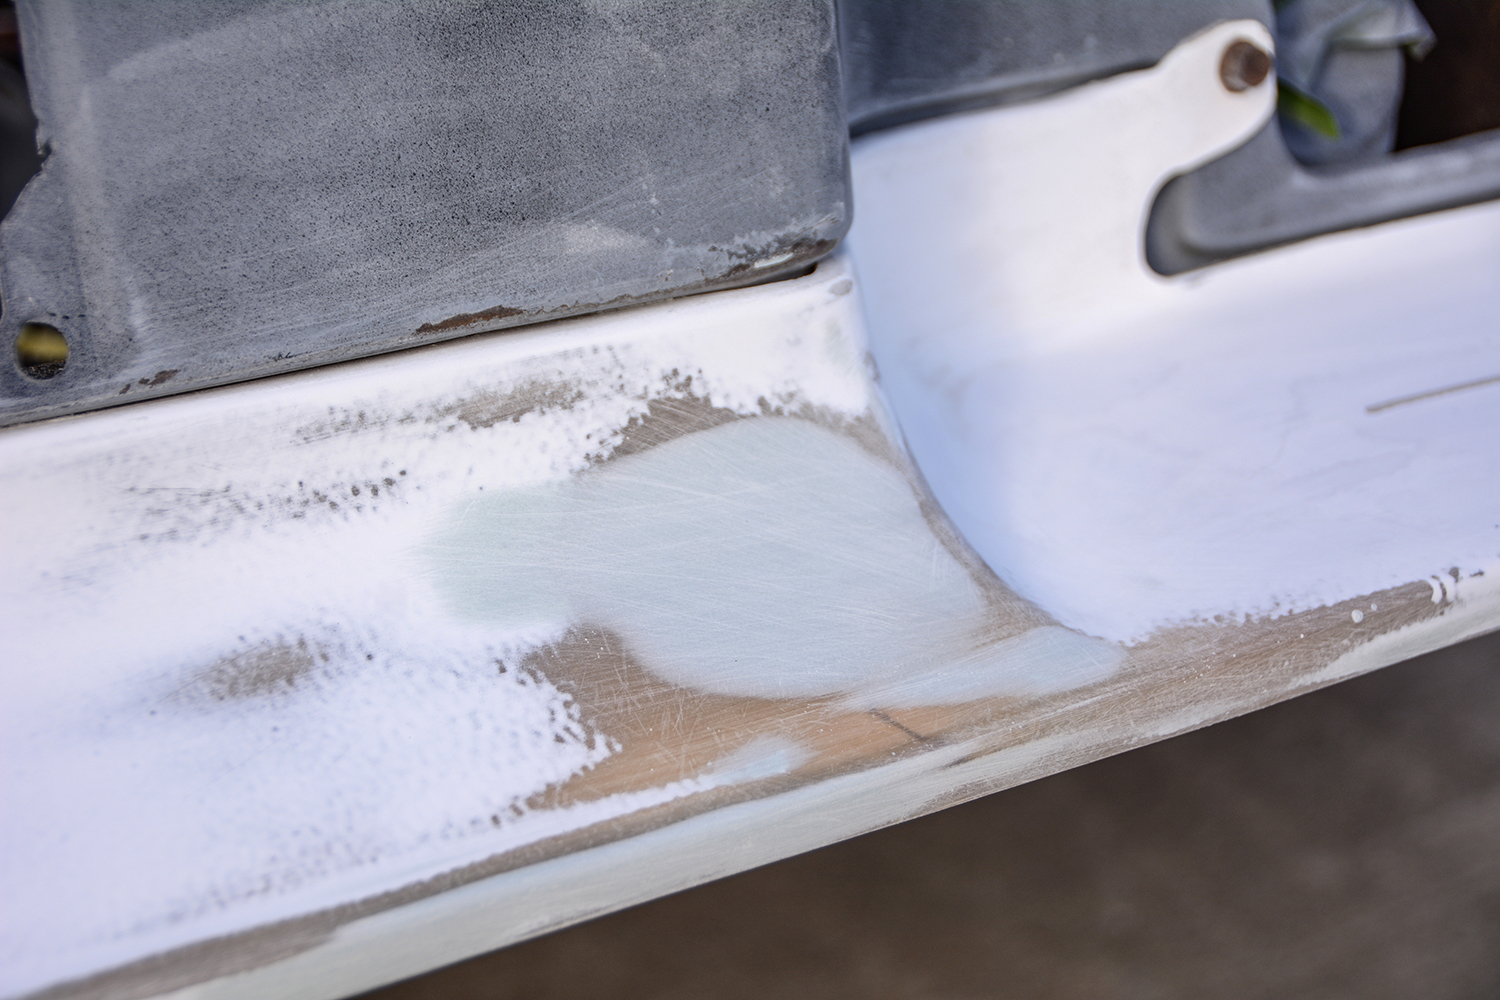
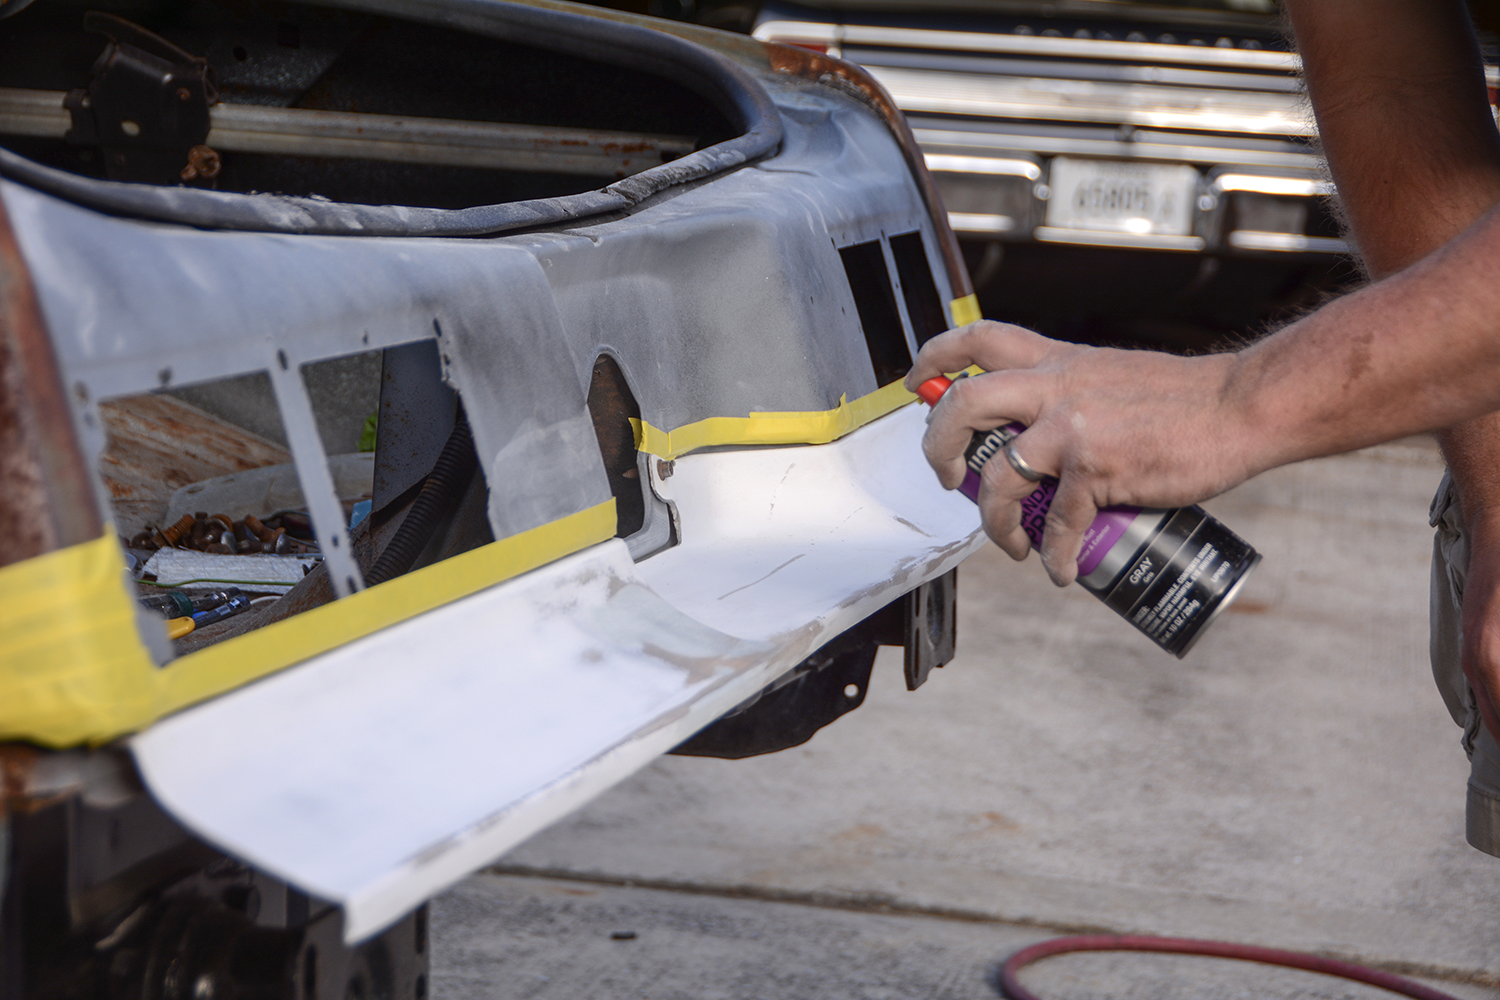
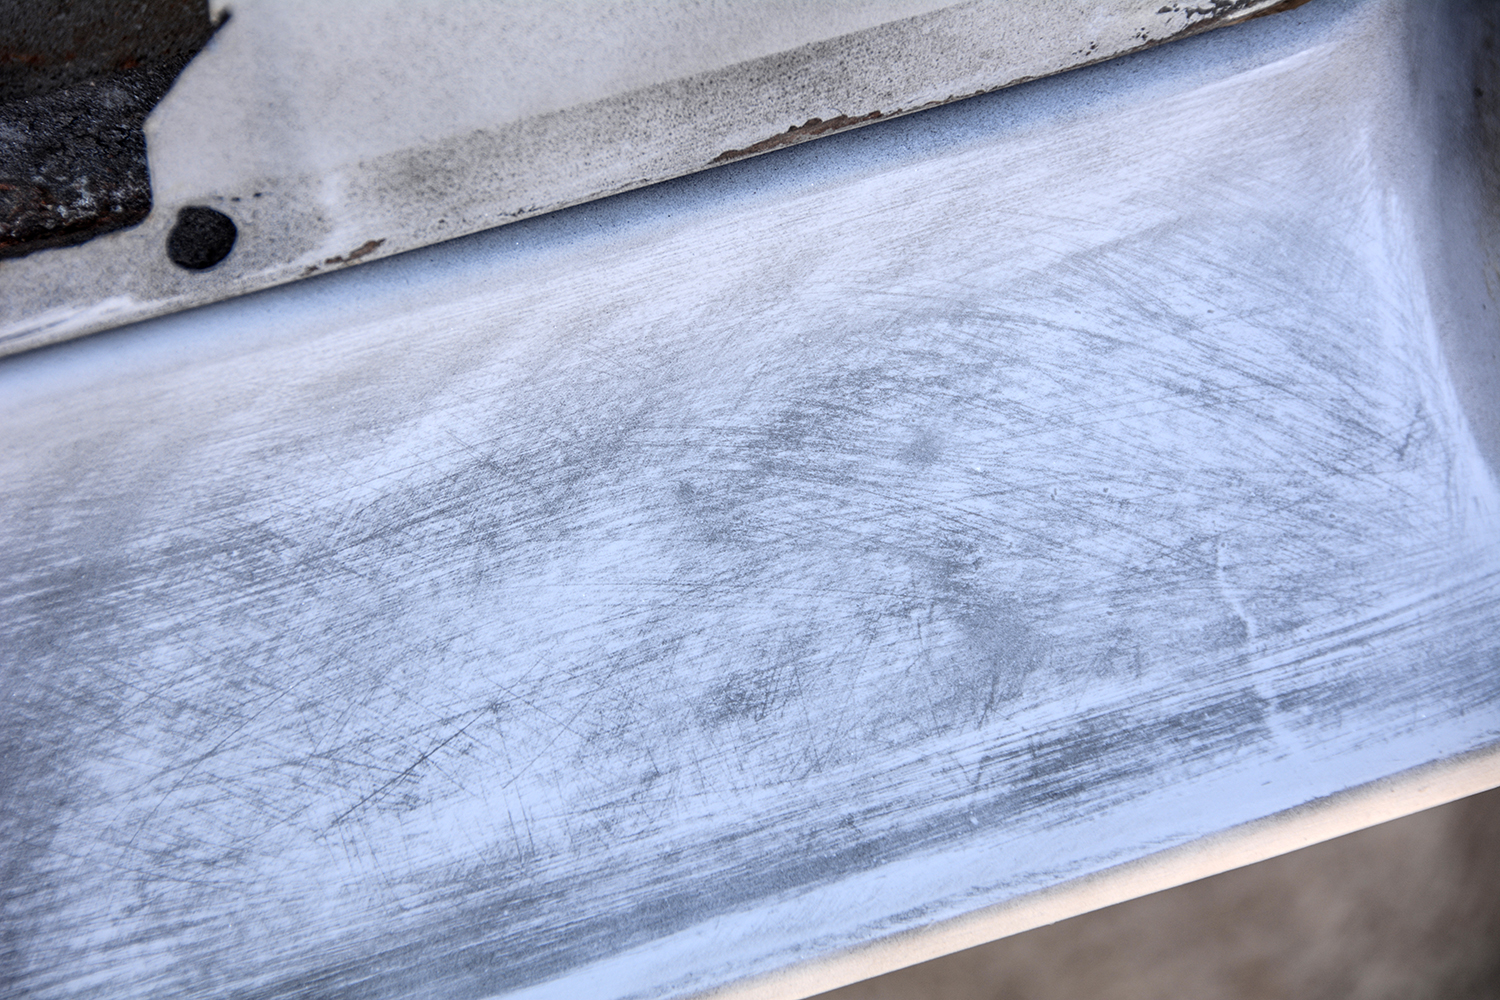
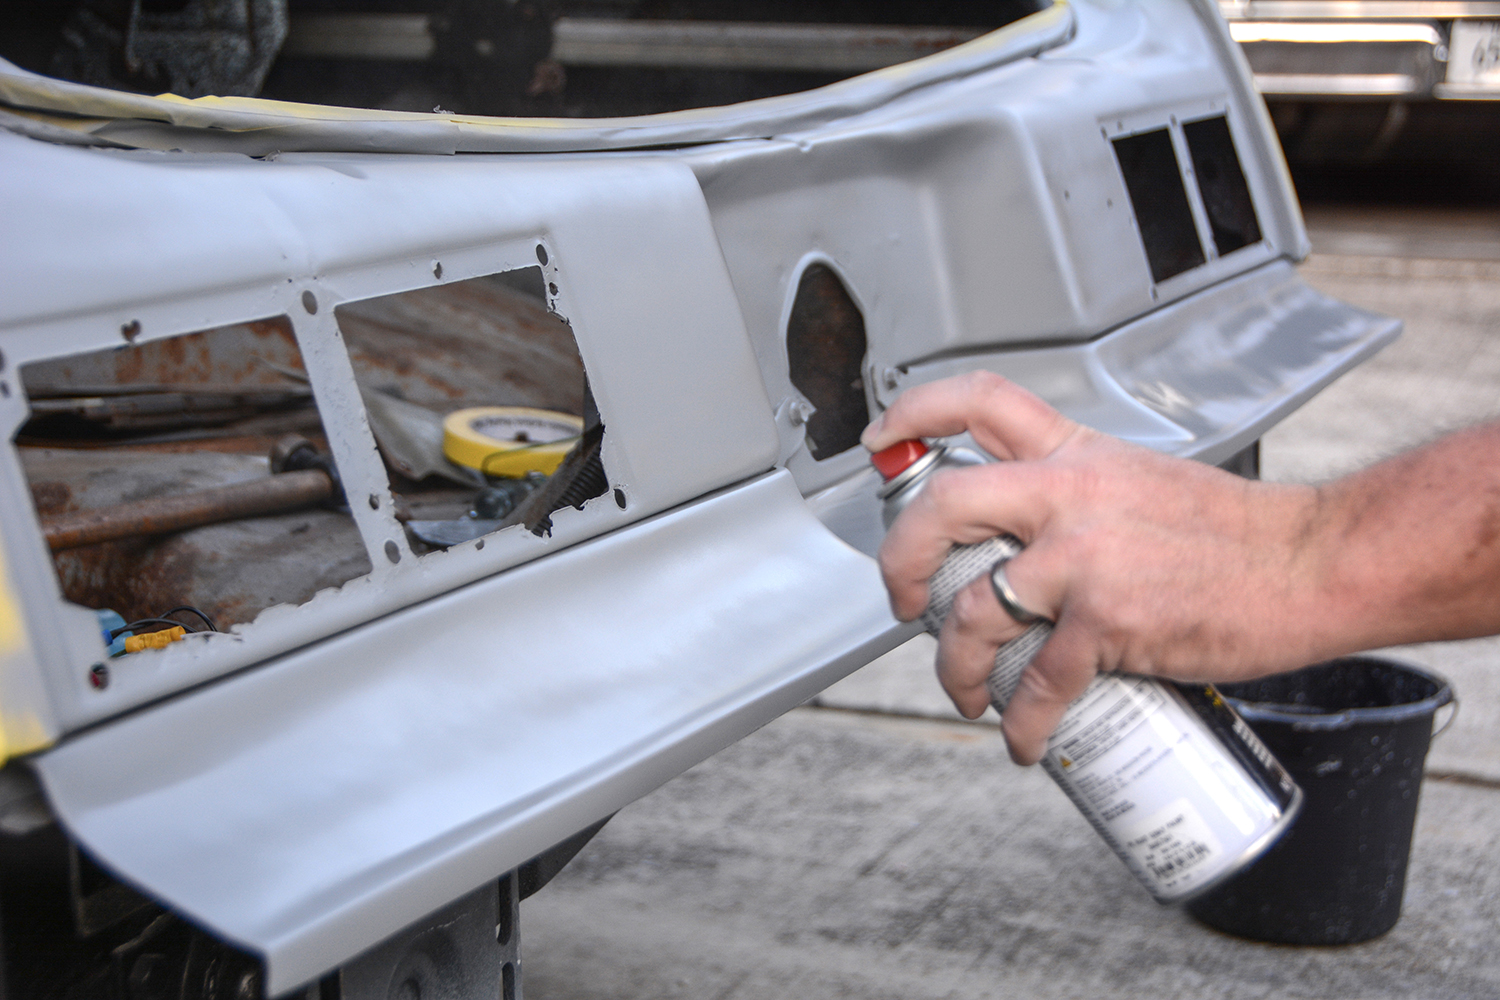
We turned the grinder up on its side to dig into the crack, and then made some perpendicular ridges with the grinder to give the resin a little something extra to bite into.It is very important to blow the area off with compressed air, being sure to get the fiberglass dust out of every crevice or pinhole.We picked up this U-Pol Fantastic fiberglass repair kit from our local parts store for less than $30. It comes with fiberglass mat, resin, hardener, a mixing cup, mixing sticks, and an application brush.We prefer the loose weave fiberglass mat, compared to the tight weave mat in other kits. Scissors or a razor blade can be used to cut the mat into pieces that are just large enough to cover the damaged area.The resin comes in a 250ml container, but most small cosmetic repairs will only need about 50ml of resin to complete the job. We pour 50ml into the supplied mixing cup.The instructions tell us to squeeze a pea-sized portion of hardener for every 10ml of resin, so we used five squeezes of hardener for this batch. Stir thoroughly with the provided stick.We applied the resin to the affected area on the panel and worked quickly, as the resin sets up in less than 10 minutes.The first layer of fiberglass mat is applied to the wet resin, and then an additional coat of resin works the fibers into the panel. After the main part of the repair area is saturated, we apply resin to the 90-degree fold, and it conforms to the shape.We always like to use a second layer of fiberglass mat, applied directly over the previous layer while the resin is still wet. We follow this with more resin to work the fibers into the panel.There are several ways to go about finishing the edges. You can tape a paint stirring stick to the edge if you want a hard edge, but our preference is to let the mat and resin hang off the edge of the panel.After the resin hardens, we use the angle grinder with 36-grit to make quick work of the rough edge. We’re not trying to get a final finished edge in this first pass—we’re just knocking down the rough stuff and will smooth it later.The angle grinder is also used to knock down the high spots in the main area of the repair. Again, we don’t want to dig too deep, as we still have some finessing to do with the DA sander.We used 80-grit on the DA sander to get the area dialed in a little closer. The DA is much gentler than the grinder, but we’ll finish the area by hand to ensure a smooth and straight panel.This close-up photo shows a few pinholes in the fiberglass, which is normal. You can fill these with fiberglass resin, or in our case, we’re going to apply a skim coat of regular body filler to the entire affected area, as it’s much more forgiving.After the body filler is sanded down, we blow off the area and prepare it for primer.High-build automotive primer is expensive and often sold in large quantities like a quarter or gallon, so we grabbed a can of U-Pol aerosol primer, as it works well for small areas.We fogged a black guidecoat over the primer to help us see the low spots and sanding scratches as we sand the primer. We used 220-grit sandpaper on a flexible sanding block. At this point, you can either dry sand or wet sand.Finally, we spray two more coats of U-Pol primer on the area. Now, it’s ready for final sanding and prepwork as we get ready for paint.
We use cookies to ensure that we give you the best experience on our website. If you continue to use this site we will assume that you are happy with it.