We are continuing our investigation of the inspiring work being done on the 1969 Camaro project being built by Auto Body Specialists in Manchester, New Hampshire. In this installment, we’ll take a close look at the extensive stainless steel hardline plumbing and the all-stainless exhaust system.
A good-quality manual tube bender can form tight-radius bends in smaller stainless steel hard lines, such as the ¼-inch tubing used here for the radiator overflow. All the hard lines were purchased from McMaster-Carr.
Stainless steel is sometimes called the “queen” of metals because it does not rust and is non-corrosive. If you polish or brush the surface to a high luster, it will usually keep that shiny finish for many years. That’s why stainless steel is widely used in industrial kitchens and surgical tools.
With larger sizes of tubing, such as the 3/4-inch-diameter material shown here, manual benders are only capable of making large-radius bends. While there are cases where a large radius bend can be effective, for high-precision applications, the tighter radius of mandrel bends is often the best approach.
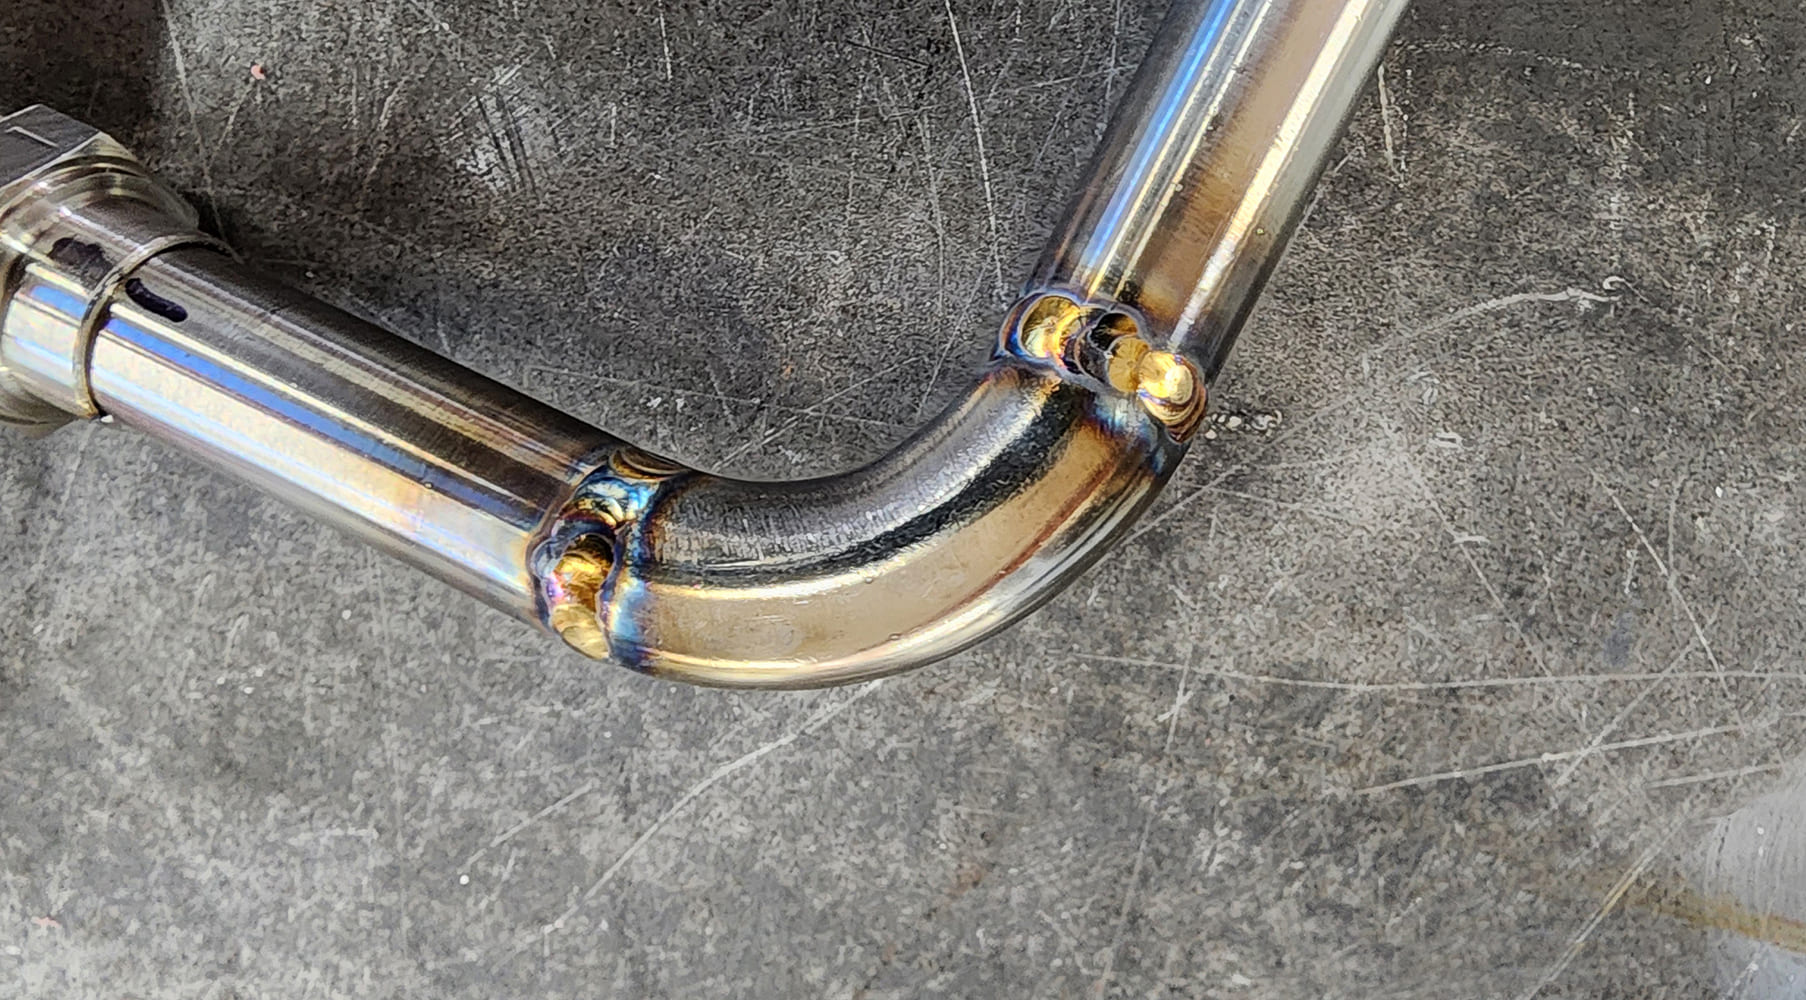
But stainless steel is a tough material to cut, and the fitup of joints is critical. Any defects in the joint fit will require extra heat and filler rod to flow together, and because stainless steel distorts much more than mild steel or aluminum, it’s essential to keep the heat to the absolute minimum. It requires top-notch welding techniques to make leak-free joints for plumbing and exhaust systems, and Jay Doefler, the owner of Auto Body Specialties, is a master welder, as you will see in the photos.
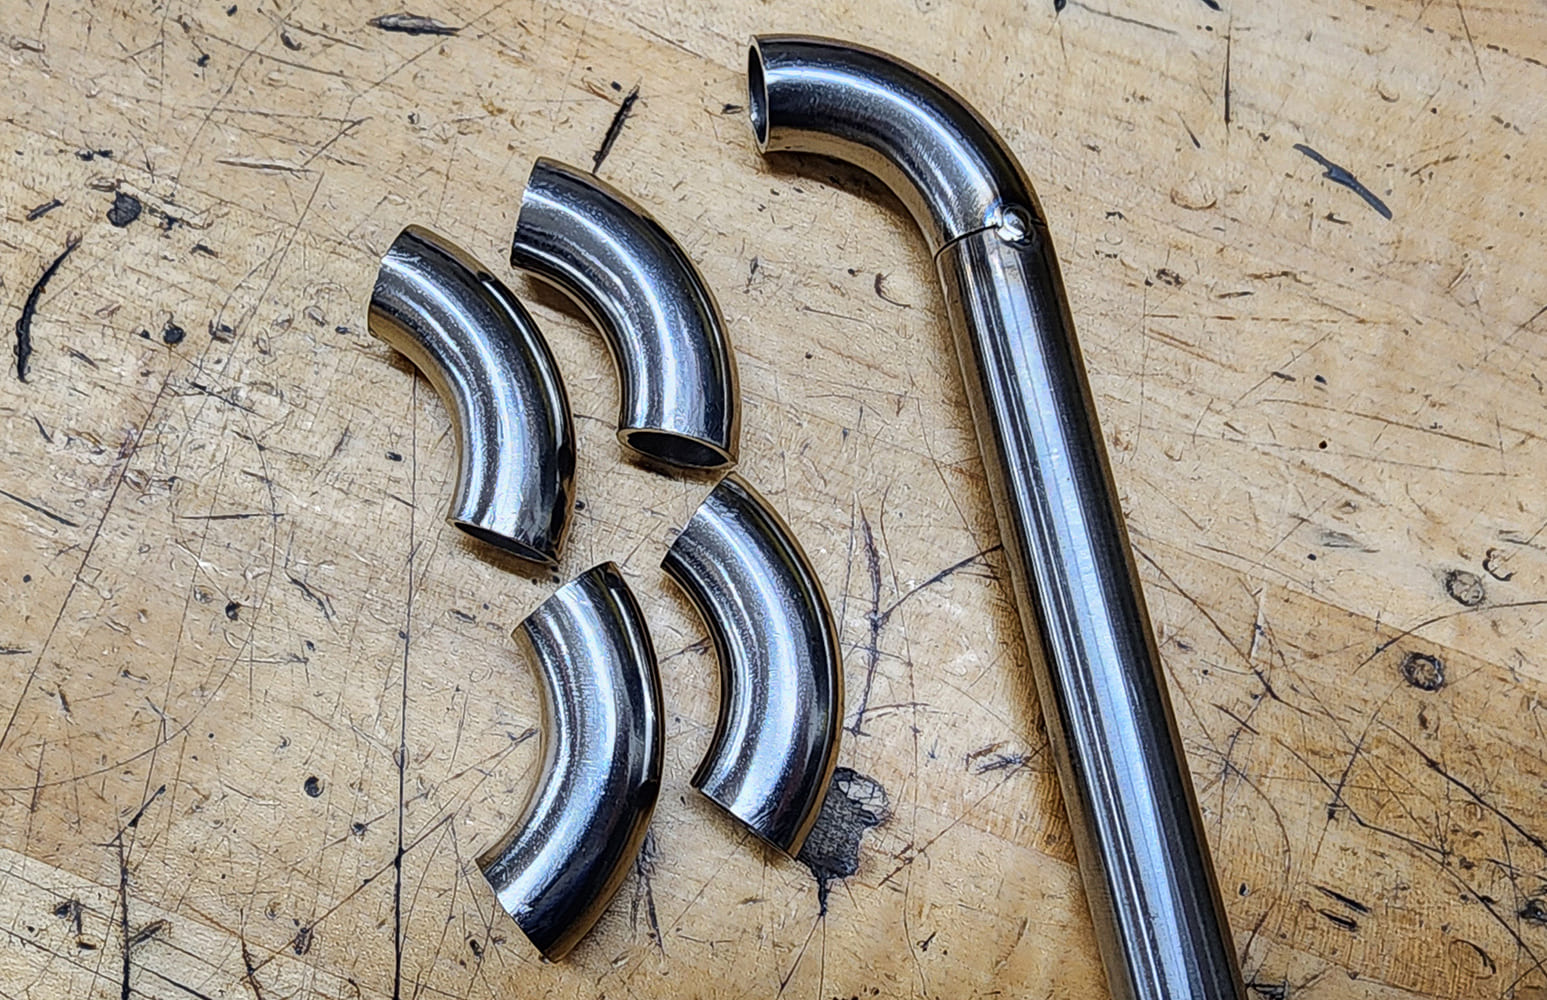
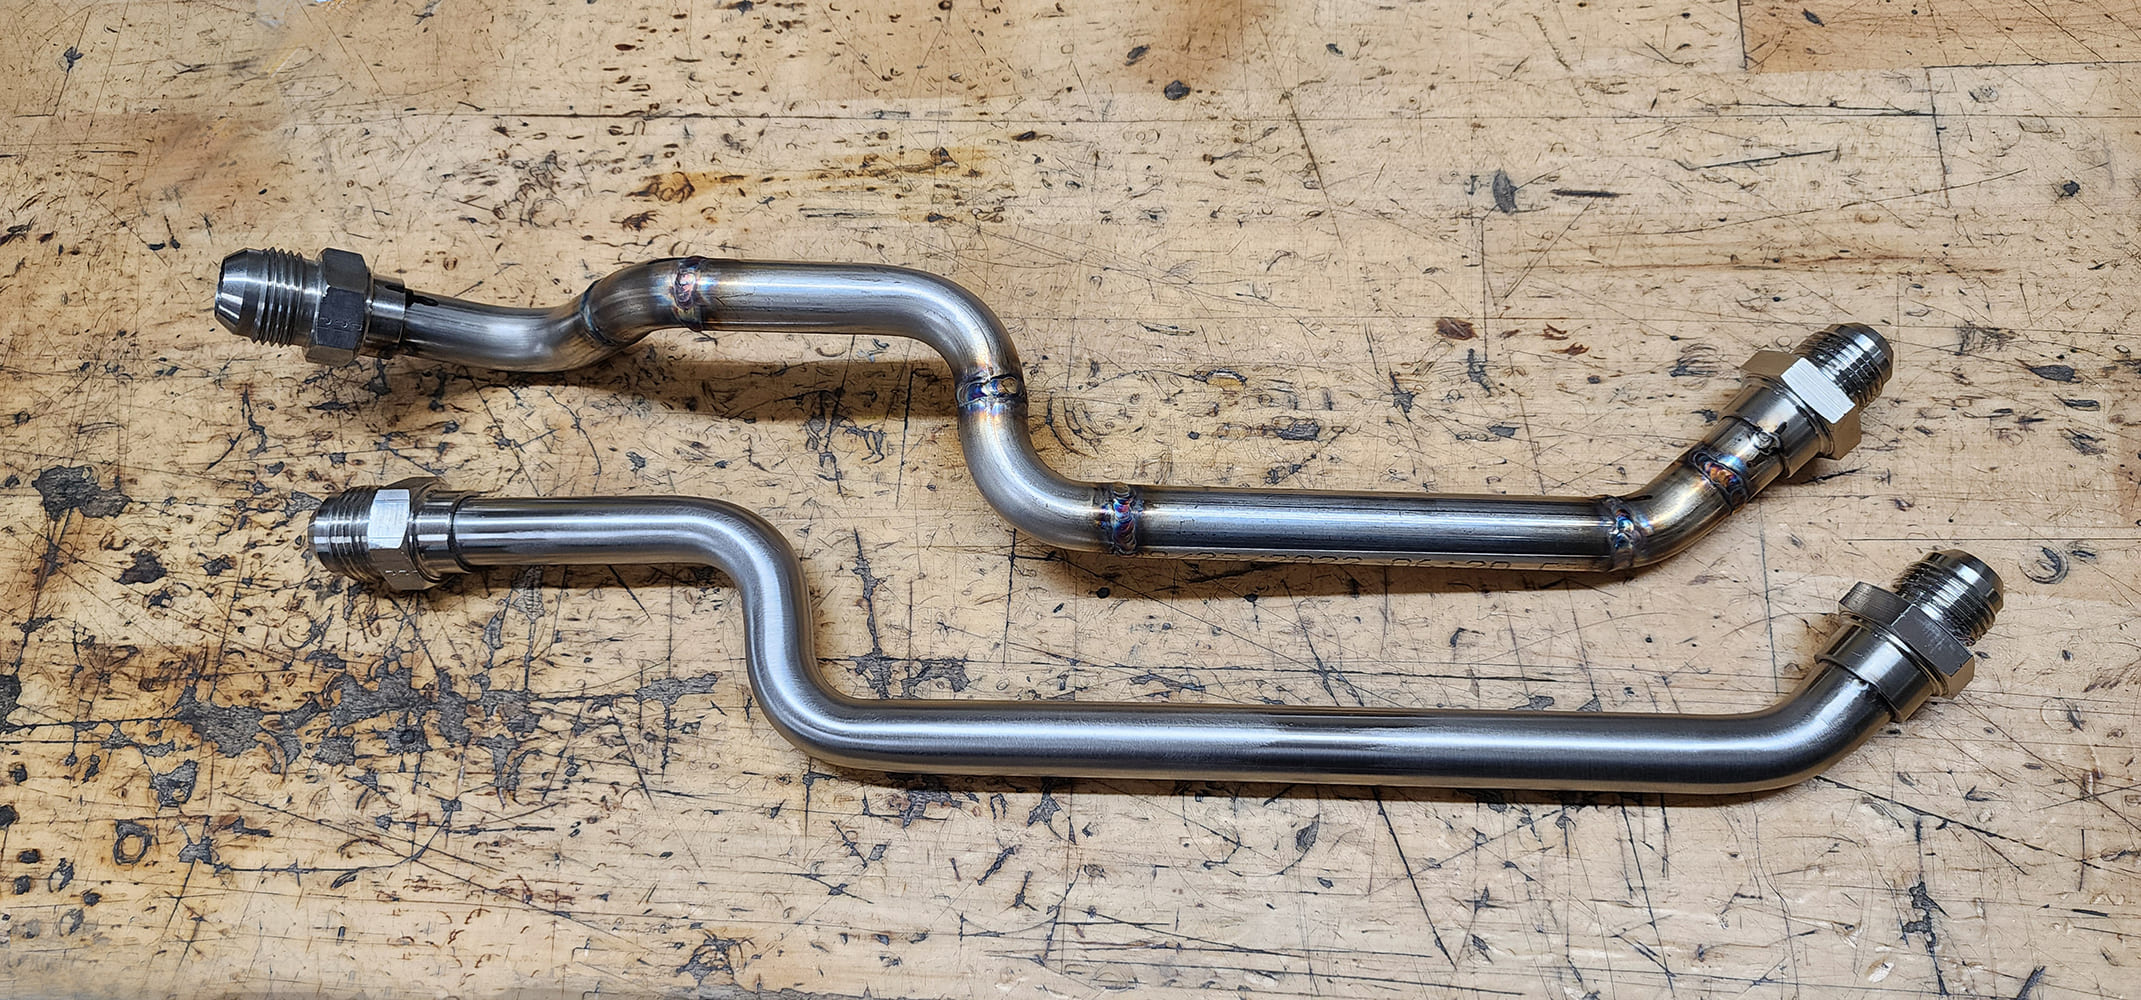
To use the mandrel bends, sections are cut from the bent sections and fitted to straight pieces of tubing.
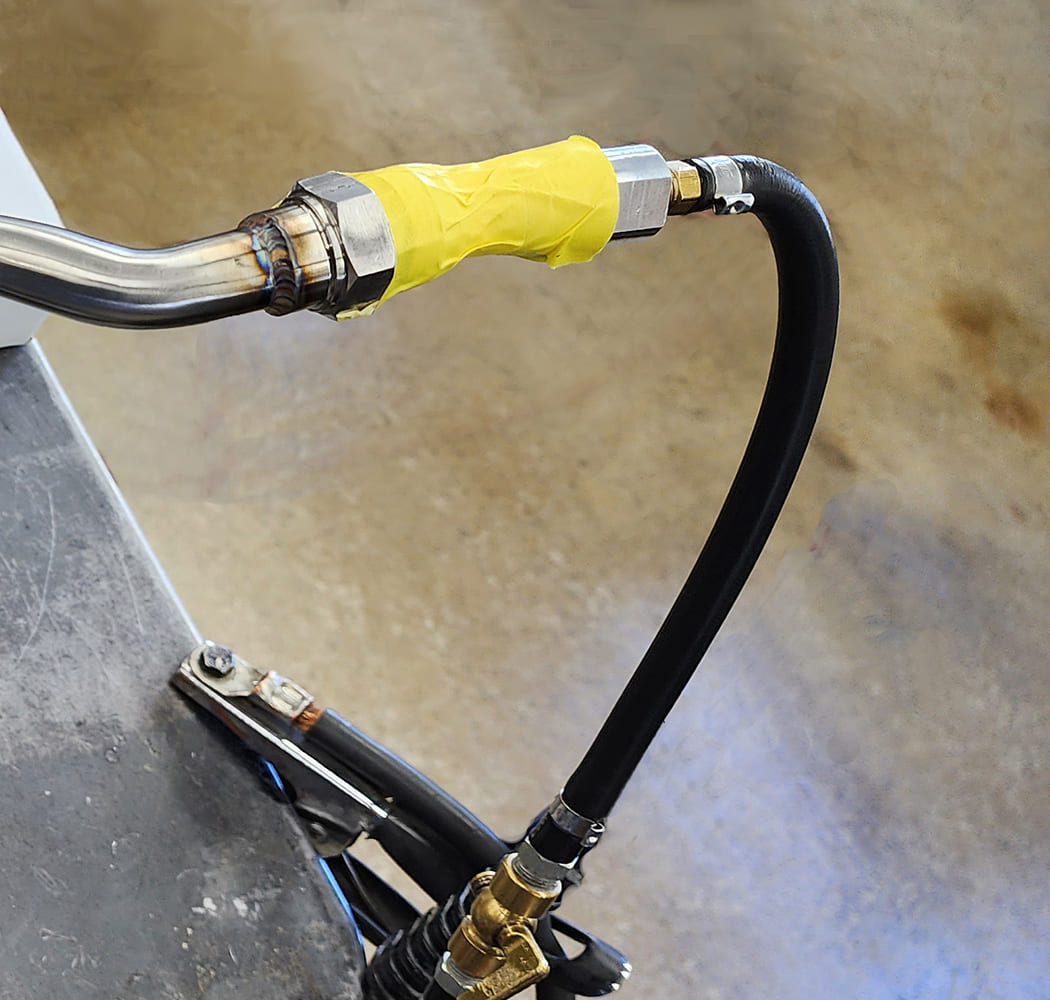
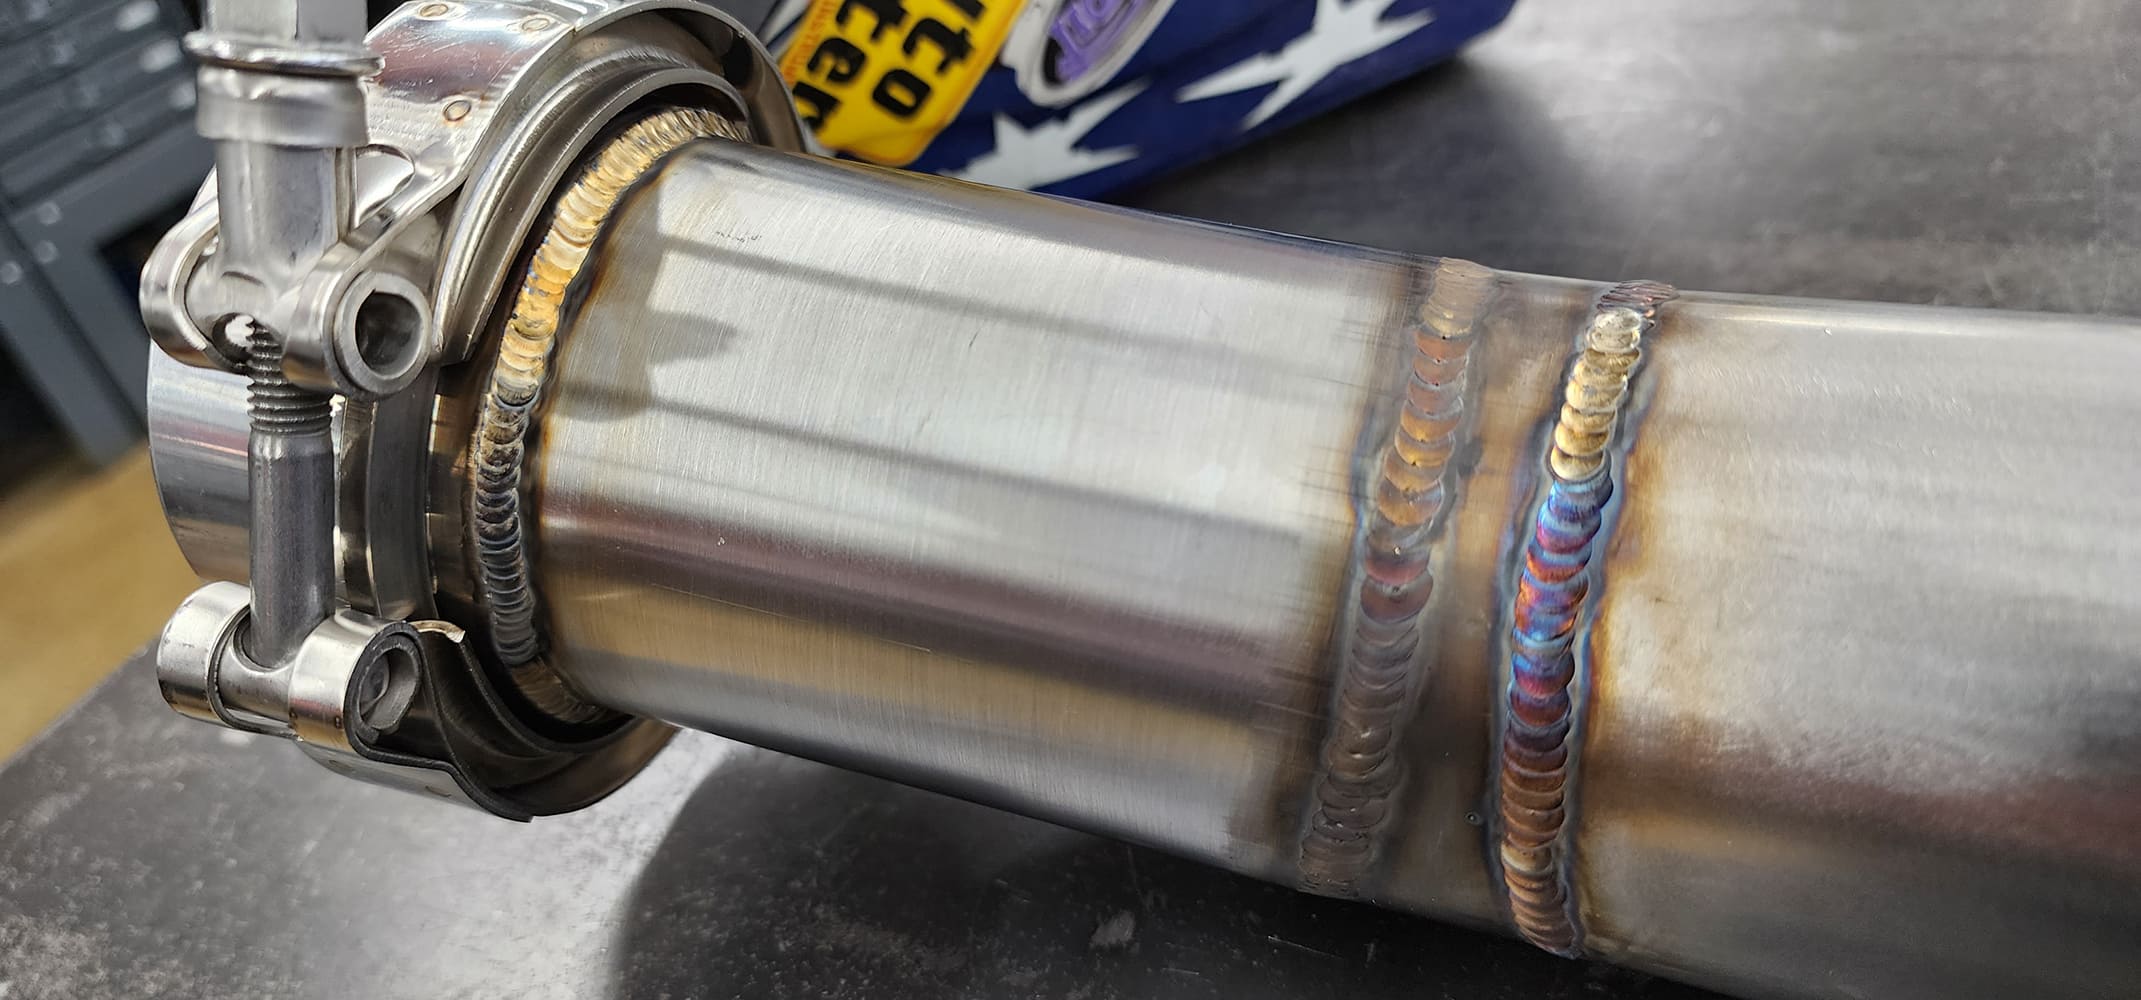
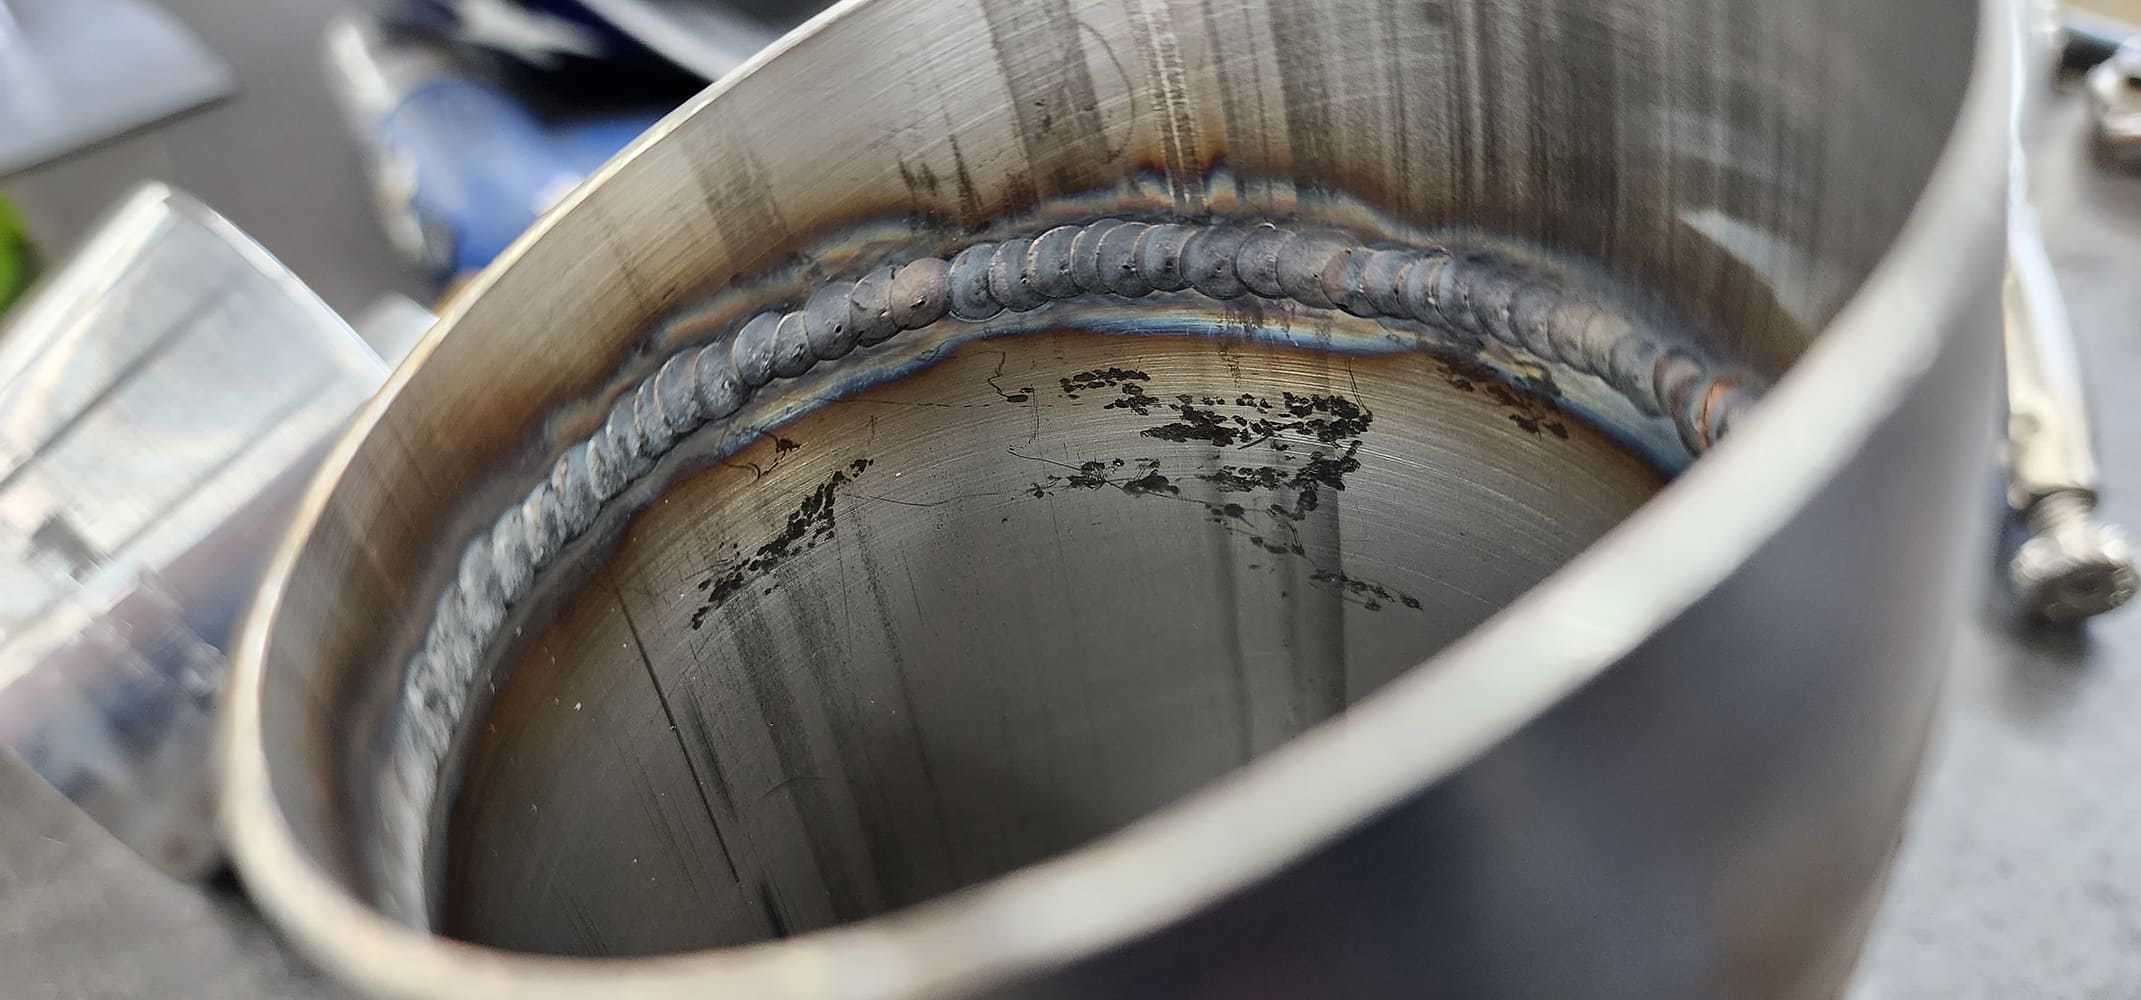
For first-class work, the inside of the tubing should be purged with argon gas. Argon is heavier than air, so the proper method must be used to remove all the air from the tubing before welding. Usually, a cap is placed on the highest end of the tubing, with a flexible line connected to an argon regulator. The lowest end of the tube also needs to be capped, but a sealable vent must be provided so the argon can force the air out the bottom. After all the air is expelled, the bottom vent is sealed and the weld is completed with the tube filled entirely with argon gas. Not properly purging the tubes will lead to a granular weld, which may be prone to failure.
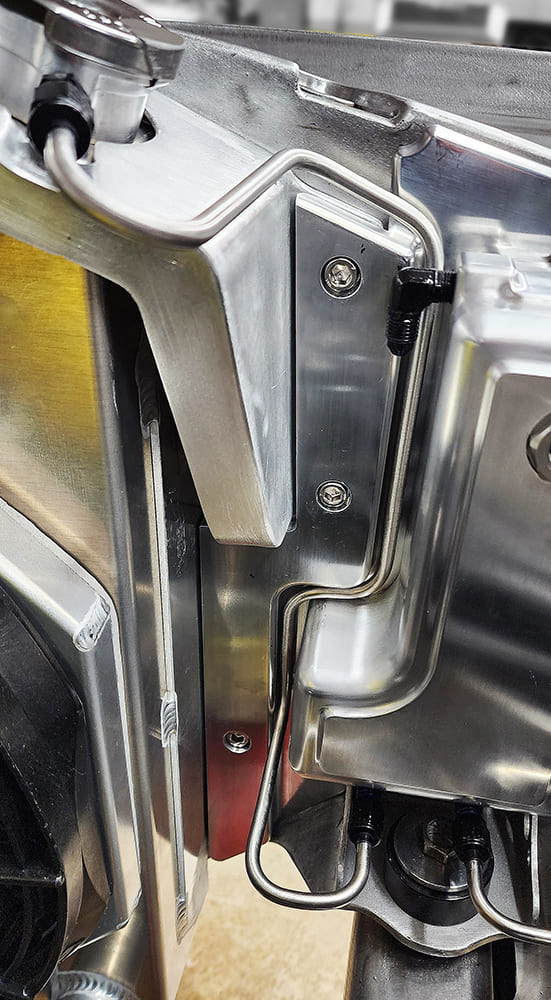
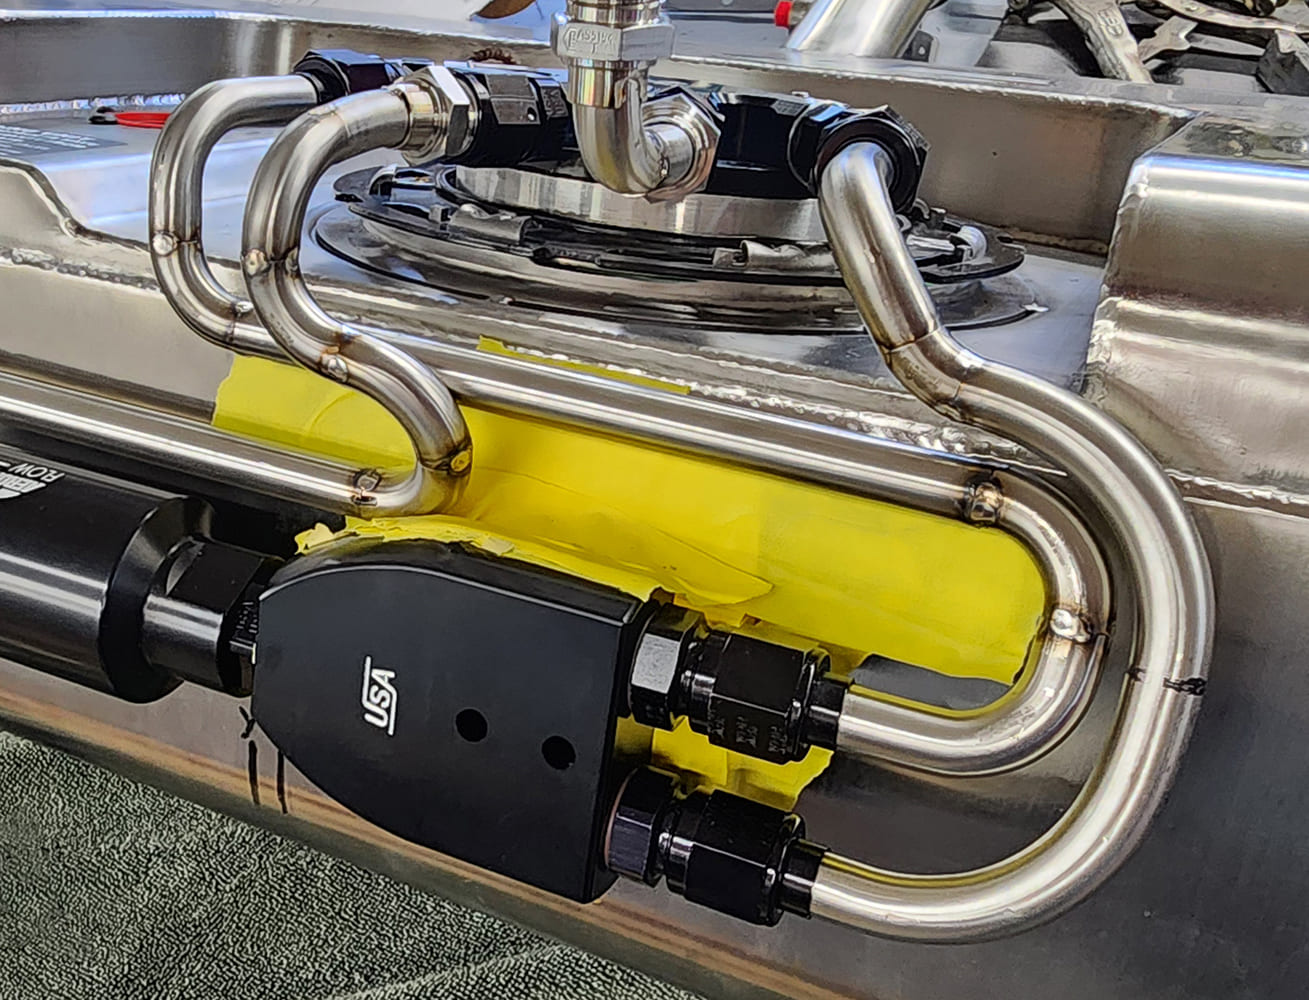
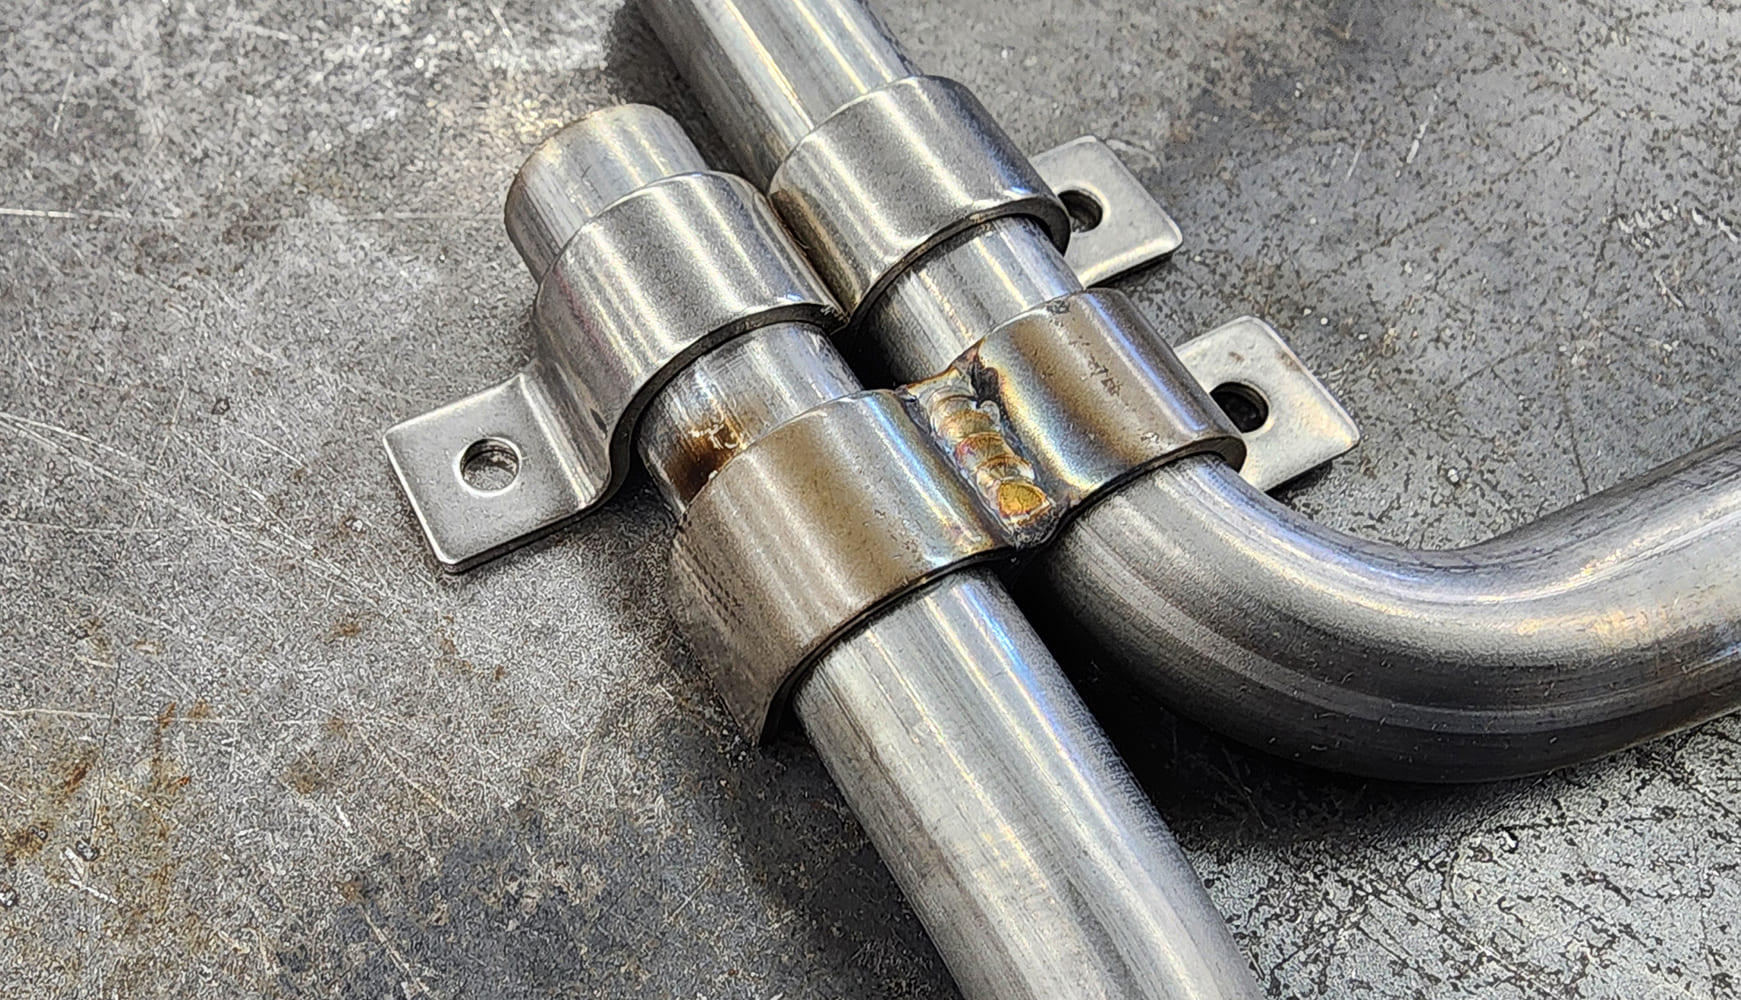
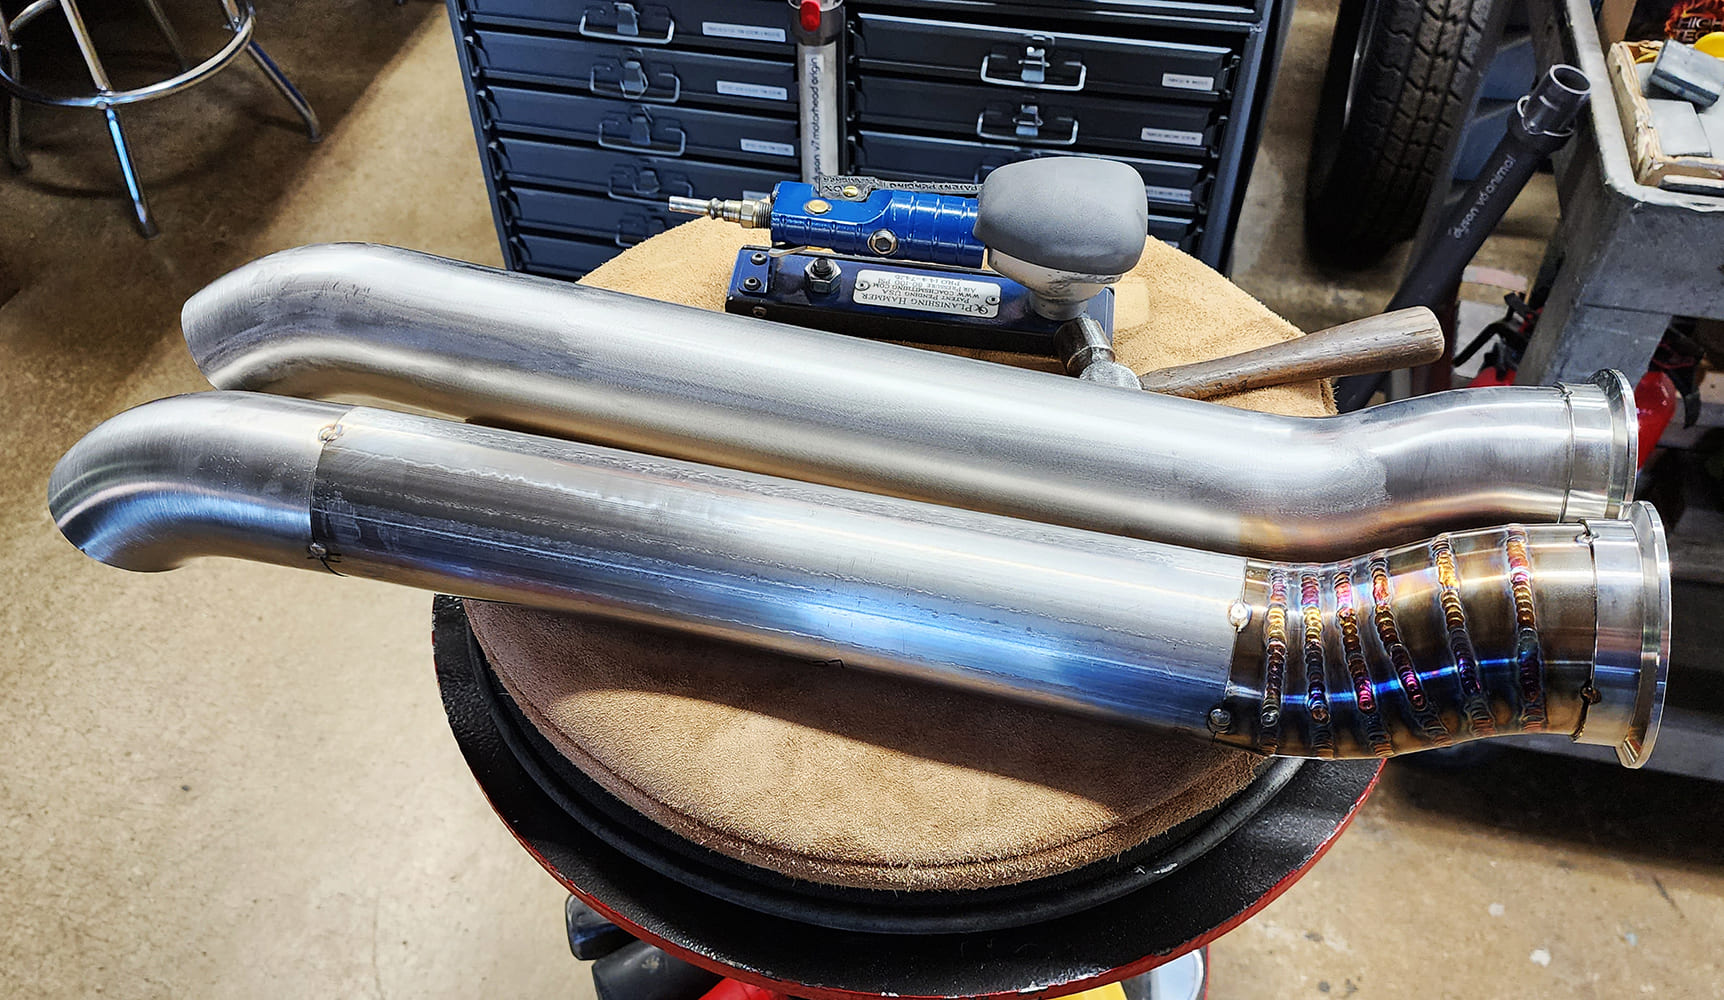
Here, two tubes are being fitted simultaneously to ensure they run parallel. Masking tape helps hold the tubes in place as the joints are carefully fitted. Once the fit is dialed-in, the tubes are tack-welded together.
Small sizes of stainless tubing can be successfully bent using hand-operated tools, but for sizes over 5/16-inch, the hand tools must make a relatively large-radius bend to avoid wrinkling. These large-radius bends work well in many cases, but when multiple tubes need to fit into limited spaces, tight-radius bends are often better. The best way to get these is to buy a selection of mandrel-bent tubing and cut sections from them to join with straight pieces. When finished properly, these welds can become nearly invisible—a sign of expert craftsmanship.
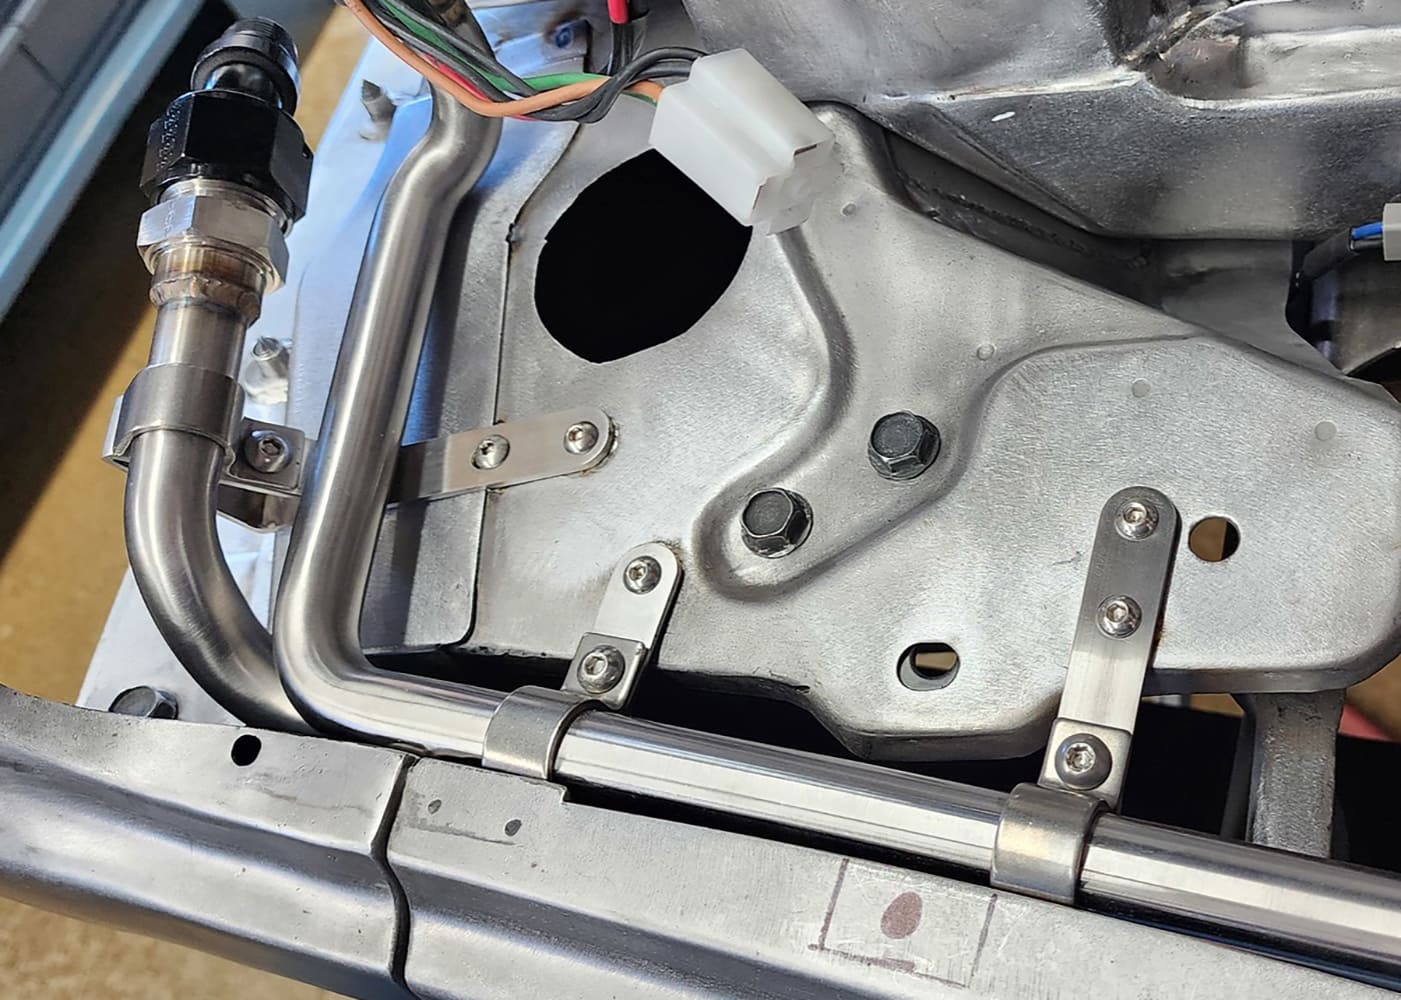
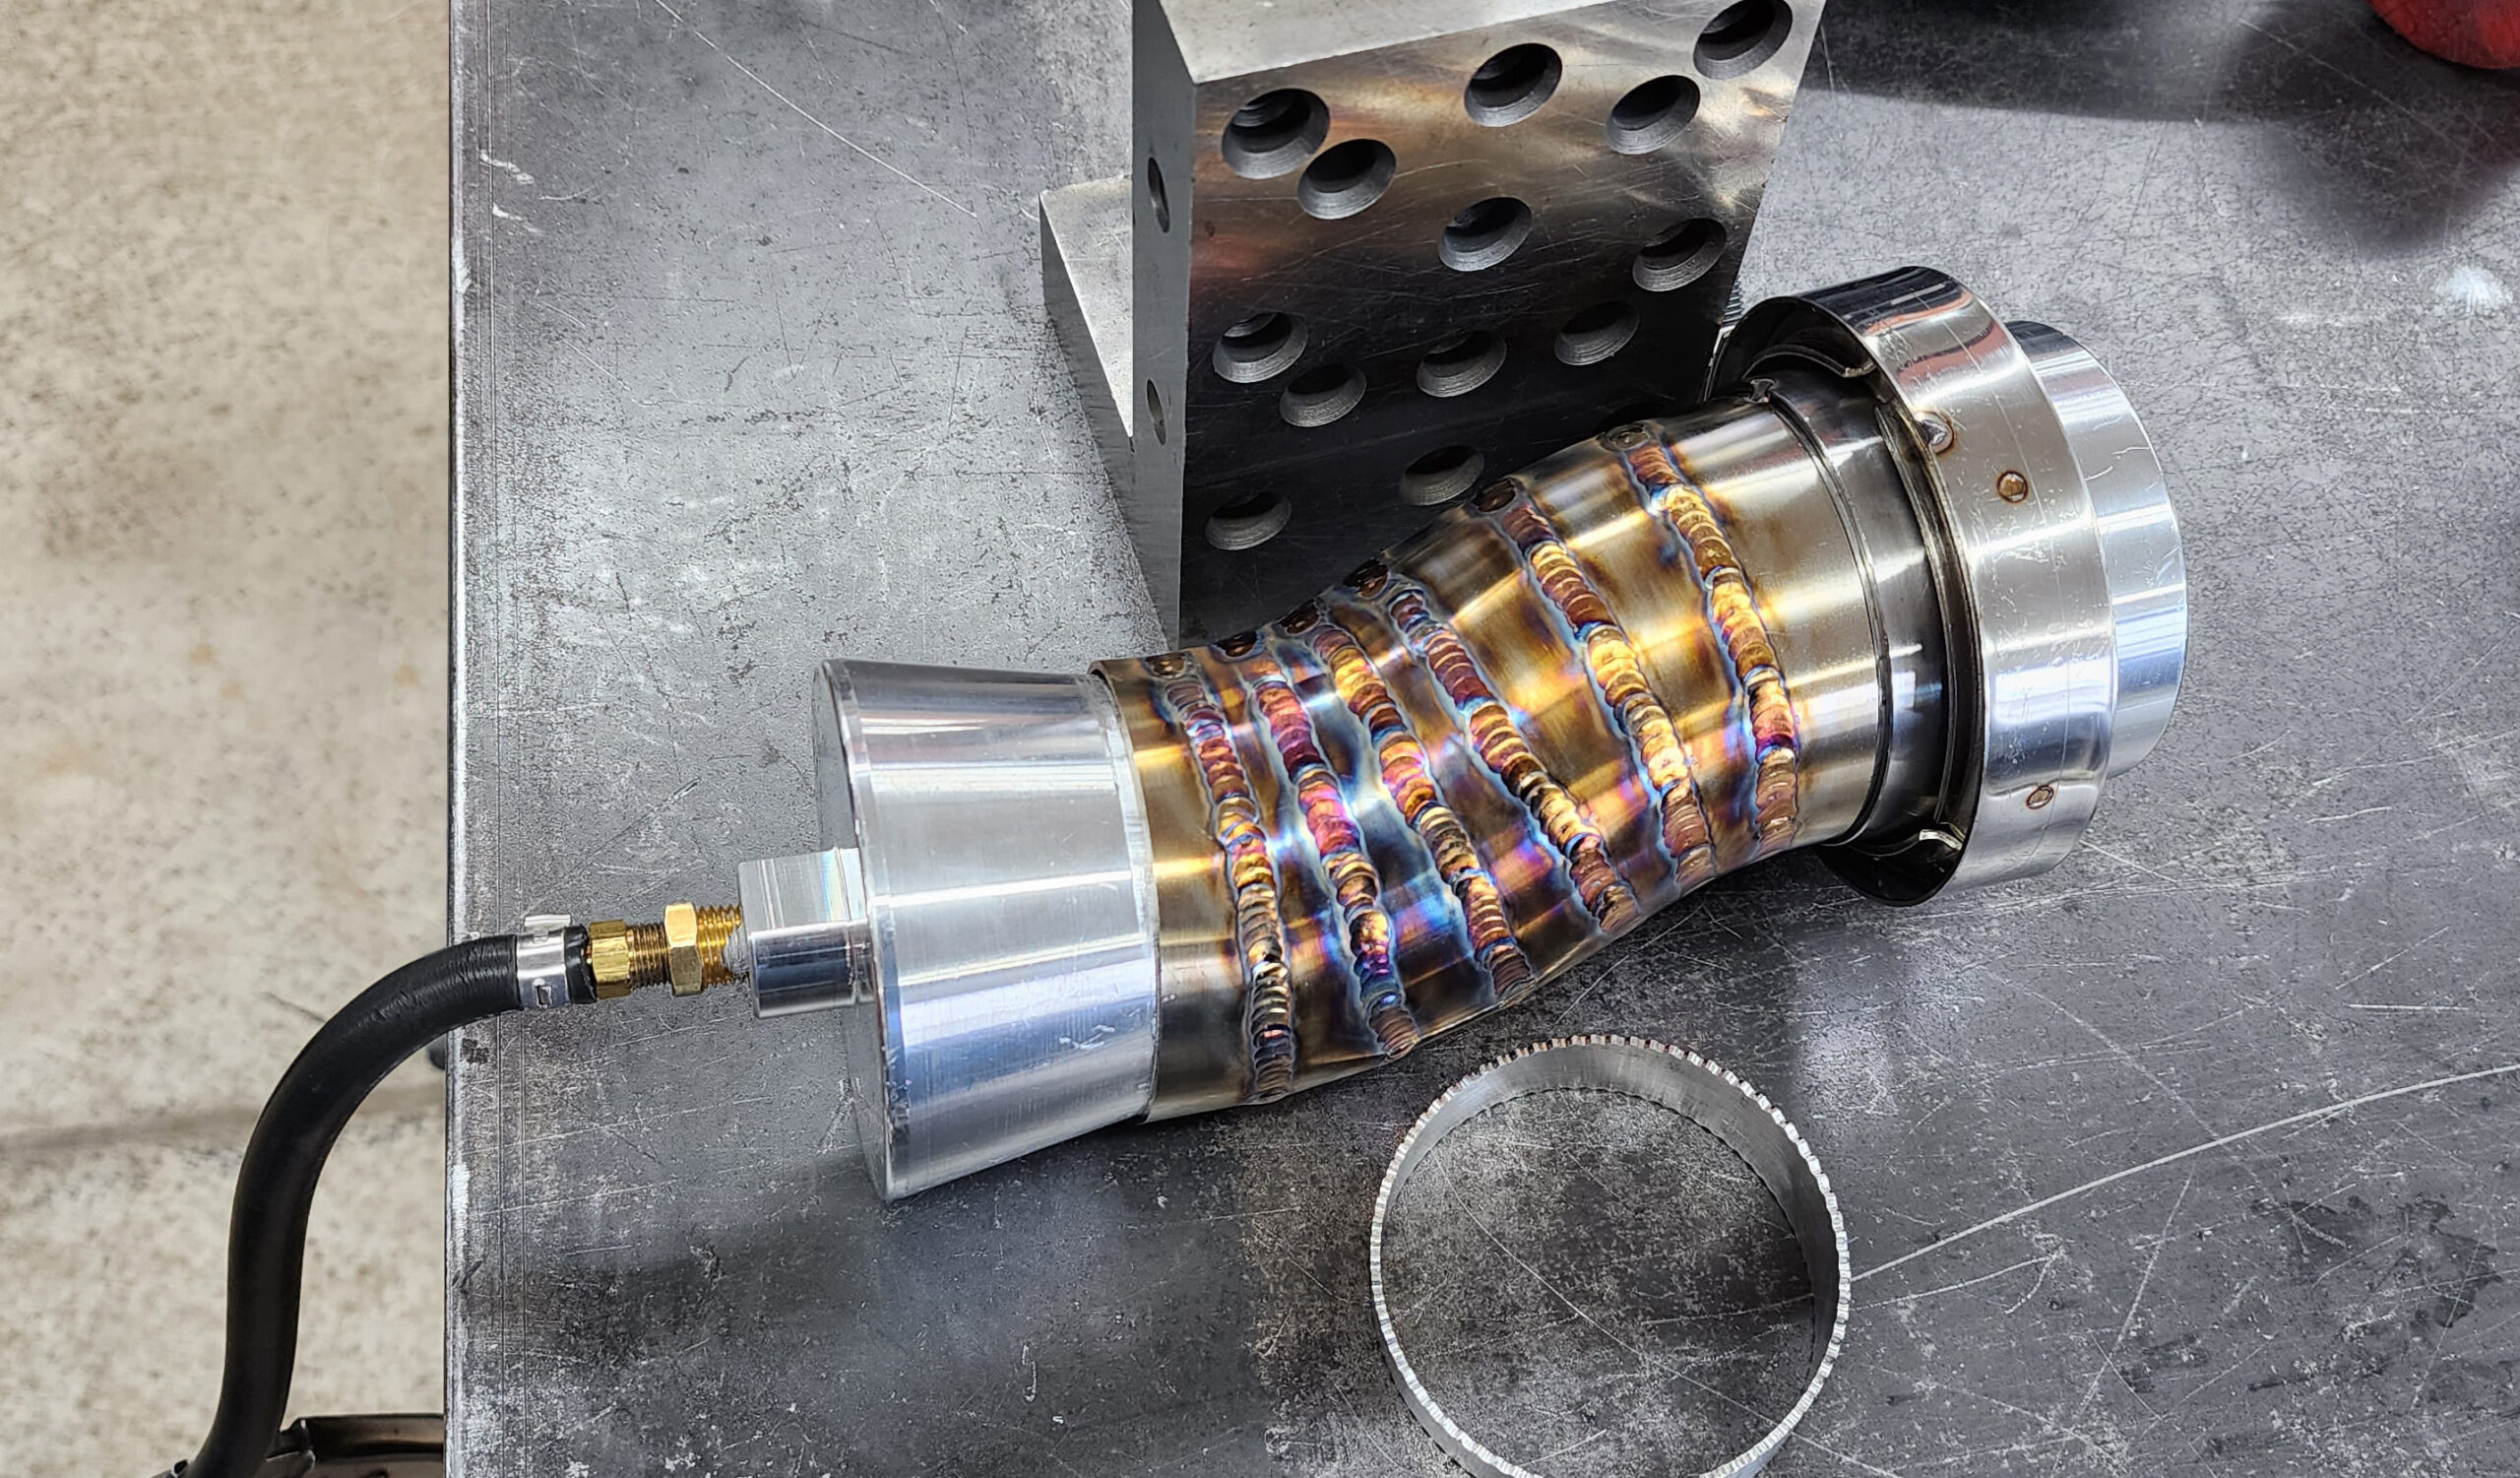
Note the fitting attached to the right end of the tube and the rubber hose that supplies argon to it. The opposite end of the tube must be partially capped to allow trapped air to be purged, then sealed before starting the welding.
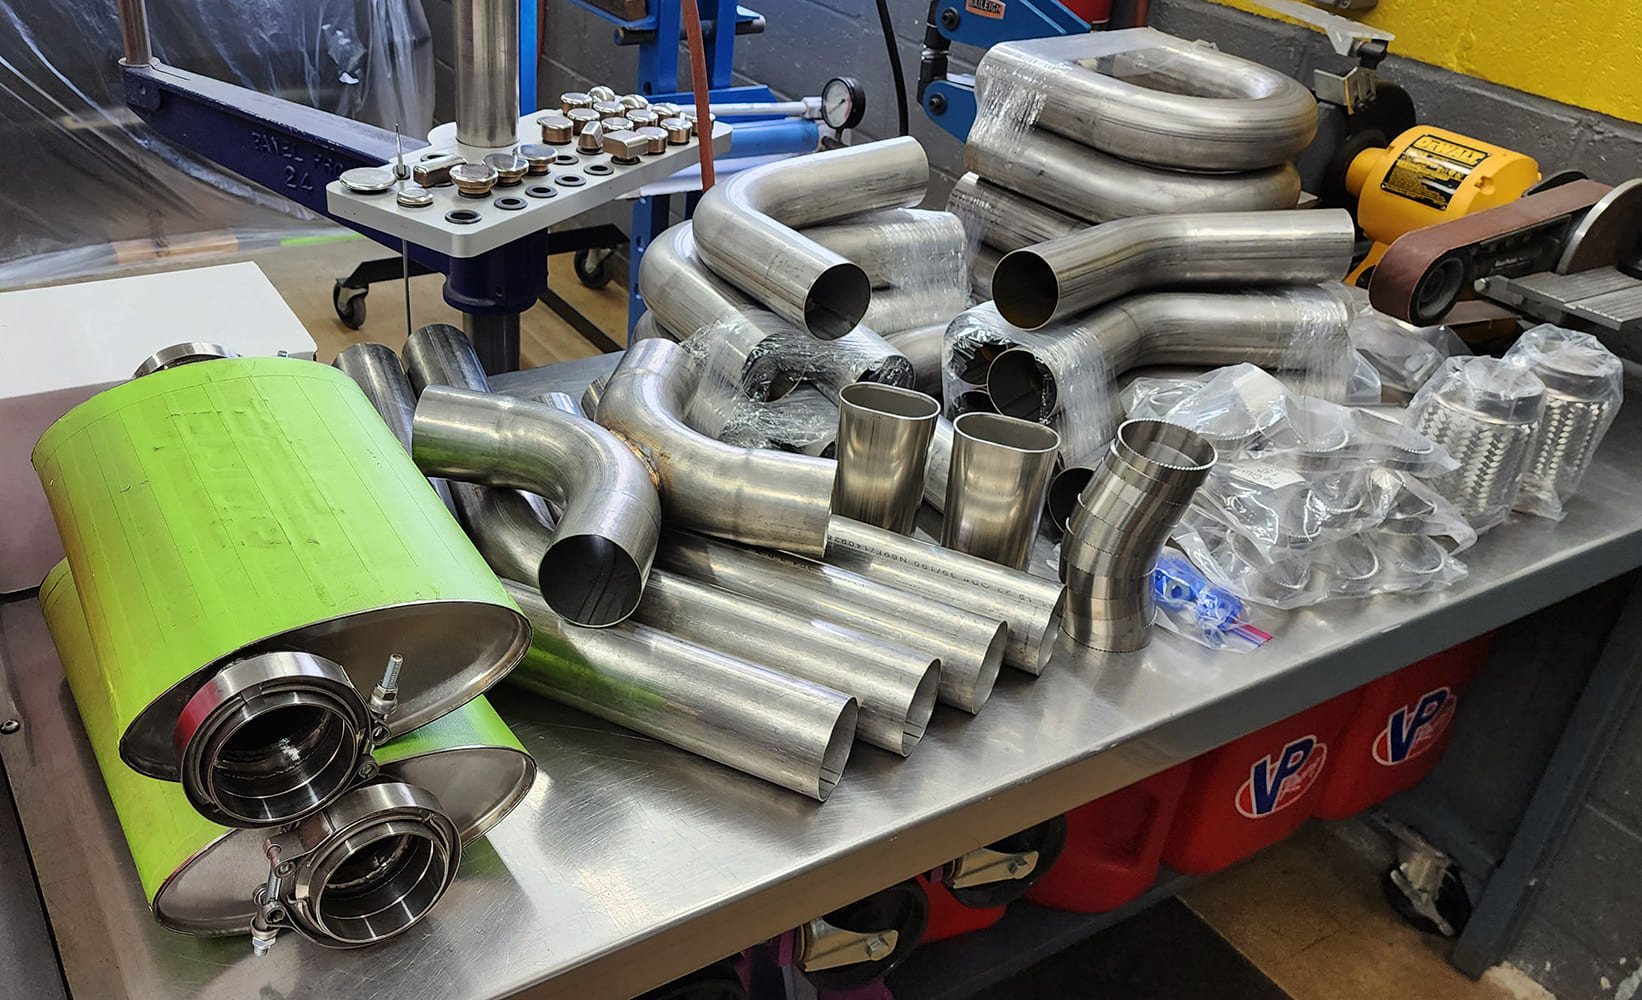
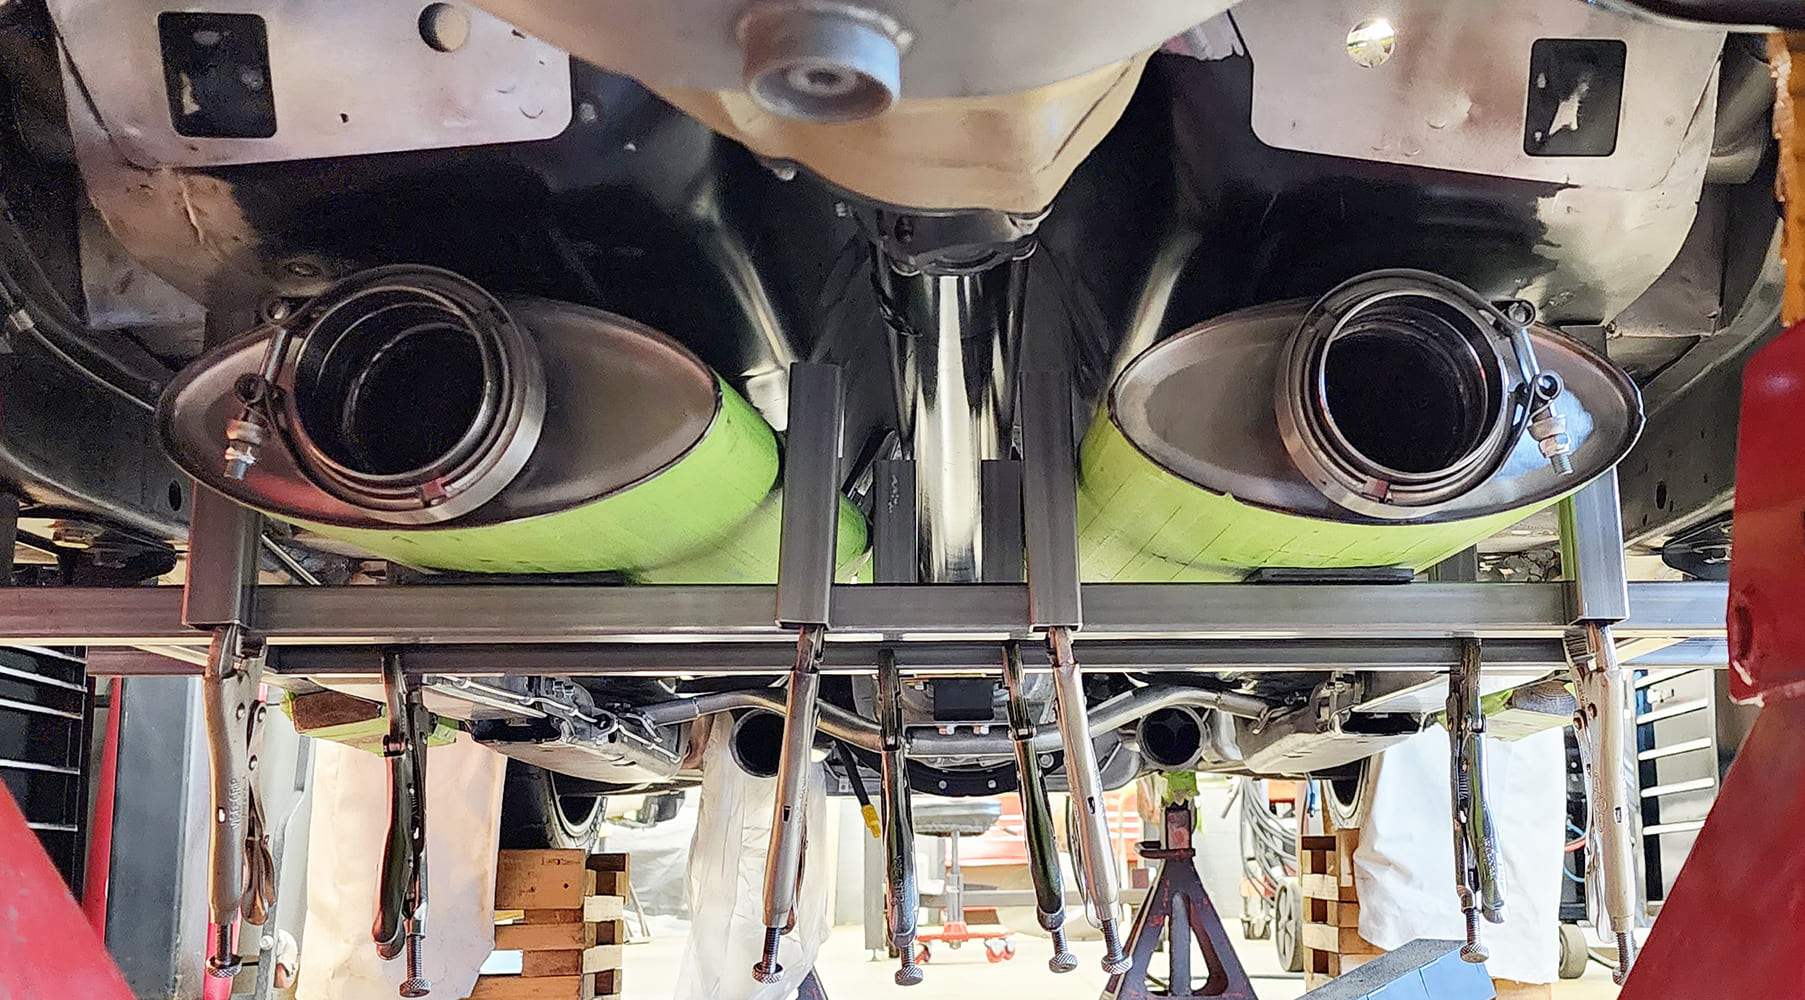
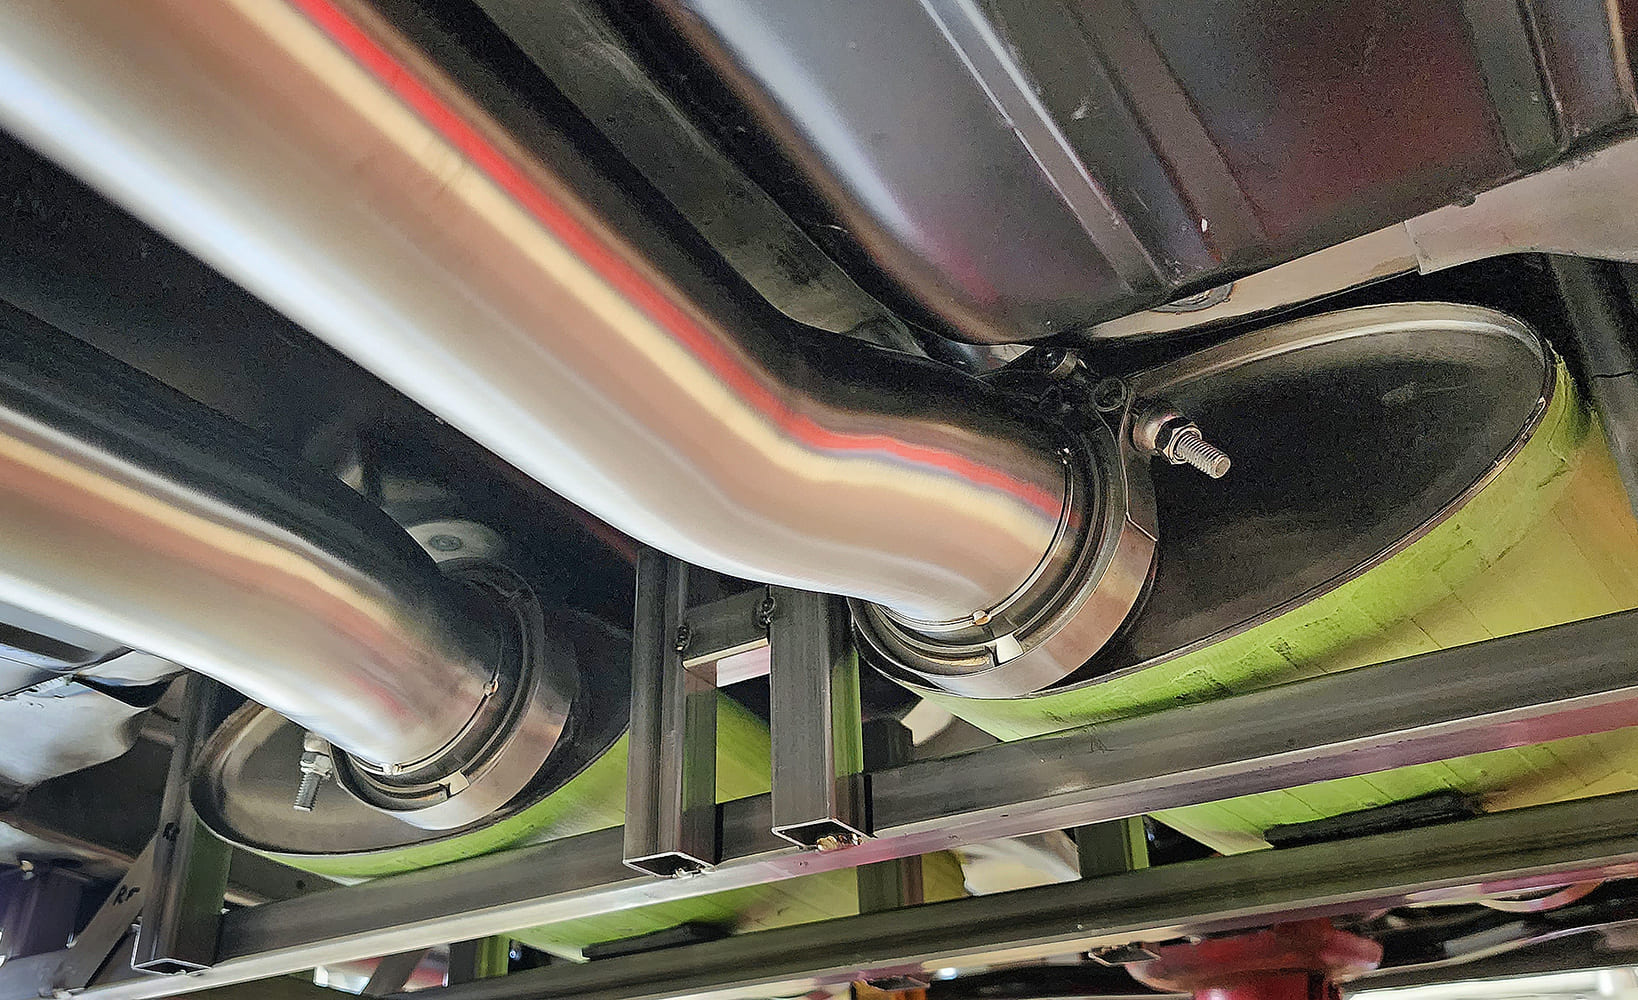
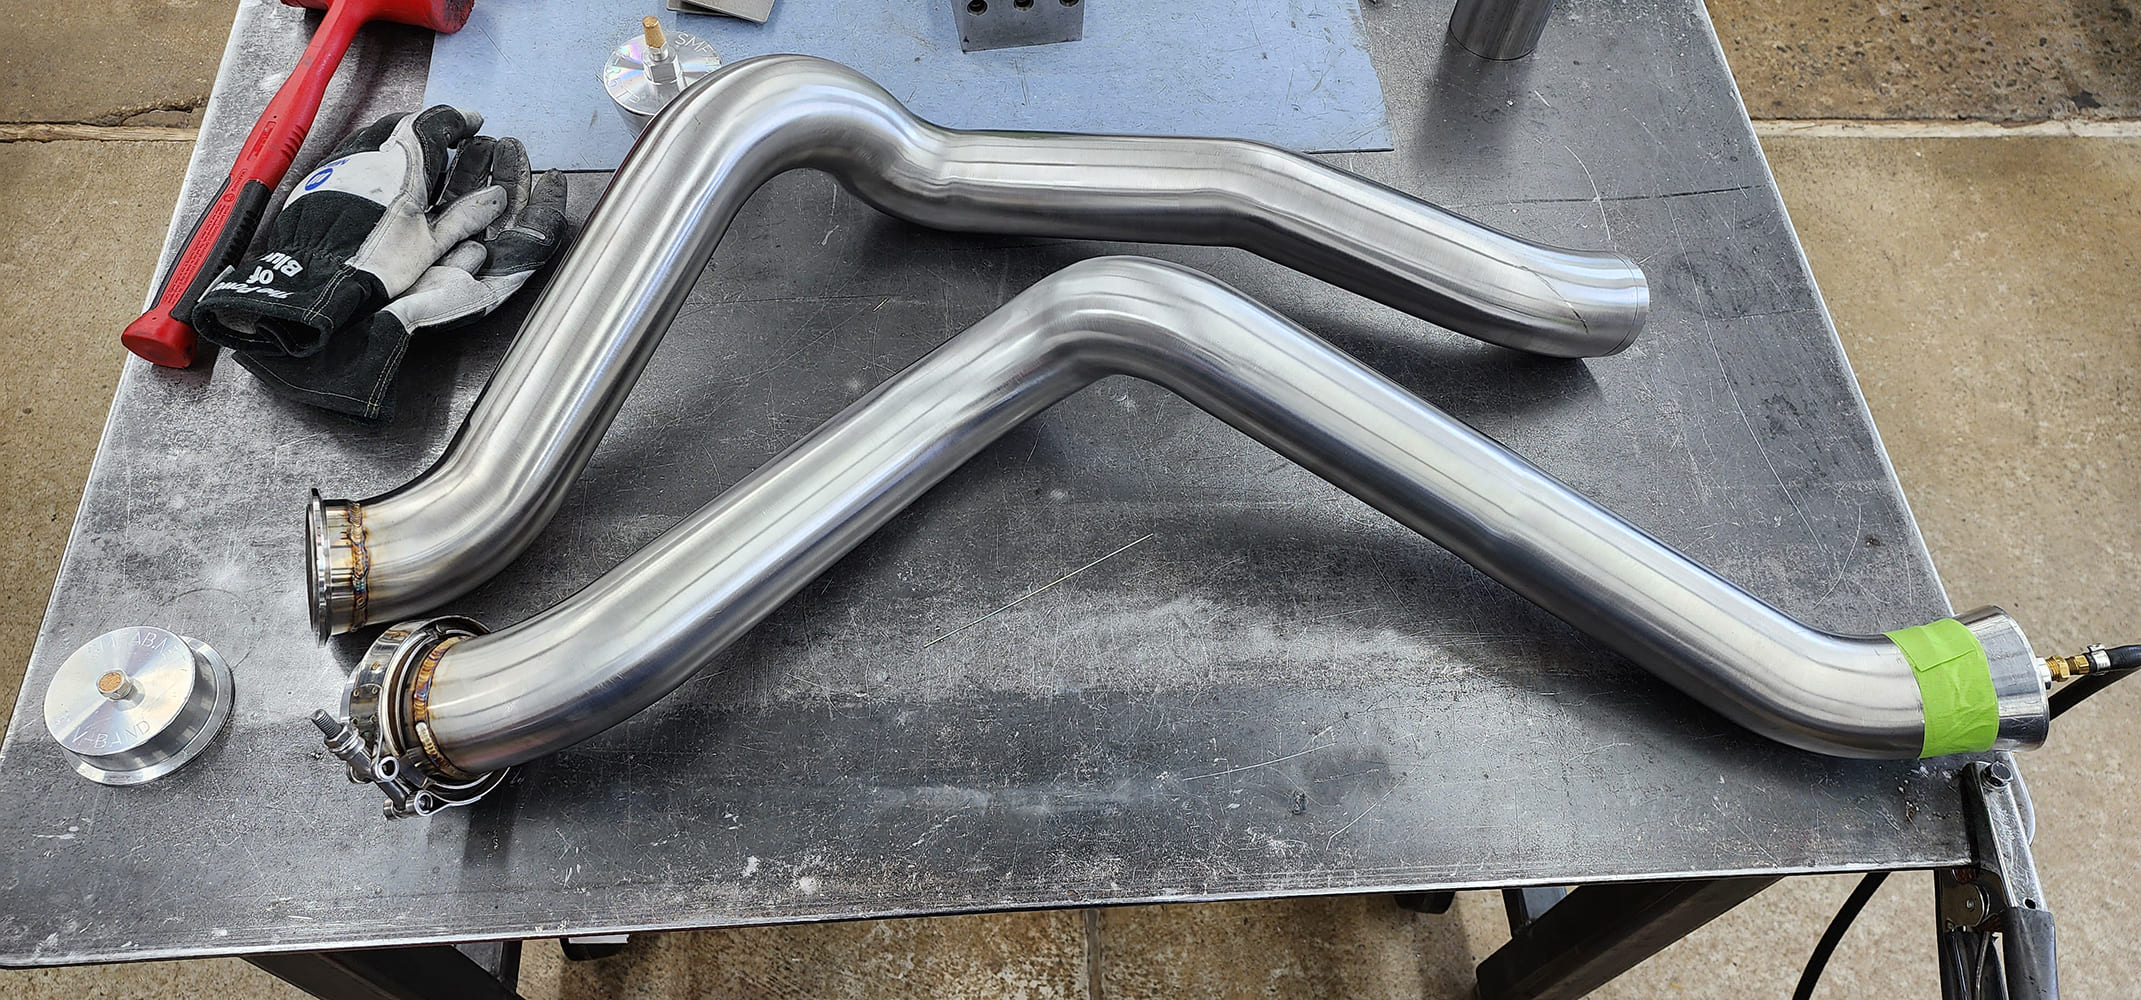
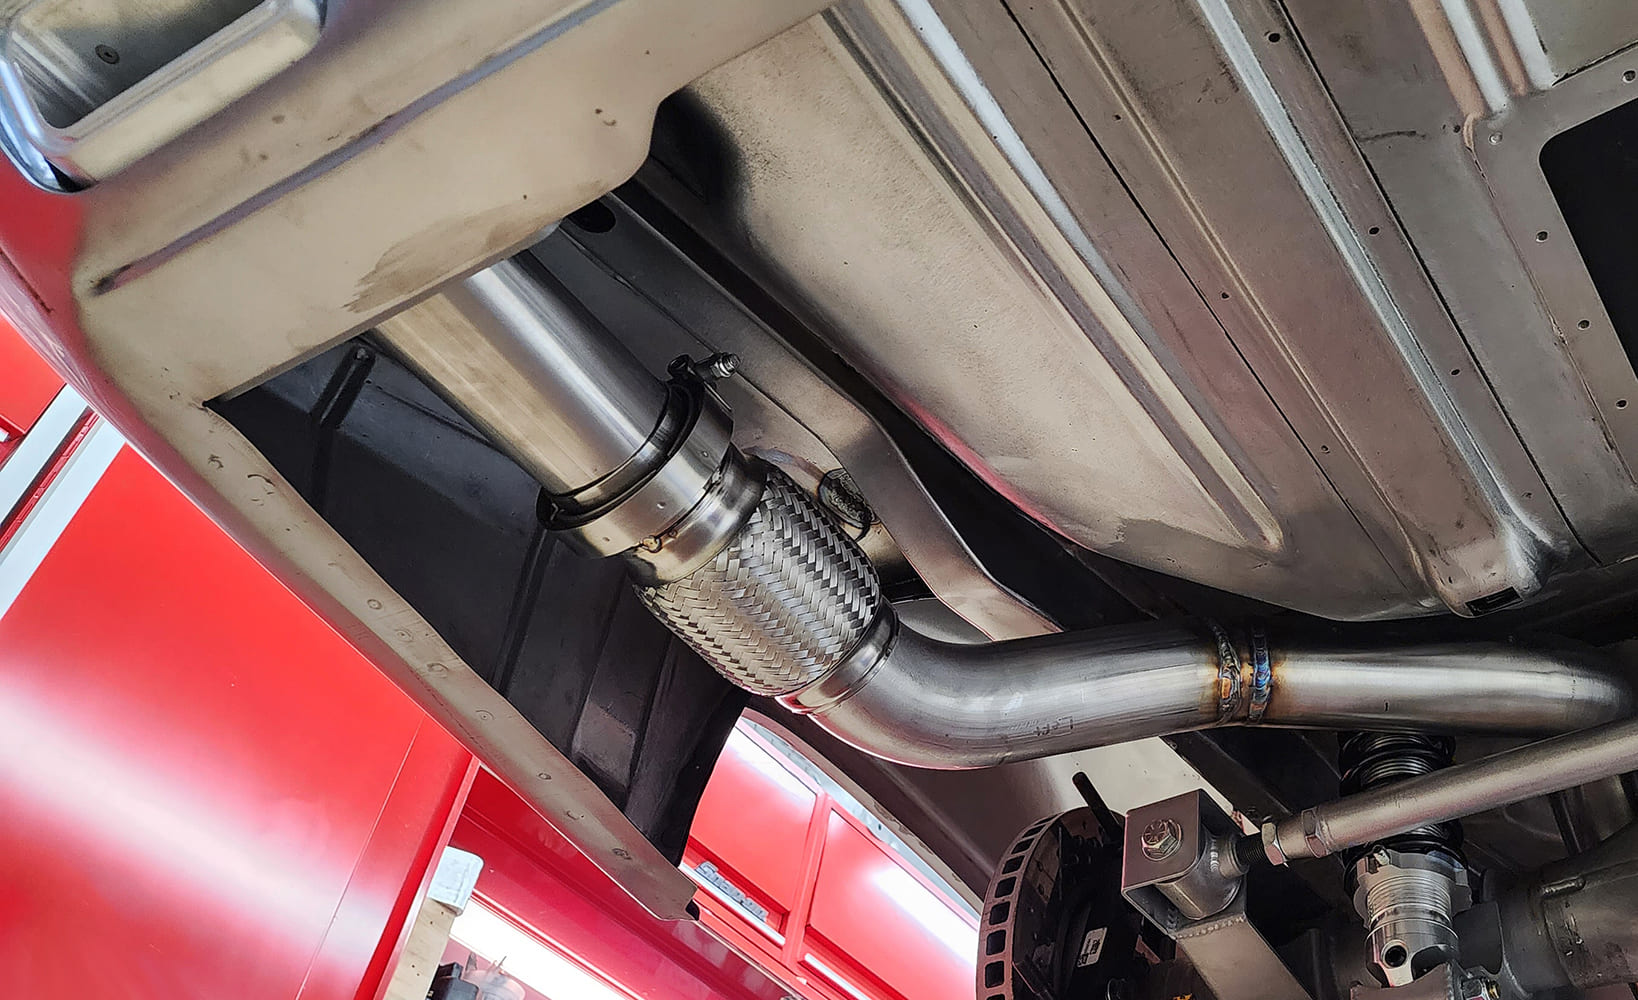
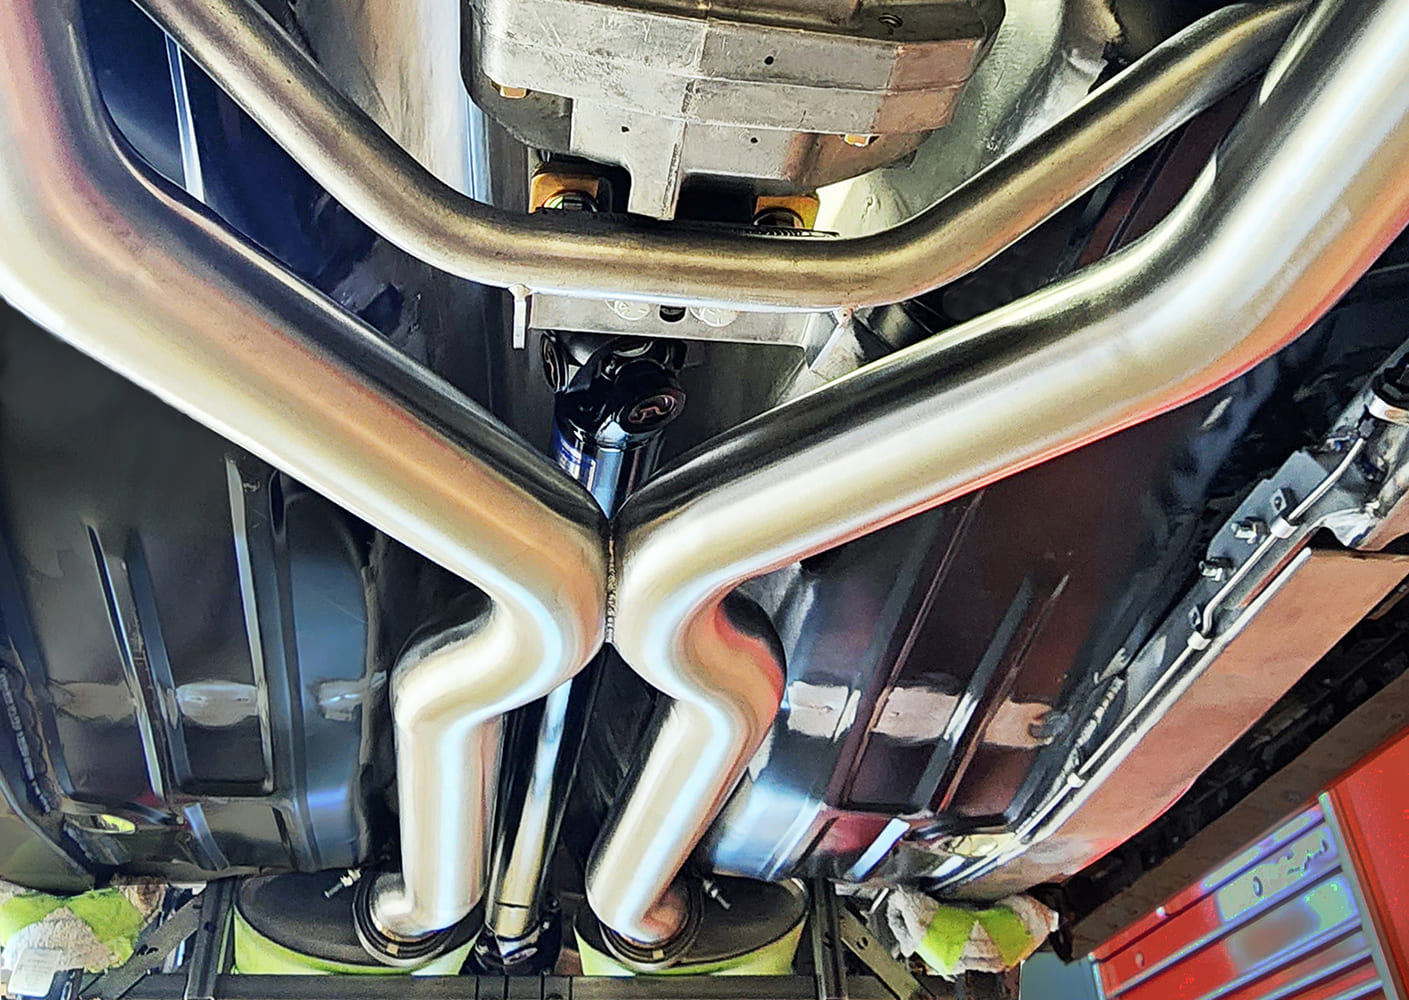
Stainless exhaust systems are assembled in a similar manner, using sections of straight tubing connected to mandrel-bent 45-, 90-, and 180-degree bends. Finding enough space to run an exhaust system under a car is usually challenging. It looks unappealing if the tubing and/or mufflers are visible from the side of the vehicle, and there are many obstacles the exhaust must clear, such as chassis crossmembers, the fuel tank, the driveshaft, the rear axle assembly, and other components. The larger the tubing, the harder the routing becomes. A high-quality job is characterized by an exhaust system that’s neatly tucked out of sight and has a smooth visual flow. The photos showcase an exemplary build of a complete stainless exhaust system, from the Detroit Speed headers to the custom-fabricated exhaust tips. MR
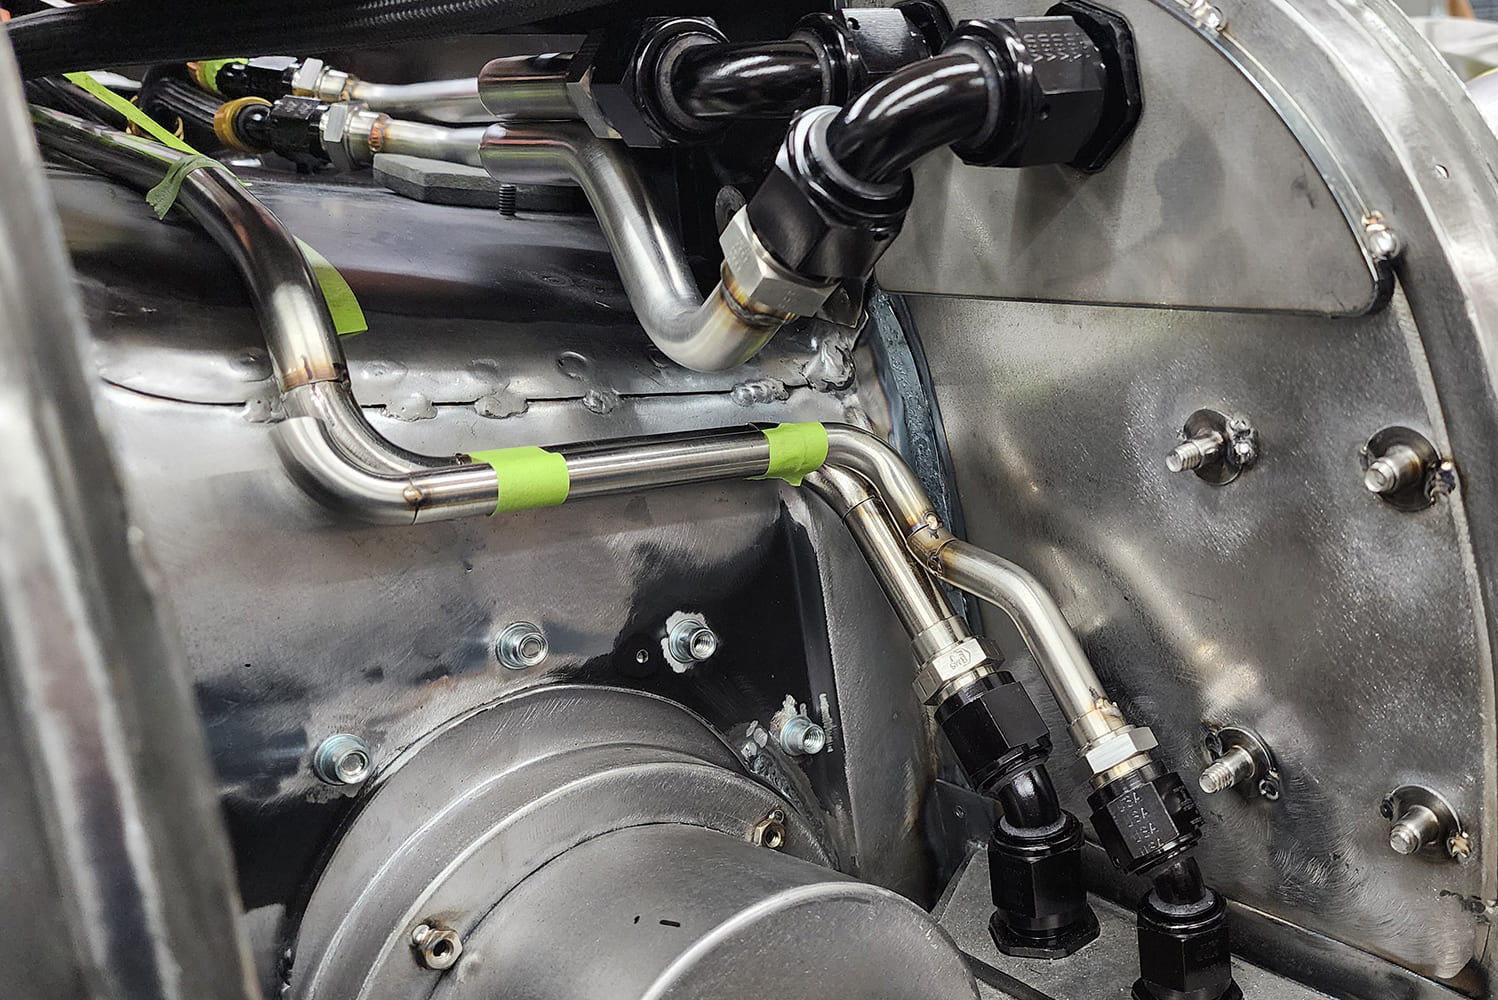
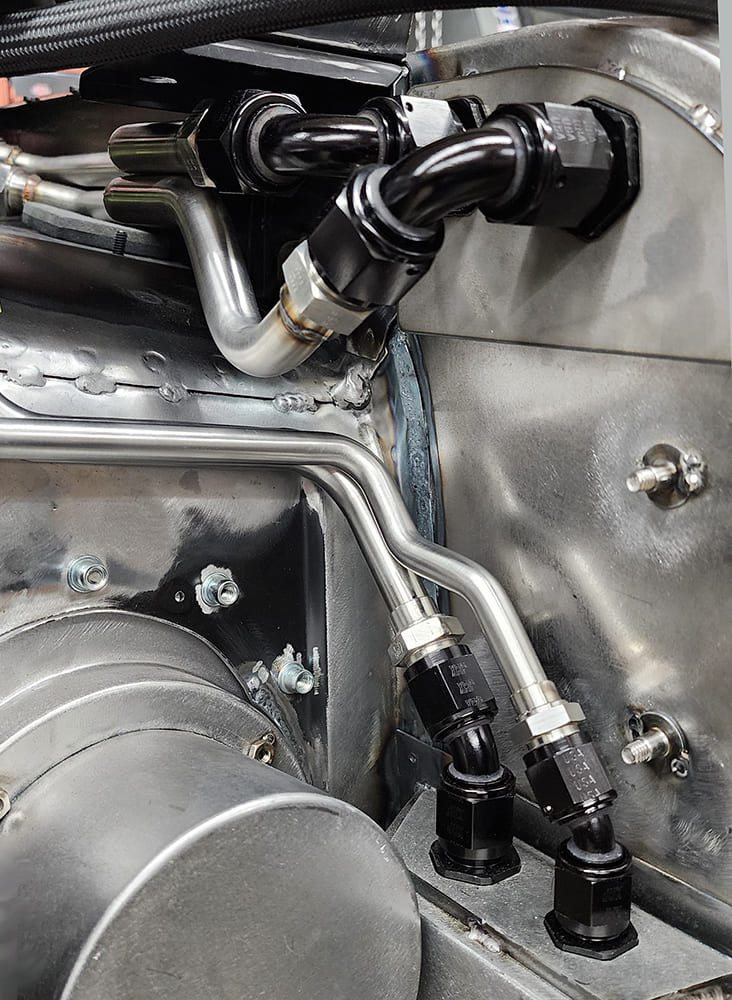
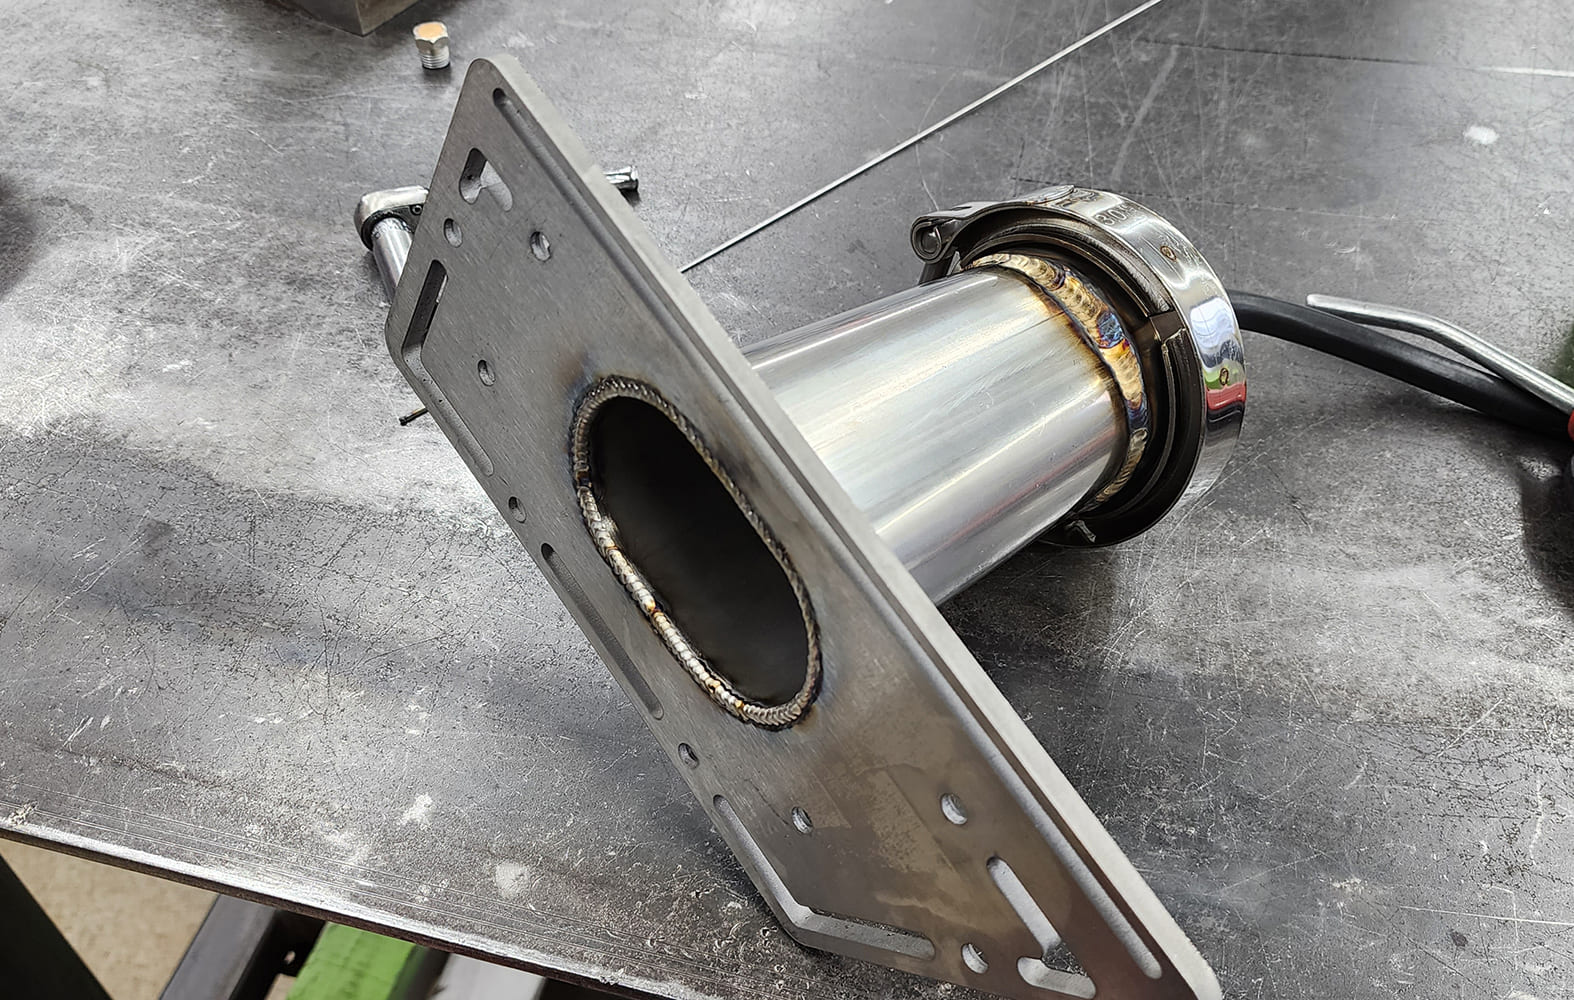
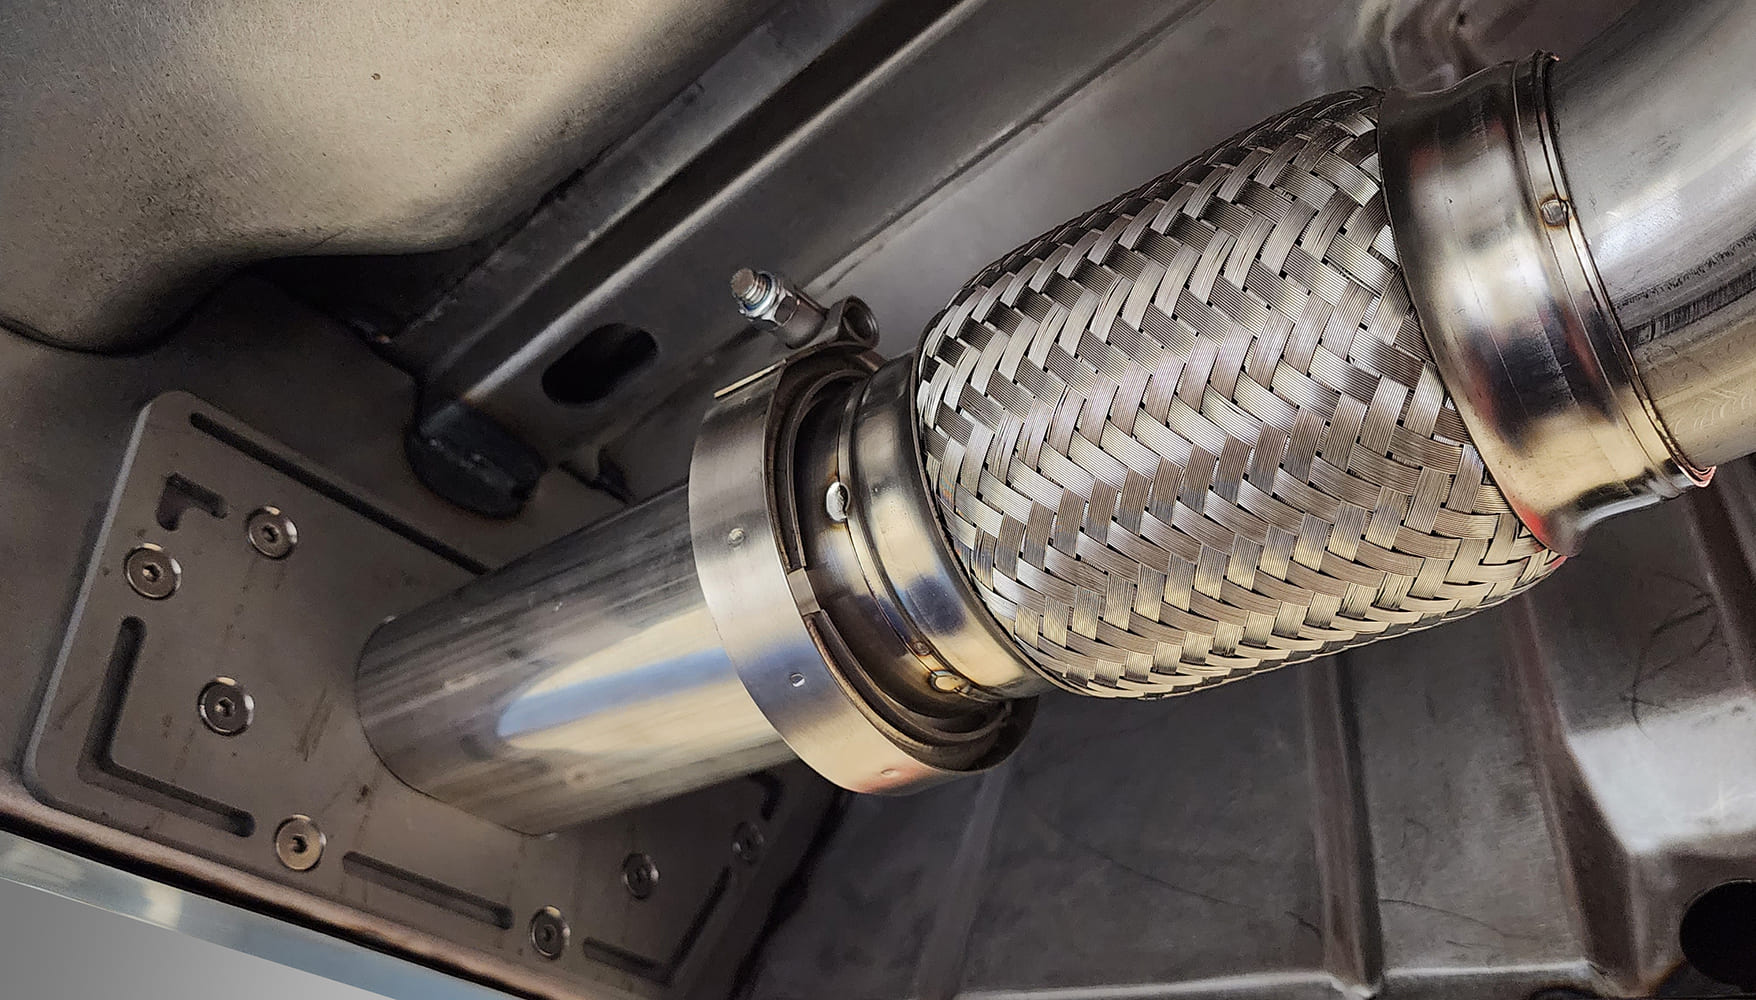
Plumbing requires high-quality welds; it’s essential to get full penetration.The top tube is fully welded, and the bottom tube has been dressed smooth. Done properly, the welds are virtually invisible.With the welds finished and smoothed, the installation looks extremely clean and professional. These black-anodized 45- and 90-degree AN fittings are made by XRP Fittings.Sometimes, large-radius bends can work well with the tight-radius mandrel bends.Longer runs of tubing require clamps to prevent movement and chafing. Single clamps are shown on the top, and two single clamps have been joined to make the double-tube version shown below.Straps may be required to connect a tubing clamp to a nearby mounting surface.Stainless steel exhaust systems are typically constructed from straight lengths of tubing and mandrel bends. This is a 3-inch Stainless Works Rod Builder Kit and an X-pipe.To get started, the headers are installed on the engine, and a temporary framework is set up to hold the mufflers in their designated location securely. Then the exhaust tubing can be fitted between them.As with the small-diameter tubing, straight sections are joined to sections cut from the mandrel bends. CX Racing V-band fittings are used at the ends of each section to facilitate disassembly.Stainless exhaust tubing should be purged with argon while welding, and if done correctly the inside of the weld flows together cleanly. Note the perfect penetration on this joint.These are the tubes that run from the headers toward the mufflers. It’s good practice to add a “crossover” in an exhaust system with two banks of cylinders. This helps balance the exhaust pulses on both sides, thereby reducing backpressure and enhancing combustion efficiency. Temporary pieces of rectangular tubing are used to hold the pipes in alignment as the assembly is fitted into place.While U-bends come in various radii, sometimes the best solution for a very tight bend is to make it yourself using small pie-wedge pieces. Note the purge tube entering from the left and the endcap fitted on the right.Here, the tight-radius sections have been joined to straight pieces of tubing and sections cut from U-bends. The welds on the rear tube have been ground smooth.With a uniform-grained finish applied to the tubing, the exhaust system looks fantastic.These are the tubes that arch over the rear axle.This car has a unique feature; the exhaust goes through the rear body inner panel. This has a couple of benefits: it keeps the exhaust tucked up high and provides support for the exhaust system so fewer hanger-style supports are needed.Here, the large flange on the tubing is bolted into place on the inner panel. There is a similar mount for the tailpipe on the back side of the panel. Note the flexible connection, which accommodates the change in length as the stainless tubing heats to working temperature.Behind the rear axle, the exhaust tubing increases in diameter and transitions from a round to a rectangular shape. Note that another expansion joint has been fitted into place.Look at how well this exhaust system tucks in close to the floorpan, without interfering with the driveshaft or other chassis components. It requires a great deal of careful planning to achieve results like this.
Sources
Auto Body Specialists
(603) 647-4000 autobspec.com
CX Racing (V-Band Clamps)
(626) 575-3288 cxracing.com
We use cookies to ensure that we give you the best experience on our website. If you continue to use this site we will assume that you are happy with it.