PERFECTION … IMPROVED

A Beautiful C10 Dash Gets a Face-Lift With Classic Instruments

By Todd Ryden – Photograpy By The Author

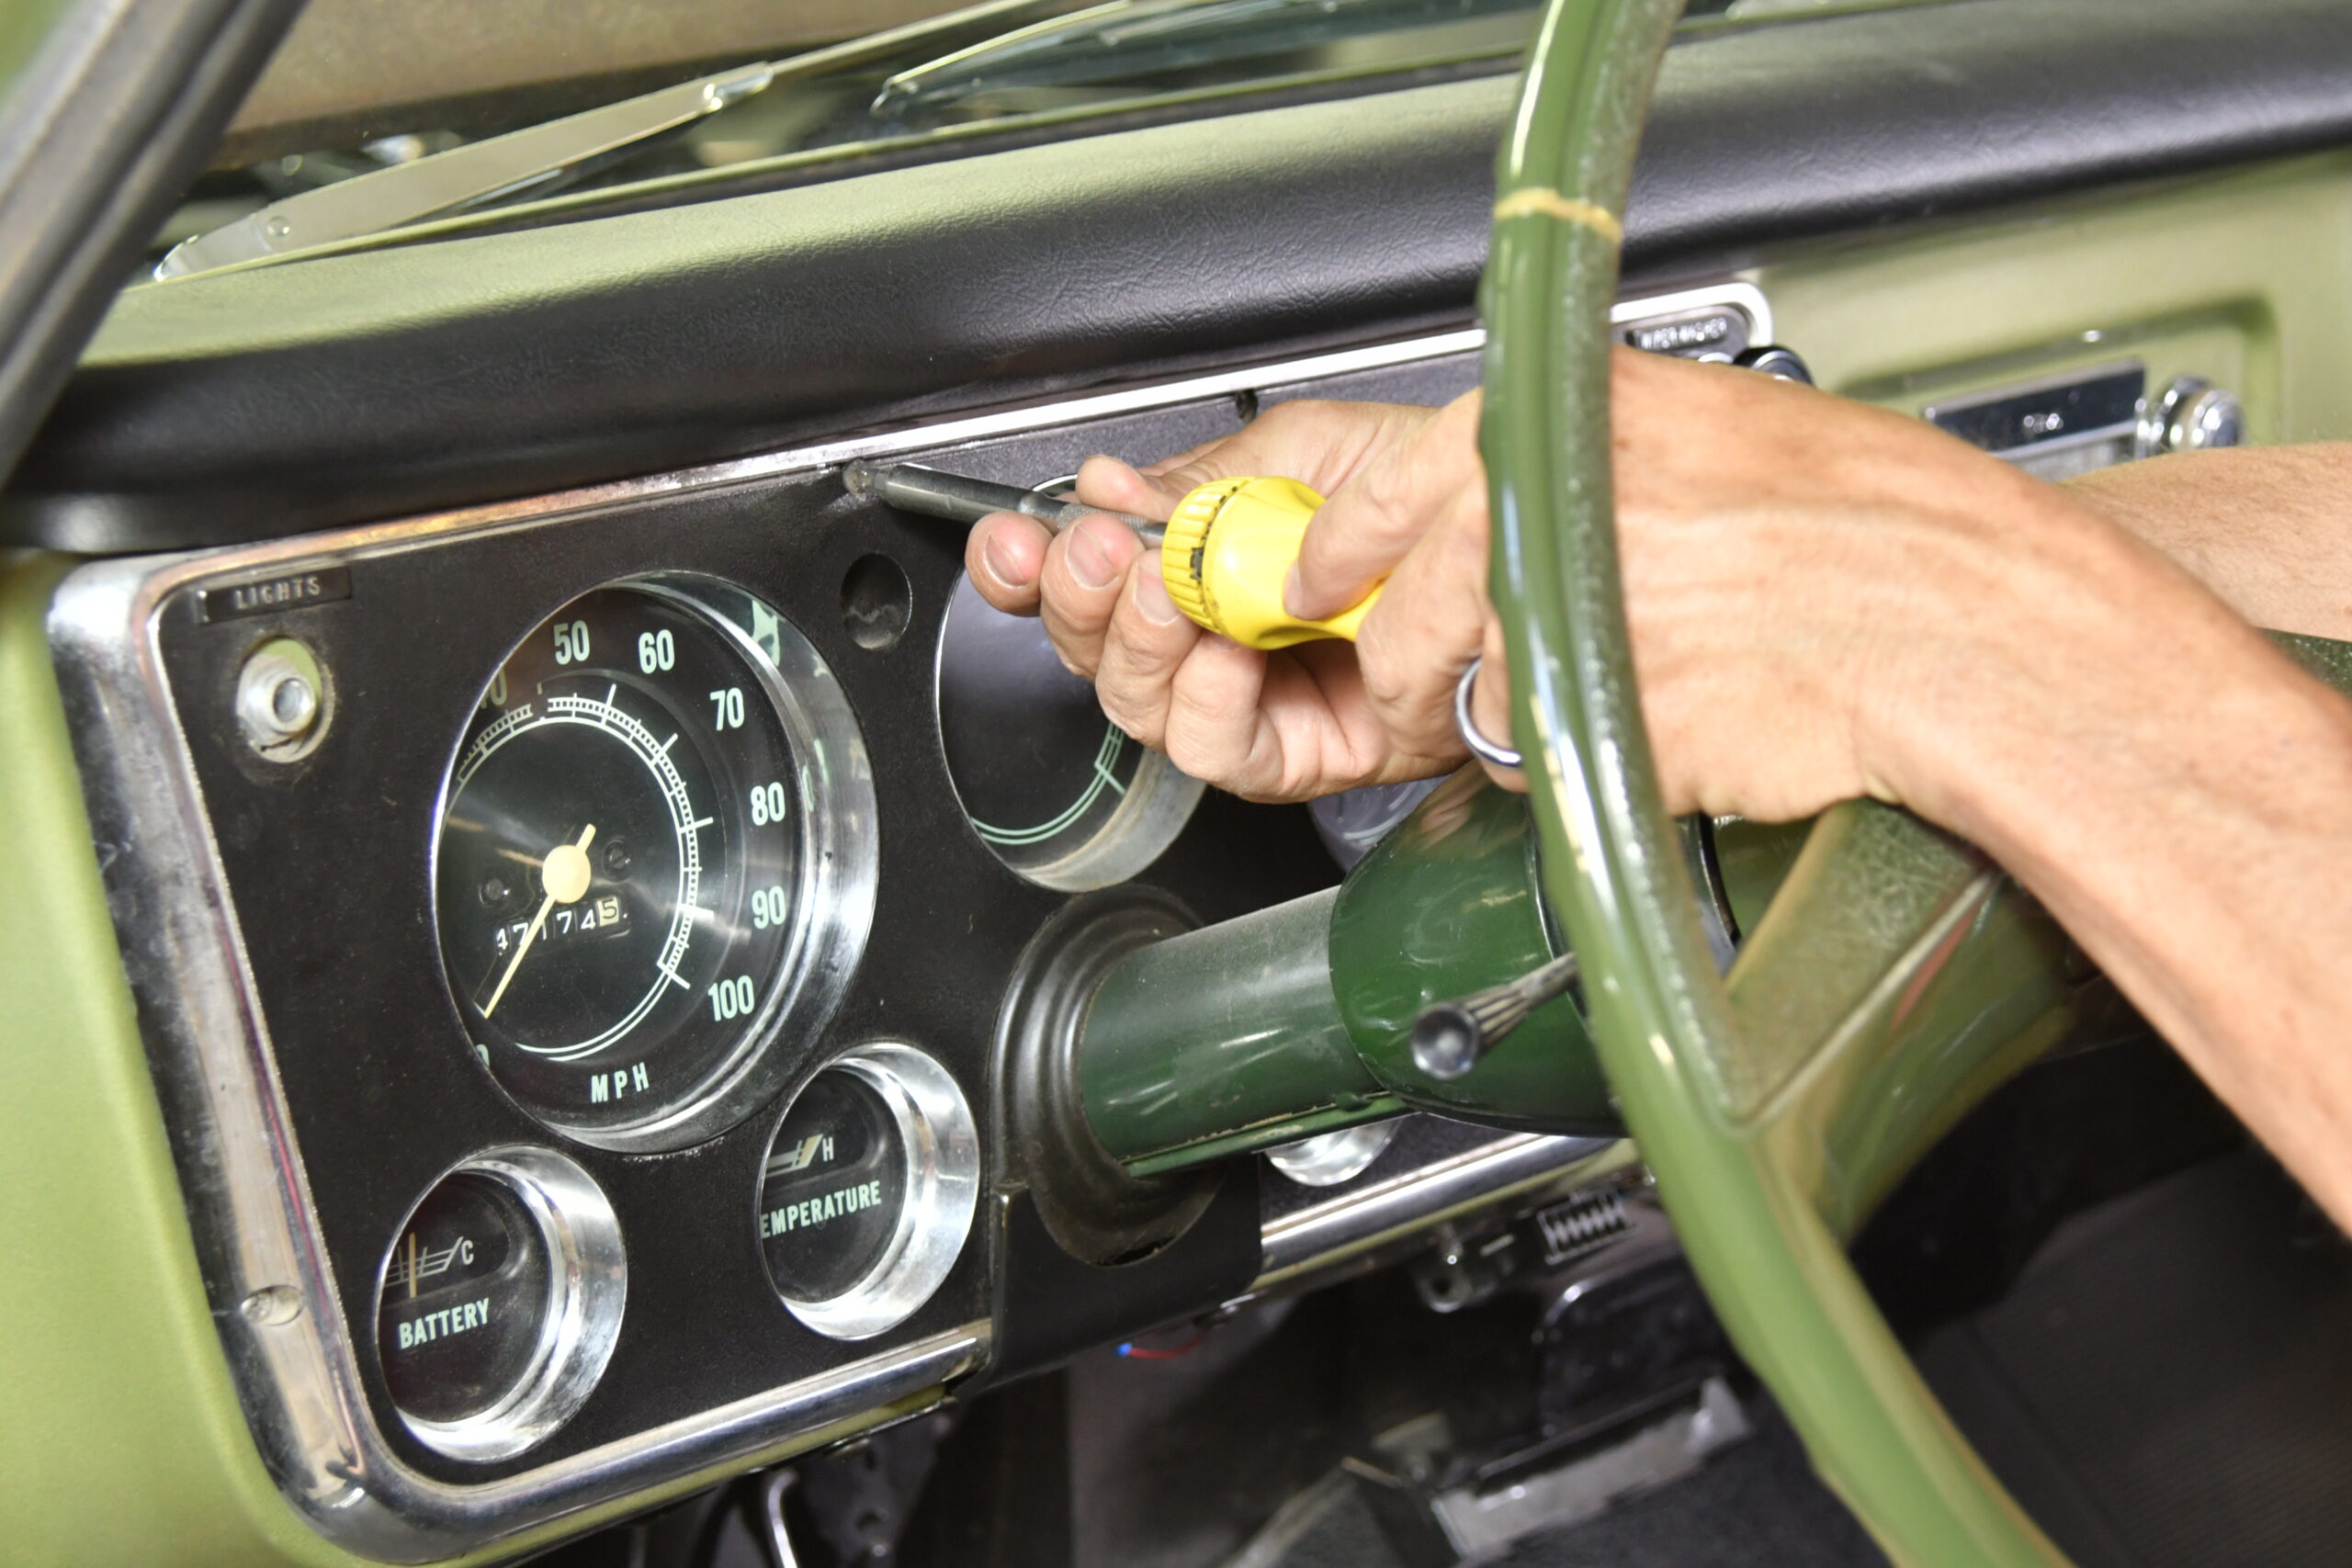
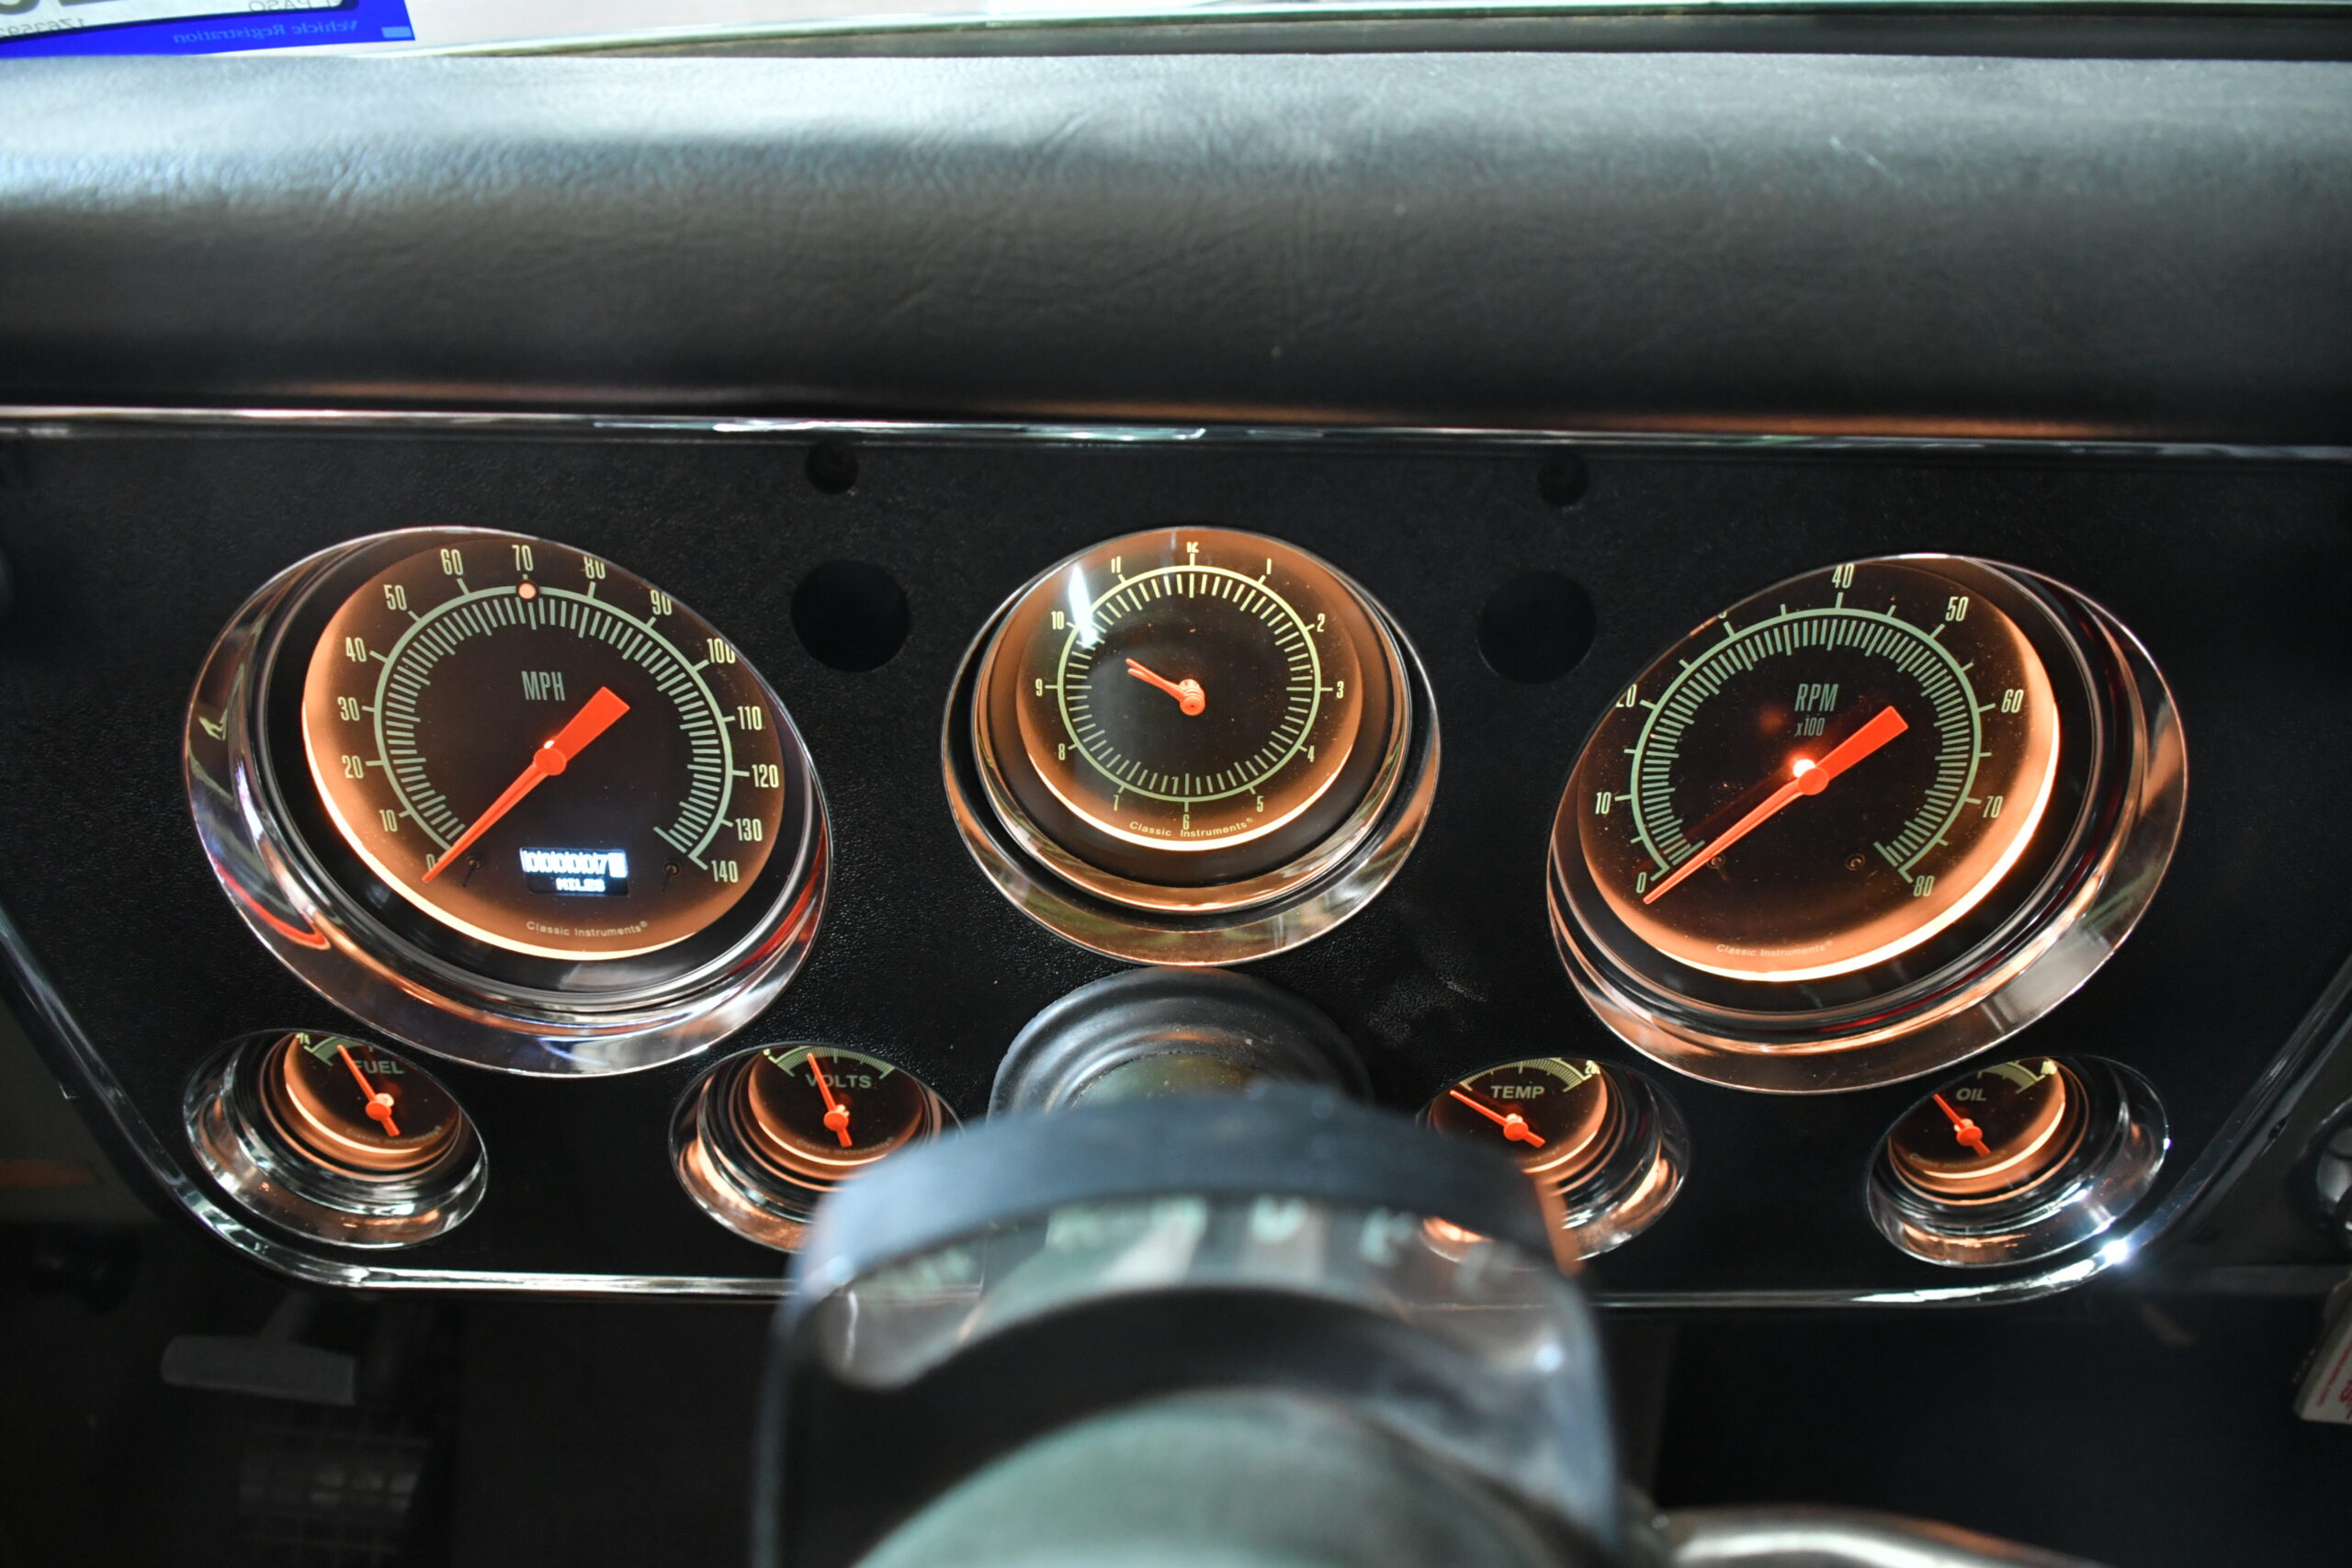
Some may say that the instrument cluster of the 1967-1972 GM C10 pickup was nearly perfect in terms of ergonomics and function. A large, easy-to-view speedometer and fuel gauge across a flat plane along with supporting gauges across the bottom (when included). The rare tach option right in the middle of the dash is icing on the cake and was great placement for tow rigs and work trucks.

- Advertisement -
ctp-oct-2020-classic-instruments-c10-gauges-002
The nice thing about removing the dash on a 1967-1972 model is all it takes is six screws, the speedo cable, and the oil pressure line (if equipped). Still be prepared for a light yoga body bend to get behind the dash.

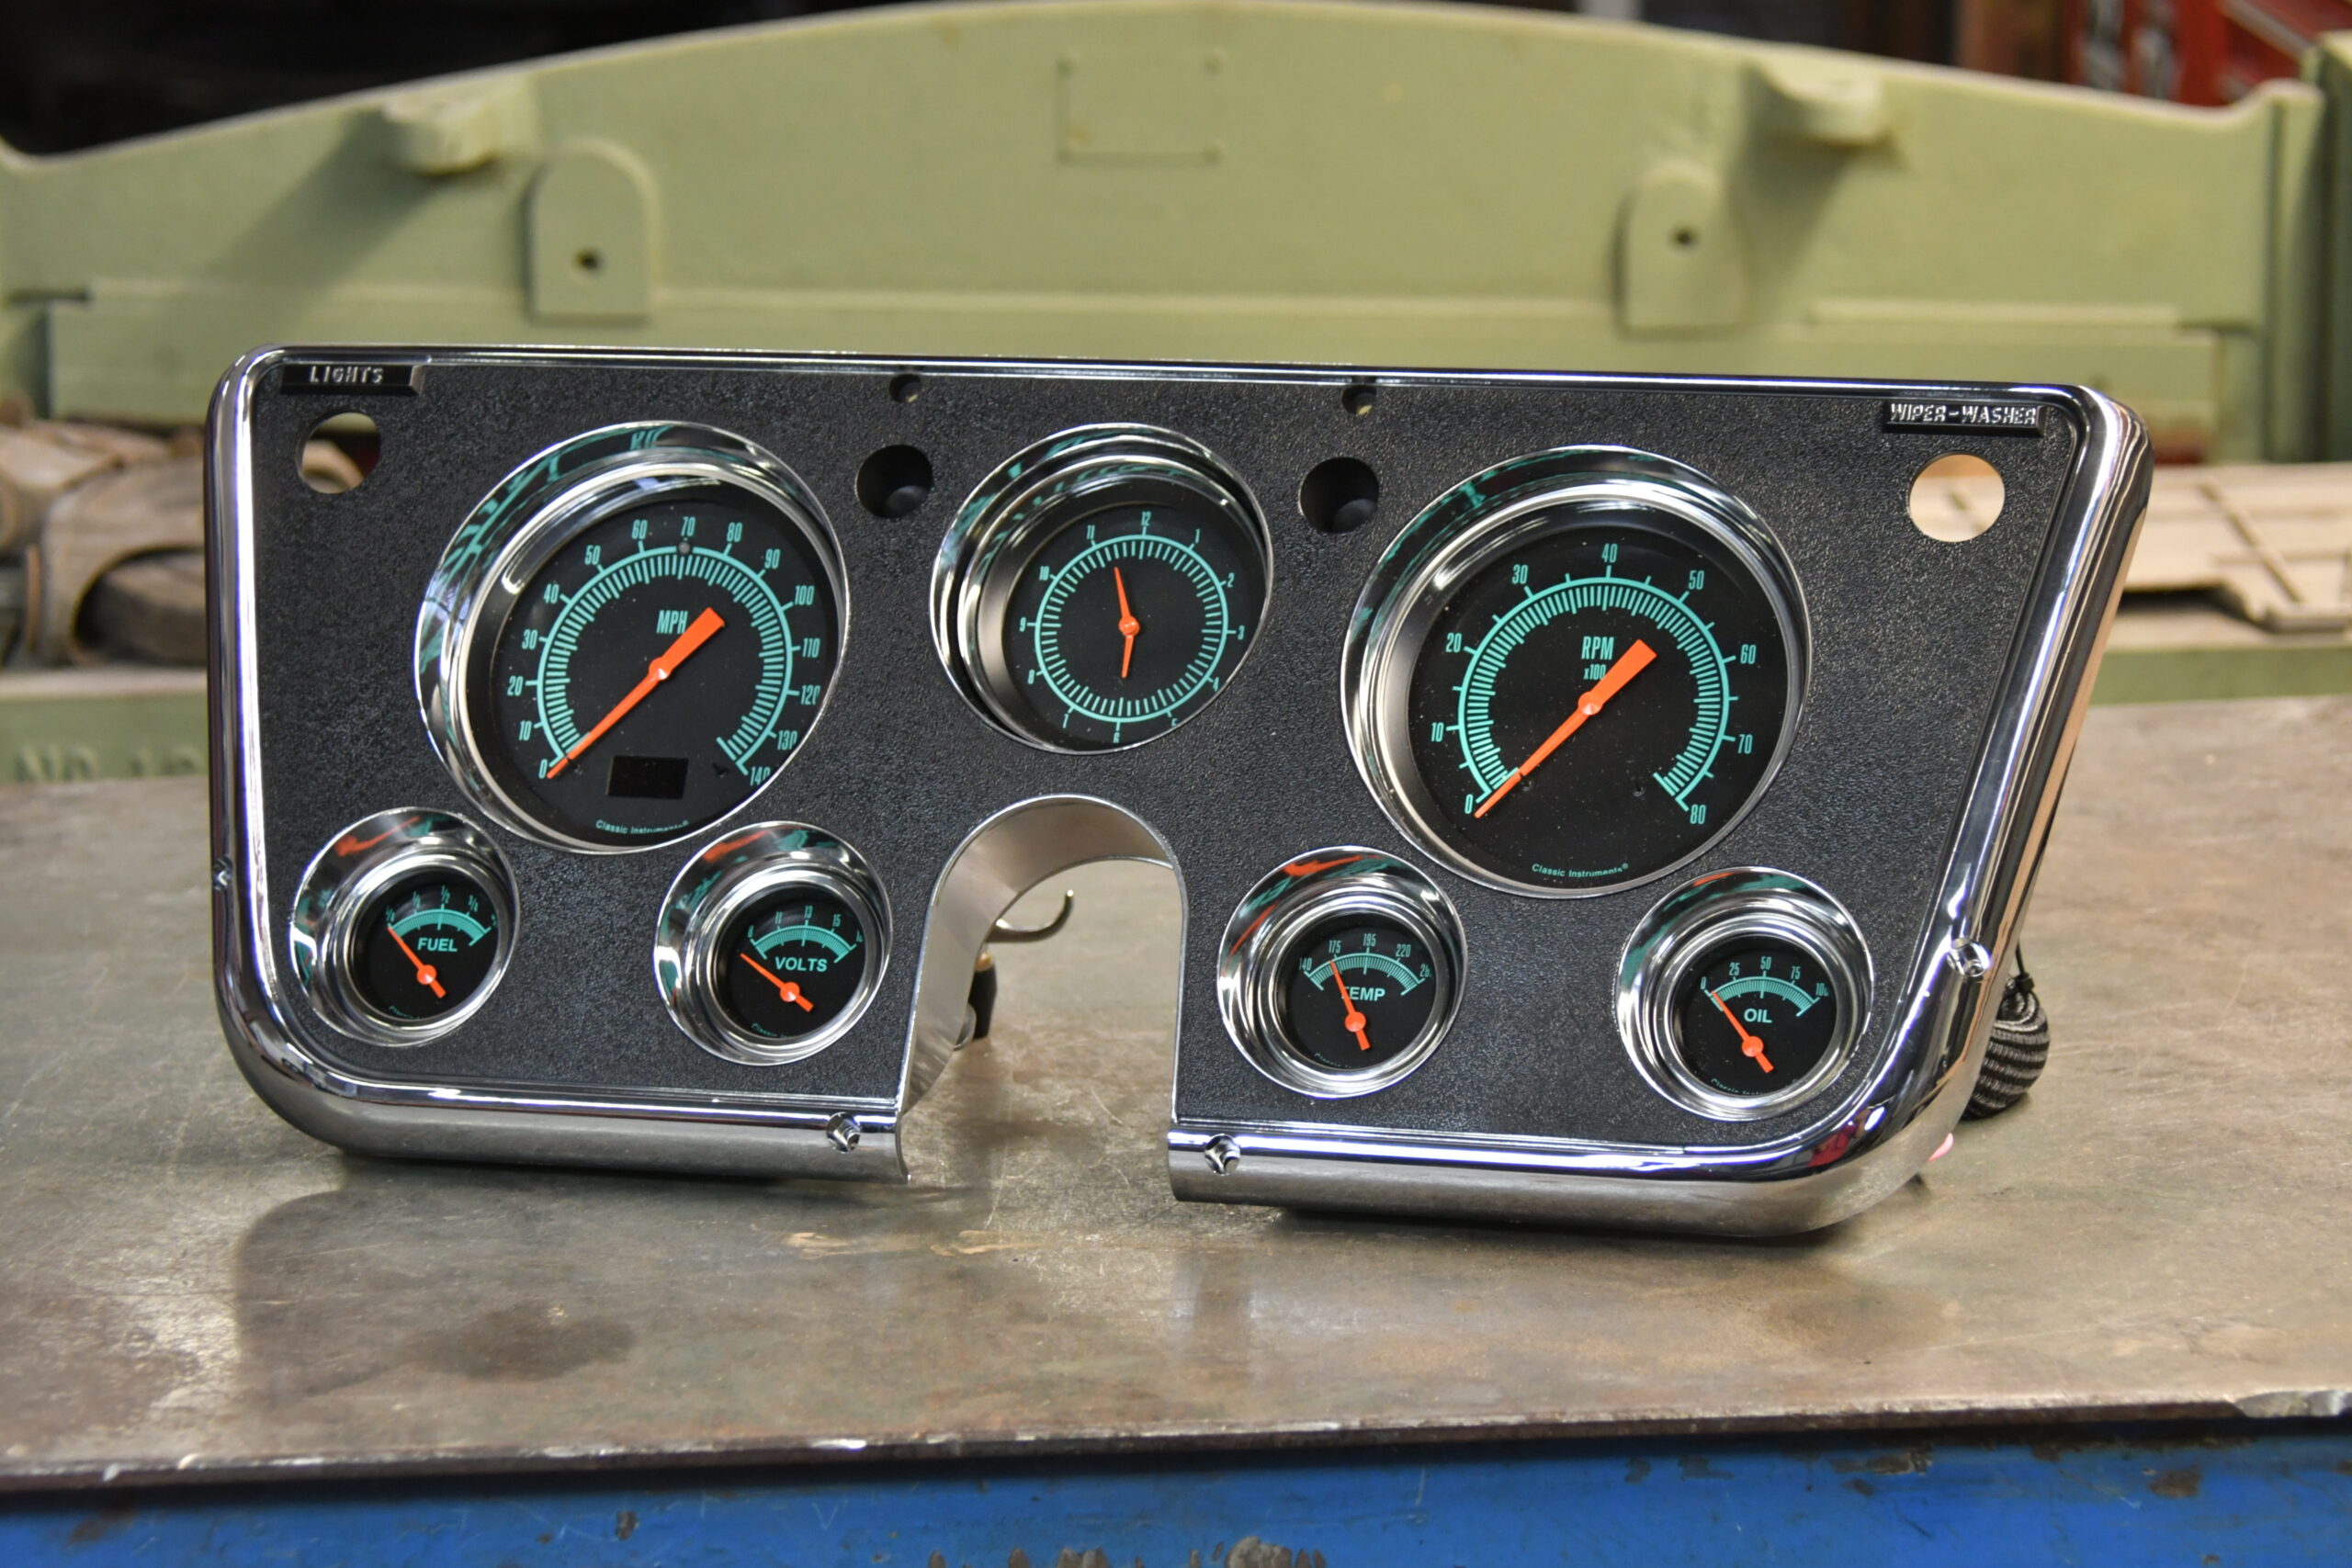
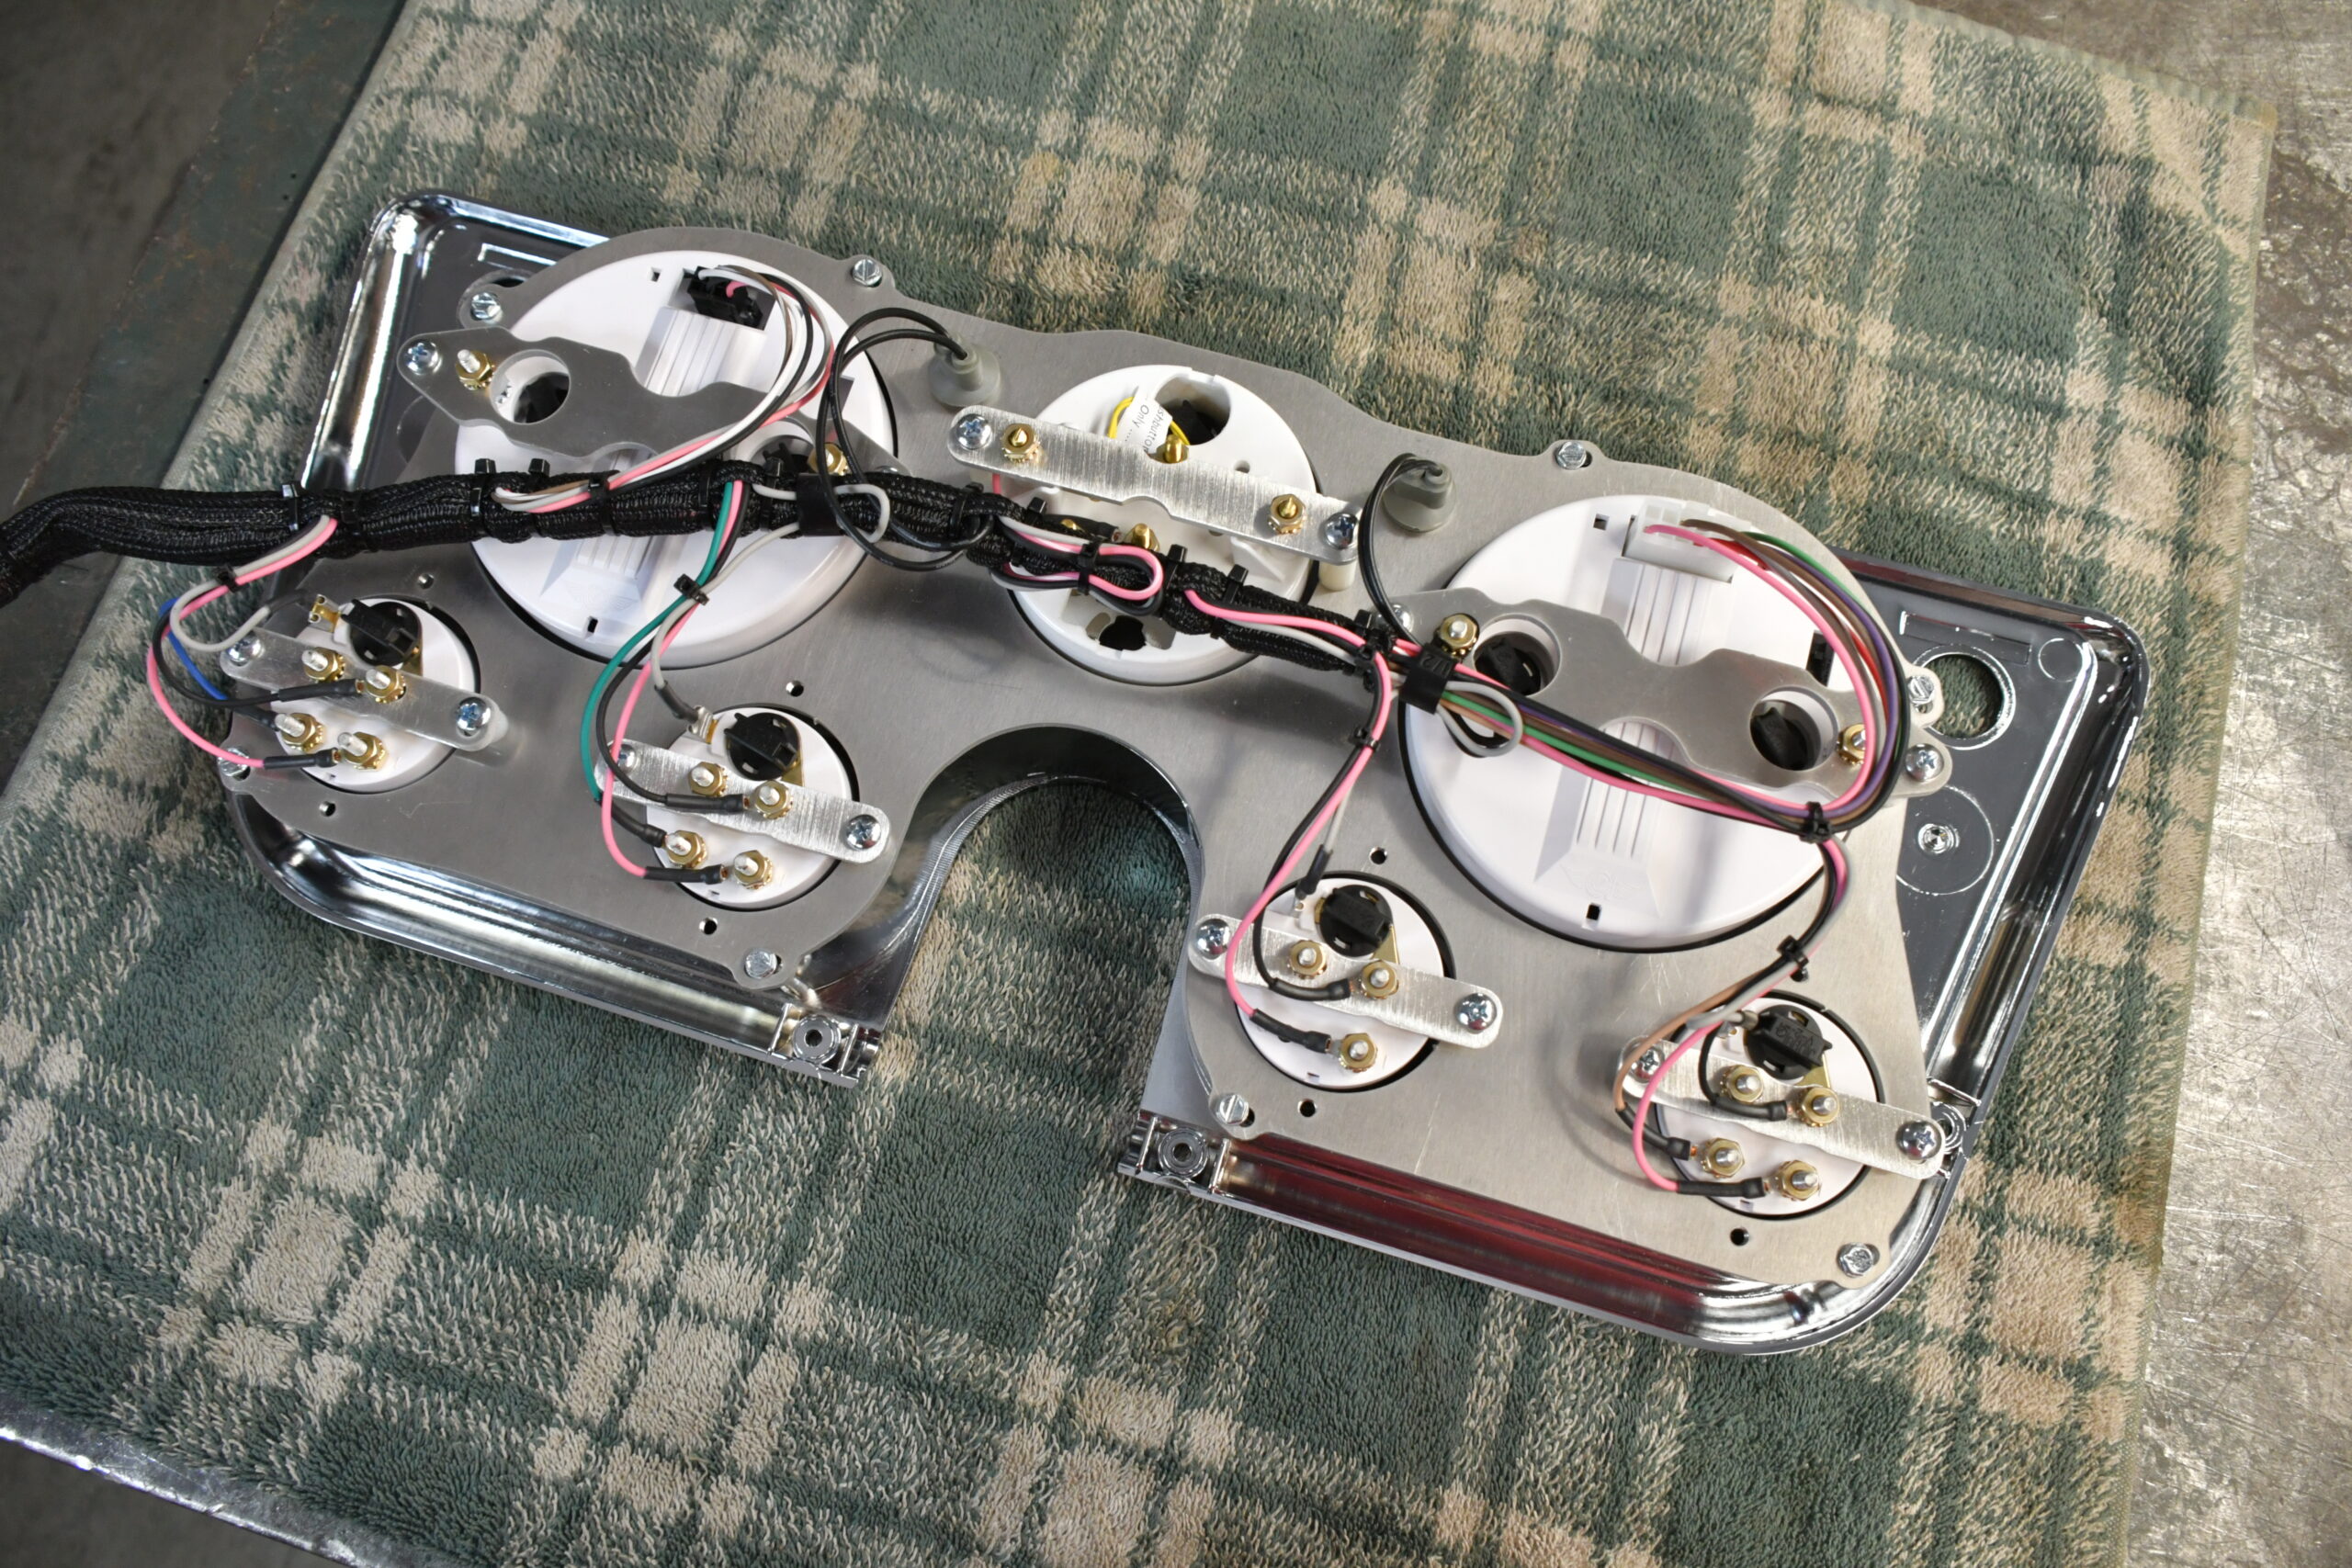
Classic Instruments (CI) thoughtfully reviewed the Gen 2 C10 dash design and didn’t set out to reinvent the overall concept and feel of the original dash. Rather, they embraced the layout to simply refine the placement of the gauges, the accuracy, and overall appearance. Their solution is a completely wired set of modern electronic gauges featuring a 4-5/8-inch speedometer and tach separated by a 3-3/8-inch clock that’s then complemented with a quartet of 2-1/8-inch fuel, oil pressure, coolant temp, and voltage gauges. Fresh turn signals and a bright light indicator are also in place.

ctp-oct-2020-classic-instruments-c10-gauges-003
We ended up dropping the column mount to be able to easily slide the dash out and access the main connector from the back. The connector will be cut off and most of the wires will receive new terminals and be installed in mating the Classic Instruments (CI) connector.

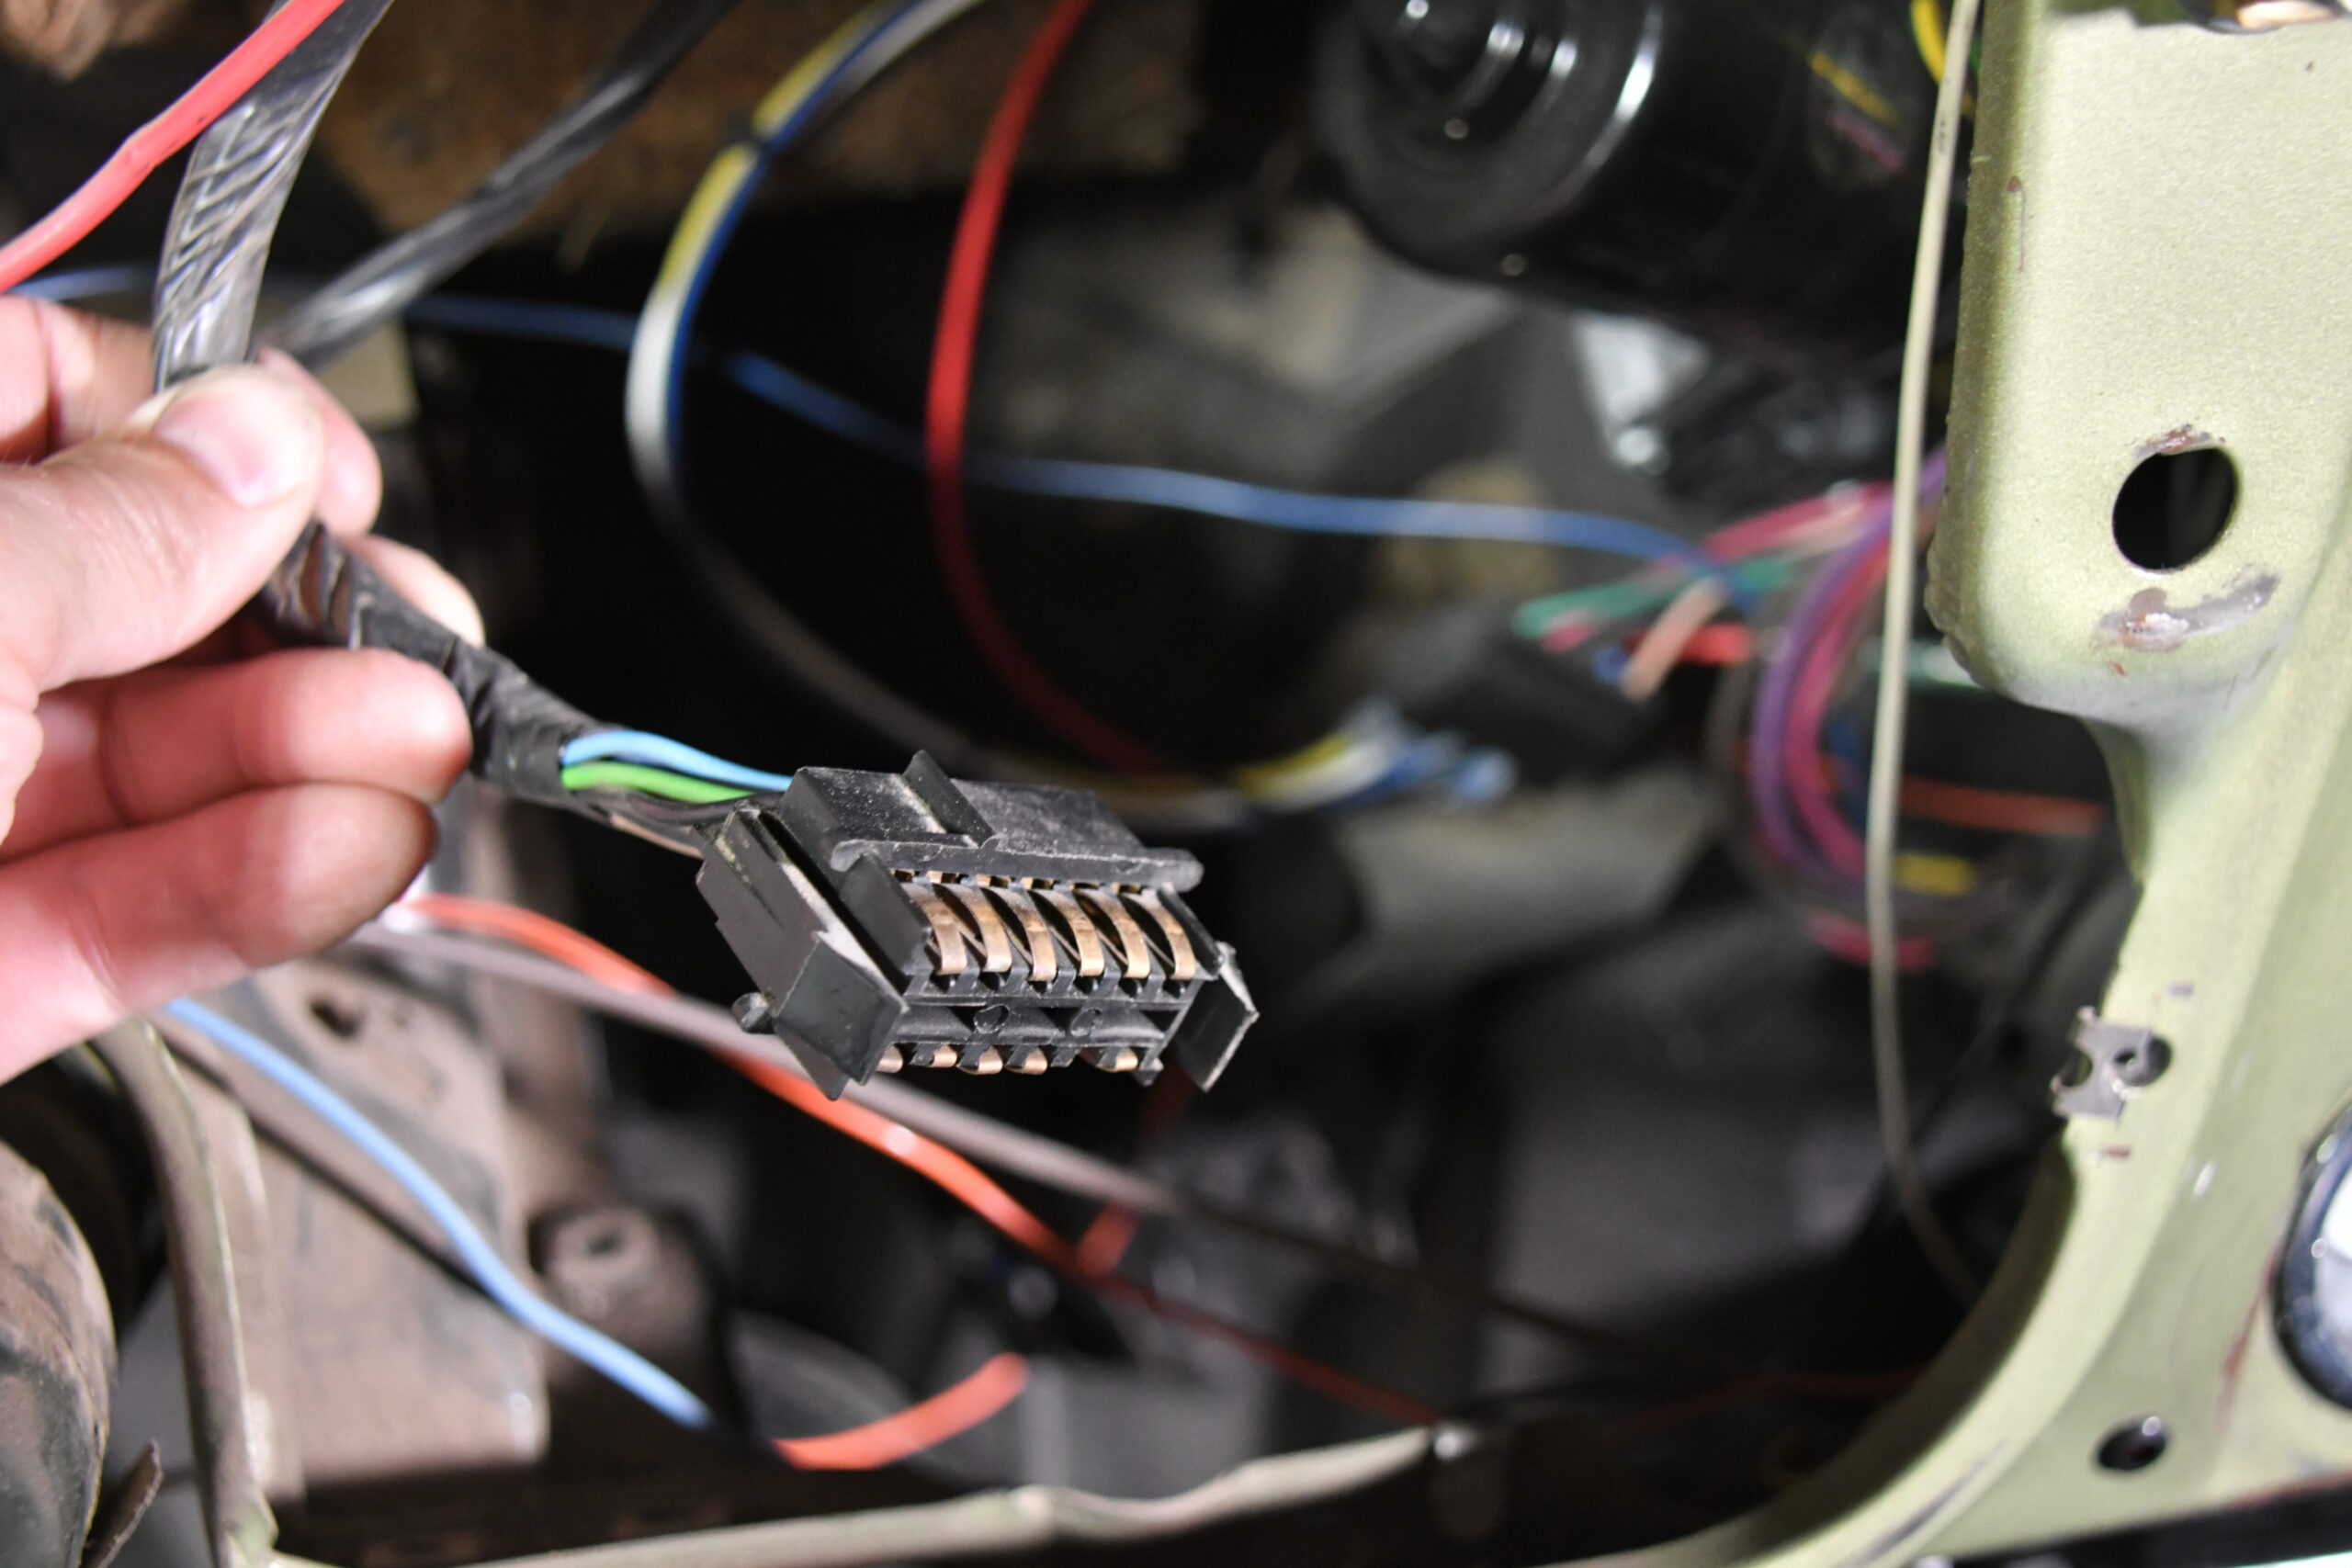
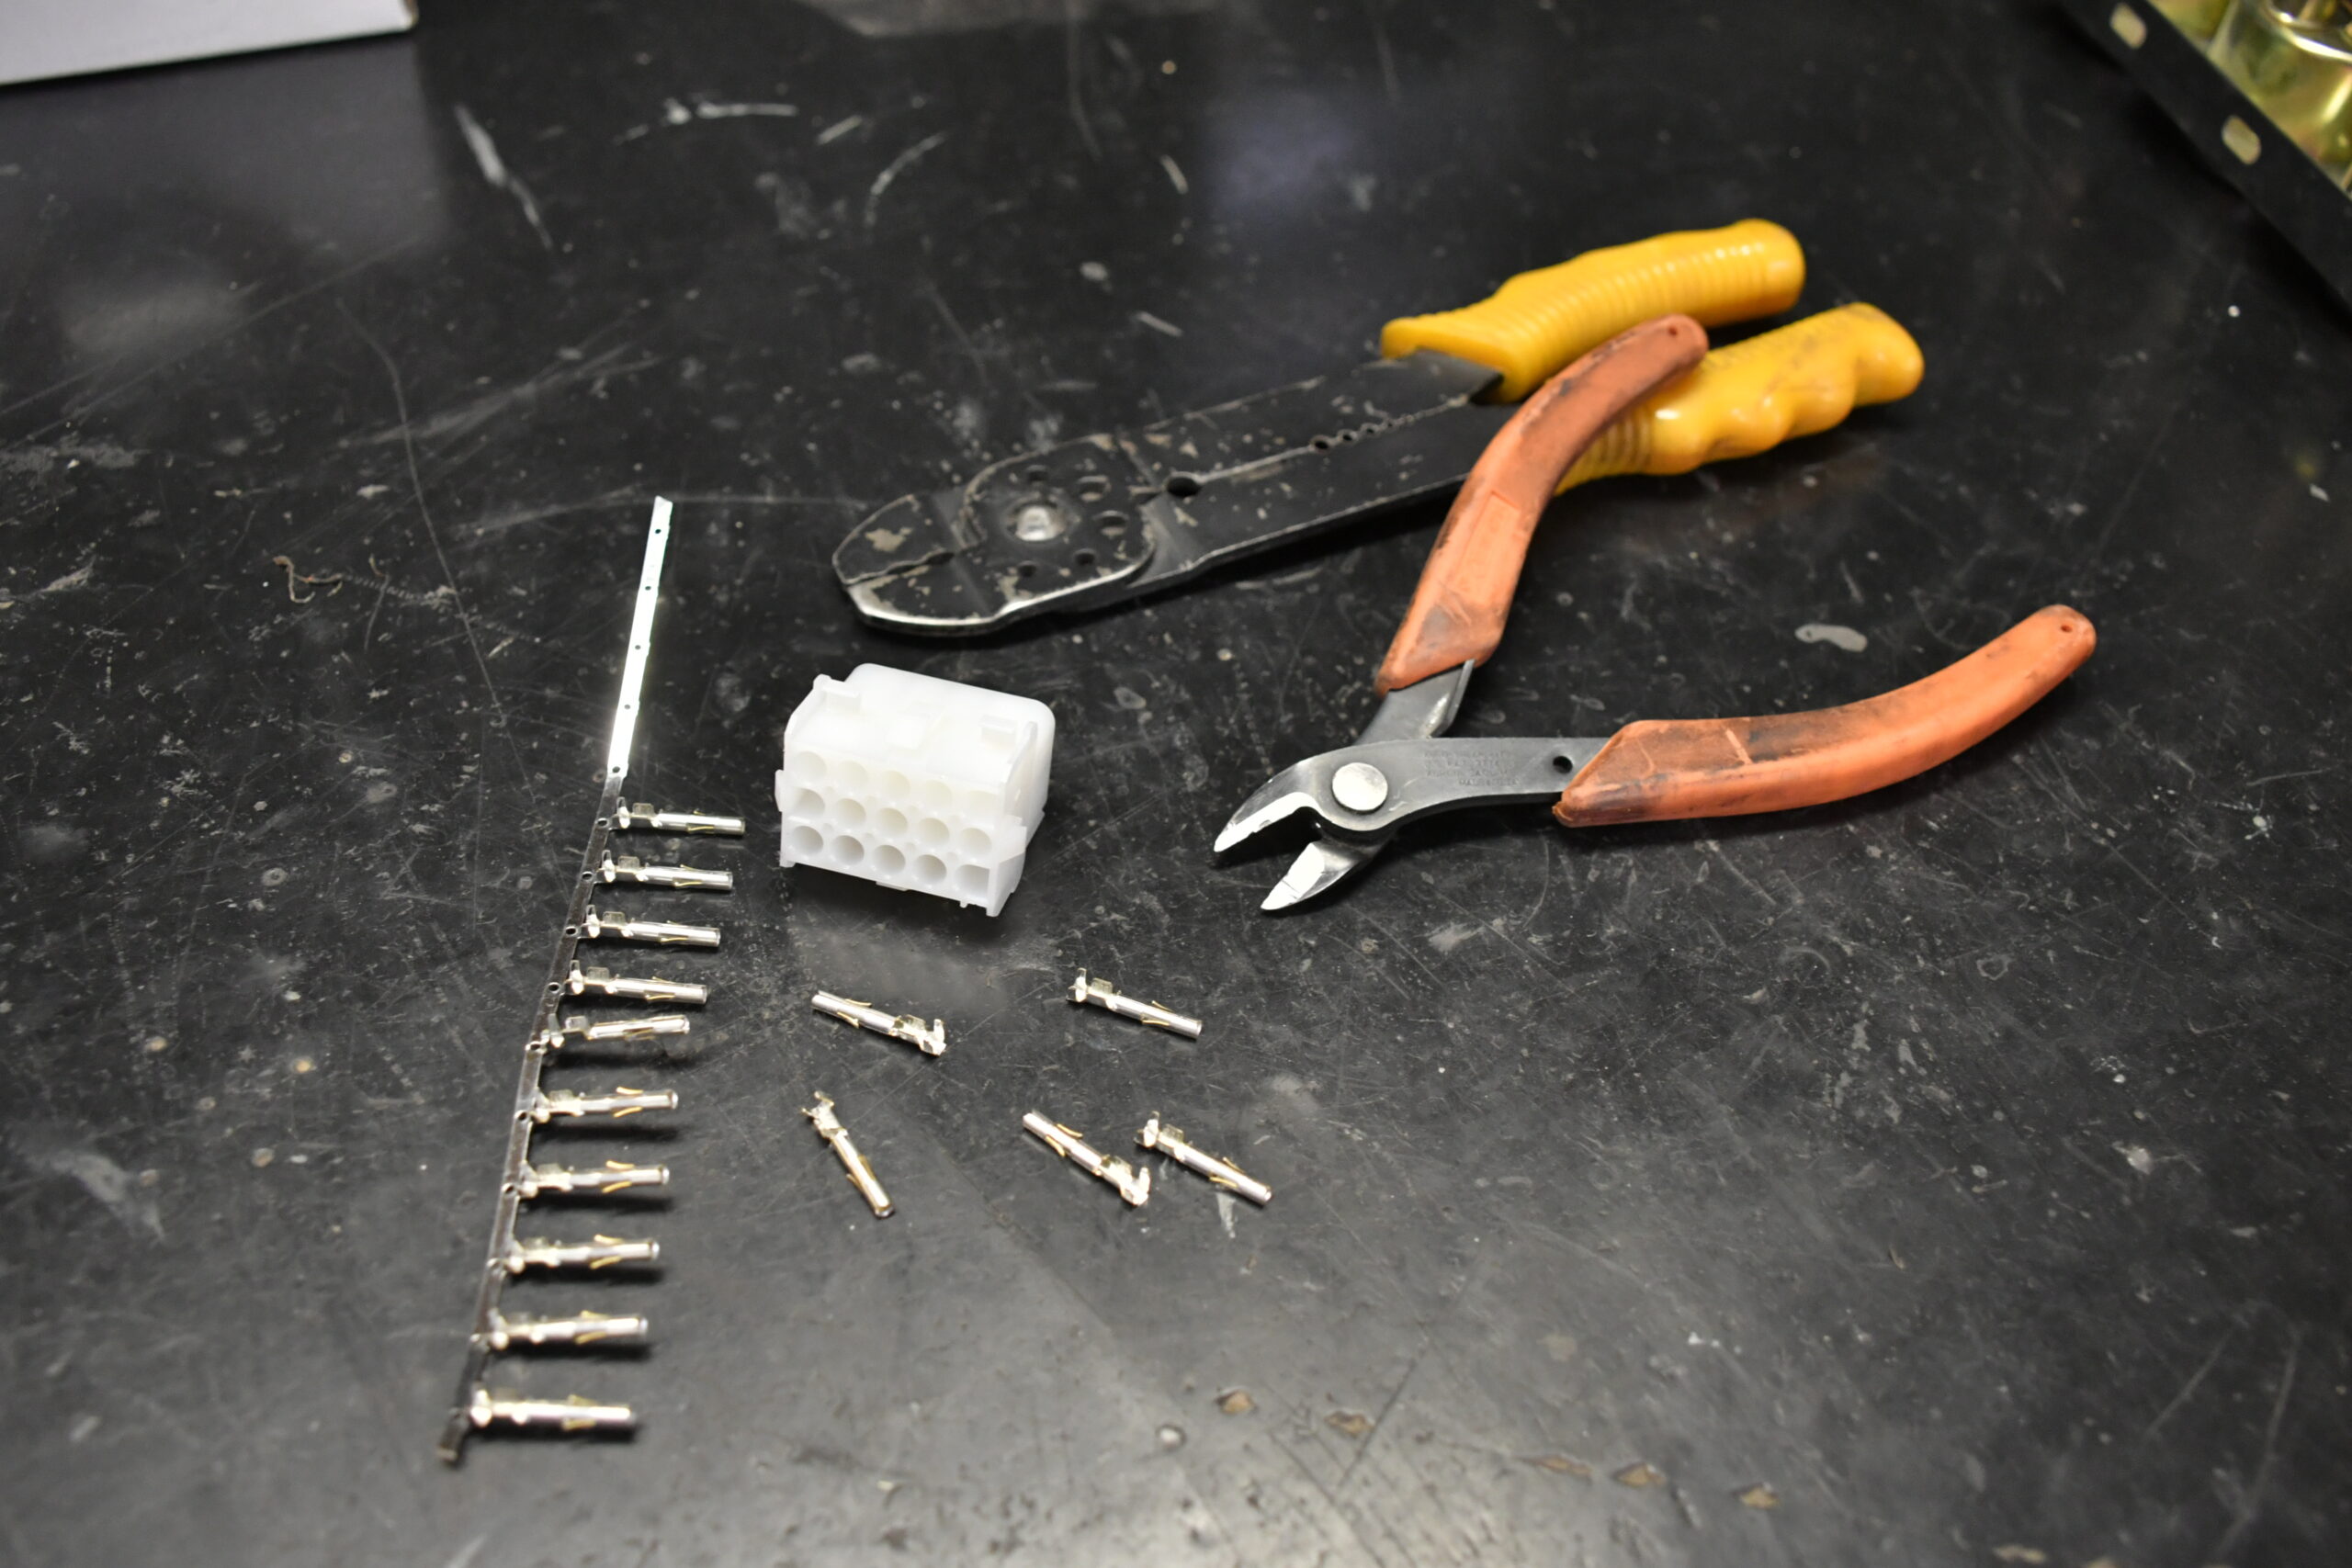
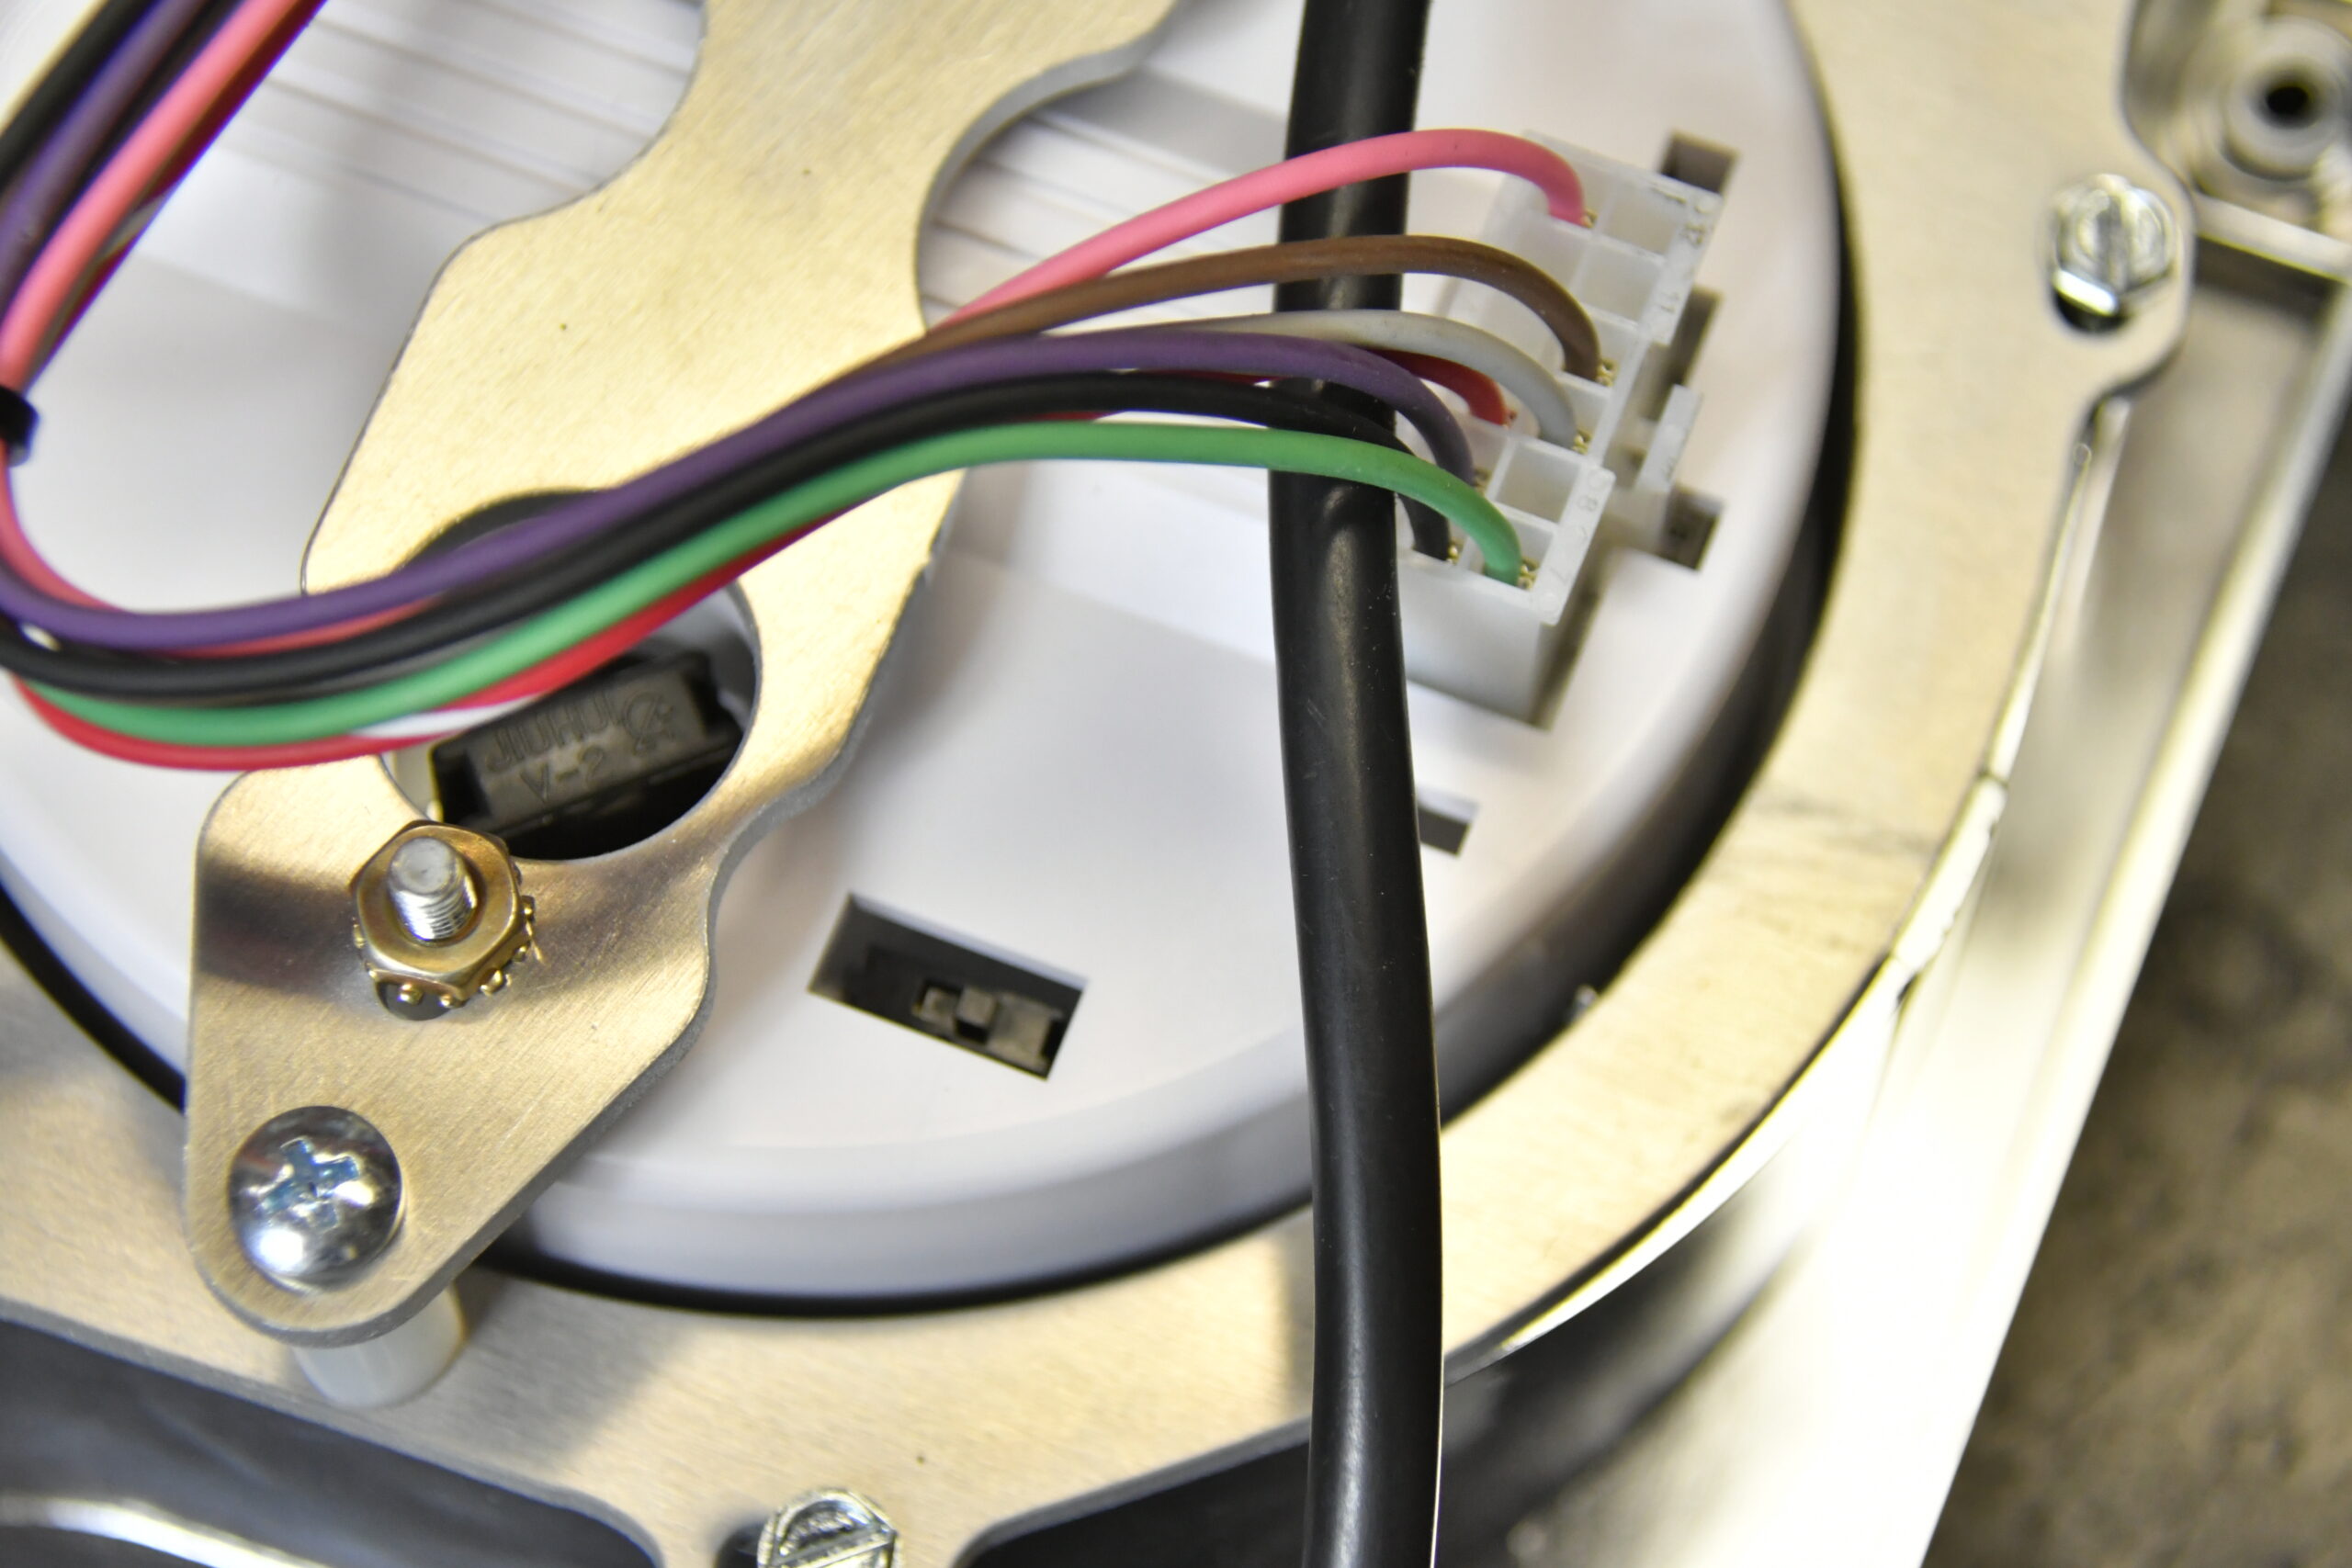
To make installation simple, the gauges area is mounted securely into an all-new dash panel with the wiring all tied together into one 15-pin connector. This makes installation basically a direct bolt-in once you splice the OEM wiring into the supplied mating connector. In our installation, we used the factory turn signal wires, high beam indicator, temp sensor, dash lights, fuel level, and power wires. That left only routing new wires for the tach, clock, oil pressure, ground, and the speedometer wiring.

ctp-oct-2020-classic-instruments-c10-gauges-004
We ended up dropping the column mount to be able to easily slide the dash out and access the main connector from the back. The connector will be cut off and most of the wires will receive new terminals and be installed in mating the Classic Instruments (CI) connector.

Speaking of the speedometer, CI has nearly any application covered, thanks to their built-in Zeus Speedometer Technology (ZST). This advanced system will connect to a pulse signal generator, Vehicle Speed Sensor signal, or an output from an ECU, which is used in many late-model drivetrain swaps. This makes for an easy installation with no external boxes or accessories to wire.

- Advertisement -
ctp-oct-2020-classic-instruments-c10-gauges-005
Our truck was upgraded to a 700-R4 trans a few years ago, which uses a mechanical speedometer cable. CI supplied a Pulse Signal Generator (SN16) that simply installs in place of the cable and generates a pulse to the speedometer. The speedo also accepts a Vehicle Speed Sensor (VSS) signal or a signal from a vehicle ECU. If you prefer GPS, CI offers their Skydrive GPS Module as another option.

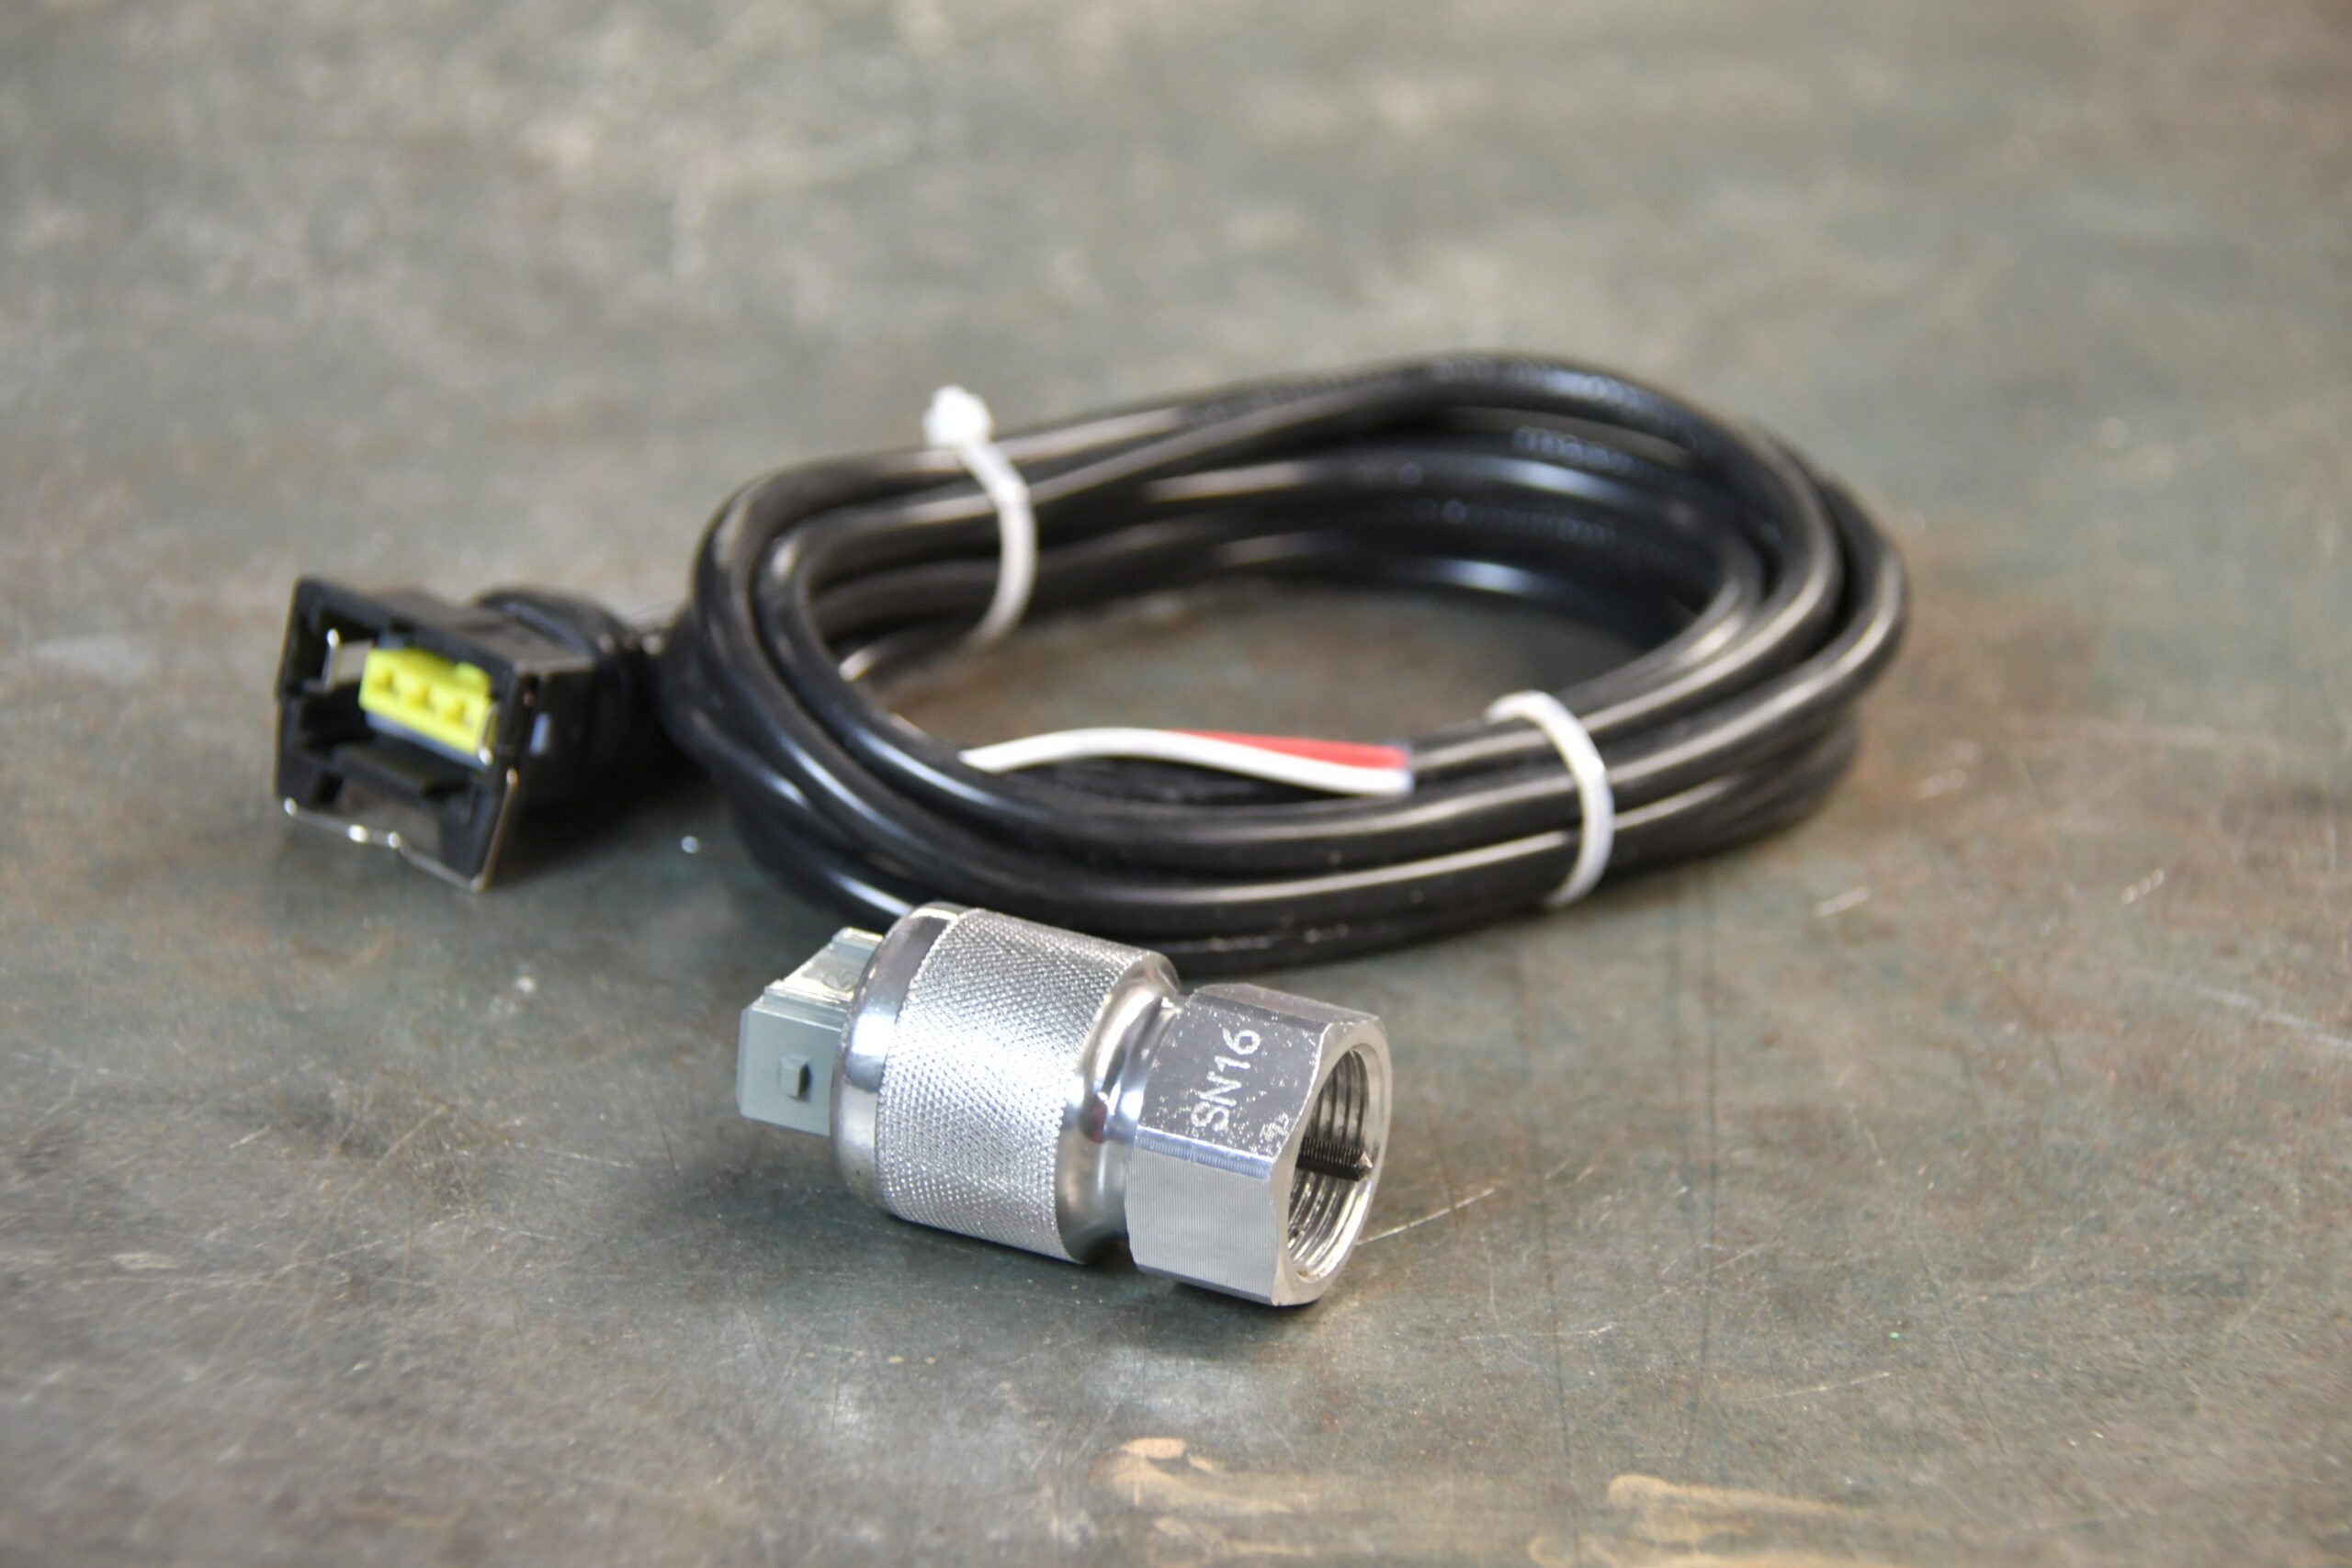
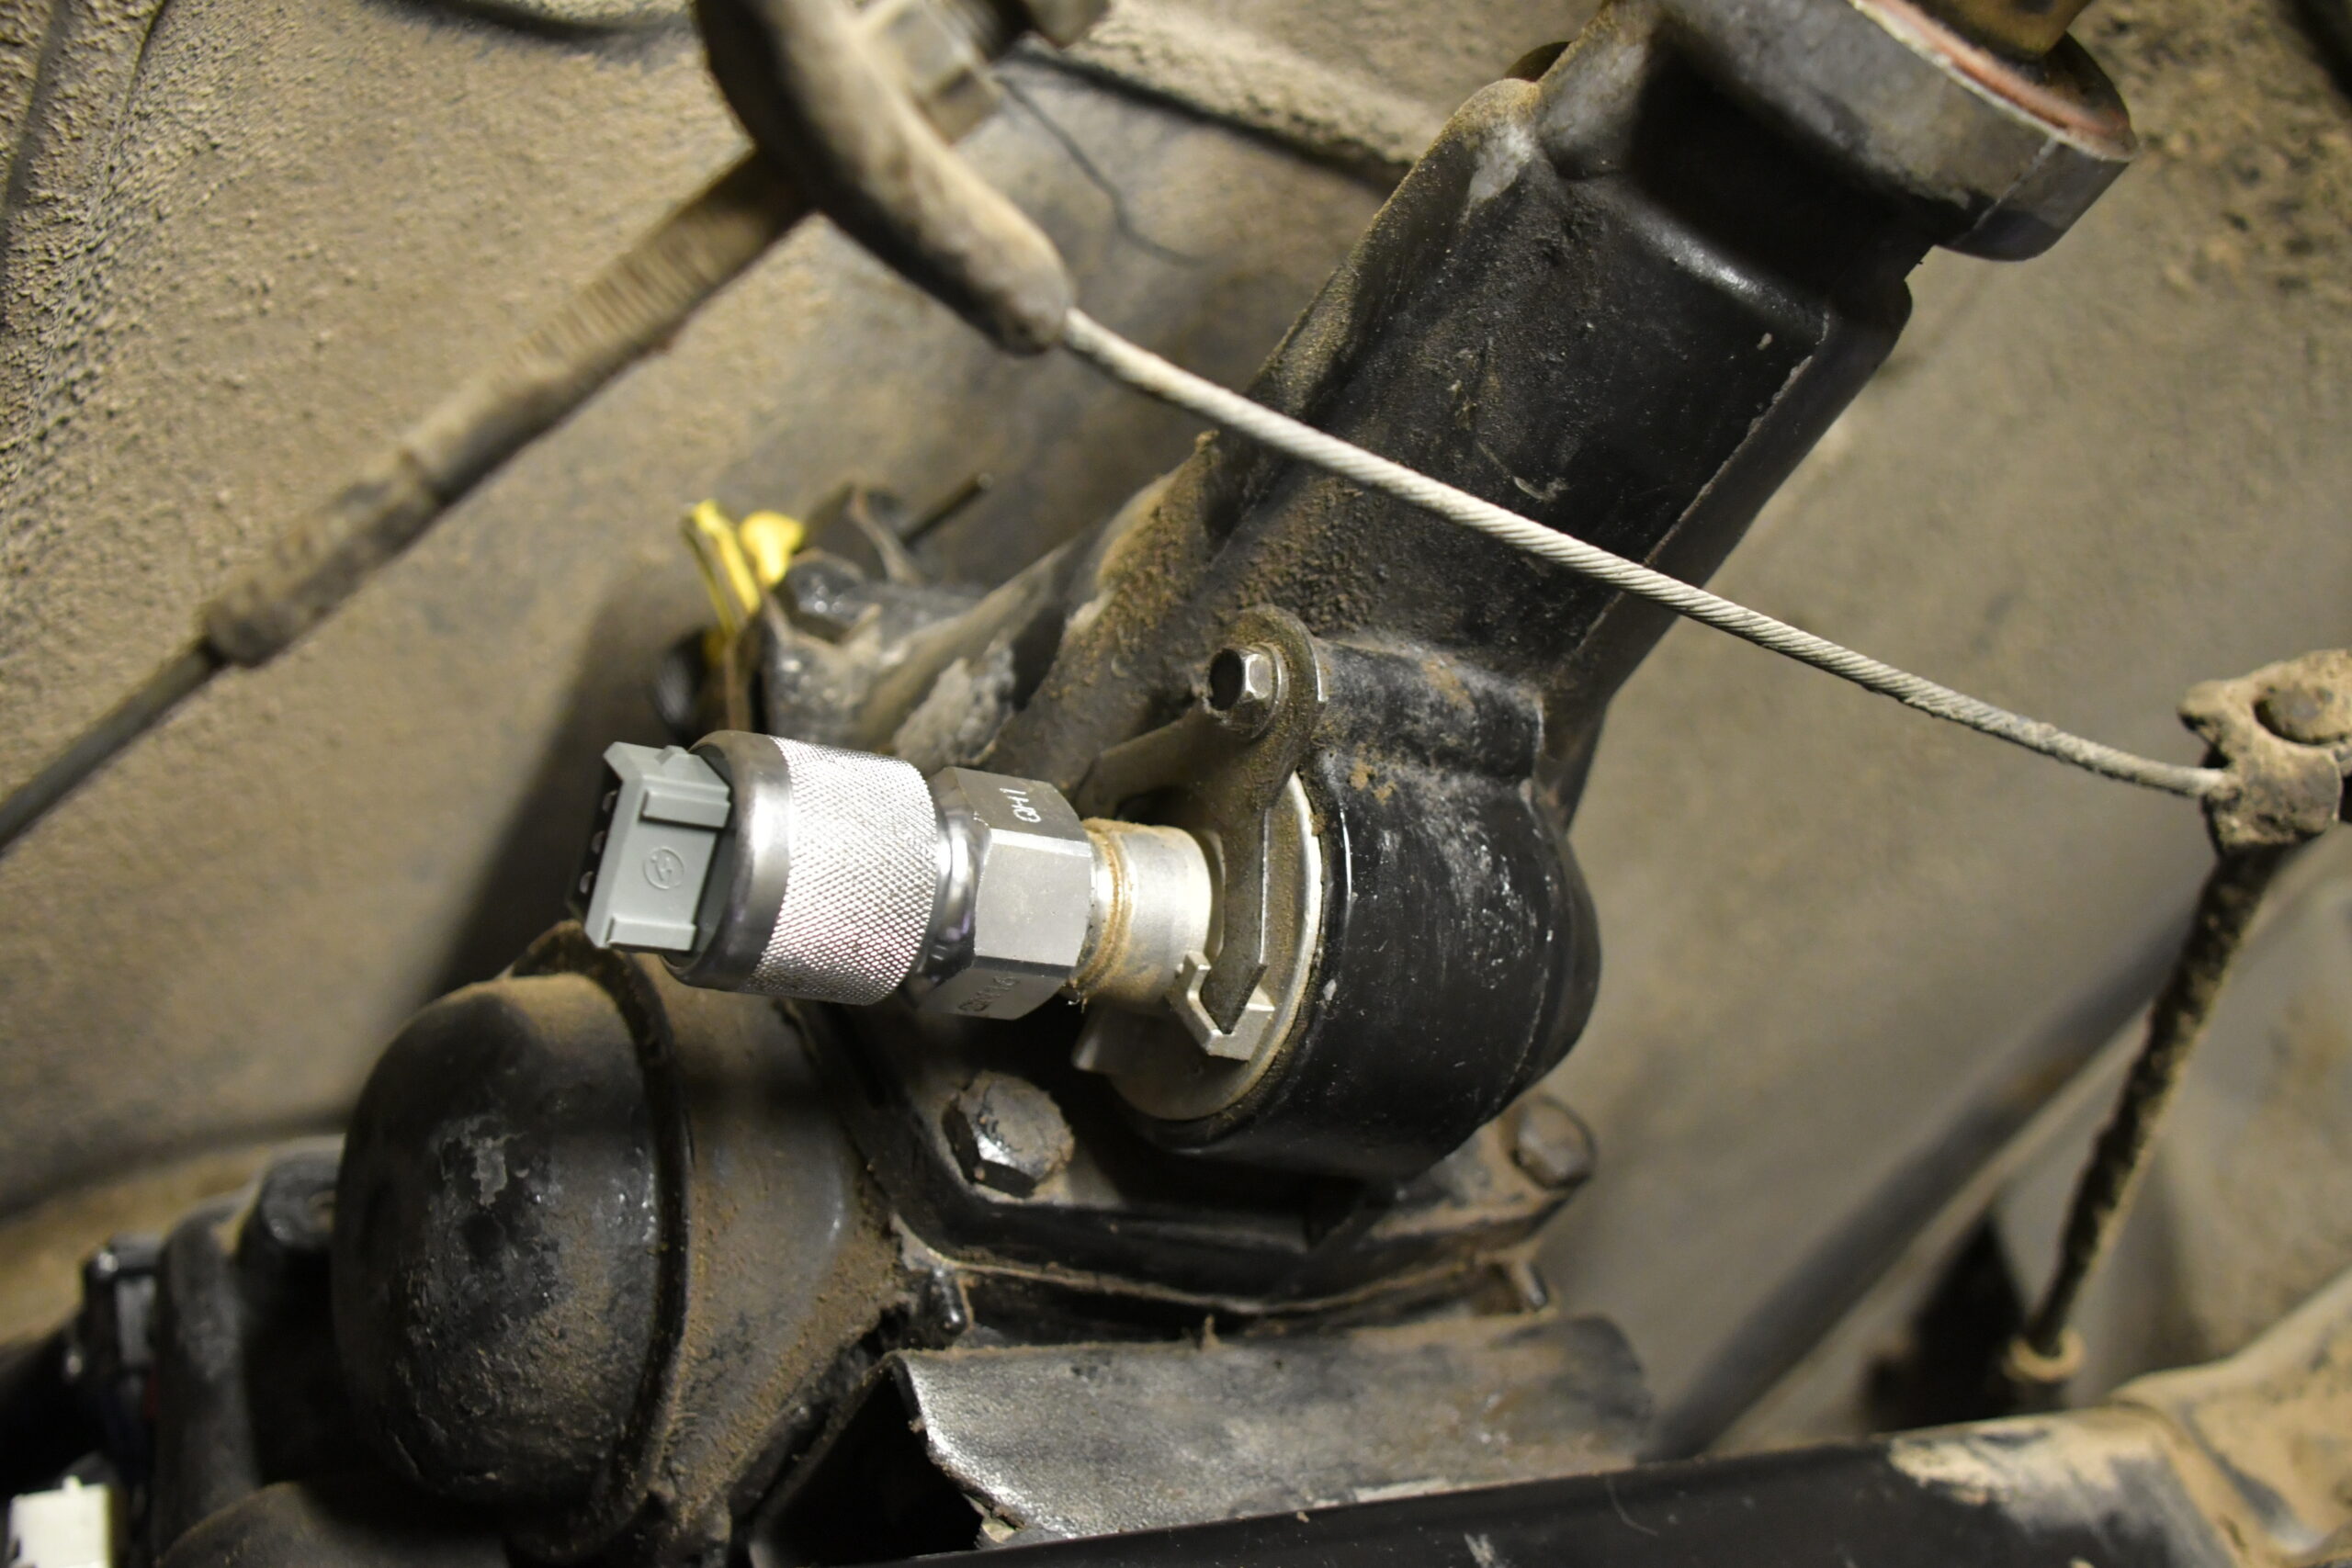
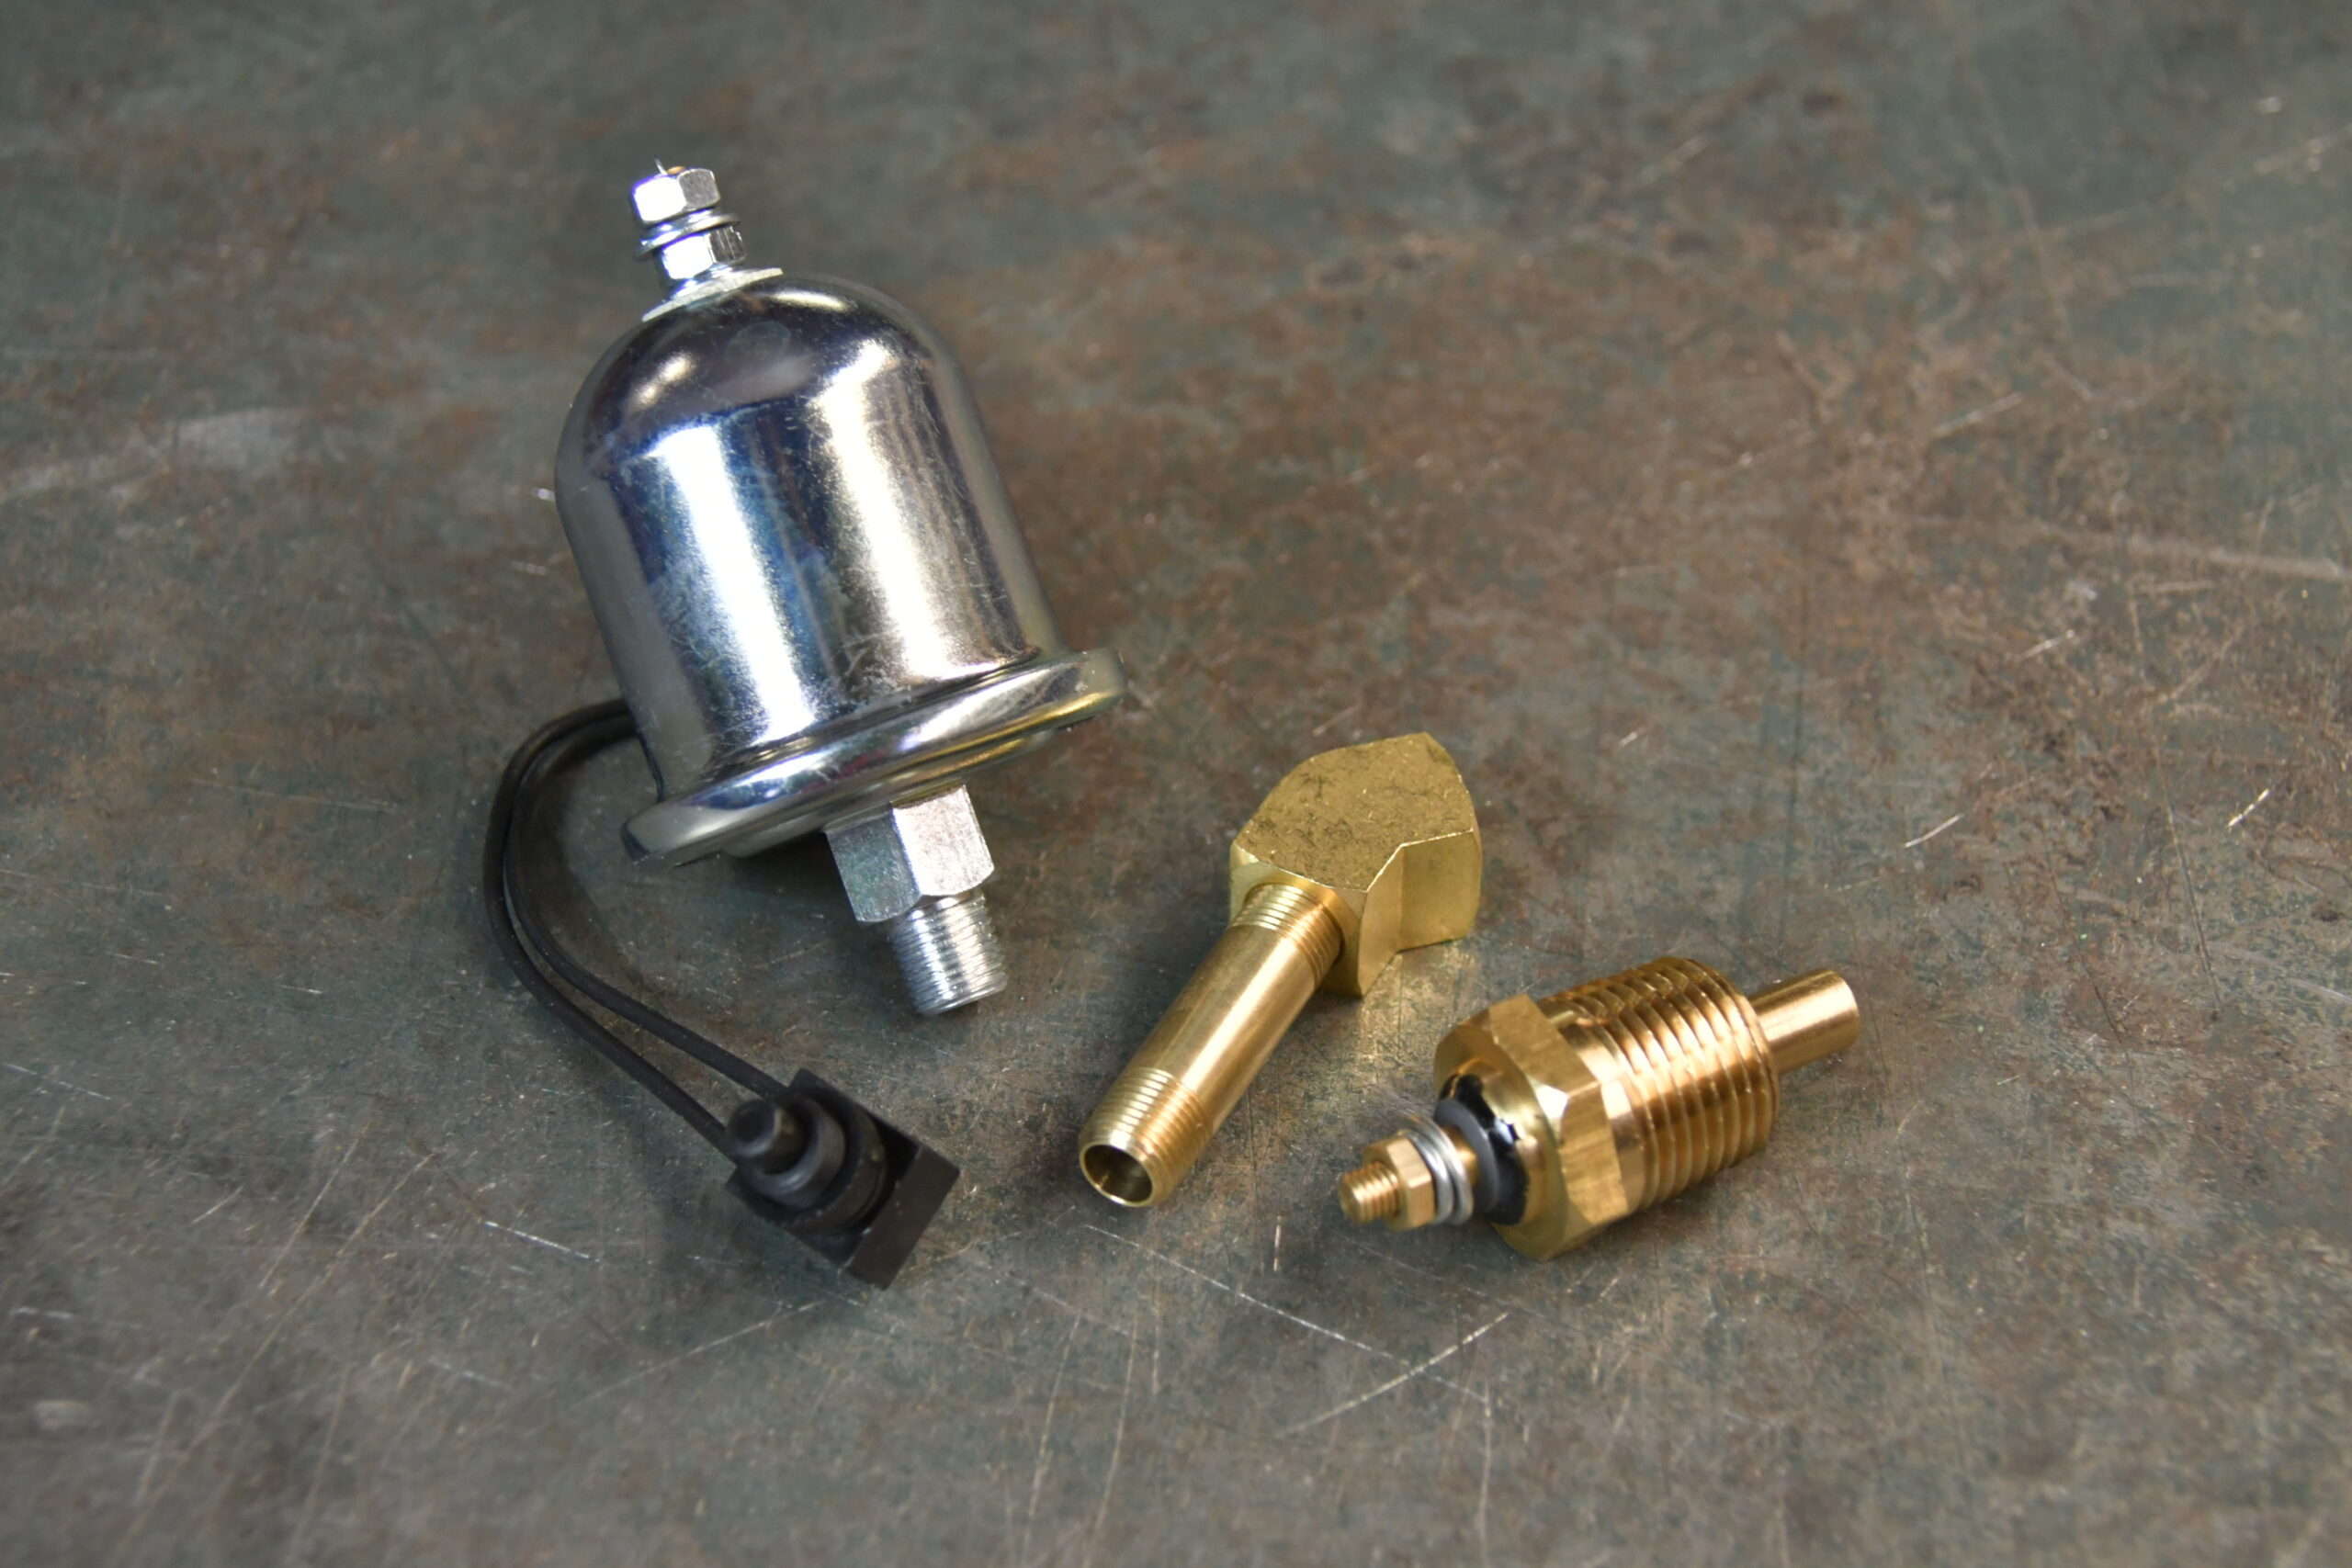
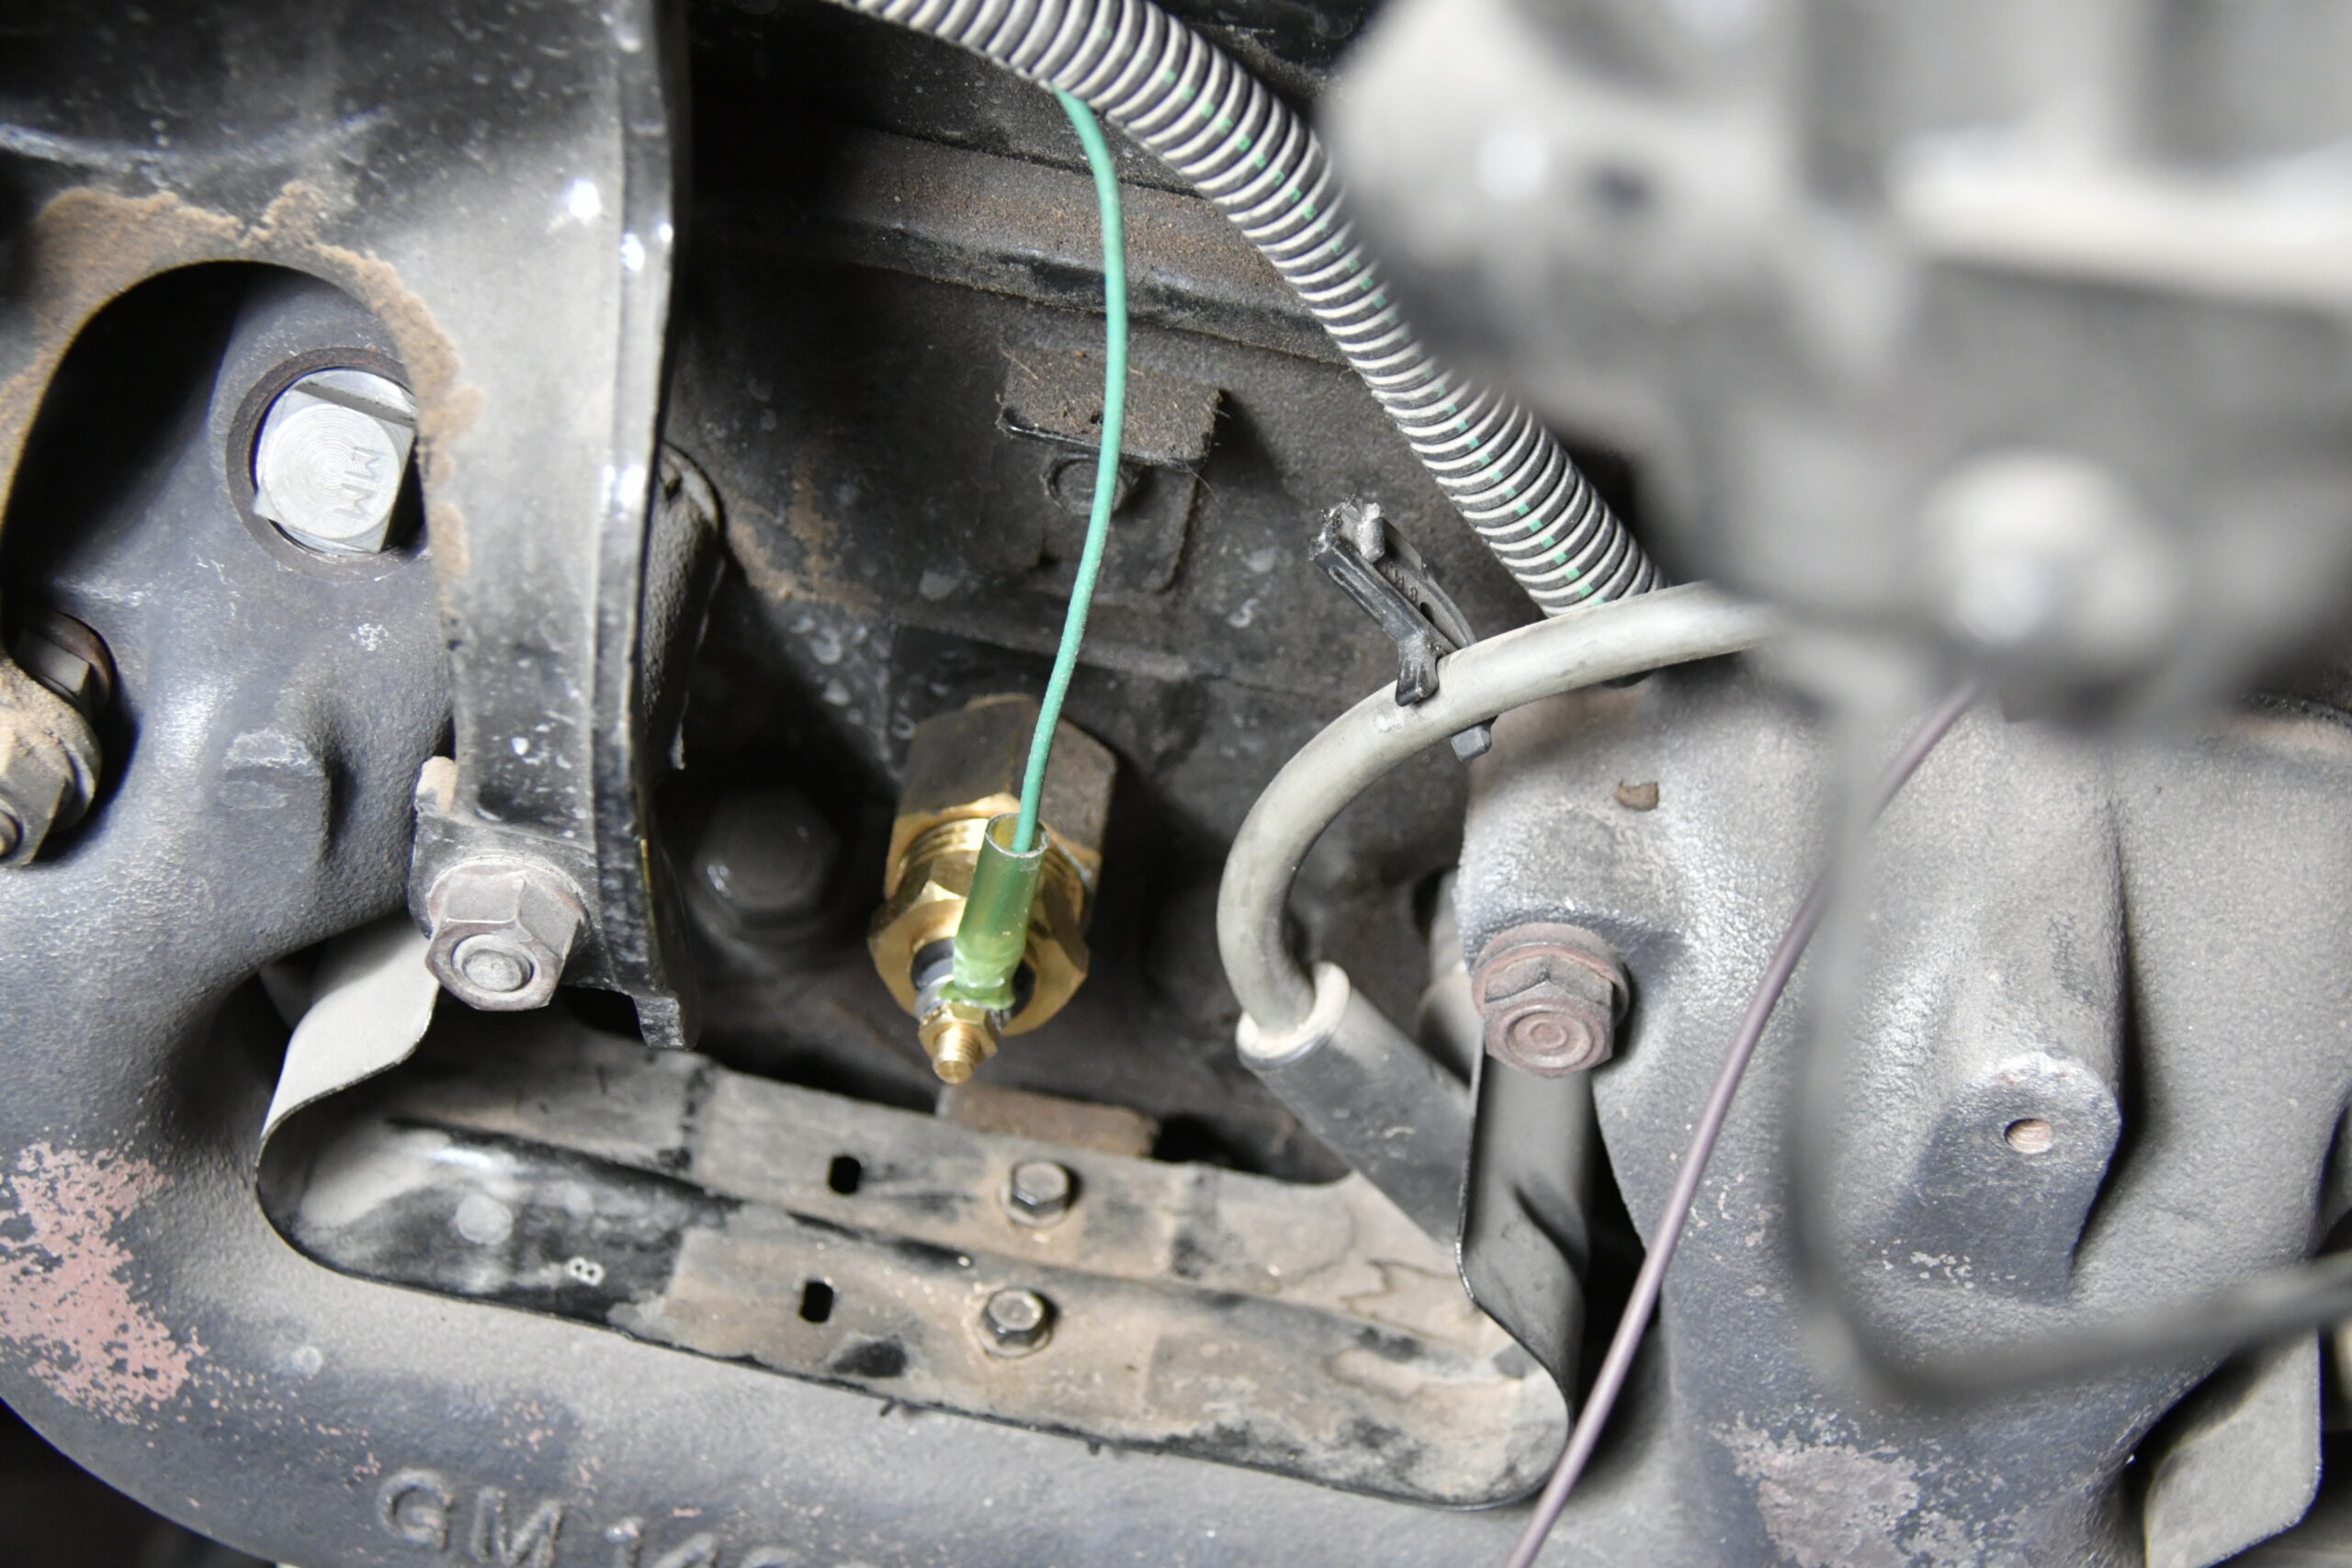
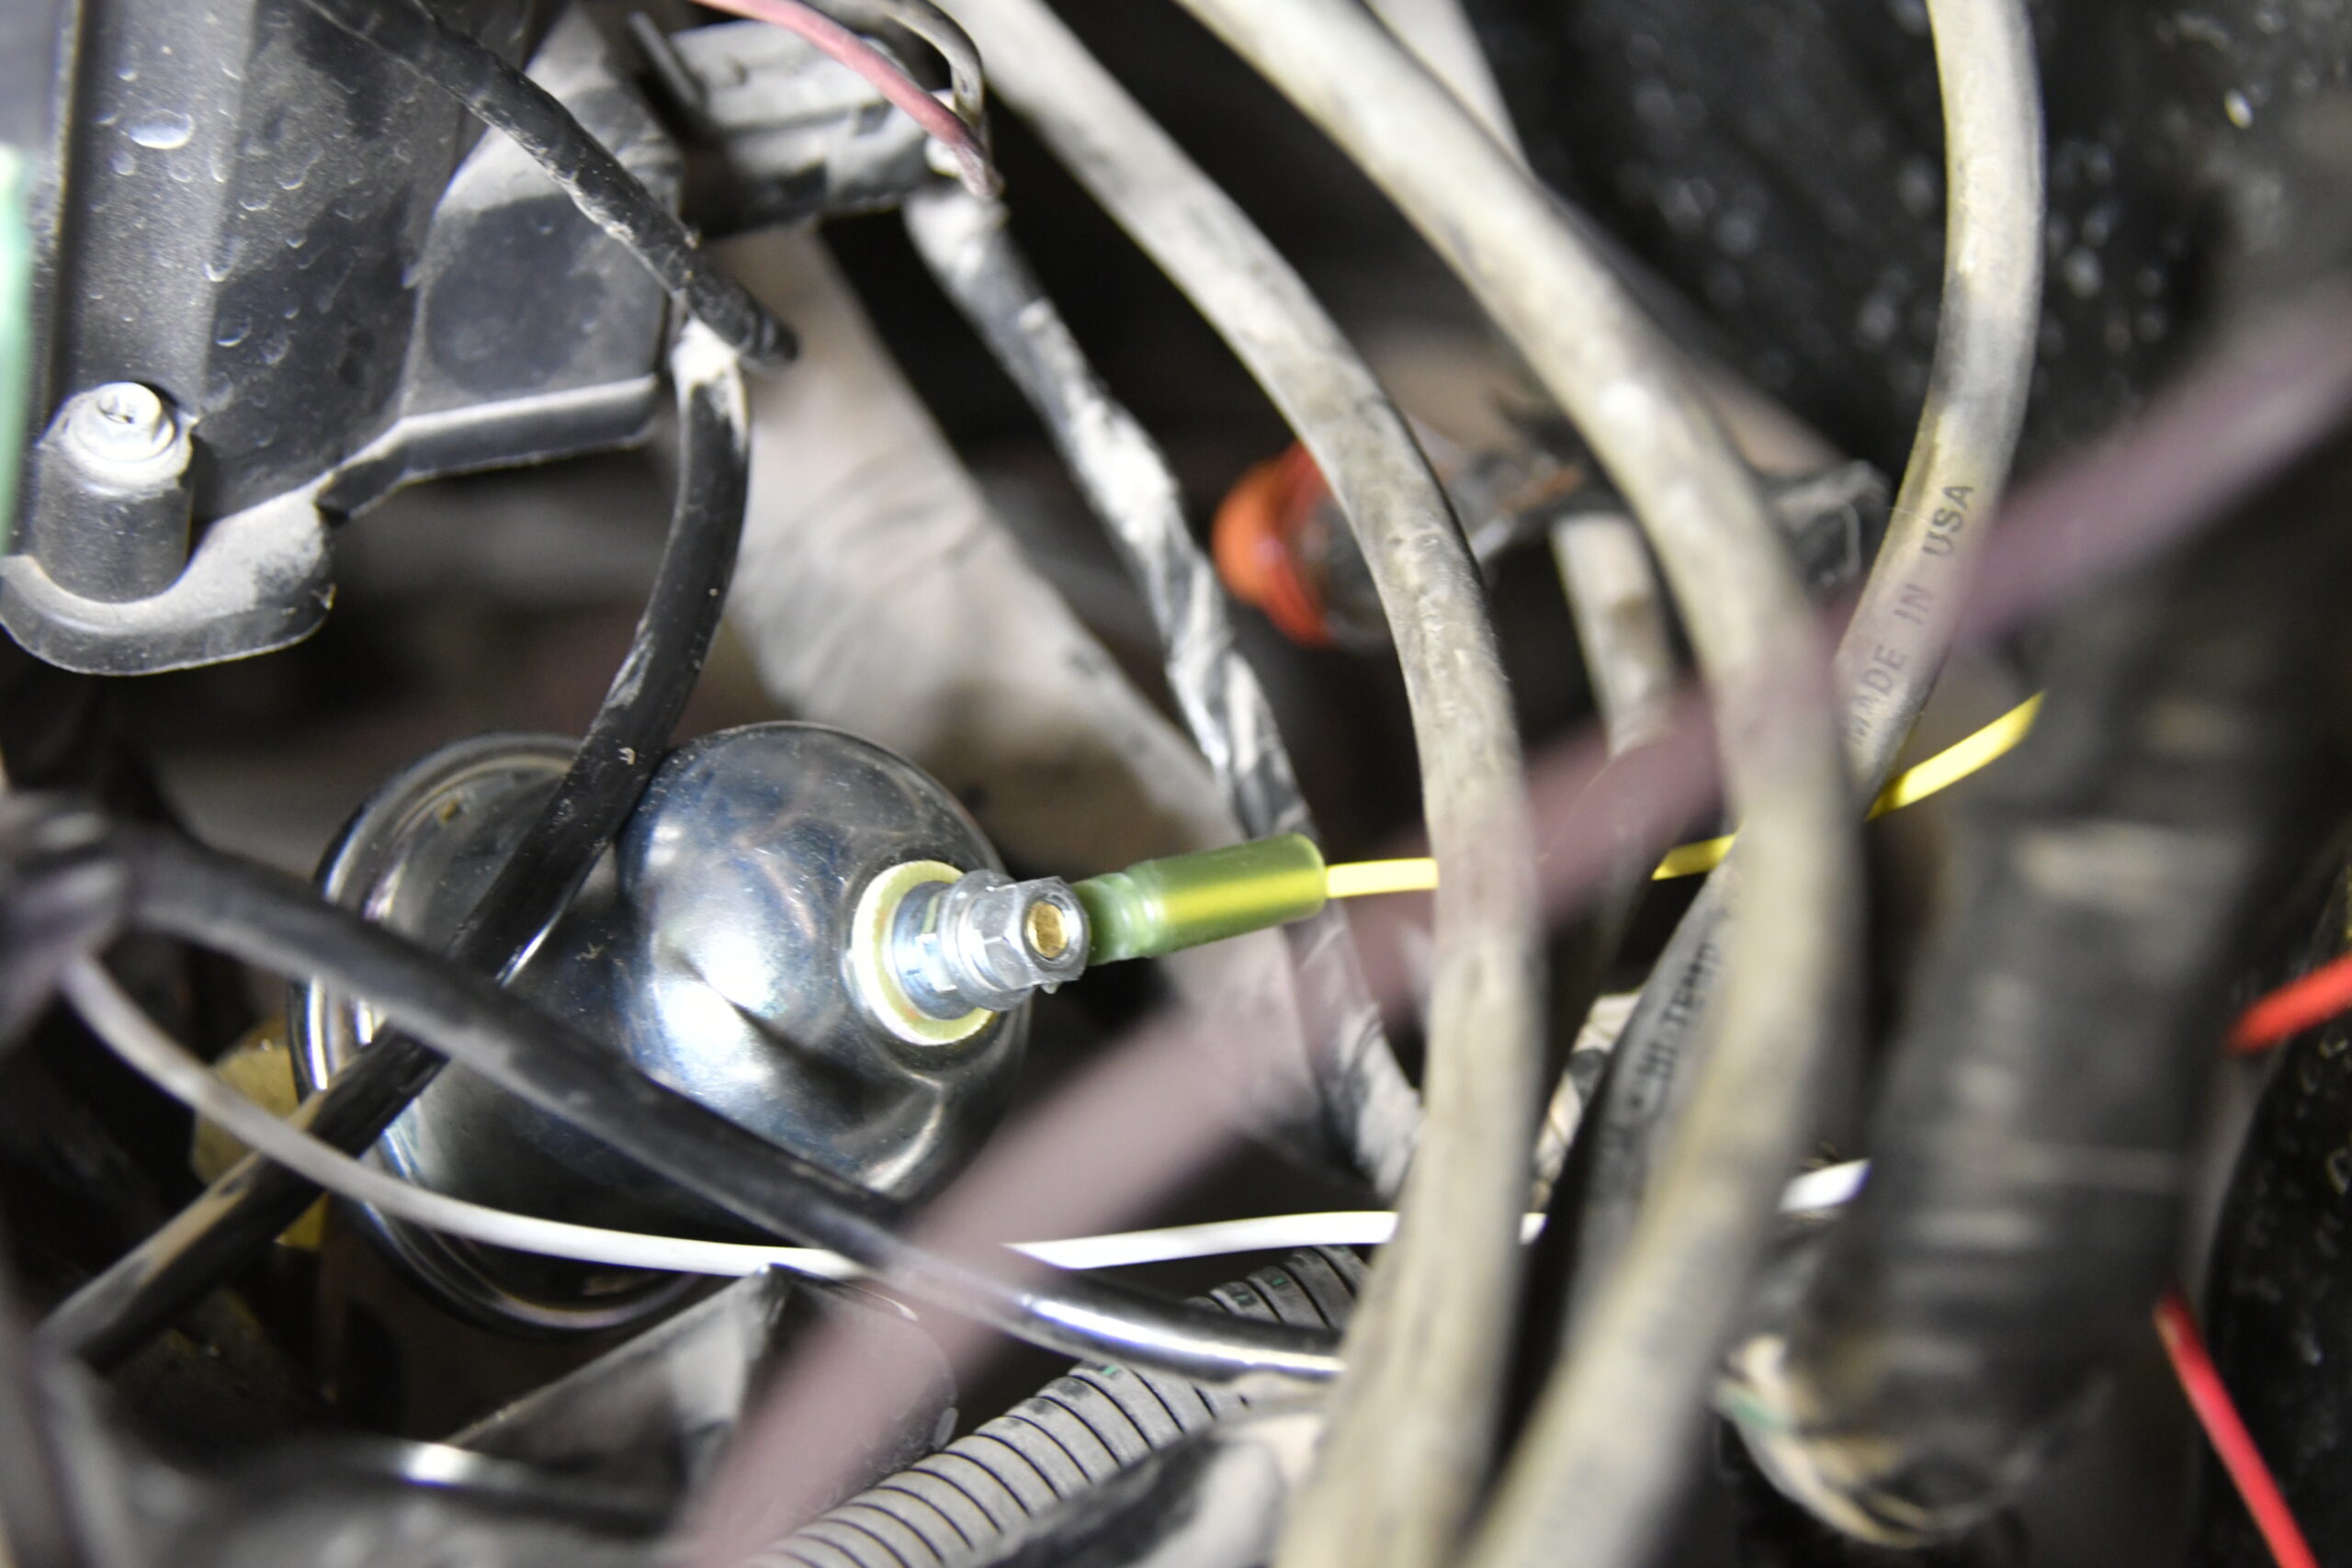
Our 1971 C10 has a 700-R4 with a mechanical speedometer so CI supplied a pulse generator sensor that screws right in place of the cable on the trans and connects to the dash with a three-wire harness. New sensors for oil pressure and coolant temp are also supplied, which made for a complete package, requiring no extra parts or trips to the speed shop down the street.

ctp-oct-2020-classic-instruments-c10-gauges-006
Our truck was upgraded to a 700-R4 trans a few years ago, which uses a mechanical speedometer cable. CI supplied a Pulse Signal Generator (SN16) that simply installs in place of the cable and generates a pulse to the speedometer. The speedo also accepts a Vehicle Speed Sensor (VSS) signal or a signal from a vehicle ECU. If you prefer GPS, CI offers their Skydrive GPS Module as another option.

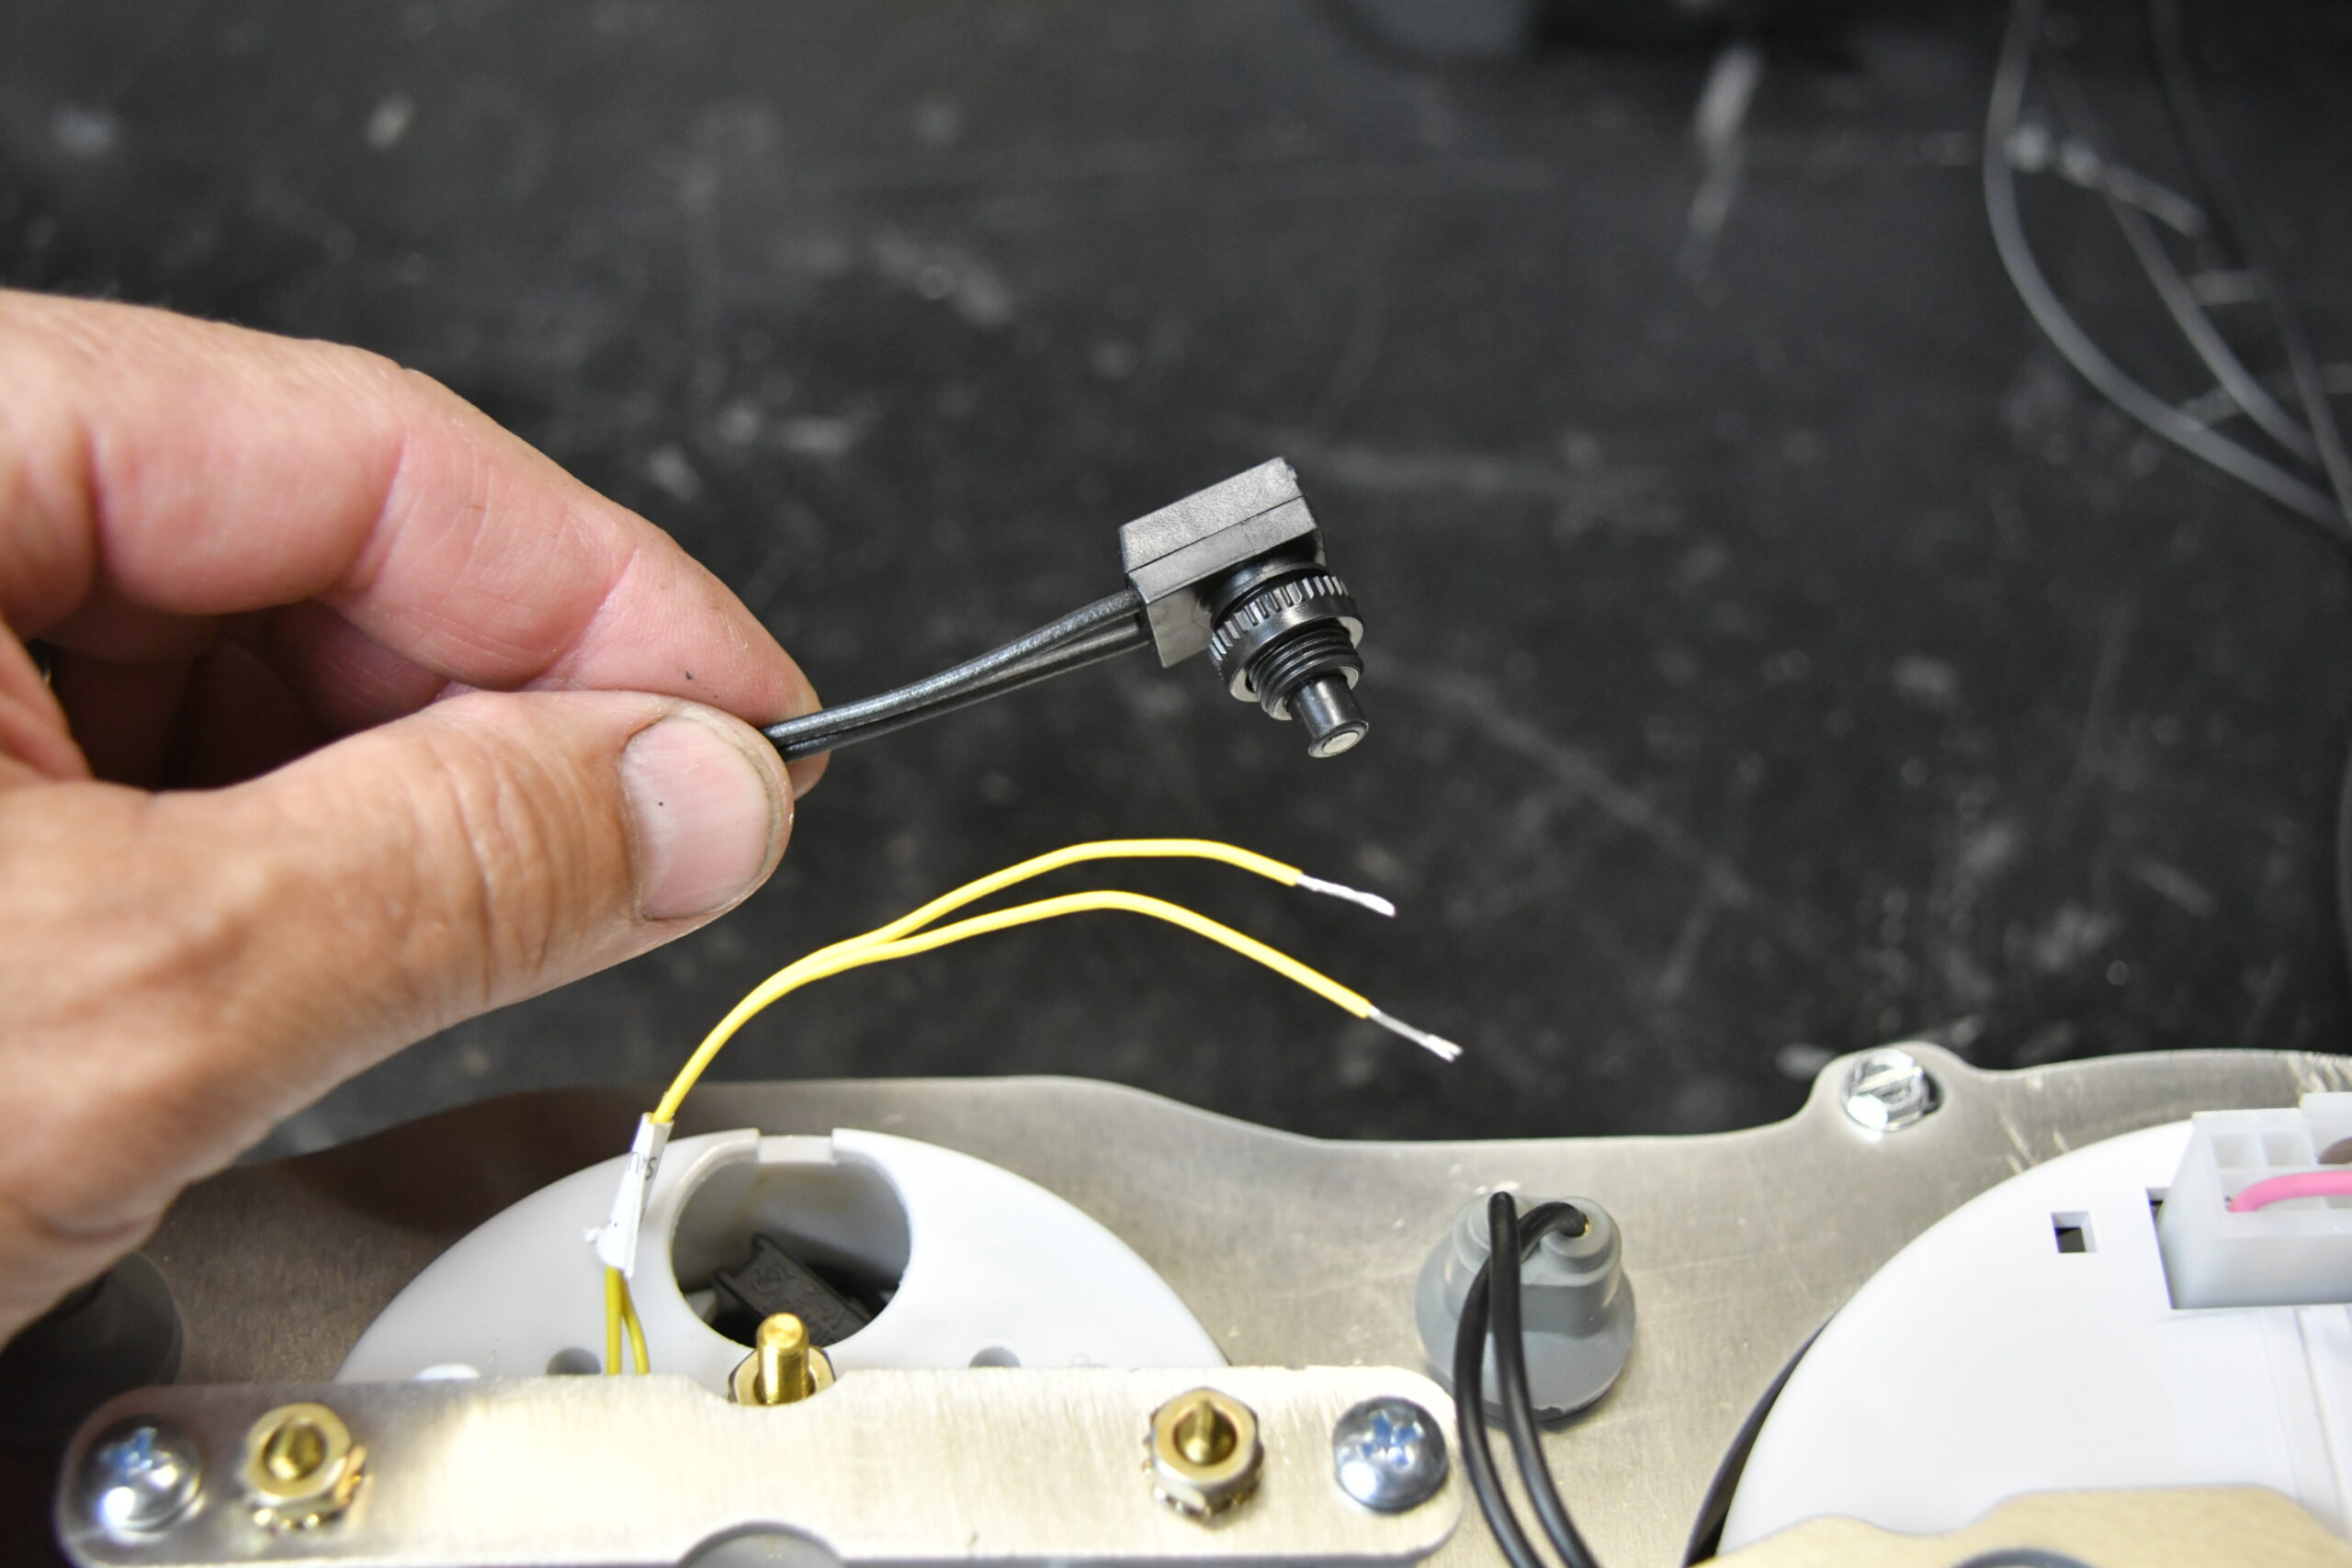
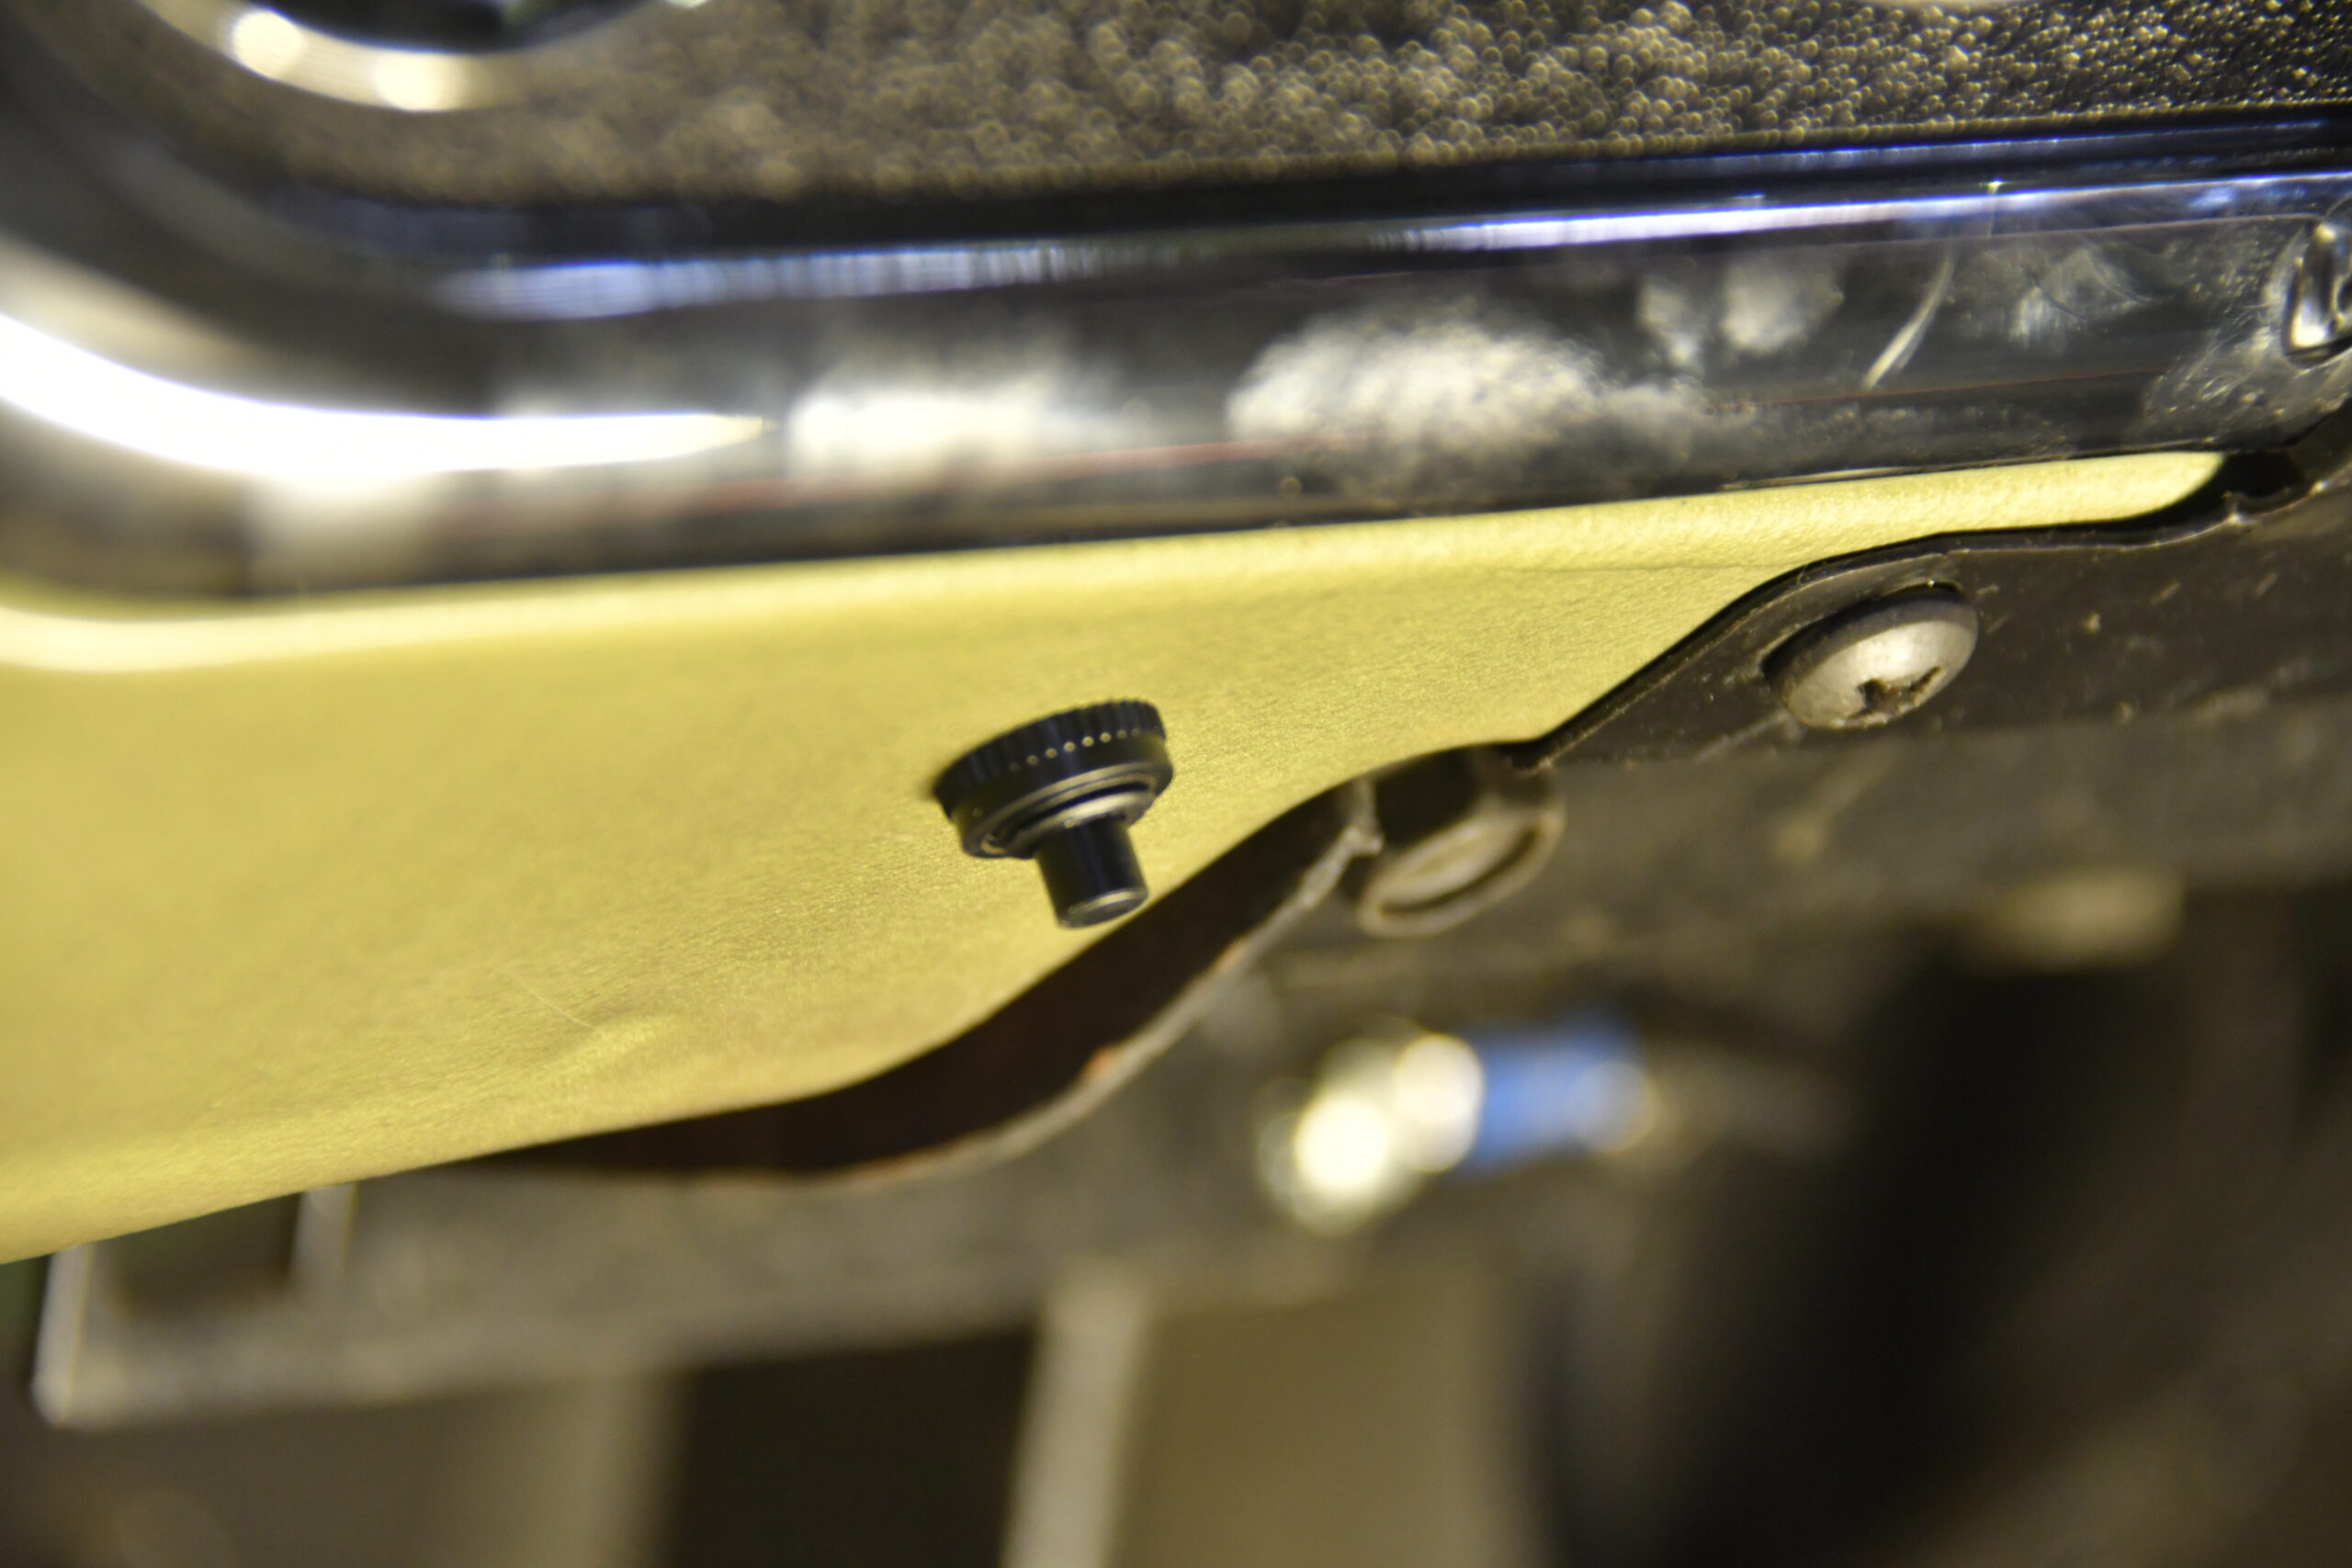
Like the ZST speedometer, the tach can also be programmed for use with a standard distributor triggered ignition or for a coil-per-cylinder system, such as an LS-series engine. The default is for a distributor, so we didn’t have to set up the tach, but this is a simple procedure similar to calibrating the speedometer or even the clock. CI includes momentary switches that are connected between the ground and gauge that allow you to enter the calibration mode without the need for any complicated tools.

ctp-oct-2020-classic-instruments-c10-gauges-007
Electronic sensors for the coolant temperature and oil pressure are also supplied. Note the black momentary switch; these are used to calibrate the tach, speedo, and to set the clock.

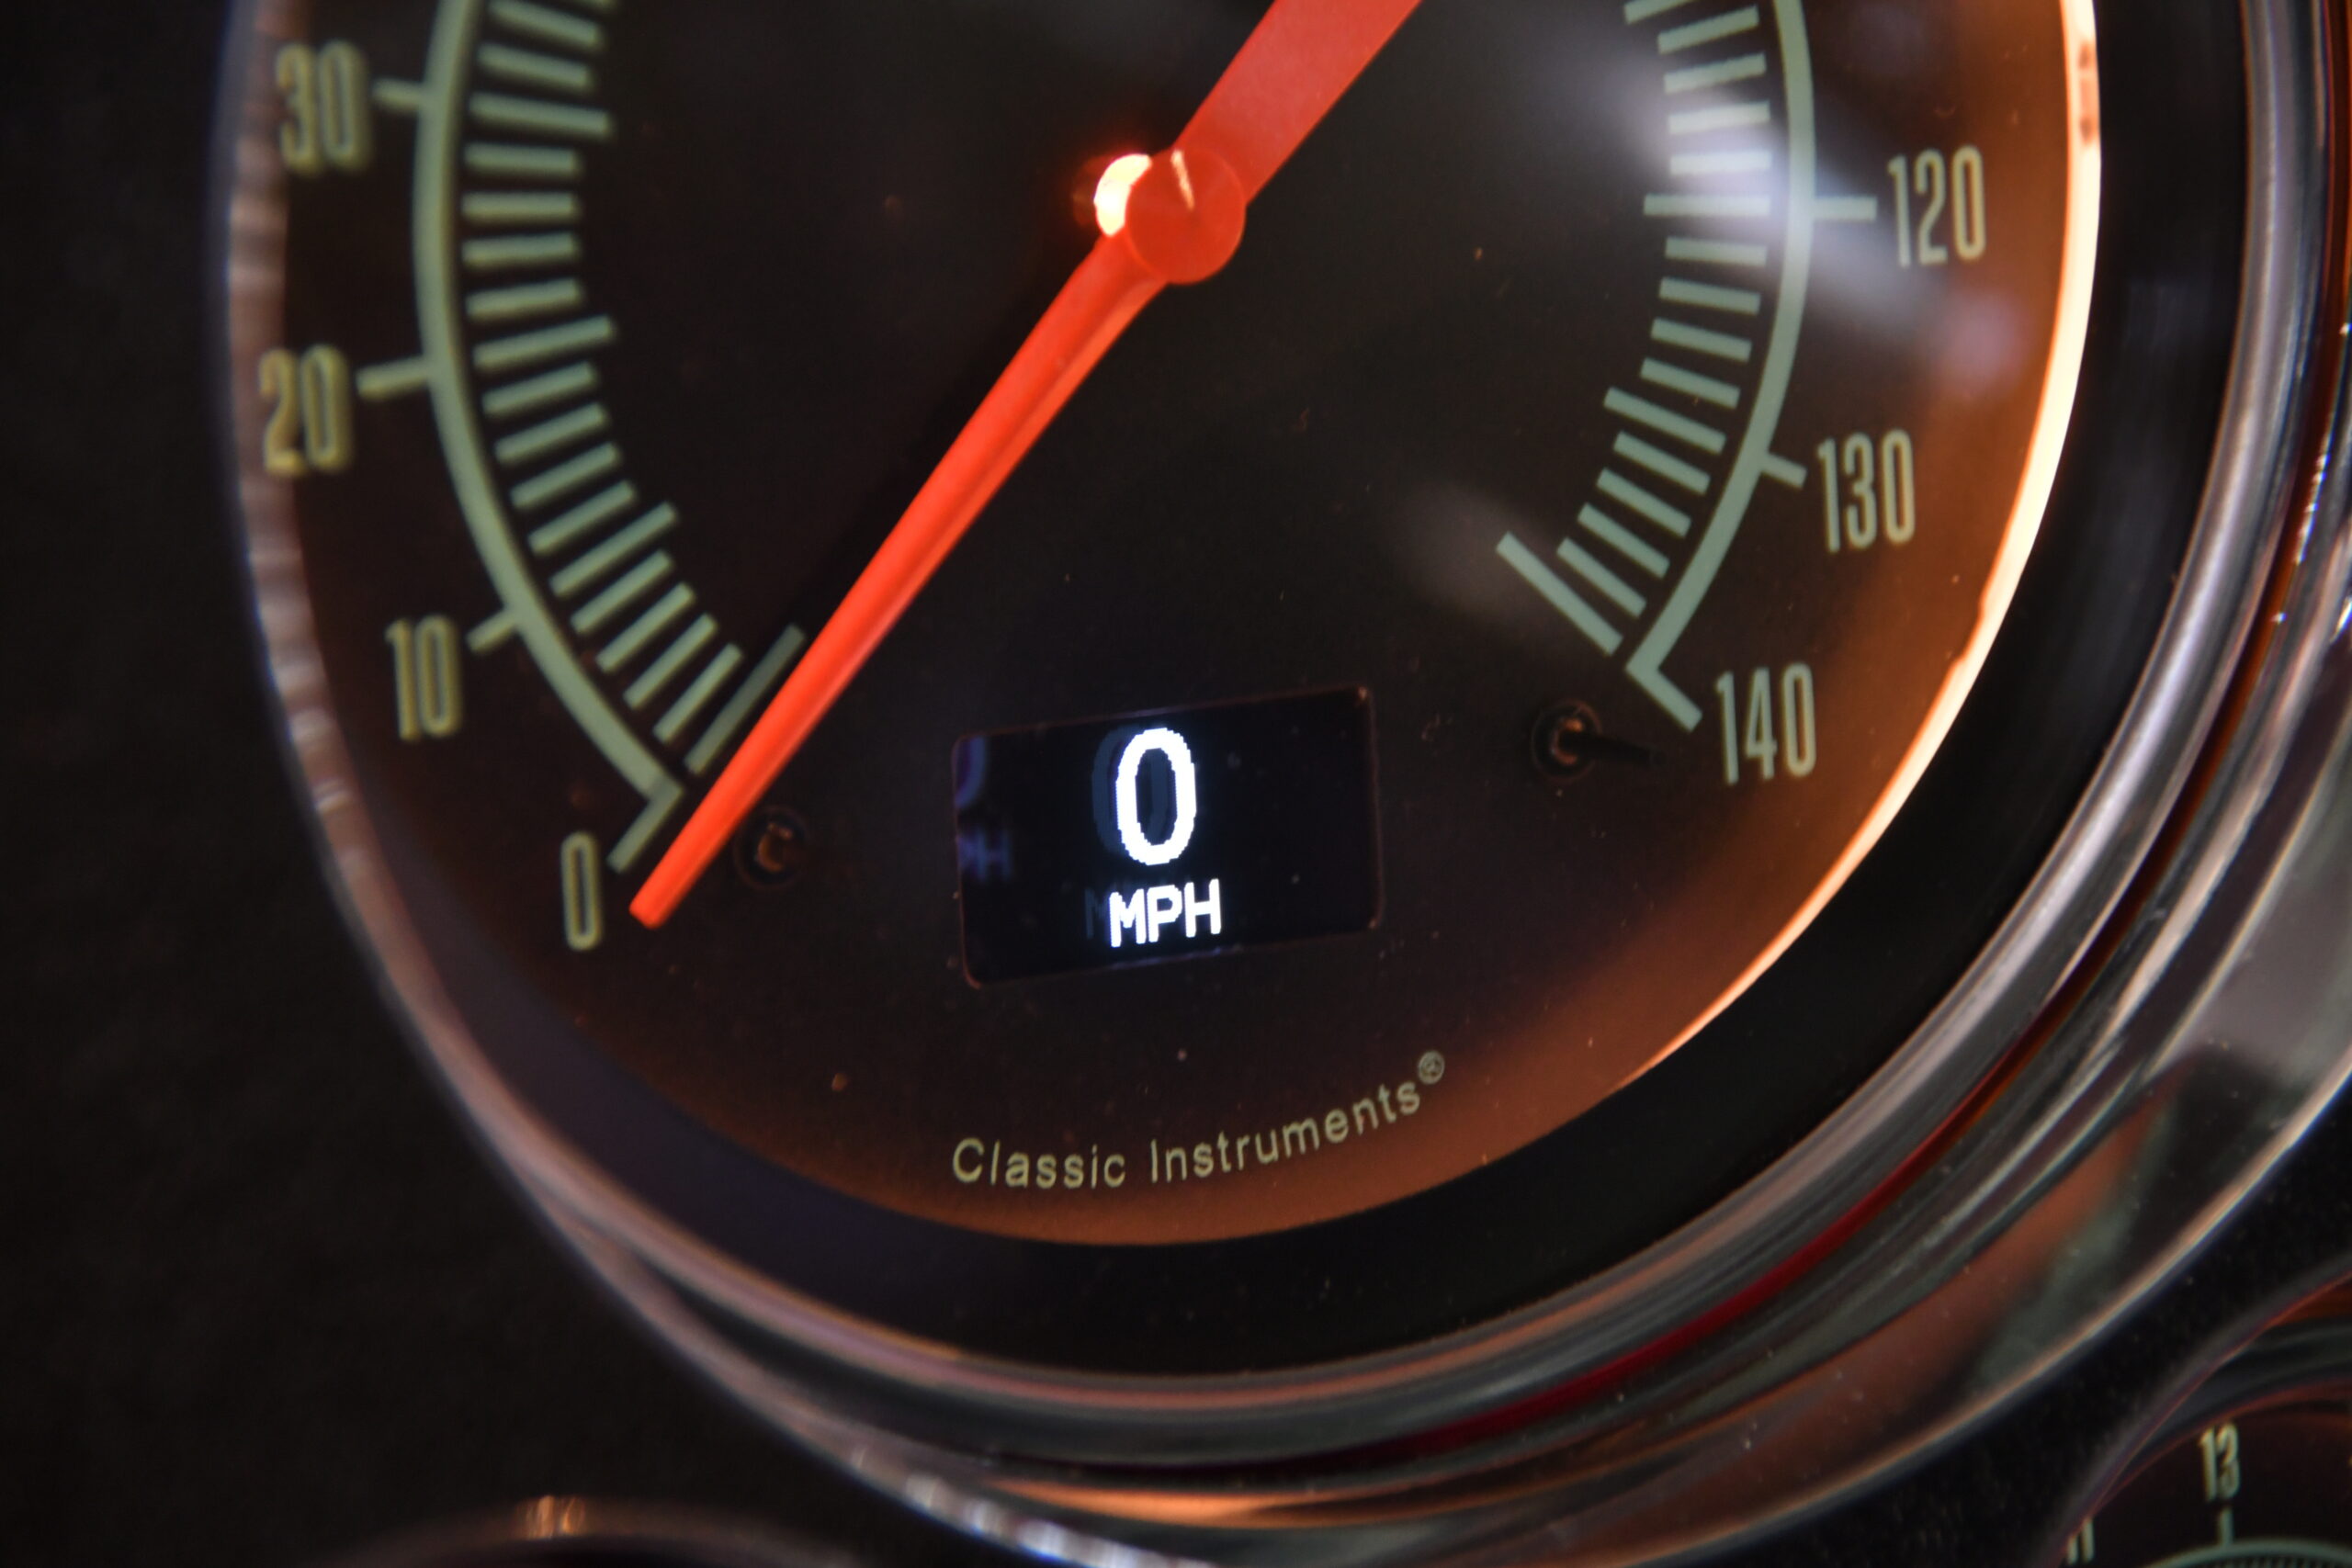
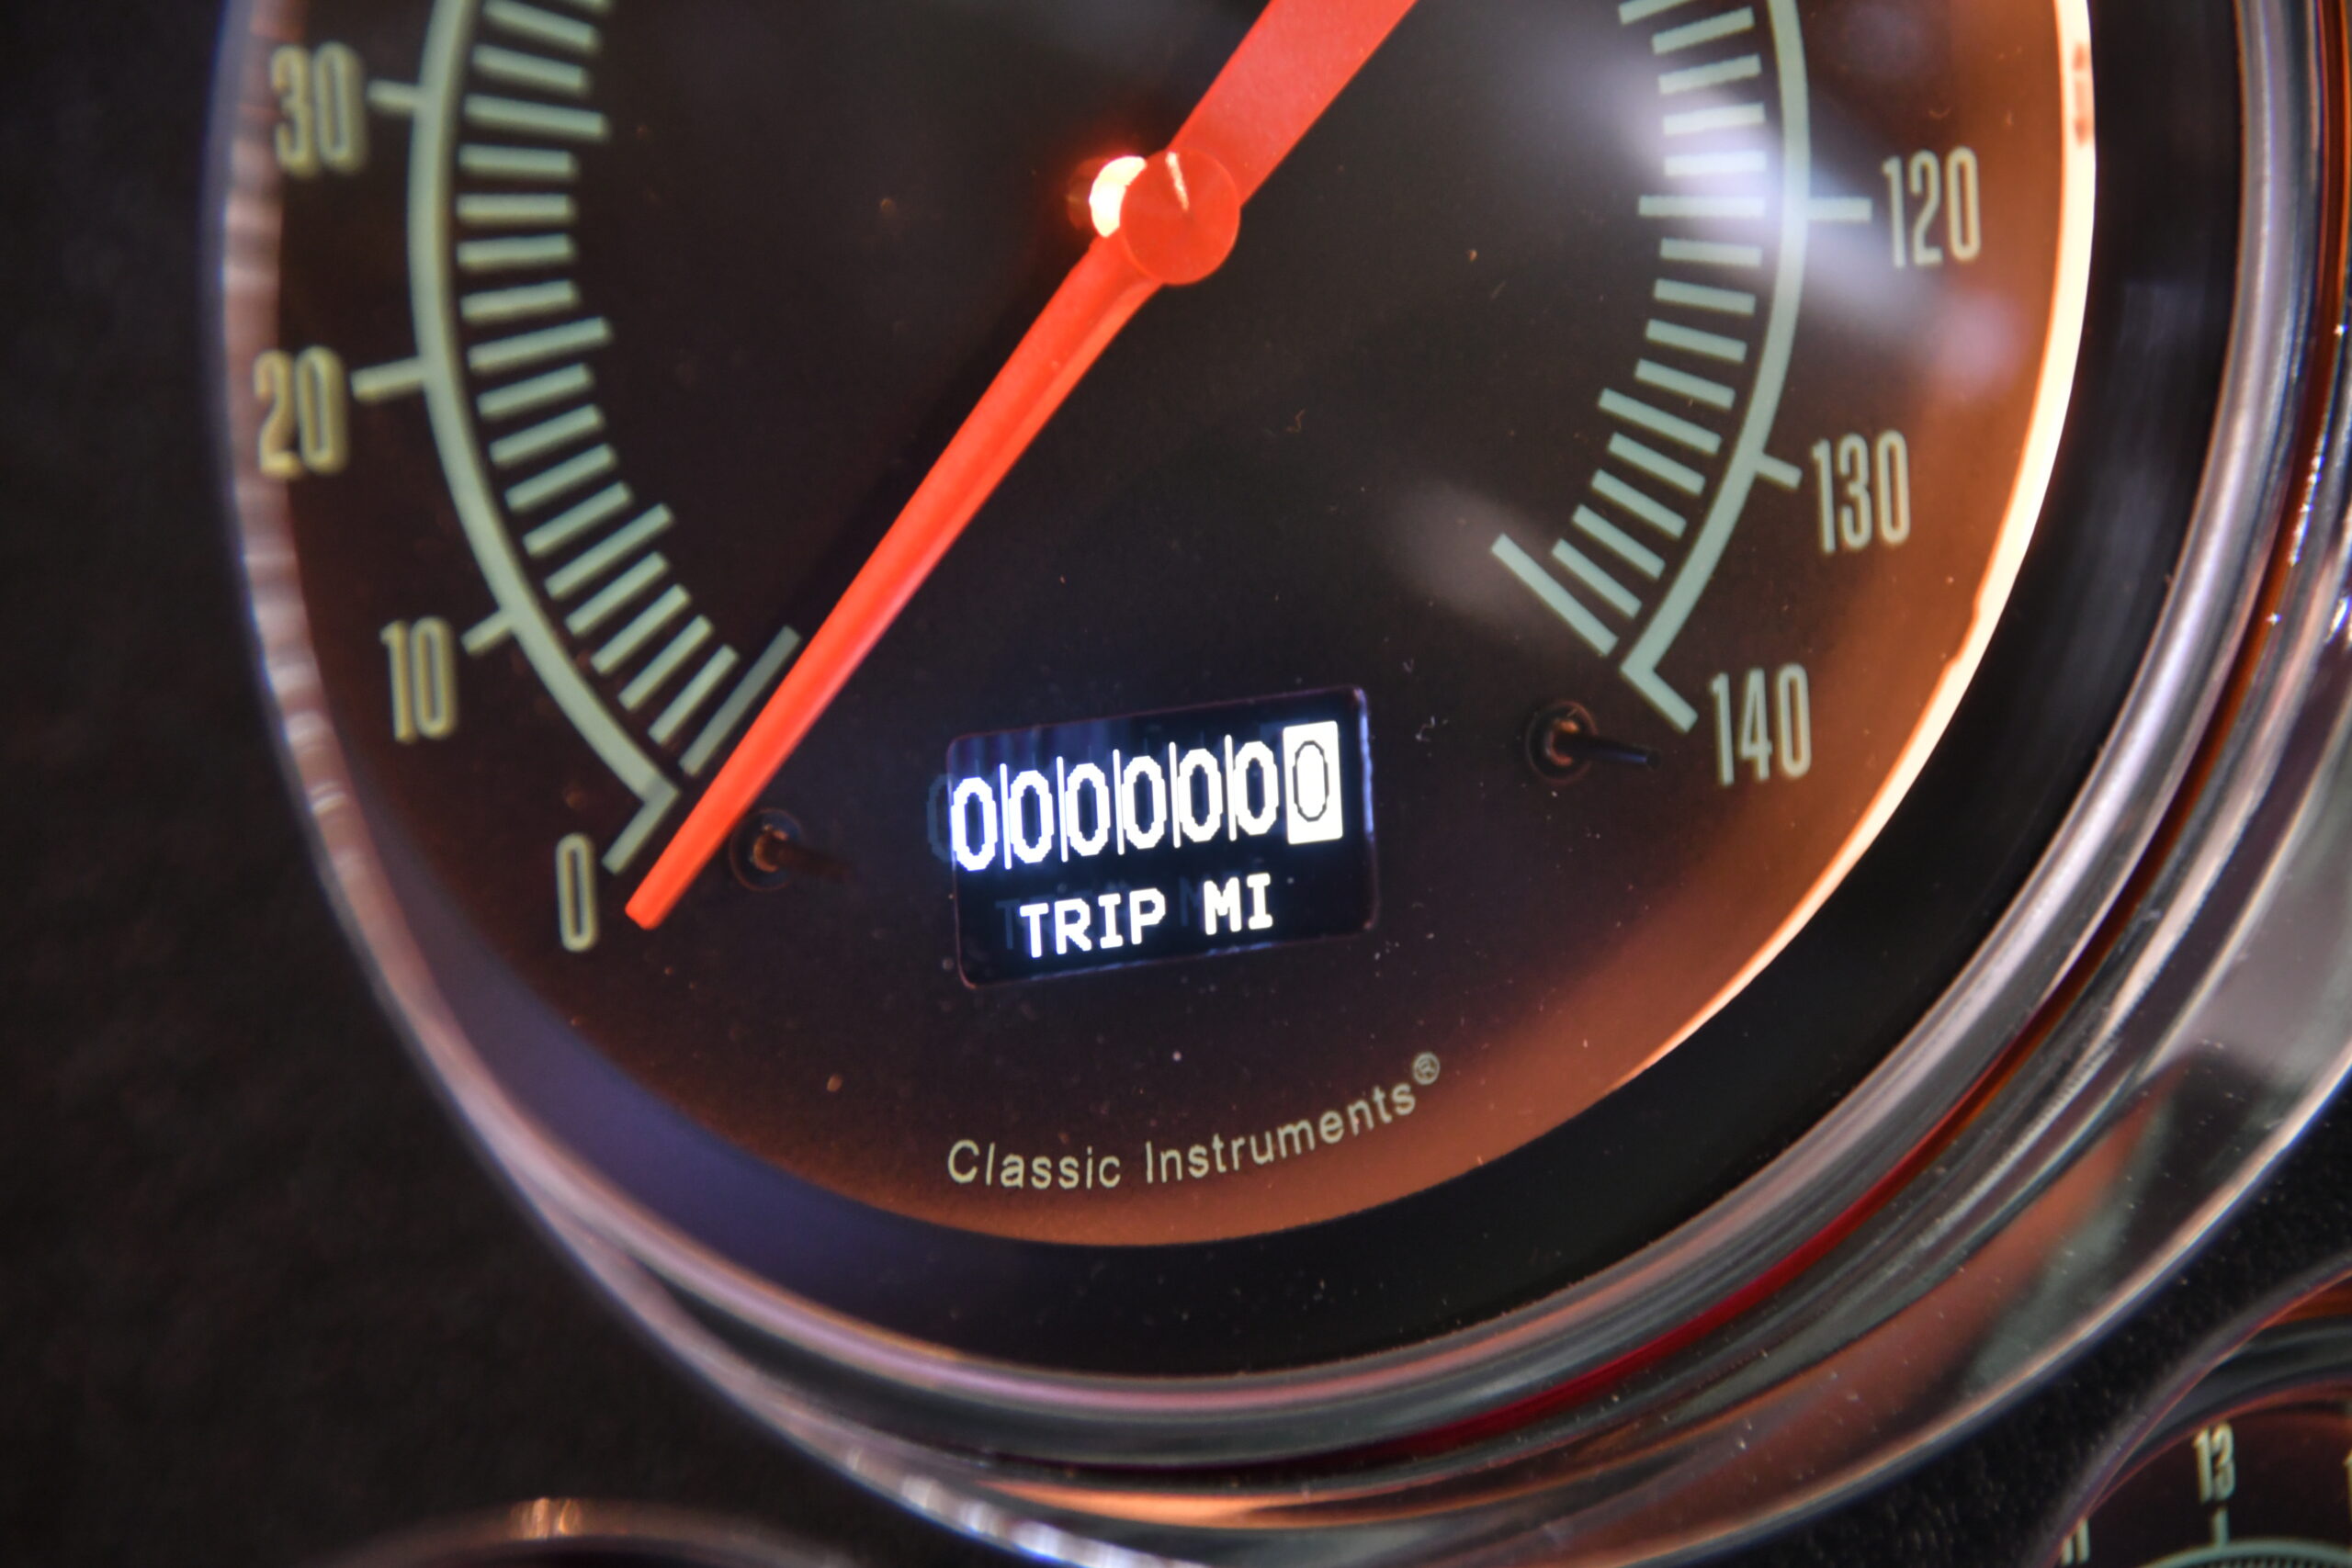
One unique option CI recently introduced is a digital information display on the speedo. This display features a unique rolling odometer that, at casual glance, appears stock but with the click of a button it switches to a numerical speed display or a trip odometer (and a choice between mph and kph). The display is also used when calibrating the speedometer and even troubleshooting.

ctp-oct-2020-classic-instruments-c10-gauges-008
When installing the coolant temp and oil psi sending units, CI cautions to not use any Teflon tape on the threads. The threads provide the ground connection, and sealing tape can cause issues. If you must use a sealer, use a copper-based antiseize sealant to ensure a quality ground. We were able to use the factory temperature wire, but had to route a new wire from the dash to the oil pressure sending unit.

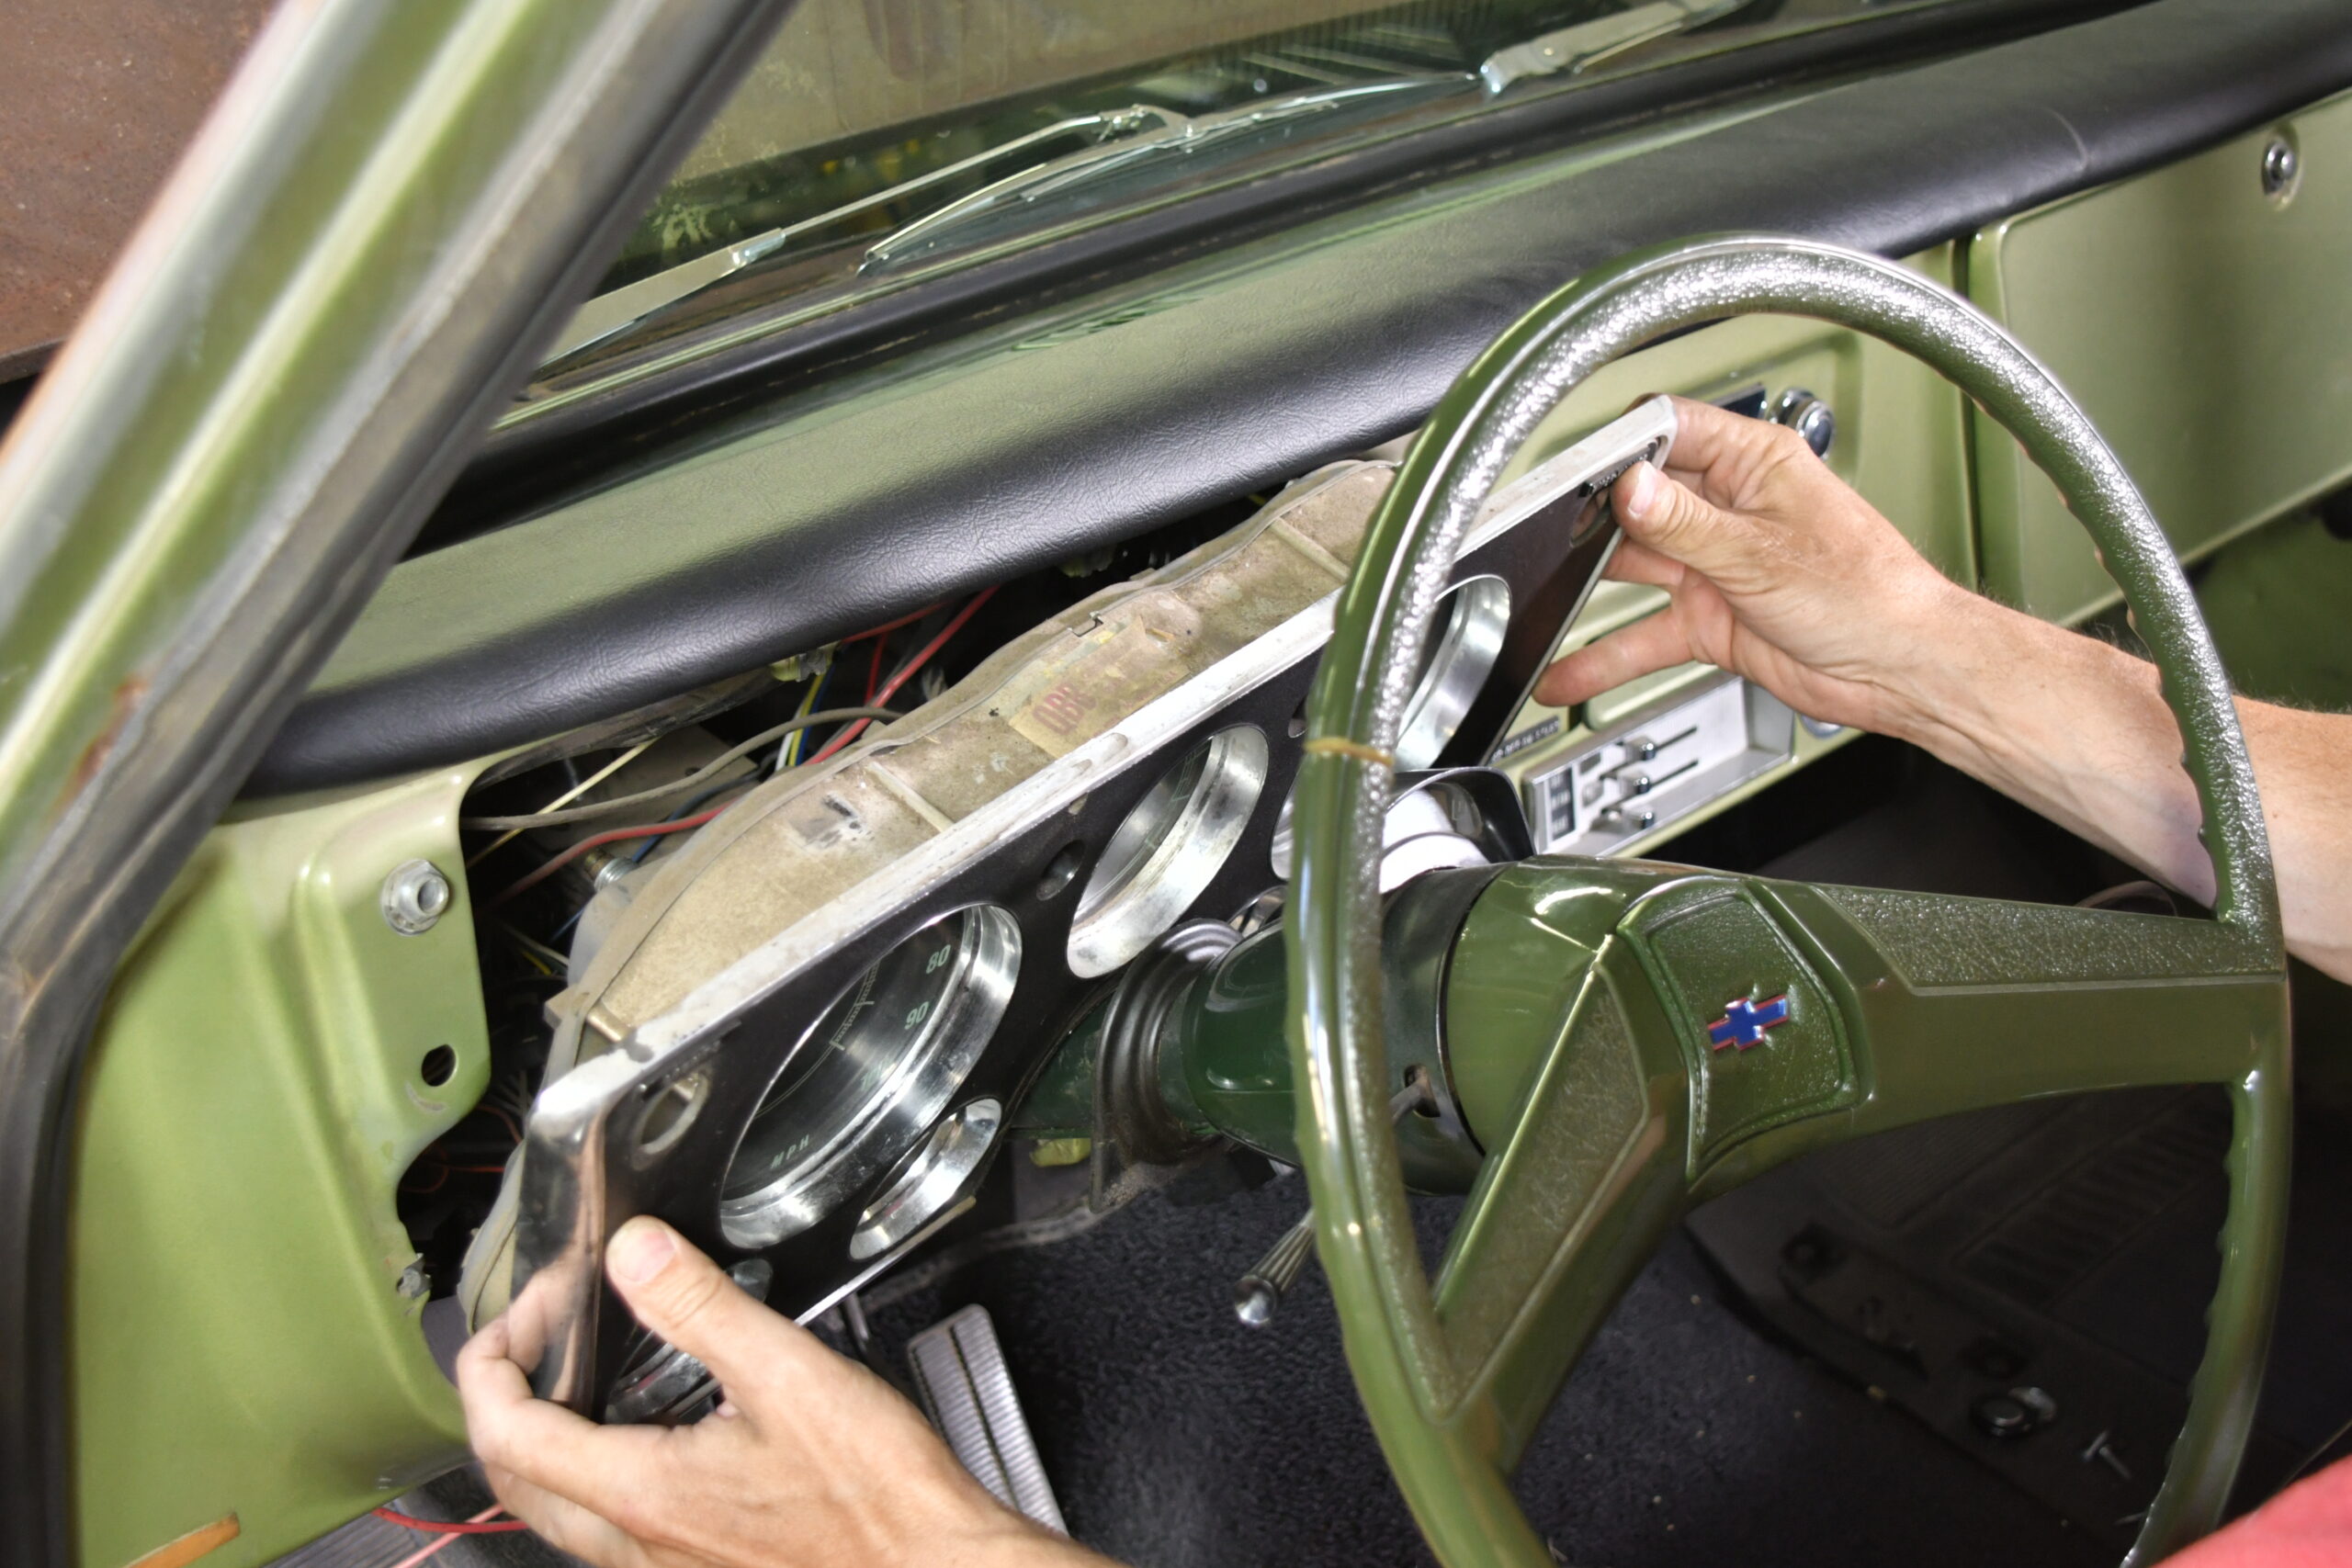
Our 1971 is largely original from the inside out, so we opted for the G-Stock series of gauges due to their factory styling with modern looks. CI offers most of their different series of gauges in the C10 package or you can opt for a completely custom gauge set to match the theme of your build. The installation of the gauge set was as straight forward as it gets. Installing new terminals on the factory wiring requires patience and skill, like any wiring project, and is made much easier when using a professional crimp tool. However, with no additional boxes to mount, the wiring was a snap. Calibration of the speedometer was a breeze and the digital odometer continues to mesmerize us as we roll down the road. For the first time, our Suburban has a full brace of accurate, functioning gauges combined with a modern look in a classic package.

- Advertisement -
ctp-oct-2020-classic-instruments-c10-gauges-009
When installing the coolant temp and oil psi sending units, CI cautions to not use any Teflon tape on the threads. The threads provide the ground connection, and sealing tape can cause issues. If you must use a sealer, use a copper-based antiseize sealant to ensure a quality ground. We were able to use the factory temperature wire, but had to route a new wire from the dash to the oil pressure sending unit.
ctp-oct-2020-classic-instruments-c10-gauges-010
With the sensors in place, we moved onto the wiring. New terminals were supplied along with a 15-pin connector. The barrel-shaped terminals have two sets of crimp tabs, one for the sleeve of the wire and one set for the copper strands. This crimp procedure is much easier with the right tool (we used crimp dies for Weather Pack terminals).
ctp-oct-2020-classic-instruments-c10-gauges-012
After mounting the new gauges firmly in an aluminum plate, CI handles all of the wiring so all you need to do is plug in the one connector.
ctp-oct-2020-classic-instruments-c10-gauges-013
To set the clock, the two yellow wires need to be connected to one of the momentary switches. Knowing that our battery gets disconnected or swapped with other vehicles at times, we mounted this switch under the dash for easy access.
ctp-oct-2020-classic-instruments-c10-gauges-014
To set the clock, the two yellow wires need to be connected to one of the momentary switches. Knowing that our battery gets disconnected or swapped with other vehicles at times, we mounted this switch under the dash for easy access.
ctp-oct-2020-classic-instruments-c10-gauges-015
Before installing the dash, there is one switch to confirm that the speedometer is set up for your application. The switch needs to be in the “on” position for an ECM or SN16 signal, or turned to “off” for a VSS or SN96 signal.
ctp-oct-2020-classic-instruments-c10-gauges-016
The speedometer easily slid right in place and uses the six factory screws to secure it. The steering column was reinstalled along with the wiper switch and light pull.
ctp-oct-2020-classic-instruments-c10-gauges-017
Electronic sensors for the coolant temperature and oil pressure are also supplied. Note the black momentary switch; these are used to calibrate the tach, speedo, and to set the clock.

Side Bar
DIGITAL FUNCTION, ANALOG LOOKS

A new option to Classic Instruments’ line of speedometers is their unique information center. This display can be switched on the fly from a rolling odometer to a numerical speed display or a trip odometer. We saw it in action during the SEMA show and thought it was a unique option to add since we favor the looks of a vintage odometer. The display also allows you to easily switch between mph or kph and is very useful while calibrating the speedometer.
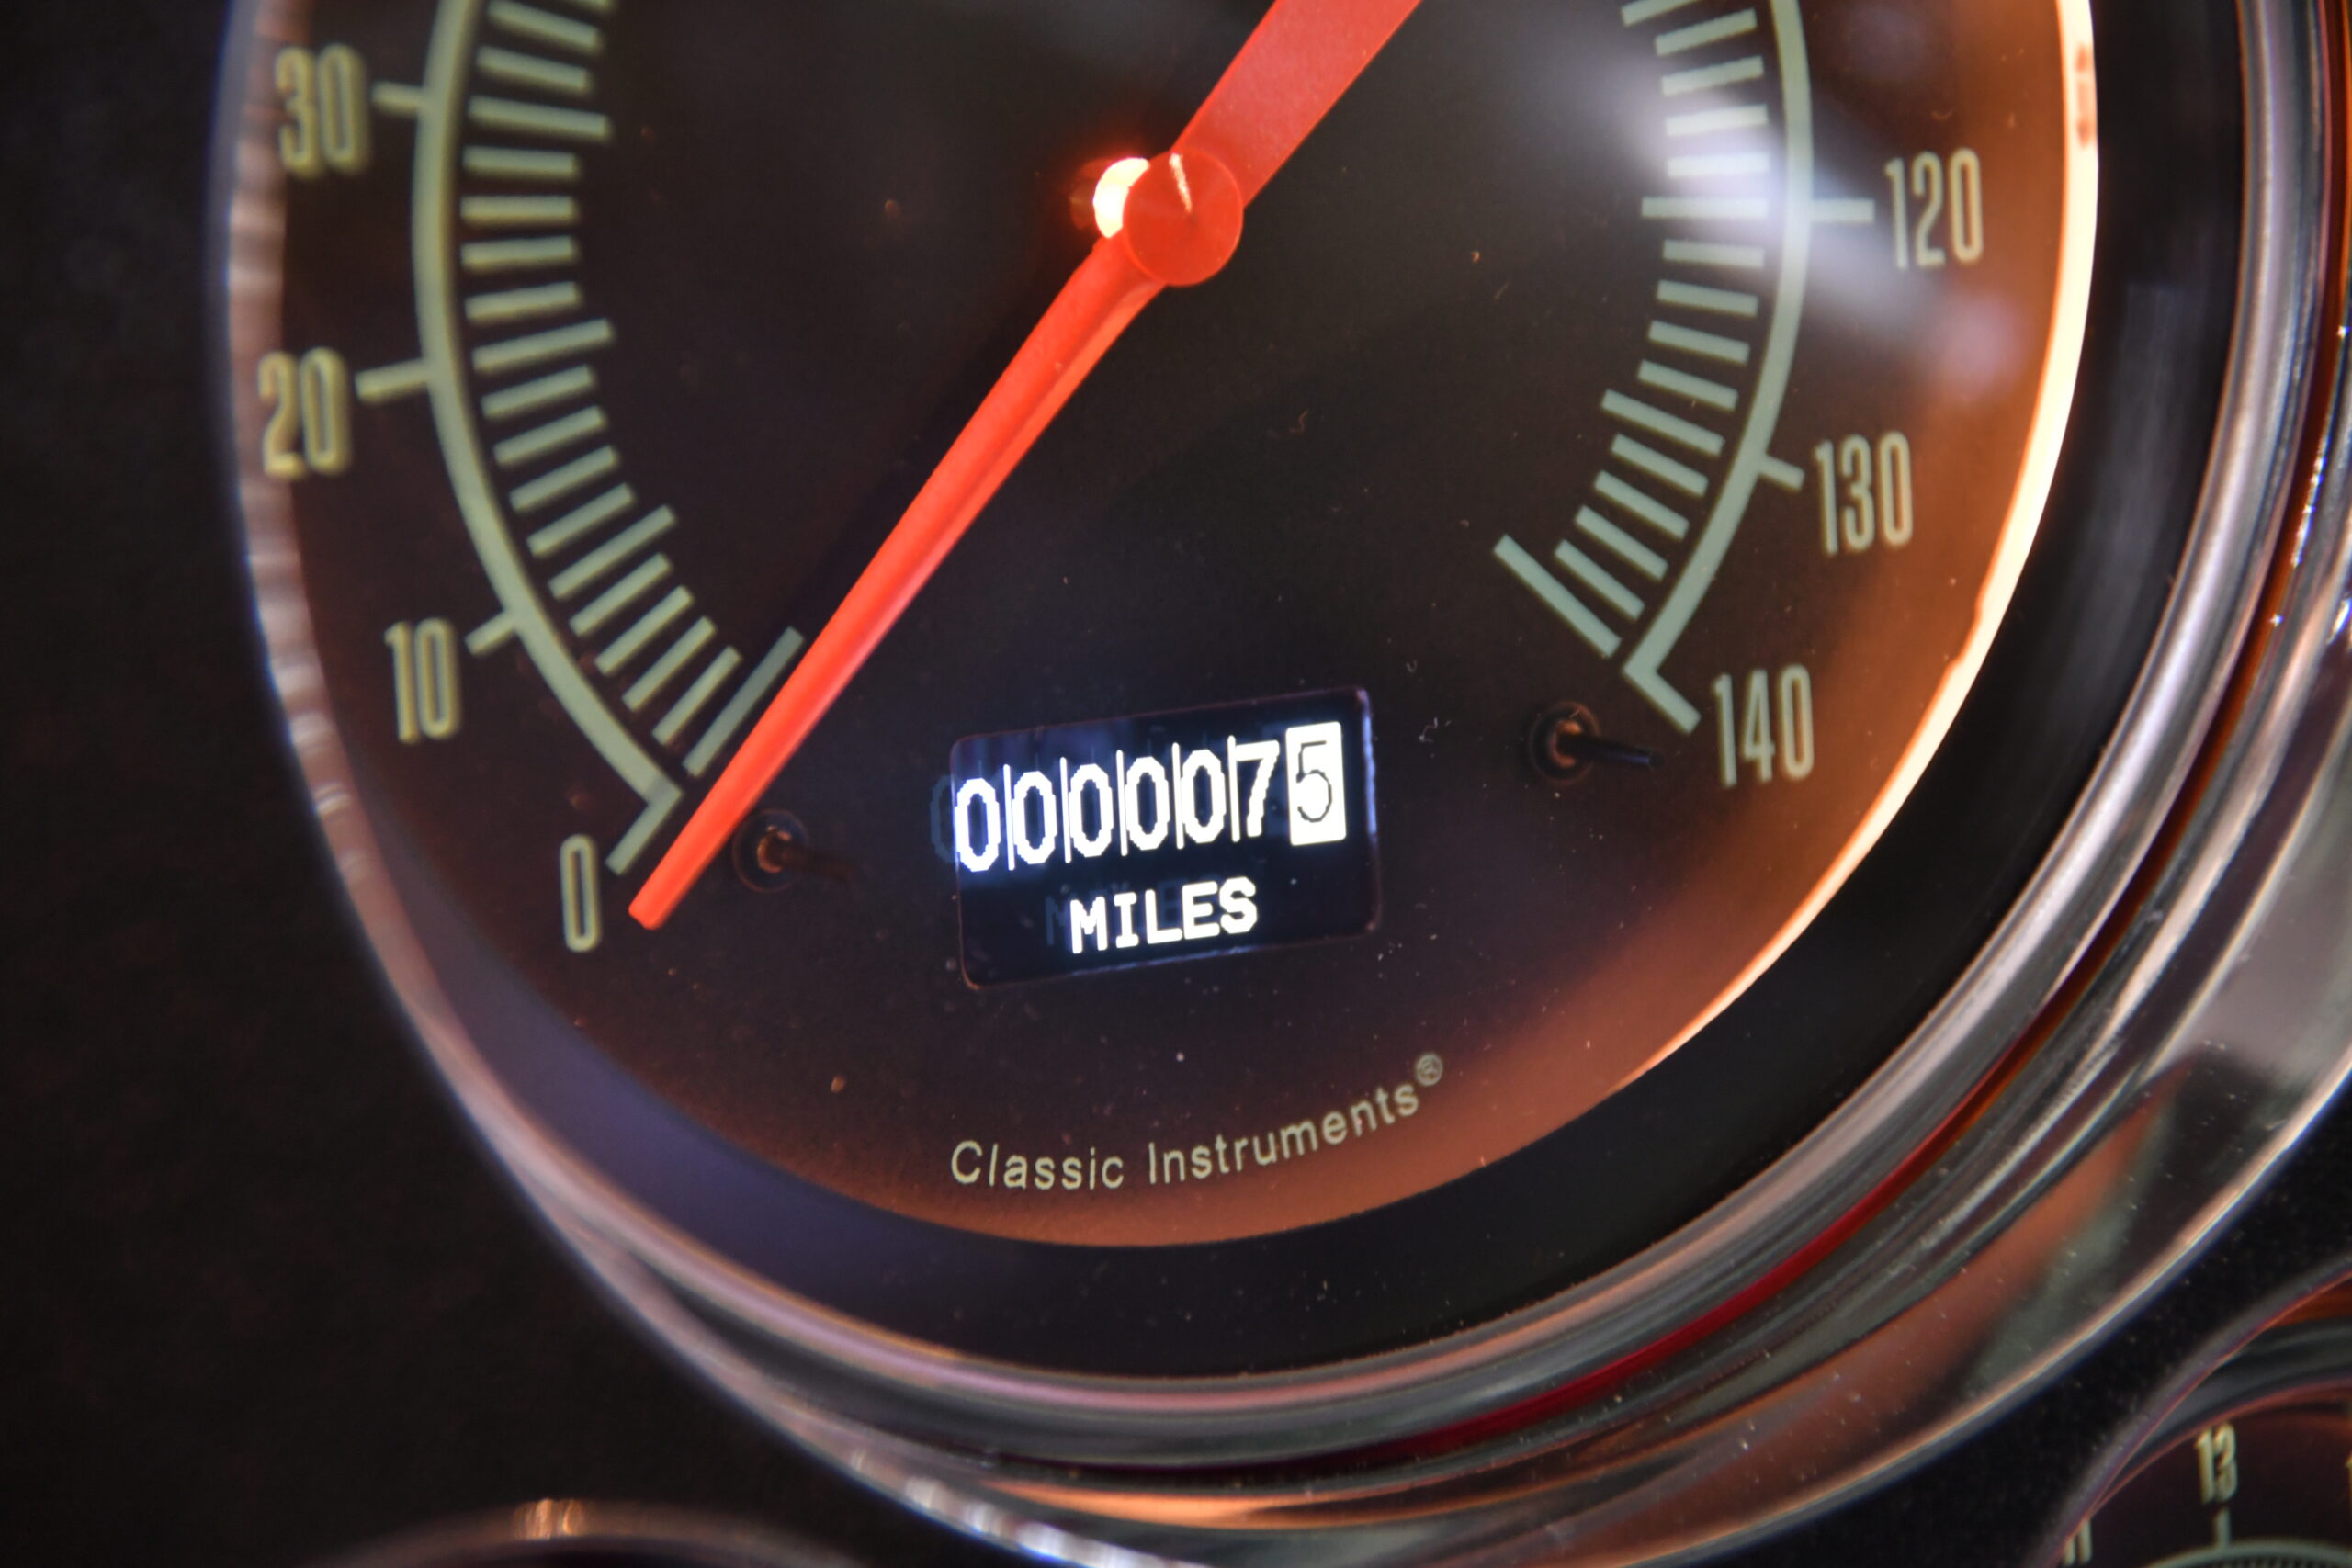
ctp-oct-2020-classic-instruments-c10-gauges-018 ctp-oct-2020-classic-instruments-c10-gauges-019 ctp-oct-2020-classic-instruments-c10-gauges-020 ctp-oct-2020-classic-instruments-c10-gauges-021

SOURCE
CLASSIC INSTRUMENTS
(800) 575-0461
www.classicinstruments.com

- Advertisement -

Related Articles

Search Our Site

More Classic Truck Performance

Jack Fillers’ 1971 GMC Stepside has the Perfect Mix of Patina and Practicality

By Tommy Lee Byrd   -    Photography by the Author When...

2024 Grand National Roadster Show: The Classic Truck Perspective

By Rob Fortier   -   Photography by the Author Still reeling...

Our Chevy Pickup Gets a New Firewall, Engine & Transmission

By Ron Ceridono   -   Photography By the Author We’ve been...

Gary & Cindy Giovanni’s ’56 Chevy Modern Pro Street … South City Style

By Rob Fortier   -   Photography by Tim Sutton If you’ve...

Part 6: Custom Header Fab on the Scott’s Hotrods ’N Customs 1951 Chevy

By Kenneth “Stress Ball” DeKissere   -   Photography by Camren...

Greg Tidwell’s World’s Most Beautiful Truck Award Winning 1940 Ford Pickup

By Rob Fortier   -   Photography by Tim Sutton When the...
More Classic Truck Performance

The Harrison’s Rod & Custom ’71 GMC, Part 1

By Bryan Harrison   -   Photography by the Author This is...

THE GOLDMAN TOUCH

Gary Brown’s Full-Attitude ’57 Chevy By Rob Fortier   -   Photography...

Independent Thinking

Part III: C4 Corvette IRS for Early Chevy Pickups By...

Brad Bolves’ ’75 Ford SuperCab

By Eric Geisert   -   Photography by the Author For some...

OBS Steering Box Upgrade with Borgeson Universal Company

By Todd Ryden   -   Photography by the Author  Considering how...

Dino’s Git Down 2023

This Bowtie Bonanza Continues to Blow Us Away By Fuelish...