1962 Chevy Impala Outfitted With a Strange Engineering Custom Rearend
By Barry Kluczyk – Photography By Taylor Kempkes & Courtesy of Strange Engineering
Over the past year, we’ve regularly visited Old Anvil Speed Shop in Orange, California, to keep tabs on a truly unique 1962 Chevrolet Impala SS convertible. Its exterior looks deceptively subtle, but it houses an impressive amount of fabrication and powertrain technology beneath its vintage exterior.
Finally assembled and just hours away from hitting the road with our Strange Engineering custom setup rear end for our 1962 Chevy Impala convertible.
Paul Bosserman, Old Anvil’s owner and founder, designed a completely new perimeter chassis for the car, replacing the original X-frame. Moreover, the chassis is welded to the convertible body, effectively creating a unitized structure that is significantly stronger than the factory foundation.
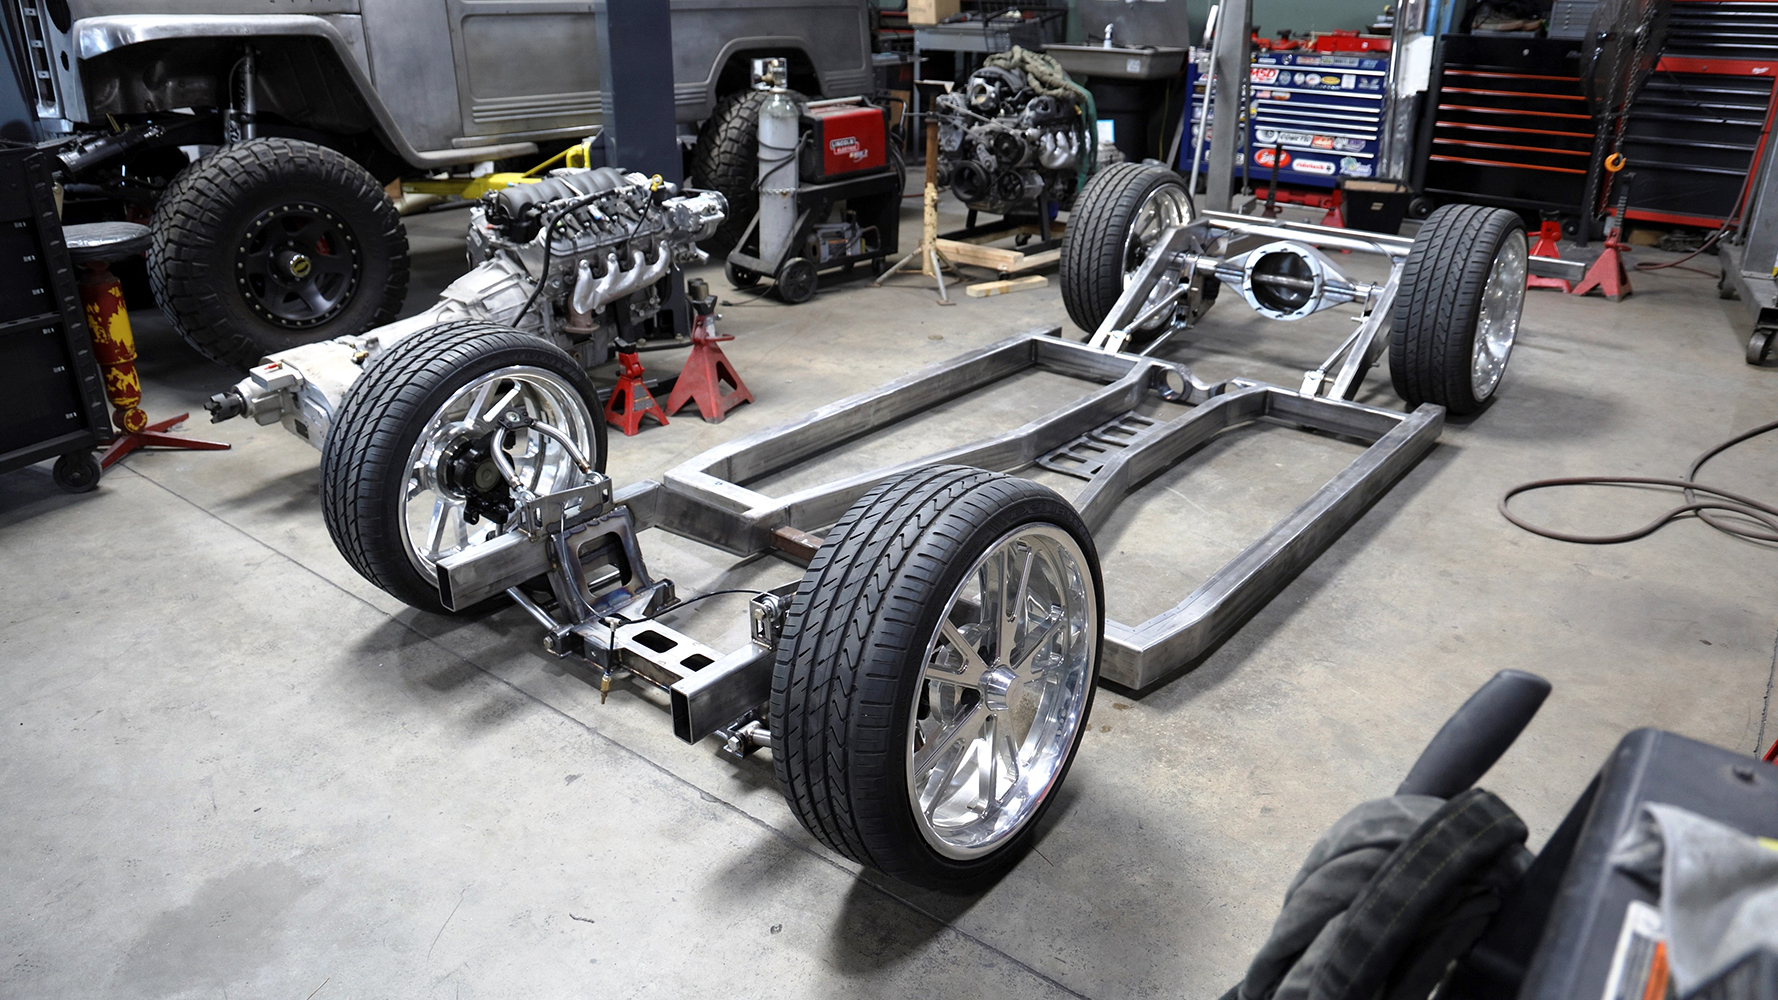
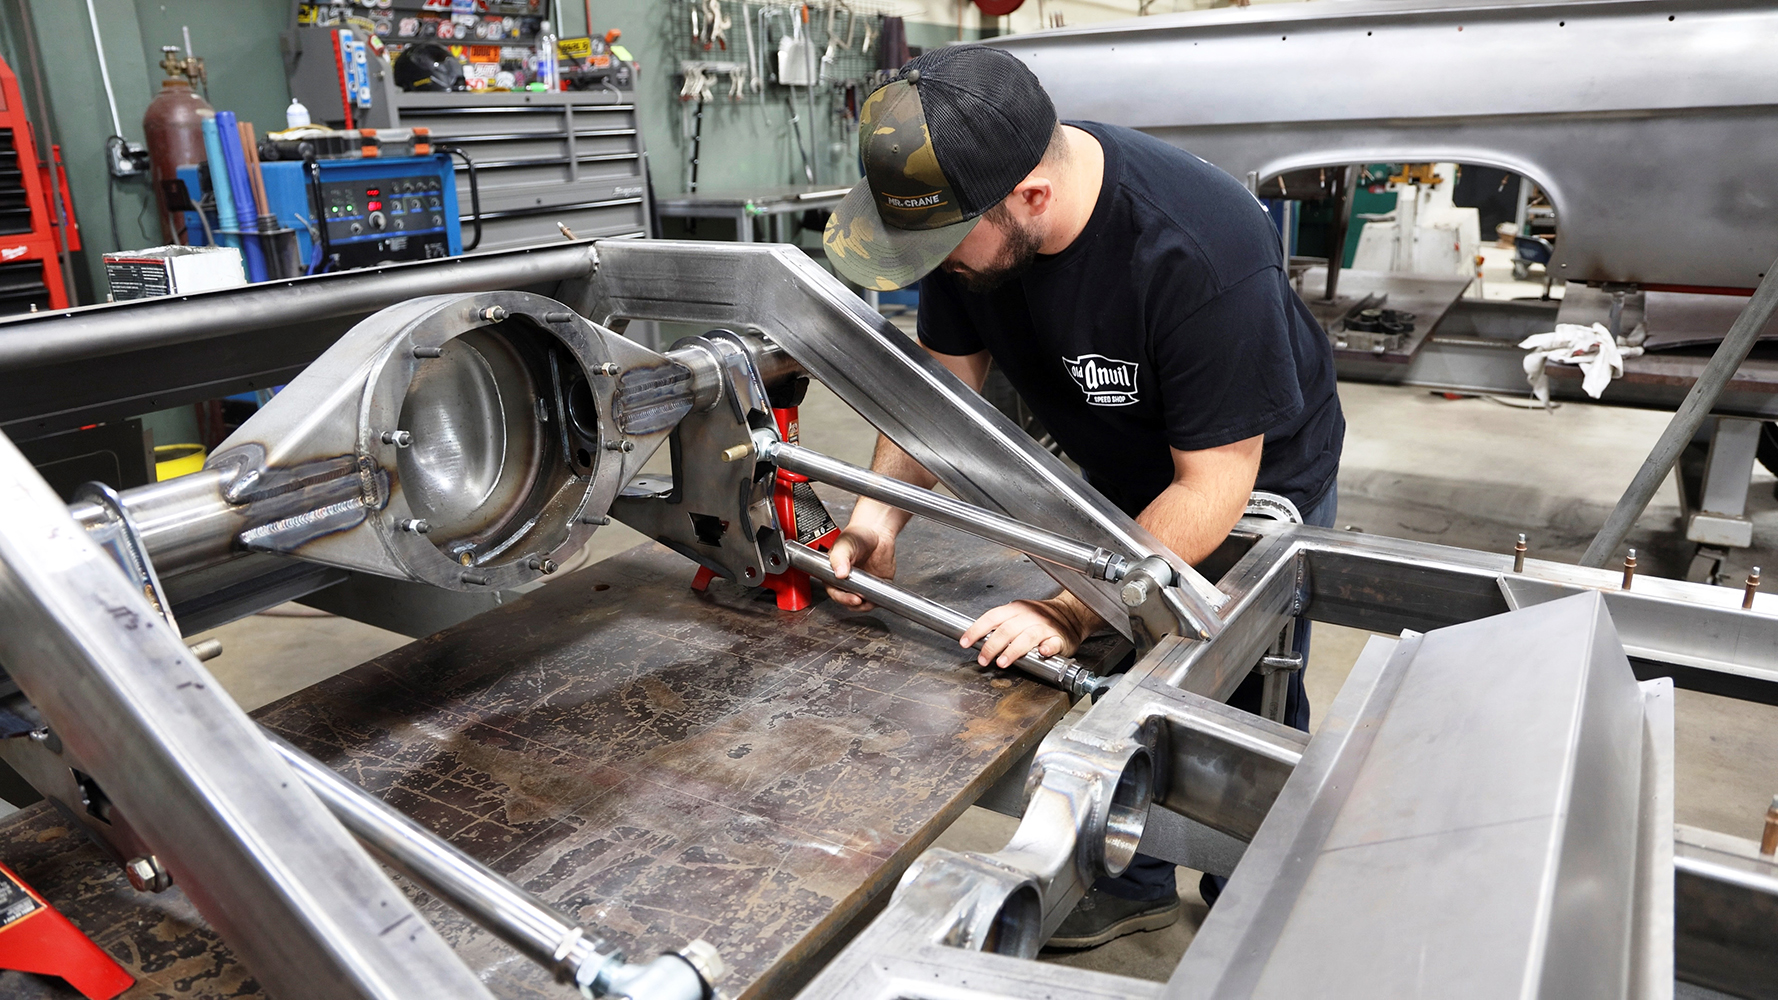
The project’s foundation is the custom chassis designed and built by Old Anvil Speed Shop. Constructed from rectangular tubing, the chassis features large step rails at the rear to fit 24-inch Schott wheels and 355-series tires. A mockup of the rear axle is displayed in position.
In addition, Bosserman and his team of fabricators created their own suspension setups, featuring a rear four-link (with a Panhard bar) and custom upper and lower A-arms in the front—all while incorporating 22-inch front and 24-inch rear custom wheels from Schott.
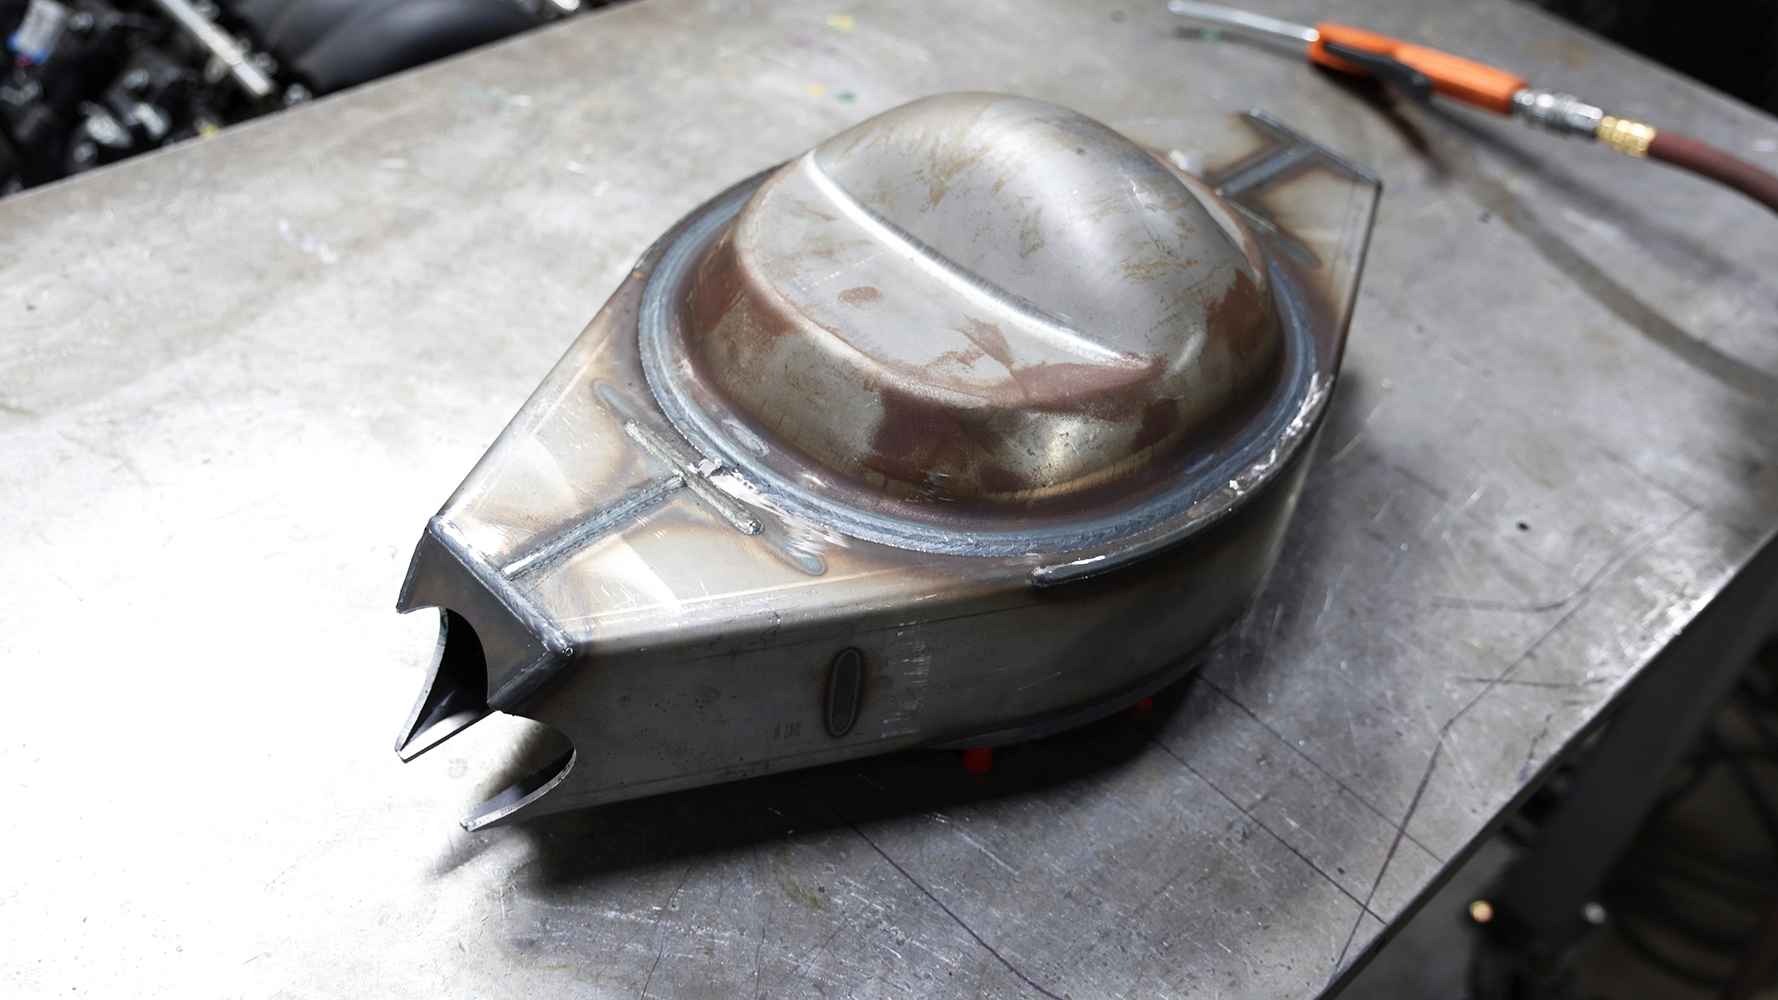
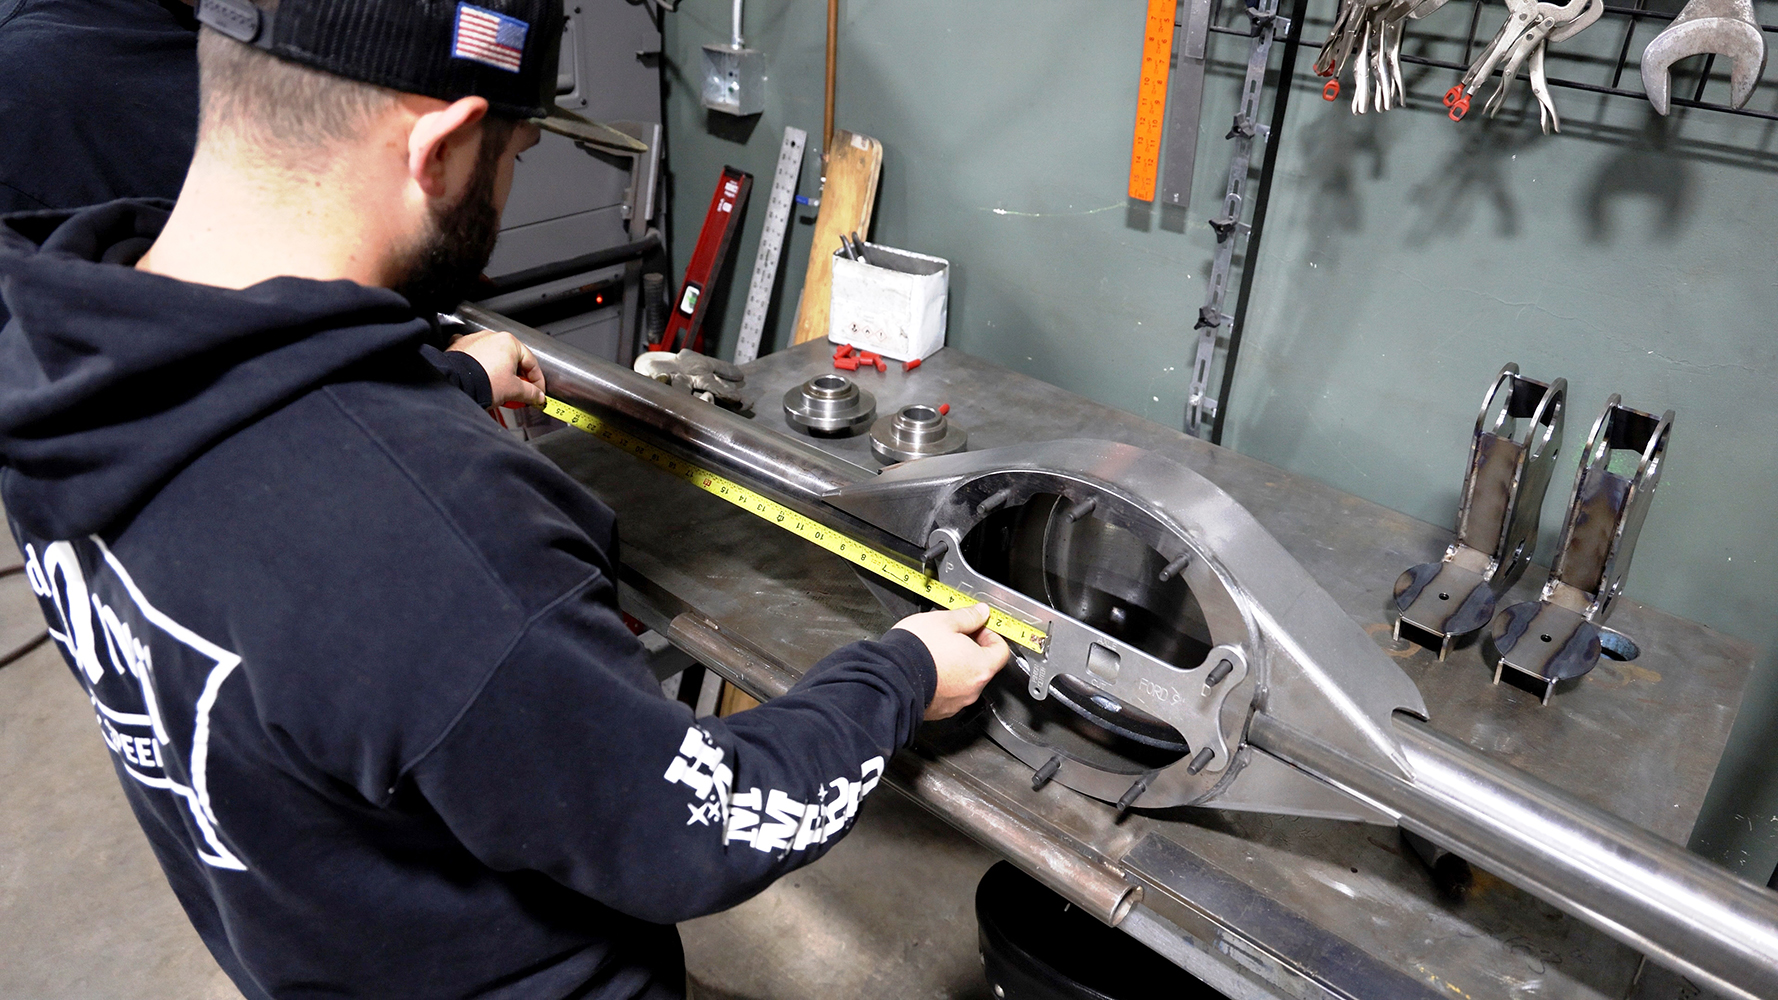
A fabricated sheetmetal housing is the starting point for the rearend buildup. Its welds have been ground down to make the housing look smoother when painted.
The car also includes the first hot rod application of King off-road shocks, as well as front and rear airbags from Air Lift, allowing for 7 inches of suspension travel while keeping the chassis just above the pavement at rest.
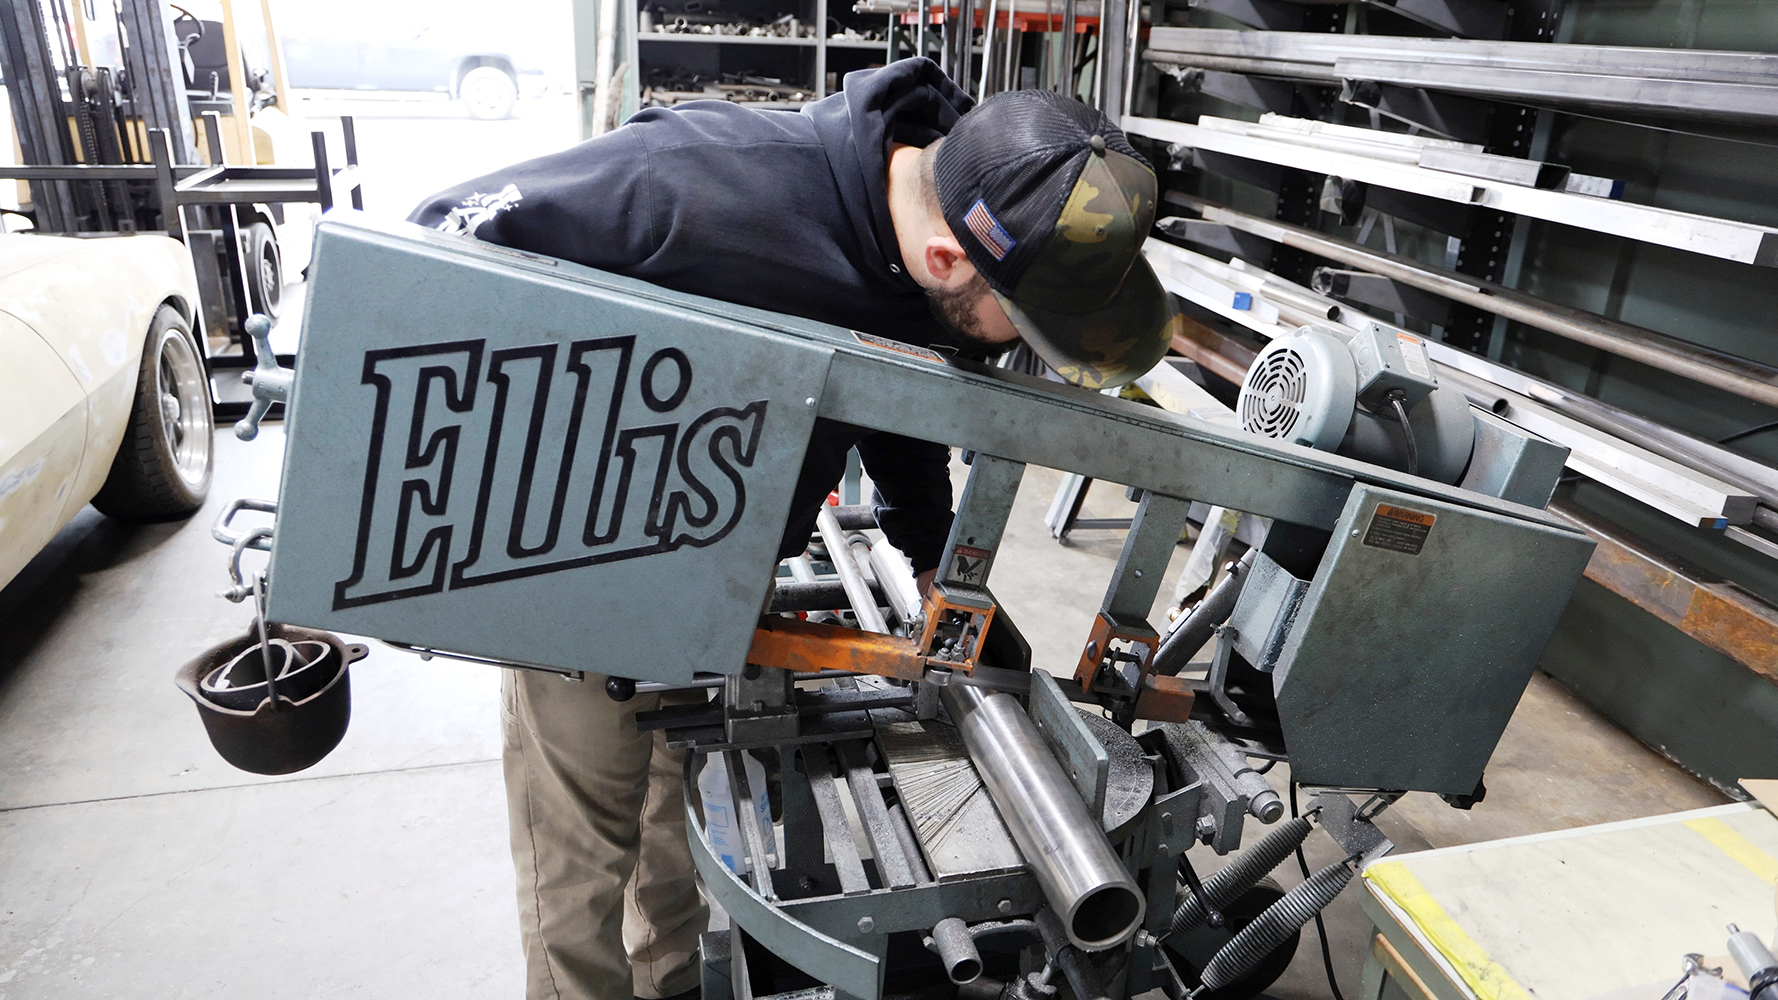
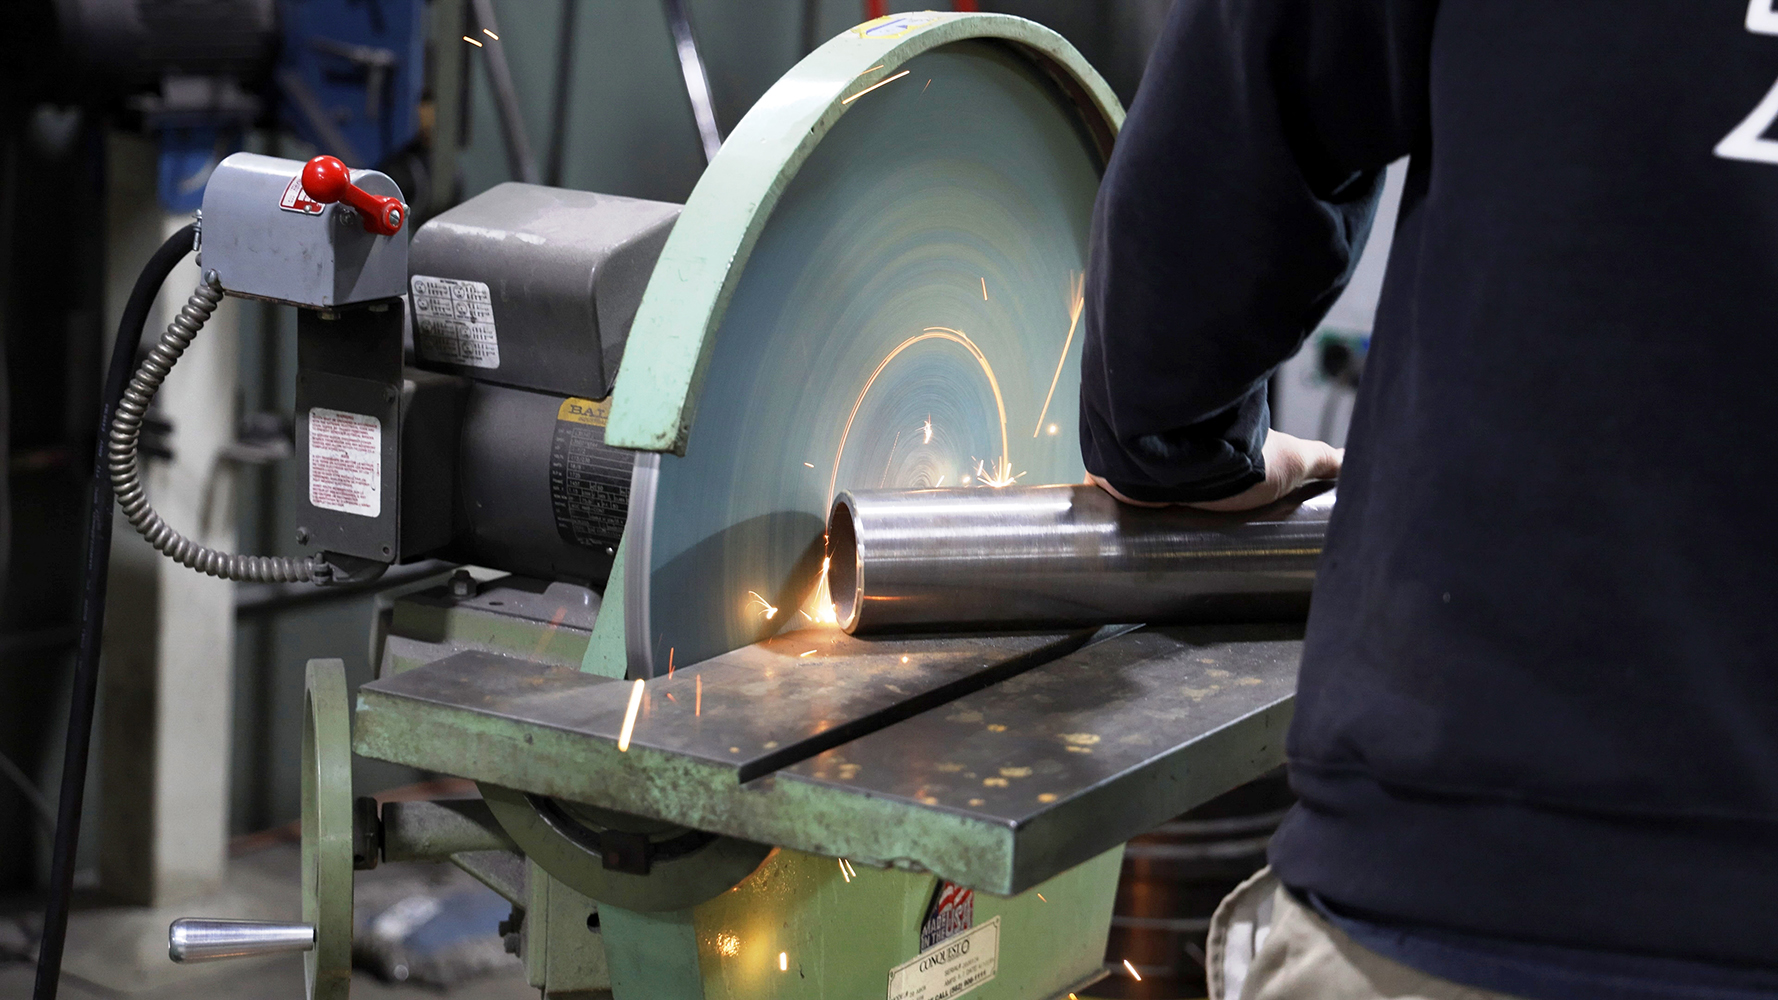
Next, some axle tubes were rough-cut from 3-inch tubing. They’ll be trimmed down further, but this is the starting point.
Underhood, the heart of the Impala’s propulsion system is a Kong Supercharged Nelson Racing 427ci LS engine producing 1,200 hp. This is paired with a strengthened 4L80E four-speed automatic transmission. The next stage of the project involves funneling all the supercharged engine’s torque through the transmission to the pavement, which is why we returned to the shop: the rear axle.
ICT’s “dog bone” tool is designed for axle narrowing, providing key measurement points for determining the proper lengths of the axles and tubes.
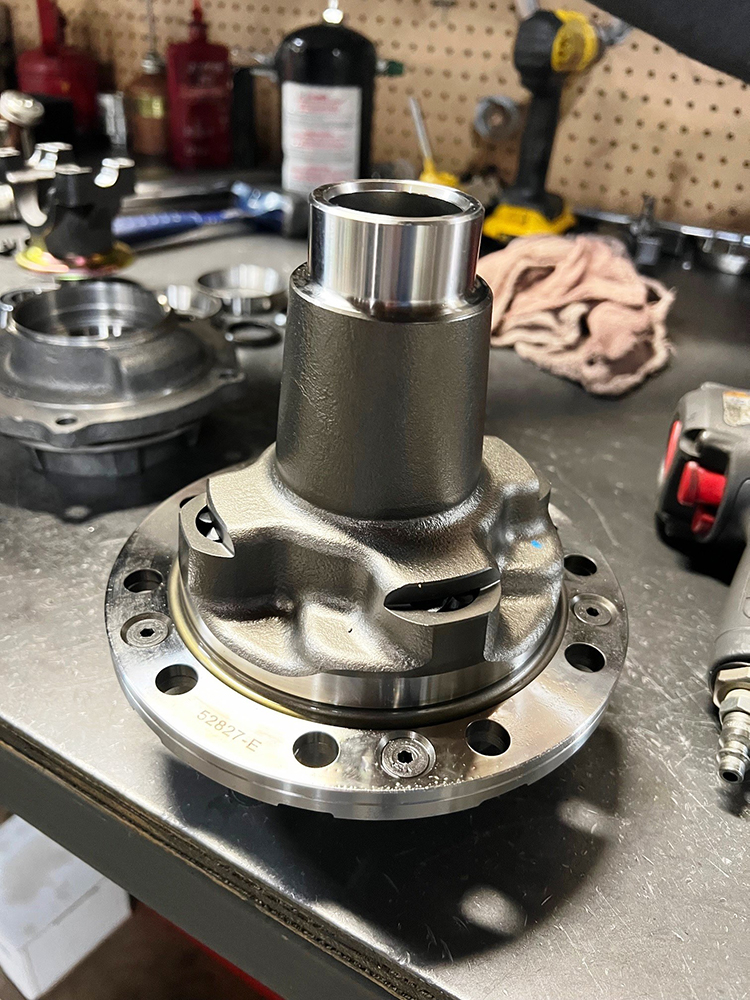
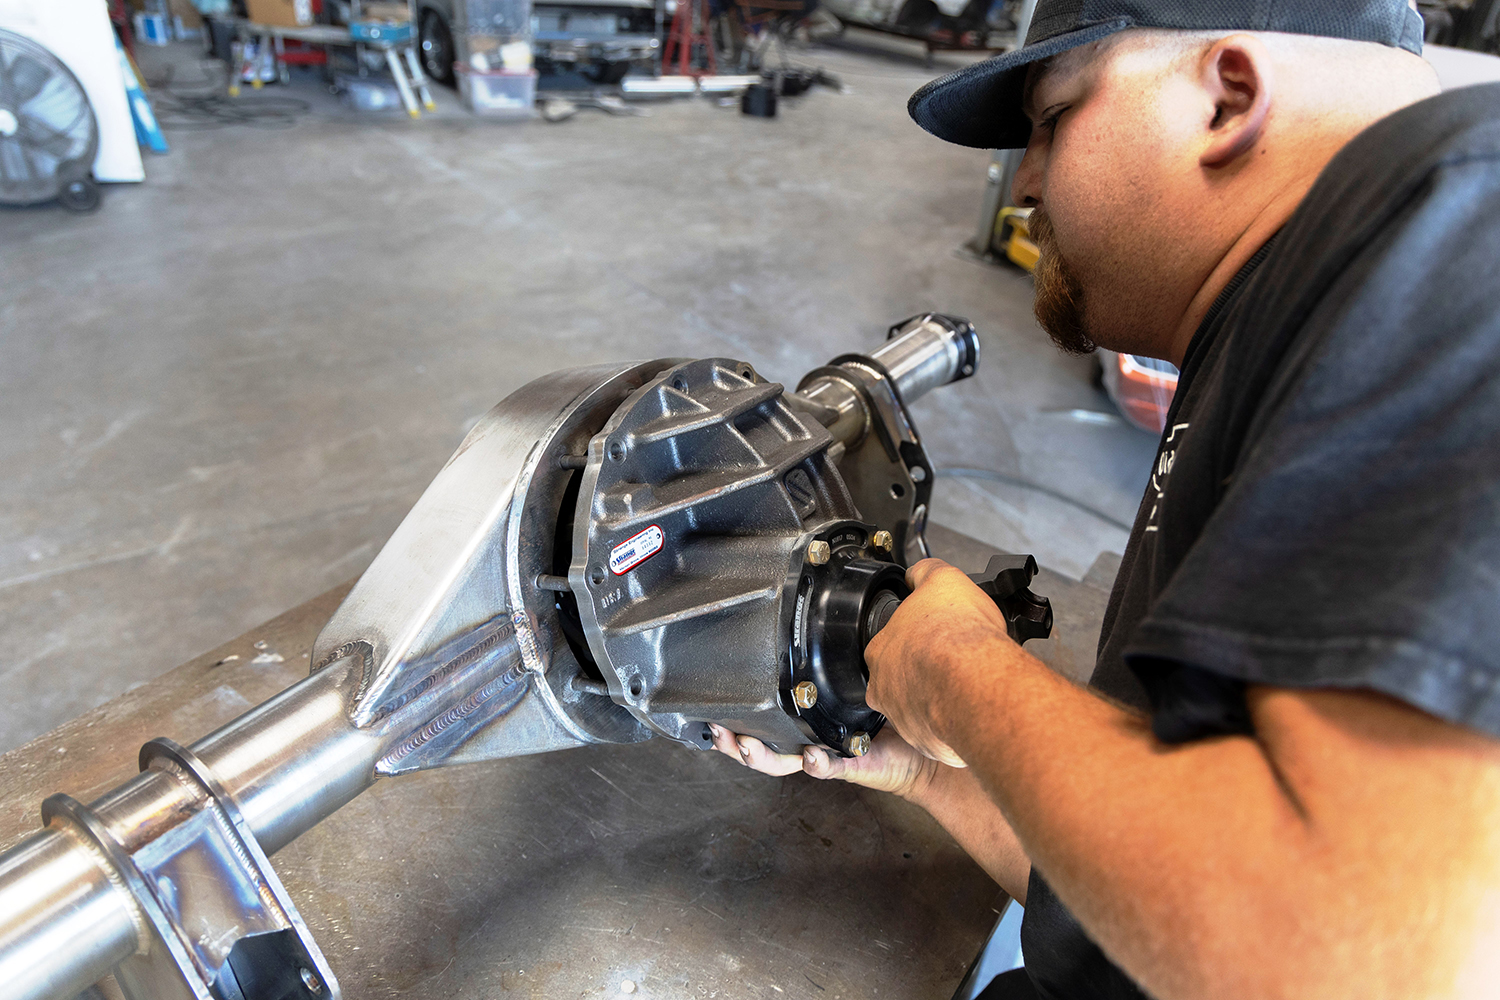
It’s no surprise that Old Anvil opted for a robust 9-inch rearend—and for that they chose a Strange Engineering Pro nodular centersection assembly, which is the company’s strongest. Supporting components included a billet pinion bearing support, an Eaton Truetrac differential, and 4.11 gears from U.S. Gear. Strange also provided all-new Torino-style big bearing housing ends to pair with a set of heavy-duty, 35-spline axleshafts.
Here’s the tool in action as we measure the axle tubes for trimming. A stock rear axle for a 1962 Chevy measures 60 inches wide. With this project, the flange-to-flange span will be almost 8 inches narrower.
Along with Bosserman, Old Anvil’s fabricators, Brandon Gerringer, Philip Avila, and Jake Caballero, worked to assemble a custom housing for the centersection and tubes for the axleshafts.
Once the tubes are cut down, their ends are finished and beveled slightly in preparation for attaching the housing ends to which the axle retaining plates are mounted.
In a car where stance and overall aesthetics are everything, it was a meticulous process to adjust the assembly’s width while fitting massive 355/35R24 Vredestein Ultrac Pro tires beneath the rear fenders.
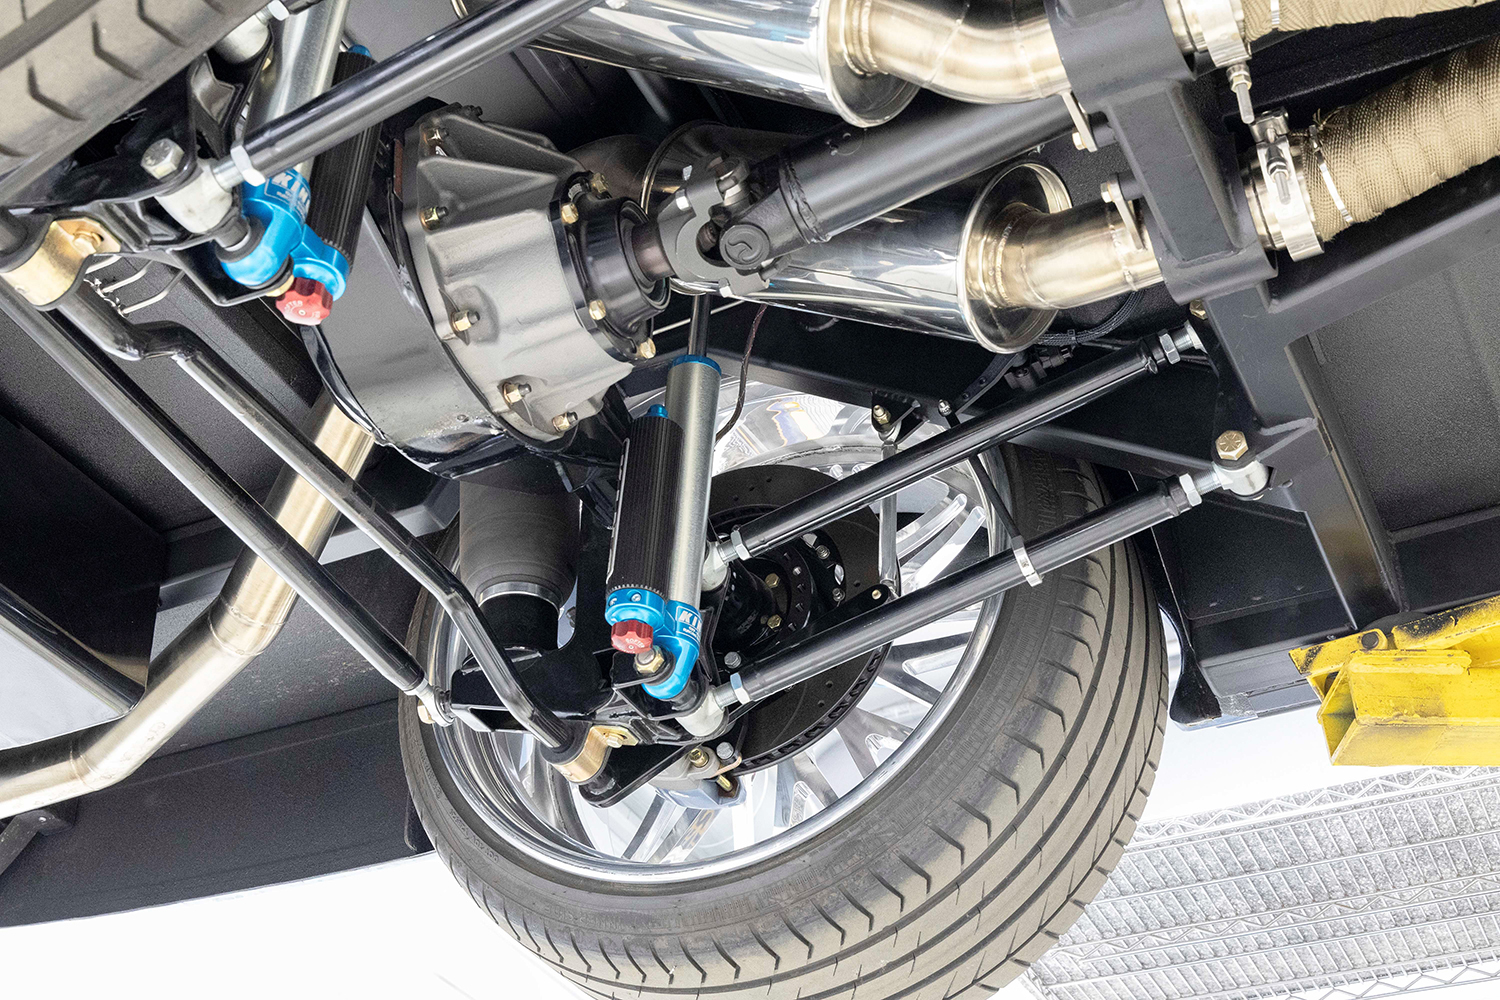
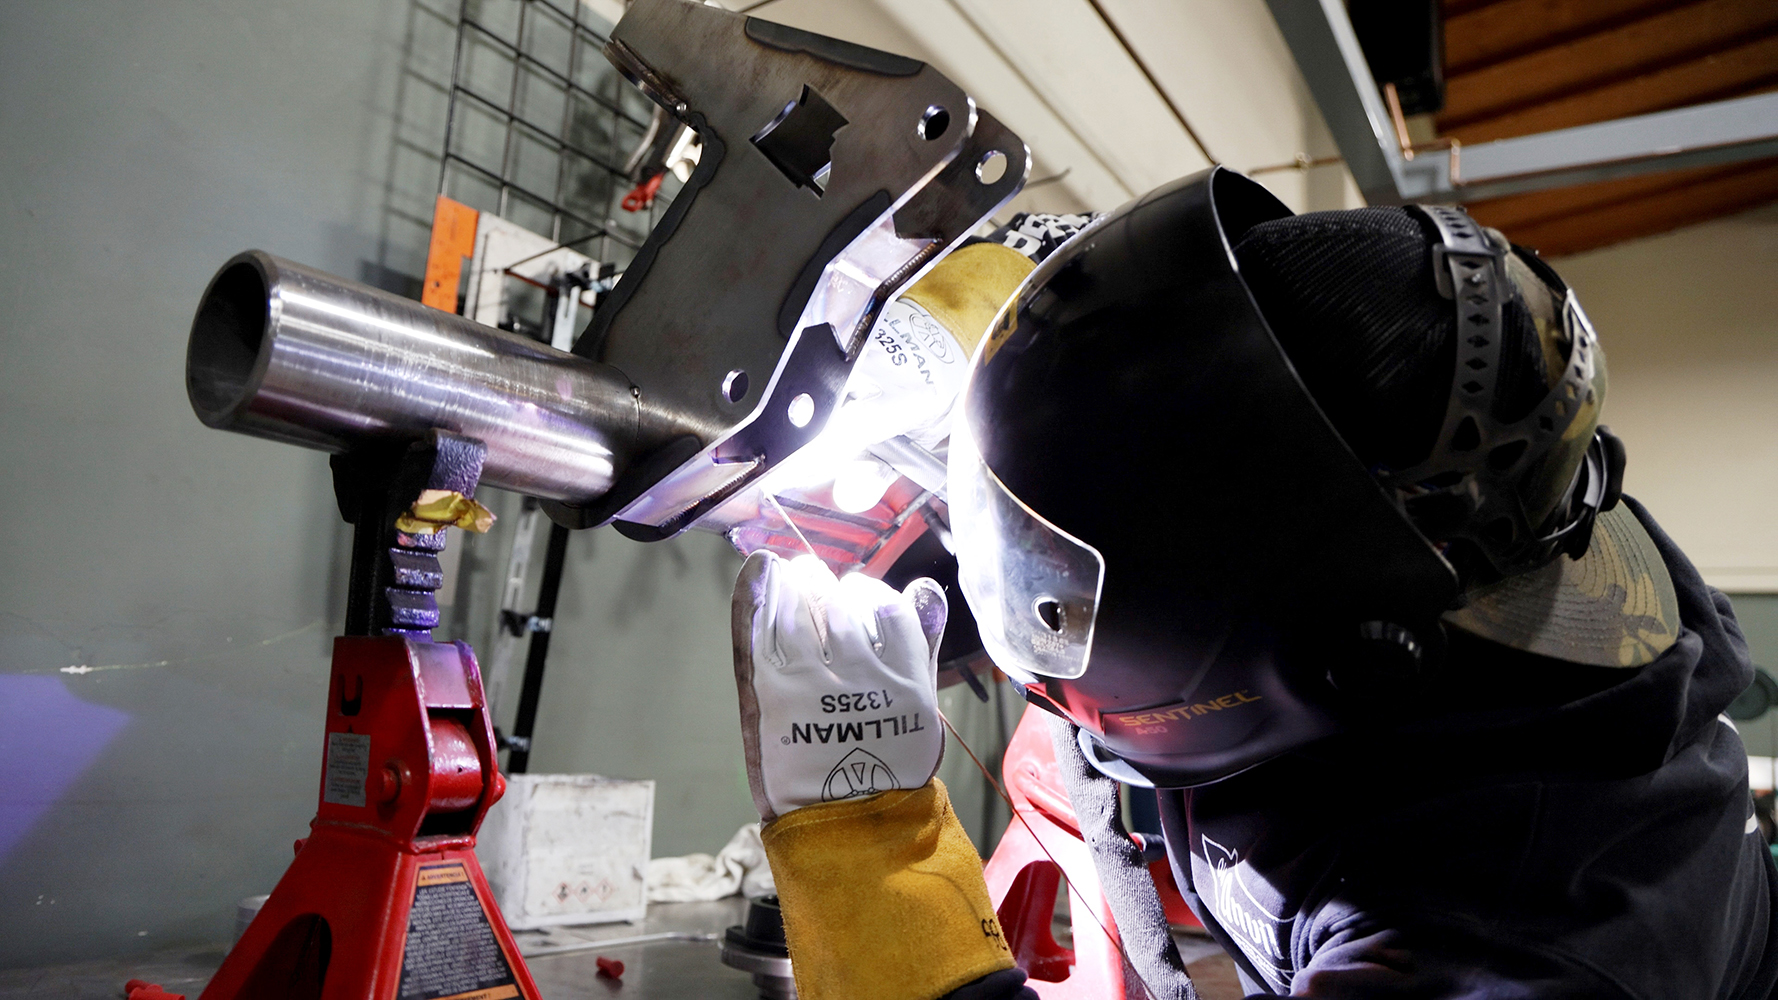
This custom rearend assembly also has fabricated suspension mounts welded. They will support a four-link suspension that includes King off-road shocks and Air Lift airbags. Altogether, the suspension will have 7 inches of vertical travel.
“We measured and measured again,” Paul Bosserman says. “It had to be perfect, and I believe we achieved it. The car looks stunning on the ground, and that strong 9-inch will handle all the power the powertrain can send to it.”
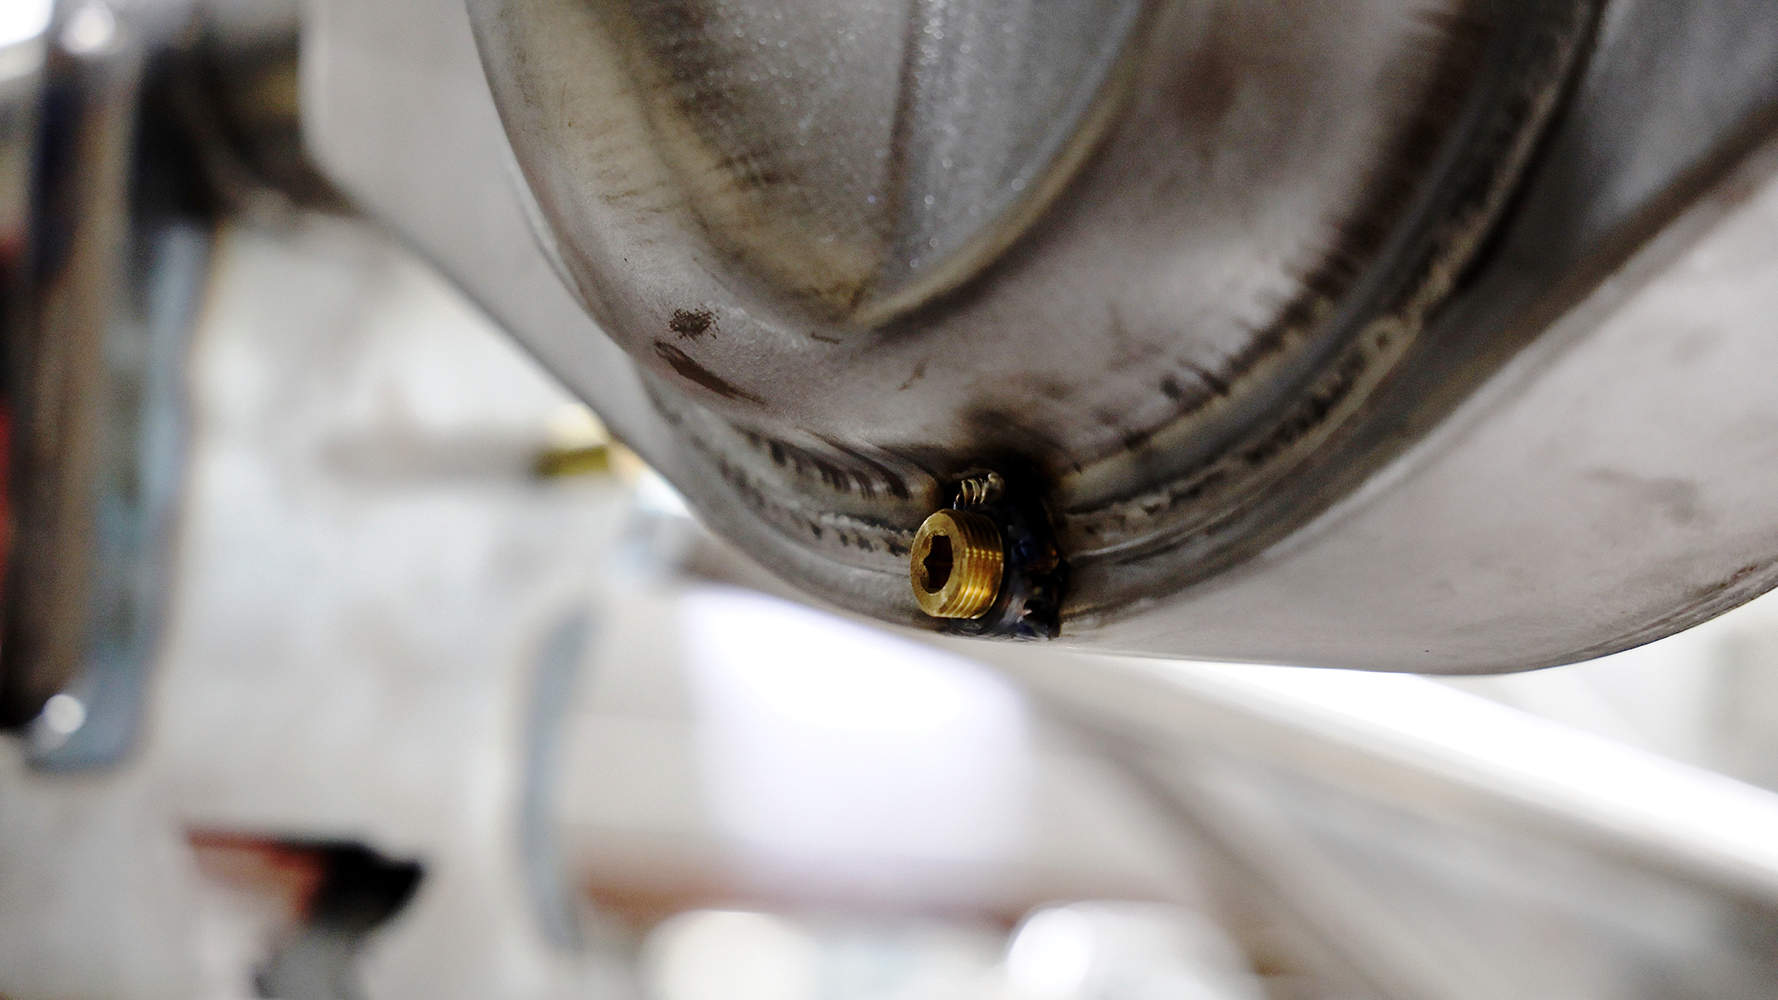
Old Anvil also modified the housing with a drain hole and plug, which will reduce the mess down the road if the axle shafts and/or centersection require removal.
From flange to flange, the assembly’s width would clock in at 52.5 inches, which was 7.5 inches narrower than a stock 1962 Chevy rear axle. Bosserman and his crew would also fabricate one-off mounts on the 3-inch axle tubes to accommodate the King shocks and Air Lift airbags.
With the axle tubes welded in place and the suspension mounts secured, the rearend housing is positioned in the chassis to ensure proper fit. All the careful measurements taken thus far have paid off, and all the custom-fabricated components align as intended.
Ultimately, the rearend assembly would be an artfully executed blend of high-performance capability and precise fabrication—just like the rest of this stunning Impala.
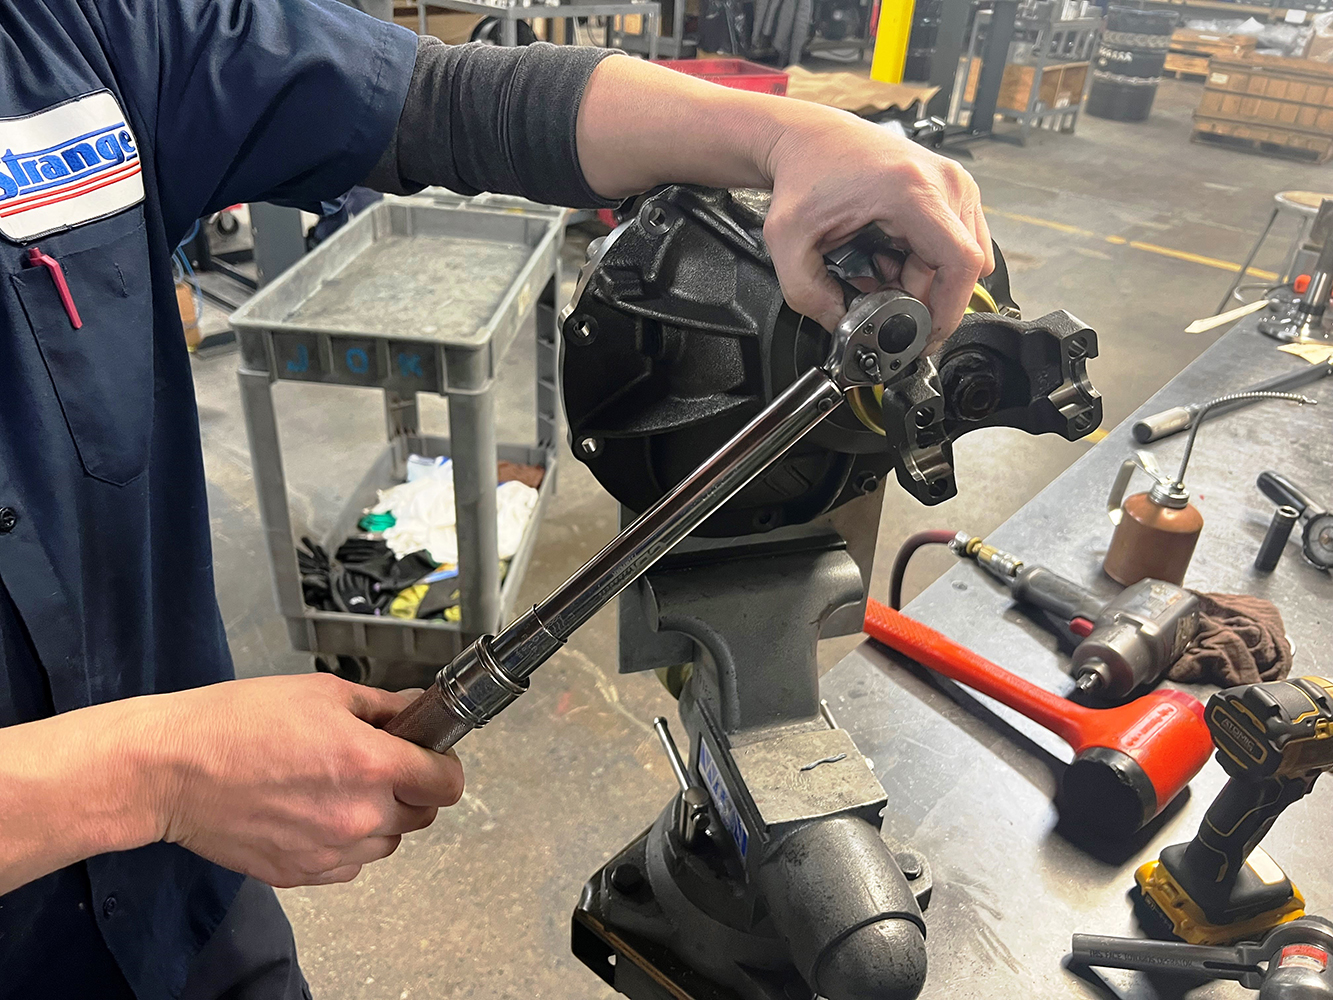
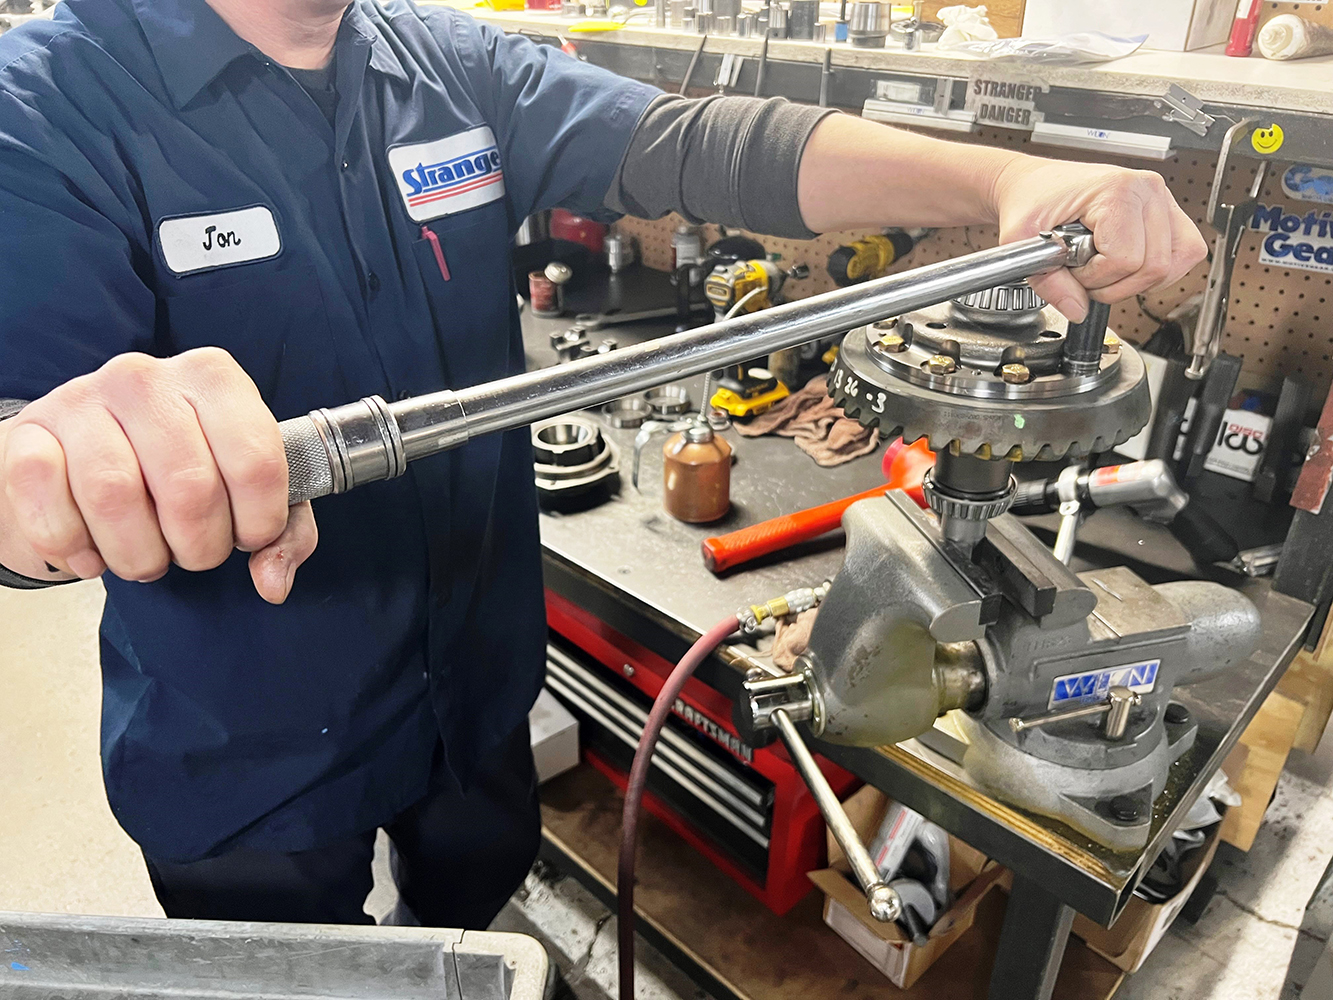
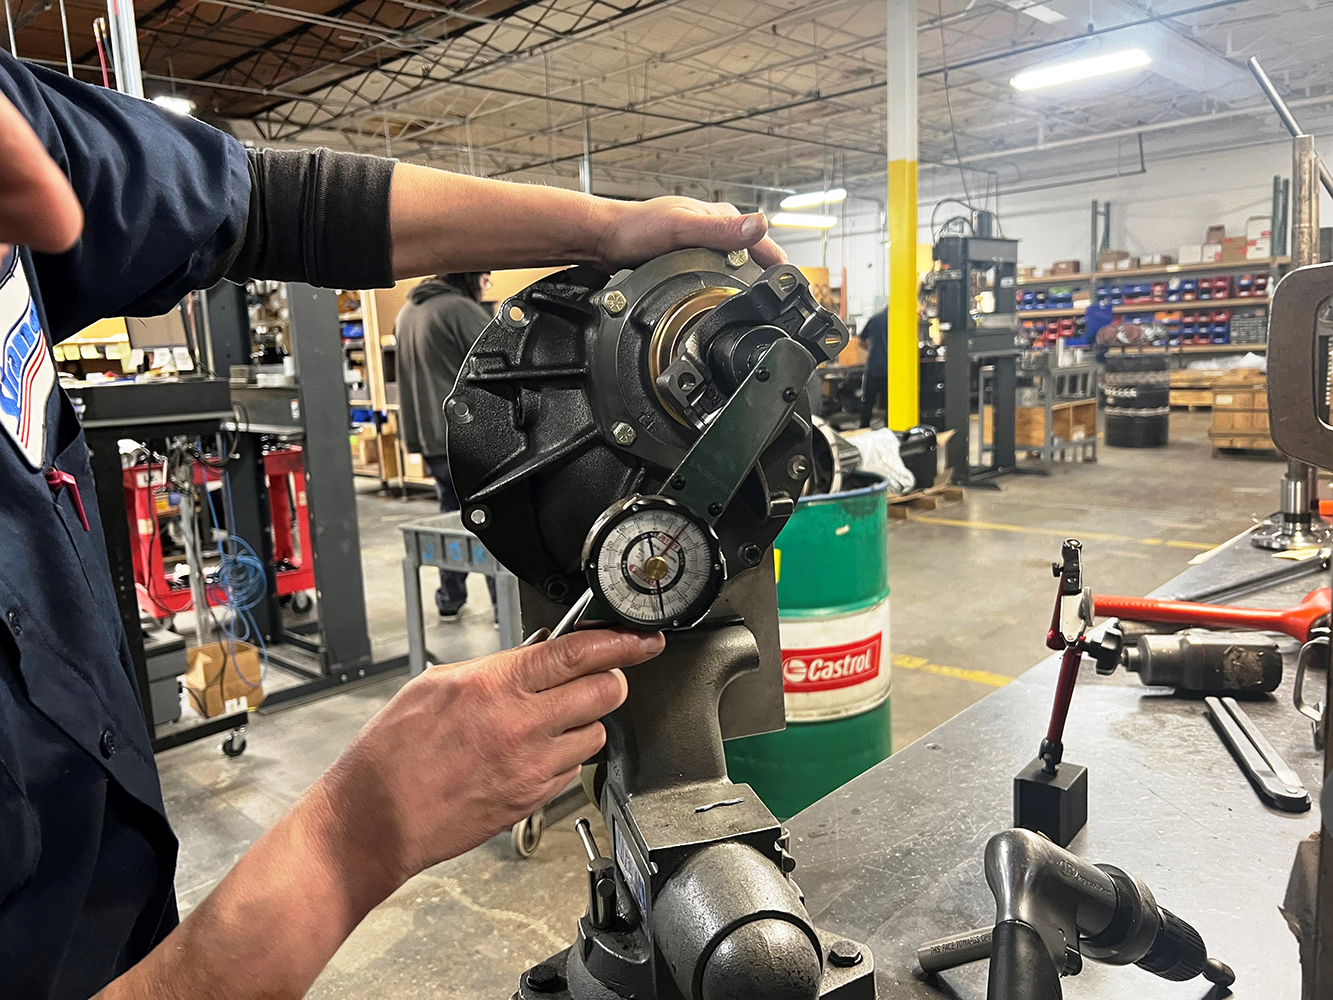
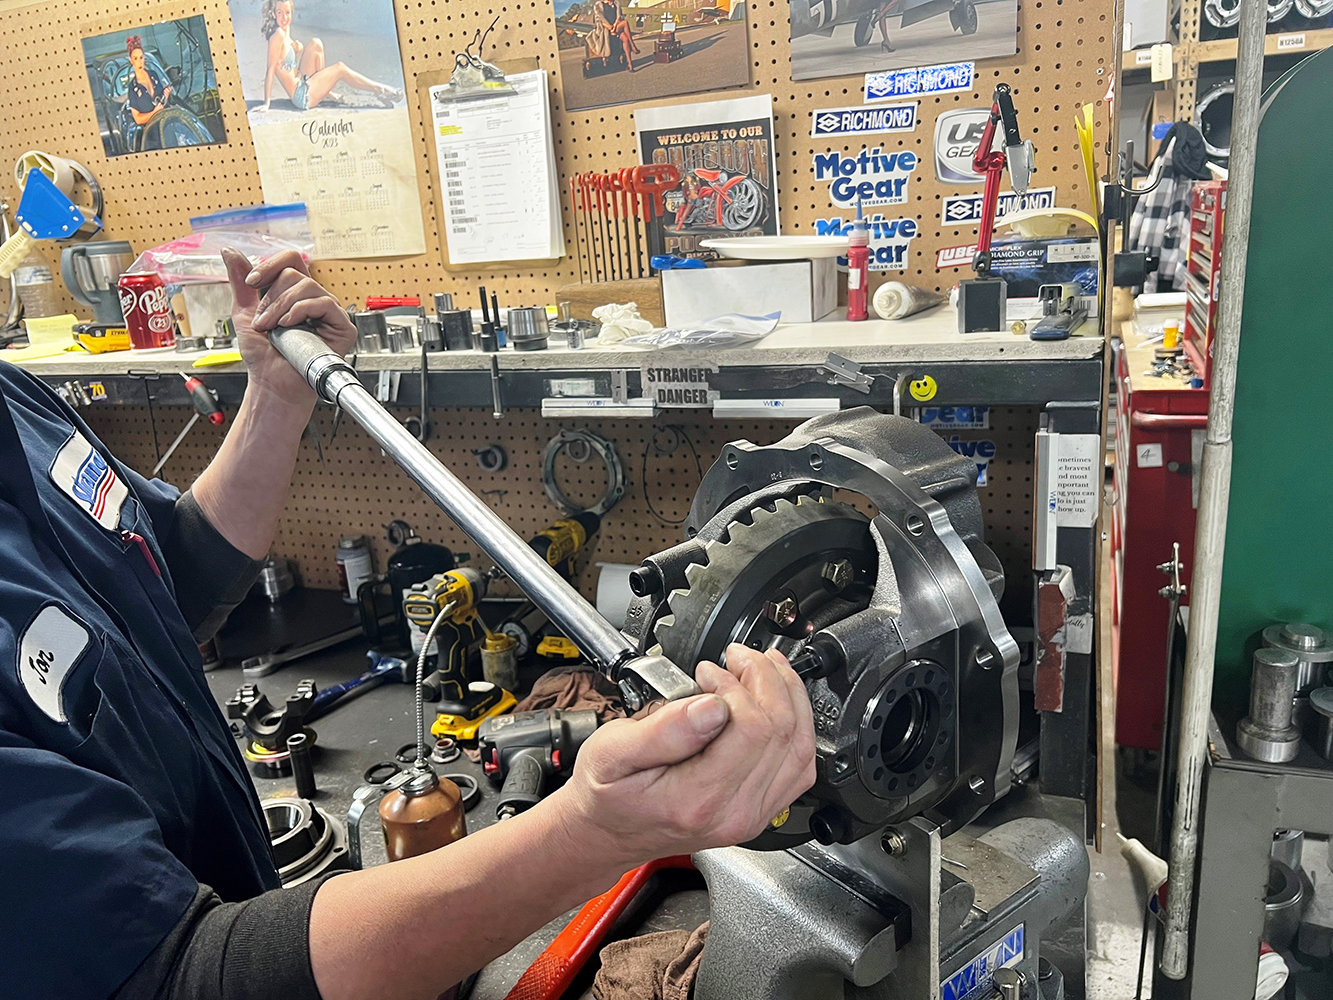
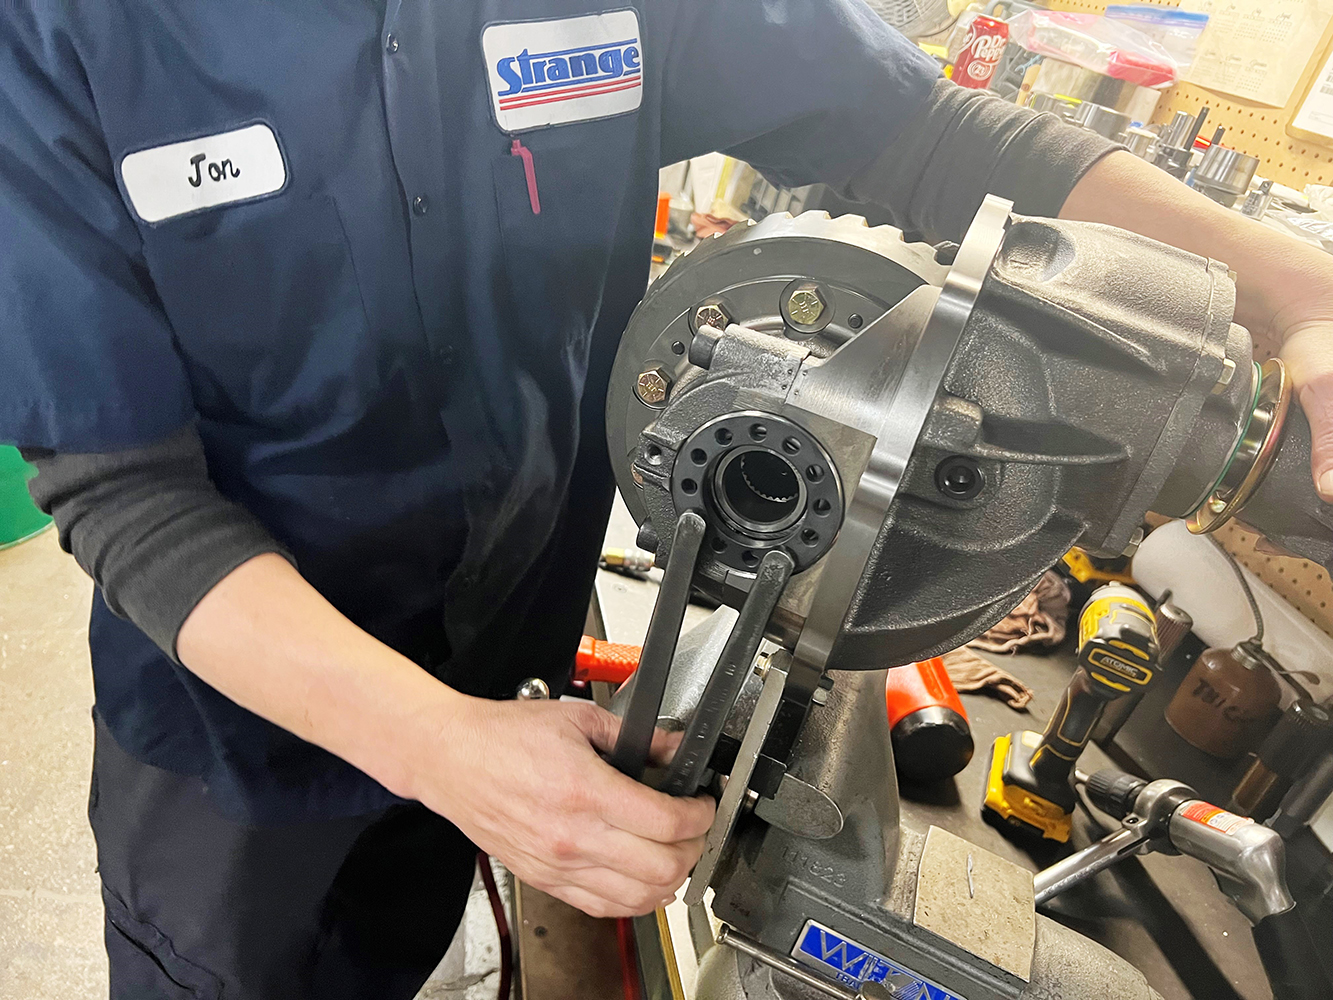
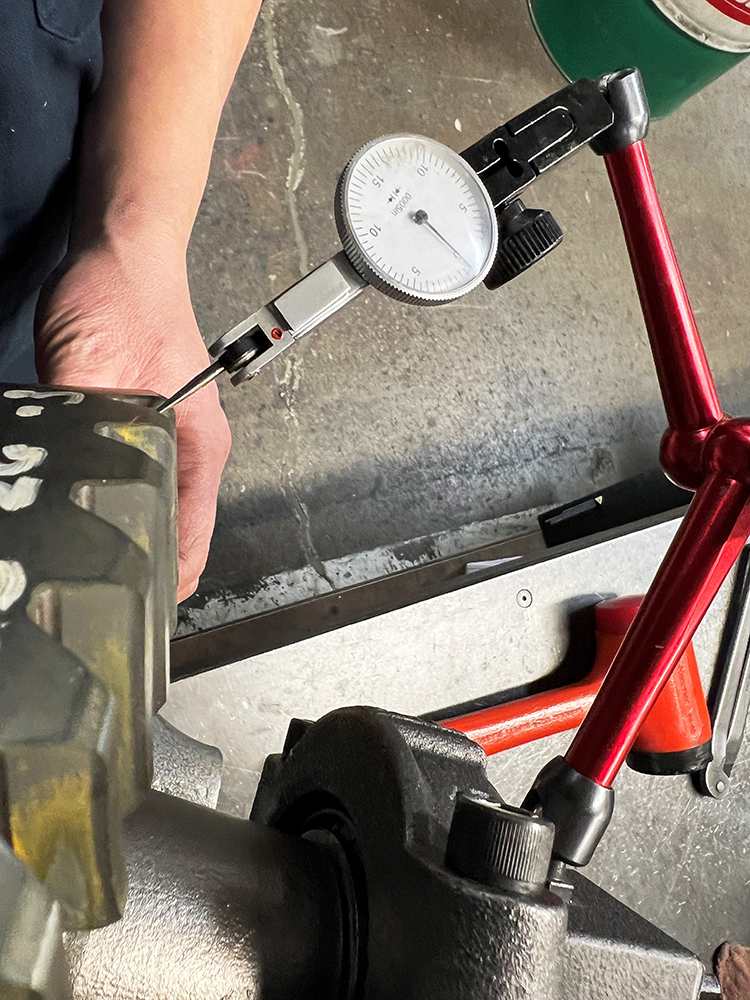
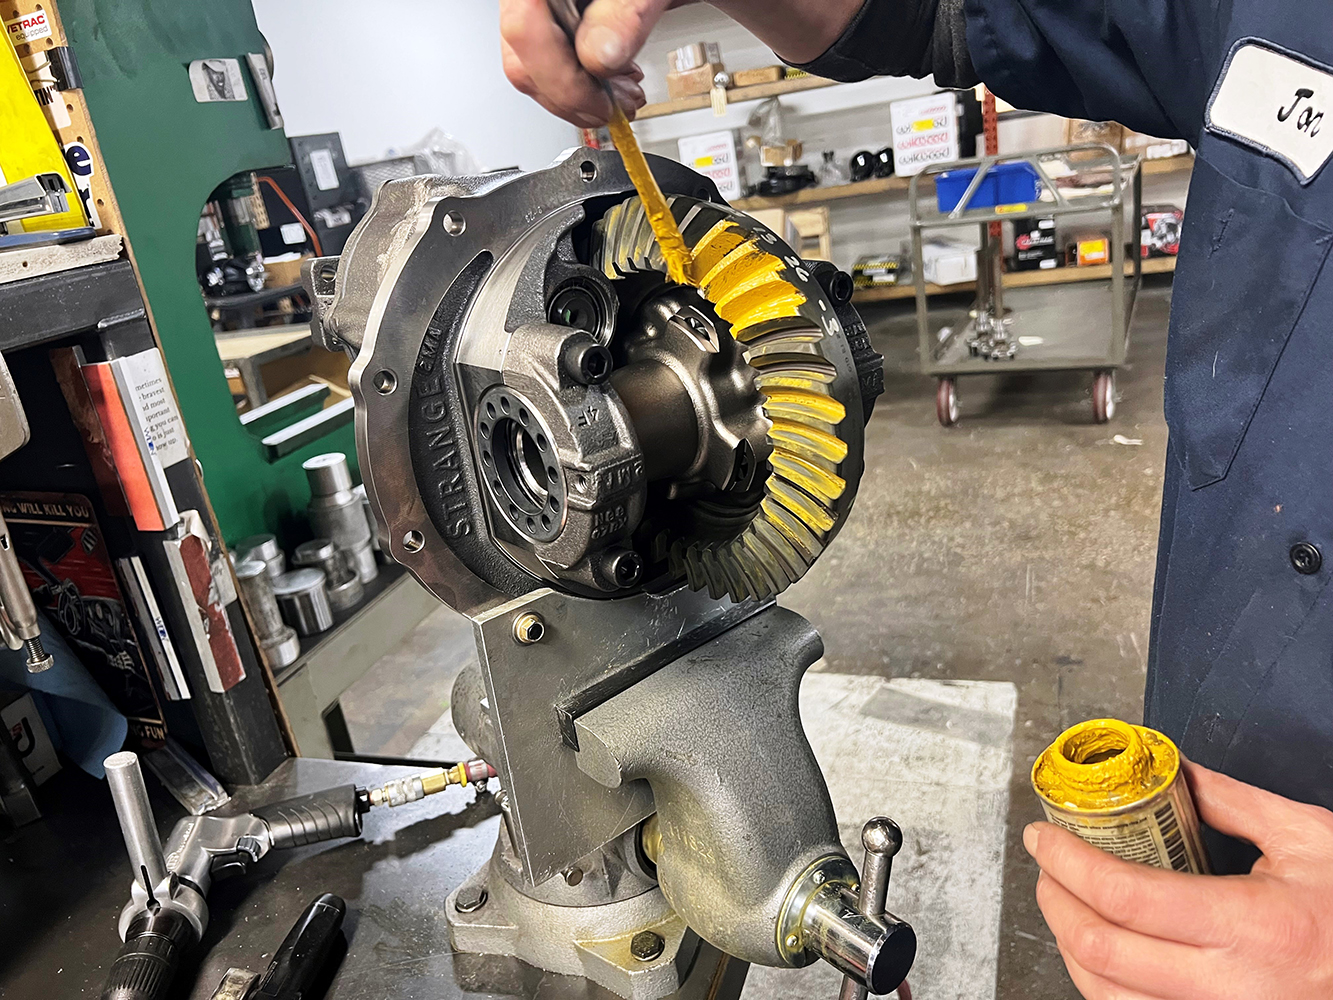
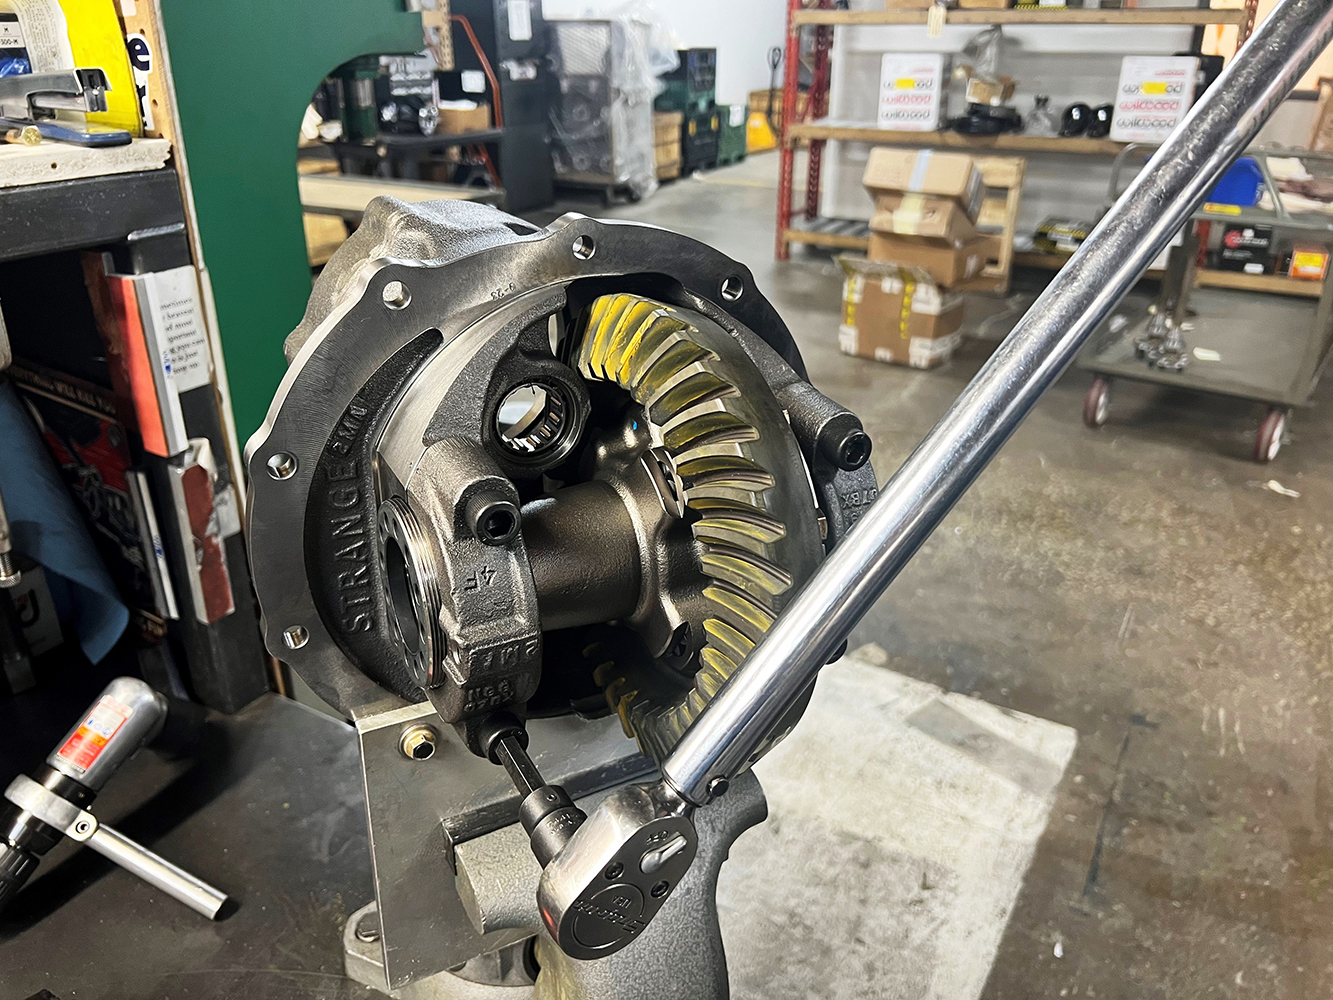
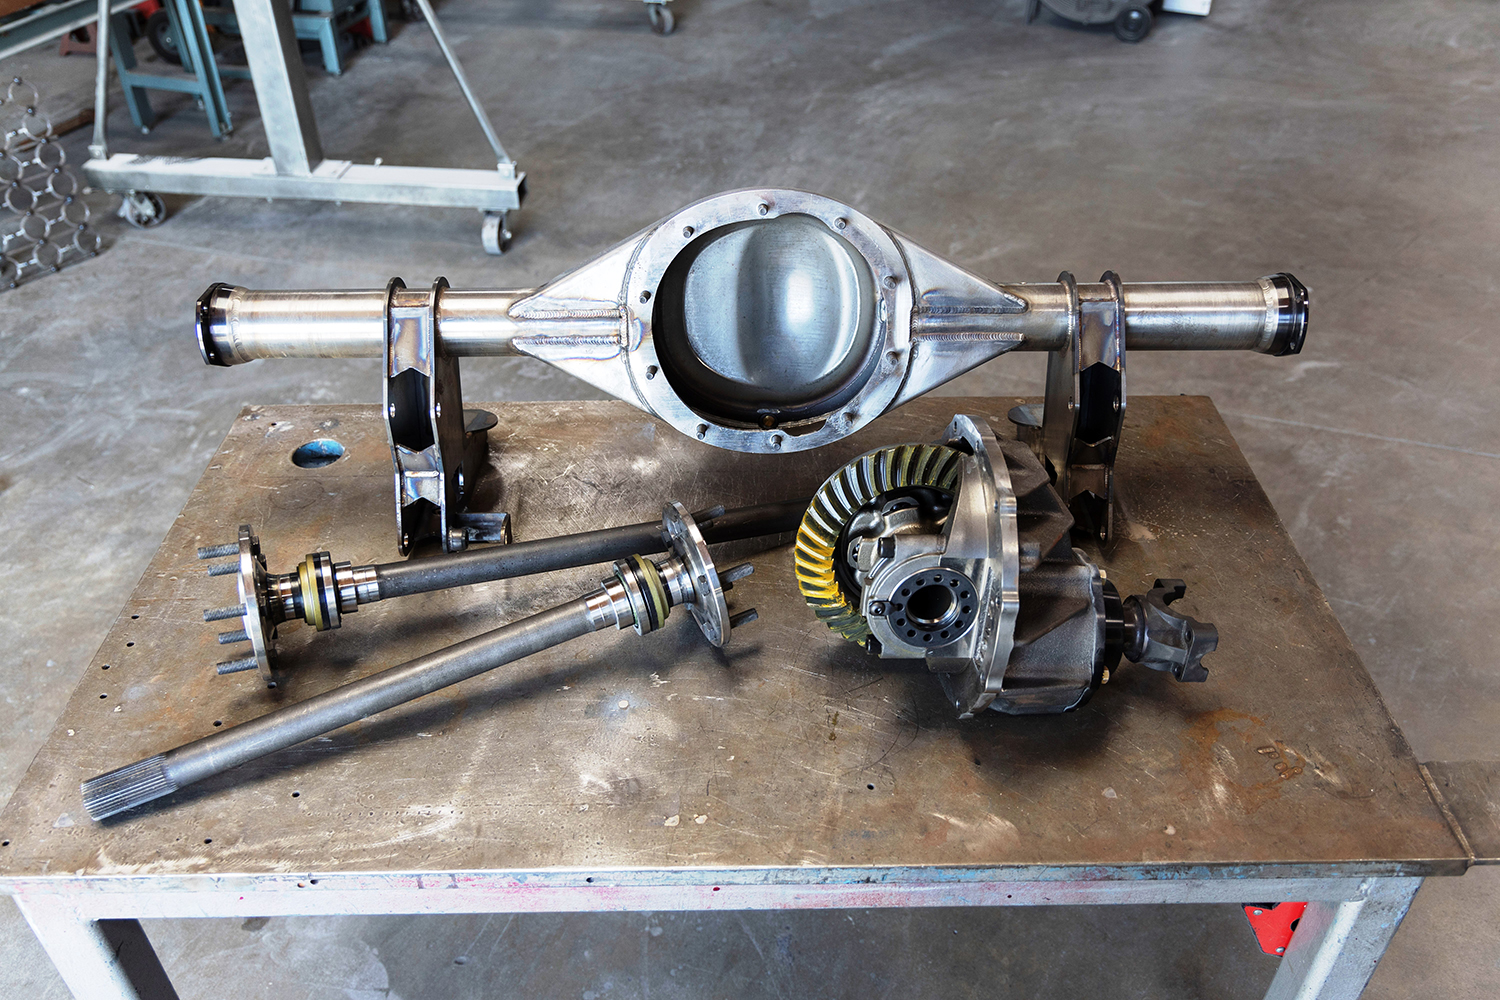
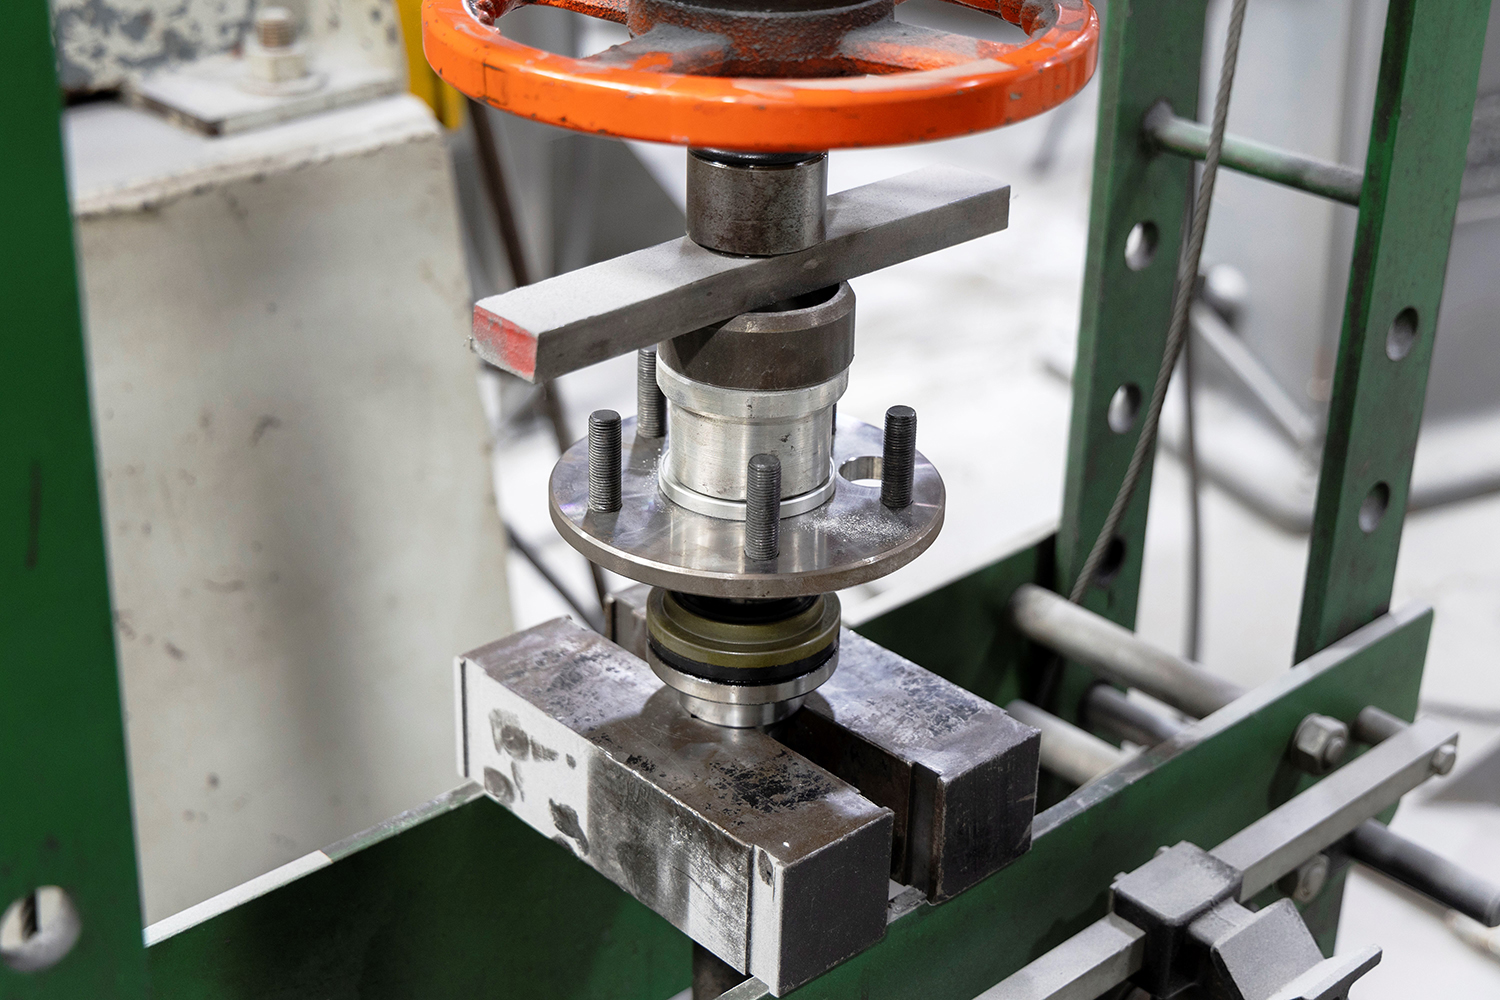
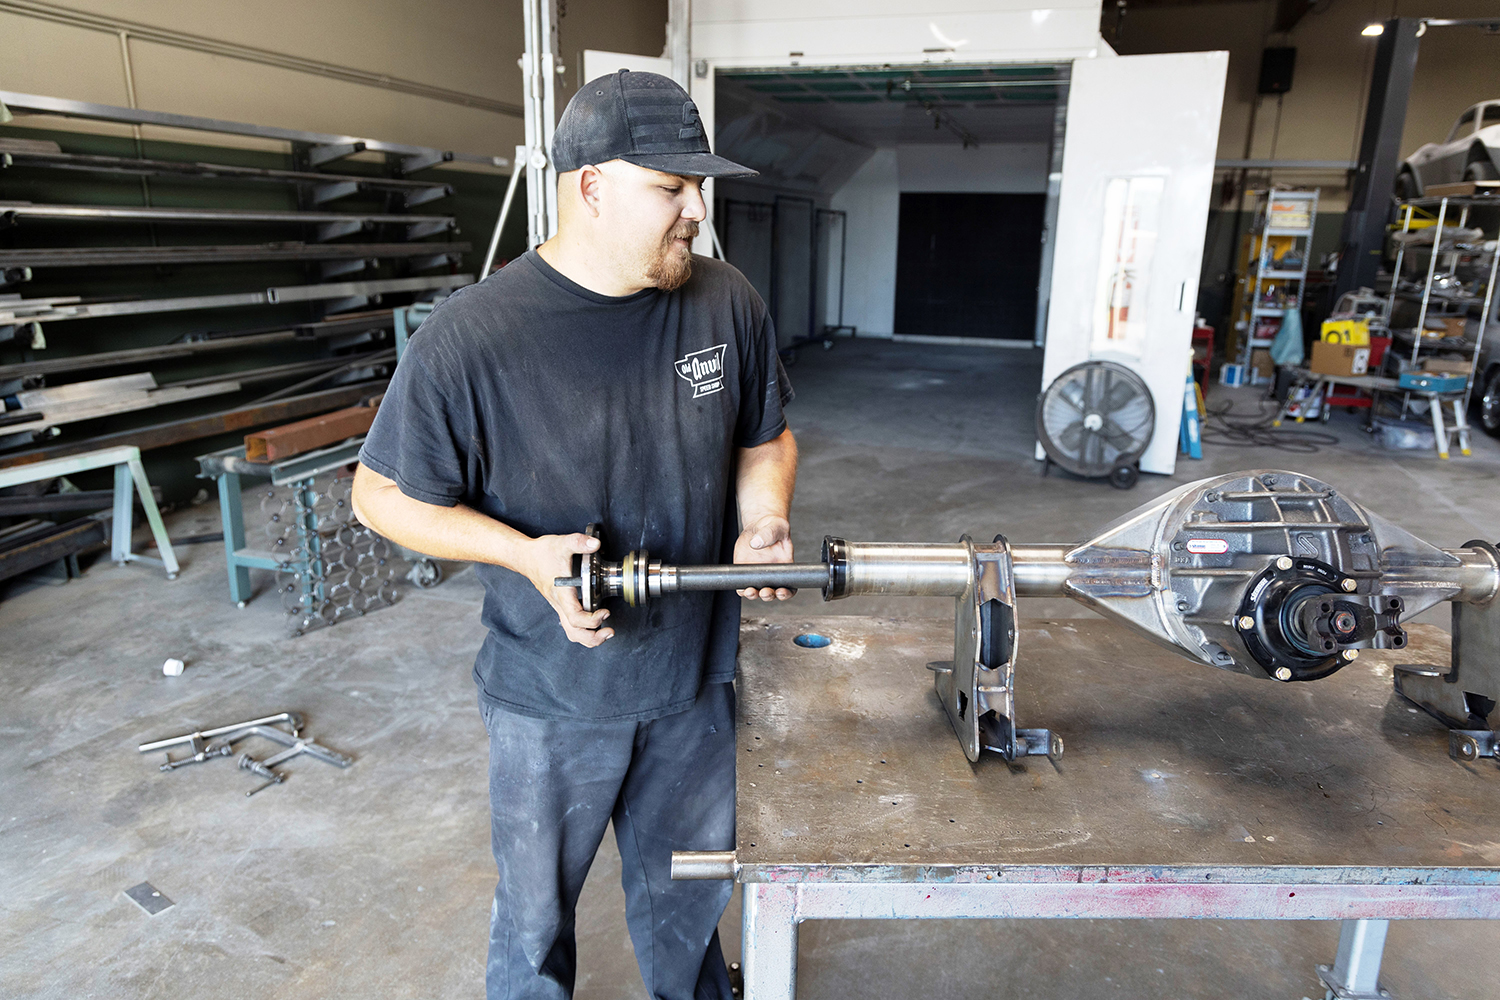
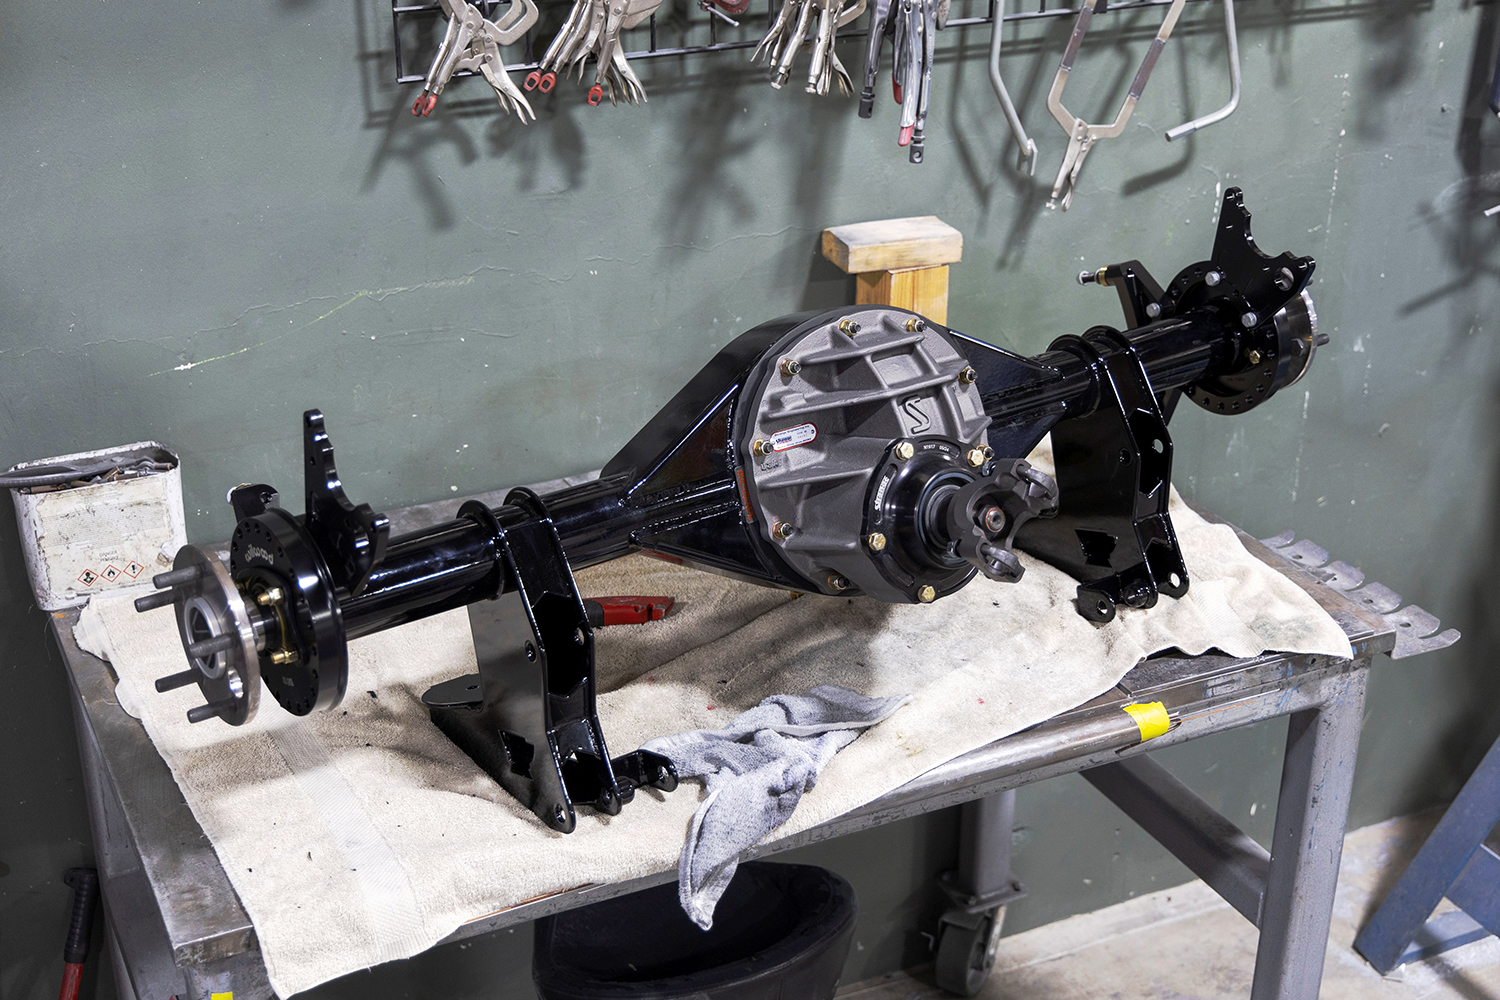
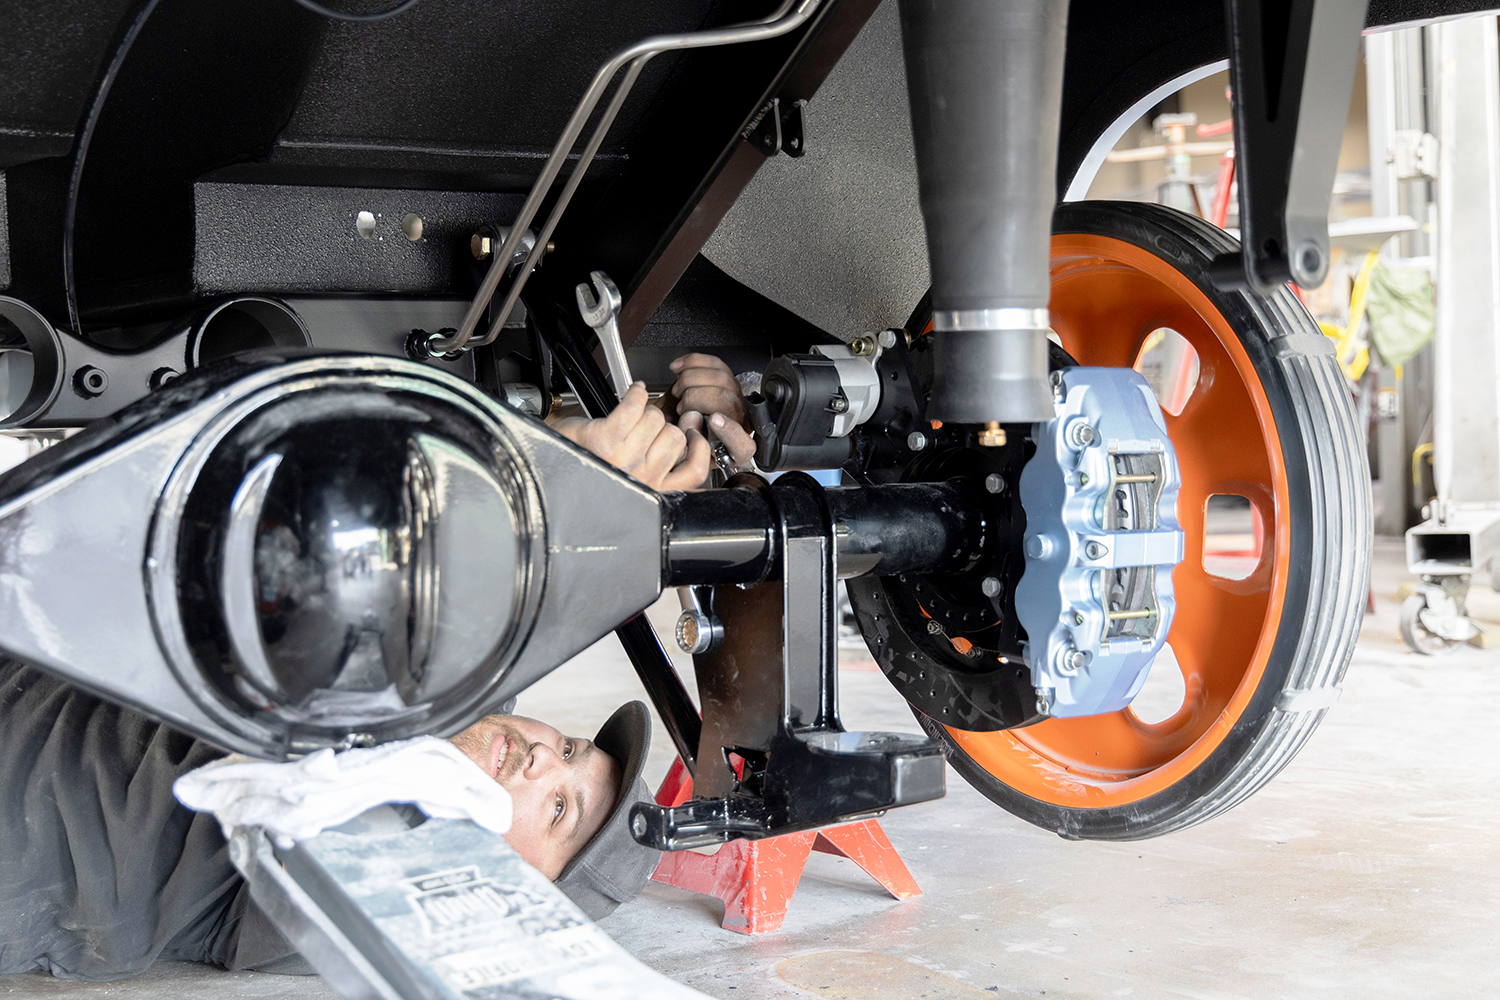
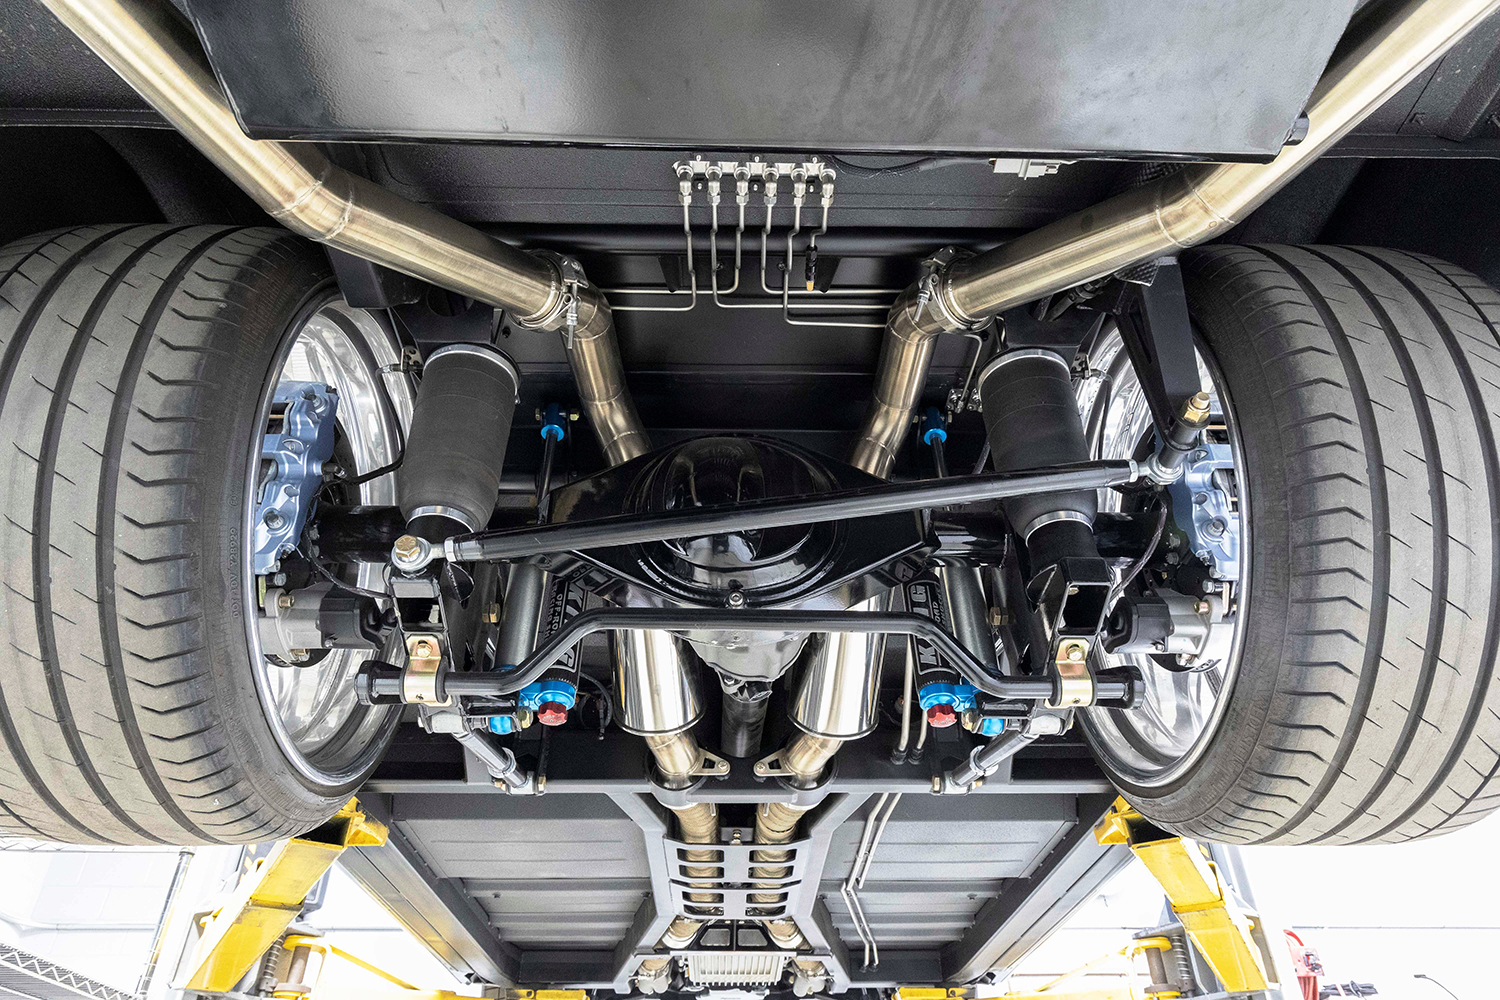
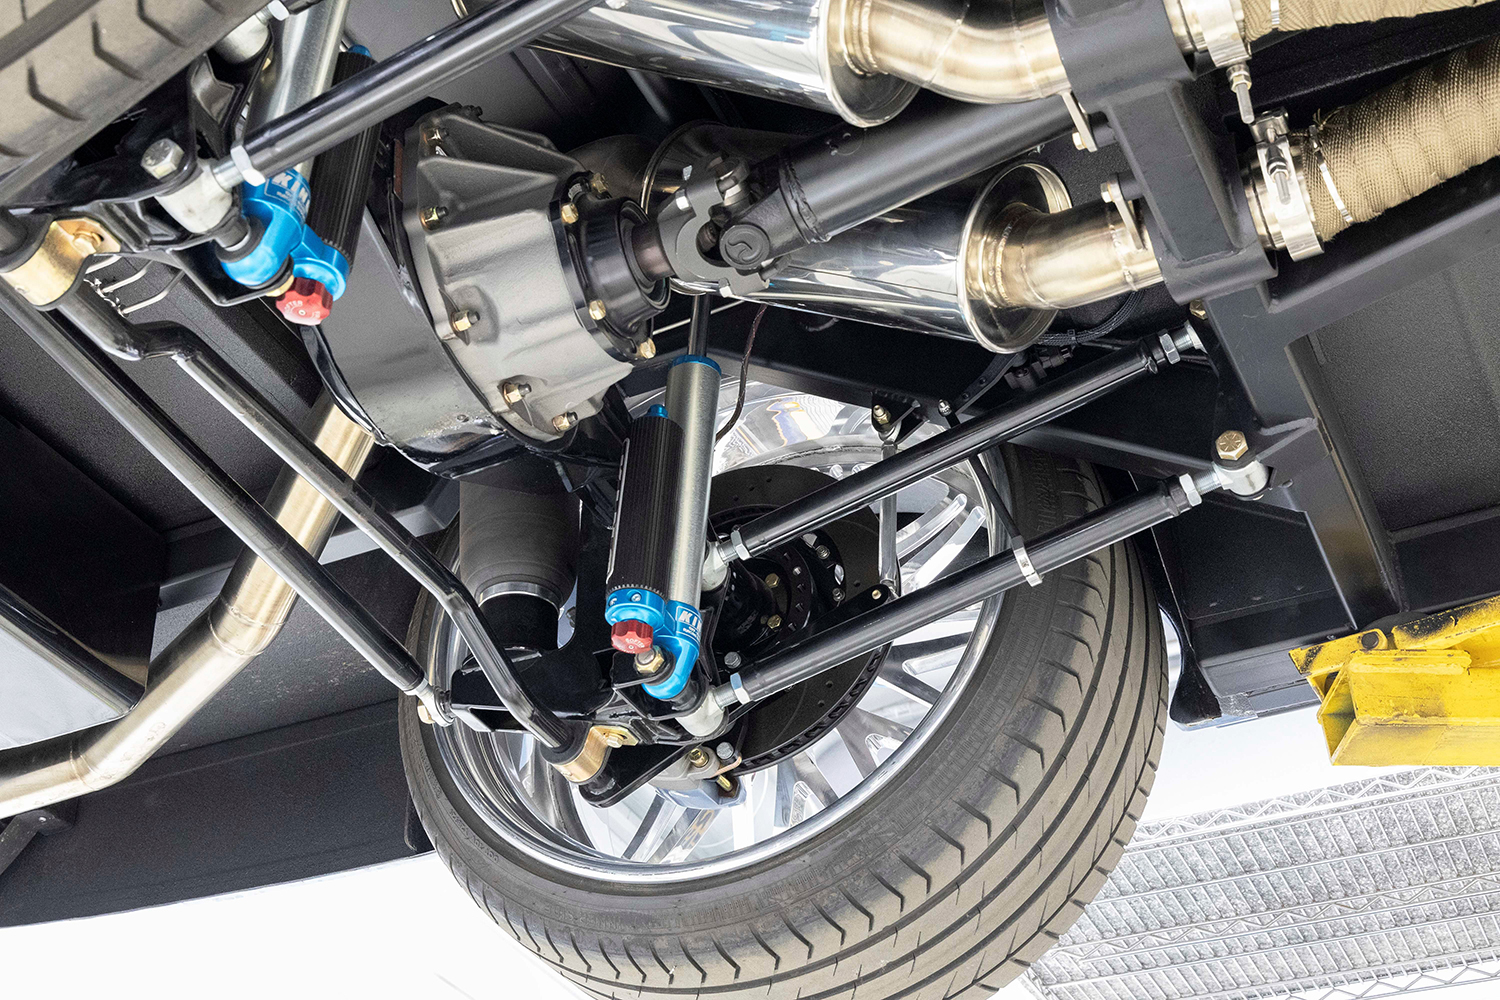
While Old Anvil measured, cut, and welded the housing in Southern California, Strange Engineering, near Chicago, was building the third member assembly to be installed in it.Many options are available for third-member housings, including billet aluminum. However, to handle the torque generated by a 1,200hp supercharged LS engine, Old Anvil chose Strange’s Pro nodular iron case, which has their strongest centersection.There are also plenty of differential options. For this project, an Eaton Truetrac limited-slip differential was selected.A 4.11-ratio ring-and-pinion from U.S. Gear was also selected, and here, the ring gear is installed on the differential.Before the differential is installed in the case, the pinion bearing is installed and its preload is verified. The preload is the force between the pinion bearing assembly and the race—and getting it right is the key to the axle’s longevity. On a 9-inch assembly with new bearings the preload is 13-15 in-lb.Next, the differential is slipped in and bolted to the case. Before the centersection is shipped to Old Anvil, a few more tolerance checks and adjustments and a check of the gear’s mesh pattern are required.One of those adjustments is the ring gear backlash for the 9-inch; it’s comparatively easy. Instead of the shims used on many axle designs, including Ford’s 8.8-inch, the 9-inch adjuster nuts require loosening one side and tightening the other to shift the gear into the proper position, as measured with a dial indicator.To check backlash, set a dial indicator tangent to the direction of the ring gear’s rotation, then rock it slightly while holding the yoke steady. Measure backlash in three equally spaced locations around the ring gear.Next, the mesh pattern of the gears is checked, starting by applying marking compound to several of the ring gear teeth. Ideally, the pinion should mesh near the center of the face of the rear gear teeth. The ring gear teeth have a drive side and a coast side, with the drive side being the more critical aspect of the mesh pattern.It may require a couple of adjustments to get the pattern just right, but once it is set and the backlash is correct, the carrier-bearing caps are torqued to 80 lb-ft., and the adjustment locks are reinstalled. After that, the pattern and backlash are double-checked and the third member is ready to ship.The new Strange centersection in California connects with the other rearend components in preparation for final assembly. Note that the axle tubes have Torino/Big Ford housing ends installed.The third member goes into the custom housing. Typically, with a 9-inch third member, the bulge in the casting makes it nearly impossible to slip nuts onto the two studs at the bottom of the housing if it is fully seated. The trick is to lower the third member halfway down and start the nuts, as there’s still room to install them. They can be tightened down after the third member is fully seated.Before installing the axle shafts, they were fitted with brand-new bearings for the 3.150-inch housing ends. A key tip for pressing bearings is to ensure the press acts solely on the bearing’s face, not on the race at the outer edge. Pressing the race will ruin the bearing.When installing the axleshafts, ensure there is 0.800 to 1.125 inch(es) of spline engagement with the differential. A simple way to verify this before the final installation is to apply white lithium grease to a few of the splines, insert each shaft, then pull them out and measure the grease displacement. If the measurement falls within the specified range, they’re good to go.Here’s the finished rearend assembly. With its robust nodular iron centersection and thick, 35-spline shafts, it’s not the lightest rear axle available, but strength and durability were the primary considerations here. Moreover, it won’t fit into the Impala in its bare form.After a trip to the paint booth it’s ready for installation. Also, Old Anvil installed a super-strong chromoly yoke to support a commensurately strong 1350-series U-joint.The car is also getting a set of large Wilwood disc brakes, and one of the backing plates is attached to the axle housing flange. The axleshaft on each side must be removed to install the backing plates.Finally, the rearend assembly is mounted in the car and attached to the custom four-link rear suspension. One of the Air Lift ProSeries air springs is also visible.Here’s a look at the installed assembly, with the big Schott wheels and 355-series Vredestien tires in place. Note, too, the Panhard bar for the suspension. From flange to flange, the new axle is 7.5 inches narrower than a stock 1962 Chevy rearend.Take another look from the front of the rearend, showcasing the custom, two-piece driveshaft that’s in place. It’s an axle and suspension engineered for 1,200 hp.
We use cookies to ensure that we give you the best experience on our website. If you continue to use this site we will assume that you are happy with it.