LS Classic Install

Transforming a Modern LS3 into a Vintage Corvette Fuelie from the Early ’60s

By Jeff Smith – Photography by the Author & Lokar Performance Products

To say that the LS engine appears to be omnipresent and swapped into just about every car, truck, and street rod imaginable is to merely re-state the obvious. So, it’s no surprise that the more enterprising street rodders might want to search out older engines for something a little different. The problem is that old engines are just that—old technology. Not only do they leak oil and struggle to make underwhelming power, the original pieces are becoming harder to find. Those are just some of the reasons why the LS has gained such a following.

- Advertisement -
You opt for the vintage 1957 Corvette fuel injection look you might as well go all the way with the “proper” air cleaner. One more piece to the vintage V-8 puzzle.

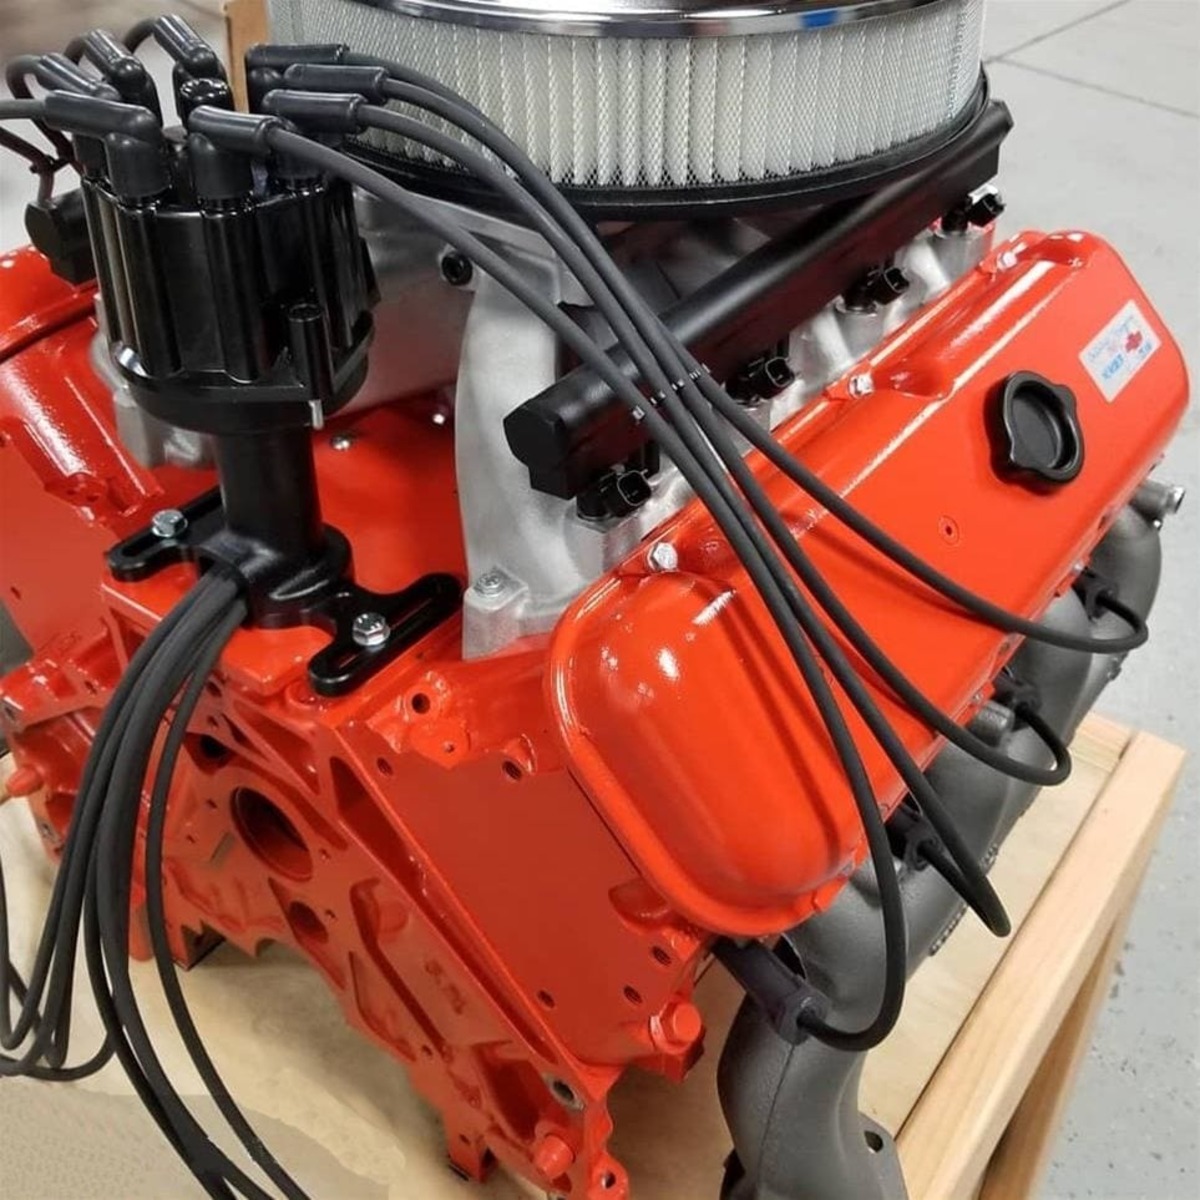
So, the next logical evolution in this creative thought process is to somehow make the LS look like an older engine. Something like a 1962 Corvette fuelie 327, for example. Almost six decades have passed since the early 327 Rochester Ramjet fuelie engines were at the pinnacle of the Christmas present wish list.

These are all the parts necessary to convert your LS3 to an LS Classic 1963 Fuelie kit. On the right are the upper and lower portions of the manifold. On the left are the matching valve covers, lifter valley plate, distributor, and plugs wires.
Once the OE intake and lifter plate have been removed, the first step is to install the O-rings on the new lifter valley. There are eight ¾-inch O-rings that must be installed to prevent a massive internal oil leak and one larger 7/8-inch O-ring positioned at the rear of the plate. The smaller O-rings are used for LS3’s Active Fuel Management (AFM). Even if AFM has been disabled, these passages in the engine still must be sealed.
Install the lifter valley plate and torque the bolts in place. Next, with the intake manifold upside down, install the blue intake seals around all eight intake ports. Then align the intake manifold and drop in all the intake bolts and start all the intake bolts by hand first before torquing them down using an inside-out pattern.

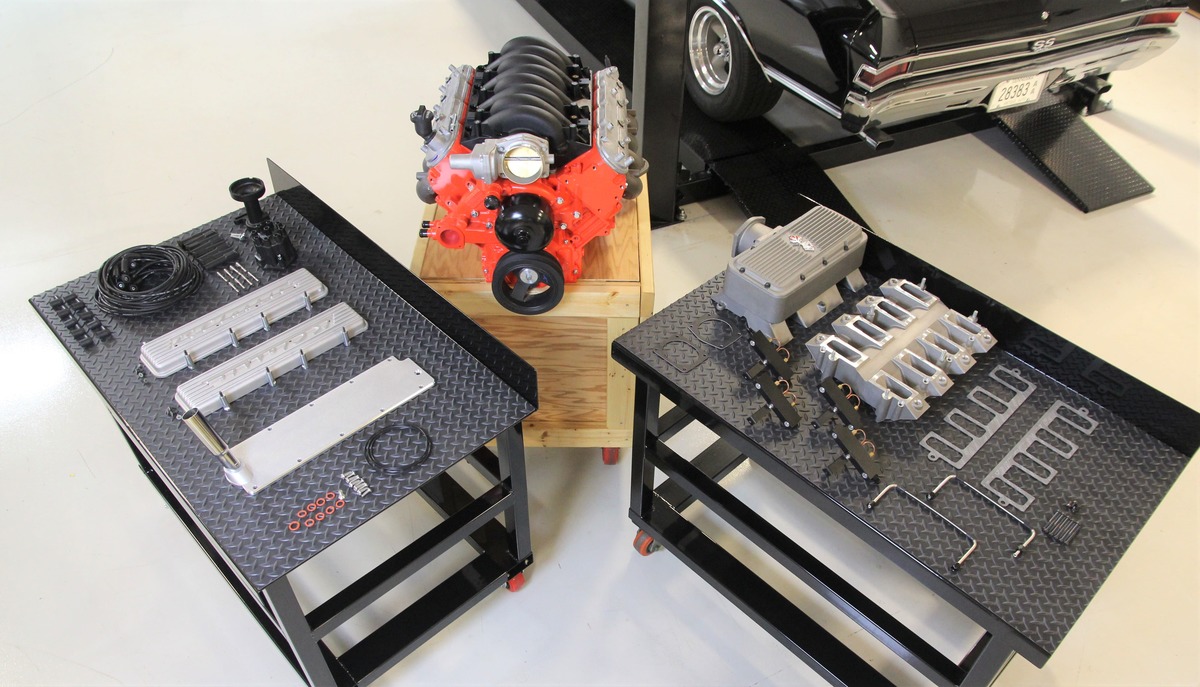
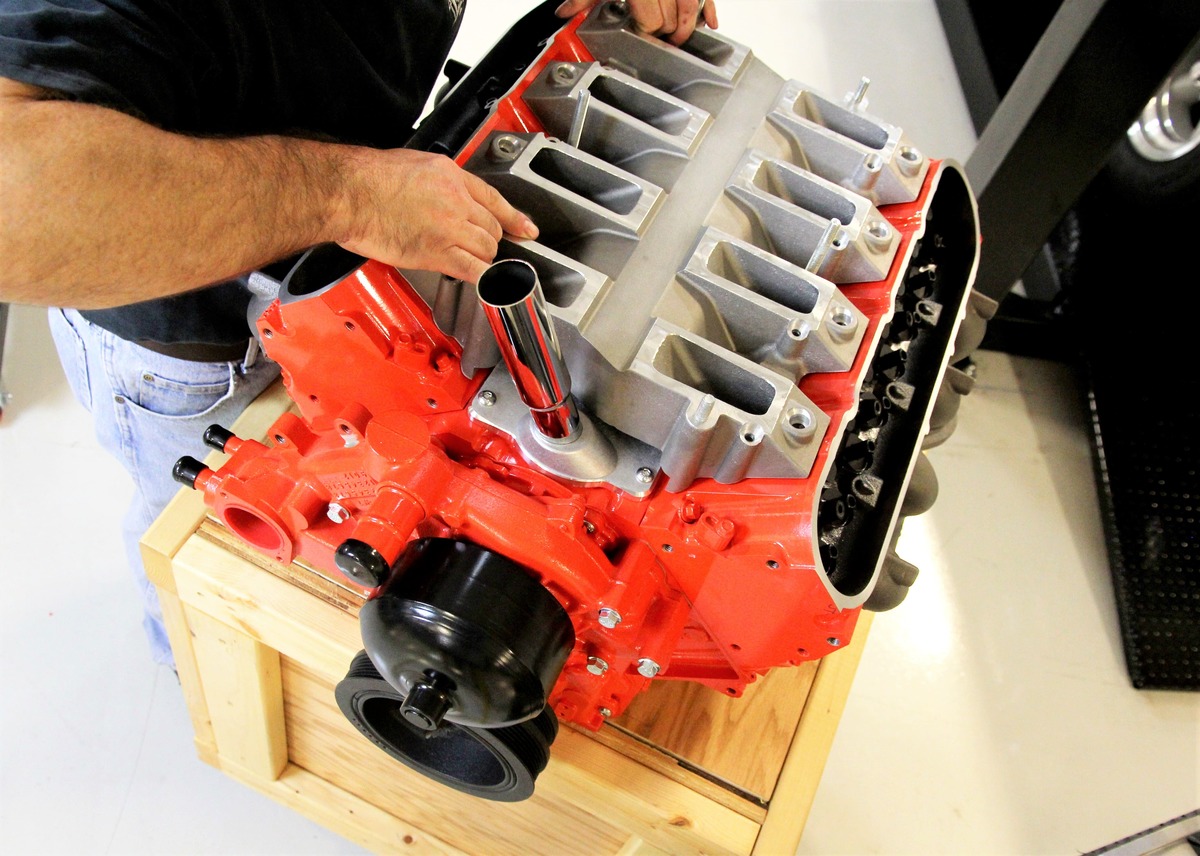
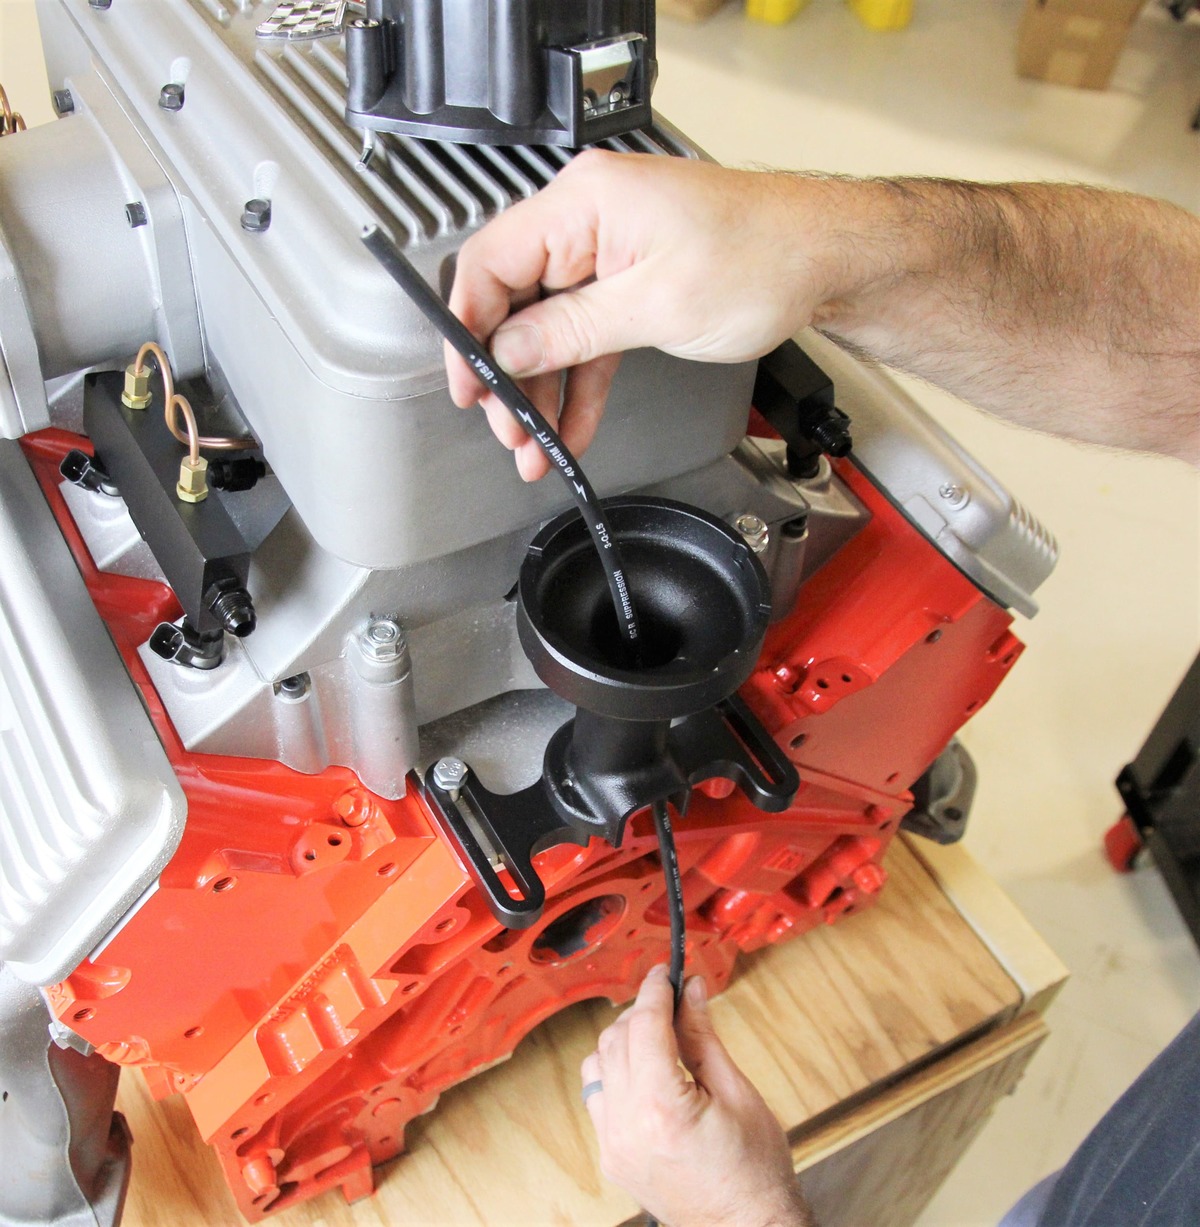
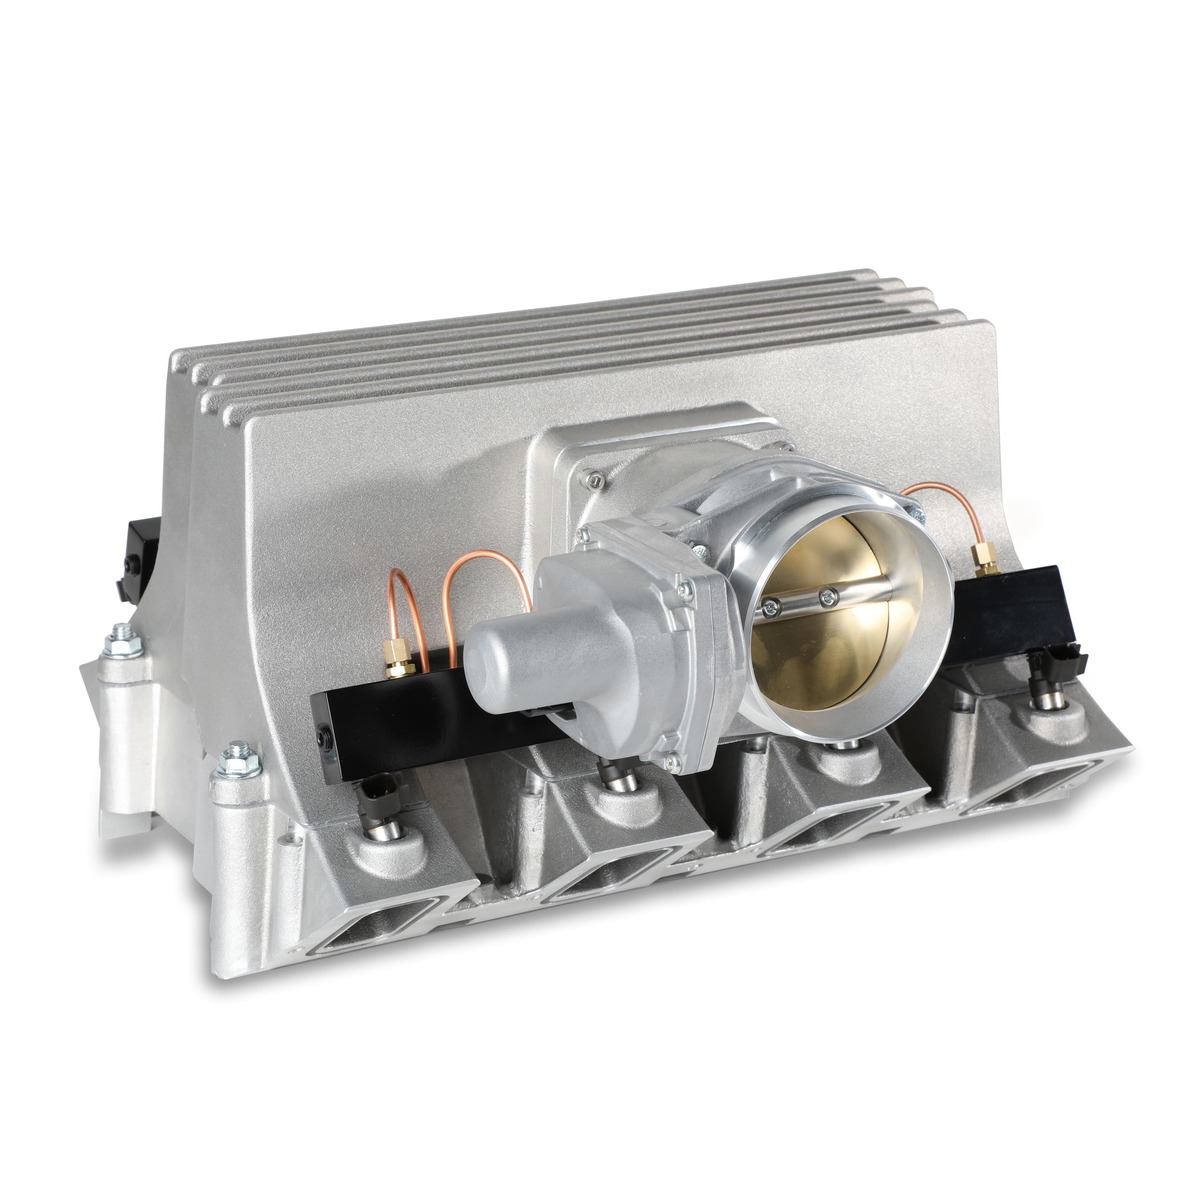
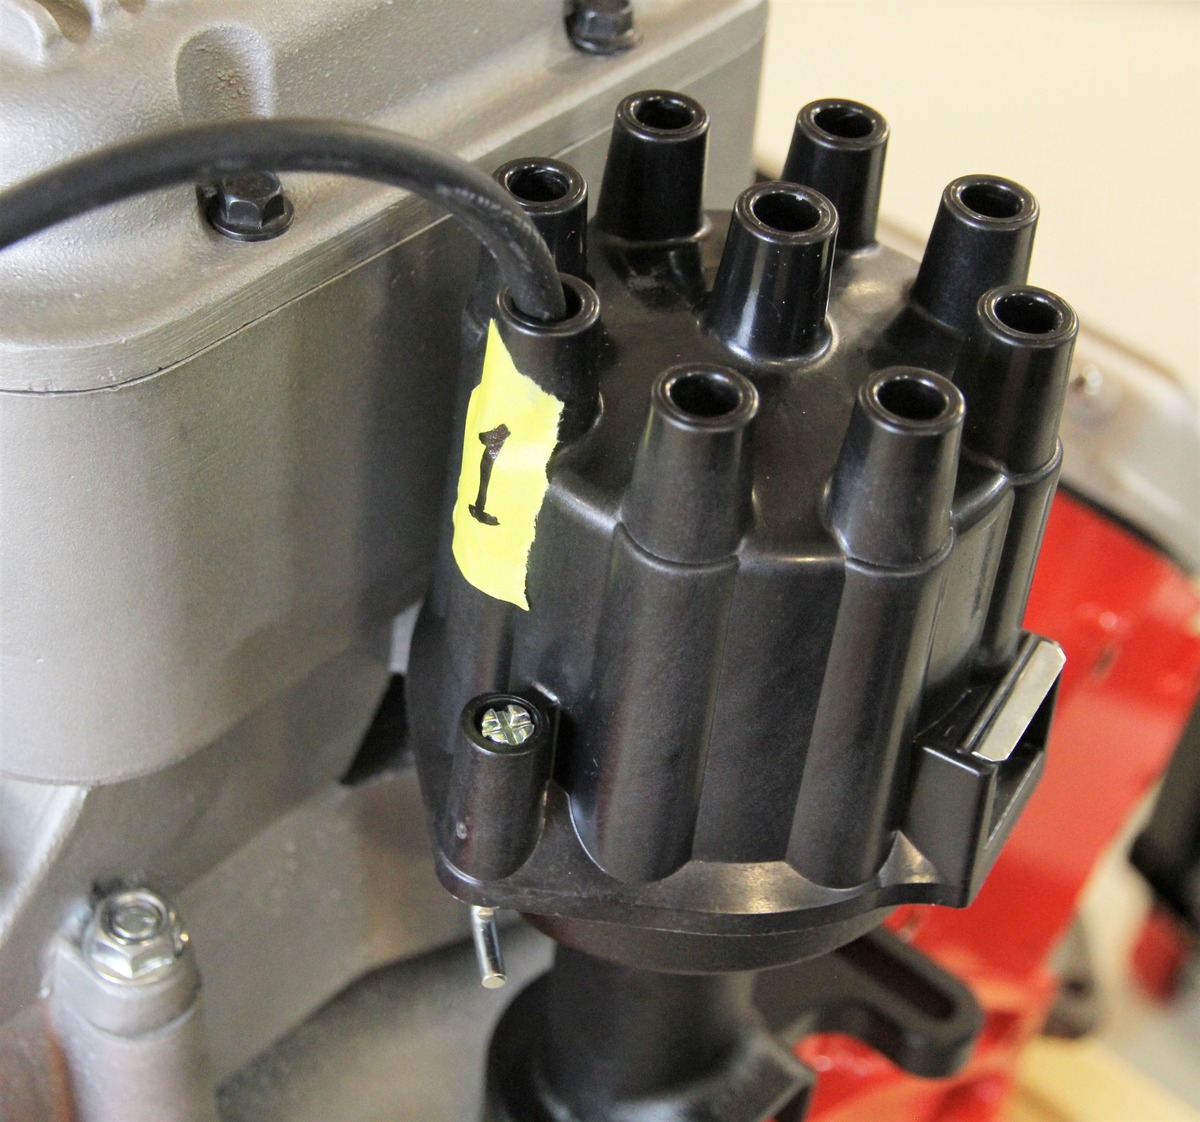
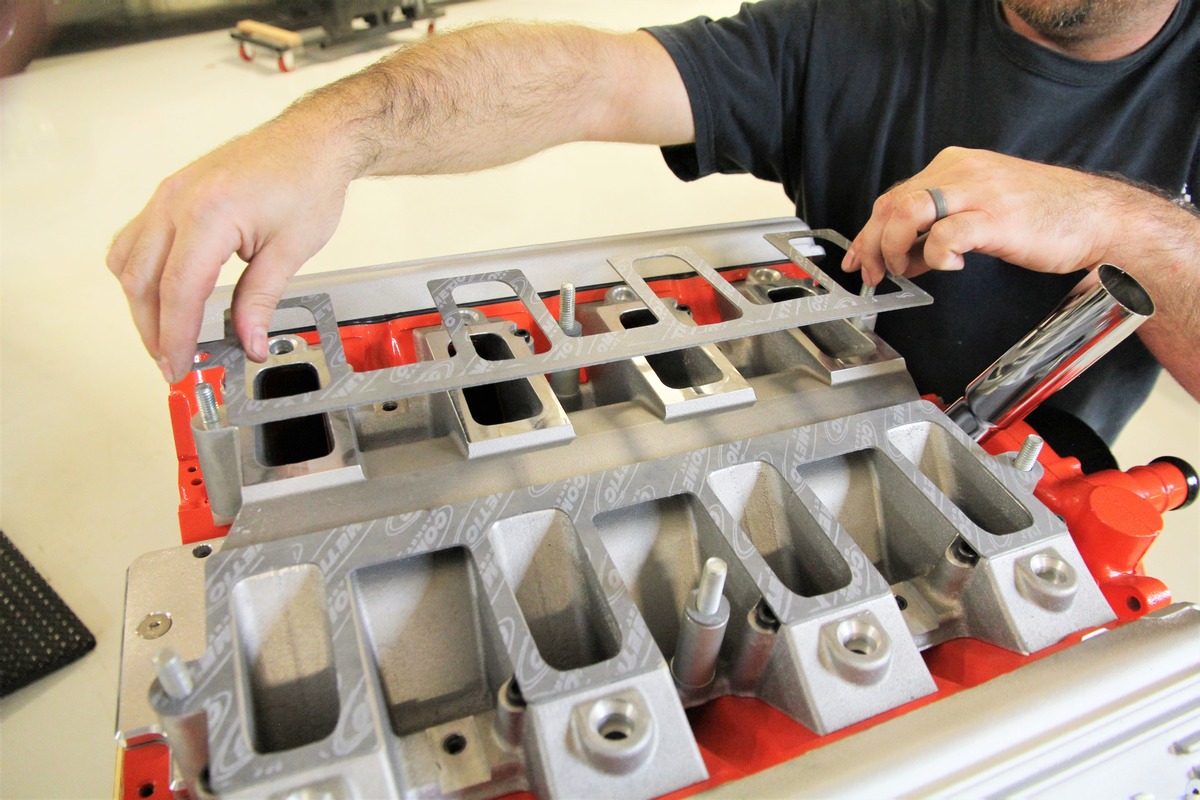
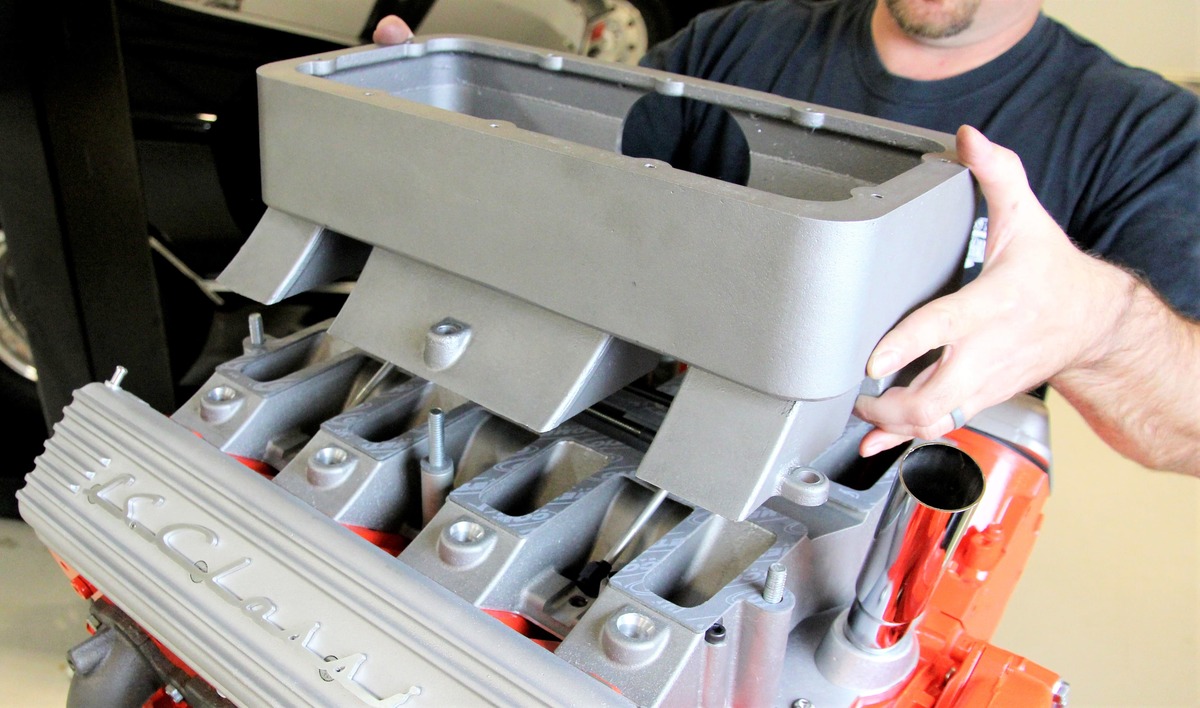
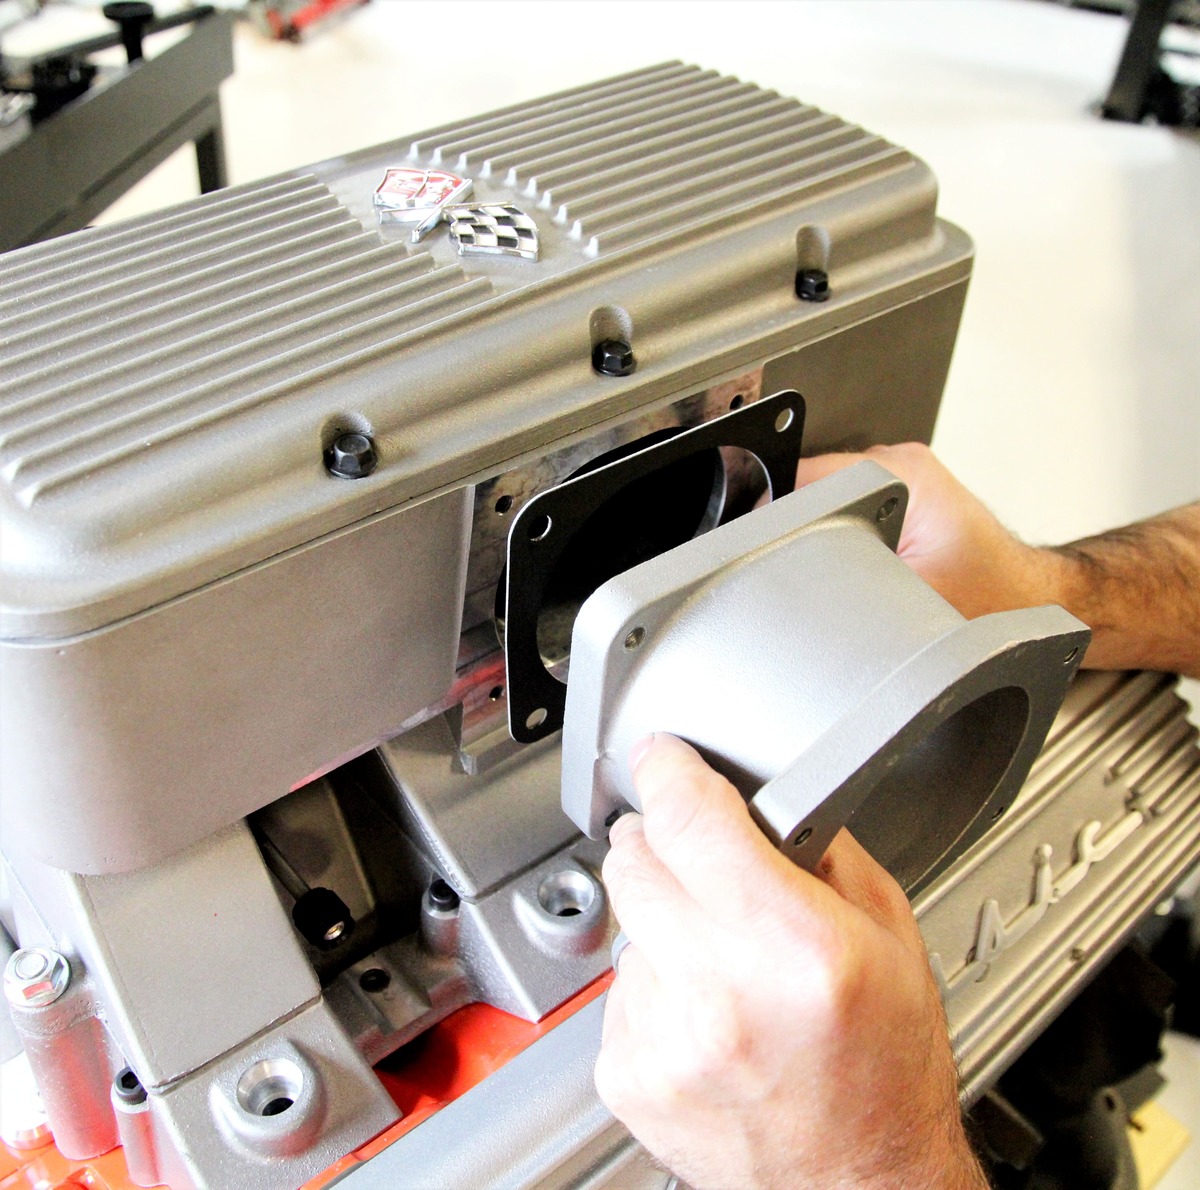
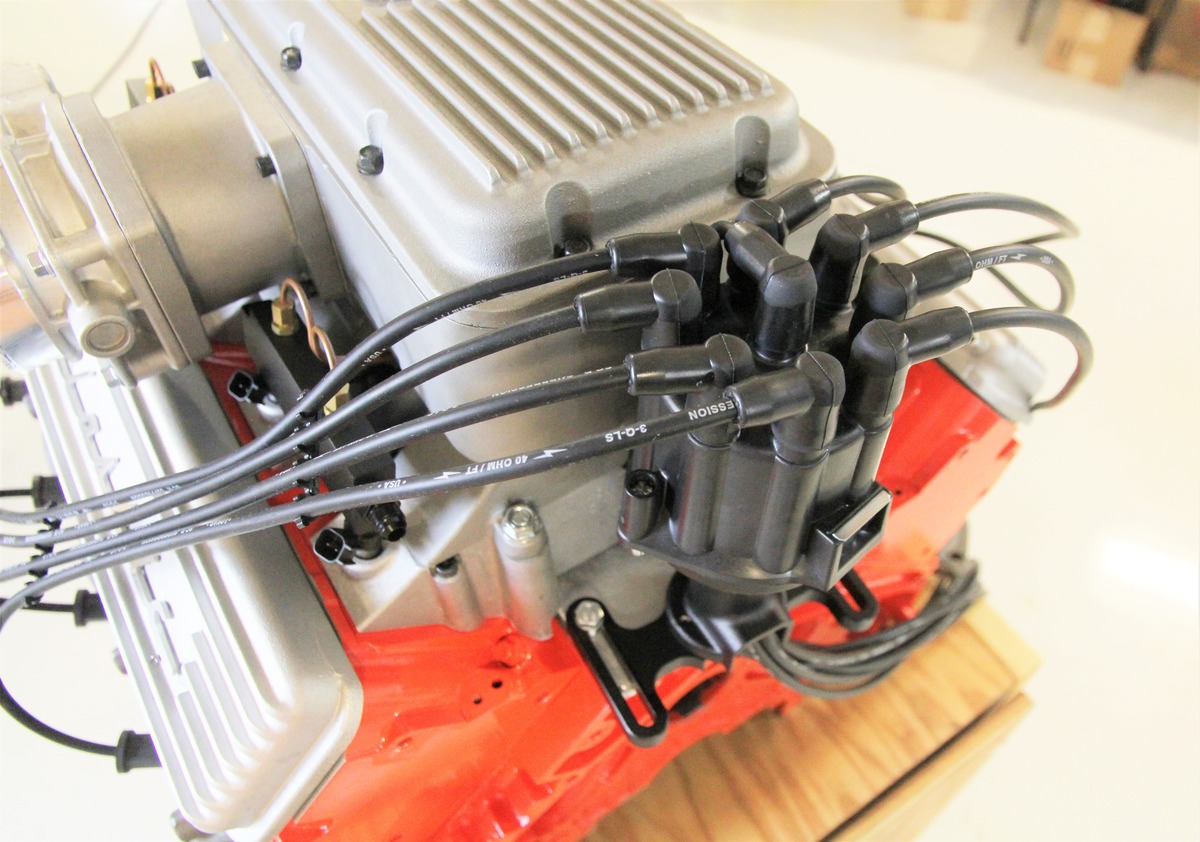
The guys at LS Classic Series by Lokar decided to act on that retro-plan and build a manifold that not only looks like a fuelie manifold but emphasizes the image by matching it with a set of ribbed valve covers, an intake valley cover with a chrome oil filler tube, and even a simulated distributor sticking up out of the back of the engine.

There are eight decorative 1/8-inch copper lines that can now be fitted to the fittings on top of the fuel rails. These simulate the original fuel line connections and disappear behind the fuel rails. These are strictly decorative and are not connected to fuel in the fuel rail.
The stock LS3 throttle body can now be bolted to the throttle body adapter on the manifold. Be sure to include the gasket.
The LS Classics system routes the plug wires from the remotely mounted LS coils through the bottom of the simulated distributor body that’s bolted to the rear of the engine, as shown here. The plug wires are routed through hollow plug wire terminals on the cap and out to the spark plugs. The LS coil end connector has been previously assembled so all you have to do is crimp the spark plug end.
With the plug wires in place, the system is now installed. All that’s left to do is connect the ECU.

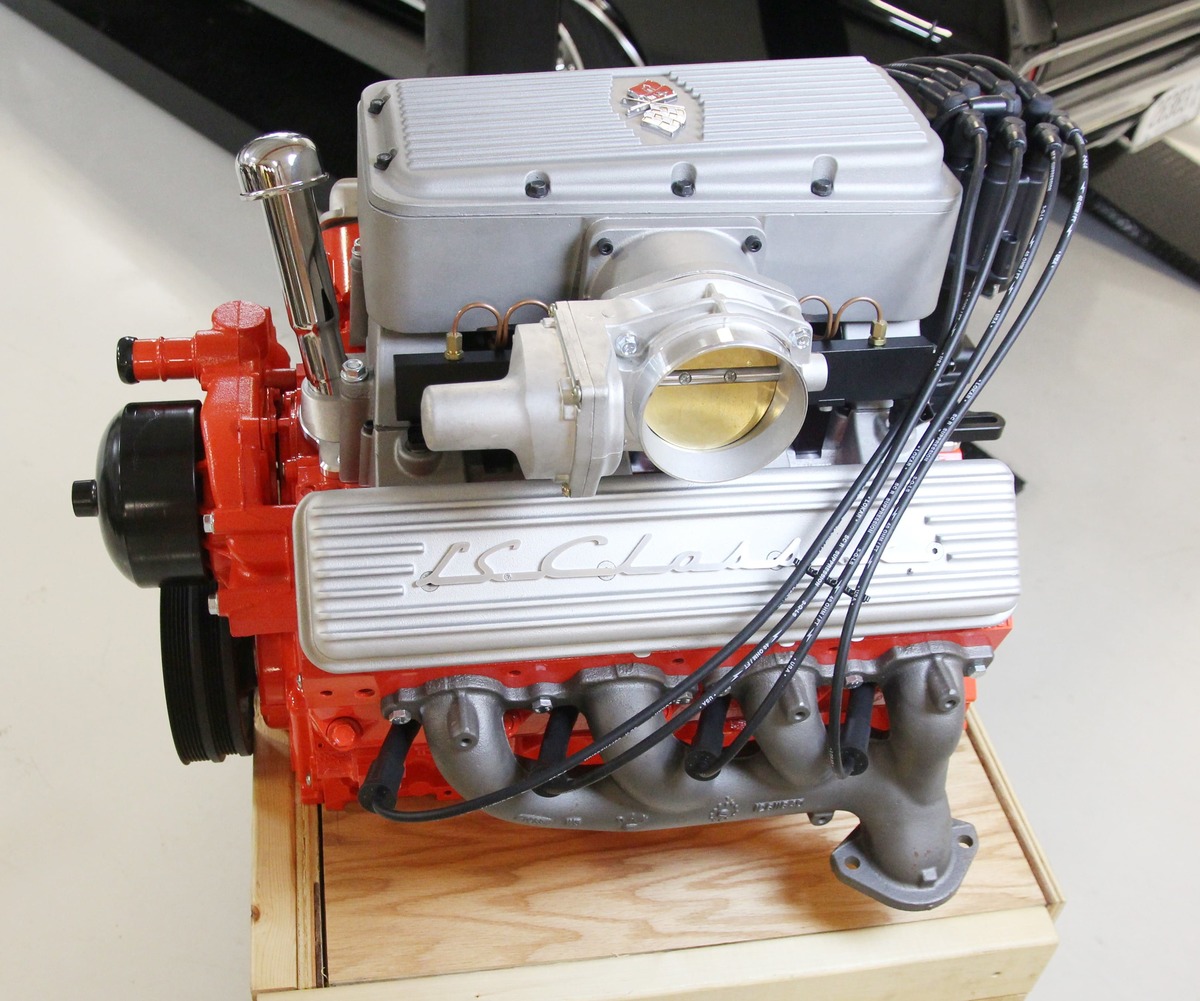
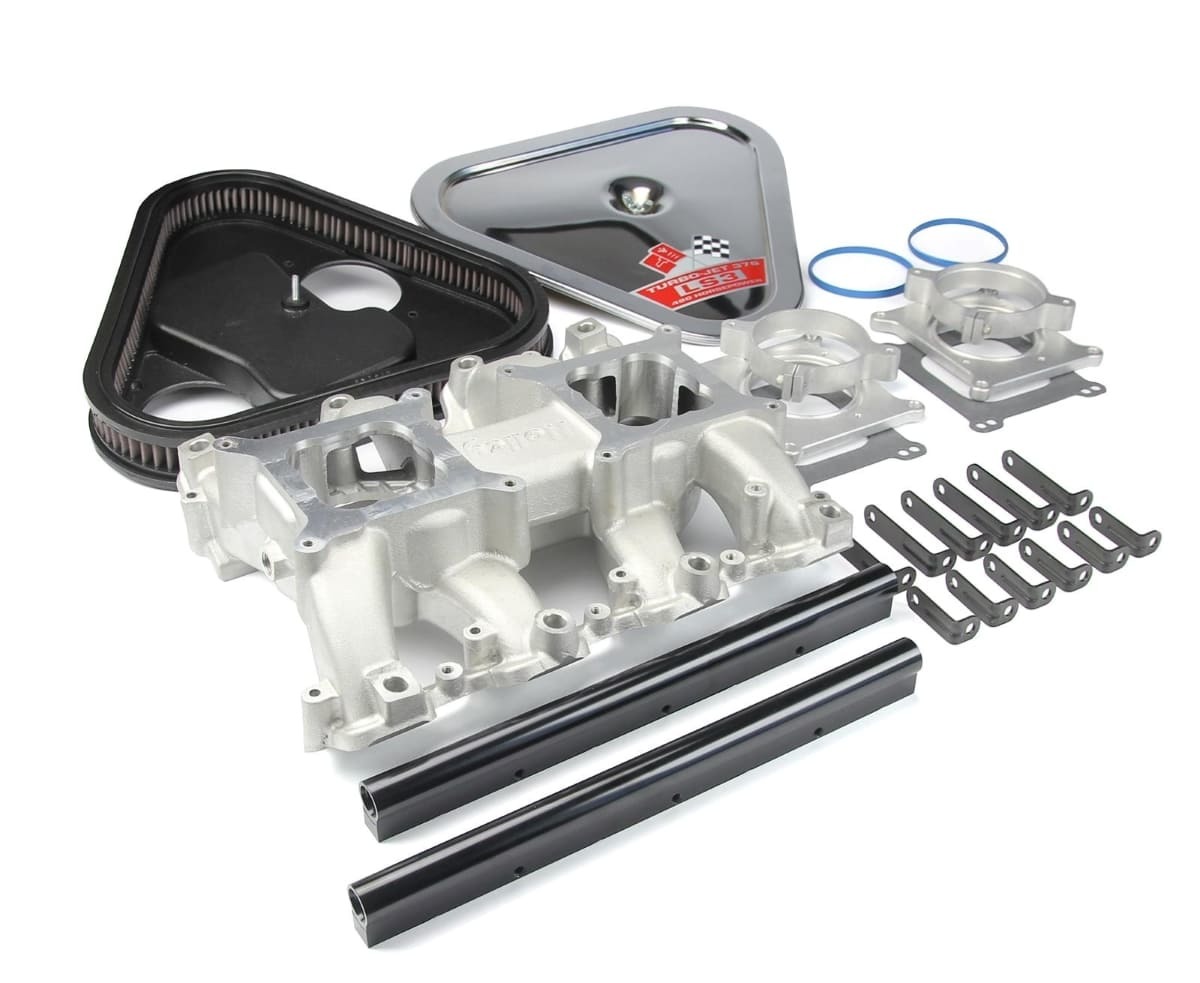
The LS Classic folks actually created several versions of this fuelie approach, including early the 1957 ribbed top manifold, the 1962 smooth top manifold, as well as a 1963 rendition that we followed along as LS Classic ran through the installation. Beyond the fuelie versions, there’s also a single-plane intake manifold with multi-point injection with a 14-inch air cleaner, a Tri-power setup that is topped with a triangle-shaped air cleaner, as well as big-block Chevy and 348/409-style valve covers and vintage distributor kit to produce a broad spectrum of retro-looks.

- Advertisement -
There is one more vintage fuel injection look and that is the “smooth top” that was a familiar sight on 1960-1962 fuelie Corvettes. You have your choice of the ribbed top, smooth top, or the big-box large plenum (used in this story) styles of the early Rochester Ramjet mechanical fuel injection look yet today’s modern electronics yielding today’s performance, reliability, and drivability.

Fuel Injection Intake Kits

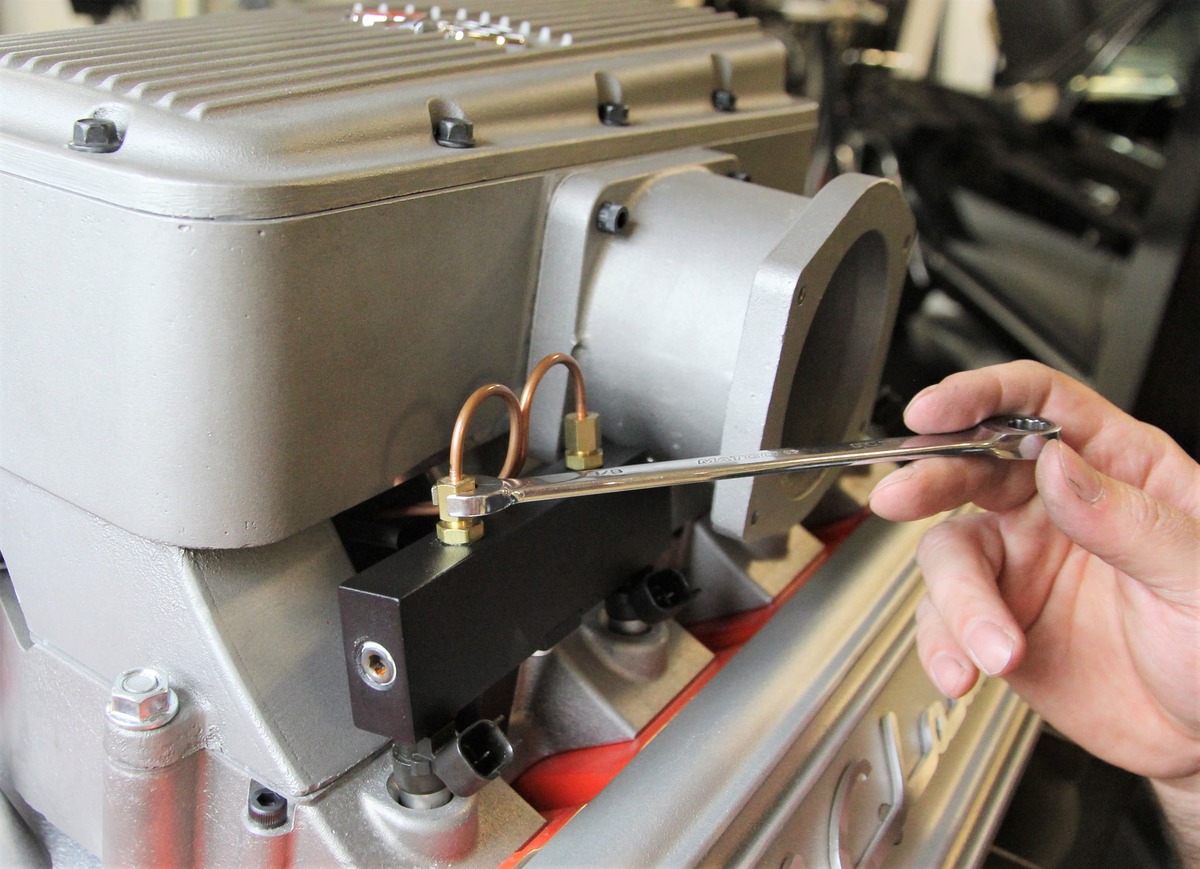
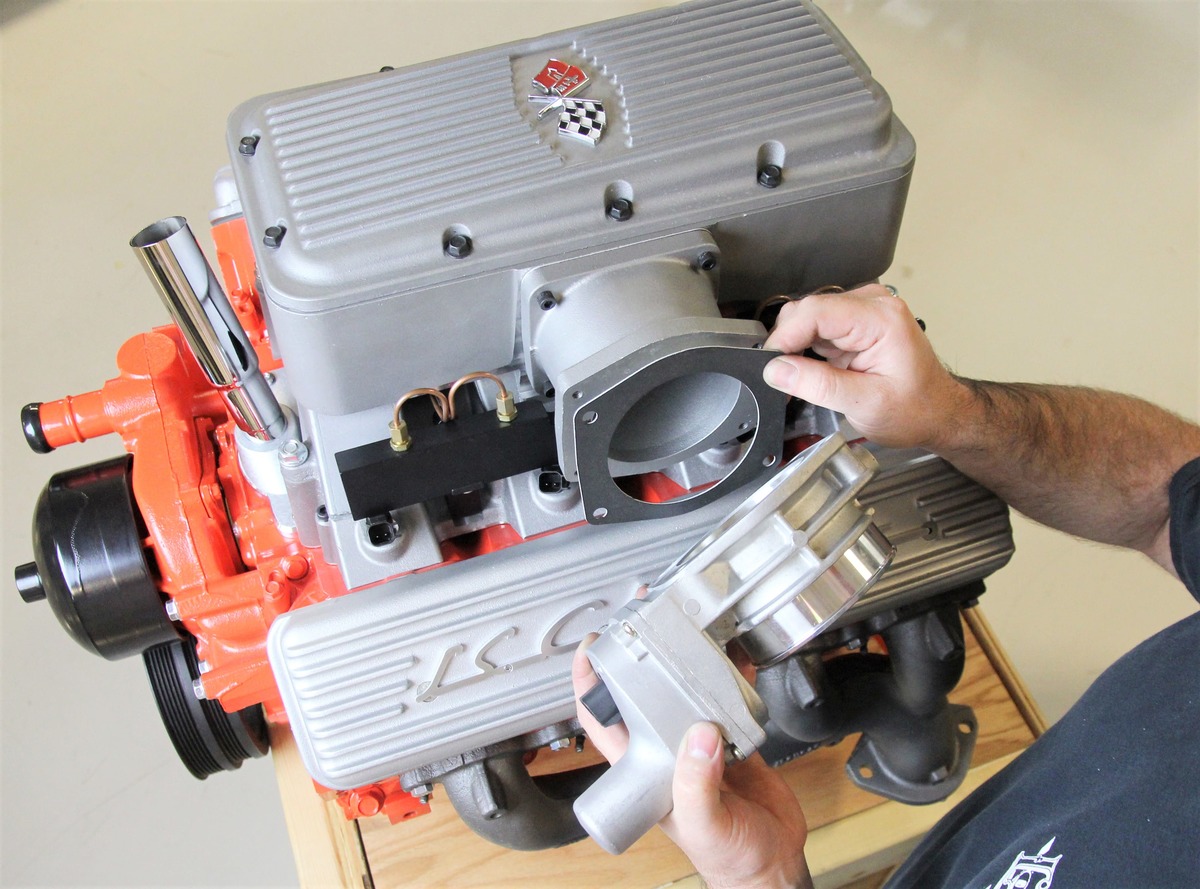
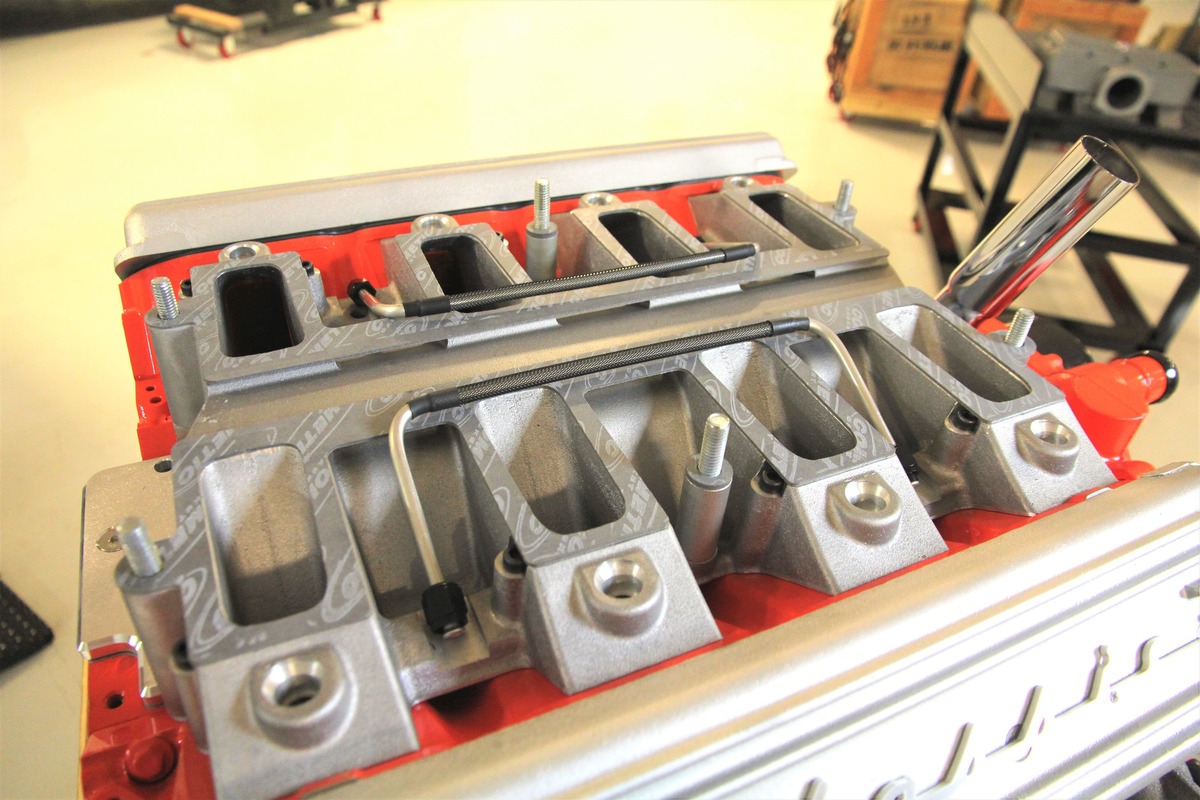
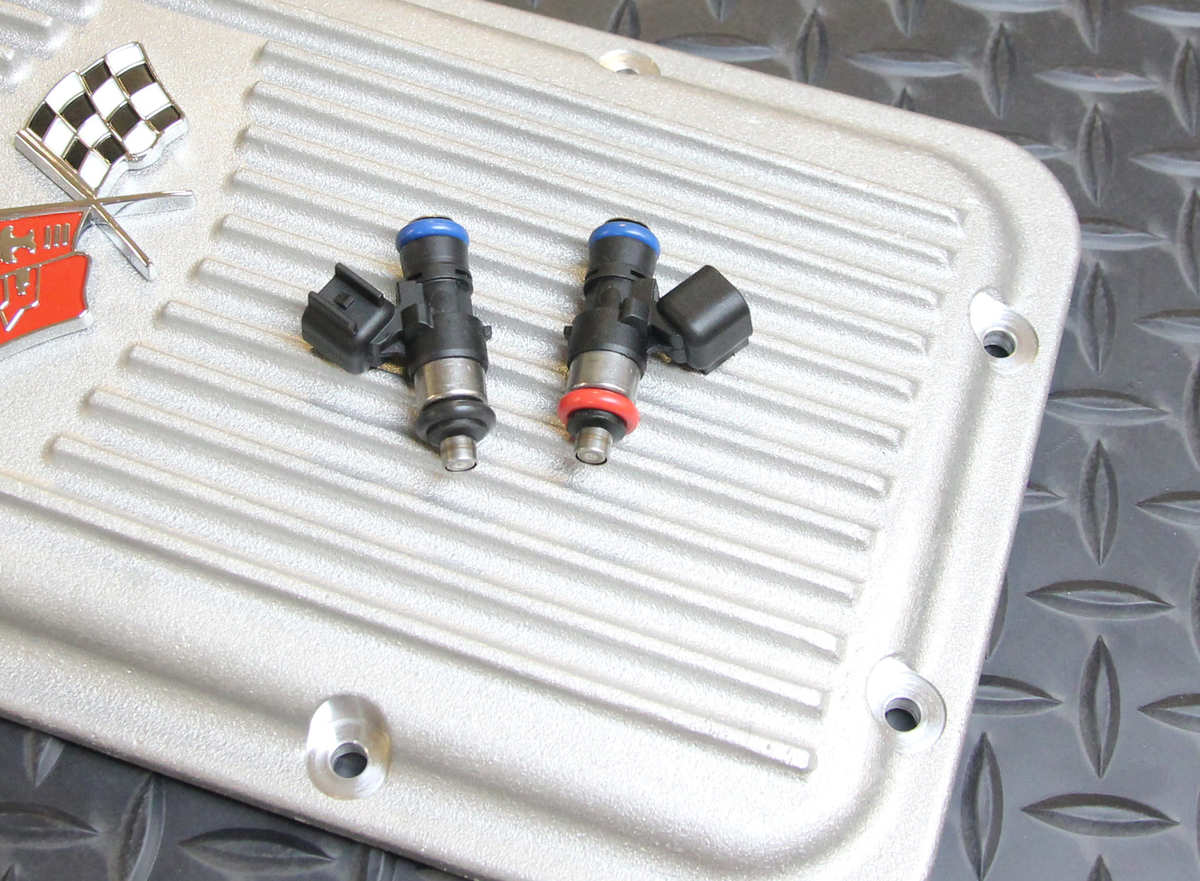
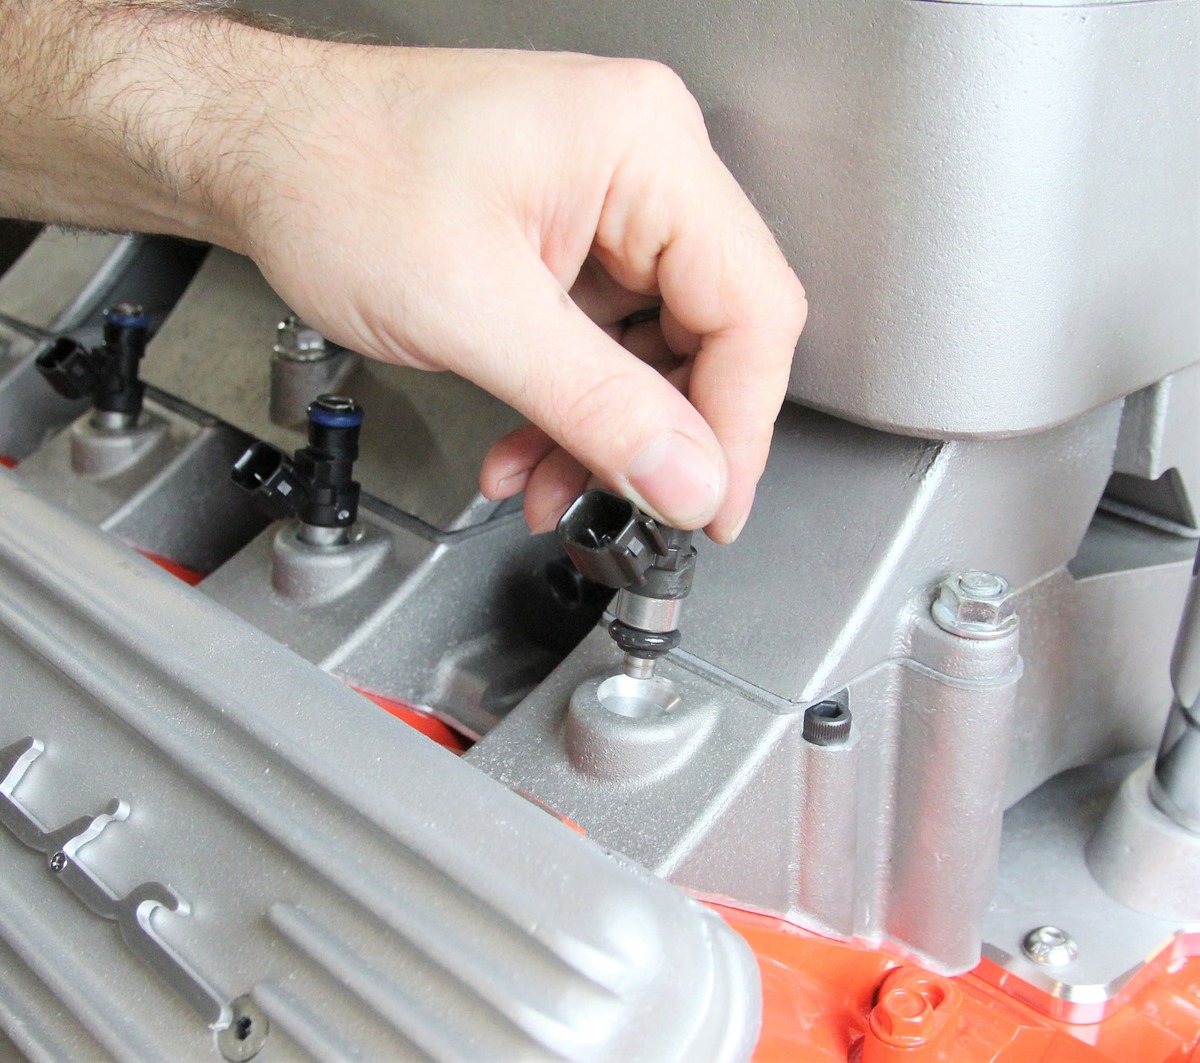
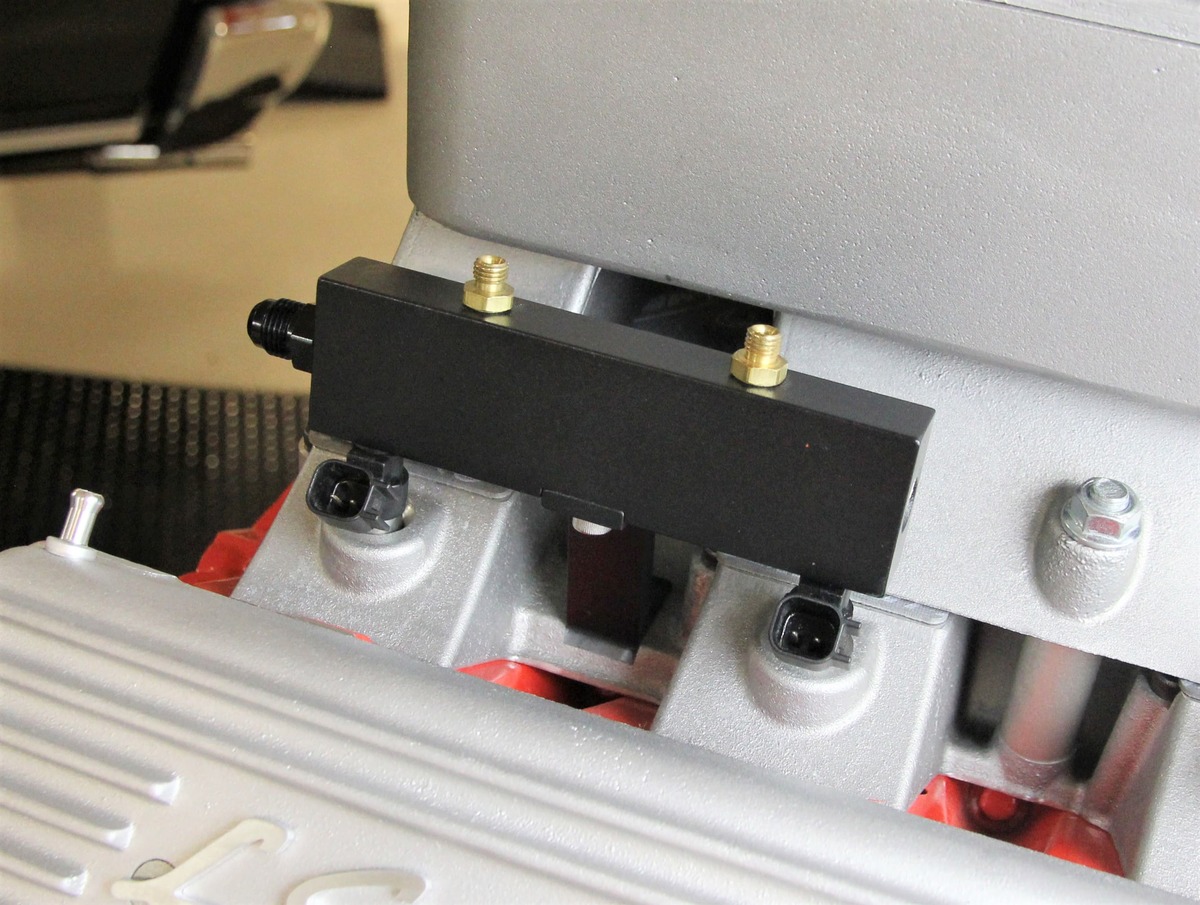
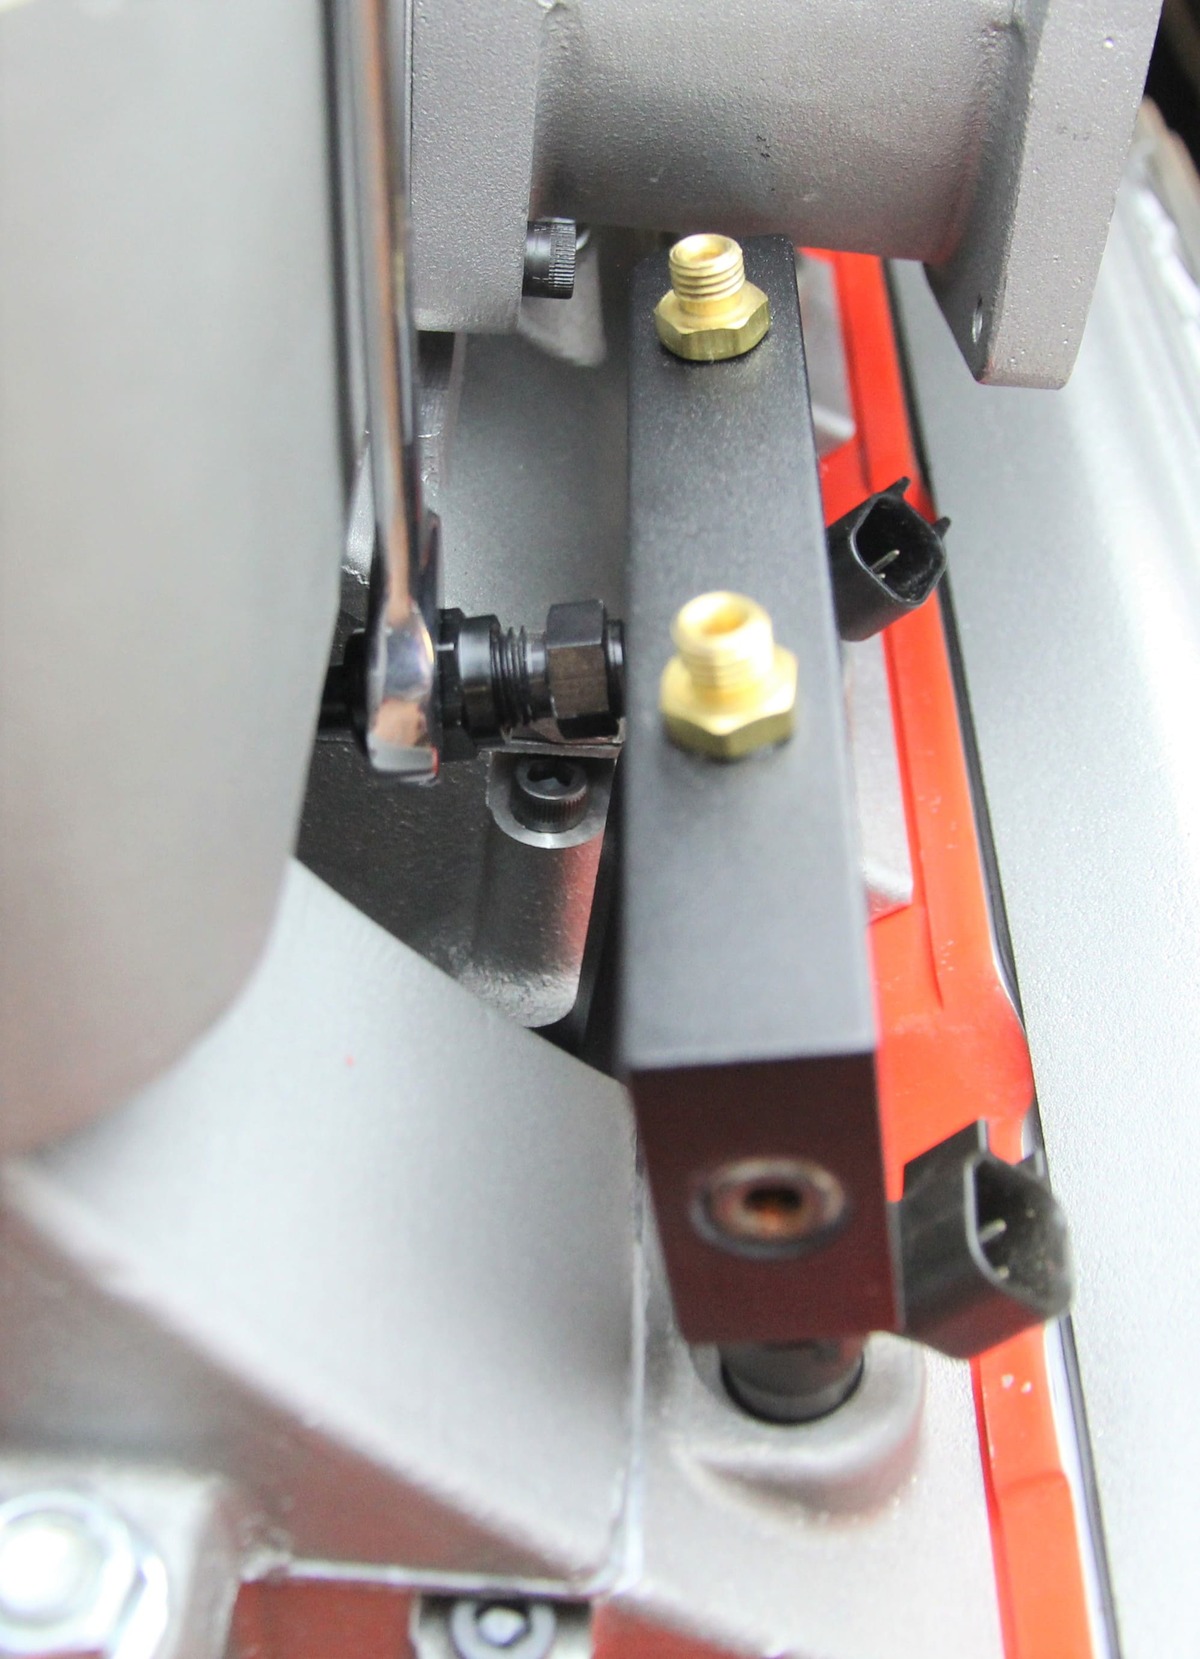
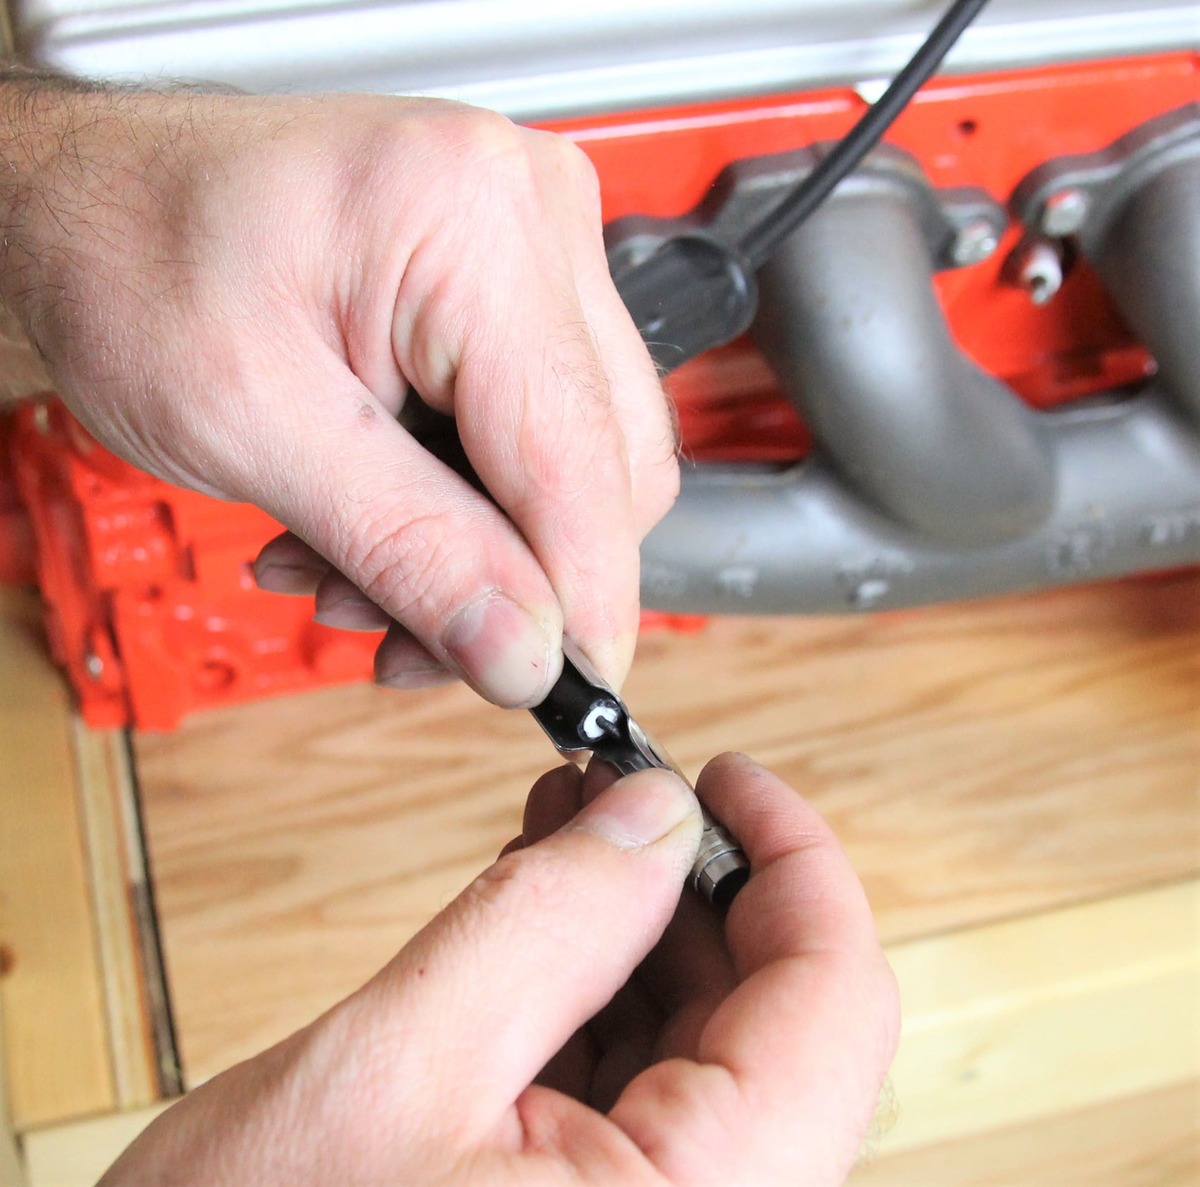
Fuelie intake kits look like the original 1957 system, the ”flat-top” 1960-1962 intake, and the 1963-1965 big-box finned-style intake—but with all the advantages of modern EFI. They feature a two-piece cast-aluminum manifold (just like the originals), billet aluminum fuel rails, all mounting hardware, and gaskets. The intakes accept factory-style LS3/EV6 42 lb/hr fuel injectors and a factory 92mm four bolt, drive-by-wire throttle body, and are compatible with GM and most aftermarket engine management systems that support both drive-by-wire and speed density tuning.

Reminiscent of the mid-’60s big-block Corvette Tri-power days, this LS Classic system will accept twin EFI throttle bodies in place of the triple carbs of yesteryear.

Tri-Power Intake Kit

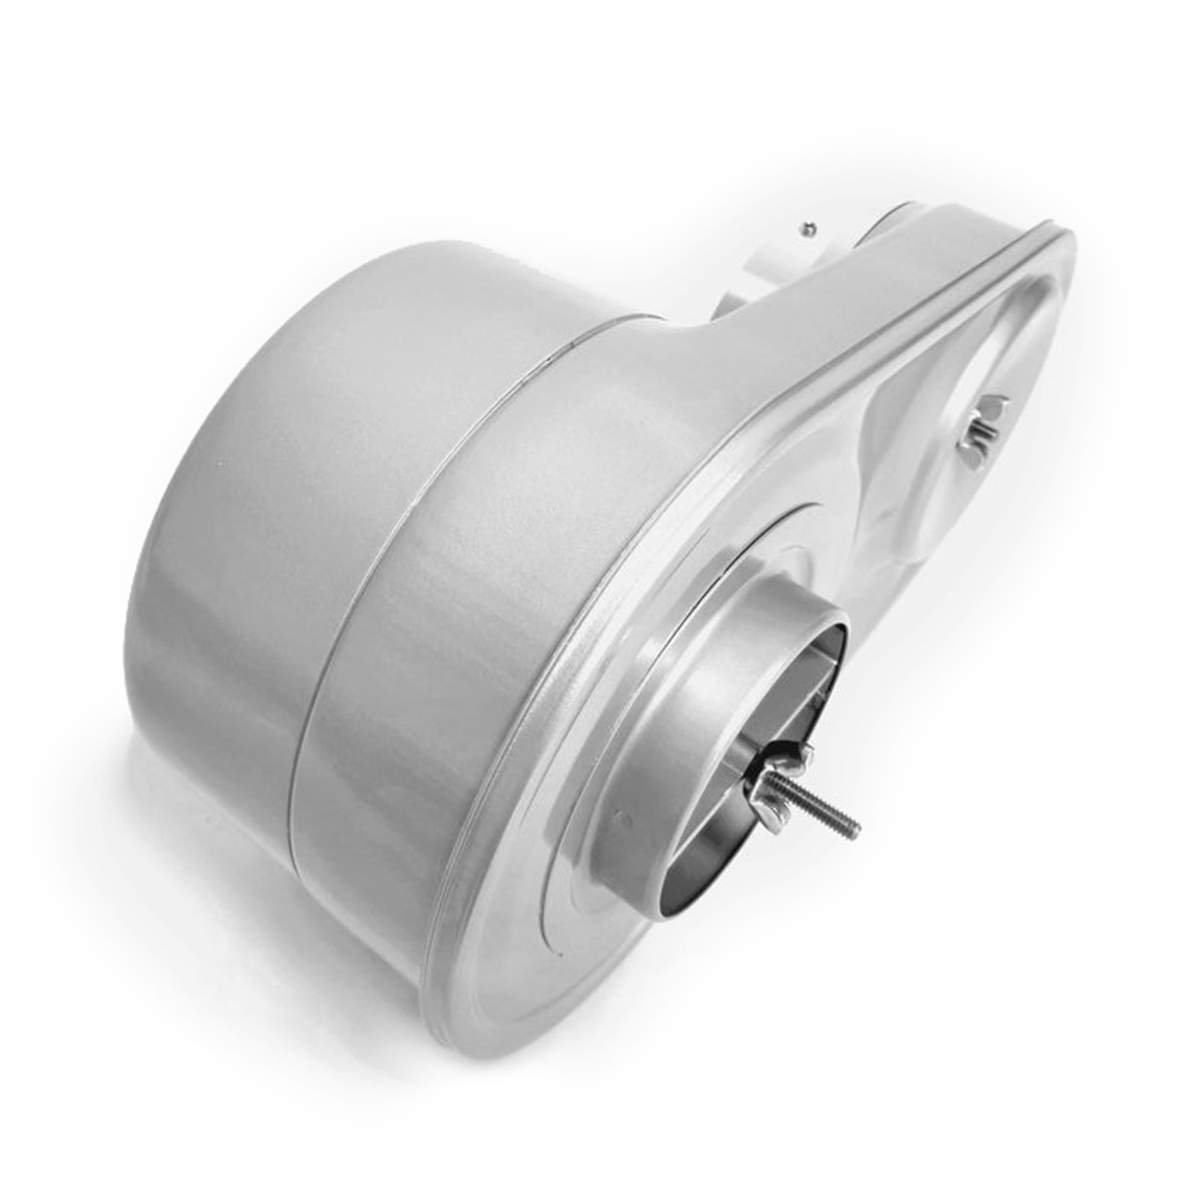
Tri-power intake kit pays homage to the big-block Corvettes of the ’60s. The kit is built around a modified single-plane, dual-carb aluminum intake manifold that accepts two factory LS3 92mm four-bolt throttle bodies and either LS3/EV6 or LS1/EV1 fuel injectors. You also get a Tri-power–style chrome air cleaner assembly with a K&N reusable air filter, throttle body adapters, and 4150 carburetor-to-manifold adapters.

- Advertisement -
Be sure to label each wire as it runs through the distributor to ensure it is connected to the proper coil. Be sure to install the distributor cap boot over the wire before installing the spark plug wire connections.

Distributor Kit 

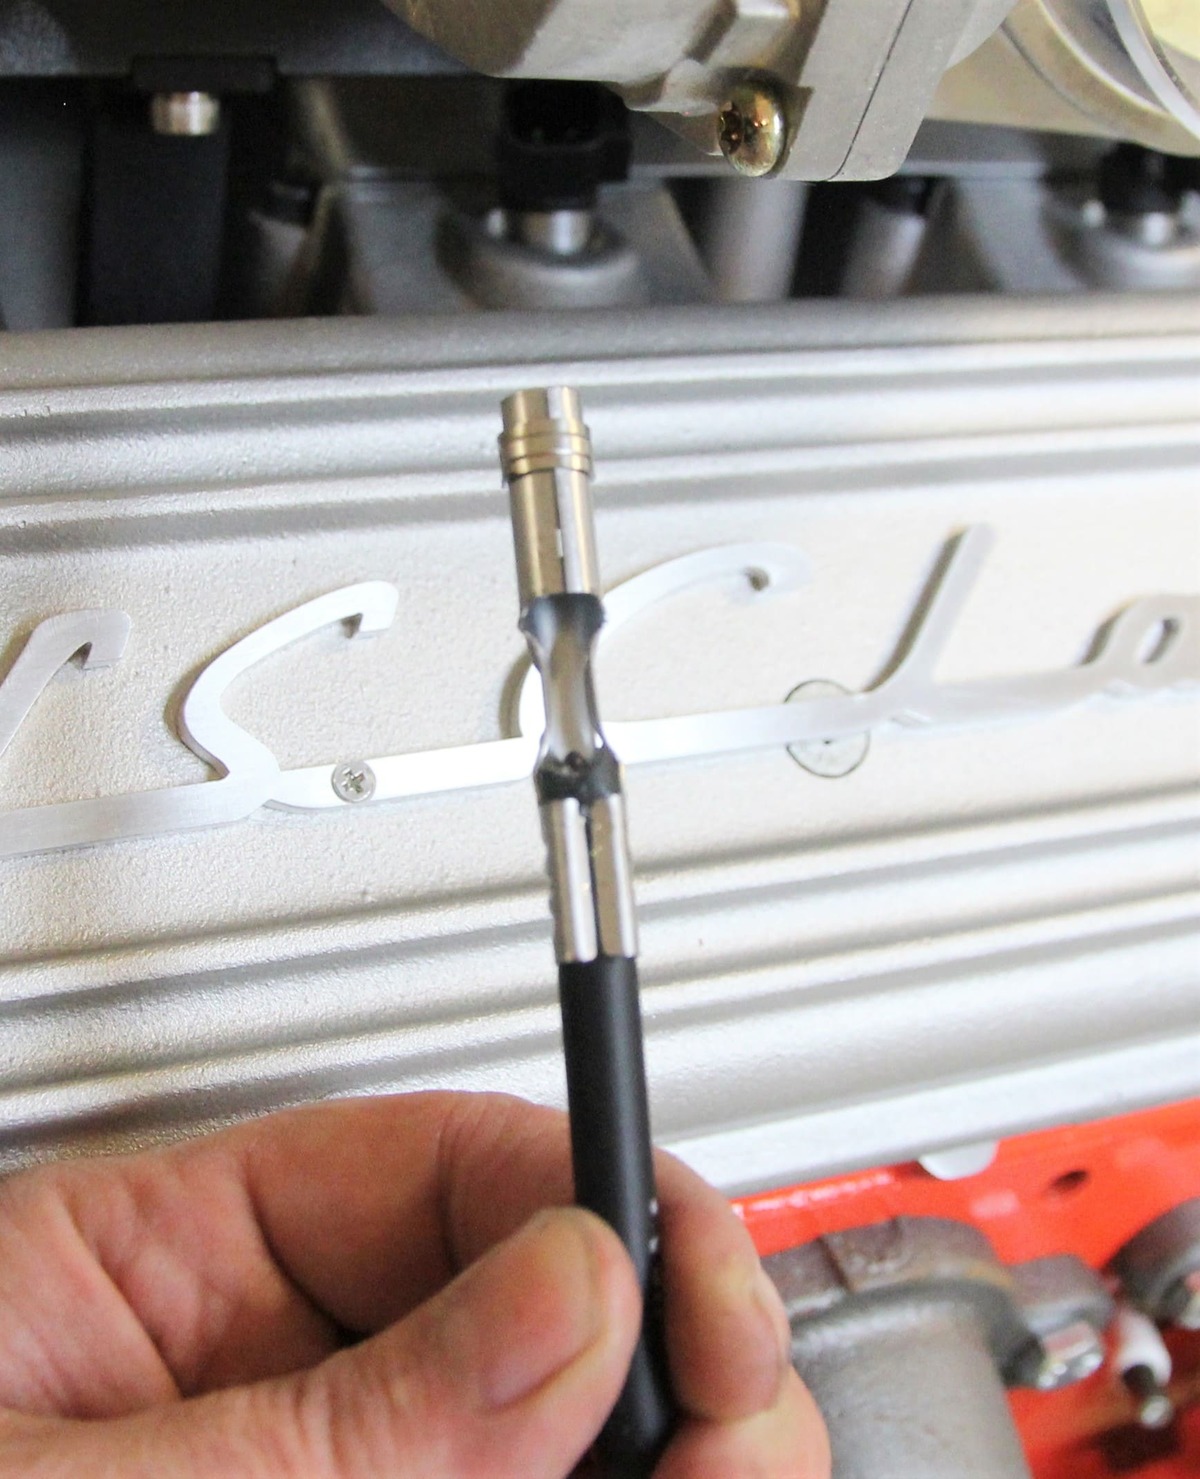
The vintage distributor kit features a hollow cast aluminum distributor body that bolts to one of LS Classic’s valley plates (not included). The ignition wires run from the coil packs to the distributor cap, then feed through the distributor body to the spark plugs. The kit includes 7mm spiral core ignition wires with preinstalled 90-degree coil boots, straight unterminated spark-plug boots, 90-degree distributor boots, and terminals. Requires remote-mounting of the factory coil packs.
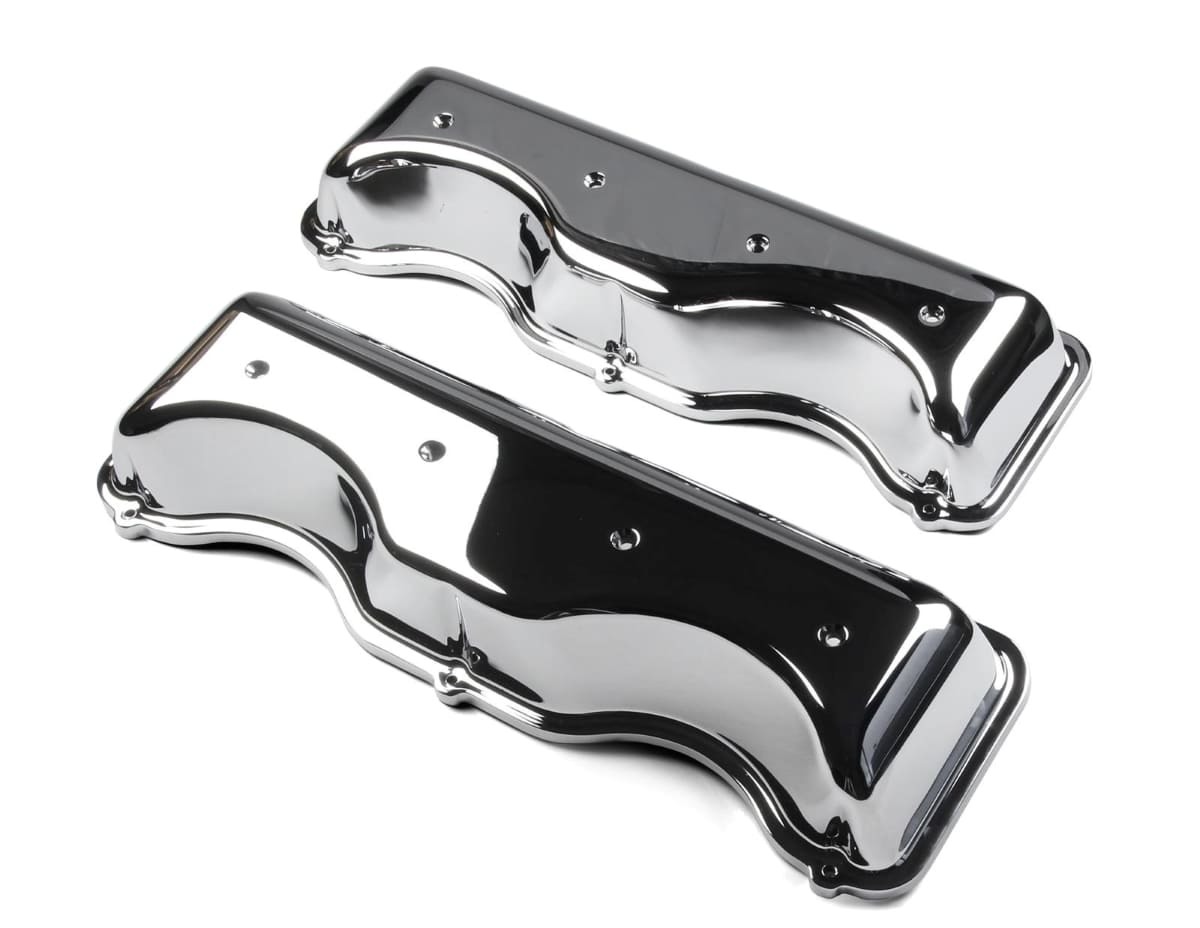
Sure, they do look like big-block Chevy V-8 valve covers, but they are scaled down “just a bit” to fit the proportions of the LS3 motor.
Need we say more, the 348/409 is as distinctive a motor as there ever was to wear the Bowtie and come in Chevy Orange. These W-motor valve covers will readily adapt to your LS thanks to the LS Classic valve cover kit. (Every hot rodder has a sentimental spot for the 409 and its unique valve cover.)

Valve Covers

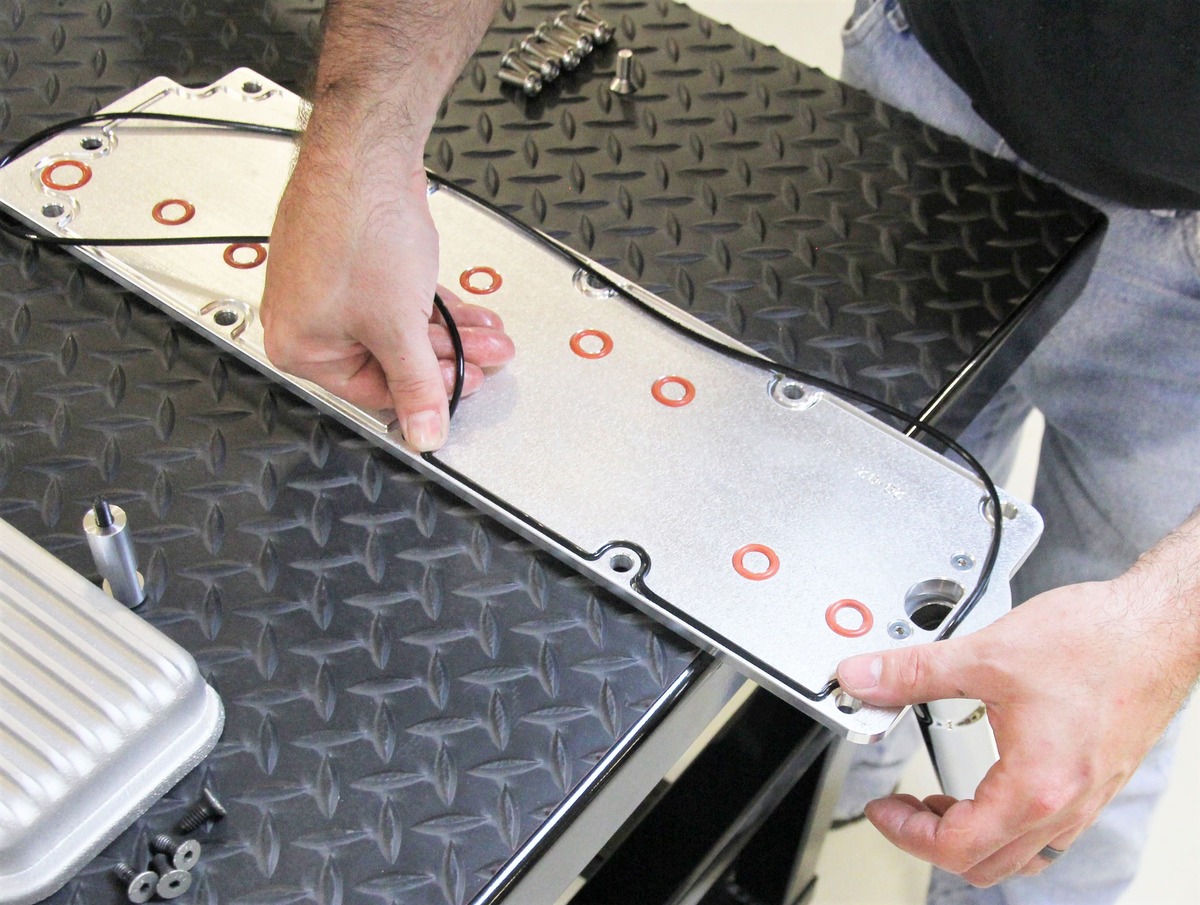
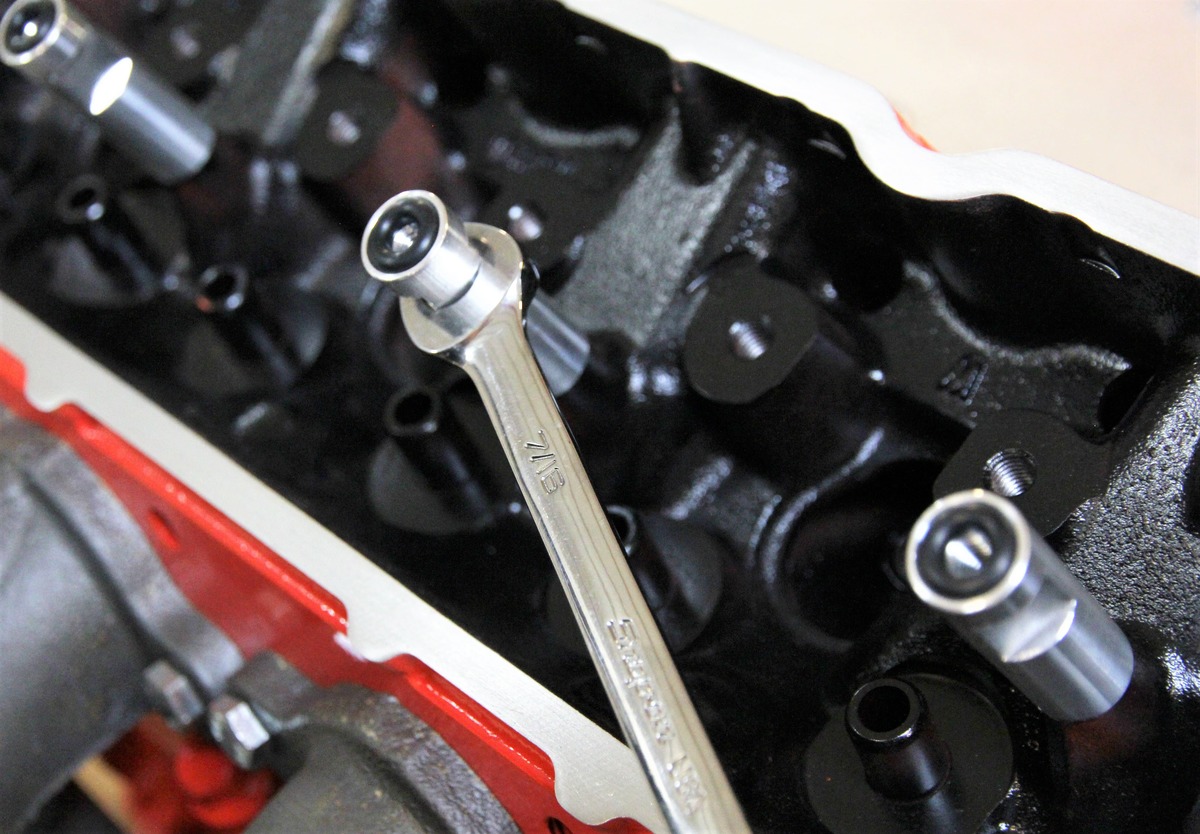
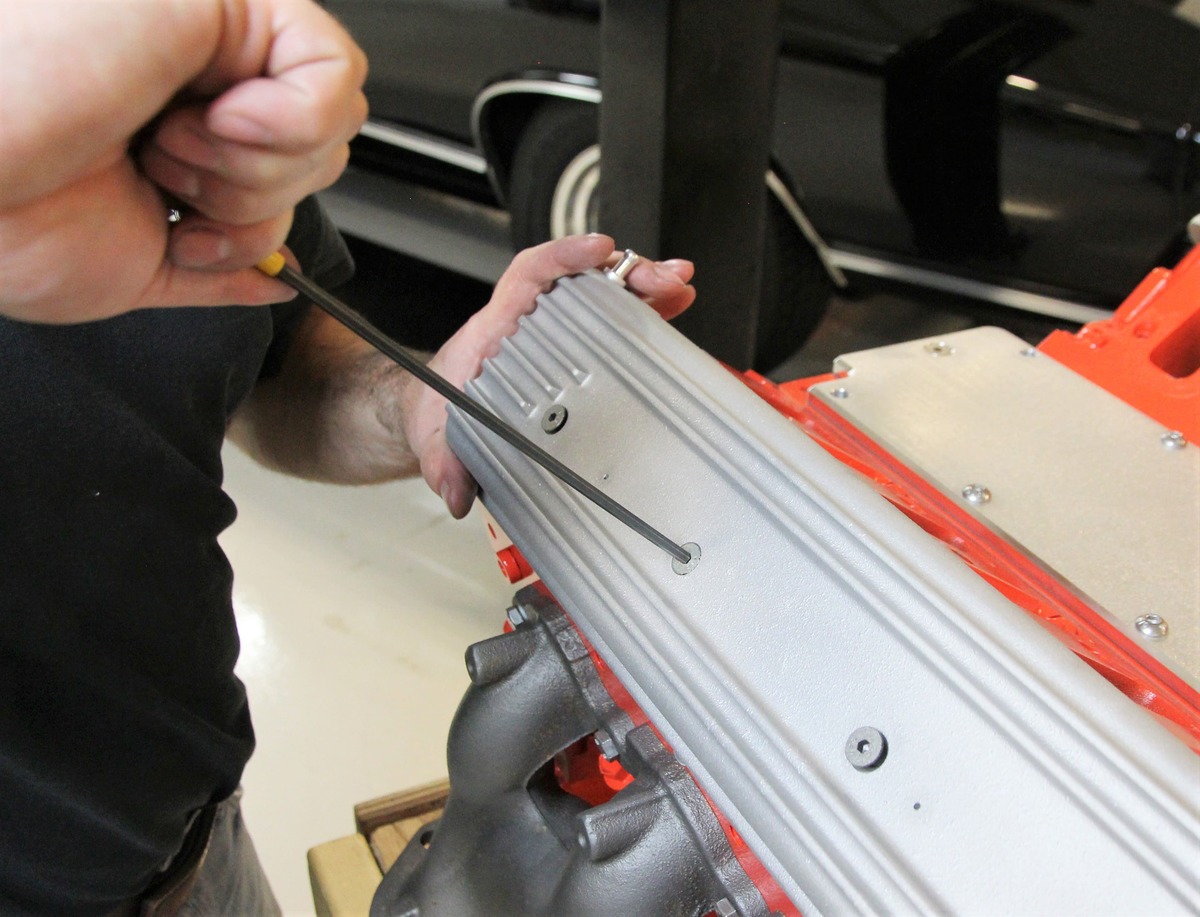
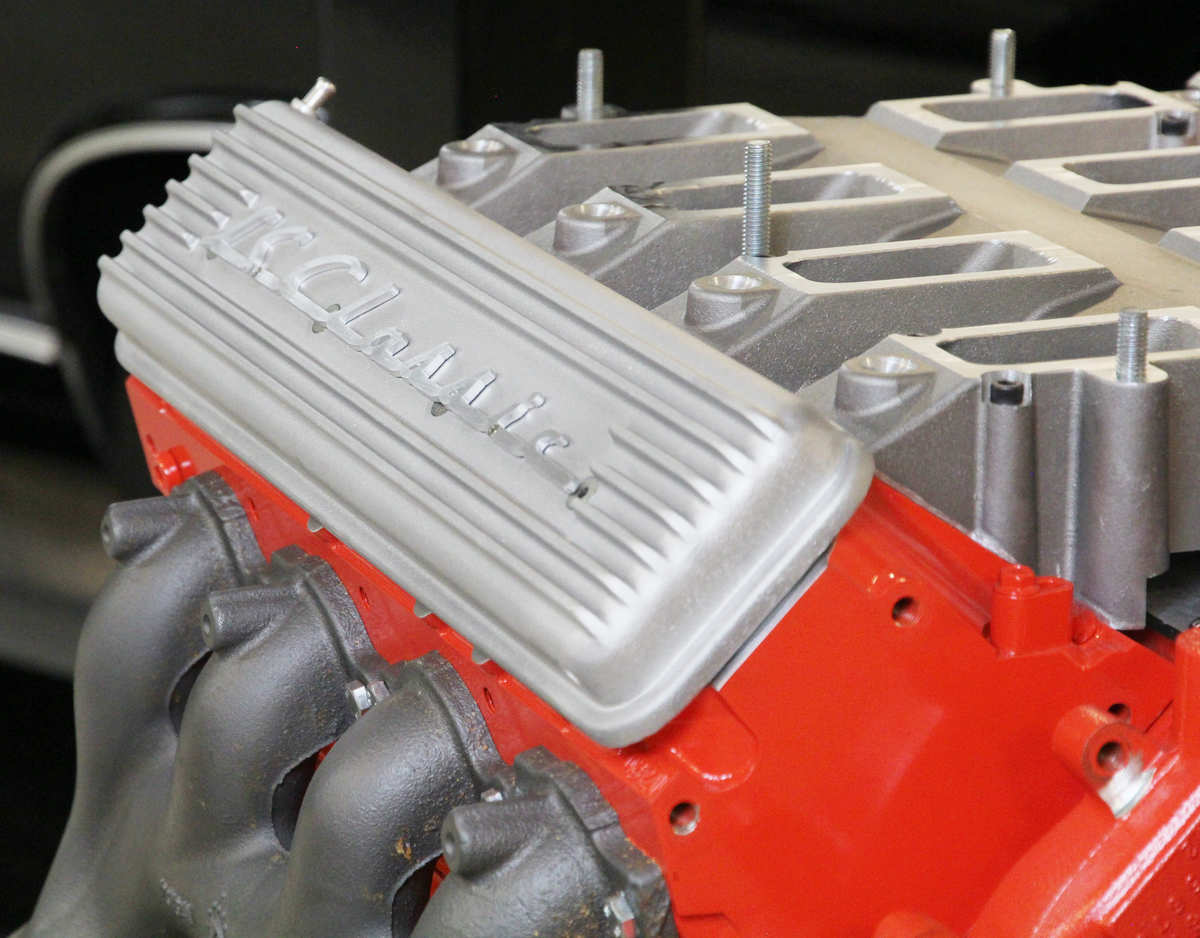
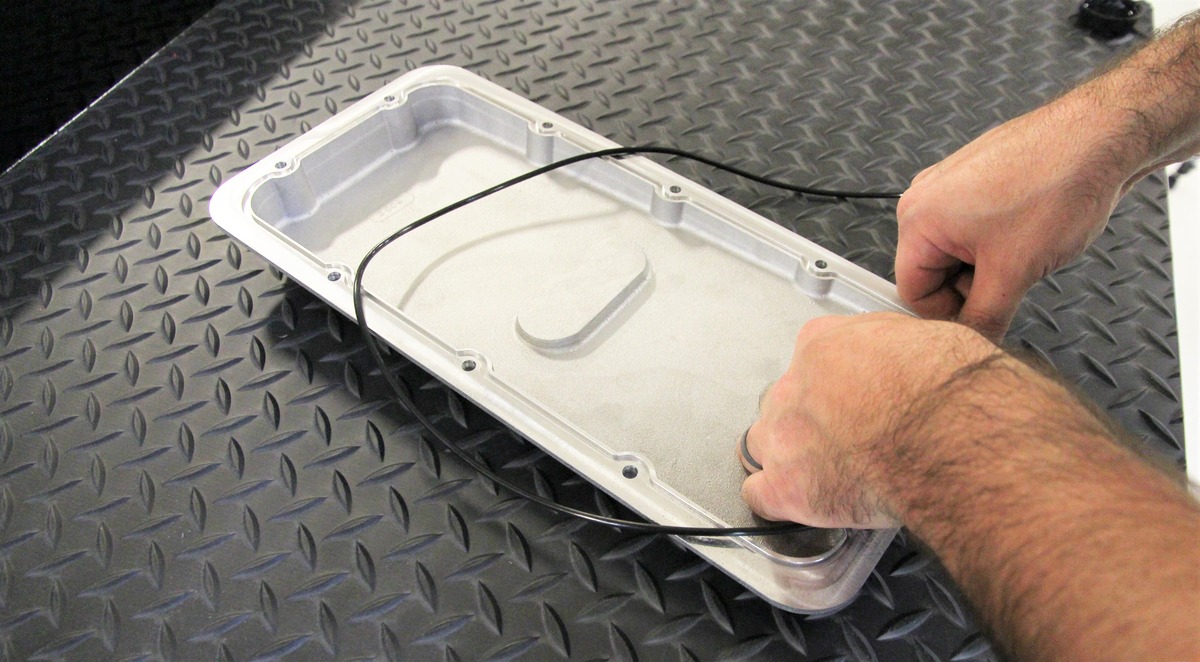
To complete the vintage look there is a line of valve covers that represent the small-block, big-block, and 348/409 engines all for the LS V-8. The cast aluminum covers do not require adapters—they use the OEM rubber gaskets and bolt directly to the cylinder heads. That means they look right and are less likely to leak. LC Classic by Lokar also fit a ported PCV fitting/vacuum port and an oil splash baffle to one cover. The valve covers come with factory-appearing load spreaders and all required hardware.

Valve covers for small-block Chevy have the classic finned design and come in a natural cast finish. The “‘LS Classic” script is removable, so you can add your own custom logo.

Valve covers for big-block Chevy are scaled down to fit the proportions of an LS engine. They’re available in natural, chrome plated, and orange painted finishes and come with vintage-style “Chevy Tonawanda” decals.

Valve covers for Chevy 348/409 are also scaled down to fit the proportions of an LS engine and come in your choice of natural, chrome plated, and orange painted finishes. Factory-style “409 Turbo-Fire” decals are included.

A total of eight valve cover stands come with the valve covers and must be installed on the heads. Note that the O-ring seals should be on the top to seal the valve cover bolts.

Wrapup

All of these kits are designed to fit an LS3-style engine, which is to say a Gen III/IV LS. The manifold base for the fuelie and other packages are intended for use with a rectangle port Gen III/IVLS engine. But if you have a cathedral port 6.0L LQ4 for example, LS Classics can supply an adapter package that will allow all of these various LS Classics manifolds to fit a cathedral port engine.

After sliding the long, rubber O-ring gasket in the valve cover groove, place the cover over each head and line up all four bolts and start them all before tightening.
This LS3 is beginning to look like a real hot rod engine now. We also installed the LS Classic logo on the valve covers.
Install the plenum gaskets over the manifold base.

There are a multitude of variables if you decide to use a non-LS3–style LS engine that space doesn’t allow us to get into, but the task is not difficult and can be accomplished. For example, this particular installation uses the four-bolt 92mm electronic drive-by-wire throttle body as used on the LS3. But if you’d prefer to use a cable-style throttle body, that’s certainly easy to accomplish and Lokar could supply the throttle cable of your choice.

Place the left and right side -4AN fuel lines down the middle of the intake base where they connect to the fuel blocks to be installed later. These lines transfer fuel from the rear injector blocks to the front.
There are six main studs that align the plenum to the manifold base. Shoot a little engine oil on the threads and carefully drop the plenum in place.
With the nuts and washers in place, torque the fasteners in a two-step process at the supplied torque specs using a spiral pattern from the center outward.

We’re not going to get into the details of installing an LS engine into an older car, but you should be aware that this system is designed around an LS3 engine that, just like every other Gen III/IV engine, uses a deadhead or non-return fuel delivery system. Of course, it’s become relatively easy now to create a high-pressure fuel delivery system using multiple component options from Holley as one option. The company offers a wide selection of fuel pumps, regulators, filters, fuel lines, and fittings to complete a return-style system that will be completely reliable and surprisingly affordable.

The Terminator-X system is very compatible with the LS Classic system and is also affordable. The wiring looks intimidating but it’s actually fairly simple. The Terminator ECU even includes an internal MAP (manifold absolute pressure) sensor, which takes much of the mystery out of setting up these systems. The Terminator-X is also as self-learning systems that can be up and running in roughly an hour.
With the Terminator-X configured and the engine running, a display screen like this can offer a wealth of information on how the engine is running. This is a great system that does not take long to install. In this photo, the engine is idling at 782 rpm, in closed loop, and learning with an air/fuel ratio of 13.2:1 at idle with a target of 13.5:1. Note it is currently pulling 12 percent fuel in order to achieve that 13.5:1 commanded air/fuel ratio.

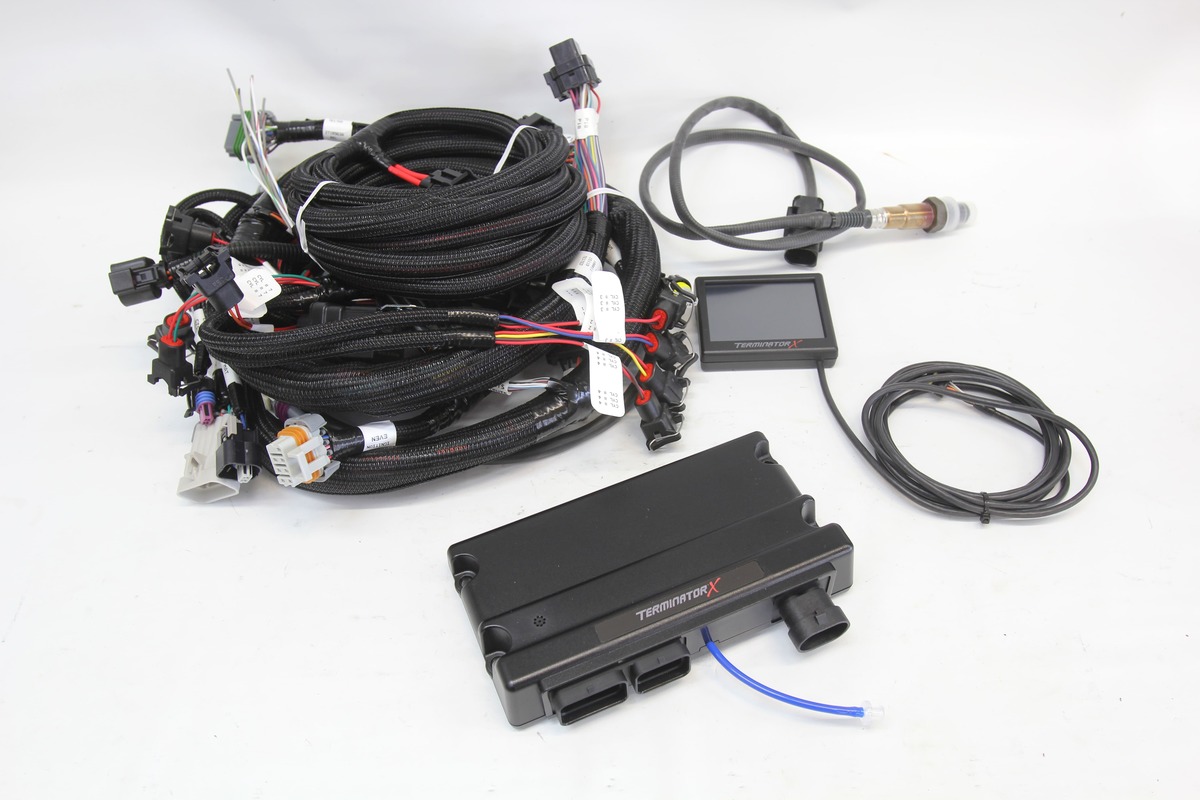
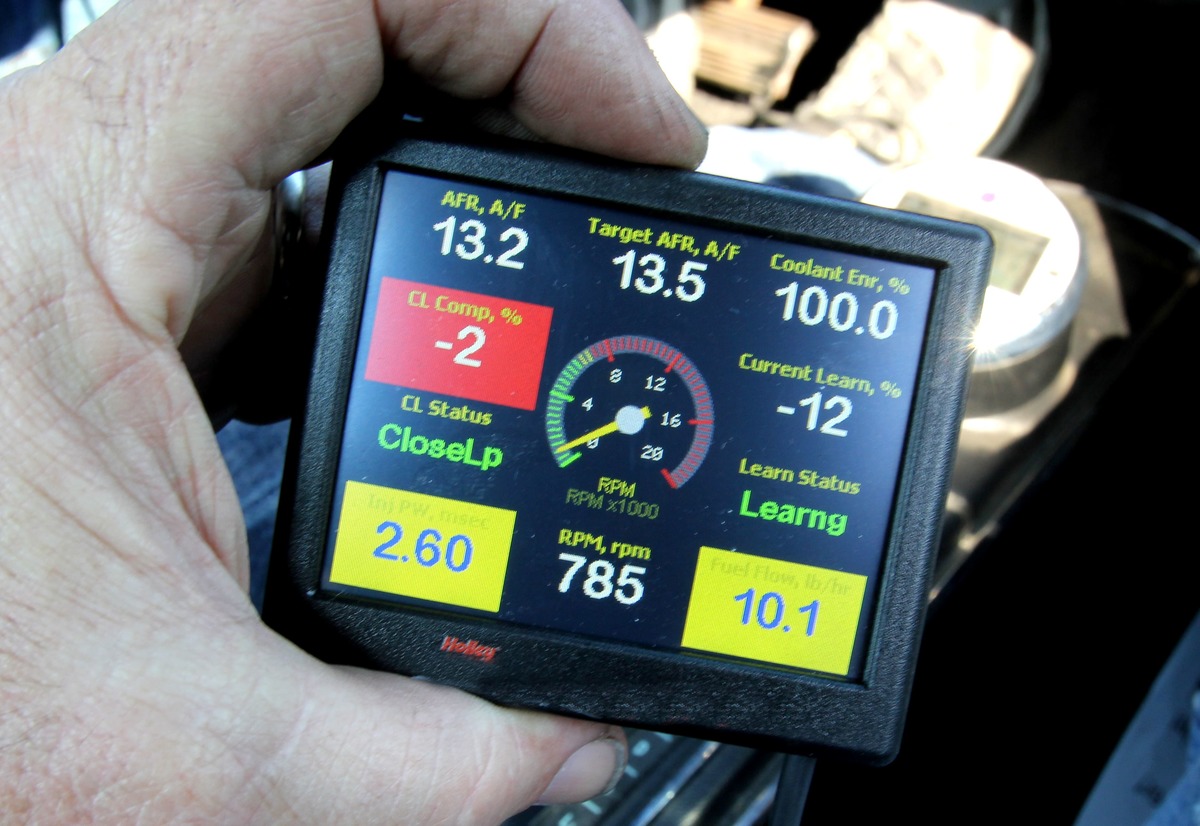
The only other addition to this system is electronic control. There are several high-quality systems out there but LS Classic has found that Holley’s Terminator-X system is an affordable balance between ECU control and affordability. Certainly, Holley’s Dominator of horsepower systems would work extremely well, but for a mild, street-driven where that last ounce of power and control is not the goal, this is where the Terminator-X shines.

We’ll not go through all the details on the Terminator-X installation as, frankly, once you hook up the system, it’s just a matter of following the on-screen prompts from the handheld display. The system is very easy to install and, in fact, the hardest part will probably be deciding where to place the ECU. The EFI connections only fit one way so it’s hard to make a mistake if you follow the instructions. Plus, if you do find yourself stuck on a question, Holley offers a wealth of easy-to-follow videos that cover many of the installation issues you may have.

With all those details handled, let’s get into what it takes to install one of the LS Classic by Lokar fuelie systems on an LS3 and convert this LS into a retro-winner.  MR

Sources:

Holley Performance Products
(866) 464-6553
www.holley.com

Lokar Performance (LS Classic)
(865) 966-2269
www.lokar.com

The plenum lid can be installed now with the O-ring in place. The lid is retained with a series of 10-¼-inch Allen head bolts. Once in place, start on the first pass in the center and work outward at 7 lb-ft. On the second pass, increase torque to 12-15 lb-ft in the same spiral outboard progression.
Now the throttle body adapter can be bolted to the plenum with the gasket. There is a machined flat portion of the adapter on the plenum side that should be on the bottom to position the throttle body correctly. Torque the ¼-inch bolts to spec.
The LS Classic system is designed to use the GM production LS3 injector, which uses an EV6/USCAR electrical connector. These injectors are short, only about 1.9 inches in overall length, and flows 42 lb/hr at 58 psi which is enough fuel to feed over 600 hp.
The injectors should be installed so the wiring harness connections face outboard.
There are four injector fuel rails that simulate the appearance of mechanical injection. Each fuel rail segment houses two injectors. There are two fuel rails with a -6AN male inlet fitting. These will face the rear of the engine. The two driver-side fuel rails feature a notch as shown in the instructions. These notches face each other on the driver side. Ensure the injectors are fully seated in the fuel rails to prevent a leak. Start the fuel rail mounting bolts and then connect the inboard fuel line that feeds fuel from the rear to the front segment. Do this on both sides of the manifold to ensure connections on all four segments.
Once you are certain the injectors are positioned properly and are not binding in the fuel rails, and the fuel rail mounting bolt is secure but not torqued, tighten the fuel hose connection (as shown) on all four segments. Then tighten the mounting bolts at the manifold to the proper spec.
It might be a good idea to first route all eight spark plug wires with the looms you intend to use before cutting and installing the spark plug wire ends. This may reveal how it will look before you cut the plug wires to length. Once that is accomplished, you can start by installing the plug wire boot about 12 to 18 inches onto the plug wire and then cutting the wire to length and trimming back roughly 5/8 inch of insulator to reveal the conductor.
Bend the conductor back 180 degrees and capture the conductor with the spark plug wire connector and then crimp with a spark plug wire crimping tool. The finished plug wire end should look like this.
With the plug wires routed over the valve covers in the traditional way, this is starting to look like a vintage small-block.
One last step is to add the oil pressure sending unit adapter to the oil pan. This supplies the oil pressure signal to the ECU. We’re showing this on a pan that has been removed but this sending unit can easily be placed on the pan in place on the engine.
The vintage V-8 distributor look from days gone by of the big-block Chevy complete with wiring can be had for your LS3 with the LS Classic by Lokar distributor kit.

Torque Specs
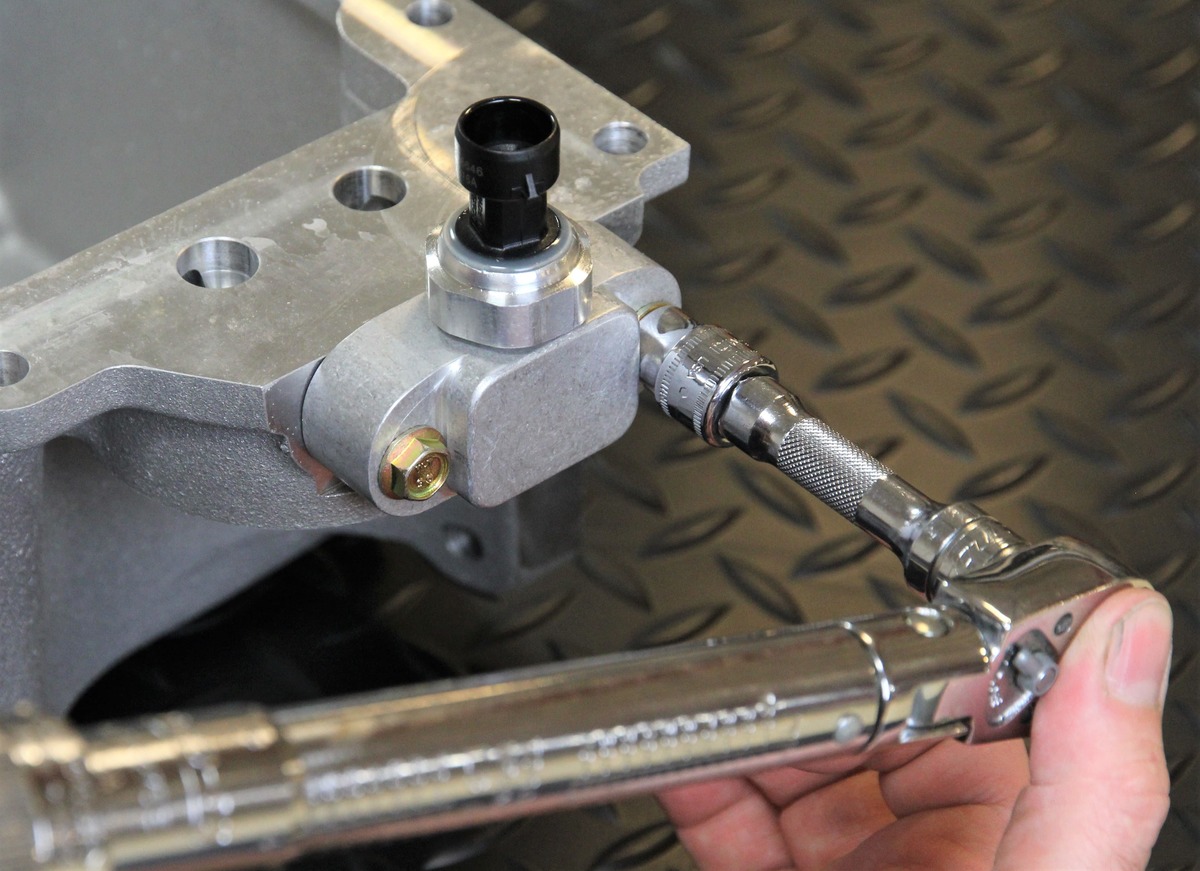
Lifter valley bolts                                8mm                18 ft-lb
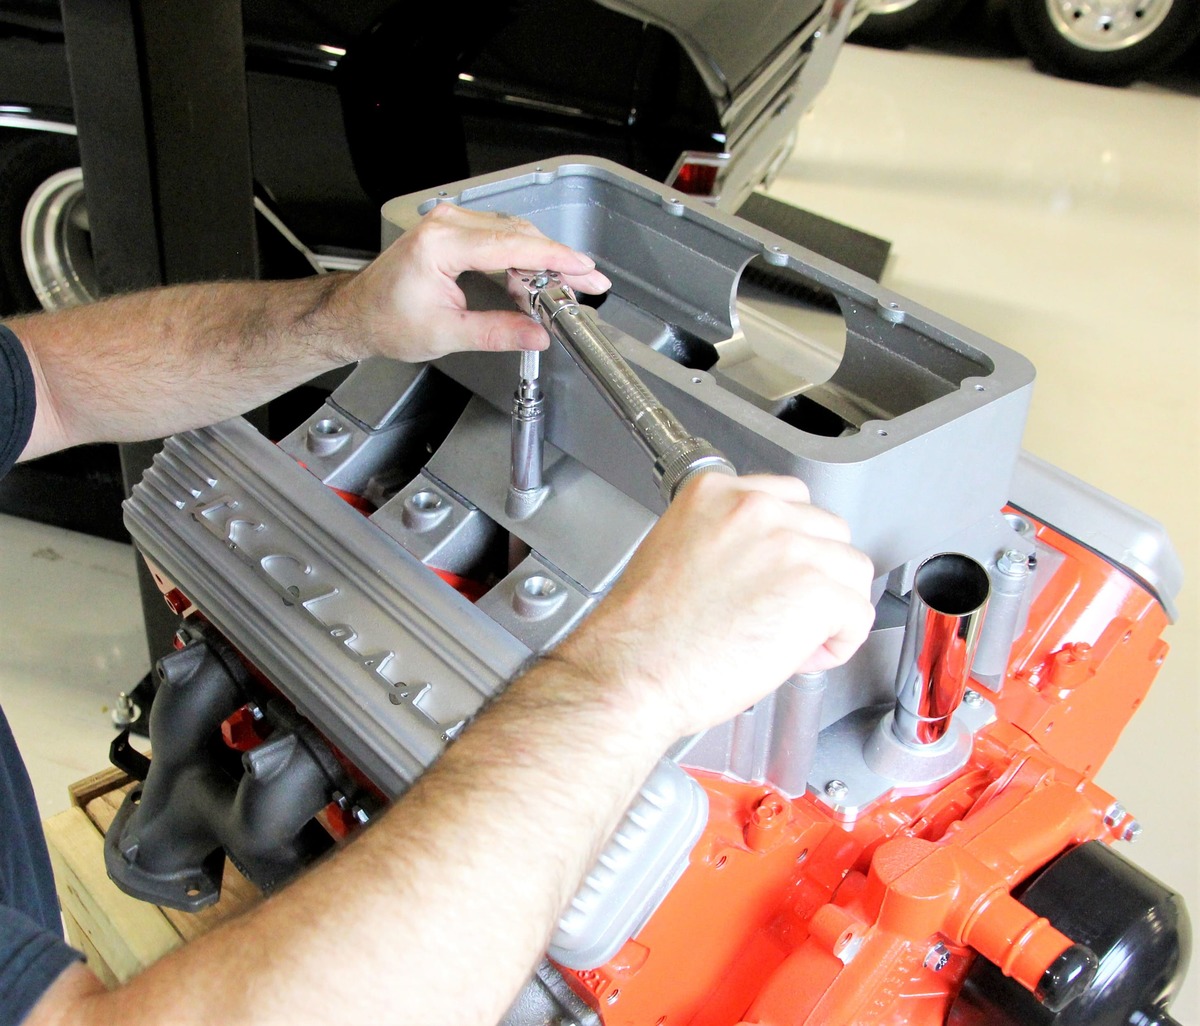
Intake base bolts                                 6mm                (1st pass) 50 in-lb         (2nd pass) 106 in-lb
Plenum to base bolts                           3/8                    20 ft-lb
Plenum bolts                                       1/4                   (1st pass 7 ft-lb)           (2nd pass) 12-15 ft-lb
Fuel rail bracket bolts                         1/4                    (1st pass 7 ft-lb)           (2nd pass) 12-15 ft-lb
Throttle body and adapter                  1/4                    (1st pass 7 ft-lb)           (2nd pass) 12-15 ft-lb
Fuel rail mount bolts                           1/4                    (1st pass 7 ft-lb)           (2nd pass) 12-15 ft-lb
Dist. Housing to engine                      8mm                 18 ft-lb

Parts List

Description PN Source
1957 Fuelie kit, rec port GMLS3001 Lokar / LS Classics
1962 Fuelie kit, rec port GMLS3002 Lokar / LS Classics
1963 Fuelie kit, rec port GMLS3008 Lokar / LS Classics
14-inch Classic conversion kit, rec port GMLS3006 Lokar / LS Classics
Tri-power conversion kit, rec port GMLS3004 Lokar / LS Classics
SBC conversion LS valve covers, cast GMLS1002 Lokar / LS Classics
BBC conversion LS valve covers, cast GMLS1003 Lokar / LS Classics
409 conversion LS valve covers, cast GMLS1004 Lokar / LS Classics
Gen III lifter valley plate w/ oil filler, machined GMLS2005M Lokar / LS Classics
Gen IV lifter valley plate w/ oil filler, machined GMLS2006M Lokar / LS Classics
Distributor adapter kit w/ plug wires GMLS4002 Lokar / LS Classics
Terminator-X, 58x, cable throttle 550-910 Holley.com
Terminator-X MAX, 58x electronic throttle 550-931 Holley.com
- Advertisement -

Related Articles

Search Our Site

More Modern Rodding

MR’s Featured New Products For Your Hot Rod – 2024

Classic Instruments 1978-88 Chevy G-Body Gauge Cluster Classic Instruments now...

Purple Reign: Custom Pinstriped Merc Coupe

Brian Omatsu's 1951 Mercury Coupe: Blending Styles from Classic...

Parting Shot: Isky’s Tribute Ford Roadster

Dennis Taylor’s Modern-Day Representation Of Isky’s Ford Roadster At...

2024 Detroit Autorama Ridler Winning ’53 Corvette

Owned by Dave & Tracey Maxwell & Built By...

First Look 2024 Detroit Autorama Great 8

The 71st Annual Detroit Autorama & The Competition For...

A New Suspension on Jason Scudellari’s Brookville Model A

By Ron Ceridono   -   Photography By Jason Scudellari Over the...
More Modern Rodding

2024 Barrett-Jackson Cup Top Five Finalist Revealed – 1968 Ford Mustang

From the Shop of East Bay Muscle Cars Comes...

David’s Dream 1938 Ford Coupe Build

David Burgard’s Good-Looking Hot Rod Ford Coupe By Dale Moreau ...

2024 Barrett-Jackson Cup First Look At Competitors

Country’s Best-Looking Hot Rods, Trucks, and More Compete For...

How To Fix Quarter Panel Rust

Patch Panel Install For Rust Repair on Your Vintage...

Hemi Swapped 1932 Ford Roadster

Dave Gray’s Deuce Roadster Built In only 5 Months By...

Under The 1965 Buick Riviera Detroit Speed Chassis

Unmatched Street Performance & Sixties Style By Gerry Burger   -  ...