At the dawn of hot rodding, there was only one way for a rodder to source a body to build a hot rod from to find a genuine, factory-made, real steel body. The majority of early hot rods, not counting the oddball marques, were built using genuine Ford bodies. However, as the years passed and many old Fords found their demise battered beyond recognition racing on a circle track, the herd thinned out. Thinned out to the point that a “genie” body by itself began commanding top dollar.
Never chemically “wet strip” paint from a painted fiberglass body. The liquid stripper will permeate the gelcoat and forever plague you with paintjob-related problems.
Hot rodders have always been an imaginative bunch and found inspiration from the Chevrolet Corvette, popping out fiberglass replica bodies ranging from T-buckets to Deuce roadsters to fill the void. The demand for fiberglass bodies proved strong enough to justify the expense of evolving and tooling up to stamp out and reproduce steel bodies. That said, there’s still a place in the market for fiberglass vintage Ford bodies and a plethora of ’glass bodies, ranging from 1956 Ford F-100 cabs to a wide spread of Corvette generations available. The vehicle featured in our story is a 1963 split-window Corvette, but the steps to repairing, bodywork, and repainting any laminated fiberglass body are the same.
Using 80-grit dry paper on a DA (double-action sander) will buzz the bodylines off if a person doesn’t pay attention when approaching the edges.
A little about Corvette history: The Corvette was not the first American-made sportscar manufactured using a fiberglass body, but the first fiberglass body introduced to the market by a major automobile manufacturer. Life for the fiberglass-bodied Corvette began in 1952 with Harley Earl’s excursion to Costa Mesa, California. Earl witnessed firsthand how the Glasspar boat company laminated fiberglass to produce its Glasspar G2 sports car. Earl shared his findings with General Motors brass and the decision was made to manufacture the Corvette body out of fiberglass. In 1954, Corvette production moved to St. Louis, and of the 3,640 1954 Corvettes made that year, only four were painted black. You could get any color you wanted for the Corvette when it first appeared at Chevy dealers in 1953, as long as it was white—Polo White, to be exact. And it wasn’t a random decision that the first 300 Corvettes built in Flint, Michigan, at Chevrolet’s Factory were only available in white; white is the most forgiving color when it comes to disappearing ripples and flaws in the bodywork.
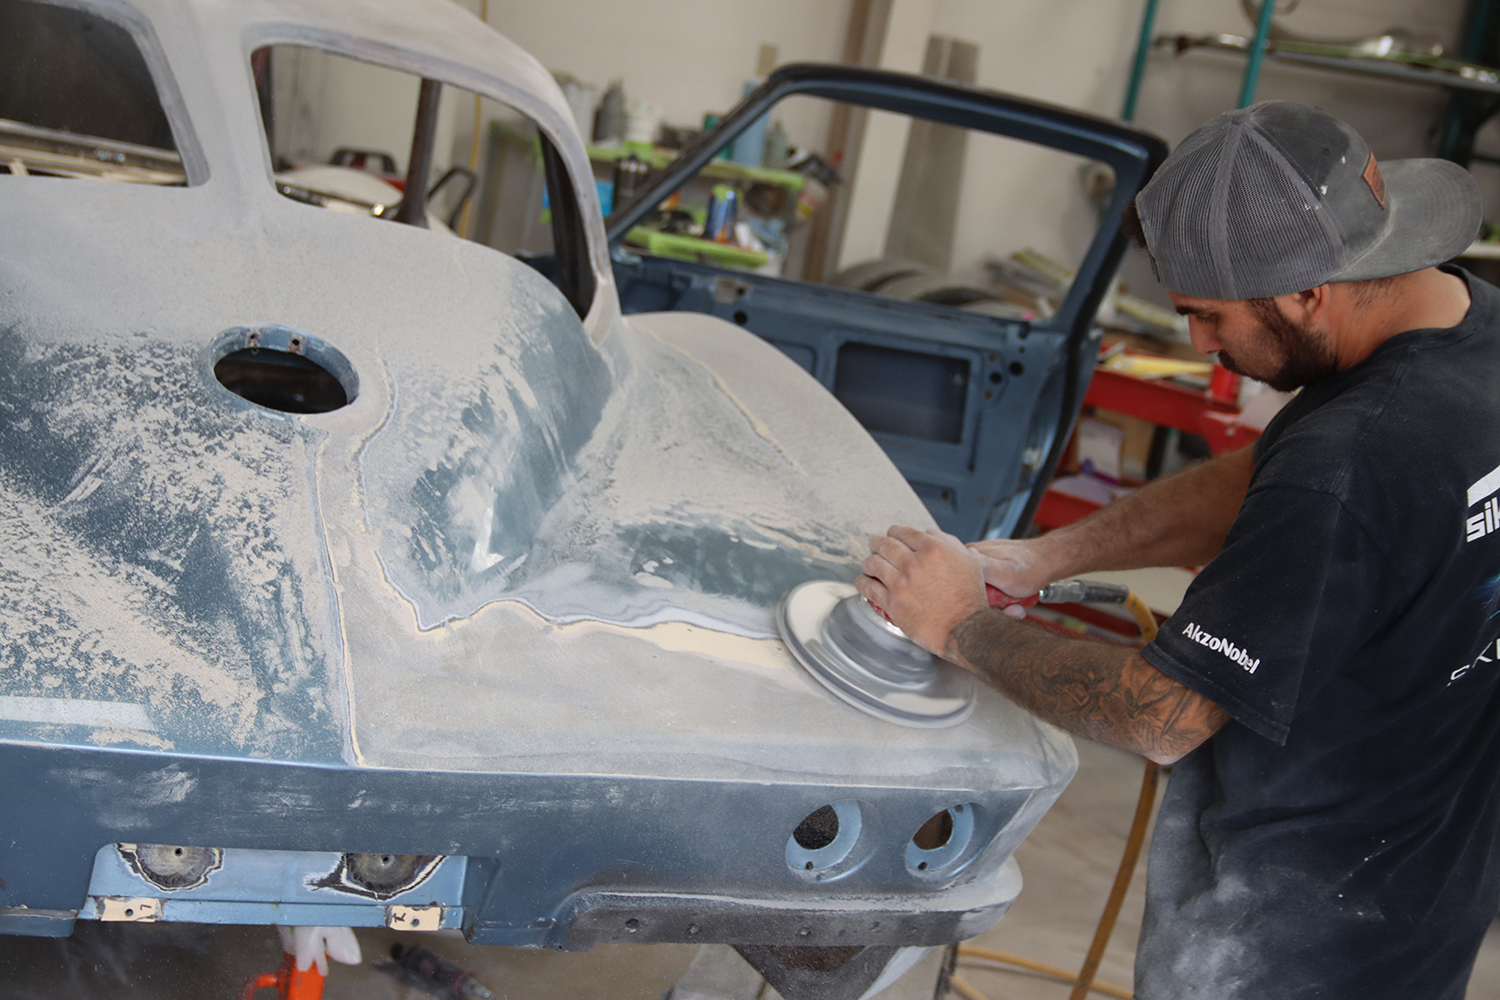
Corvette bodies employ a steel “birdcage” plus additional pressed steel parts to strengthen and reinforce the body’s structure. Buzz the paint off tight areas with a small-diameter 80-grit disc.
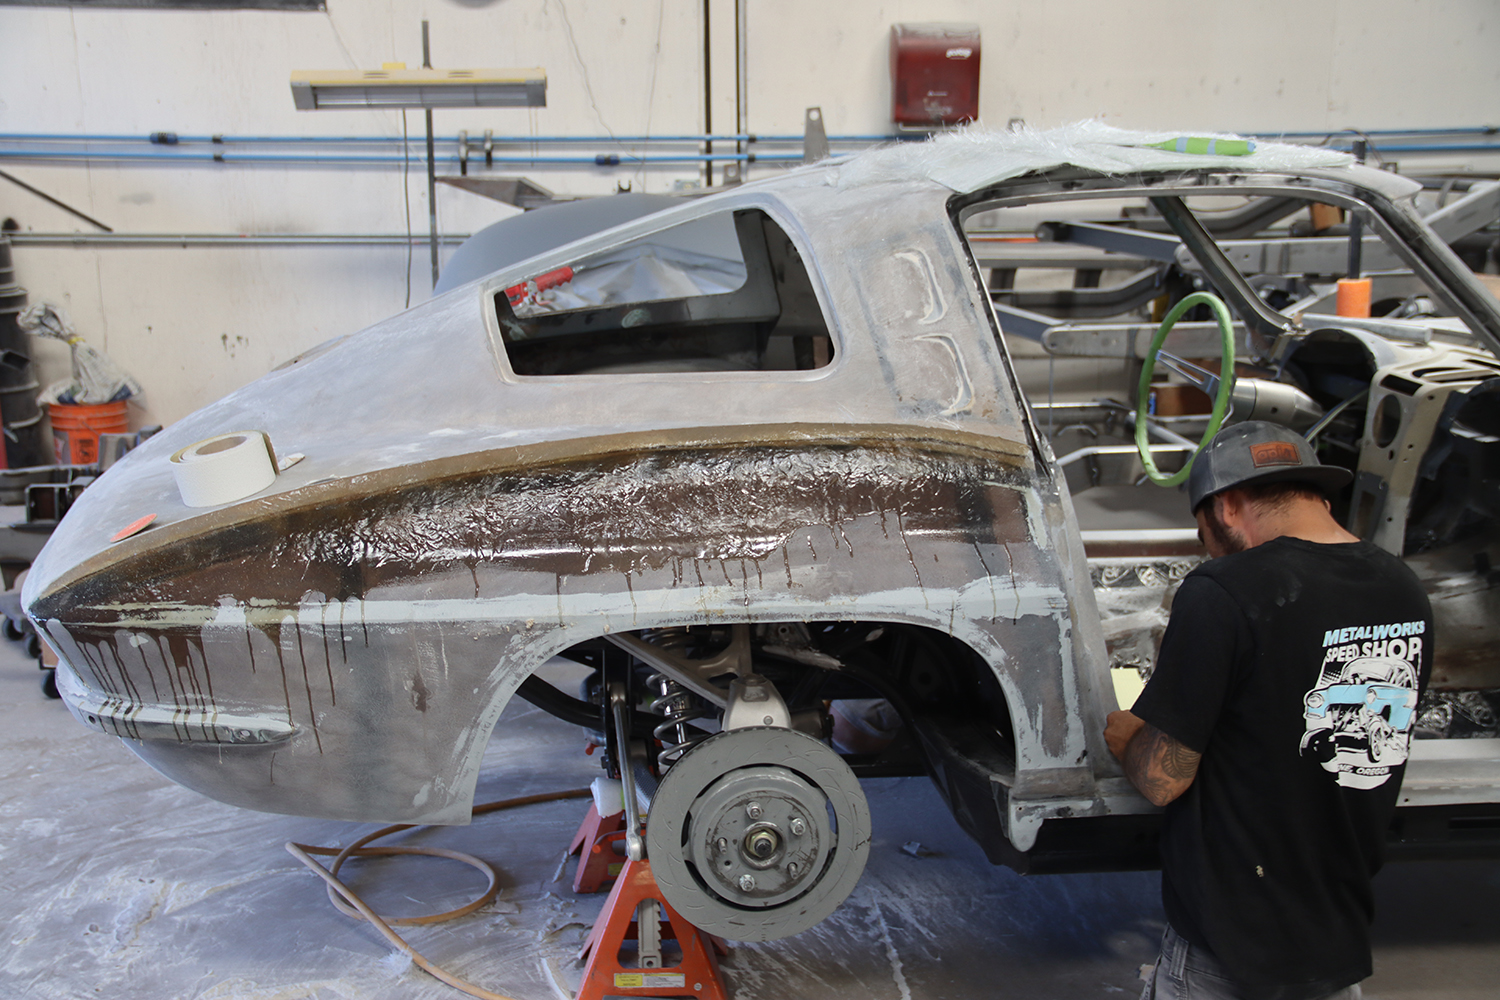
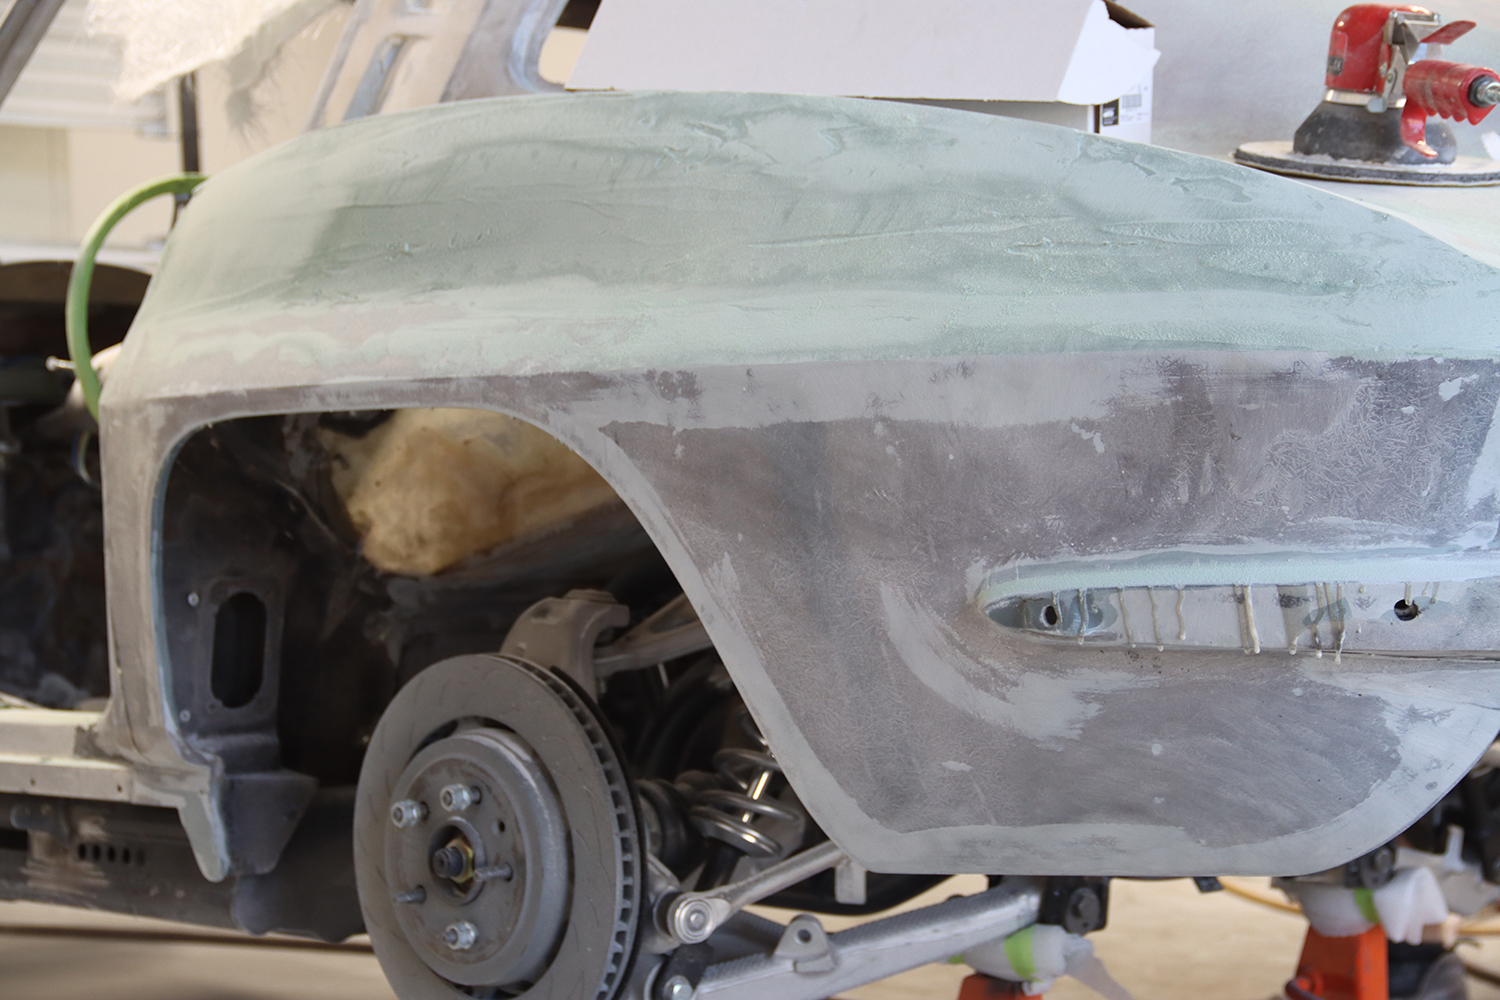
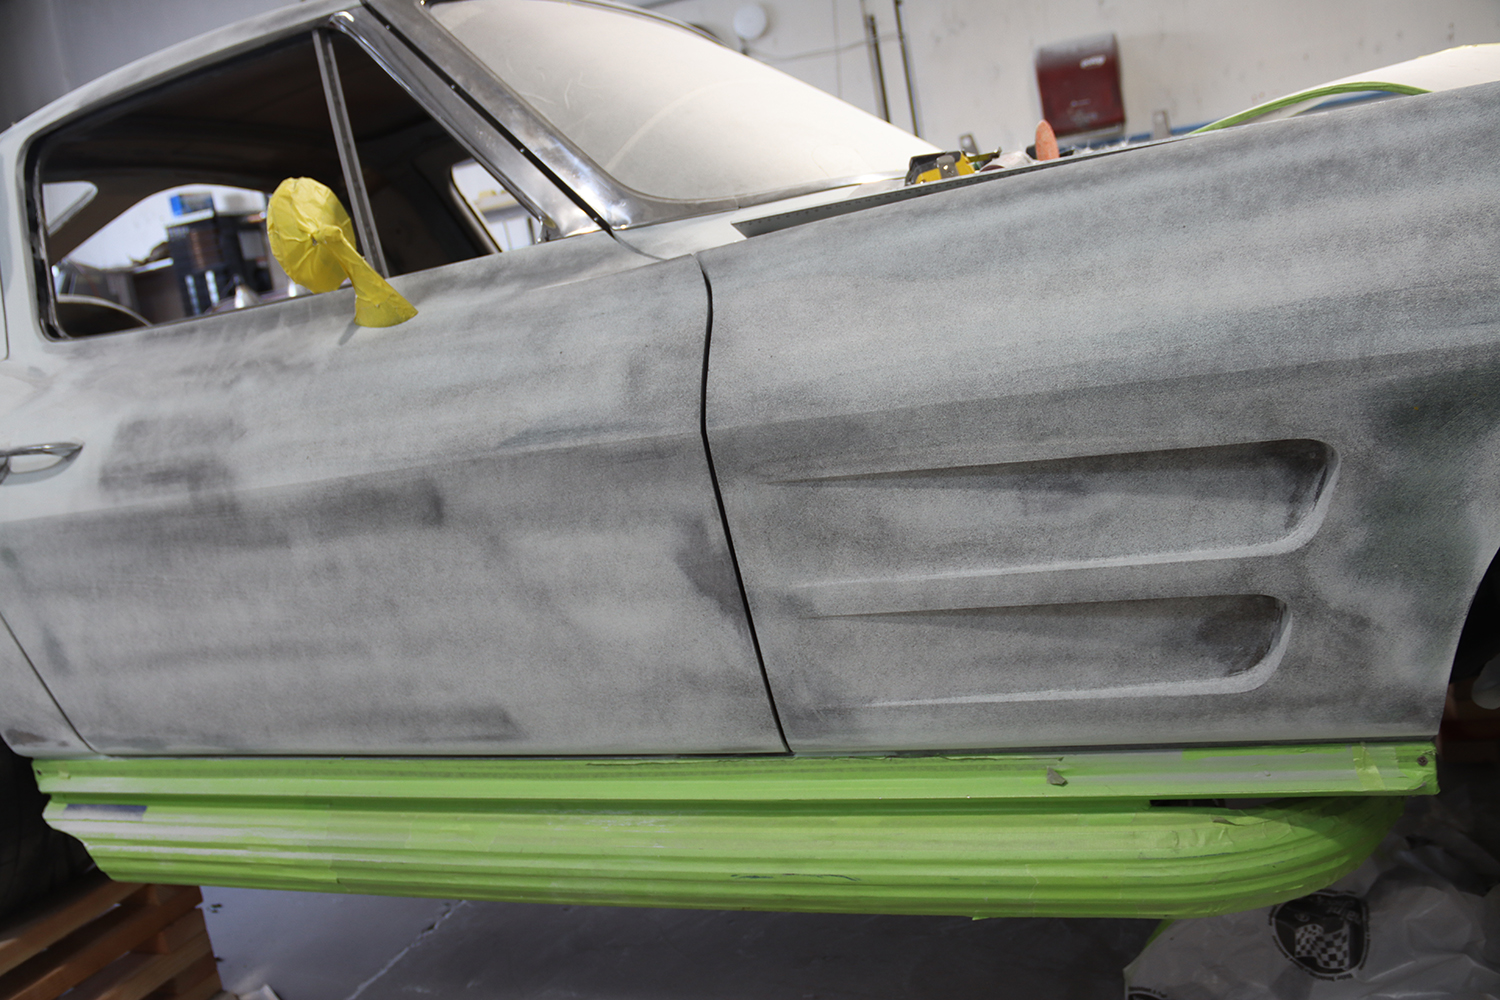
We found our subject vehicle, a 1963 split-window Corvette, undergoing bodywork and paint at Metalworks Speed Shop in Eugene, Oregon. This Sting Ray is done in a restomod style, and the edges have been sharpened compared to a stock 1963 Sting Ray. The good news about working with fiberglass is that it’s easy to sand down and shape, but the bad news is that it’ll likely make you itch or possibly even cause a bad allergenic reaction. In recent times, the terminology has changed slightly from doing bodywork and paint to now calling it fit and finish, however, the process is pretty much the same as when Chevrolet debuted the Corvette on June 30, 1953, and continued manufacturing a laminated fiberglass-bodied car until 1973 when SMC (Sheet Molding Compound) was introduced.
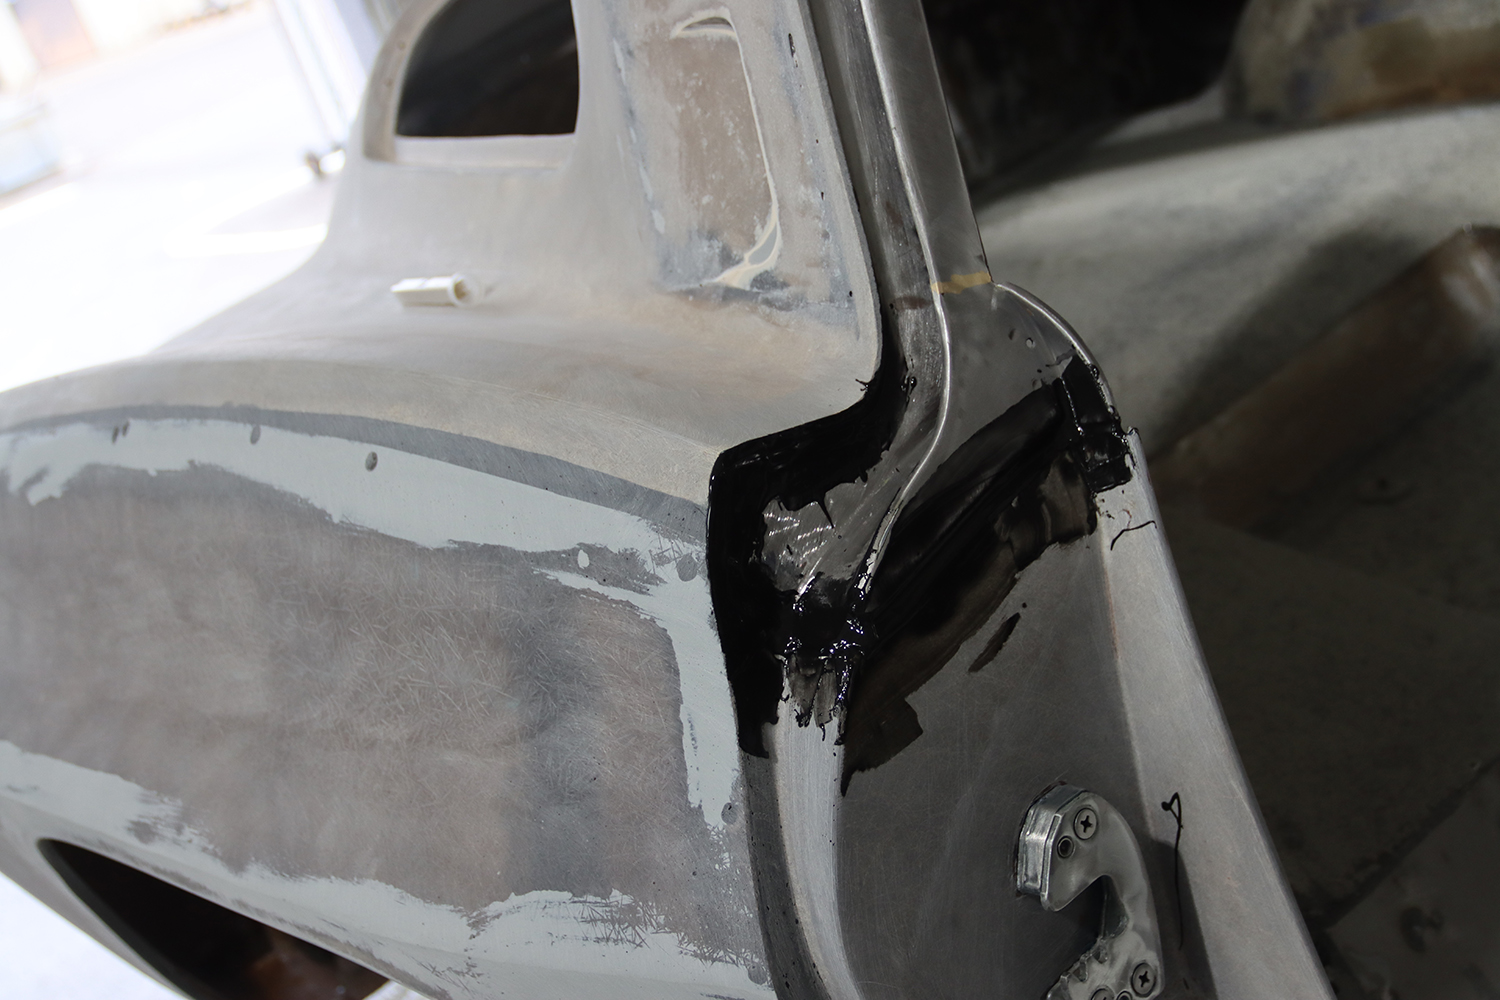
The hot tip for re-bonding fiberglass to steel or aluminum is to apply Jet BlaxTer. This two-component fast-setting epoxy adhesive can be sanded within 10 minutes of application.
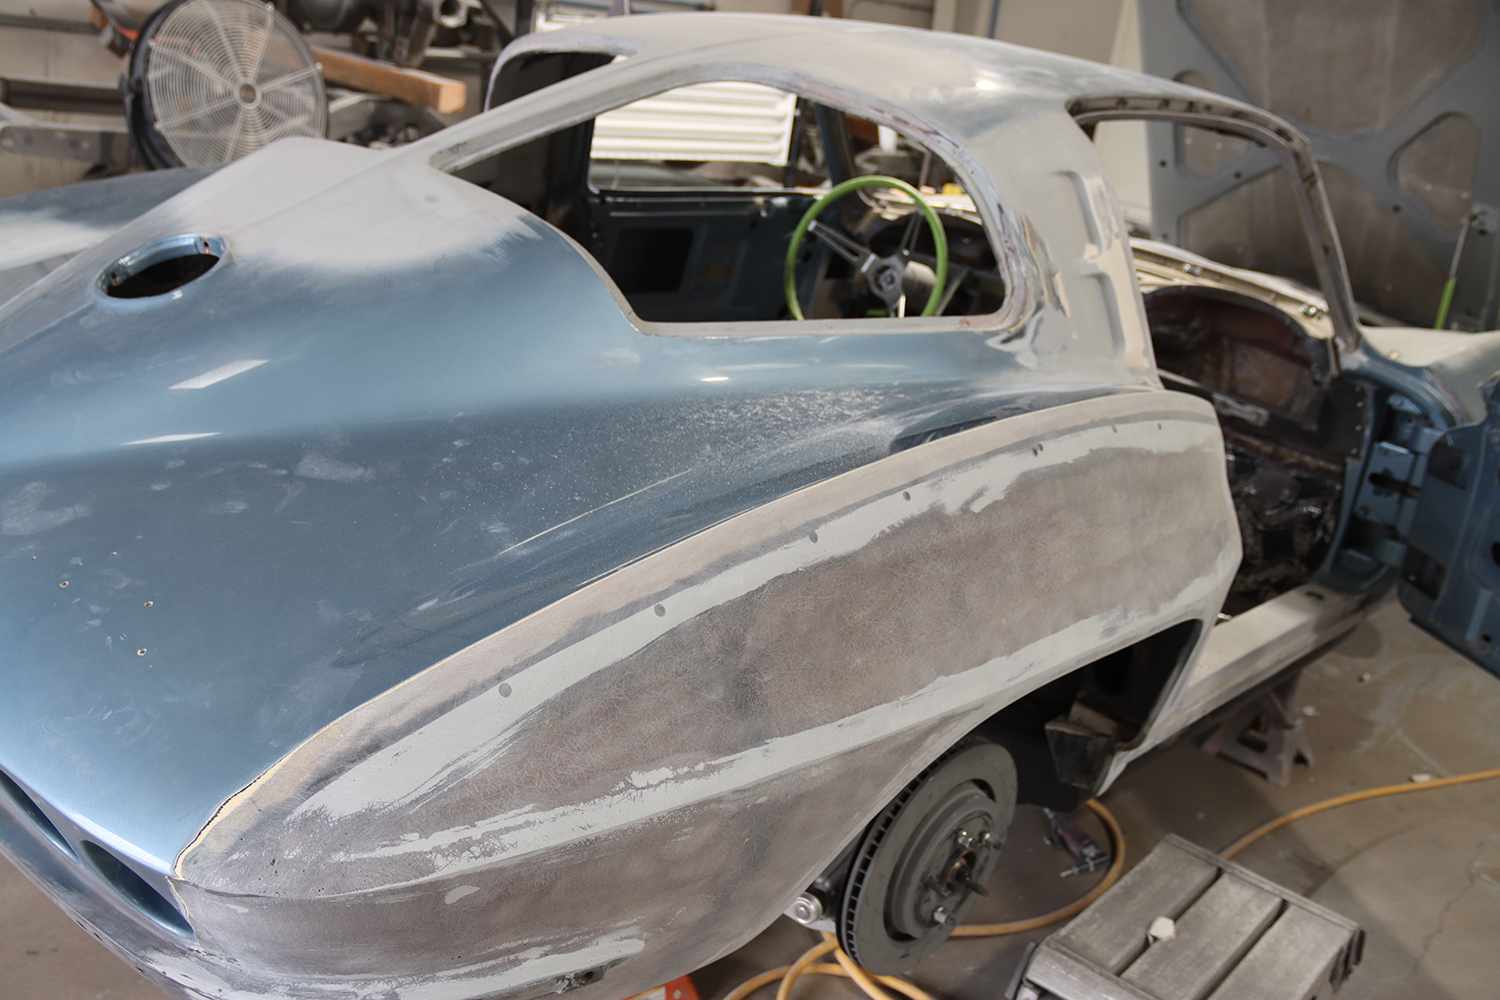
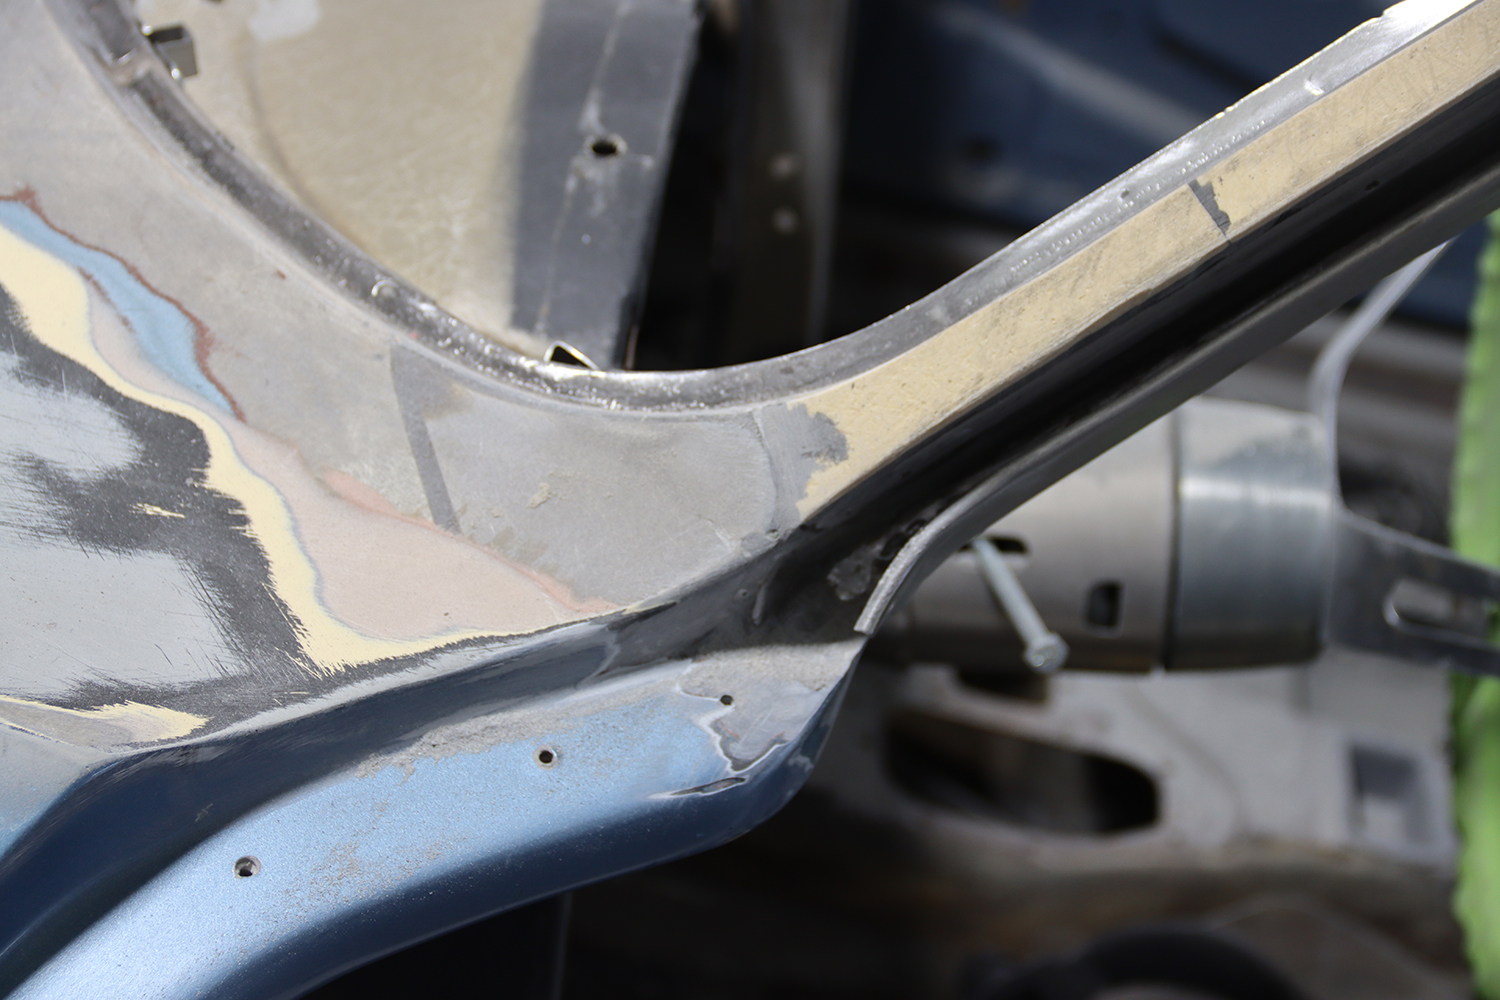
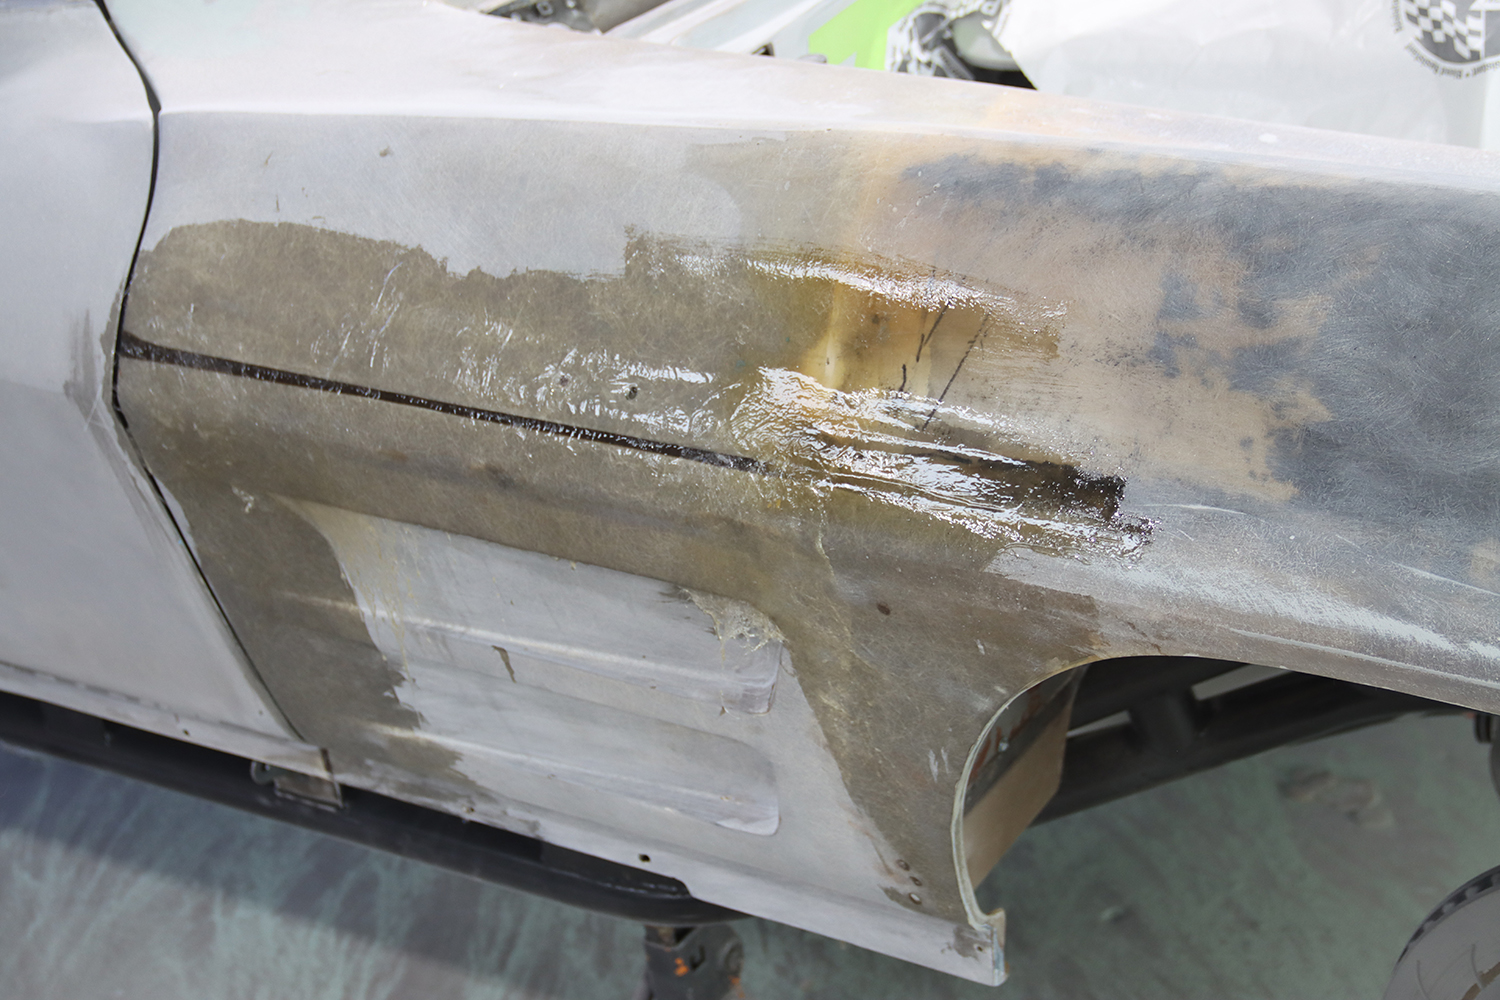
Sanding down through the layers of paint revealed the 1963 factory-original red oxide primer and OEM light blue metallic acrylic lacquer paint, with Bondo underneath a same-color repaint.
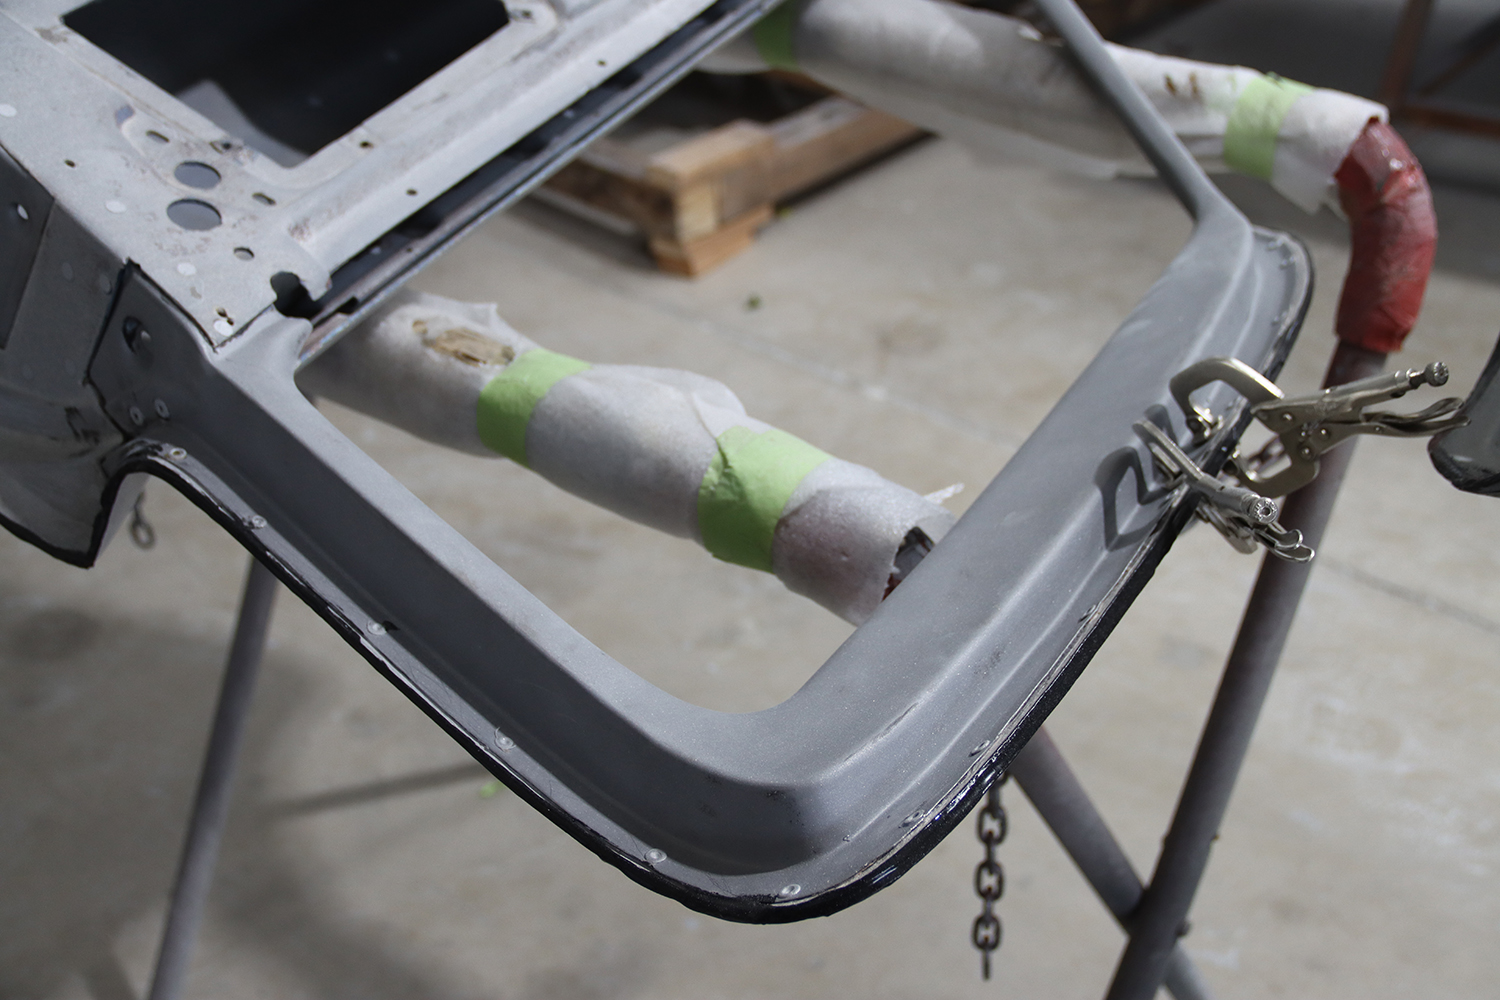
A bead of Jet BlaxTer black two-component fast-setting epoxy adhesive glued the stamped steel window frame to the fiberglass doorskin.
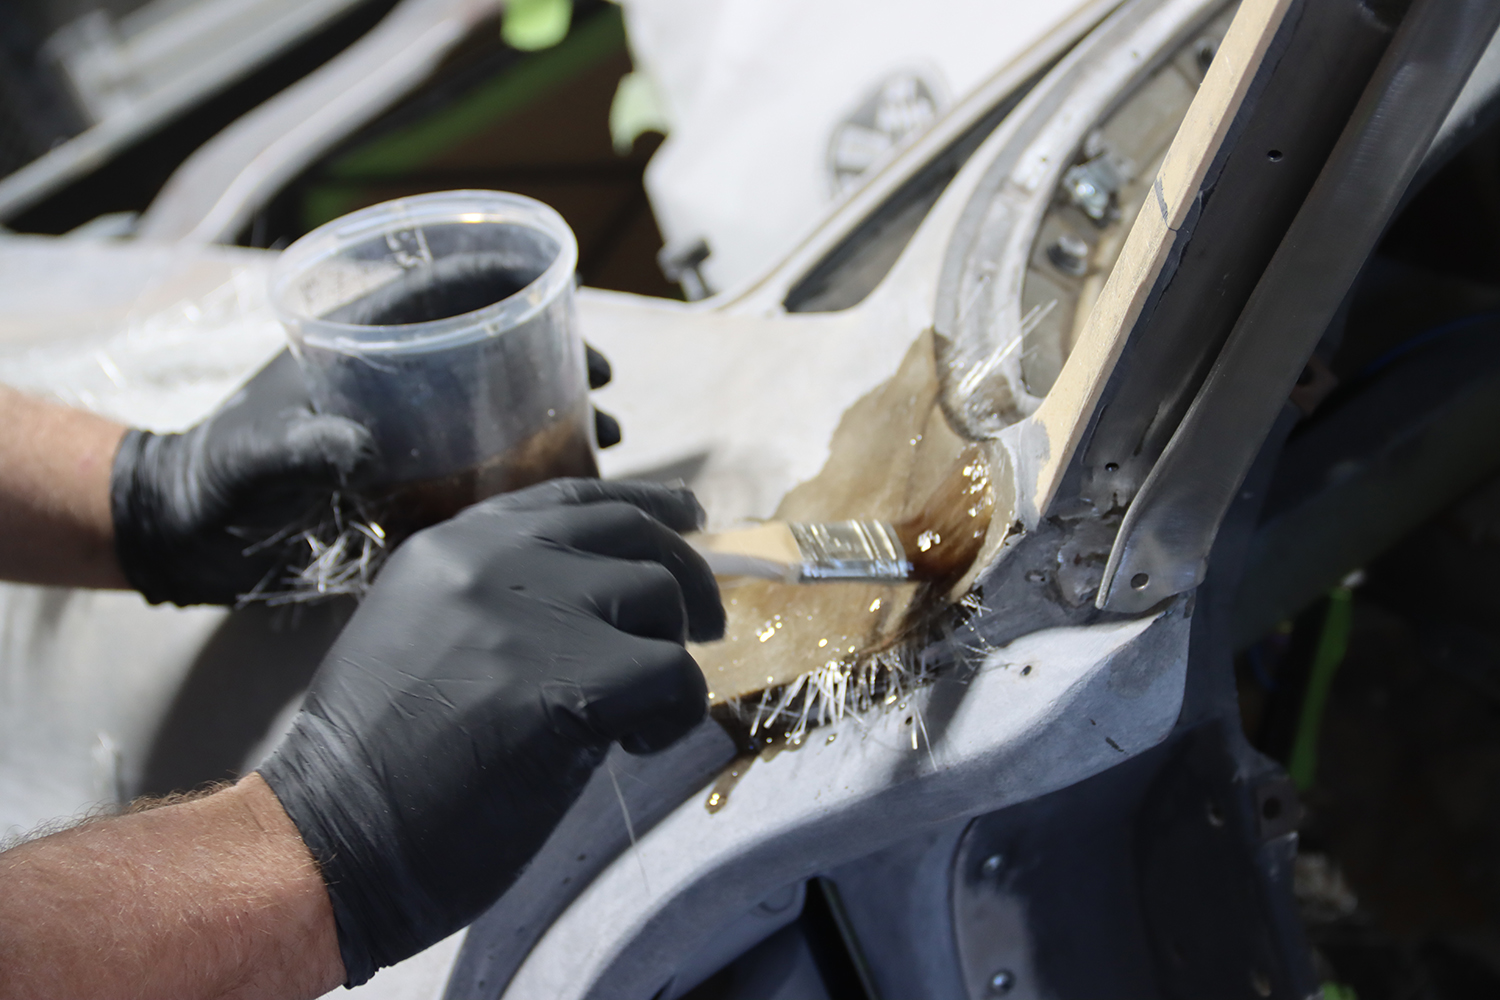
The 61-year-old Corvette coupe had stress cracks and thin areas in the fiberglass that needed attention. A brush forced USC 58020 resin to the USC 58075 fiberglass mat patch.
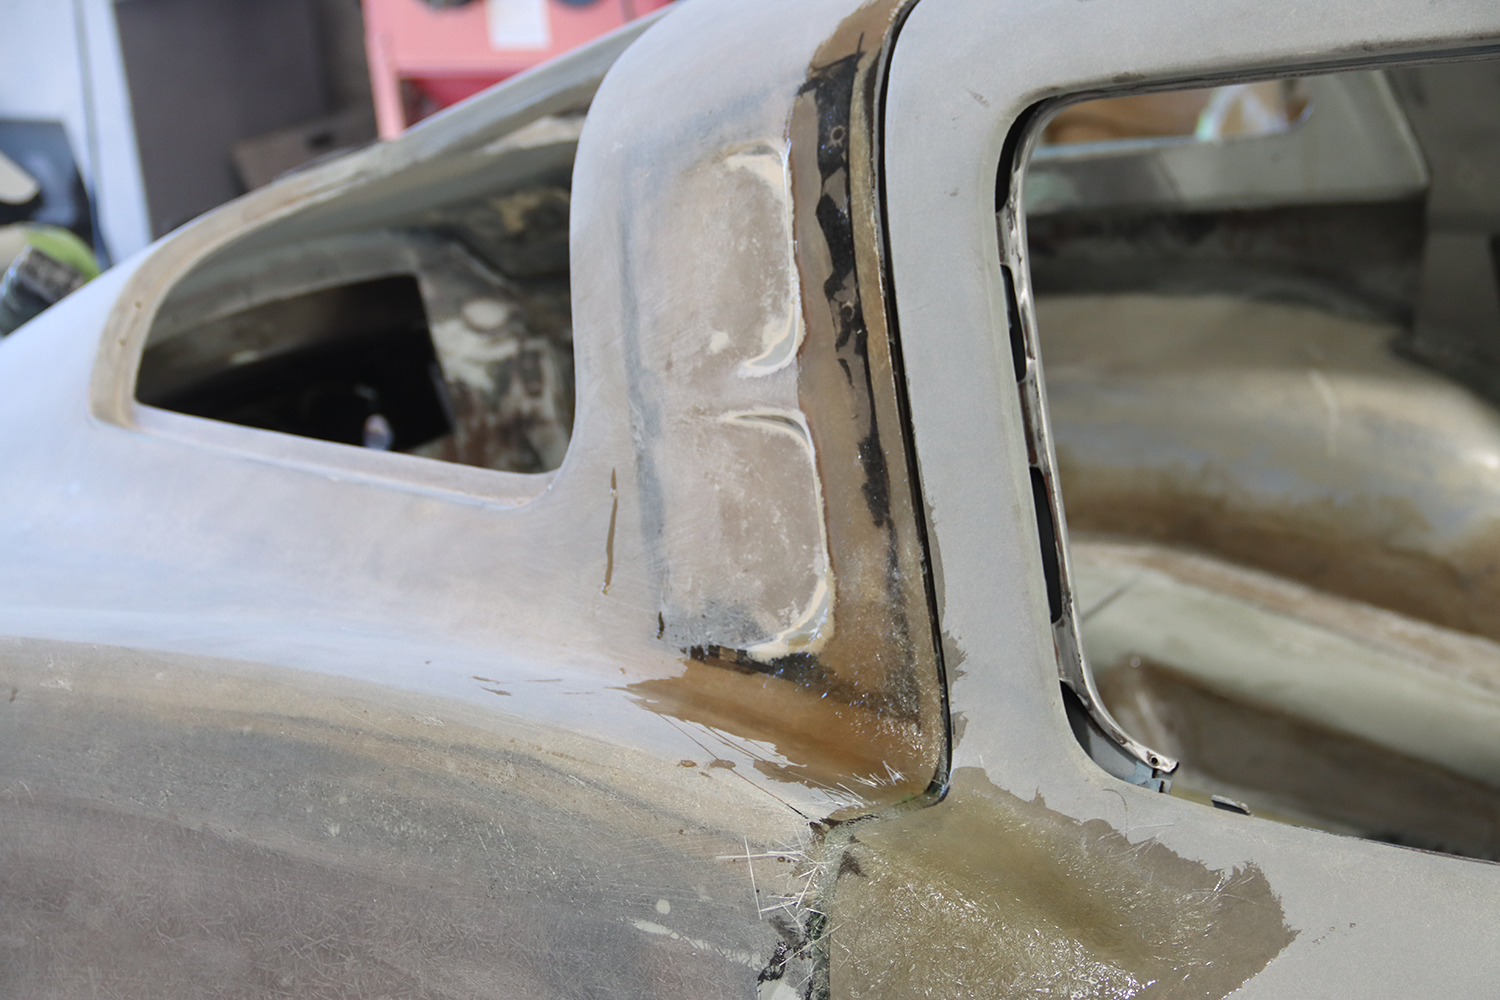
Typically, large areas where the sun beats down on top are suspected to host the worst area of stress cracks and thinning fiberglass. An added new layer of fiberglass mat corrects the problem.
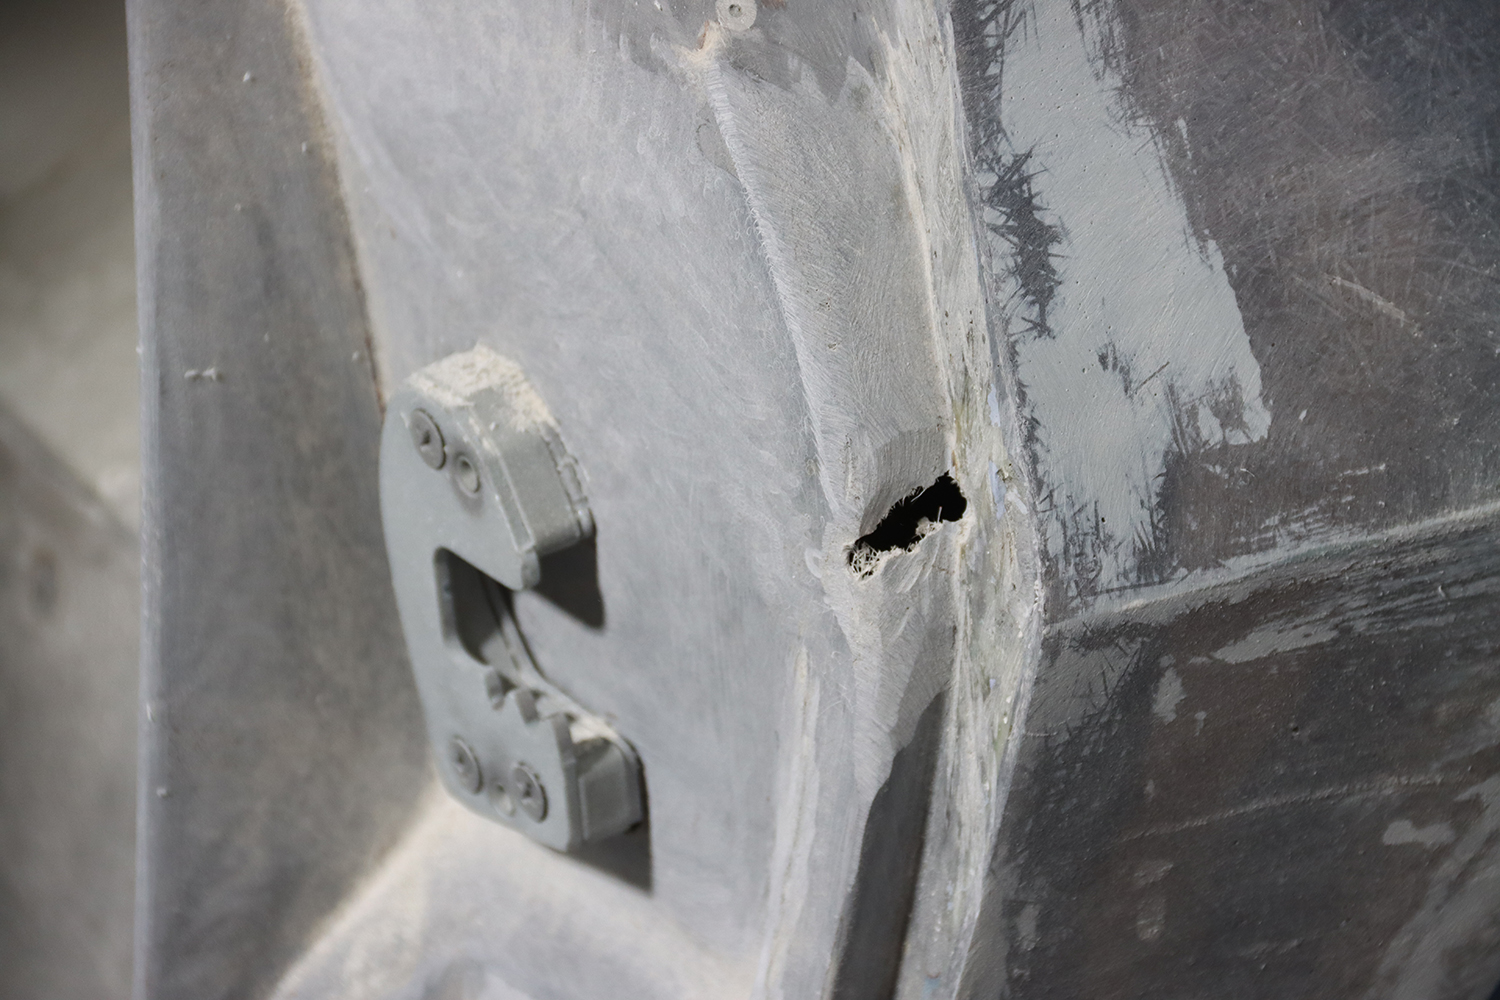
What at first appears to be only a stress crack can open into a hole during grinding until the stress crack disappears entirely. A gob of resin-soaked mat fills the hole.
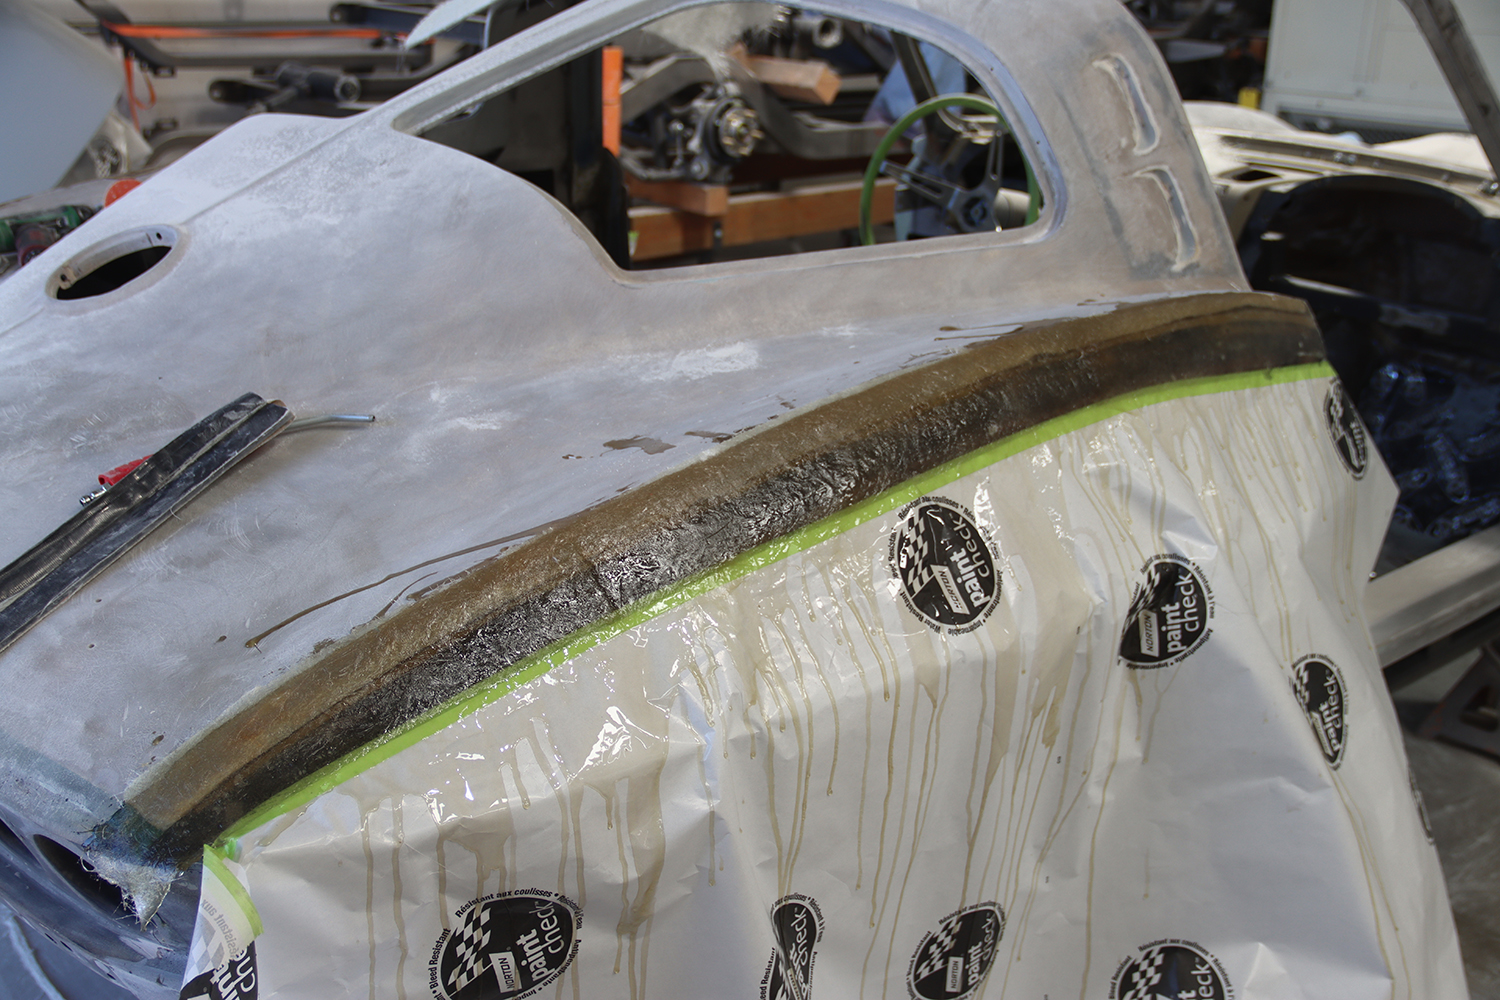
After the first layer dripped, an additional resin-soaked mat was applied over it and sanded completely smooth. A sheet of Paint Check taped on helped to define the bodyline.
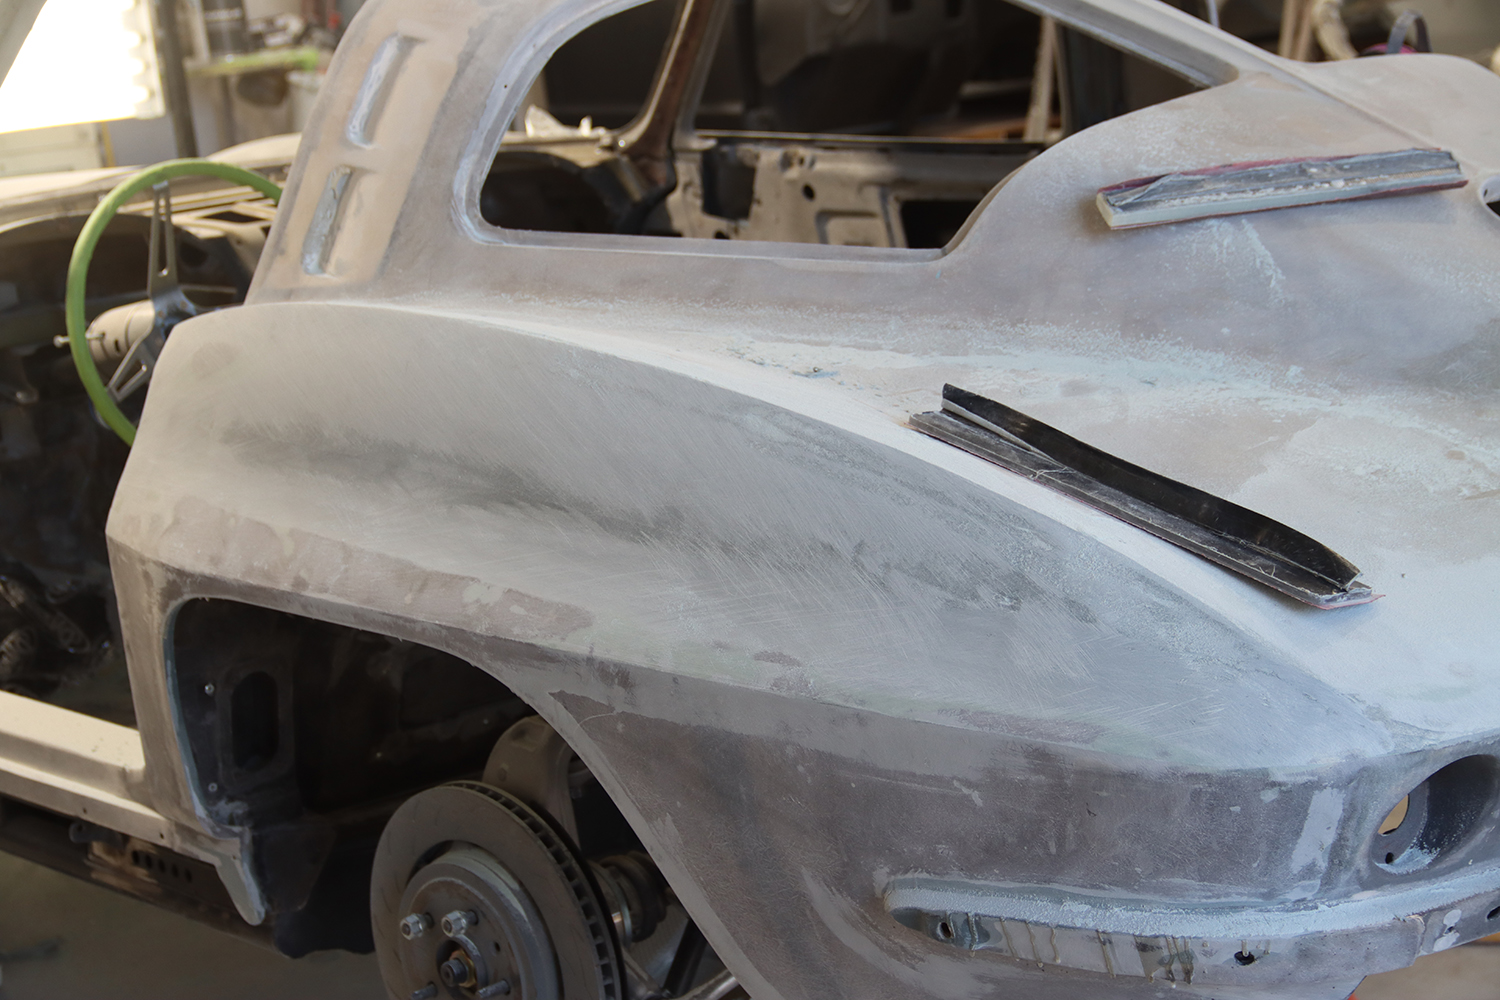
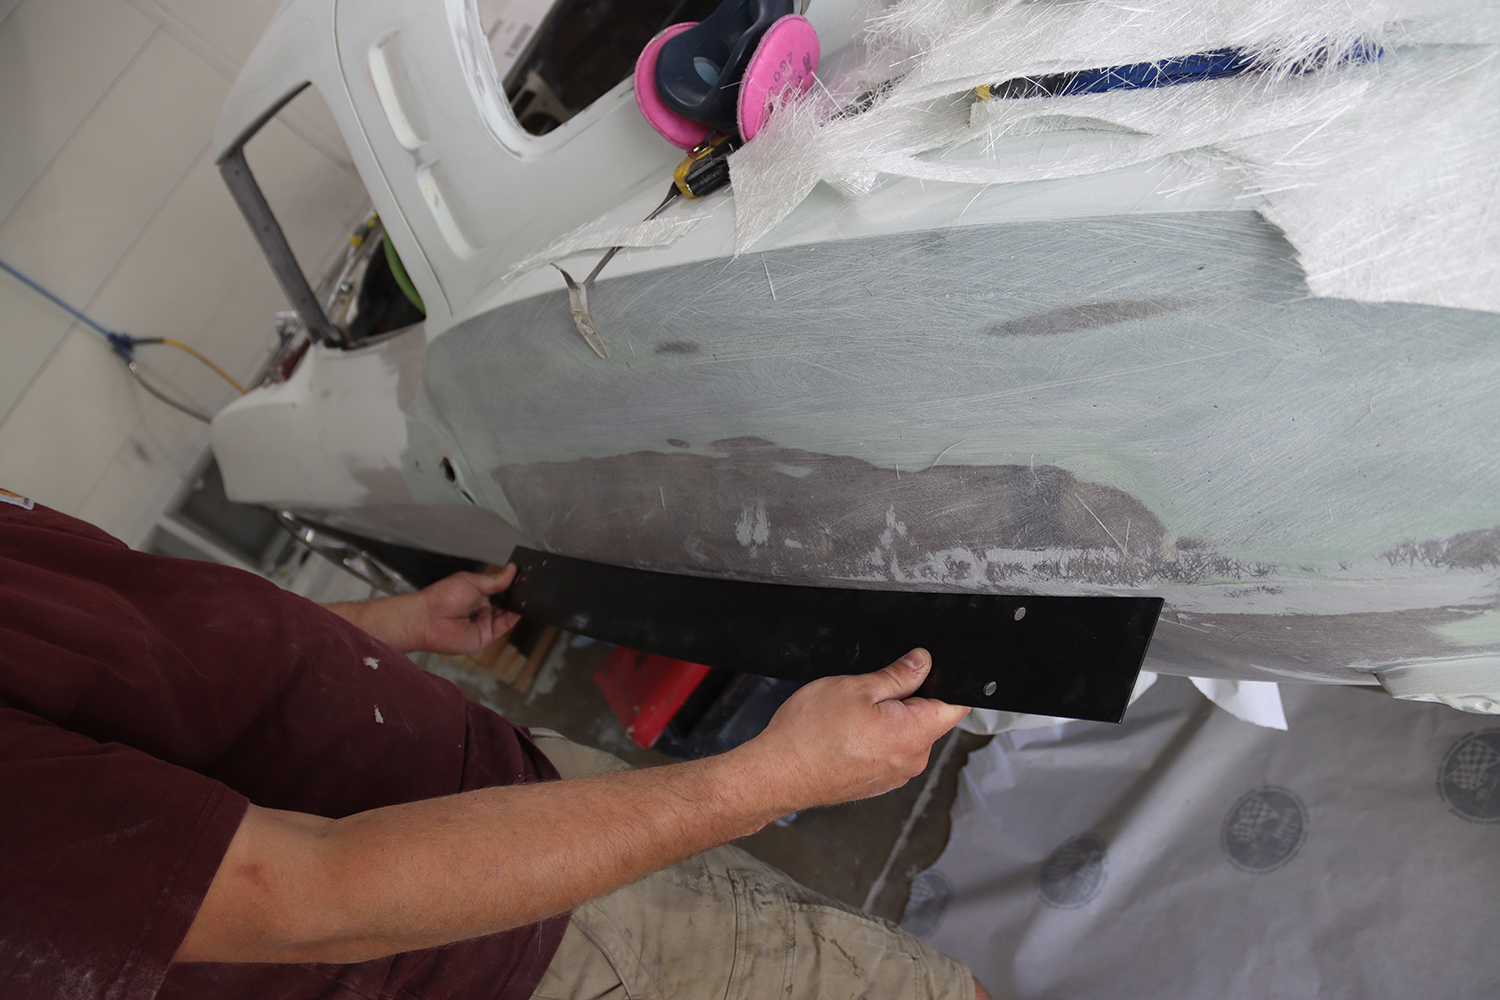
A longboard sanding block loaded with 80-grit dry sandpaper cut the fiberglass perfectly flat, and with applied care, a sharp bodyline was left behind.
Using nonstructural Bondo on fiberglass to fill imperfections is a bad idea. Duraglas fiberglass, a reinforced body filler made with short fiber strands of fiberglass, when catalyzed, fills imperfections and adds strength.
The same procedure was used to block out the fiberglass with a longboard sanding block, and 80-grit dry sandpaper worked to cut the fully hardened Duraglas.
Individual parts were hung on a rack and went through the same stages of prepping and primer as the Corvette body. Unexposed areas do not need to be prepped; they only need to be primered.
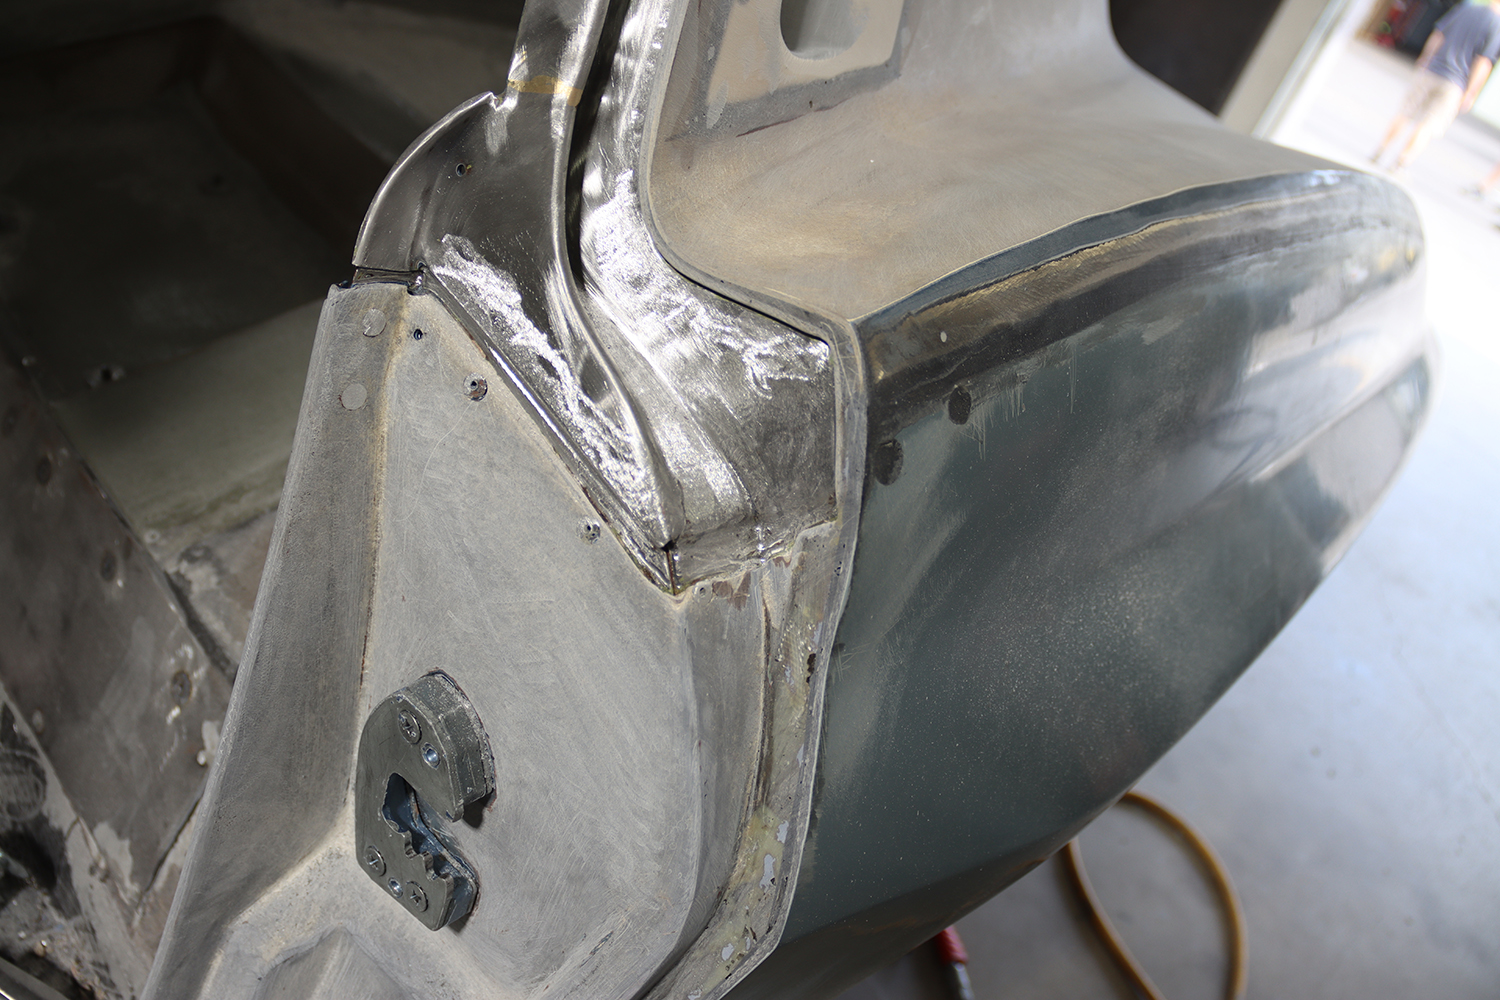
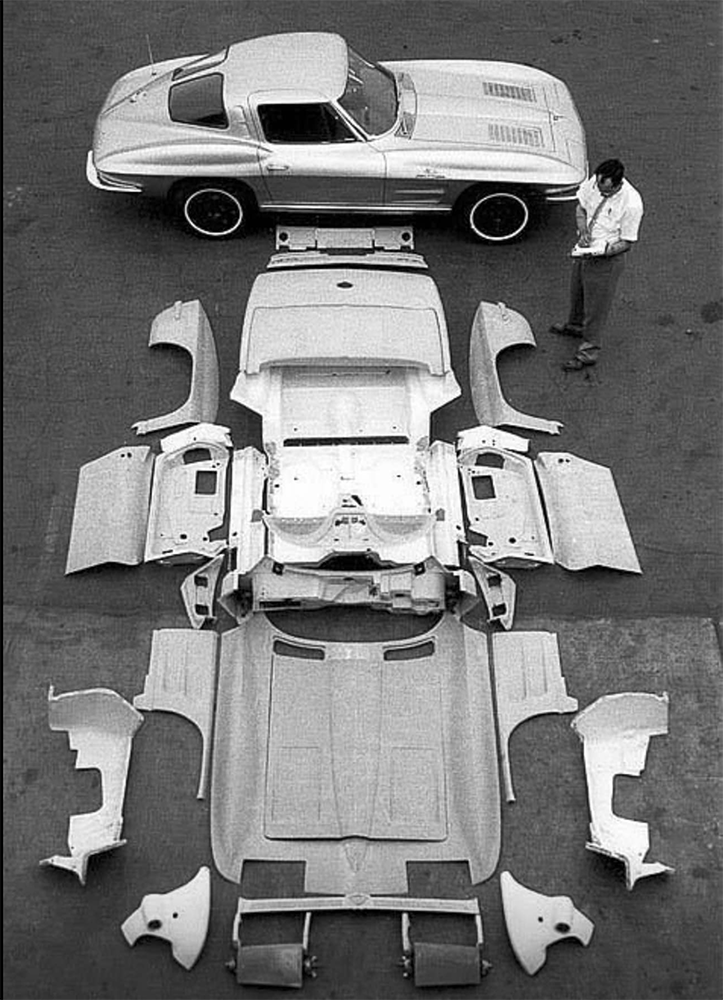
Corvette Sting Ray (C2) bodies were composed of large quarter-panels, a split-window roof section, front fenders, and a nose glued together at the St. Louis factory and broke apart after years of body flexing. Jet BlaxTer re-glued the large panels back together.
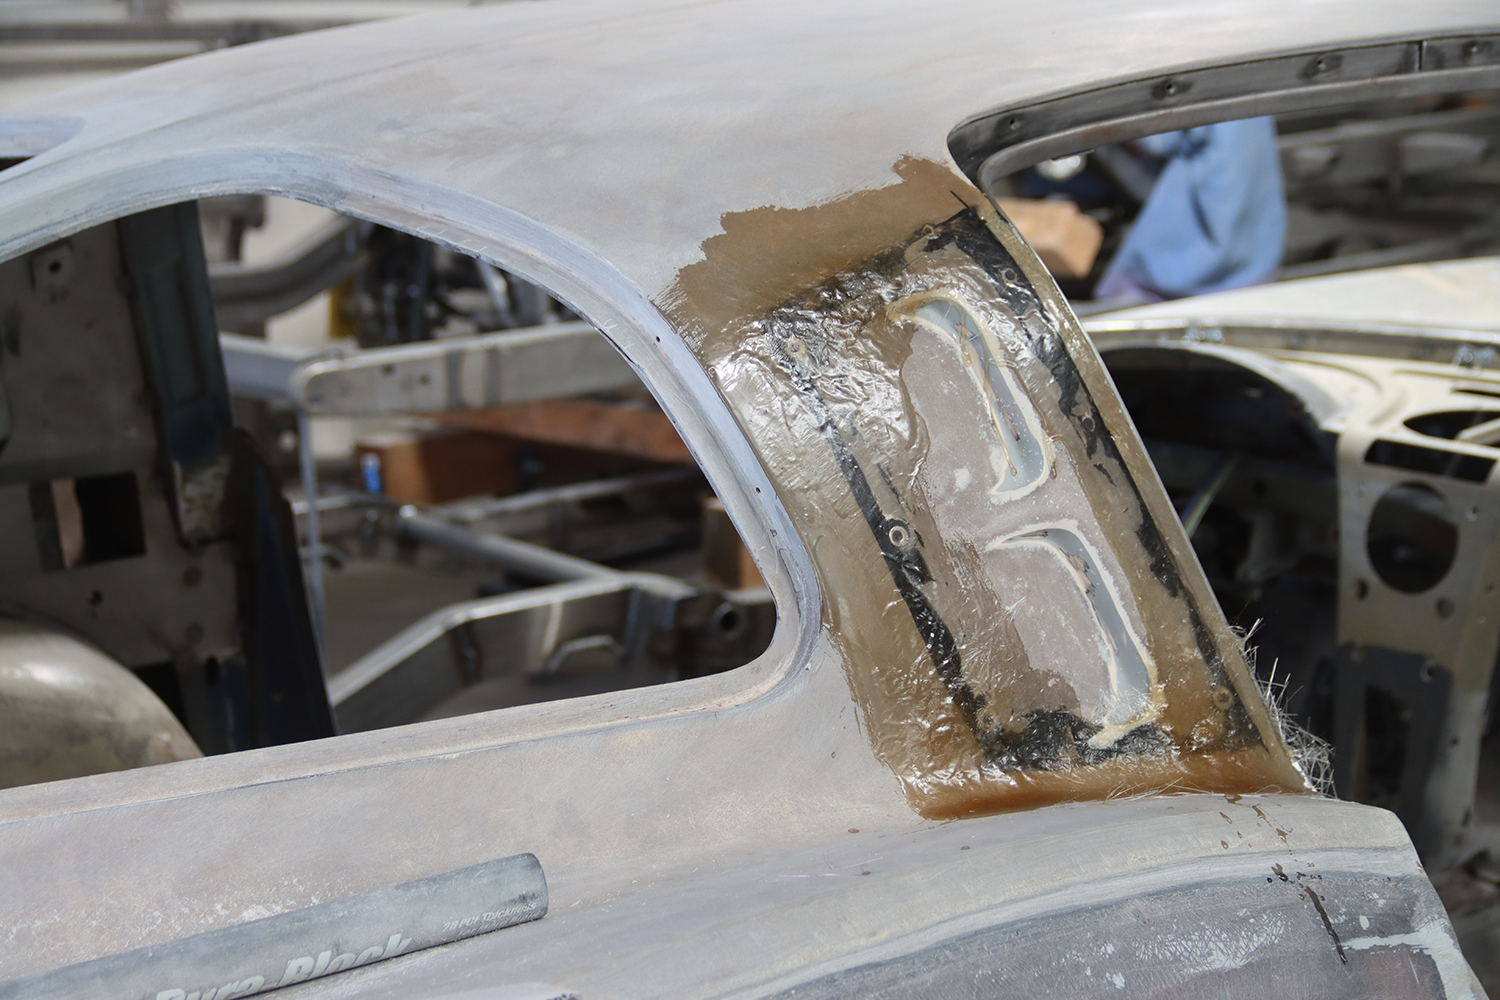
The same process was used, using Jet BlaxTer to re-glue smaller areas, like the simulated vent panels on the B-pillars, and laminating resin-soaked fiberglass on top.
Notice that the door gap between the body and the door is fiberglassed together. This is done to hold the door in place to align, and then the gaps are sanded down or built up to produce a perfect gap.
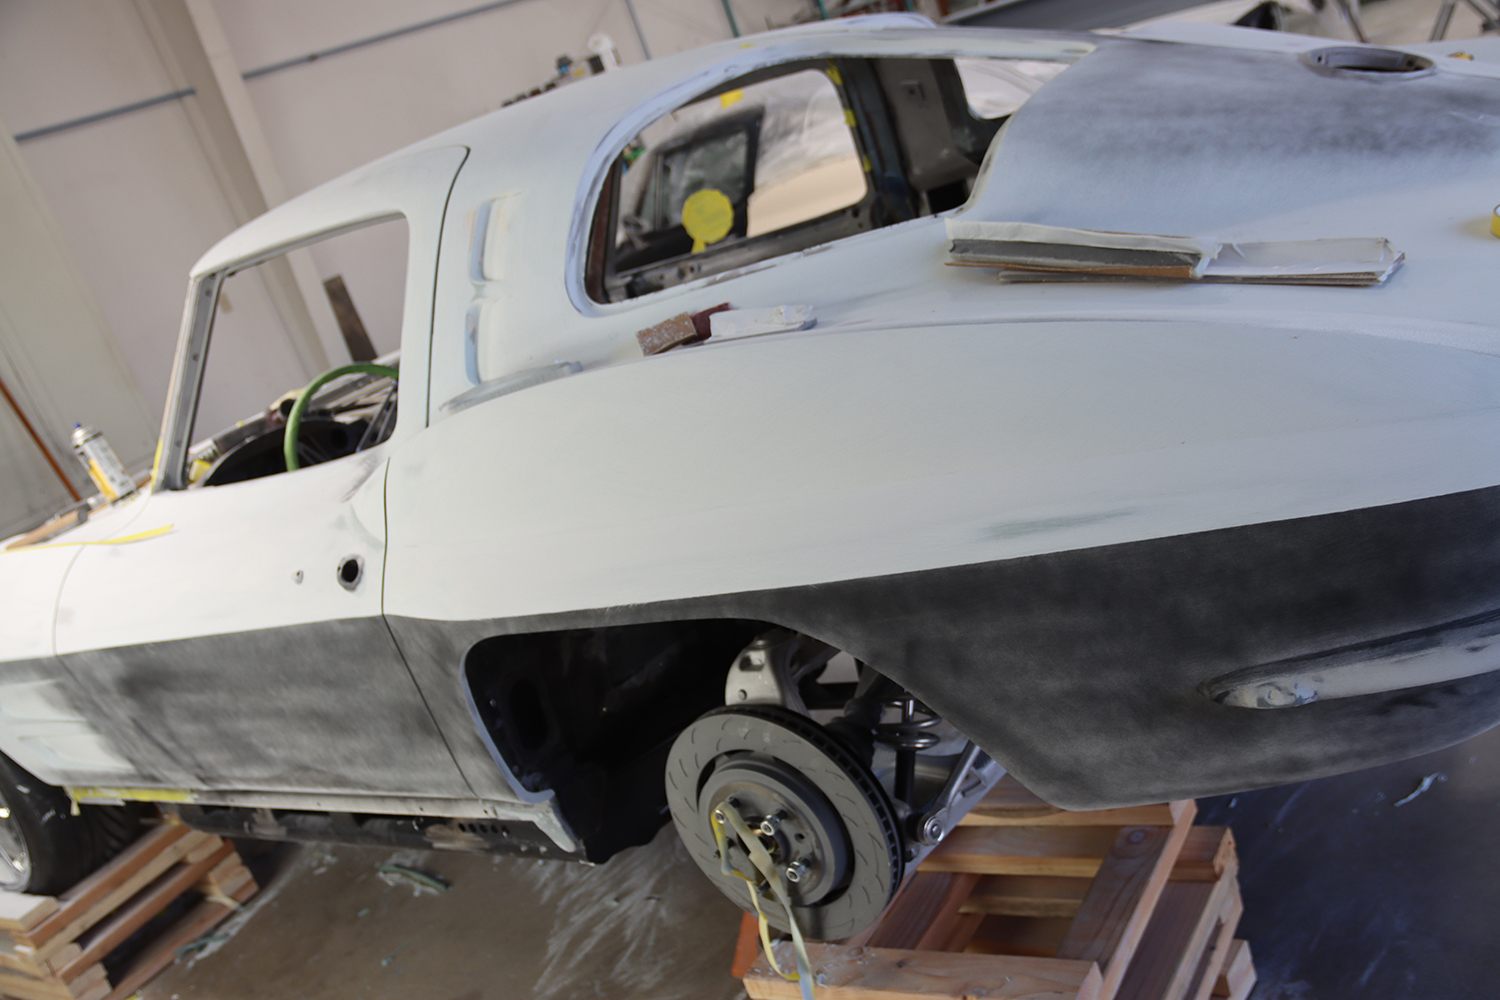
A gauge, similar to what is used to check NASCAR race cars to ensure the body shape hasn’t been modified for better aerodynamics, is used to ensure the bow on the rear quarter-panels matches exactly on each side.
At this stage, all the fiberglass work has been done, and the areas finished with Duraglas have been block-sanded flat with 80-grit dry sandpaper.
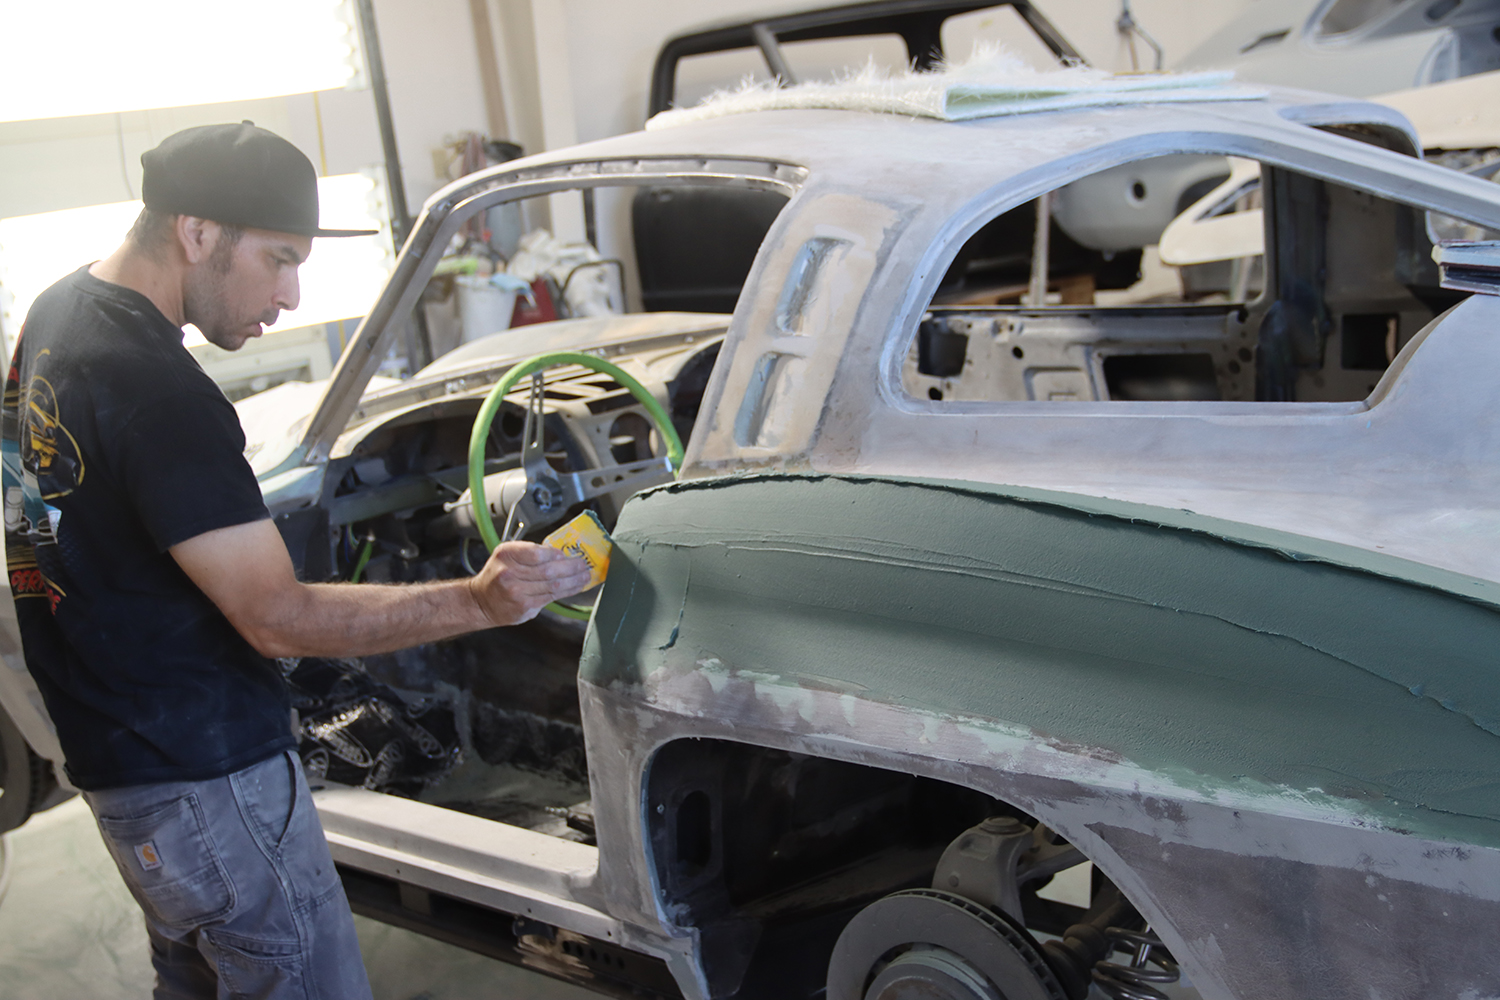
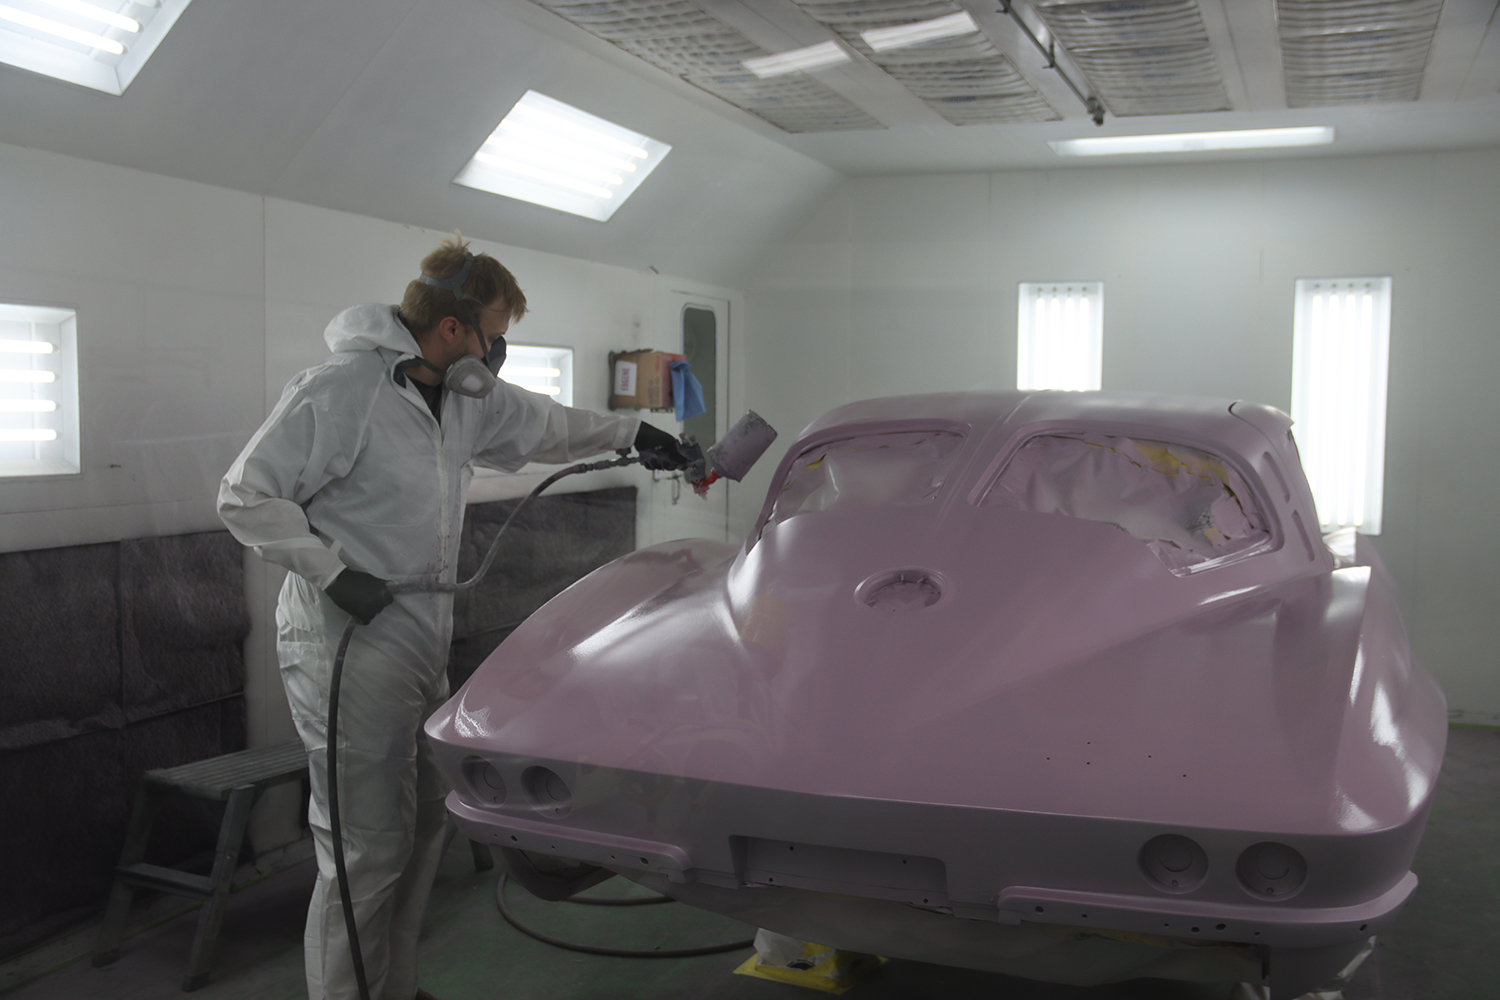
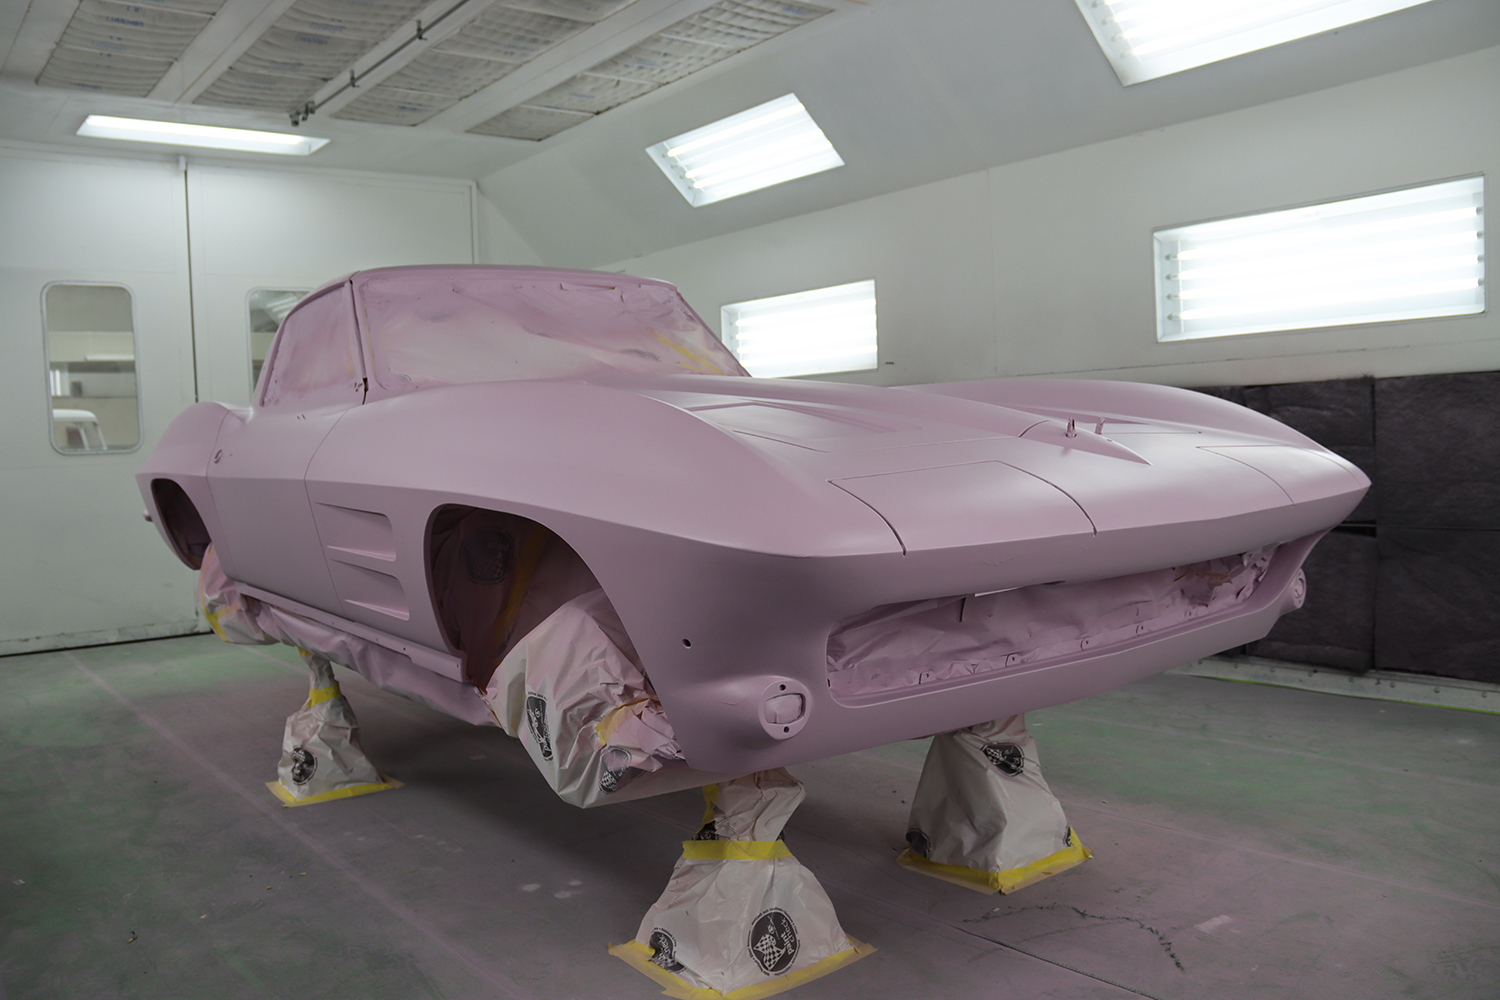
The pink Evercoat OPTEX Super Build catalyzed surface primer is sprayed on wet but not too heavy or runs will follow.
After the pink Evercoat OPTEX Super Build catalyzed surface primer cures, a good stage is to test-fit to ensure all trim items, including taillights, grille, emblems, window glass, and trim, are installed easily.
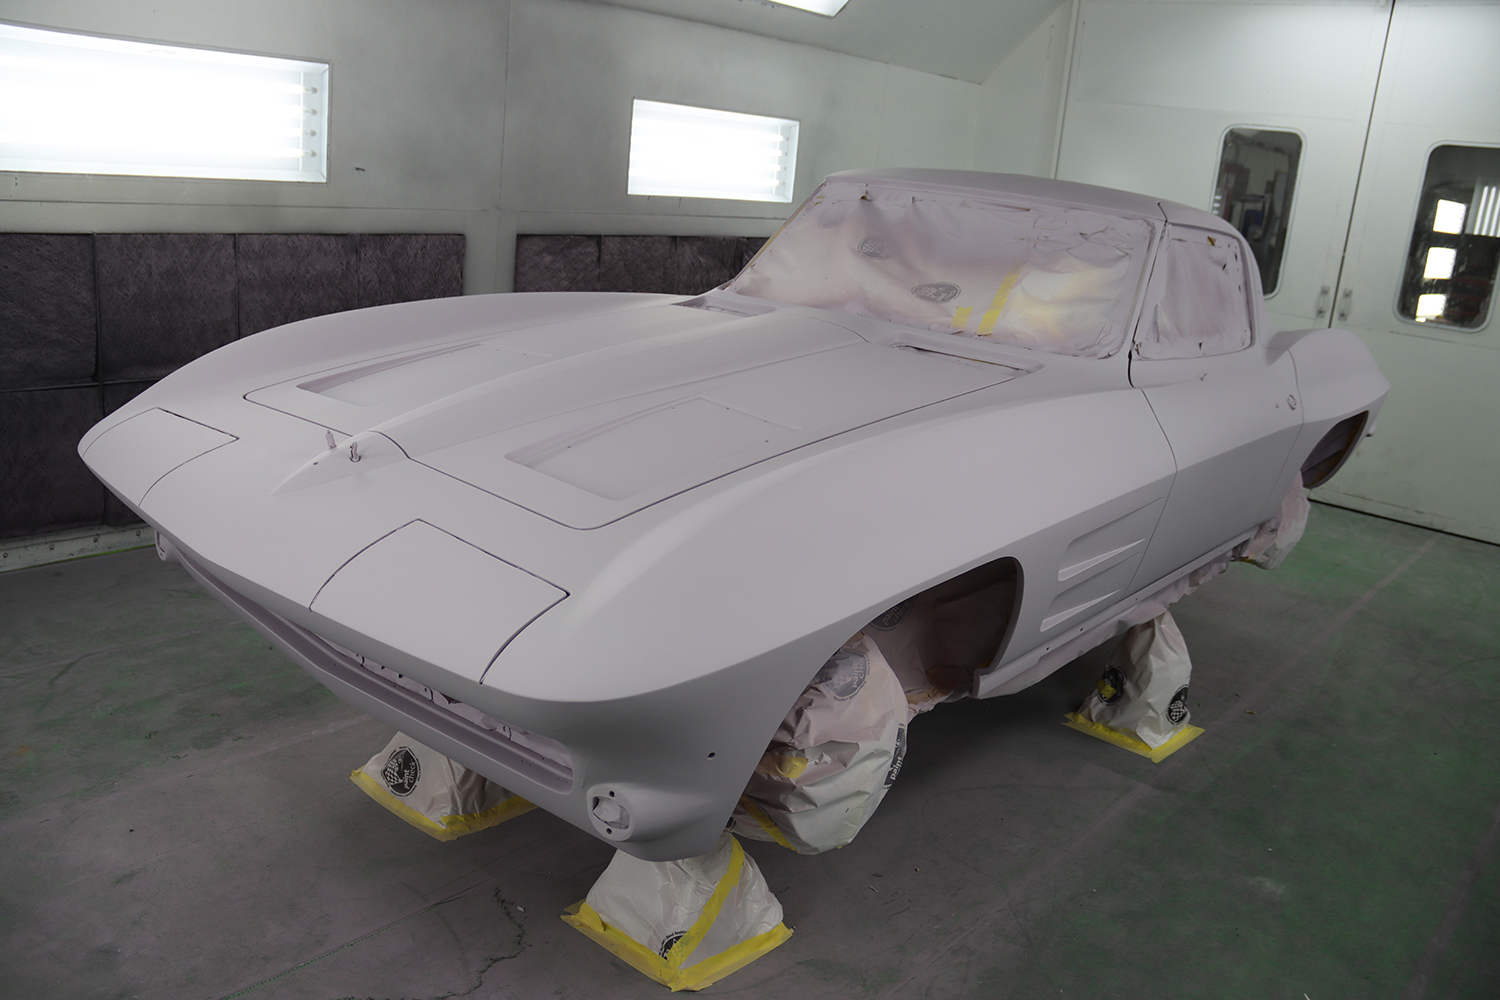
Next, the pink Evercoat OPTEX Super Build catalyzed surface primer was block sanded with 100-grit and then finished with 150-grit dry sandpaper.
This was followed by a high-build epoxy primer sanded in steps from 100-grit to finish with guidecoating powder blocked off with 400-grit dry sandpaper.
The last stage, after blocking the primer surfacer with 400-grit, is to spray on a sealer and block sand the sealer with 600 grit to ensure the final finish (color) will not show through looking “pinched.” Guidecoated with MIRKA dry powder.
This exploded view photo of a 1963 Sting Ray coupe body from General Motors’ archives illustrates the seams a person can expect Chevy’s glued-together sportscar to separate some 60 years later in the 21st century.
We use cookies to ensure that we give you the best experience on our website. If you continue to use this site we will assume that you are happy with it.