“They don’t make ’em like they used to.” We certainly do hear that a lot. If by chance it’s true, is it a good thing or a bad thing? When our subject 1955 second-series Chevrolet rolled off the Oakland, California, assembly line, its current rebuilders hadn’t yet been born. Since we don’t know anyone who actually worked at the Oakland plant, we also don’t know how well bed panels may’ve fit together.
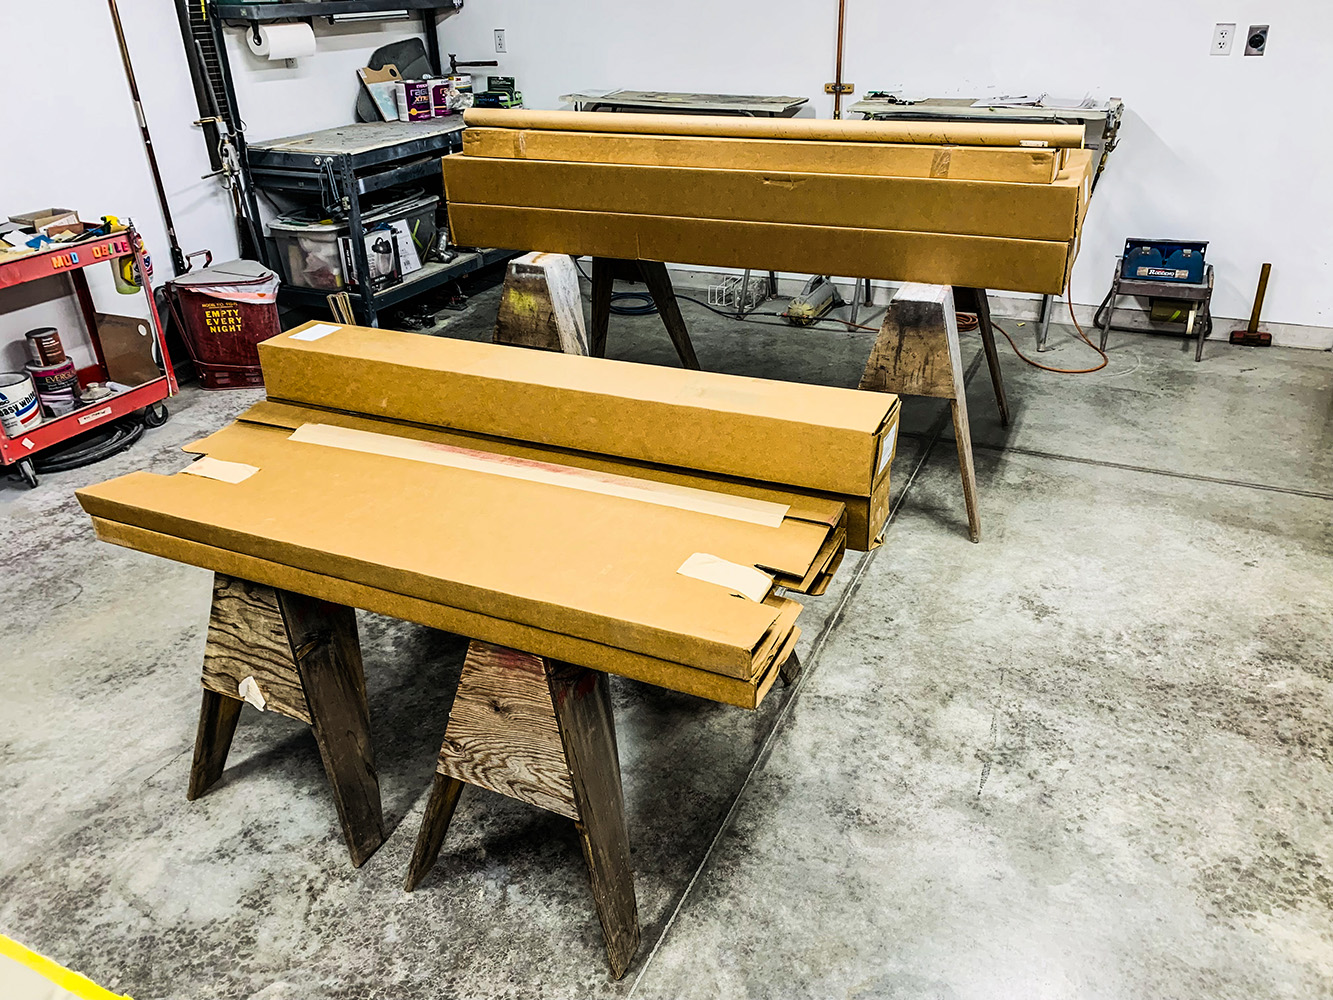
Just in from Pandora’s pallet rack, here’s everything we’ll need to build a short Stepside bed. It’s all been sourced through Premier Street Rod; we’ve actually had these parts in stock here for several months now. Today we’ll finally open some boxes.
For the business end of a 1950s-era utility vehicle, let’s assume the factory focused on function, over fitment. Now for our subject truck’s second time around, let’s attempt to tighten tolerances to better-meet the showtime standards of today.
If you’re real familiar with OE stake pockets you’ll notice these vertical creases. They’re uniform, and although they don’t look bad, we’ll chase them away with a little filler. Apart from this we see no other bodywork to do on these, so far.
Back when the old 1955 project first came to us, it came with a disassembled shortbed. Although the major components were there, they were badly beaten, as we’d expect the business end of any old work truck to be. To the overly optimistic, some parts of the original bed could’ve been considered repairable. If practicality counts, however, our customer’s money would be better spent on brand-new, reproduction steel.
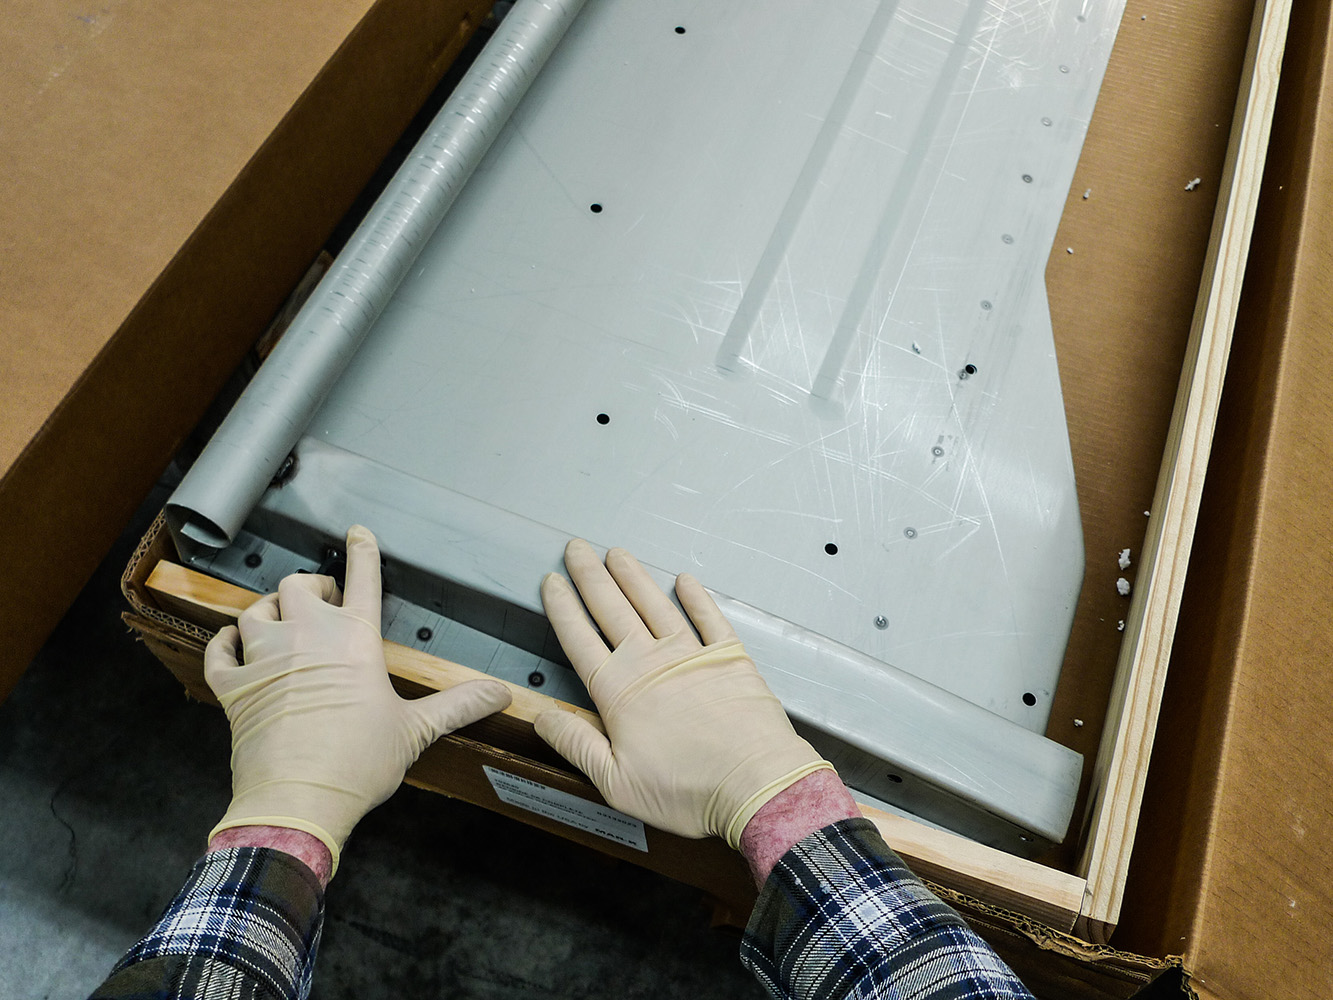
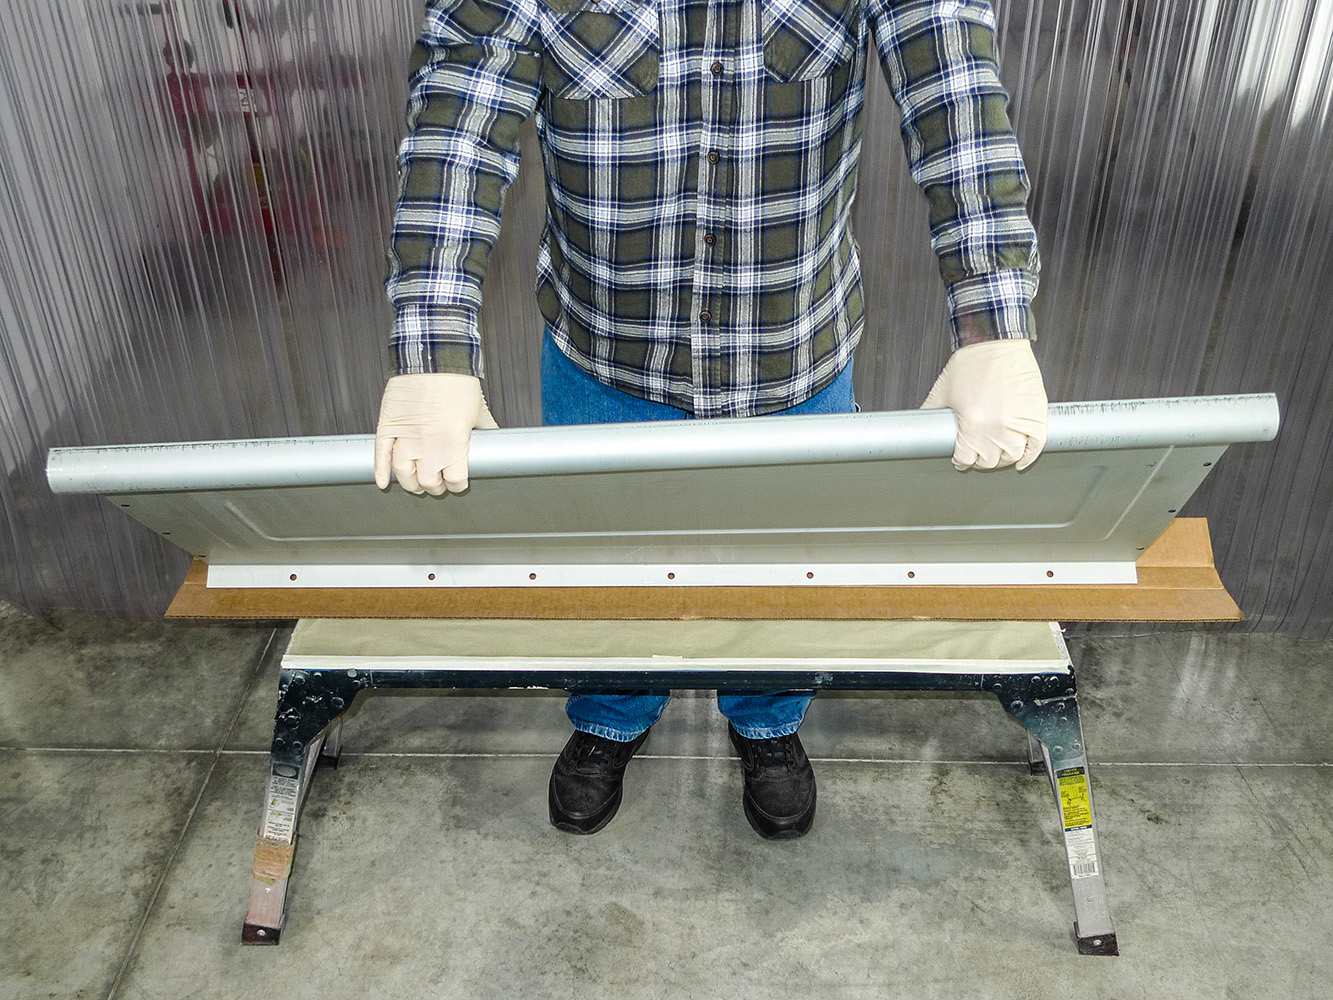
For the most part as we open boxes, we’re pleased, but here’s a little surprise. Our front panel holds one shape or another. Hopefully later, bedsides might hold it in a neutral position.
Years ago, let’s say 30 or 40 or so, when Task Force trucks were belly-button-common and plentiful, who could’ve predicted that an entire bed could be built from aftermarket components? Today an entire truck can be built the same way, without an old beater to begin with at all.
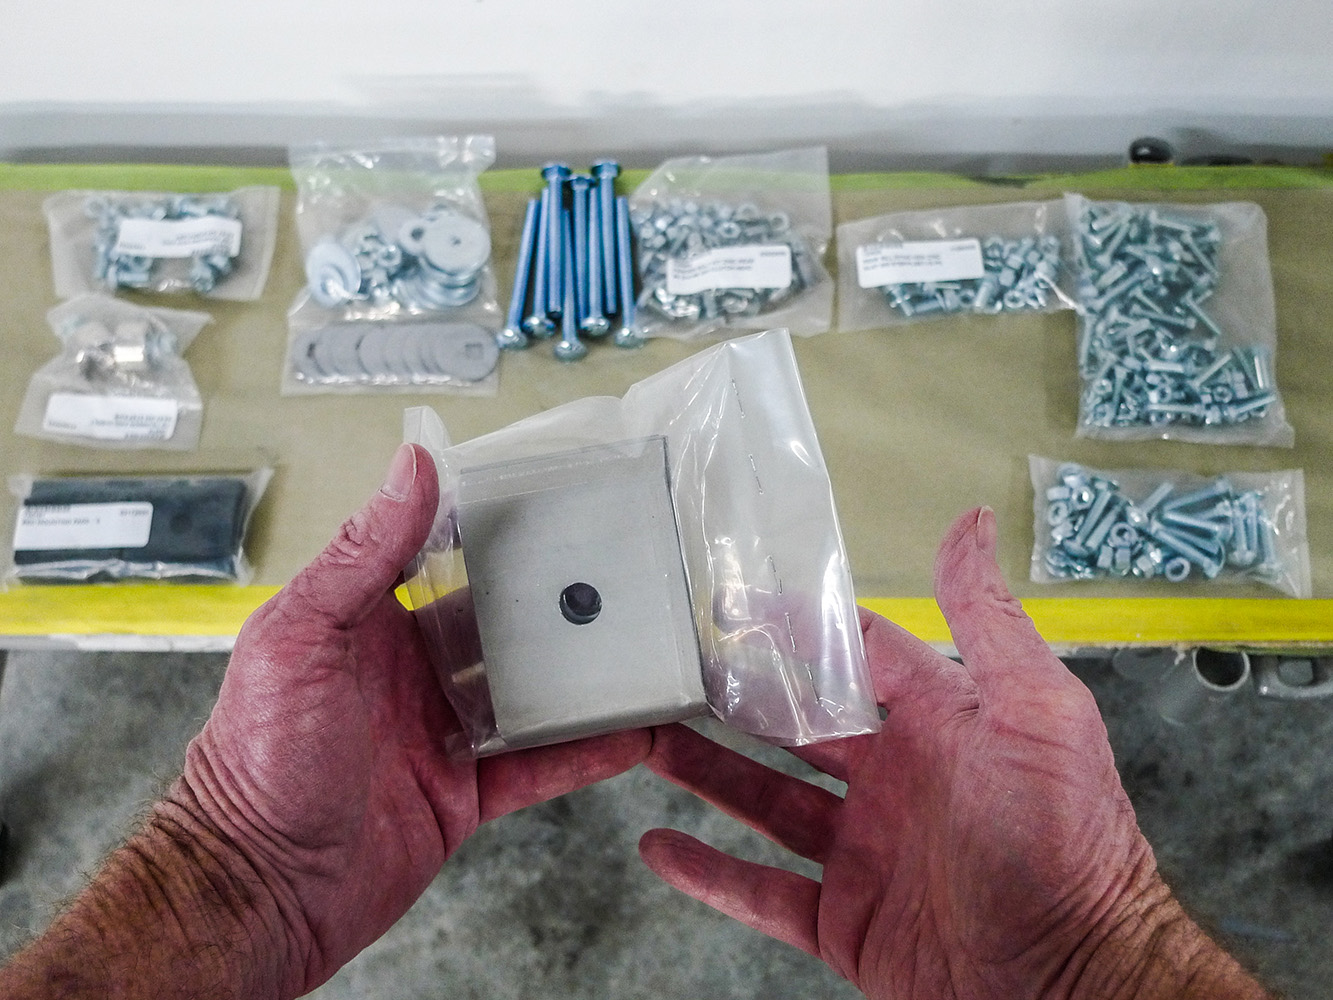
This might be a good time to get familiar with supplied hardware. Supplied instructions are rather vague but packages are labeled. It’s pretty much just nuts and bolts, so we think we can figure things out.
For procurement of GM truck reproduction steel, builders do have choices. On this particular job we’re doing a fair amount of business with Premier Street Rod in Lake Havasu City, Arizona.
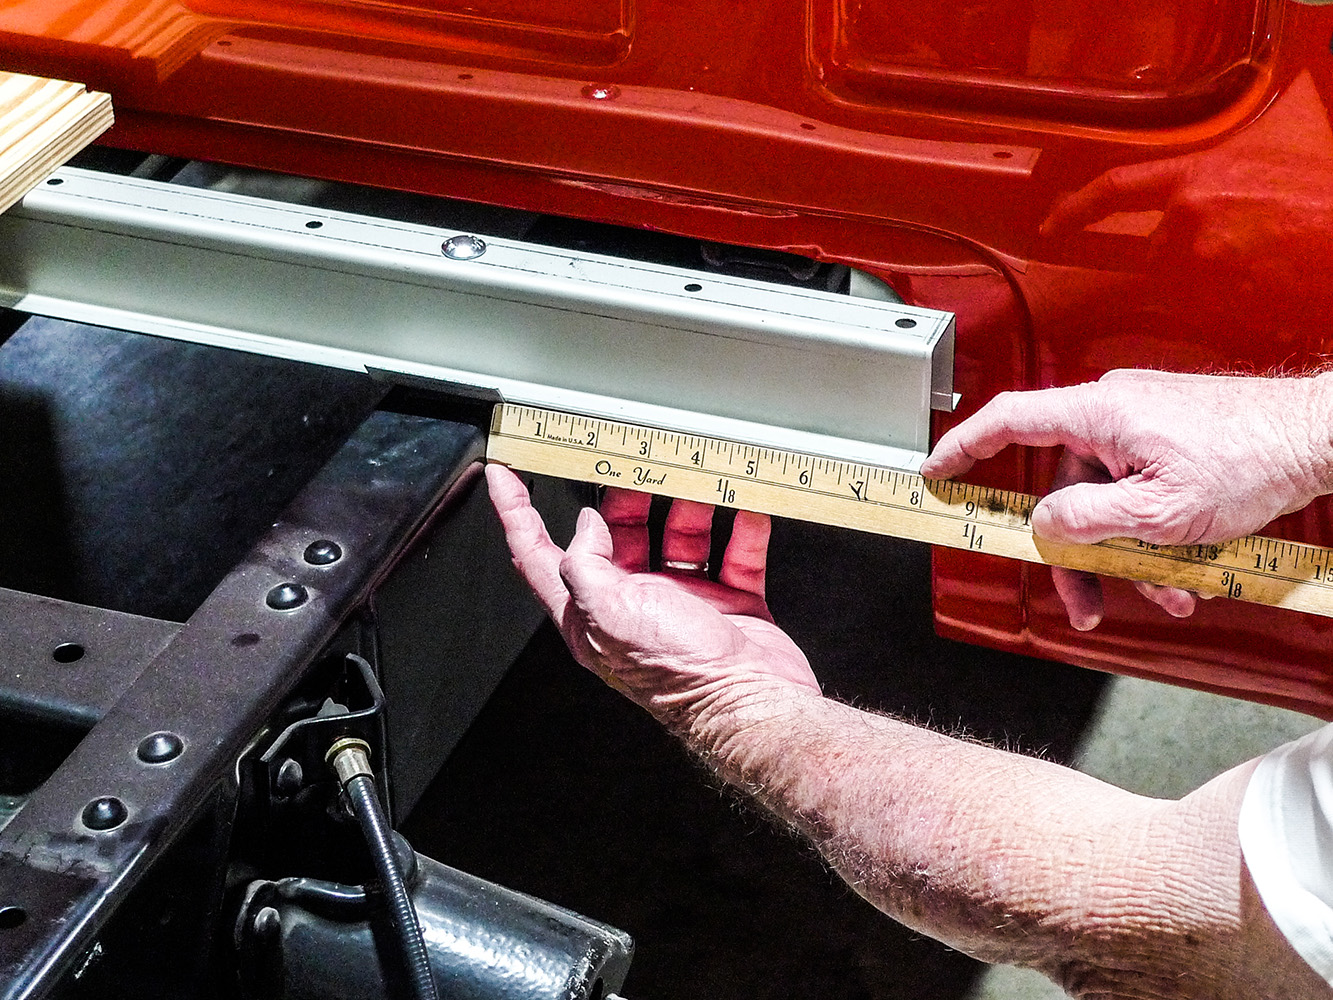
Sidestep bracket holes are properly aimed toward the cab as the foundation’s layout begins. With the forward cross sill on supplied rubber pads there’s room for adjustment. However, if we don’t dead-on nail it here, it’ll all end up askew.
OK, so why Premier? Well, first, they’re not just a source for needed parts, they’re at all times hands-on building Chevy trucks—reproduction cabs and all. Secondly, Lake Havasu feels like home and we don’t mind driving there to purchase parts the old-fashioned face-to-face way. Thirdly, we get our questions answered by true experts, as necessary as we go.
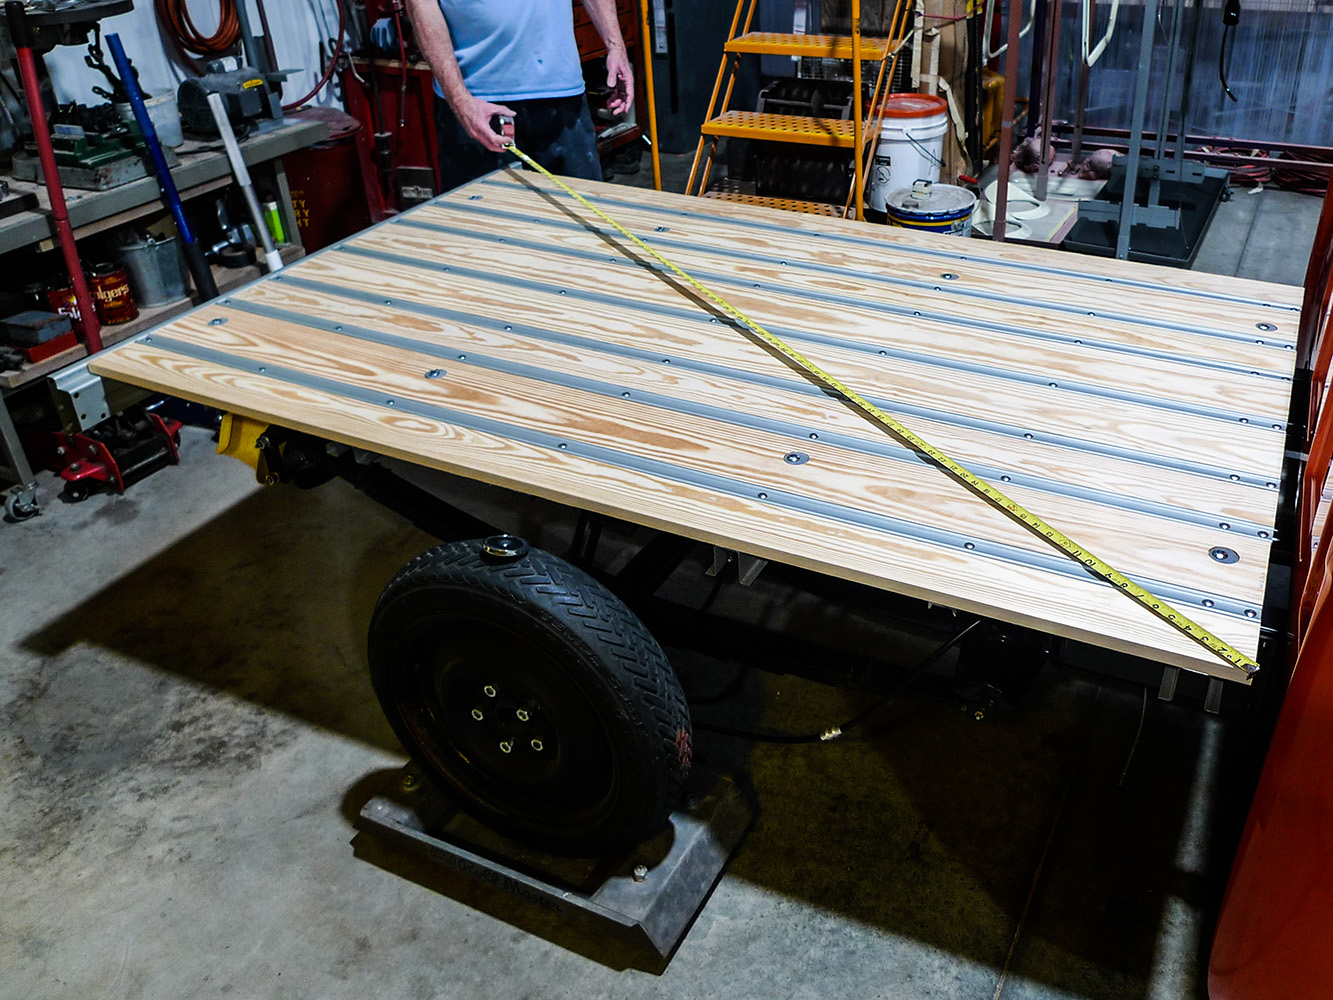
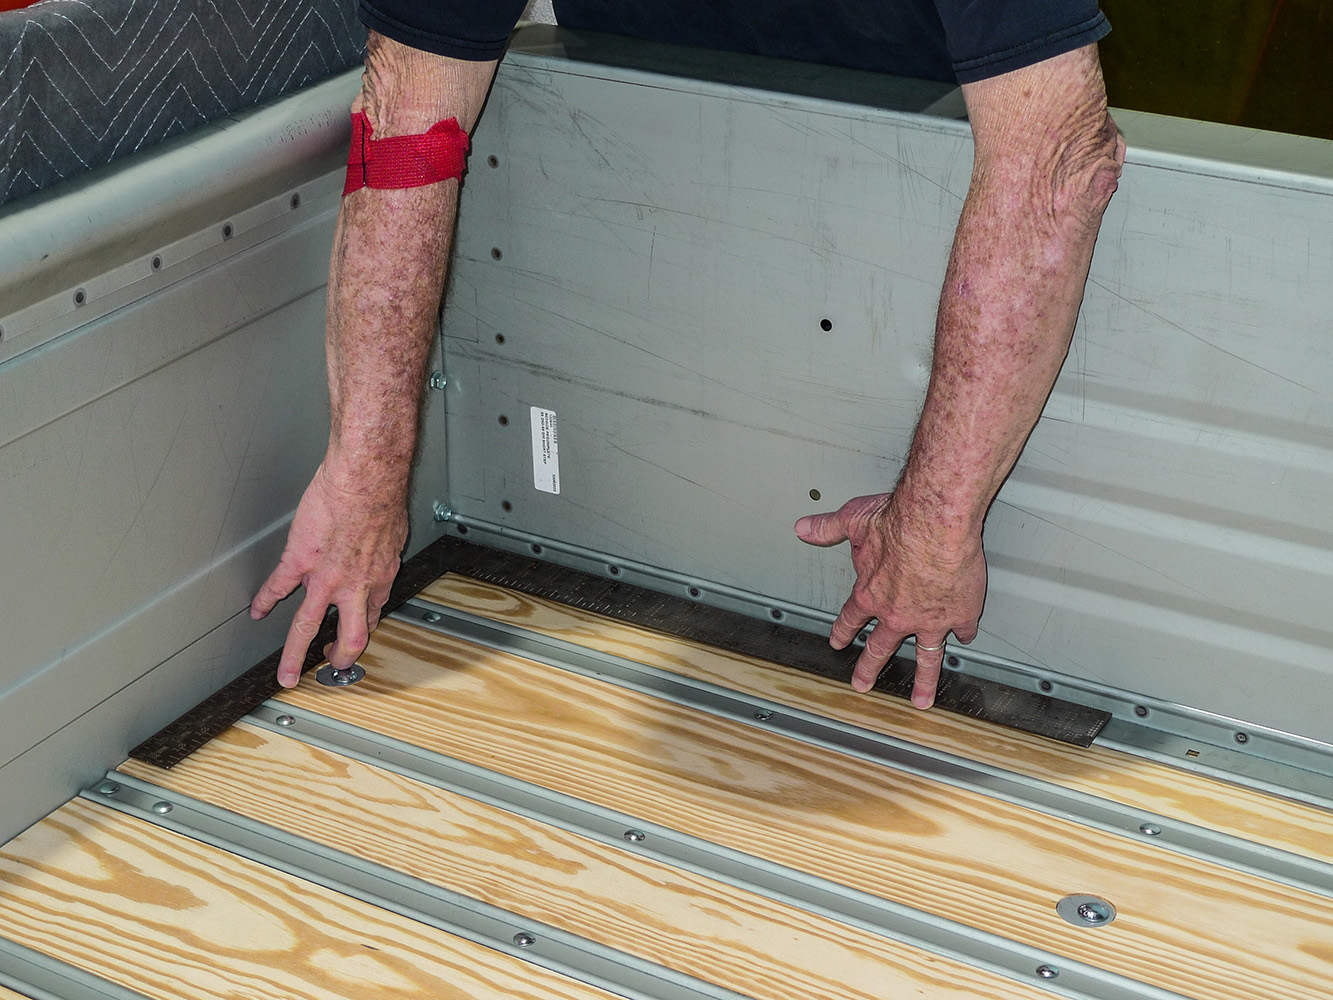
Notice the difference in cross sills? The third one back has reliefs, perhaps for old work truck helper springs? Anyway, this bed build will be based on positioning of our four priority planks, beginning with the two that secure through cross sills to the frame.
Just the other day, our painter (that’s yours truly) had questions for Isaac, the painter at Premier. Since every bit of the bed we’ll build was sourced through Premier, and since Isaac works with the same reproduction parts darn-near daily, I sort of figured he’d be the guy to ask.
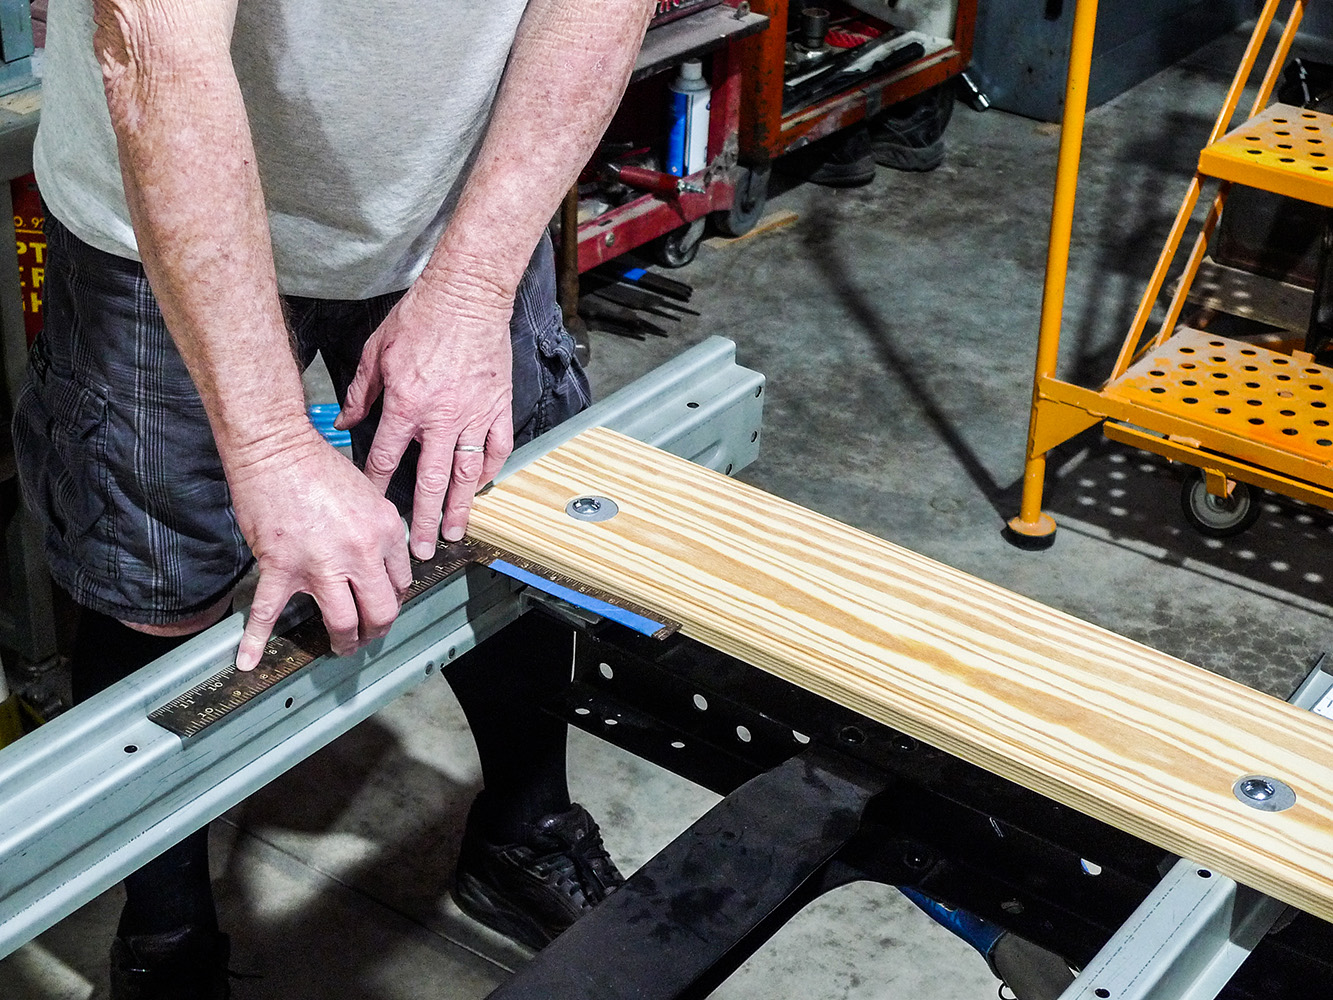
To this point our cross sills are left a little loose. As wooden planks are placed in their places, there’ll be many such square checks along the way.
Here, our initial notion was to build the bed on a sturdy rolling cart that we use routinely for bodies and cabs. The problem with that is, the 1955-1959–style GM Stepside beds are structurally dependent on four particular wooden planks. Without the outer perimeter planks, and the next two inboard planks in place for location, we’d likely never get the bed squared away. In addition, it would be more difficult to figure cross sill spacing on the cart.
With the first two priority planks squarely located, a taut stretch of masking tape makes a good gauge for cross sill harmony. If we see a hump or an open gap we might go for body shims as necessary.
For the dry-fitting job at hand, the best bed building fixture we have is the frame of the truck itself—and, well, there’s a problem with that notion, too. At the time of this typewriting, the project’s freshly painted cab is sitting in place on a finished rolling chassis. In 20/20 retrospect, we probably should’ve left the cab on its cart, safely out of the way as we go about building a bed. At any rate, paint-protective padding will be an absolute necessity here.
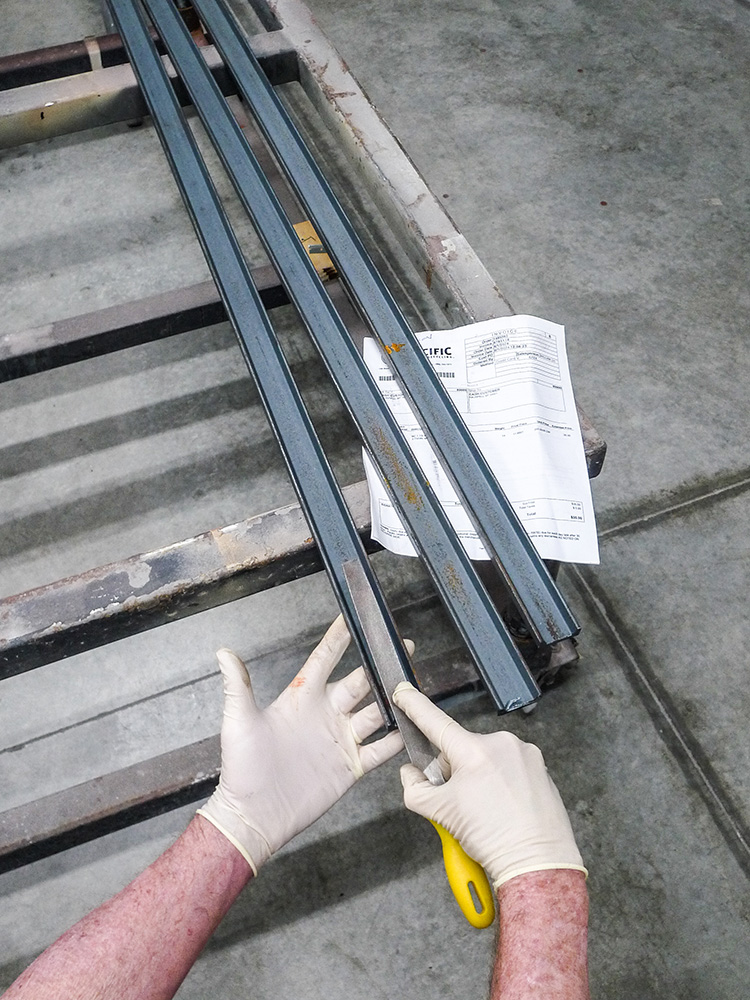
Among our original bed’s loose bits and pieces, there should’ve been three side-to-side braces to support planks between cross sills. A quick trip to our local metal supply rendered a 1-1/2-inch channel, which will do the job nicely.
Assuming you’ve been with us, you likely know there have been a couple bed building tech stories in Classic Truck Performance recently. By the time this one goes to print, there will have been one more, but they’re all different types of trucks with different types of beds. This time around, we’ll focus specifically on the 1955-1959–style GM short Stepside bed.
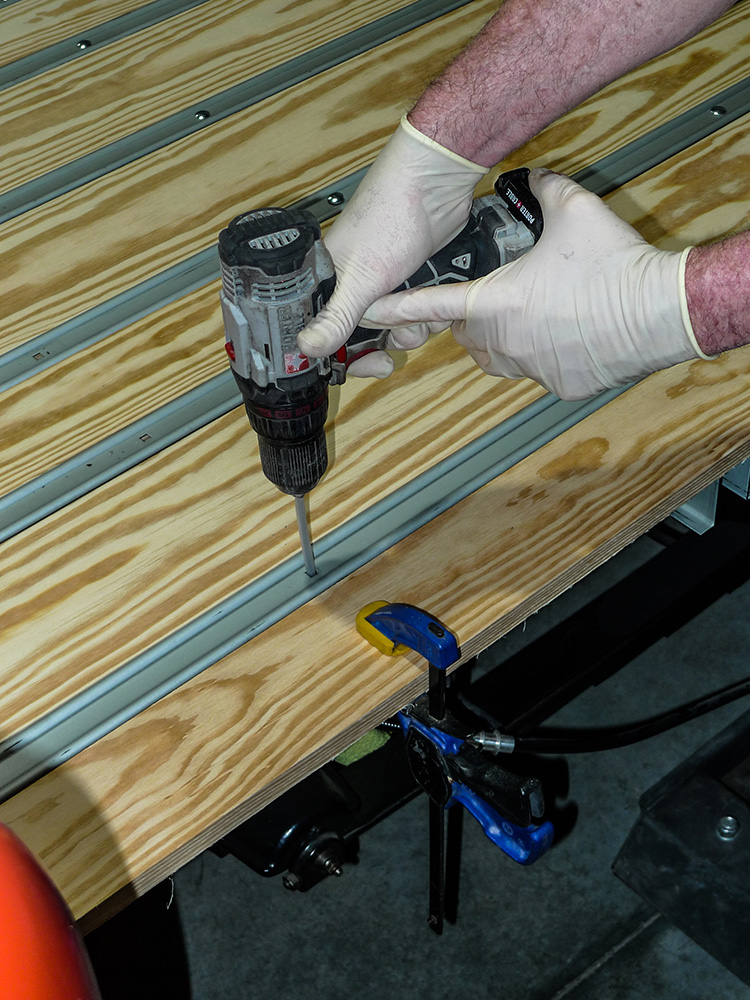
With new channel braces clamped in their places, a short stretch of 1/4-inch-OD hose helps to keep a 1/8-inch bit centered for pilot holes. We’ll drill again to actual size with braces removed.
While some bed building procedures are similar, they’re not all the same, and there’s generally more than one way to approach pert-near anything, anyway. Here as we (that’s my right hand, Mrs. Rotten, and I) undertake this reproduction bed construction, we’ll indeed be referring to the earlier CTP bed building tech stories. We’ll also be conferring with our preferred parts purveyors at Premier Street Rod.
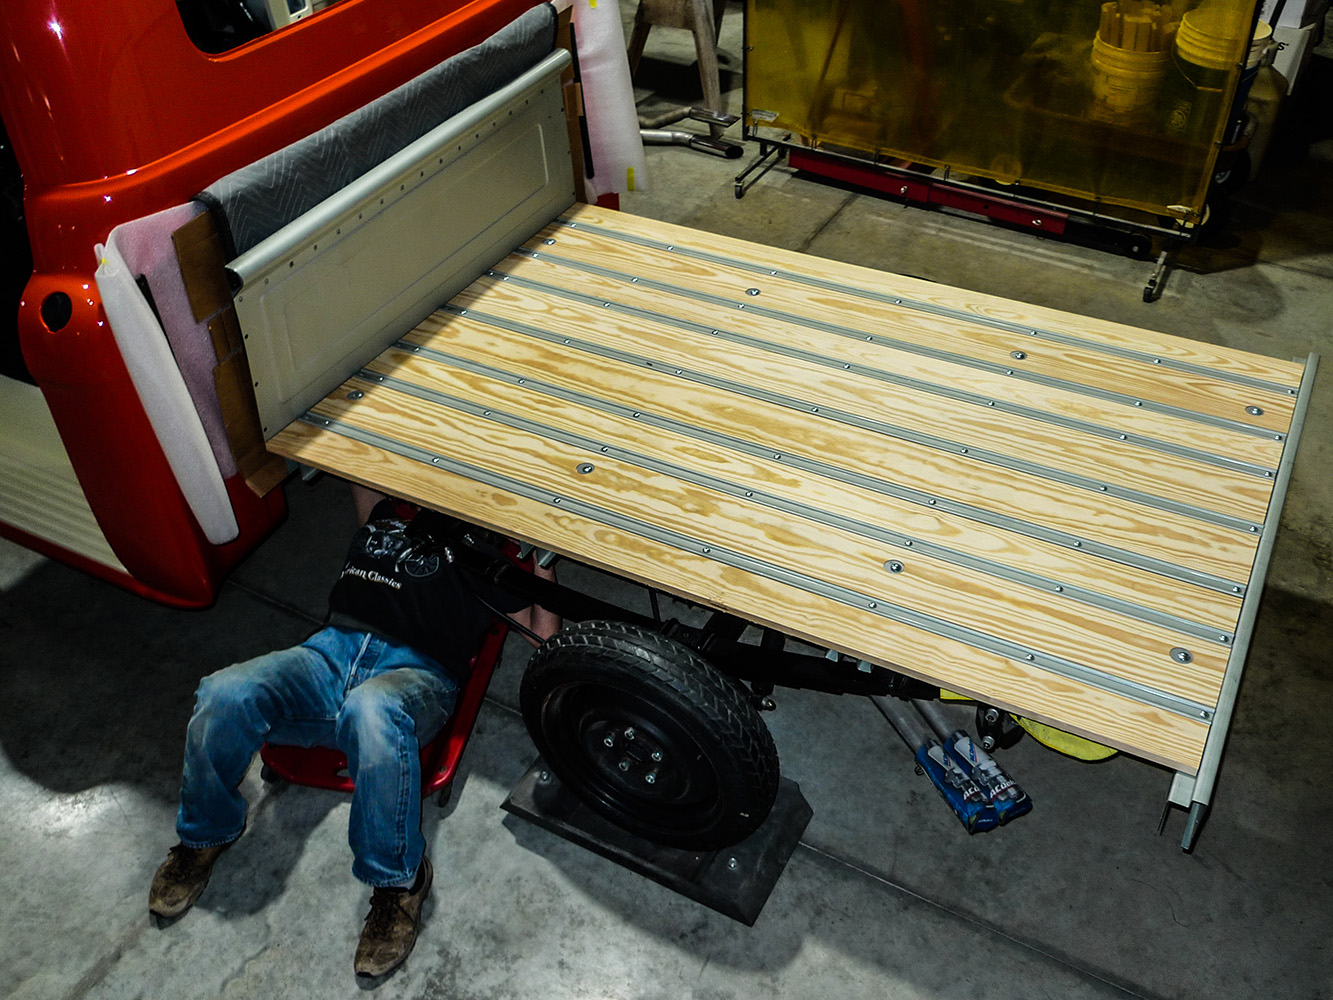
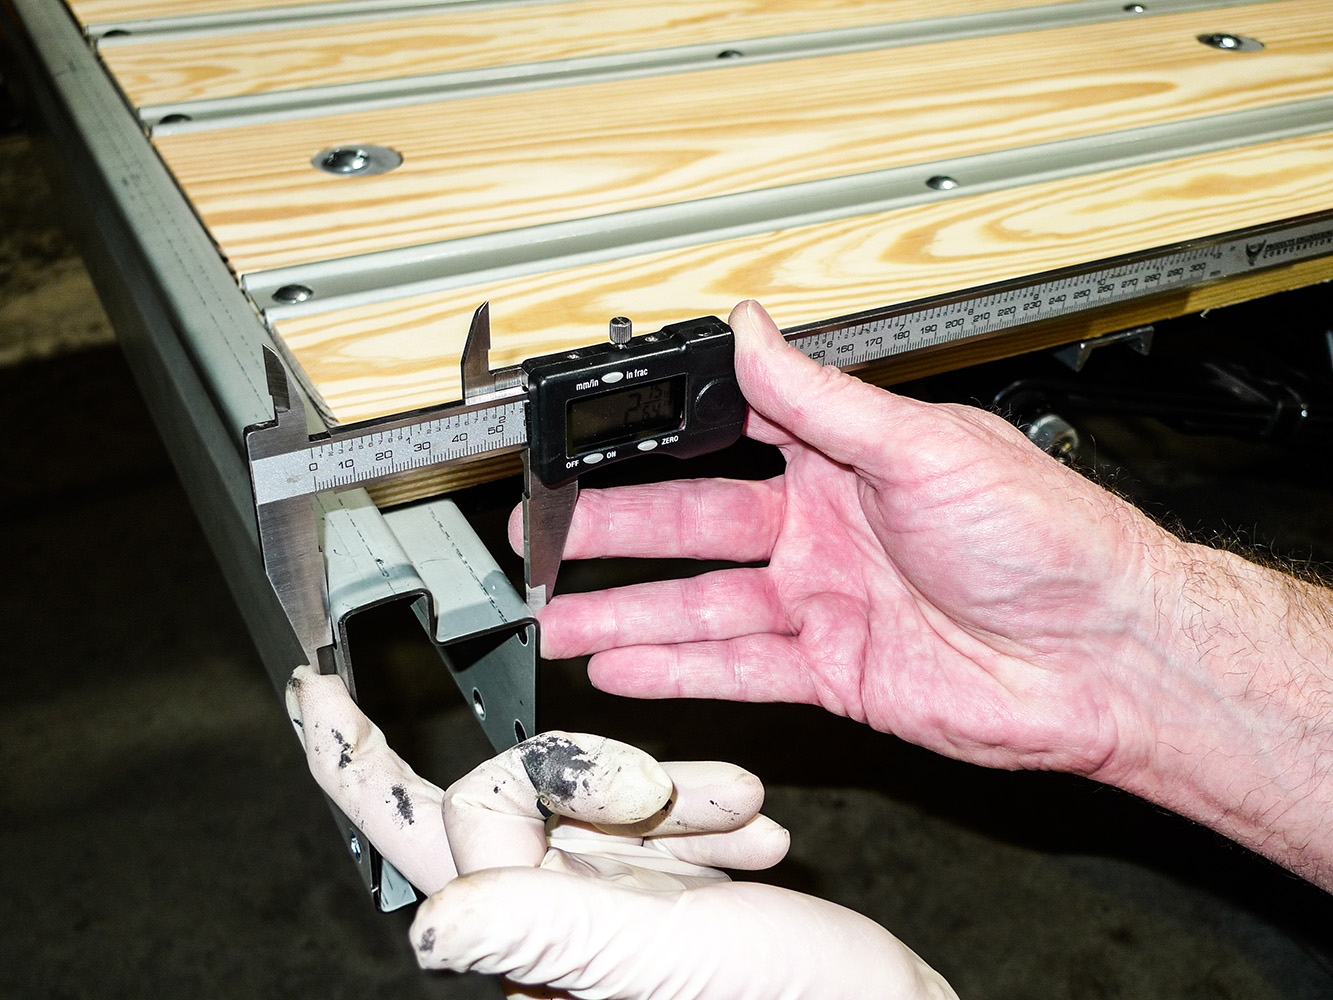
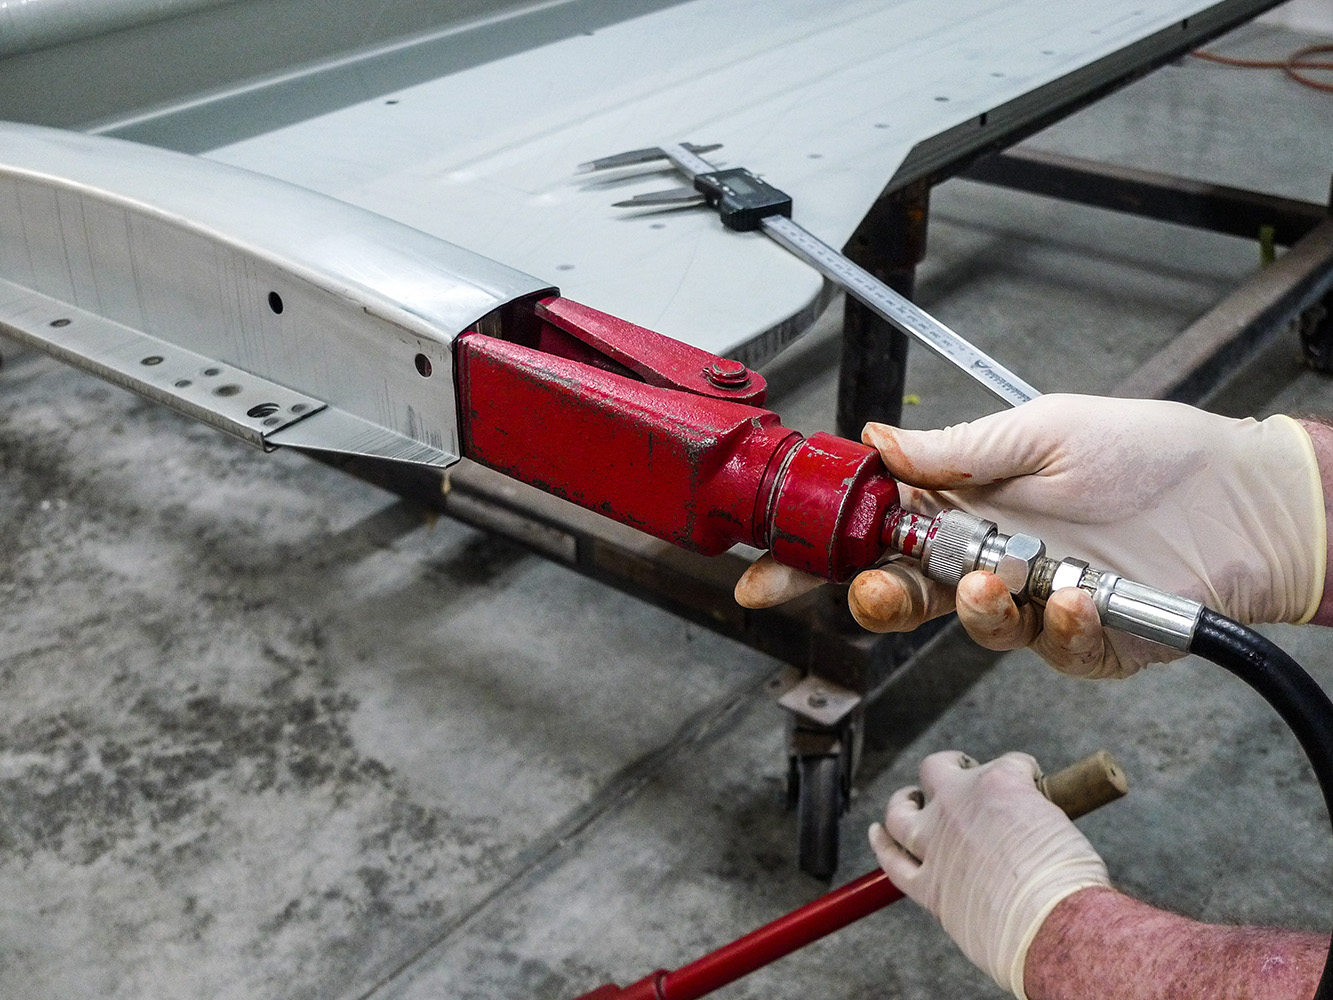
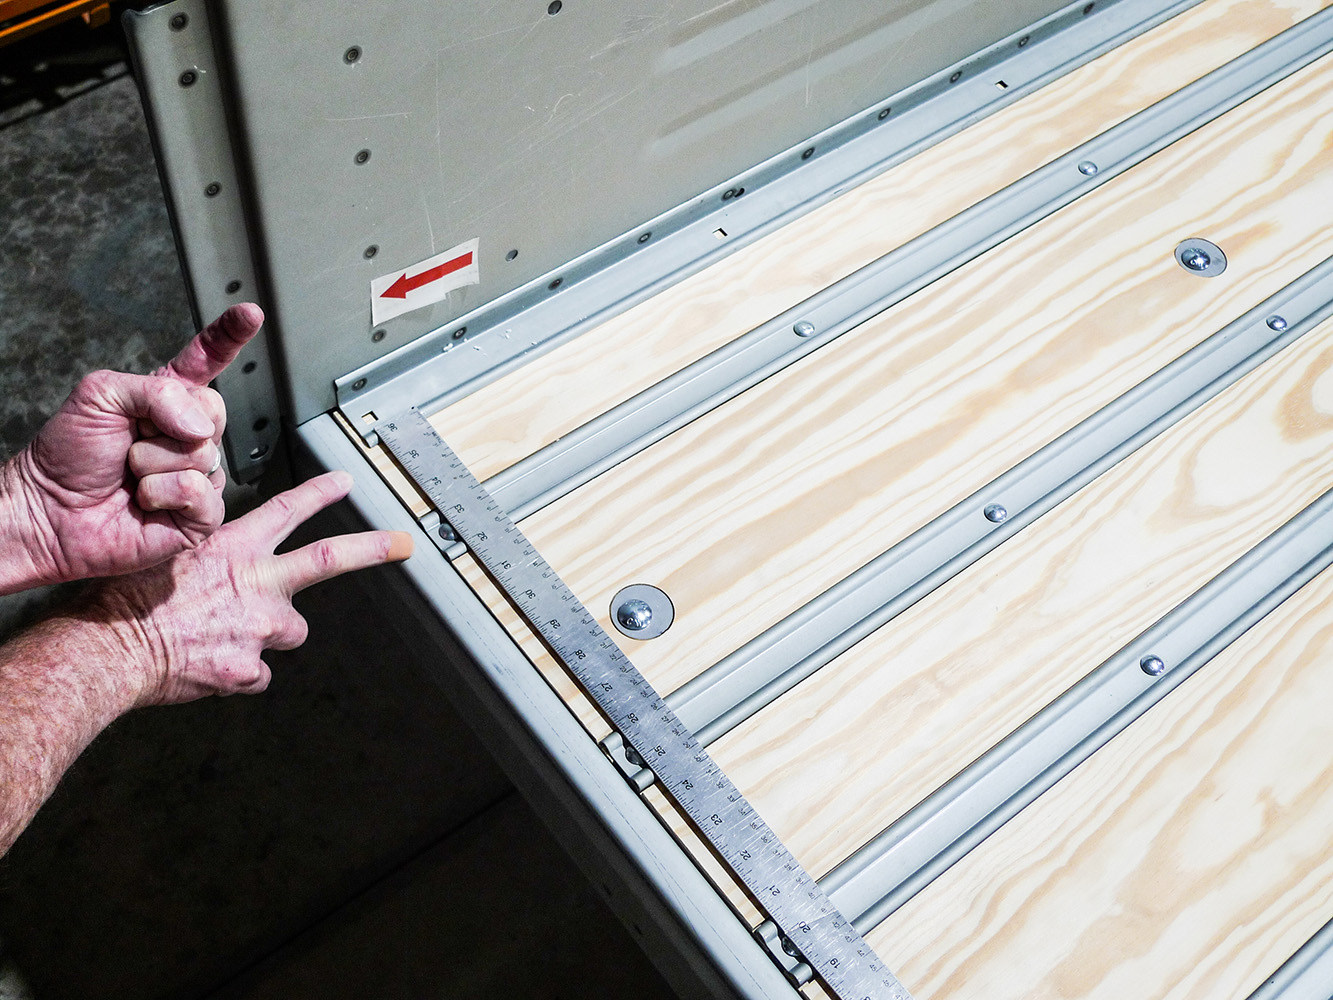
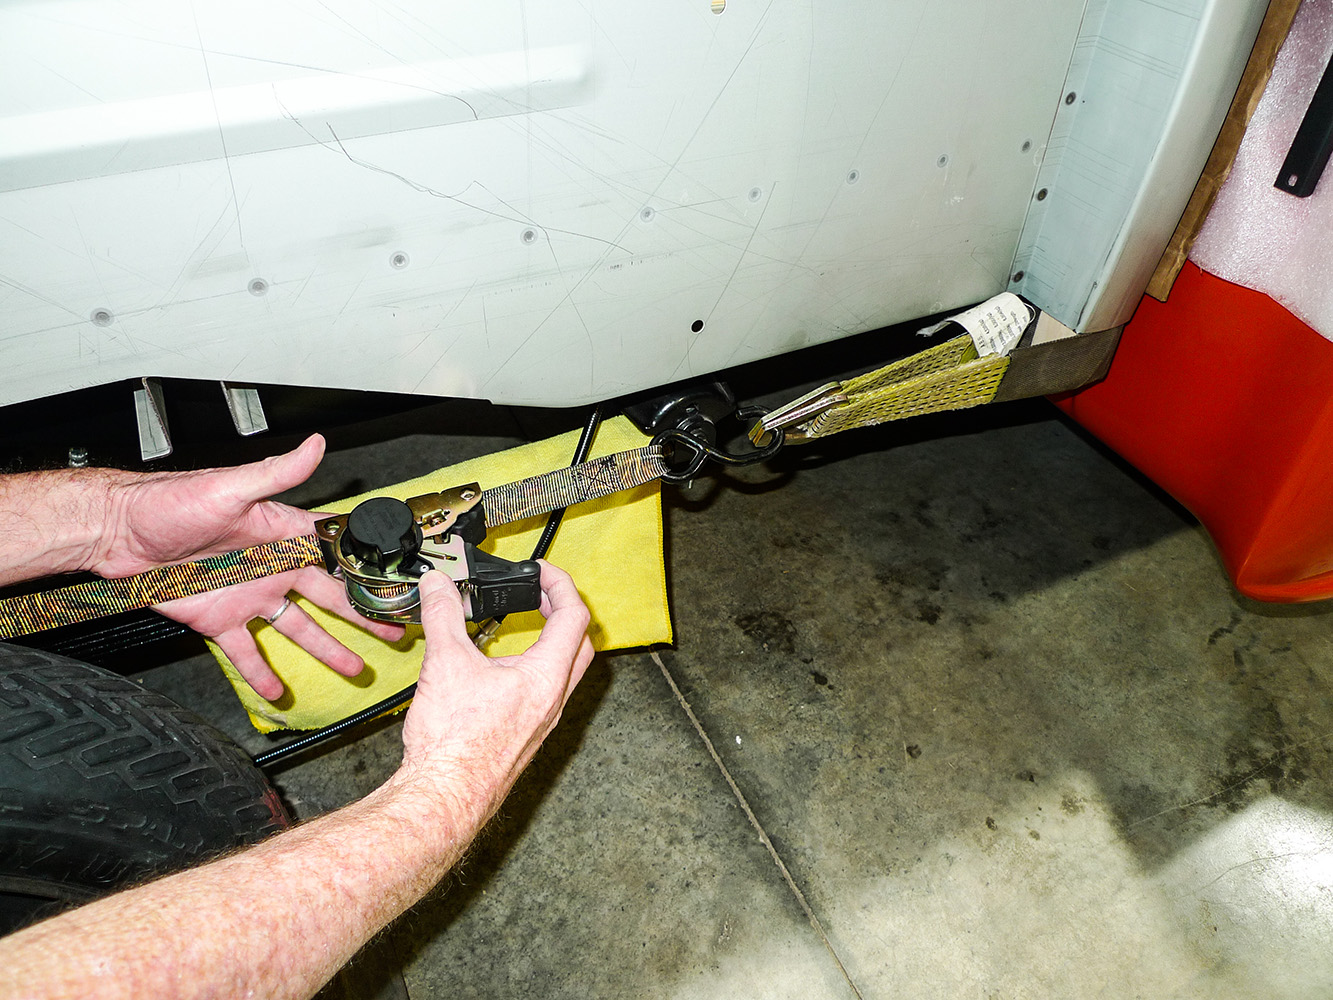
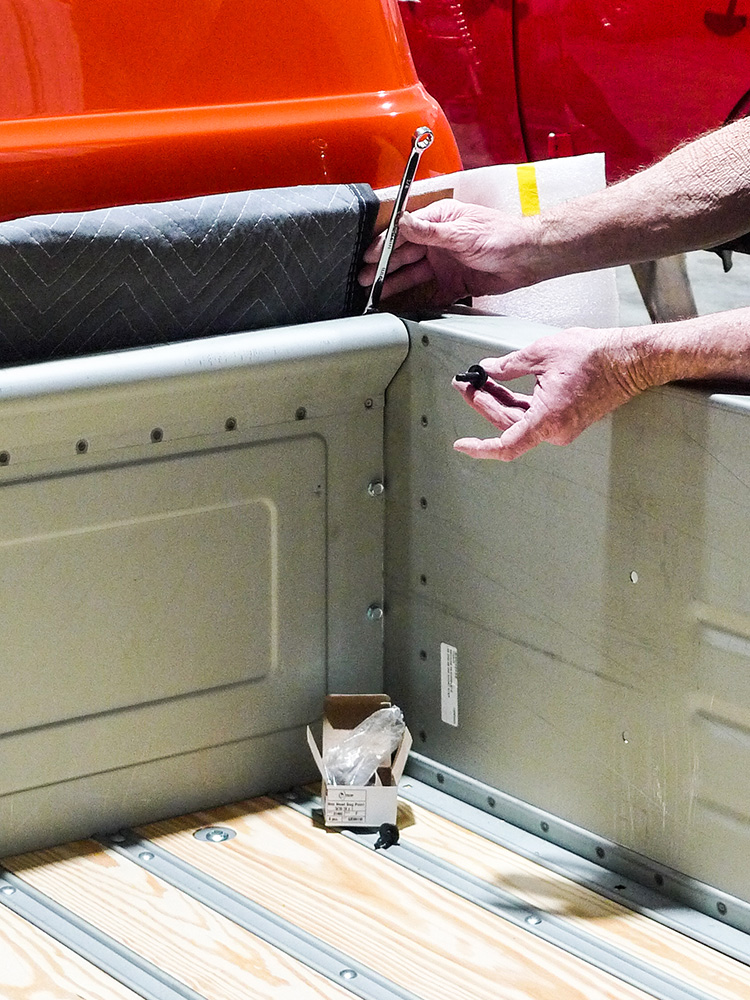
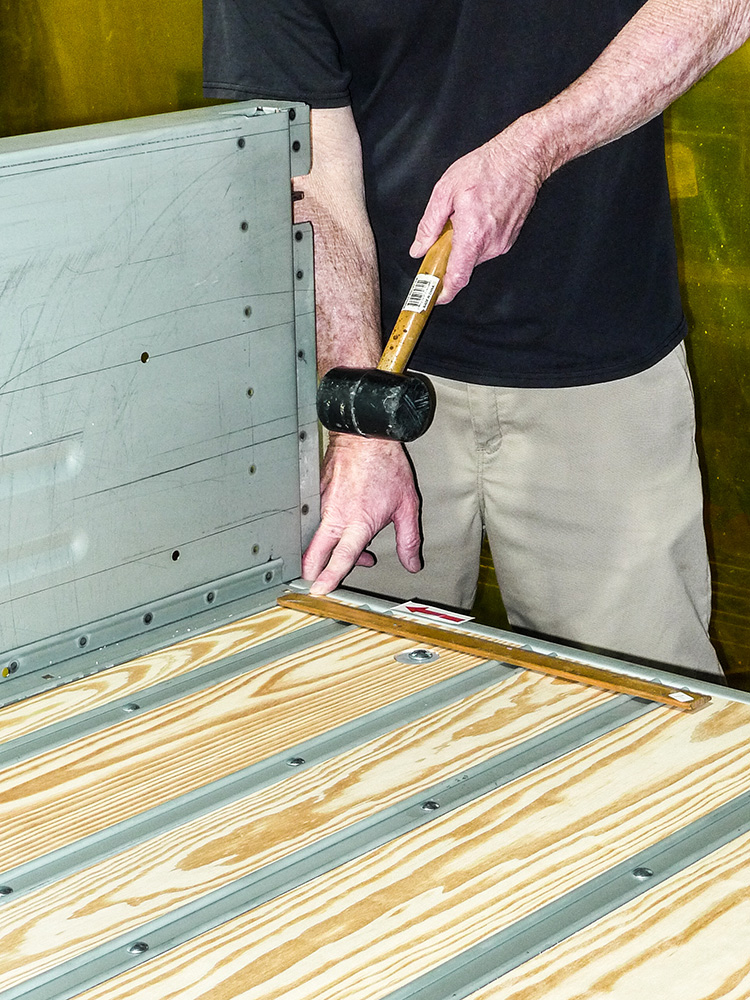
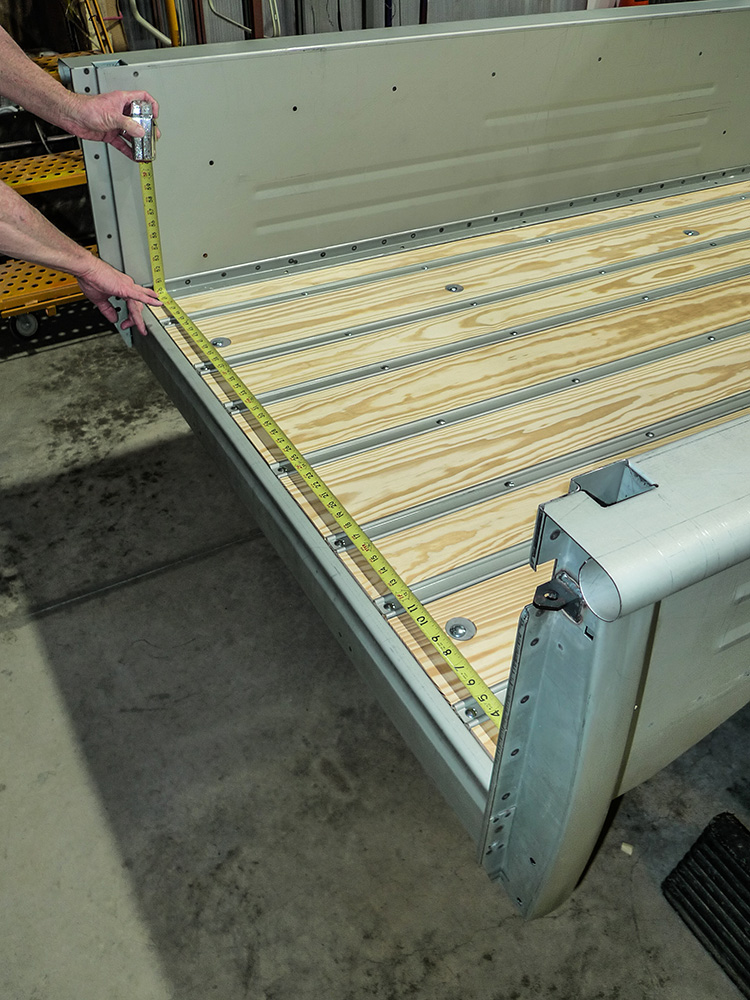
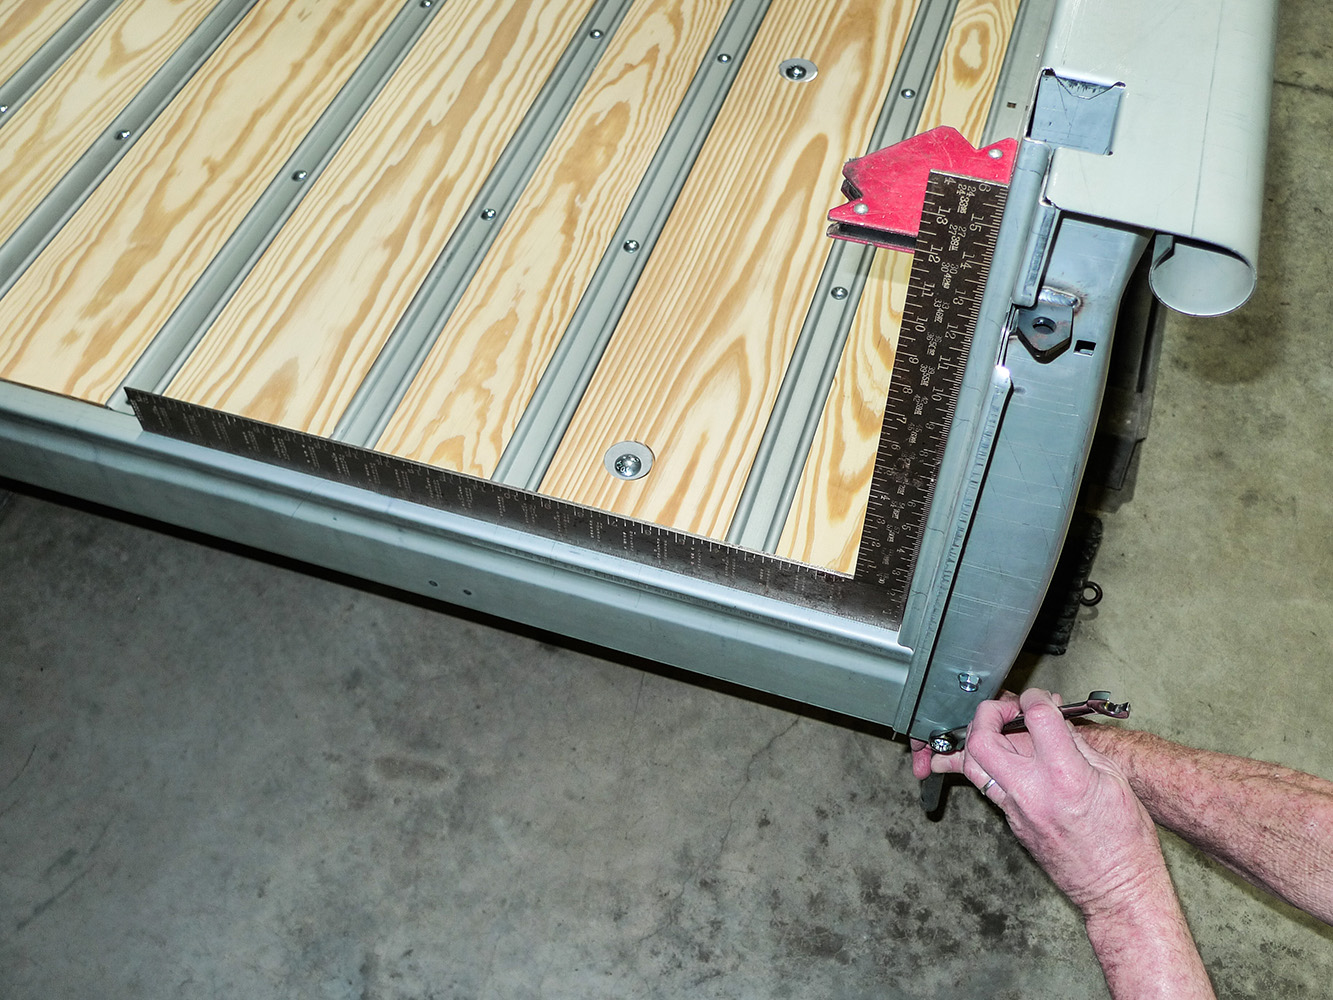
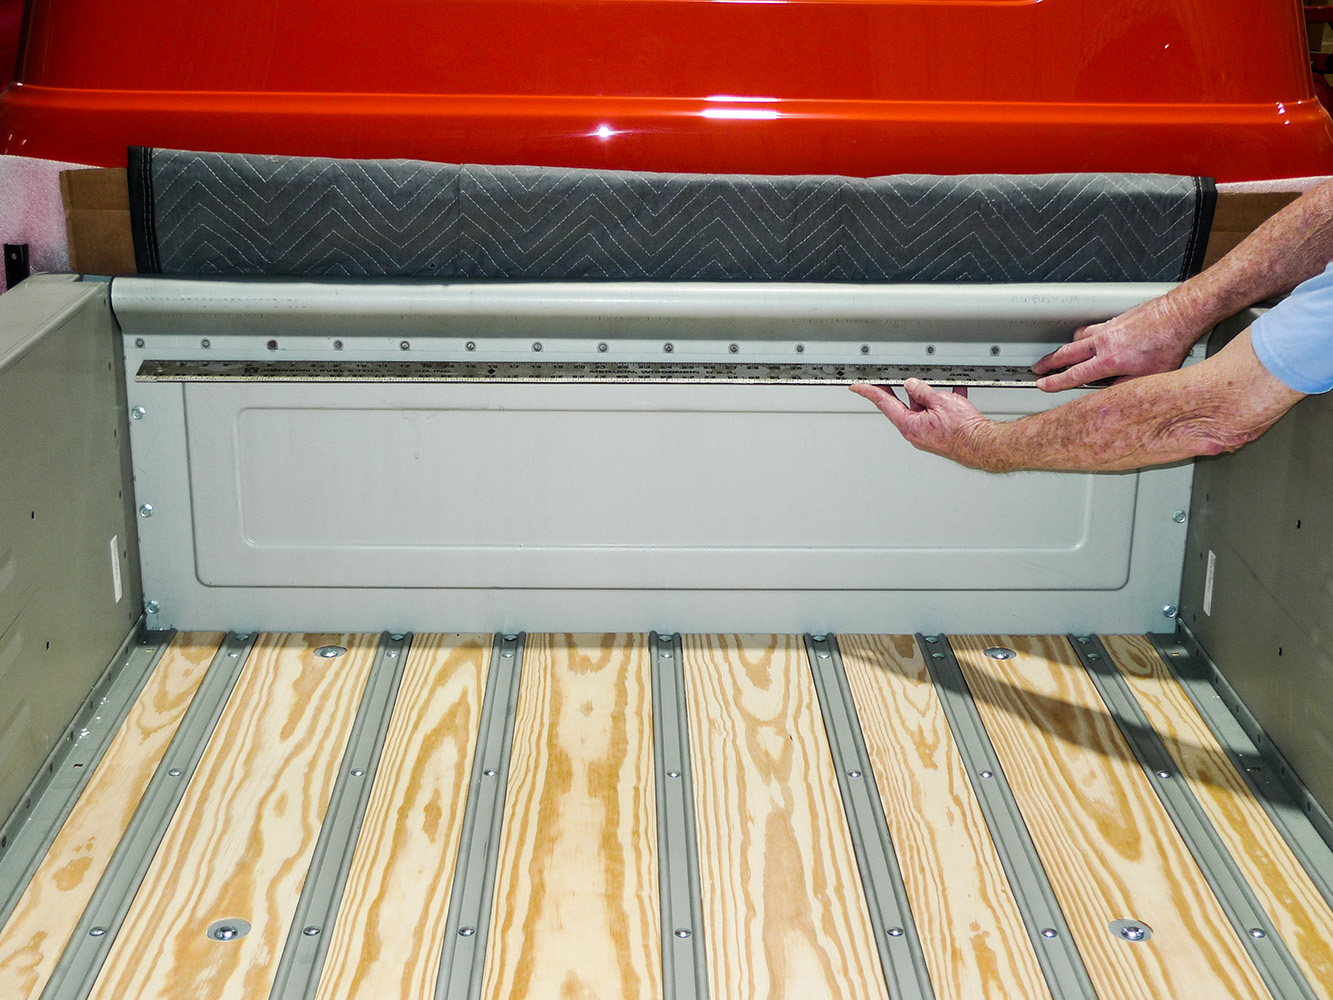
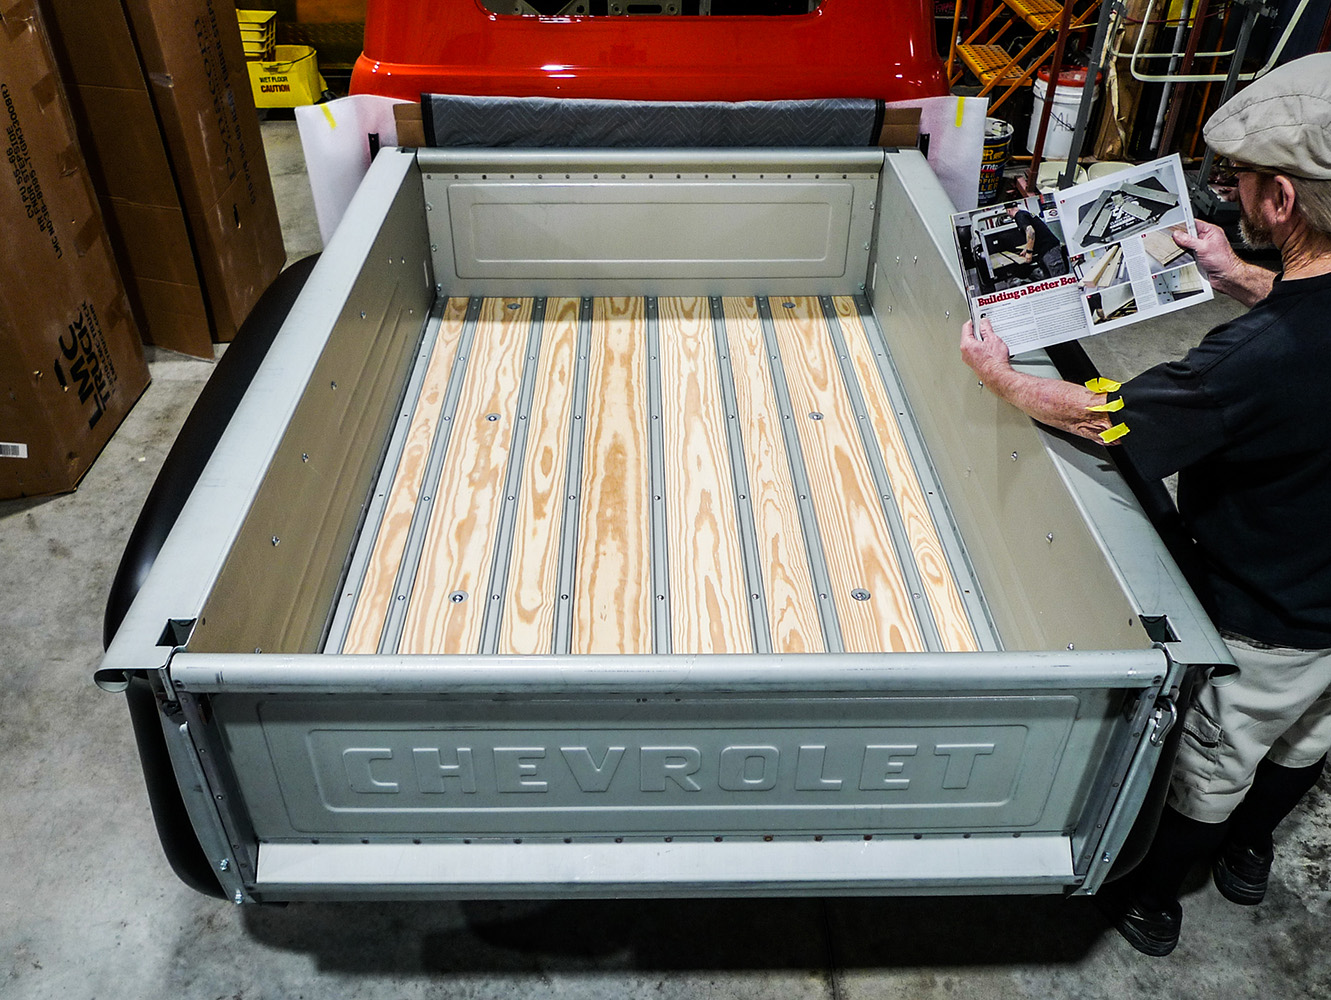
Following side-to-side measurements let’s take some X-pattern measurements as well. With carriage bolts in loosely, the planks are still movable. New steel strips are fitting in their grooves and we’re now satisfied our bed’s foundation is square.Perimeter planks can now support bedsides, but this’ll go easier if we begin with our sprung front panel. Obviously, we’ve been to Harbor Freight for magnets and a moving blanket—and that’s Mrs. Rotten down there snugging the forward row of fasteners.By this time we’ve attempted to position the right bedside. While doing so we encountered unexpected interference where the stake pocket should’ve slipped over the end of the rearmost cross sill.As it works out, rear stake pockets both need relief. Here a porto-power fits the bill. We’ll compare caliper readings as we go. We wouldn’t want to overdo this step, but painterly instinct says we’ll also need a gap for paint film thickness later on.With clearance gained, stake pockets slip over now, as they should. Trying not to disturb perimeter plank locations, we’re moving heavy bedsides as necessary. There’ll be many more angle-checks before we call them square.Although we’re getting closer, we’re still discovering inconsistencies. Here it’s clear that our bedsides should be moved slightly rearward, so these boltholes will align properly. For what’s next, we’ll snug our eight main mounting bolts.To get this right, we’ll only need about 1/8 inch of rearward movement—same for each side. With lumber inserted into each forward stake pocket, ratchet straps provide a needed mechanical advantage. Just out of view, they’re hooked to padded spring shackles.While bedsides remain in traction, let’s see about snugging front panel fasteners. Here our paint-protective padding makes this tight spot tighter. For up top, substituting dog-point body bolts helps a lot.So far, all that’s holding the bedsides upright are the fasteners at the bed’s front panel. Here toward the opposite end we’re not yet in position, but with a rubber mallet it doesn’t take much to move bedsides around.Providing things go our way, this just might be our final-for-now side-to-side measurement. If this reading matches that of the front, we’ll move onto vertically square the rear of our bedsides.With this old square magnetically affixed, we have hands-free enough to hold this bedside while rear cross sill mounting bolts are tightened. There are five bolts per side, but these first two are already holding firmly.Our prefab planks came with predrilled holes—except for where perimeter planks meet bedsides. A transfer punch helps us nail dead center, and this only takes a gentle hammer smack. We’ll drill these holes later when the bed comes back apart.Now who remembers the natural shape of our bed’s front panel? Who remembers the two-position twist it had—straight from the cardboard box? Every now and then it’s nice to get away with something. Here it looks as though we will.So, right about now, the brand-new bed we’ve worked for could come back apart for paint. On second thought, we still have custom taillights and tailgate latches to figure—and maybe a little reading to catch up on, too.
On those notes, let’s open up some big old cardboard boxes for an overdue look inside. It’s finally time to pay some attention to this marathon project’s hind end.
We use cookies to ensure that we give you the best experience on our website. If you continue to use this site we will assume that you are happy with it.