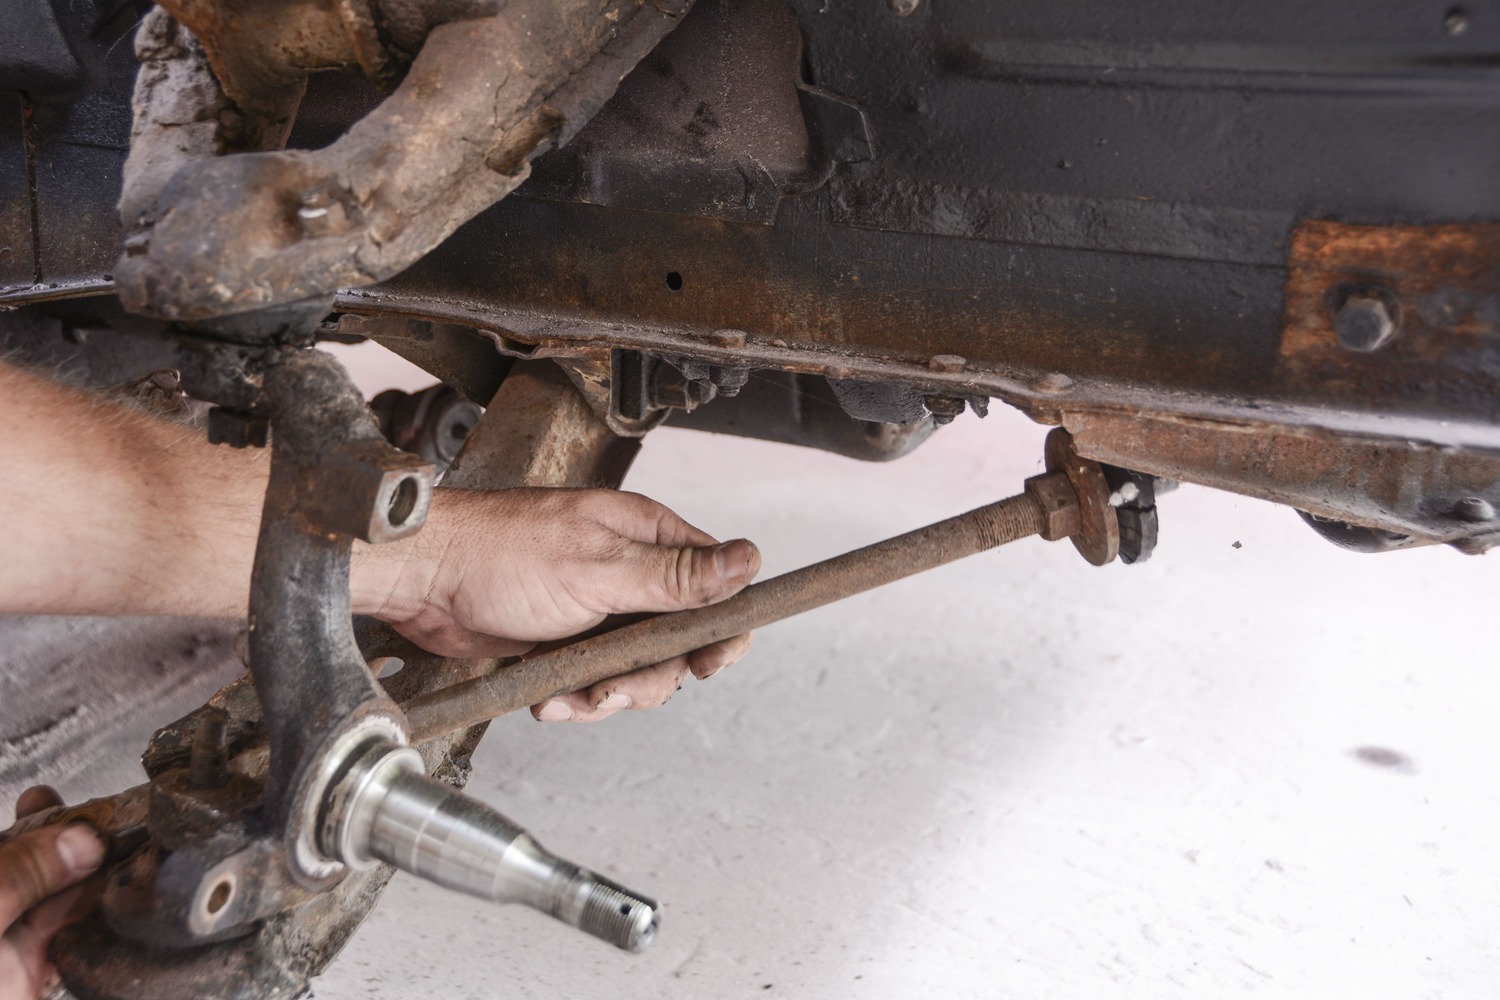
Chevrolet had a good thing going when it spruced up the Chevy II platform in 1966. Even though the early cars were stylish and cool, the two-year run in 1966 and 1967 had one of Chevrolet’s finest body styles. However, there were quite a few carryover items from those earlier designs that made it into the redesigned platform. One of the major items is the front suspension, which features a coil spring that rides on top of the upper control arm. The real drawback to this design was the lower control arm, which was a very small unit with only one mounting point on the chassis. It was braced by a strut rod, which ran at an angle to add strength to the otherwise flimsy control arm.
Our starting point for this project includes a crusty front suspension with rotten bushings, sloppy ball joints, and those dreaded strut rods. Early Chevy IIs are known for wonky handling and an inability to retain proper suspension alignment. We’re about to change that.
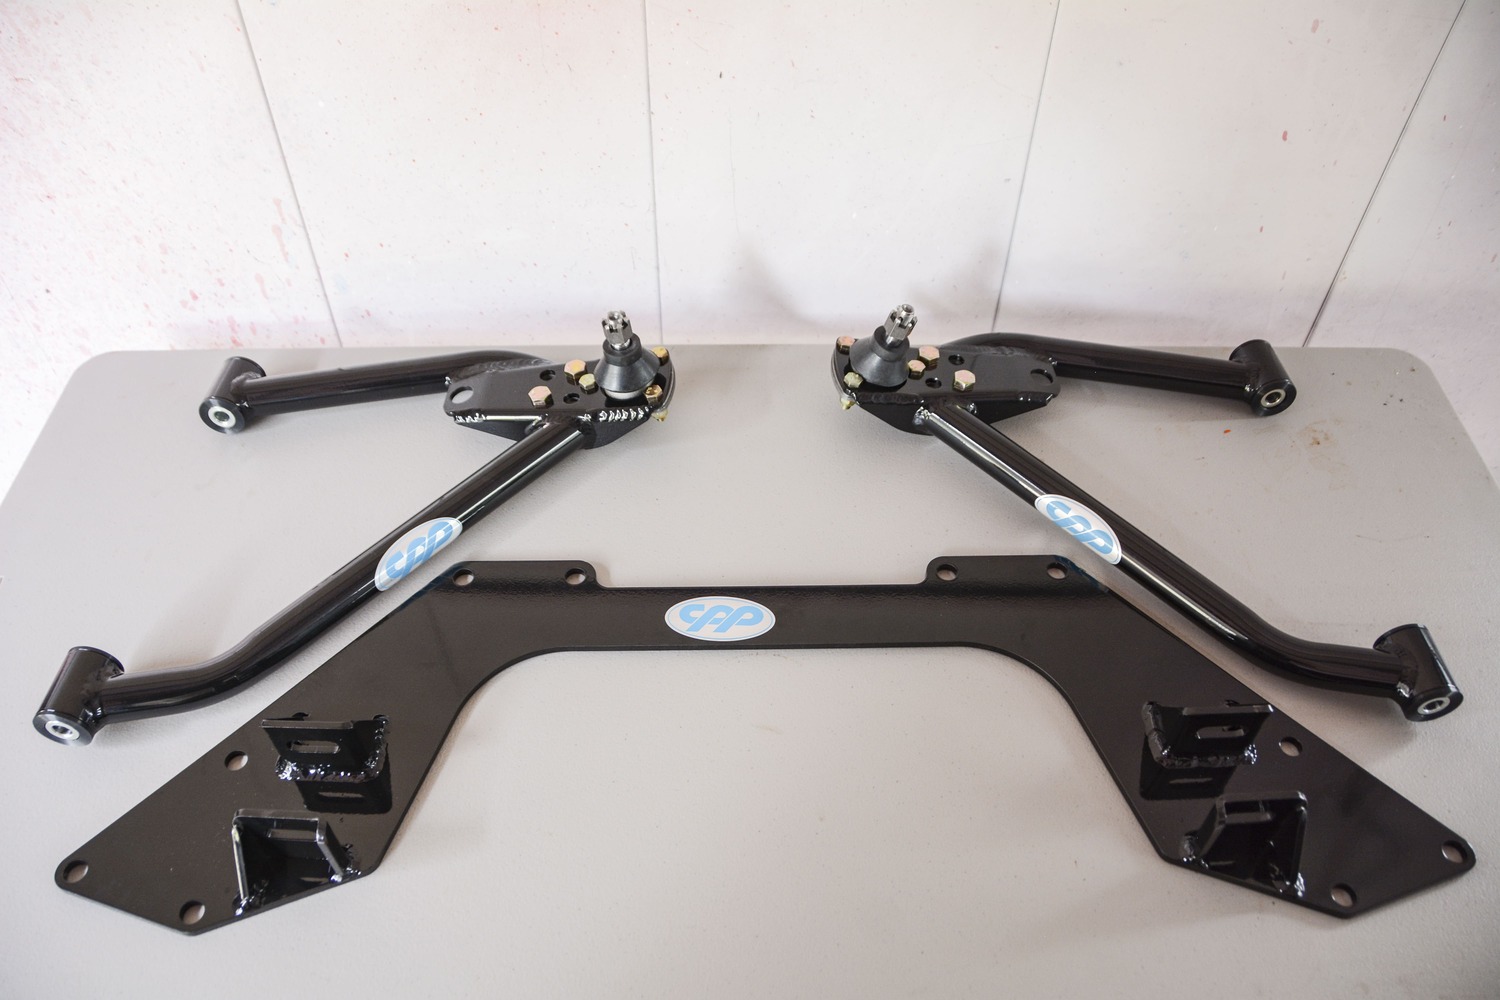
1962-67 Chevy IIs have a reputation for darting under braking and other unfavorable characteristics, such as inconsistent suspension alignment. The flaws of this design are amplified by age, as worn or cracked rubber bushings allow the front suspension to flex and provide unpredictable handling. Our ’66 Chevy II project car had all of the signs of a worn-out front suspension, and it was time for an upgrade. We could’ve easily replaced all the bushings with stock equipment and been back on the road, but we wanted a long-lasting upgrade that would eliminate a major problem area. For that, we called Classic Performance Products (CPP) and ordered a MINI Sub-Frame Kit, which includes a custom 1/4-inch steel crossmember and tubular lower control arms to improve the front suspension geometry and remove the pesky strut rods altogether.
A two-post lift is the ideal situation for this front suspension rebuild, but we’re tackling it in the comfort of our home garage. Using a regular floor jack, we lift the front of the car and secure it with jackstands placed behind the engine, leaving plenty of room to move around underneath the car.
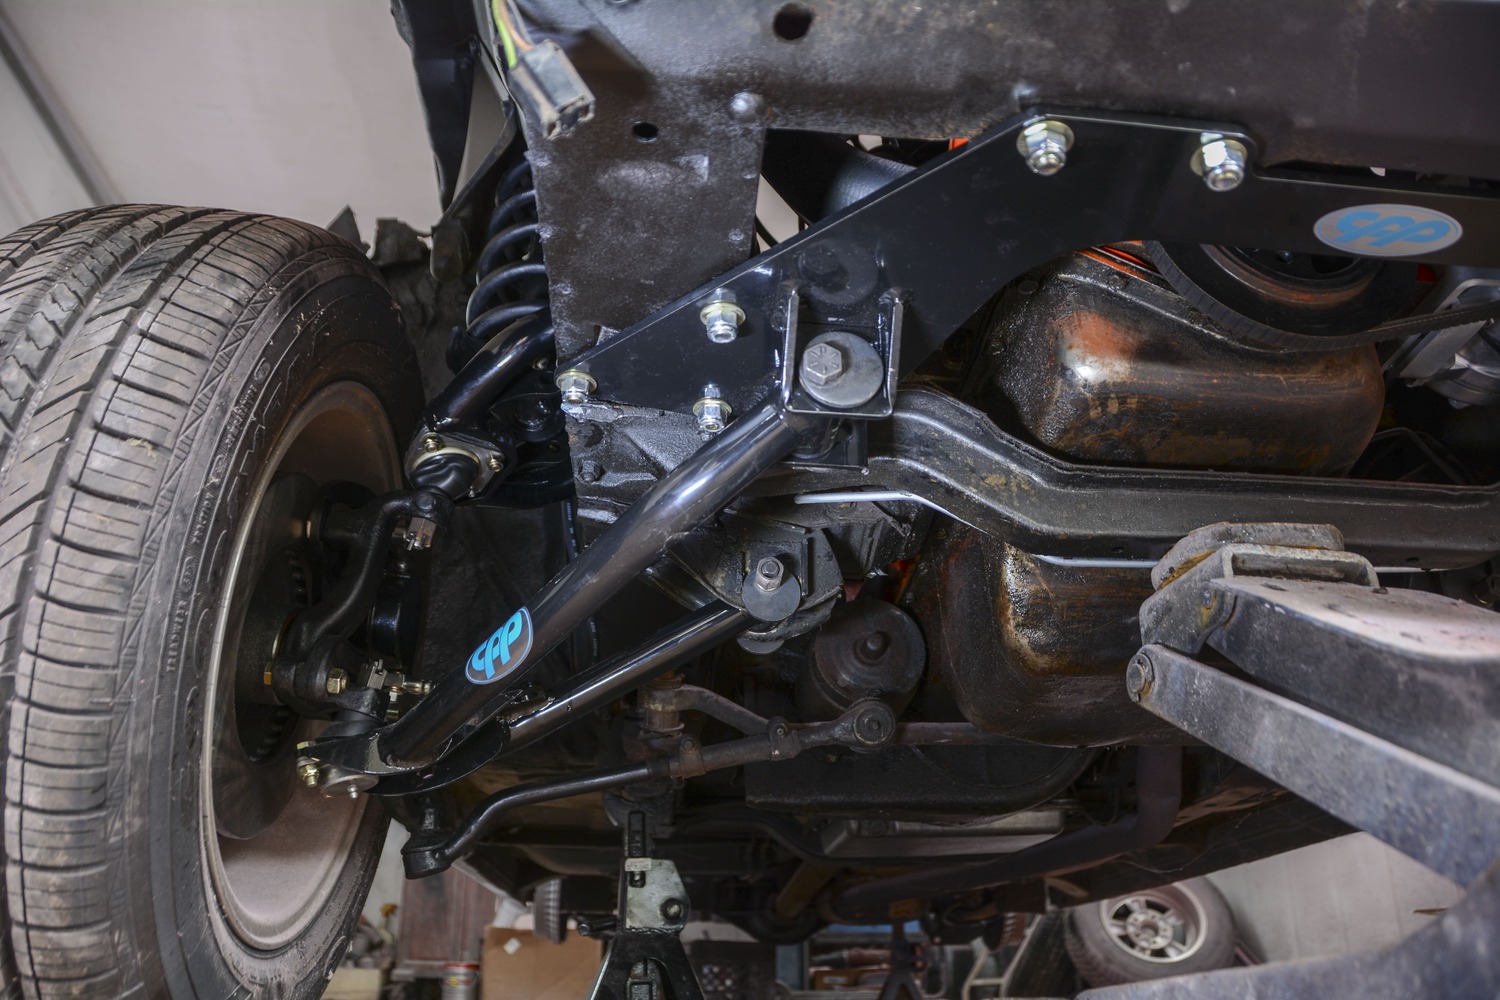
CPP’s MINI Sub-Frame Kit (PN 6267TCA-KB) is a bolt-on system that uses existing holes in the framerails for mounting the subframe. The A-frame–style control arm features two mounting points: one that bolts to the original control arm mount and one that bolts to the CPP MINI Sub-Frame crossmember. It’s a simple solution to a 60-year-old problem, and it’s something that can be installed in the comfort of your home garage and be back on the road by the end of the weekend. Additional benefits are increased ground clearance, more stability, and an additional adjustment point for alignment.
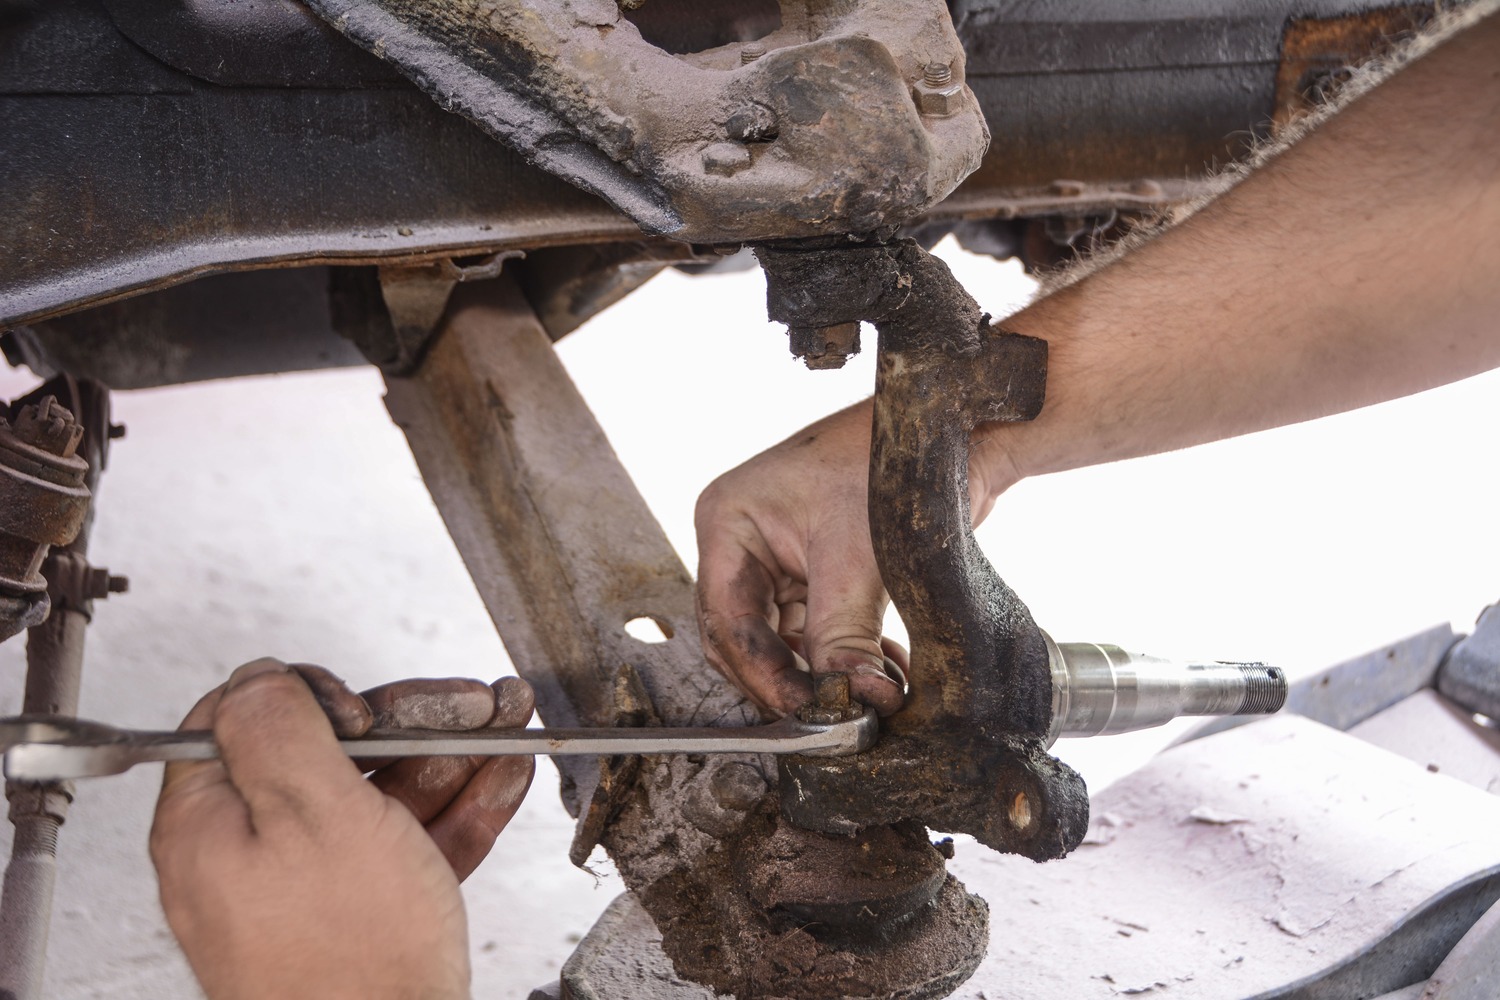
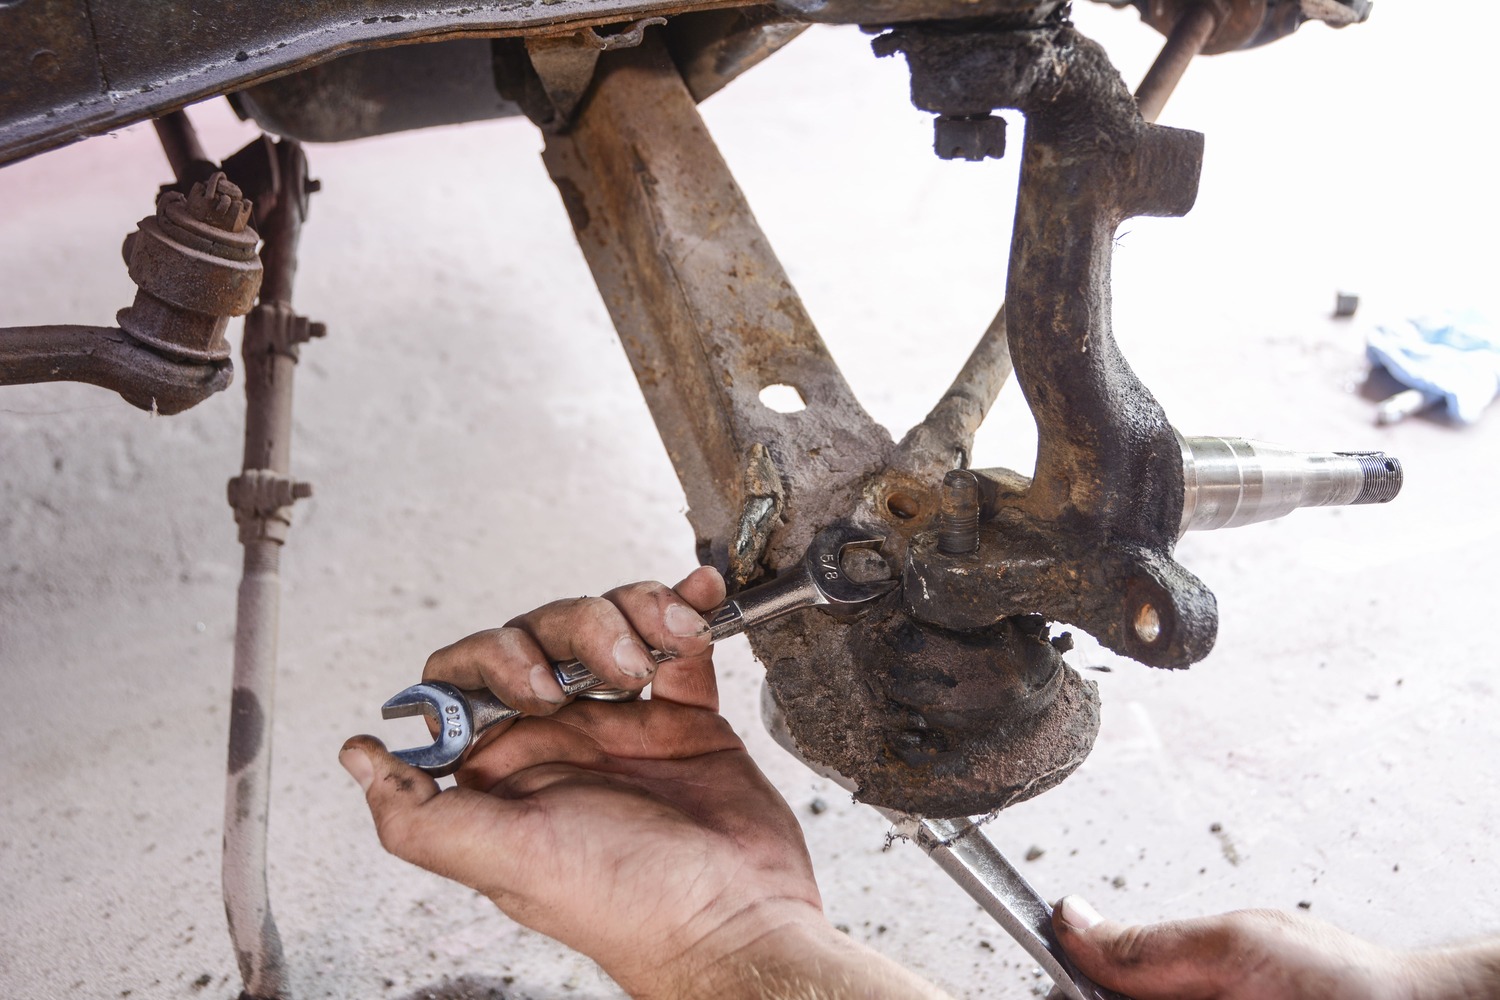
We’re doubling up on this teardown by also preparing for a disc brake conversion, so we stripped the spindle of its original drum brakes. Then we can start removing the cotter pins and loosening (but not completely removing) the ball joint nuts.
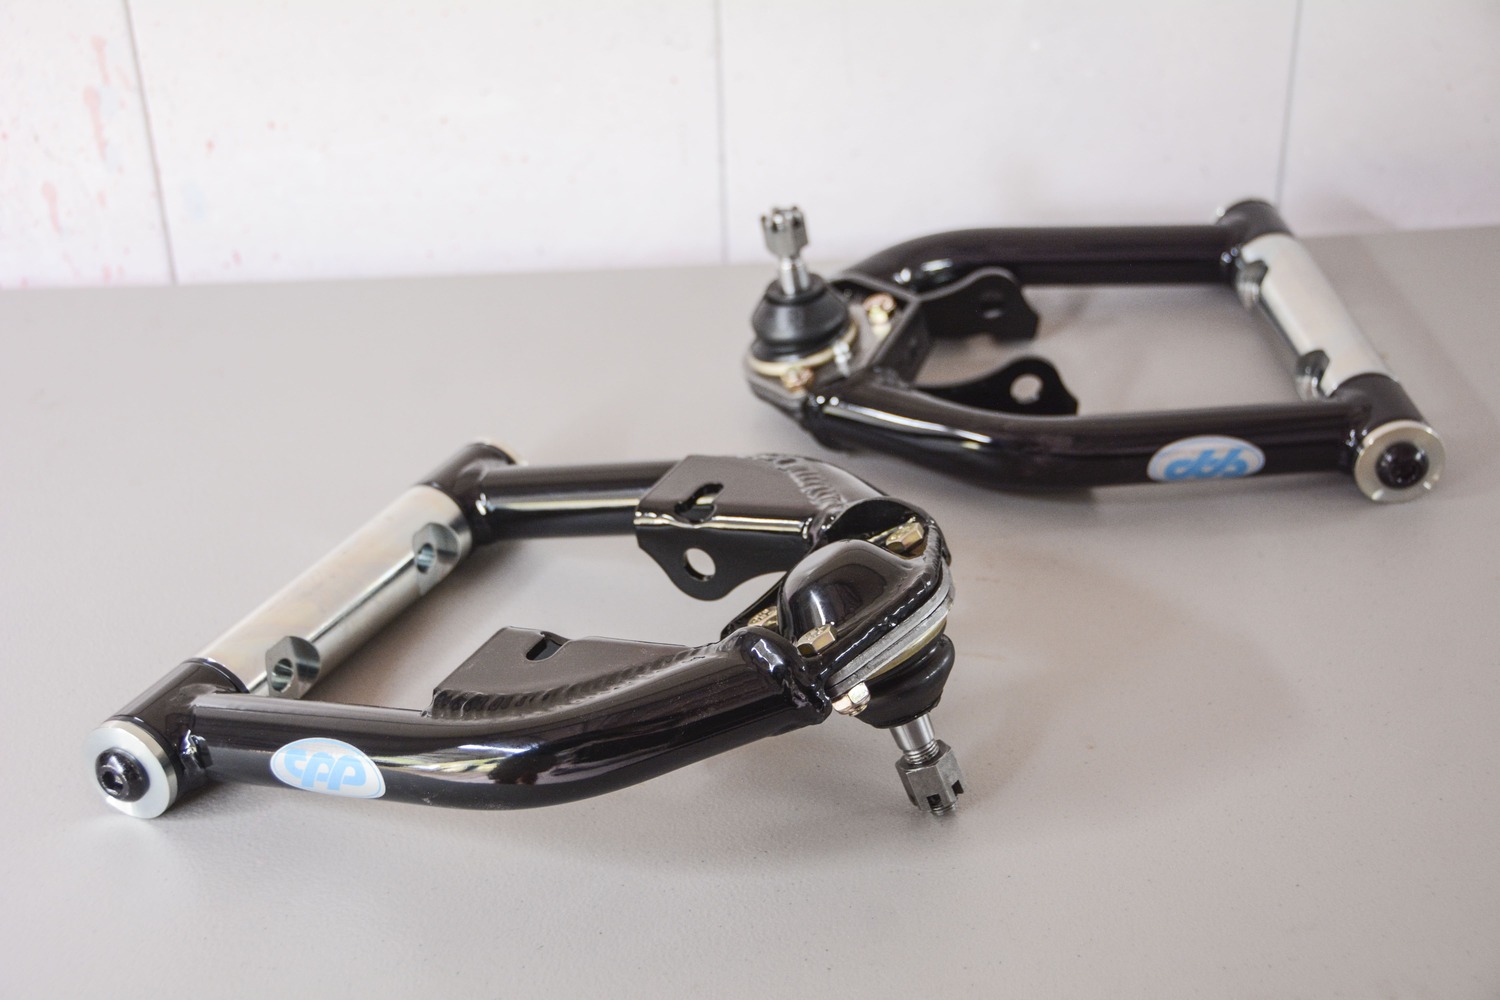
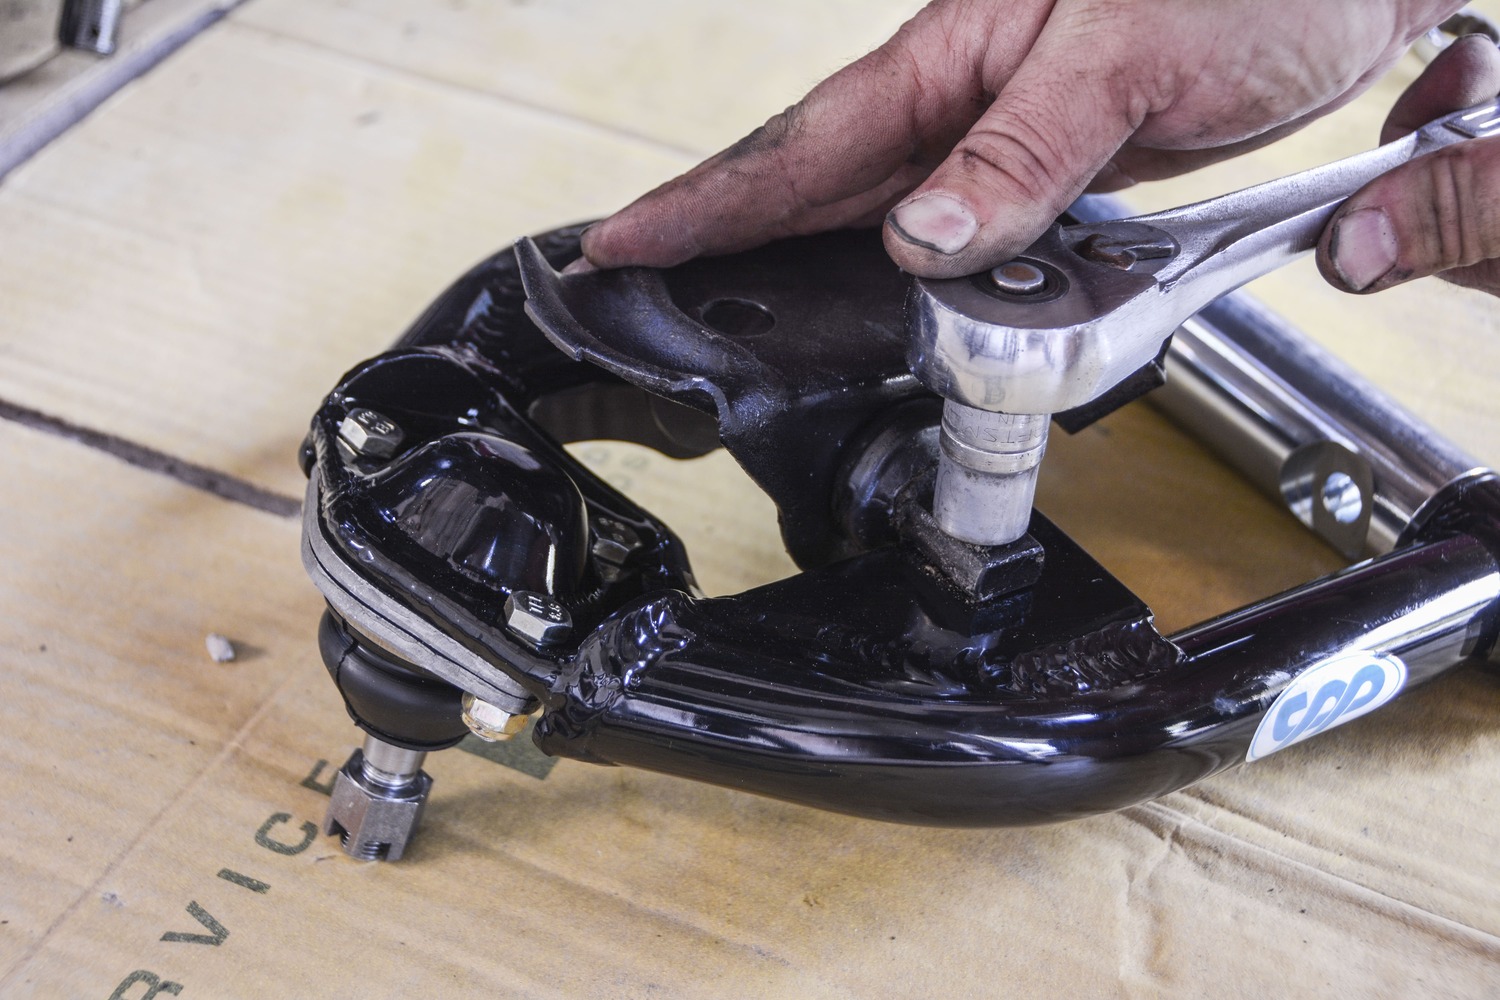
There are many ways to upgrade the suspension, in addition to the MINI Sub-Frame Kit. We chose to also upgrade to CPP’s tubular upper control arms (PN 6267TCA-UKB). This is an obvious upgrade to the flimsy stamped steel arms, but it also saved us lots of time, as they were already set up with new bushings and ball joints. The best part? The MINI Sub-Frame Kit and tubular upper control arms are relatively affordable and you can get a deluxe kit with new springs, shocks, and more for a little more scratch as well (check the CPP website for pricing). CPP also offers coilover kits, sway bars, and many other suspension components for early Chevy IIs, but we kept it simple this time around.
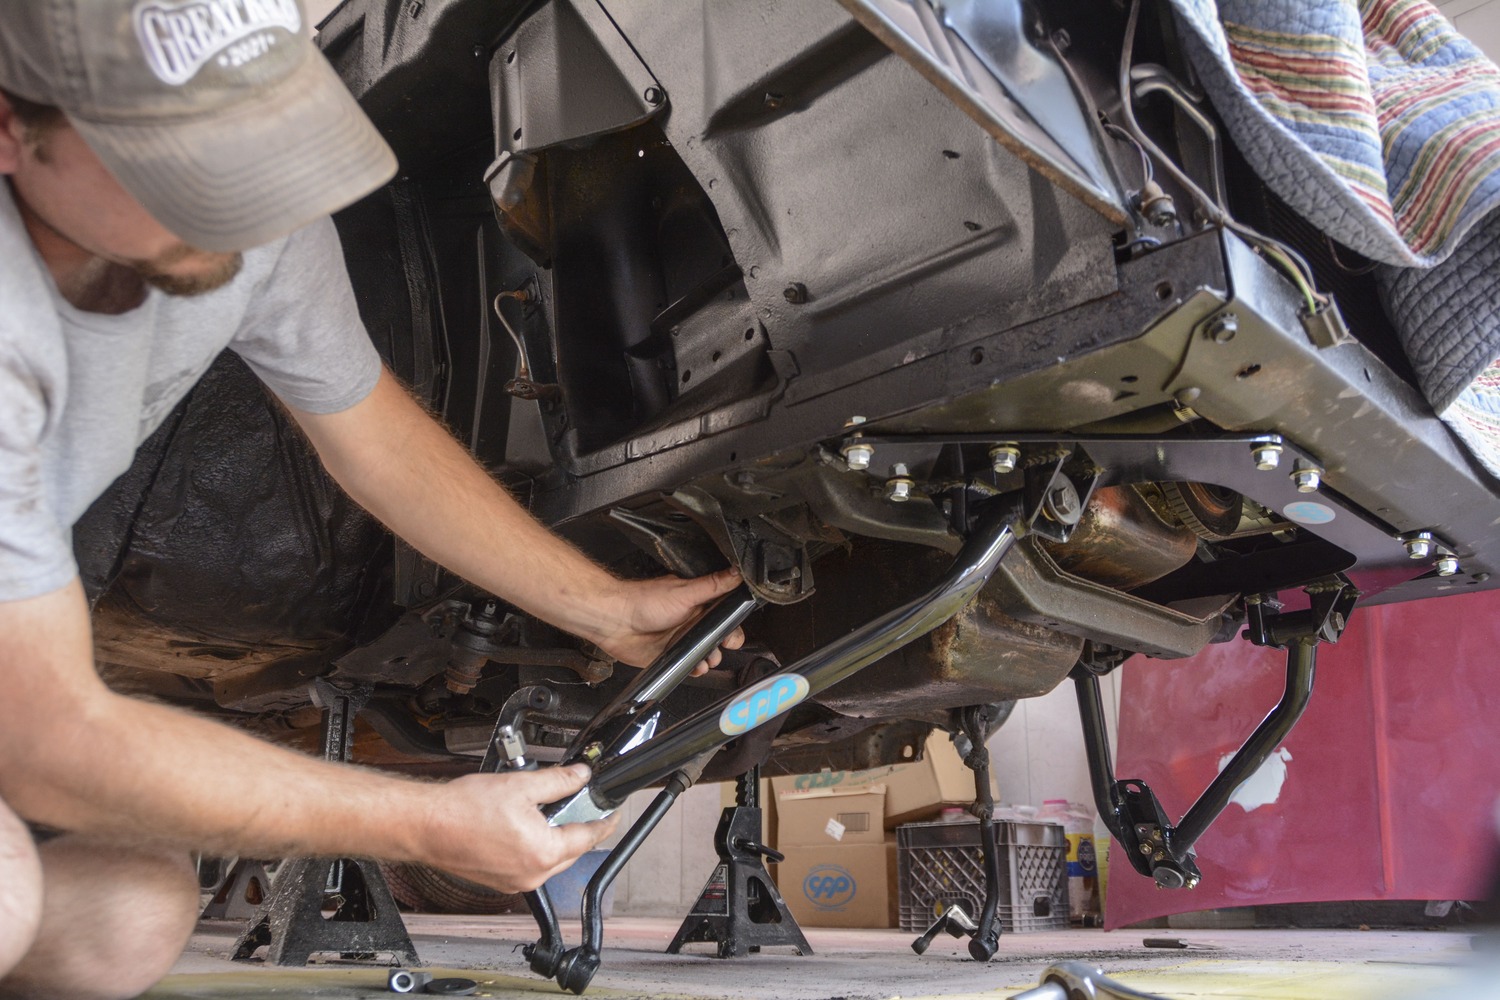
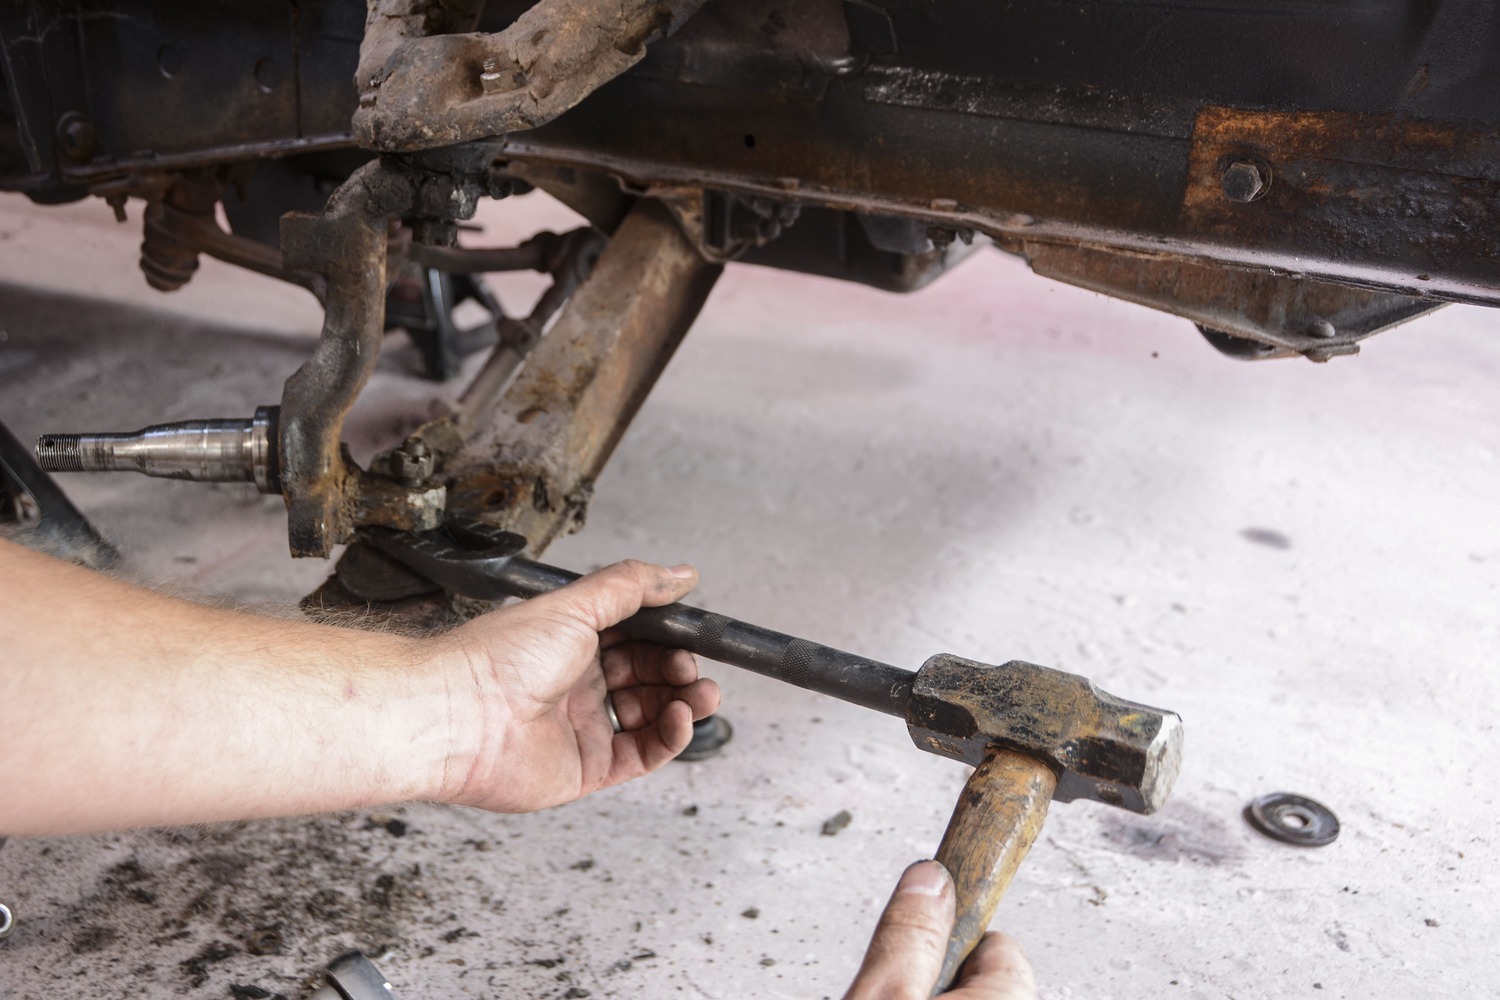
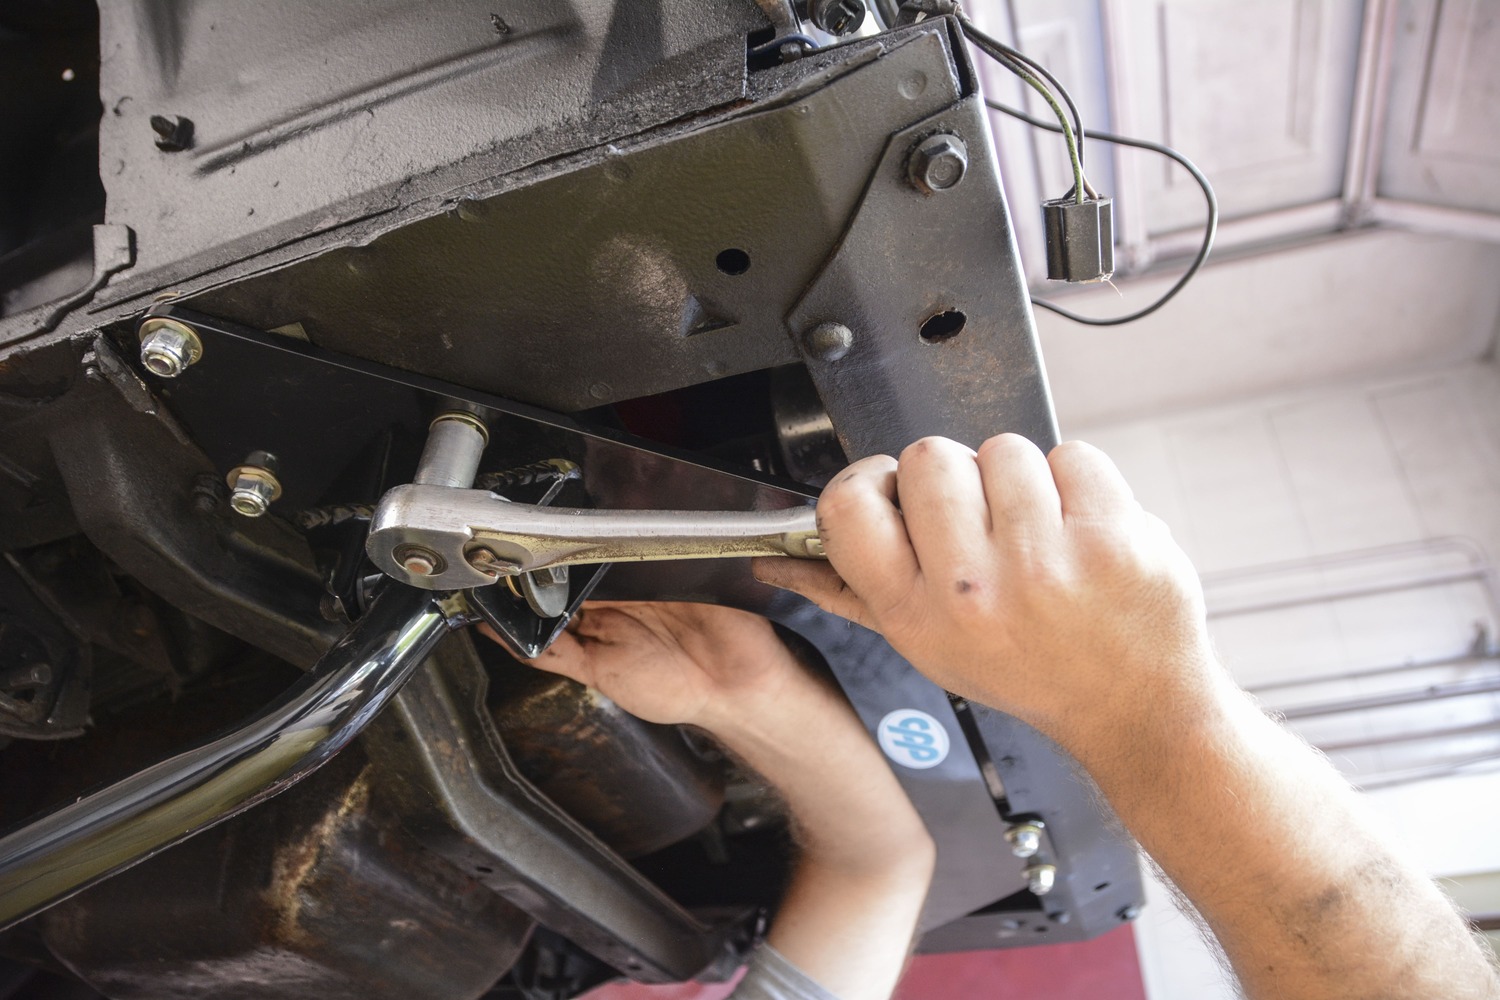
The strut rods are the next item on our to-do list. We remove the two bolts and nuts that attach the rod to the lower control arm. Then, we use an impact to remove the large nut that holds the rod to the frame.
The next time you see this project, we’ll be converting it from manual drum brakes with a single-pot master cylinder to a CPP power disc brake kit. Stay tuned as we take this sleepy project and put it back on the road.
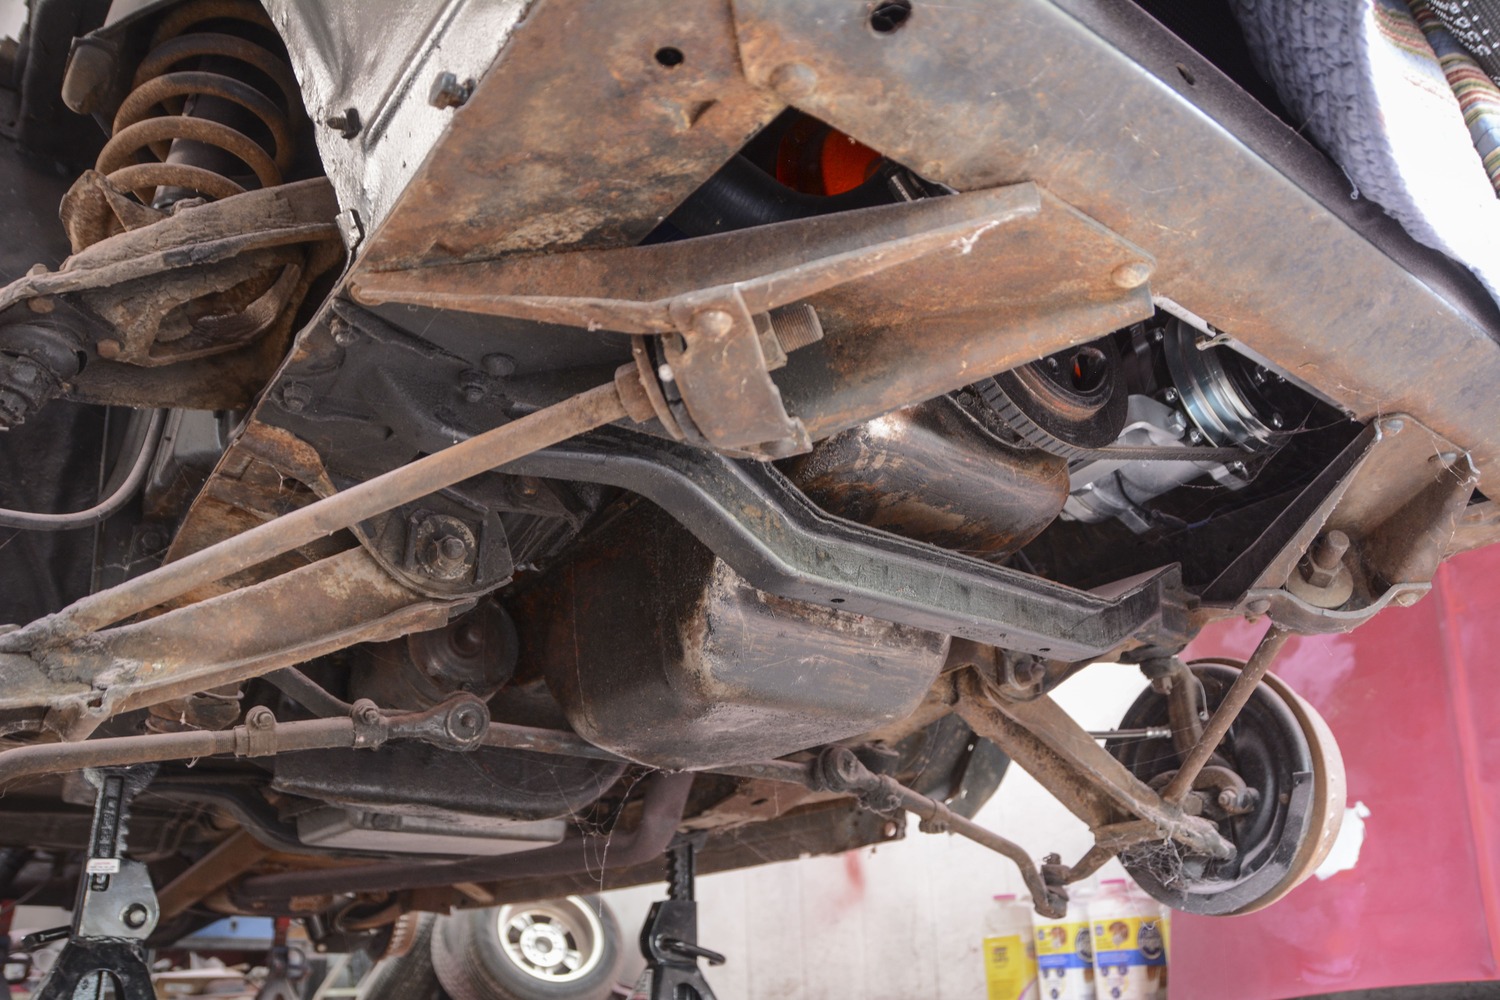
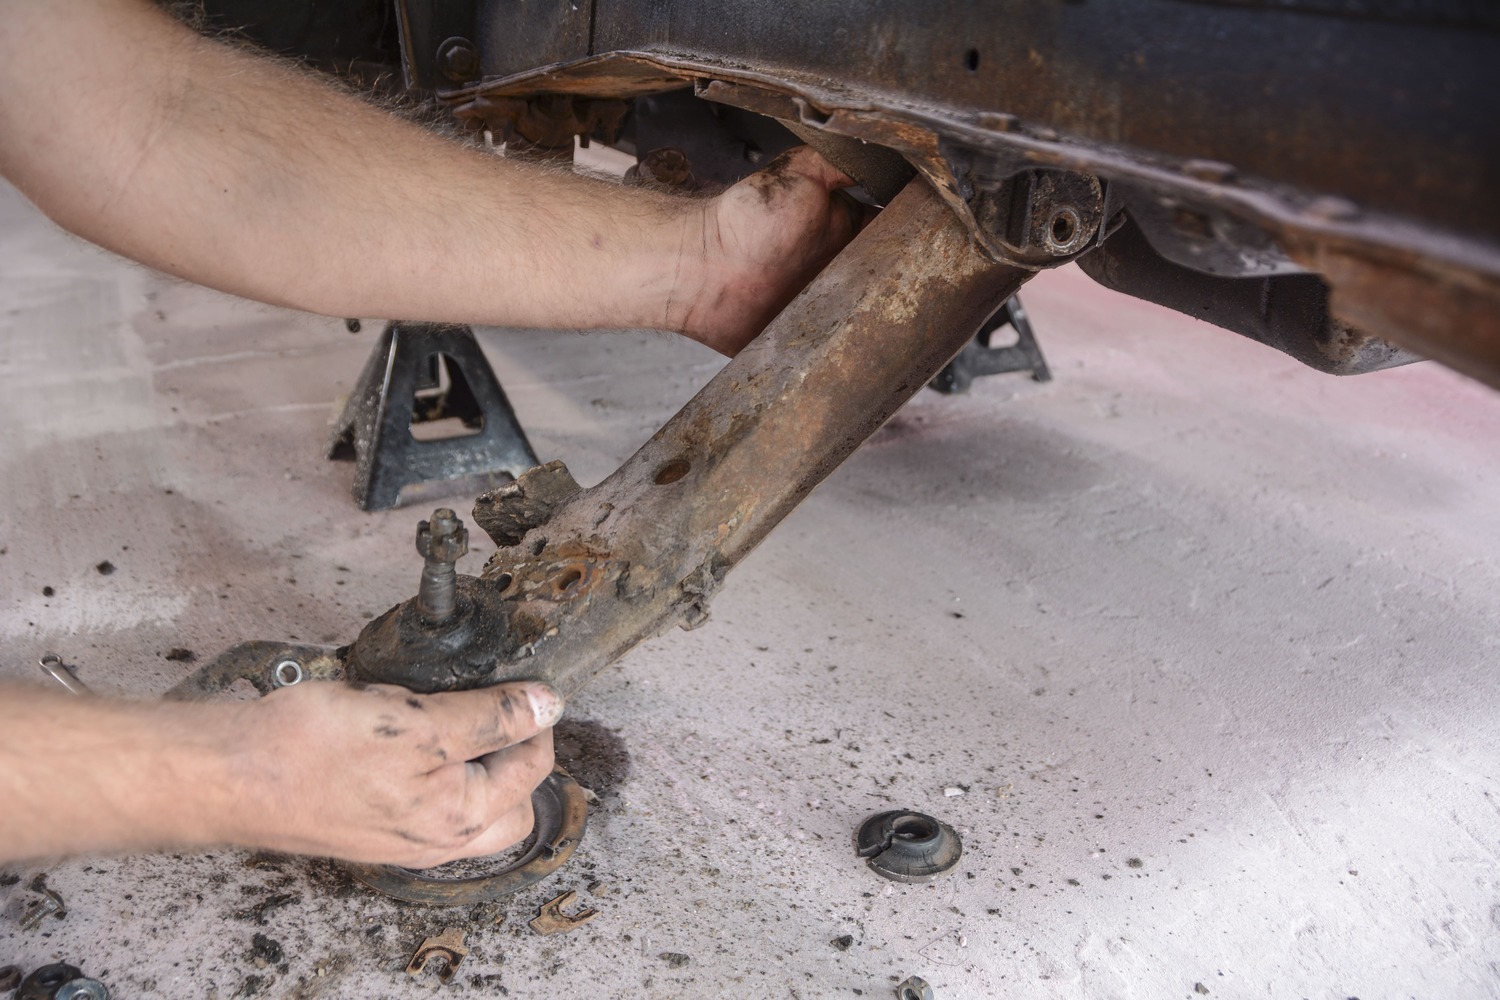
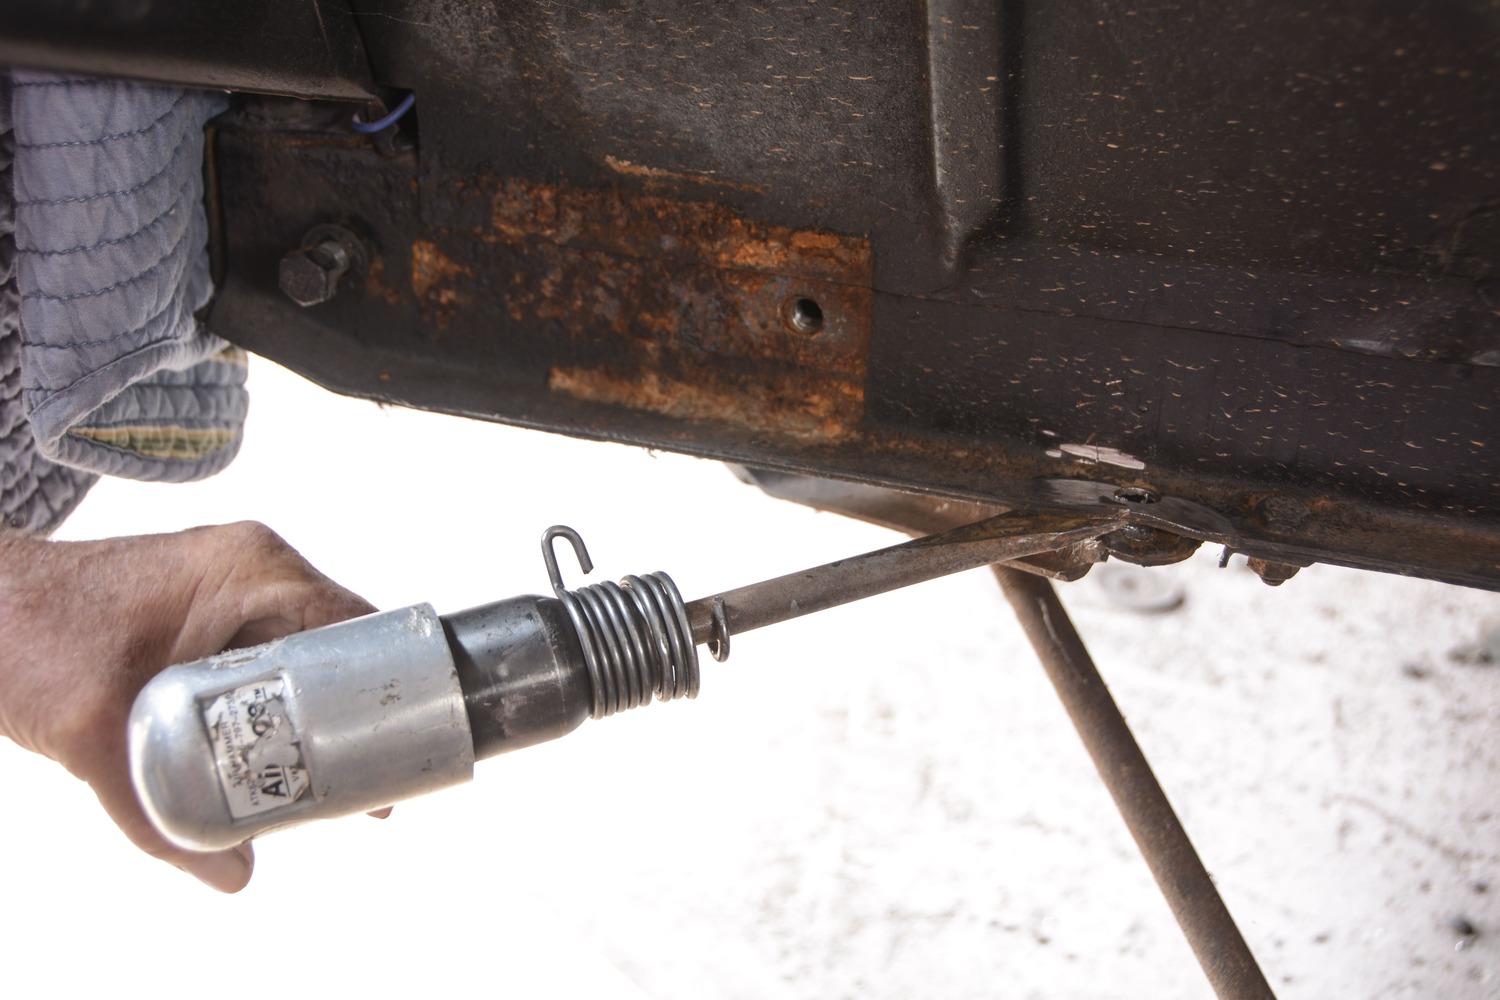
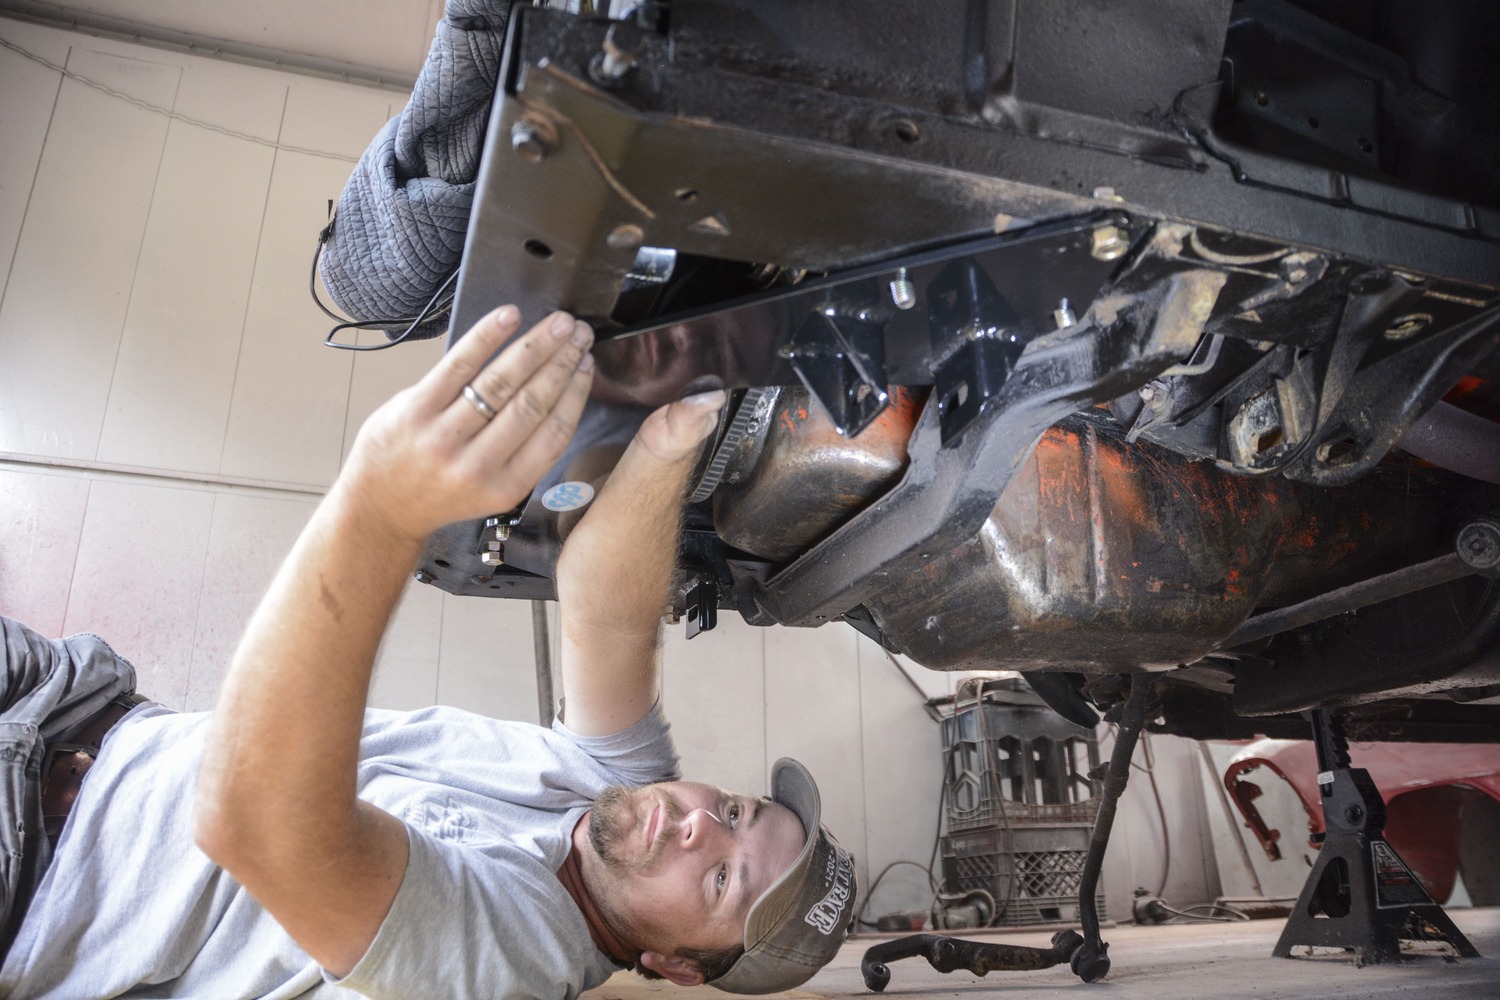
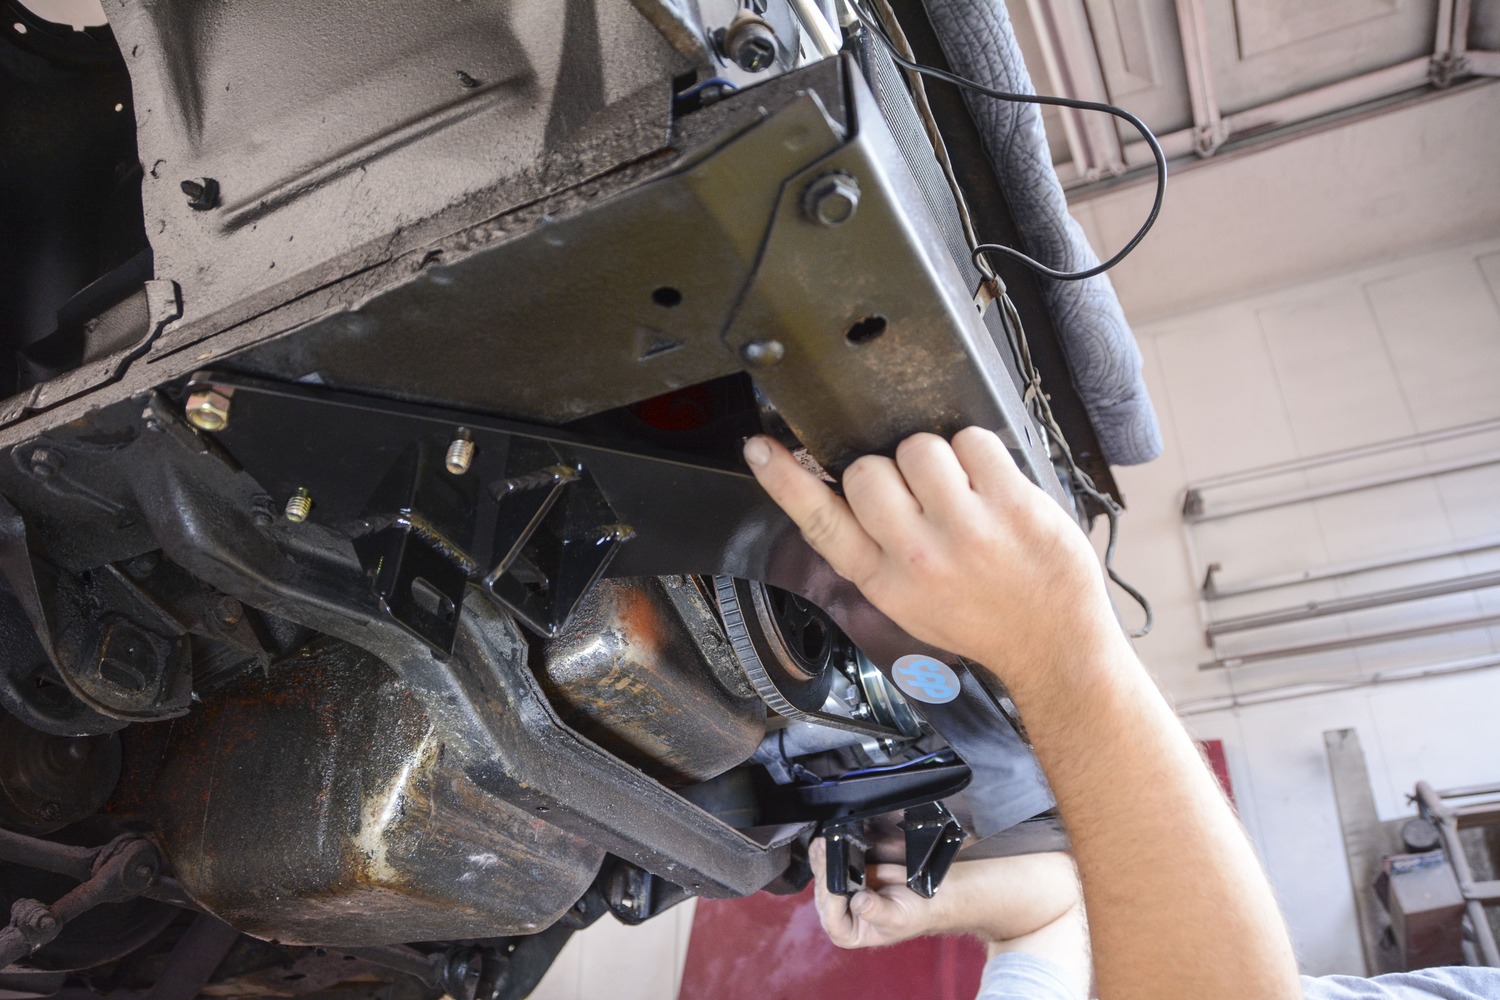
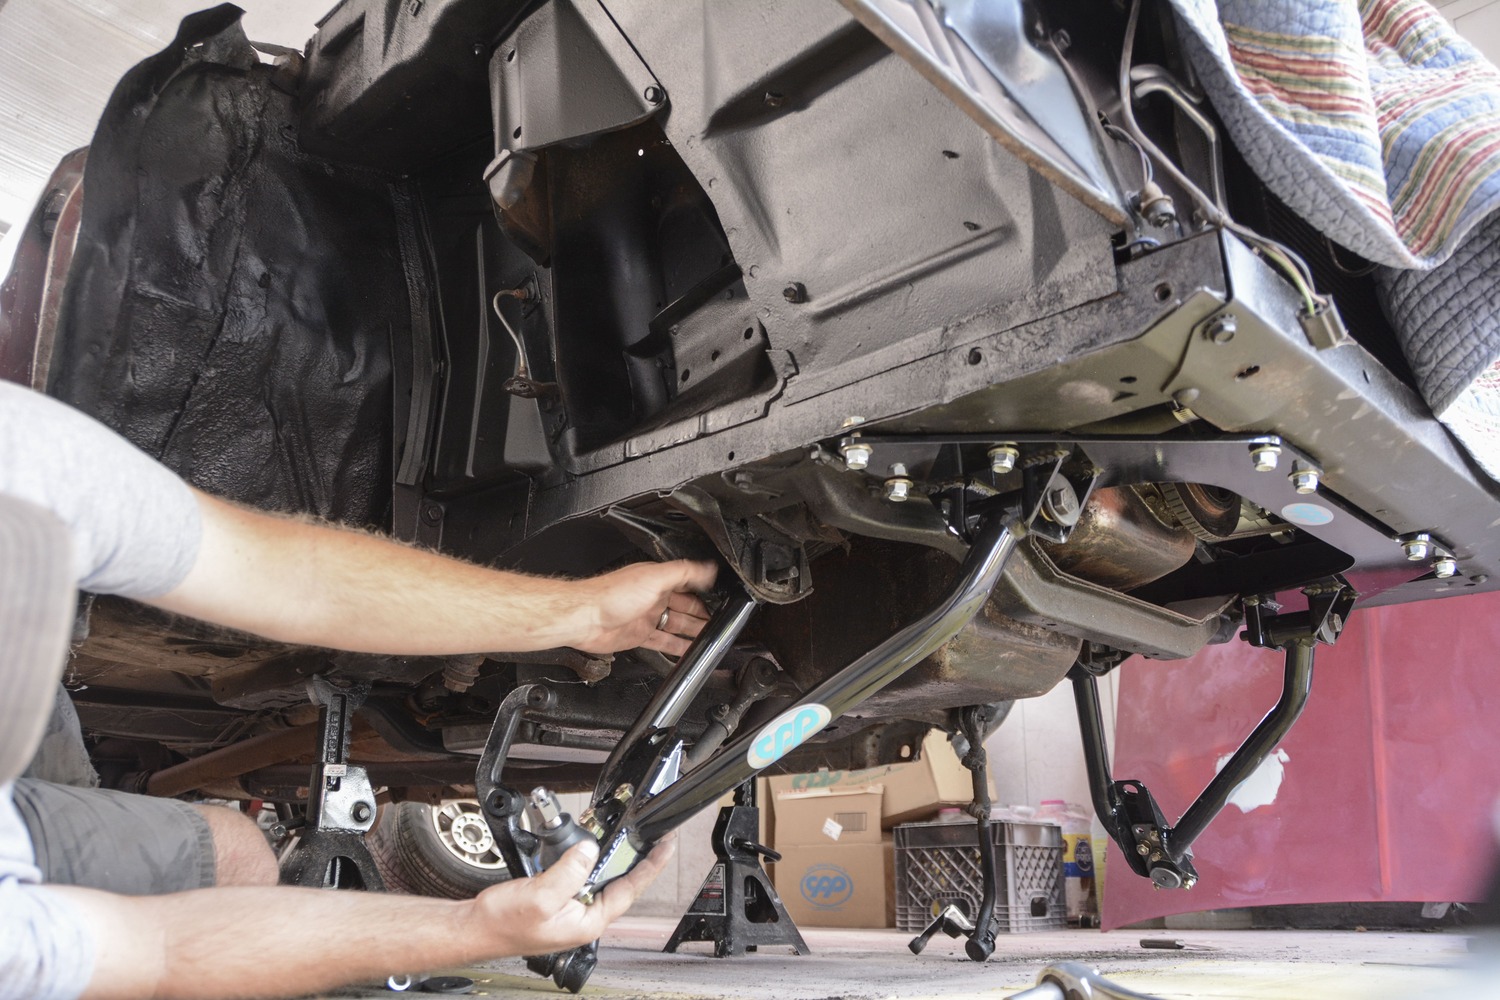
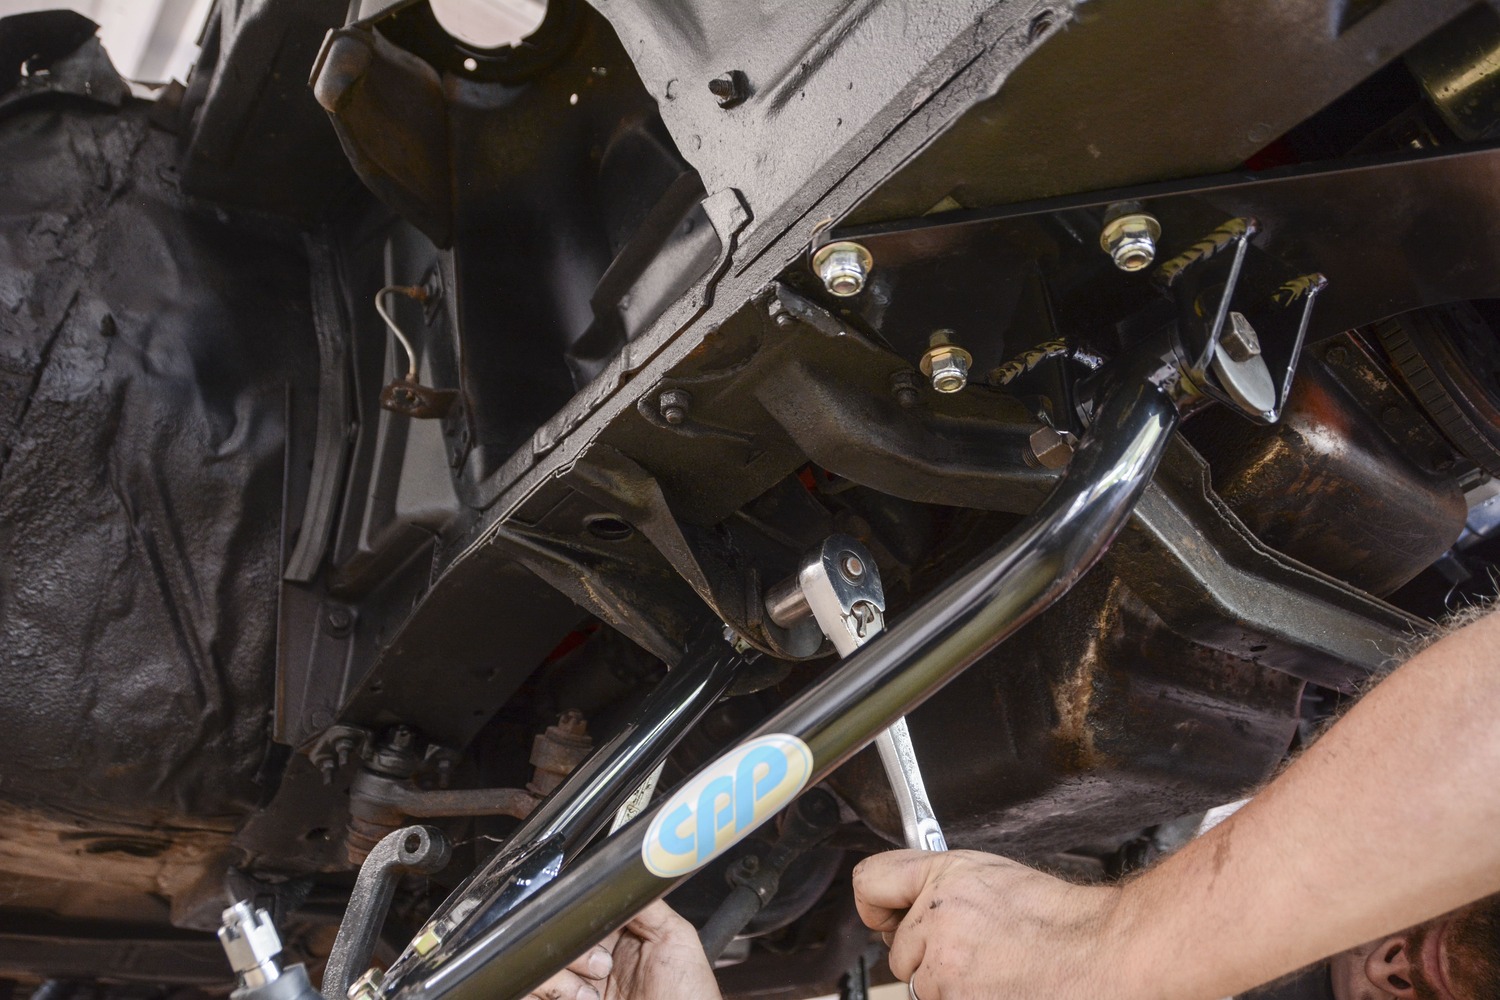
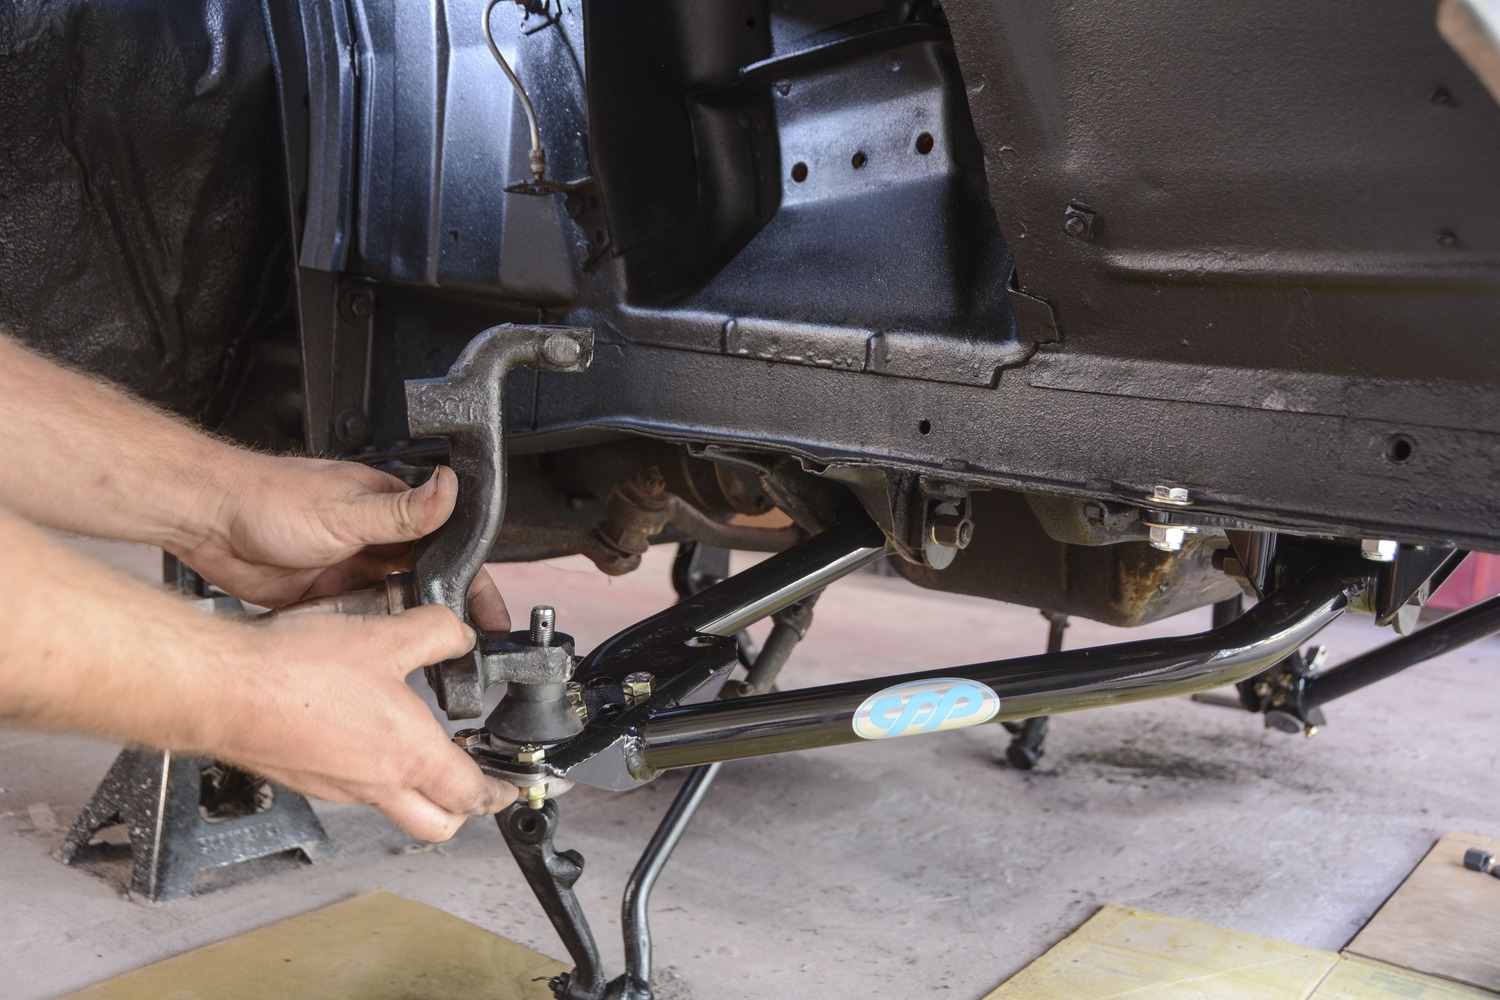
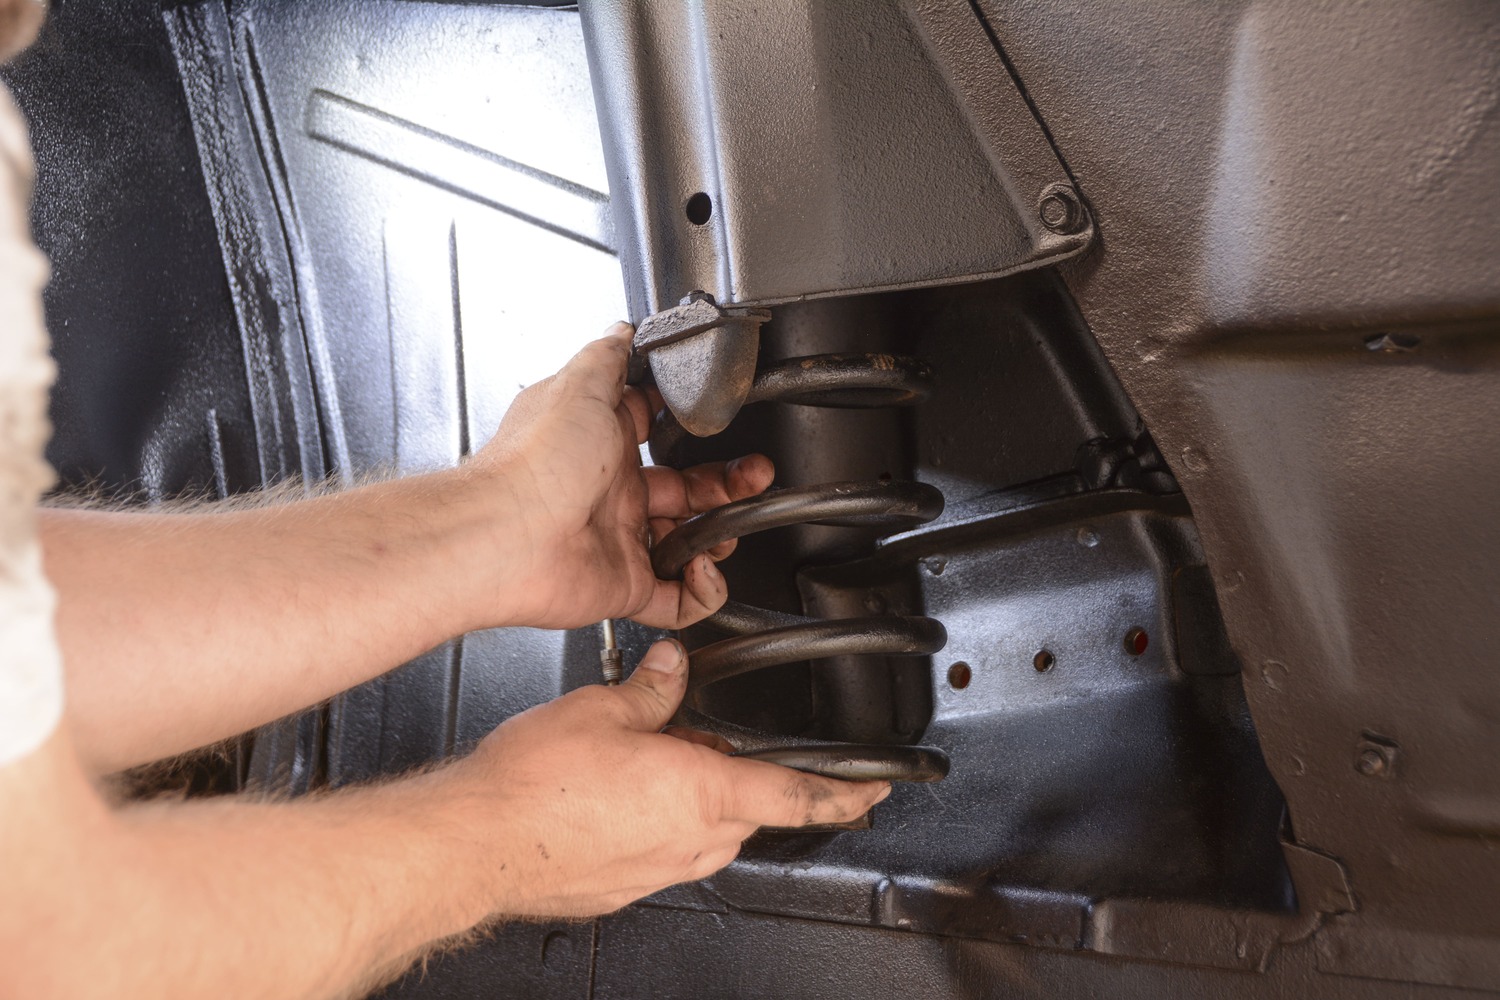
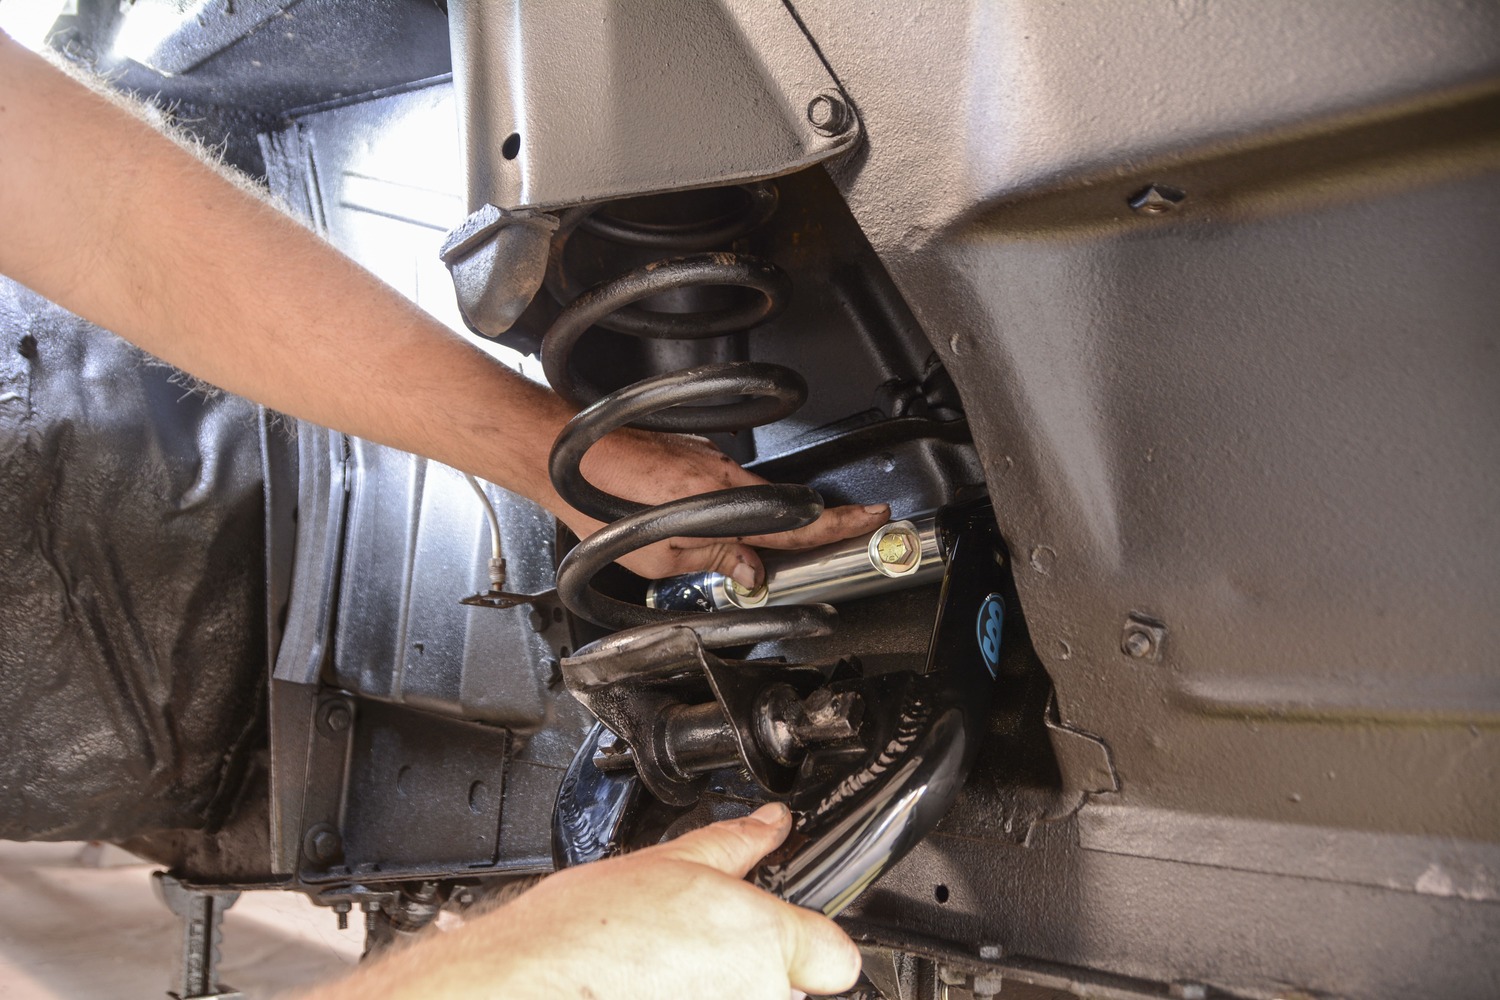
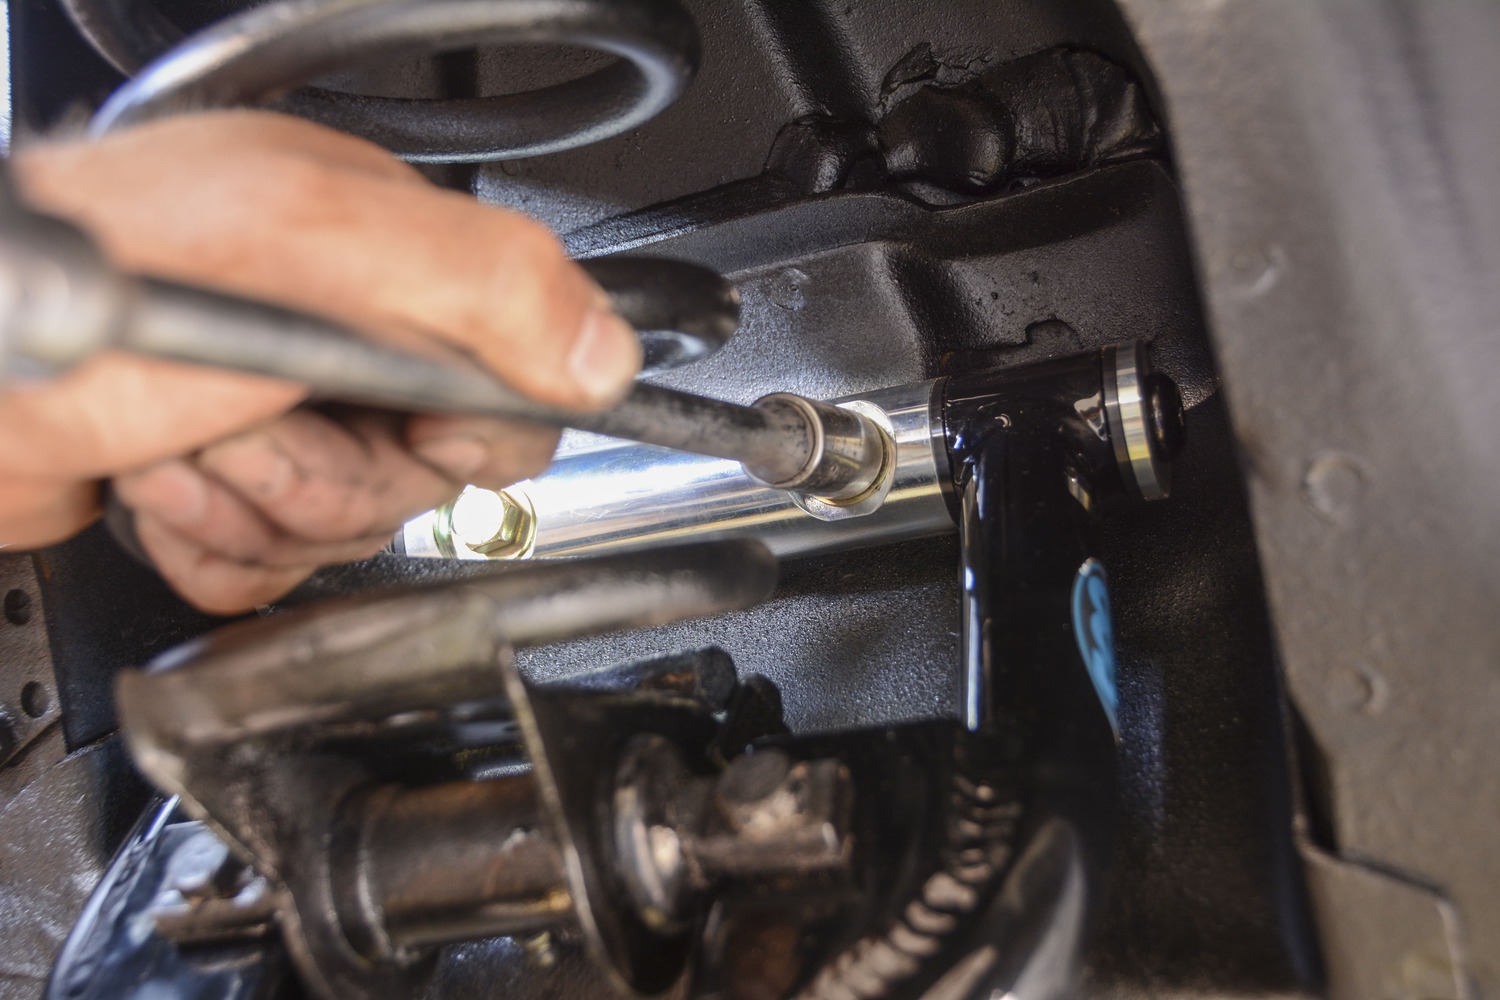
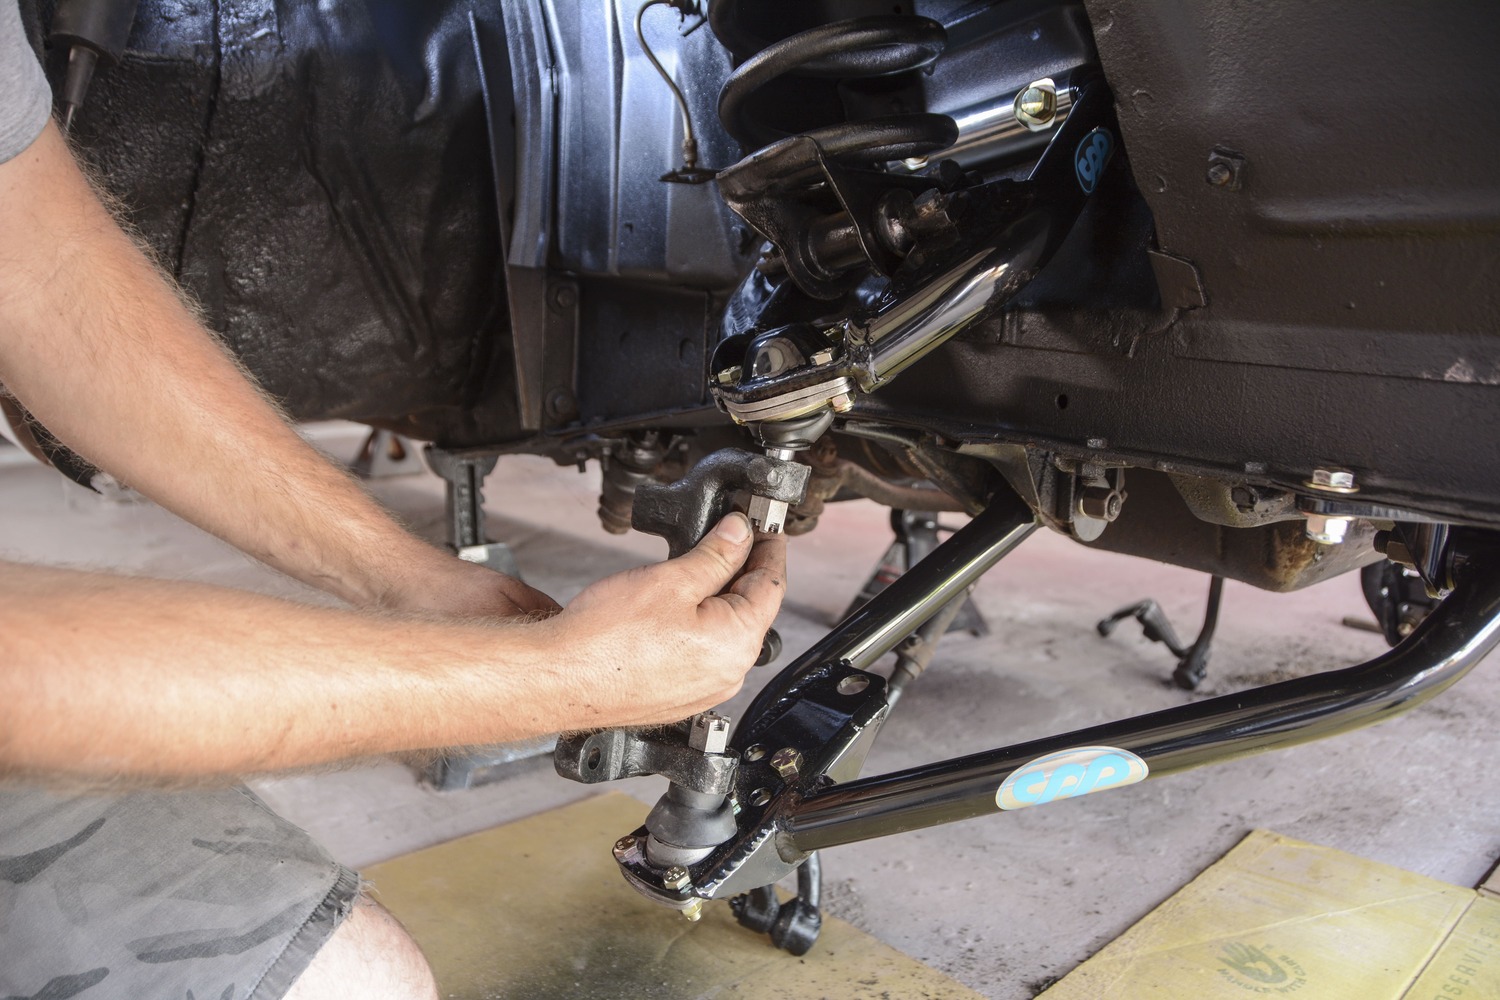
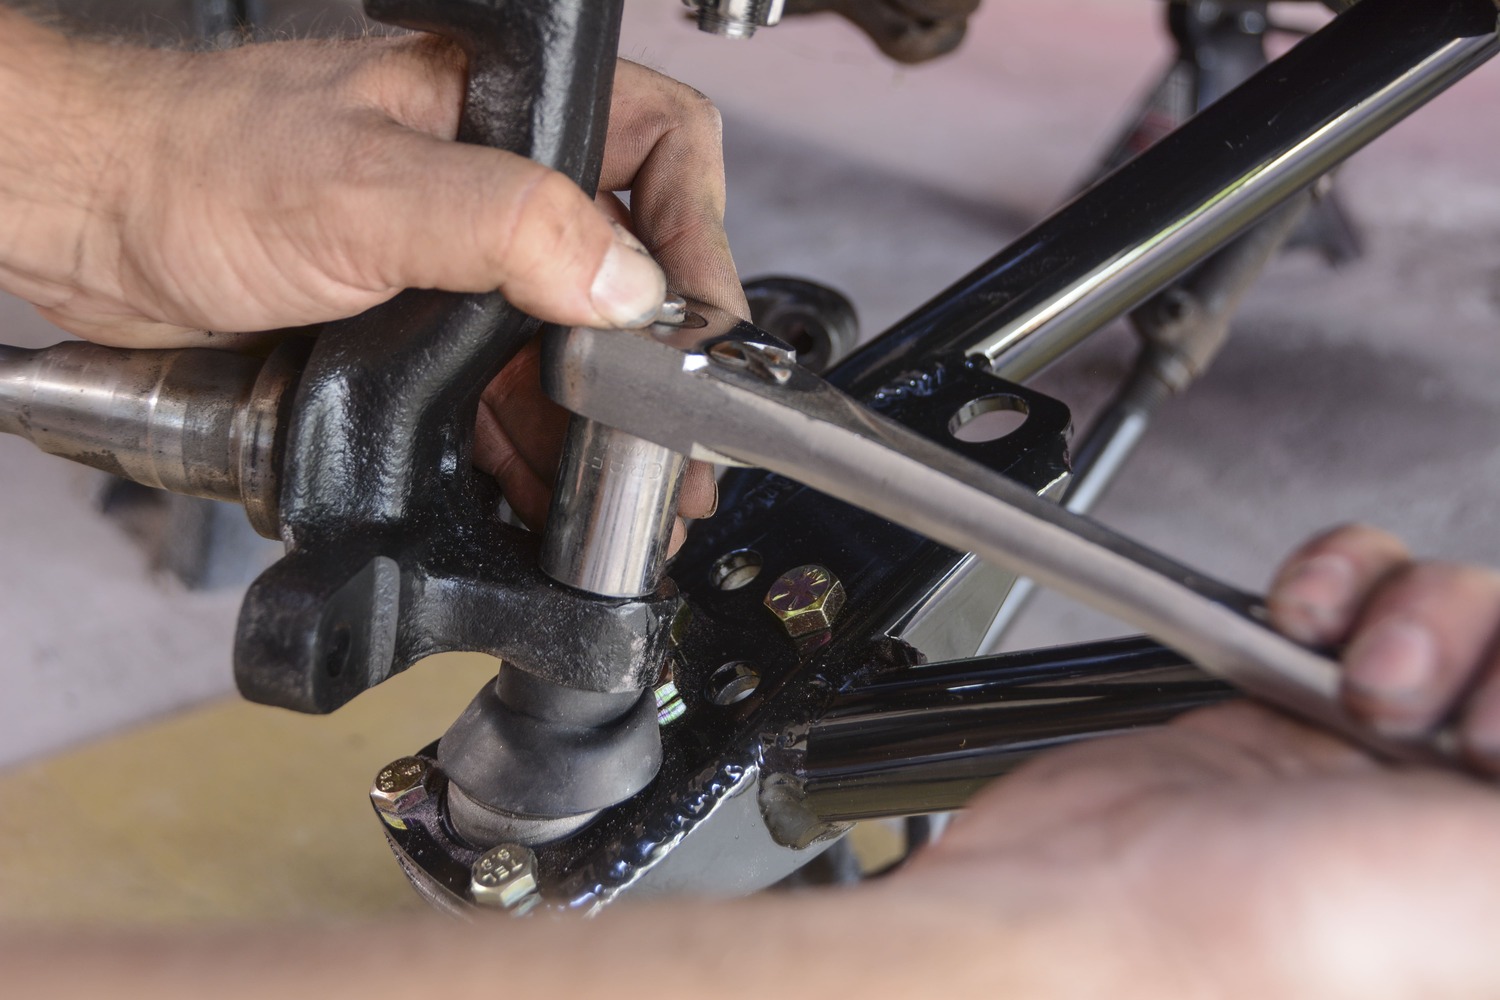
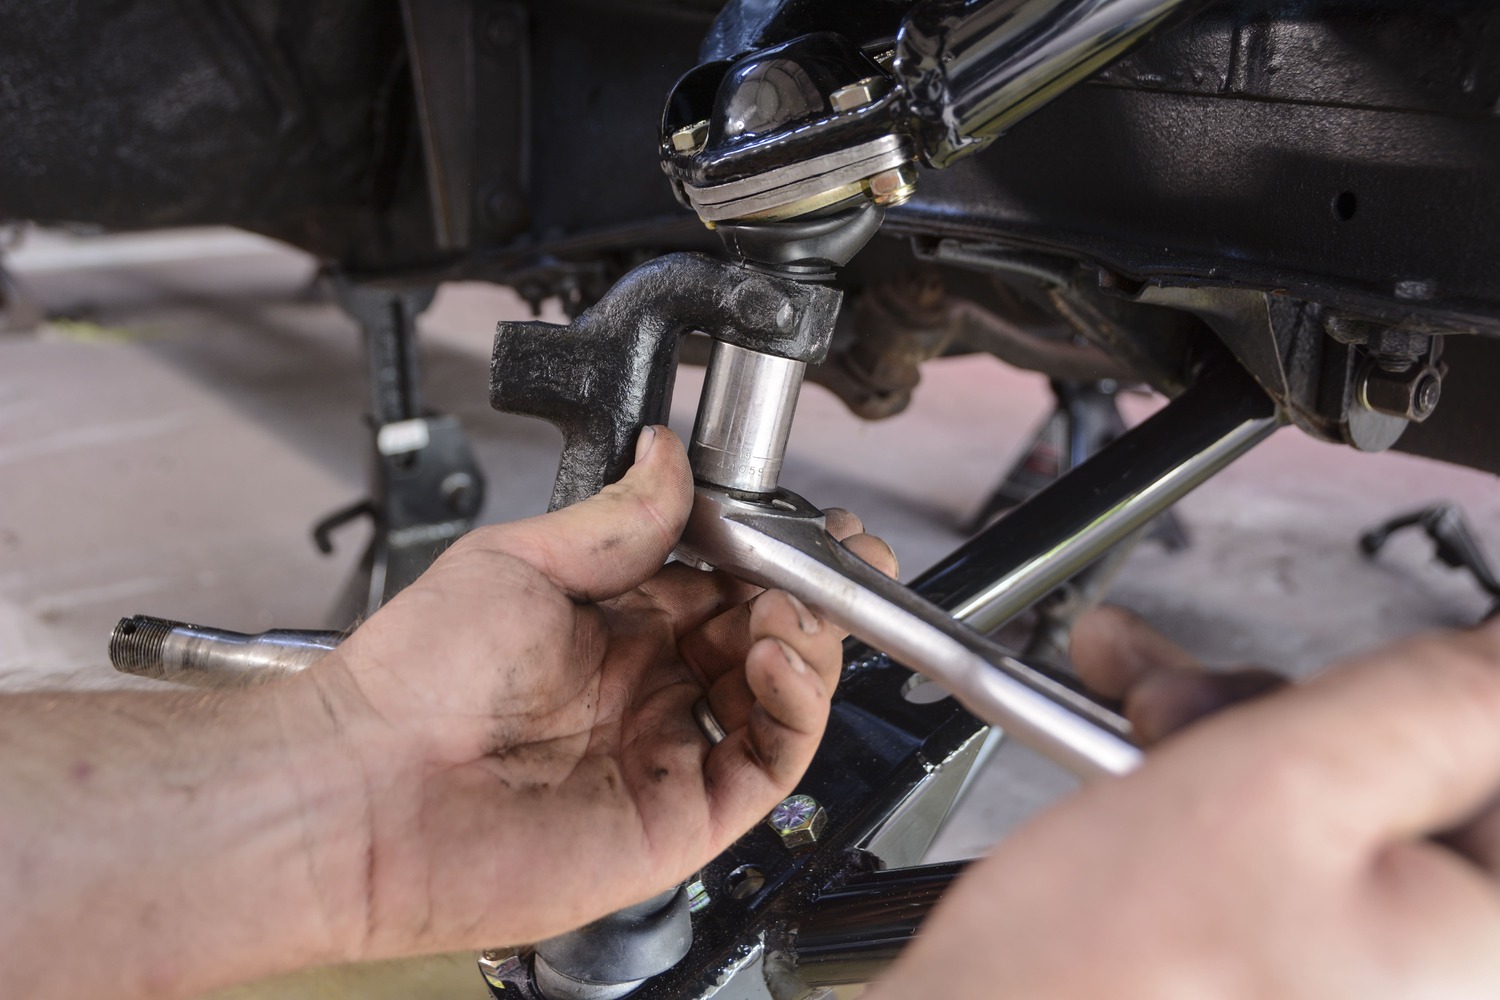
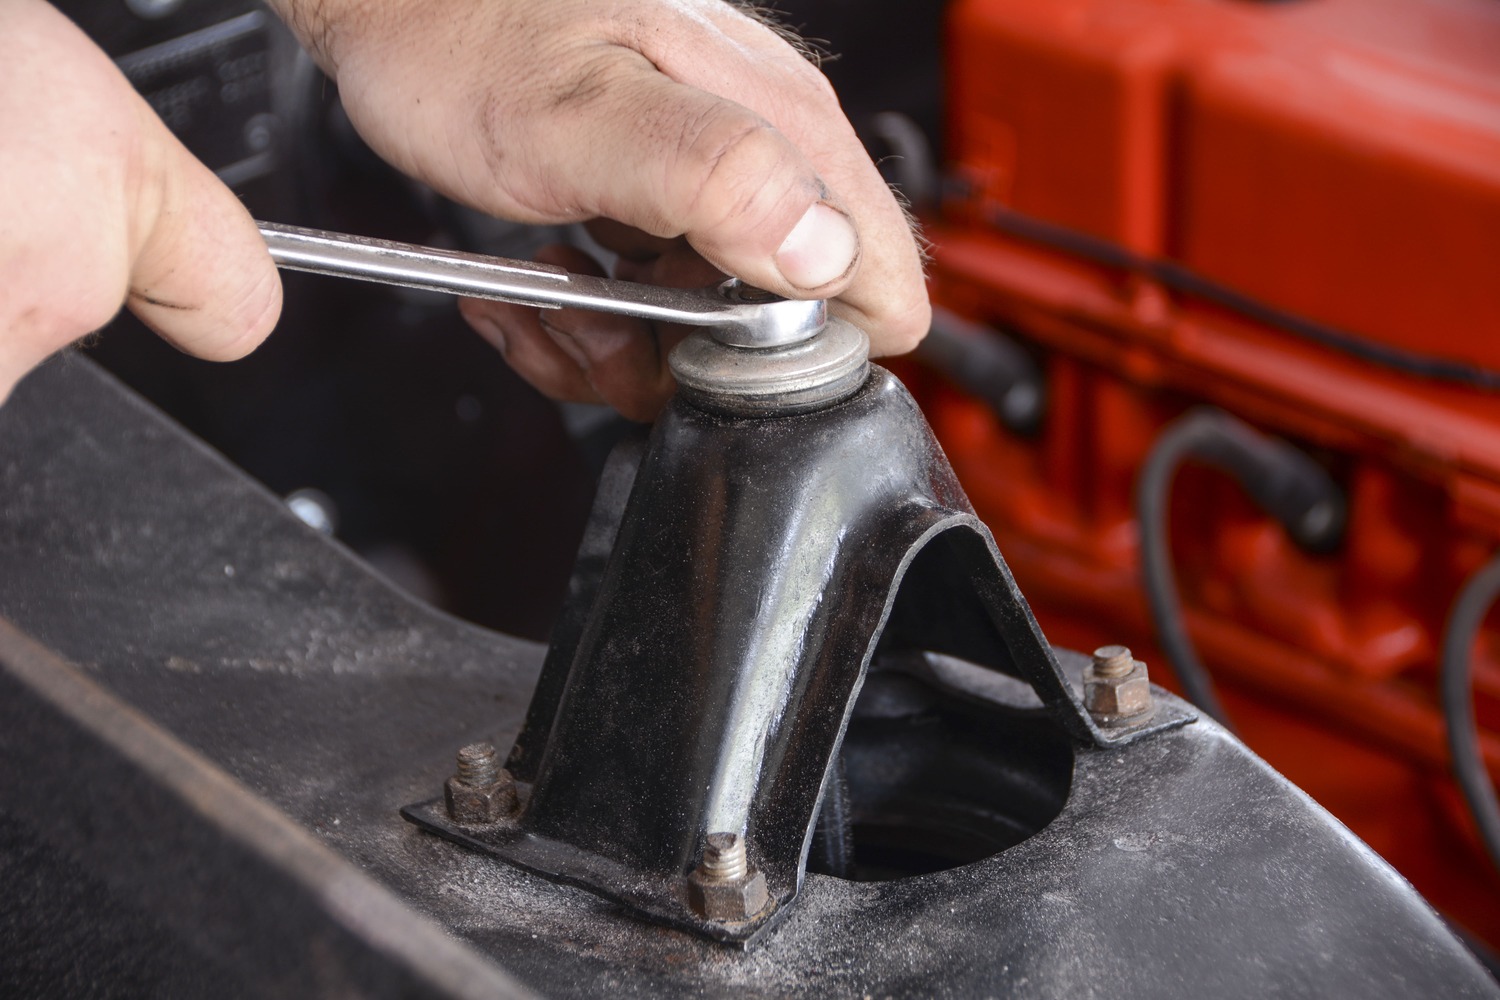
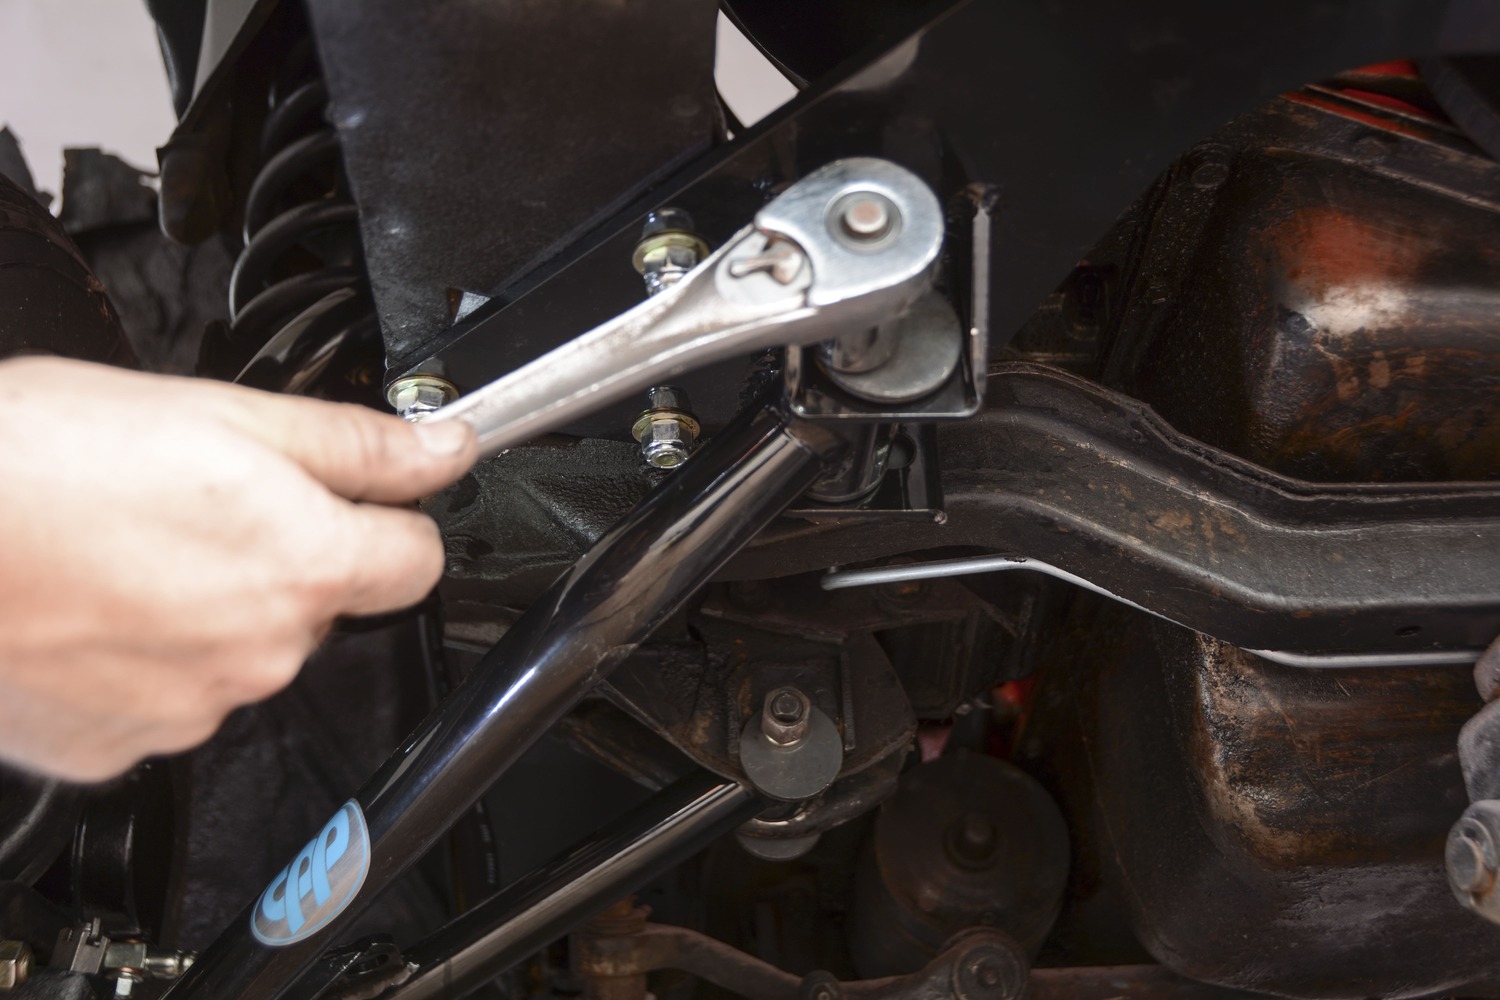
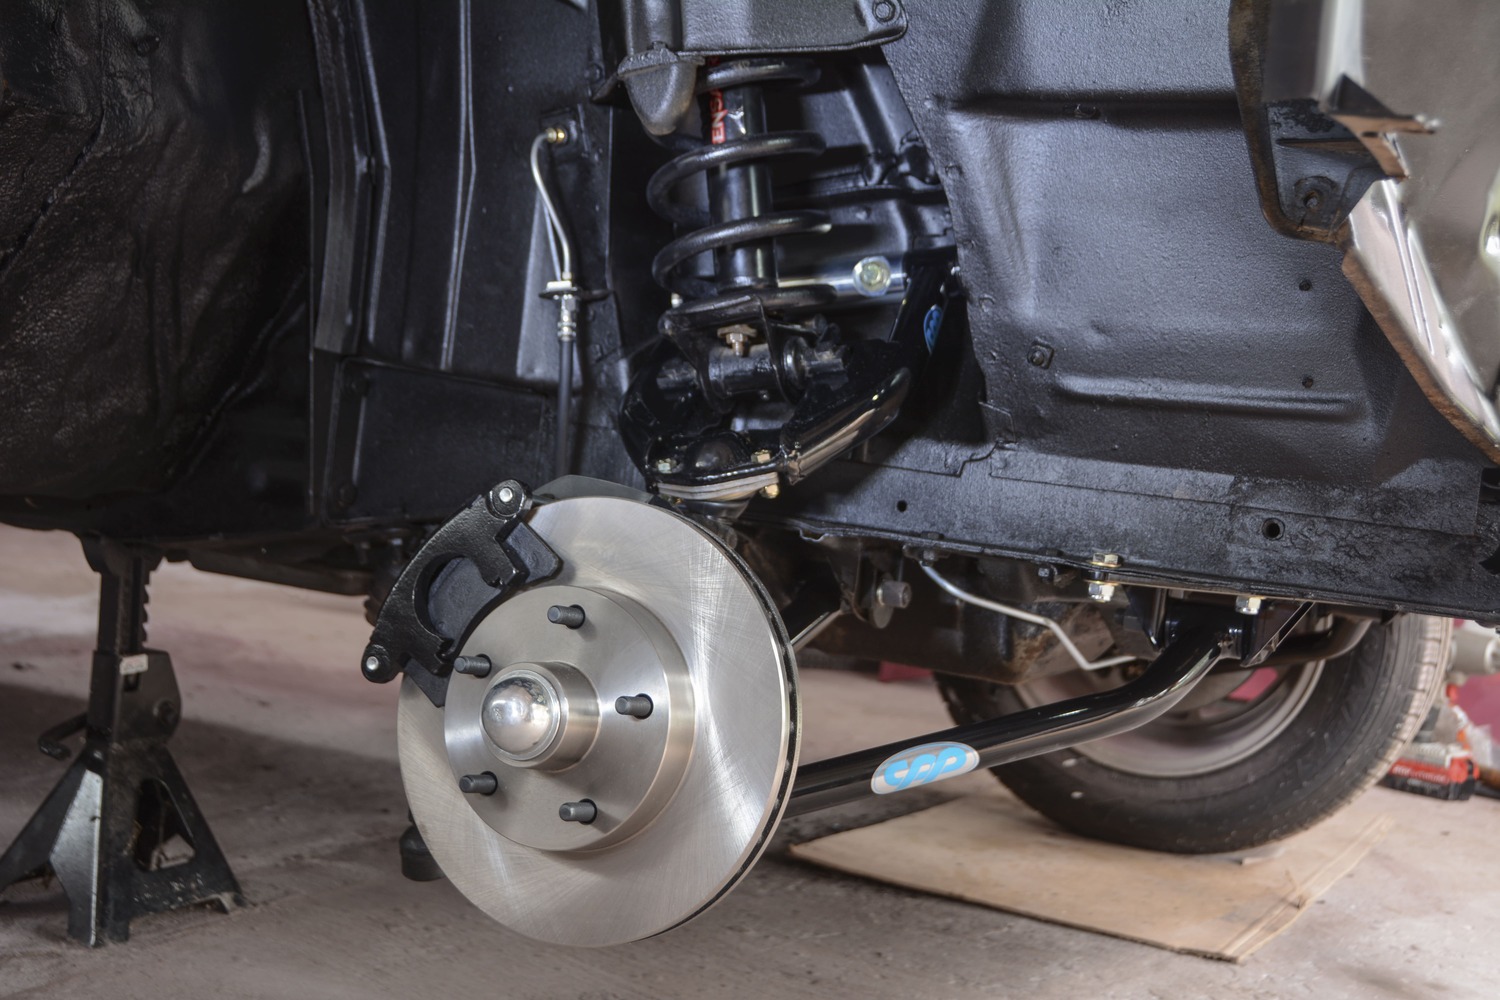
After the large nut is removed, we can dispose of the strut rods. Most of the Chevy II’s bad handling can be attributed to the rotten bushing at the front of this rod, which allows the lower control arm to move around under a load.A mini sledgehammer and a fork are typically necessary to break the ball joint loose from the spindle. Always leave the nut loosely installed to keep the suspension contained. Then, once it’s broken loose, you can put a jack under the control arm to carefully remove the nut and lower the arm.The lower control arm is held in place with a single bolt and nut. The upper control arm is attached with two studs and nuts, which can be removed from inside the engine bay. Finally, the nut that holds the upper shock mount in place can be removed to drop the spring, shock, and upper control arm out of the car.Although this step is covered in only one photograph, it’s the most time-consuming portion of the install. In order to install the CPP MINI Sub-Frame kit, we must remove the rivets that hold the strut rod brackets to the framerails. An air chisel works well, but you can also drill out the original rivets.We’re using CPP’s 6267TCA-KB MINI Sub-Frame kit, which includes tubular lower control arms and this specially designed mounting plate. Made from 1/4-inch-thick steel, the plate offers a firm mounting point for the new design tubular control arms, which eliminates the strut rods.After flattening out the areas where we chiseled the rivets out, we test-fit the MINI Sub-Frame plate and ensured proper bolt alignment. The kit comes complete with Grade 8 bolts, nuts, and washers, which utilize the existing holes that were once occupied by rivets.Now that we see that it’s a perfect fit, we can install the 10 bolts and nuts. Keep in mind that some cars require the removal of the radiator to access the forward bolts for the plate crossmember.Before we completely tighten the heavy plate crossmember, we decided to install the lower control arms. We did this because the front portion of the control arm attaches to the new CPP crossmember, and the rear portion of the control arm attaches to the original mount, so it needed some wiggle room for proper alignment.Now we can do the final tightening of the MINI Sub-Frame crossmember using the supplied Grade 8 hardware.Next, the lower control arm bolts and nuts are “snugged.” It’s important to wait to fully tighten the lower control arm hardware until the car has weight on it, so the bushing isn’t pre-loaded when the car is lowered off the jack.We cleaned and repainted the original spindle and installed it on the lower control arm, which was pre-assembled with a high-quality replacement ’62-67 lower ball joint. We loosely installed the new castle nut that was supplied in the kit.The CPP 6267TCA-UKB tubular upper control arms are an easy install and the perfect upgrade for this MINI Sub-Frame kit. The arms are heavily built with specially designed cross shafts and they’re powdercoated for durability.We’re reusing the original coil springs, perches, and spring retainer plates but all of these items are available brand new at CPP. This is also a good opportunity to upgrade to CPP’s bolt-in coilover system to really tune this car’s handling.Reassembly is often a two-man job, but the first step is positioning the spring into its pocket. Once it is indexed properly in the retainer plate, we can install the control arm.Notice the spring perch is already bolted securely to the upper control arm. There is tension on this control arm assembly with the spring in place, so you may need a jack or a helping hand to push the control arm bolts through the holes to secure the assembly.A socket with a long extension is used to reach the upper control arm bolt. The locking nut inside the engine bay is held with a wrench while we snug these bolts with an impact.The upper control arm will be completely bottomed out because of the spring tension, so you’ll need to maneuver the lower control arm and ball joints to fit properly. The kit comes with grease fittings, cotter pins, and extra-thick castle nuts.We tighten the lower ball joint and then give it a couple more bumps to line up the hole for the cotter pin.The same goes for the upper ball joint. Tighten the supplied castle nut and then install the cotter pin.Now, the shock can be dropped in from the top side and reinstalled using the original towers. The bottom of the shock attaches to the spring perch with the two original bolts.With all the parts installed, we can test-fit the front tires and wheels to give us a better idea of our suspension alignment. We remove the jackstands and lower the car down to the ground with the floor jack.The CPP MINI Sub-Frame kit comes with eccentric washers, which allow for vastly improved adjustment compared to the original lower control arm. The main function of these washers is to adjust caster and camber, but the wide range of adjustment can affect the toe, so it’s important to have the car professionally aligned after you “eyeball” it in the shop.We’re extremely happy with the simplicity of the CPP MINI Sub-Frame kit. The appearance is a huge improvement, and the ride quality is a night and day difference. The car no longer wanders around on the road and there is huge potential for even more upgrades as we continue to tweak this ’66 Chevy II in preparation for road trips and daily driving.
We use cookies to ensure that we give you the best experience on our website. If you continue to use this site we will assume that you are happy with it.