By Ron Covell – Photography By Chris Gray & Elia Daoud
When building a car, decisions are made at every step of the process that affect the look of the finished project. Some cars have a very simple design, while others incorporate so much detail that it can be overwhelming.
It can be challenging to know how much detail to add, so today we’re looking at an example of a 1970 Chevelle built at Roadster Shop. We believe it has just the right amount of detail for this type of hot rod build.
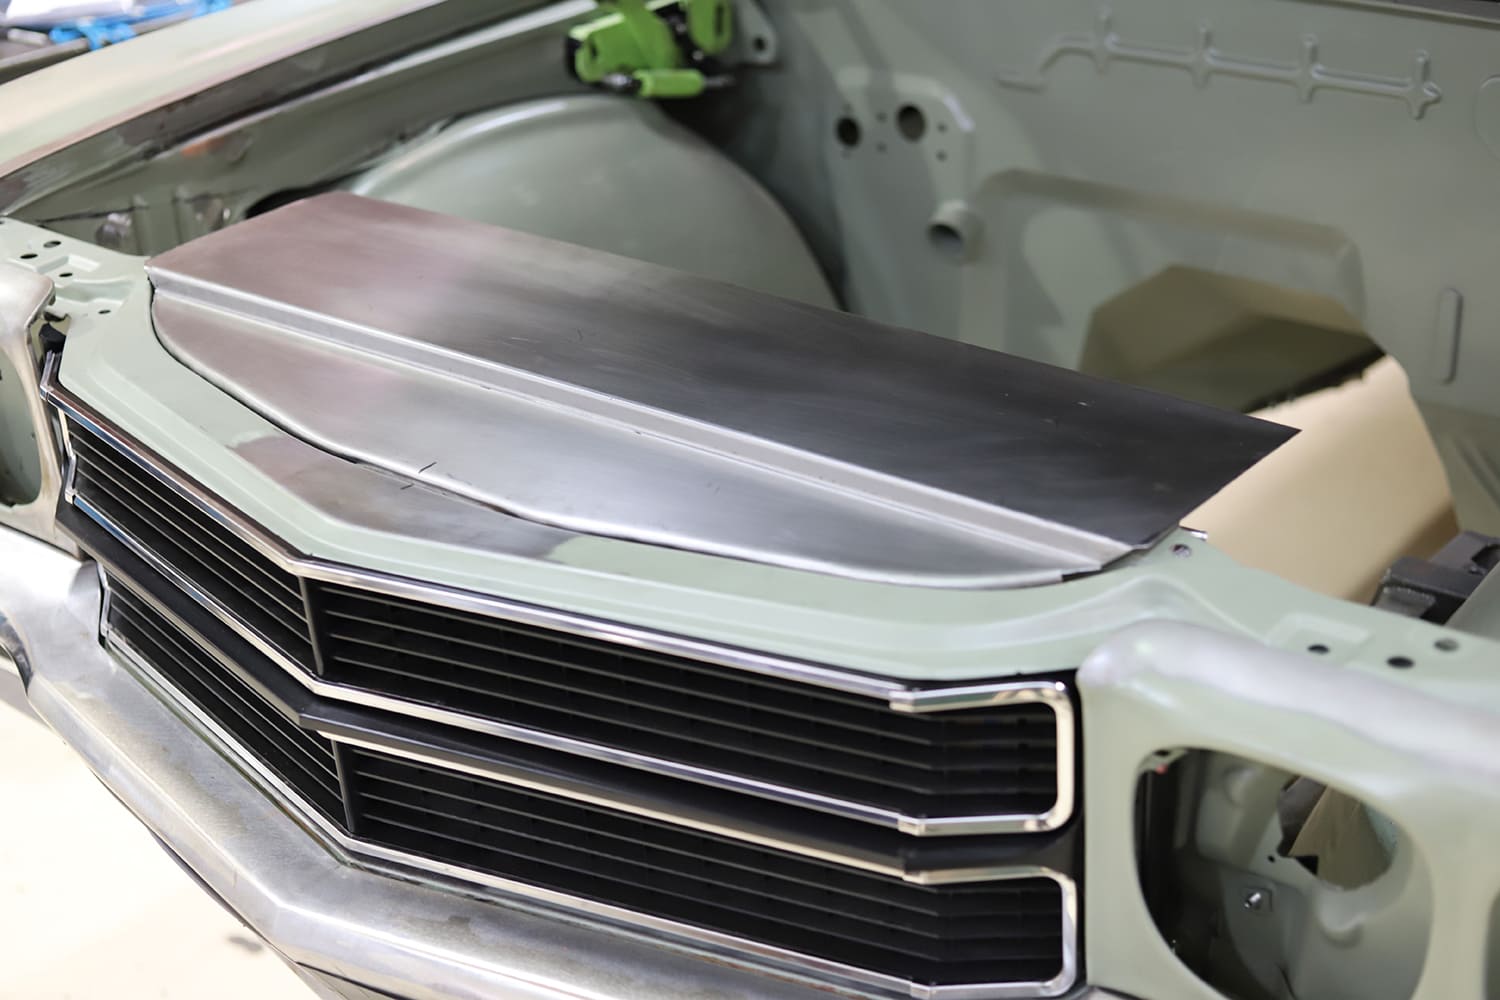
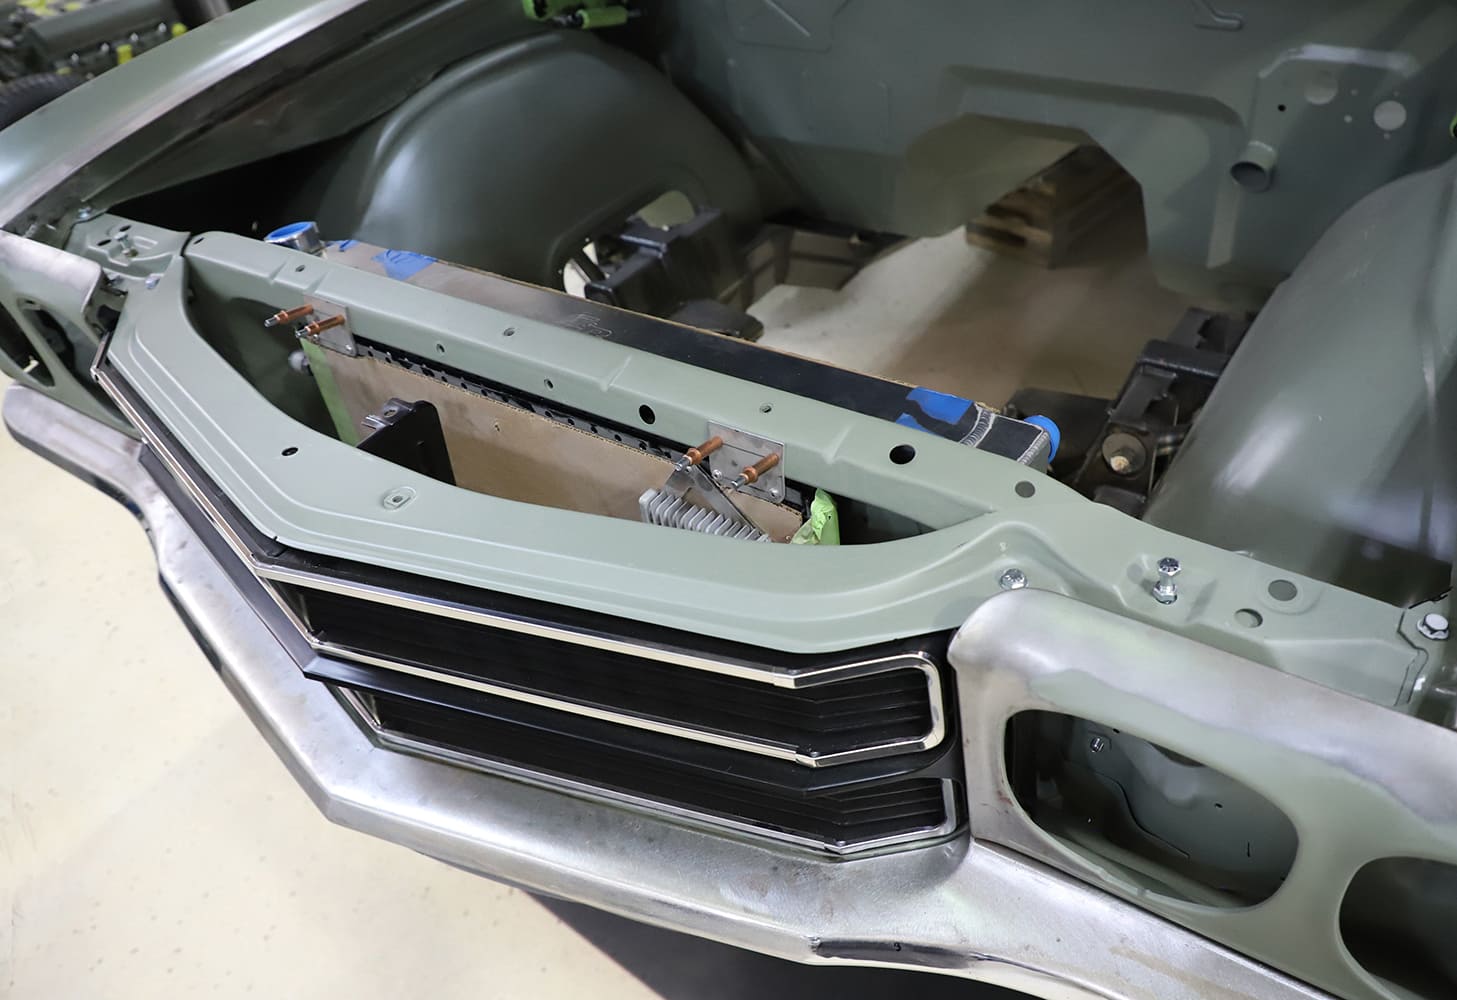
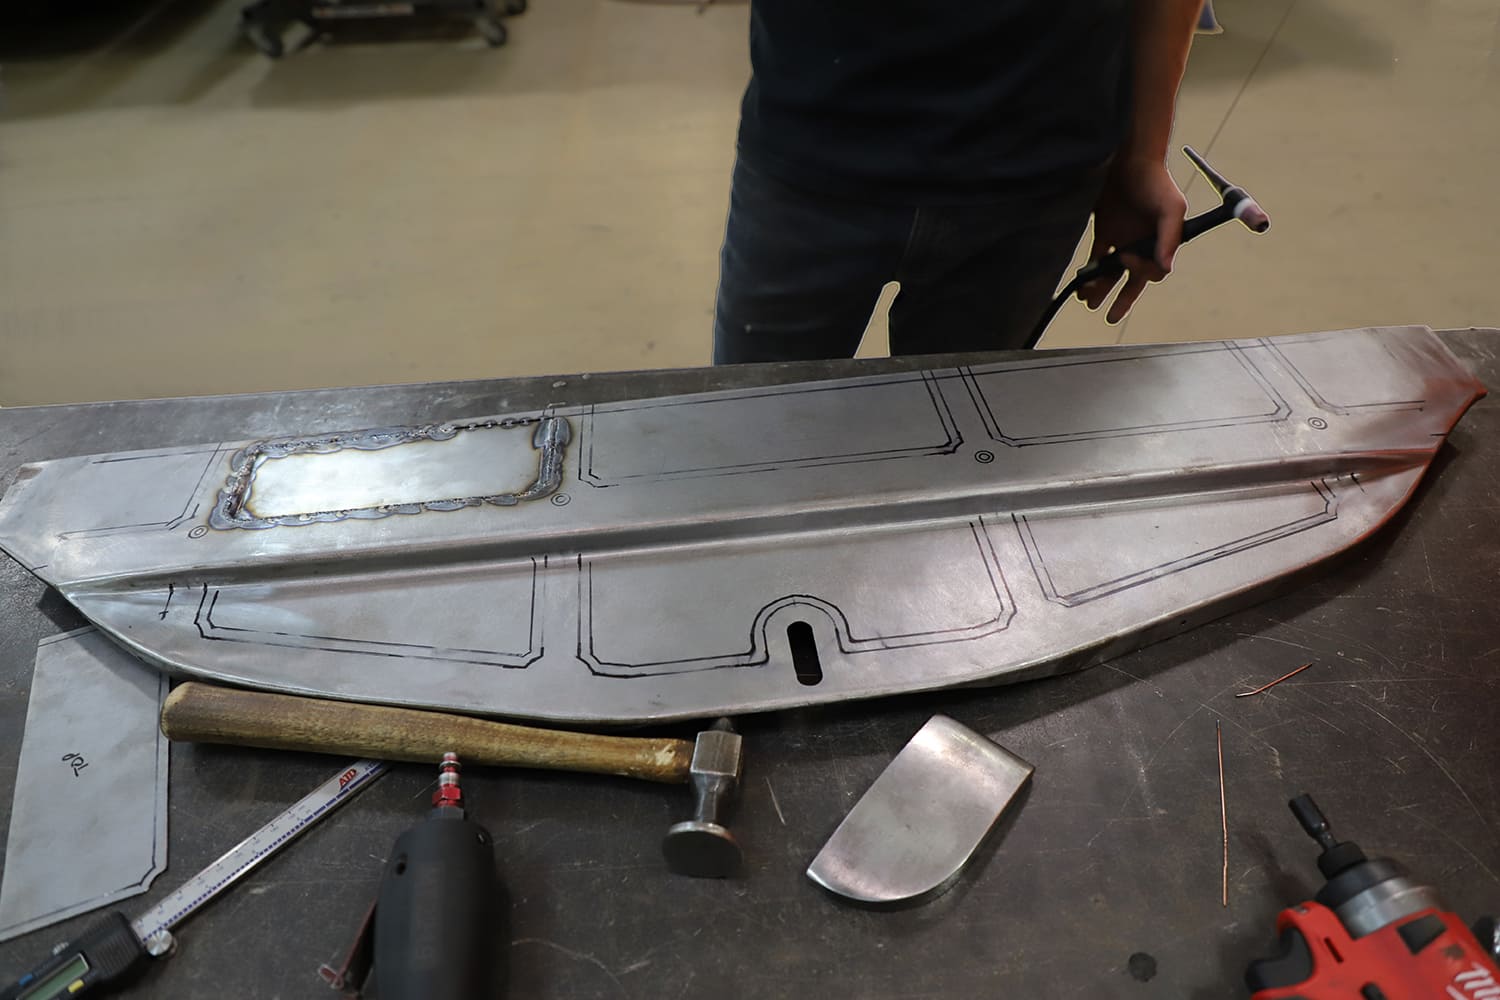
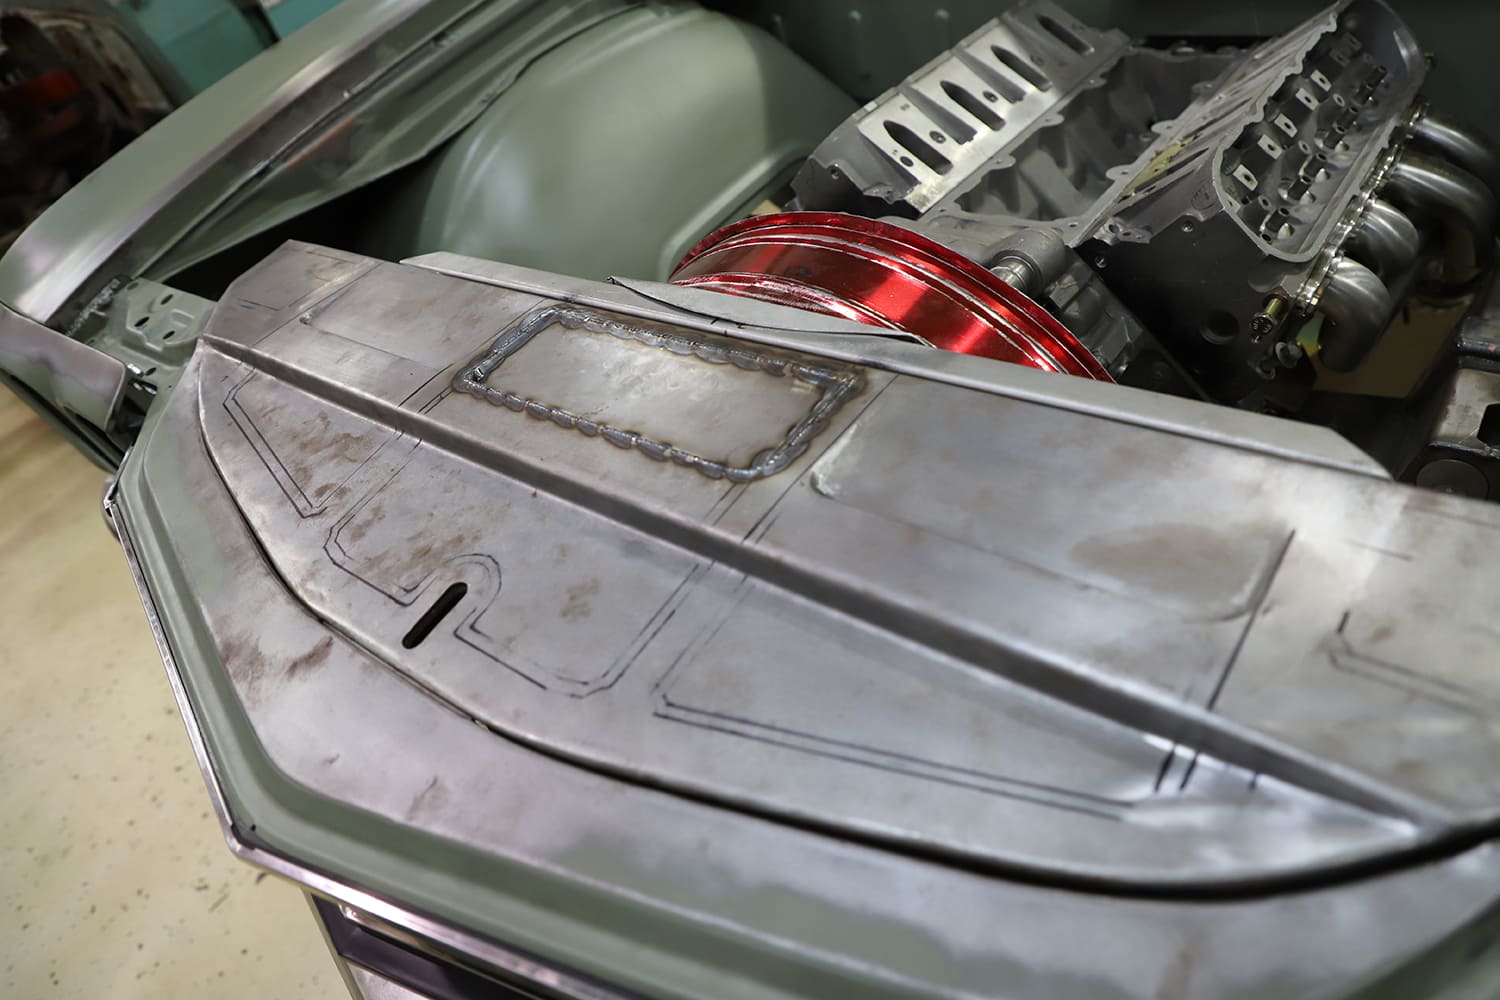
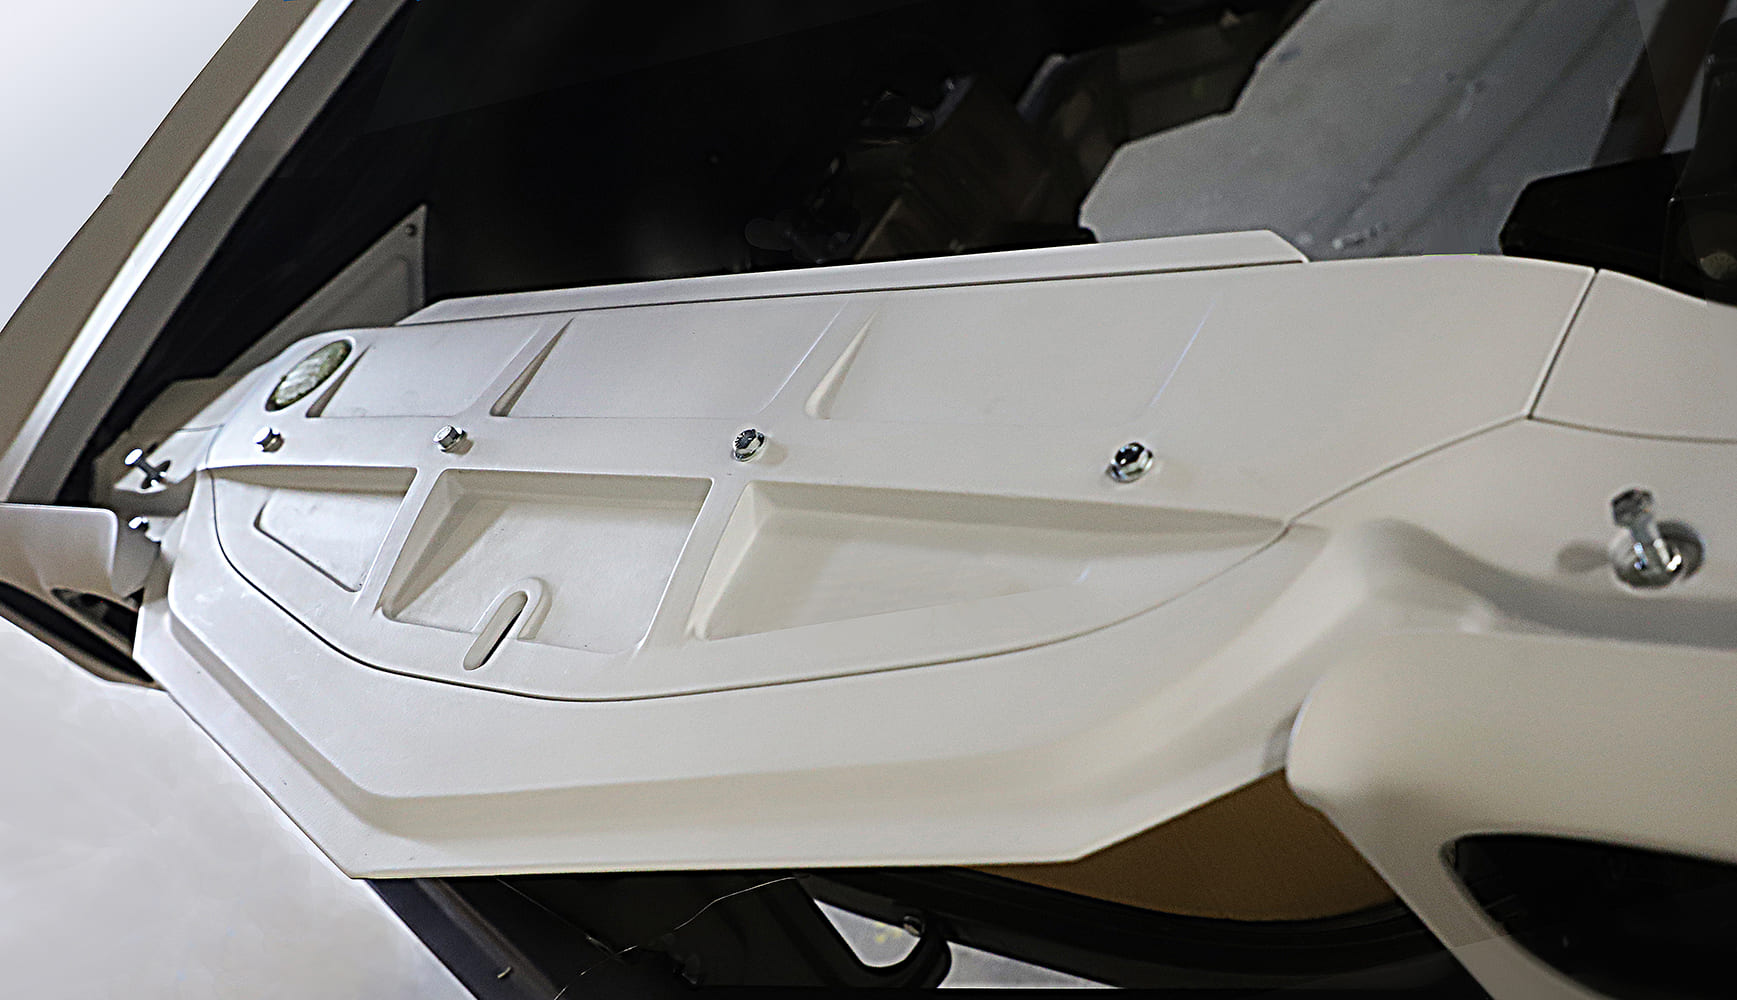
The original Chevelle had a large open area between the grille and the radiator, and when the hood was open, it looked quite utilitarian. The first step in refining this area was to create a simple panel with a single lateral step. Although this was a significant improvement, the Roadster Shop team believed the panel would have a far more interesting look if a series of shallow indentations were added, giving the panel a “ribbed” appearance. While this kind of fabrication requires time and skill to execute, we think you’ll appreciate how this treatment transformed the panel into a real accent piece—one of the first things to catch your eye when the hood is opened.

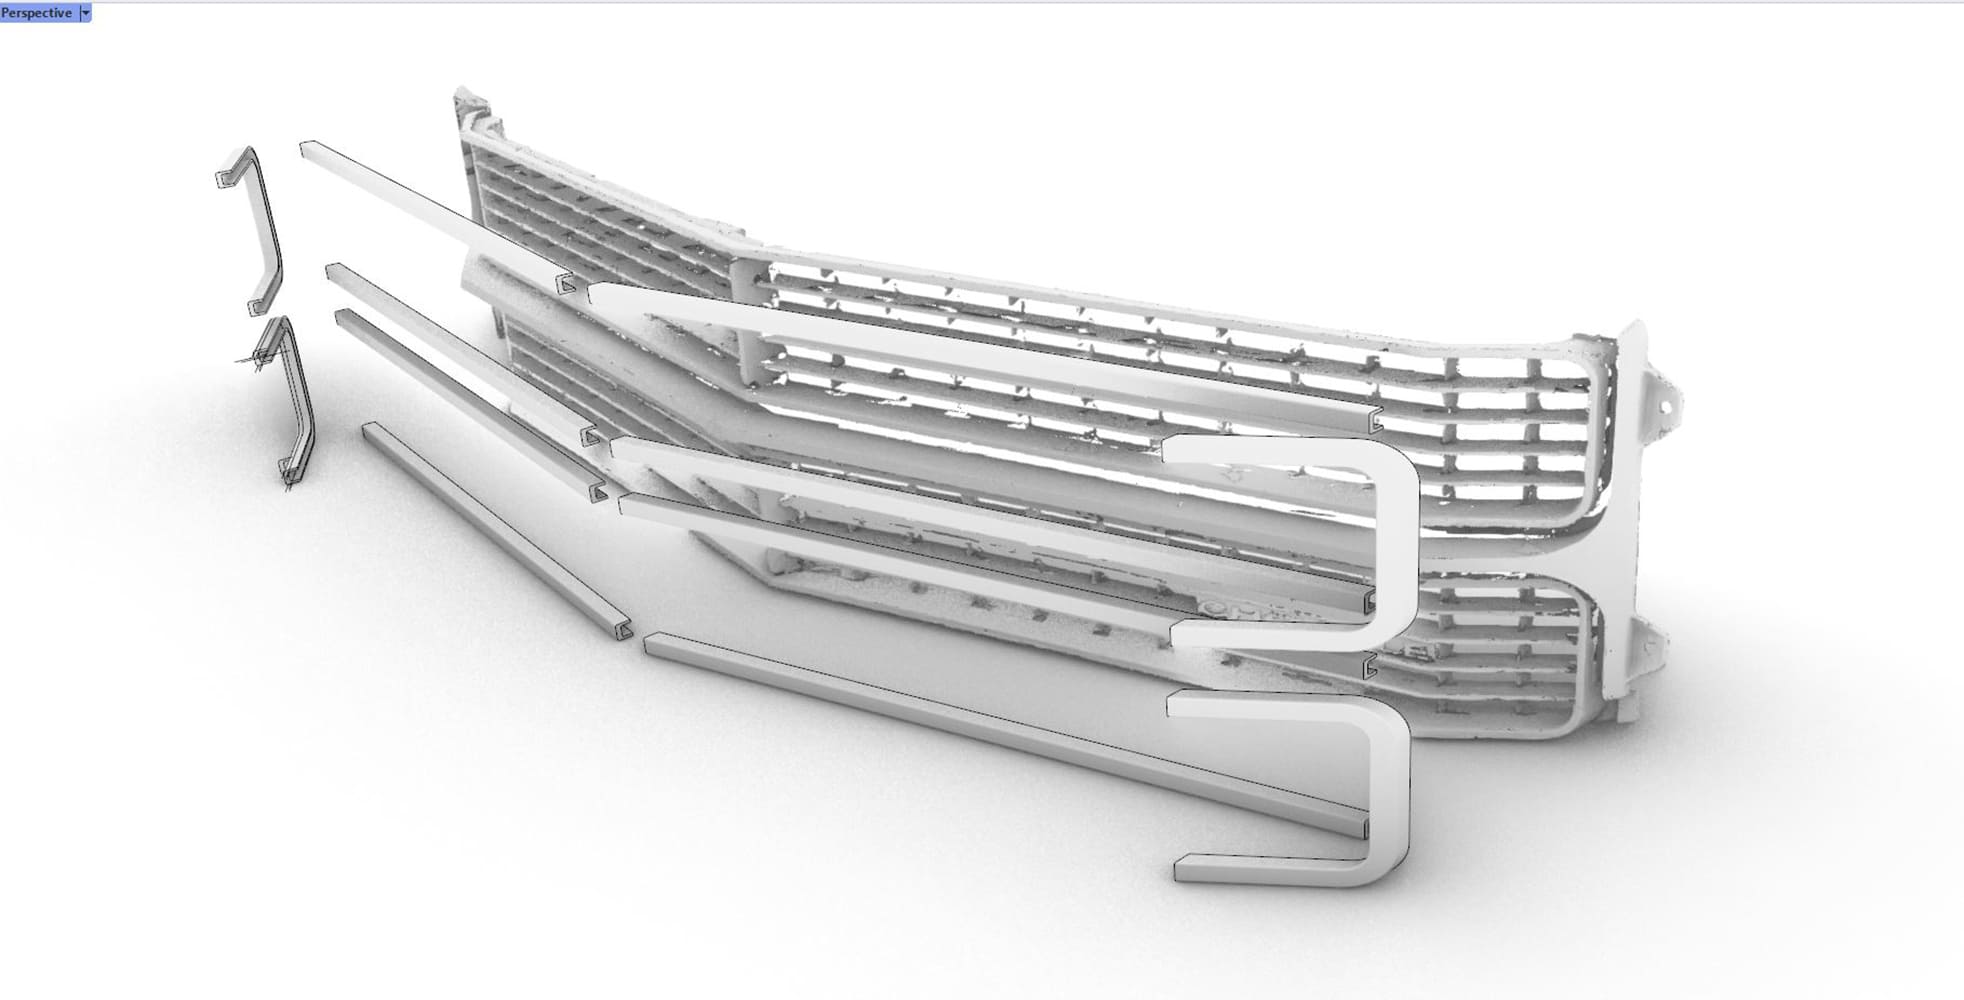
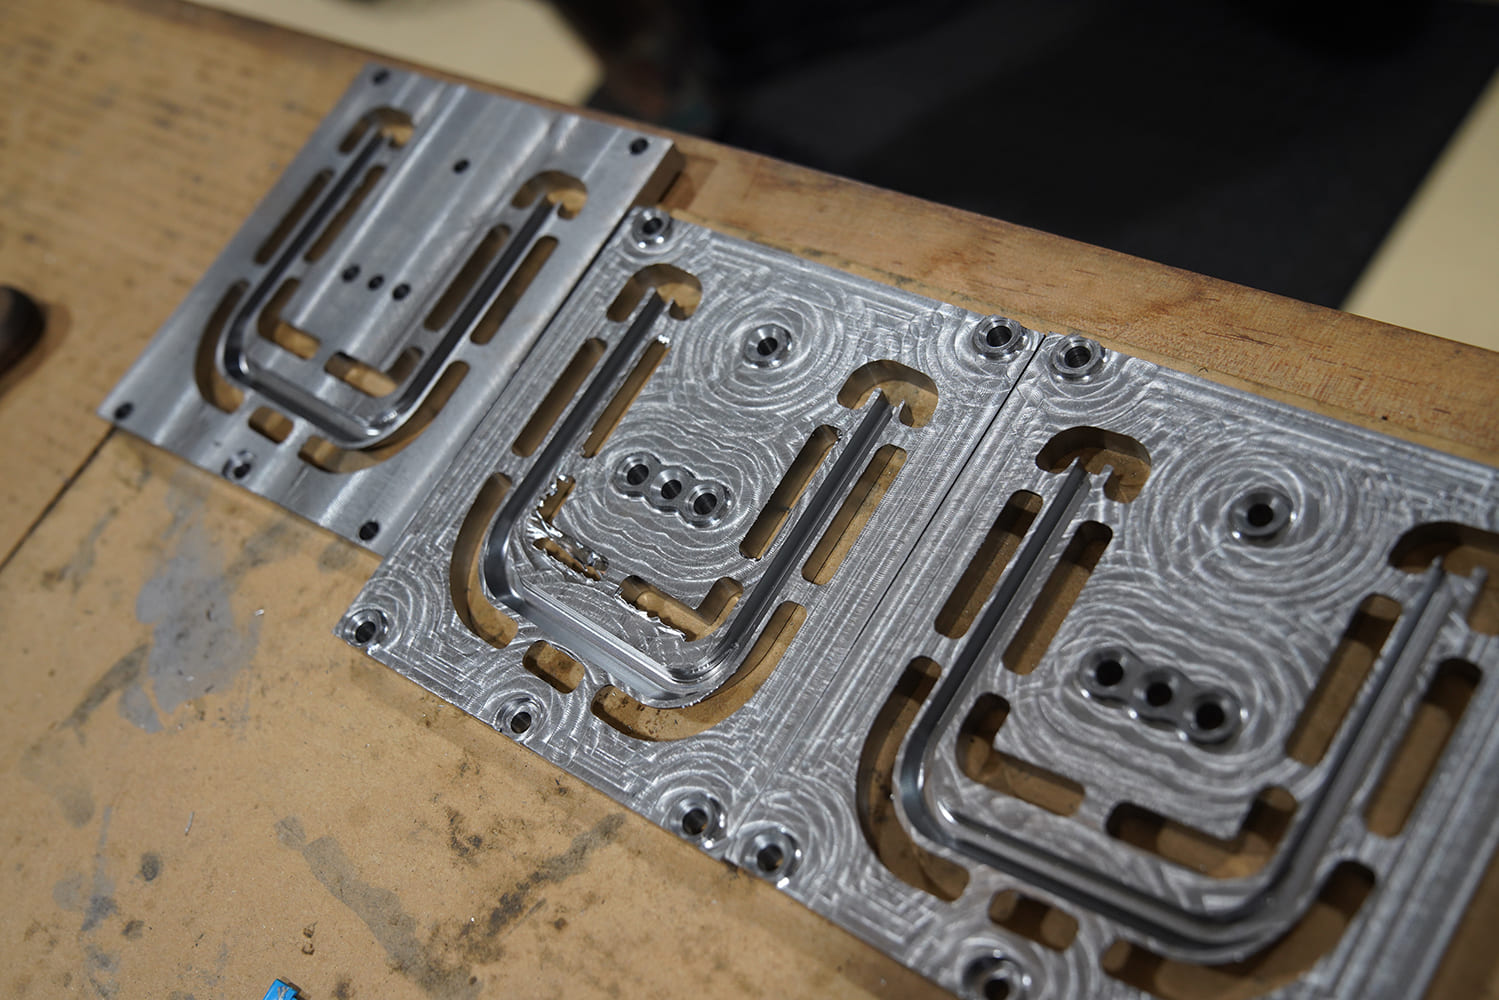
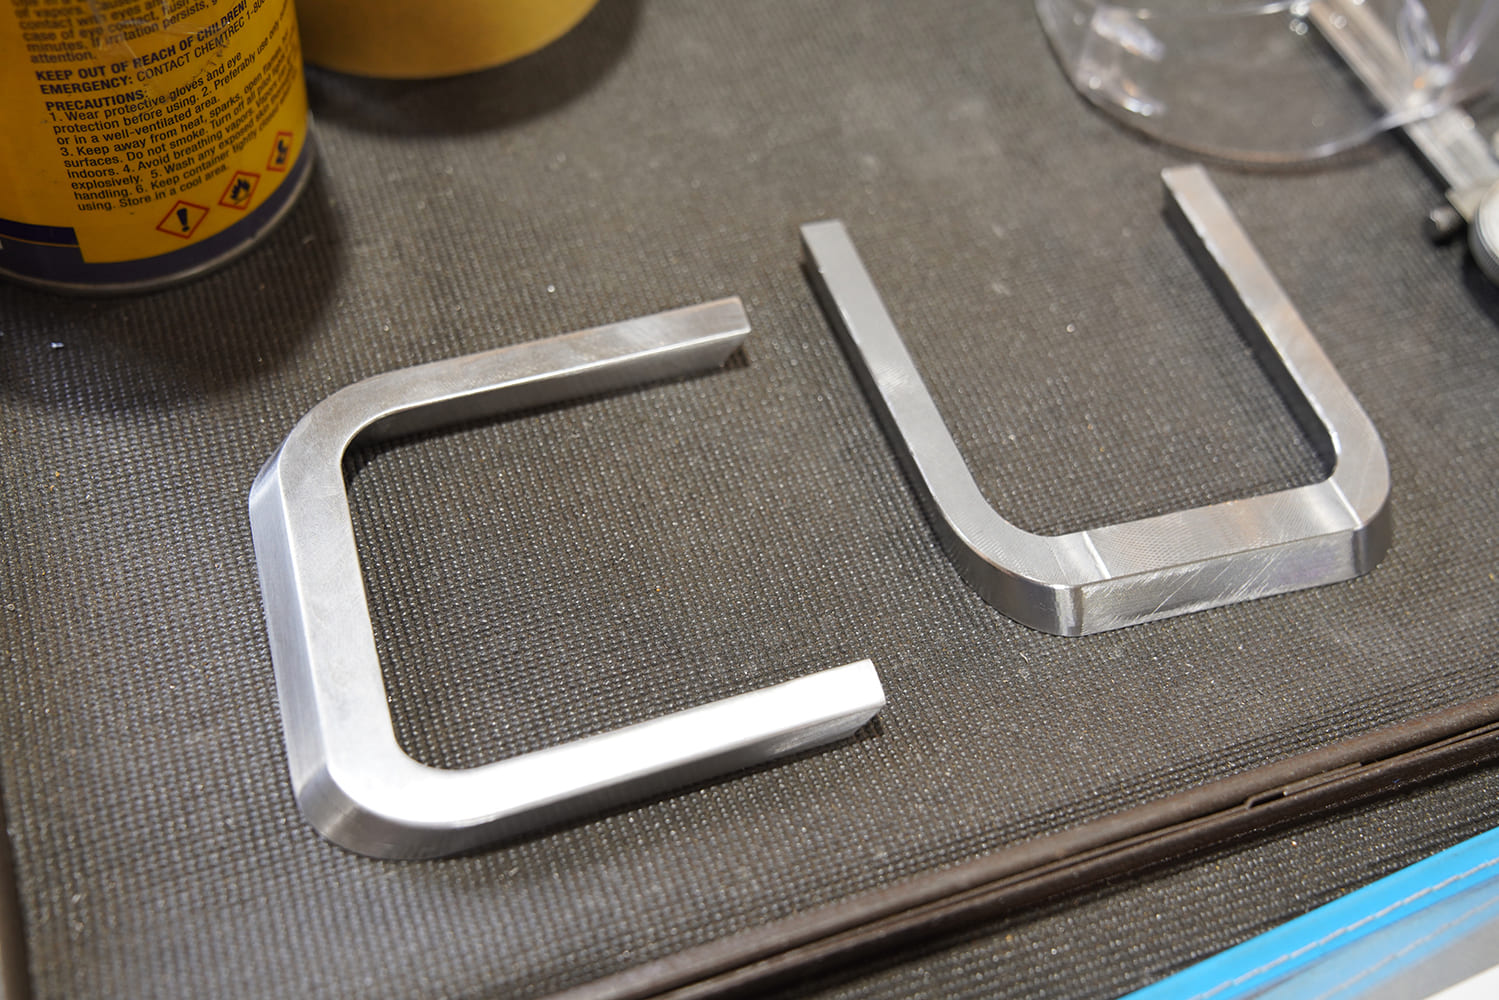
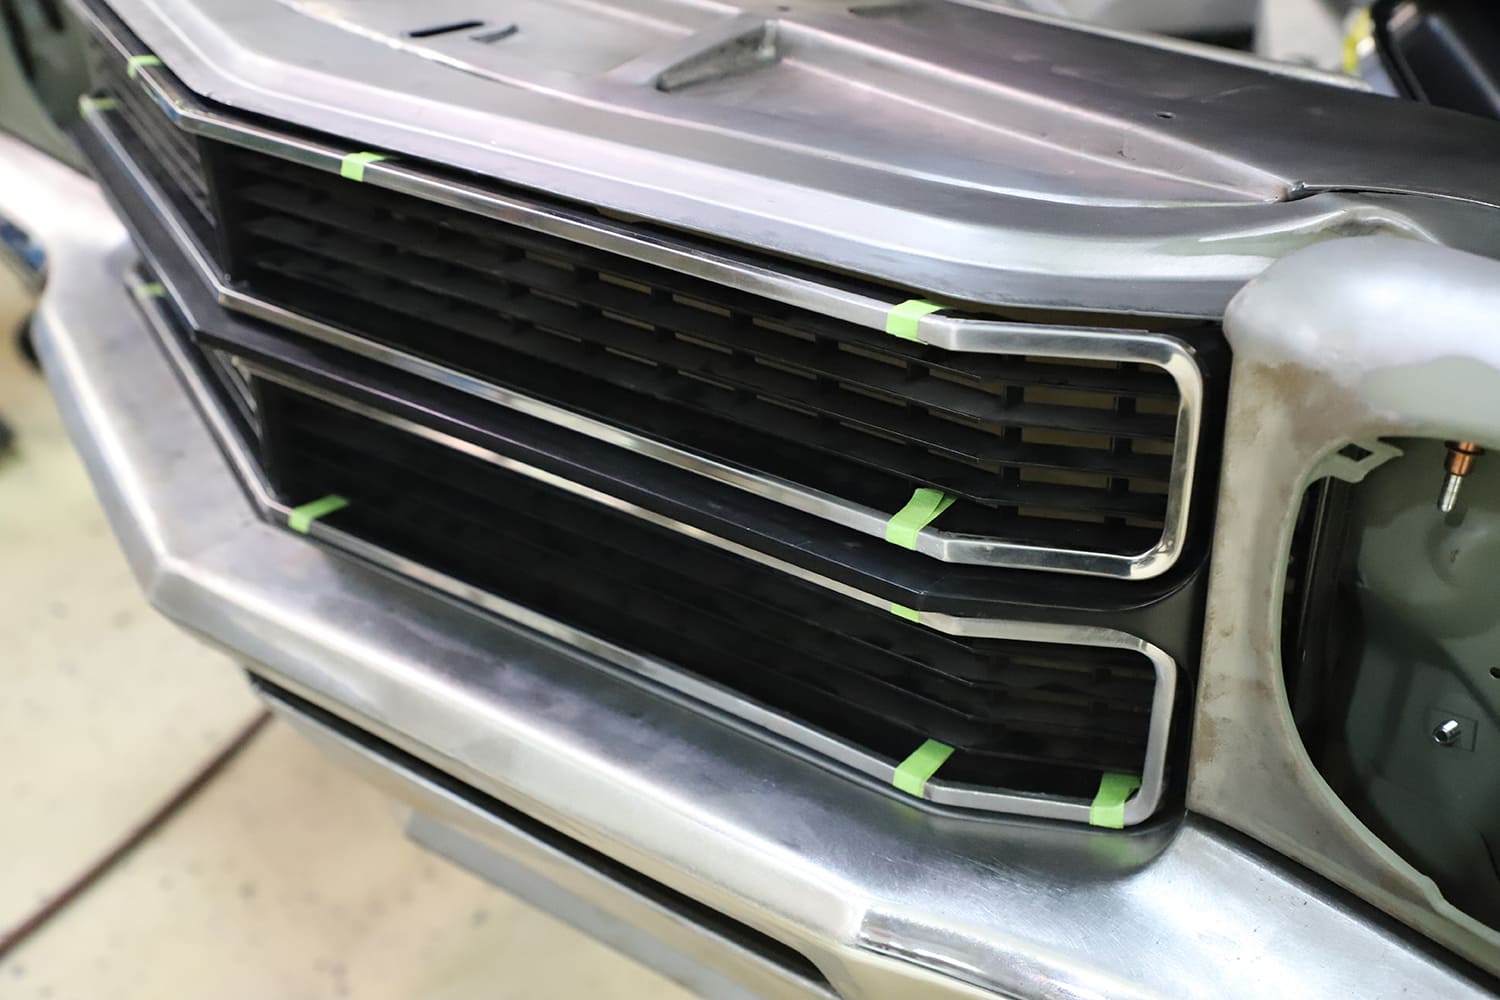
The original grille on this car had trim made from fragile aluminum channel, which featured overlapping joints between the pieces. It’s very challenging to get this type of trim to fit together precisely, so the team decided to machine their own trim from steel billet, allowing the sections to be welded together, which provides the trim with significantly more strength and a cleaner appearance.
The new trim pieces were designed using CAD and milled on a CNC machining center, which produced parts with very close tolerances. These pieces were carefully fitted together on a special jig, ensuring that alignment was maintained during the welding and metal finishing processes.

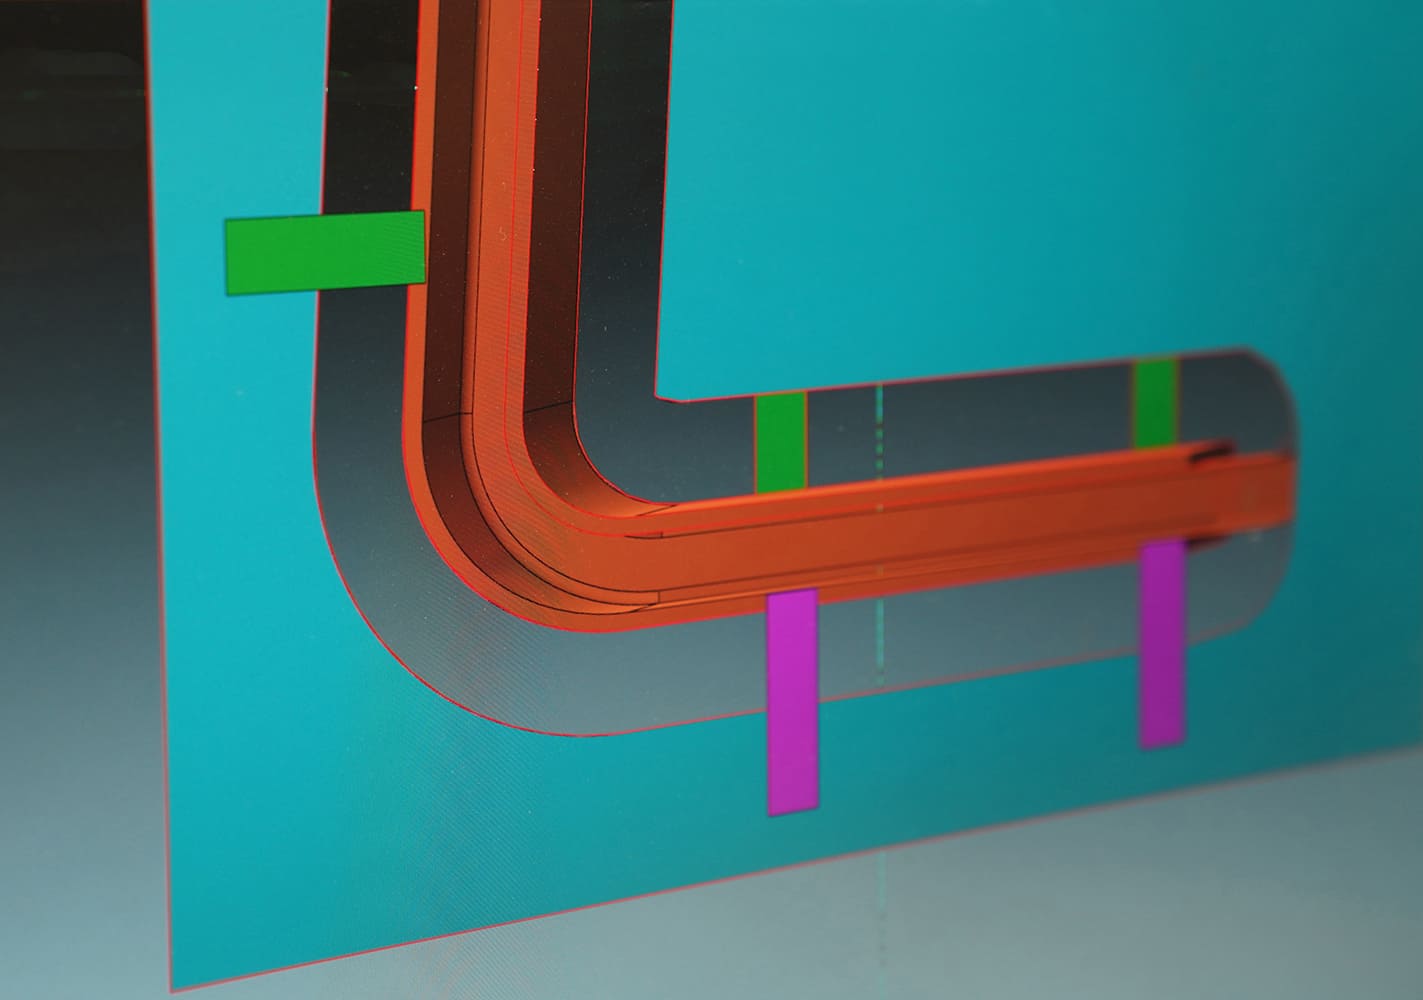
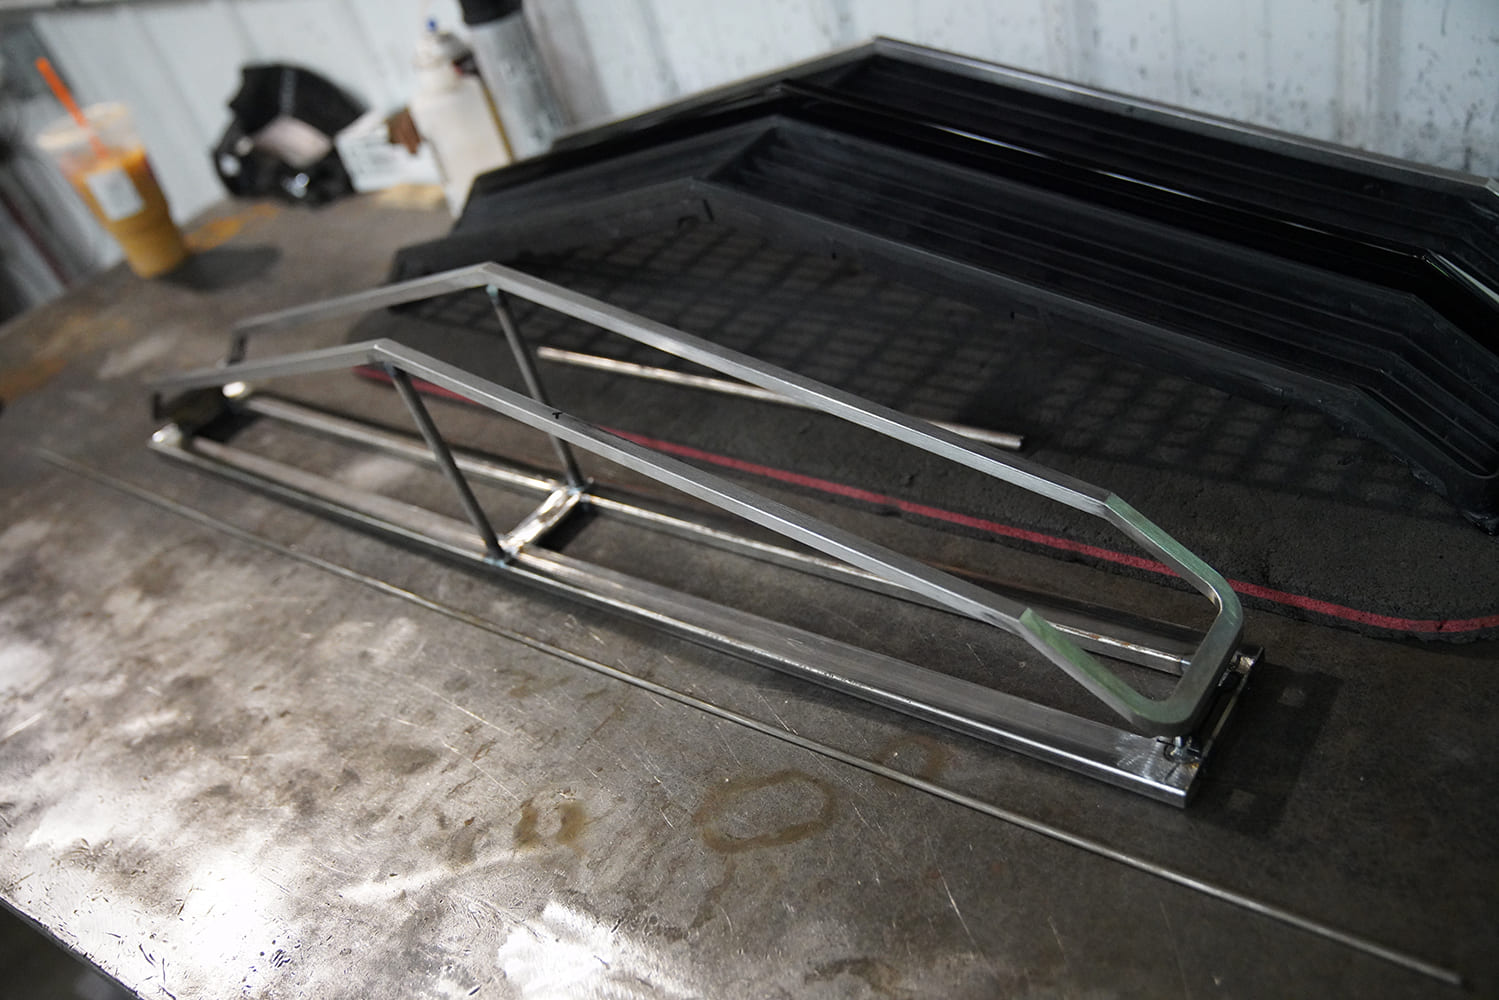
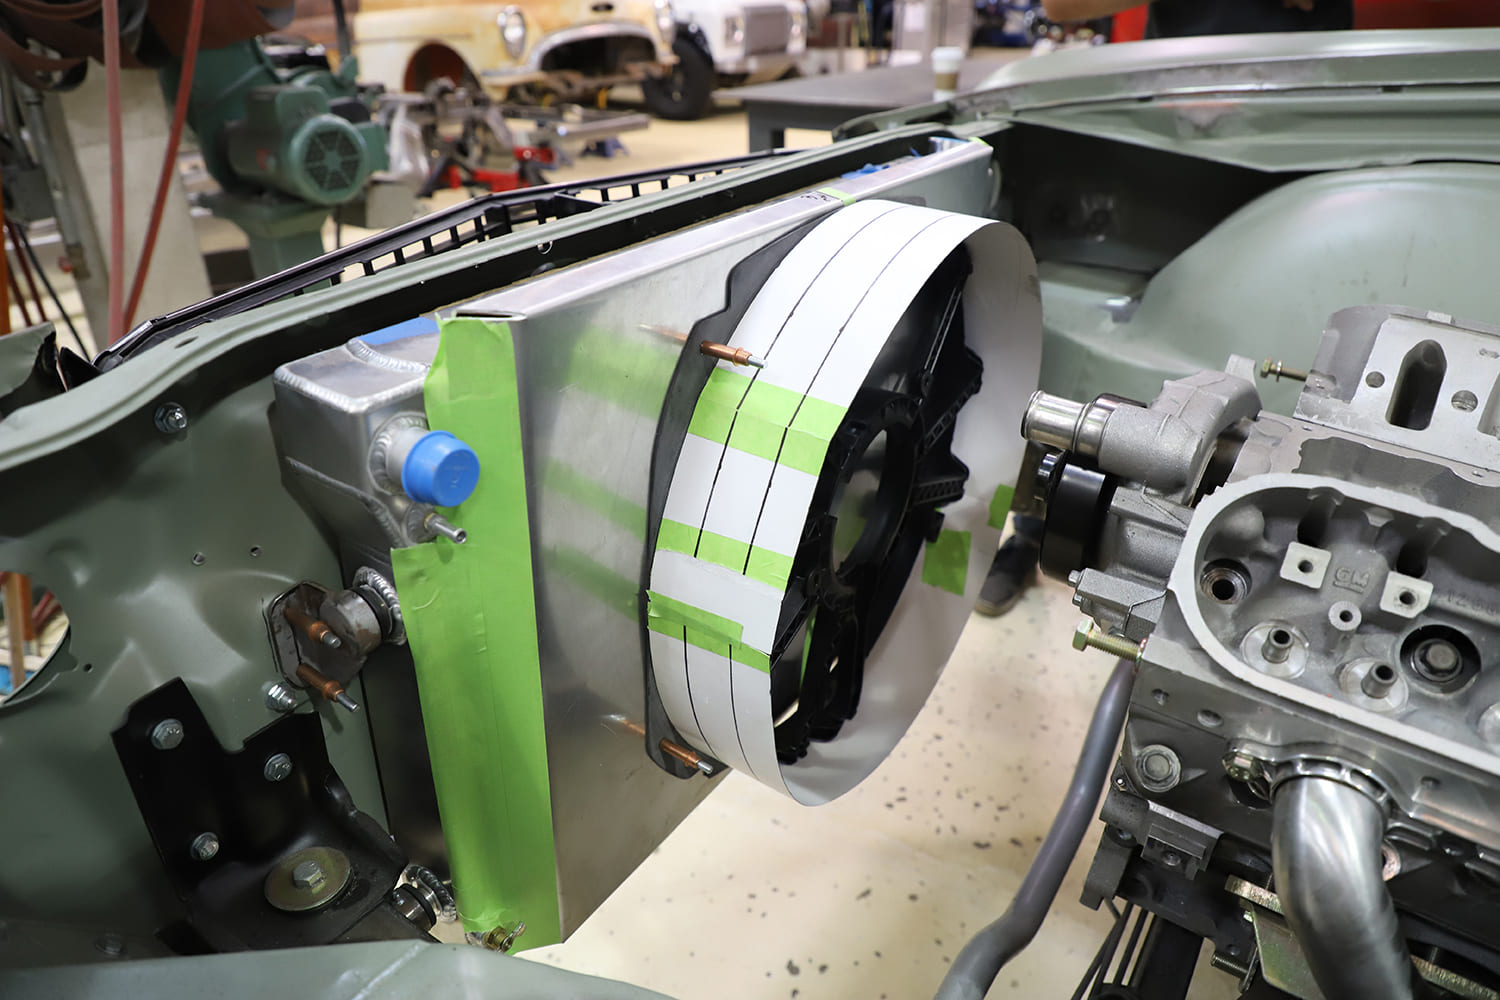
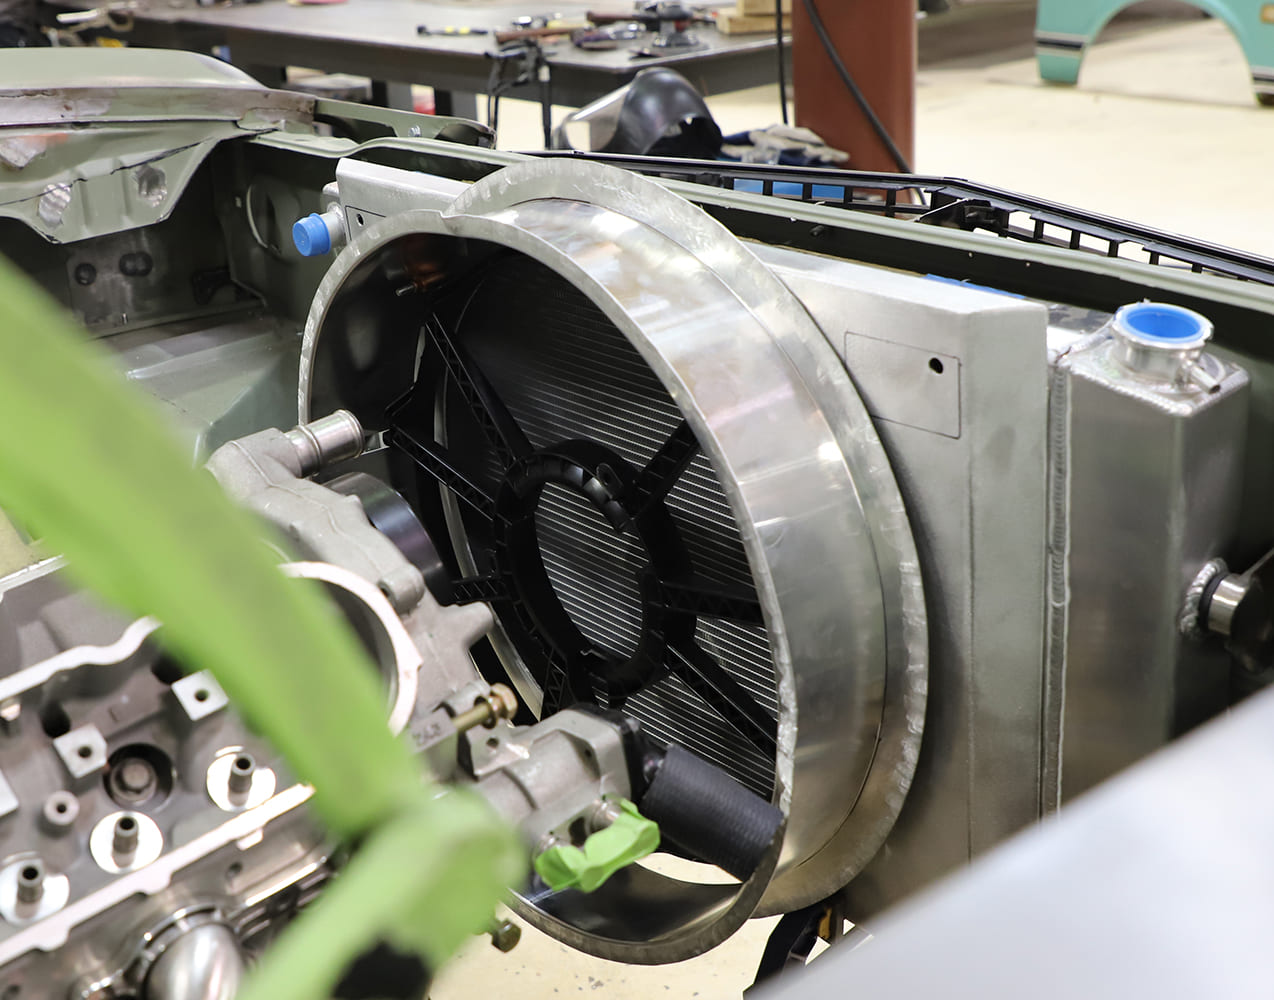
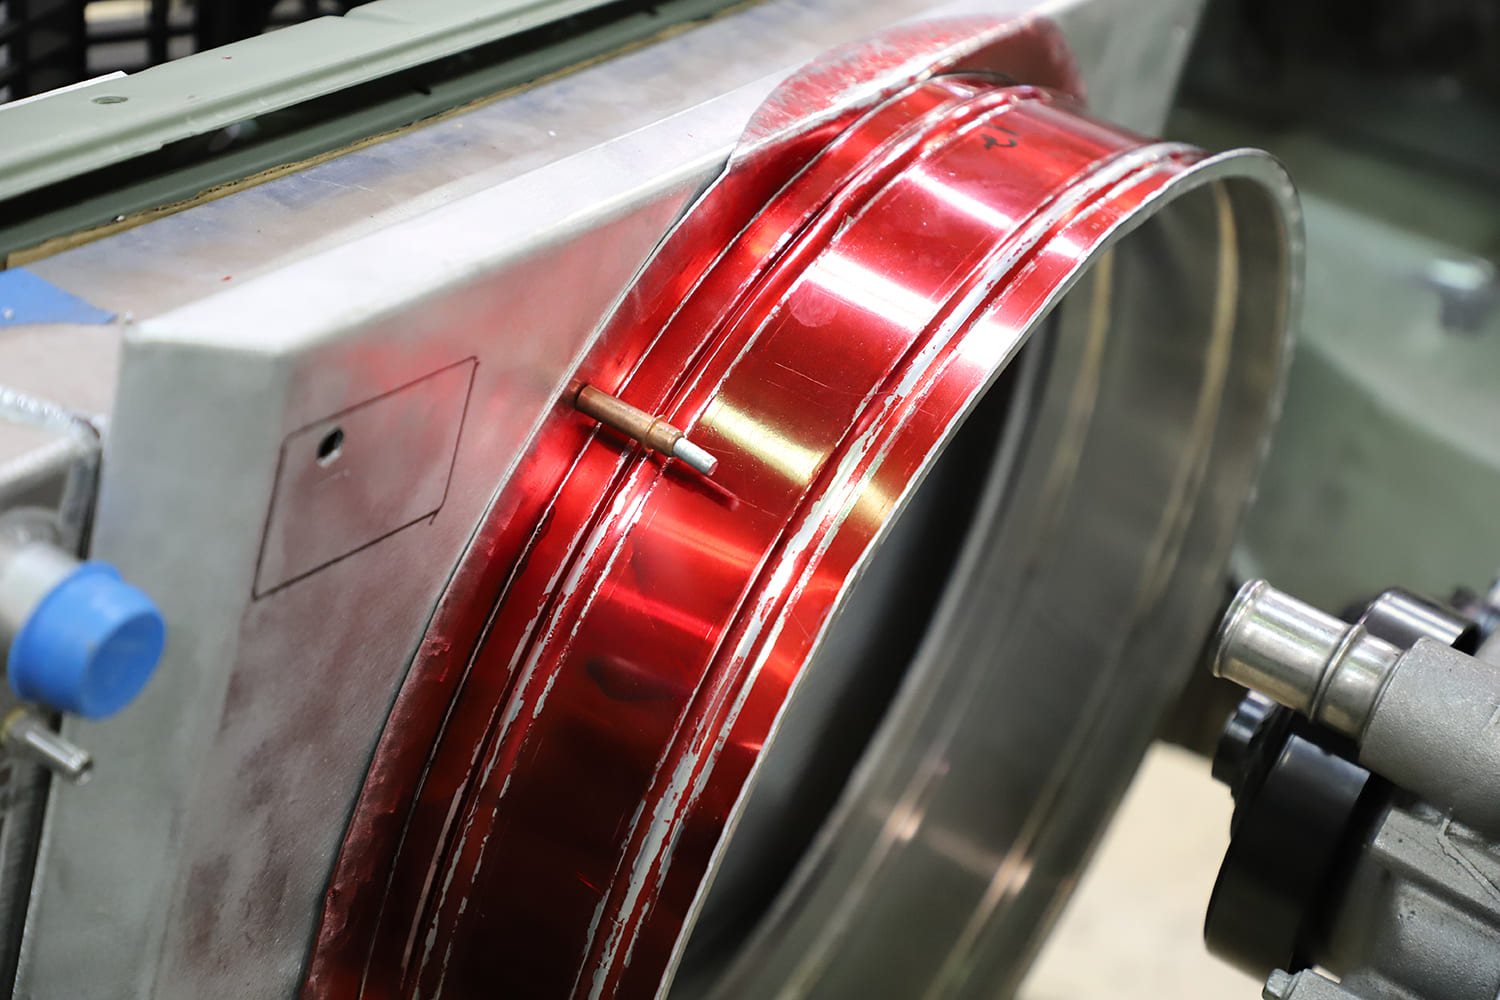
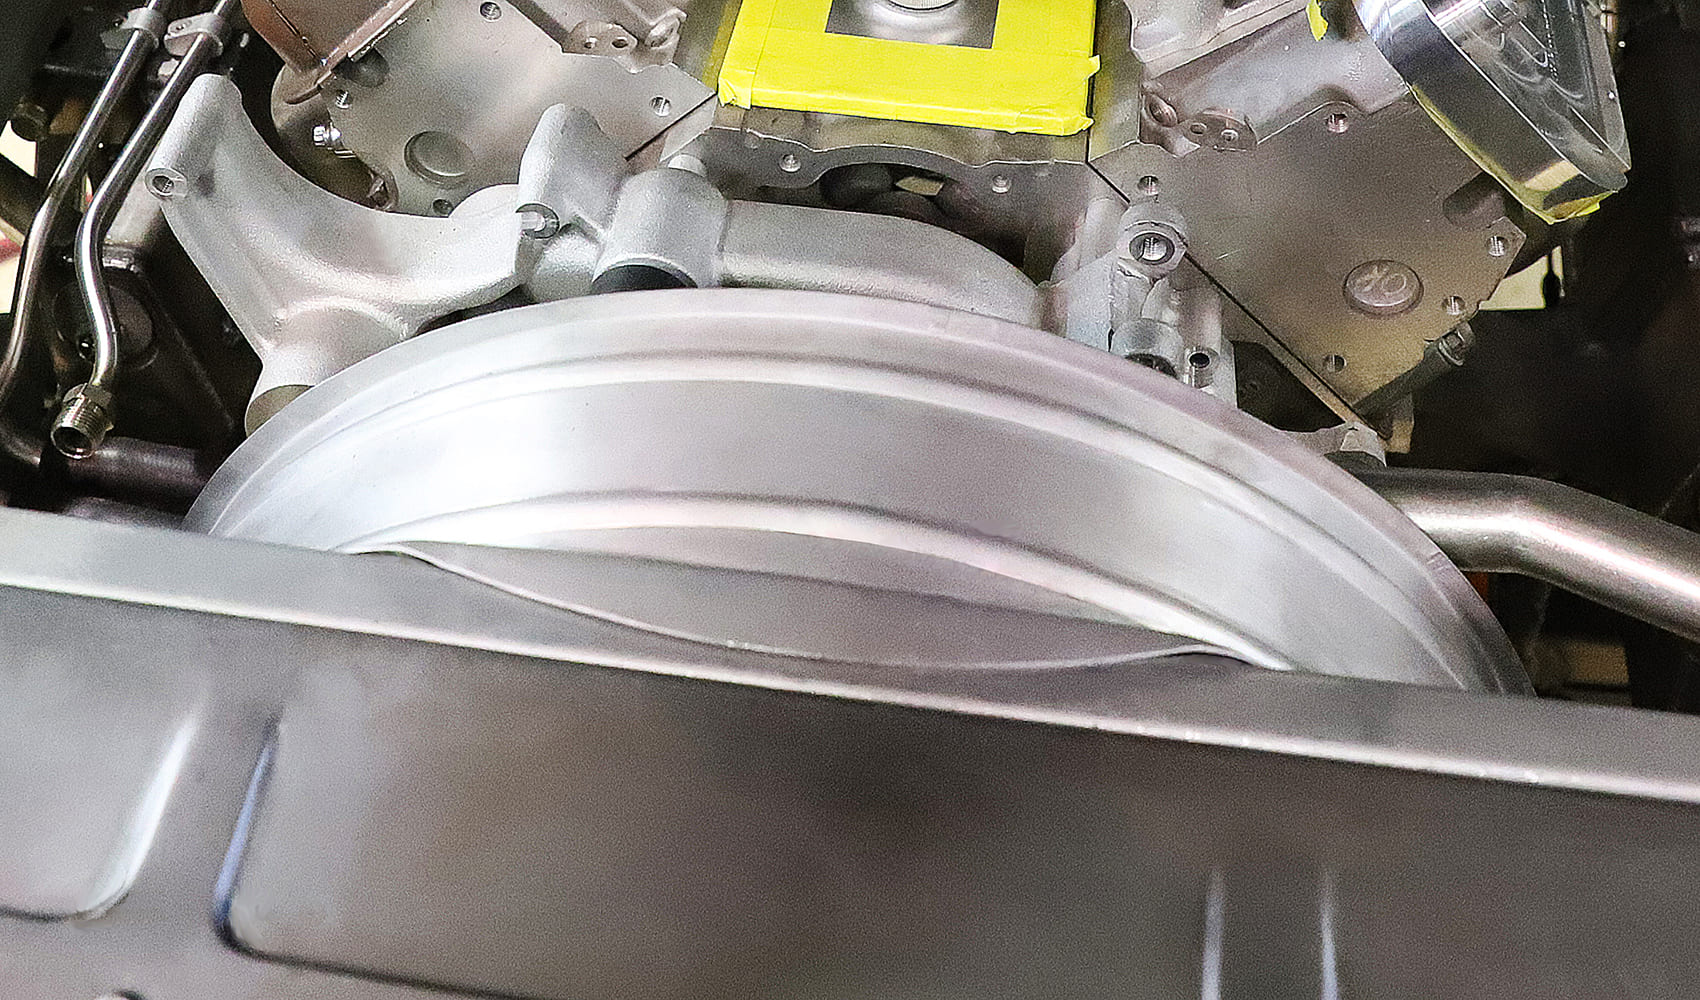
The car will have an electric fan on the rear of the radiator, and a custom shroud has been designed to fit around it. Shrouds need to fit closely to the fan blades to operate efficiently, so care was taken to ensure a good fit during the fabrication of this part. While a simple band of metal would have sufficed, the crew added strengthening flanges to both the front and rear edges of the ring, along with a couple of beads around the perimeter—providing additional strength and tasteful style.
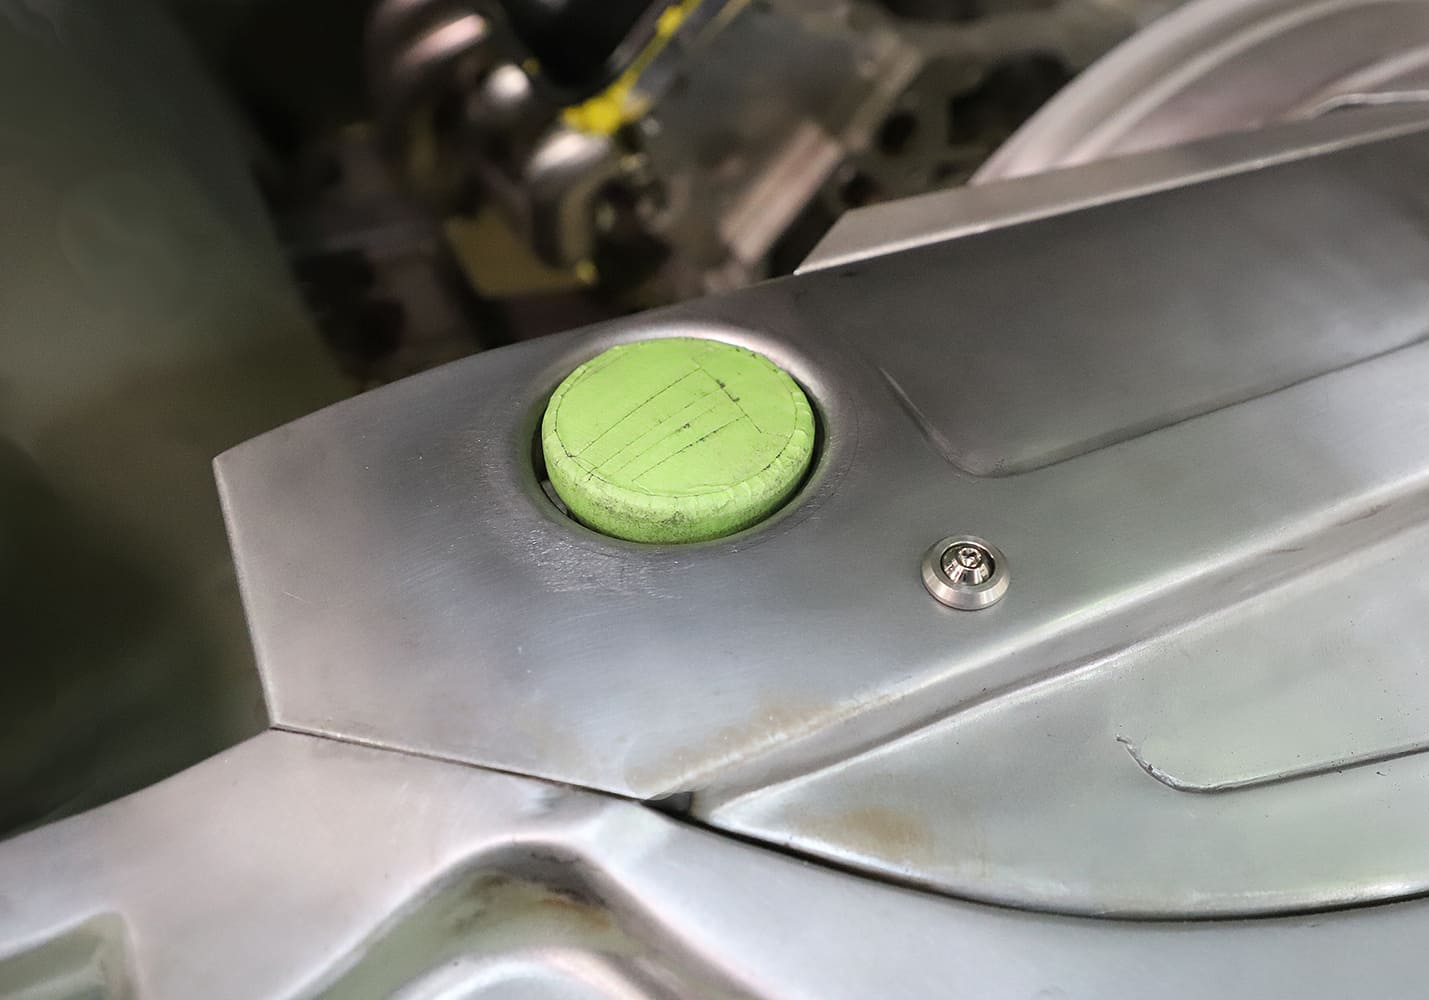
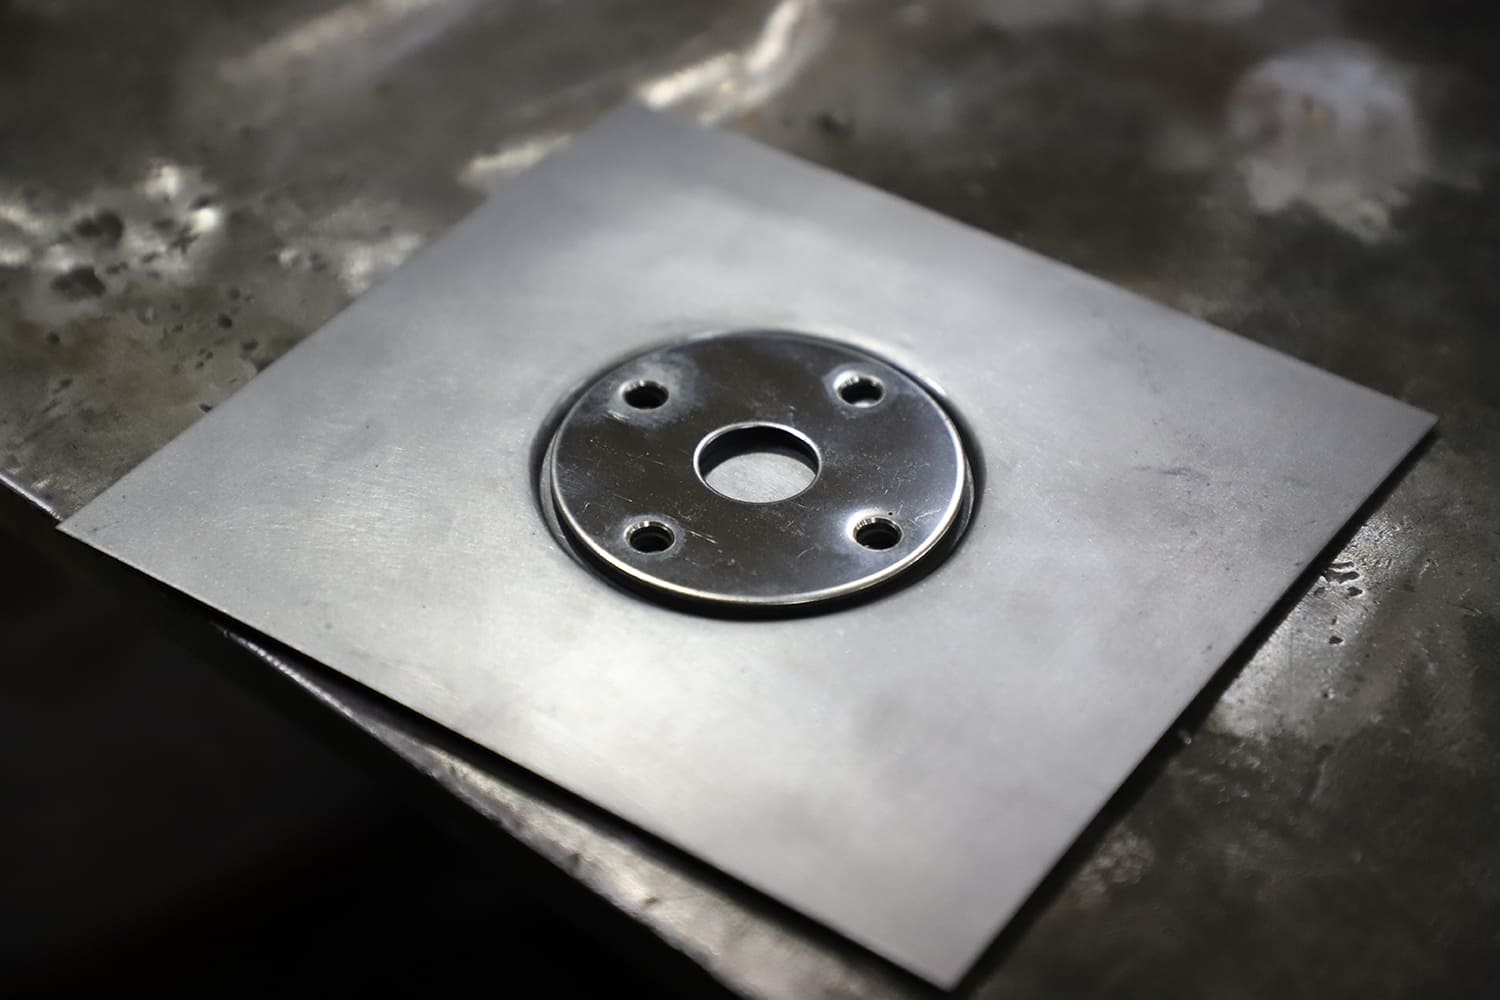
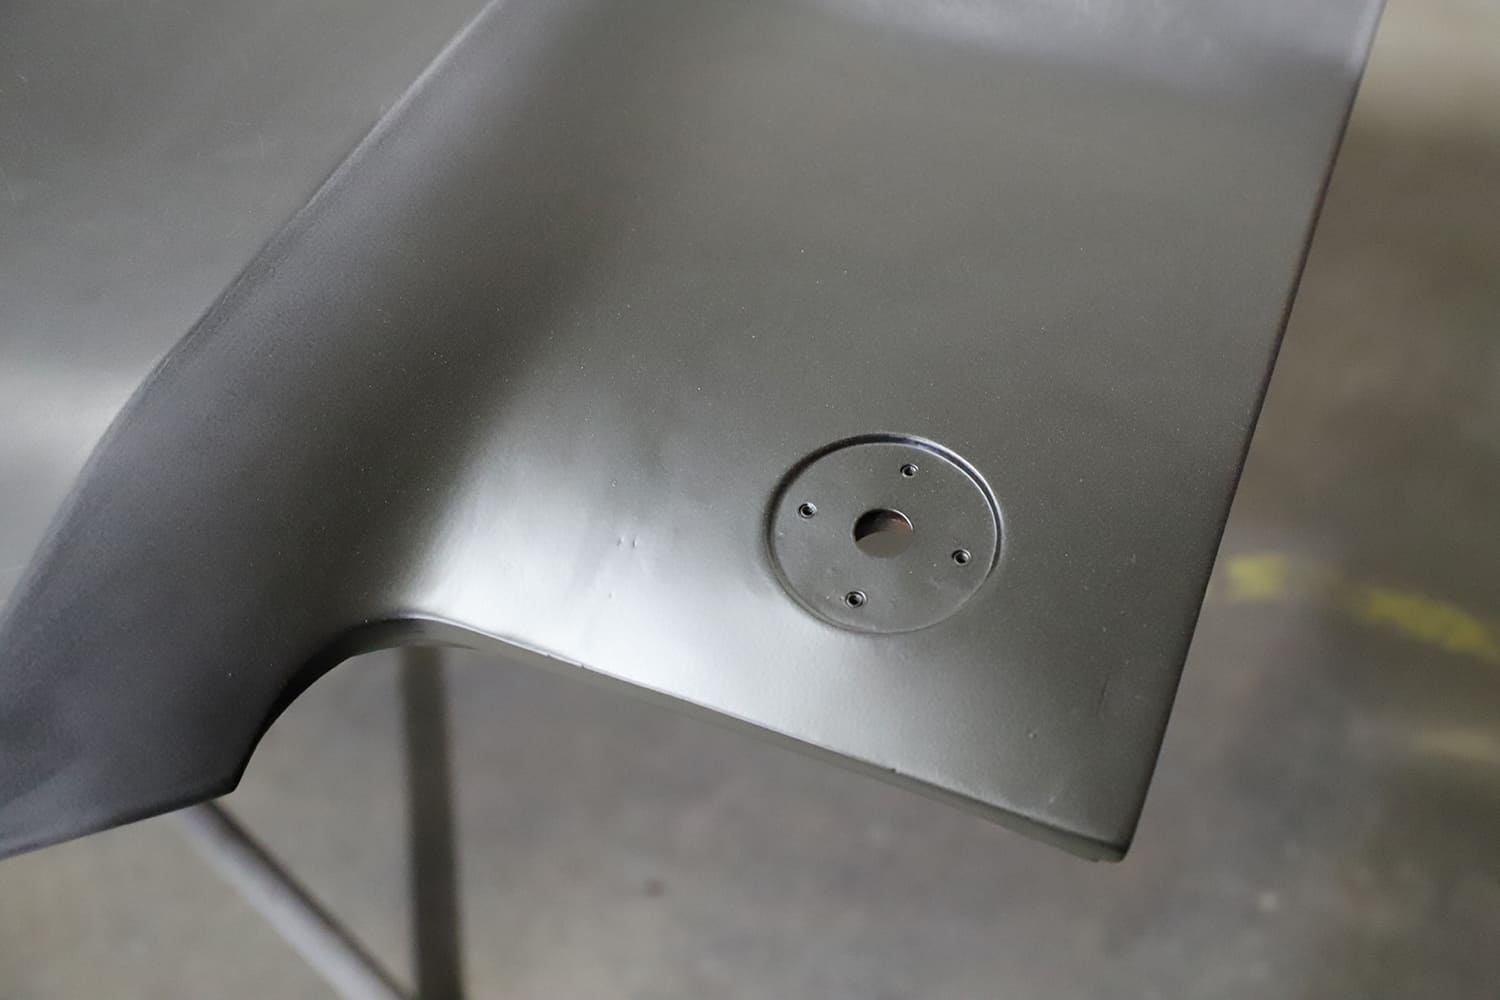
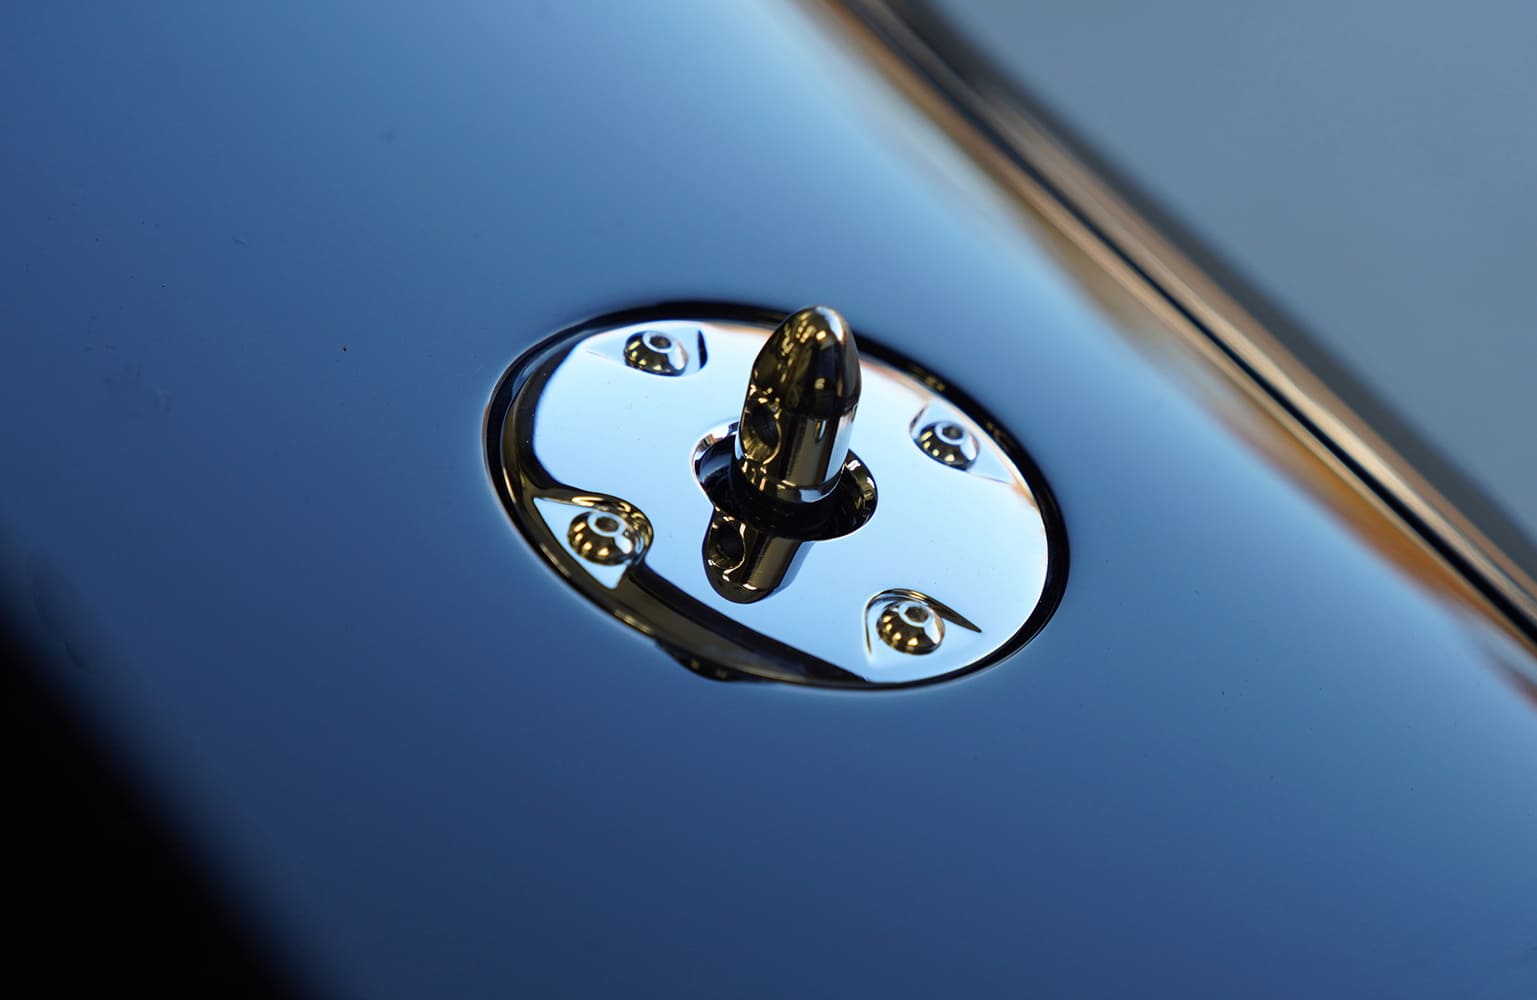
Another small detail was added for plates that fit around the hood pins. These plates are typically screwed to the surface of the hood, protecting the paint from being marred by the clips inserted through the pins to ensure the hood can’t pop open unexpectedly. To create this recess, special tooling was made to emboss a circular indentation in scrap pieces of metal. These were then fitted into the hood, welded, and finished. Again, this small detail makes a noticeable improvement in the appearance of this feature.

We hope these tips will provide some ideas for refining the details of your next project. MR
Check out this story in our digital edition here.

Source
Roadster Shop
(847) 949-7637
roadstershop.com