")

Old-School Modern Cool
Factory-like modern interior climate control for 1967-72 Chevy/GMC C10 pickups
By Rob Fortier – Photography by the Author
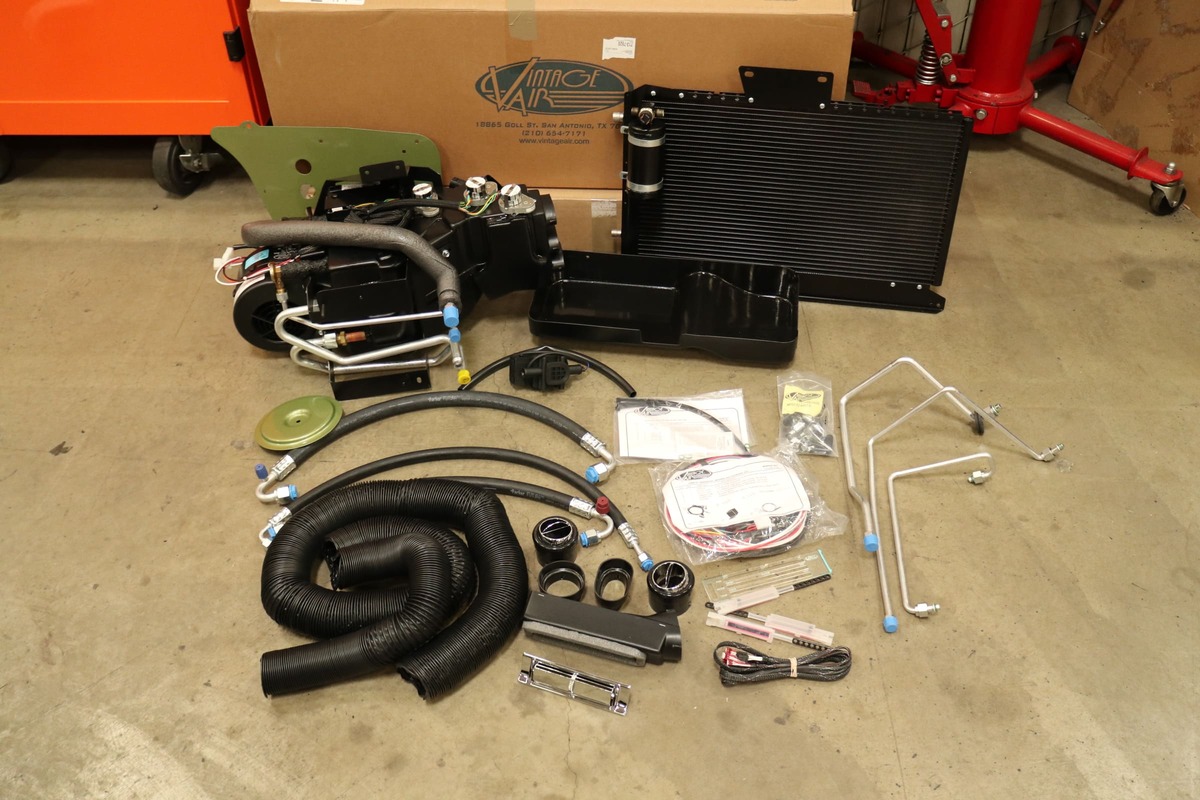
Vintage Air’s Gen IV 1967-72 C10 SureFit comes with everything shown: microprocessor-controlled under-dash heat/air-conditioning/defrost unit, unique fly-by-wire servo motor control panel retrofit system that allows use of factory control panel (eliminating cables), modern evaporator/condenser, compressor and brackets, plumbing, vents, and more.
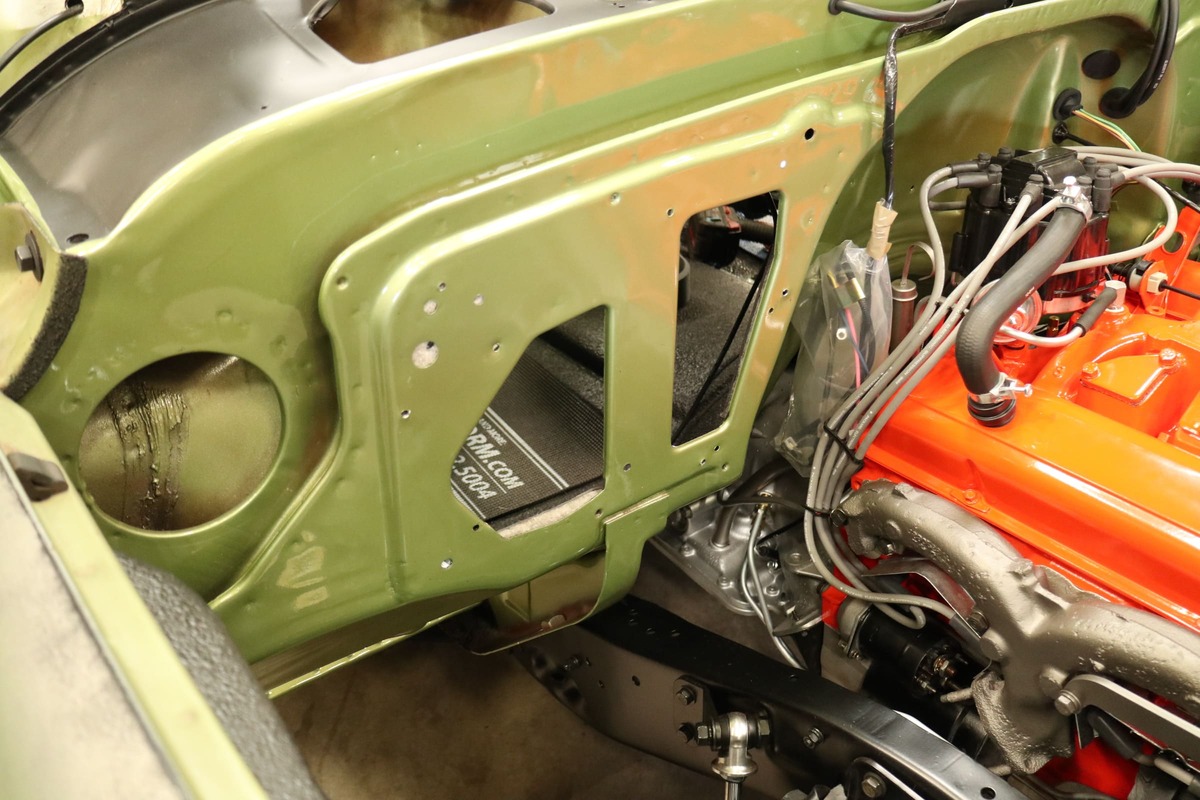

Prior to repainting the firewall, all the factory heater components were removed. This particular model did not originally come with A/C—the only issue that will pose is having to provide blow-though access for the air, which you’ll see covered separately in the accompanying sidebar.

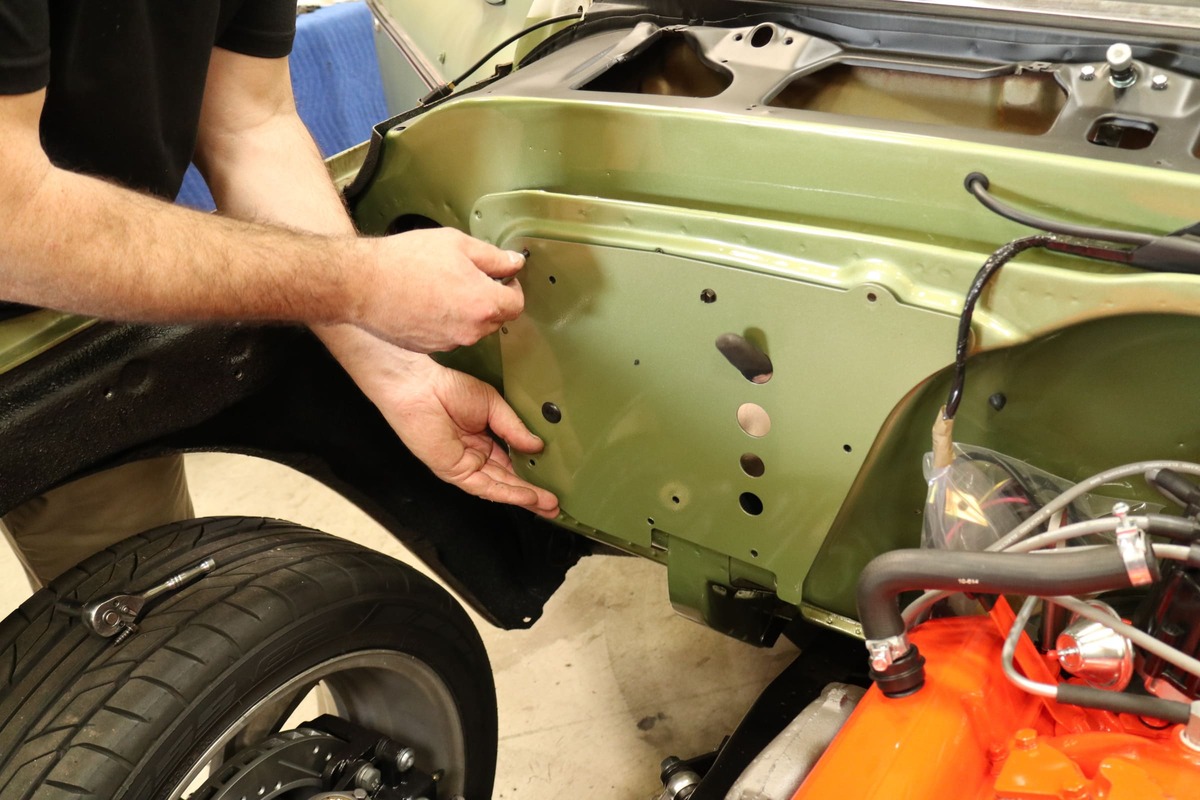
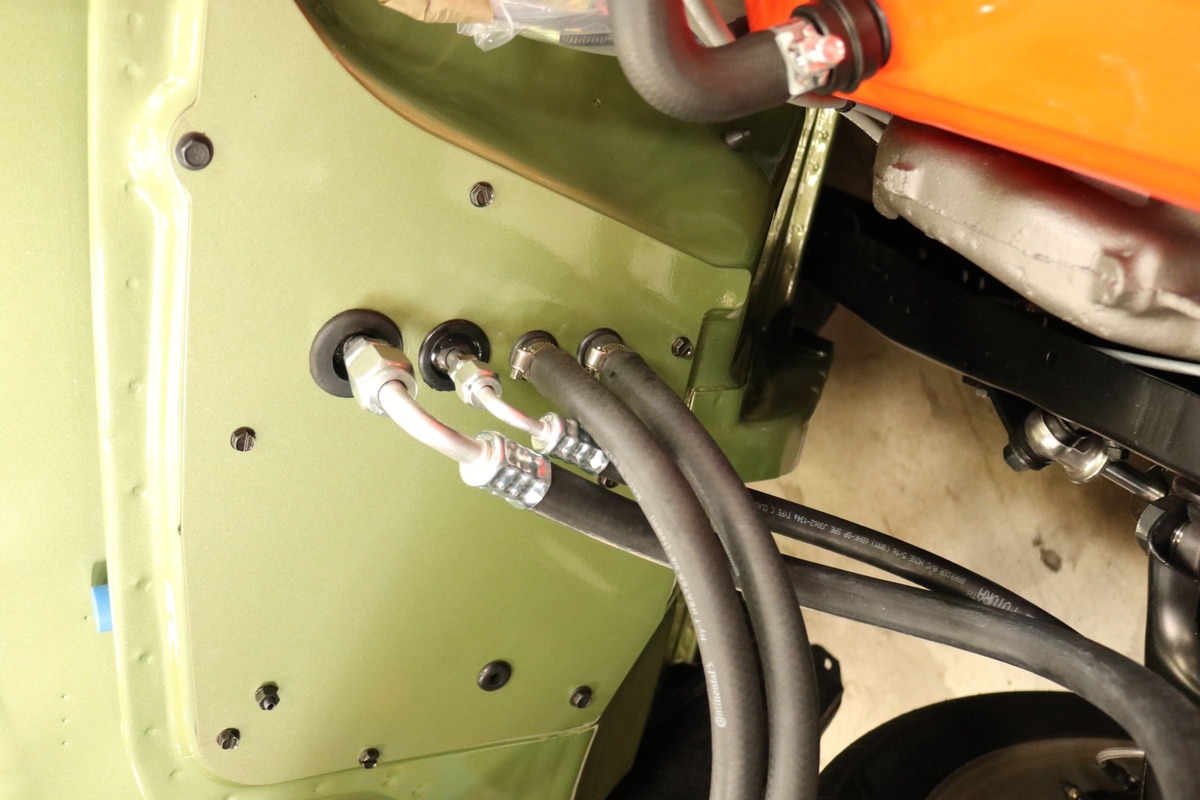
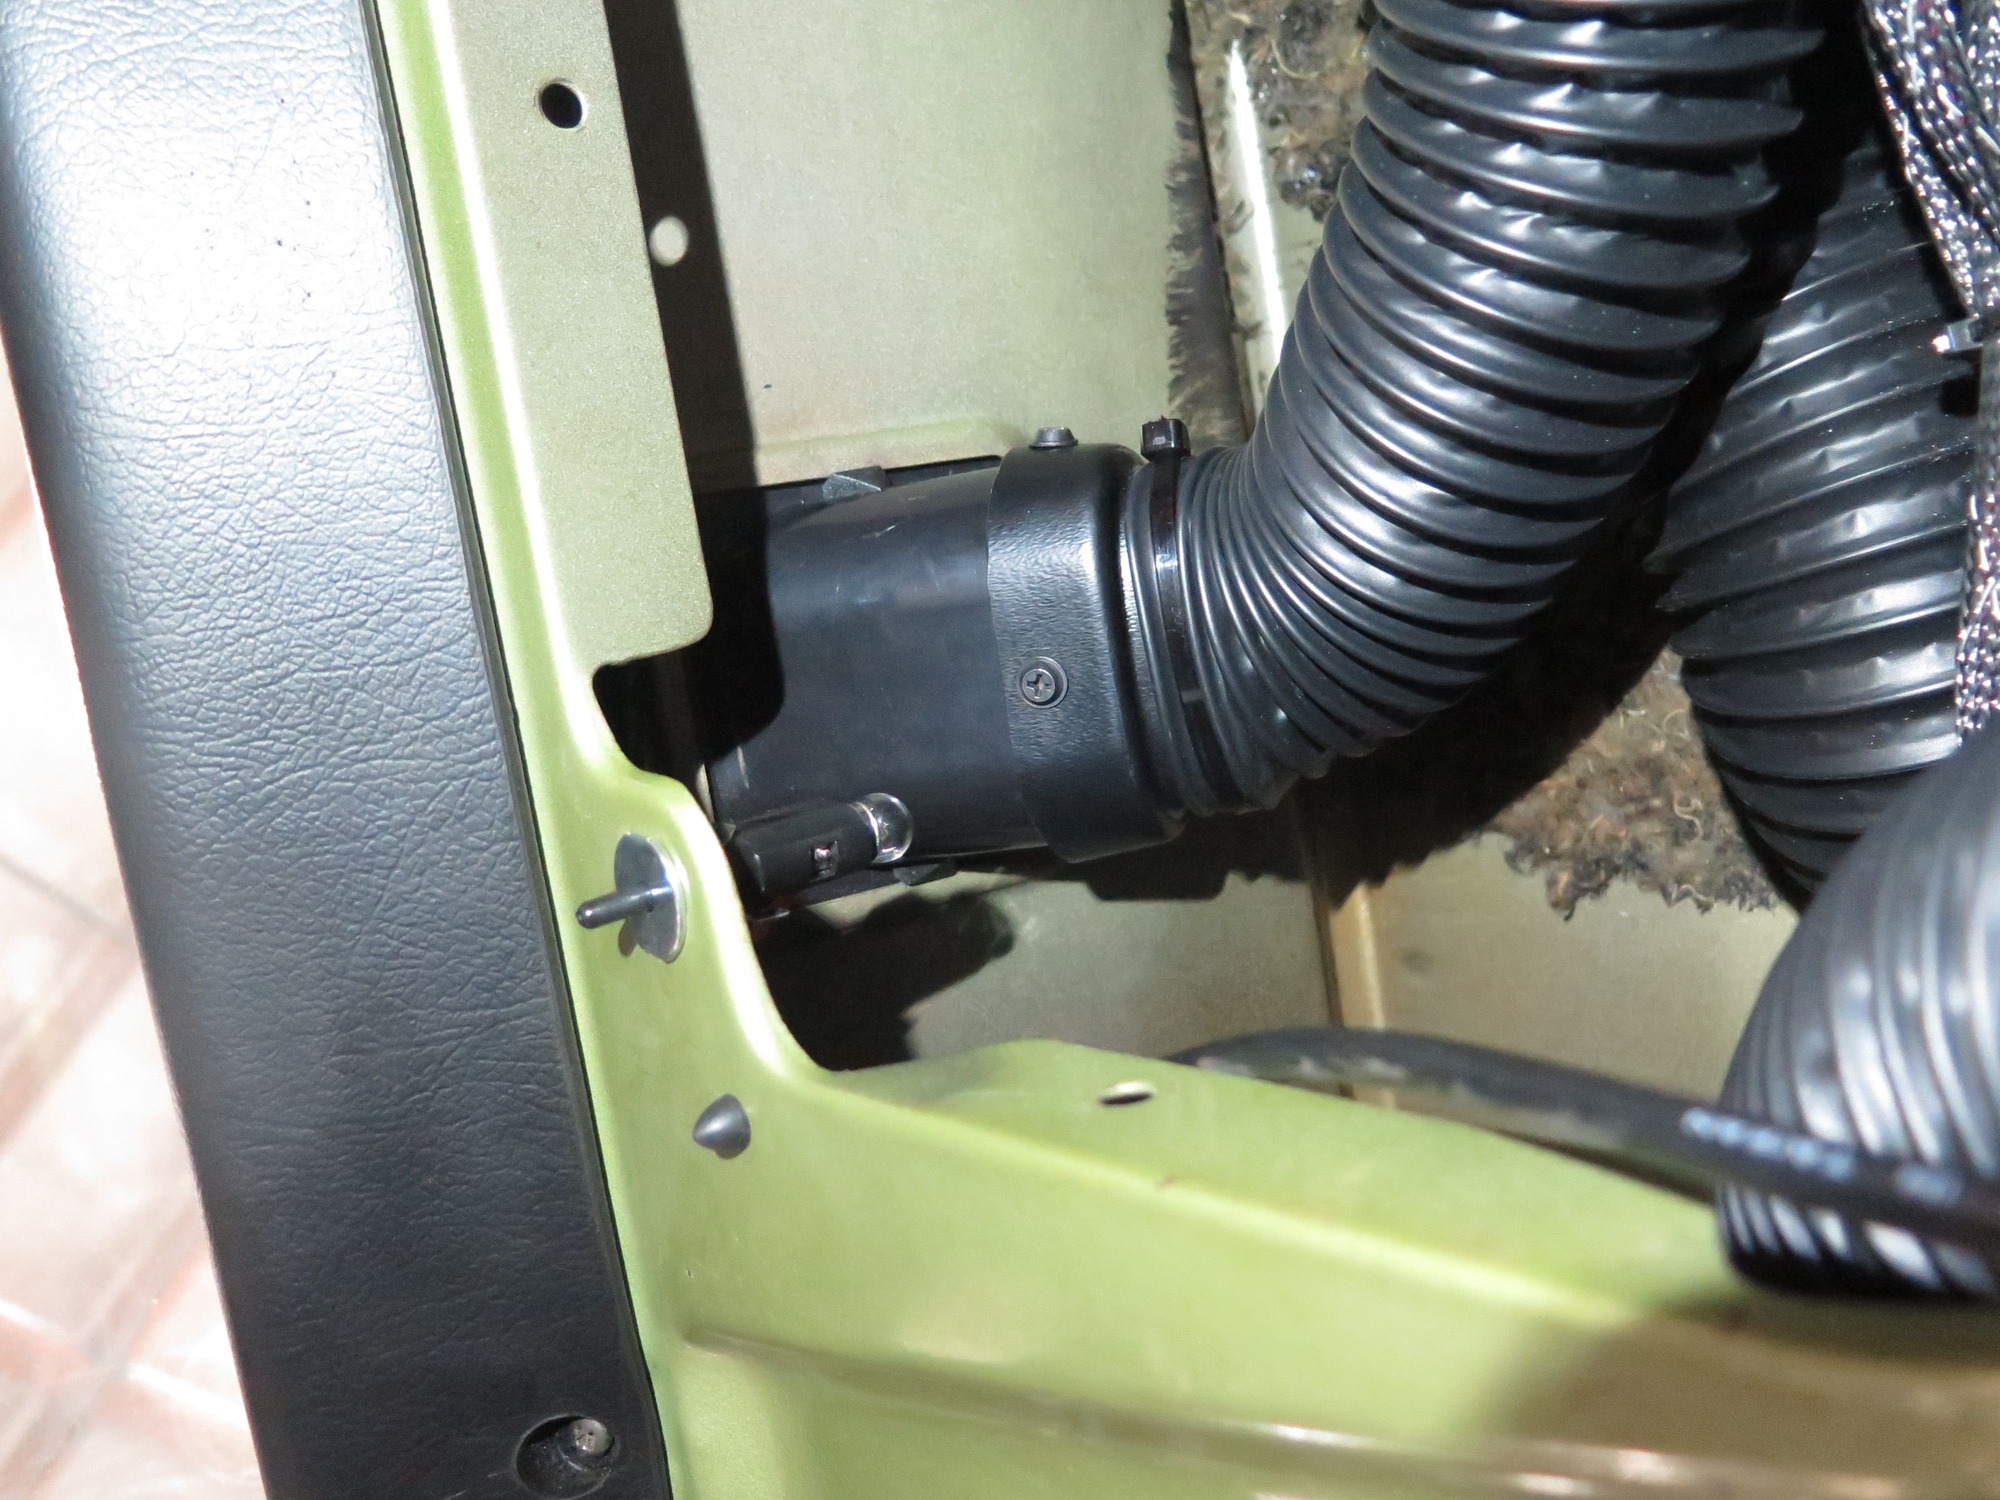
Vintage Air supplies the necessary steel firewall plate to accommodate the Gen IV’s cold air and heater fluid lines safe passage (with provided rubber grommets) and completely seal off the passenger cab from the engine compartment. Heavy-duty flexible caulk was used to ensure no unwanted heat entered or cold air escaped—and vice versa!
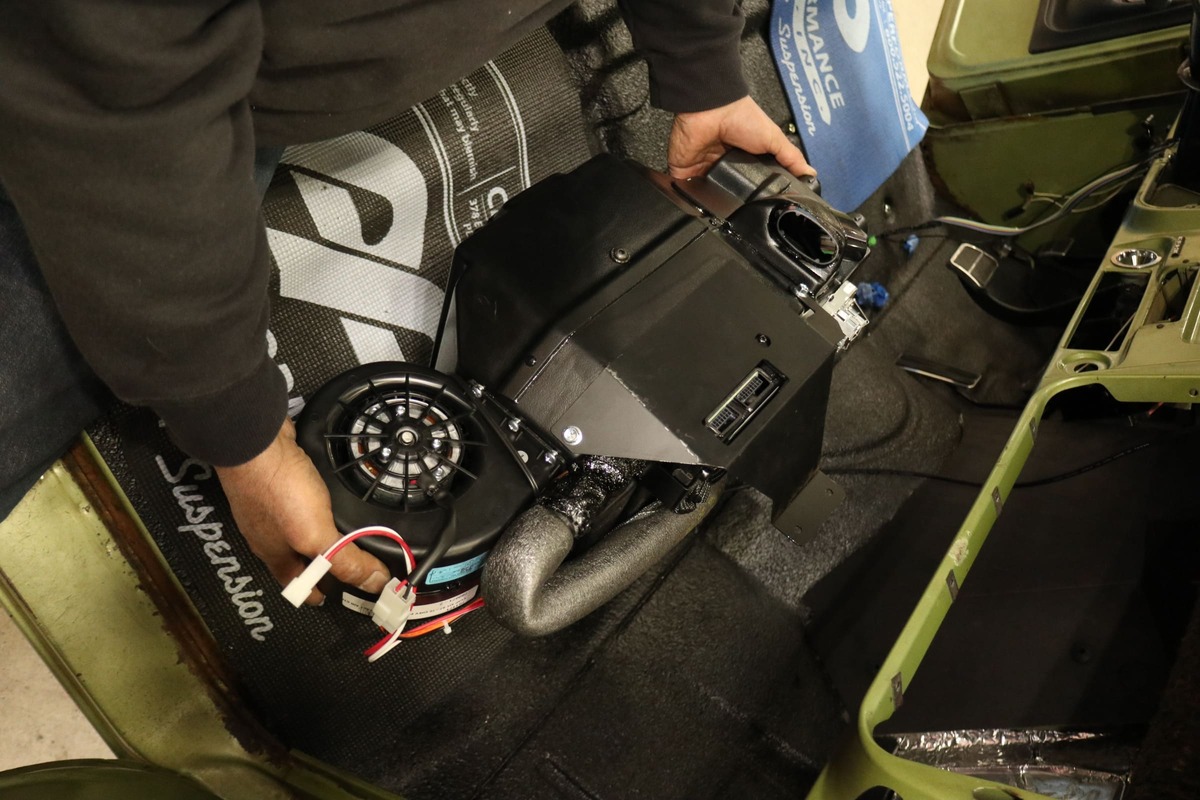

With the firewall sealed up, the Gen IV was mounted up under the dash using the pre-installed bracket that attaches the top of the unit to the interior surface of the cowl as well as the pre-drilled holes in the firewall plate.
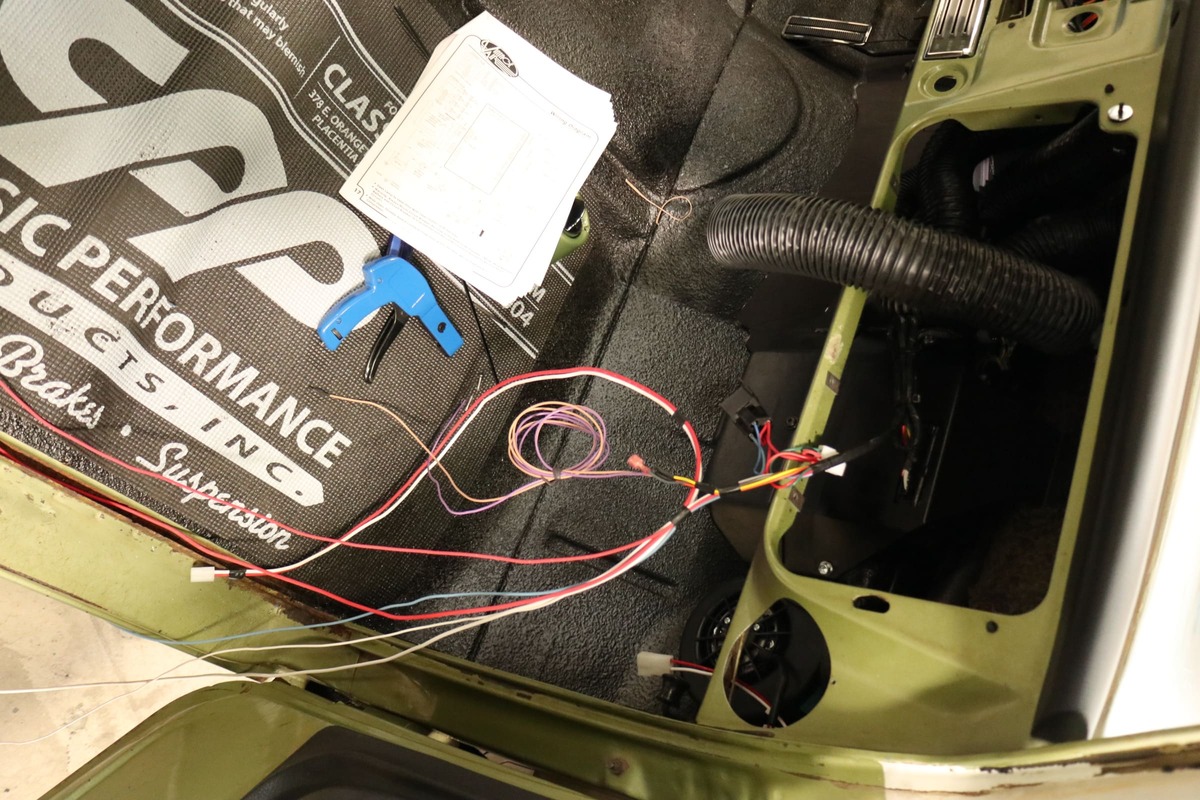

Vintage Air supplies all the necessary wiring harness components over-length, so the installer can determine exactly where to mount the relays and make the various connections—with a fully detailed set of instructions to help guide you along the way!
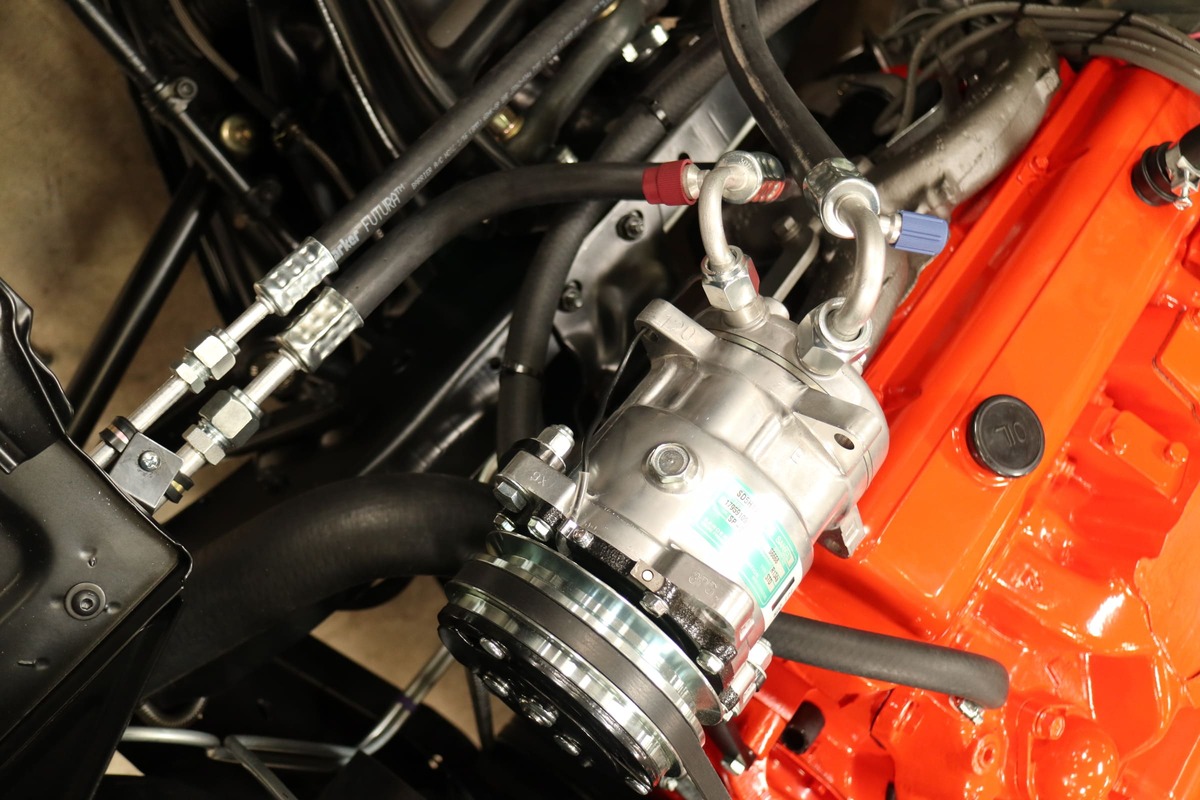
The refrigerant lines are supplied pre-cut with R134a high-pressure fittings pre-crimped and clocked accordingly. When installing the A/C lines, always remember to lubricate the (green) O-rings beforehand.
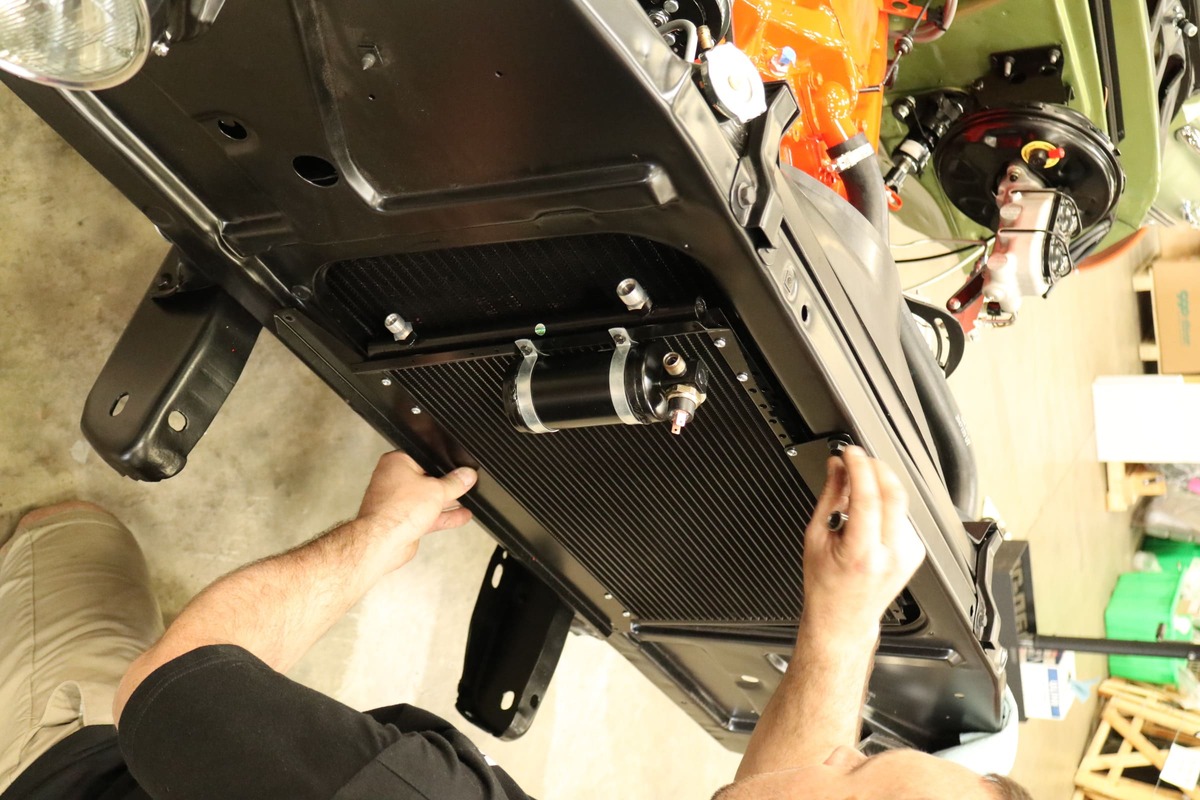

Having the grille removed is necessary when it comes to installing the condenser, as the top bracket is designed to sandwich between the grille and radiator core support. With the provided aluminum brackets, the dryer mounts off the condenser on the left, as shown.
Moving back inside the C10’a cab, we can begin the “non-A/C” retrofit chores—that being the facilitation of the vents, for which there are no factory provisions. If you prefer not to cut into dash, Vintage Air has options to mount vents below the dash. (See the accompanying Side Bar for additional info on venting.)

In order to attach the factory reproduction center vent to the distribution plenum behind the dash, install the 1/4-20 studs, as shown and secure with the provided hardware.
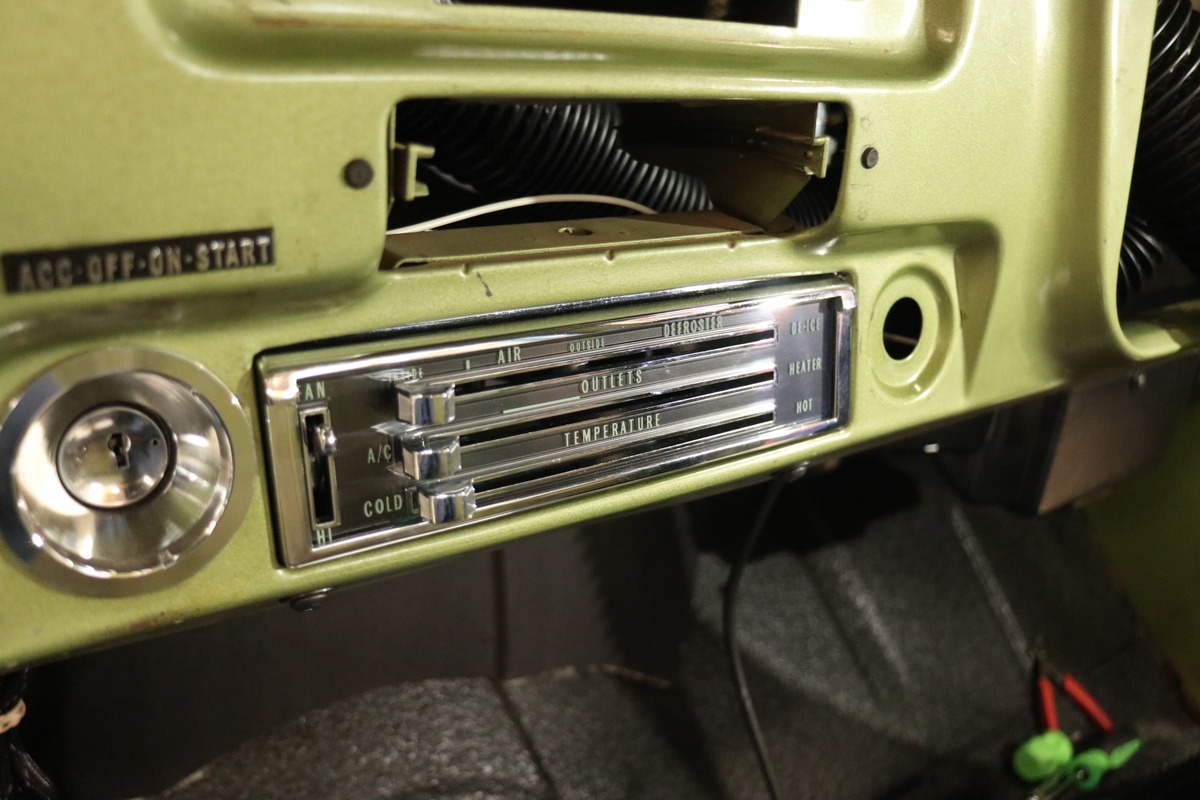
If using the OE cable-actuated control panel, refer to Vintage Air’s detailed instructions for the microswitch installation and setup.
Ensure all ducting connections are properly sealed tight and secured—with provided screws and zip-ties, as shown.

Once all the ducting, wiring, and plumbing behind the dash is installed, secured, and sealed tight, the supplied “abbreviated” glove box can be installed. (Word of caution: make sure all behind-dash work is complete, as the molded plastic glove box likes to stay put once it’s put in!)
Non-Factory Factory Vent Install

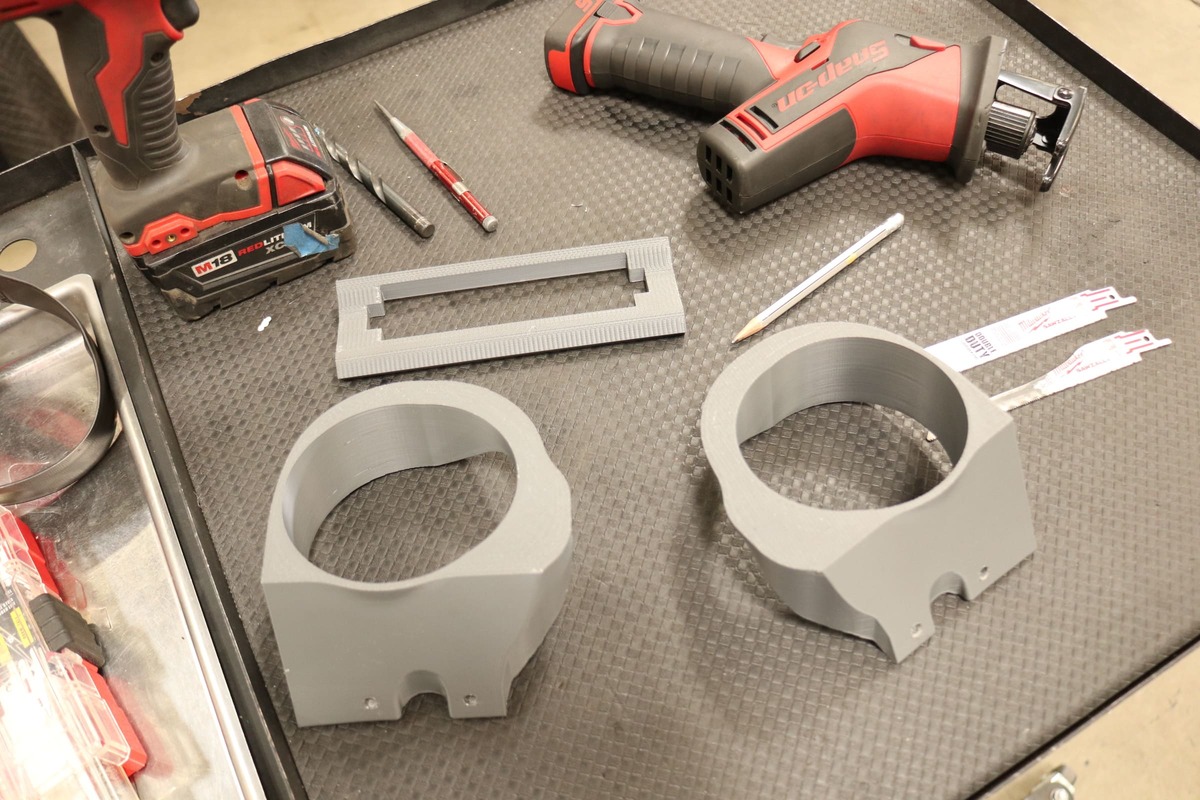
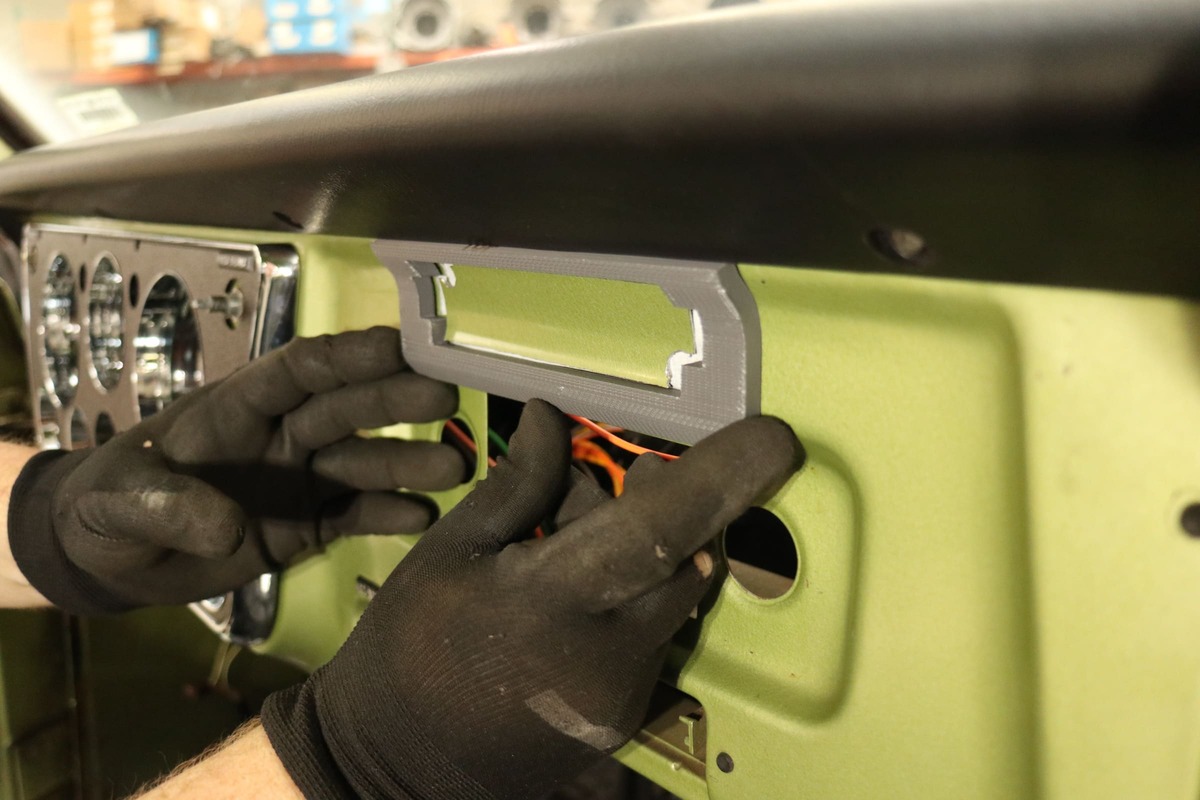
Cutting holes in a pristine C10 dash can be a frightening thought—and an even more frightening procedure if you’re not careful, let alone not sure what you’re doing in the first place! For those reasons alone, CPP has developed a 3D-printed template kit for locating, marking, and facilitating (cutting) those air-access holes for both the side and center vents.

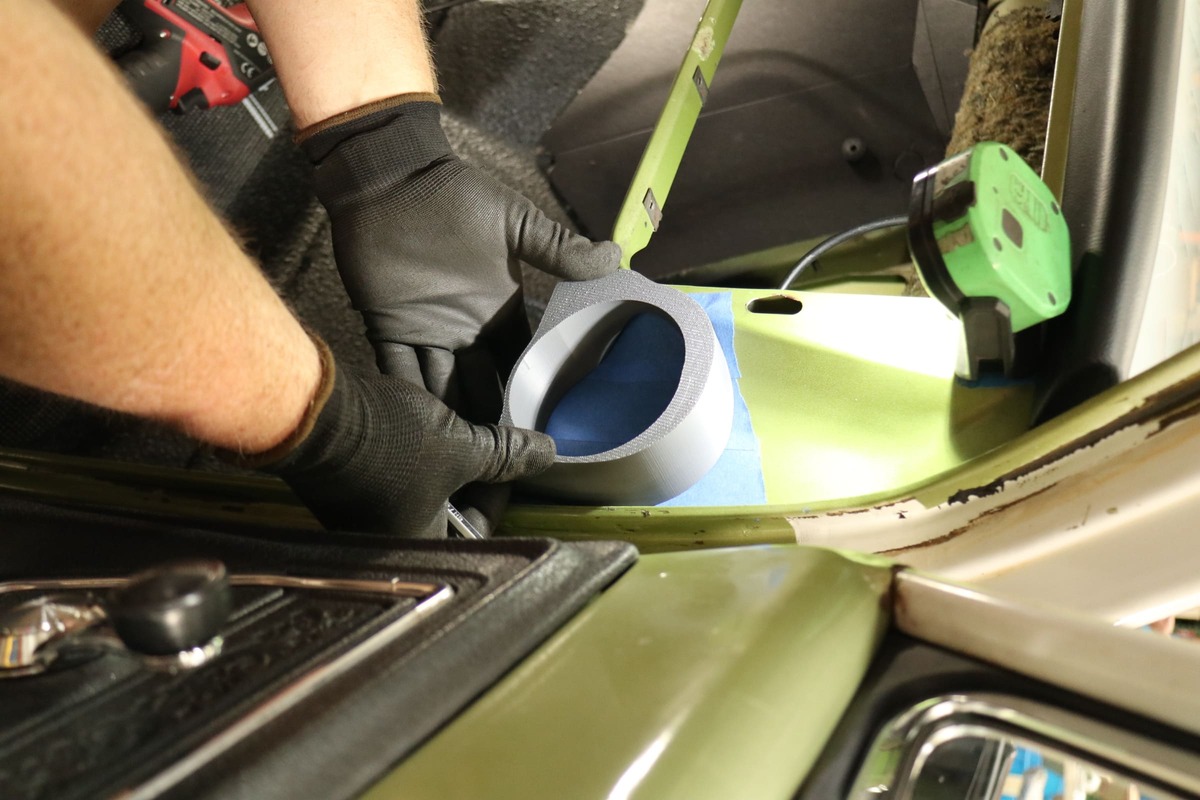
Using blue painter’s tape, mask the areas where the vents will locate. Attach the templates via the vent mounting holes along the lower edge and, using a pencil (laid flat against the inner circumference of the template), mark your holes.
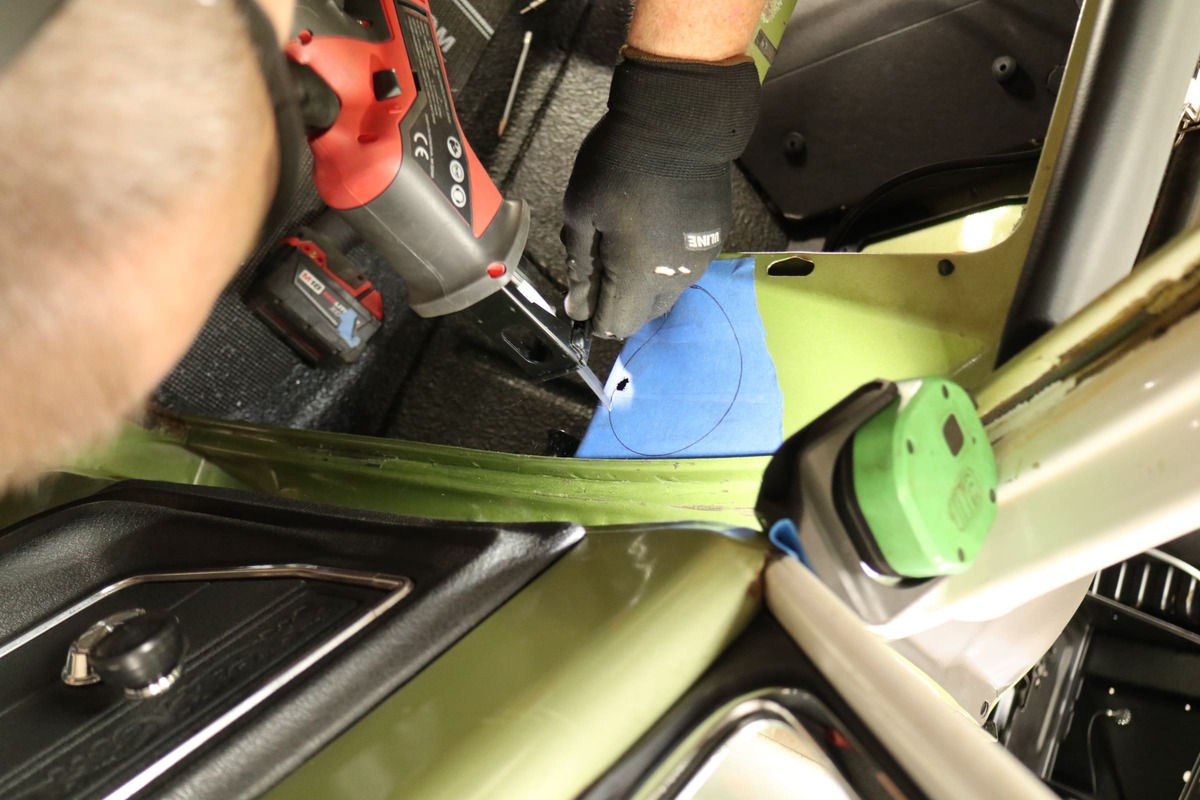
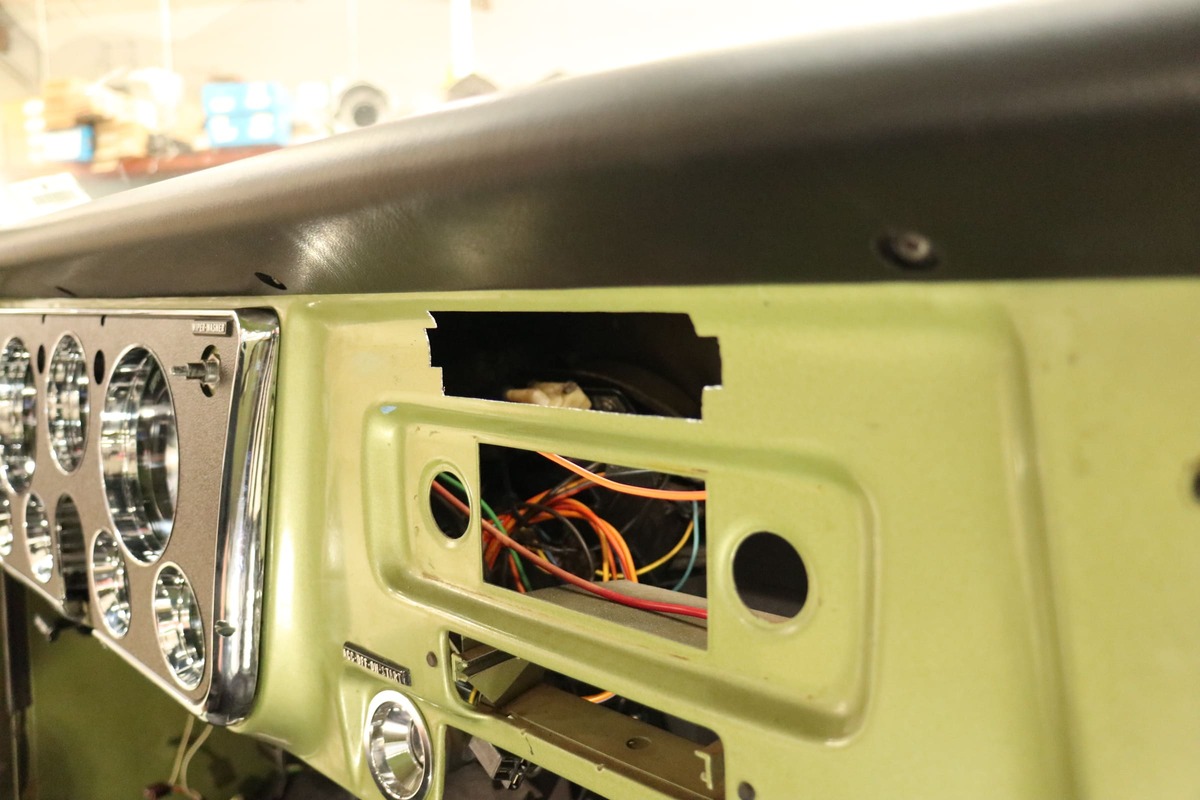
First, drill a pilot hole within the perimeter in order to start your cut. If you look close, you’ll notice that the reciprocating blade being used has been trimmed down to jigsaw size, which makes the cutting process much, much easier, from the start to the tight corners, as opposed to using a full-width blade.
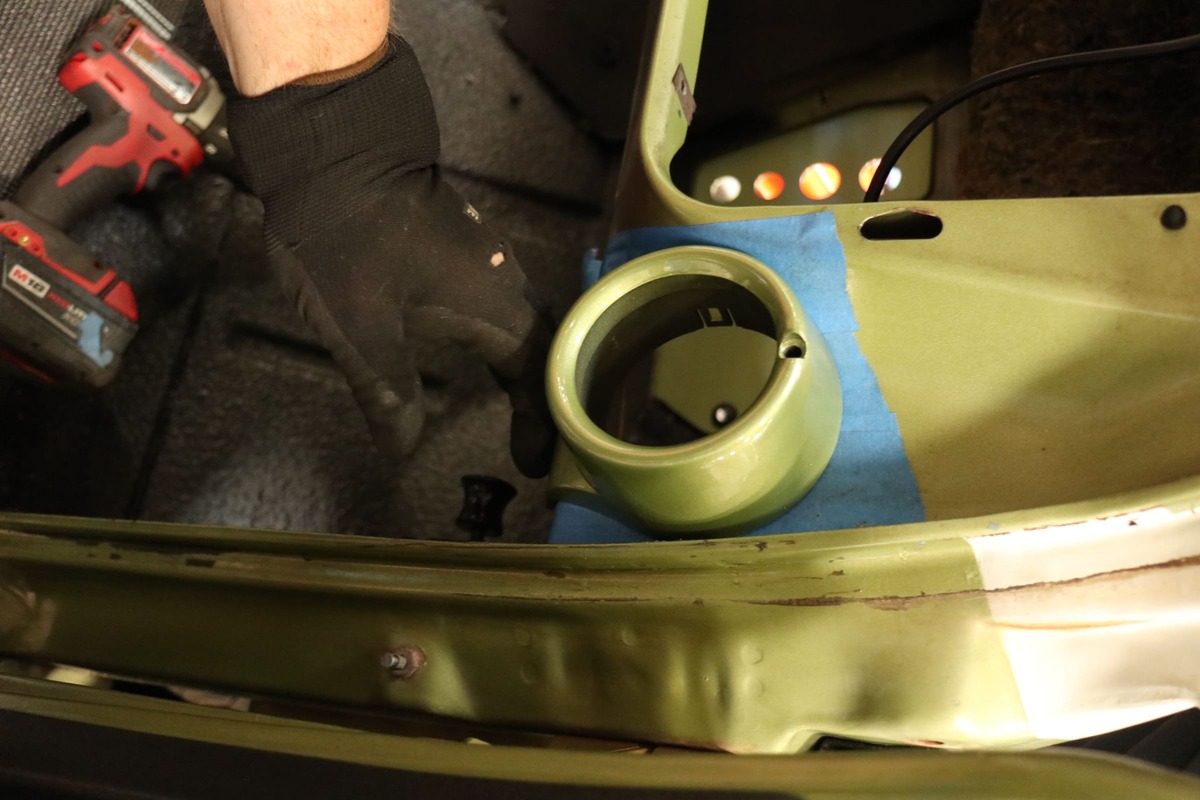
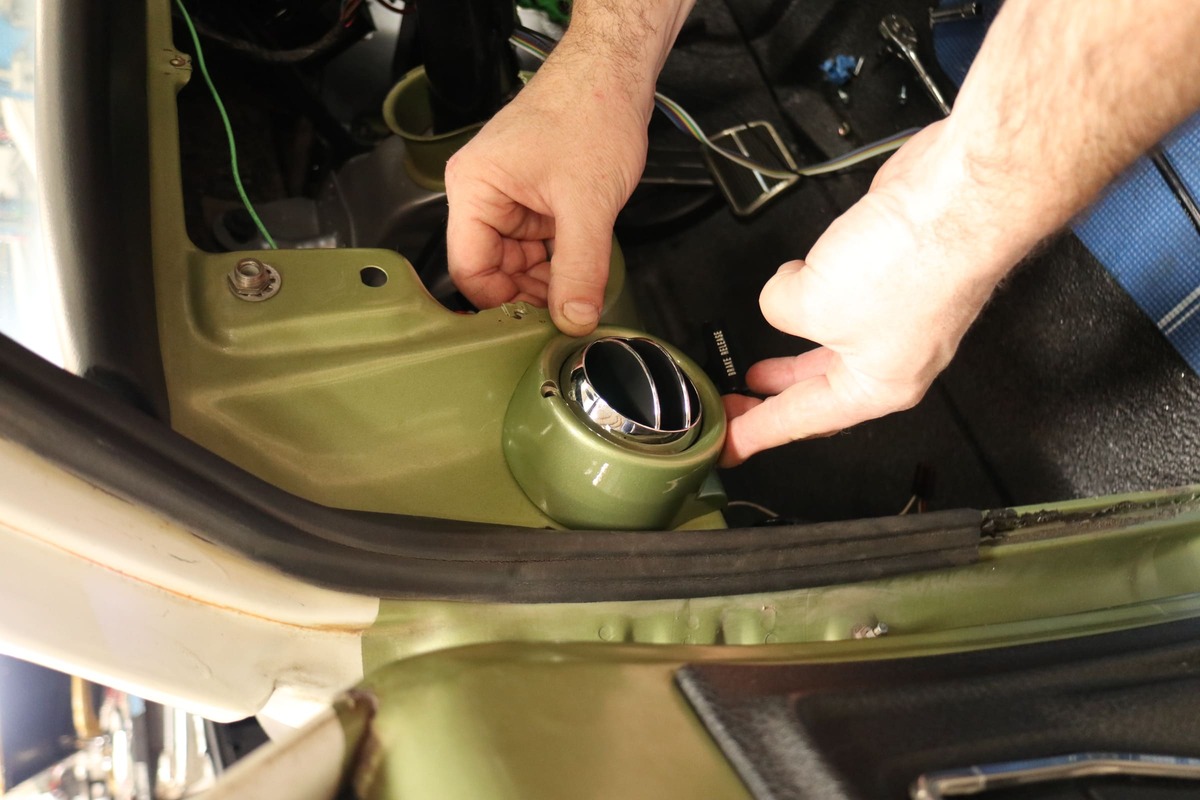
Carefully deburr the cut edges (without going oversize, as it’s a close fit) and ensure your OE vent (repop or original) fits snug. CTP
Vintage Air
800-862-6658
www.vintageair.com
Classic Performance Products
800-760-7438
www.classicperform.com