How to Install Heidts’ 4 Link Suspension On A Tri-Five (1955-1957) Chevy
Our goal was to take out the old Chevy rear end and install an upgraded 9-inch complete with a Heidts 4 link suspension to modernize the ride of our ’56 Chevy wagon.
Improving the Handling and Ride Quality On This 1956 Chevy Nomad
Leaf Removal – We Upgrade a Tri-Five Chevy With Heidts’ 4 Link Suspension
Leaf springs are commonplace in the old car world. We’ve relied on them for more than 100 years but they’re not always the ideal platform for performance. In the case of this 1956 Chevy Nomad project car, it had a nice stance and already had a selection of aftermarket components, but the owner wanted to make big improvements. He commissioned Hot Rods by Dean to revitalize the suspension with a Heidts four-link rear suspension kit (PN RC-151-K).
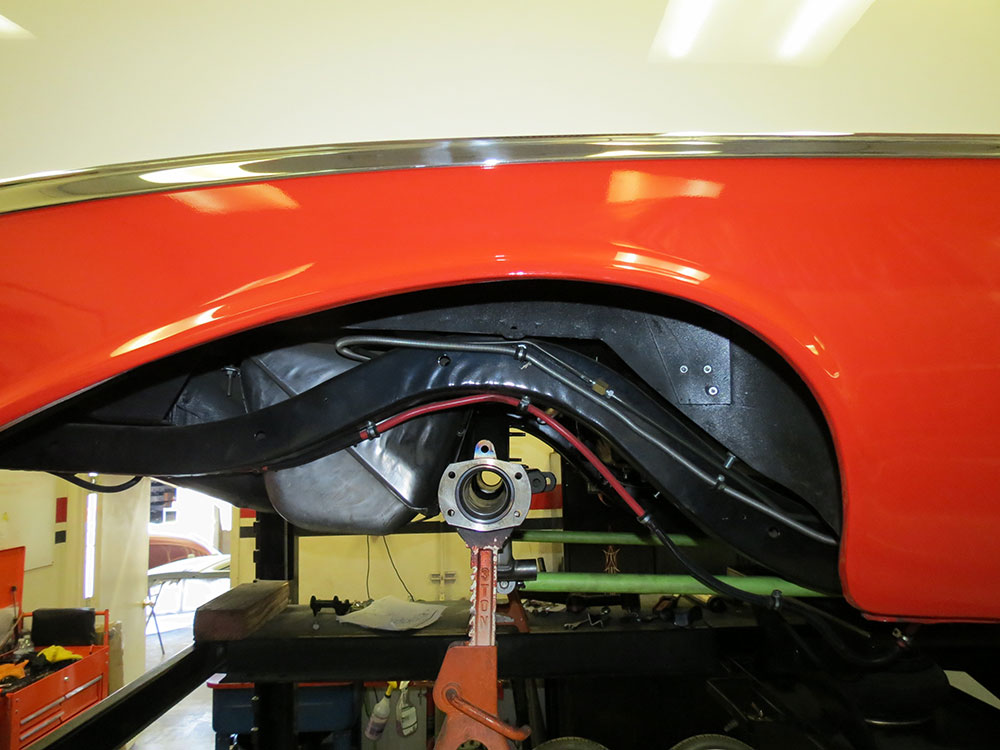
The starting point for this project is a mildly modified ’56 Chevy wagon. The rear suspension has been upgraded with an aftermarket shock crossmember and QA1 shocks, but everything else is stock.
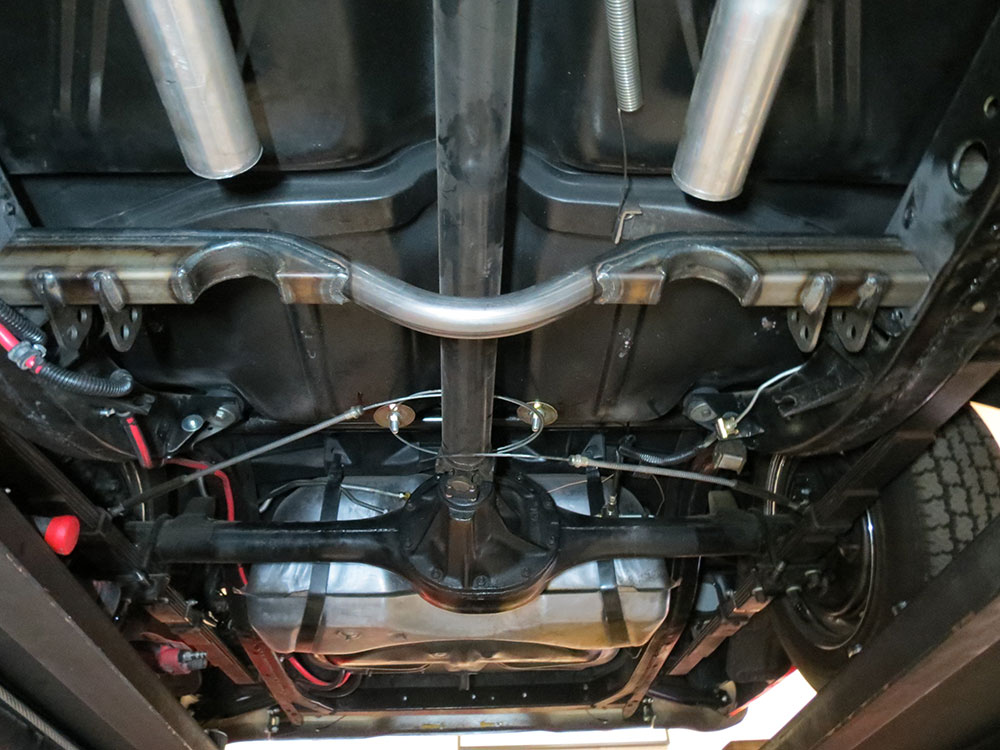
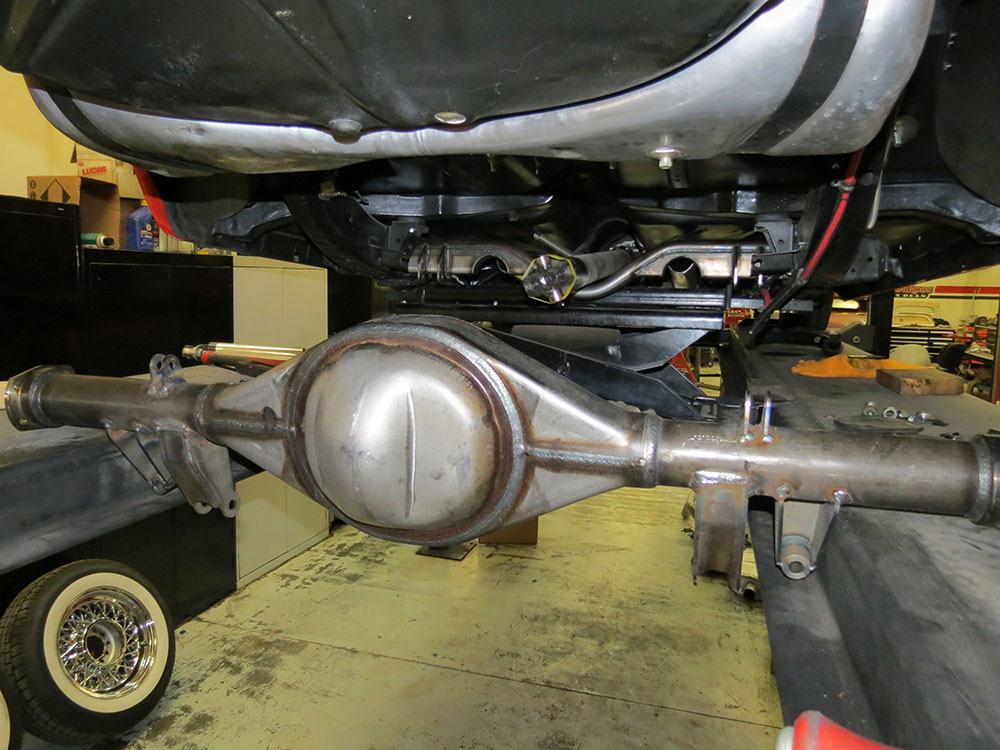
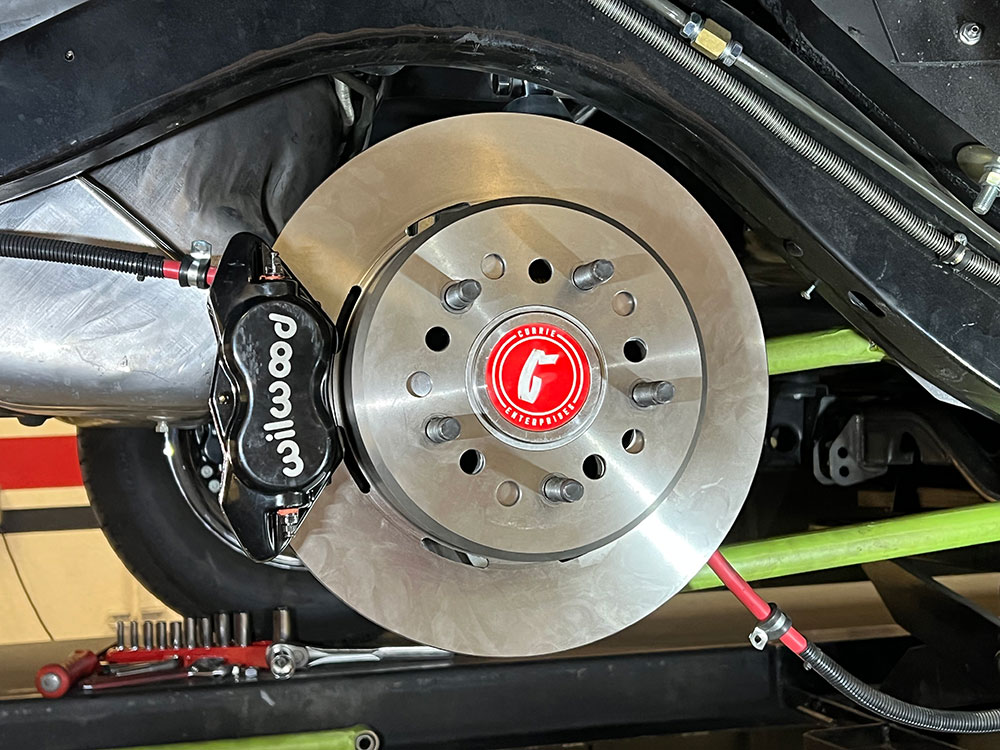
The new suspension eliminates the leaf springs, in favor of an adjustable four-link system, coilovers, and a sway bar. Additional options include a new 9 inch rear end housing, complete with pre-installed brackets. In addition to the rear end and suspension upgrades, this Nomad also received a Wilwood big brake kit, a huge upgrade from the original drum brakes.
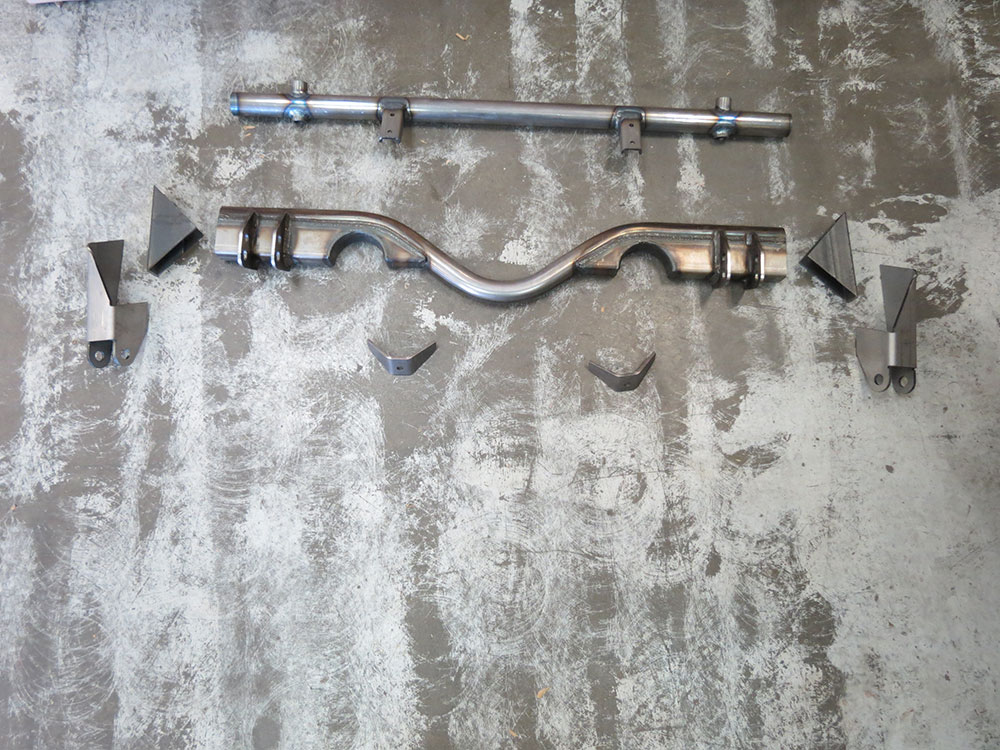
To upgrade the rear suspension, Hot Rods by Dean is installing a Heidts ’55-57 triangulated four-link kit (PN RC-151-K). The heart of the kit is the main crossmember, but you’ll see that it also comes with additional bracketry and a new shock crossmember.
The install process is intense for the casual car enthusiast. It’s not what we’d consider the average weekend project. You’ll need cutting tools, a good MIG welder, and a wide selection of hand tools to get the job done. Luckily, Heidts has taken the guesswork out of it and handled most of the challenging fabrication work.
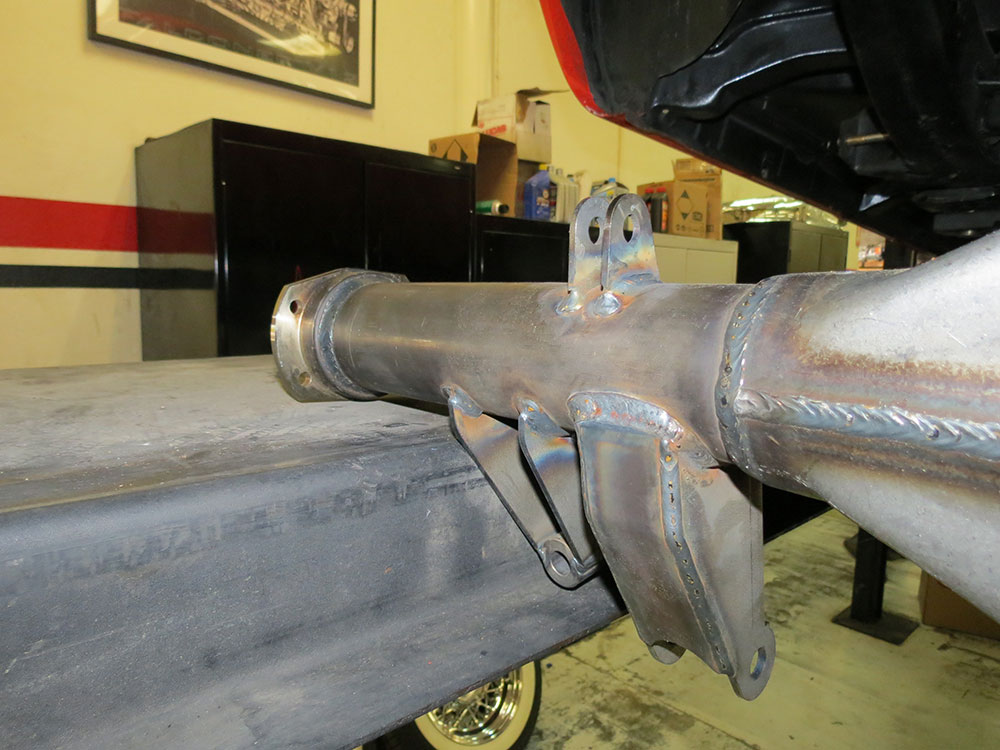
The main crossmember consists of round tubing, with extra strength coming from the rectangular tubing that is spliced in. The 4 link brackets are pre-welded and feature two mounting locations.
Follow along as we follow Cody Barenz of Hot Rods by Dean as he installs the Heidts triangulated four-link rear suspension and gives this Nomad improved handling and ride quality. This classic Chevy is ready for the road once again! MR
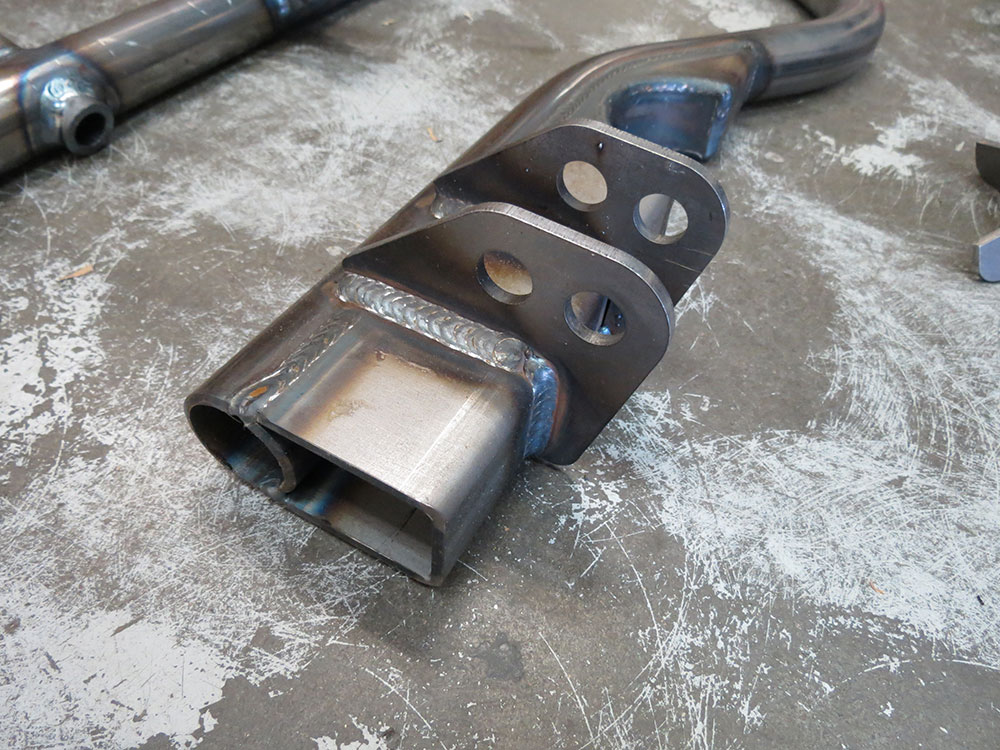
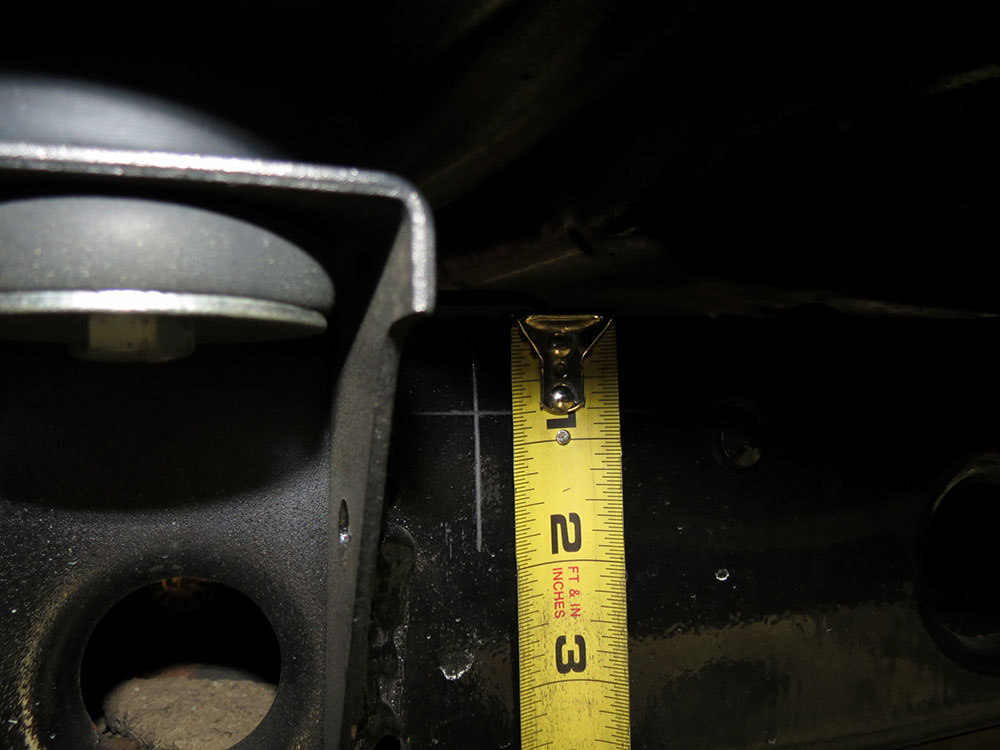
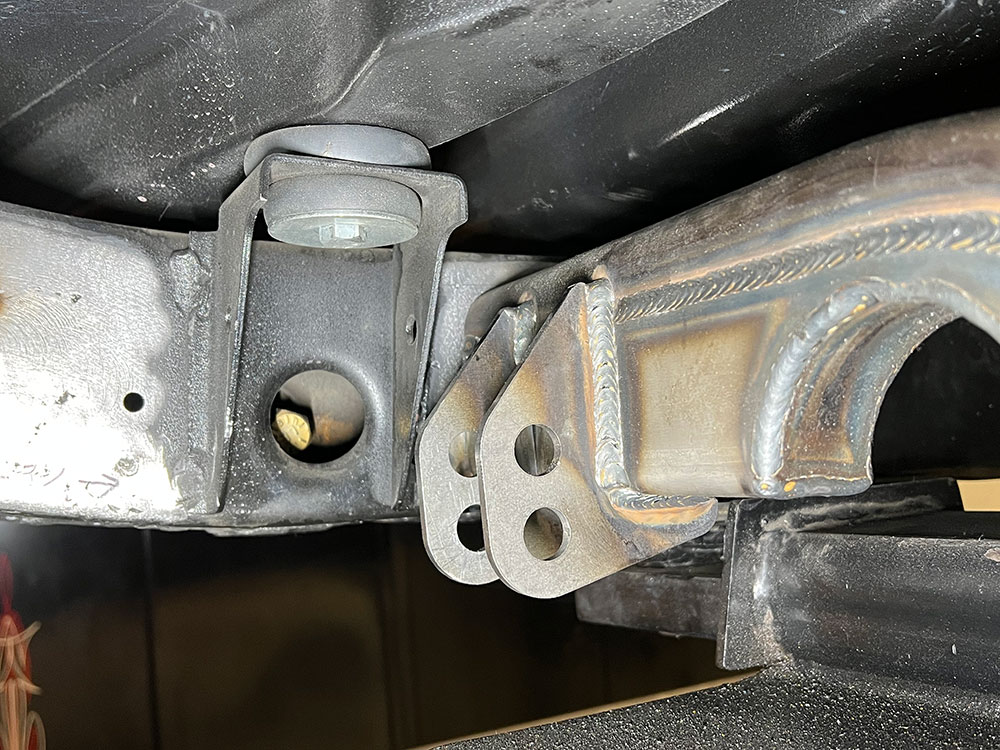
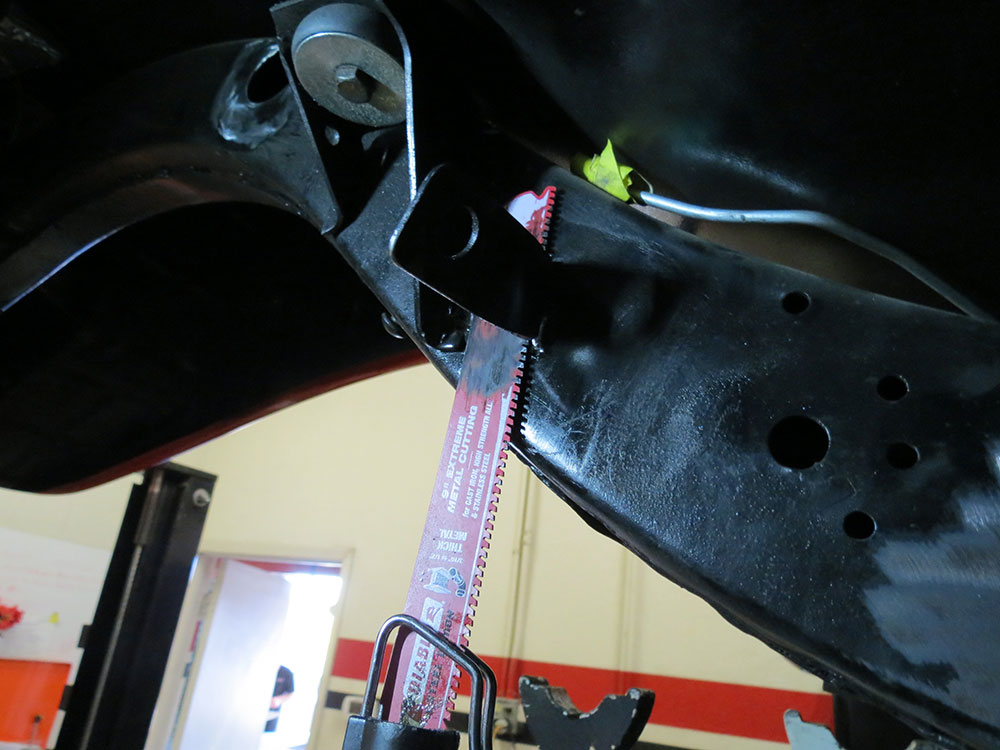
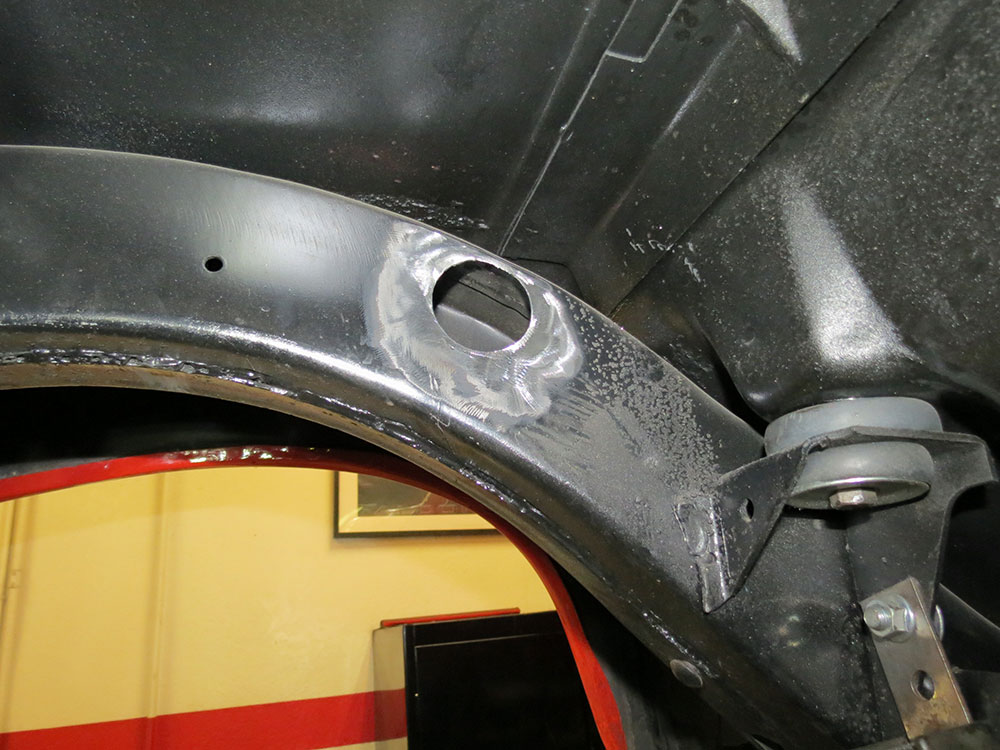
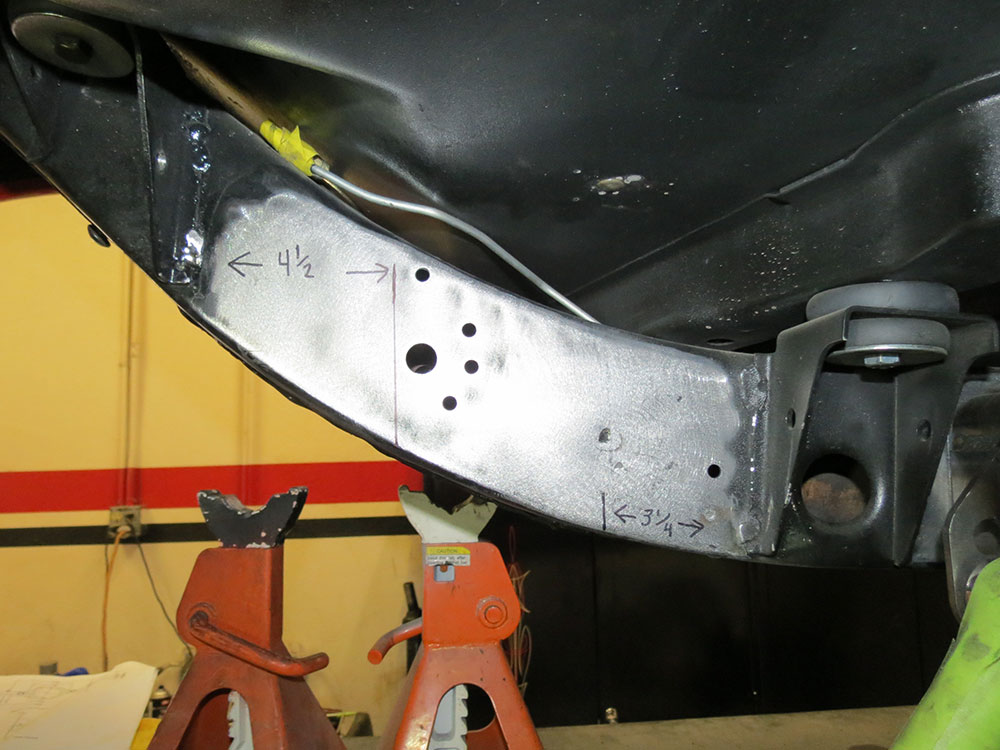
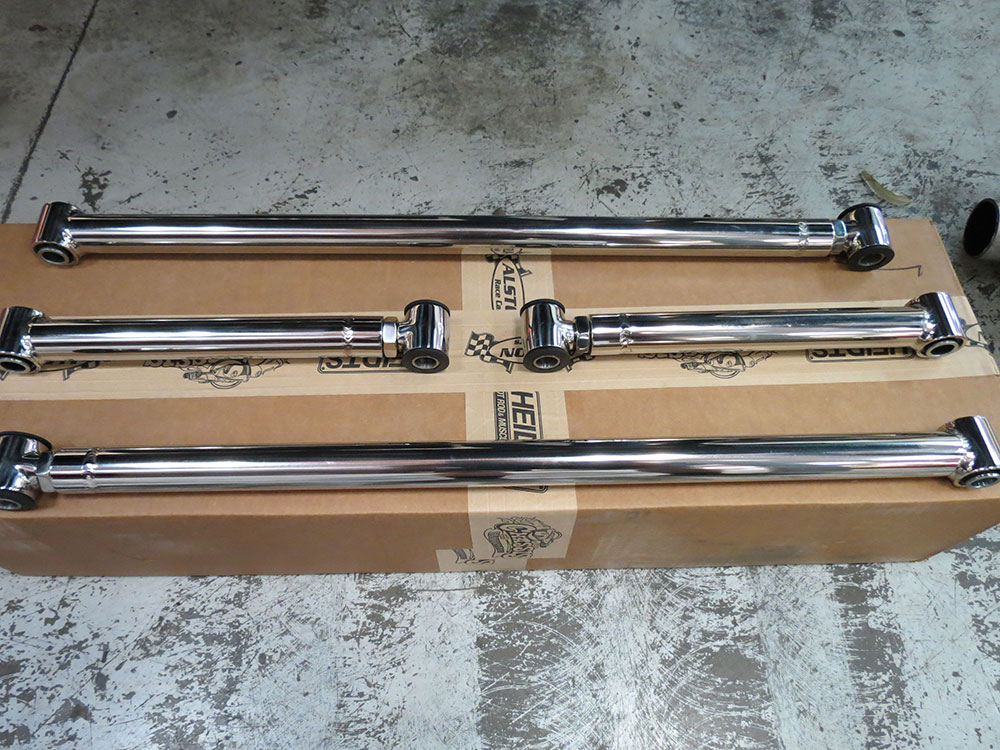
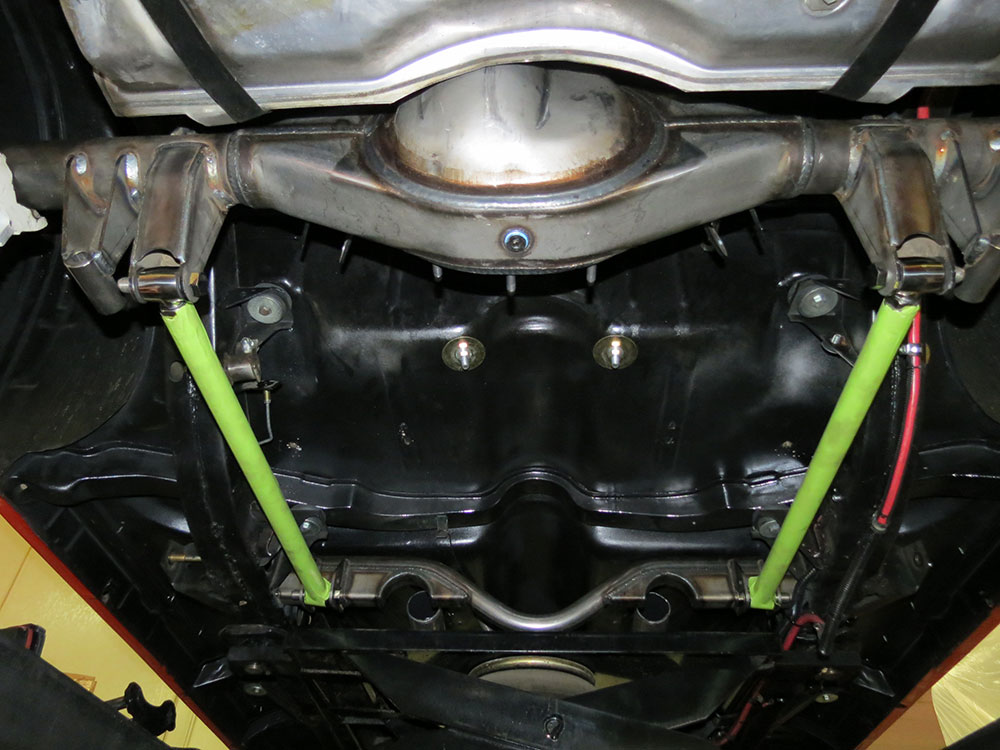
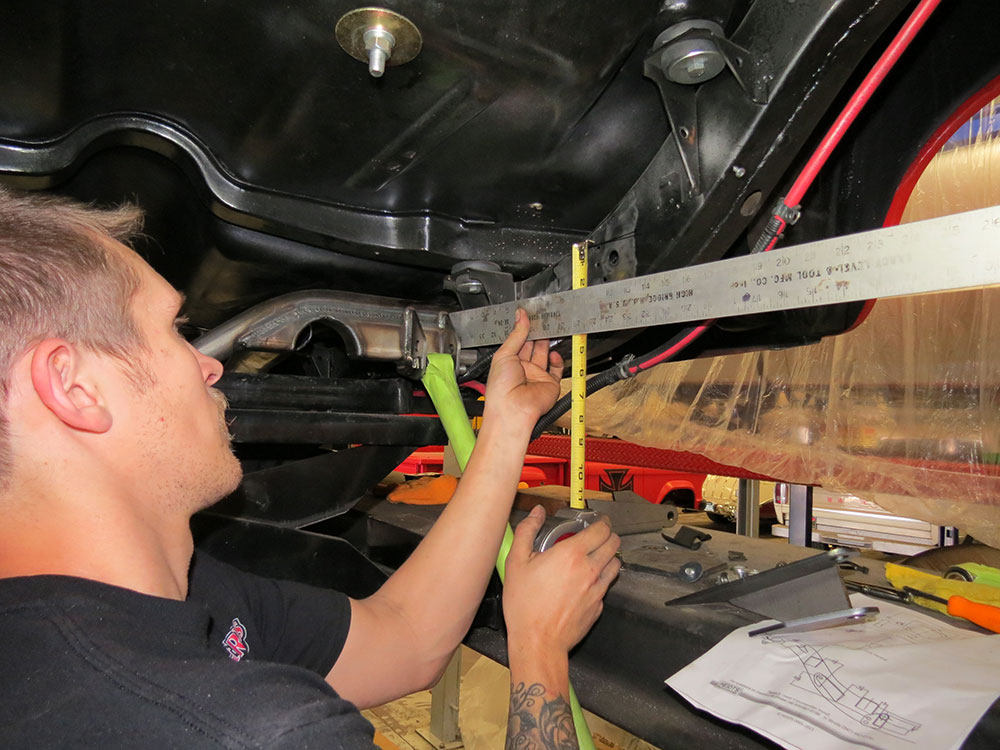
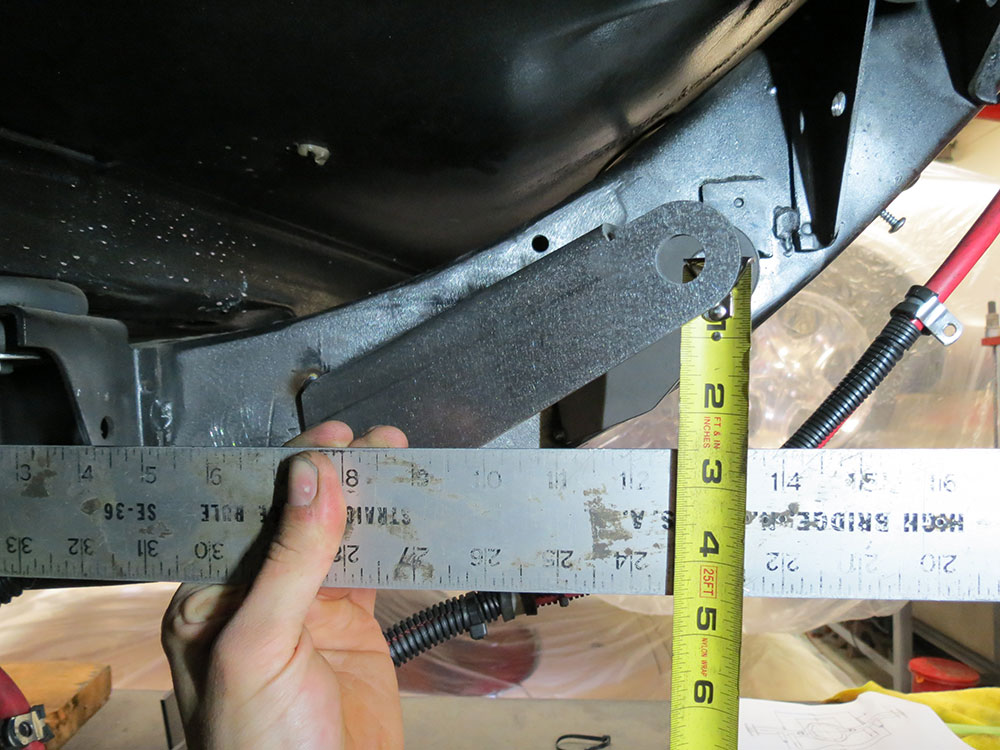
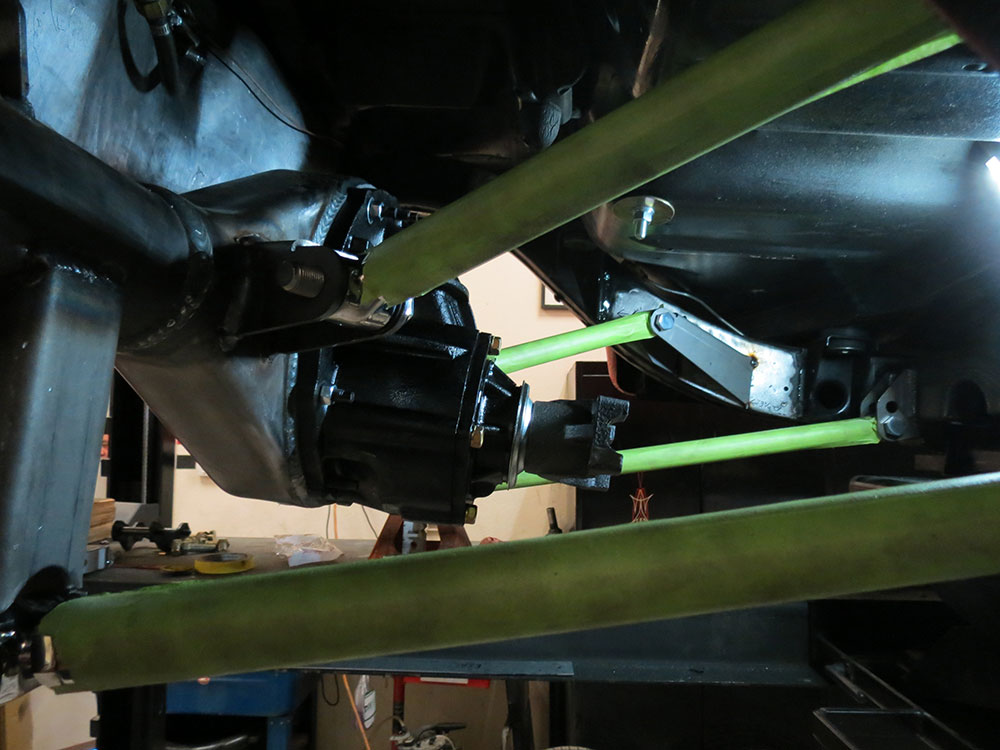
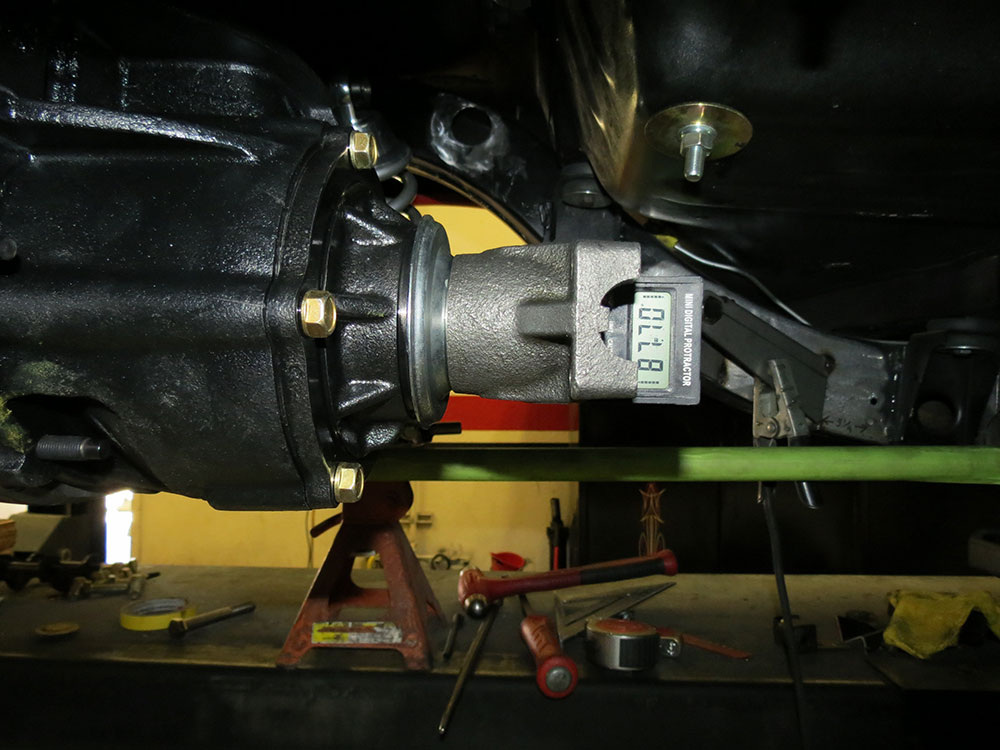
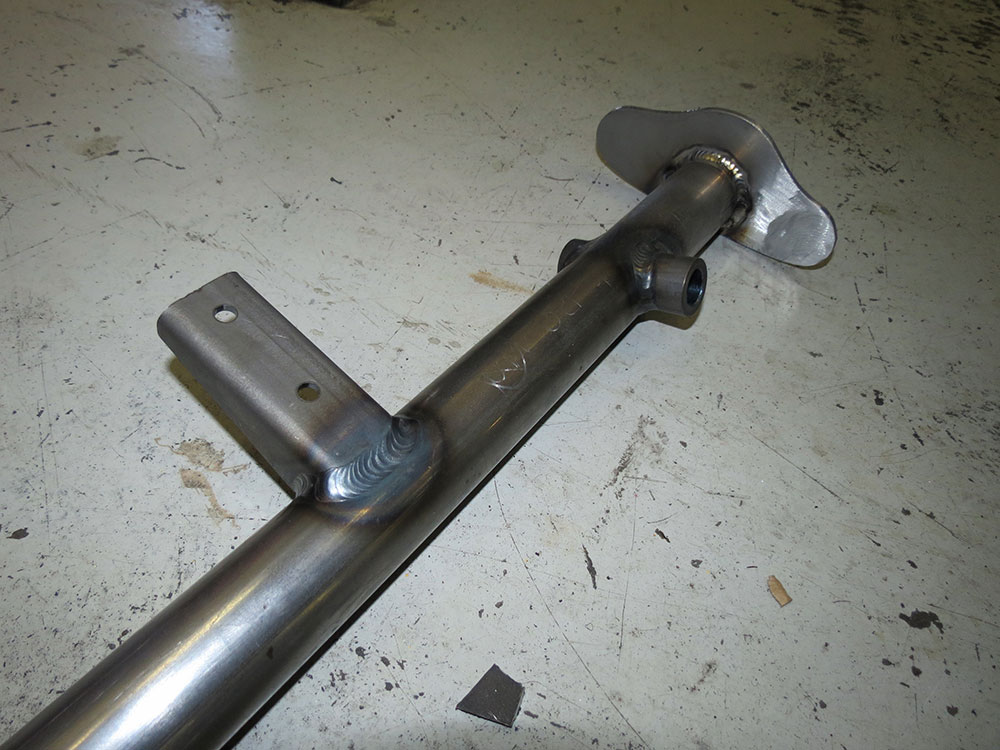
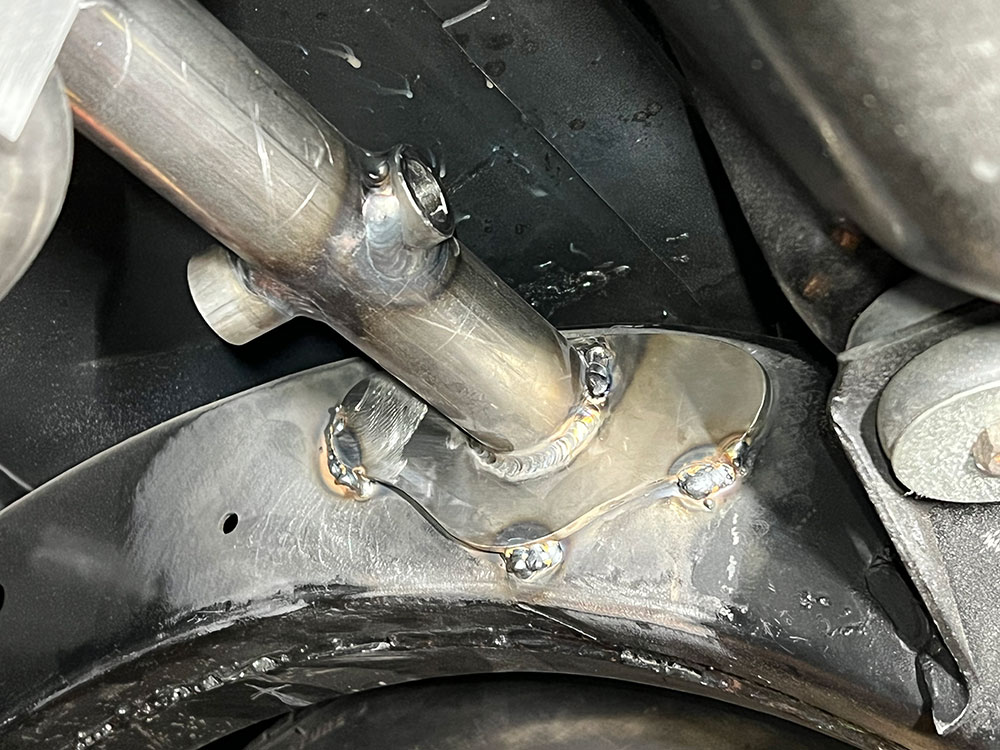
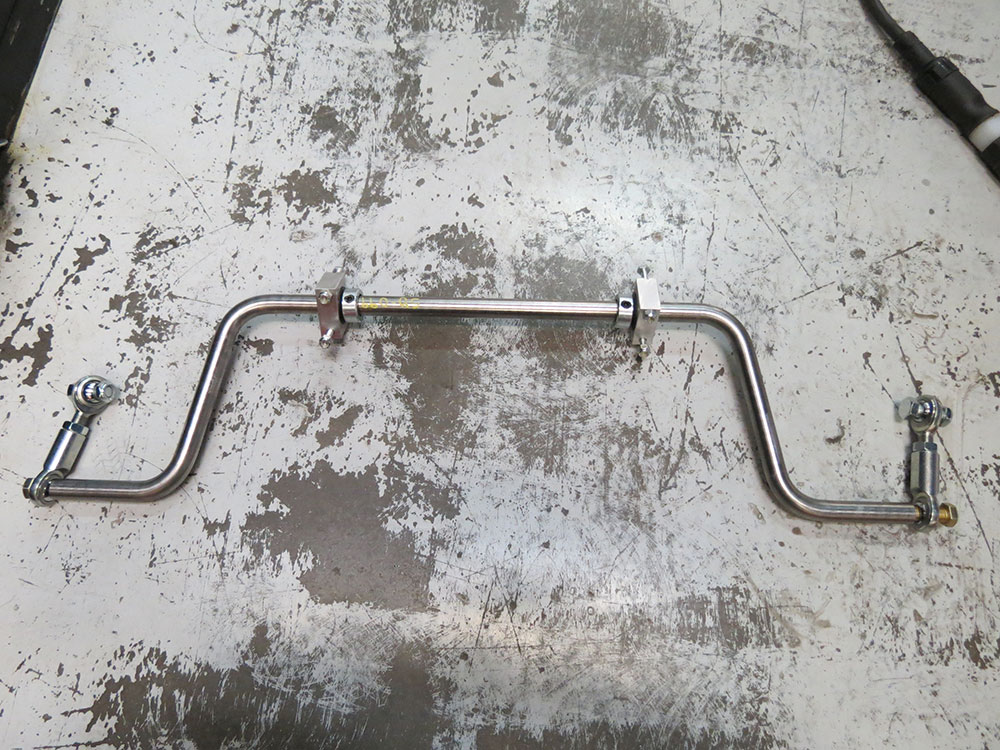
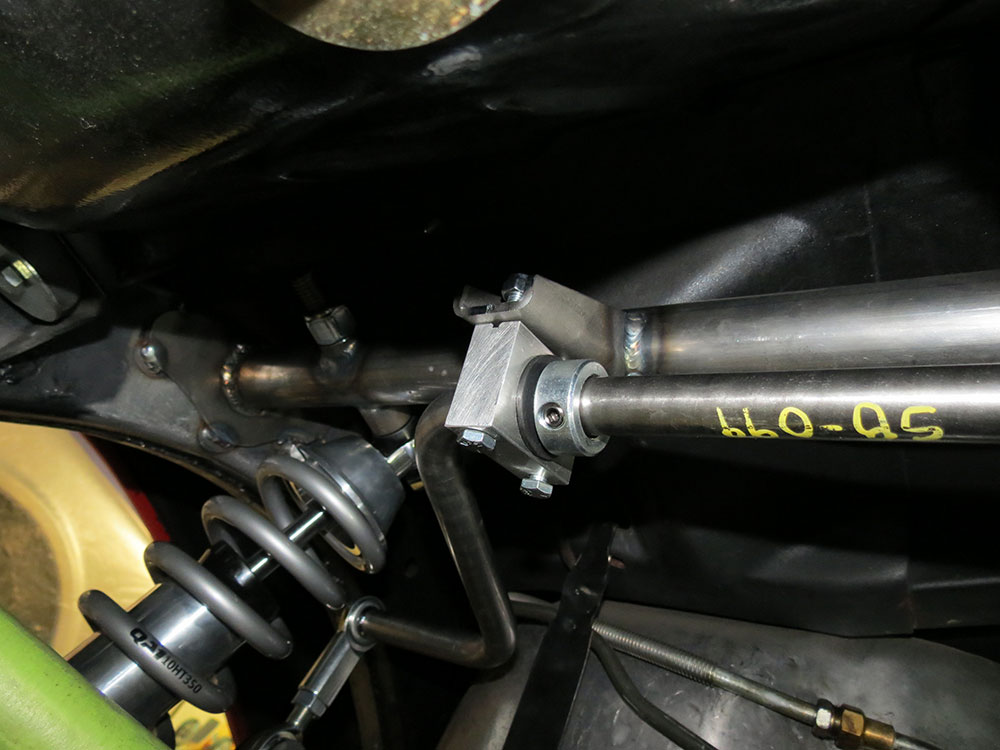
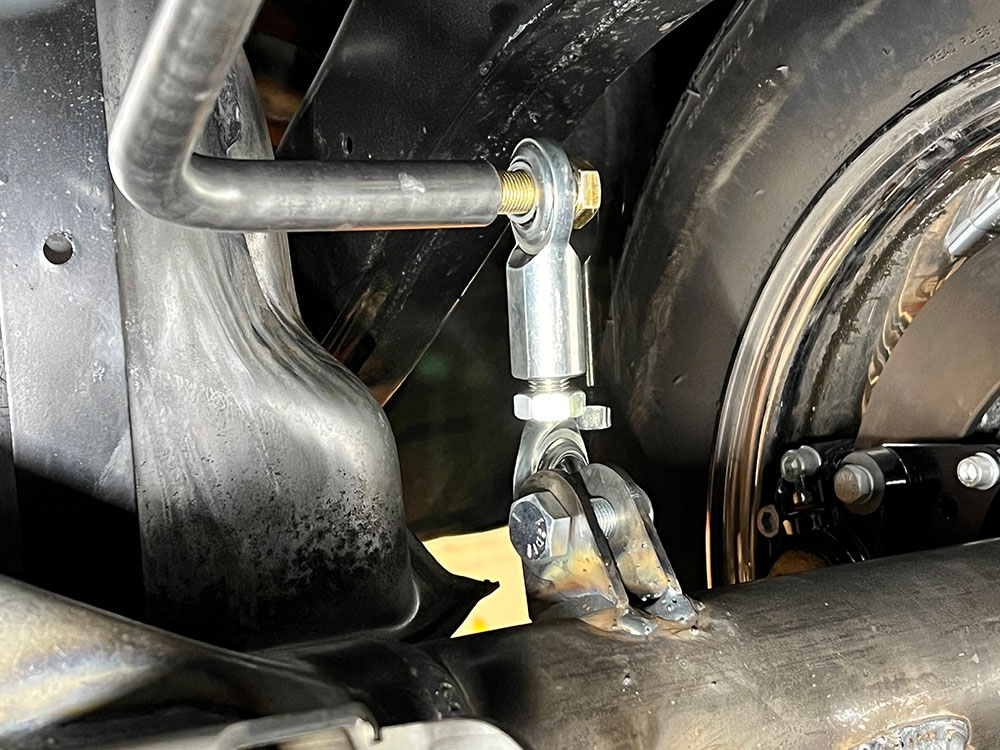
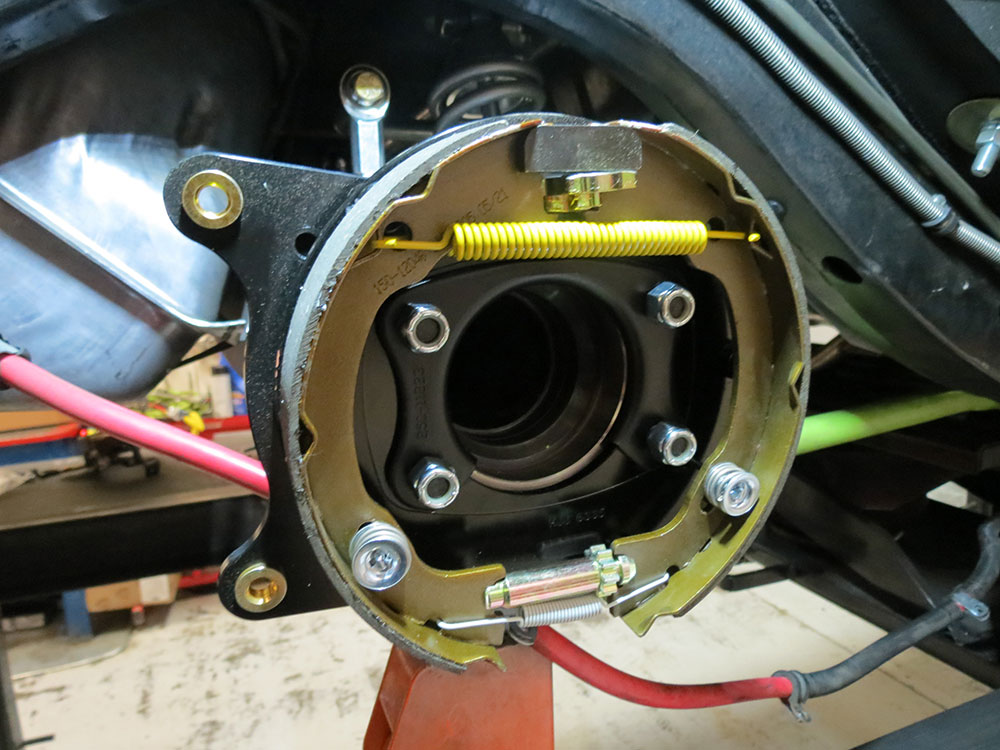
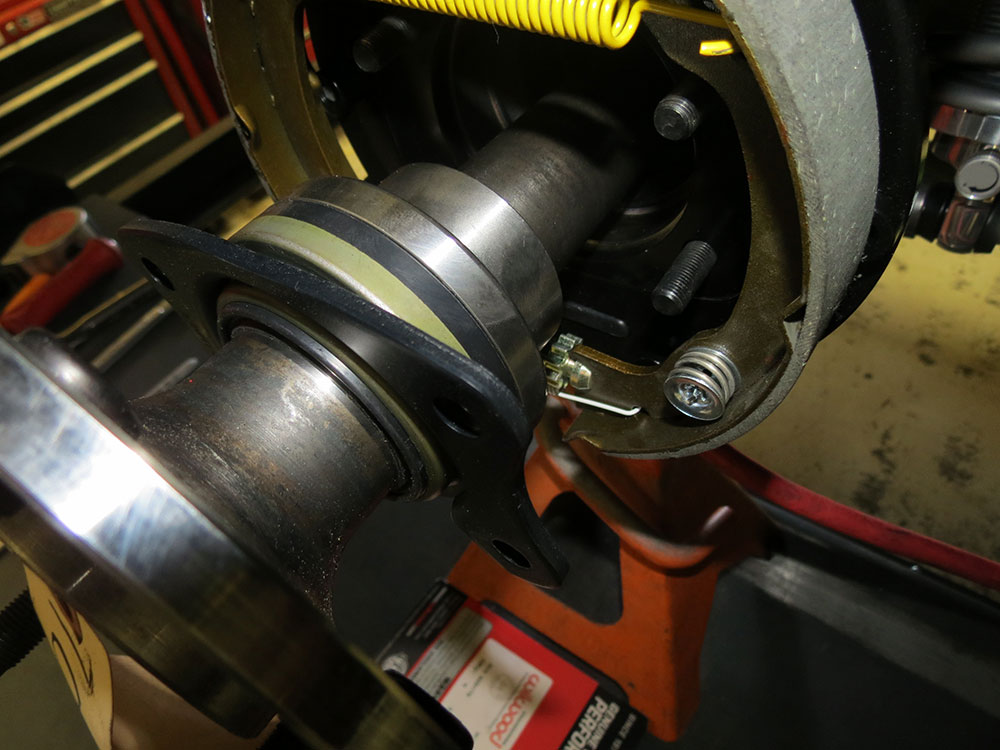
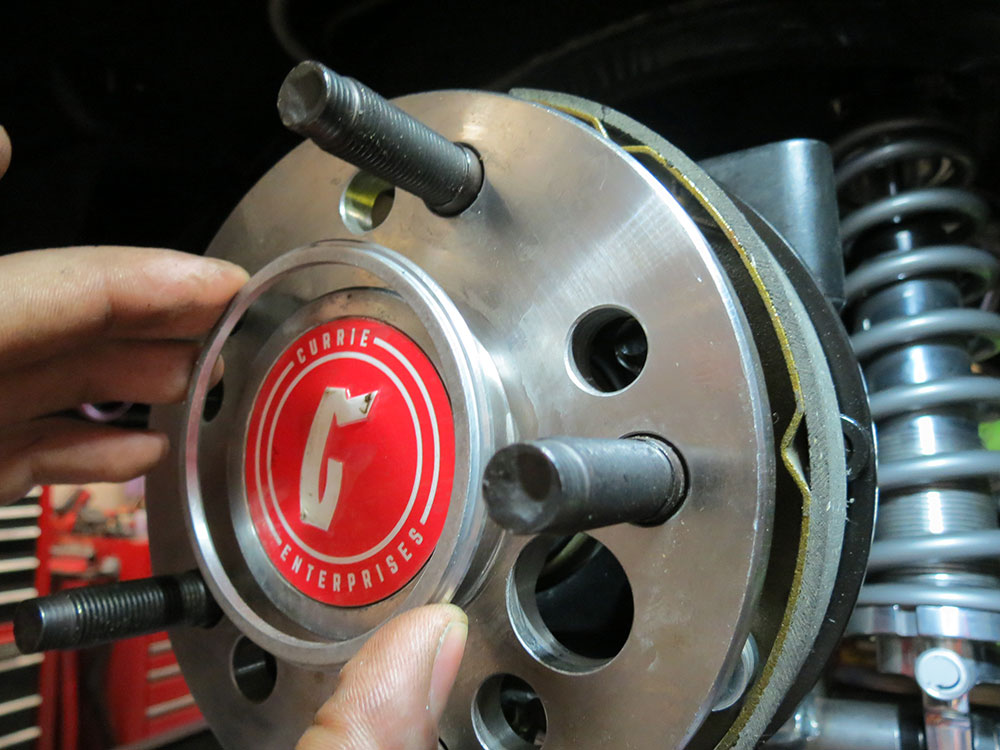
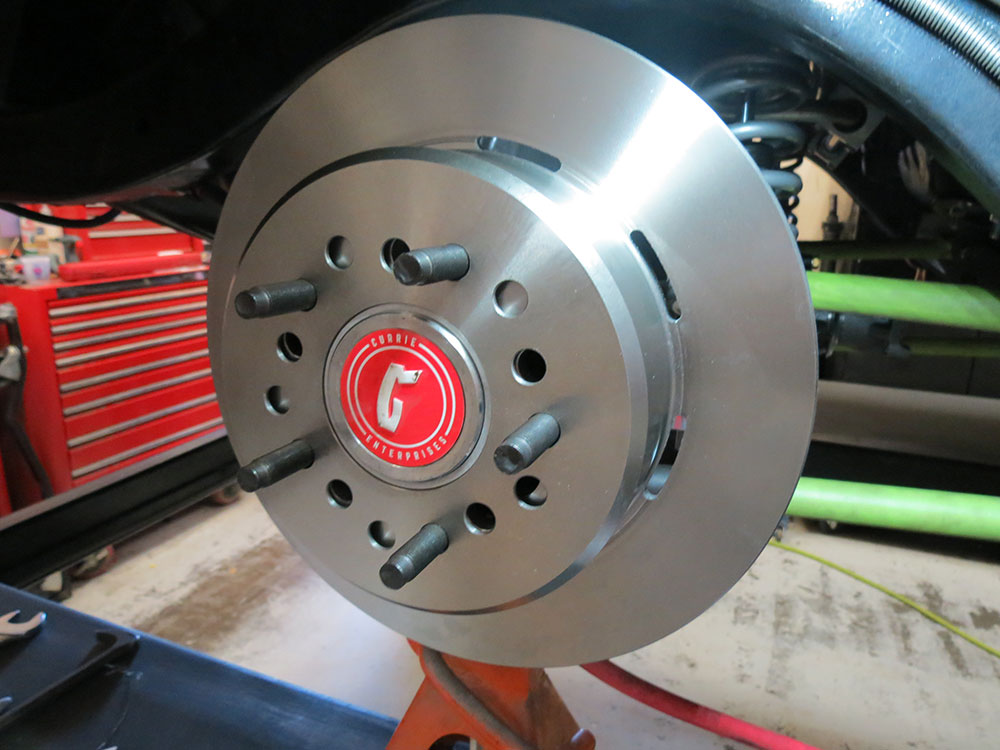
Before getting started, a few measurements are taken on the frame. According to Heidts instructions, the crossmember is positioned 1 inch forward of the body mount and 5/8 inch from the top of the frame rail.Hot Rods by Dean cut off the existing exhaust system to provide adequate room for the new rear suspension system. Notice the crossmember has provisions for exhaust. You may need to trim a little off the sides of the crossmember for proper fitment between the frame rails.It’s important that the crossmember is installed squarely between the frame rails. Simple tools and tape measures are sufficient for the task.Jack stands or blocks can be used to prop up the crossmember. Notice the positioning, just ahead of the body mount and 5/8 inch down from the top of the frame rail. The crossmember can now be tack-welded into place.With the main crossmember test-fitted, it’s time to start modifying the frame rails in preparation for the additional brackets. The kick-up area of the rear frame rails needs to be smooth, as that is where the upper four-link brackets are located.Additionally, the existing shock crossmember is removed, in preparation for the Heidts unit, which is included in the kit.After smoothing the inner frame rail, it was time for more measurements and markings to position the triangulated four-link brackets. The Heidts instructions call for 3-1/4 inches back from the “front” body mount and 4-1/2 inches ahead of the “rear” body mount.Heidts offers the 4 link suspension kit with many options, including a custom 9-inch rearend housing that’s available in 56-, 58- and 60-inch widths.The beauty of adding the rear end housing to the order is the pre-welded brackets. This saves a lot of time, as it already has the upper and lower four-link brackets, the coilover brackets, and sway bar brackets welded.Heidts offers the standard kit with painted bars, but we stepped up to the polished stainless steel bars. The bars are adjustable on one end, allowing for ample fine-tuning.The 9 inch rear end housing is mocked up using jack stands, and then the lower link bars are loosely installed. It’s a good idea to wrap the bars in tape to prevent damage during mockup.With the lower bars bolted into place, you can step back and make sure the rear end housing is centered in the wheel well. The bars are adjustable, but if there is a major discrepancy, it might be time to re-check the location of the crossmember.Here Cody Barenz from Hot Rods By Dean uses a straightedge and measuring tape, as you’ll need to take some baseline measurements to determine the proper location for the triangulated four-link bracket. Heidts calls for 4-5/16 inches from the center of the upper hole on the main crossmember to the center of the hole on the triangulated bracket.The baseline measurements allowed the guys at Hot Rods By Dean to tack-weld the triangulated brackets into place. Now, with the straightedge lined up with the upper hole on the main crossmember, you’ll see the measurement of 4-5/16 inches.With the triangulated brackets tack-welded, the upper link bars can be loosely bolted into place. Using jack stands, you can move the rear end housing to your estimated ride height.This Mini Digital Protractor is handy for checking pinion angle, and it’s showing we have about 2.30 inches of negative pinion angle (pointing downward). Heidts calls for -2 degrees, so we can adjust the upper bars slightly and get the angle dialed in perfectly.While the rear end is at the proposed ride height, it’s also a good time to mark the proper location for the supplied bump stops. Brackets are provided and should be welded to the inner frame rail. Then the bumpstop is threaded into the bracket.The Heidts coilover shock crossmember features custom plates that attach to the frame rails. This one also features brackets for the optional rear sway bar.The coilover shock crossmember is now partially welded to the frame rails. It’s important to mock up the coilovers and sway bar before final welding.A rear sway bar is a suggested upgrade, as it stabilizes the rear suspension even more. Heidts offers it as an upgrade in the kit, and it’s a simple install.The Heidts 4 link suspension kit also comes with every necessary nut and bolt to complete the install. The coilover is loosely bolted into place, as is the sway bar for mockup purposes.The sway bar bolts to the coilover crossmember using the supplied hardware and the supplied mounting block, bushing, and collar.Heim joints are used on the sway bar endlinks, offering plenty of adjustability. Heidts suggests threading the ends all the way inward and then back them out approximately 3/8 inch. Only mount one side and wait until the car is resting on flat ground to connect the other side.Another option on the Heidts Suspension kit is Wilwood disc brakes. It’s a simple bolt-on kit (PN 140-10511) designed for Big Ford 9 inch rear end housings. It features an internal parking brake, seen here.Wilwood’s retainer bracket is responsible for holding the backing plate and axle in place. It bolts to the Ford housing with the provided hardware.This rotor registration adapter slides onto the axle flange with the smaller side facing toward the brake rotor.The Wilwood 12.19-inch vented rotors are drilled with multiple wheel bolt patterns, so align the proper holes and studs to slide the rotor into place.Finally, the Wilwood four-piston calipers are bolted to the supplied brackets. The brake system is completed with new hard lines and flex hose. As with any brake system modifications, the system will need to be bled.With the suspension system bolted up, it’s time to completely disassemble it for final welding and paintwork. Once those tasks are completed, the parts are bolted together again for a final time. From there, final adjustments to ride height, pinion angle, and sway bar can be made to dial in this new Heidts rear suspension.
We use cookies to ensure that we give you the best experience on our website. If you continue to use this site we will assume that you are happy with it.