Let’s face it, cruising around in a classic Chevy should be an enjoyable experience, but as our pal Bruce Valley found out, doing so at the height of Summer in Phoenix was anything BUT. With temperatures peaking somewhere near the melting point of Tungsten, the inside of Valley’s fishbowl Handyman Wagon was akin to being an ant under a prepubescent teen’s magnifying glass. It was hot, uncomfortable, and you felt like a hot dog under a heat lamp. Unfortunately, that meant that the Valley family found that they were only able to enjoy their Tri-Five for a few short months at either end of Summer each year. Wanting to add a few months to that timetable, they tapped the Clampdown Competition workshop to add a fully functioning A/C system while it was there getting a myriad of other upgrades.
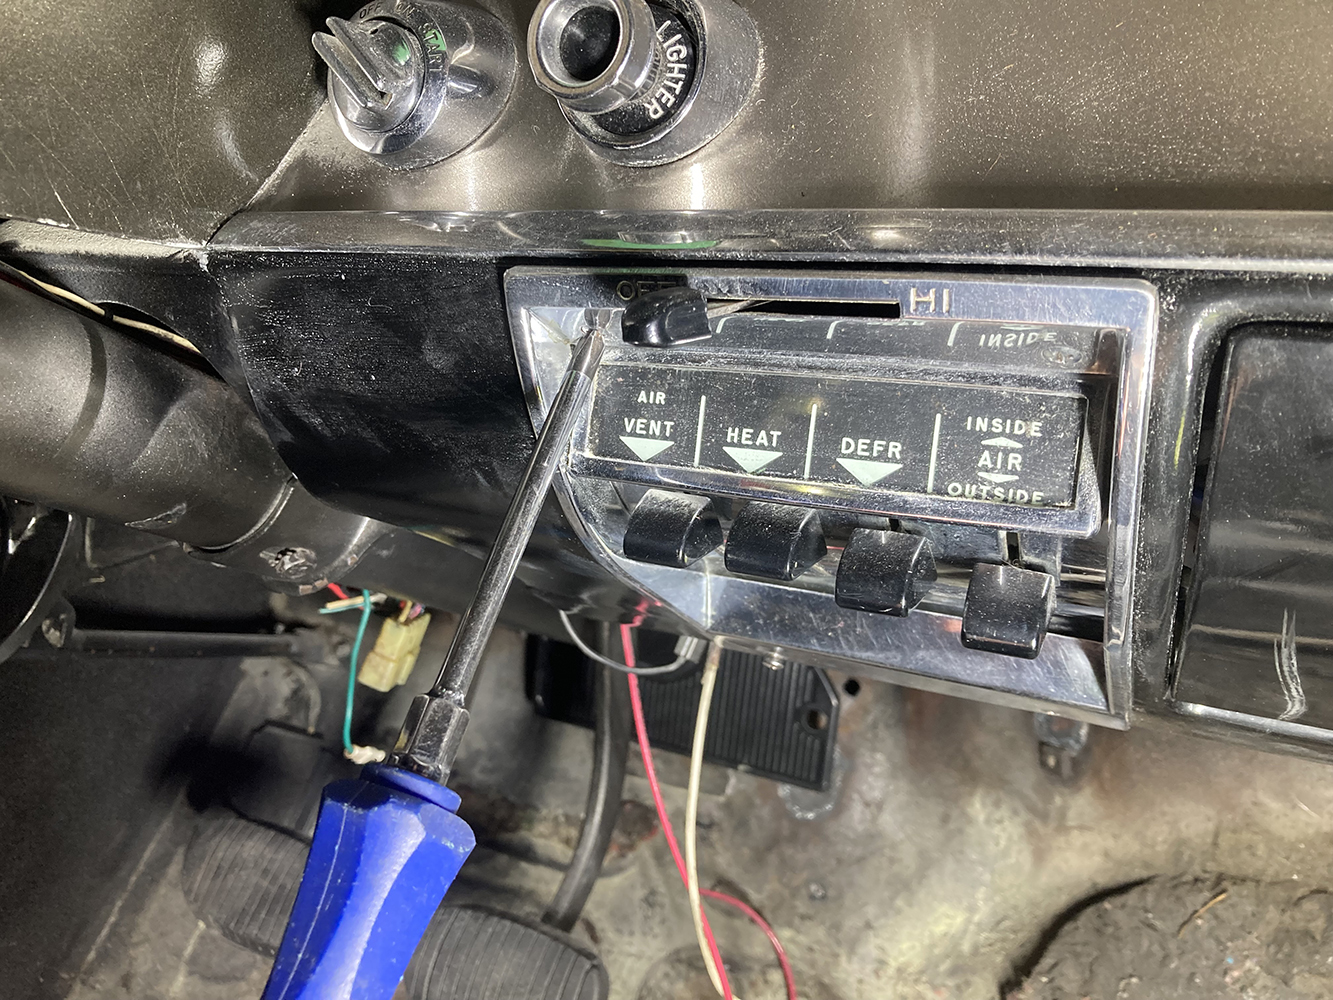
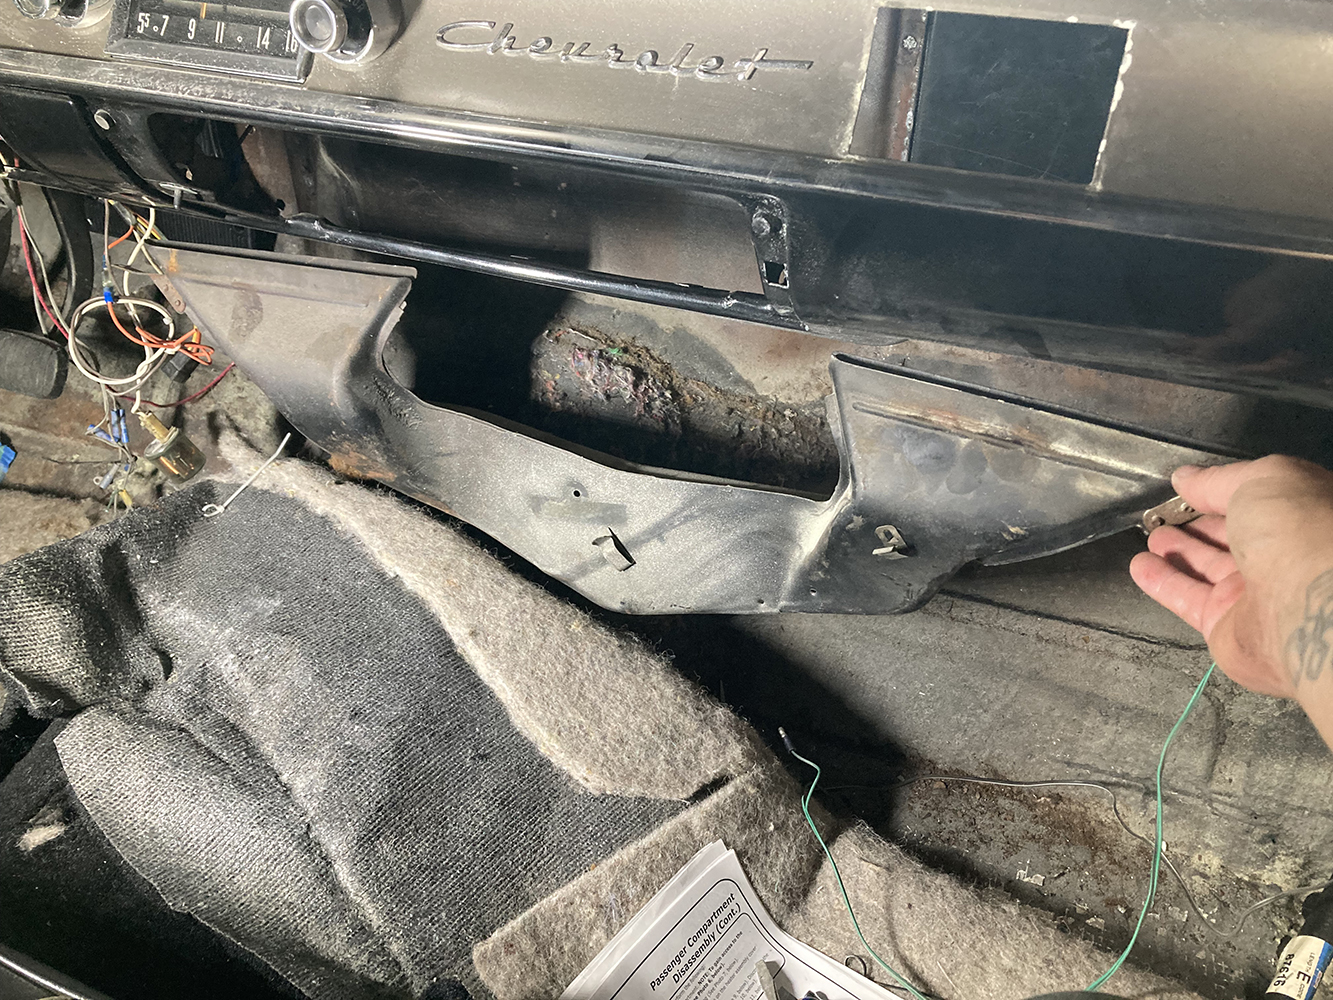
The installation of Vintage Air’s Gen 5 kit begins by removing a number of underdash items, including, but not limited to, the heater assembly, defrost duct, glovebox and door, clock, and the OE control panel assembly.
Typically, adding A/C to a vintage vehicle can be challenging, given engine accessory limitations and the like, but thankfully, Clampdown Competition had recently completed an LS3 drivetrain swap in Bruce’s ’57, complete with a Concept One pulley kit. That meant that not only did they get the power steering upgrade that was originally desired, but it also added a Sanden SD-7 compressor, a perfect complement to the Vintage Air SureFit A/C Kit that was to come.
That challenge of adding an A/C system to a vintage vehicle is actually a thing of the past, thanks to Vintage Air and their vast line of SureFit kits. From Tri-Fives to ’80s Monte Carlos and nearly everything in-between, Vintage Air has just about every Chevy body style sorted when it comes to upgrading to a modern A/C system, with a multitude of vent and controller options to boot.
Since we recently refinished the dash of the ’57, it was stripped bare and ready for reassembly.
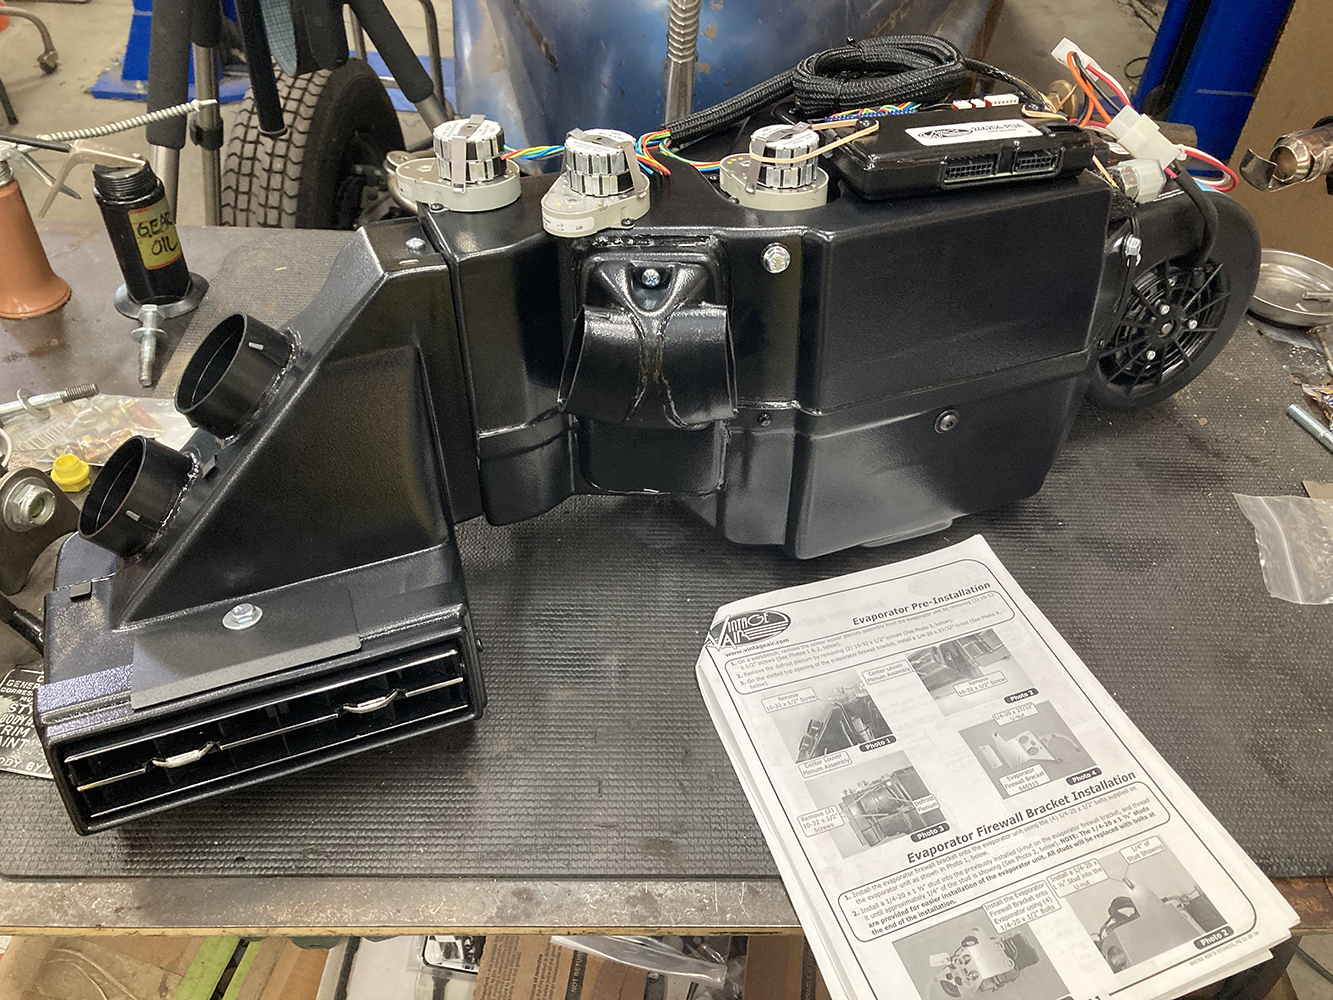
When it came time to select a system for our 1957 project, we opted for Vintage Air’s SureFit Complete Kit with Center Vent Plenum (PN 961552). This kit offers the most recent generation of climate-control configurations offered by Vintage Air, employing an exclusive, fully electronic microprocessor-controlled system. By eliminating cables or vacuum connections, Vintage Air utilizes separate, state-of-the-art, high-density aluminum exchangers that pack the maximum possible performance and reliability designed to fit within the confines of the Tri-Five’s dash. With variable blower speeds and dash/floor/defrost blend modes, their Gen 5 system performs as well, if not better, than most modern OE climate-control systems.
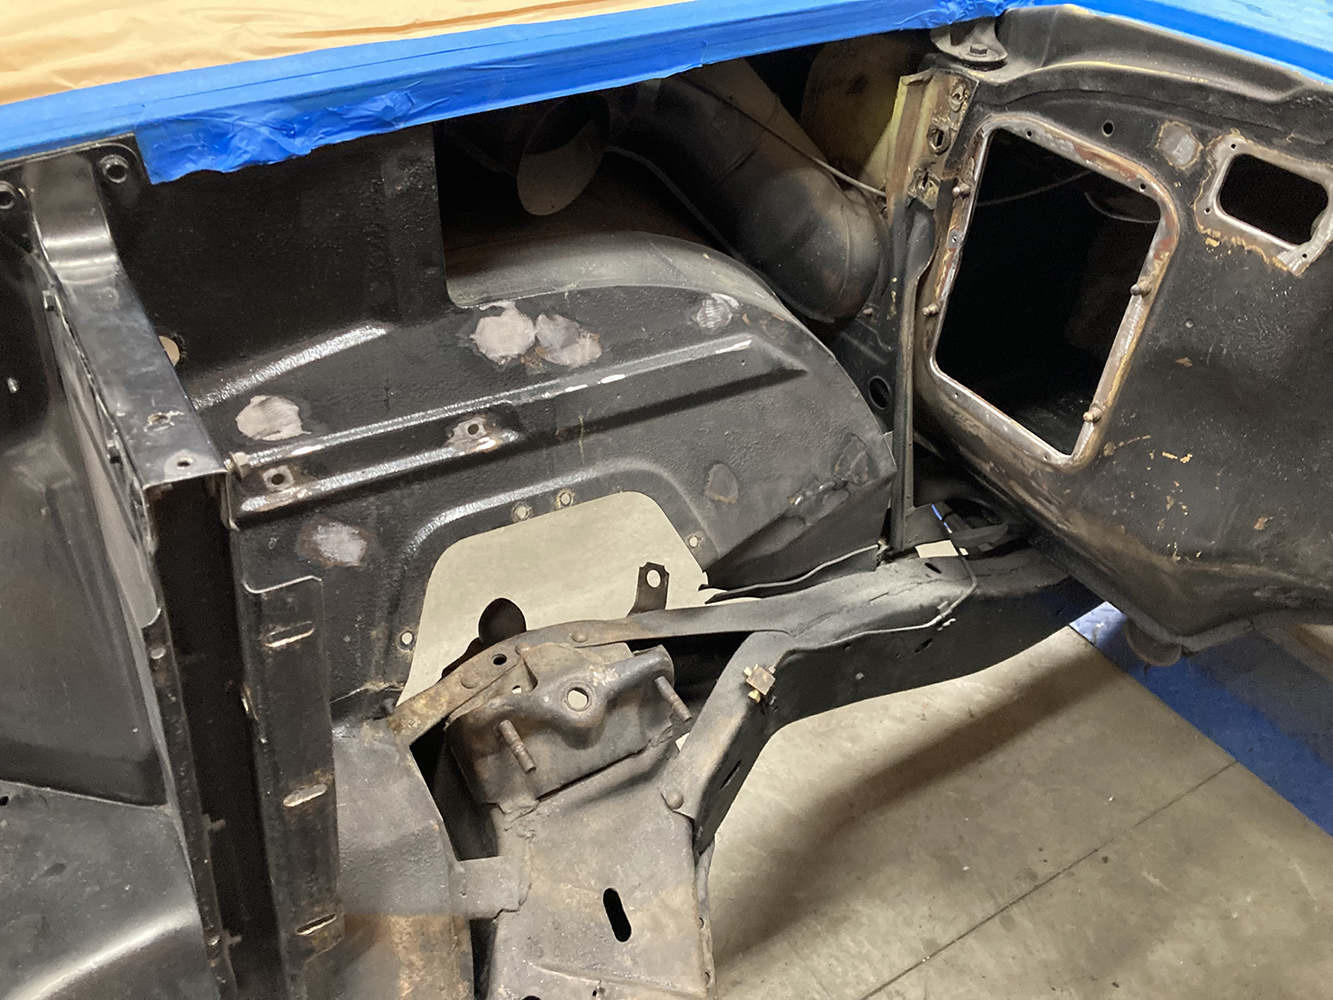
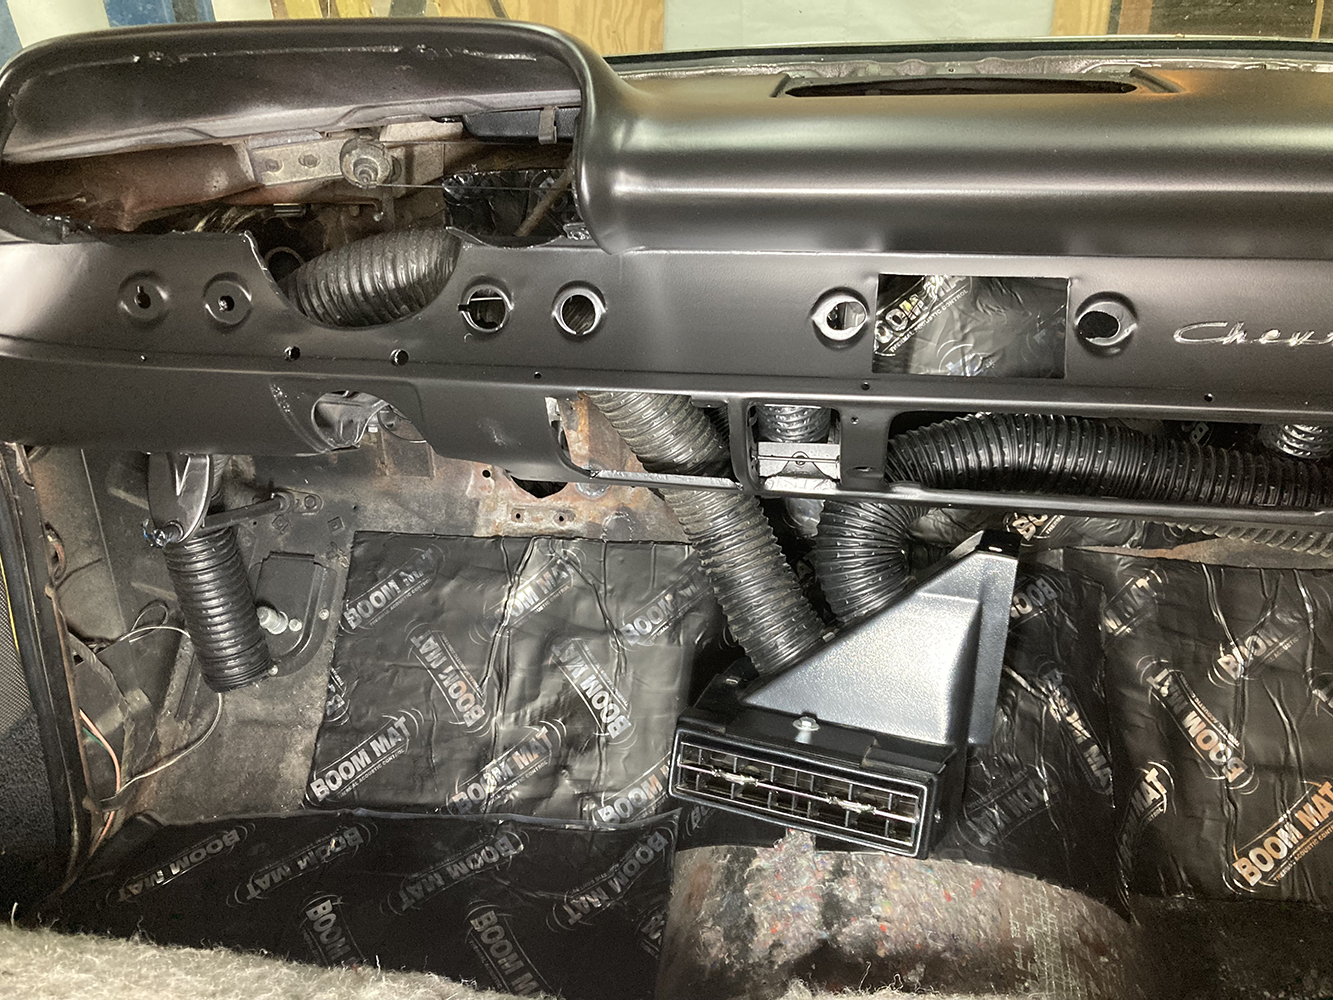
The removal of the heater assembly and heater control valve results in two voids in the firewall that will need to be filled. Note the absence of the passenger side hood hinge, which has been removed in anticipation of the removal of the fresh air vent tube assembly.
While we ordered our SureFit kit with everything needed for the complete installation of our A/C system, from the condenser to the evap unit, and even down to the retrofit components needed to upgrade and retain the stock heater controls, it turned out to be too much info to pack into one single article. So, we’re going to split it up into two separate pieces, covering the majority of the interior components first; namely the Gen 5 evaporator unit, returning next issue to cover the condenser install, lines, wiring, and such.
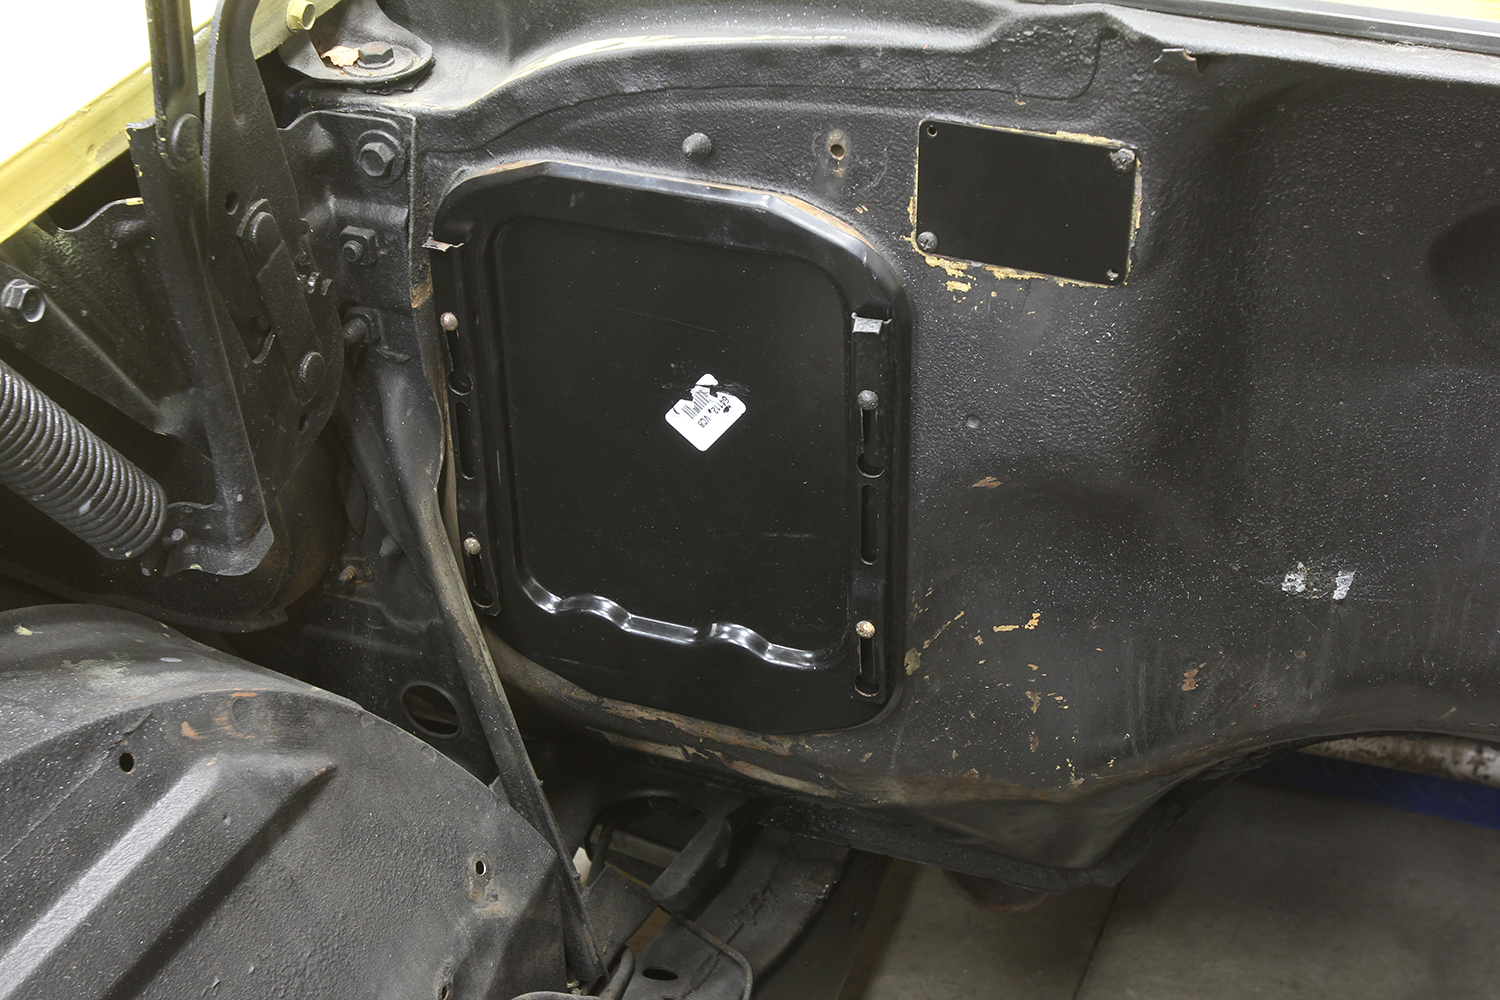
Vintage Air provides two plates that attach to the firewall to cover these voids. The heater control valve cover is fastened with four sheetmetal screws, while the heater box cover is held fast using the OE brackets. Savvy readers will remember our coverage of the engine compartment overhaul a few issues back and the fact that we opted to trim and weld these panels in place, making for a very clean installation.
It’s a big job, but one that’s well rewarded when it’s all said and done, with the entire family cruising in comfort all year long.
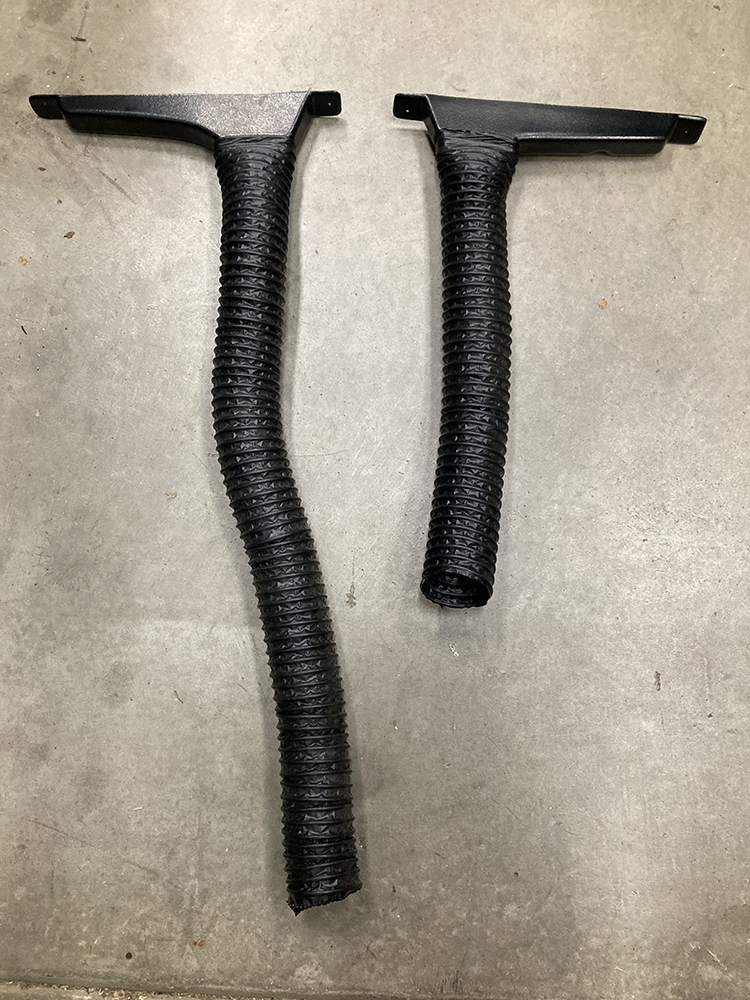
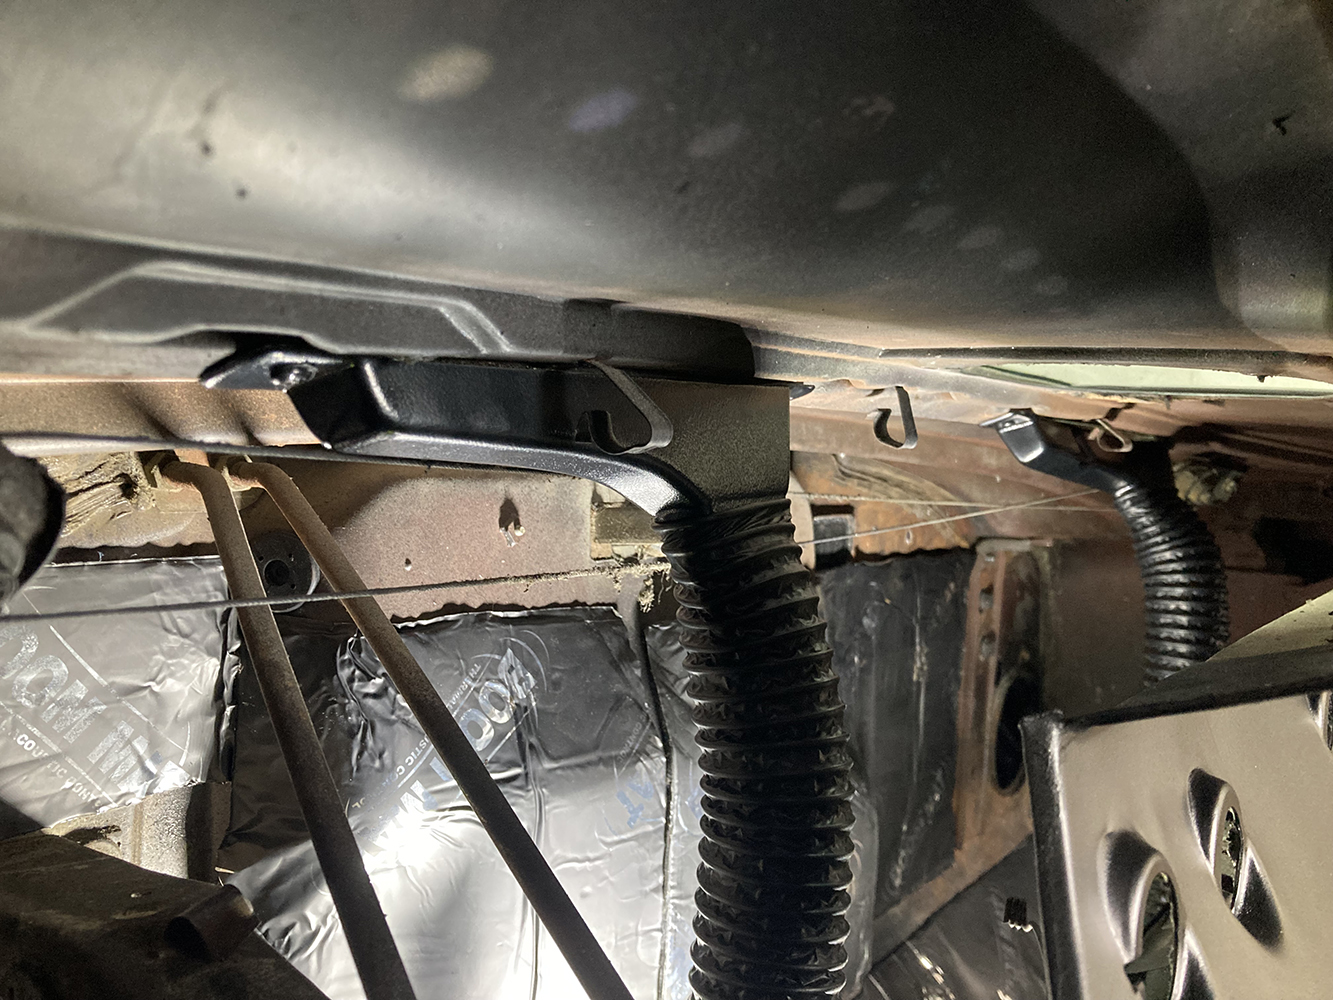
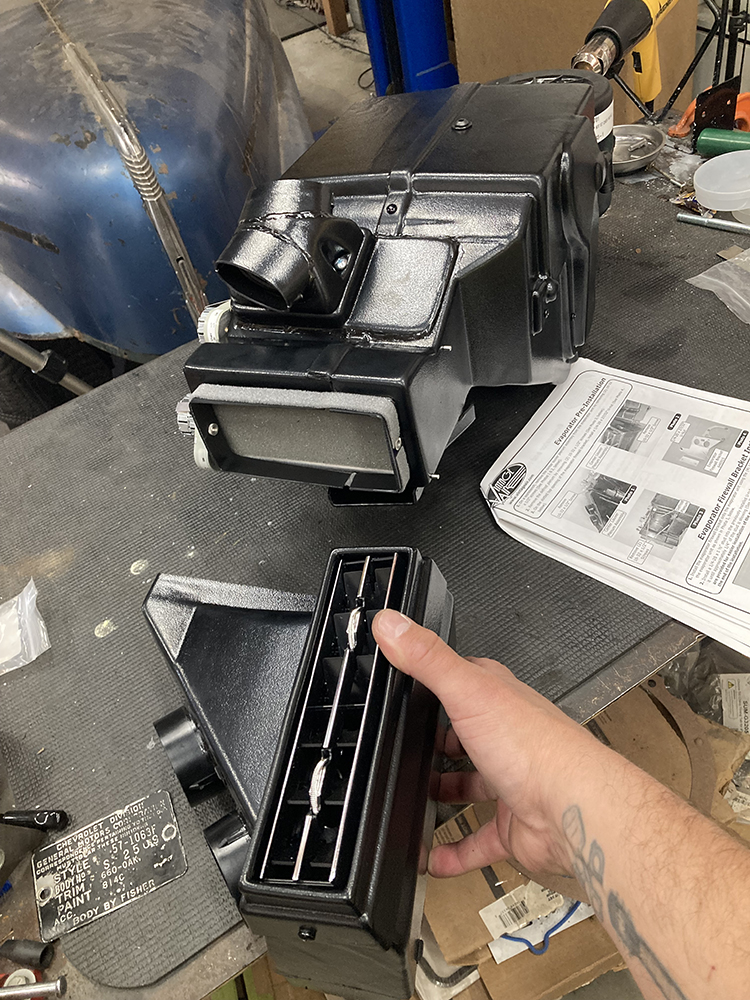
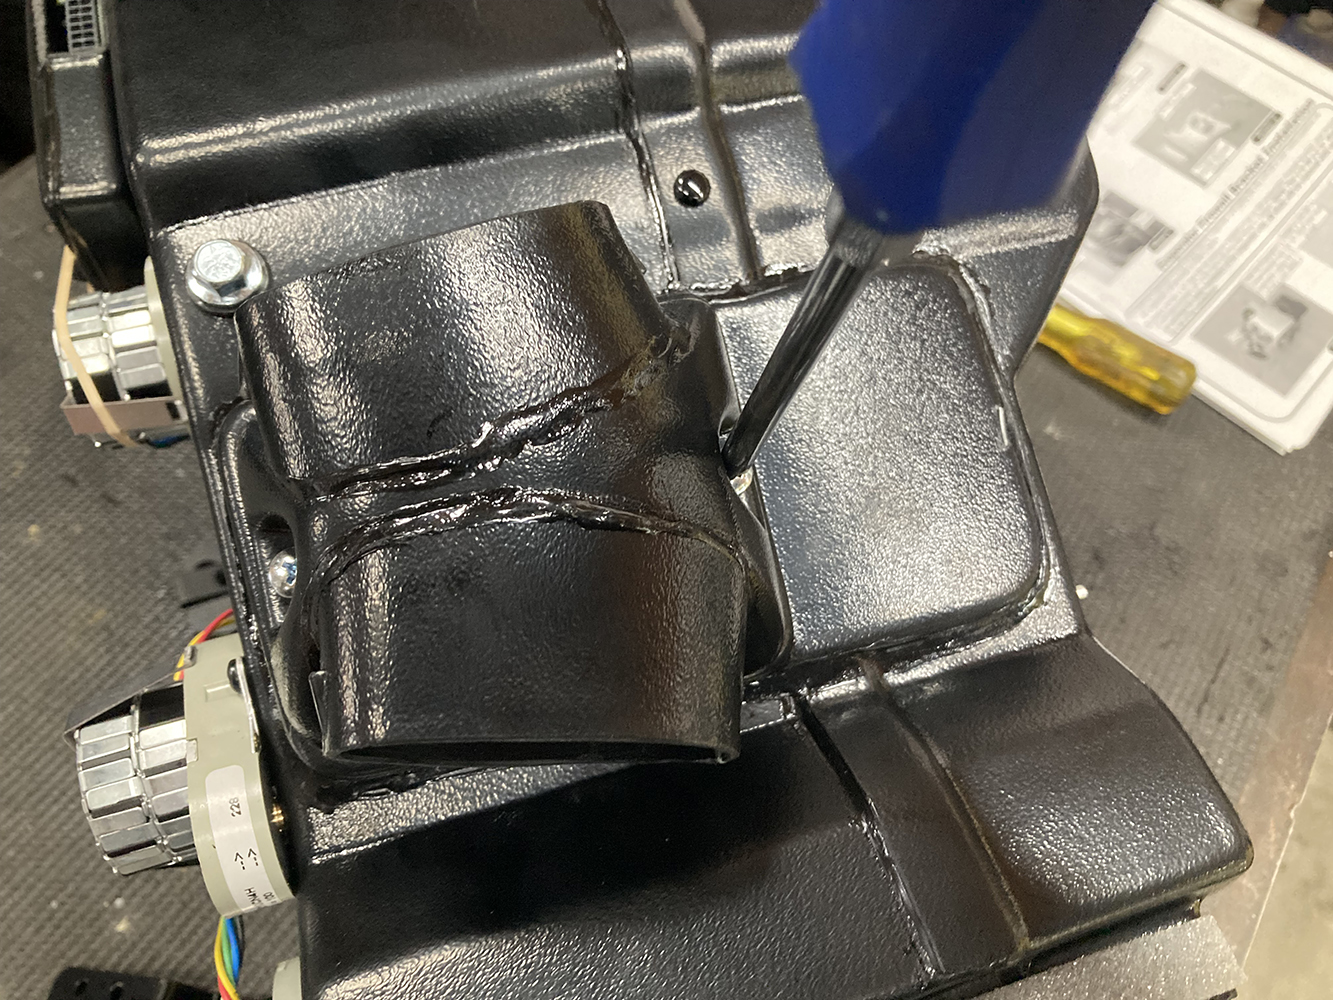
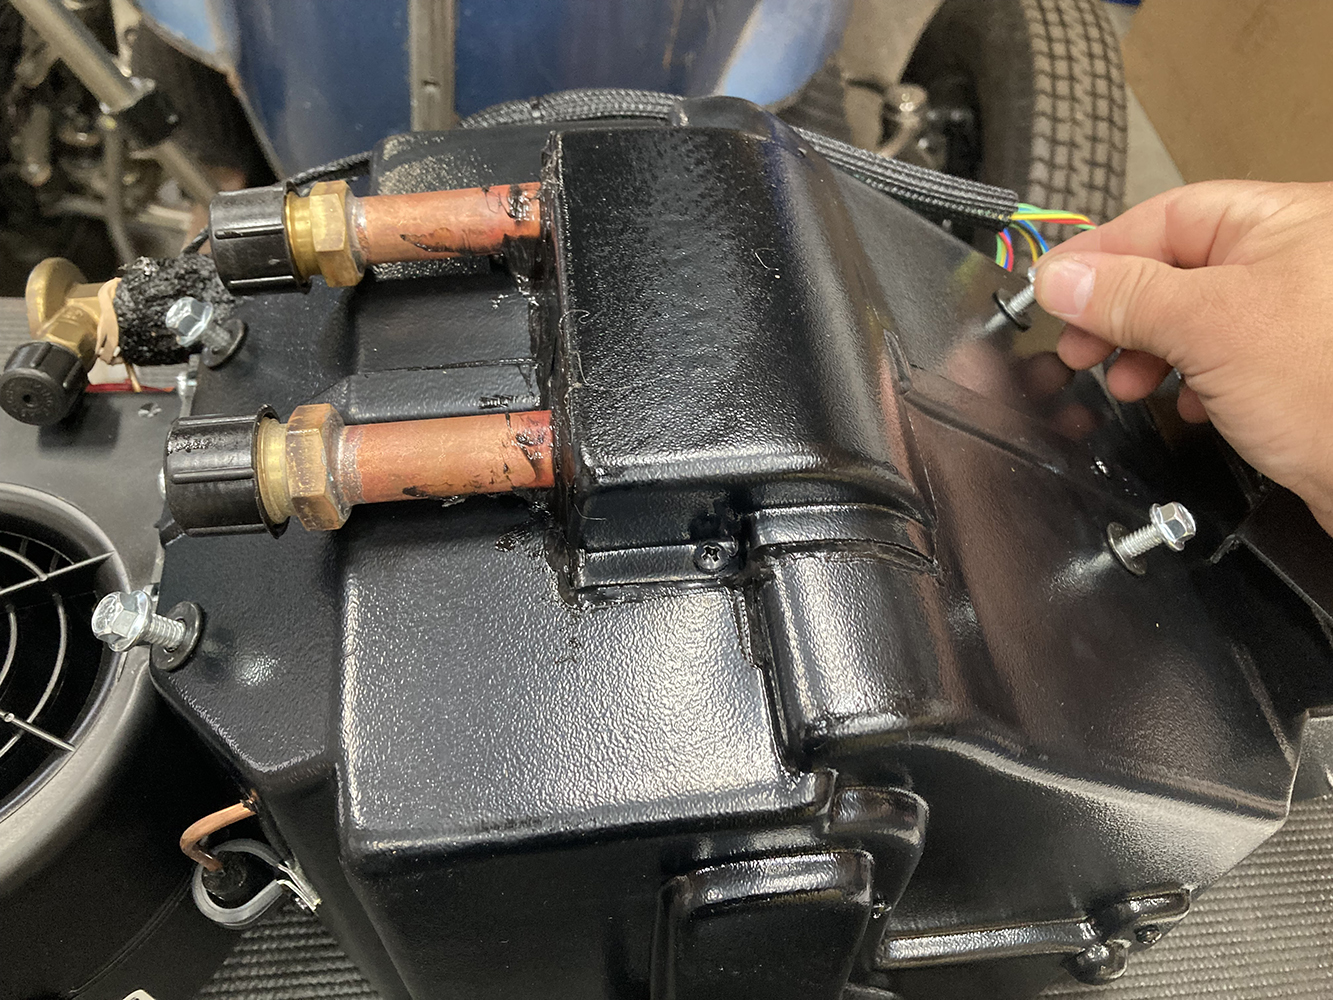
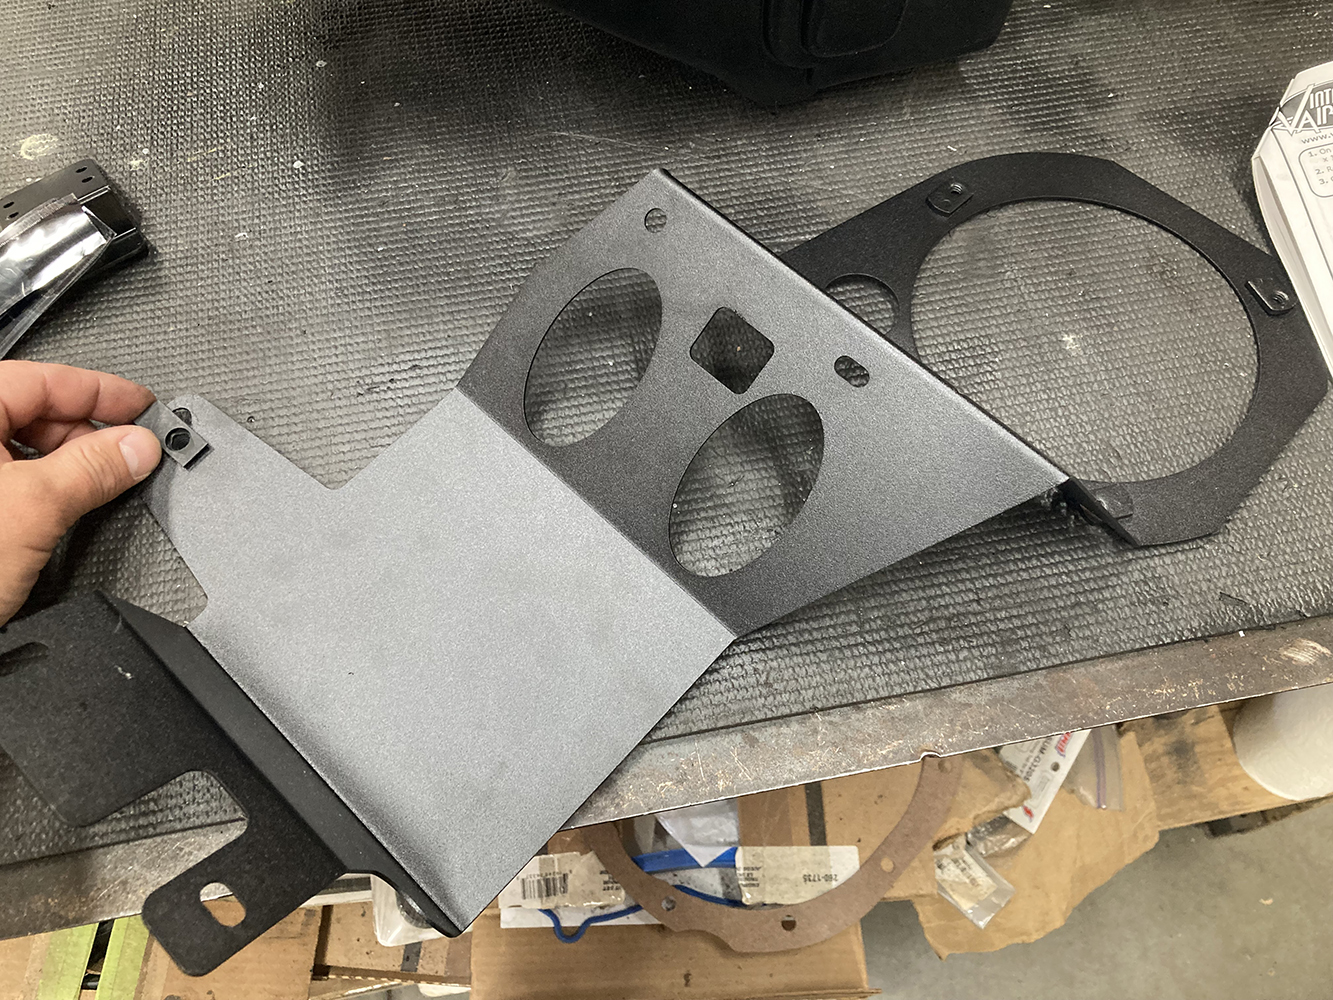
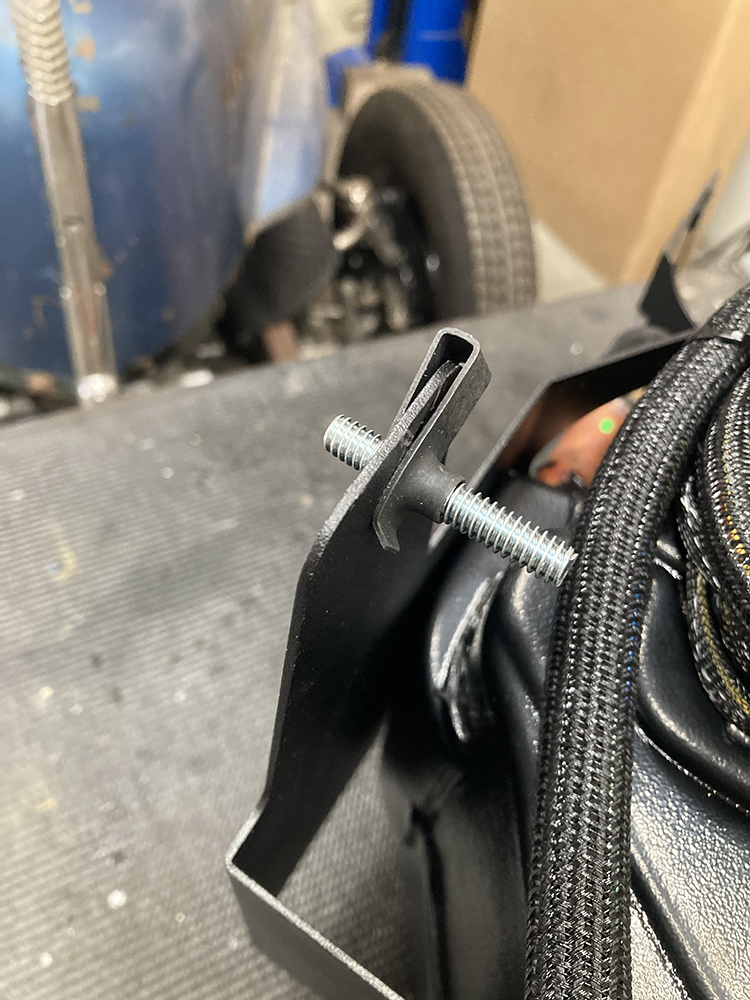
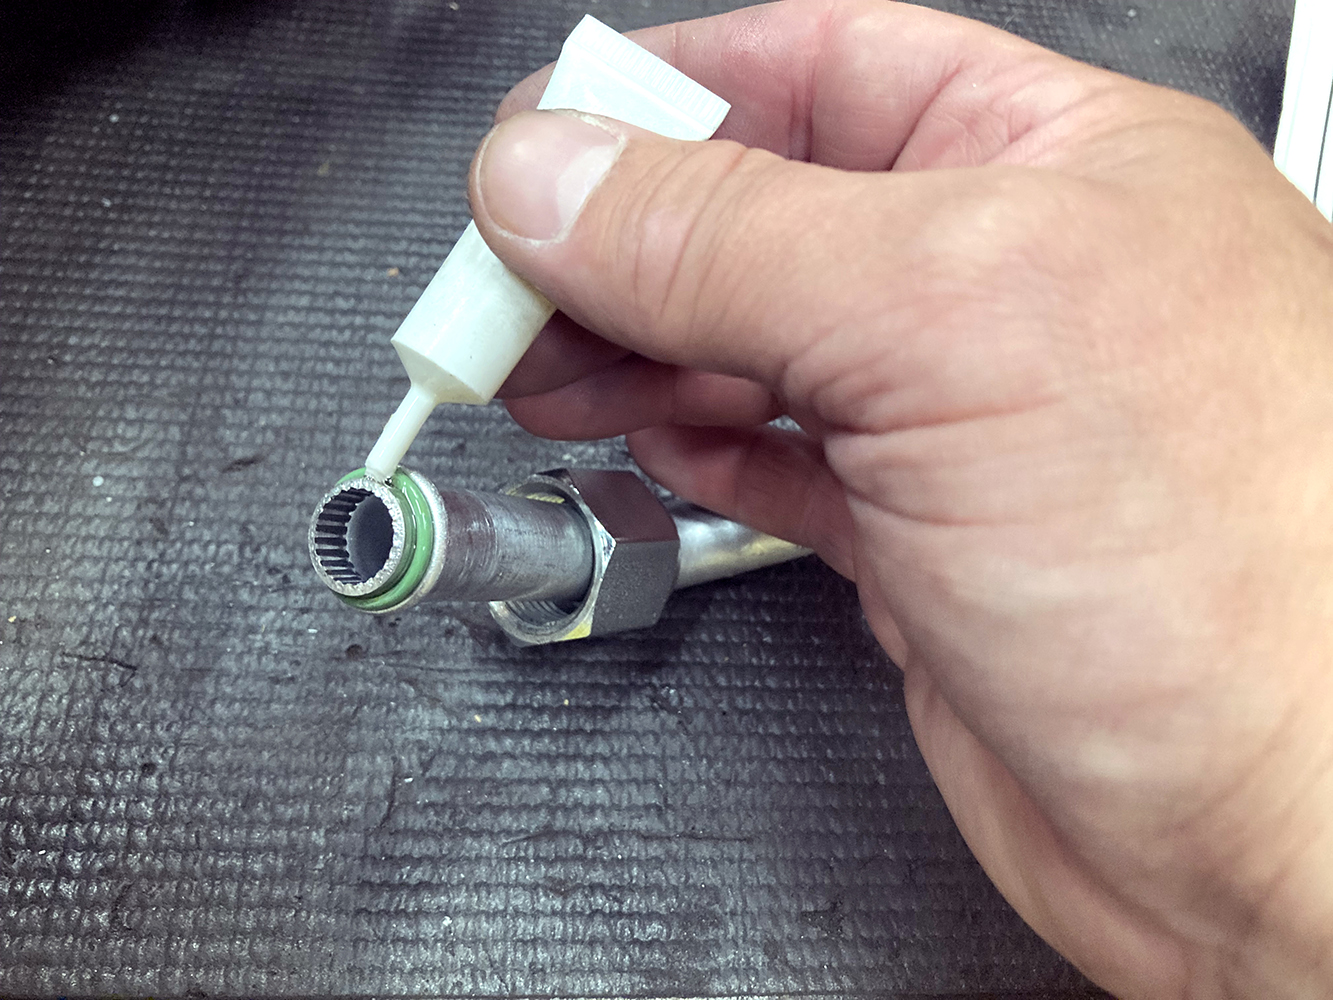
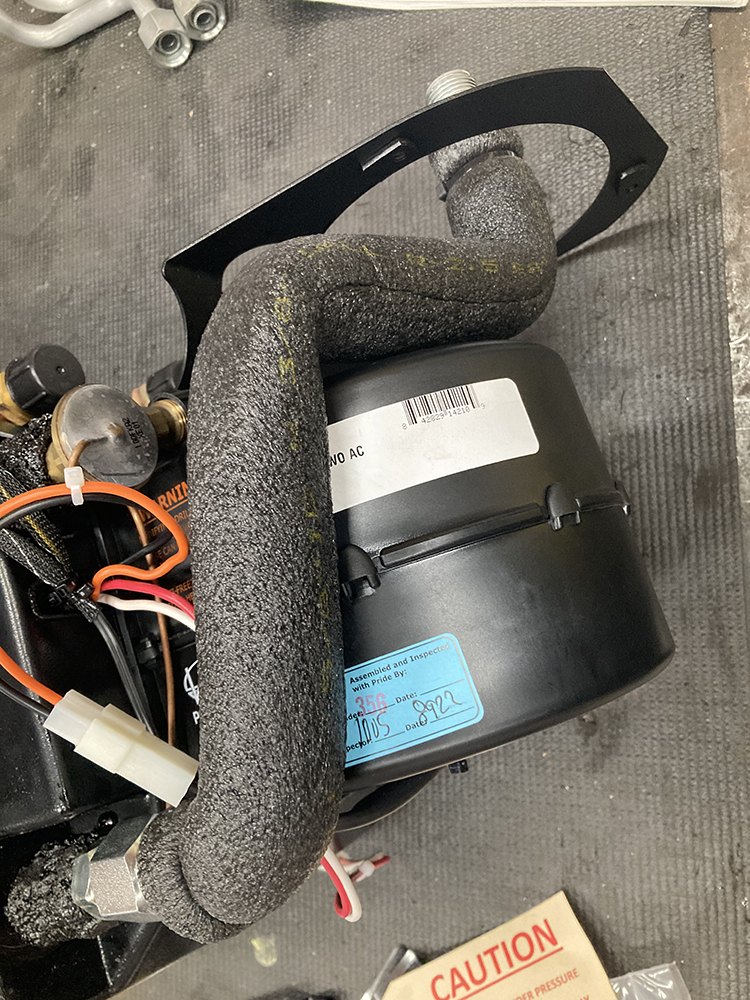
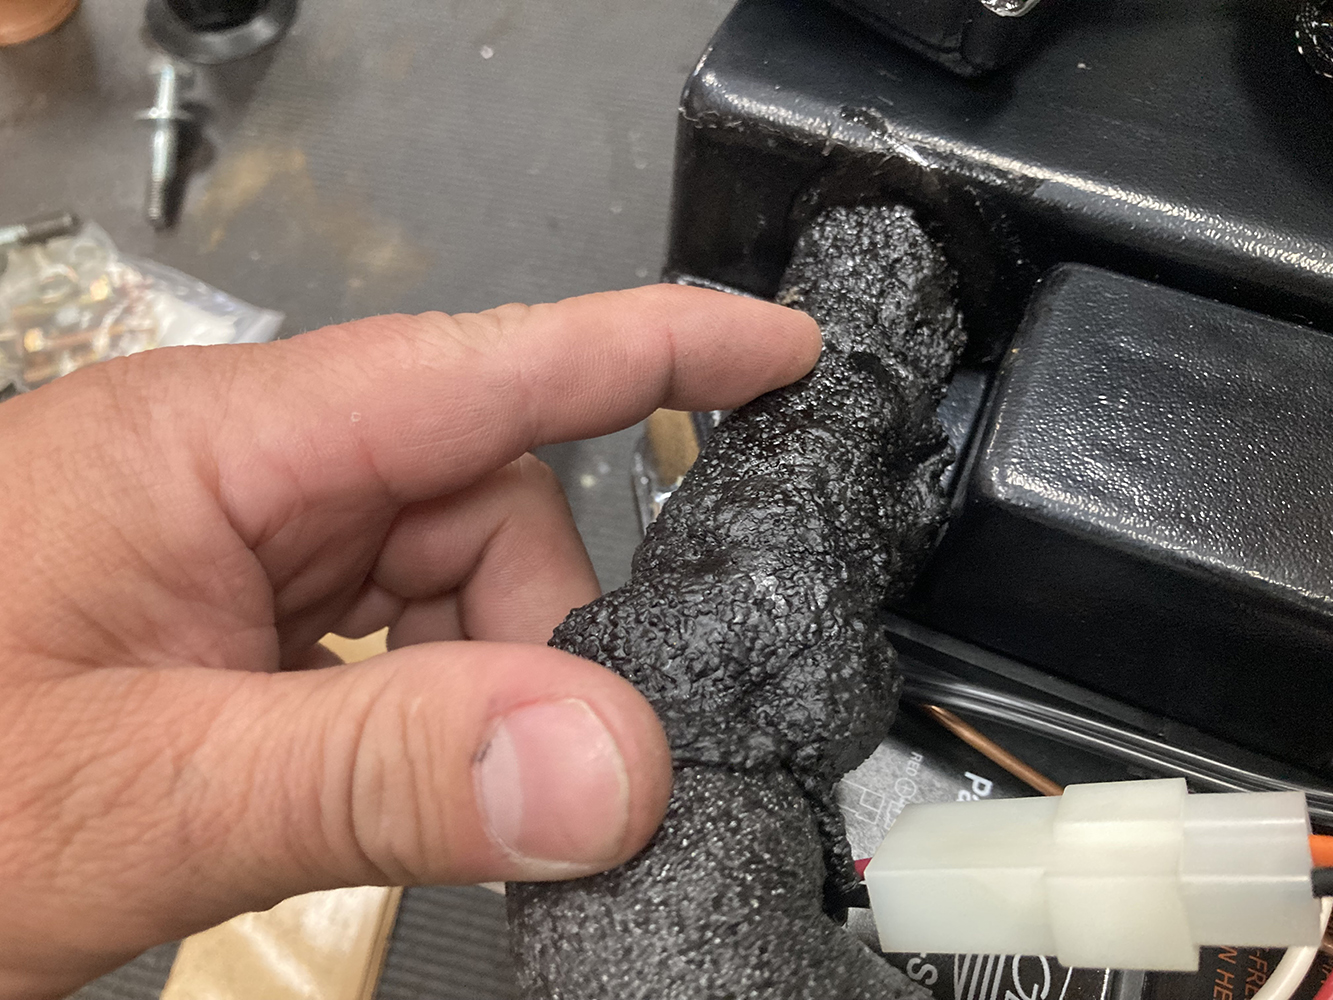
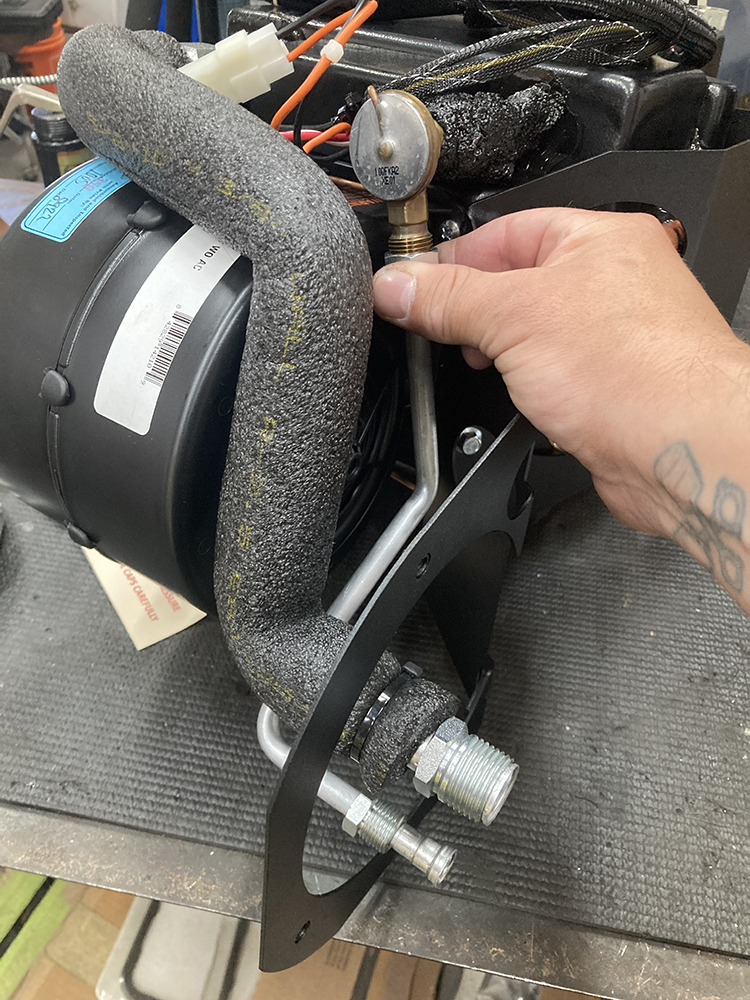
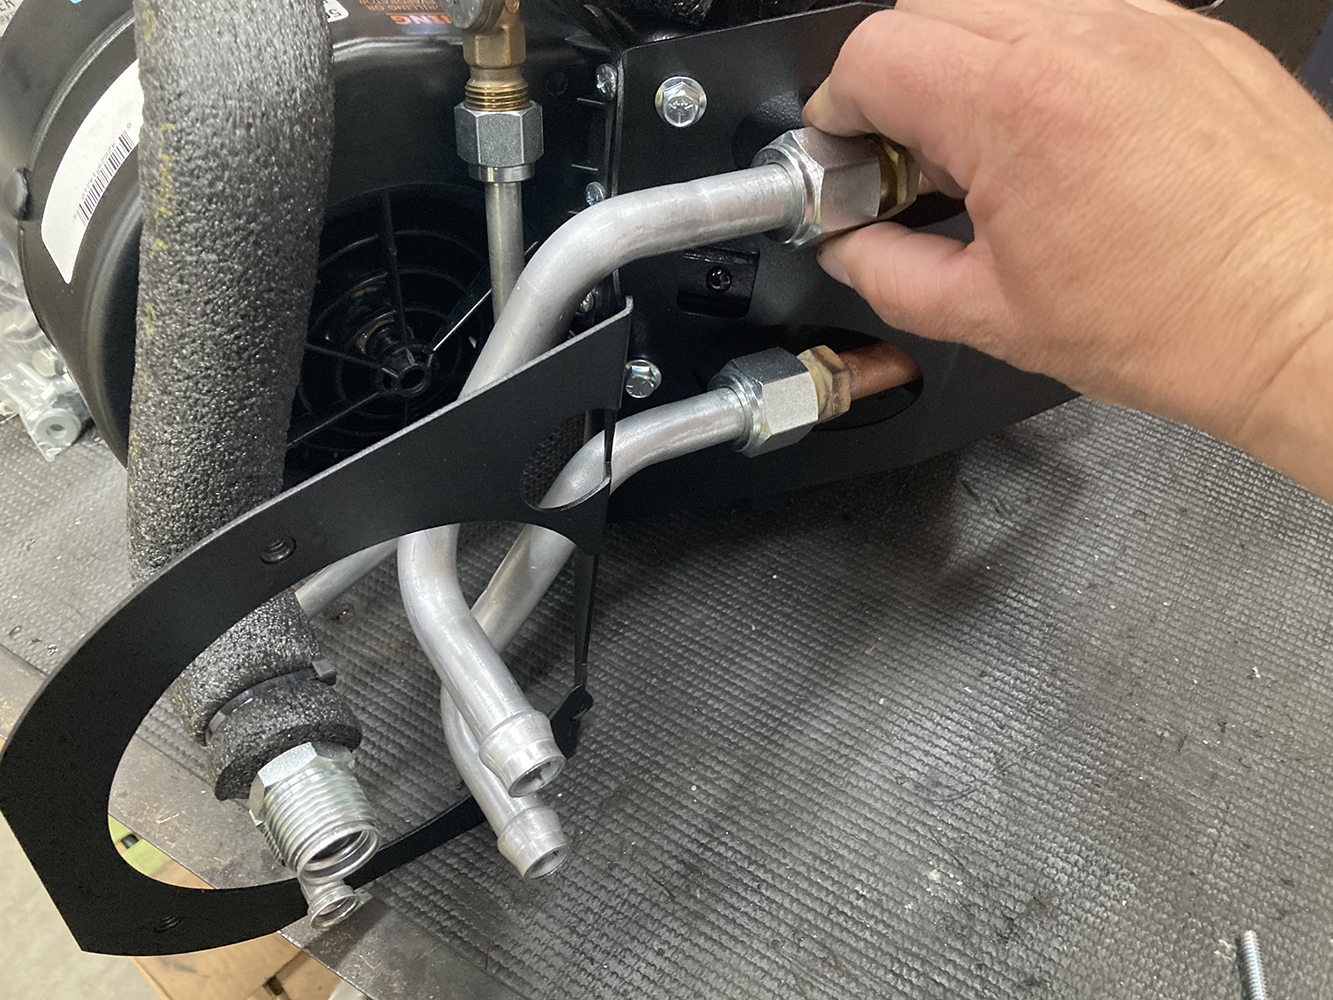
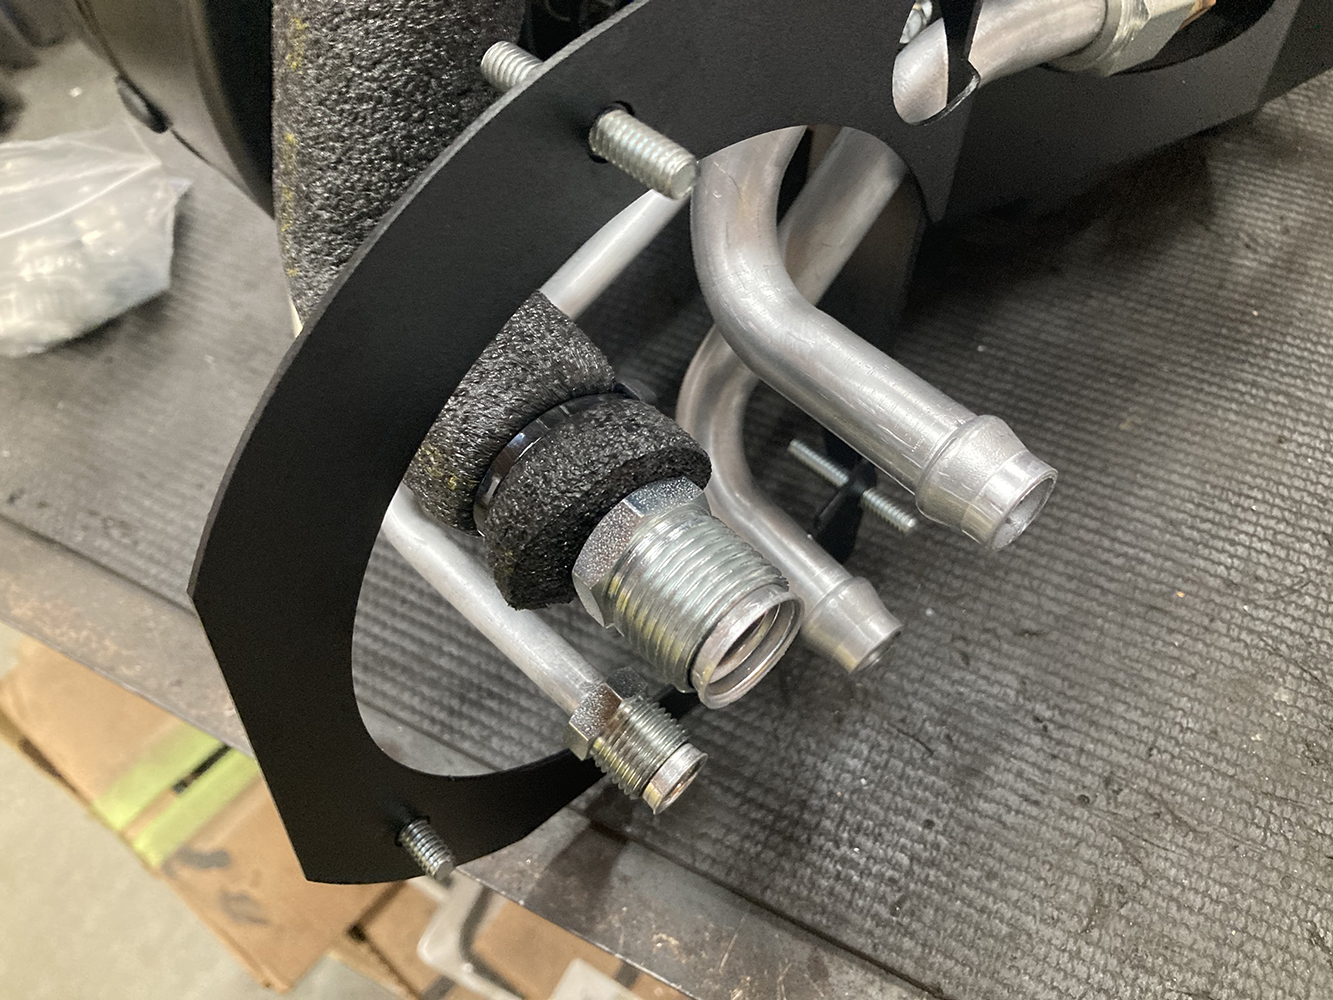
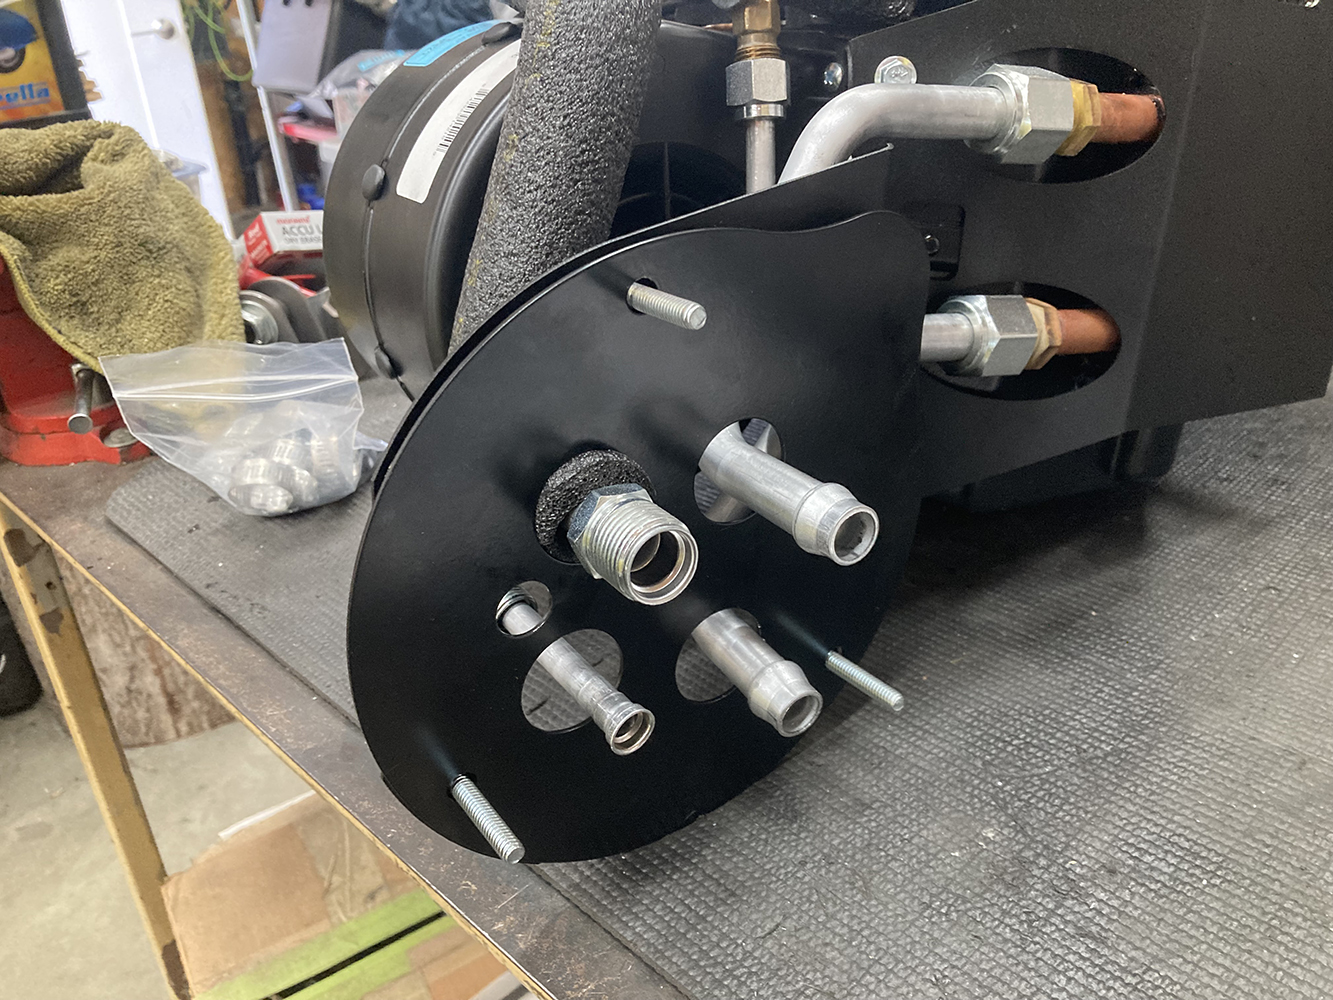
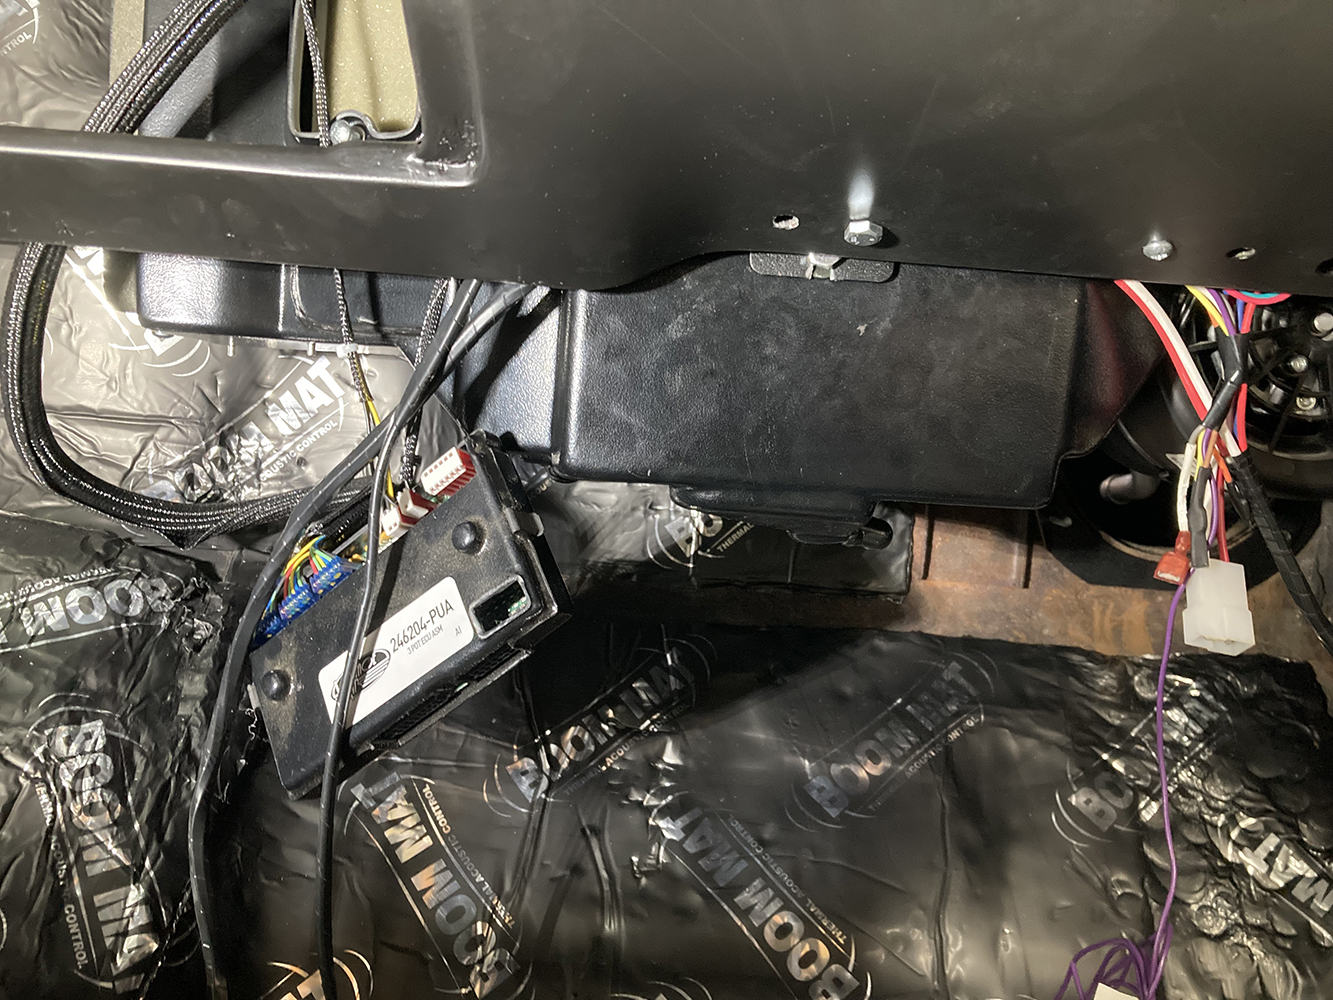
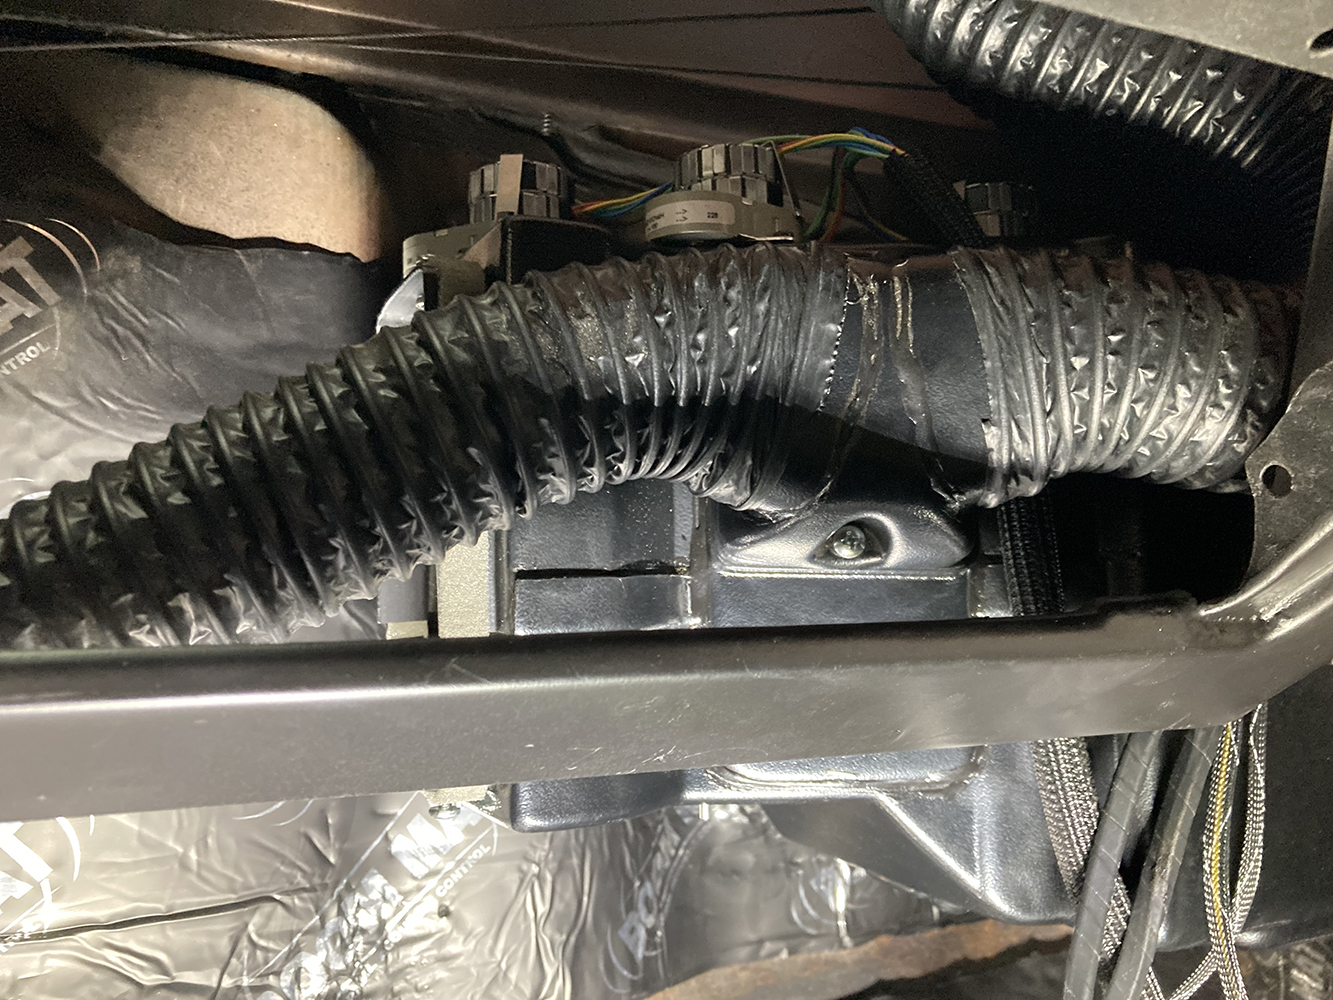
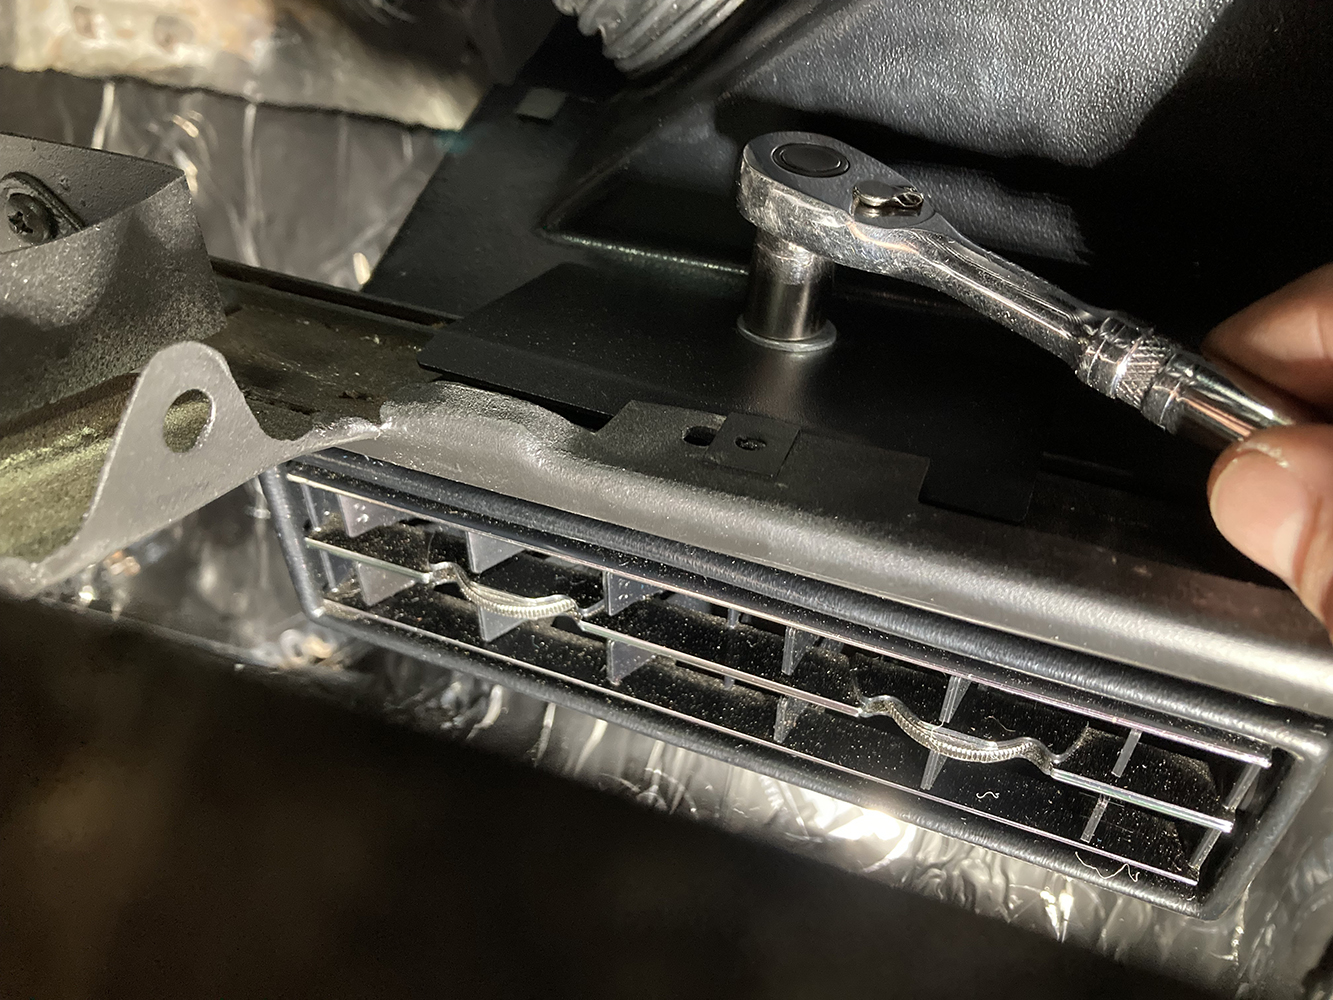
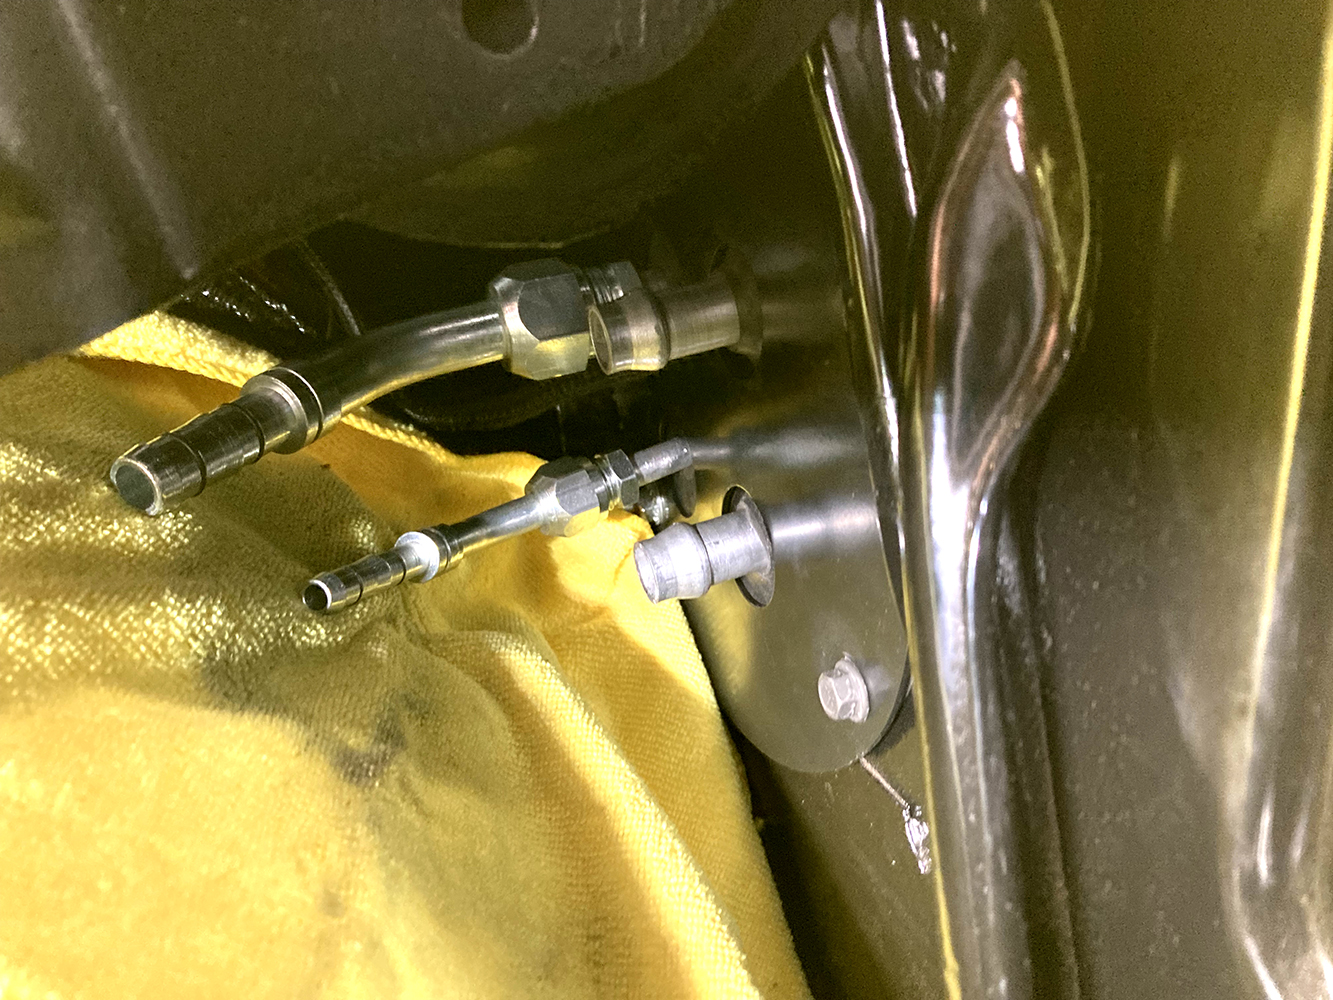
Before we raise the evaporator unit into place under the dash, new defrost ducts and duct hose need to be installed.Like the original ducting assembly, these are held in place using sheetmetal screws.Vintage Air’s Gen 5 SureFit evaporator unit packs a ton of functionality into a small space but getting it into position fully assembled can be a challenge. Therefore, we need to prep the unit before it’s ready to be raised into place.First up, the center louver plenum assembly is removed and set asideNext, the defrost plenum is removed. The removal of these two items simply makes the evap unit easier to handle and maneuver up behind the dash’s tight confines.The firewall mounting bracket attaches to the back side of the evaporator module using four 1/4-20 fasteners.Before the bracket is attached, a U-nut is installed, which will be used to fasten the bracket to the firewall using an existing hole.To ease installation, a temporary 1/4-20 stud is placed in the U-nut. This will allow the evaporator module to be raised in place, using the stud to help locate the original hole in the firewall and support the unit while the remaining fasteners are installed. Here, the bracket has also been attached to the evap unit.There are four hardlines that need to be attached to the evap module before it can be installed. These lines feature an O-ring seal and should be properly seated and lubricated with the provided O-ring oil before installation to prevent damage.The large #10 suction or low-pressure refrigerant line is insulated to prevent condensation from building up on the line itself.Once the line is installed and the fitting tight, press tape is applied around the fitting to insulate it as well.Next, the #6 liquid line is attached to the evap unit …… followed by the two 5/8-inch heater lines.Three additional studs will be used to perform a similar function as the single unit installed earlier. All the studs will be replaced by provided 1/4-20 fasteners once the evap module’s placement is finalized.Vintage Air provides a plate to cover the hole that previously provided fresh air into the passenger compartment. That space will now be hosting the four hardlines as they pass through the firewall. Before the evap module is installed, this fresh air plate is checked for fitment and any necessary adjustments are made.In anticipation of the installation of the evap unit, duct hose has been attached to each defrost louver as well as the center louver plenum outlets.Raising the evap module into place takes a little patience and is easier with an additional set of hands. Once home, the mounting fasteners are installed loose while the unit is leveled and finalized. Here, one of the front brackets that attach the unit to the bottom rail of the dash is visible.With the evap module in place, the defrost plenum is reinstalled and the duct hoses attached.The center louver plenum is reattached to the evap unit and attached to the bottom of the dash using a provided bracket. Once this is achieved, the unit is once again checked for level, each temporary stud is removed, and each installation fastener is tightened down for the final time.The evap unit requires a drain to expel any condensation developed inside the unit. A length of hose attaches to the barb fitting on the bottom of the unit and exits through a hole drilled into the floor or firewall. Note the rubber gasket that seals the area around each hardline in the fresh air opening.The hardlines pass through the rubber boot and fresh air plate into the engine compartment where they’ll connect to the rest of the system via hose.
We use cookies to ensure that we give you the best experience on our website. If you continue to use this site we will assume that you are happy with it.