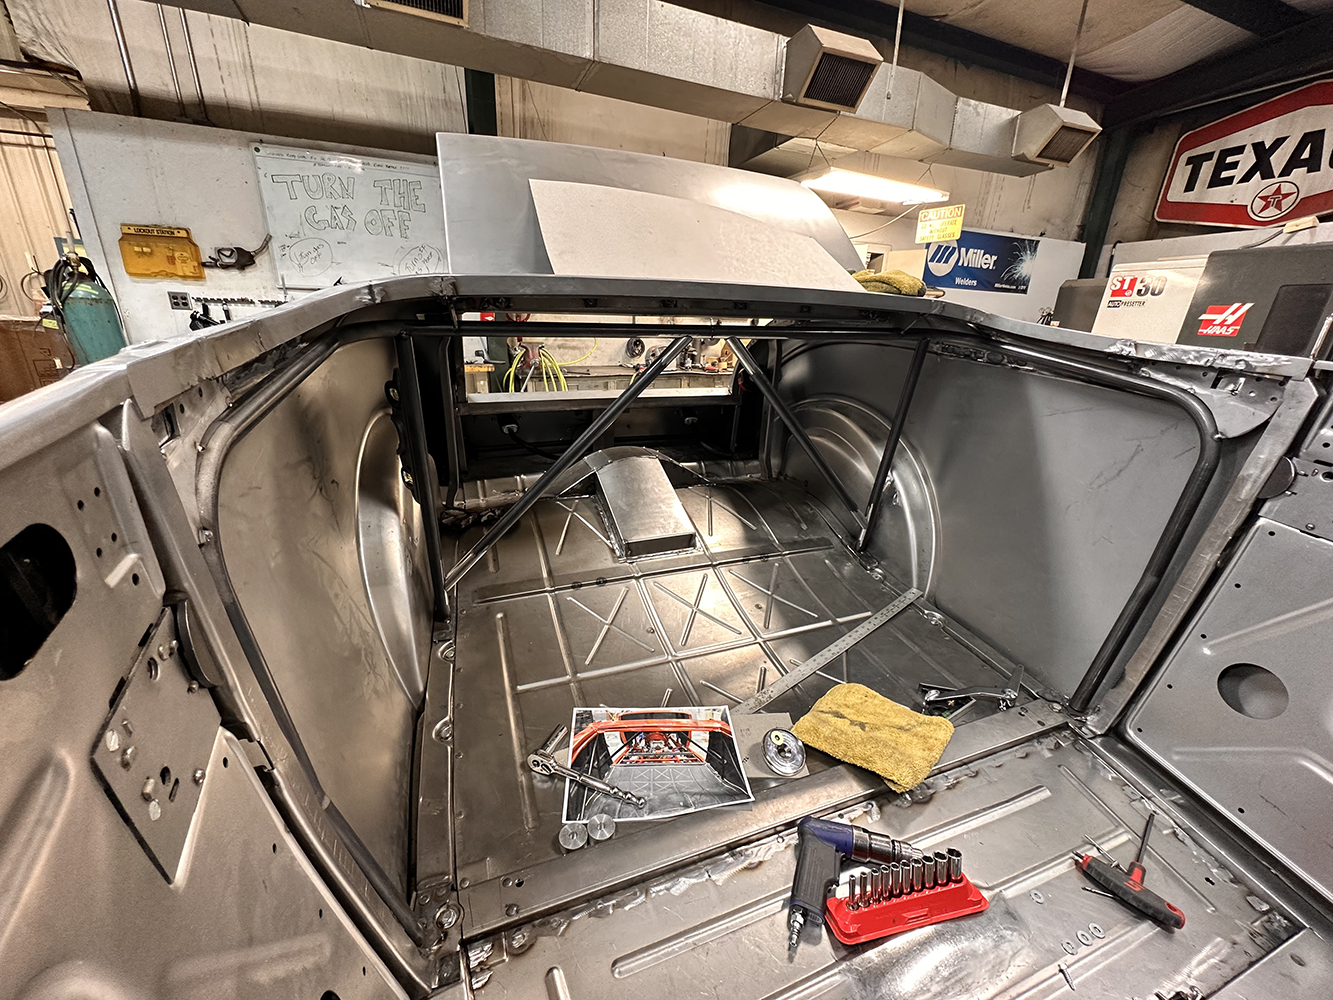
While reproduction Brookville Roadster steel bodies are designed rigid, adding an inner structure of 1-inch mild steel tubing (0.125 wall) provides additional body rigidity and mounting points for interior panels and accessories.
It’s one thing to stroll through the aisles of the Grand National Roadster Show or wander among the rows of outrageous hot rods competing for some gold at Triple Crown. The level of craftsmanship is stunning, revealing thought, design, and creativity, but wouldn’t you love to have X-ray vision to see through those panels to the structures beneath? (Be careful what you wish for; Apple might be working on something! —B.B.)
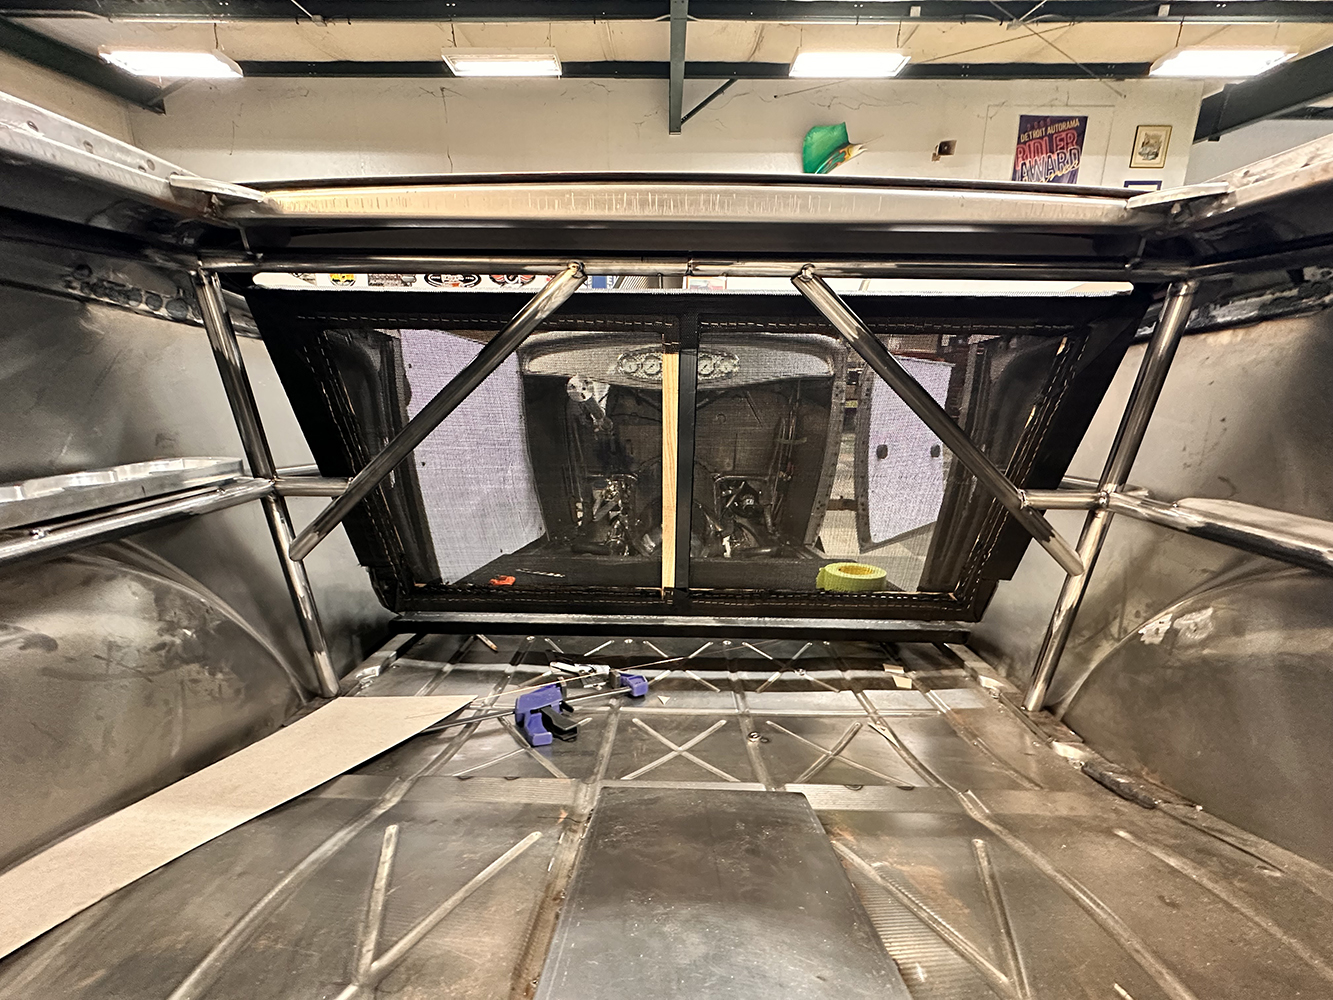
Before building the inner structure, JHRS fitted the body to the chassis and gapped the doors and decklid. The inner structure is welded to the body, making it very rigid. Note that the tubing at the B-pillar is a slightly curved vertical following the pillar.
One standout example is MeKenzie Murphy’s stunning, pink-flamed roadster. A breathtaking hot rod inside and out, we thought it would be intriguing to reveal what lies beneath that custom leather upholstery and the fabulously finished exterior panels. Convertibles, in general, and early roadsters, in particular, aren’t exactly known for their flex-resistant body styles due to the absence of a roof. Toss in 500 wild ponies underhood and the roadster body’s structural integrity is truly tested. Since this isn’t Alan Johnson’s first rodeo, he includes interior bracing in his Deuce roadster builds. This provides the stability necessary to maintain super-close panel gaps and prevent stress cracks (like the original bodies did) while offering a mounting structure for utilitarian items like batteries and interior panels. While it isn’t advertised as such, it could also enhance the structure’s safety. Like every facet of a Johnson’s hot rod, the design and craftsmanship are top-notch.
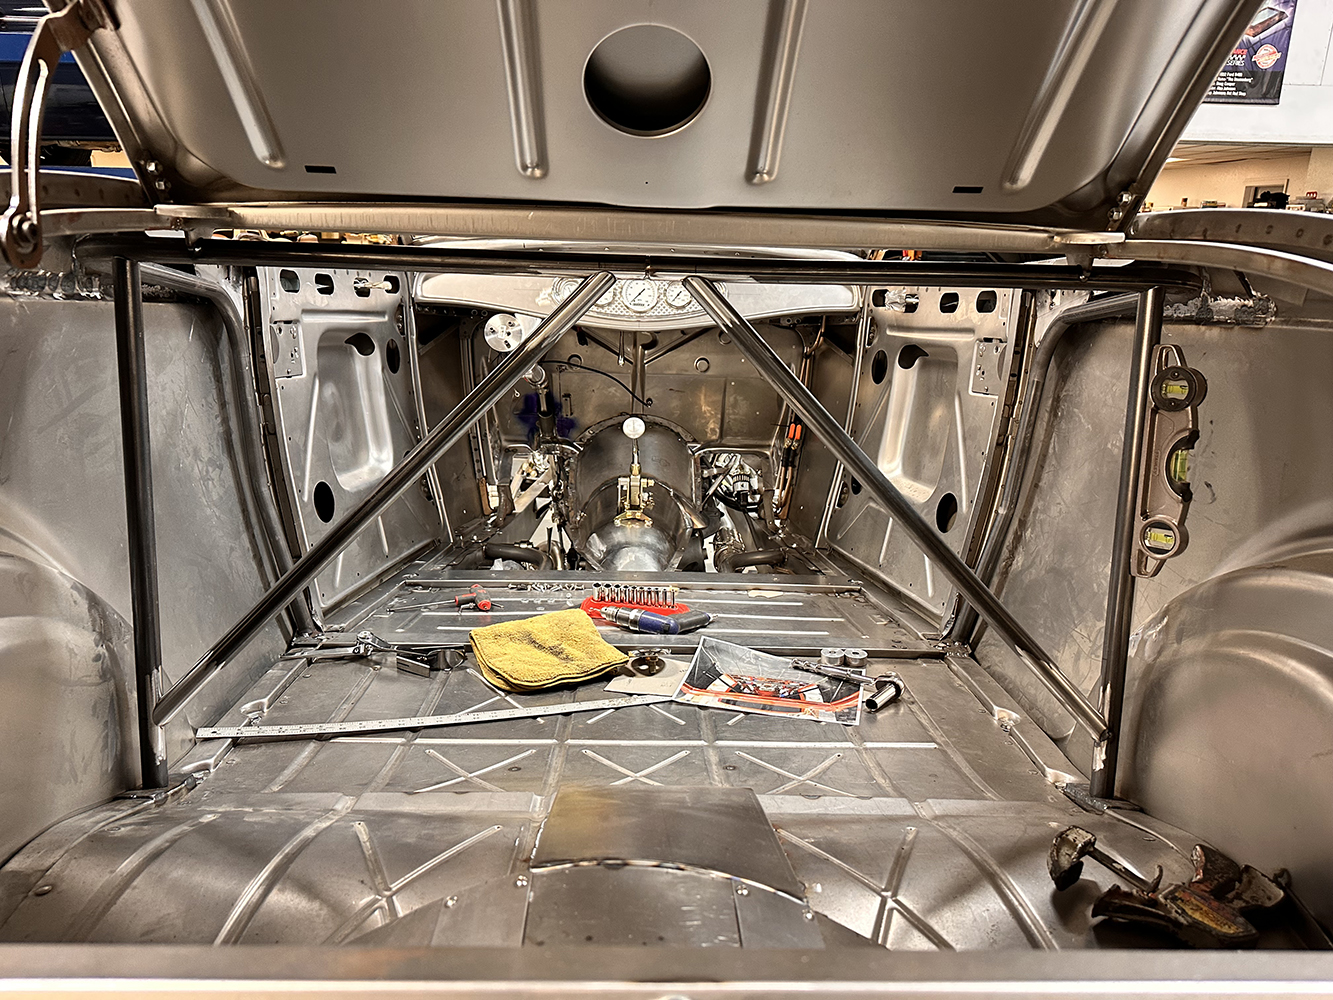
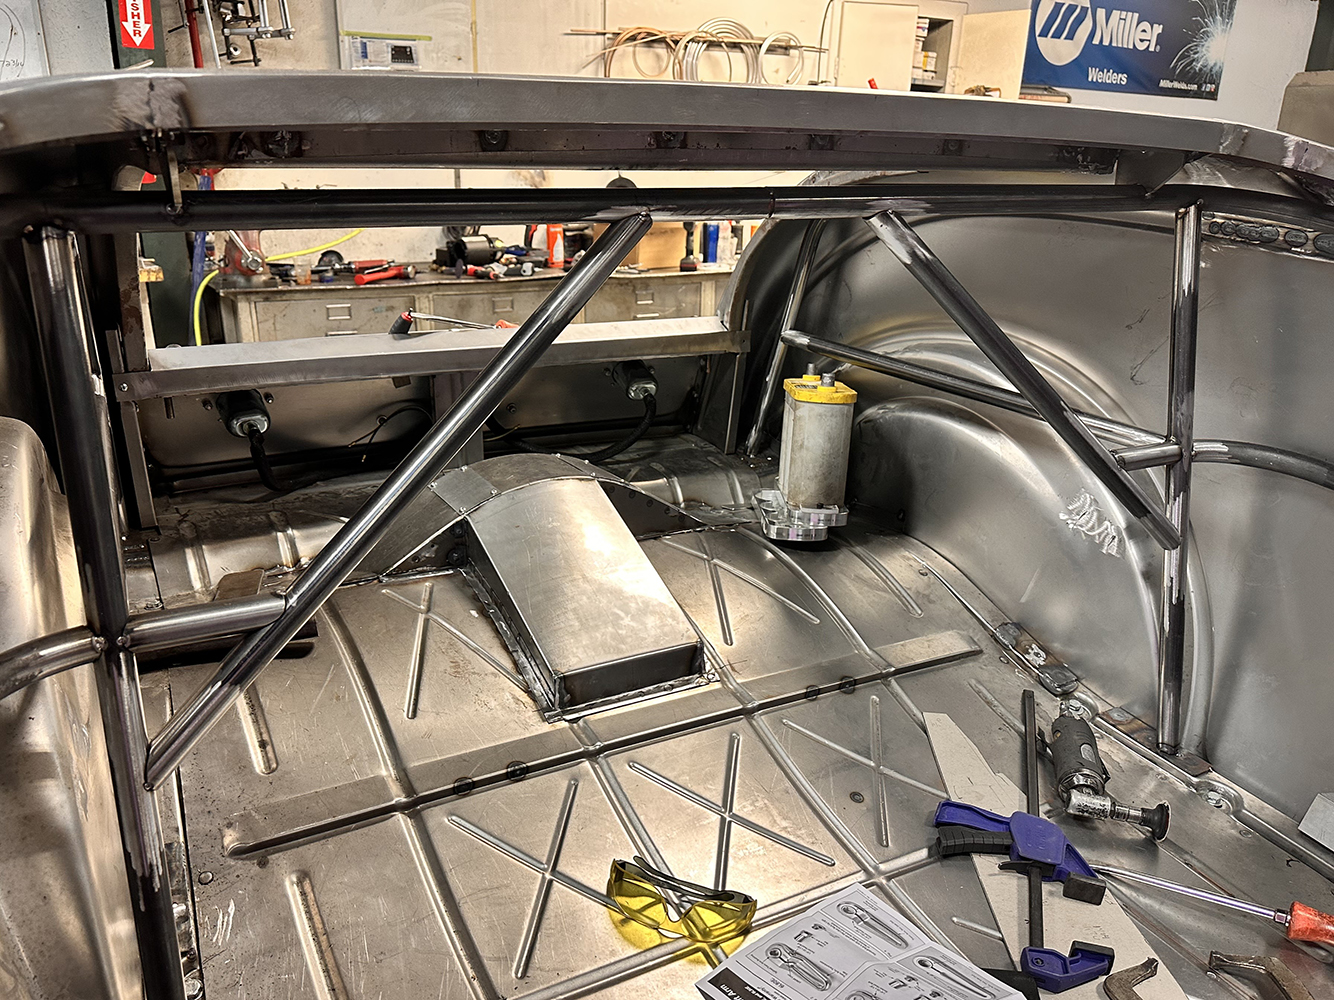
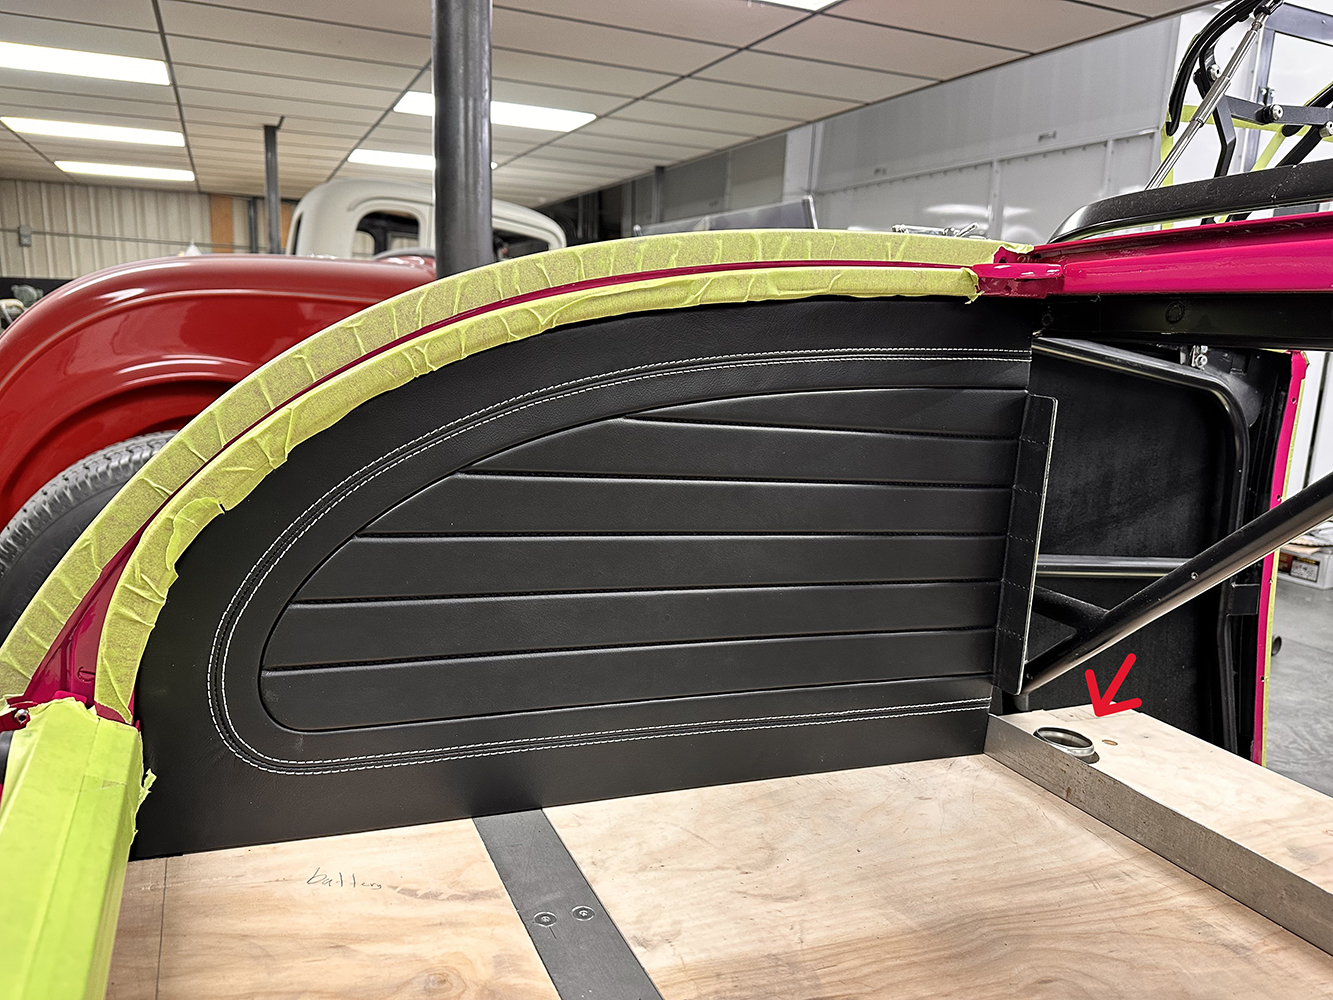
Looking forward from the trunk, we see the crossbracing behind the seating area and under the panel that holds the decklid hinges. Mounts welded to this panel stabilize the stress-prone decklid hinge area. Diagonal tubes triangulate the structure, adding body rigidity.
This structure consists of a 1-inch-diameter, 0.125-inch wall, mild steel tubing welded to the lower sills of the body, connected to the upper panels at key points. While this provides maximum stability to the body, it also requires that all panels be perfectly pre-fitted before this structure is finalized and welded in place, as the body may not respond to shimming after this bracing. Since we here at Modern Rodding like to share pro-building methods with an eye toward that backyard shop, let’s take a quick look at how to build a similar structure.
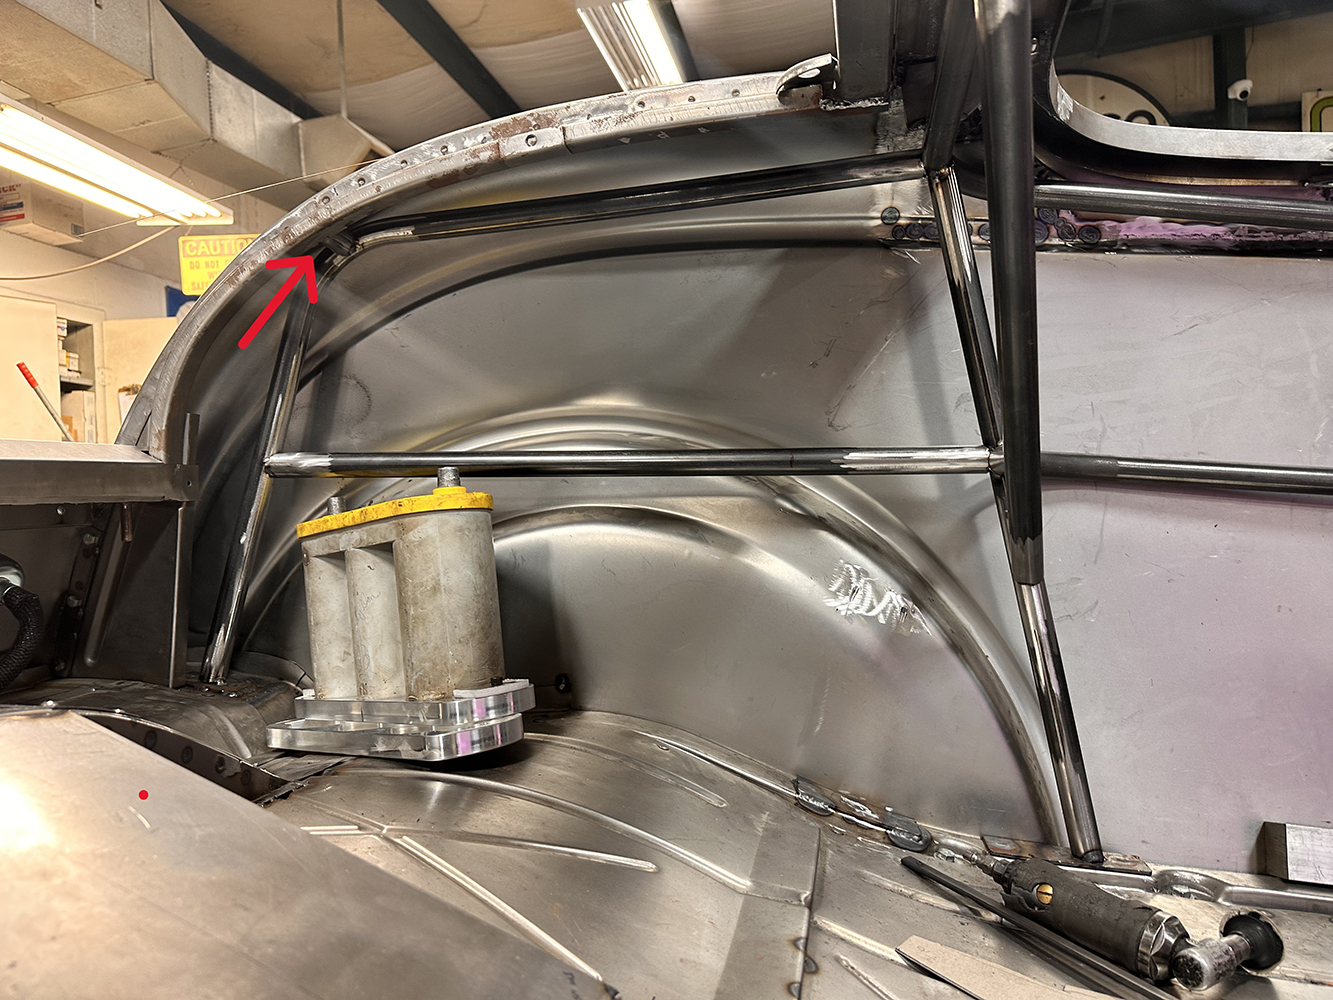
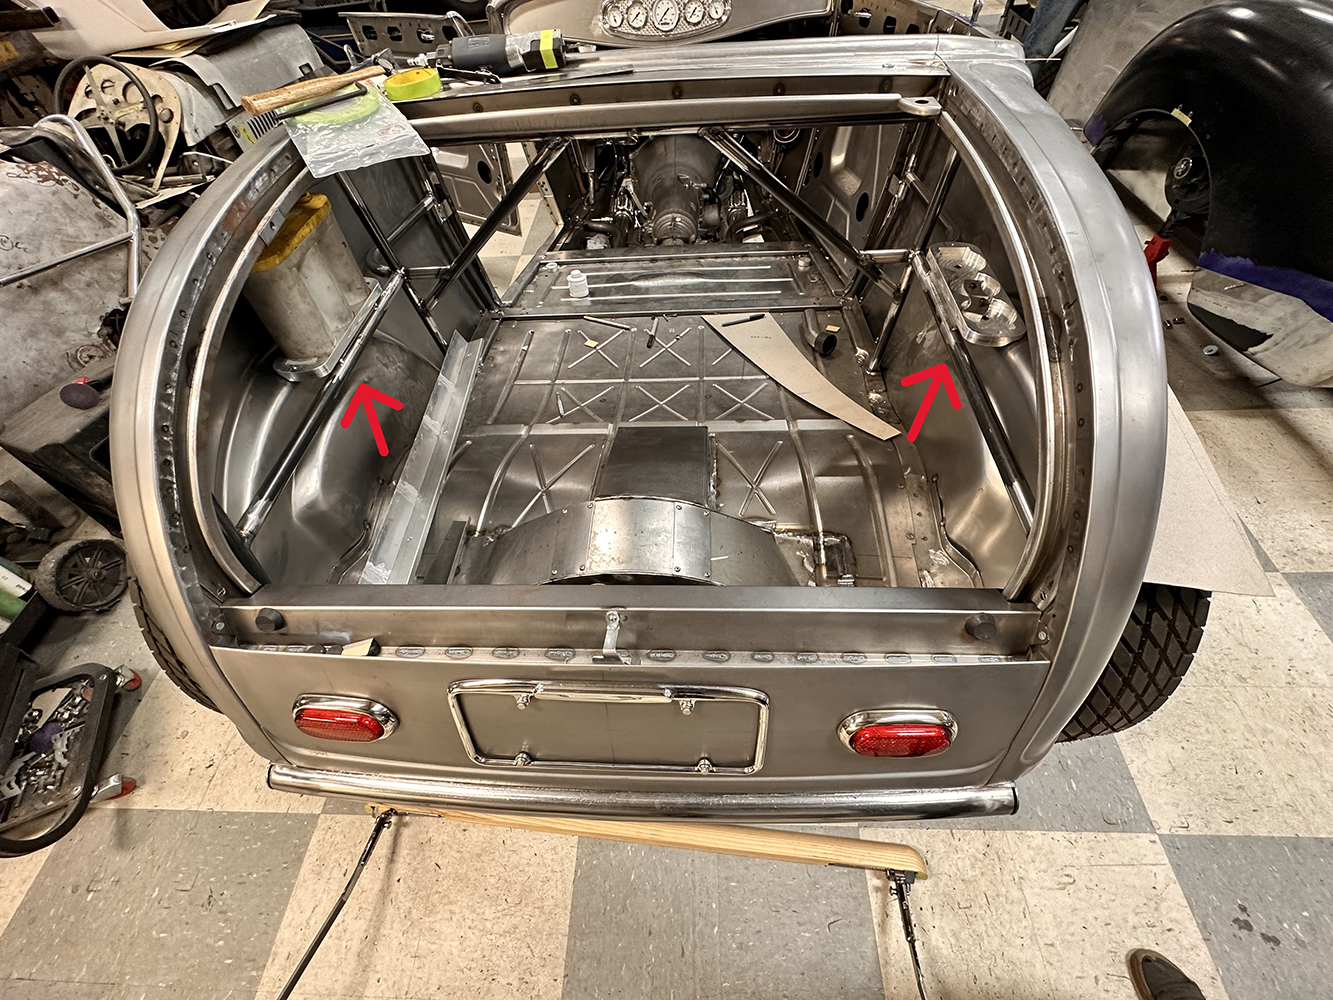
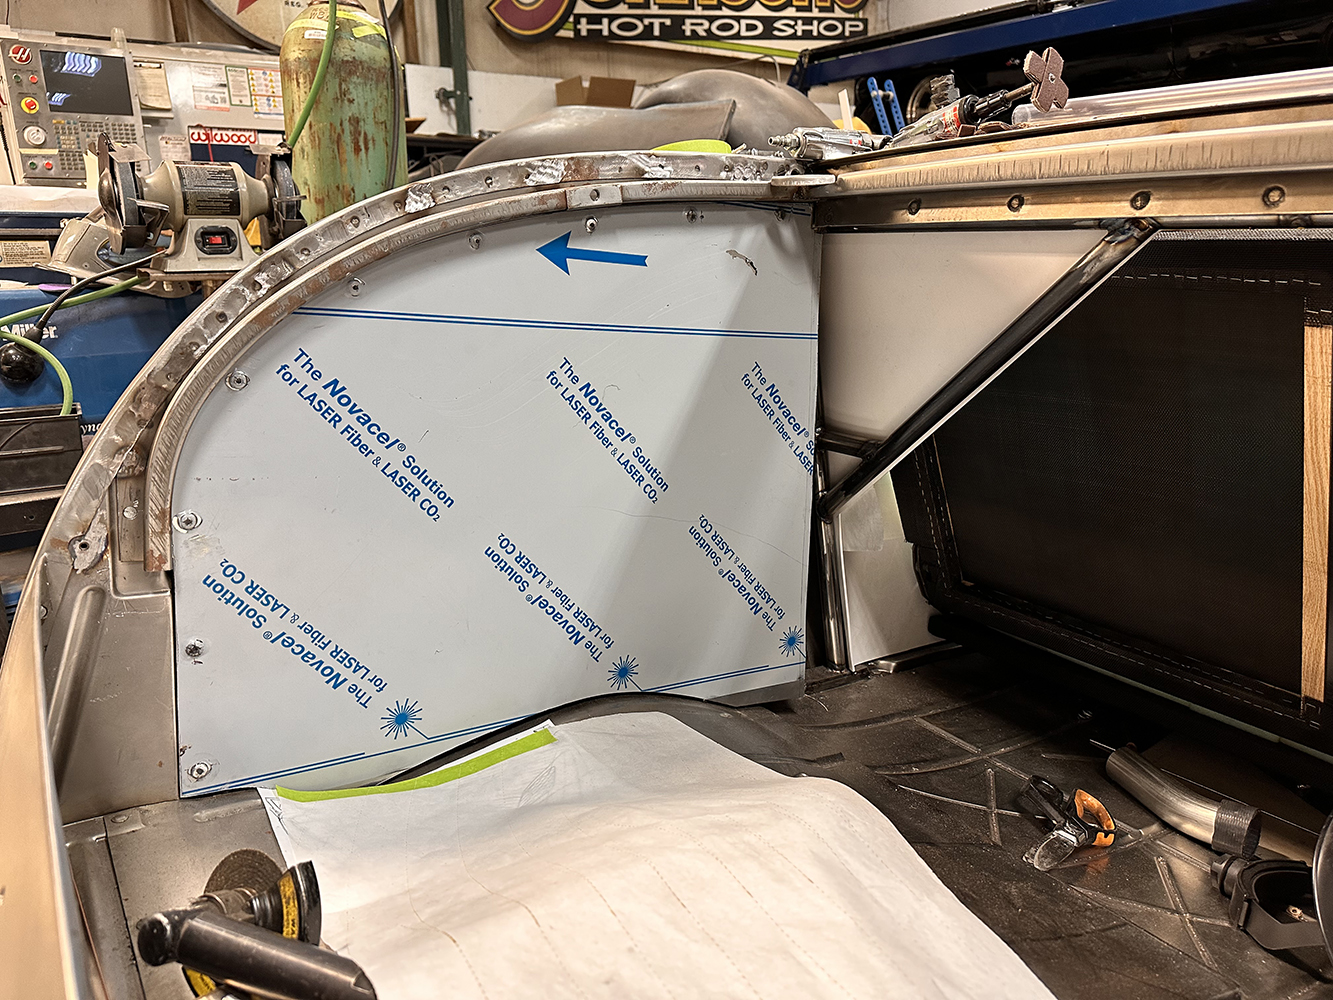
The quarter-panel center tube passes above the wheelwell while the upper bar curves gracefully toward the floor. The upper bar connects to the body at the decklid gutter area (arrow). A center bar will serve as a mounting point for the Optima Batteries.
First, there are two types of tubing to consider: round or square. Undoubtedly, round tubing has an advantage in appearance; it is very strong. Did we mention how great it looks? However, bending it requires special tools, making fish-mouth cuts for joints. Experience plays a significant role in making round tubing effective. But remember, the only way to gain that experience is by starting to work, and tools for tubing tasks have become more affordable. Alternatively, you can pay a shop to do the bending; universal bends are also available online.
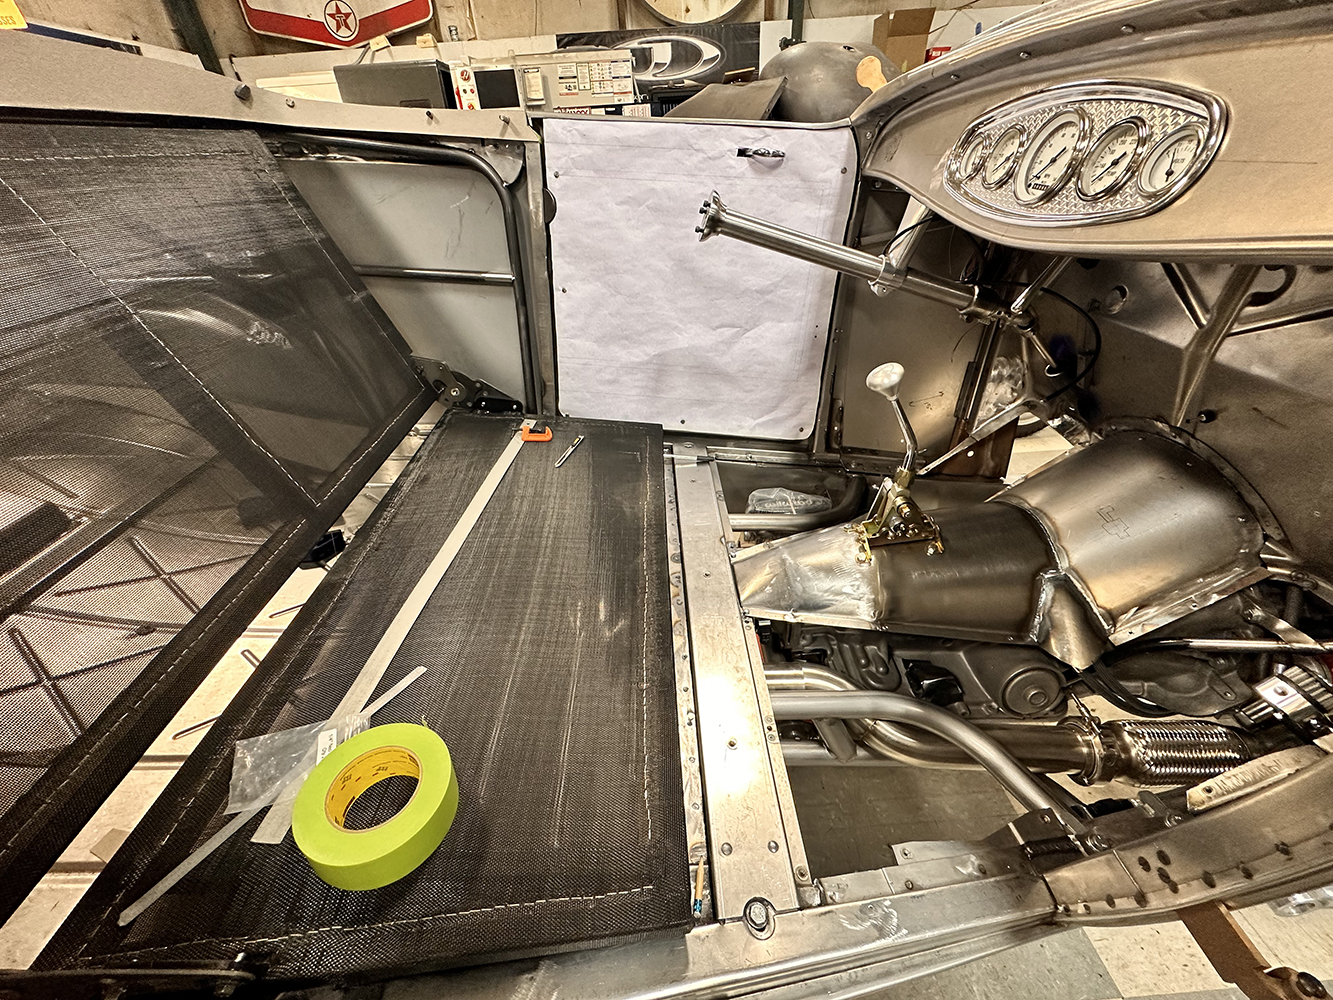
The trunk bracing ties in nicely with the cockpit bracing. The front and rear center bars connect to the cross-support vertical. All joints are fish-mouthed for proper fit and maximum strength.
The second option is square tubing. Square tubing is strong and easier to cut and fit but difficult to bend, and it simply isn’t as visually appealing as round tubes. Due to its flat surfaces, adding components like brackets and mounting tabs is simpler on square tubing. Remember, quality fabrication looks good regardless of shape; in the end, all of this will be concealed.
The billet mounts for the twin Optima Batteries (arrows) are now in place. A simple flat-plate bracket extends from the center of the tube to the top of the wheelhouse. This stiffens the body while mounting the batteries in one clean bracket.
Regarding strength, round tubing handles high pressure and stress exceptionally well. Just look inside any race car to see that tubes reign supreme. In contrast, square tubing, with its shape, provides excellent rigidity and load-bearing capacity, making it ideal for constructing this type of automotive framework. In this context, either tube will work well, ultimately due to aesthetics, skill, and the tools available. If you’re bracing a roadster body, you might consider using these Johnson tubes as inspiration.
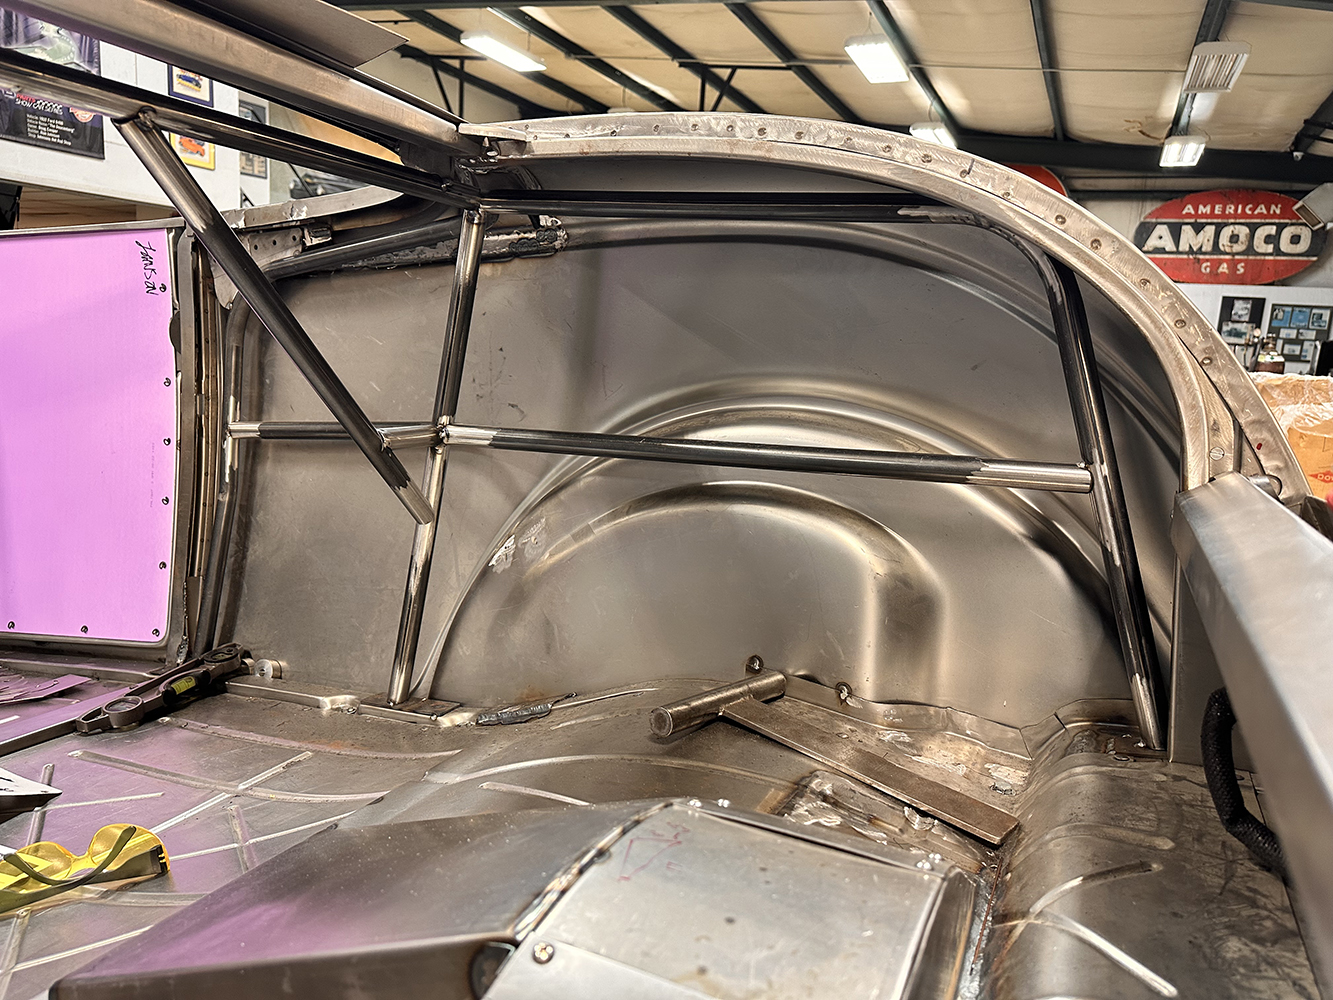
Looking from the cockpit into the decklid area, it is obvious that this inner structure is very strong. JHRS’s years of rollcage building are apparent. Everything is securely tack-welded at this point; the final welding will come later.
With that in mind, let’s delve into the Murphy roadster to uncover more hidden aspects contributing to its quality.
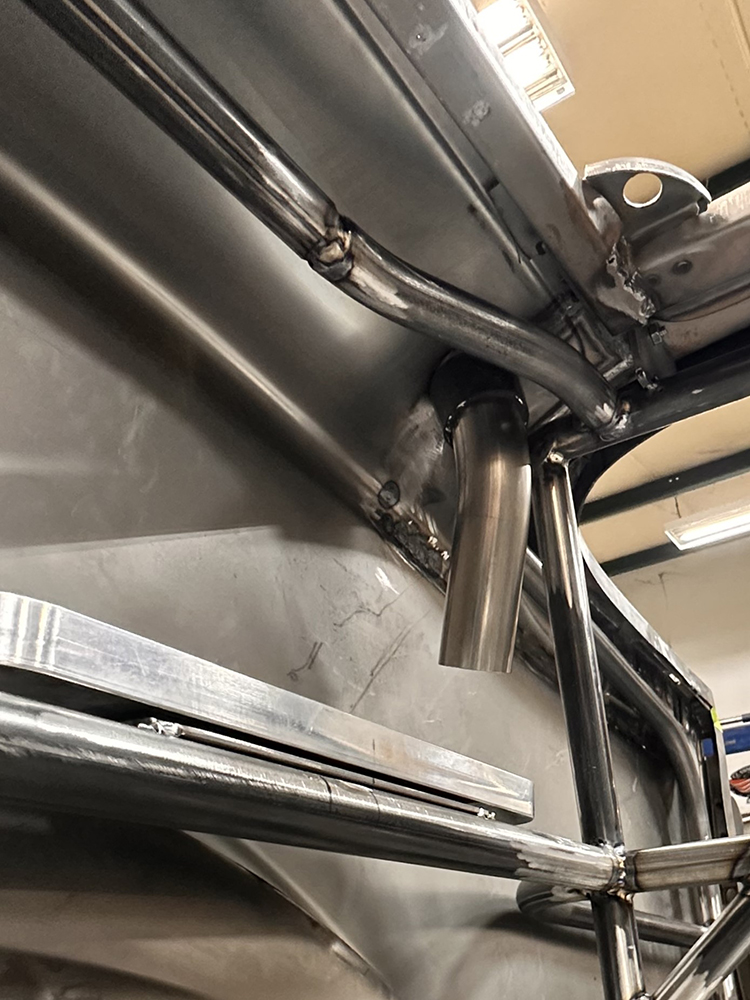
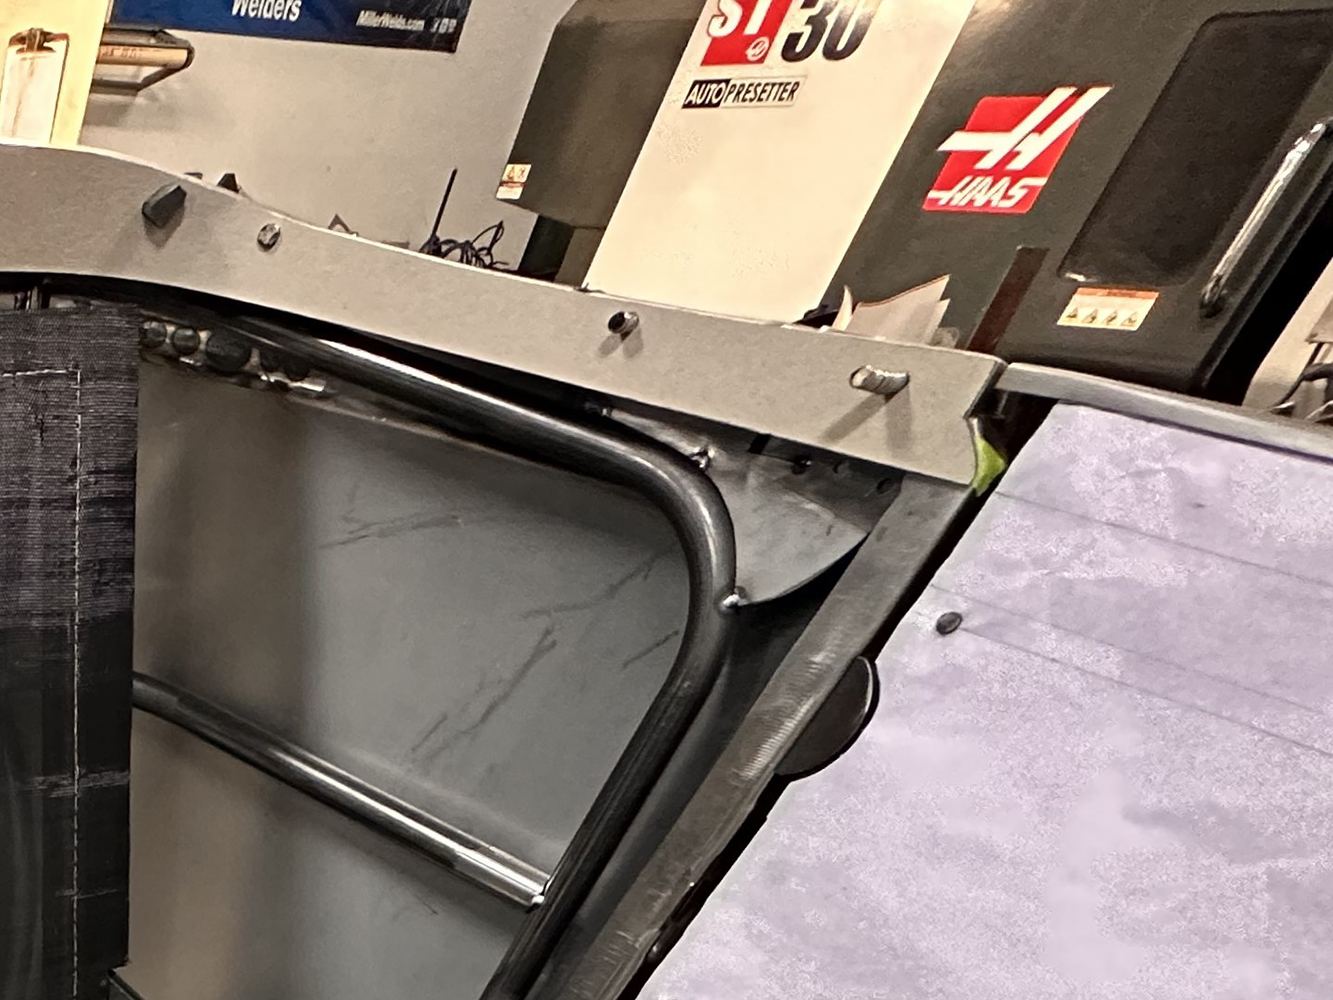
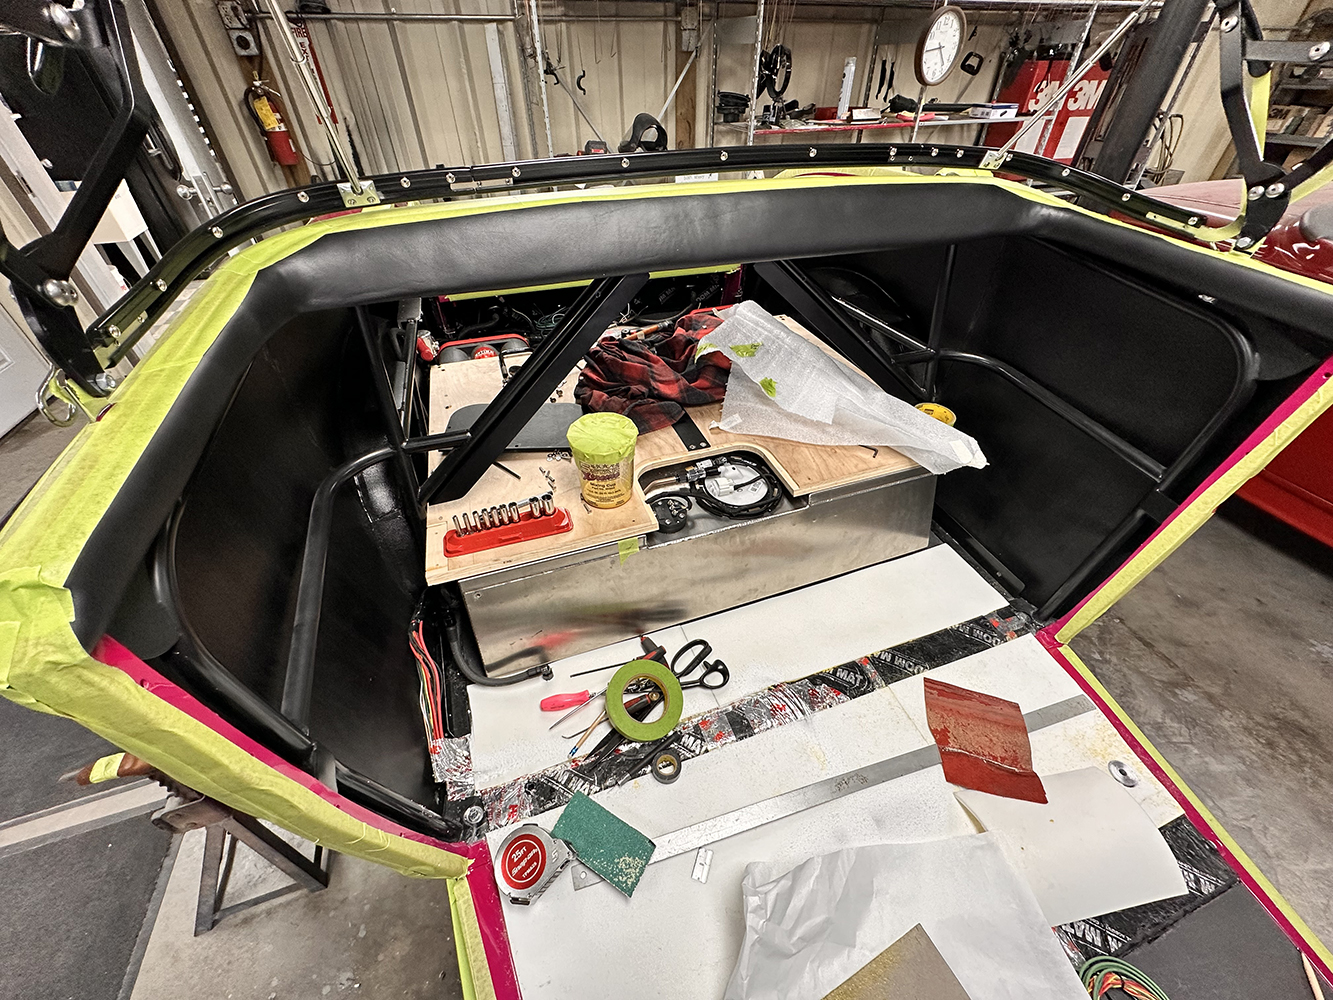
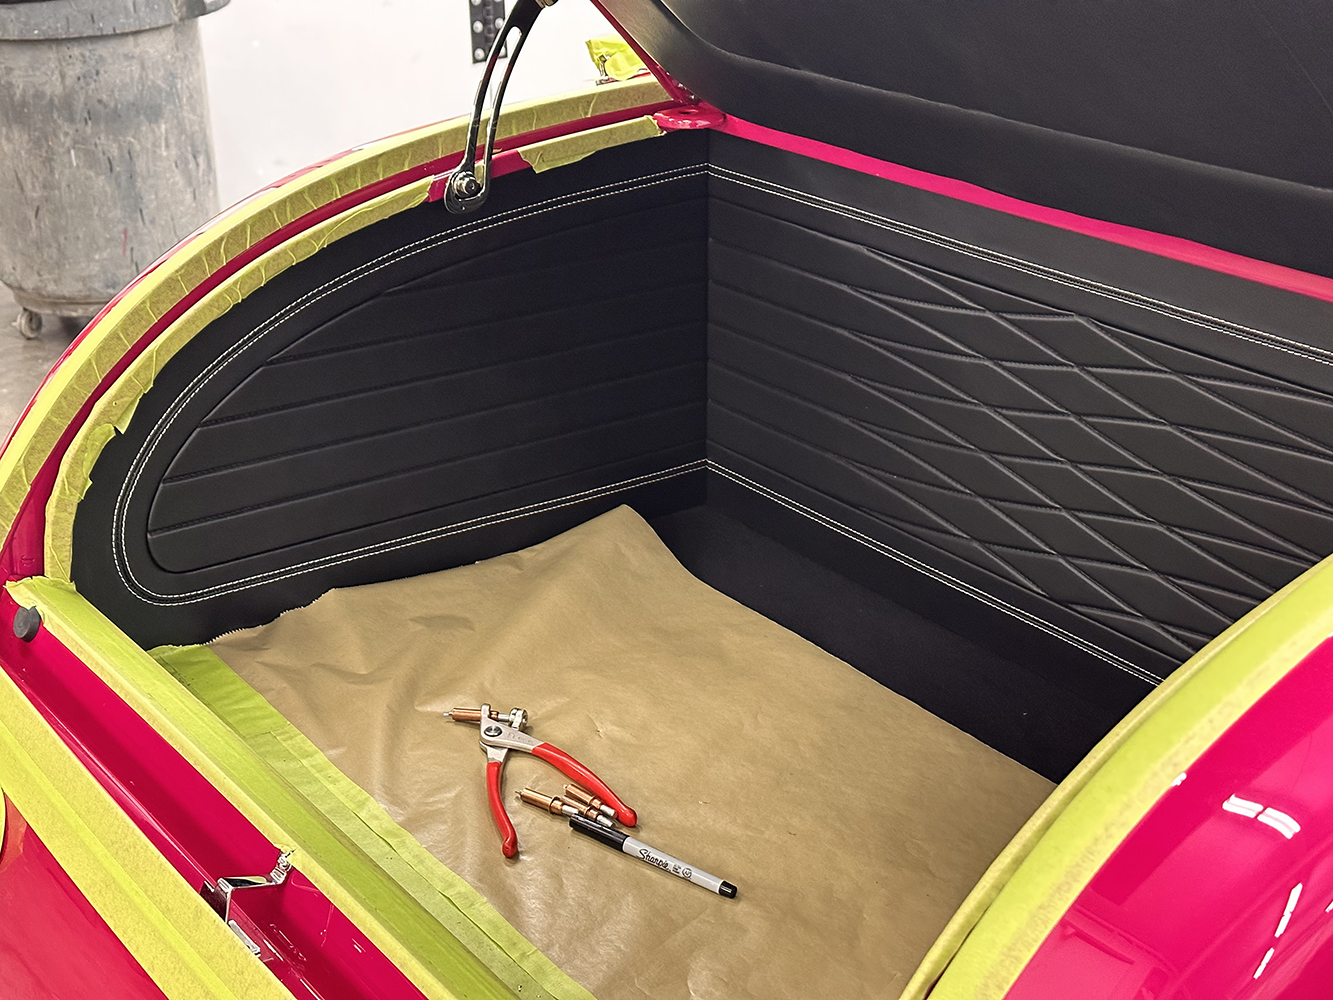
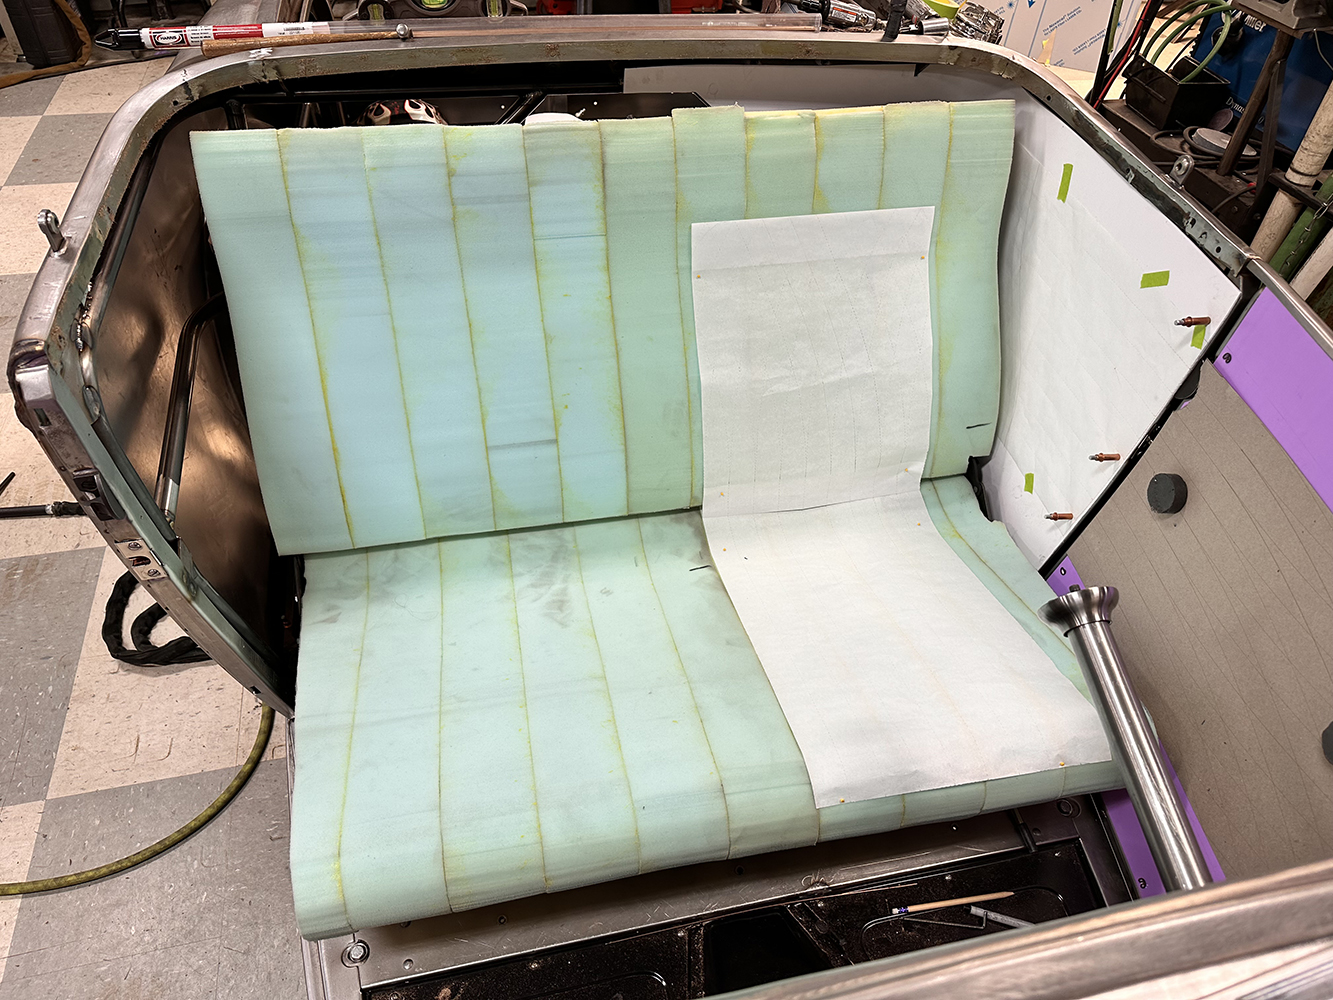
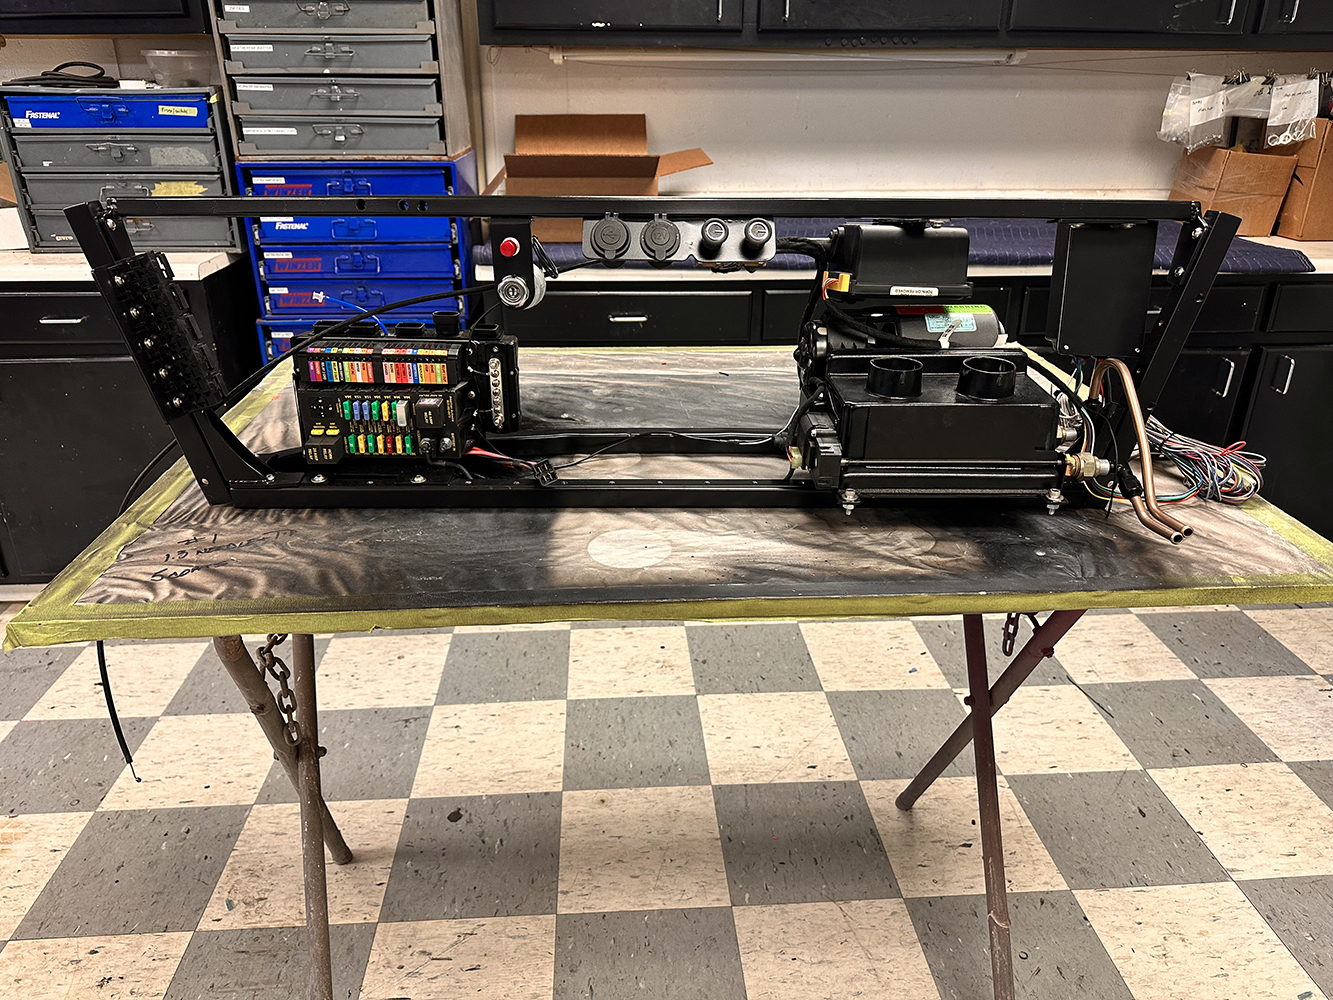
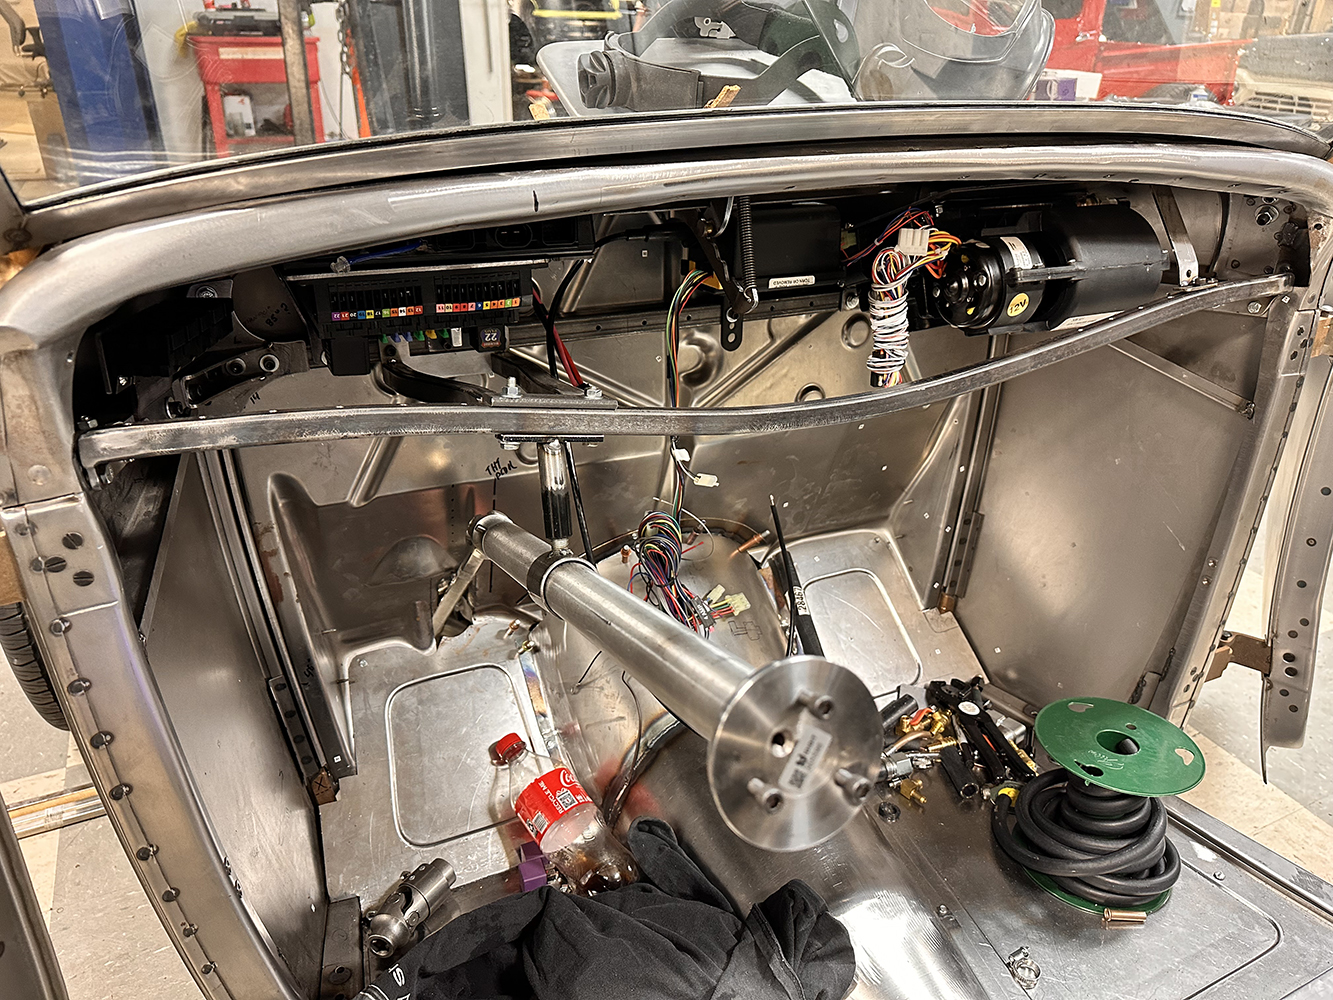
Here you can see the mounting plate that goes from the inner bar to the panel between the trunk and the cockpit (arrow). This makes for a very solid decklid hinge mounting area.The fuel filler is located atop the quarter-panel just behind the hinge mount. A mild S-bend was required to provide clearance for the fill pipe.Up front at the B-pillar, a piece of flat stock was formed to meet the top of the quarter-panel and tie into the top of the B-pillar. A second B-pillar mount was formed to attach to the pillar at the center bar location. This makes for one very strong B-pillar and folks are saying, “Gee, these doors sure close nicely.”After measuring and fabricating the upper and lower seat frames, they were installed and mounted to the car’s floor and inner structure.From the rear, the laid-back angle of the seat back is apparent. This angle provides needed room for the custom-built gas tank from Rick’s Tanks.Once again, the laid-back seat is apparent, and if you’re thinking, “This looks bigger than my Deuce roadster,” it’s because JHRS extended the cockpit area 4-1/2 inches to the rear.Here, we can see the custom Rick’s stainless steel gas tank in place. The 3/4-inch plywood floor covers the tank and converts the trunk area to a flat floor. With the inner body and tubes painted, it all becomes one cohesive unit.After the welding was complete, inner upholstery panels were formed, with attachment points provided by the tubular inner structure.The finished floor is cabinet-grade, 3/4-inch birch plywood, converting the trunk to a flat floor space. Note the fuel tank filler protruding through the plywood. The metal angle piece is the lower mount for the front trunk upholstery panel.With the trunk upholstered, the flat floor appears perfect, creating a practical space for luggage. A sturdy mounting system ensures the precise fit and finish of the interior panels.The beginning of the seat mockup and inner upholstery panels effectively hides all that nice structural tubing work. Often, we see a world-class hot rod and don’t realize that what you can’t see is what makes the things you can see work so well.One last piece of body bracing is this 1-inch box tubing cowl brace, which supports the Vintage Air heater and the American Autowire panel. This cowl “cage” also holds the ignition switch, a 12V power port, a USB port, and the heater controls.Here we can see the cowl cage mounted in the car. While it provides some stiffening, its primary function is to keep everything high and dry on either side of the cowl vent. A 1-inch box tubing brace is designed to follow the dash panel, offering a solid structure for the dash and supporting the upper door hinge area.
We use cookies to ensure that we give you the best experience on our website. If you continue to use this site we will assume that you are happy with it.