ITGMw
SUBSCRIPTIONtext
ProgressArrows
digital issues
ProgressArrows
online store
ProgressArrows
SUBSCRIPTIONtext
ITGMw
ACPnew header logo
CTP LOGOs
all cars

Under the Hood of a 1971 Plymouth Duster

By Ron Covell

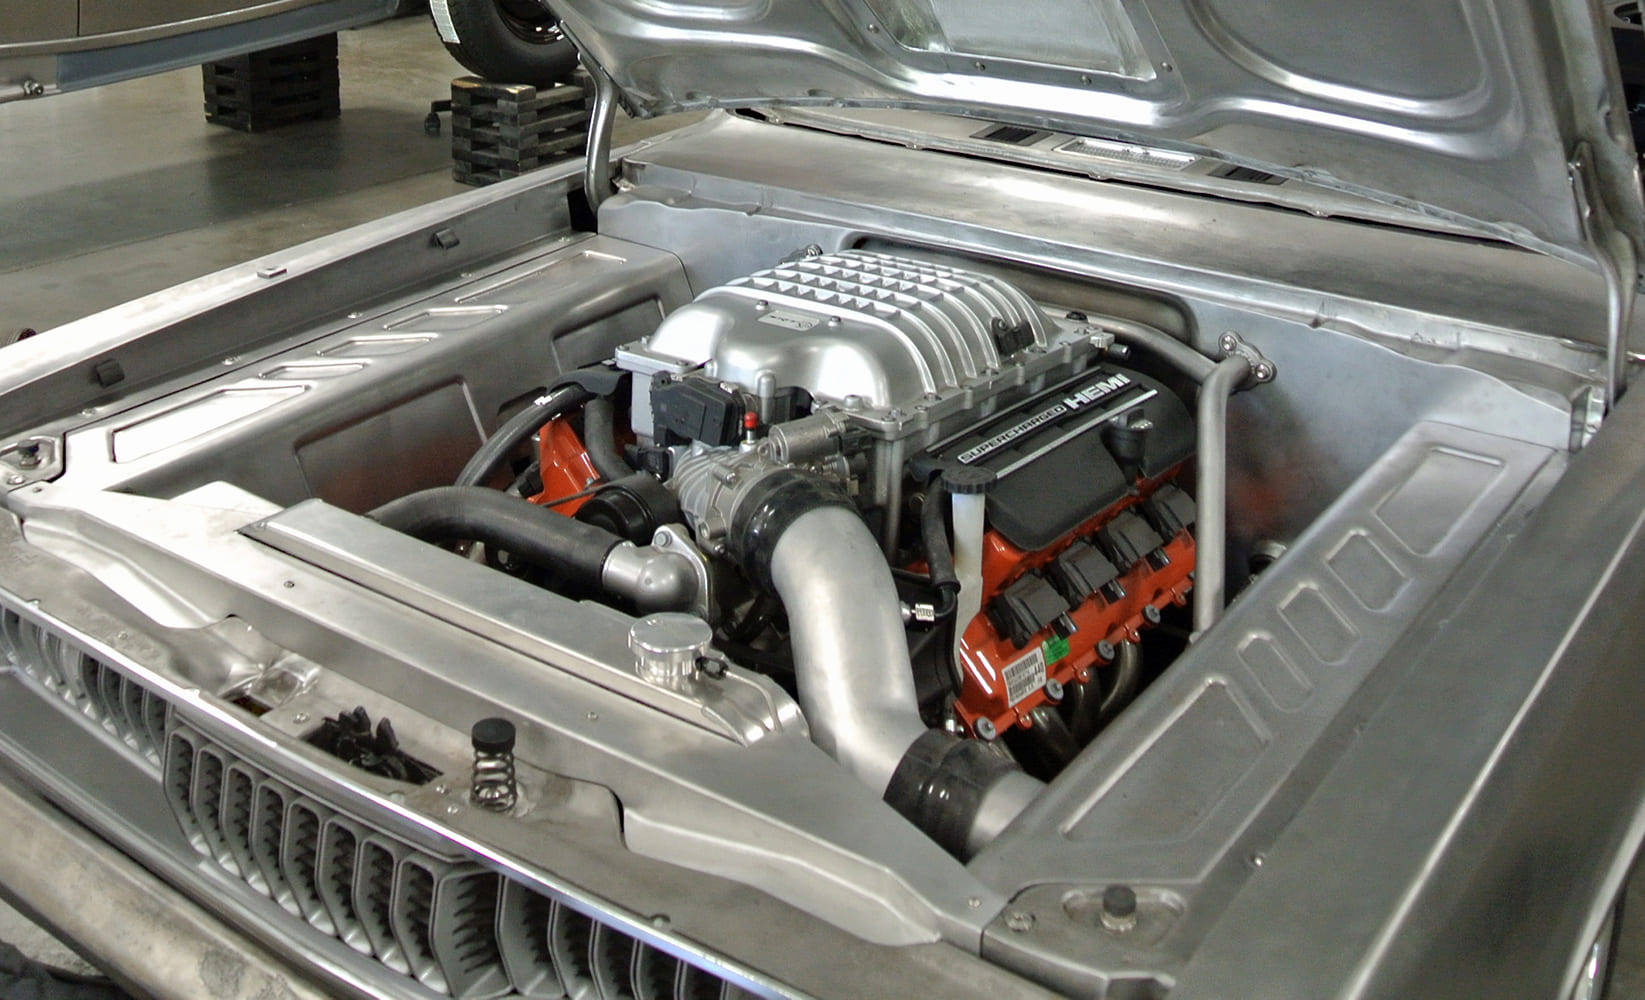
In most high-end project cars, the sheetmetal in the entire engine compartment is completely custom fabricated. This is sometimes necessary to accommodate a specific engine, but it also serves as a “statement piece” that allows the builder to showcase their design and fabrication skills. BBT Fabrications in Mahomet, Illinois, is building a 1971 Plymouth Duster project with a supercharged Chrysler Hellcat Hemi engine; in this article, you will see the unique approach they took in constructing the underhood panels for this car.

02 Gen III HEMI installed in 1971 Plymouth Duster with tubular front clip mock up
The original core support was made entirely of sheetmetal, and it does not fit the new custom chassis that was built for the car.

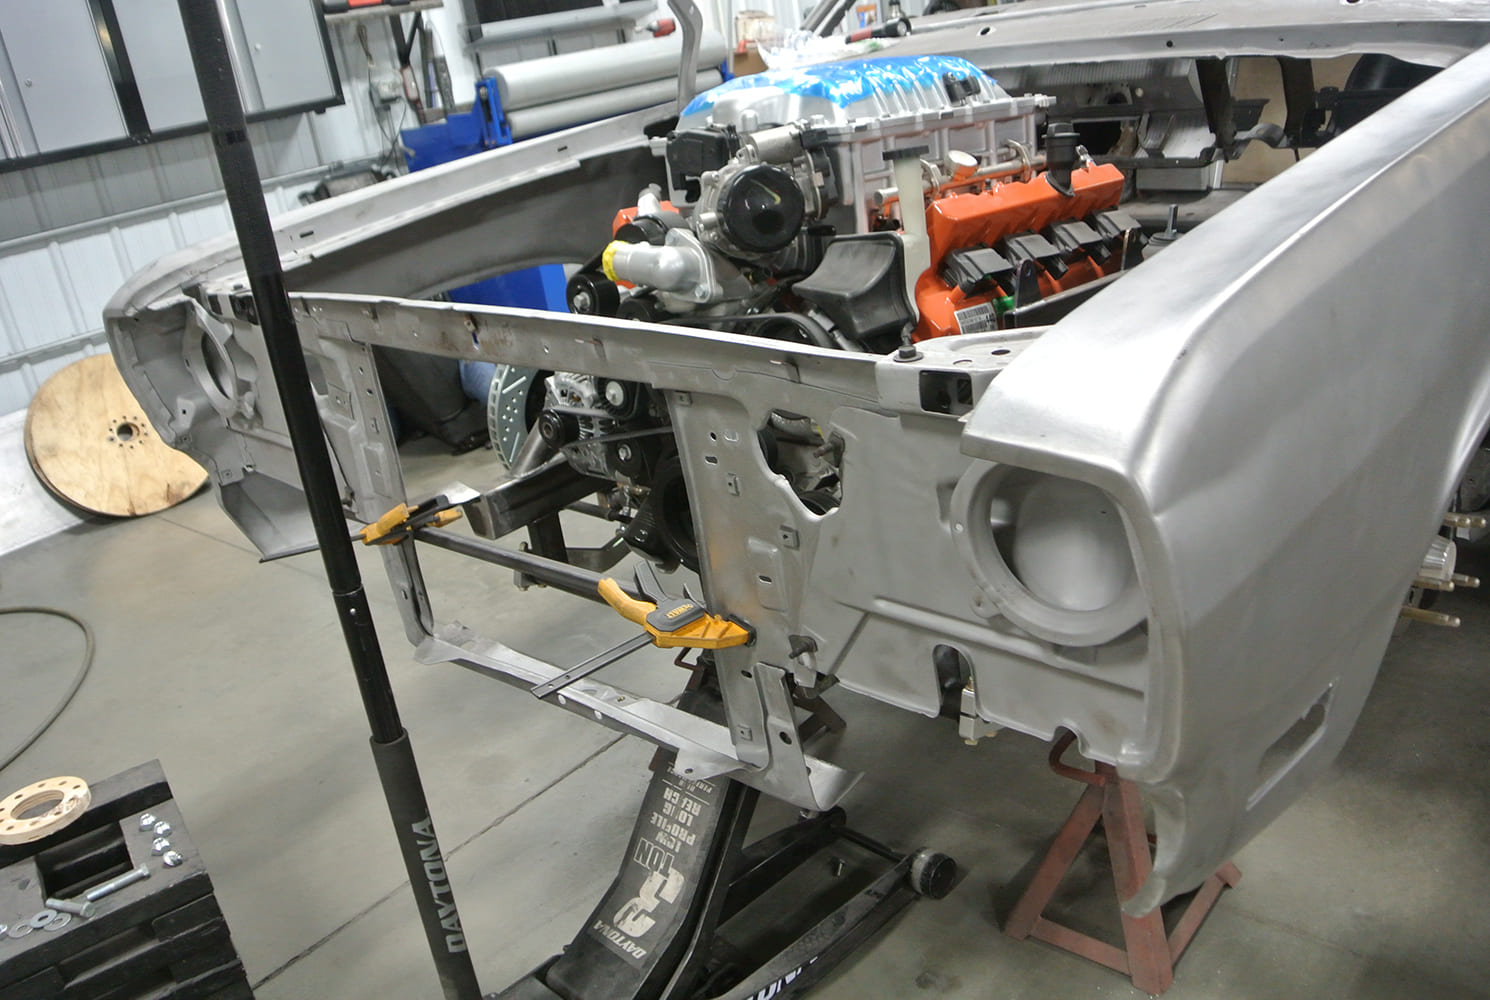
As with most projects at this level, one of the first steps is to remove the factory sheetmetal in the engine compartment then examine the space available for the new sheetmetal. Many components must either be built into the design or the design must be configured to provide sufficient room for their removal and reinstallation.

03 Custom aluminum radiator support mocked up with HEMI belt drive visible
With the new radiator positioned in the desired location, 1×2-inch tubing is shaped to fit and bolted to the original corner structure under the hood.

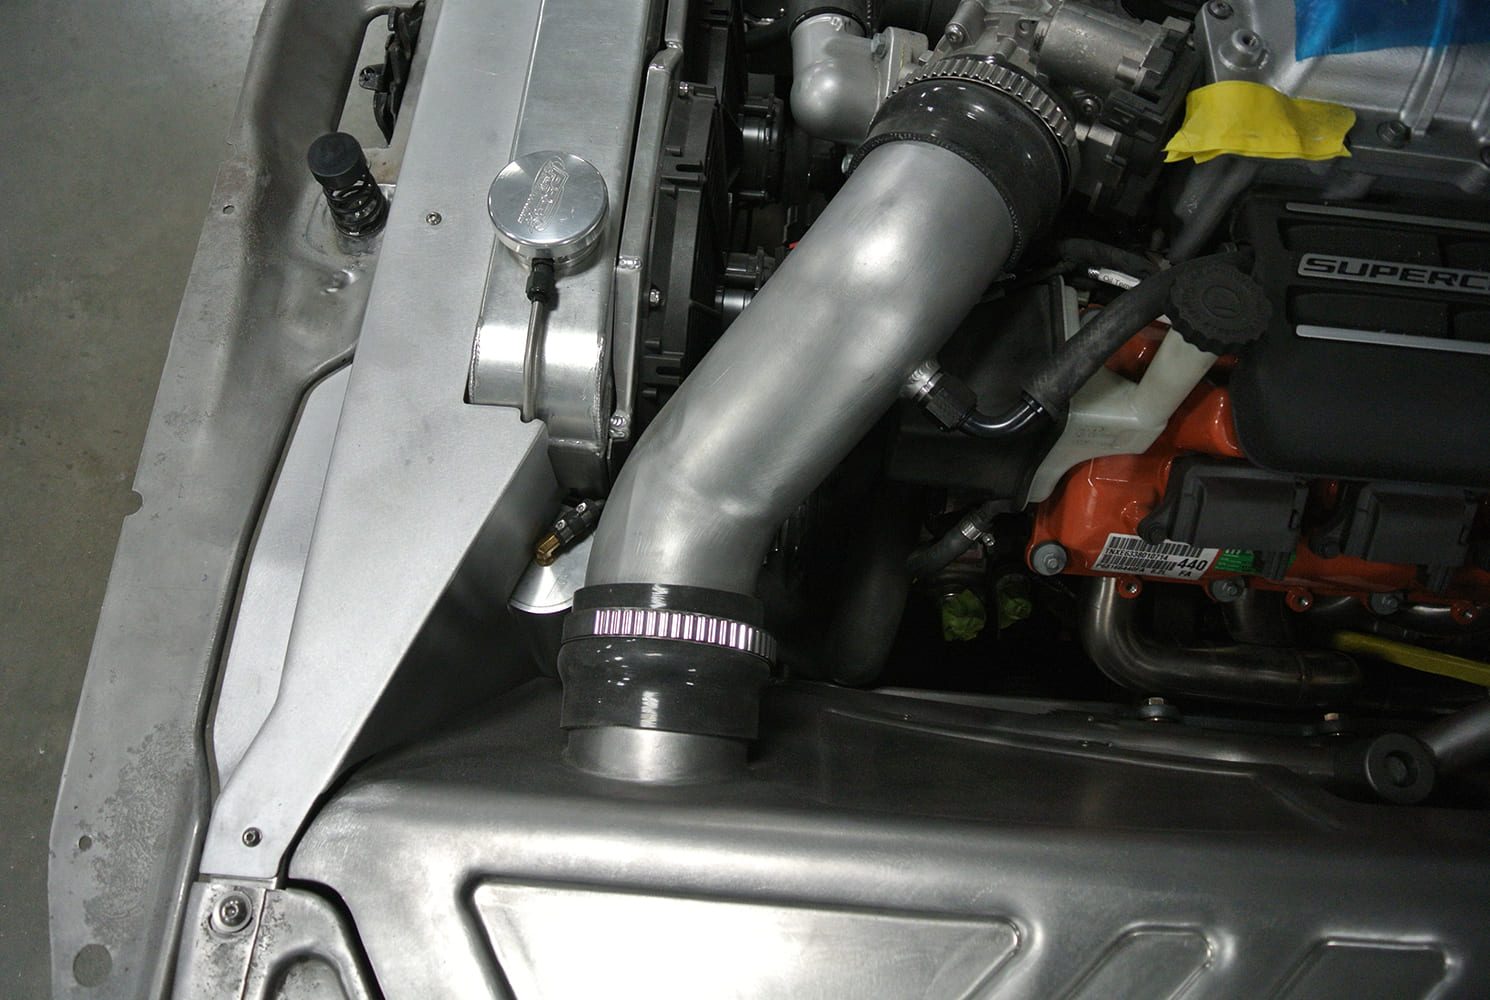
Additionally, adequate clearance is essential for hands and tools during maintenance. More than a few builders have been unhappy because they had to redo extensive work after failing to allow enough room for necessary components, such as the steering box, exhaust manifold, or radiator overflow tank.

04 Upper radiator mount and dual fan setup fitted in shaved engine bay
Sections of 1×2-inch tubing are shaped to run alongside the radiator sides, and they drop down to connect with extensions attached to the 2×4-inch framerails.

Troy Gudgel and his crew at BBT Fabrications have many years of experience, enabling them to anticipate all potential issues. They not only developed a design that truly highlights the powerful Hellcat engine but also created unique designs for the most visible panels, giving this car a character unlike any other. Most of the work was done in 18-gauge steel, with some components made from aluminum.

05 Dual electric fan radiator mounted with custom aluminum shroud and support
Aluminum angles are designed to secure the radiator in position. They are bolted to the vertical support tubes and welded to the sides of the radiator.

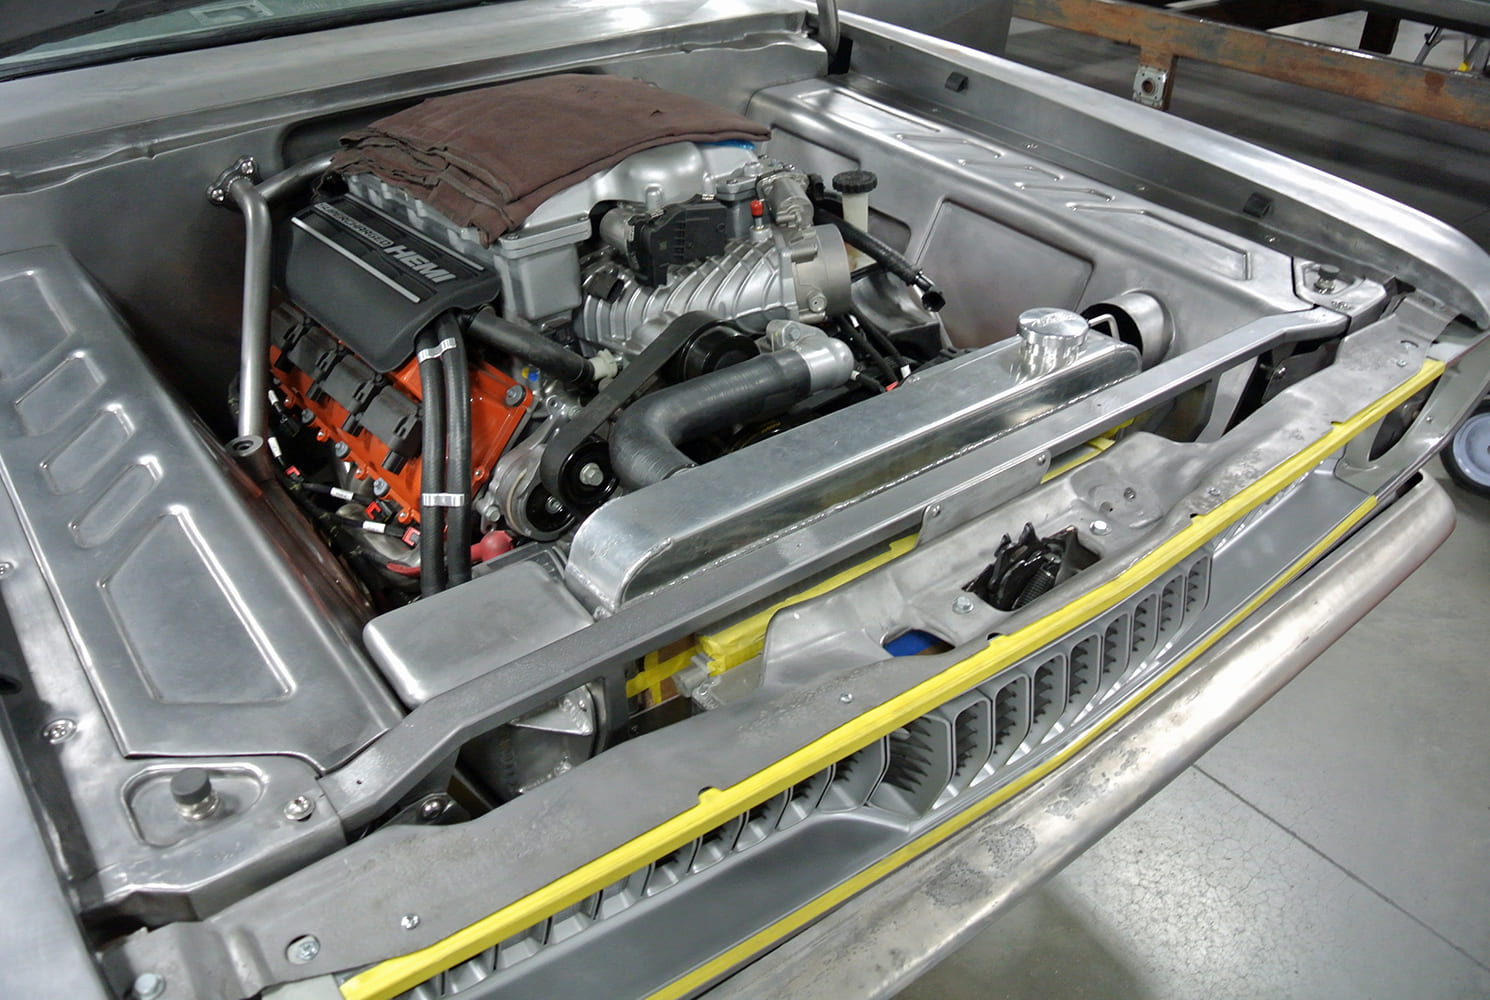
The firewall on the Duster had many uneven nooks and crannies from the factory. So, before fabricating any other panels, a smooth firewall was constructed and installed, featuring a recess in the center to accommodate the robust engine. With the new firewall, they had a clean, flat target to aim for with the new inner fender panels.

06 Smooth sheet metal inner fenders fabricated for clean engine bay appearance
The original inner fender panels were removed, and 18-gauge steel was shaped into blanks for the new panels. A radius was created along the length of both panels.

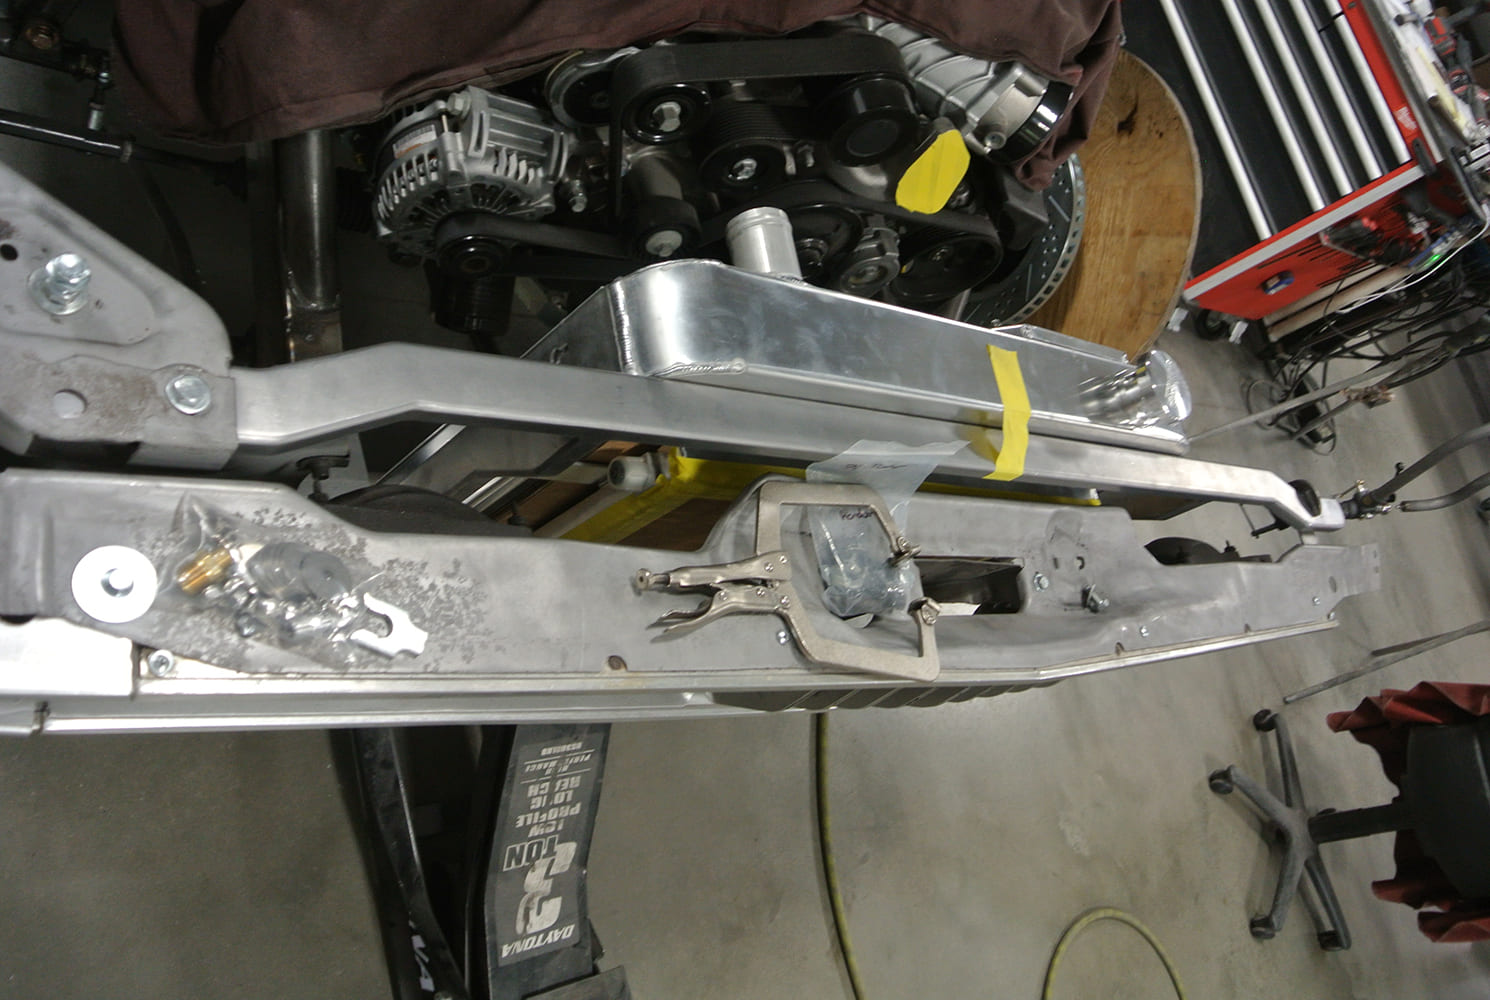
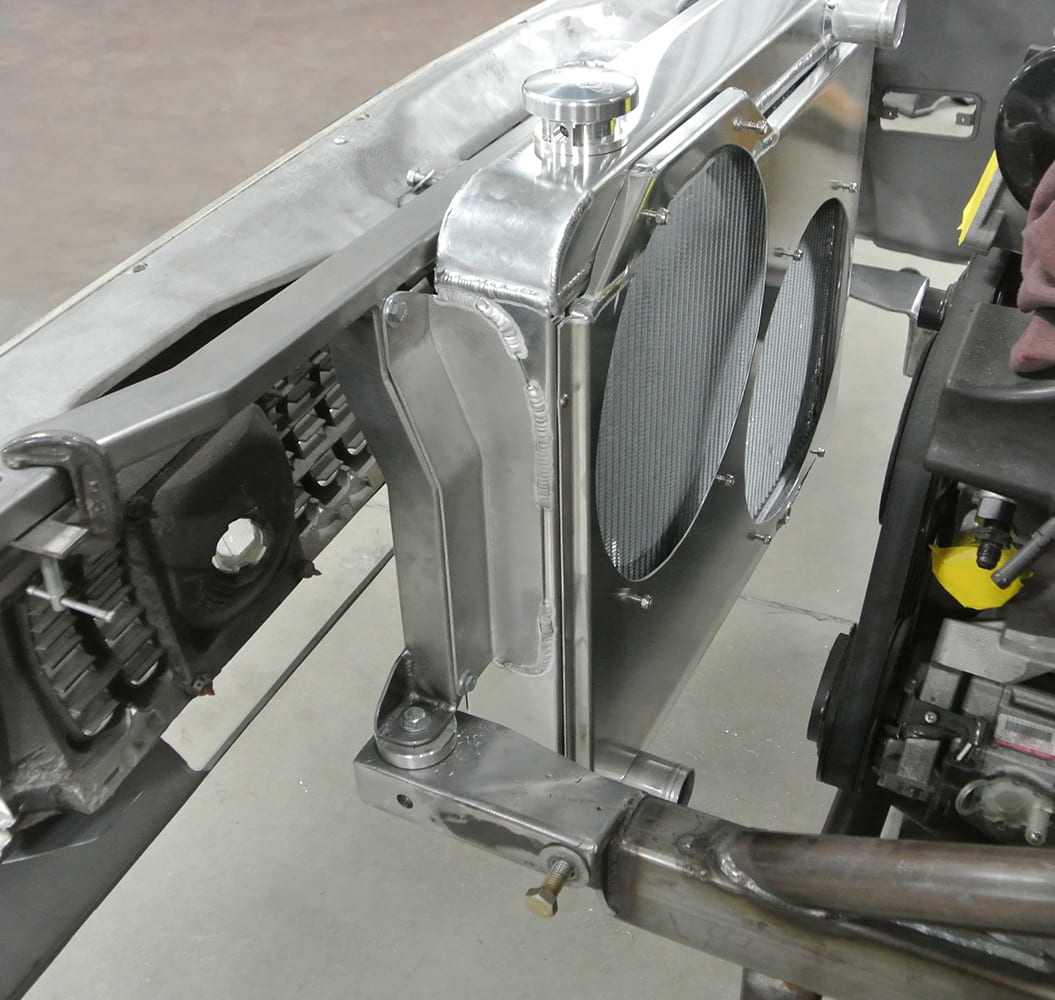
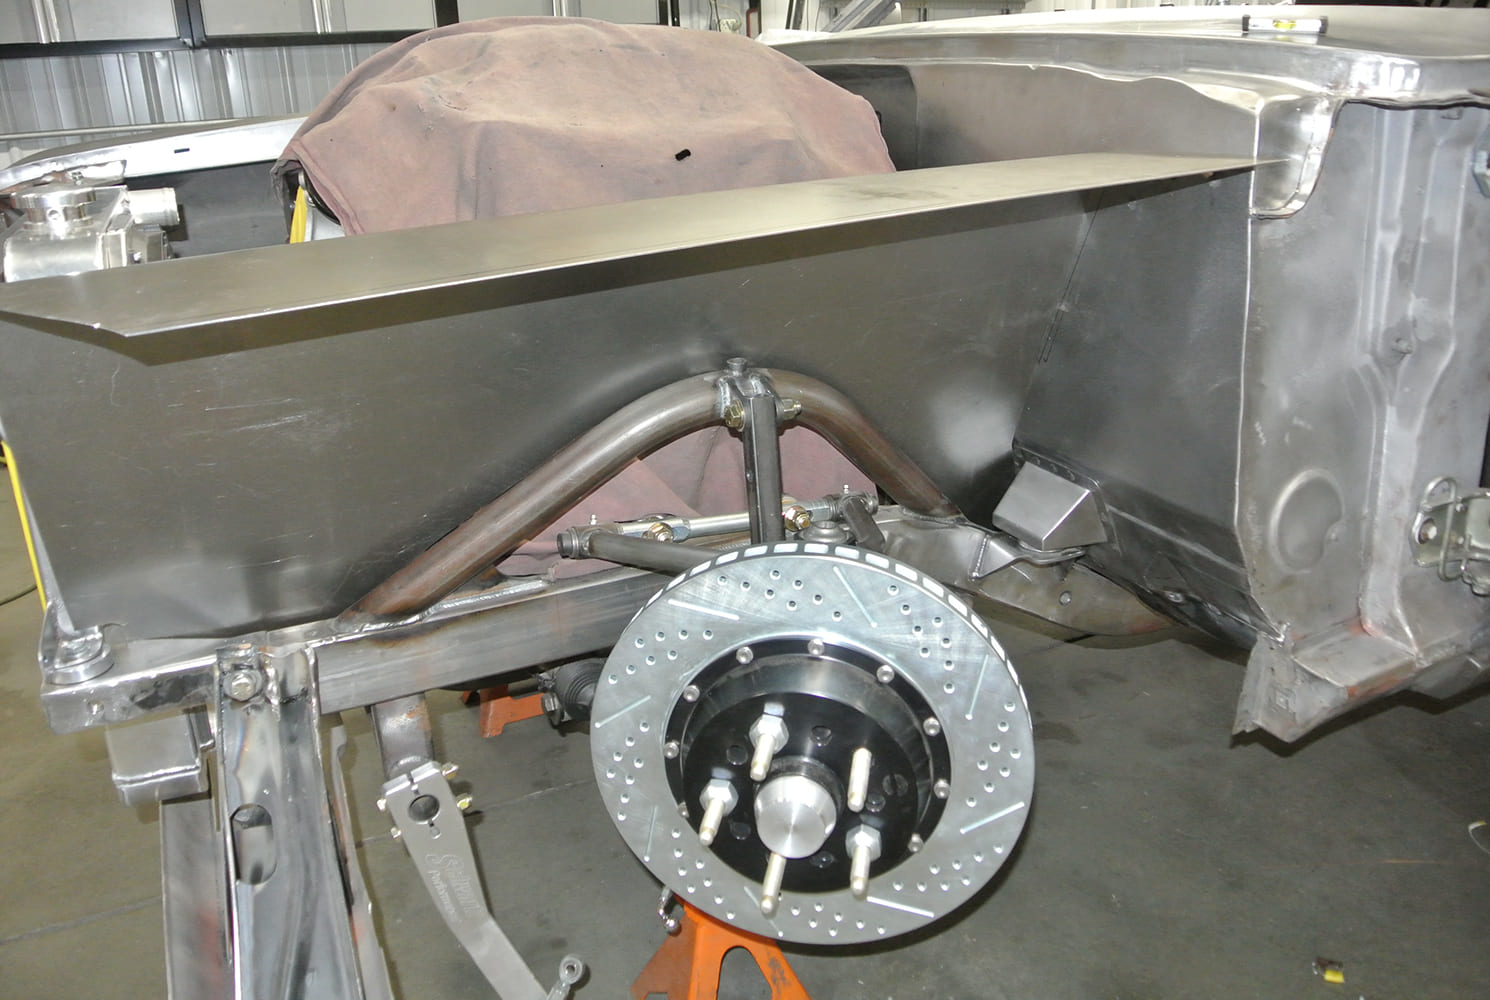
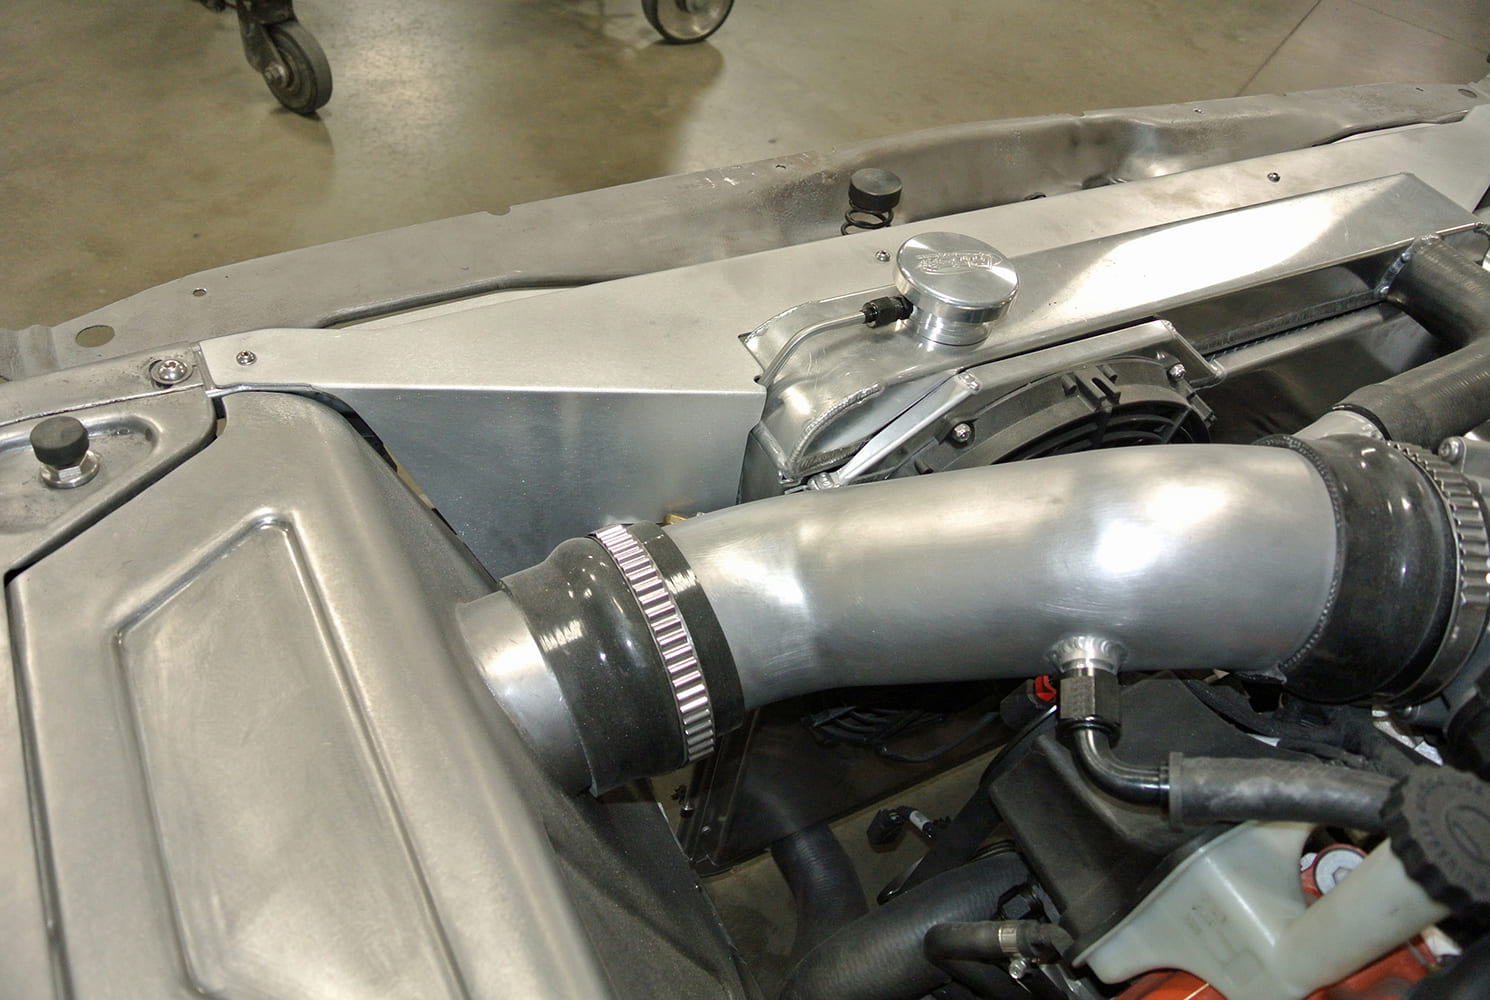
A new aluminum radiator was needed for the Hellcat engine, and little of the original core support was usable. The car features a custom-built chassis as the original unibody construction can’t handle over 700 hp. Extensions were added to the front of the chassis to connect with a structure made from 1×2-inch steel tubing for mounting the radiator. Heavy aluminum brackets were attached to this tubing structure and welded to the side plates of the radiator. This creates a clean, low-profile mounting system, which provides ample support for the radiator to endure the immense acceleration and braking forces this car can generate.

07 Tubular upper control arms and Wilwood disc brakes mocked up on custom subframe
The new panels are precisely trimmed to fit against the firewall and to clear the round tubular chassis members above the front suspension.

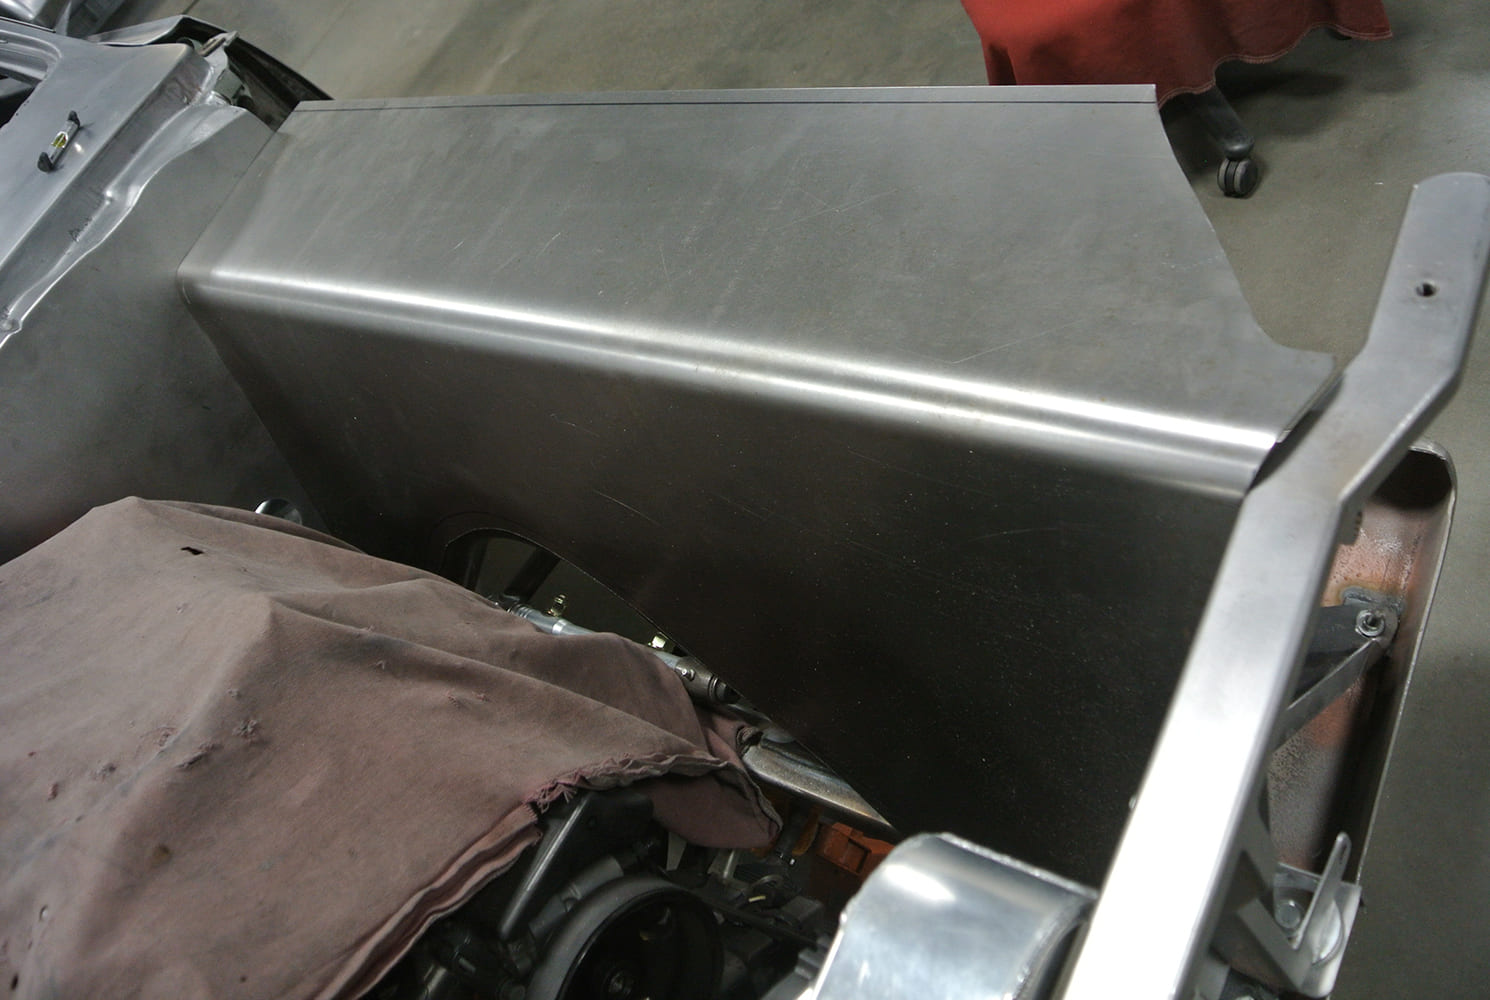
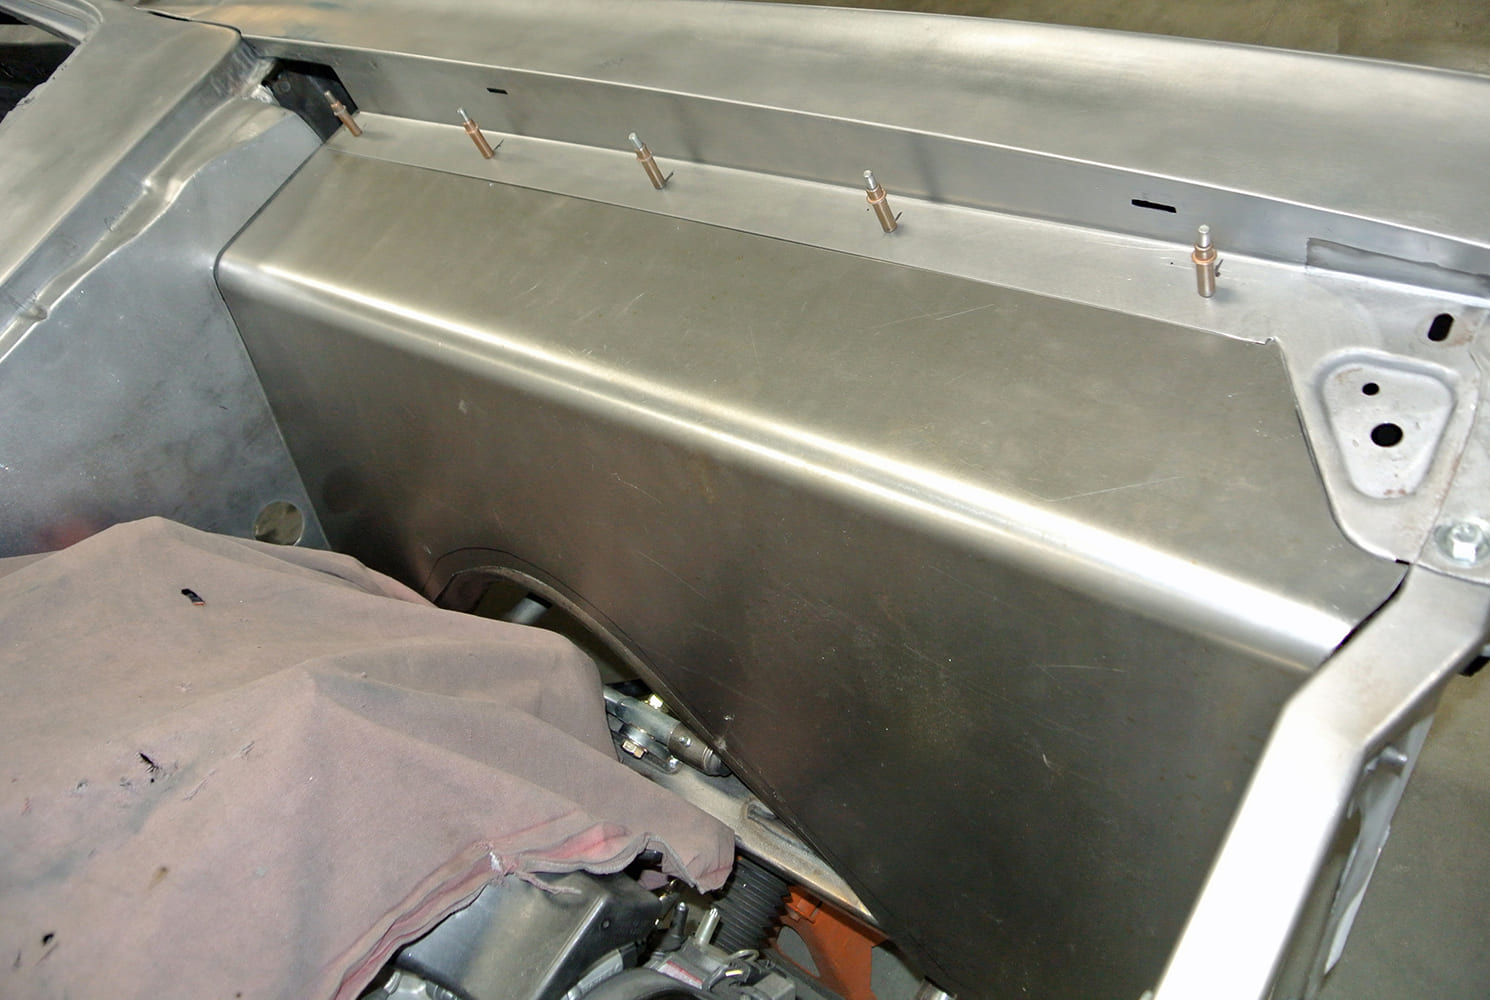
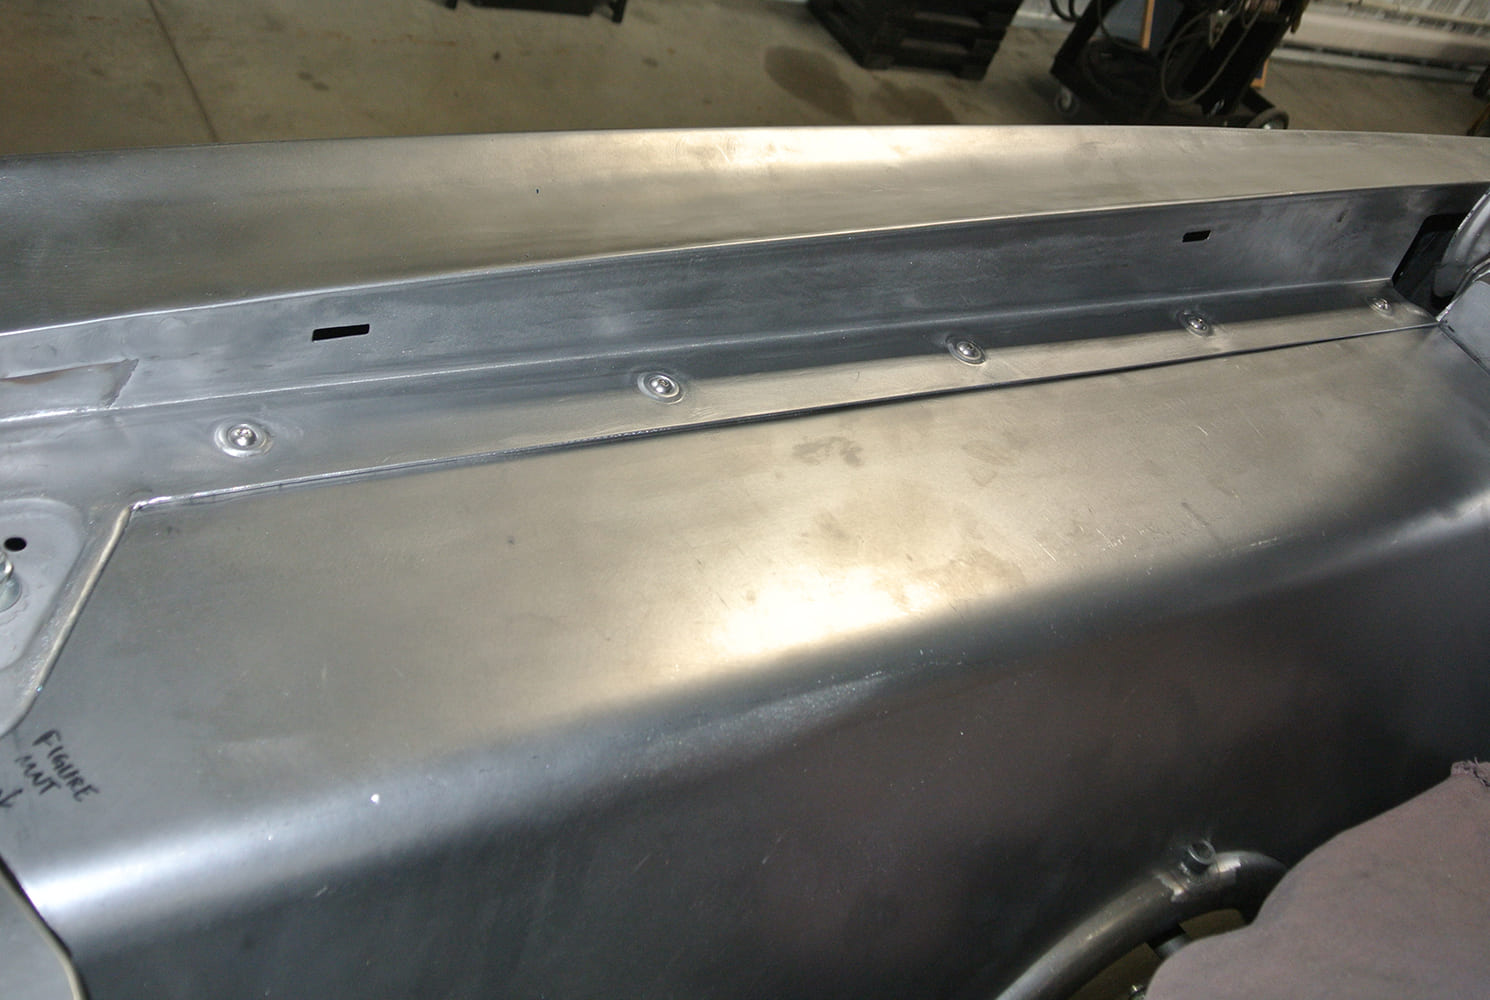
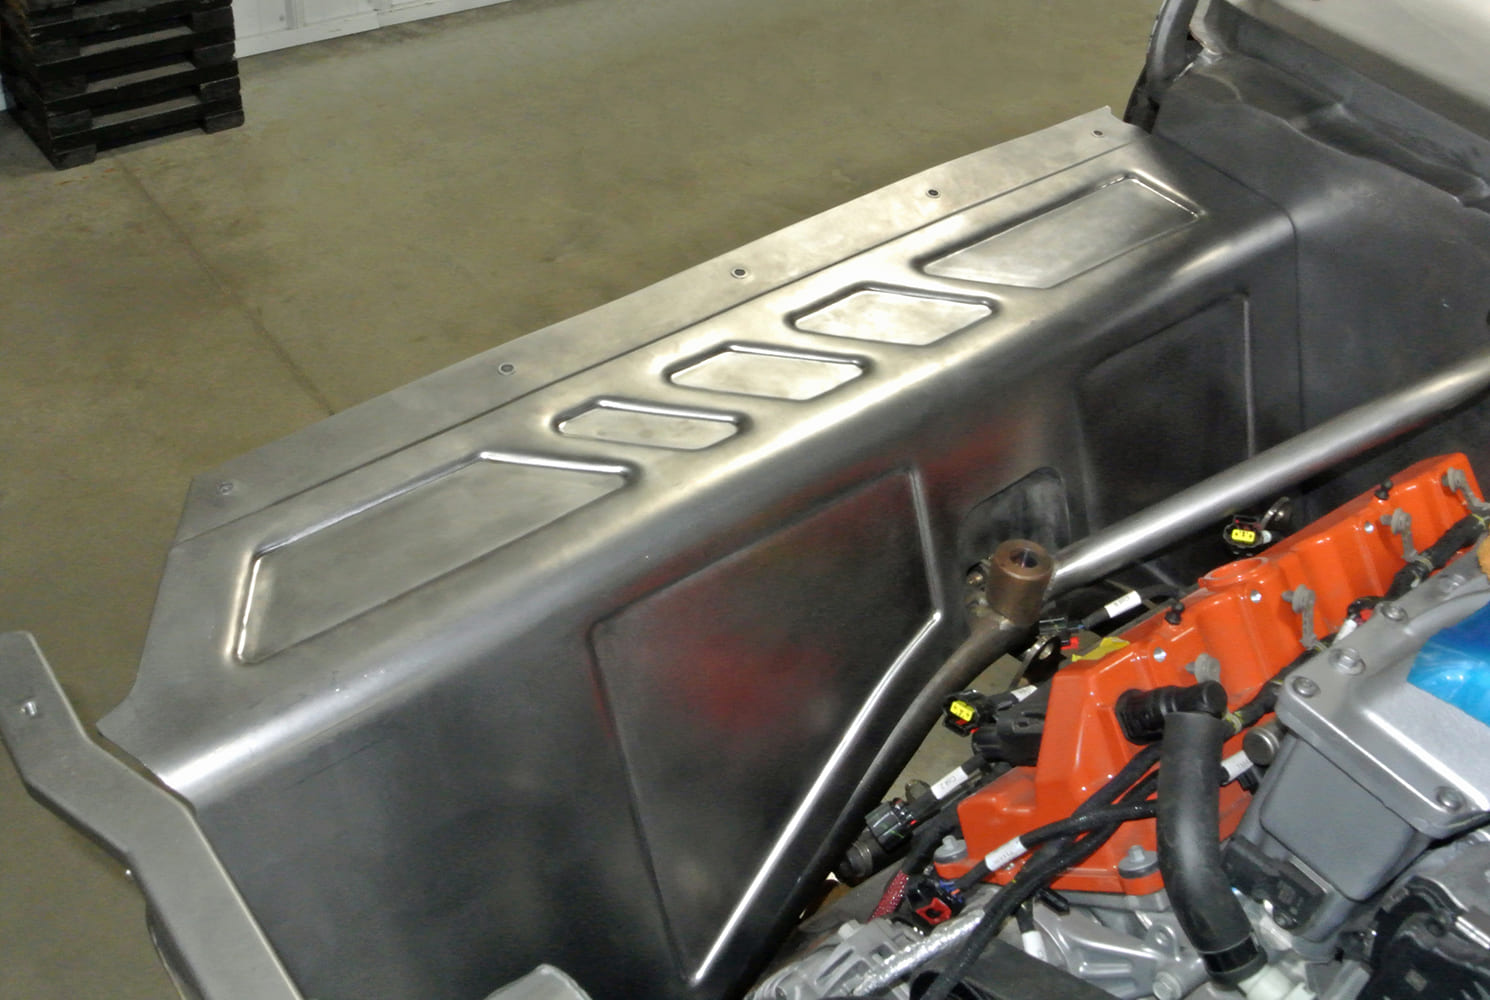
Sheets of 18-gauge steel were shaped on a radius brake to create a smooth, rounded corner. These pieces were then aligned to fit new flanges attached to the fender tops and carefully positioned against the firewall, held temporarily in place with Clecos while the fit was confirmed. Once everything was adjusted, the panels were secured to the fenders using button-head machine screws. The mounting holes in the fenders were embossed with dimple dies to enhance strength and provide a more polished appearance.

08 Passenger side smooth inner fender with Cleco fasteners in place for mock fitting
The new inner fender panels are temporarily secured with Clecos while fit and alignment checks are performed.

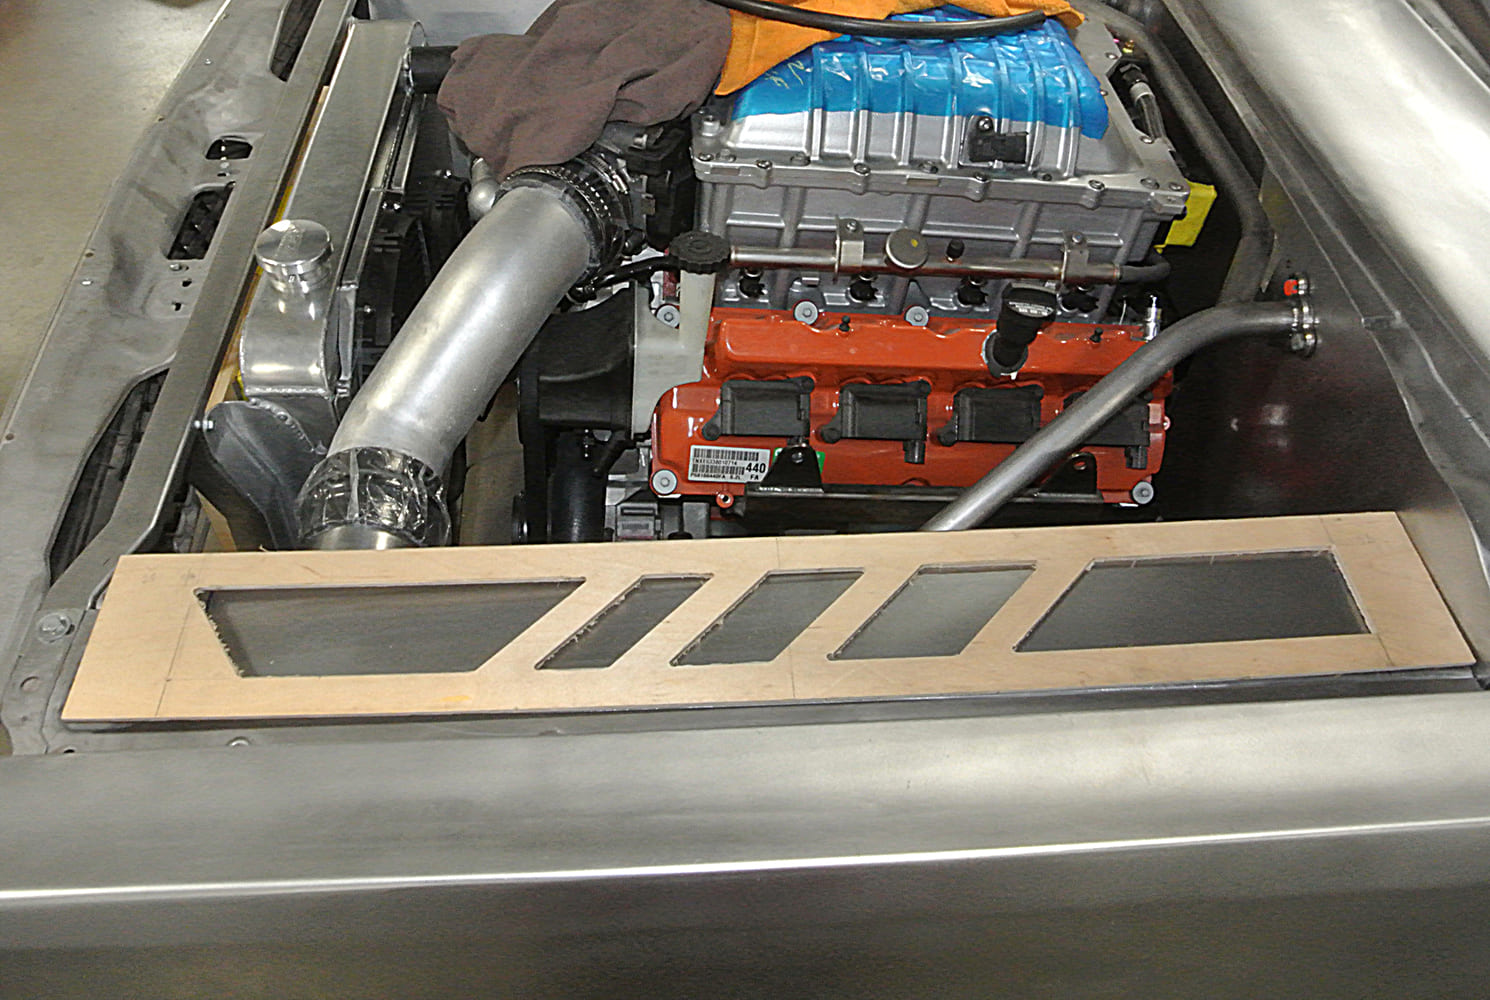
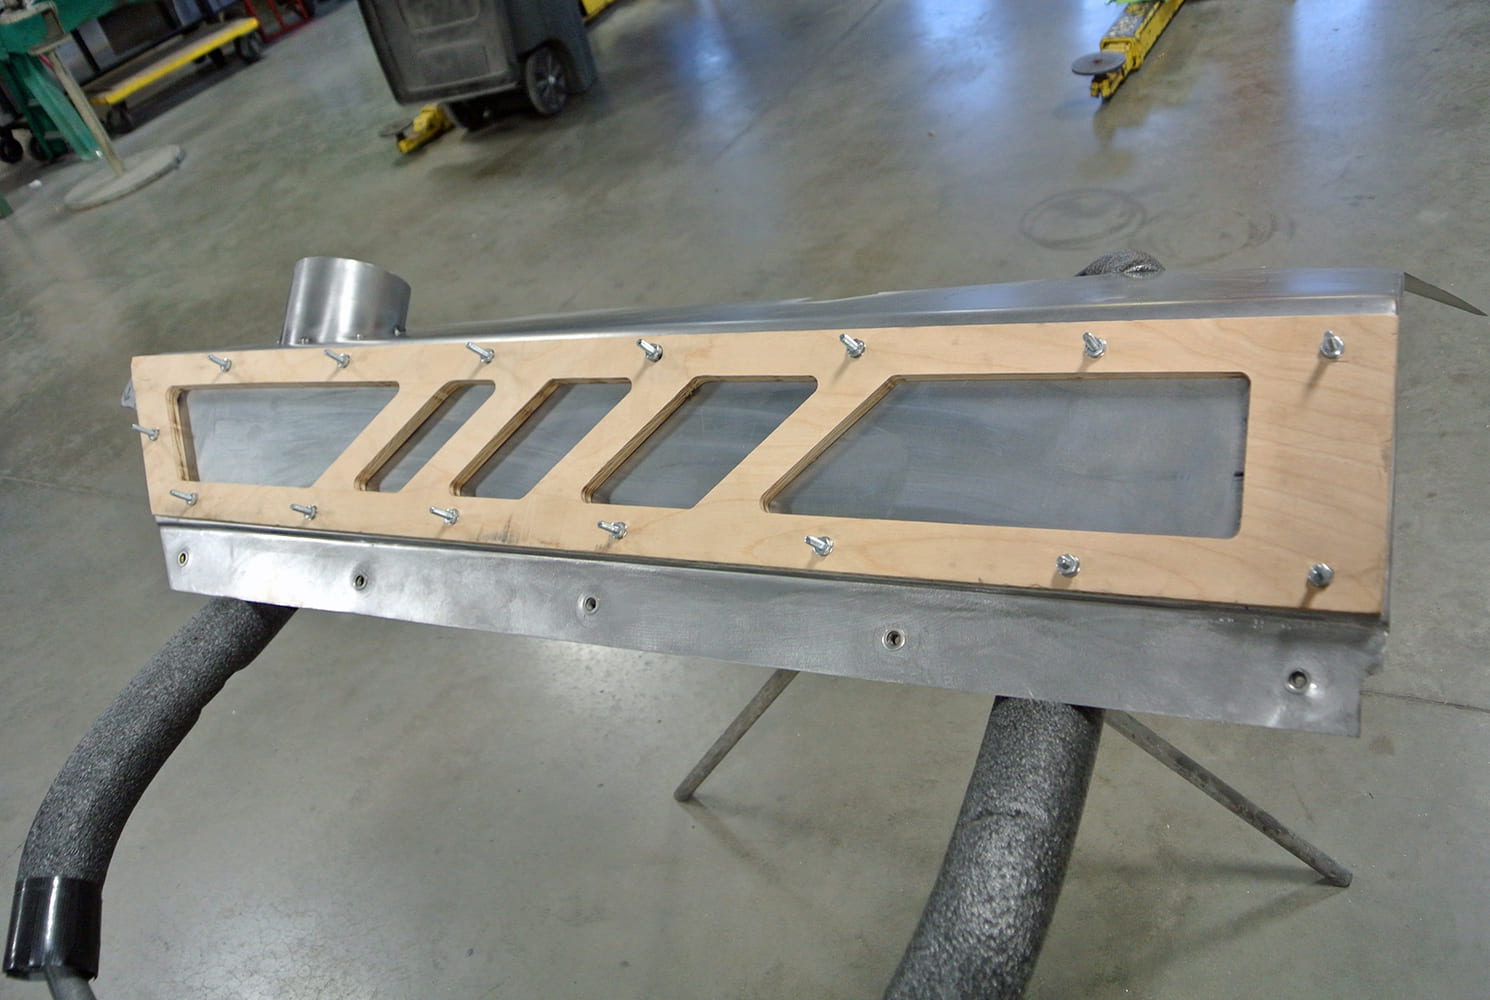
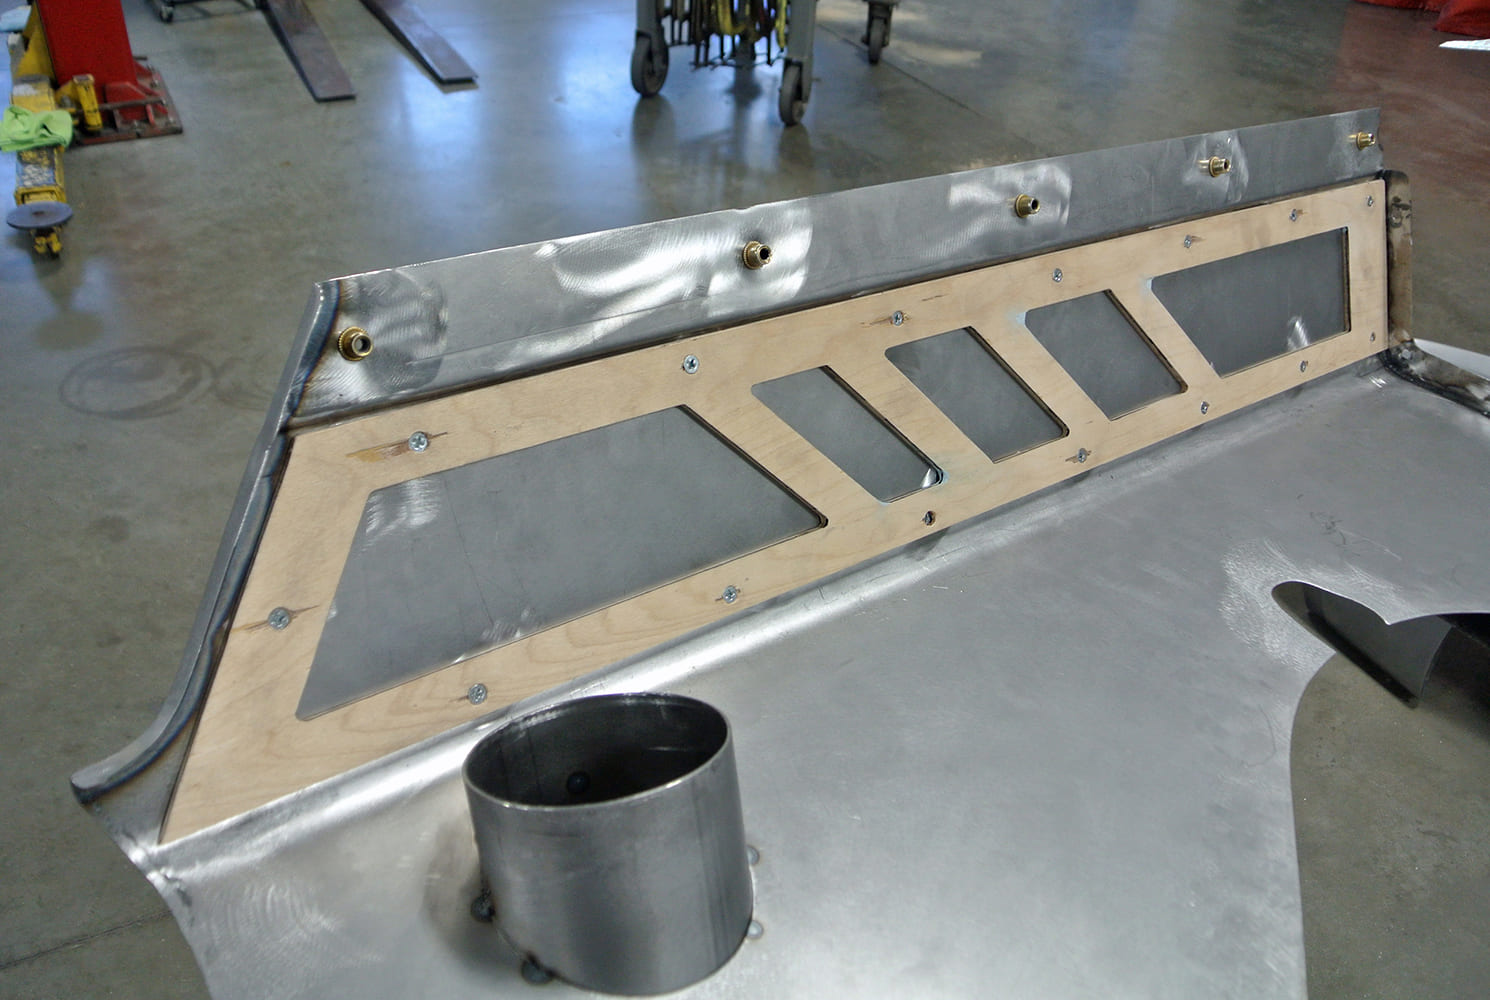
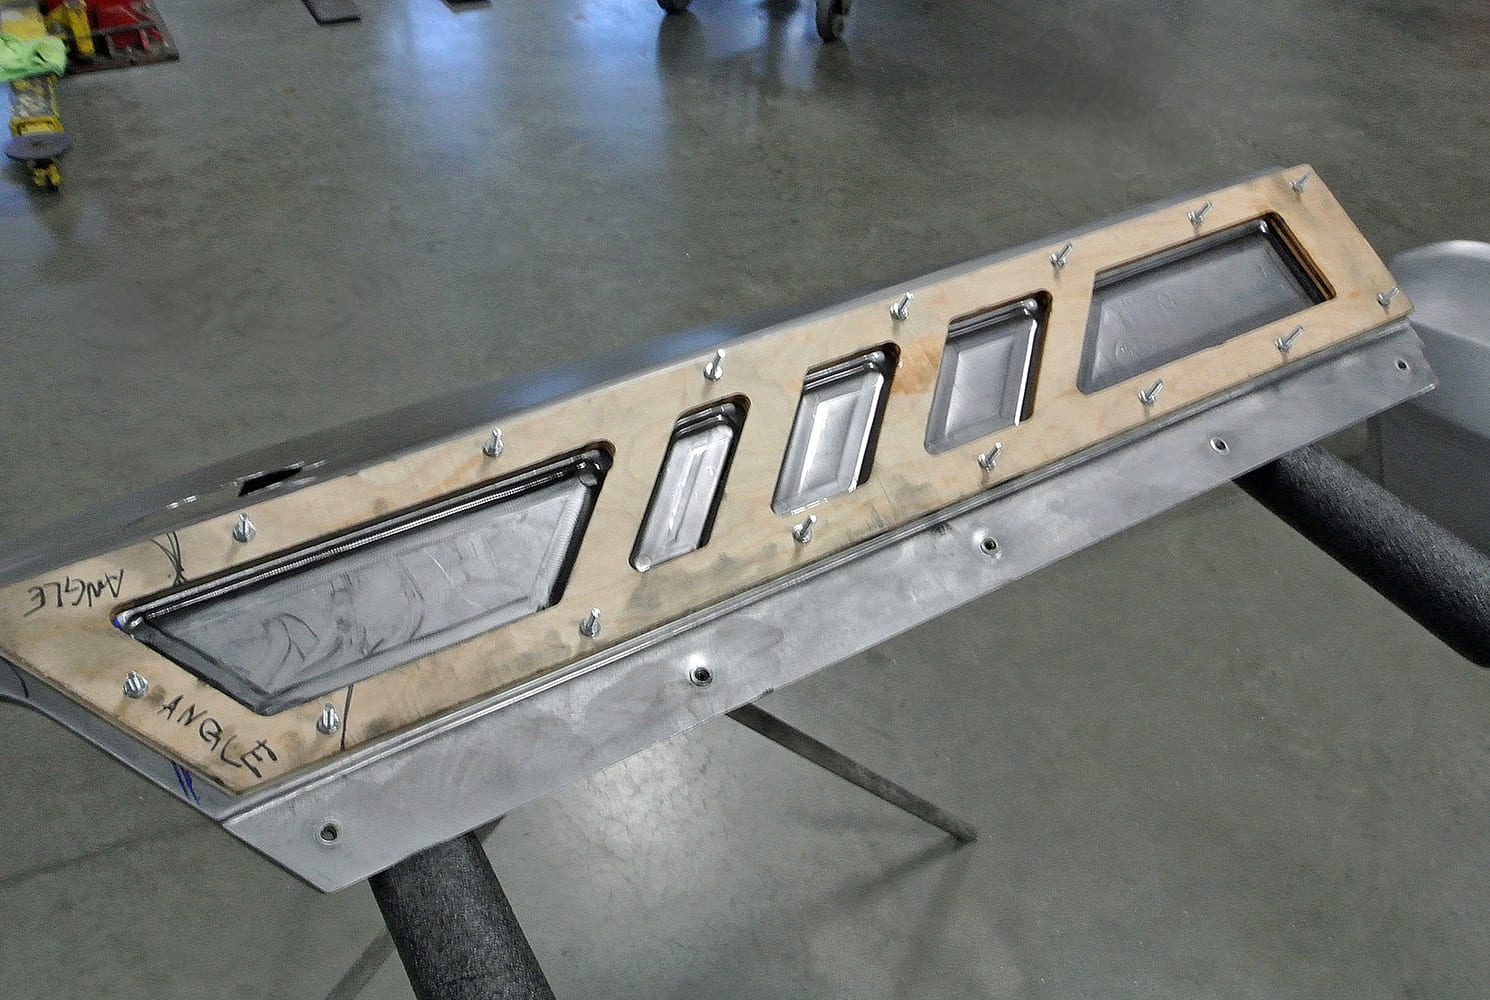
The most impressive part of the fabrication was embossing a bold design into the inner fender panels. This was accomplished using specialized tooling on a Pullmax machine, and simple guides were made from plywood. This method worked perfectly, adding significant “eye appeal” to these panels.

09 Finalized fender panel and cowl area prepped for seamless firewall transition
Once the fitment is verified, button-head fasteners are used to securely attach the inner fender panels.

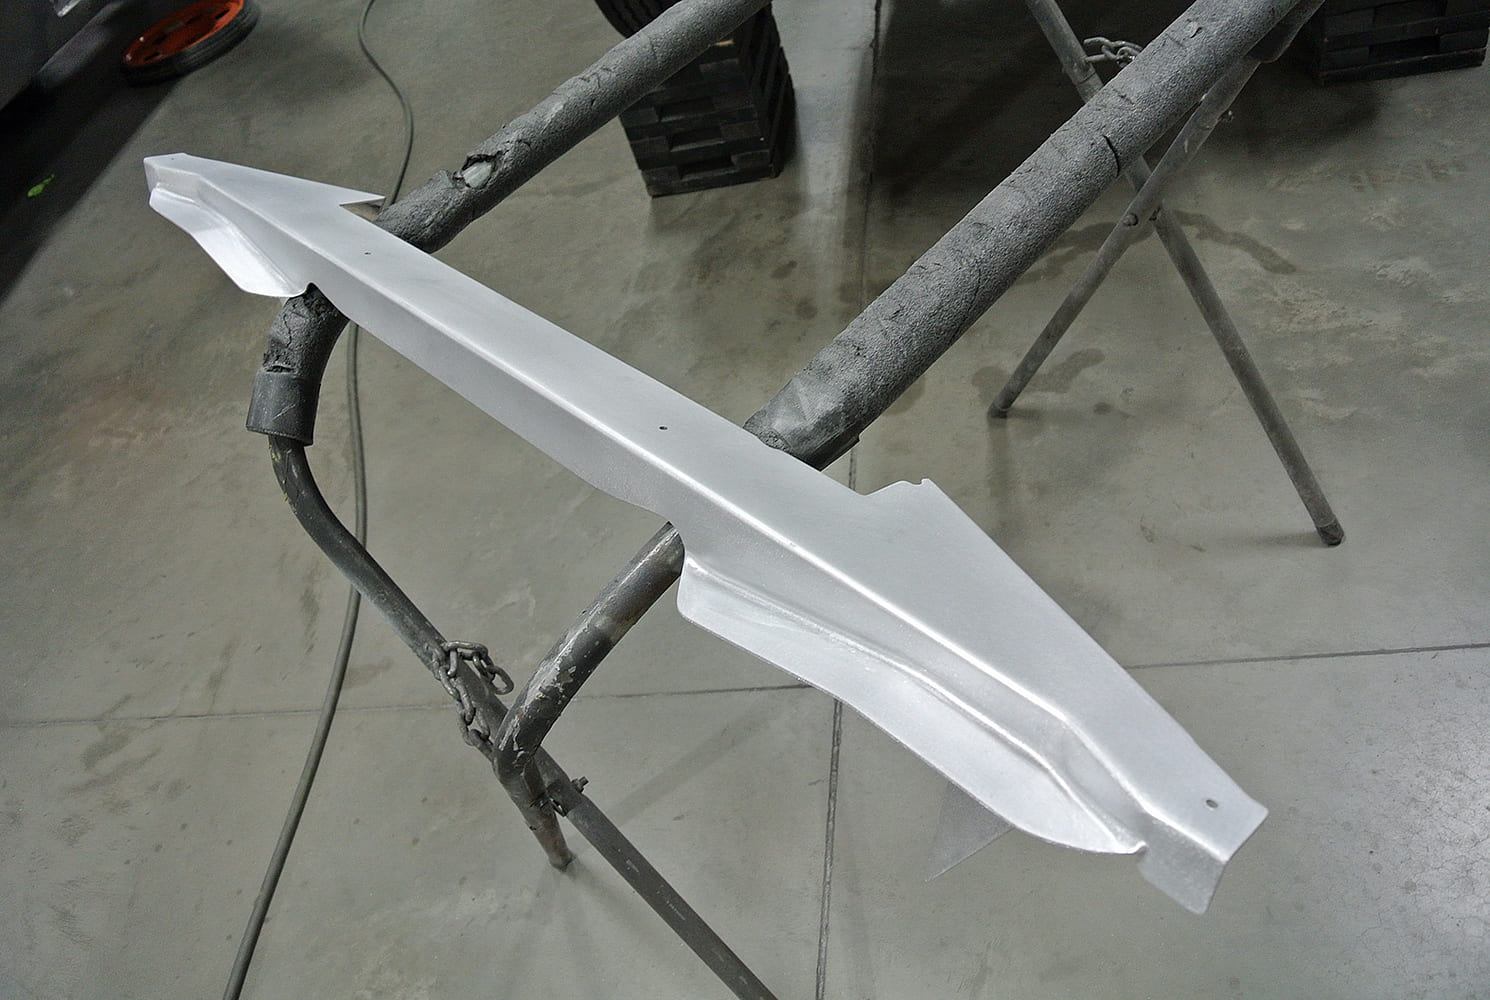
An intricate aluminum panel was built to fill the space in front of the radiator and cover the new crossmember for the core support. It was welded together from several pieces, and the joints were smoothed so perfectly that they are invisible.

10 Mock up cold air intake and supercharged Gen III HEMI setup with custom firewall bar
The inner fender panels will be embossed with a bold design. A template for the wooden guides that will enable a Pullmax machine to create these details is displayed here.

If you examine the photos closely, you’ll notice that a lot of problem-solving was employed to ensure all the pieces worked together efficiently. Many of these techniques could probably assist you with a current or future project.  MR

Check out this story in our digital edition here.

11 Custom cowl vent panel mock up for 1971 Plymouth Duster using a wood template and aluminum base
The template was used to trim two pieces of plywood that serve as guides. The outer piece is made from ½-inch plywood and is secured to the panel with multiple screws.
12 Full panel fitment of custom cowl with bead rolled vent insert and mounting studs
A ¼-inch plywood panel is used on the inside. This panel determines the depth of the embossed design.
13 Final shaping of bead rolled insert vents into the fabricated cowl intake duct
This is the panel after being embossed in the Pullmax.
14 Completed cowl vent panel with formed ducting and precision fitted contours
A similar process was used to emboss a design onto the vertical faces of the inner fender panels. A small, cupped indentation was welded to the panel to accommodate the tubular chassis structure.
15 Installed cowl panel on Duster showing finished bead rolls and flush fitment
With the inner fender panel secured in place, you can truly appreciate the striking design.
16 Weld in firewall tubing reinforcement tied into roll cage and shock towers
The panels fit precisely against the custom-built firewall.
17 Engine bay mocked up with supercharged Gen III HEMI and full bead rolled metalwork
With the engine and radiator installed, you can see how well the panels fit together. One more component will cover the open area in front of the new 1×2 crossmember at the top of the radiator.
18 Custom radiator cover panel shaped to match the Duster’s upper core support
The cap strip is made from several aluminum pieces, carefully fitted together.
19 Cold air intake tube mocked into bead rolled inner fender with precision grommet pass through
The cap strip effectively closes all the gaps around the radiator.
20 Intake tube fitted into custom fabricated shroud beside dual fan aluminum radiator
Observe how beautifully the air duct is fitted, delivering cool, filtered air from the wheelwell to the throttle body.
21 1971 Plymouth Duster features a modern Hellcat HEMI swap with fully custom bead rolled engine bay panels and bracing
All the underhood panels work together seamlessly, highlighting the powerful Hellcat engine.

Source
BBT Fabrications
(217) 586-5699
bbtfabrications.com

Related Articles

Search Our Site