When we swapped an LM7 engine donated from an ’04 Tahoe into our ’71 C10 a few years ago, we stuck with the OE accessory drive and even retained the original mechanical clutch fan pretty much based on budget constraints. We notched the driver side frame a bit to clear the power steering pump lines and there was no way the low-mount A/C compressor on the passenger side would ever fit. We worked with what was available and figured down the road we’d come up with a better solution to cooling and accessories.
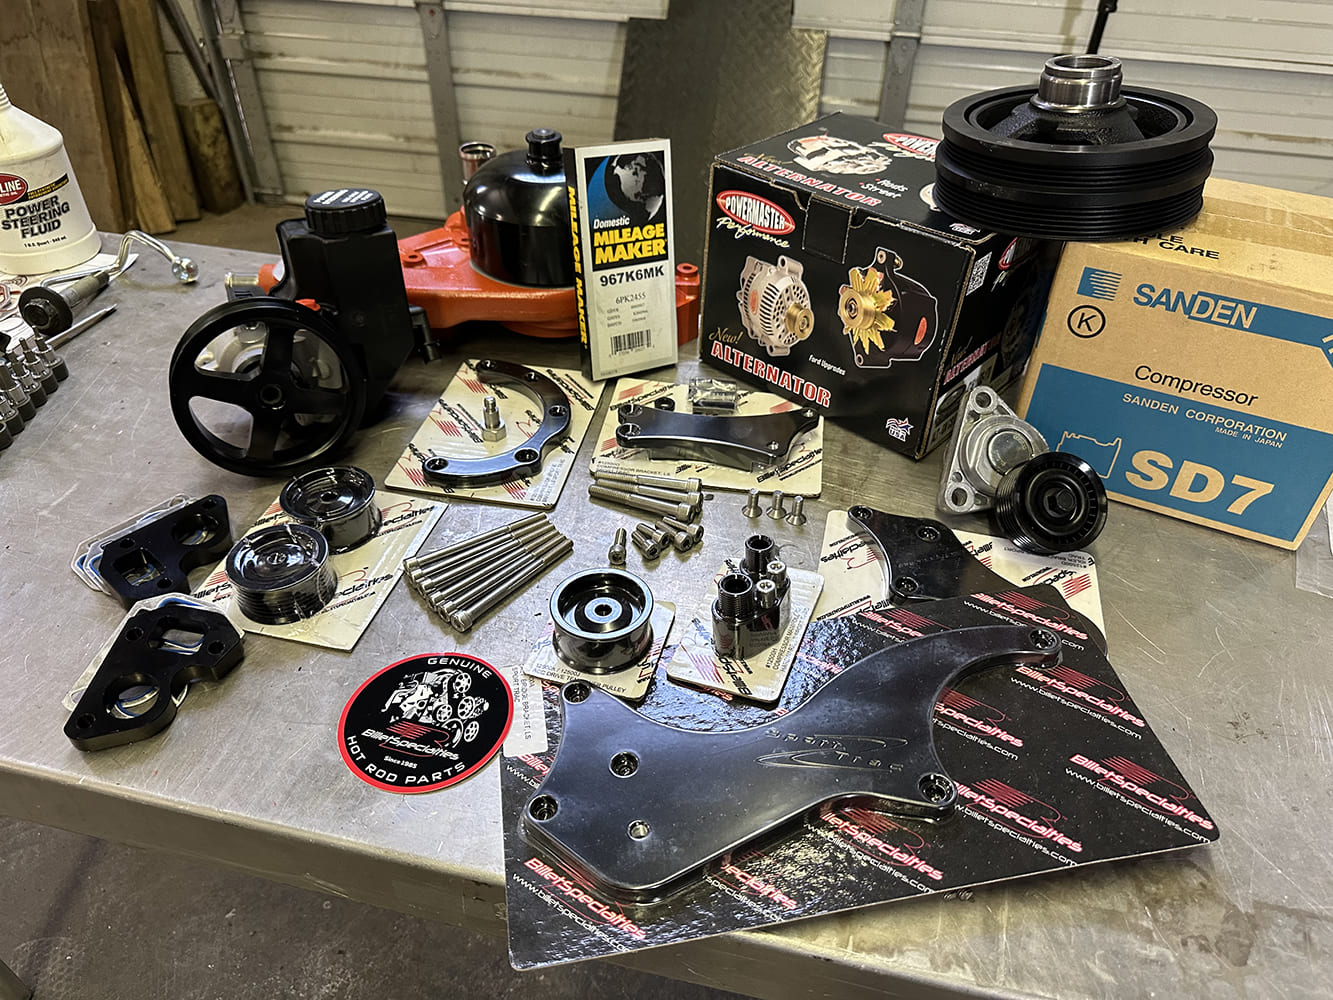
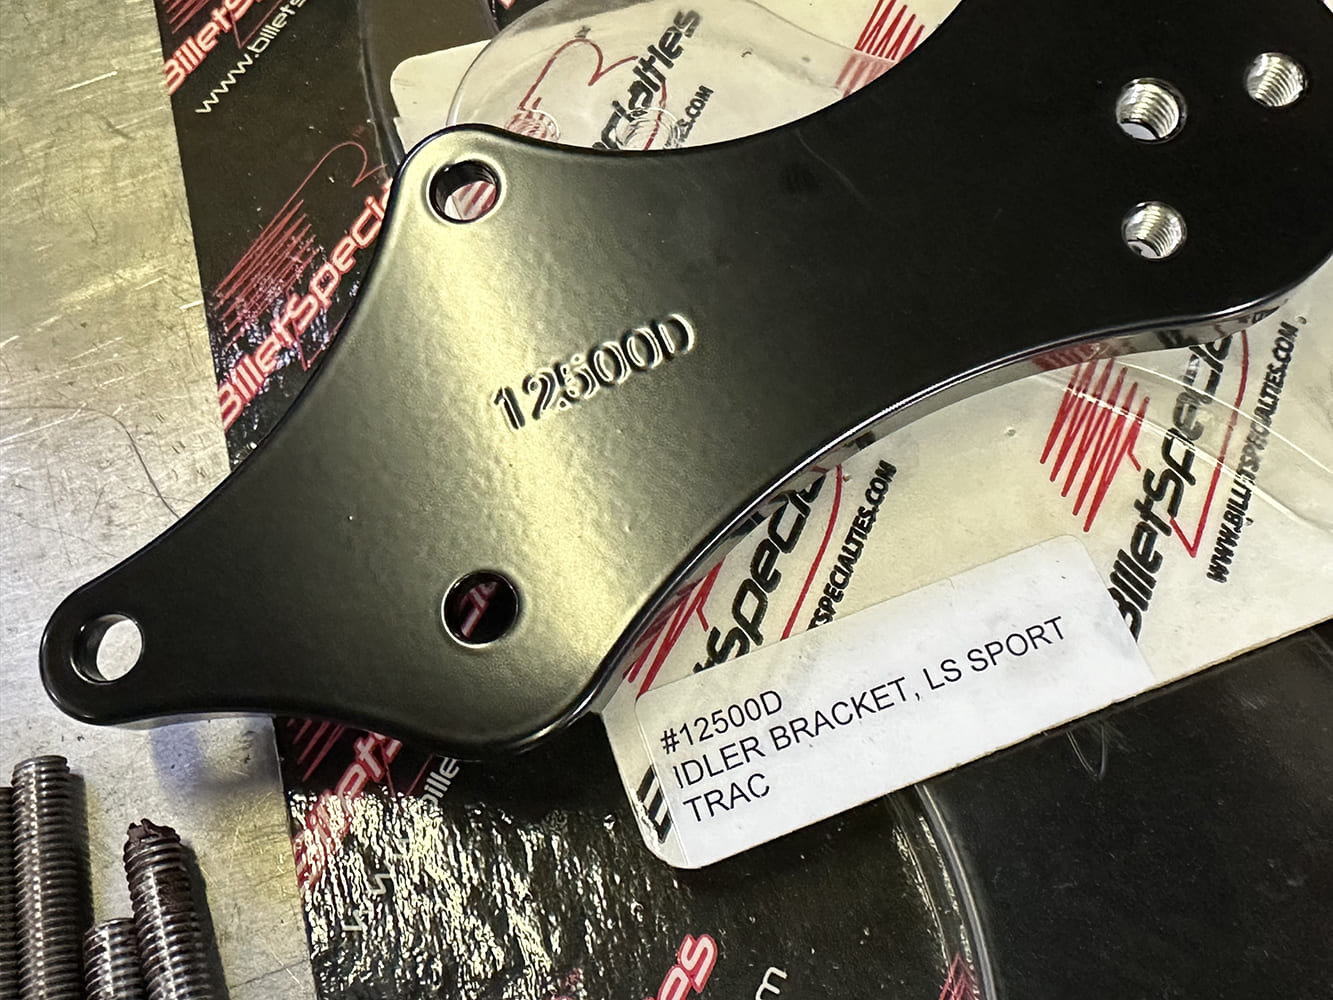
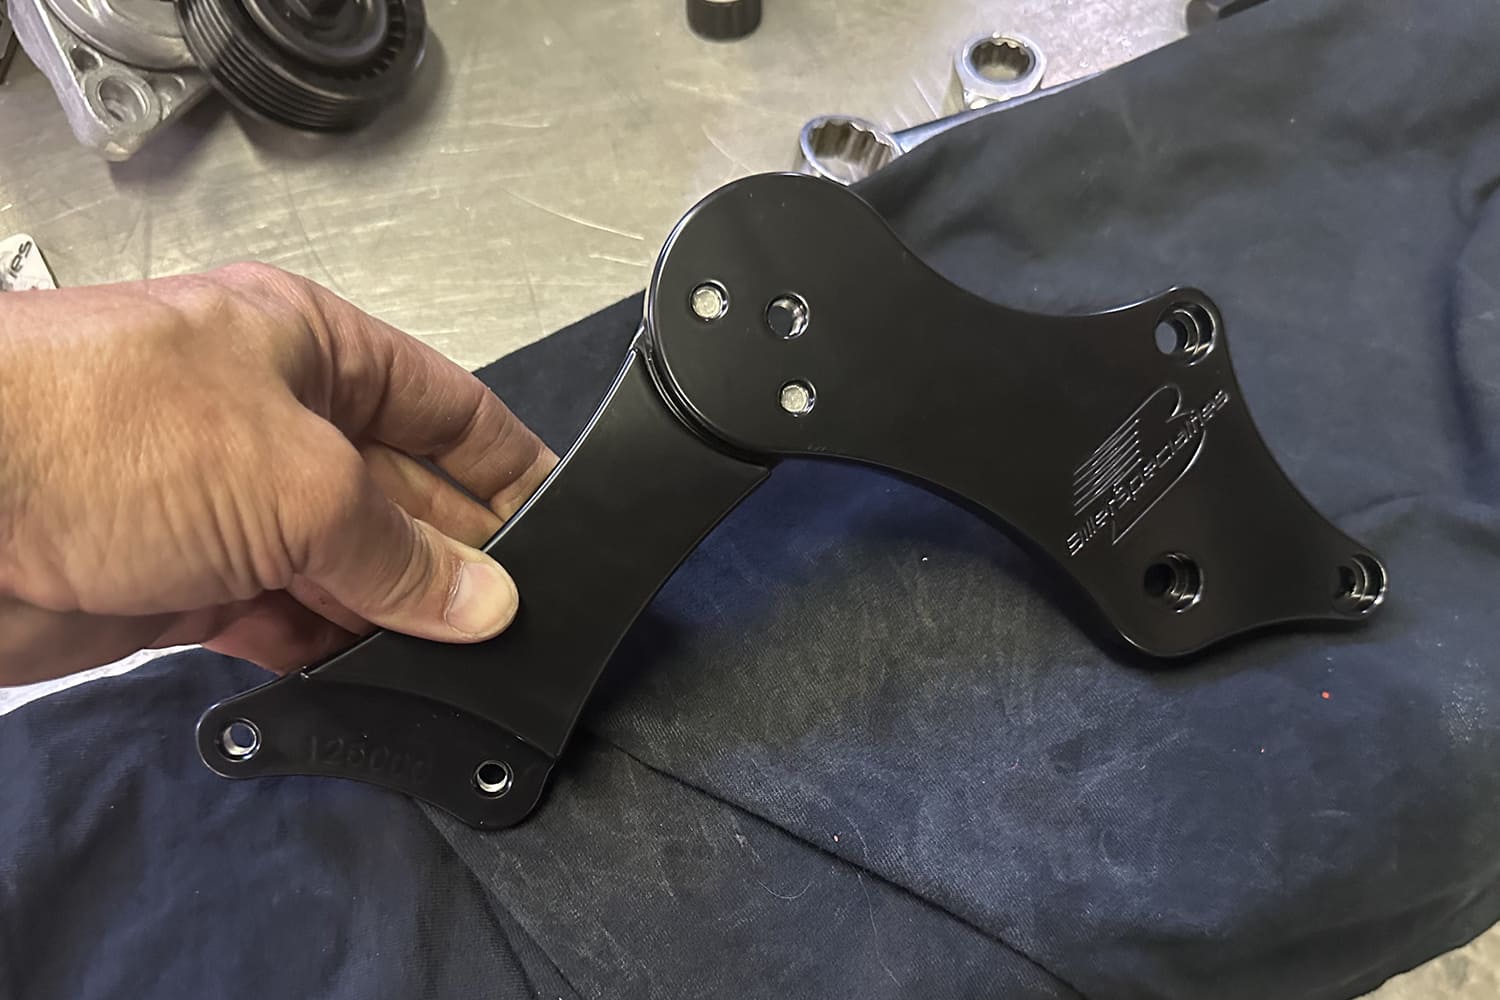
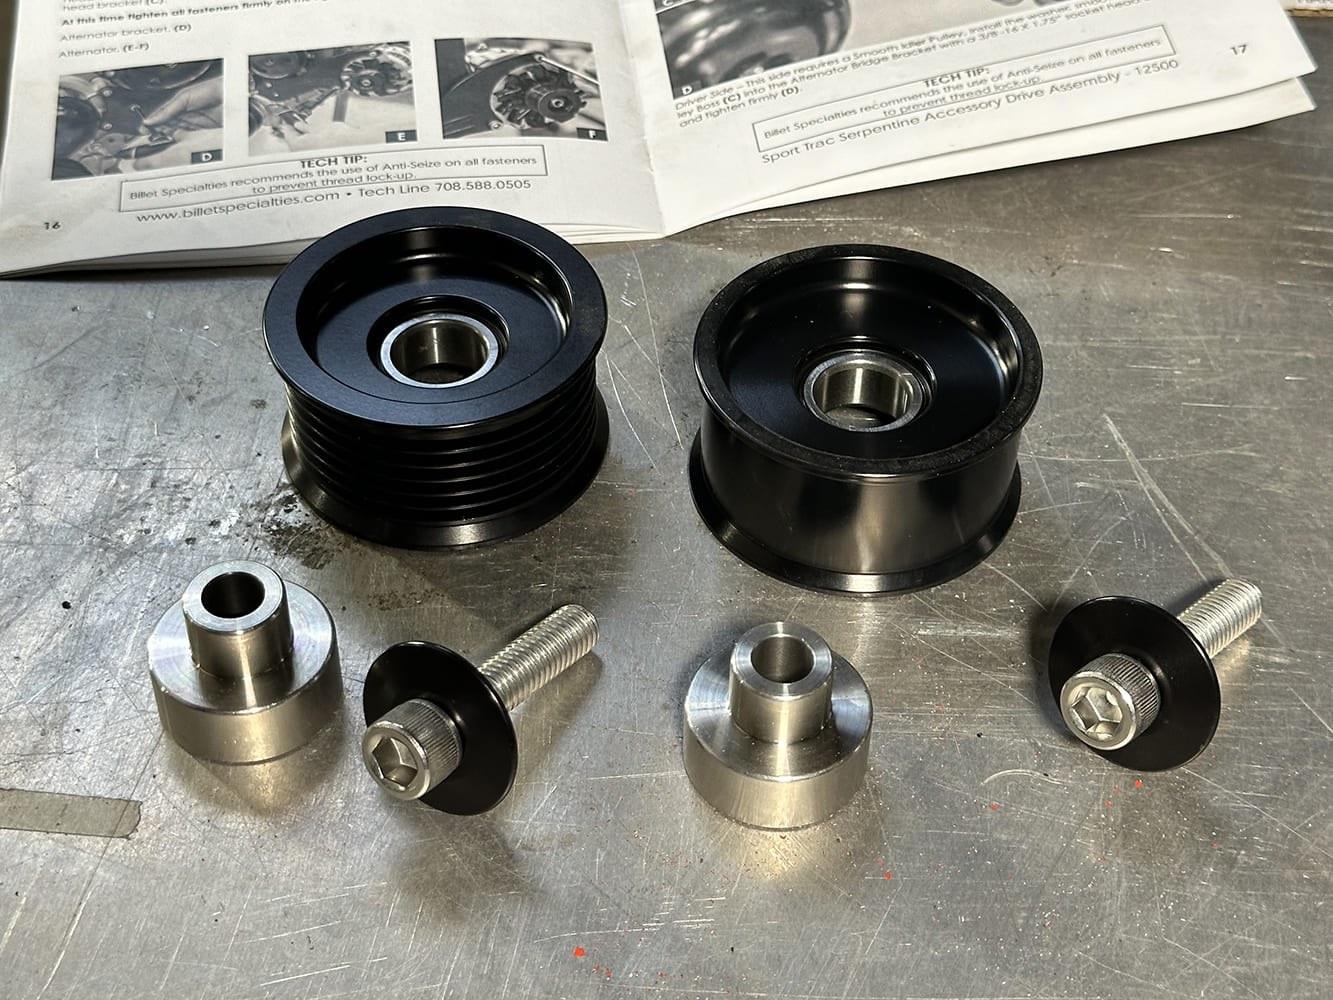
The Sport Trac system comprises of several different billet brackets, pulleys, hardware, and components. It’s a good idea to have the space to spread out the parts and fasteners to review before starting the installation process with the supplied, very-detailed instructions. PN 12500 is a Sport Trac for LS engines with power steering and A/C (no A/C is PN 12525).
That day finally arrived, and we reached out to Billet Specialties to learn more about their front accessory offerings. While best known for their line of kick-butt billet wheels, Billet Specialties also offers loads of precision billet accessories, including their Tru Trac and Sport Trac serpentine accessory drives. The Sport Trac Drive Kit was designed to easily accommodate X-frame vehicles or others with narrow framerails by placing the accessory components up a little higher on the engine. The A/C compressor is placed on the top passenger side with the power steering pump and alternator on the driver side for a smooth, clean fit and appearance. (Non-A/C-equipped kits are also available.)
Before tearing into your front drive assembly, disconnect the battery, drain the coolant, and have a different drain pan ready for power steering fluid. With the new water pump and power steering pump relocation, be prepared for new hoses and lines.
This Sport Trac is a bit more budget-friendly but still delivers the quality and performance one expects from Billet Specialties. The kit with air conditioning is supplied with a genuine Sanden A/C compressor, high-output Powermaster alternator, and a Type 2 power steering pump with reservoir and of course all their precision-machined billet brackets, hardware, and a belt. You will need to source an F-body water pump and balancer assembly if your LS is not equipped, which Billet Specialties recommends in their detailed instructions.
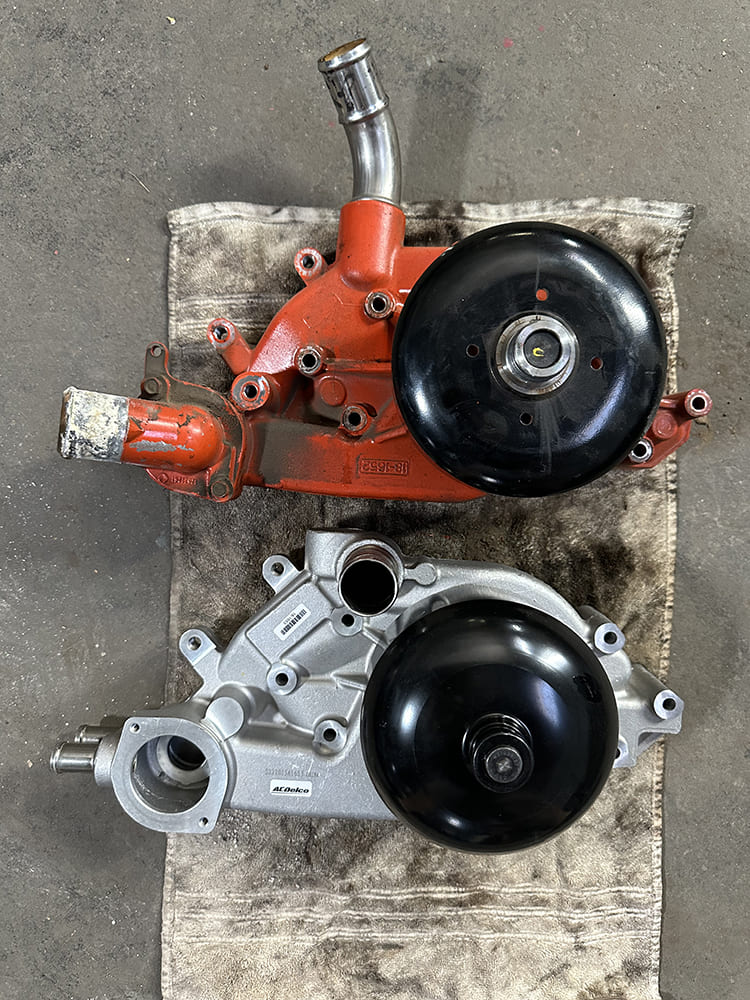
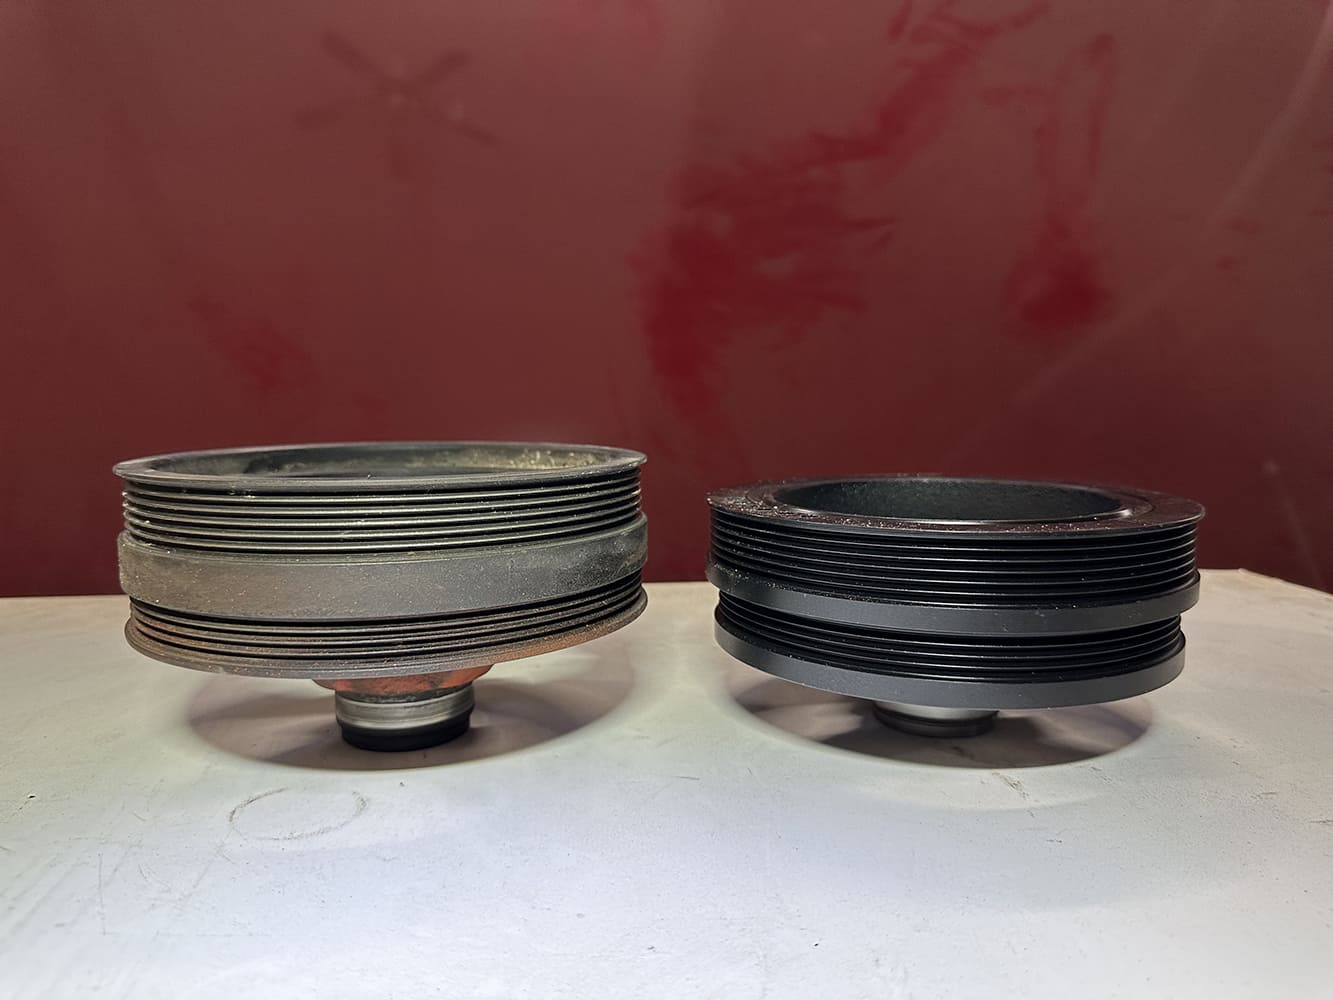
Disassembly is straight forward and fairly quick. Luckily, we ended up selling the stock alt/power steering brackets and truck water pump. Note the difference between the positions of the radiator and heater hose outlets of the OEM truck pump (top) and the required 1998-02 F-body pump.
While we had the front end apart, it was the perfect time to update the radiator and mechanical fan from the donor truck motor. The radiator was pulled from an OBS truck years ago so the hoses were ill fitting, especially the top hose that wormed its way to the top of the driver side of the radiator, requiring the longest hose we’ve ever seen.
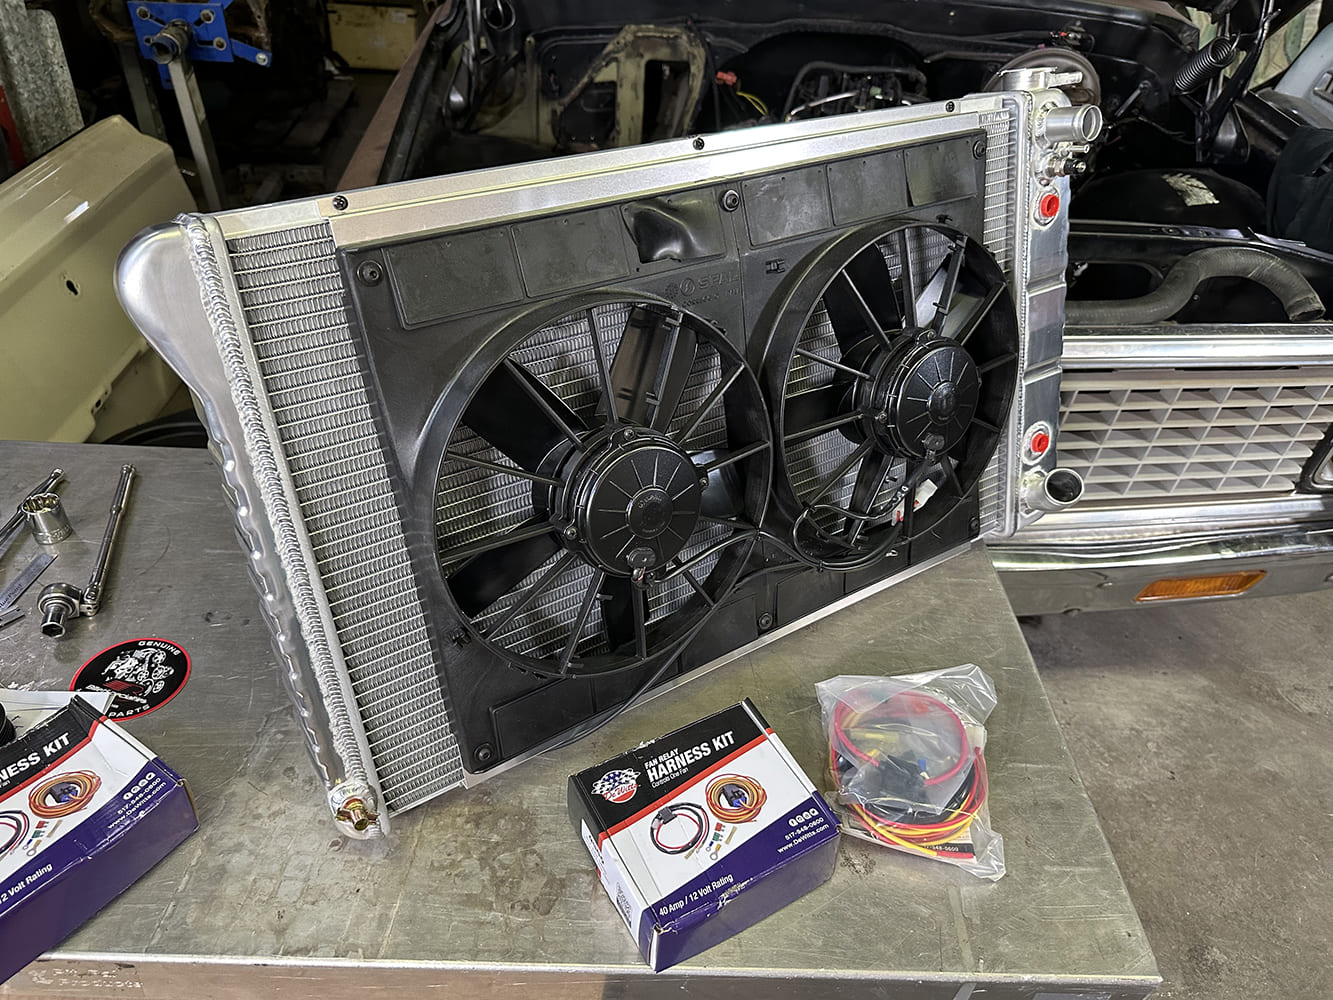
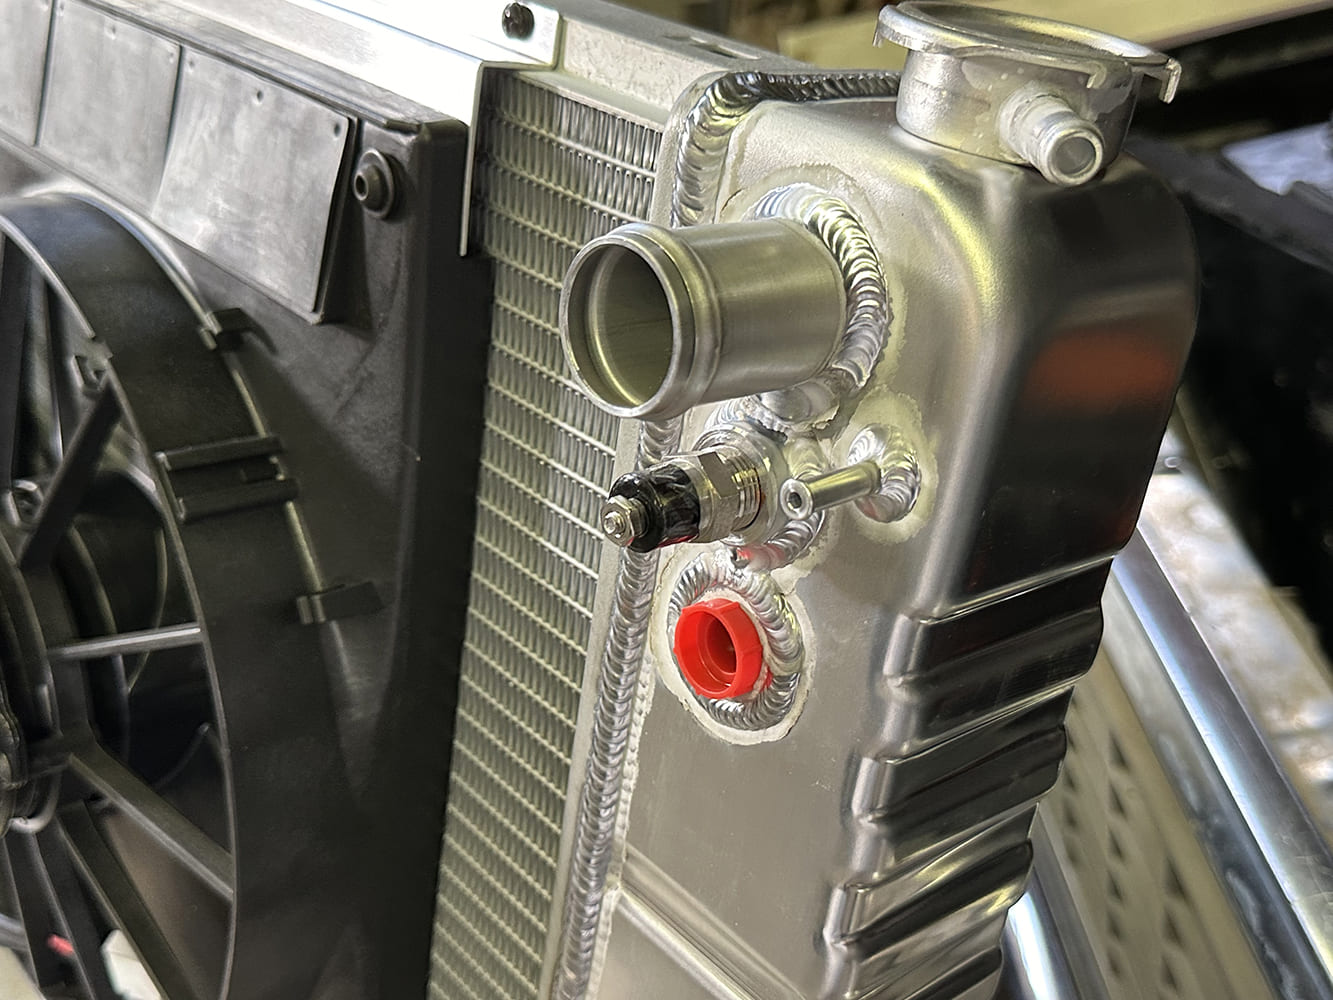
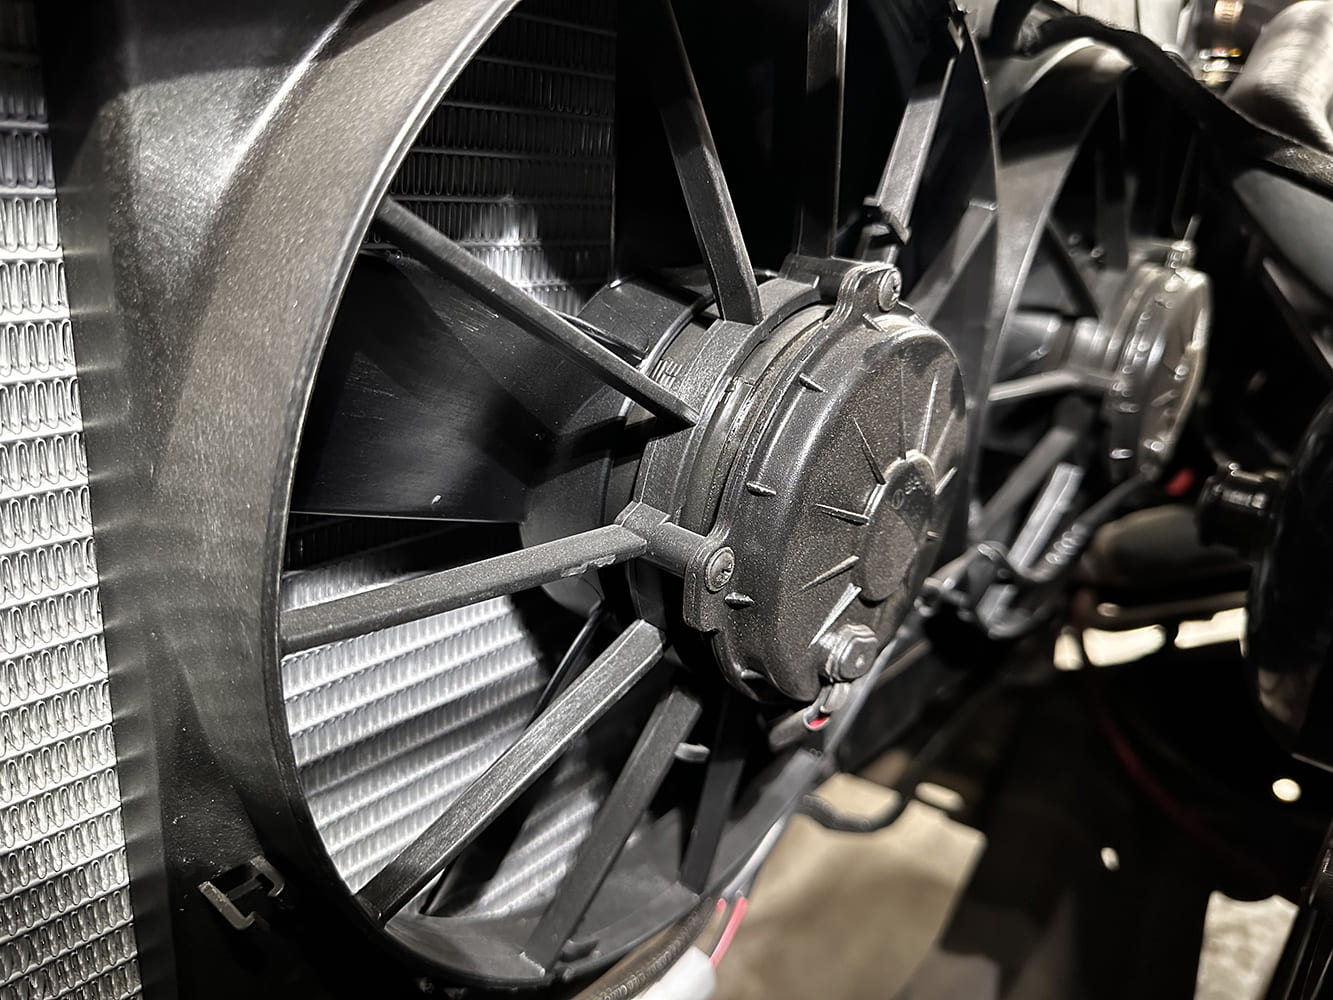
After a little research and huddle with the pros at DeWitts Radiator during a show, an order was placed for one of their LS swap radiators. These trick aluminum radiators were designed for factory fitment but based on an LS engine featuring the proper-sized inlet and outlet, along with a steam vent connection. There is even a temperature sensor bung to provide an activation signal for the supplied twin electric fans.
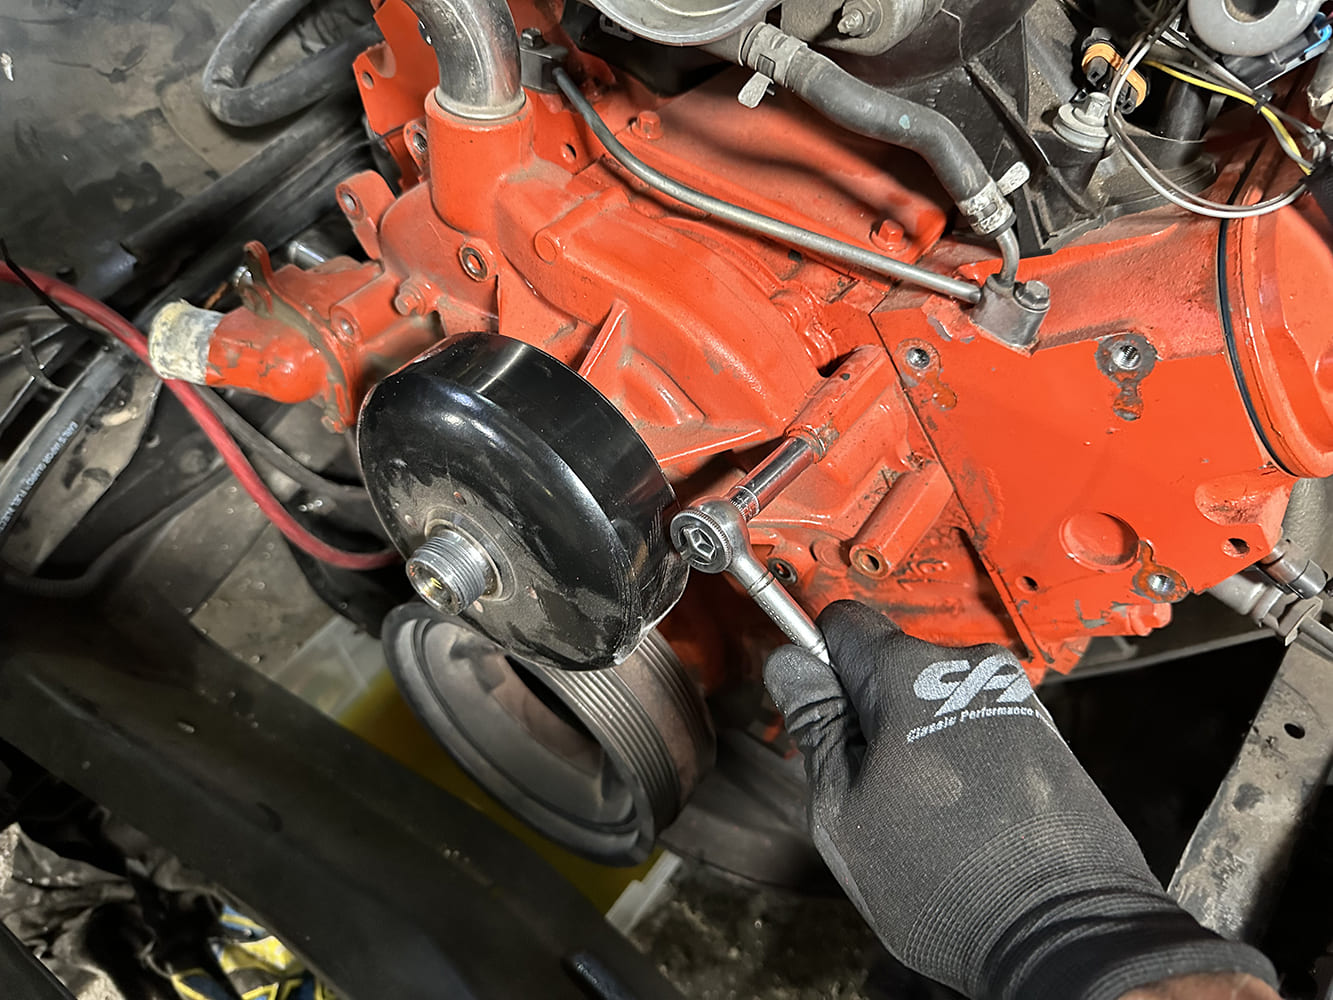
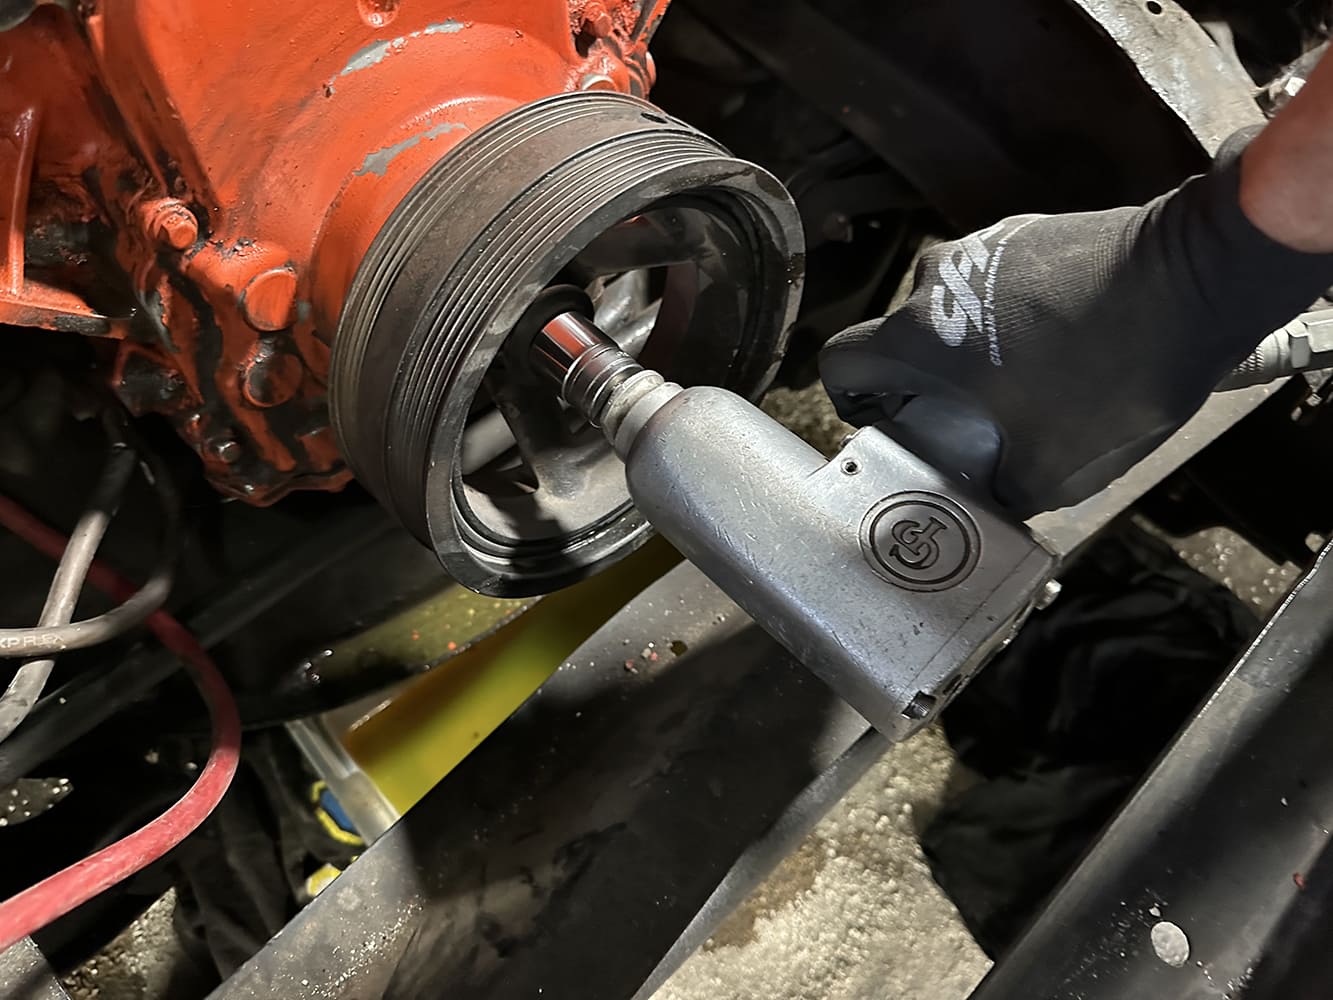
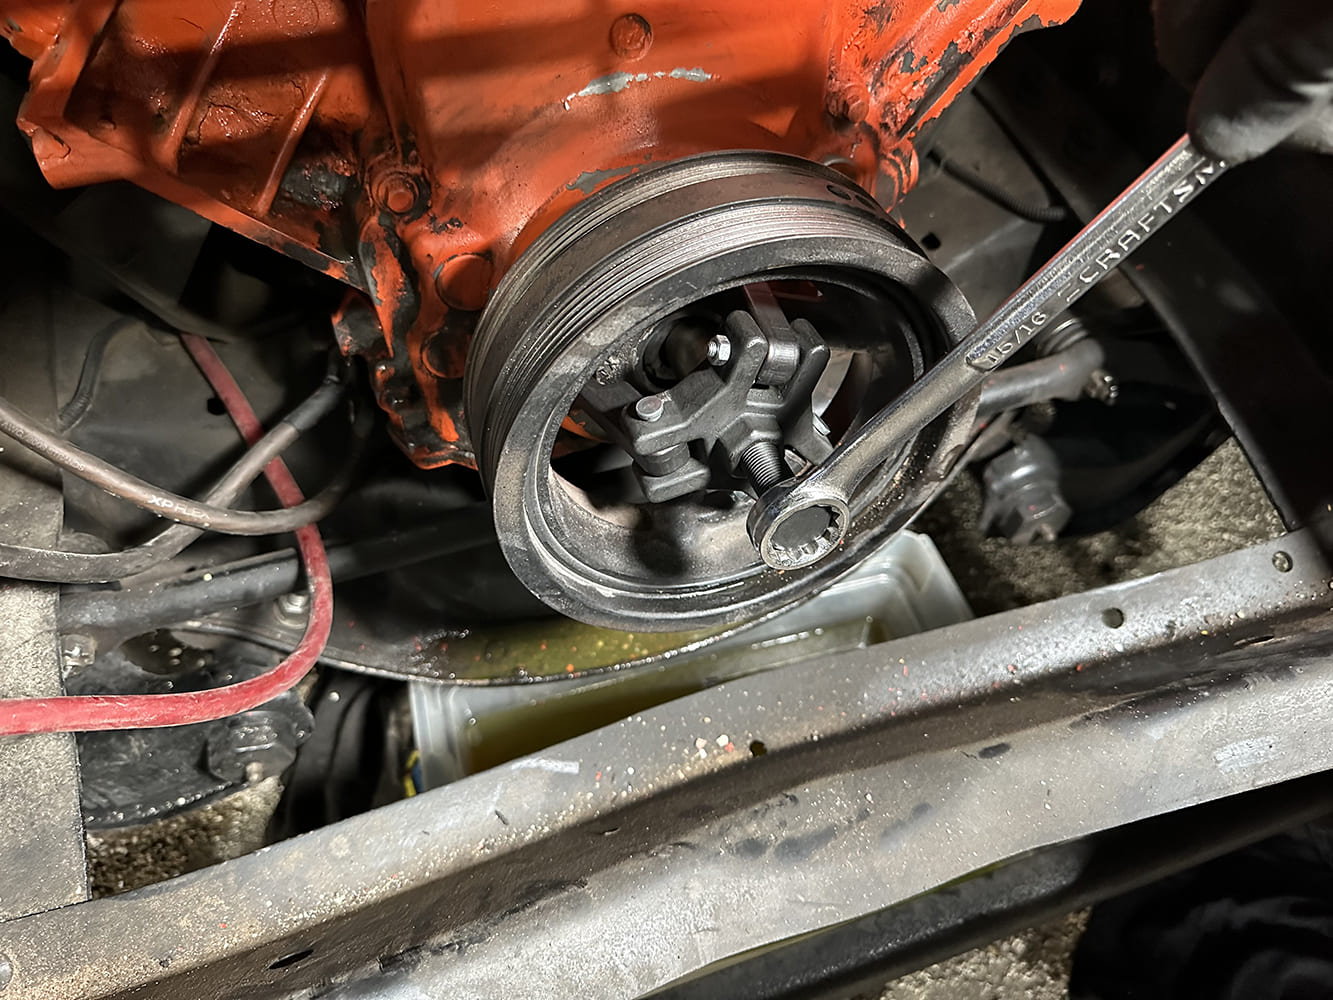
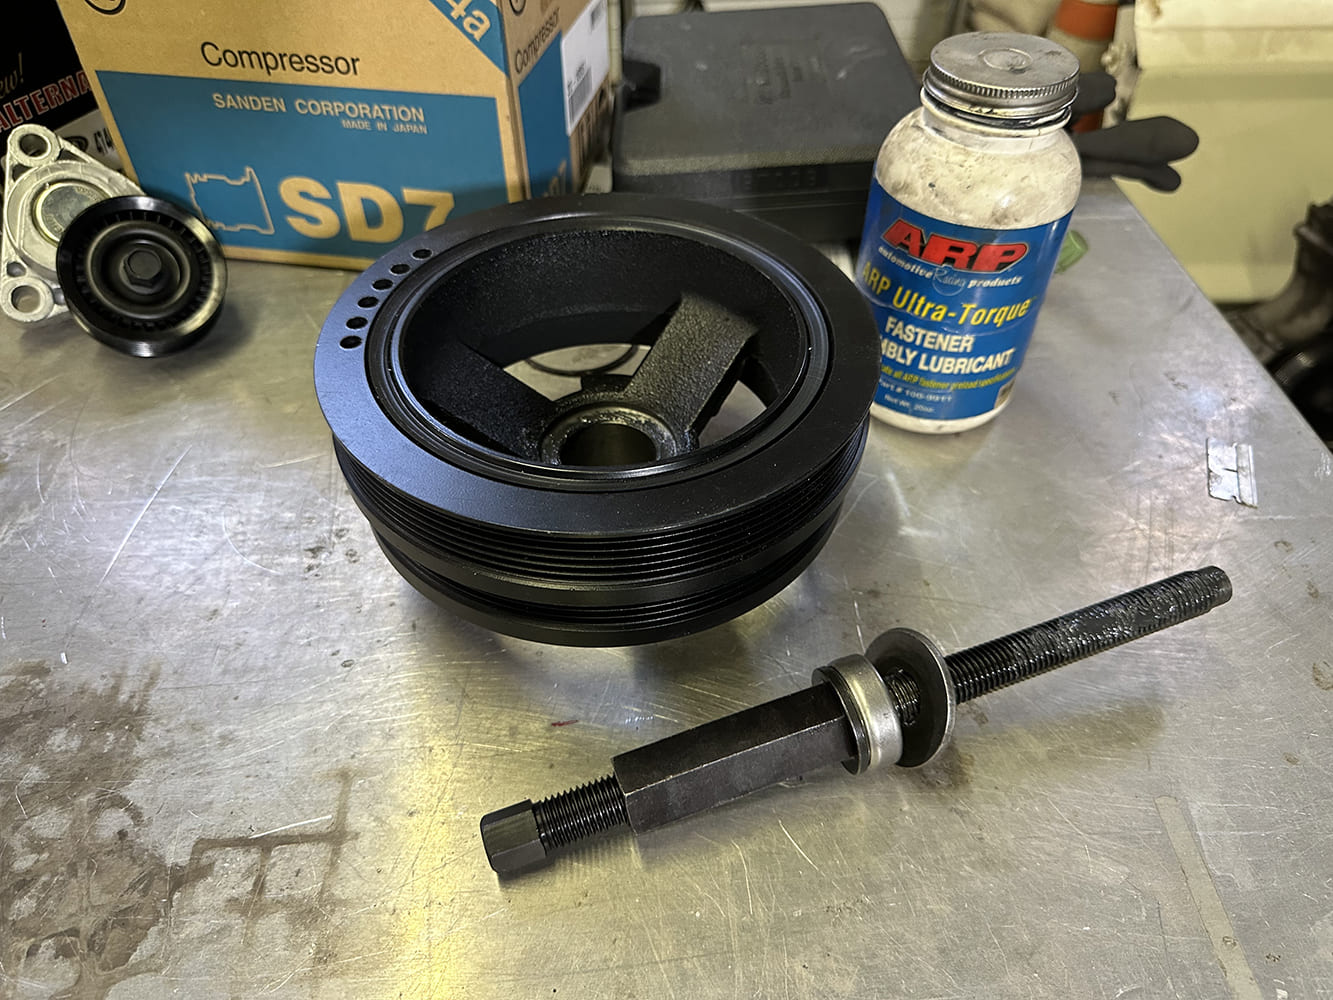
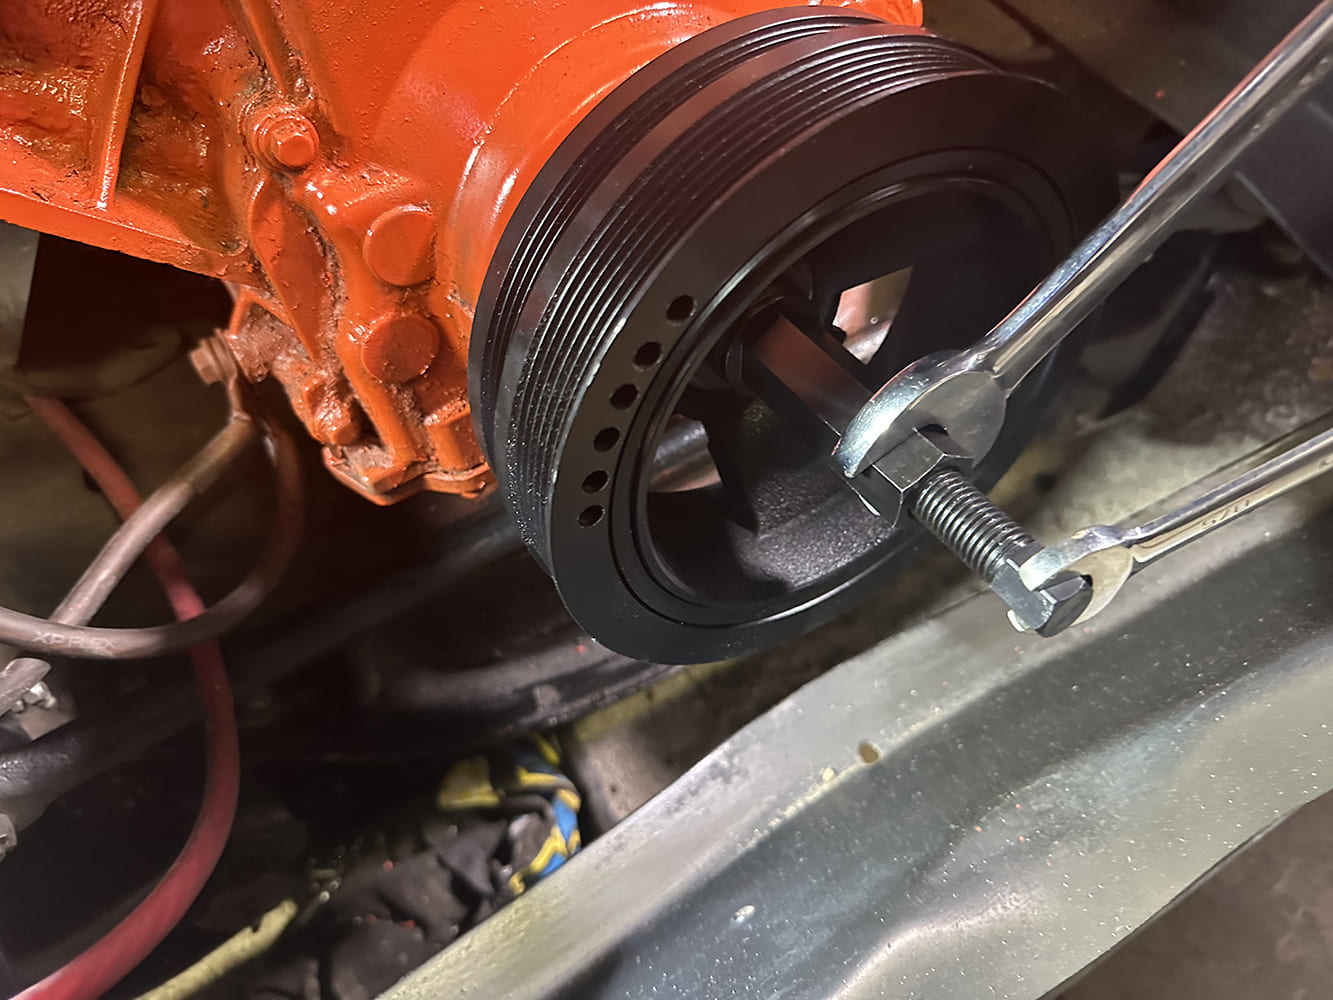
The balancer must also be swapped out, which requires a strong set of arms or impact gun, a puller, and installation tool, which can be rented at a local chain store.
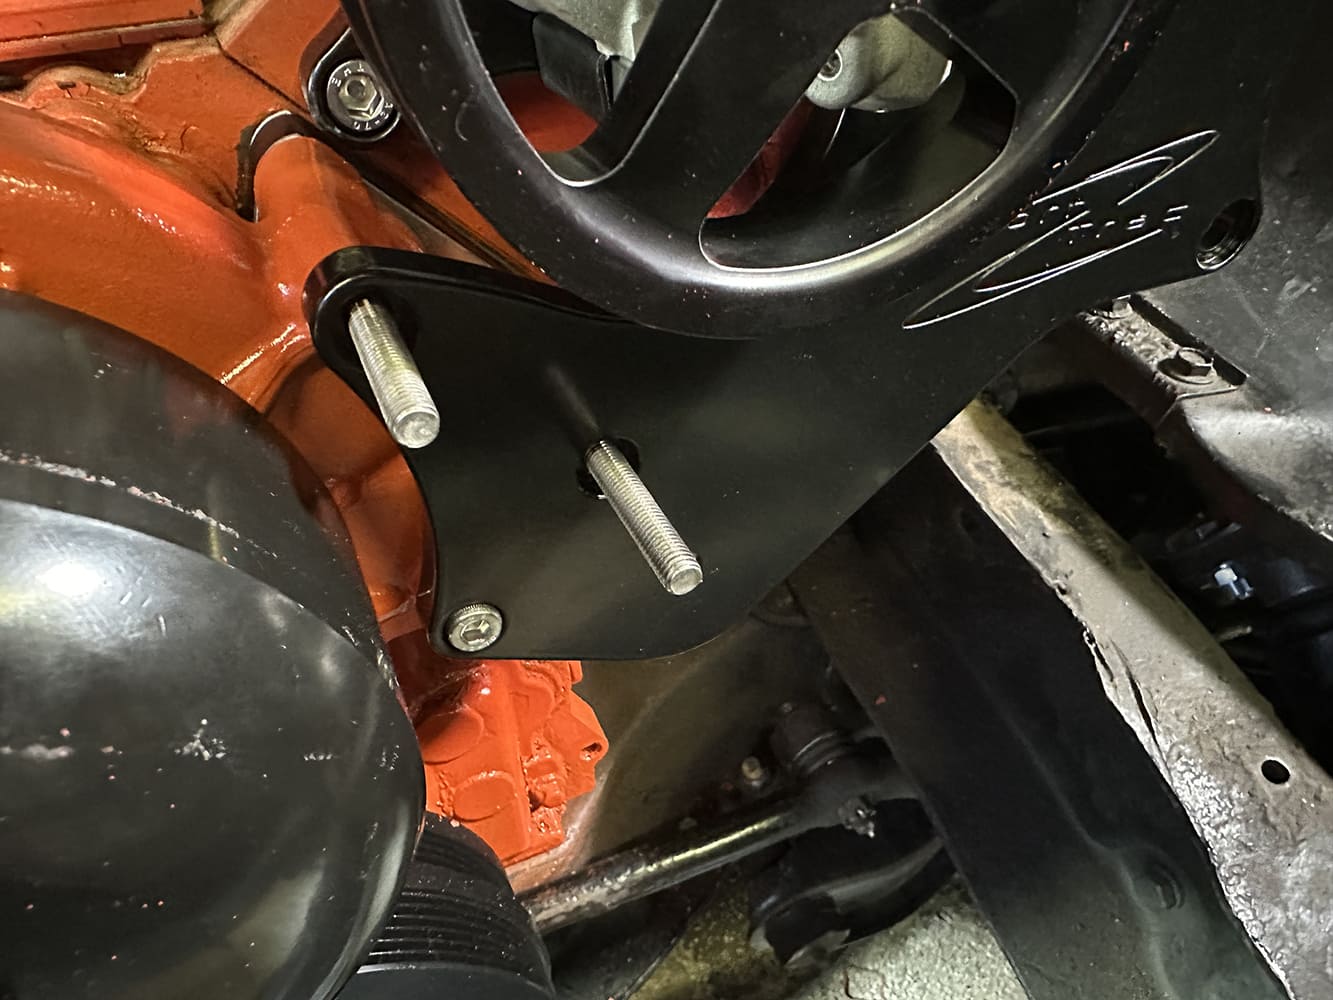
Installing the Sport Trac system was straight forward and everything went as expected. With any LS you’ll need a removal and install tool for the balancer. Billet Specialties labels all the hardware and brackets so you know exactly which bolts, spacers, and parts to install each step of the way. Be prepared to build new power steering hose lines, which they can help you out with as well. Better yet, you can follow our installation right here!
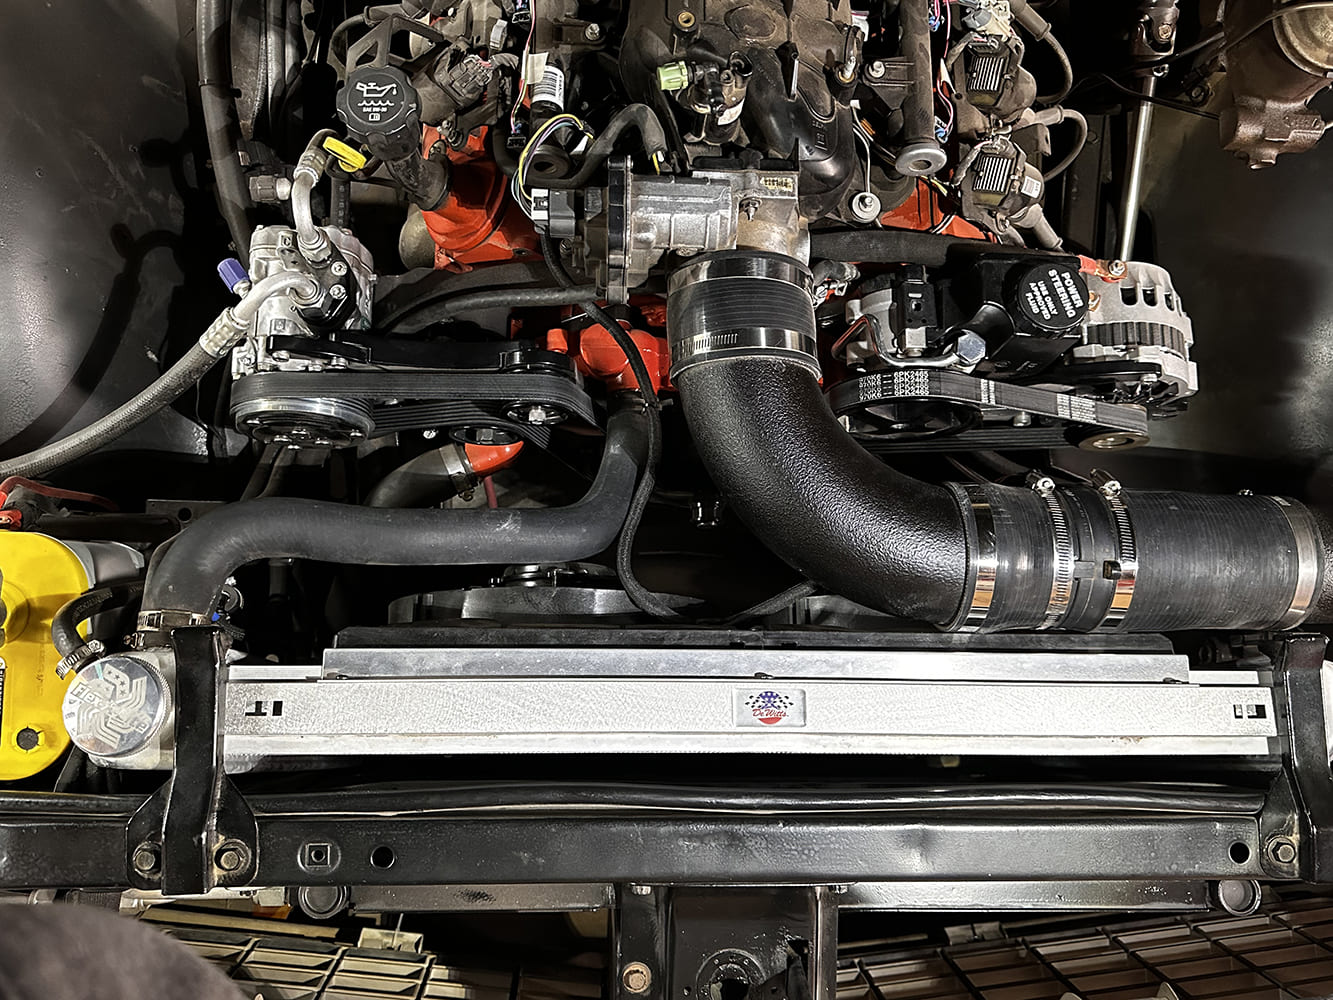
In the end, we have a much better-looking drive assembly that really cleaned up the front of the engine with new, high-quality accessories. We’ll soon have the A/C system charged up and the new DeWitts radiator and twin fans will be a big help in cooling the engine. Two more things done in our quest for a reliable driver with cool looks to match.
Billet Specialties provides part numbers for the recommended dampers that were used on 1998-02 Camaros or 2004-06 GTOs. The new damper (on the right) is considerably more compact than the stock truck balancer from our 2003 truck engine.The damper bolt is a one-time-use only so plan on buying a new one-time-use OE bolt that requires a torque-to-yield installation procedure. We opted for a new bolt from ARP that can be used multiple times but be sure to eat your Wheaties as the torque spec is 235 lb-ft!
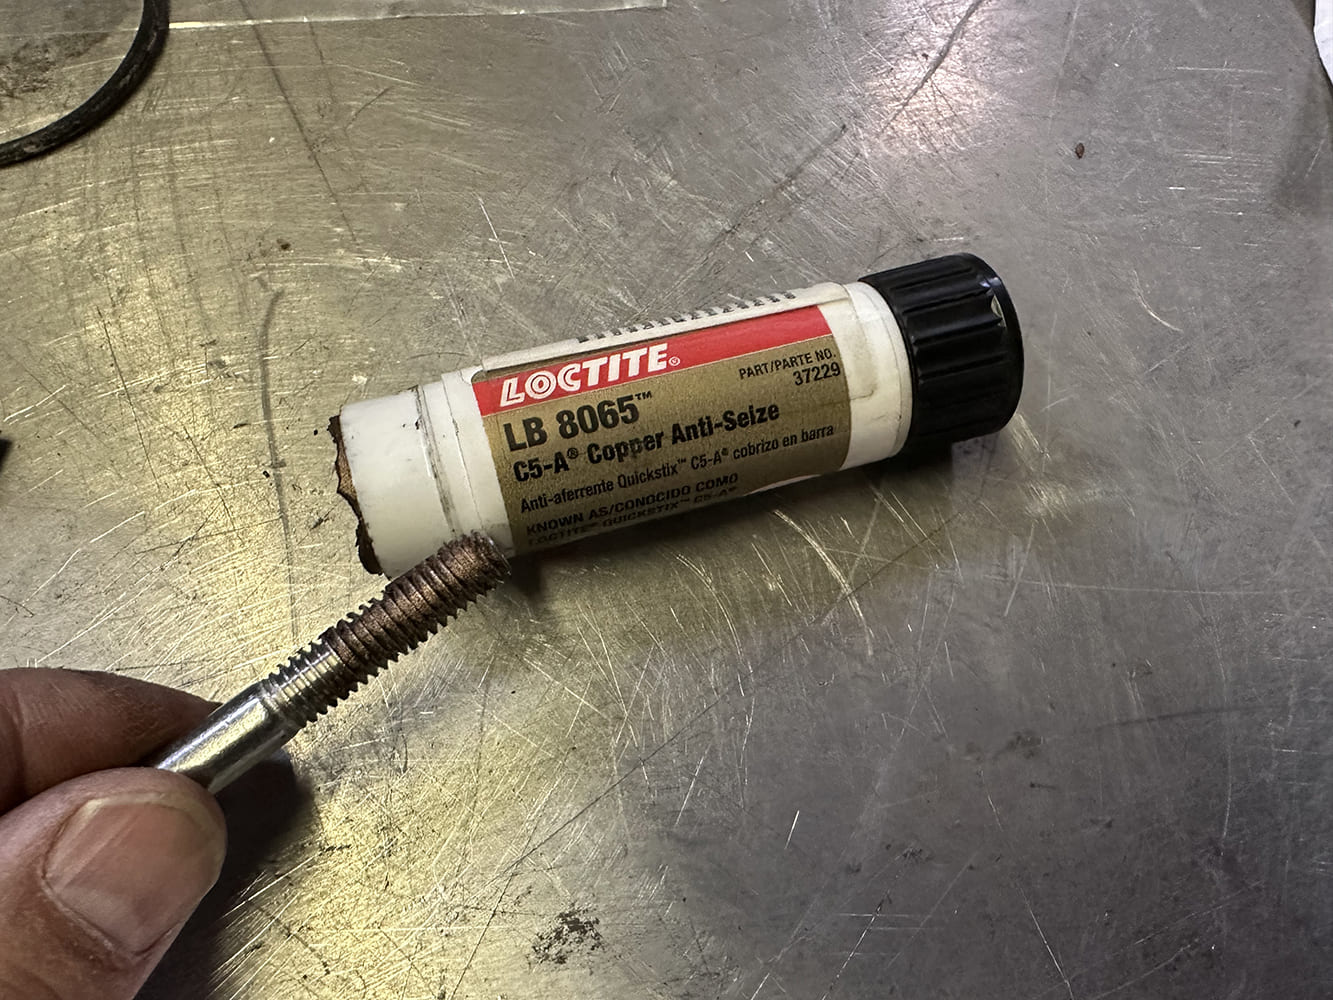
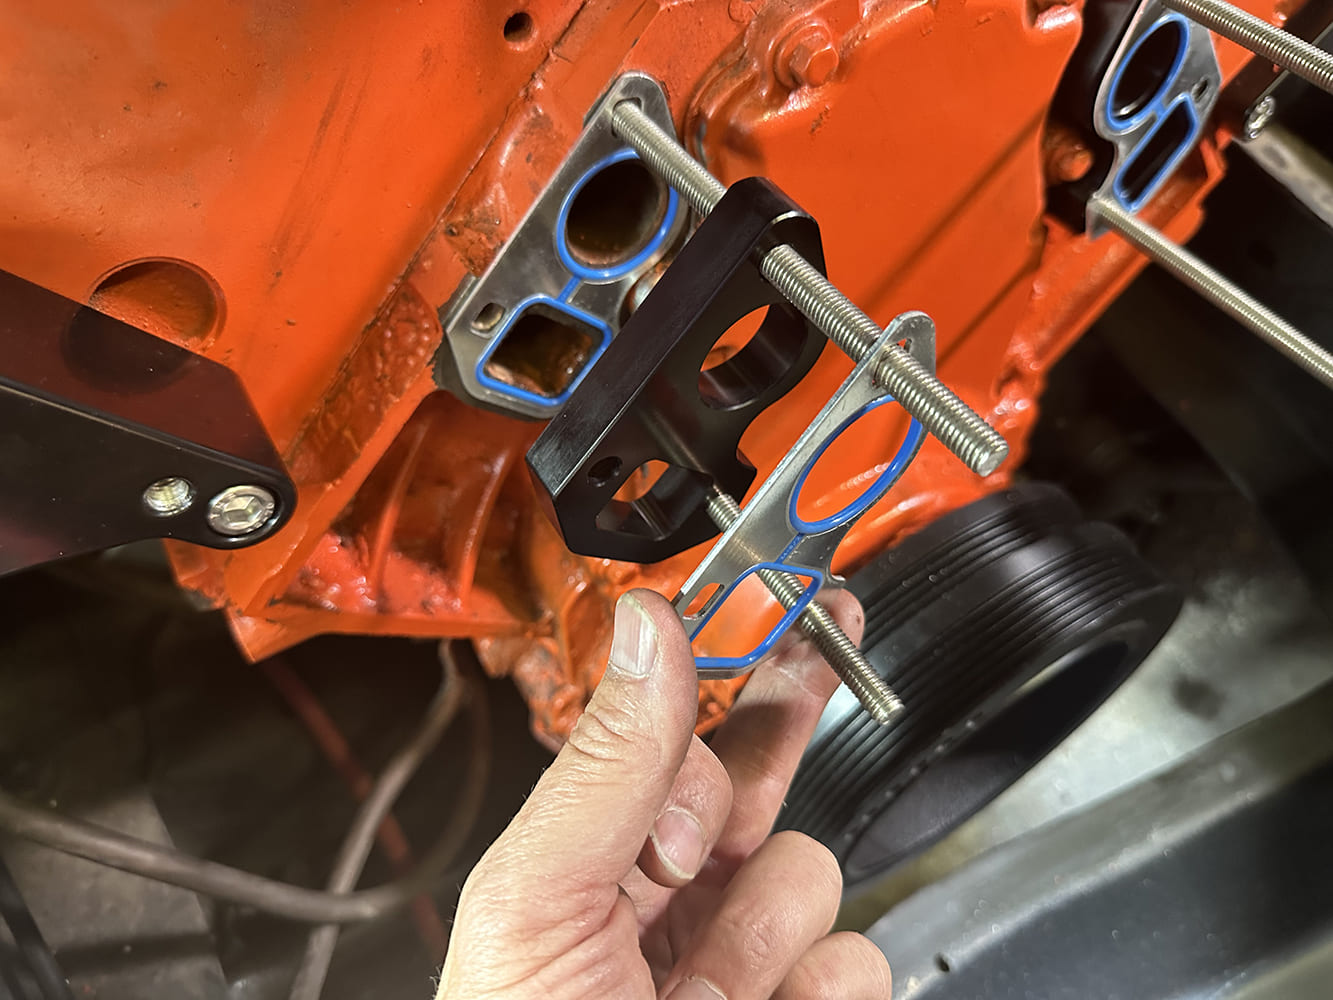
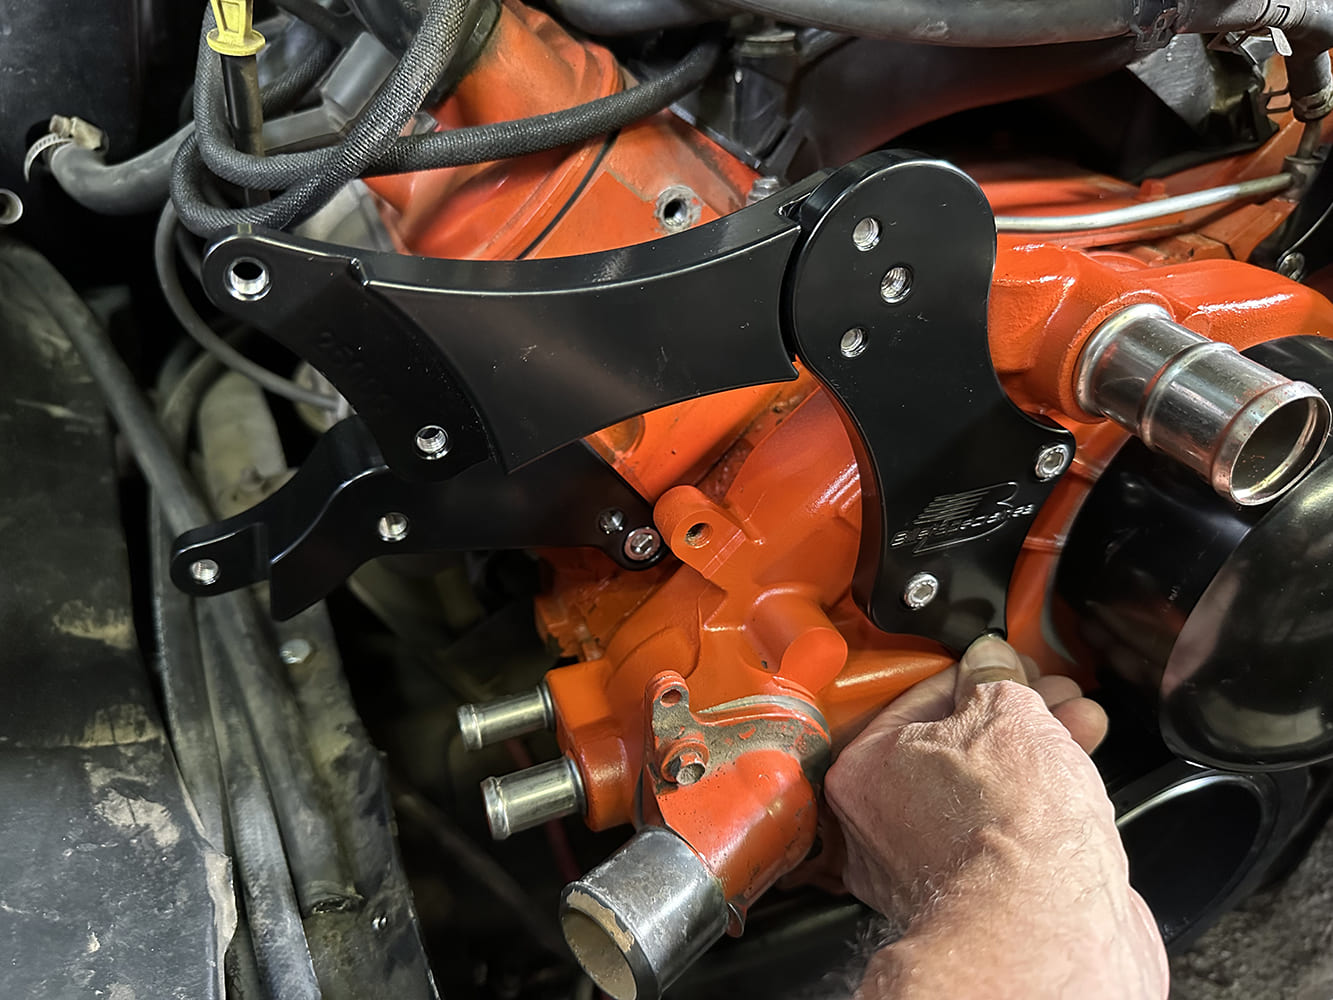
It was finally time to start bolting on the billet, starting with the lower compressor bracket on the passenger side cylinder head.Moving to the driver side, we installed the alternator bracket with three M10-1.5x20mm socket head capscrews followed by the power steering bracket.Billet Specialties supplies detailed instructions plus they take the time to put part numbers on each bracket so you can easily locate the right bracket. Another quick tip is the use of an antiseize on the new stainless fasteners. We used a copper-based antiseize due to its conductive properties.
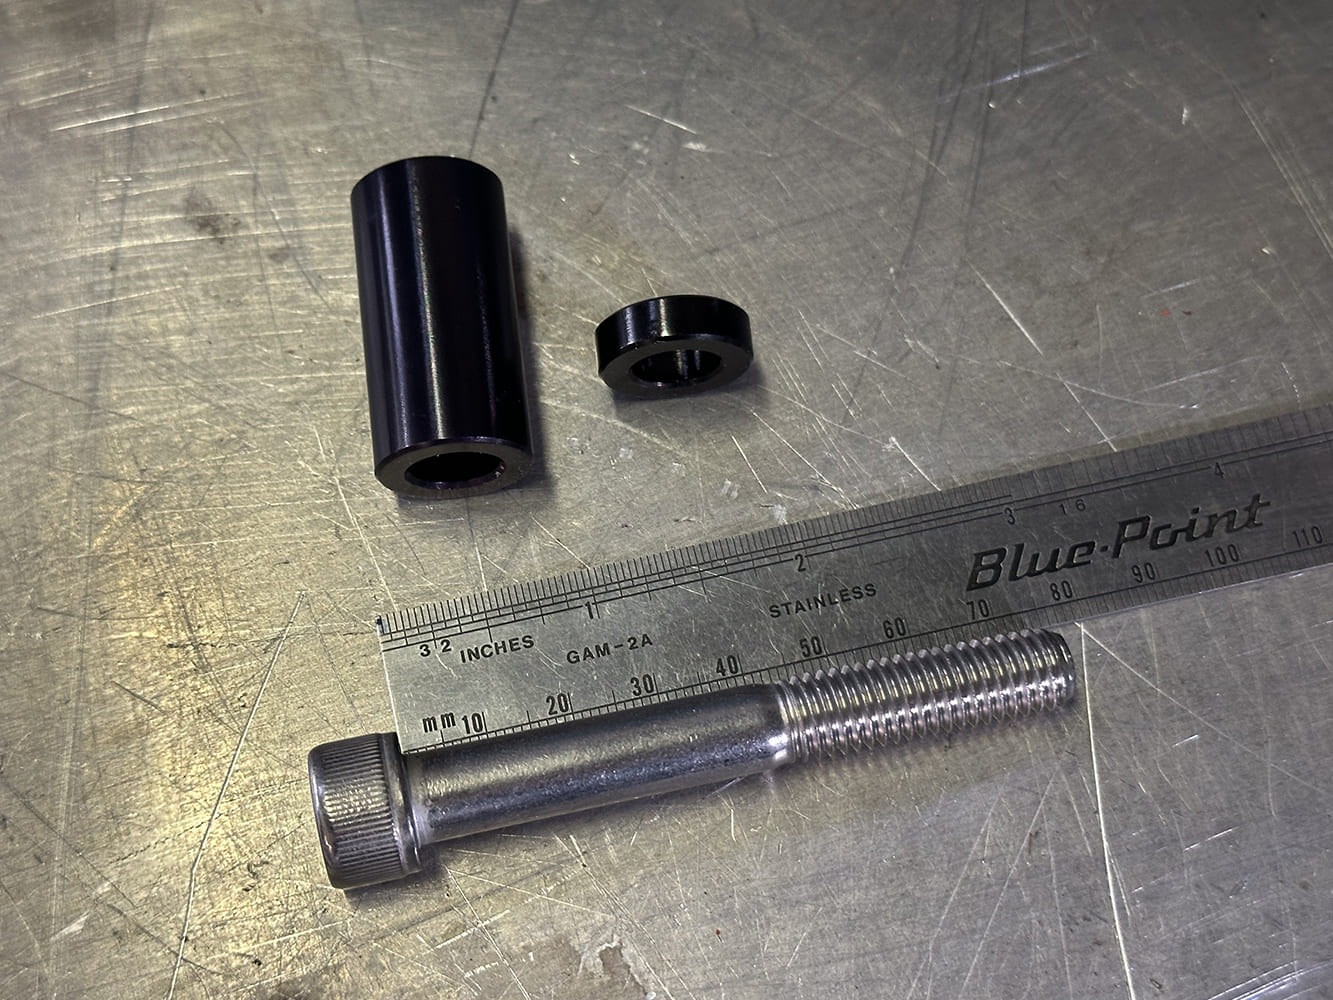
Back to bolt-ons. We installed the four M8x1.25x146mm threaded studs into the block followed by supplied water pump gaskets, billet spacers, and another set of water pump gaskets followed by the new pump. The studs are temporary and only used to get everything aligned properly, then will be replaced with bolts.
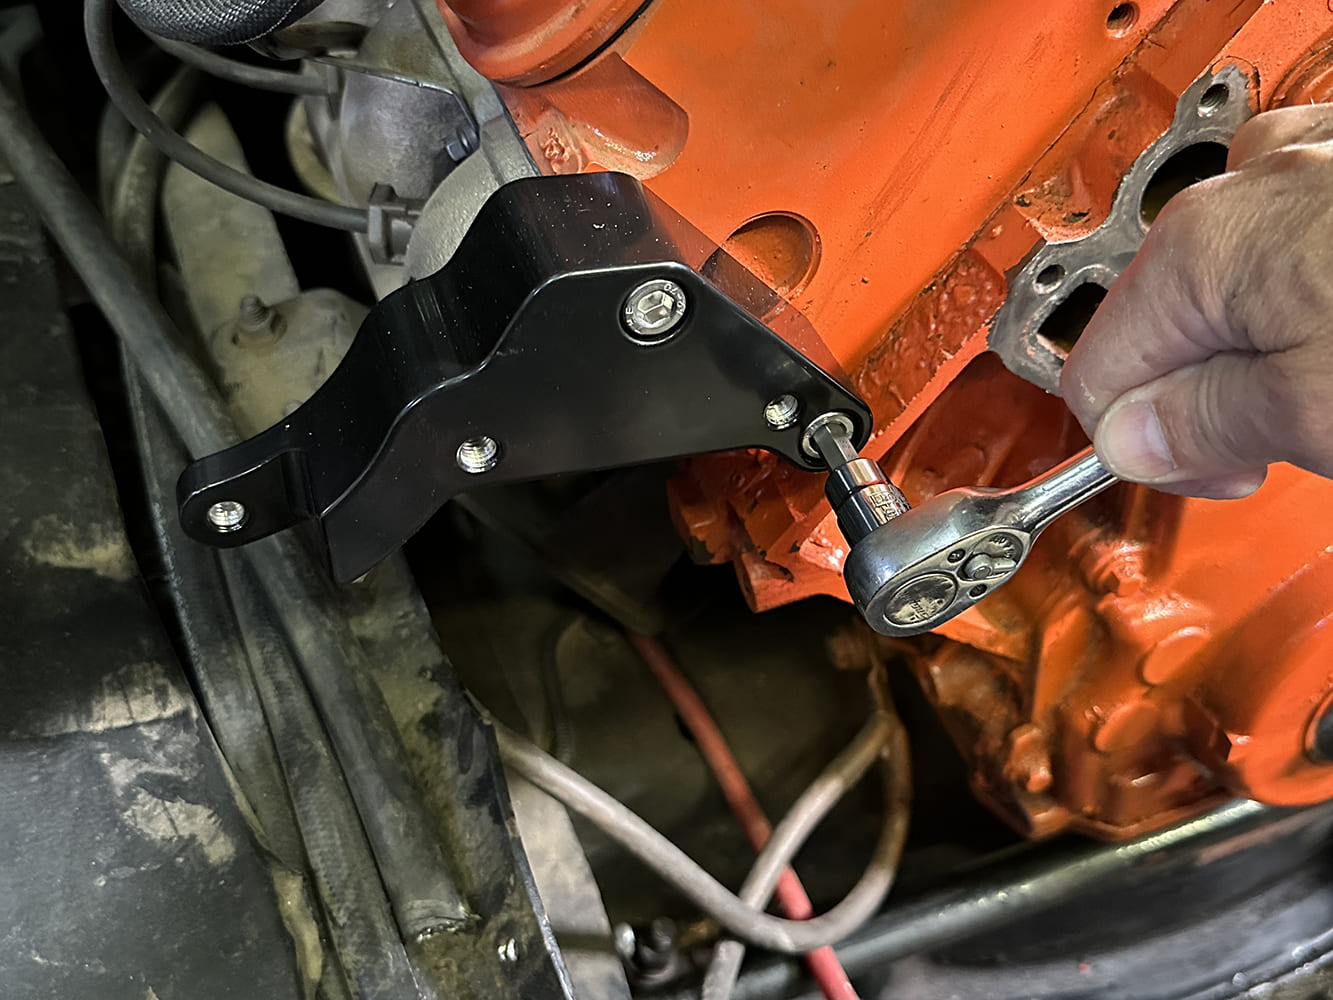
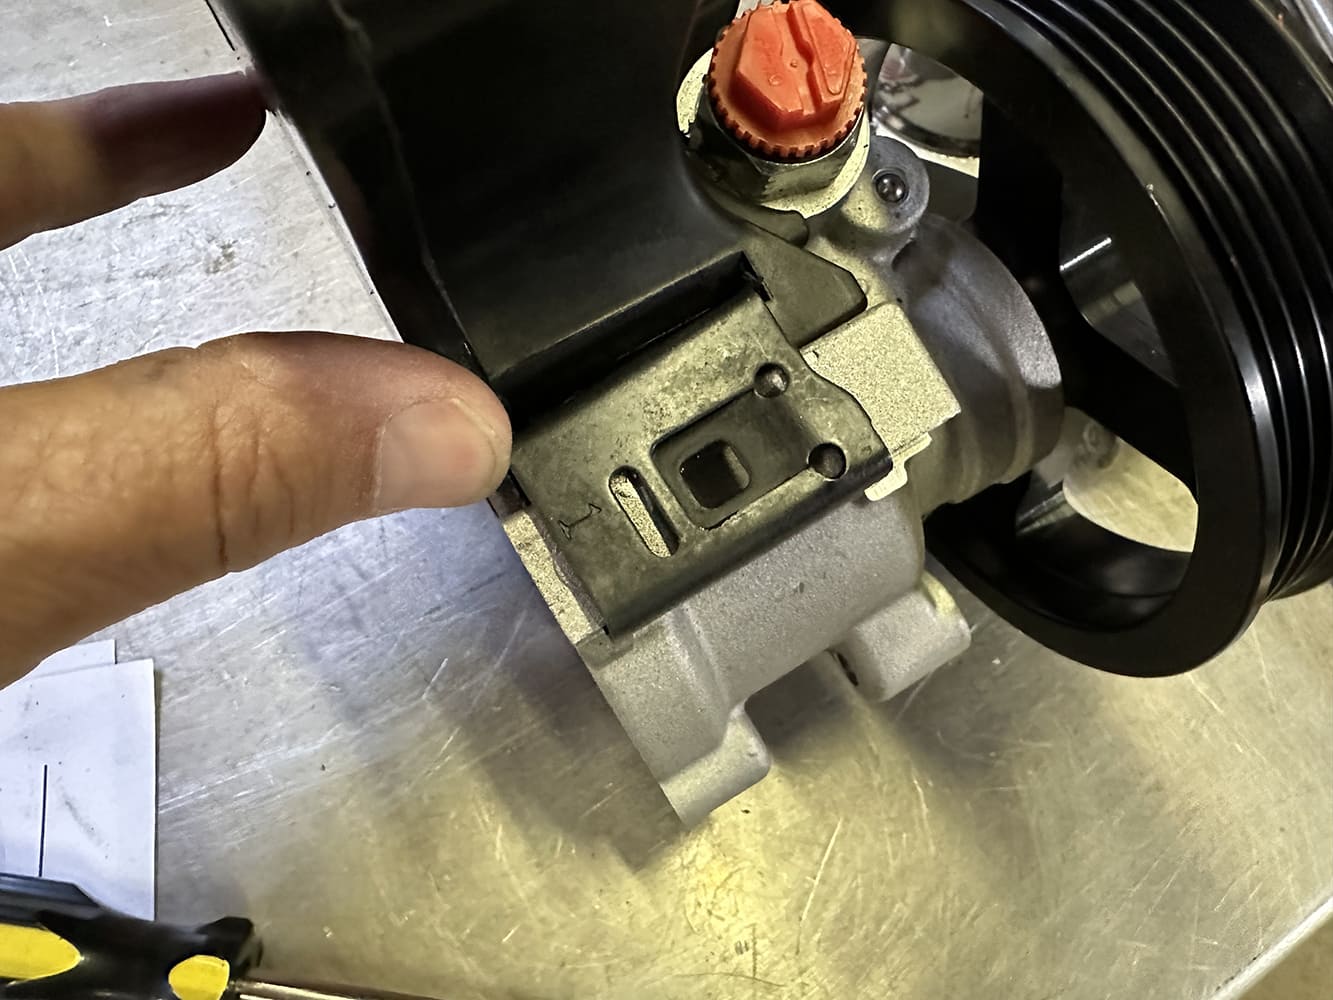
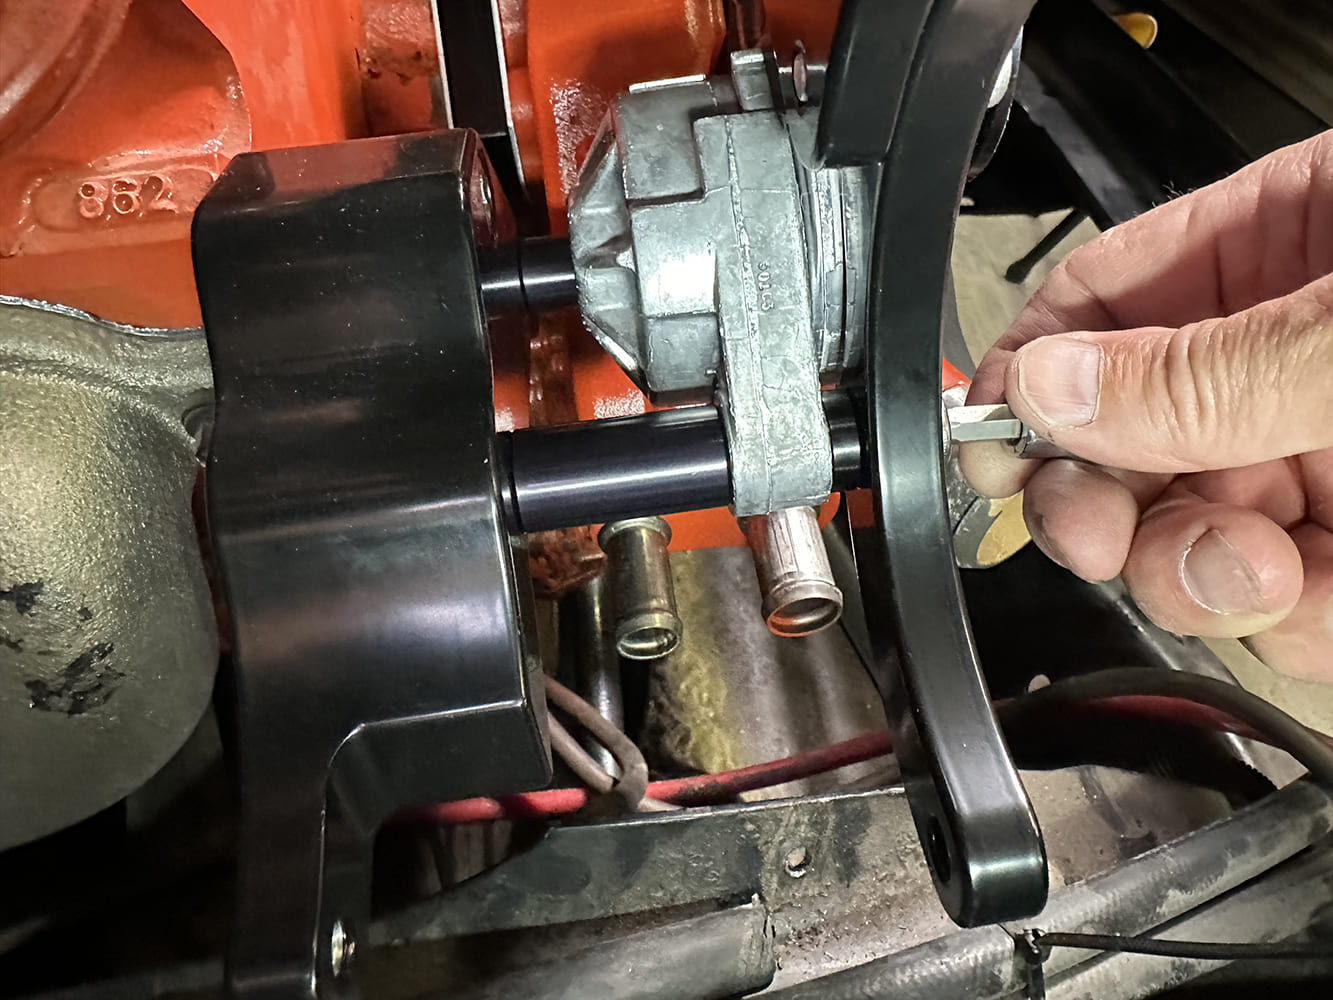
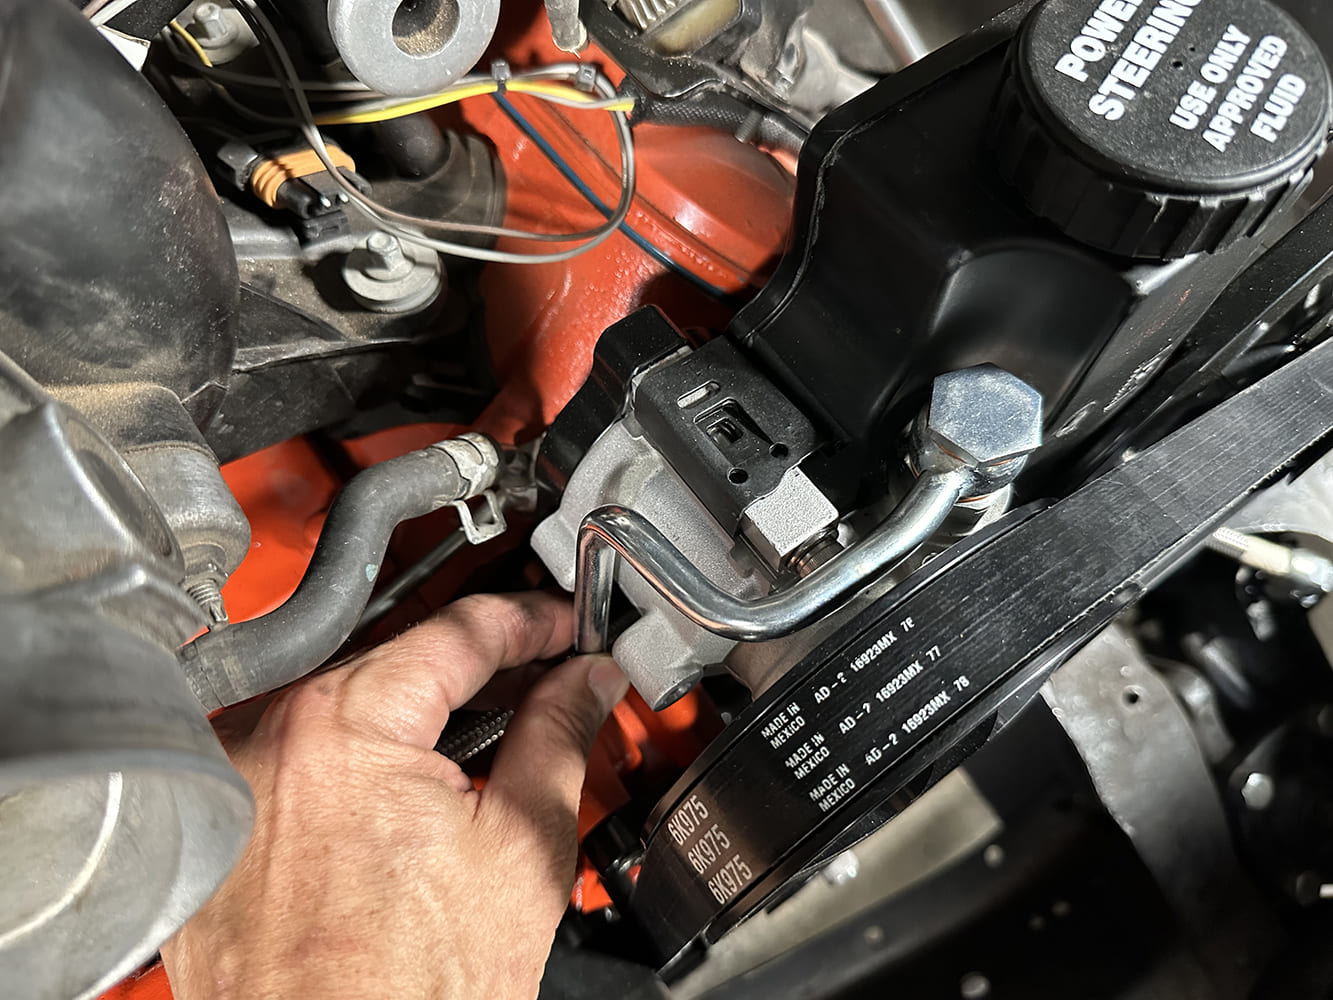
Moving to the power steering pump, the reservoir needs to be installed to the pump using the supplied O-rings and two special clips provided. The clip labeled 1, gets installed on top by the high pressure fitting while clip 2 secures the bottom side of the pump.The power steering pump installs on the top of the driver side cylinder head with the supplied 5/16-18×2.75 SHCSs and lock washers.Time for the alternator bracket, which fits over the driver side of the water pump. This is the step where you replace the threaded studs with SHCSs—but still leave them finger tight.Moving back to the passenger side, assemble the air compressor support piece with the idler bridge bracket and then install it over the water pump studs and install the new bolts—again, only finger tight.
Get out your ruler and locate the 0.220-inch spacer, M10-1.5x75mm SHCS, and 1.422-inch spacer to install the belt tensioner followed by another spacer and the compressor bracket.
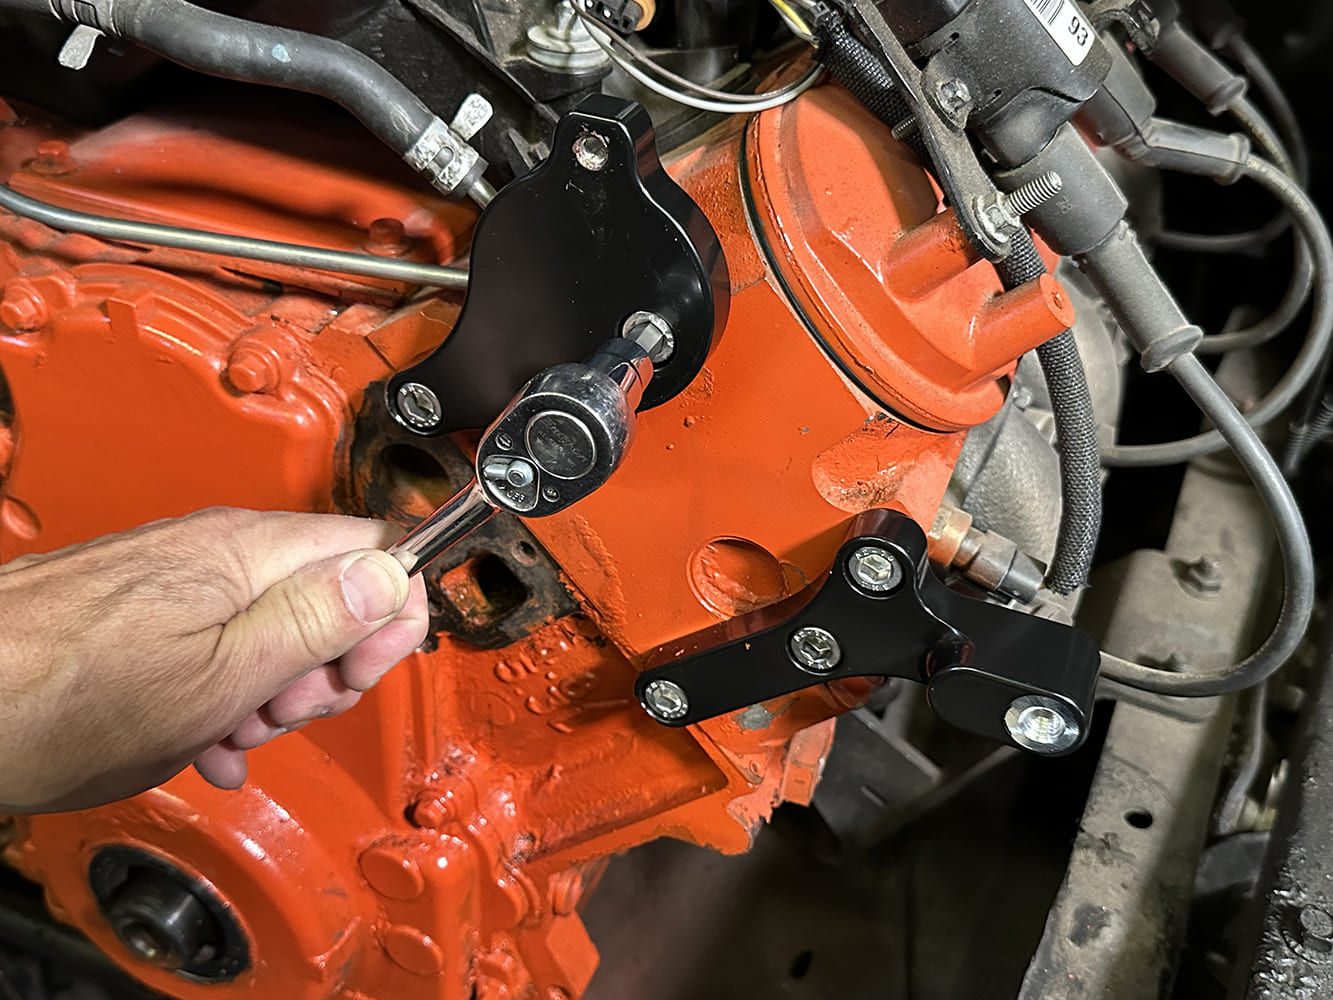
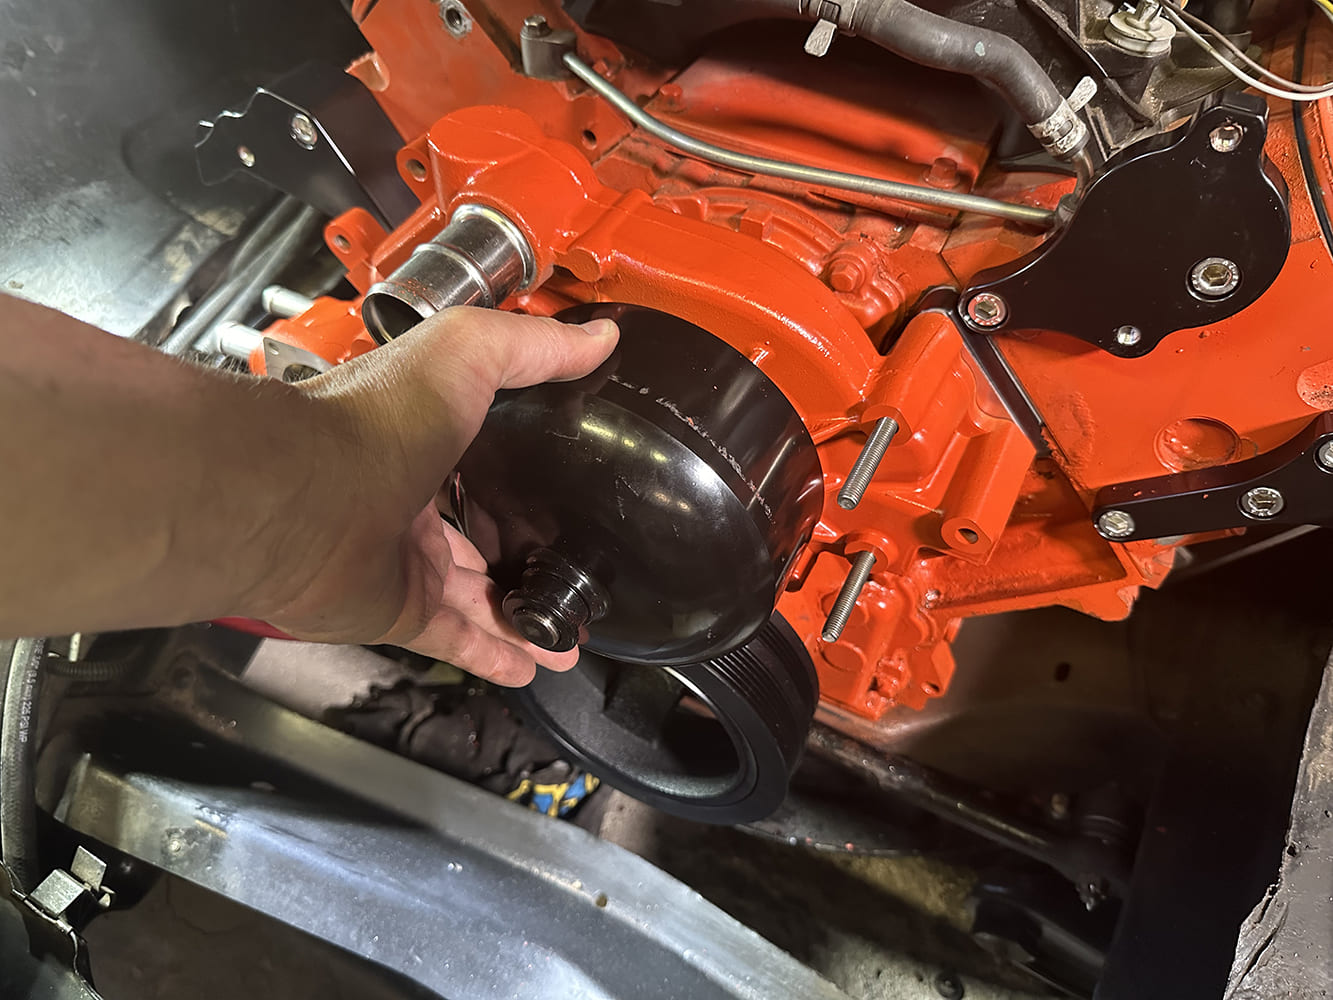
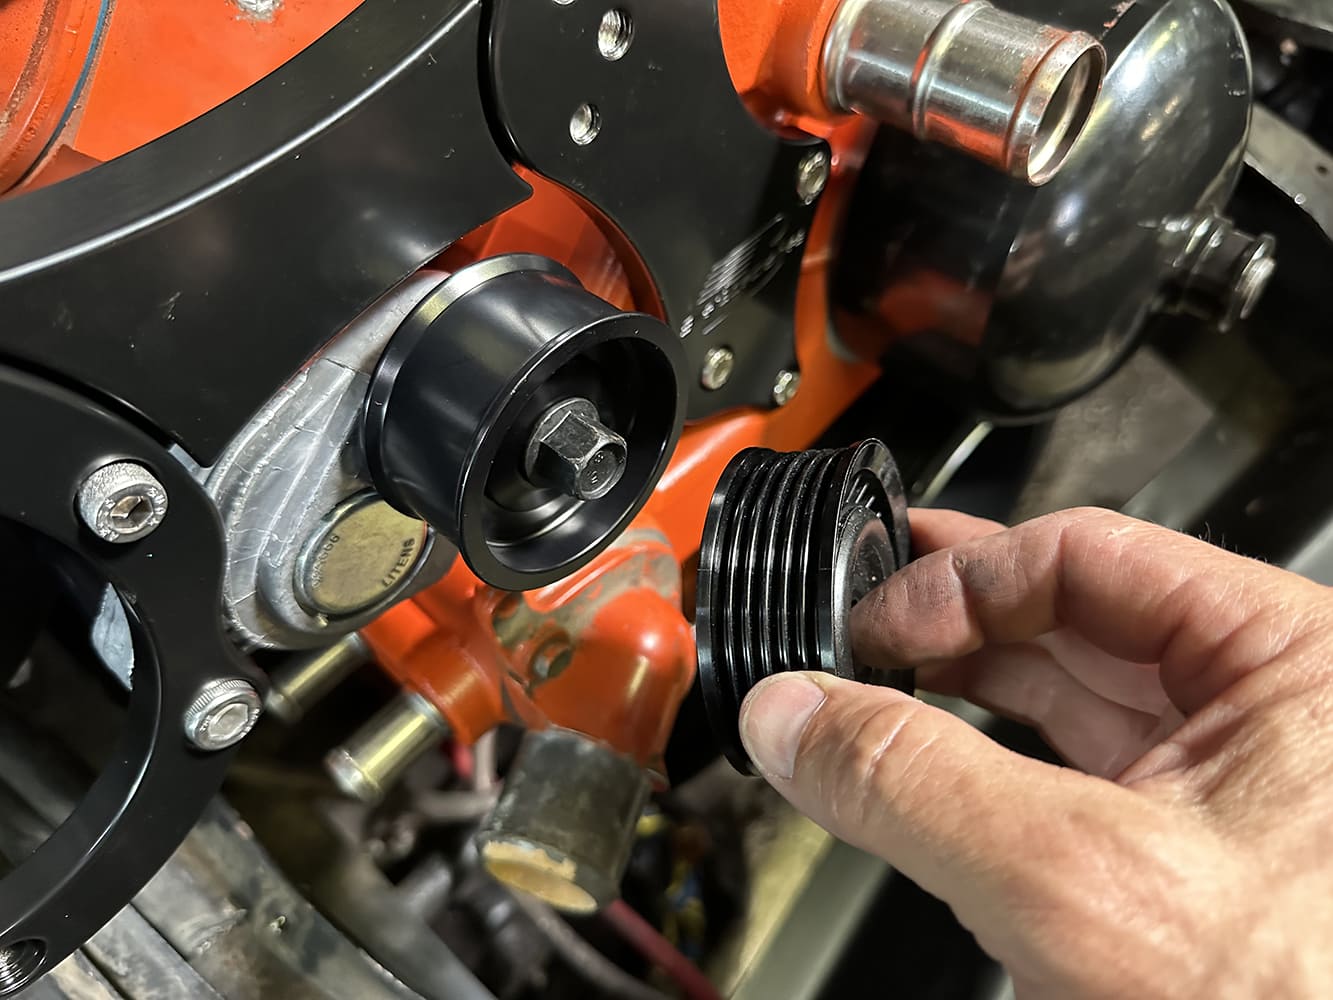
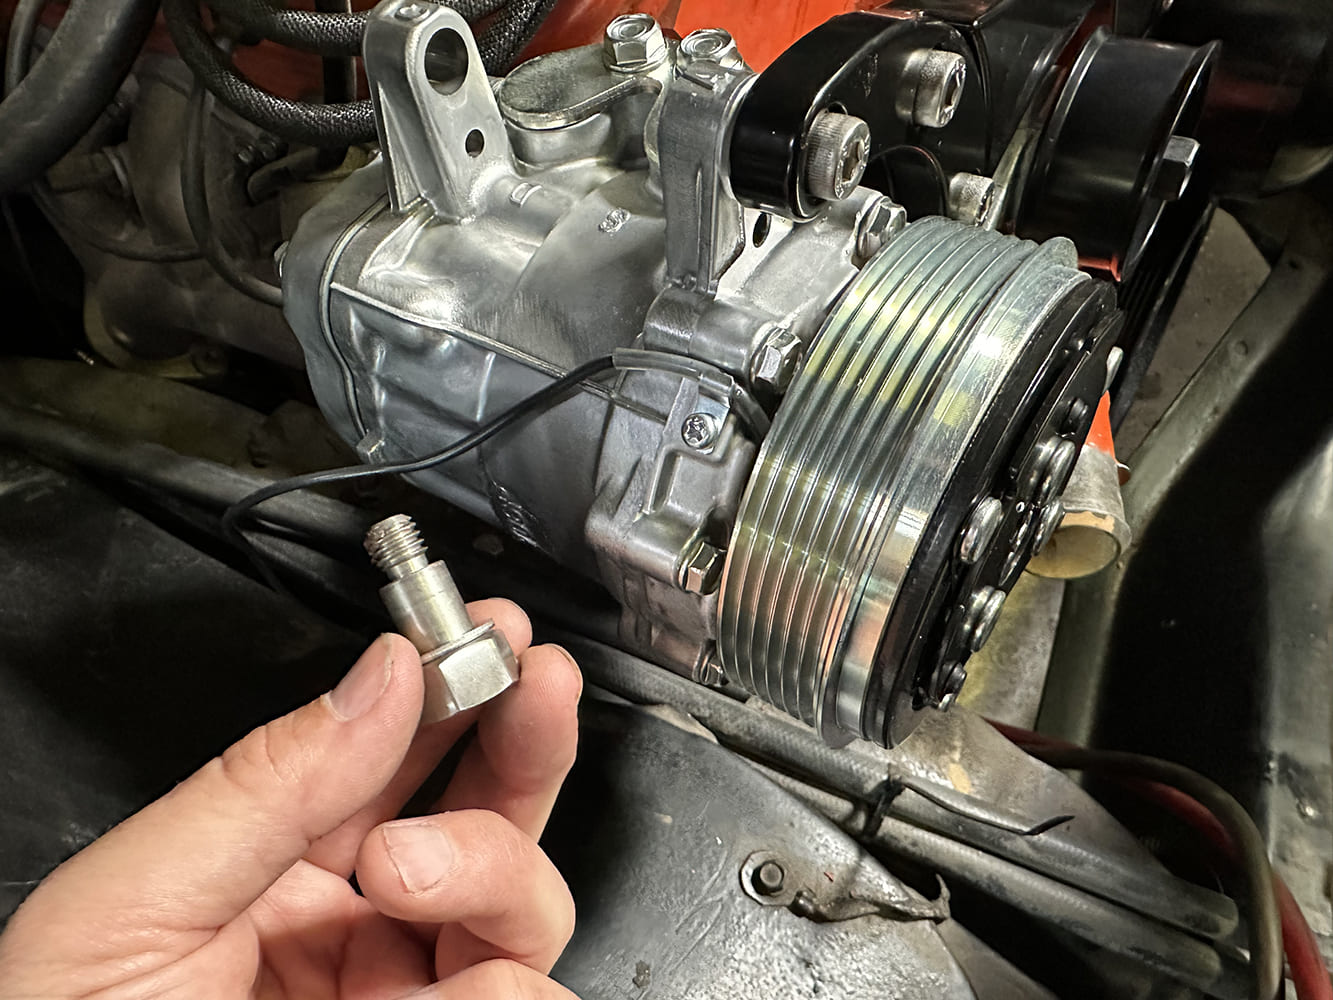
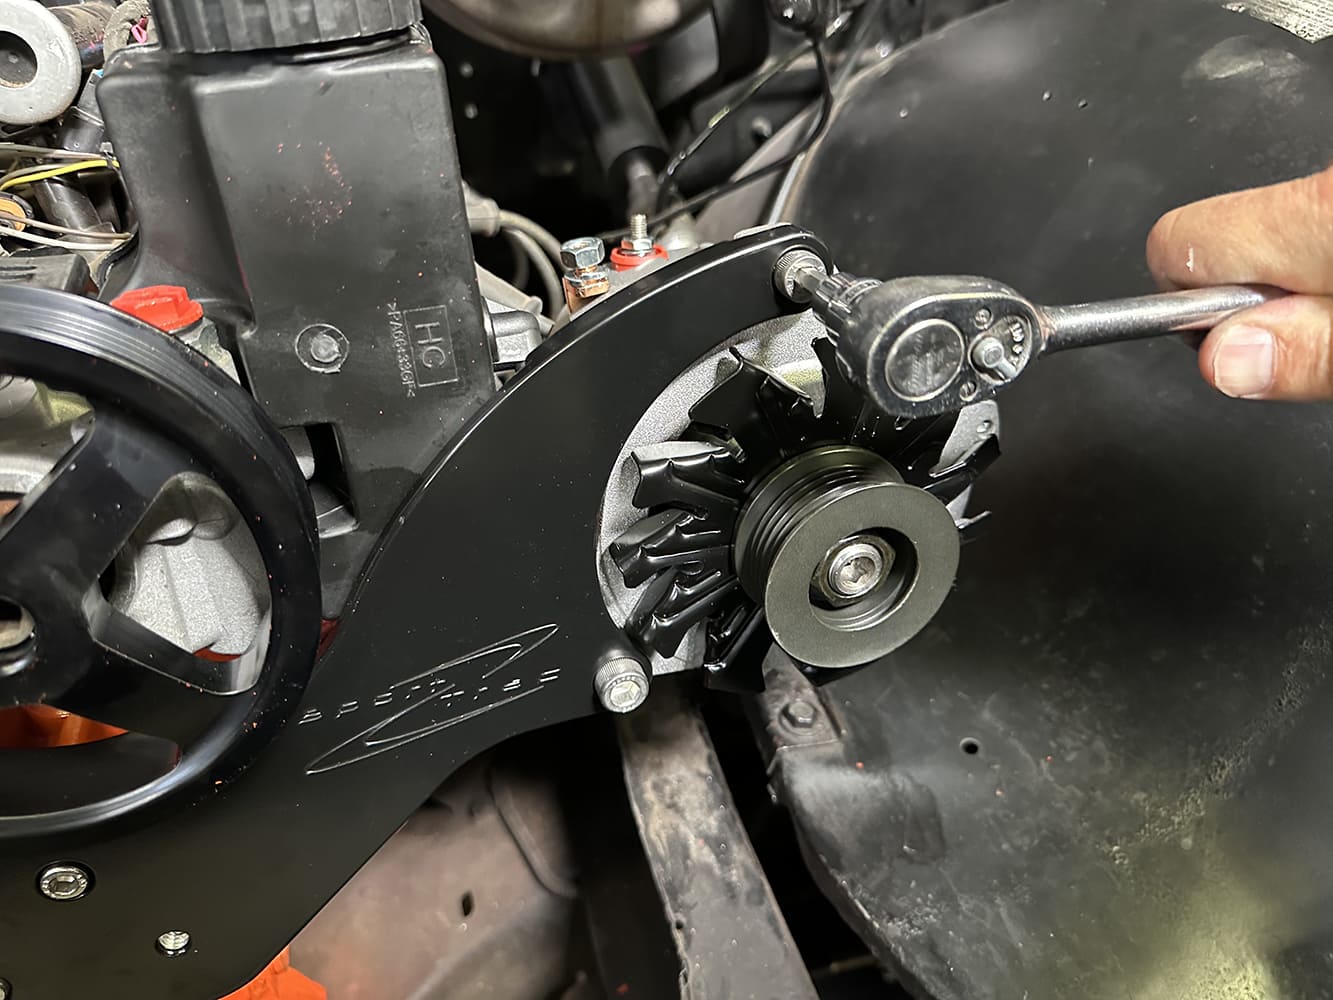
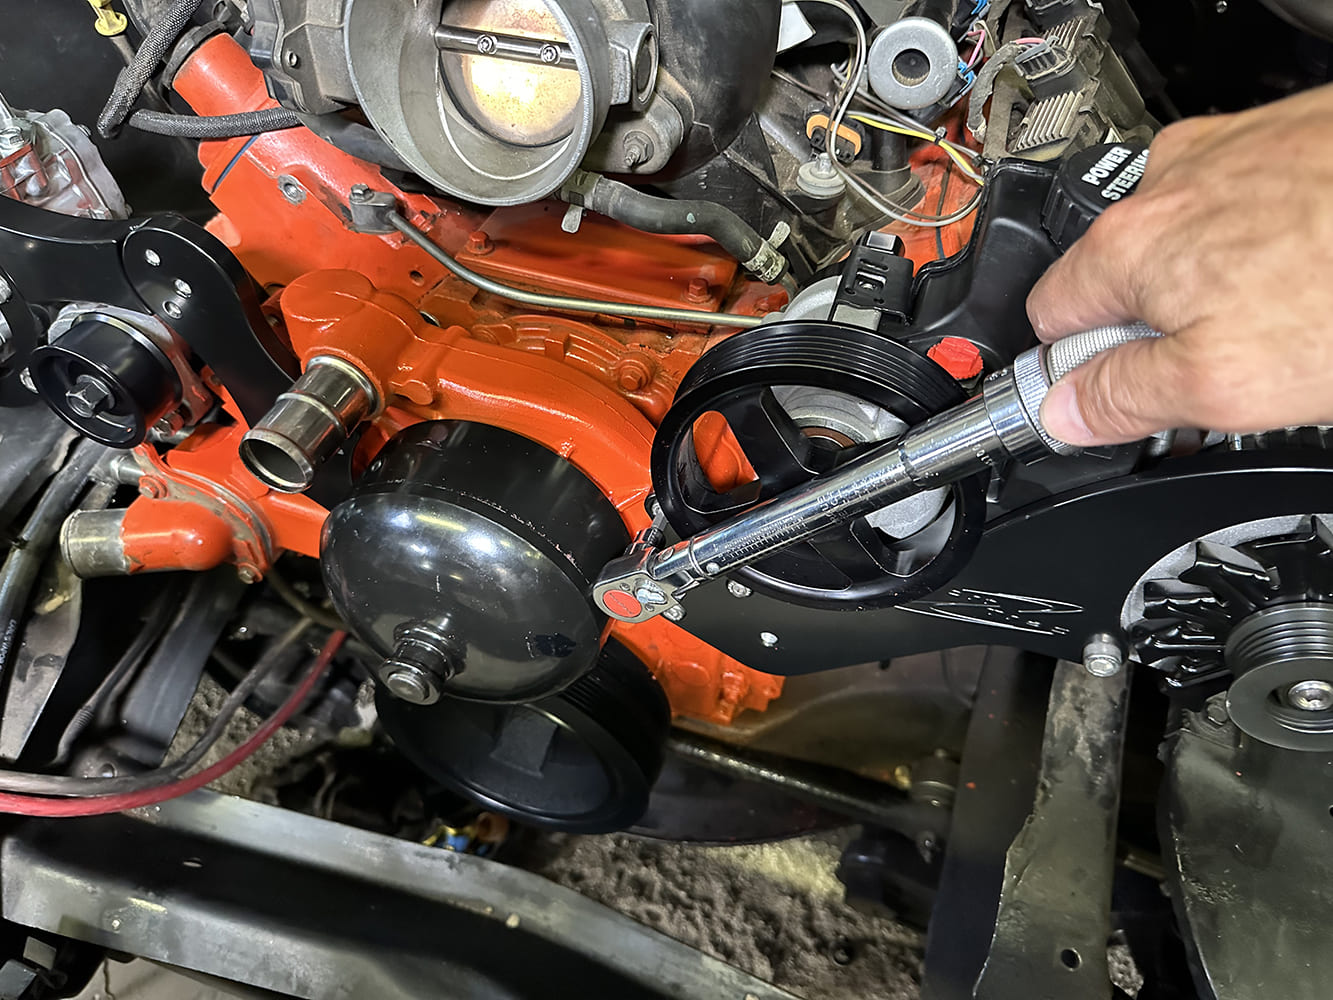
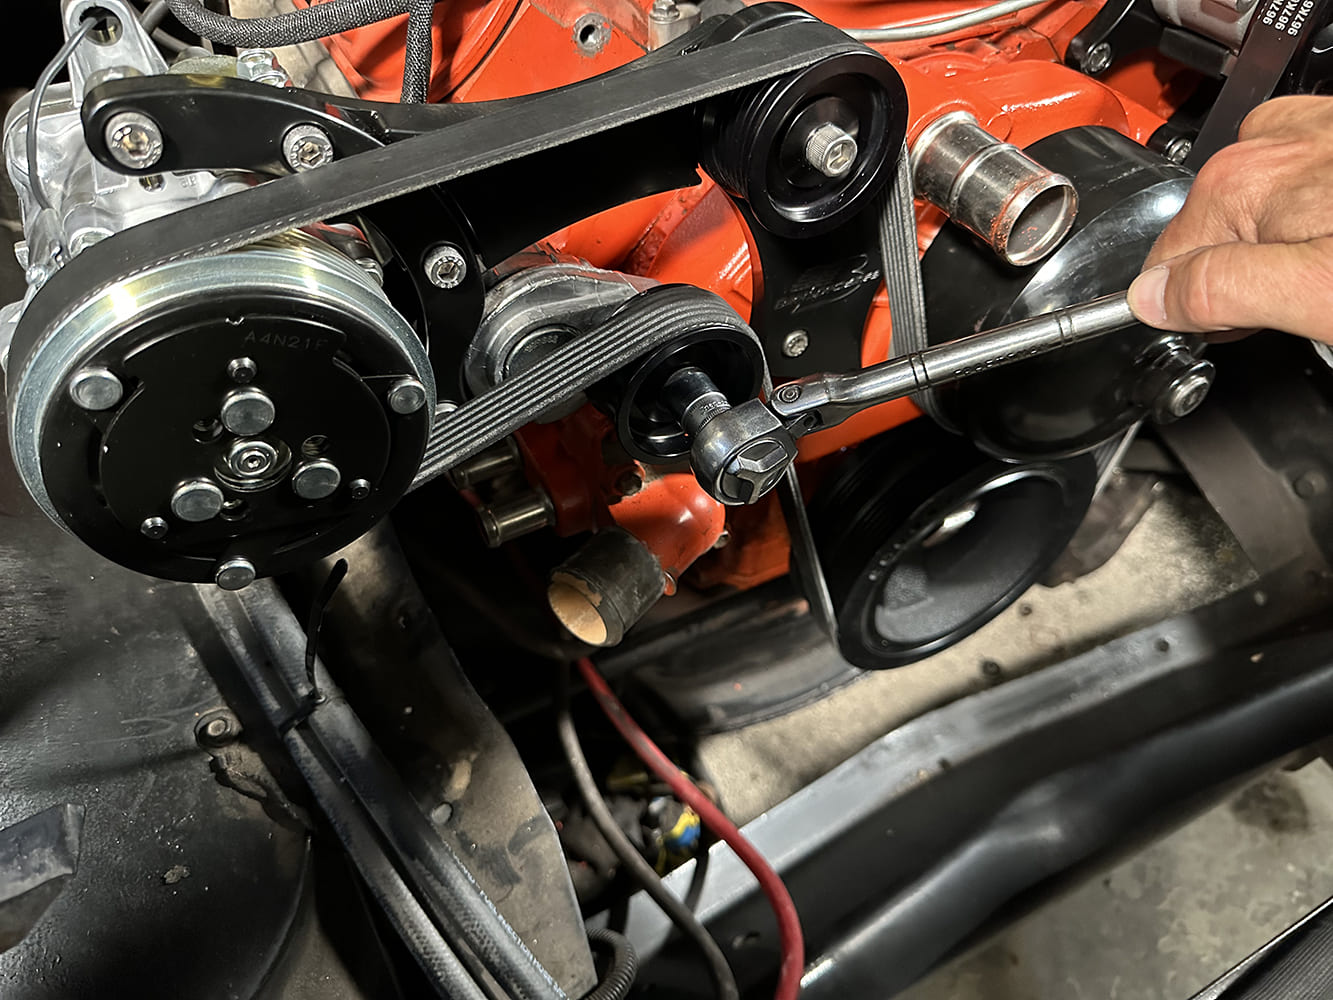
Replace the grooved serpentine pulley that came on the tensioner with the smooth pulley supplied by Billet Specialties. Be sure NOT to use the idler pulleys by mistake!We’re getting close! The new Sanden compressor bolted to the billet bracket, then there is one special bolt to secure the lower bottom side of the compressor to the bracket. Tighten this bolt firmly.At this point, it is time to tighten all the fasteners on the passenger side of the engine, the compressor brackets/bolts, and the tensioner.On the driver side we installed the new Powermaster alternator then set about tightening the remaining fasteners. Billet Specialties recommends following the OE torque spec for the water pump, which is 22 lb-ft.There are two idler pulleys; the grooved pulley installs on top of the passenger side bracket while the smooth pulley installs at the bottom of the alternator bracket on the driver side.
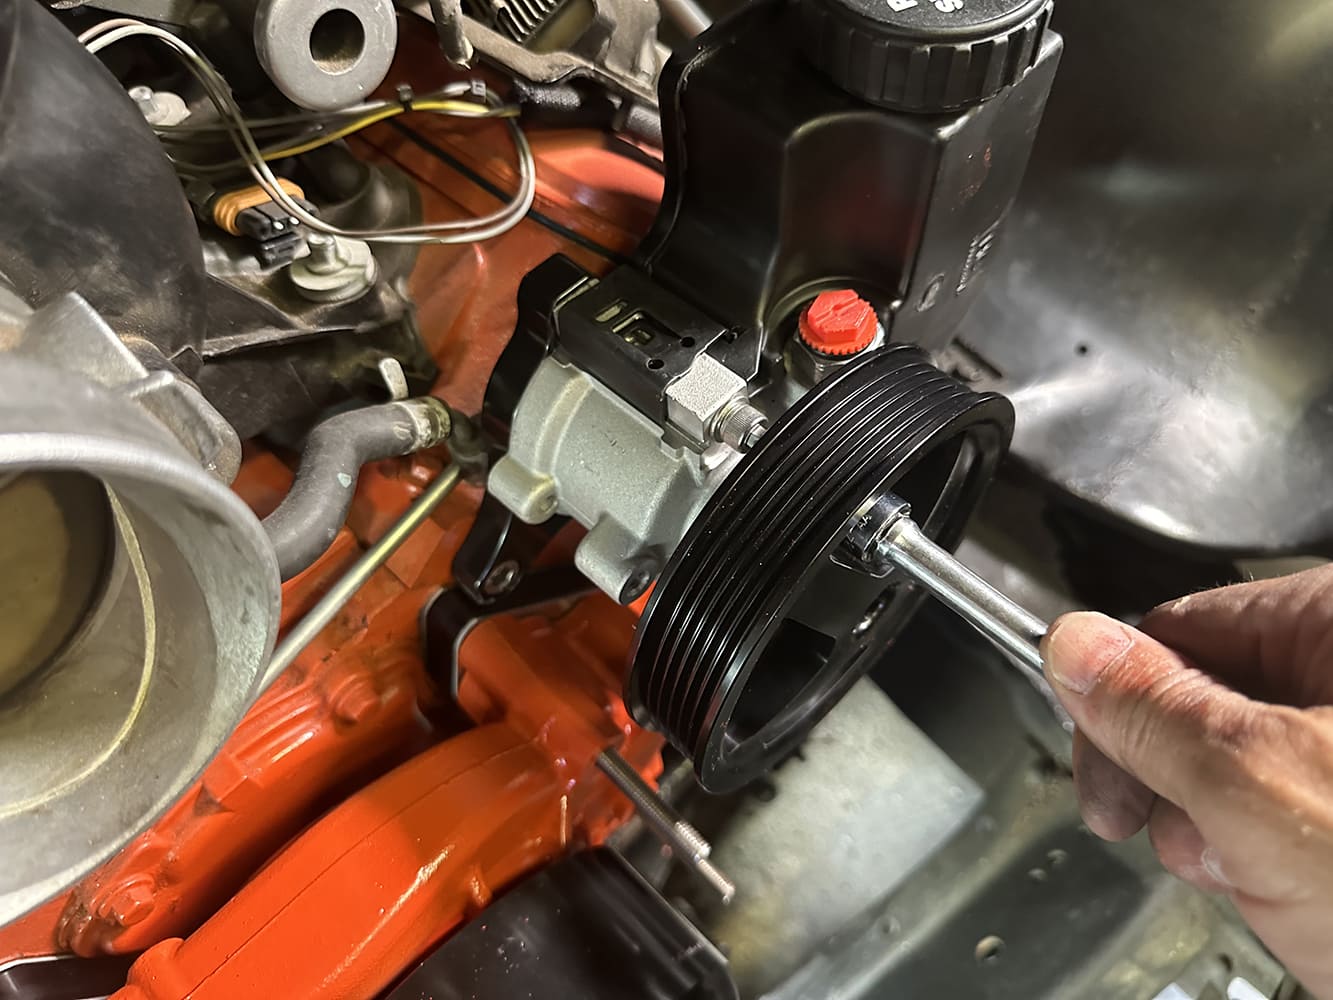
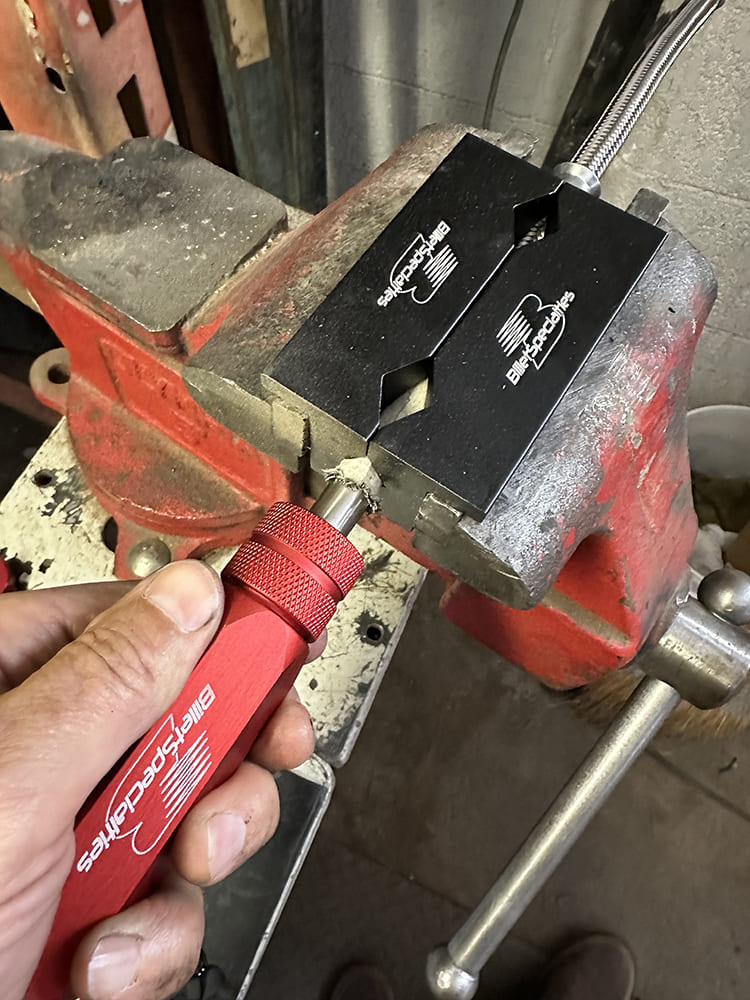
With the brackets, pulleys, and assembly torqued and tightened, it was time to snake the supplied belt up, over, and around the pulleys—perfect fit!Time to focus on plumbing the lines for the power steering pump. Billet Specialties supplies a snug hardline for the pressure side of the pump that places the hose connection facing down toward the steering box.To help build the power steering lines we opted to purchase Billet Specialties’ power steering hose assembly tool, wrenches, and vise jaw inserts. The assembly tool separates the outer steel braiding and reshapes the inner PTFE liner to ease fitting installation. It also aligns the ferrule so it sits square in the tubing. Much easier and no leaks!When the LM7 was swapped in a couple years ago, the radiator hoses and trans lines were not in the greatest shape but the budget was spent so we ran with what we had, including the mechanical fan. With the new front accessory drive, it was time to step up with a new all-aluminum radiator from DeWitts, including a pair of efficient electric fans.The DeWitts radiator is made to drop into the 1971 C10 but is made for an LS engine with the upper inlet on the passenger side and correct LS diameters. Note the steam vent nipple and the temperature sensor to trigger the fans—one less sensor to worry about fitting to the engine.DeWitts supplied a relay and harness kit for each fan. We wired the fans so one turns on with the sensor in the radiator (on at 195-degrees F, off at 175) while the other is connected to the A/C trinary switch to activate with the A/C.The Sport Trac system cleaned up the front of the engine and is the reason we were able to get rid of the long upper hose and add a more streamlined air intake tube. As for the new radiator, the Sub has never run cooler on the highway and the fans help a lot in town and at low speeds.
We use cookies to ensure that we give you the best experience on our website. If you continue to use this site we will assume that you are happy with it.