This is the final installment on our series of articles following the build of the custom-made DIVCO truck constructed at SaltWorks Fab in Sarasota, Florida. This is about as intense as a project can get, with virtually every component of the body, chassis, and trim completely handmade.
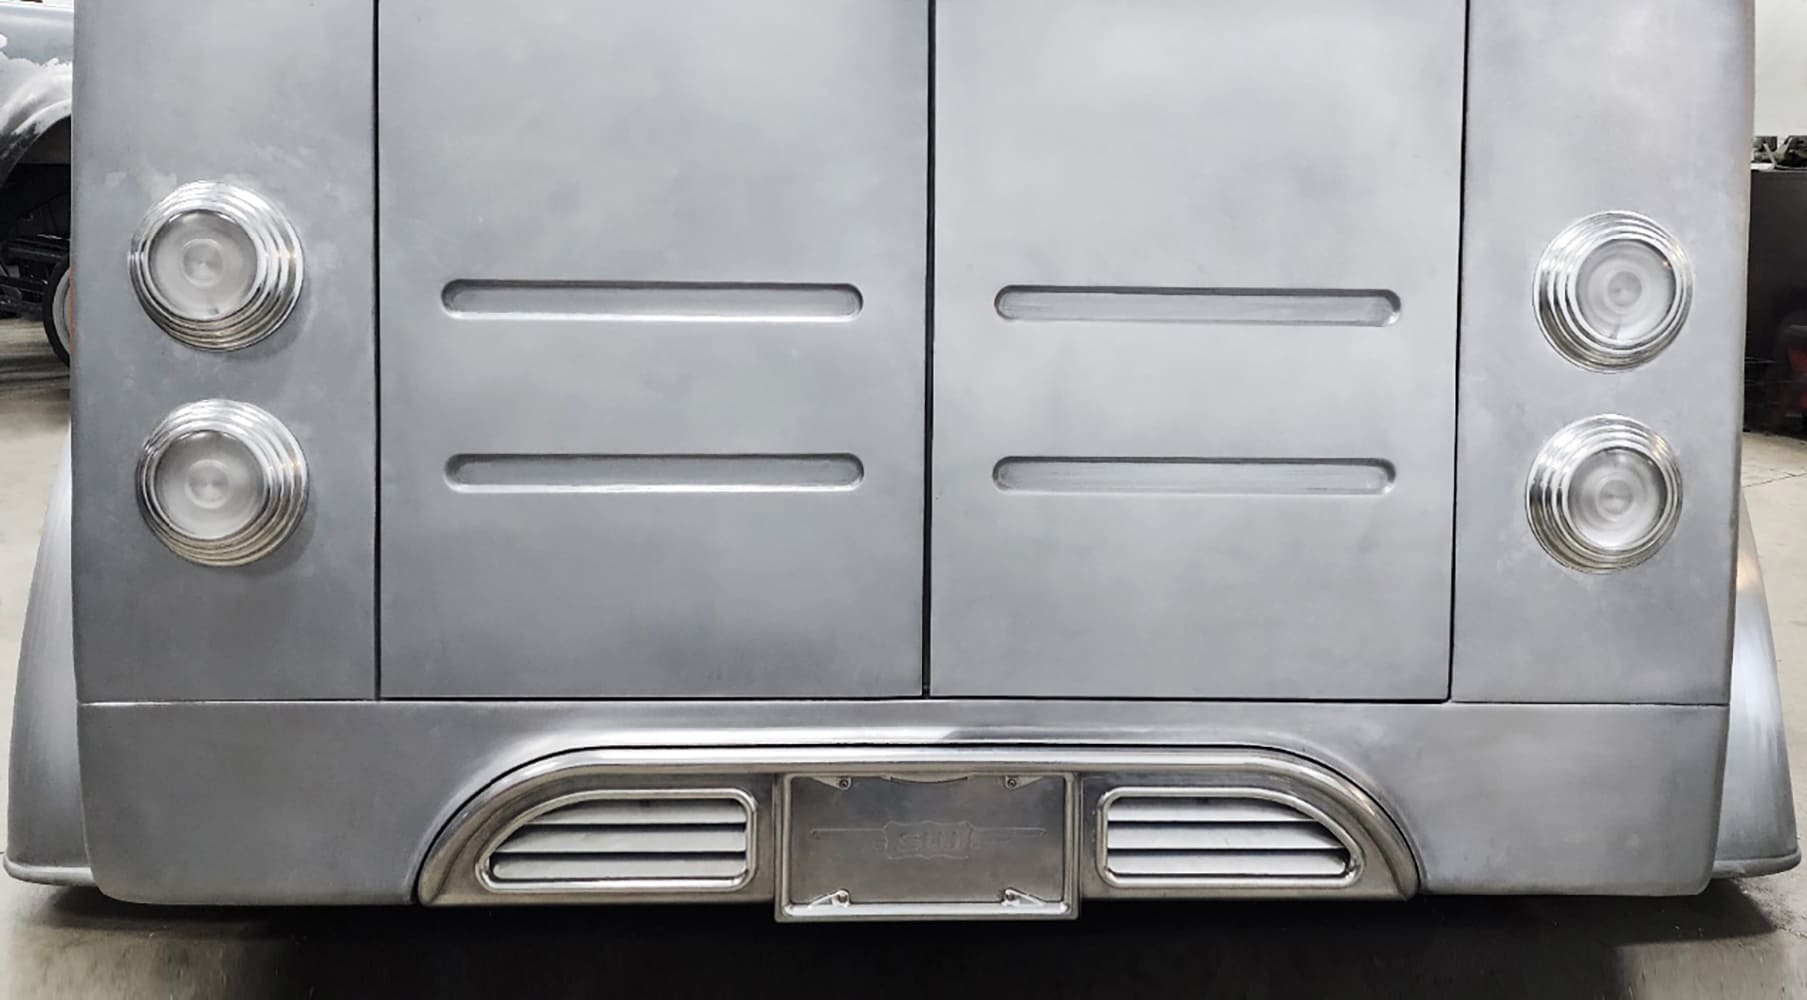
The rear of the handmade DIVCO truck has a lot of style. The taillight bezels are completely machined from billet aluminum and the lenses are custom made from acrylic plastic.
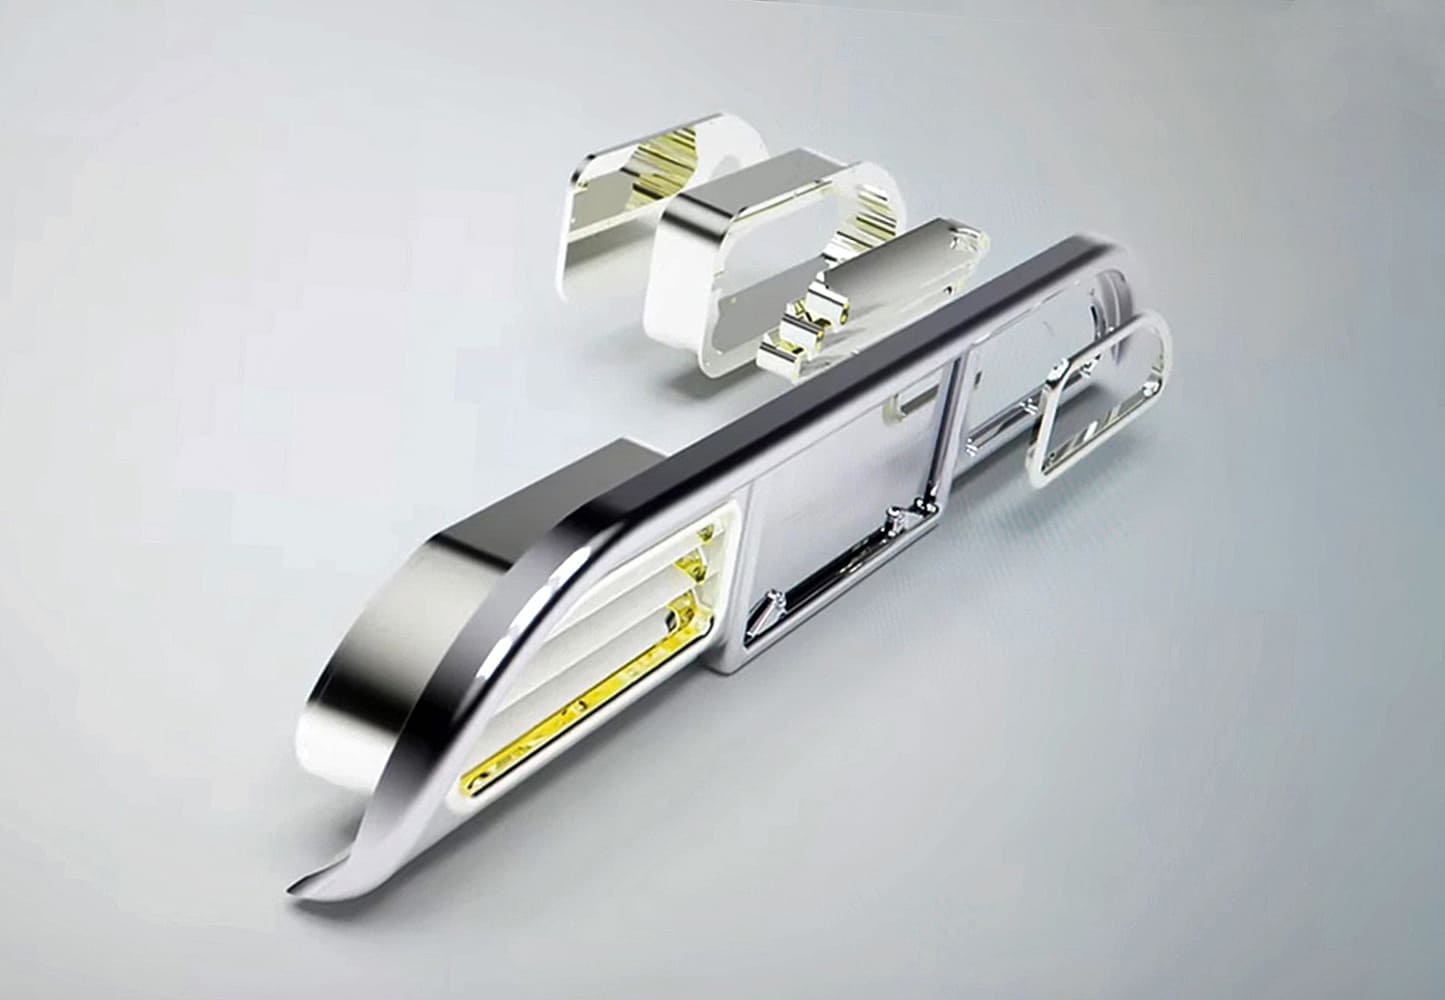
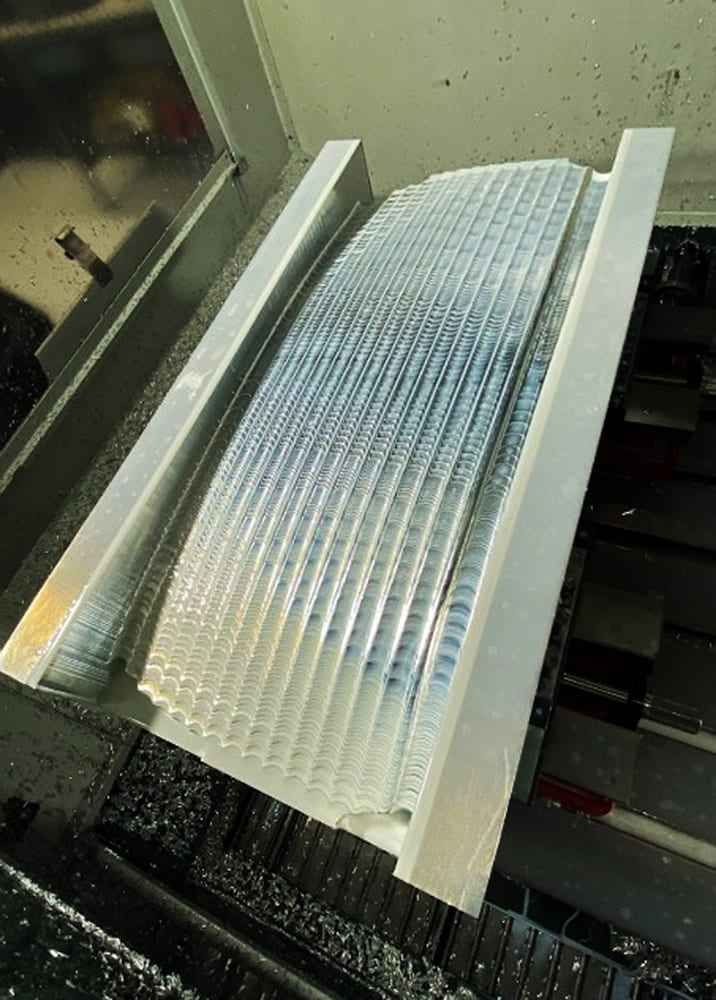
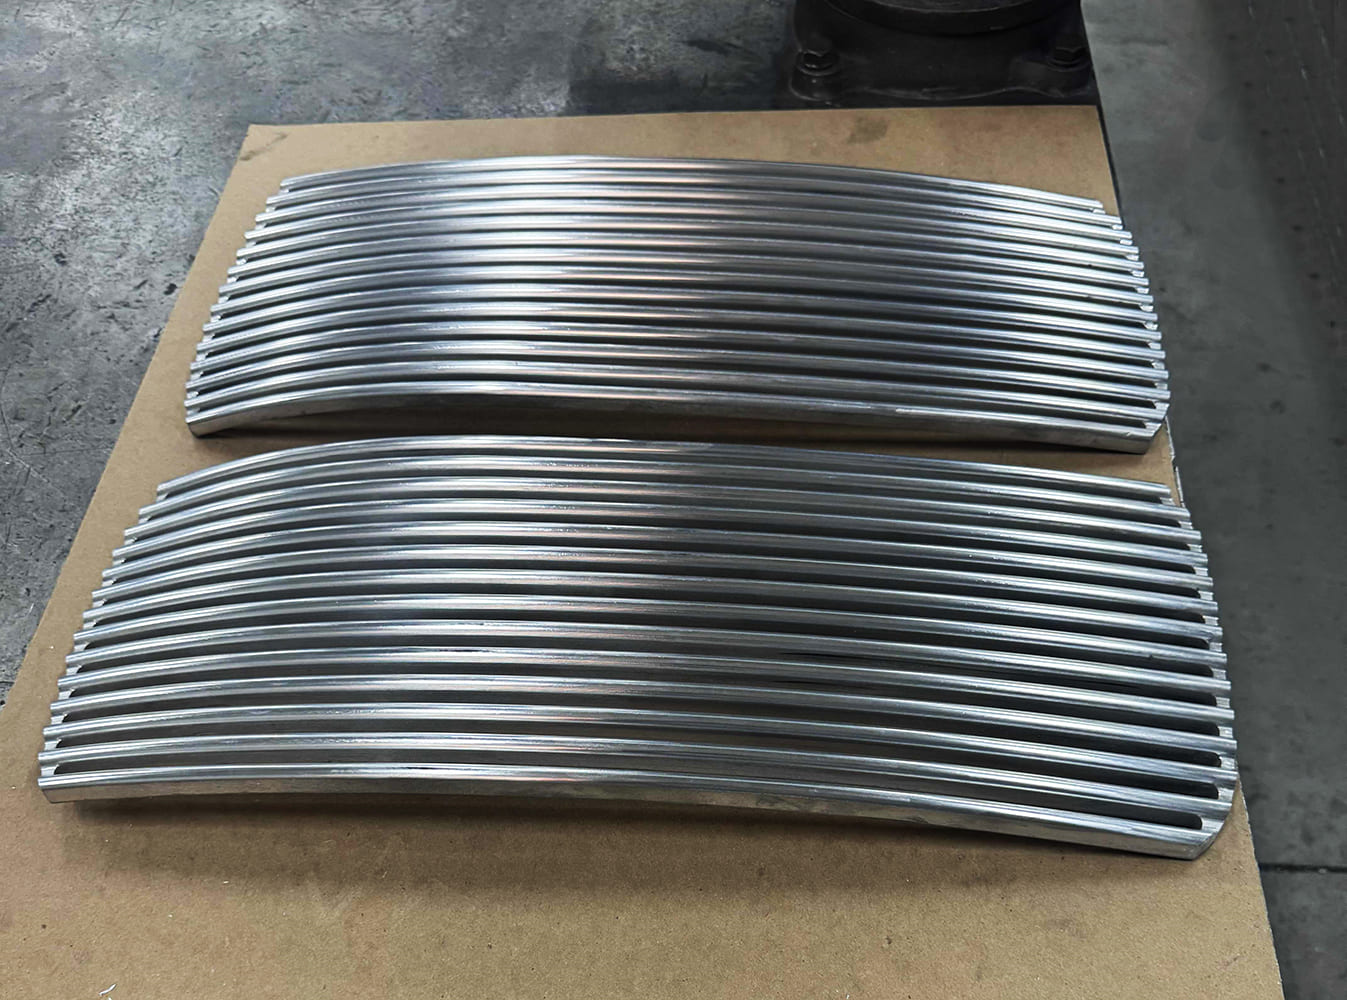
Starting at the rear, custom-made louvered panels for the exhaust outlets were fitted to the lower rear panel of the truck, flanking the license plate. These intricate components were CAD designed and CNC machined from solid aluminum. The taillights were completely custom fabricated, too.
The billet aluminum rear panel for the body features louvered exhaust outlets placed on either side of the license plate.
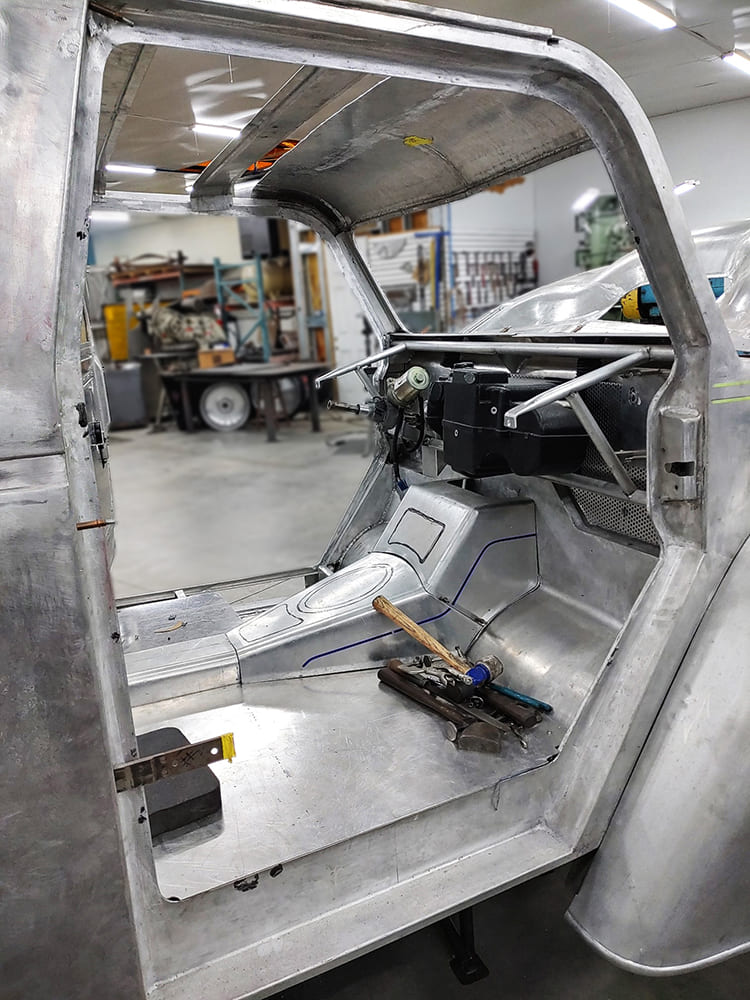
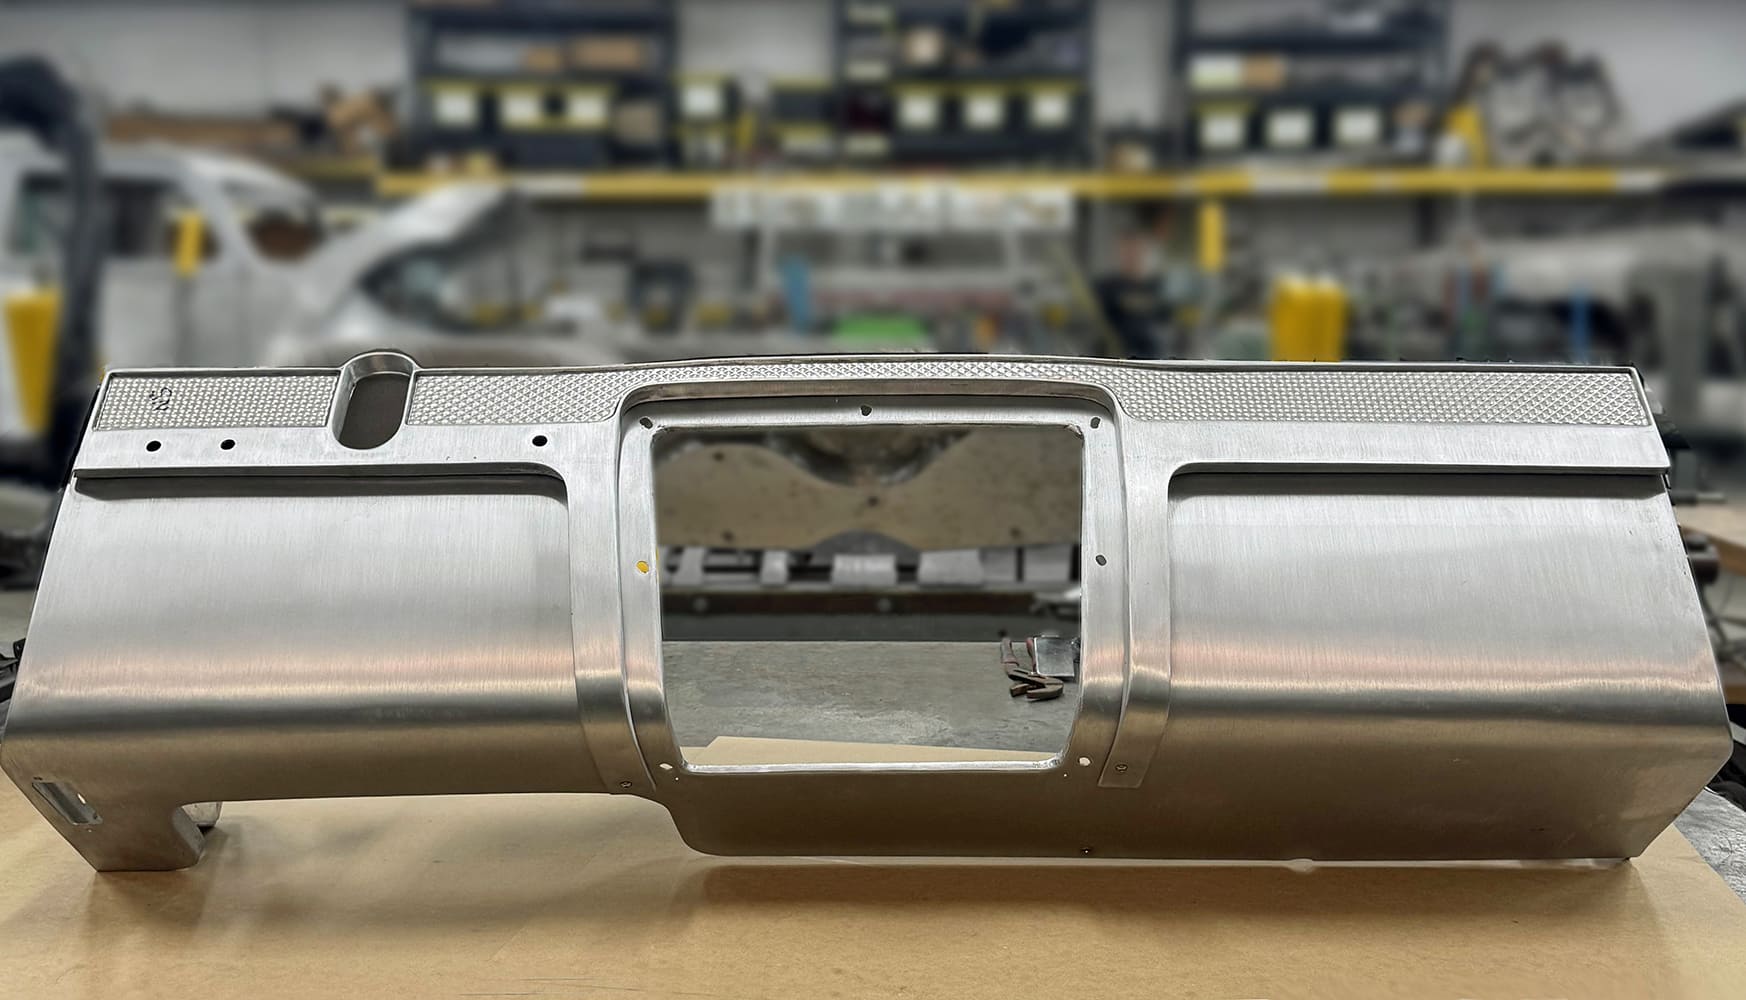
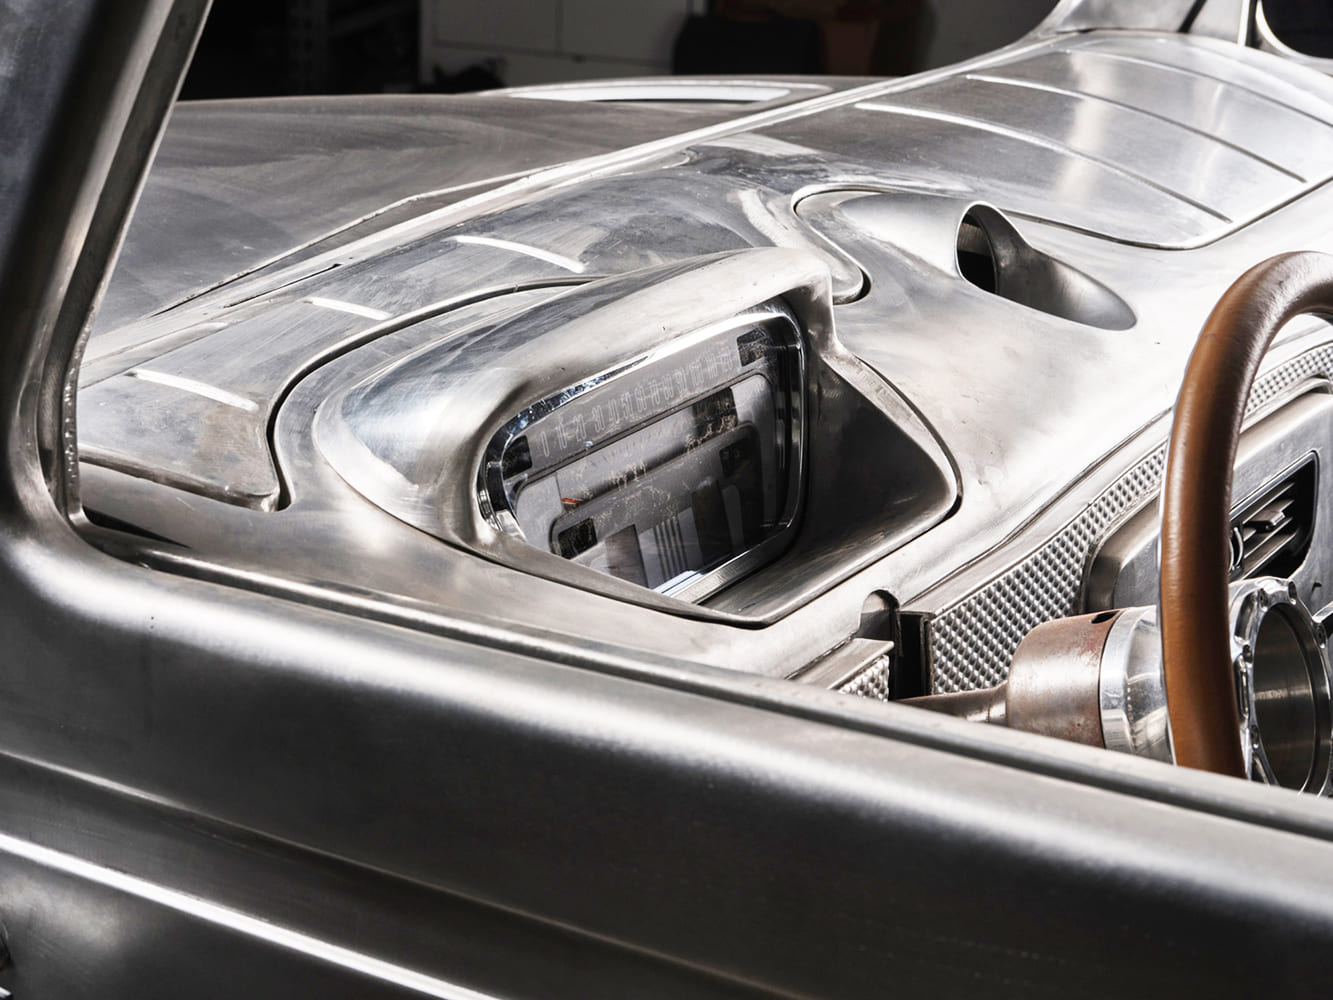
The dashboard was another intricate and complex assembly, made from dozens of parts that fit together like a jigsaw puzzle. The components mesh together so well that it looks like it could have been factory designed.
All these components were modelled in CAD before carving them from billet aluminum in a state-of-the-art machining center.
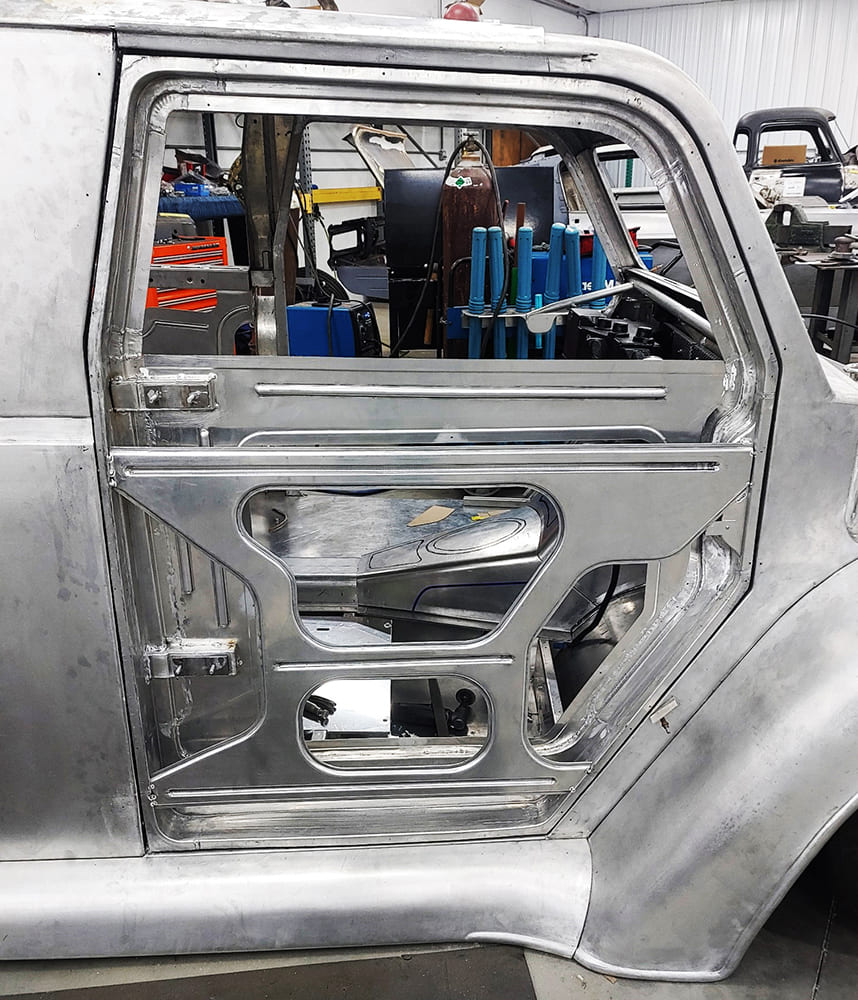
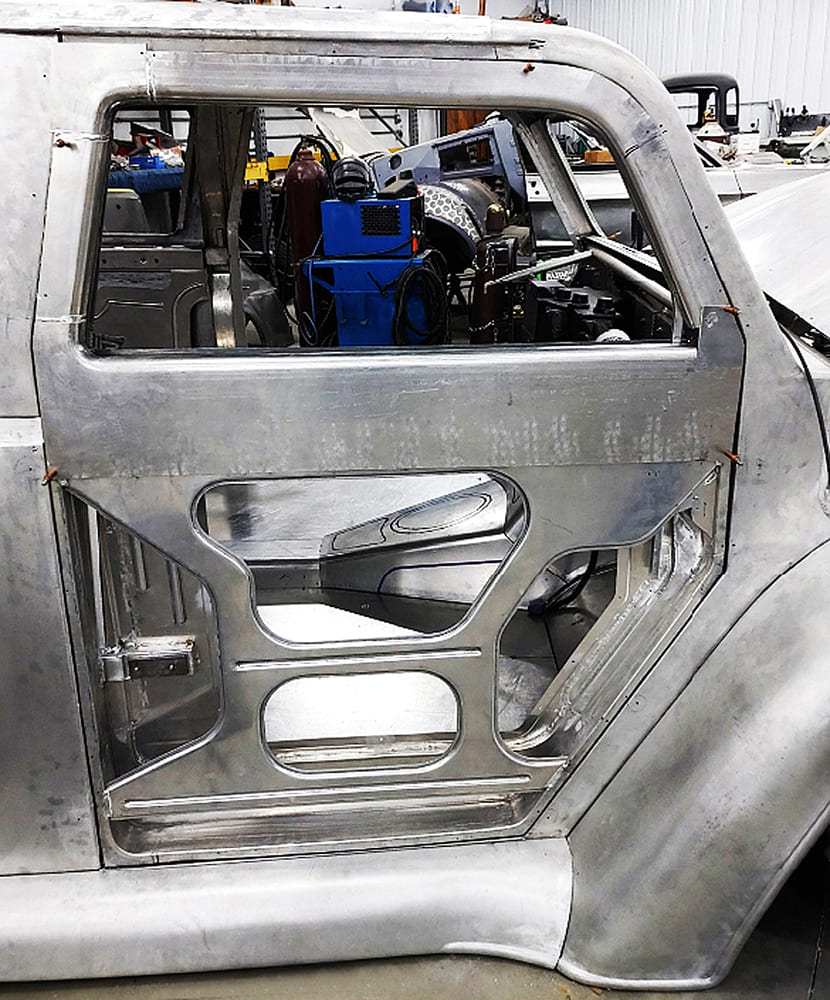
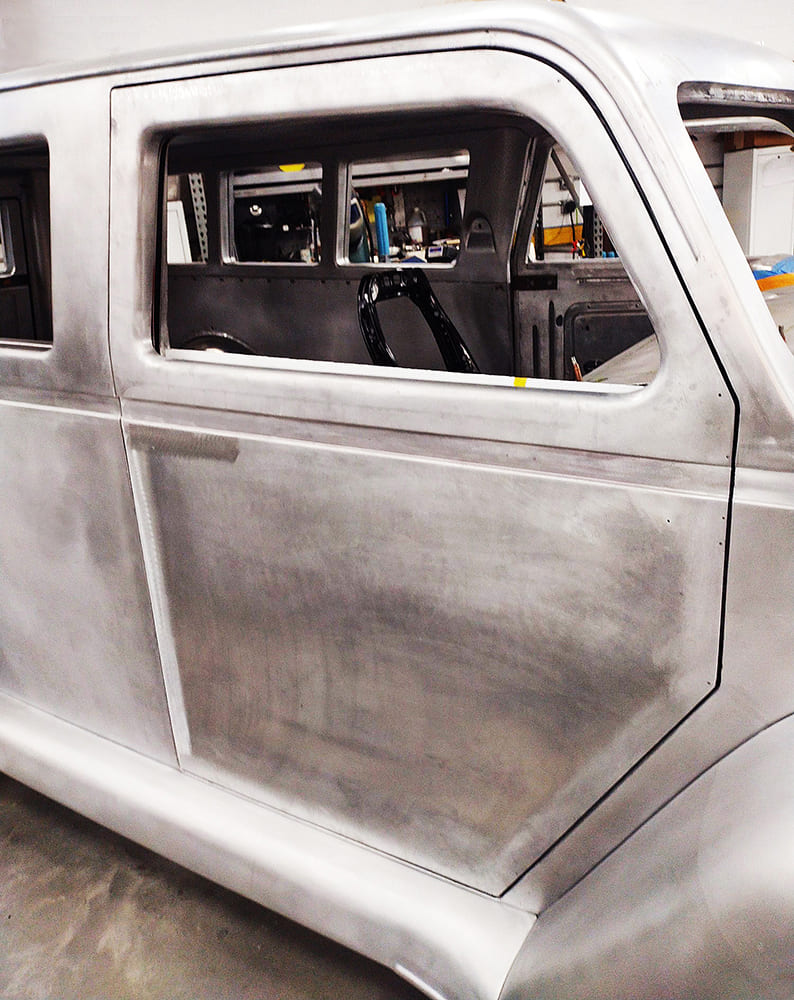
The front doors were a huge project in themselves. The work was started by forming the perimeter structure of each door, which was then attached to the suicide-style hinges and latch. Then inner and outer strengthening panels were attached to the perimeters, and all panels were heavily reinforced with beads and flanges. The outer skin was begun with the highly contoured window openings, then the lower panels were carefully shaped and fitted. While the doors look flat, they have a subtle compound curve. Specially made dies were used in a Pullmax machine to form the reveal just under the window opening.
With the floor and center console completed, work was started on the custom-made dashboard.
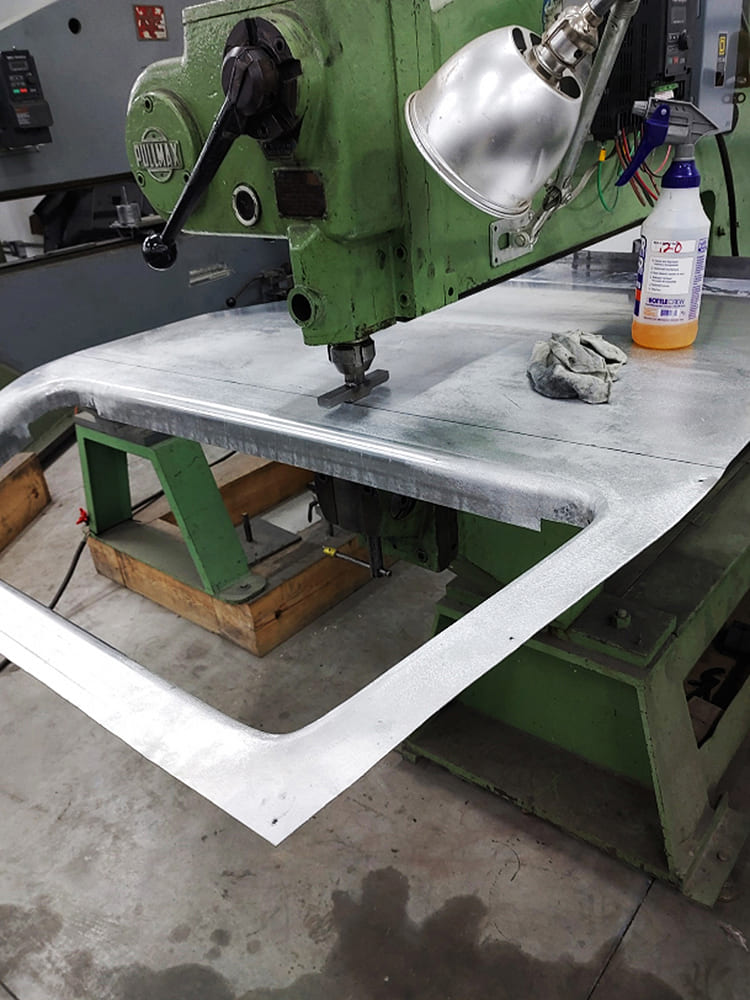
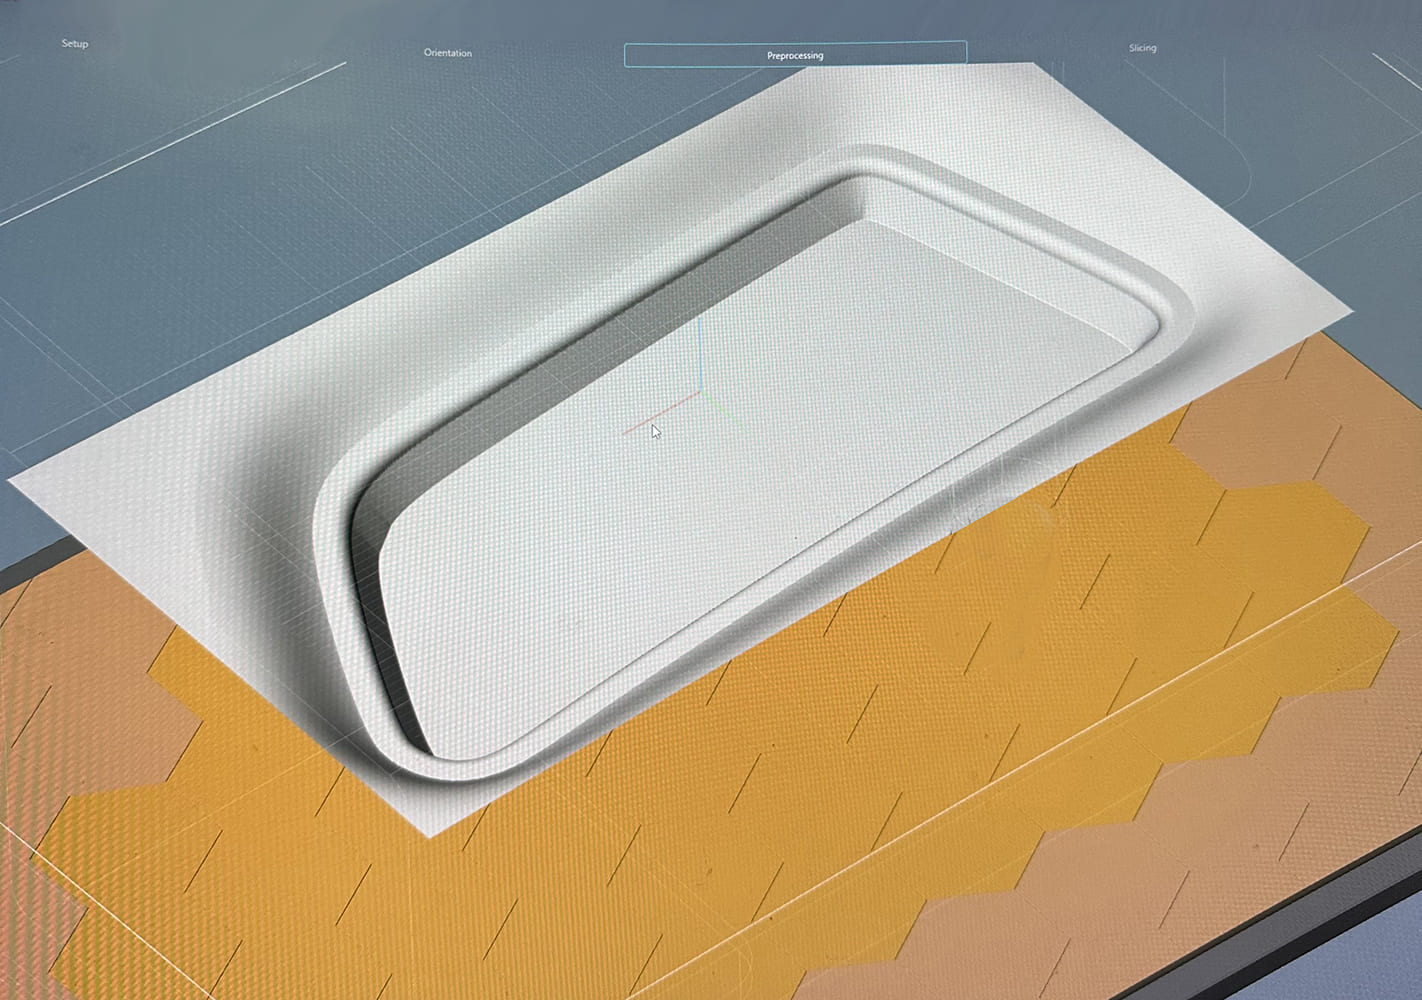
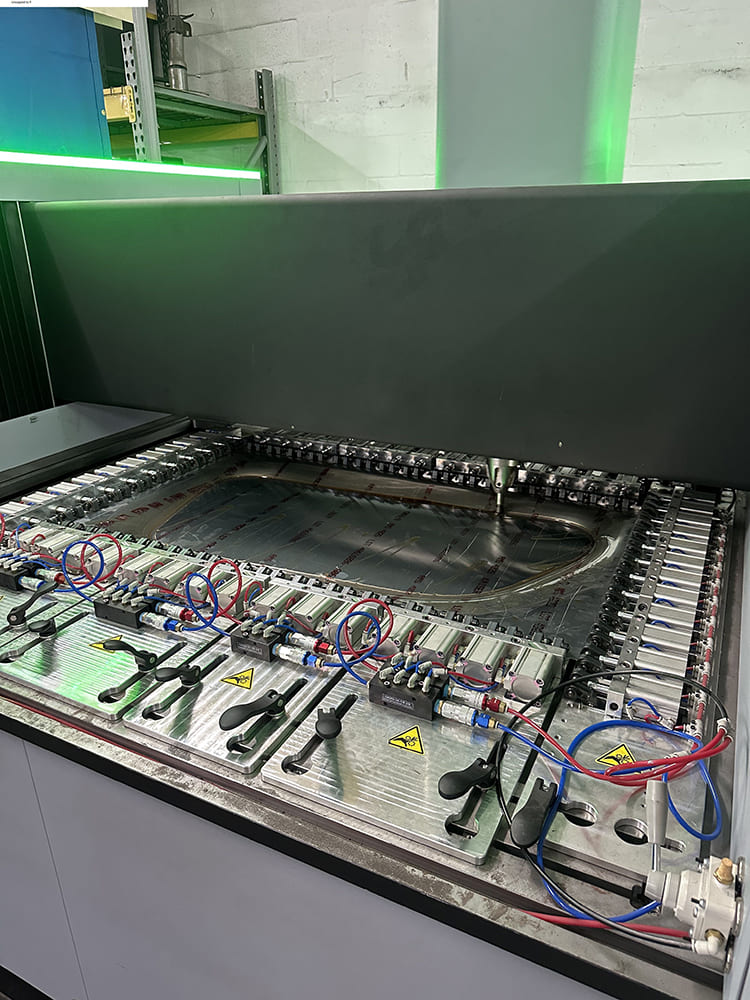
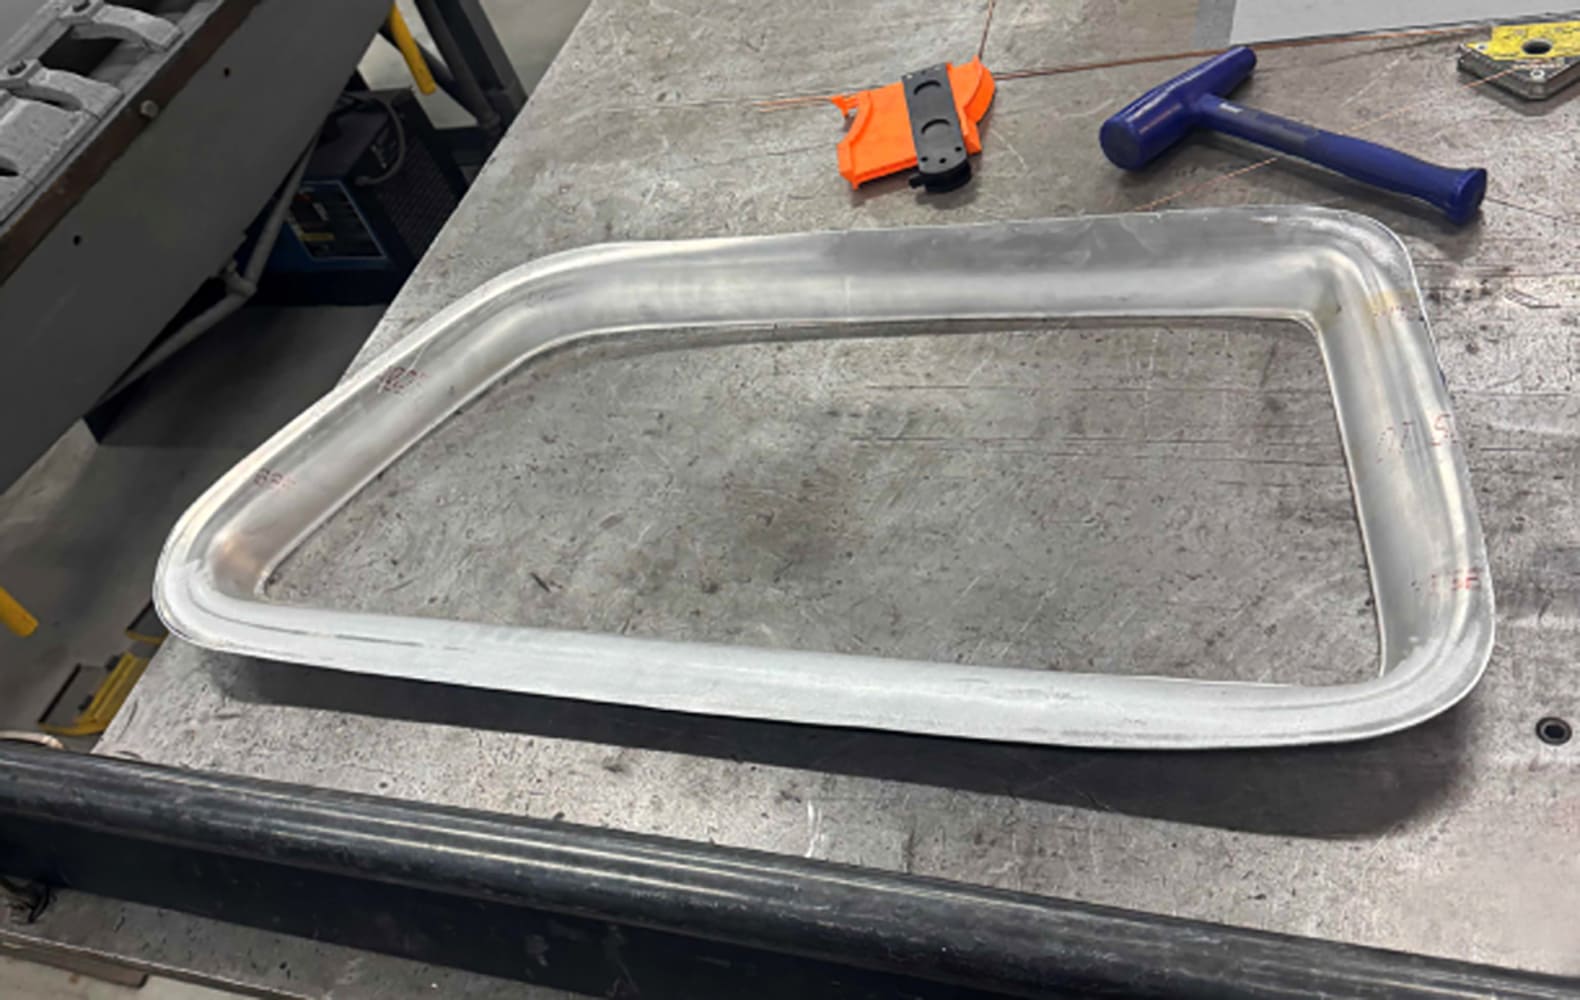
The inner trim for all windows was done in a unique way. SaltWorks has acquired two Figur Digital Sheet Forming machines, which have the capability of shaping sheetmetal very quickly and accurately. The shapes needed for the trim pieces were programmed in CAD then transferred to the Figur machine, which could form each part in about 30 minutes. CAD models are needed for only one side, since they can be digitally “flipped” to make the mirror image for the other side. This is one of the early jobs SaltWorks used these machines for, but we’ll be seeing a lot more of this style of construction.
Many intricate pieces were required to build the dash and the trim panels that finish it off.
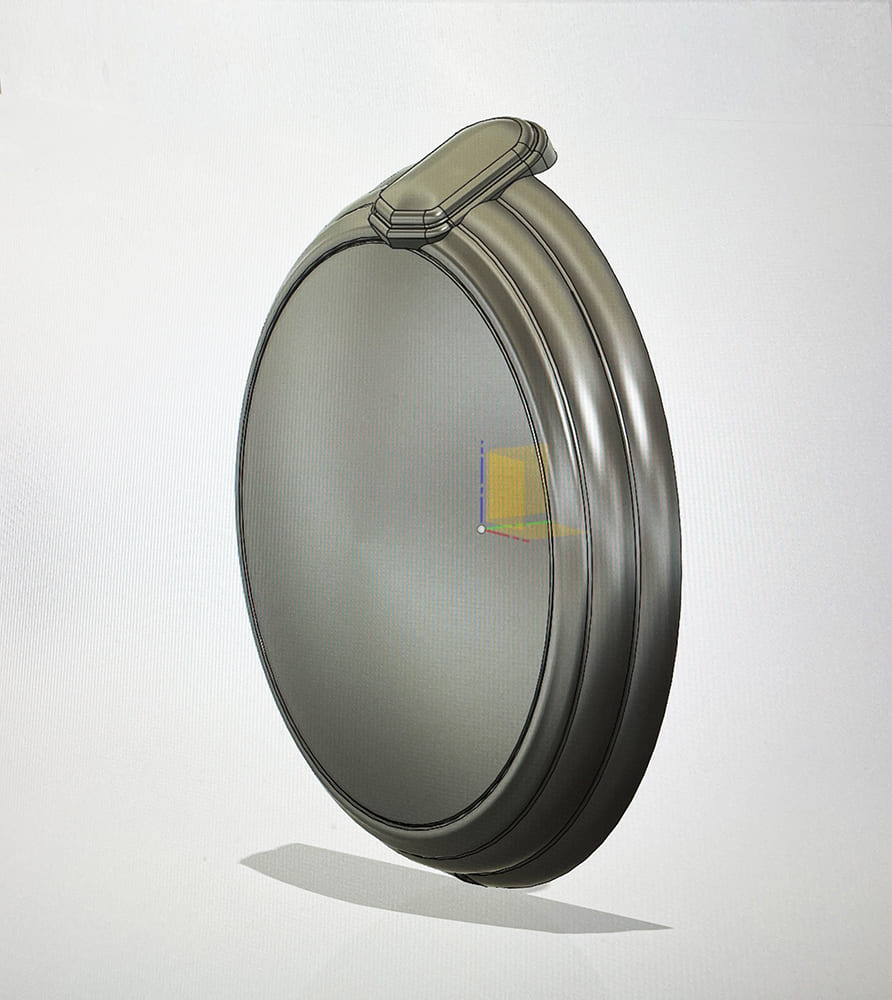
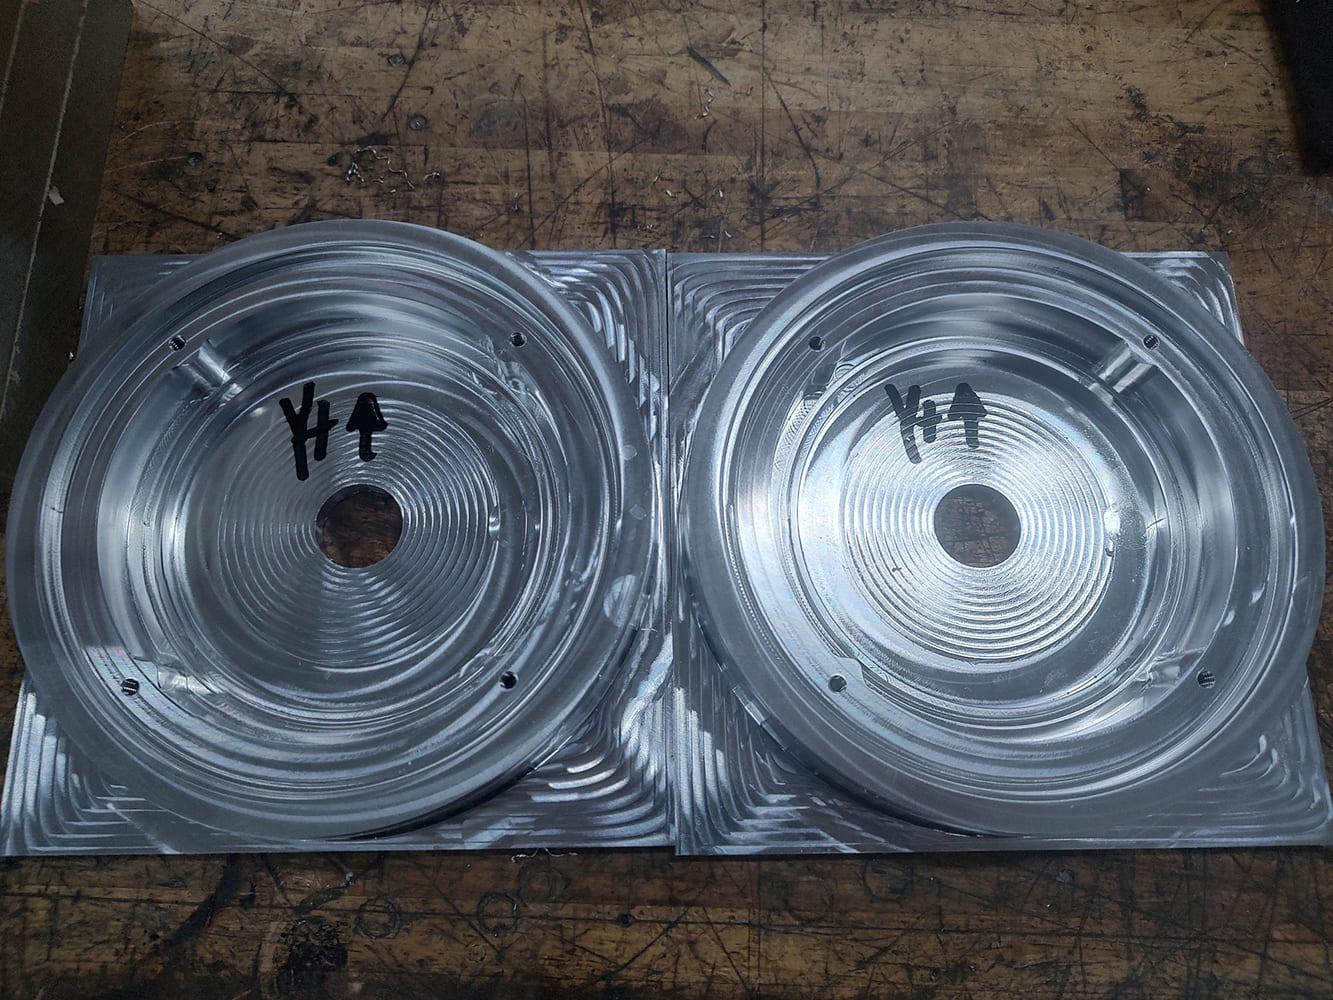
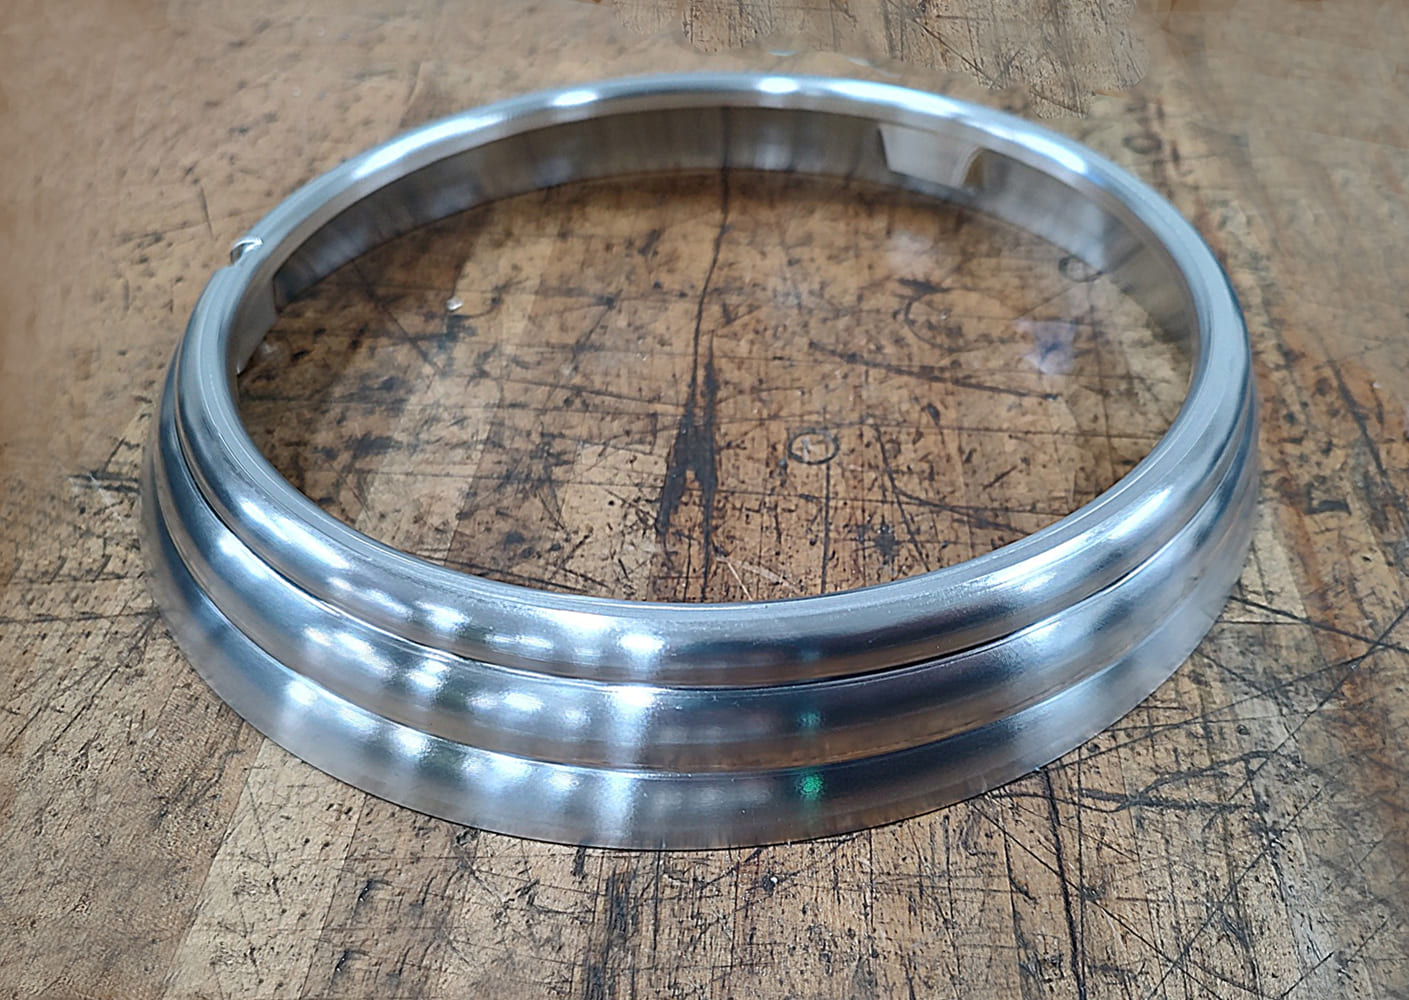
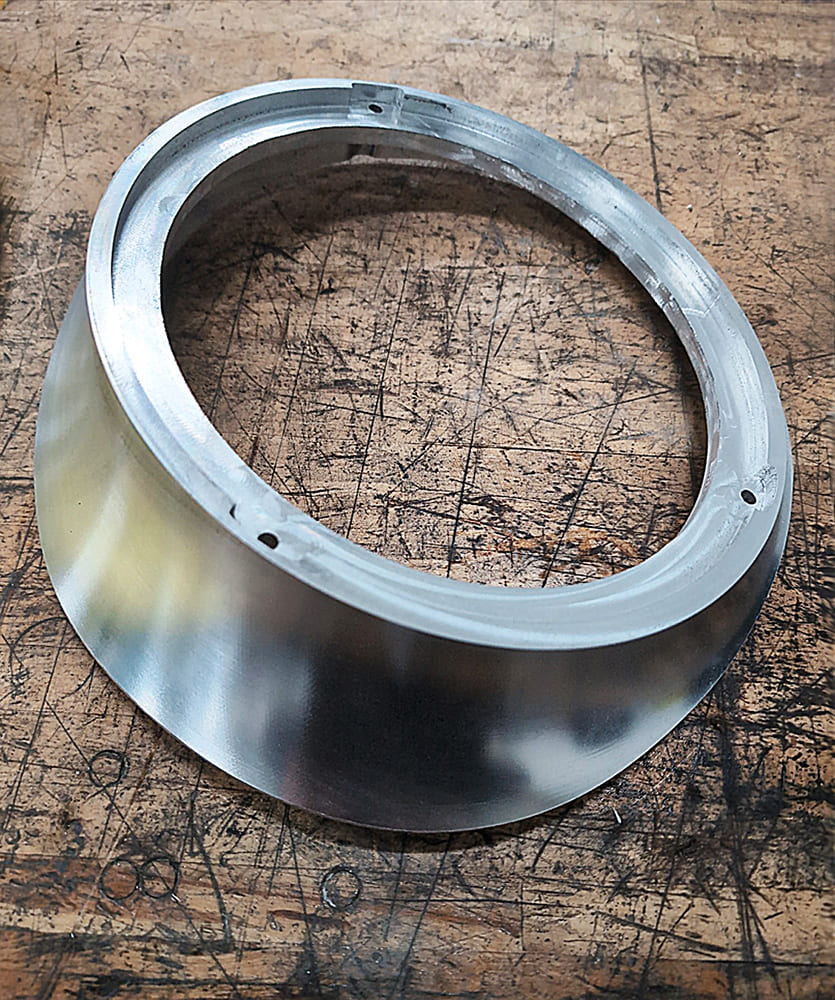
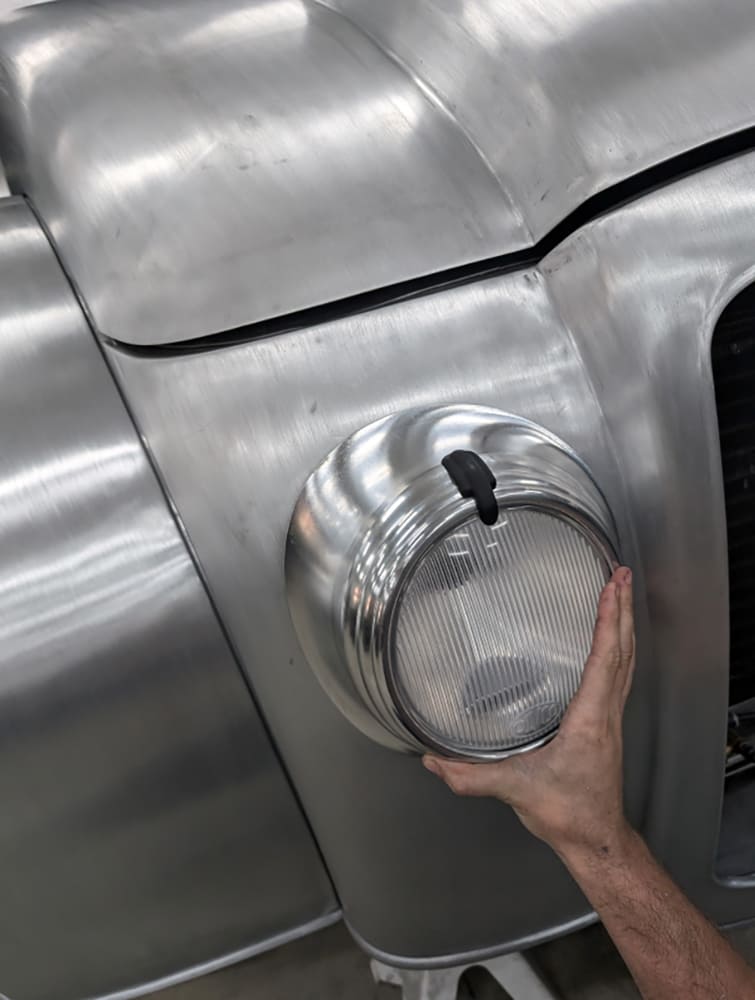
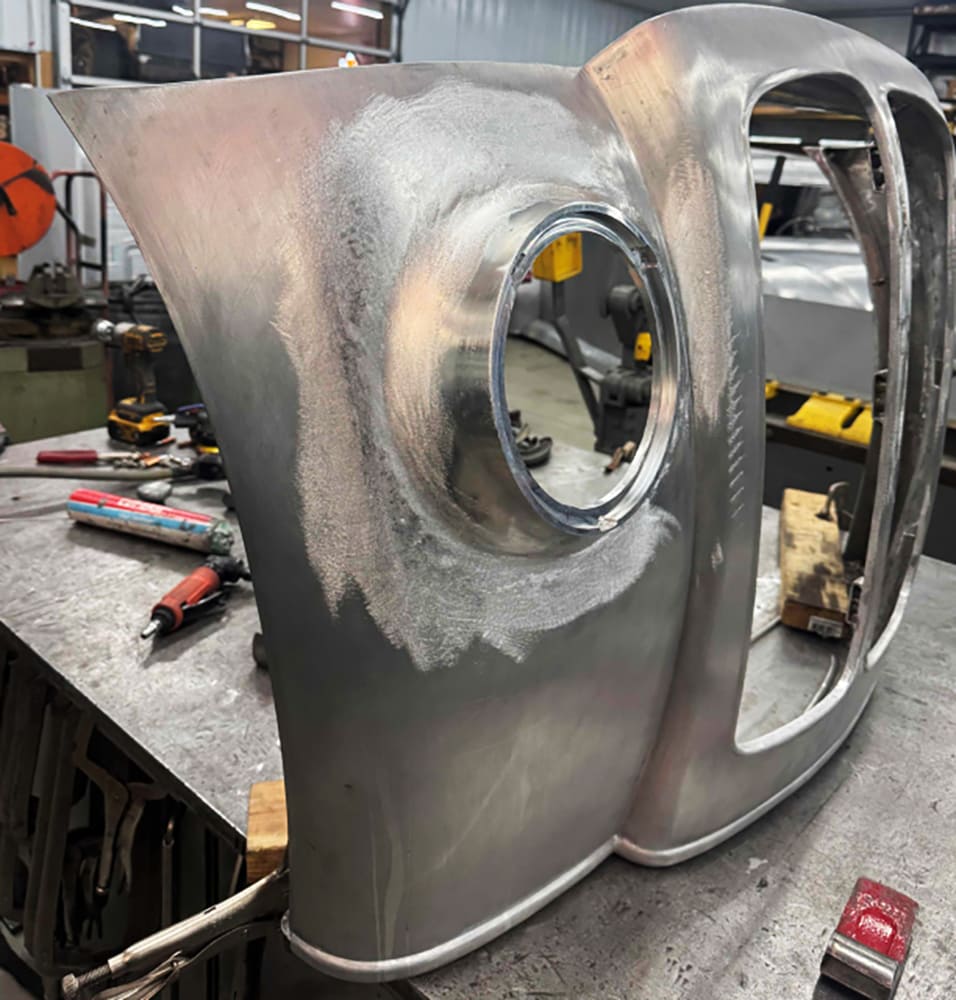
The headlights were another complicated project, with separate pieces needed for the lens, the bezel, the reflector, and the transition piece that fits against the front panel of the truck. Again, these were all modeled in CAD, then CNC machined. While it was a big job, all the parts fit perfectly and they bring a lot of Art Deco character to the truck.
The cover for the instrument cluster is another complex construction.
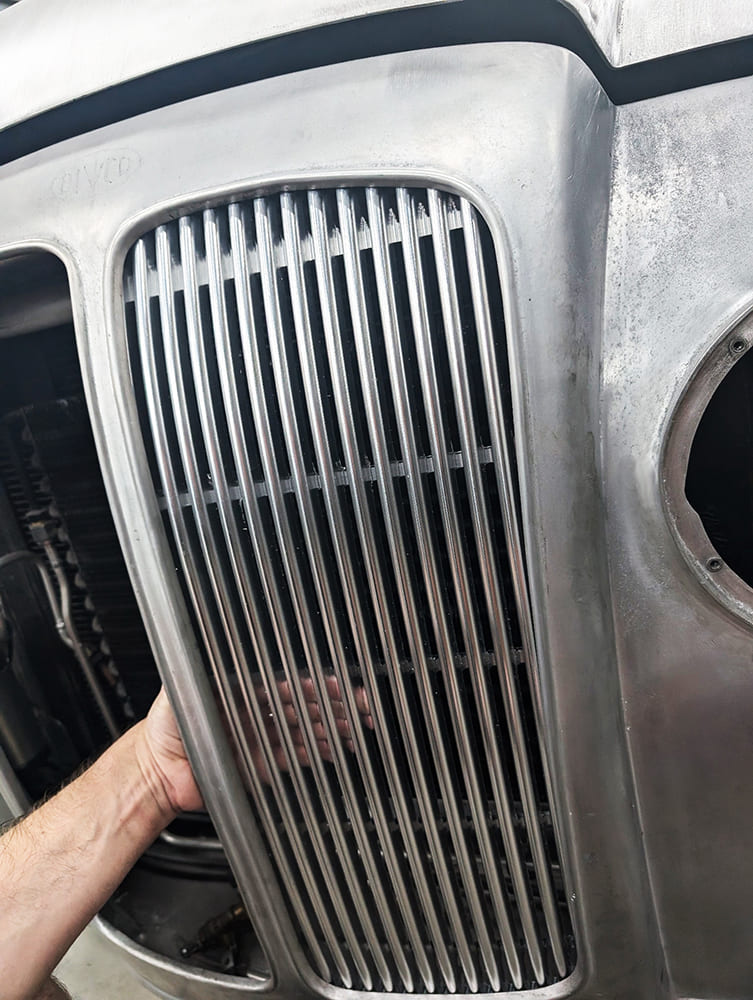
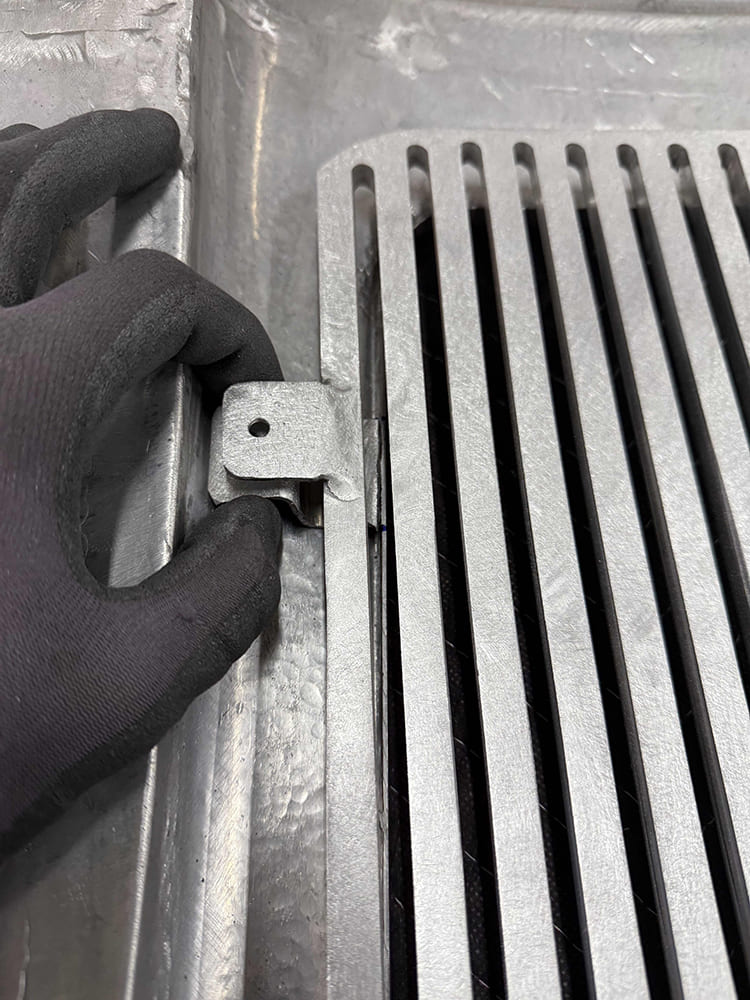
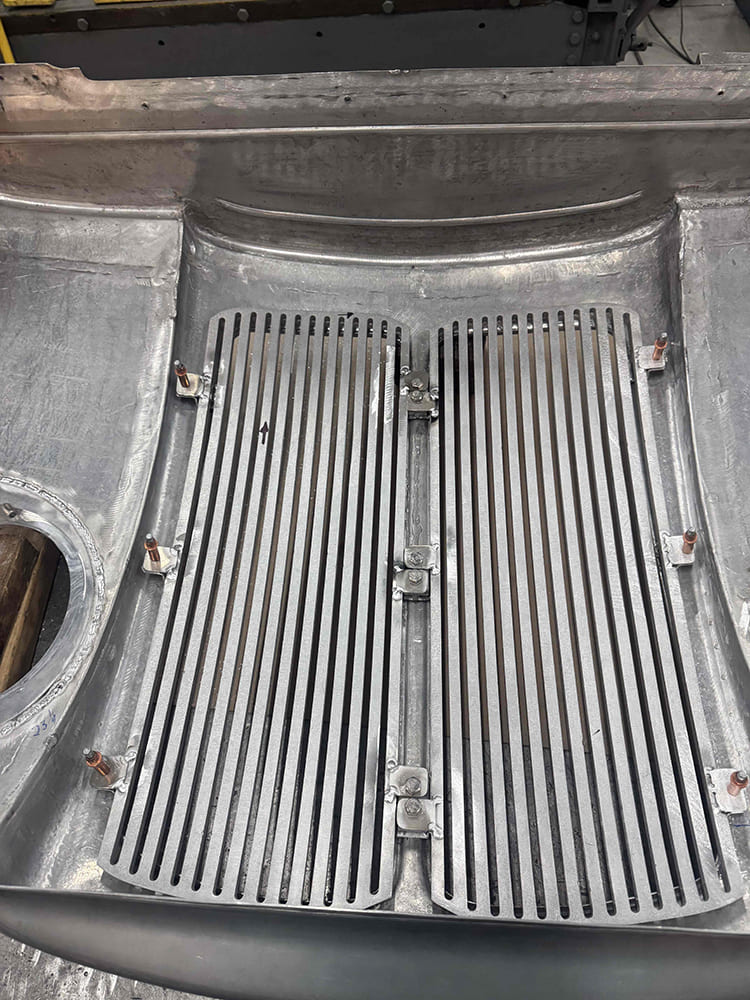
Finally, the grille was custom machined from billet aluminum. These large, delicate pieces required a sturdy mounting system, so a series of six mounting tabs was attached to each grille half.
With all the components fitted together, you can appreciate the superb fit and finish of each component.
Now that you’ve had a good look at what it took to build this incredible project, we’re sure you’ll enjoy seeing the article on the finished truck coming soon, right here.
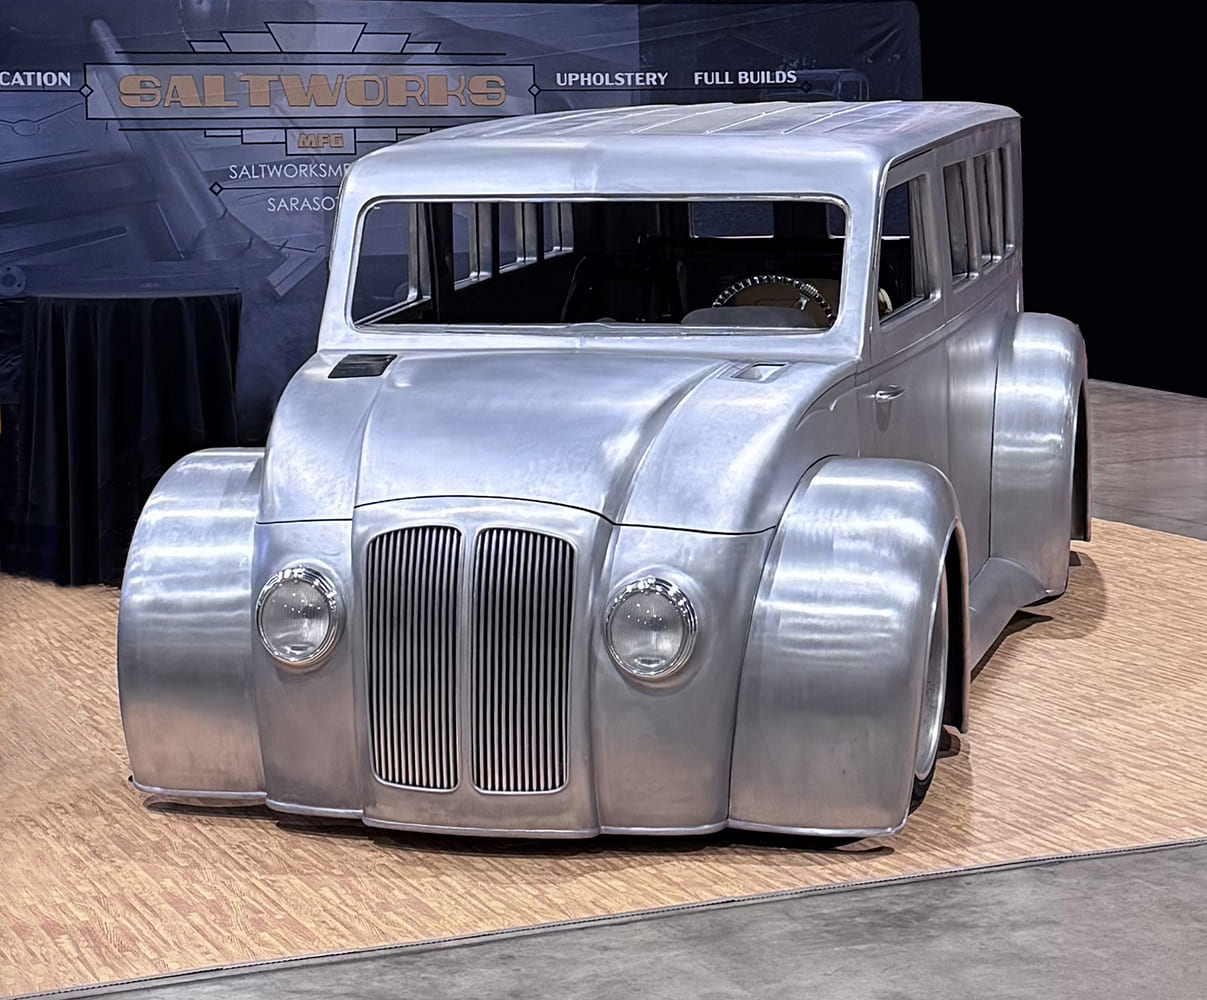
The front doors were a particularly challenging fabrication job, since they require massive strength to hold their shape over the long haul. Here the inner panels have been joined to the door edges.The upper portion of the door is made from many pieces of metal, carefully fitted to match the contours of the window opening,With the window opening finalized and the lower doorskin attached, a Pullmax machine is used to form the reveal.At this stage the reveal is formed, and the doorskin is attached to the inner panel. Note the consistency of the door gaps.SaltWorks has acquired two state-of-the-art Figur Digital Sheet Forming machines. One of the early jobs they did was making the inner window trim for the DIVCO. This is a CAD model of the passenger door trim. The process generally requires a border of metal around the perimeter of the finished part.This is the Digital Sheet Forming machine in action. The edges of the panel are securely clamped and a blunt-nosed stylus traces the outline of the part, pressing the metal down incrementally while it is backed by a urethane cushion.These panels are fully formed, and you can see the extra metal left around the perimeter of the inner window trim. The forming of a shallow part like this takes only about 30 minutes, while a similar part would take days to form by hand.Here’s the window trim with most of the waste metal removed. Some detail trimming will be required to finish the part, but this is an elegant way to make such a complex component from a single piece of metal!The headlights of the truck are completely custom made and styled with an Art Deco look sympathetic to the original DIVCO.The headlight bezels were CNC machined from aluminum billet. The first operation has been performed on these parts.With the finish operations on the bezels completed, you can appreciate their distinctive ribbed shape.The headlight lenses were carved from heavy bocks of clear acrylic plastic.A transition piece was needed to bridge the gap between the front panel and the headlight bezel. Again, this is CNC machined from billet aluminum on a Haas Machining Center.Here are the lenses, bezels, and transition pieces, polished and assembled.The headlight assemblies are carefully positioned on the front panel.A special fixture was made to ensure the headlight housings were parallel, plumb, and level.The headlight housings have been welded to the front panel and the joints are being metalfinished.Like so many other intricate components, the grille was machined from solid blocks of aluminum.Here are the grille halves after machining and some hand detailing.One of the grille halves is test-fitted into the center panel.Several mounting tabs were welded to the perimeter of the grille inserts.Here you can see how the elements are securely held together so the fasteners are invisible from the front.This is how the truck was displayed at the Grand National Roadster show in Pomona, CA. It is a beautiful testament to the work it took to create this one-of-a-kind masterpiece.
We use cookies to ensure that we give you the best experience on our website. If you continue to use this site we will assume that you are happy with it.