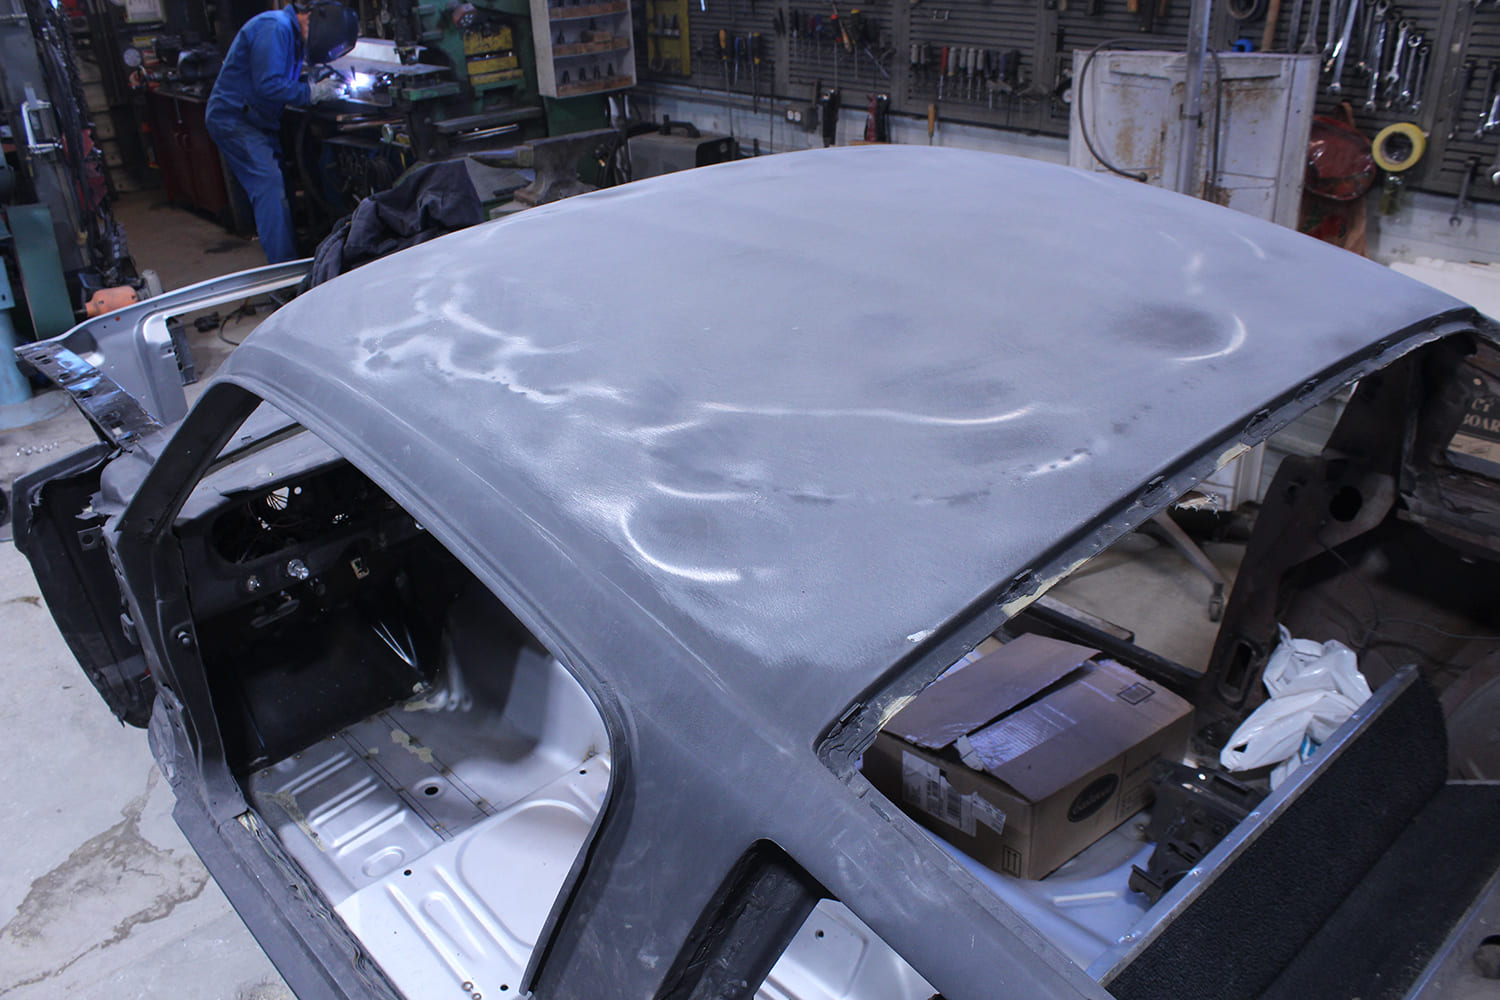
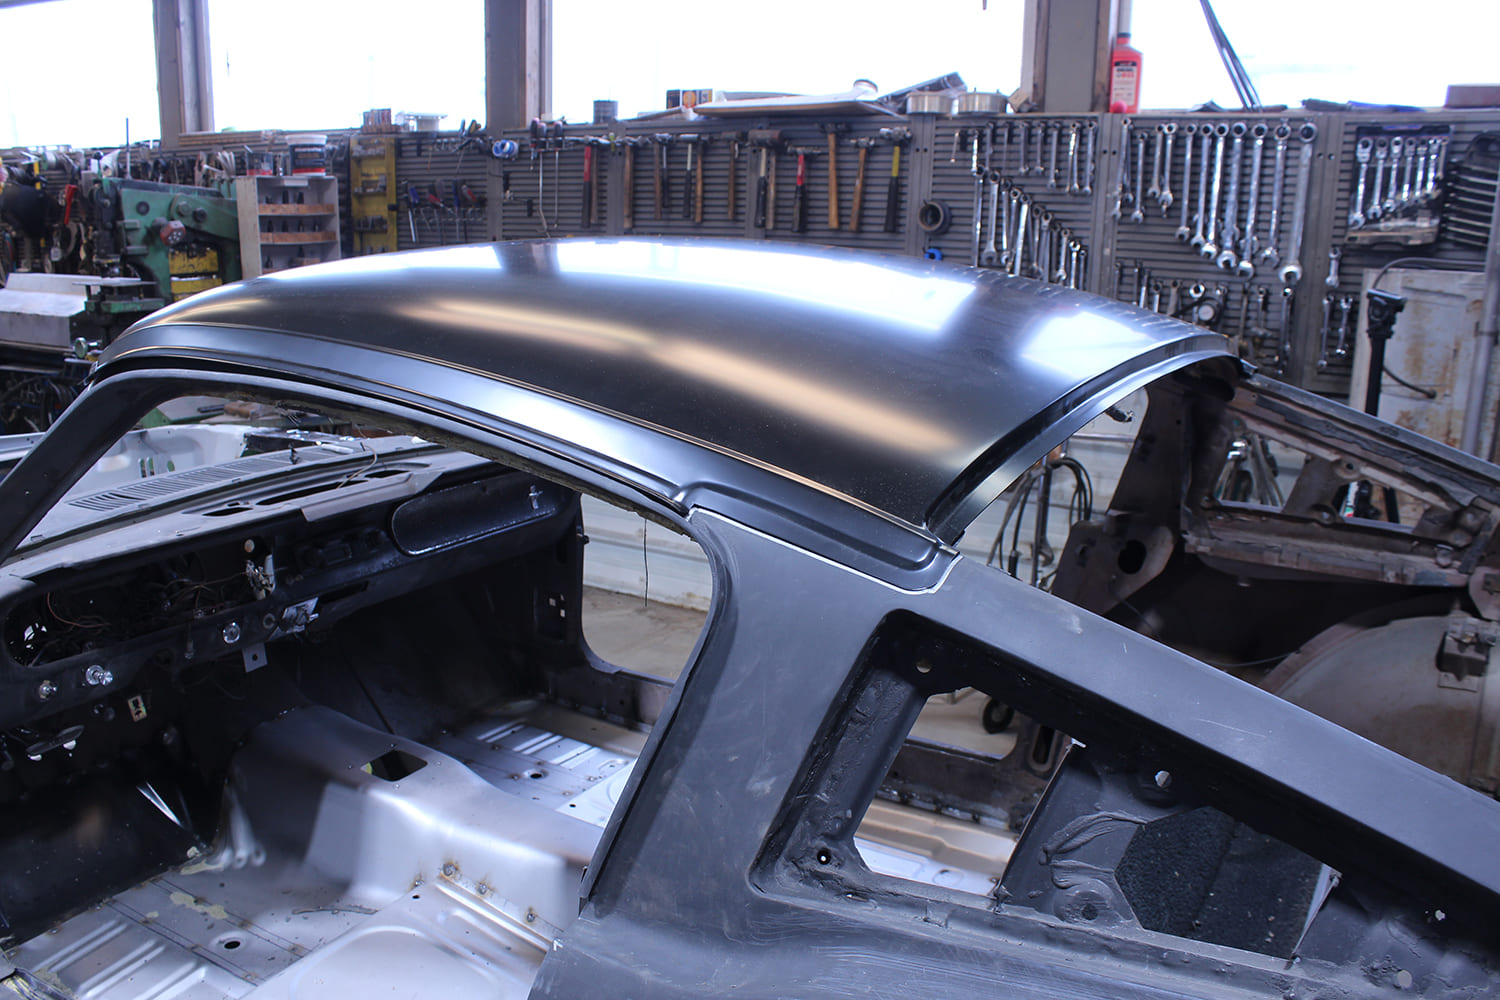
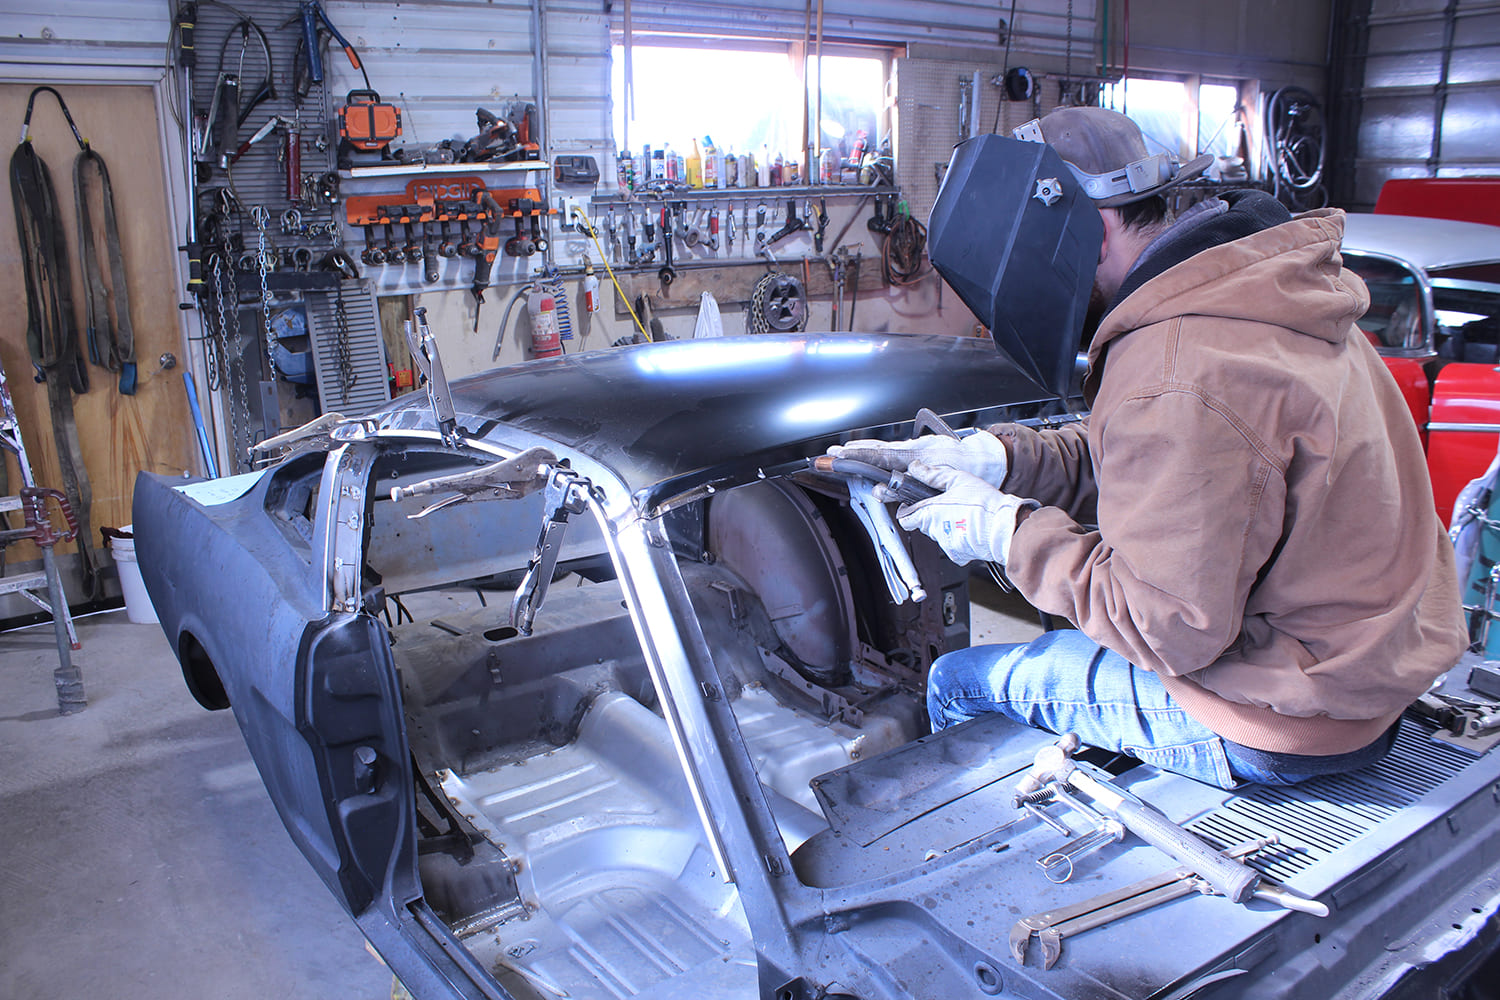
Colin and Tate Radford have rebuilt this 1965 Mustang fastback from nose to tail, with sheetmetal from Golden Star Classic Auto Parts and suspension components from Classic Performance Products. Their latest accomplishment is the installation of a new roof panel and driprails.
We’ve been following along as Colin and Tate Radford of Radford Auto Body resurrect a 1965 Mustang fastback. When they determined that the roof was beyond repair and needed to be replaced, they turned to Golden Star Classic Auto Parts for the sheetmetal and to The Eastwood Company for a lead-free body solder kit to ensure the installation would adhere to the same basic techniques Ford used so many years ago.
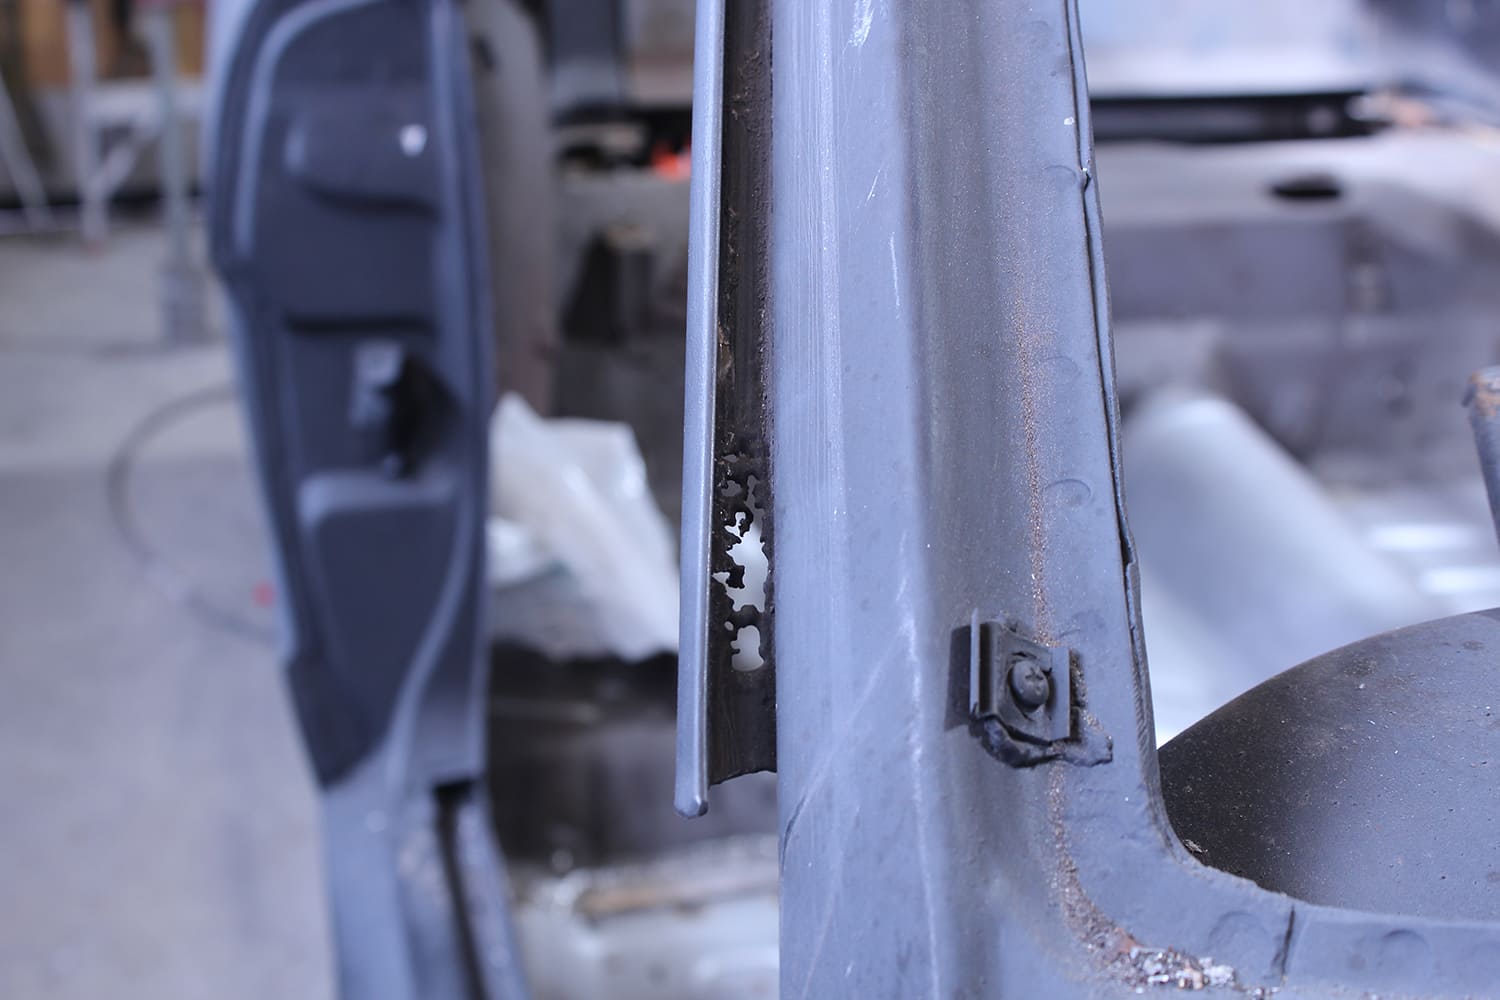
It seems that someone mistook the Mustang’s roof for a trampoline and jumped on it—the metal was stretched to the point that replacement was the best option.
For decades, auto manufacturers used lead (actually a combination of lead and tin) to fill gaps in various body panels, such as the top of the Mustang where it joined the windshield posts and B-pillars. Although lead was easy to form, adhered well, and was flexible enough to resist cracking, it was also used by customizers, giving rise to the term “leadsled. ” Despite all the advantages lead offers, there is a significant concern: lead is toxic. However, for those who want the benefits of lead without any health risks, lead-free solder is now available from The Eastwood Company.
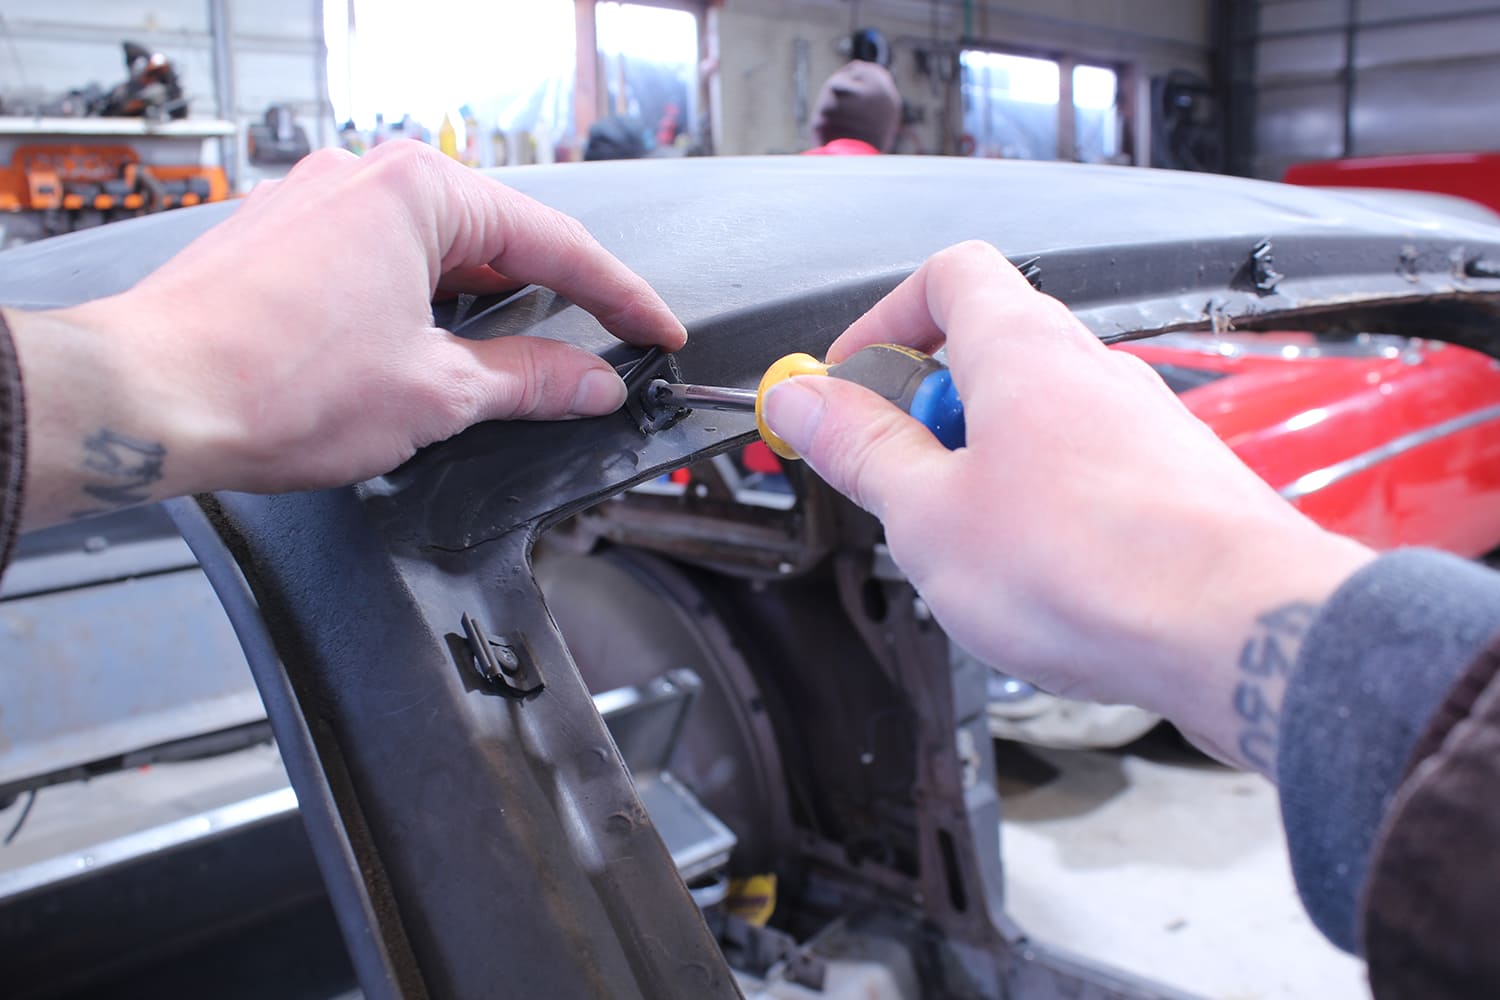
The first step in replacing the roof panel involved removing the retention clips for the windshield and rear window trim.
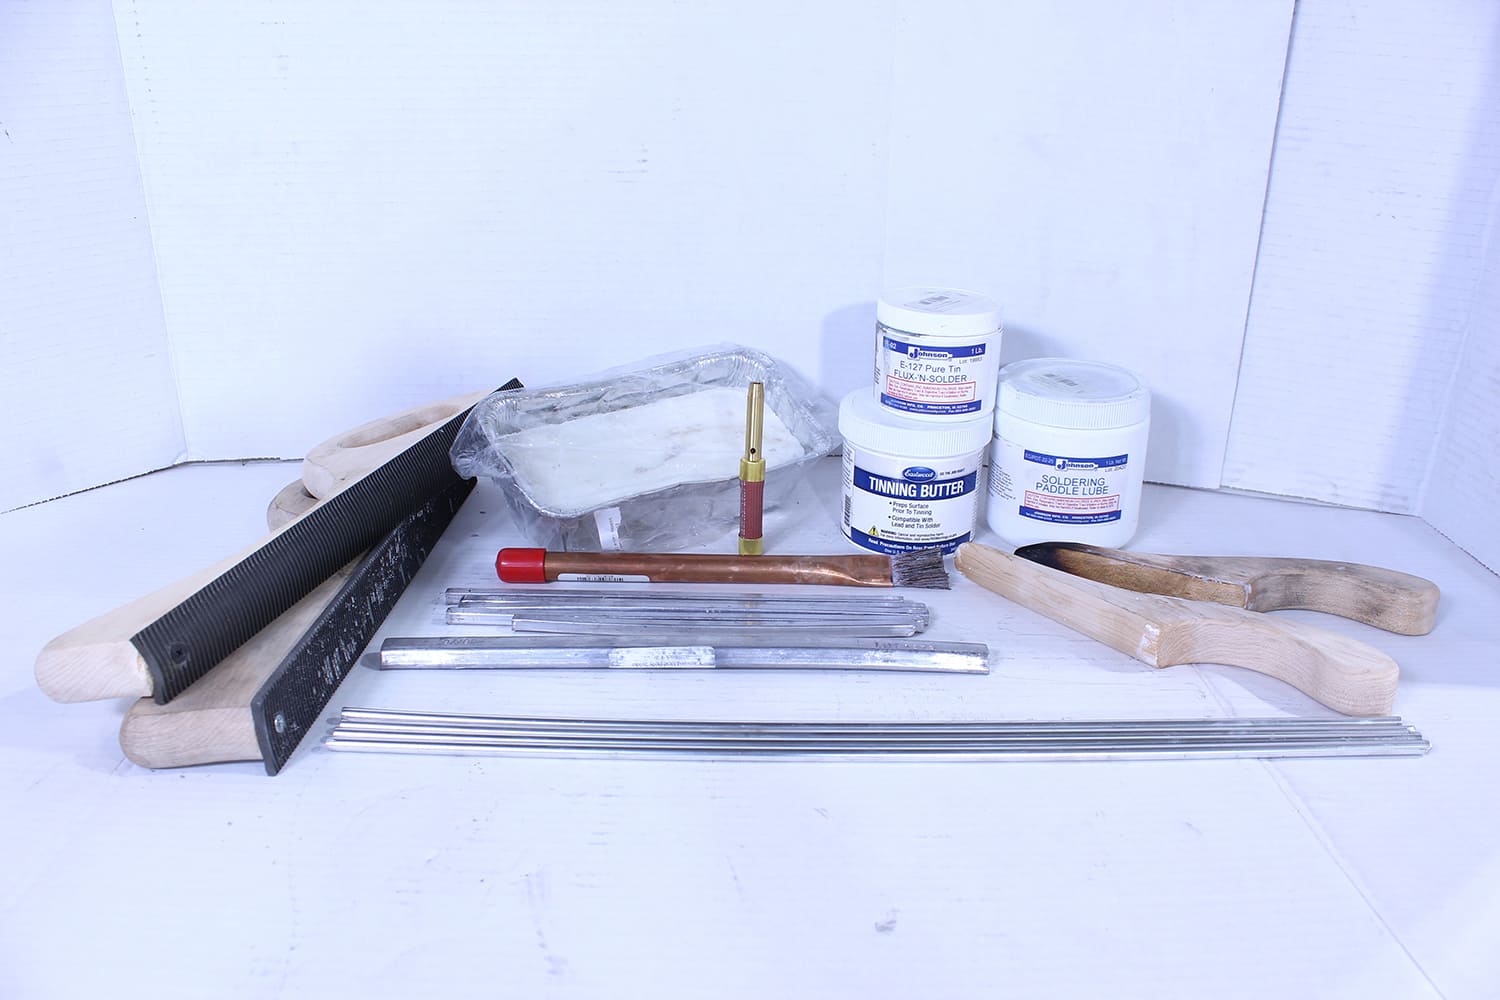
Eastwood offers several lead-free body solder kits, and Colin and Tate opted for the Deluxe version (PN 11464). It includes:
5 lbs. of lead-free solder
1 lb. Eastwood flux for lead-free body solder
4 flat paddles
2 half-round paddles
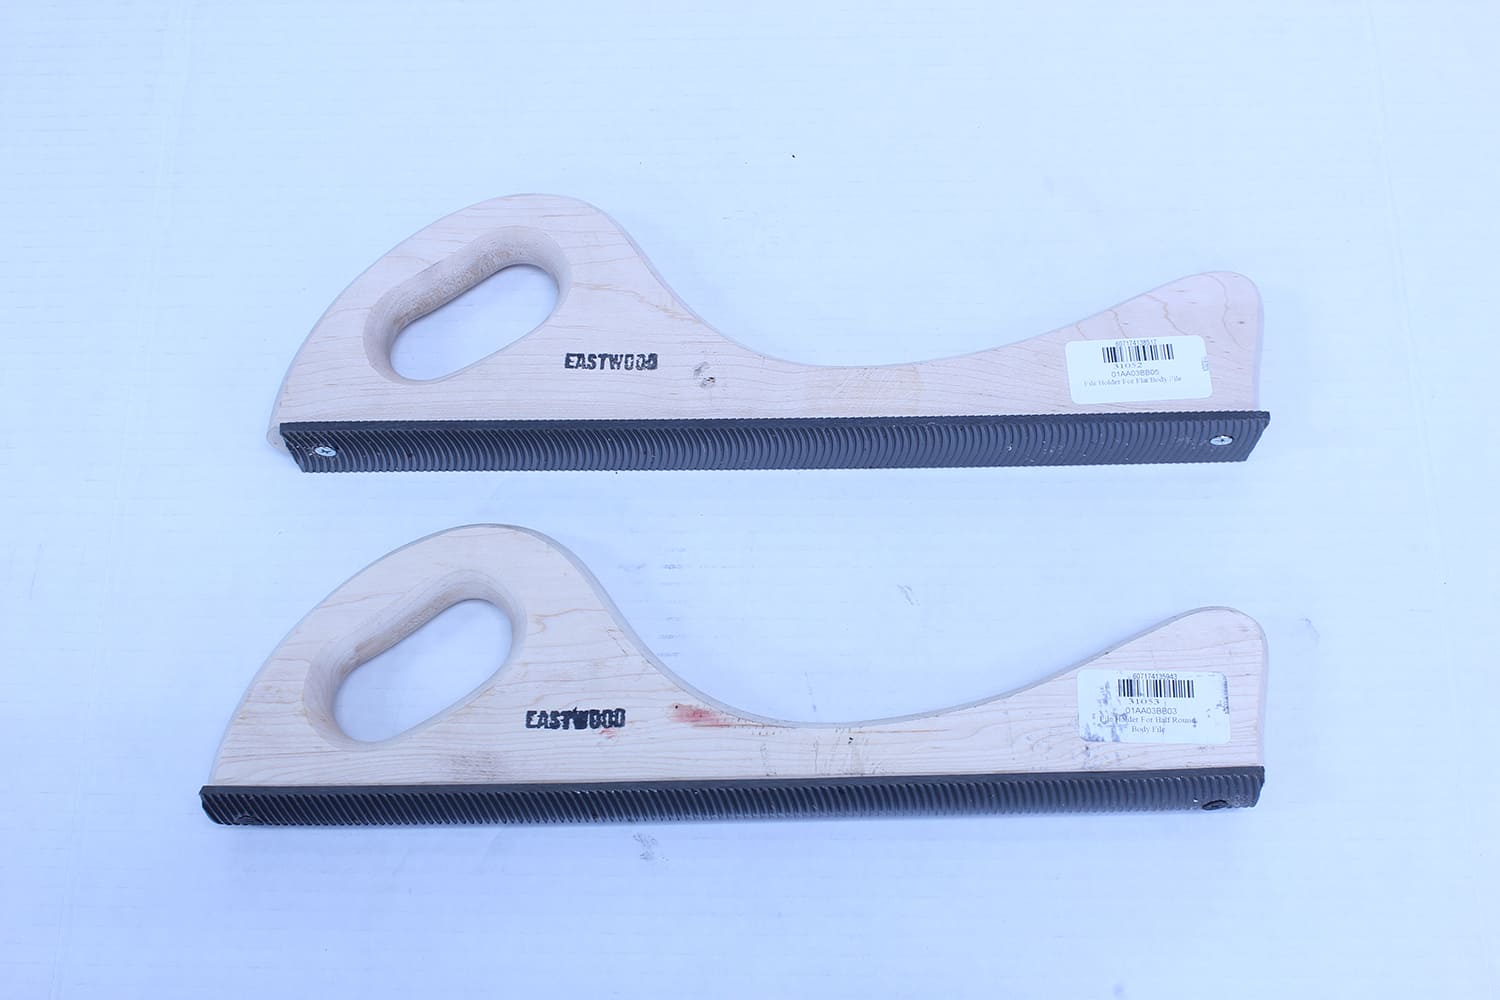
2 file holders
2 body files (flat and half-round)
1 lb. Eastwood Paddle Lube
1 lb. Eastwood flux
1 reusable fiberglass acid brush
Instructional DVD
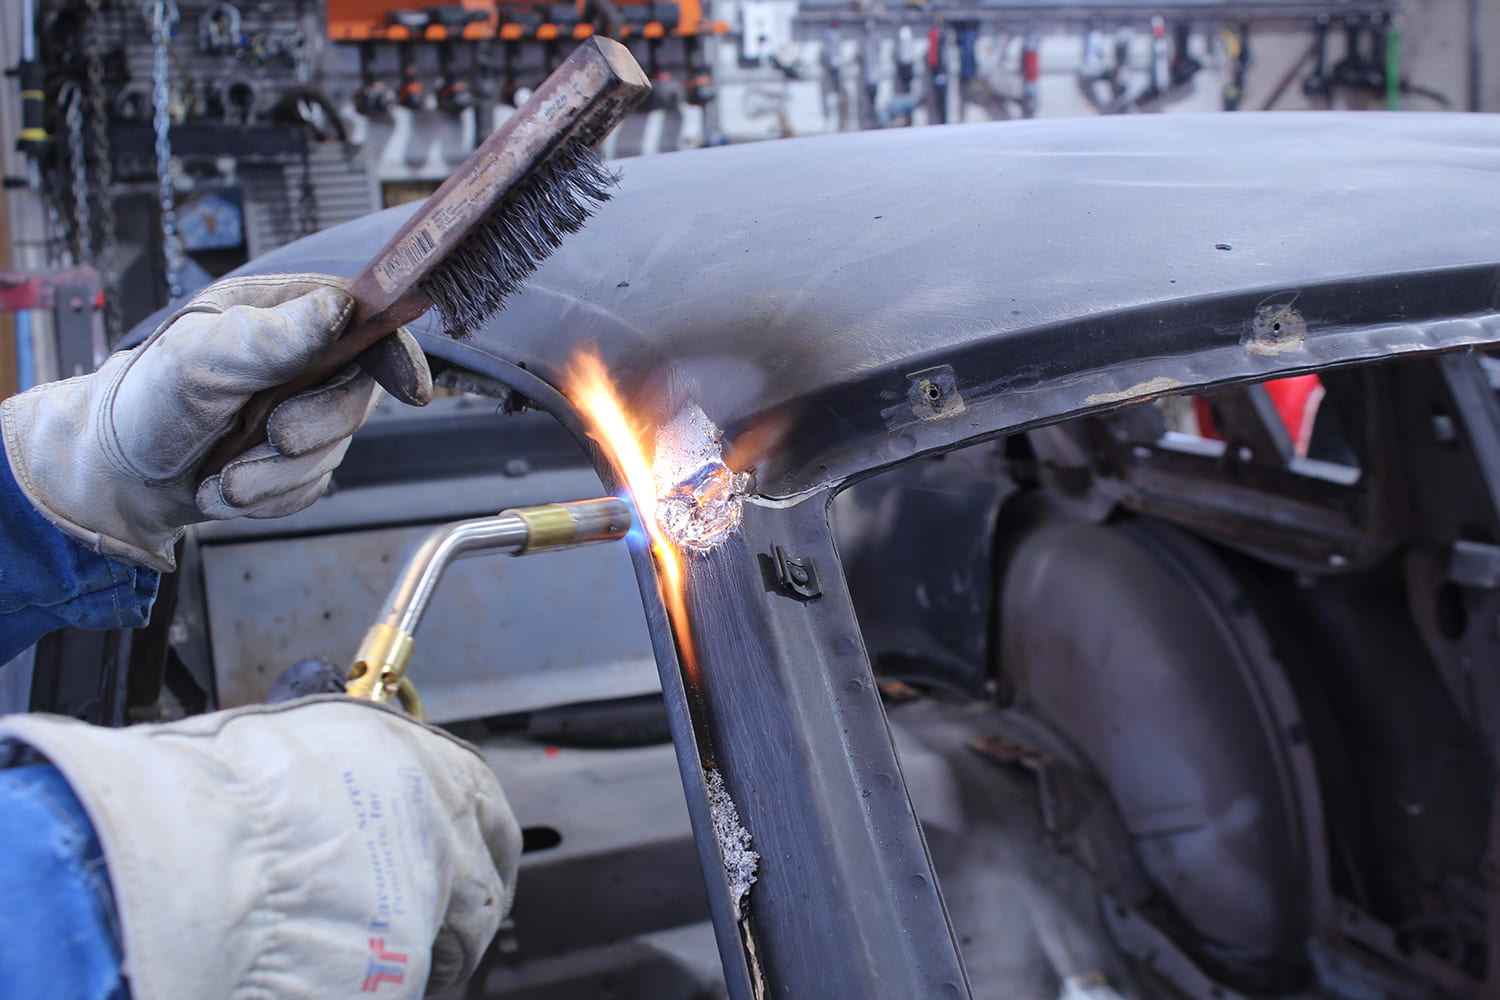
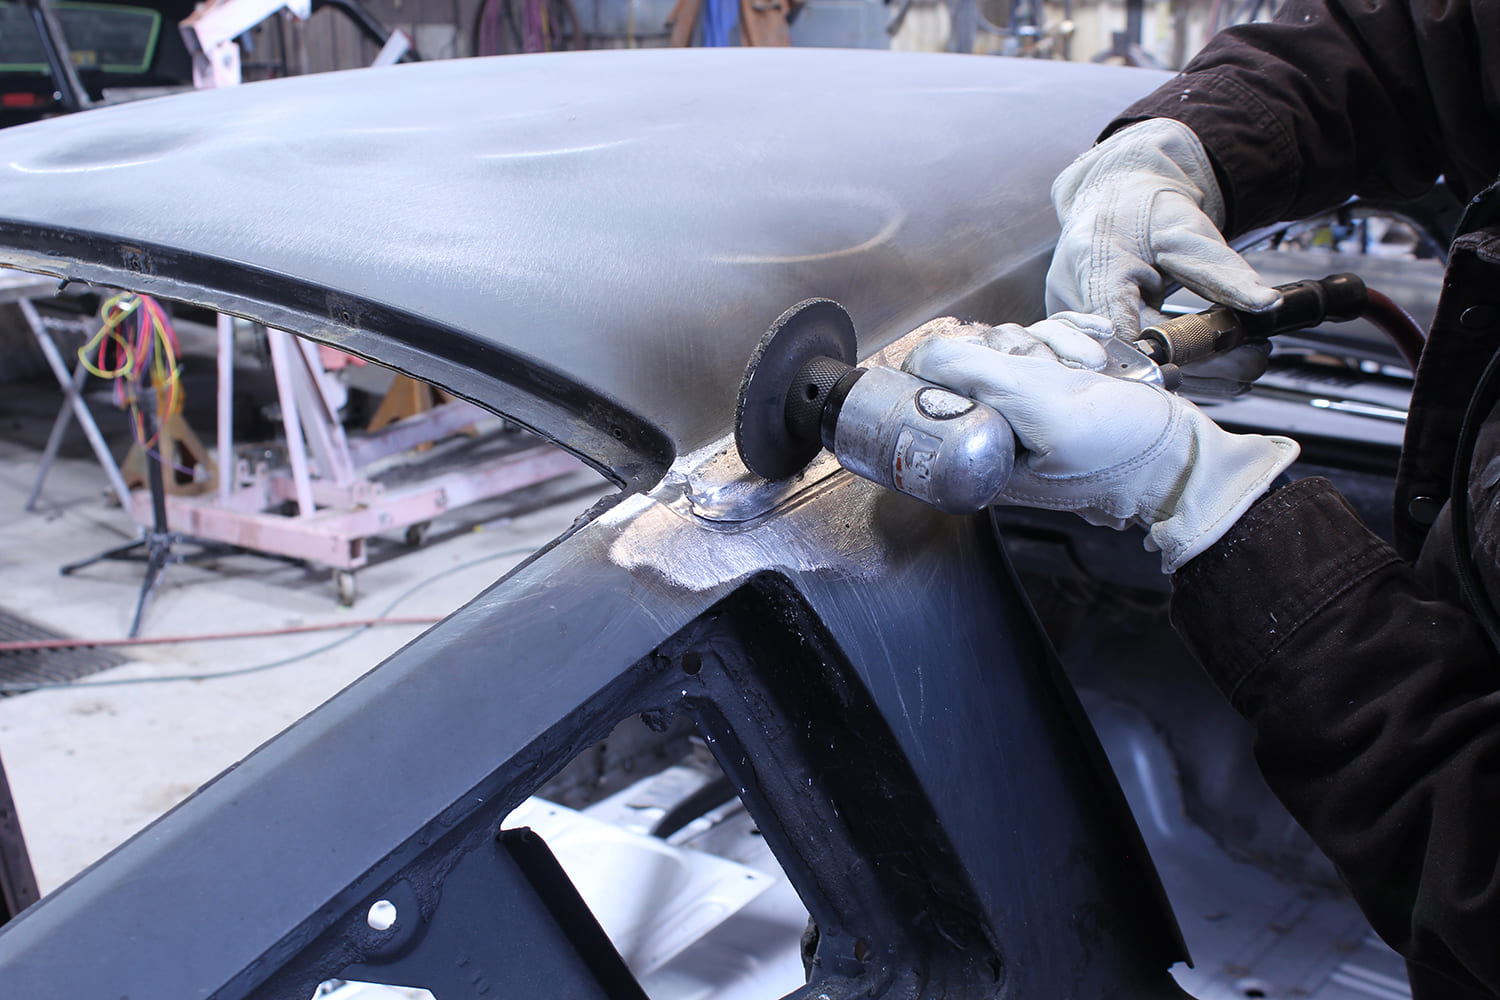
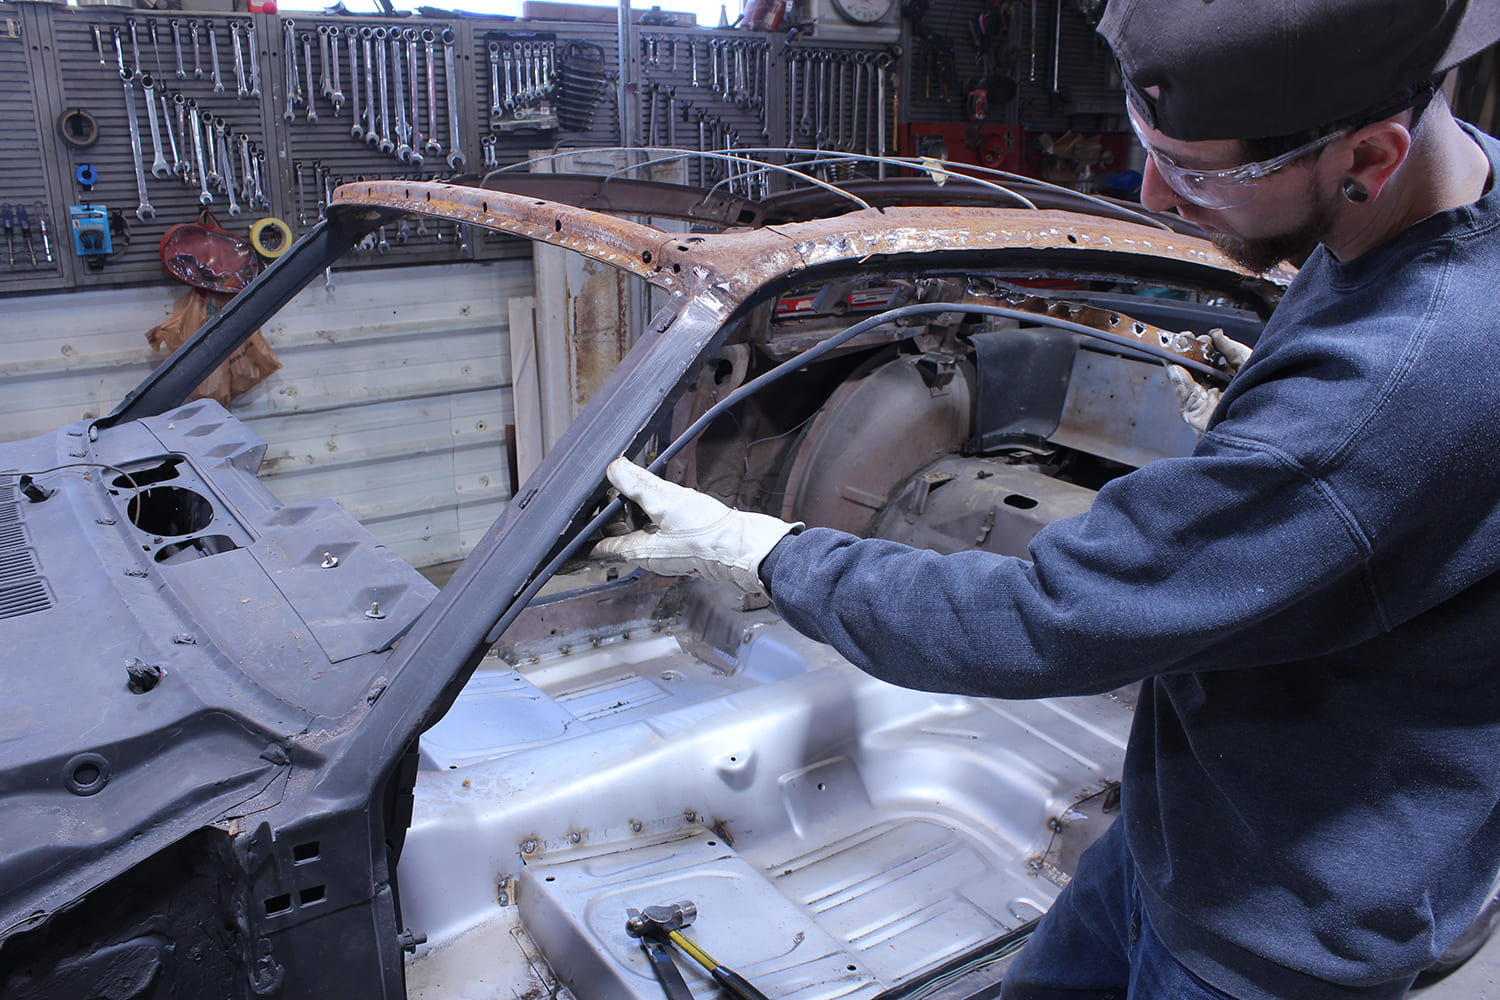
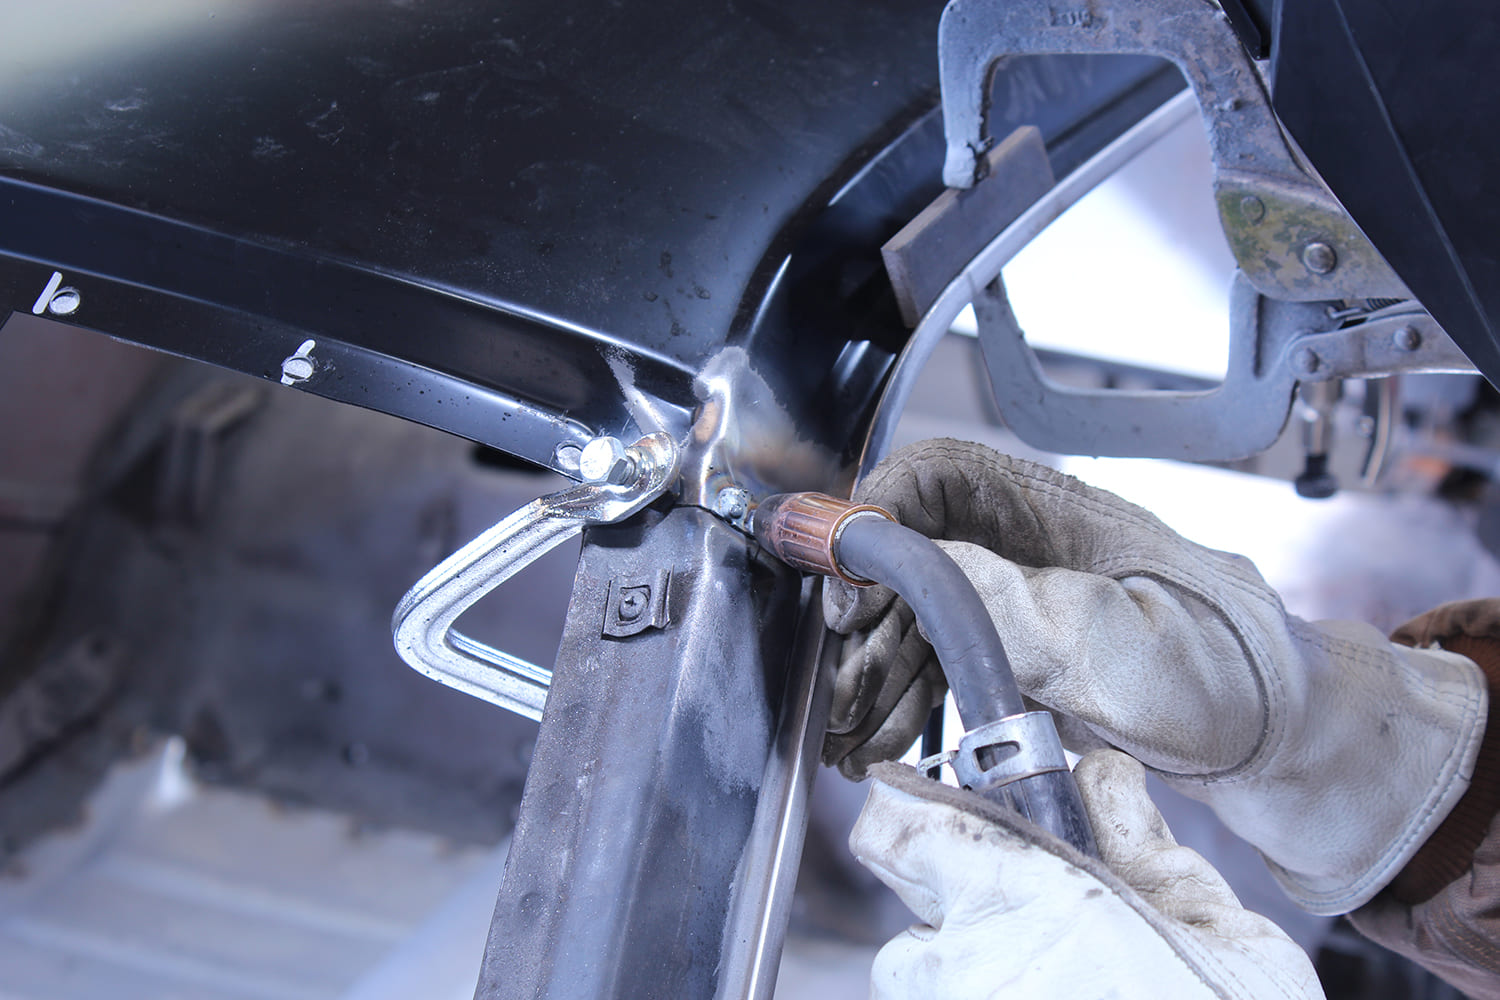
A propane torch and a wire brush were used to remove the factory-applied lead where the top panel met the A- and B-pillars, exposing the spot welds underneath.
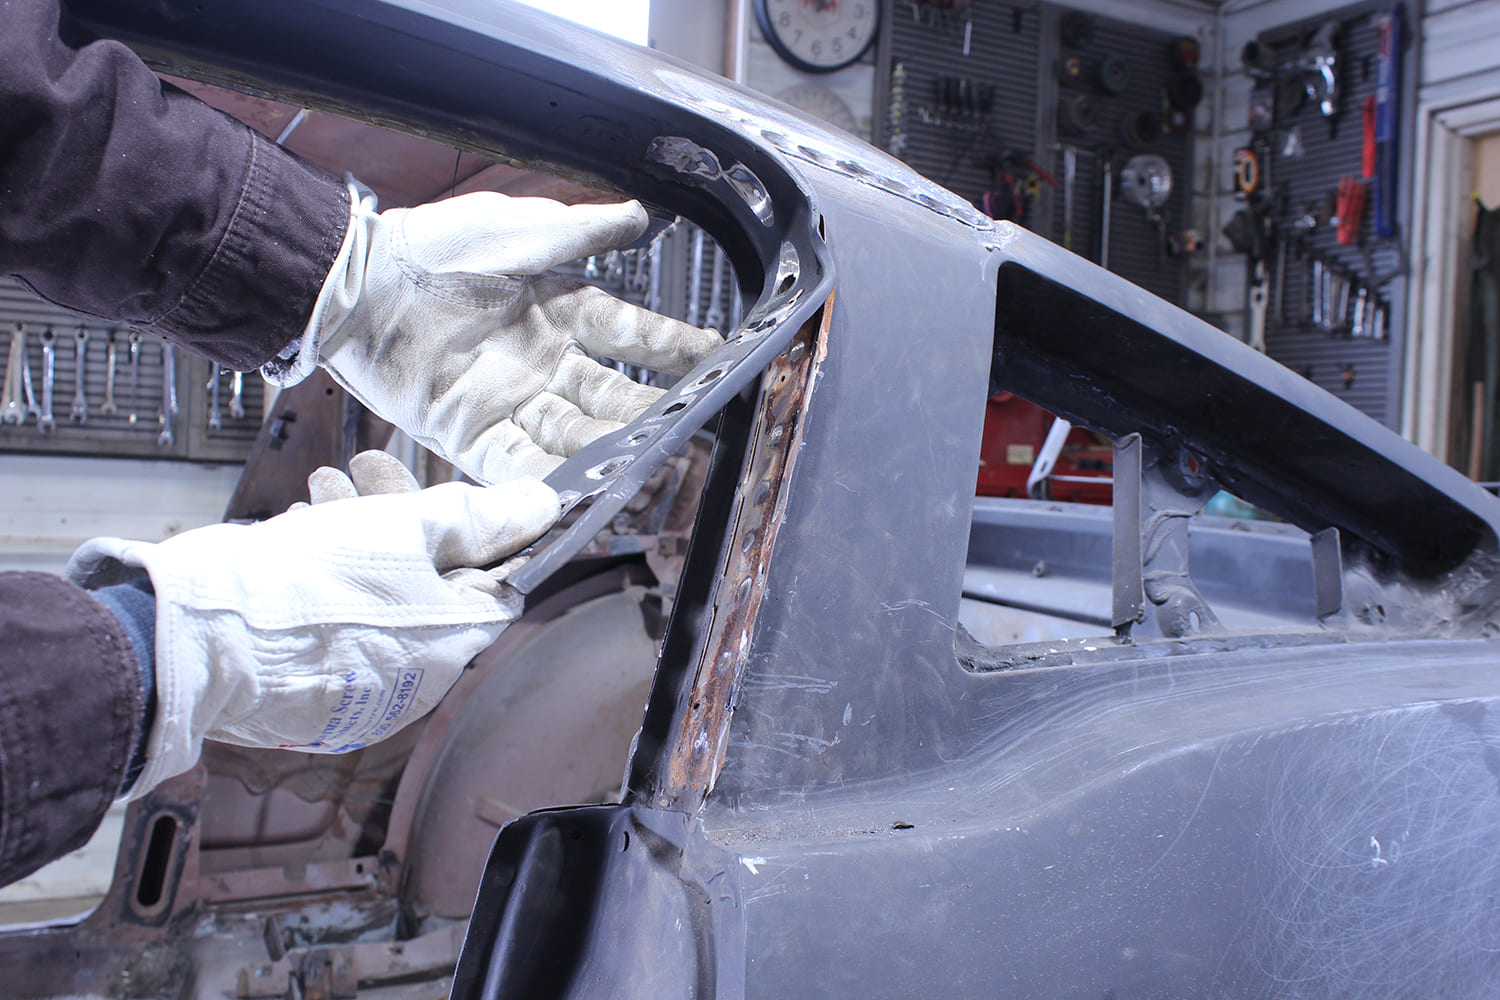
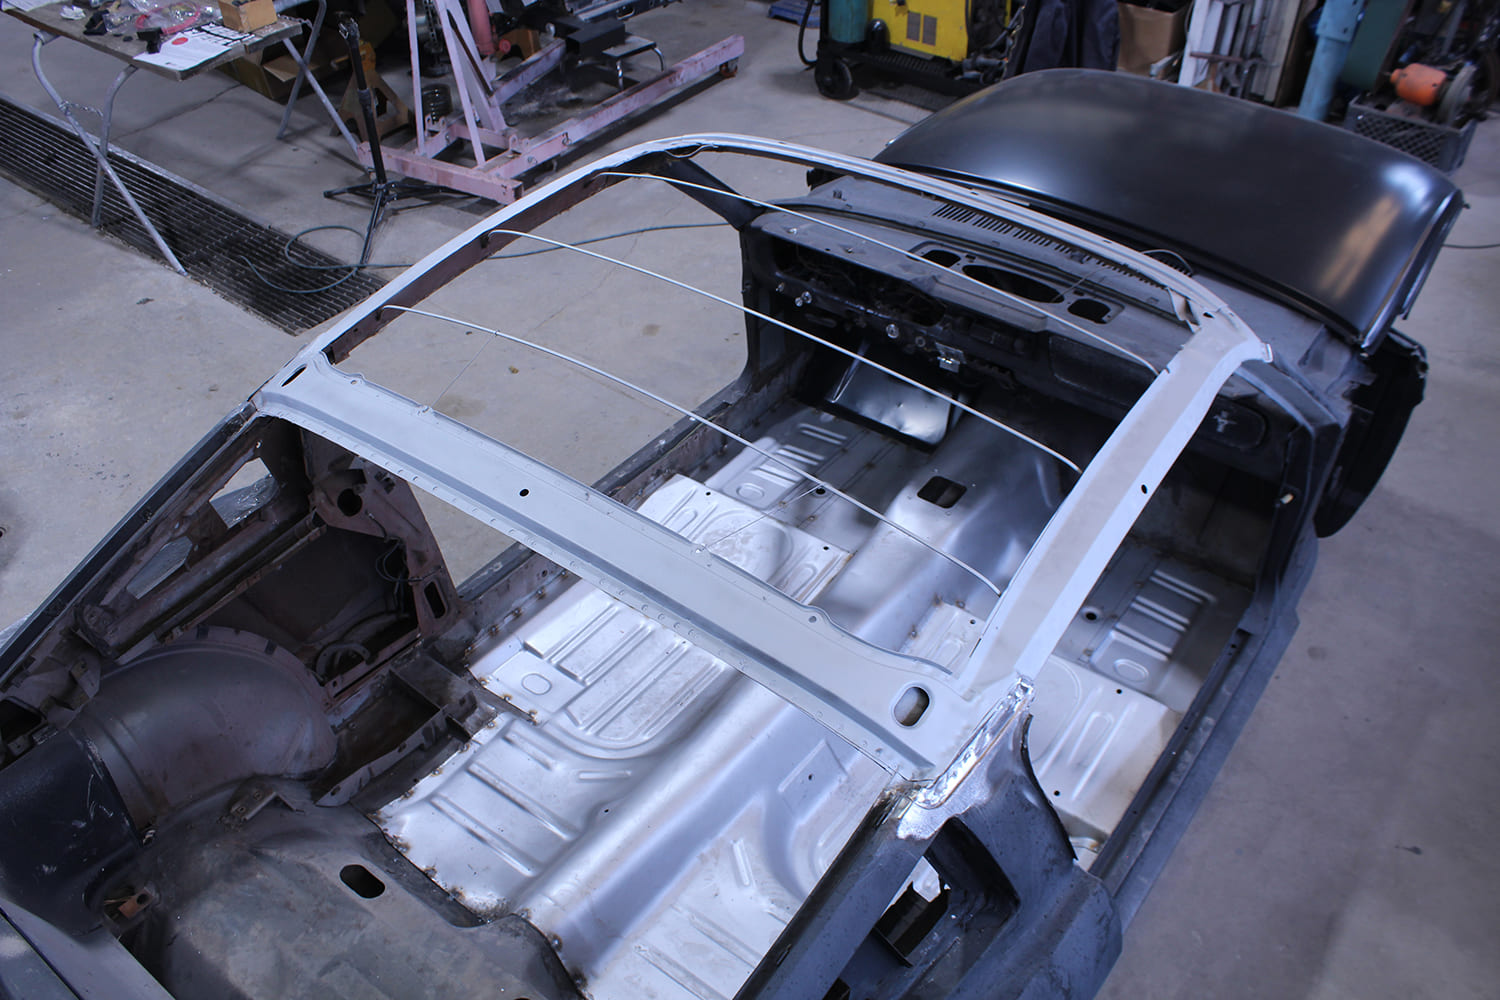
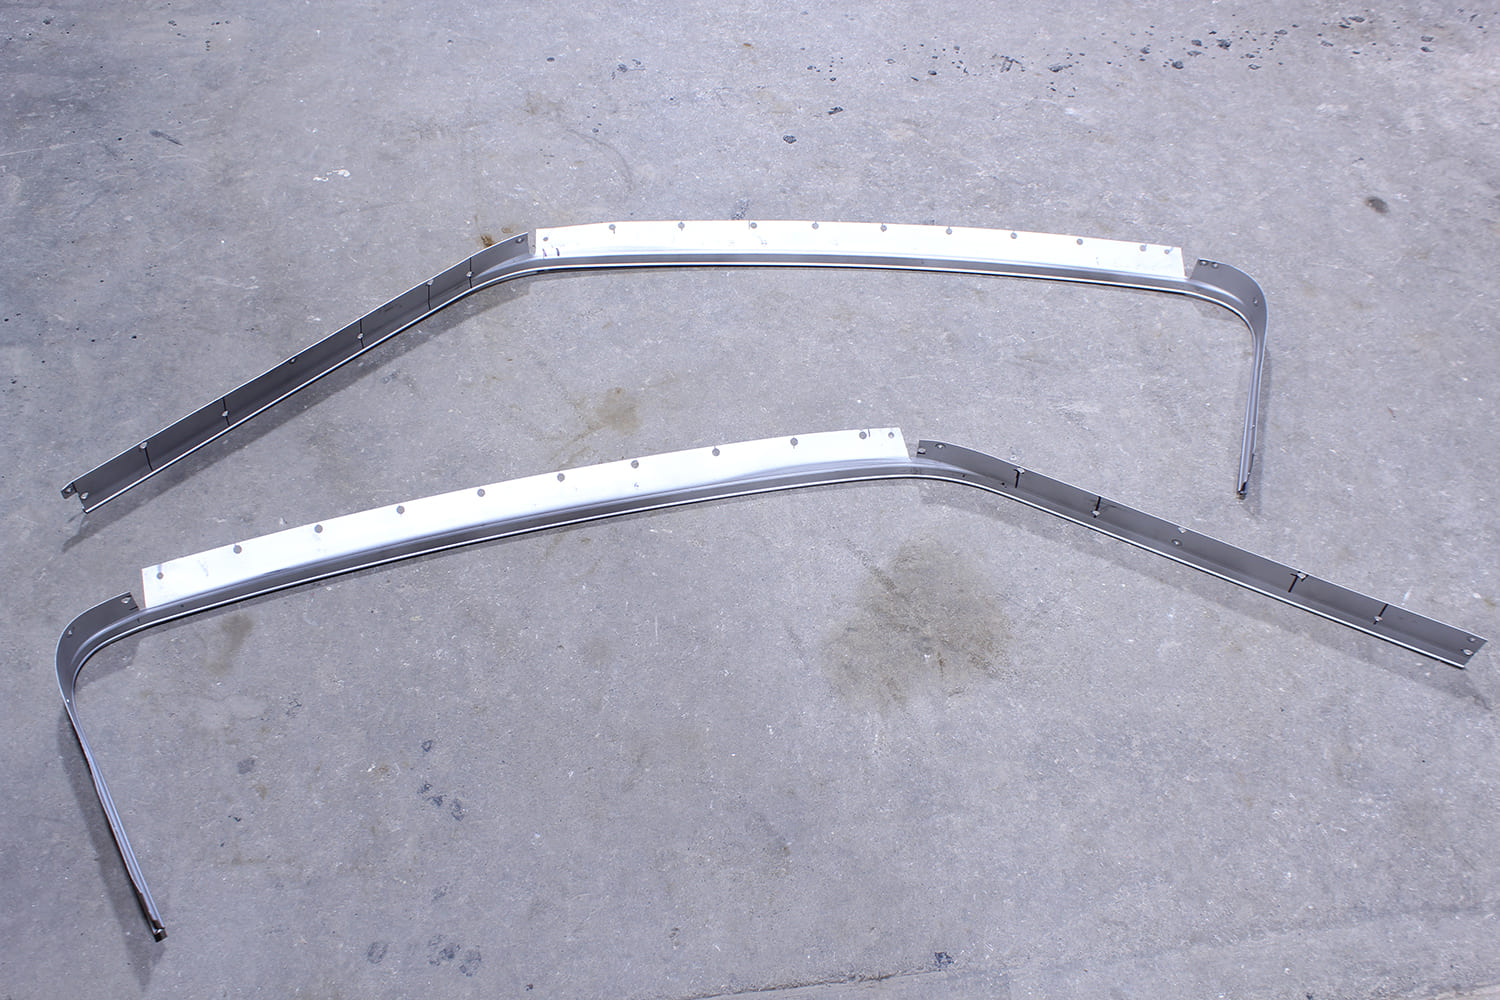
The original top was removed by melting the factory lead with a propane torch and drilling out the factory spot welds. The rusted driprails were removed by drilling out the spot welds. With the support structure prepped and primed, the Golden Star 1965-66 Mustang fastback top panel (PN RF20-65) and driprails (PN DM29-65S) were installed, spot-welded in place, and readied for applying the lead-free solder.
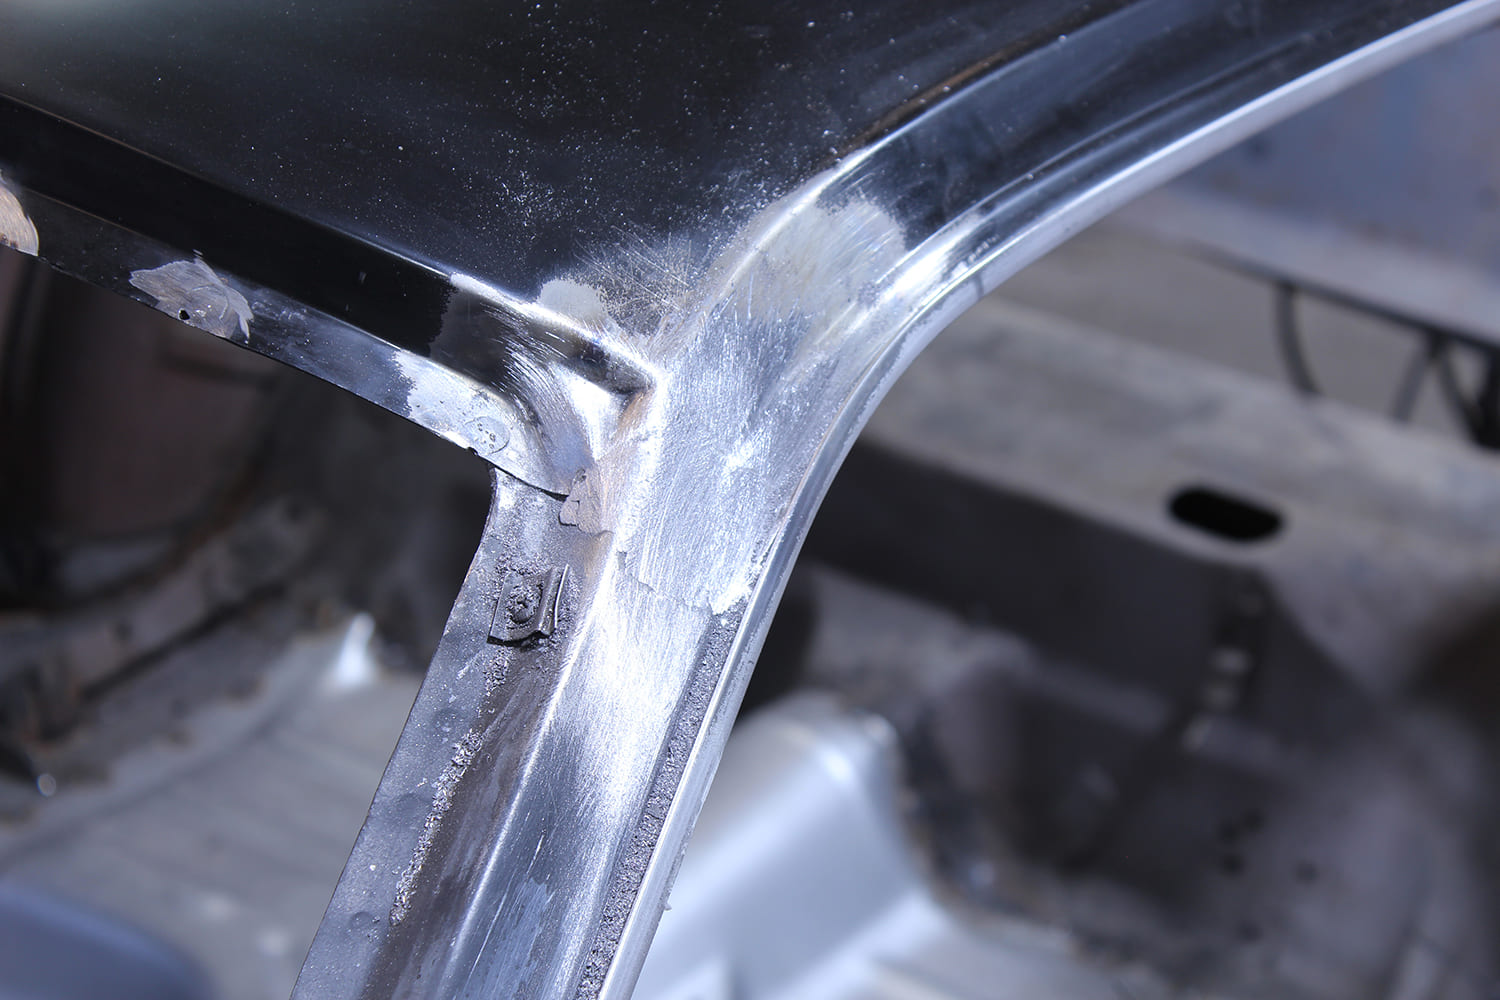
Here, the spot-welds at the B-pillar can be seen with the factory lead removed.
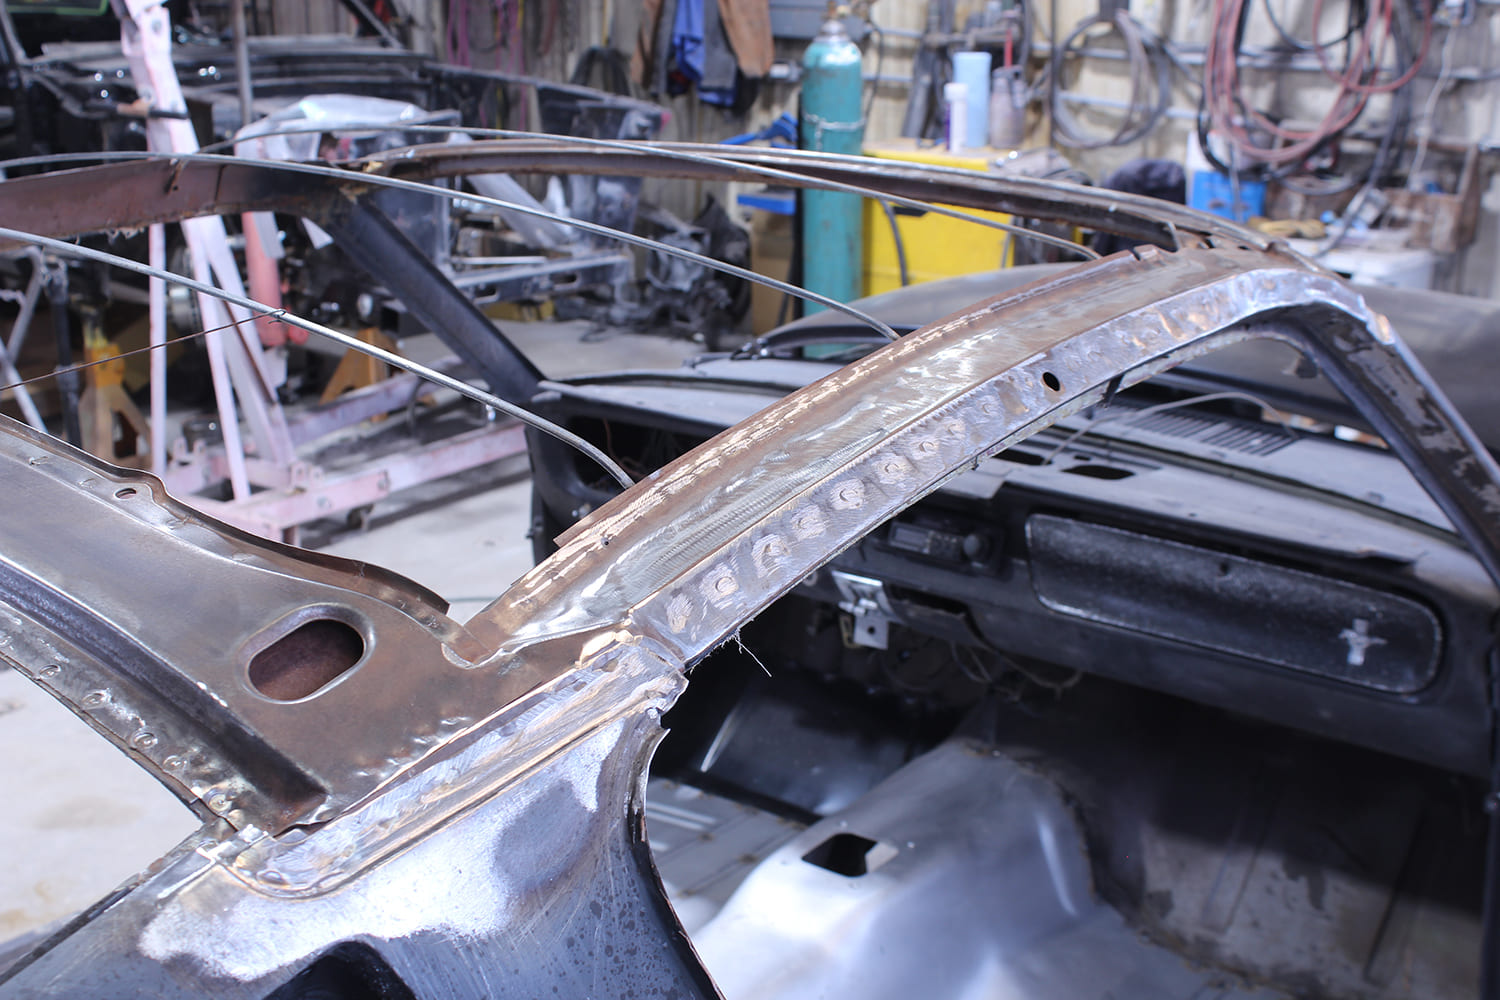
Like conventional lead-based solder, the surface must be properly prepared by “tinning” for lead-free solder to stick. Tinning chemically cleans the surface while simultaneously depositing a thin coating of material (primarily tin) that the solder will adhere to. After removing any excess tinning compound, the surface is reheated and the lead-free solder applied. While lead-based solder is spread with wood paddles, Eastwood recommends using the paddle to push the solder into the surface. They advise that the “spreading” technique not be used with lead-free solder as impurities may become trapped in the process.
Lead should never be ground or sanded, as it creates hazardous dust. However, once the lead is removed, abrasives can be used. Eastwood suggests using their nylon cleaning wheel (PN 31095), but be sure to wear a respirator, gloves, and protective clothing.
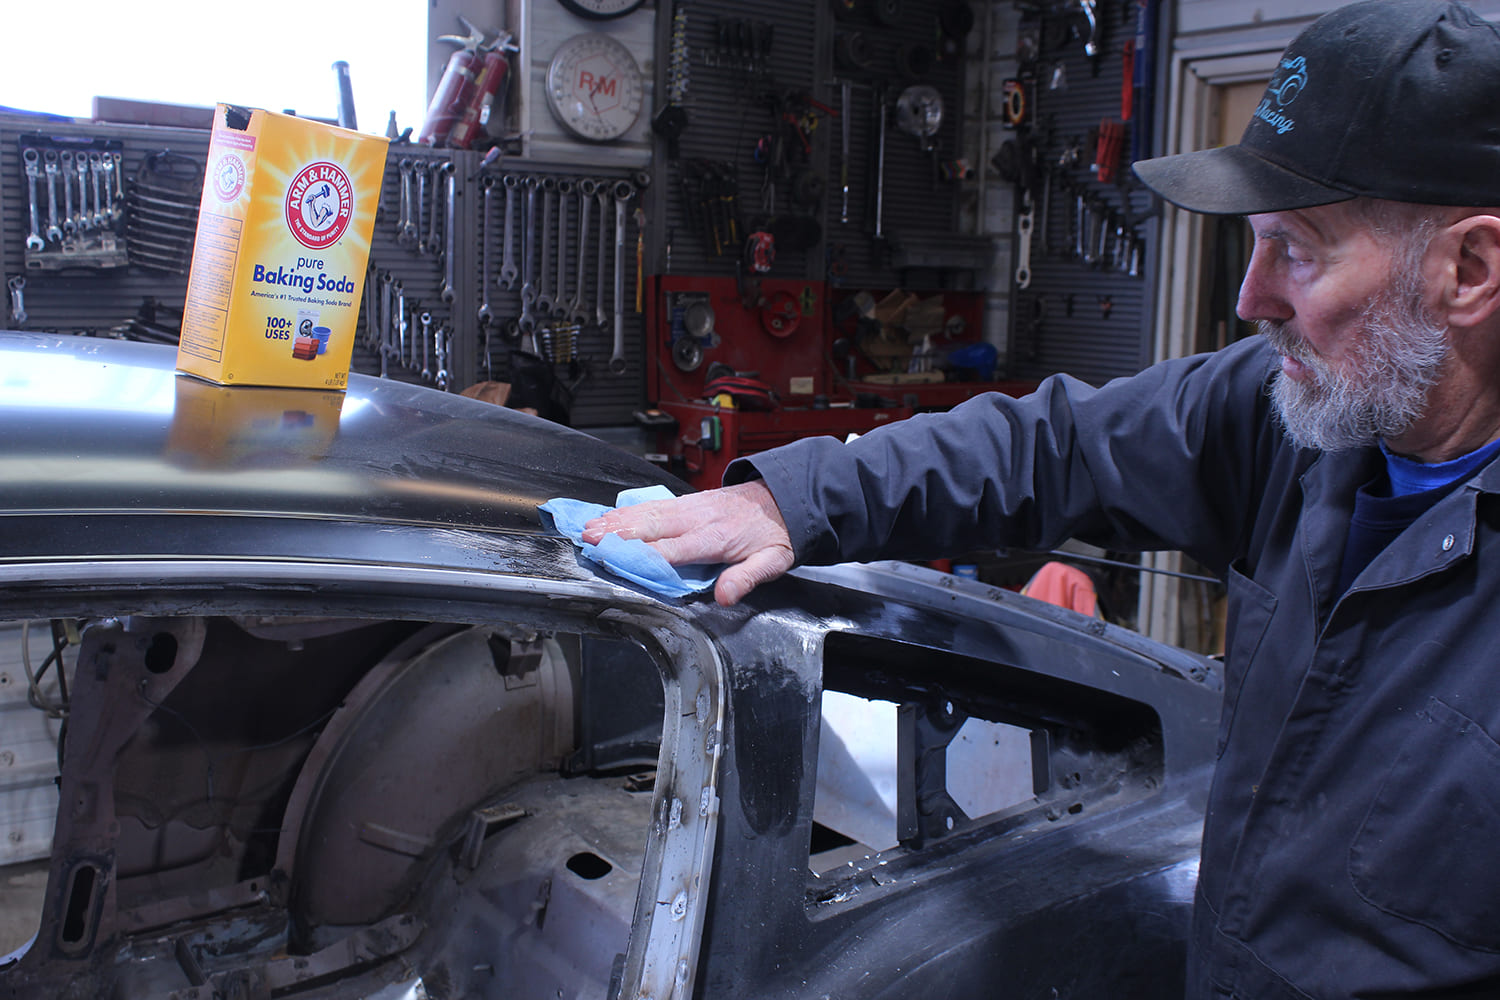
Once the surface has been shaped properly, it should be washed with a baking soda and water solution to neutralize any residual acid from the flux operation. Prior to priming, the surface should be cleaned with a paint prep solution or acetone. And yes, if necessary, polyester body filler can be used on lead-free filler to make minor corrections.
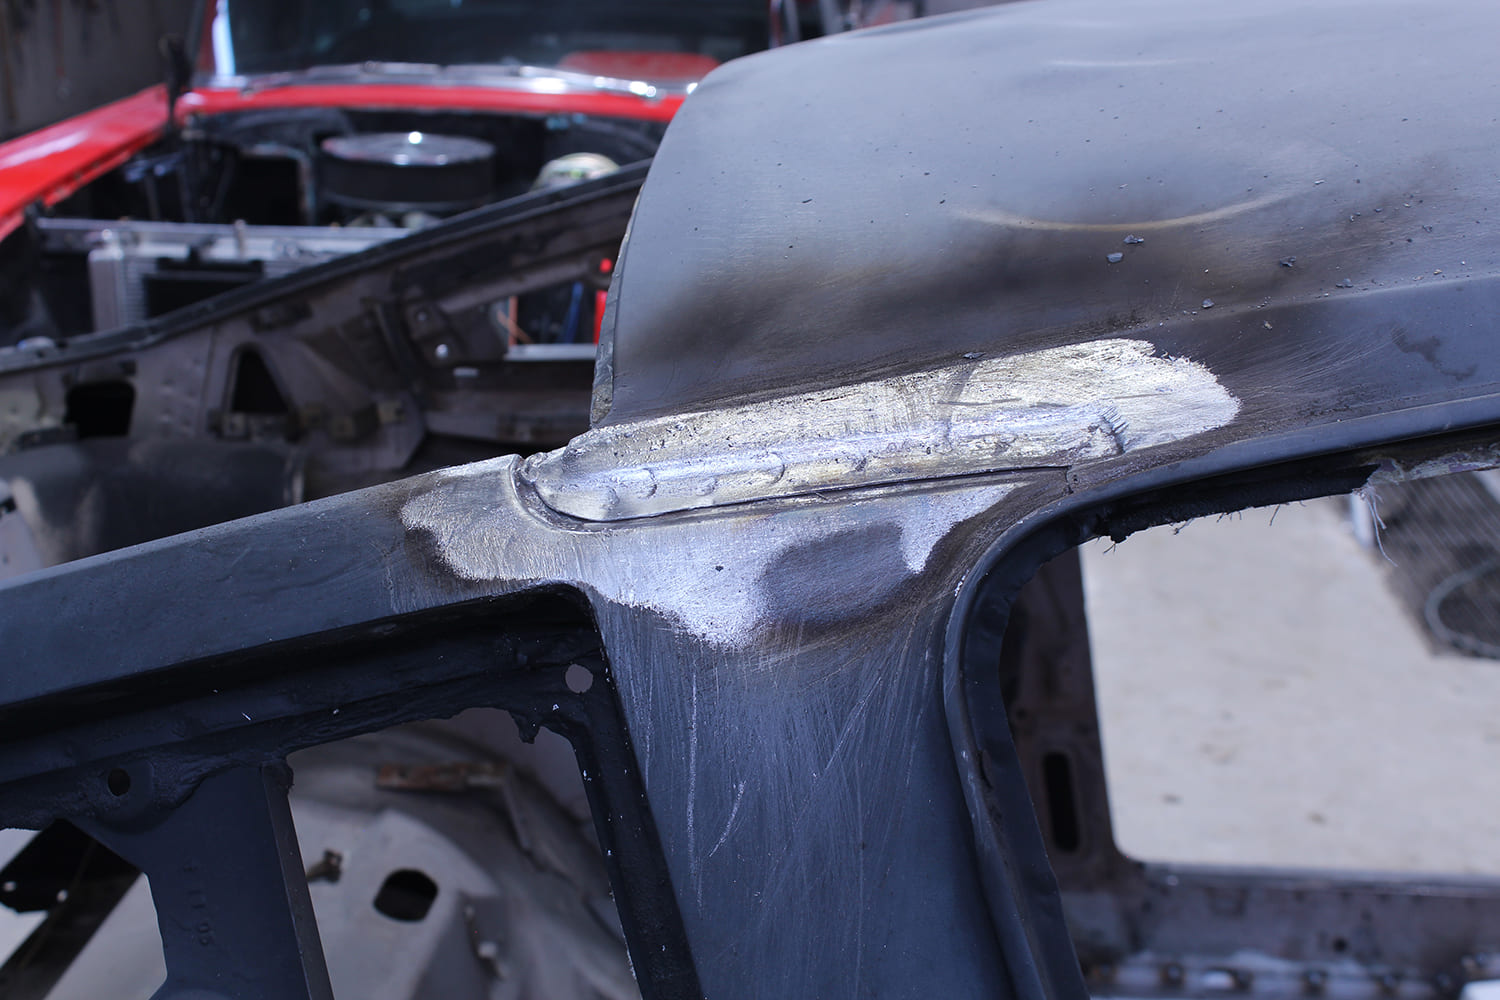
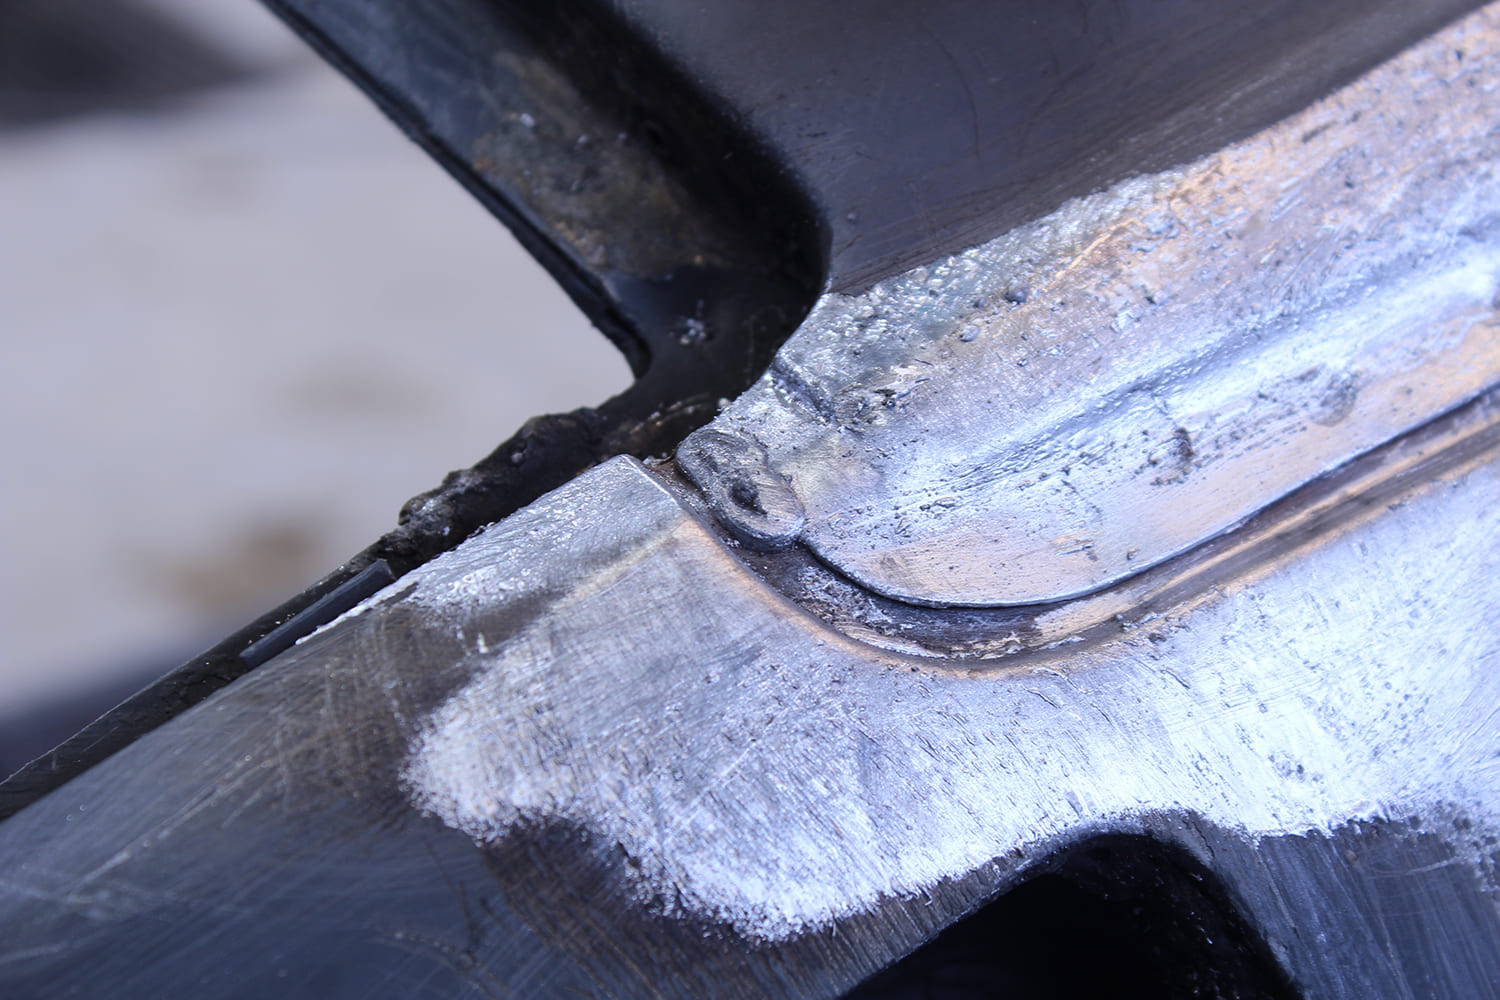
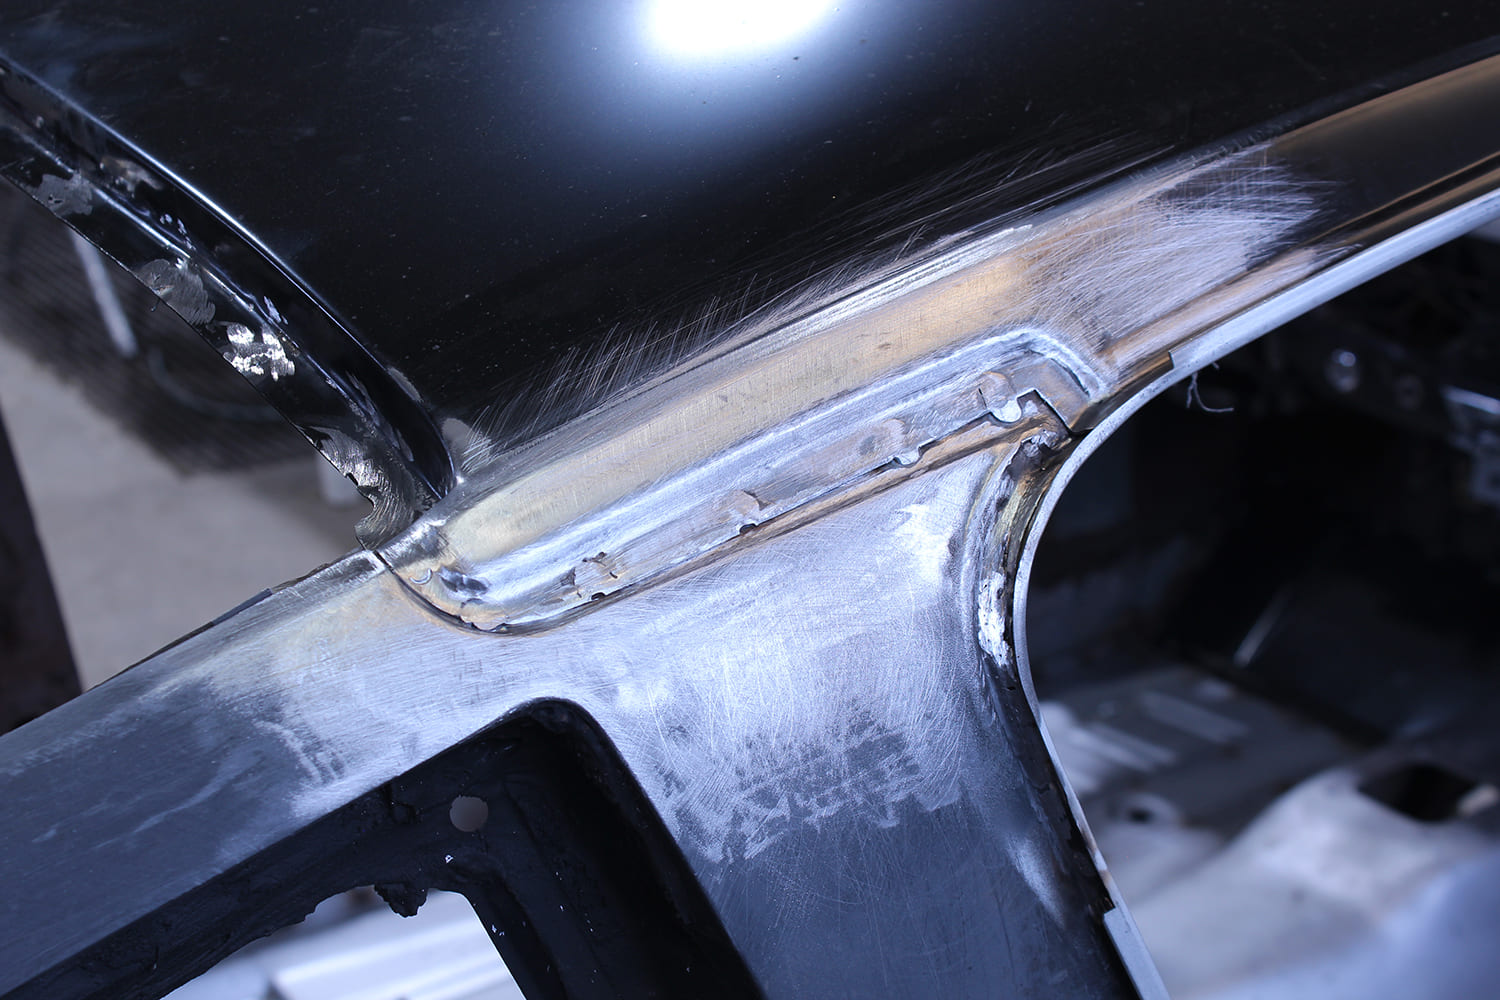
Without the lead, the size of the seam between the top and B-panel is now obvious. Take note of the factory weld that still remains.
Lead-free body solder offers a number of advantages when compared to lead-based solder. It’s stronger and safer, and it can be sanded and filed without creating toxic dust. It can even be powdercoated with a curing temperature of 400 degrees. And perhaps best of all, think of all the time you’ll save not having to clean up all that sanding dust from doing the same job with polyester filler. MR
Tate used a vintage panel separator to finish cutting the top panel away from the structure below.A spot-weld cutter was utilized to cut the top’s attachment points in the windshield opening—and there were many of them.Colin’s fastback suffered from a common malady, rusted driprails. They will be replaced along with the roof.After cutting the factory spot welds, the rear portions of the driprails became detached from the body.Here, Tate removes the spot welds securing the rear of the roof; this photo also reveals the extent of damage to the top.
After the lead and spot welds were removed from the seams, the top panel was taken off the substructure.With the roofskin removed, the rest of the driprails were taken off.Once the top and driprails were removed, the remnants of all the support structure’s spot welds were ground smooth.
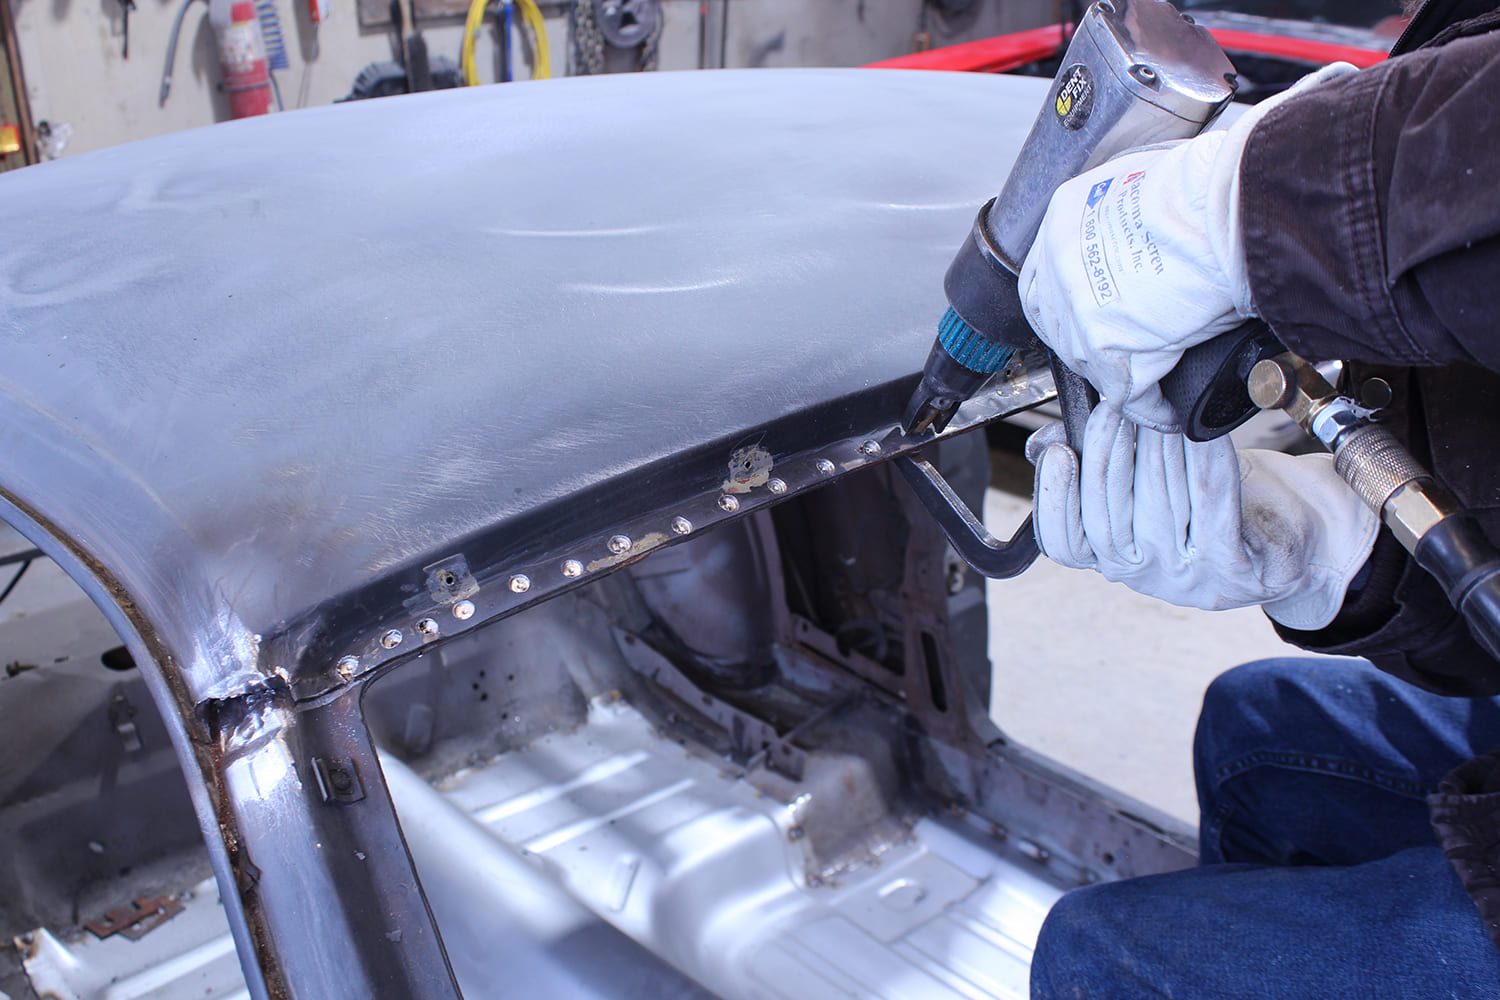
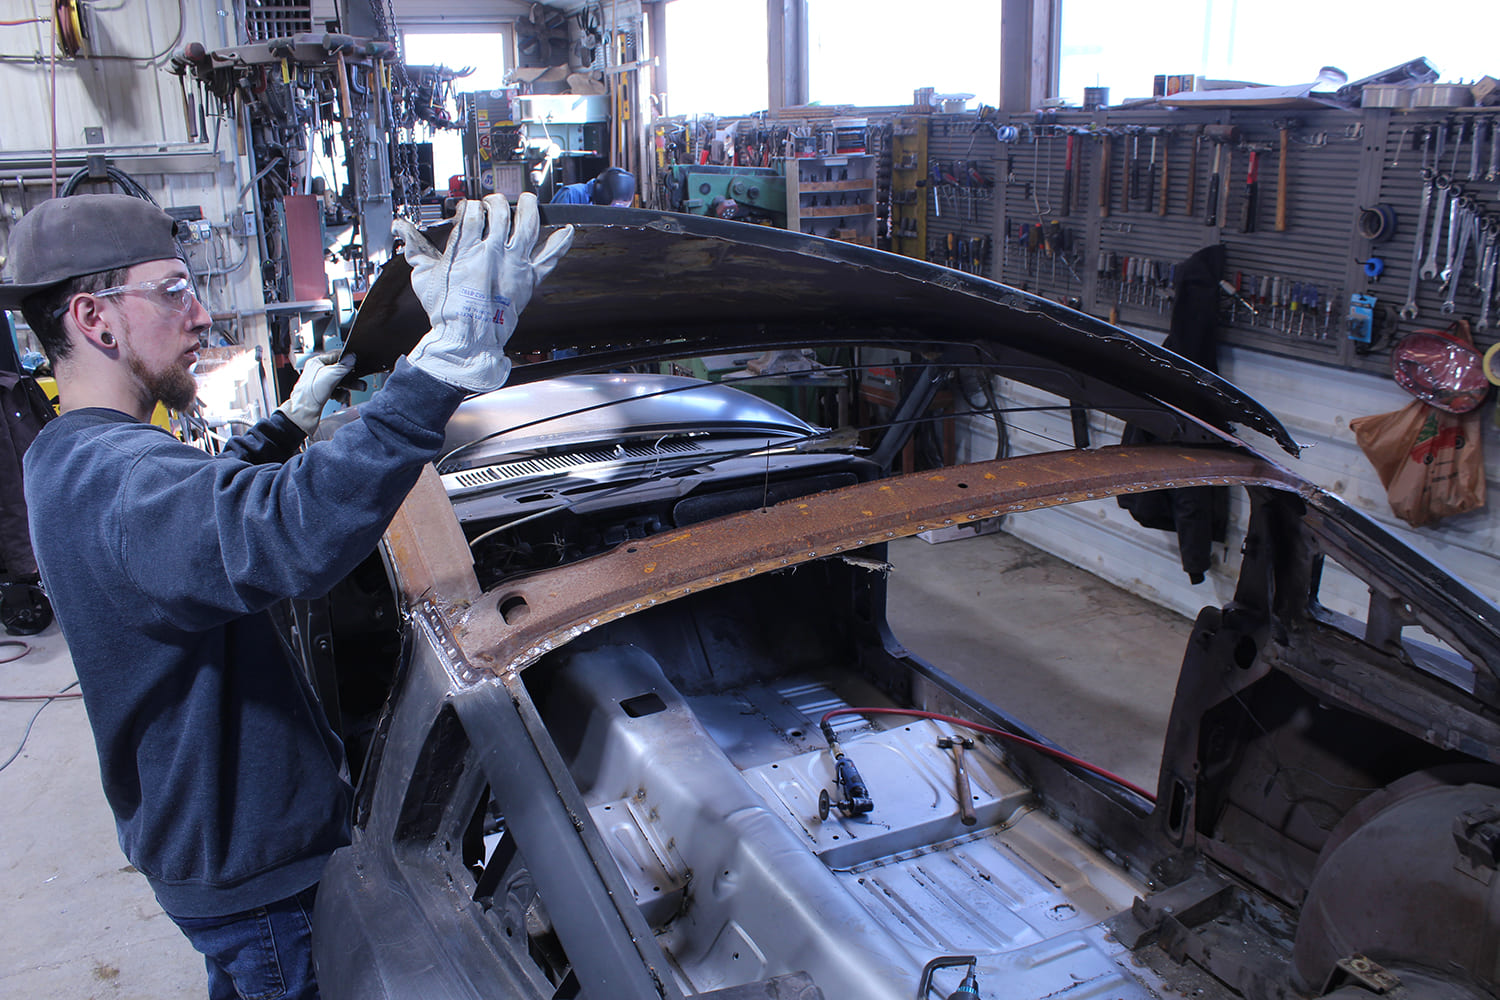
After thoroughly cleaning, the roof supports were coated with weld-through primer.A test-fit of the new Golden Star roof panel was performed; the mark on the body serves as a guide for the tinning process—it will extend well beyond that point.Tate used a pneumatic punch to create holes in the top for spot welds above the windshield and rear window.These are the new driprails from Golden Star; they are pre-formed and fit the door openings perfectly.
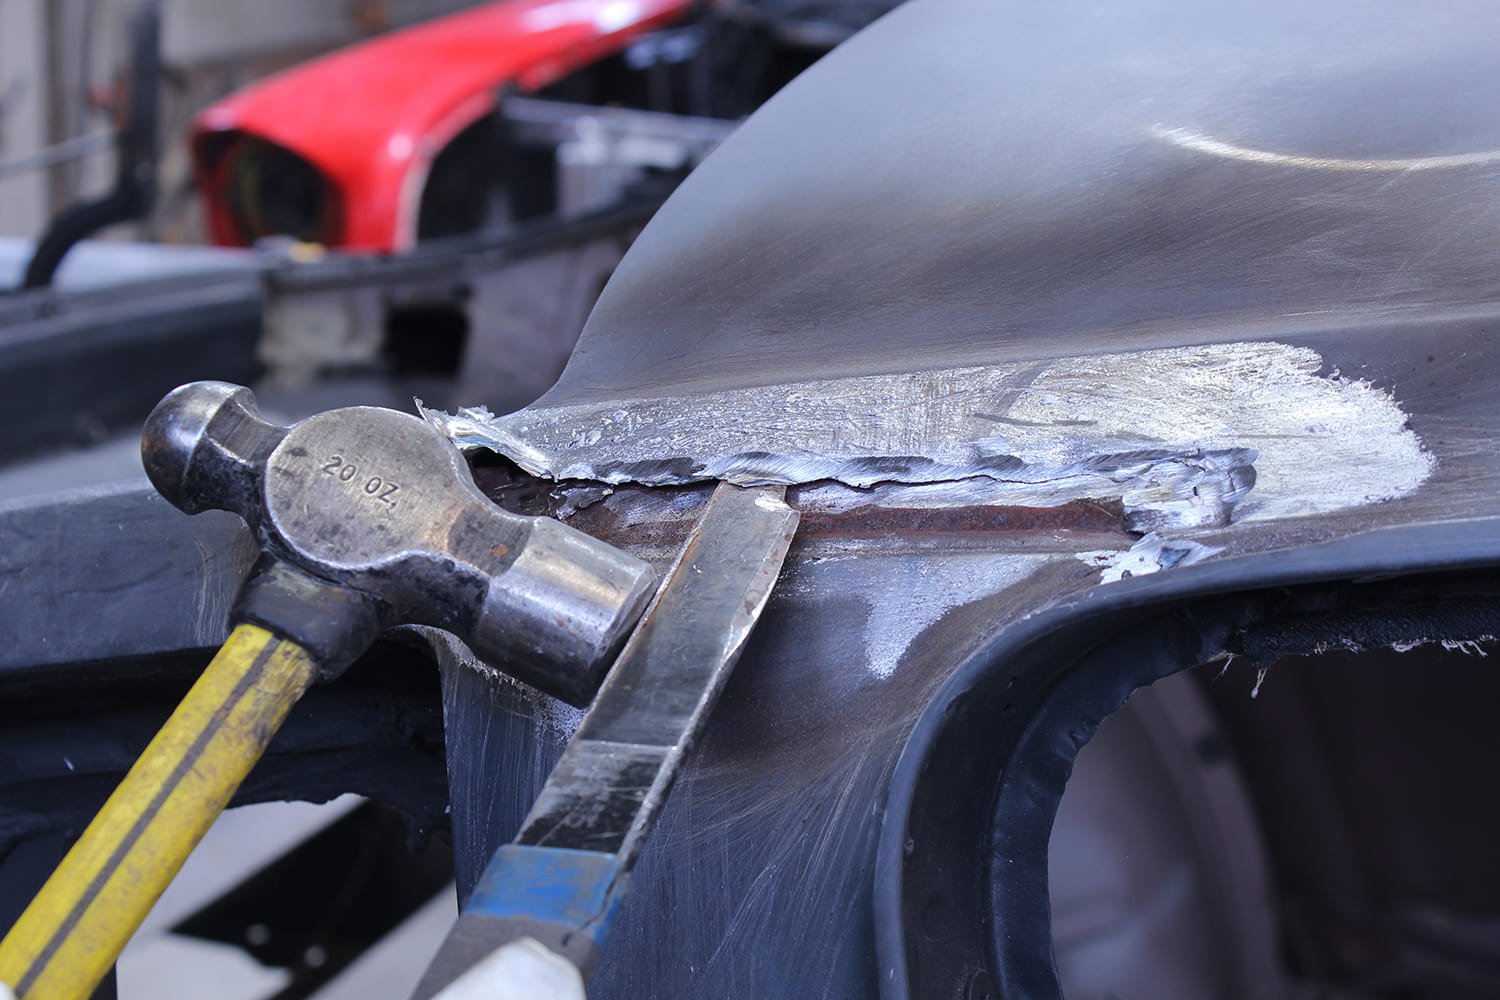
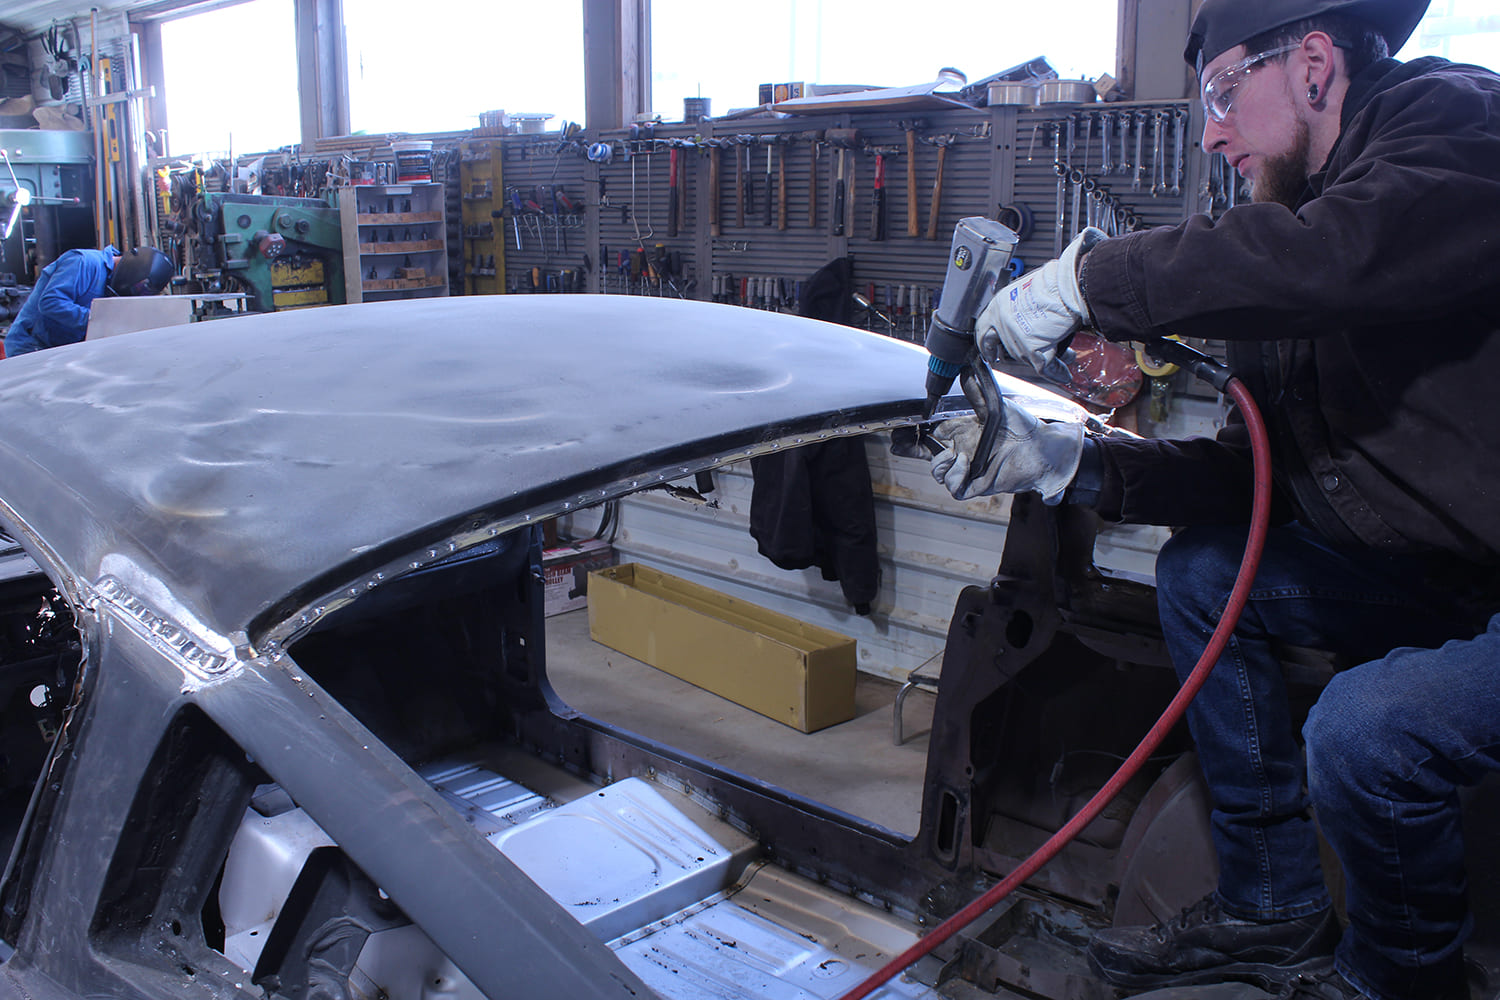
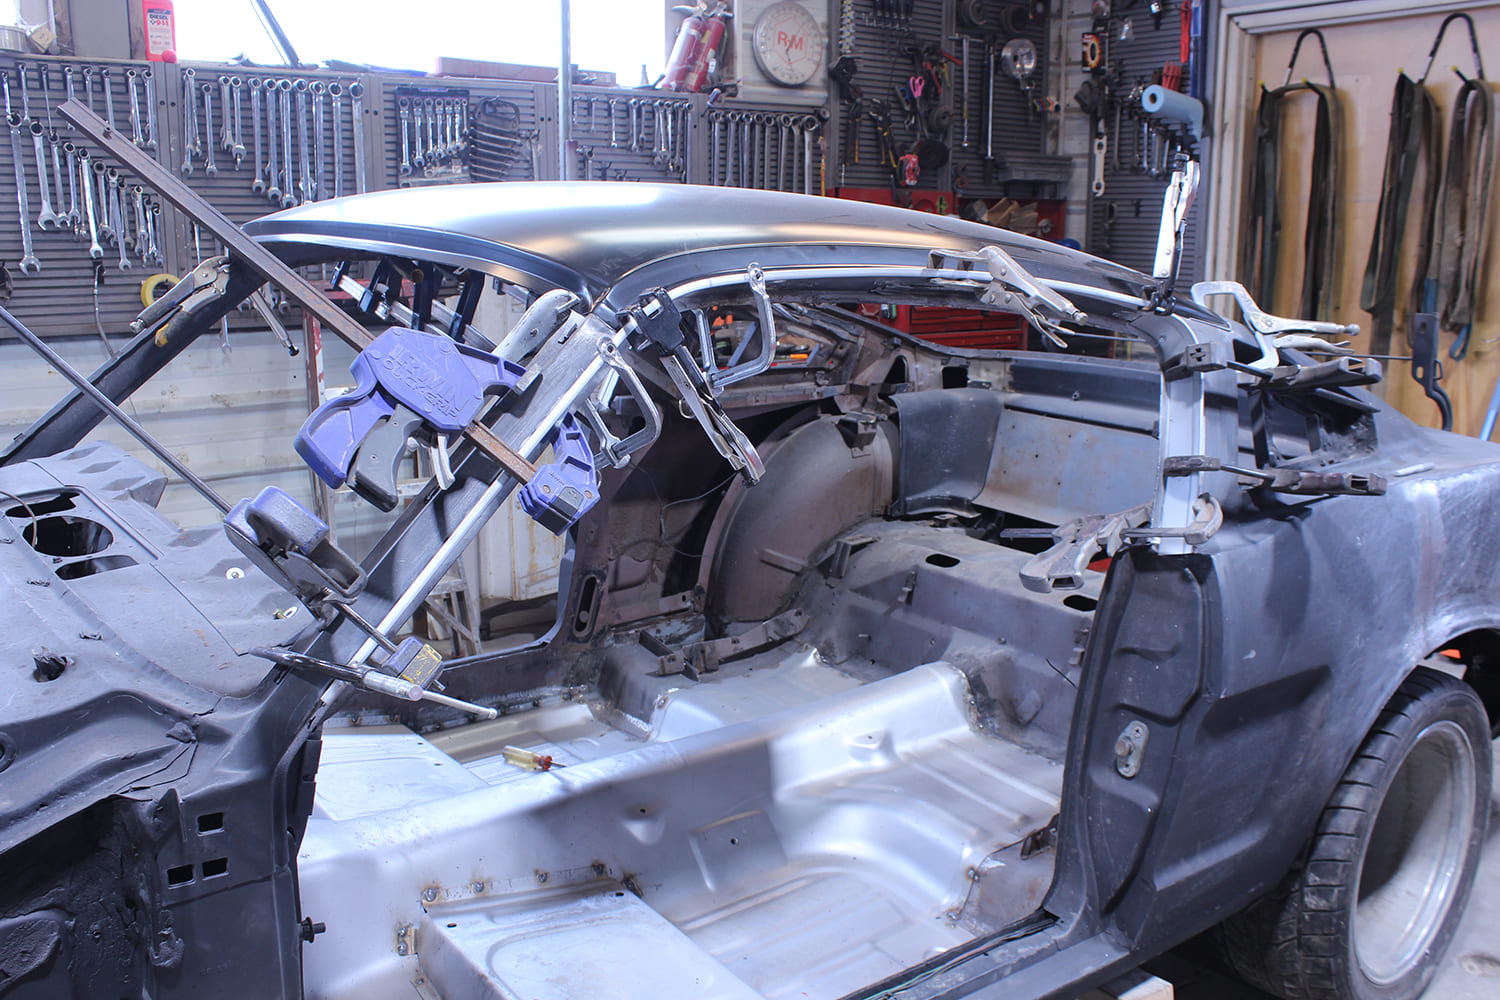
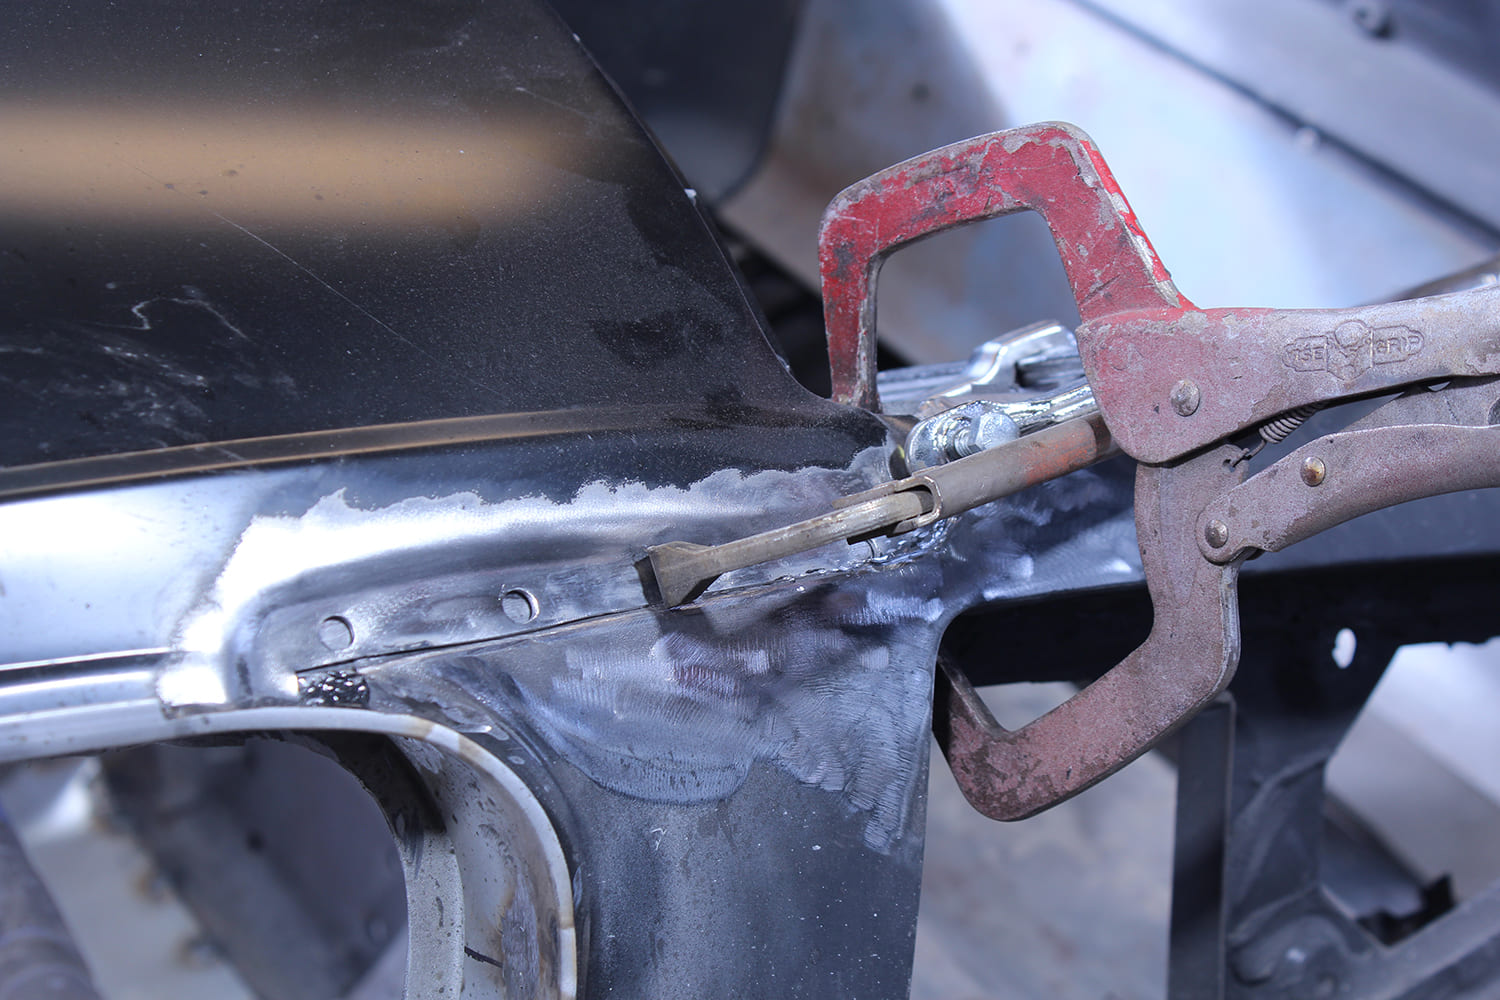
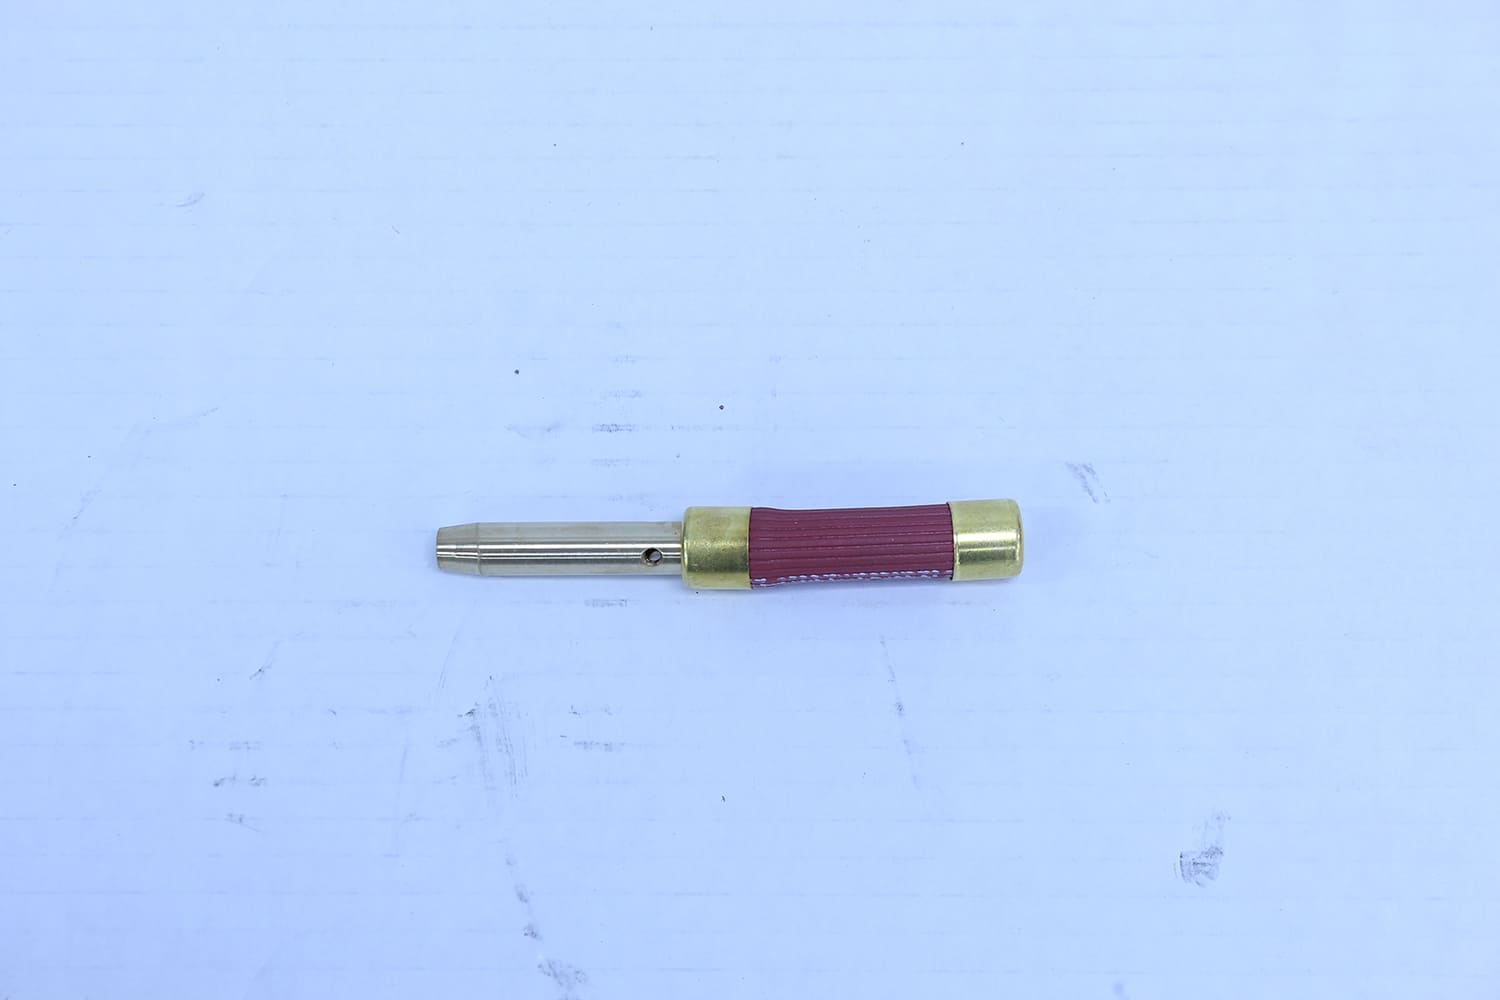
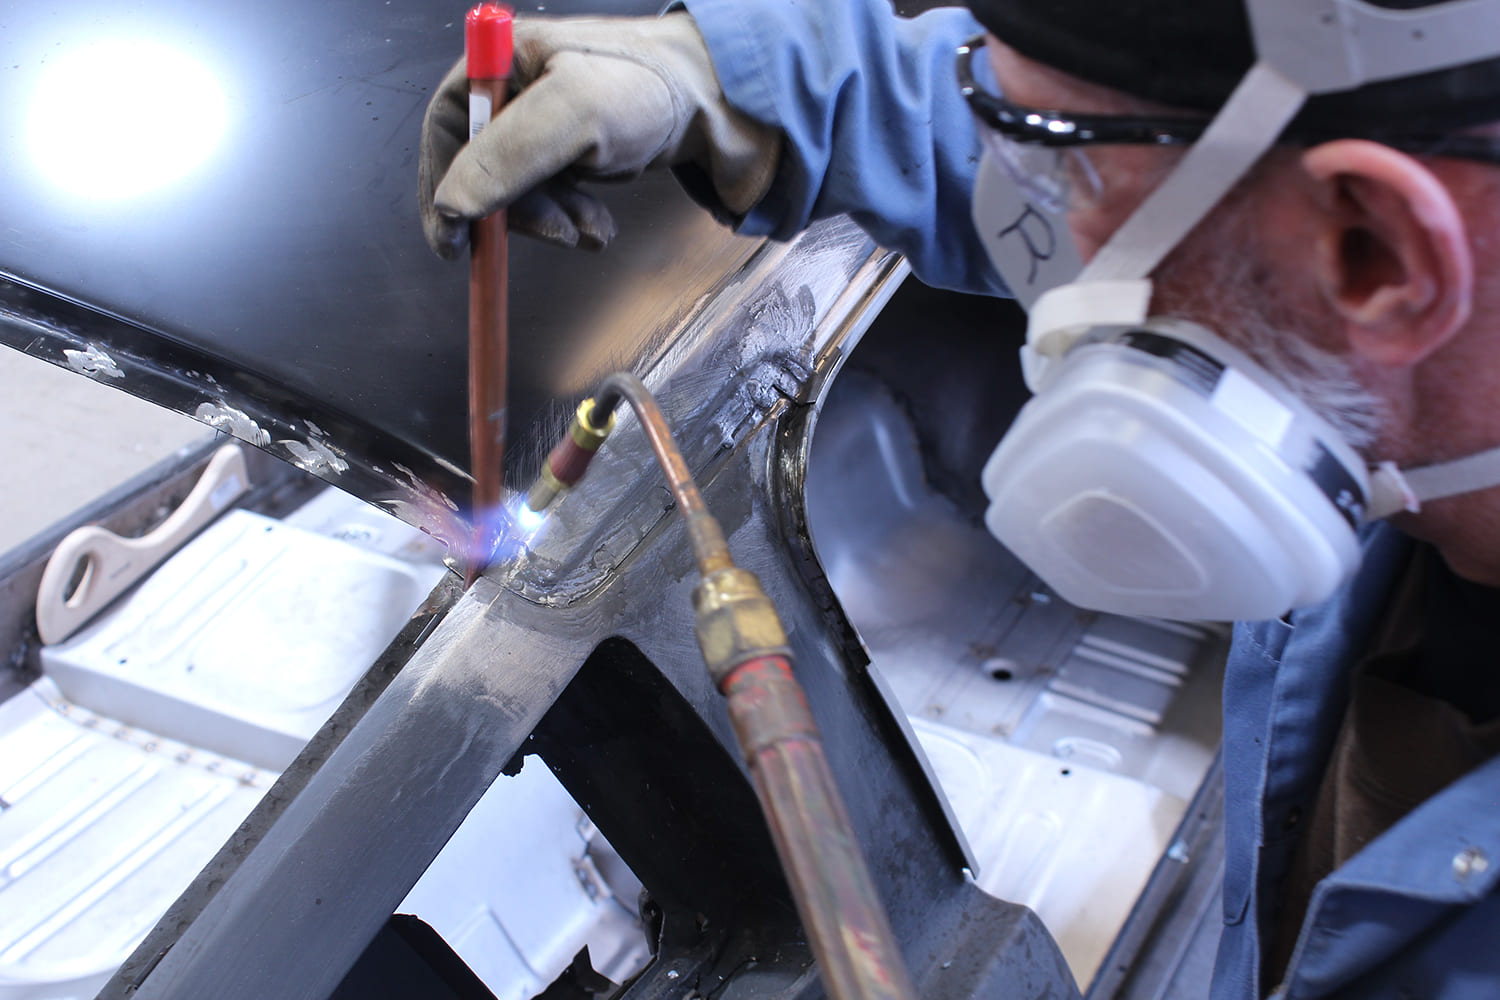
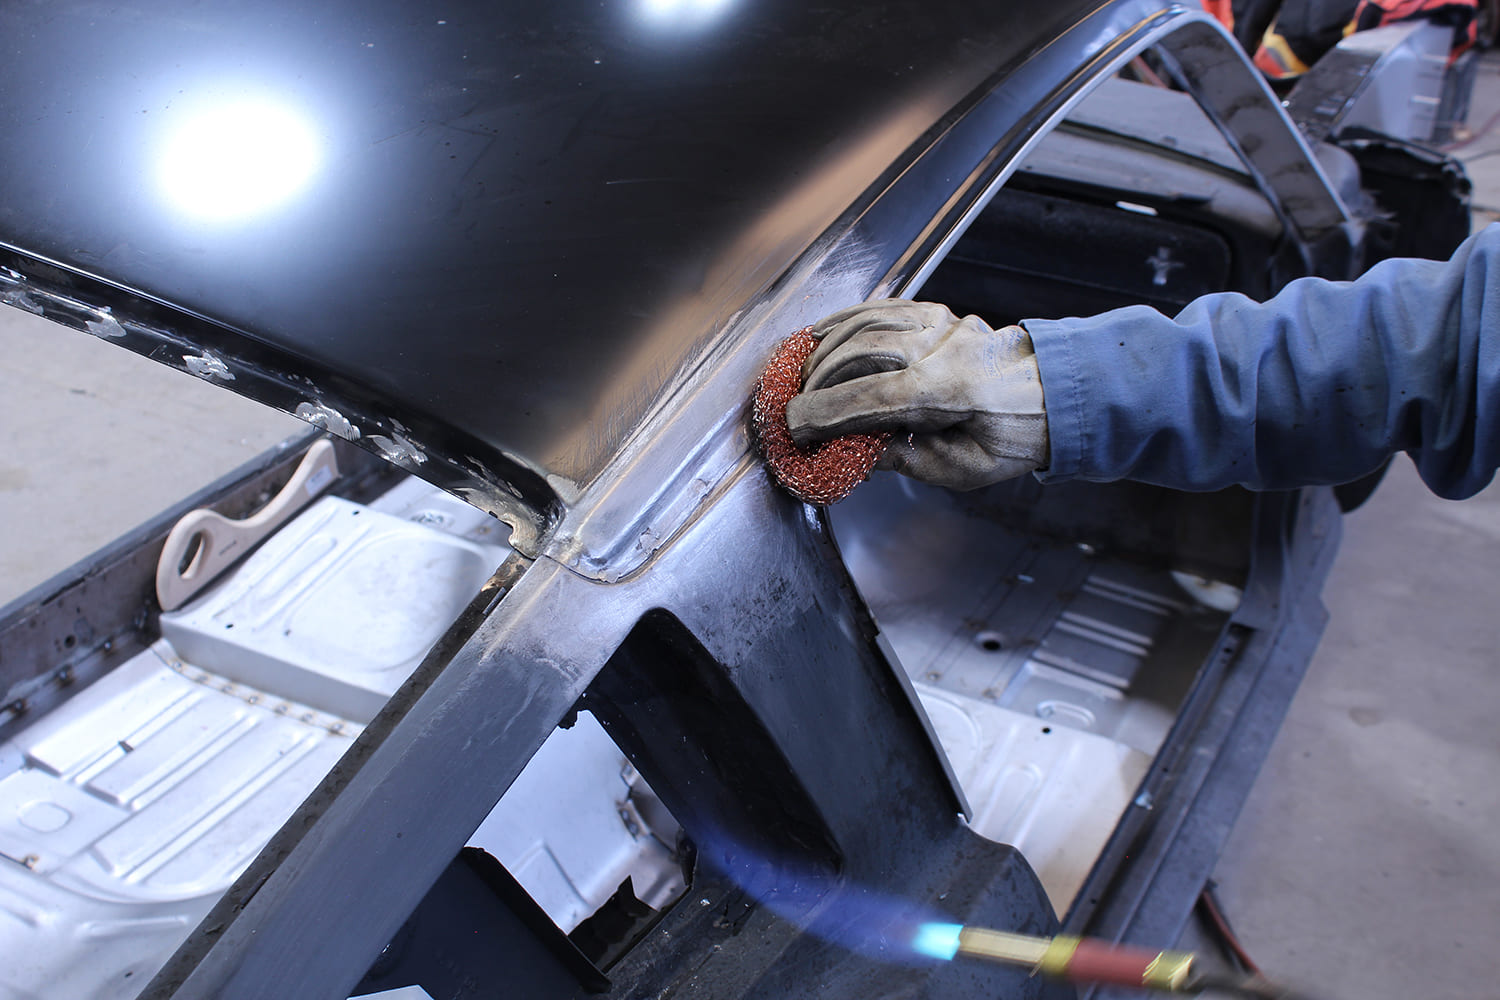
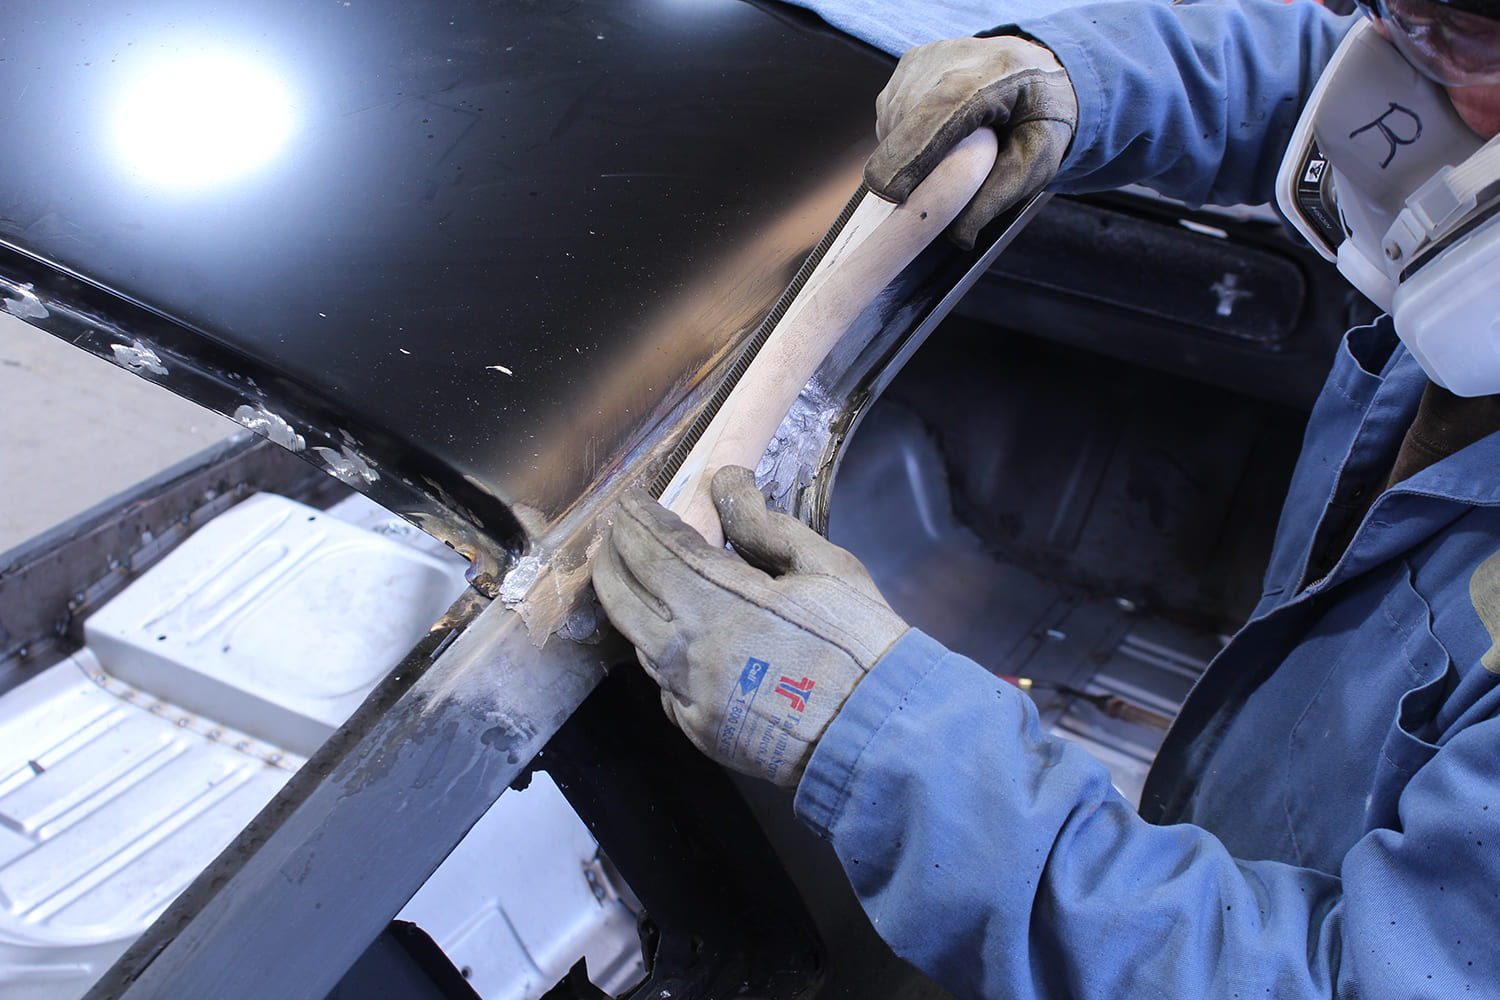
With the top panel and driprails in place, they were clamped to the roof’s framework.As if it were done at the factory, the driprails are spot-welded to the door’s framework.After punching holes in the top panel where it connects to the B-pillars, more clamps were added and spot welds were made.Here, the spot welds in the B-pillars have been ground smooth in preparation for tinning and soldering.The same procedure applied to the B-pillars was also used to attach the roof panel to the A-pillars.Tate clamped the mating surfaces together, added spot welds to the holes punched at the front and rear of the new top panel, then ground the surfaces flat.Eastwood offers several lead-free body solder kits. The main difference between them is the amount of solder and related products included.Eastwood’s diffuser tip (PN 50533 included in the lead-free kits) is used on a standard oxy-acetylene torch. Acetylene is used as the tip takes in oxygen from the air, producing an easily controlled “soft” flame.After cleaning the surface, the area is heated with a torch. Then, the supplied Eastwood Flux-N-Solder is applied using the brush included in the kit.Using a technique borrowed from the late Gene Winfield, a copper cleaning pad was employed to wipe away the excess flux. Eastwood recommends rinsing the area with hot water, followed by scrubbing with a baking soda and water solution, and then another rinse with water.After cleaning the area, a torch with a diffuser tip (a propane or MAPP gas torch also works) is used to heat the surface and the tip of the solder bar. As the solder melts, it’s applied to the area coated with flux.To accommodate the contours of the areas being worked on, Eastwood offers flat and half-round wood paddles to shape the body solder. The paddles are lightly coated with the included tallow or lubricant provided to prevent the solder from sticking to them.Heat is applied to the solder until it slightly dulls; then, the paddle is used to push the solder into the desired shape.The Eastwood lead-free solder kit includes flat and half-round body files.After the surface cooled, the flat file was used to smooth the solder. This process goes quickly since the file cuts through the solder faster than the surrounding material.Here, the seam on the A-pillar has been filed. Unlike lead-based solder, lead-free solder can be sanded; however, Eastwood cautions that appropriate eye and respiratory protection must still be used.The final step is to wash the area again with a baking soda and water solution to neutralize any remaining acid from the flux operation that could reappear and cause issues with the paint.
We use cookies to ensure that we give you the best experience on our website. If you continue to use this site we will assume that you are happy with it.