By Curt Iseli – Photography By Cody Walls
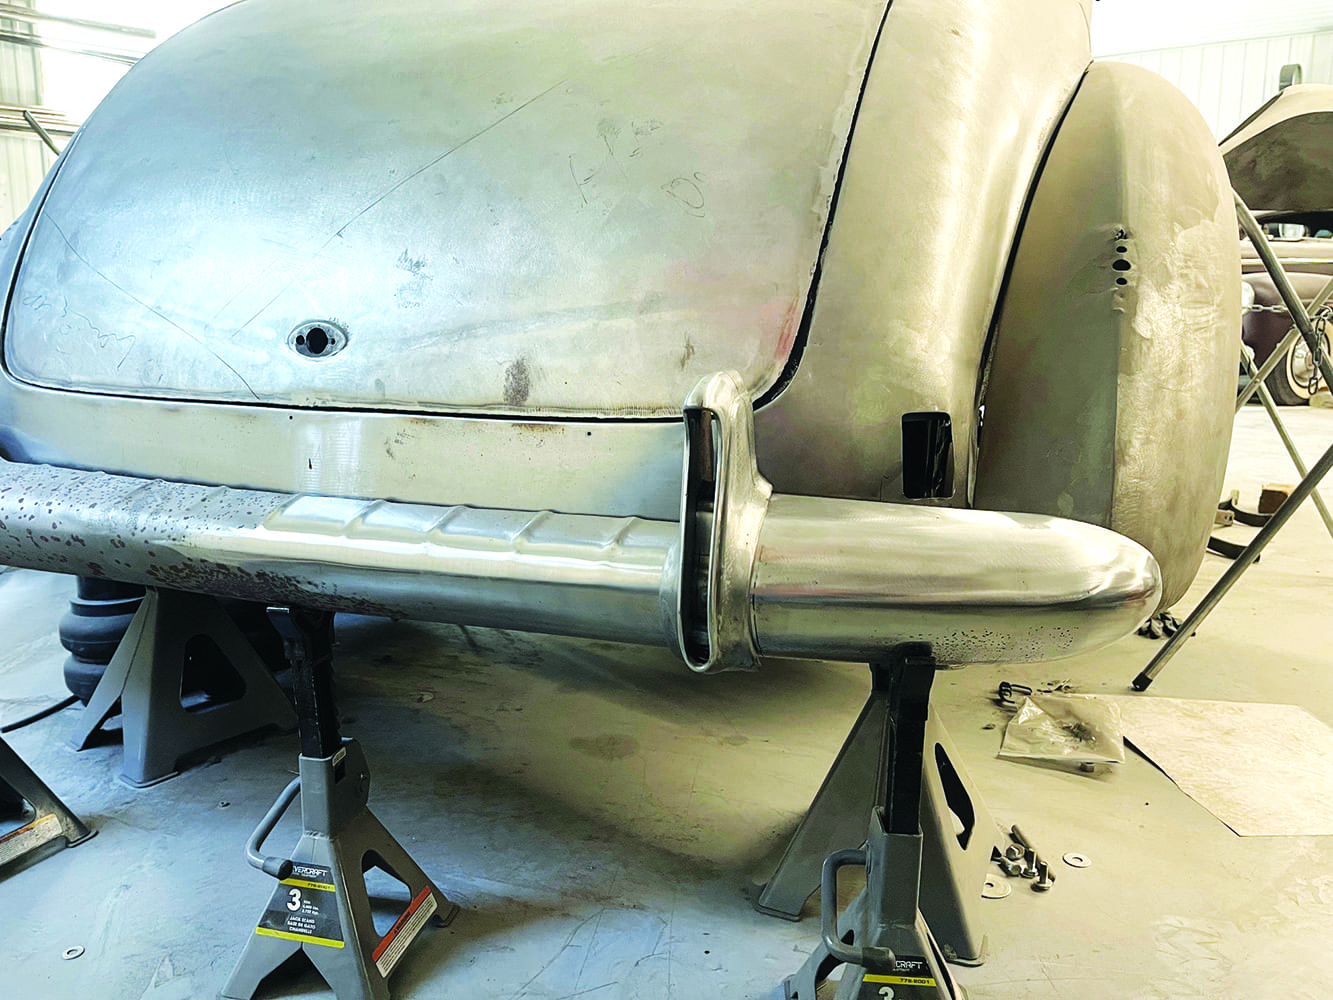
Custom taillights are a relatively simple modification that can make a significant visual impact—regardless of the model, year, or style of the custom car you’re building. In the world of pre and post World War II–style customs, nothing carries the same traditional appeal as sinking a set of handformed taillights into bumper guards. We recently had the opportunity to explore the details of creating bumper guard taillights with Cody Walls at Traditional Metalcraft who was making a set for customer Kenny Dean’s 1937 Packard. However, the process of designing and crafting custom lenses can be applied to nearly any project, whether you’re recreating a hard-to-find factory piece or designing something entirely unique.
Like many elements of automotive and industrial design, taillights initially served a purely functional purpose, with little regard for aesthetics. In the 1910s and 1920s, taillights were often simply stamped steel boxes that lit up when the vehicle stopped, alerting other drivers and helping to prevent rearend collisions. By the mid 1930s and 1940s, more attention was given to their appearance, and some of the sleek lenses and bezels, like the dagger-shaped 1941 Studebaker lights, are perfect for those seeking a bit of custom style. However, during this period, lights were mostly bolt-on components; they weren’t fully integrated into the car’s design, unlike the chrome-bezel units of the 1950s, which often required major quarter-panel modifications to install anything other than stock lights.
For this reason, fat-fendered cars from the mid 1930s through the 1940s benefit most from relocating the taillights to the bumper guards. There’s just something about their streamlined profile and pontoon fenders that calls for eliminating unnecessary interruptions like fender seams, extra trim, and those annoying lights from the body. The practice of relocating taillights to the bumpers has been around at least since the 1940s and has been documented by pioneers such as George Barris who wrote how-to articles in small magazines, and Dan Post who discussed them in his Blue Book of Custom Restyling. Back then, custom lenses were often made by cutting, grinding, and filing existing glass lenses or heat-forming Plexiglas. Today, materials for creating flexible molds and pouring plastics are easily available at any art supply store. Since lenses made with this method are more refined and consistent, that’s the process we’ll focus on here.
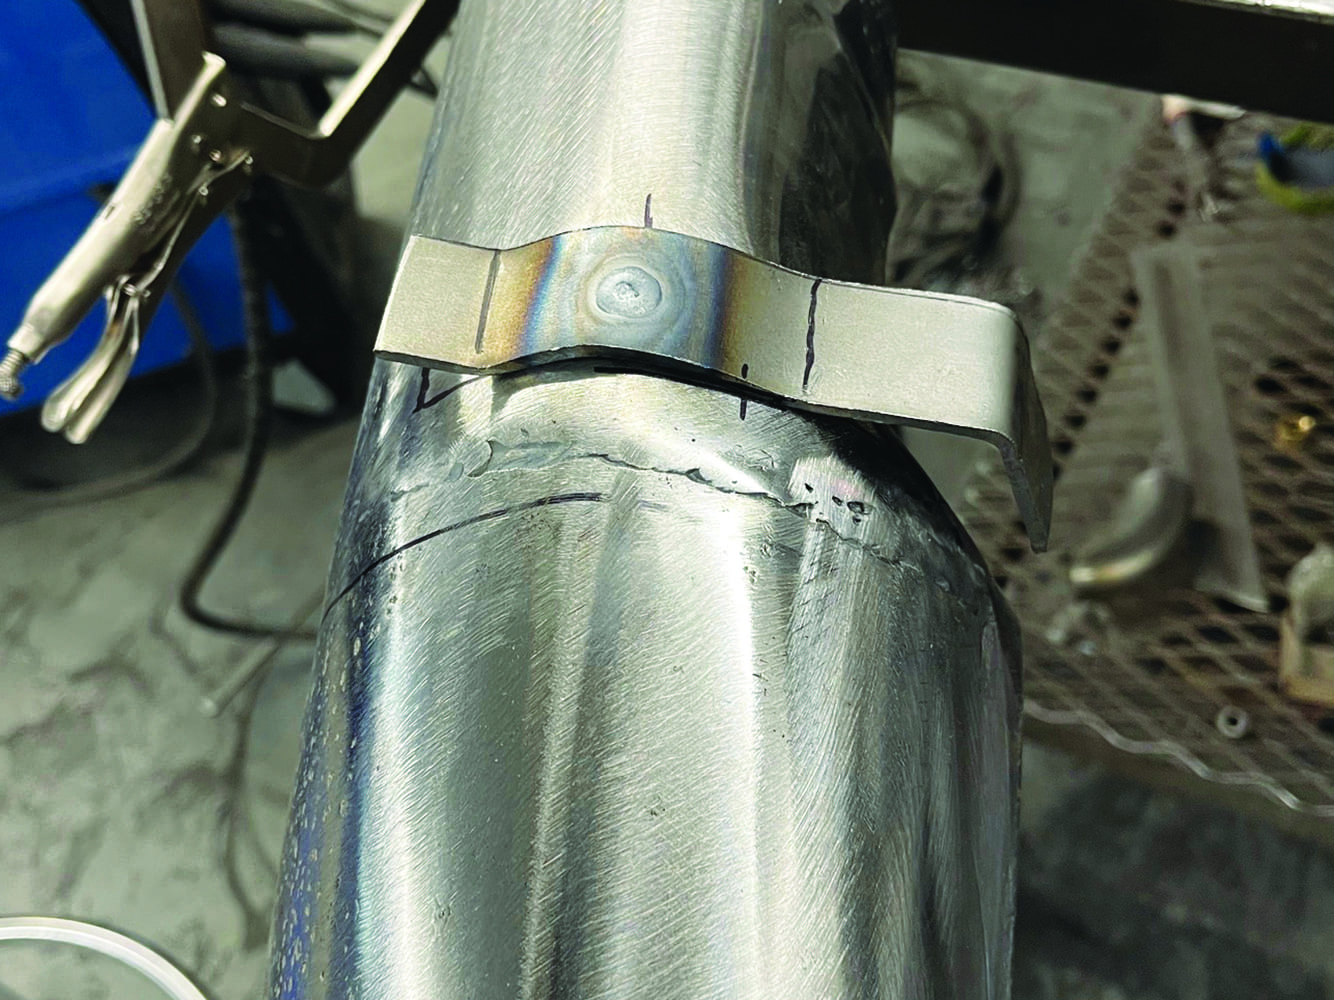
Removing and filling the stock taillights is the easy part. Once the bezel, lens, and taillight bucket are taken out of the body, you’ll have a few holes to fill—usually an opening on each side for the bucket and a couple of extra holes for the studs that held the bezels in place. A small piece of paper or poster board held against the backside of the fender makes it simple to trace the shape of the opening and transfer it onto 18-gauge sheetmetal to make filler pieces. The wiring also needs attention, and now is a good time to run new, properly sized wires back to your harness if you haven’t already. Just make sure to leave enough wire to reach the new taillight locations, as they’ll be a few feet further from the harness than the stock setups.
The next step is to select the appropriate bumper guards and the best location for the new lights. Both choices should consider not only the vehicle’s appearance but also the lights’ functionality. If you’re not using the stock guards, pick ones that not only have a stylish profile but also provide enough surface area to accommodate a decent-sized lens visible to the drivers behind you.
Where you mount the guards is also important. Some choose to mount them fairly close together, flanking a license surround or overrider that connects to a plate light. Others position them farther out toward the ends of the fenders, closer to where the stock lights would have been. Again, it’s a matter of what looks best on the car and what will be most visible in today’s world of distracted drivers and high-riding SUVs and pickups.
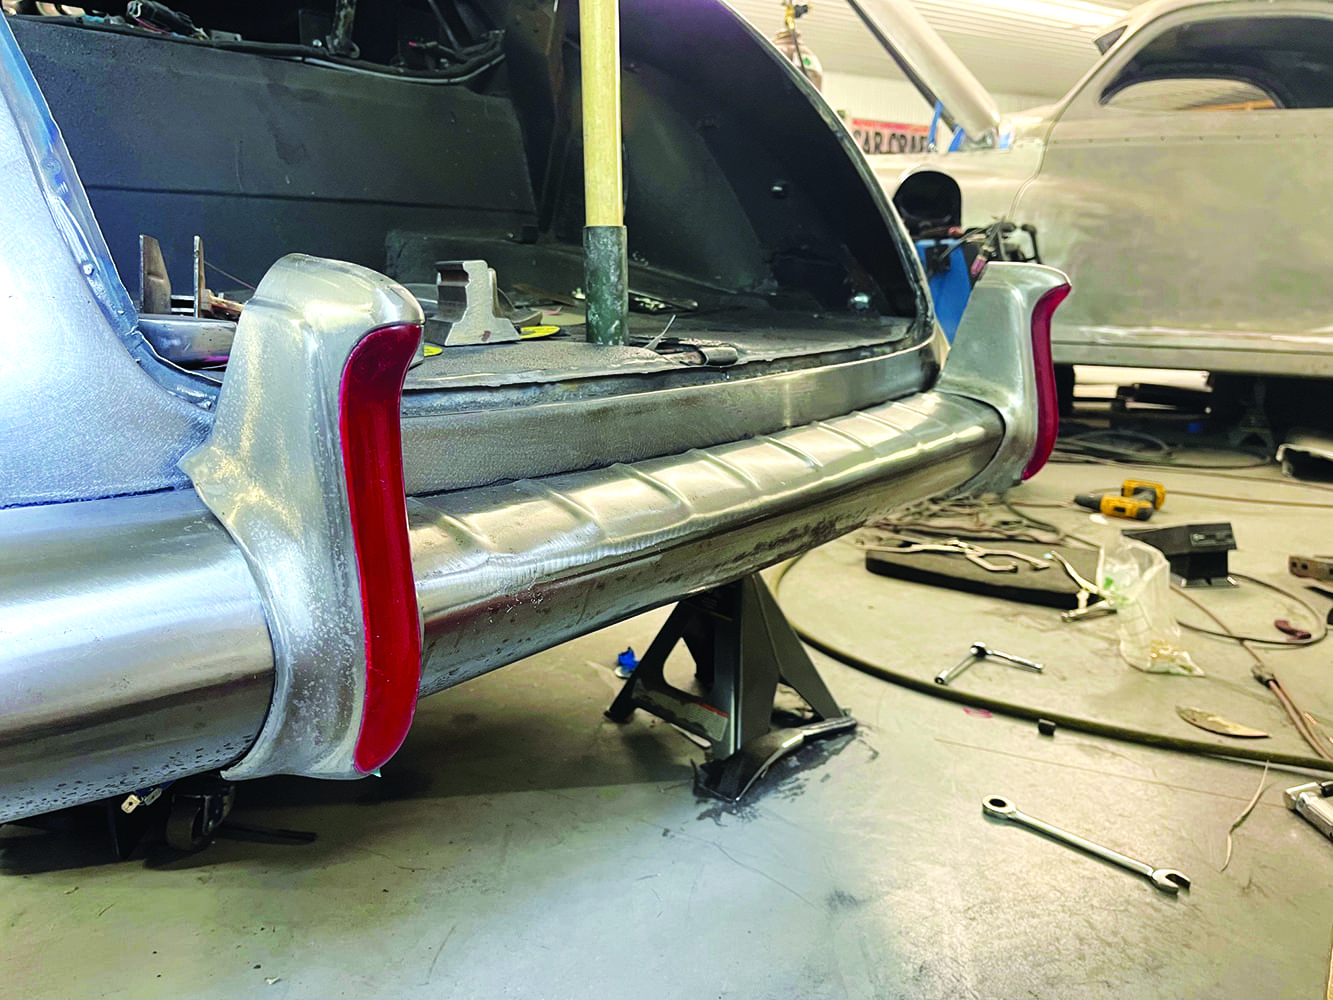
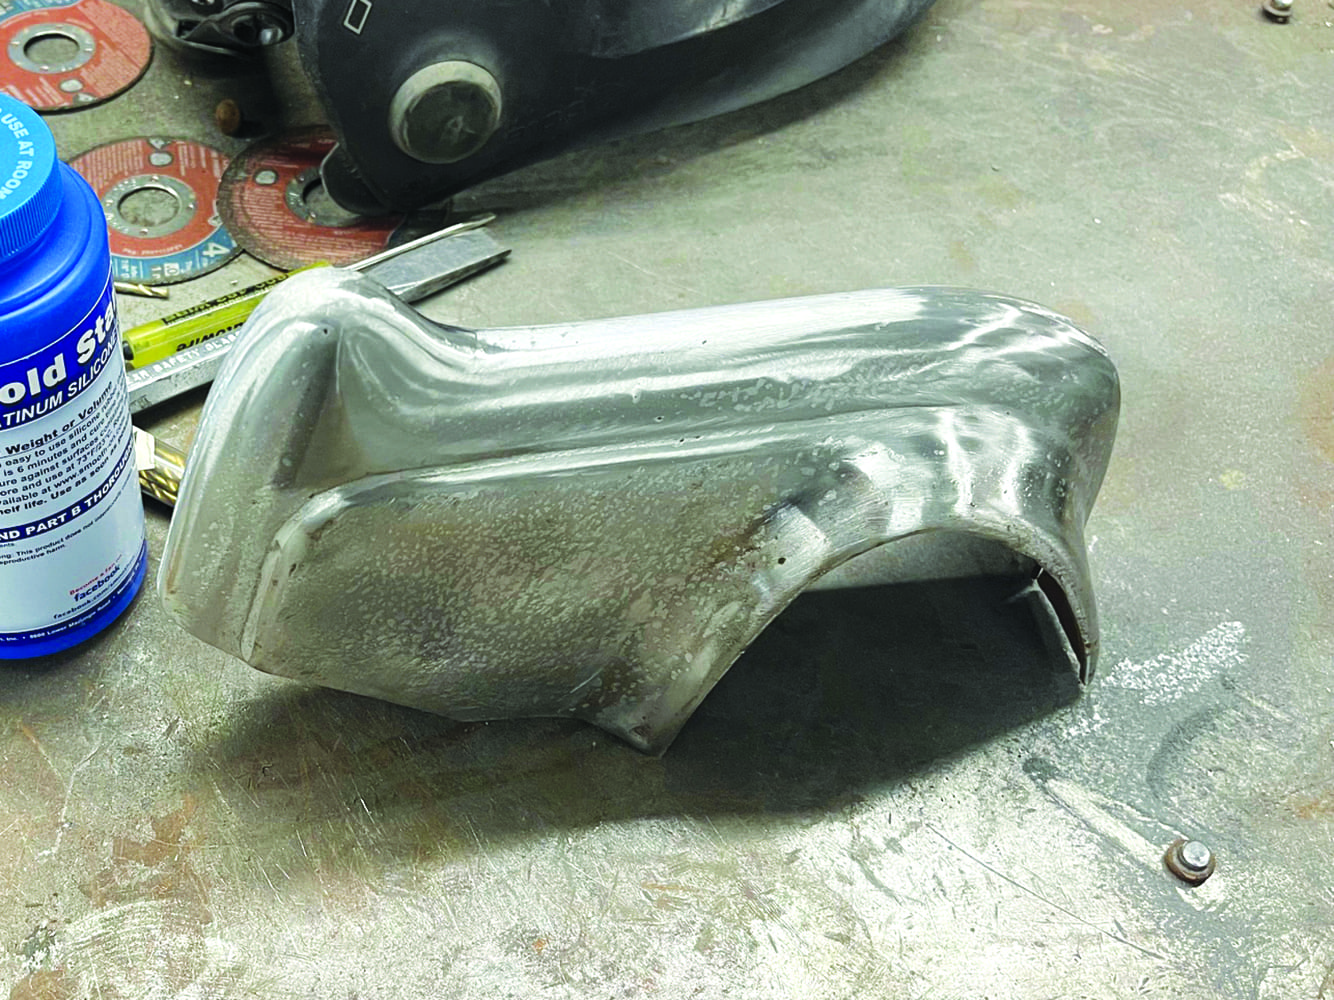
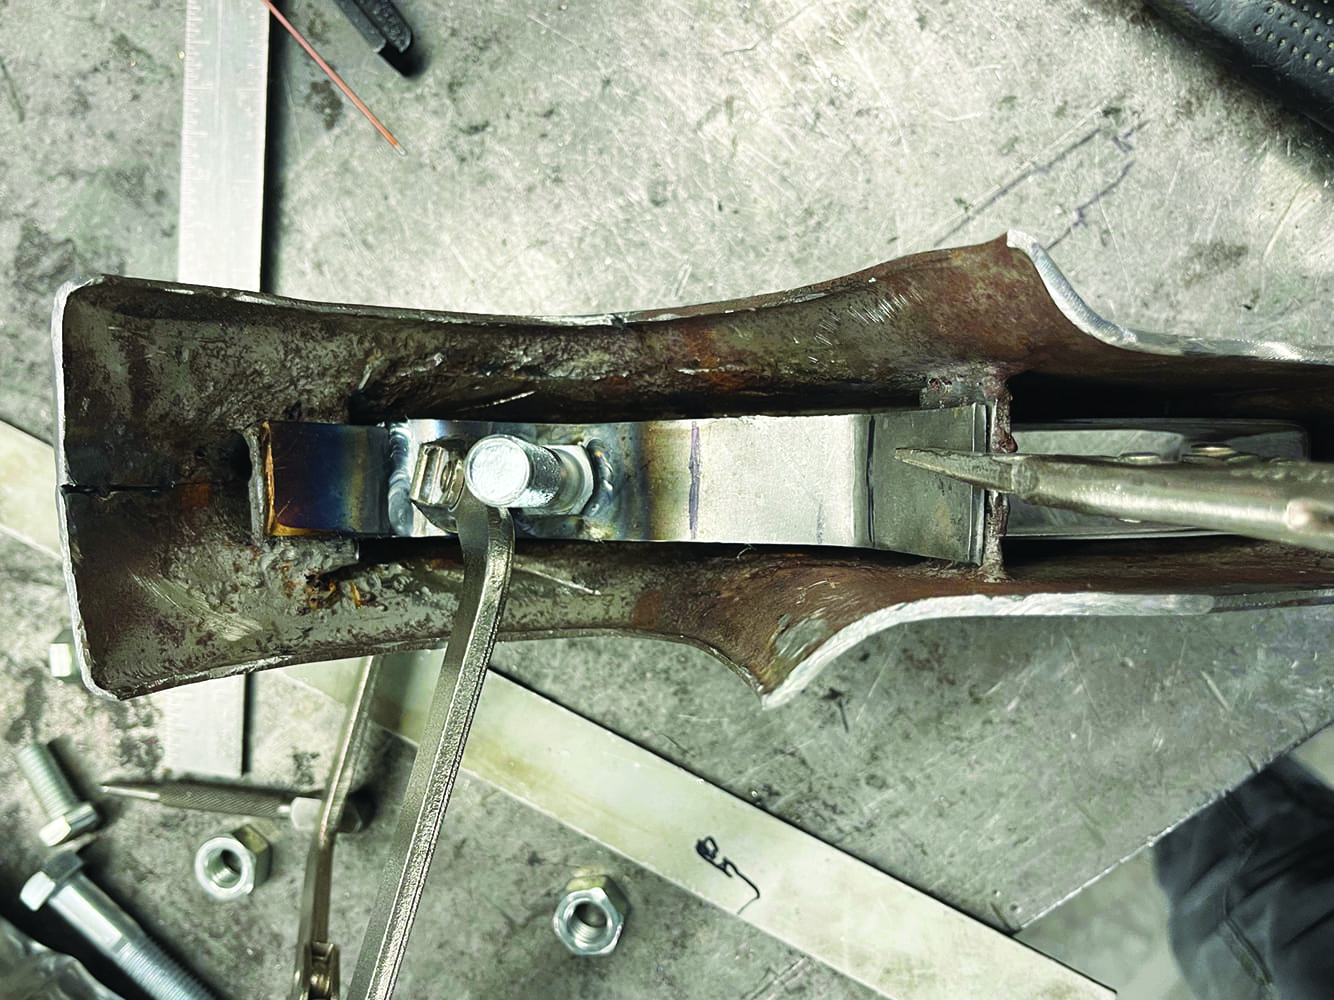
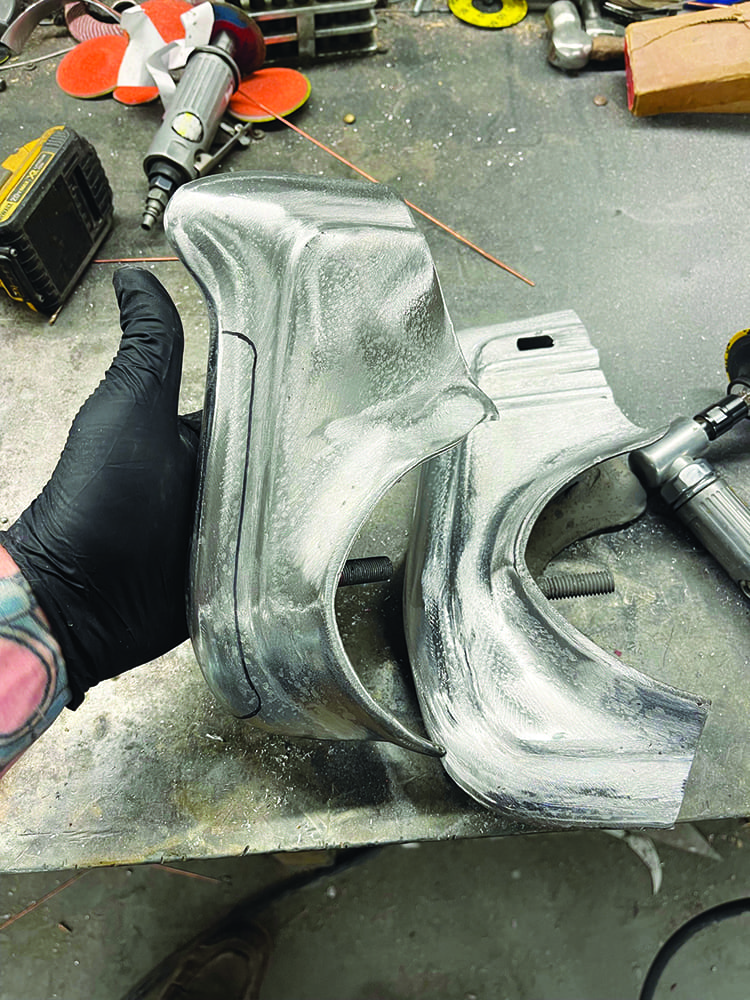
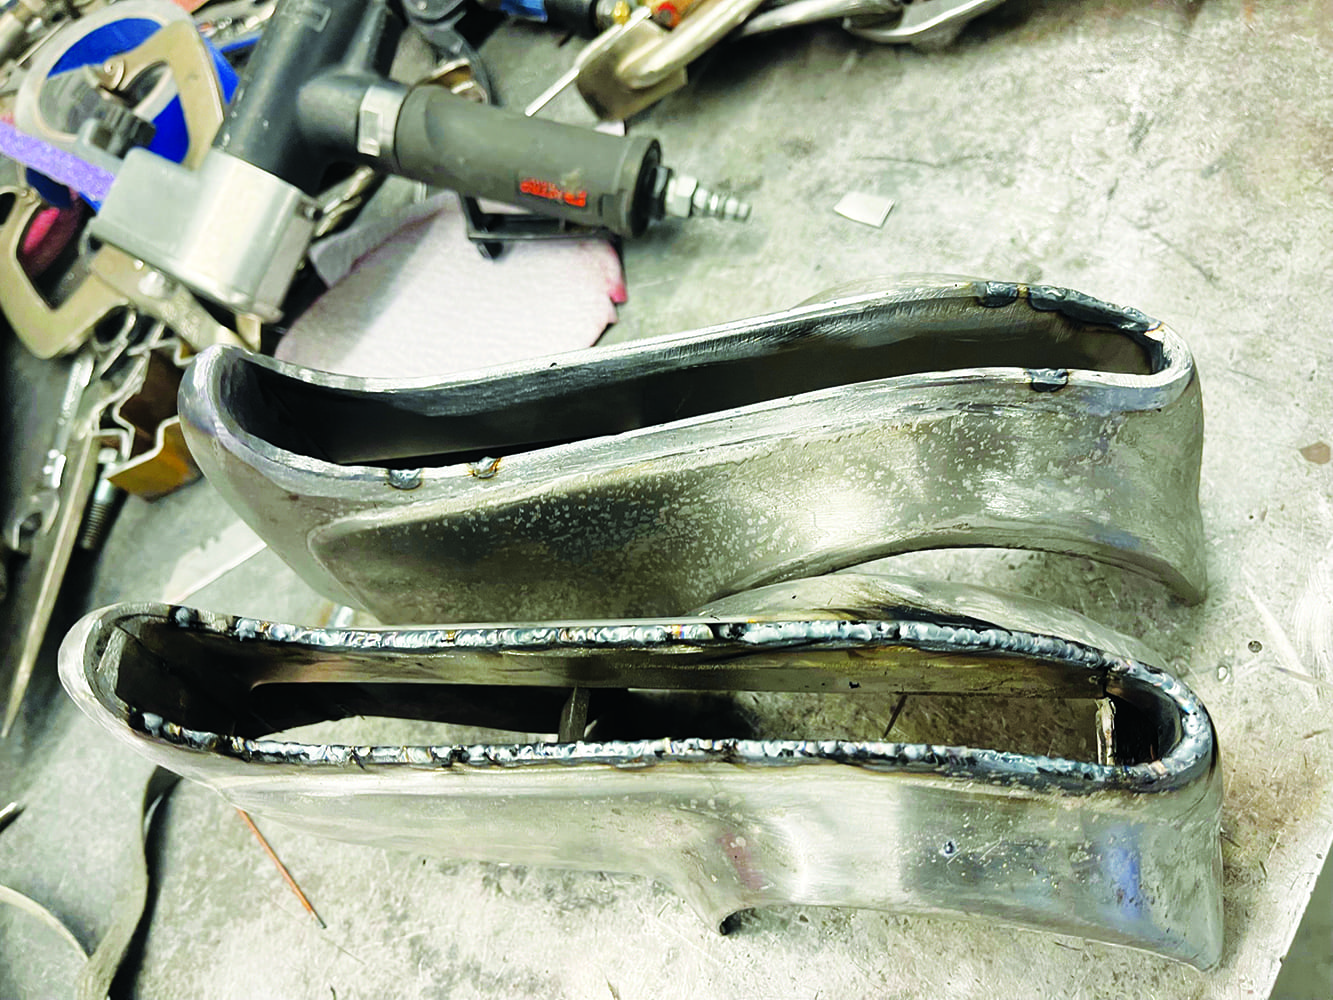
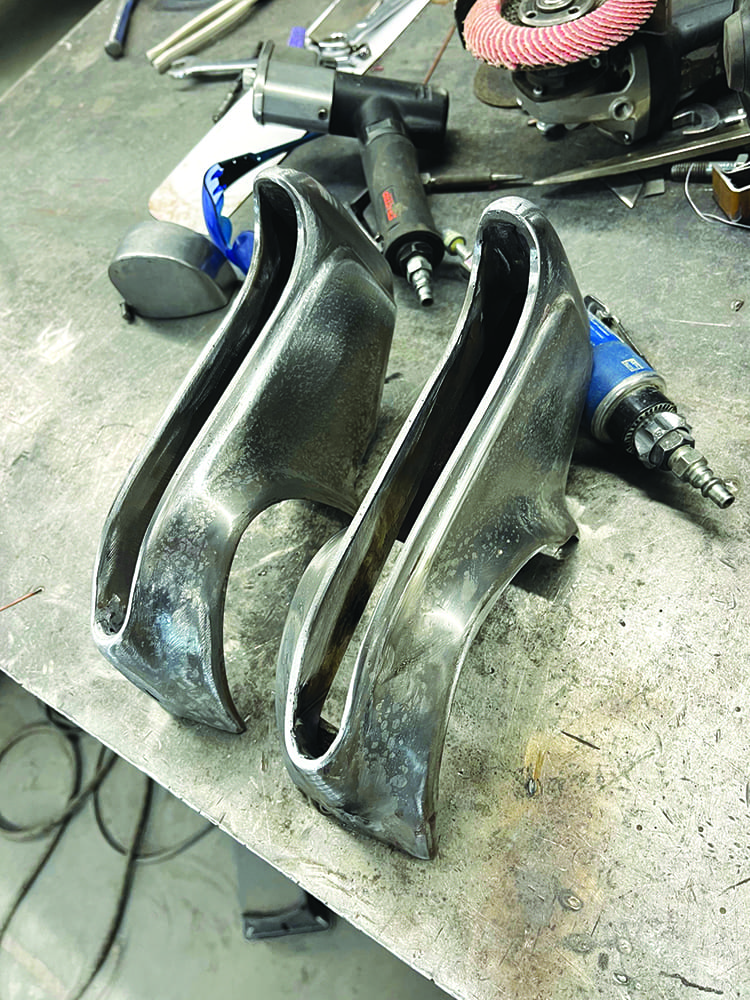
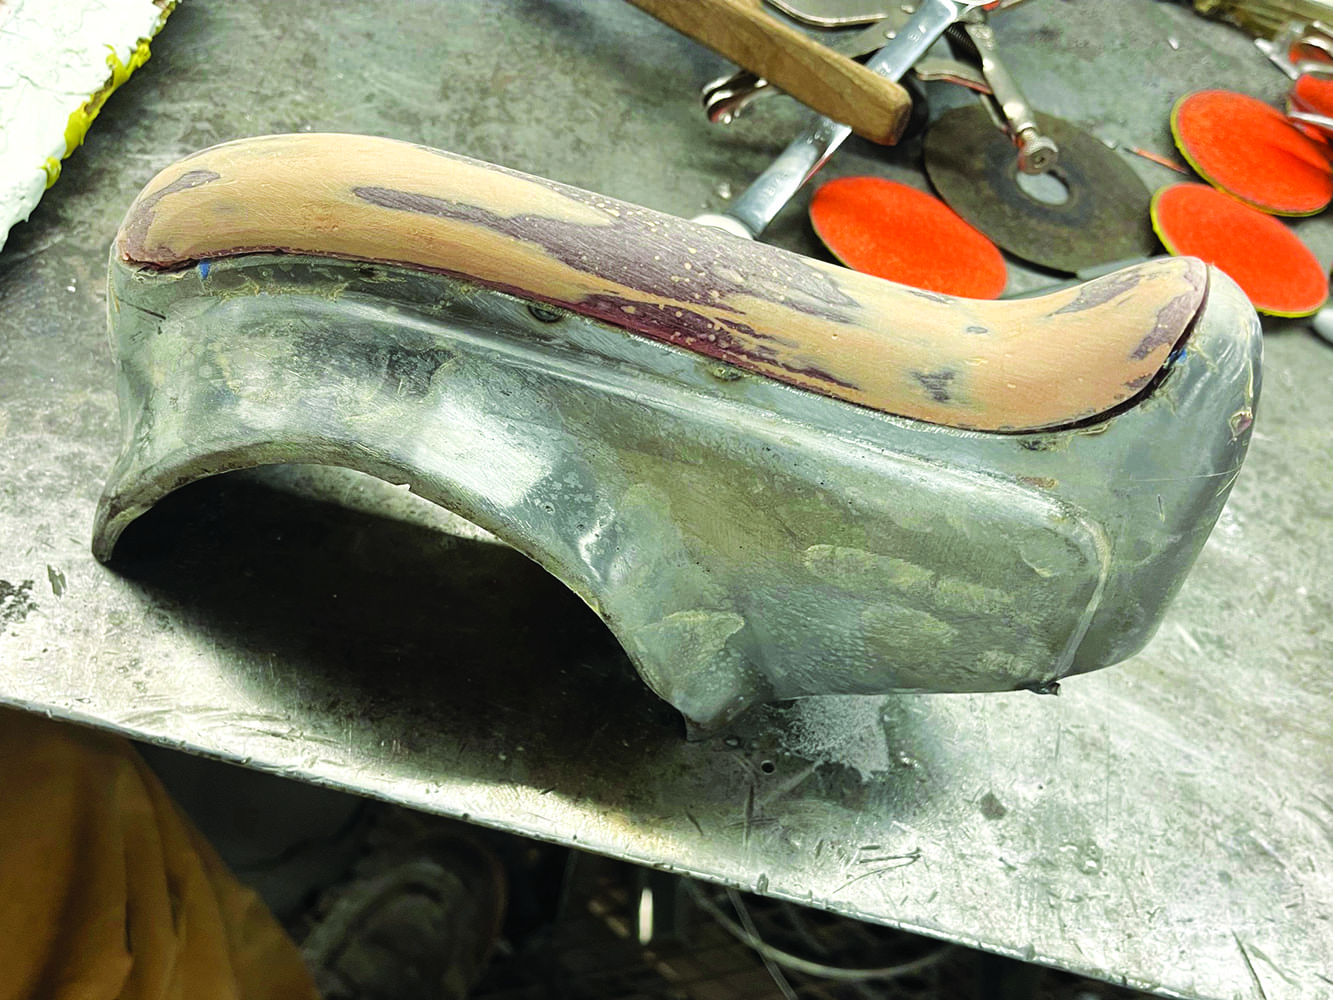
For Dean’s car, a 1941 Cadillac bumper and guards were chosen, and the bumper was modified better to fit the contours of the Packard’s tail end. The mounting studs welded to the back of the guards interfered with where the new lens and bulb would be installed, so custom mounts were made from 1/8-inch steel.

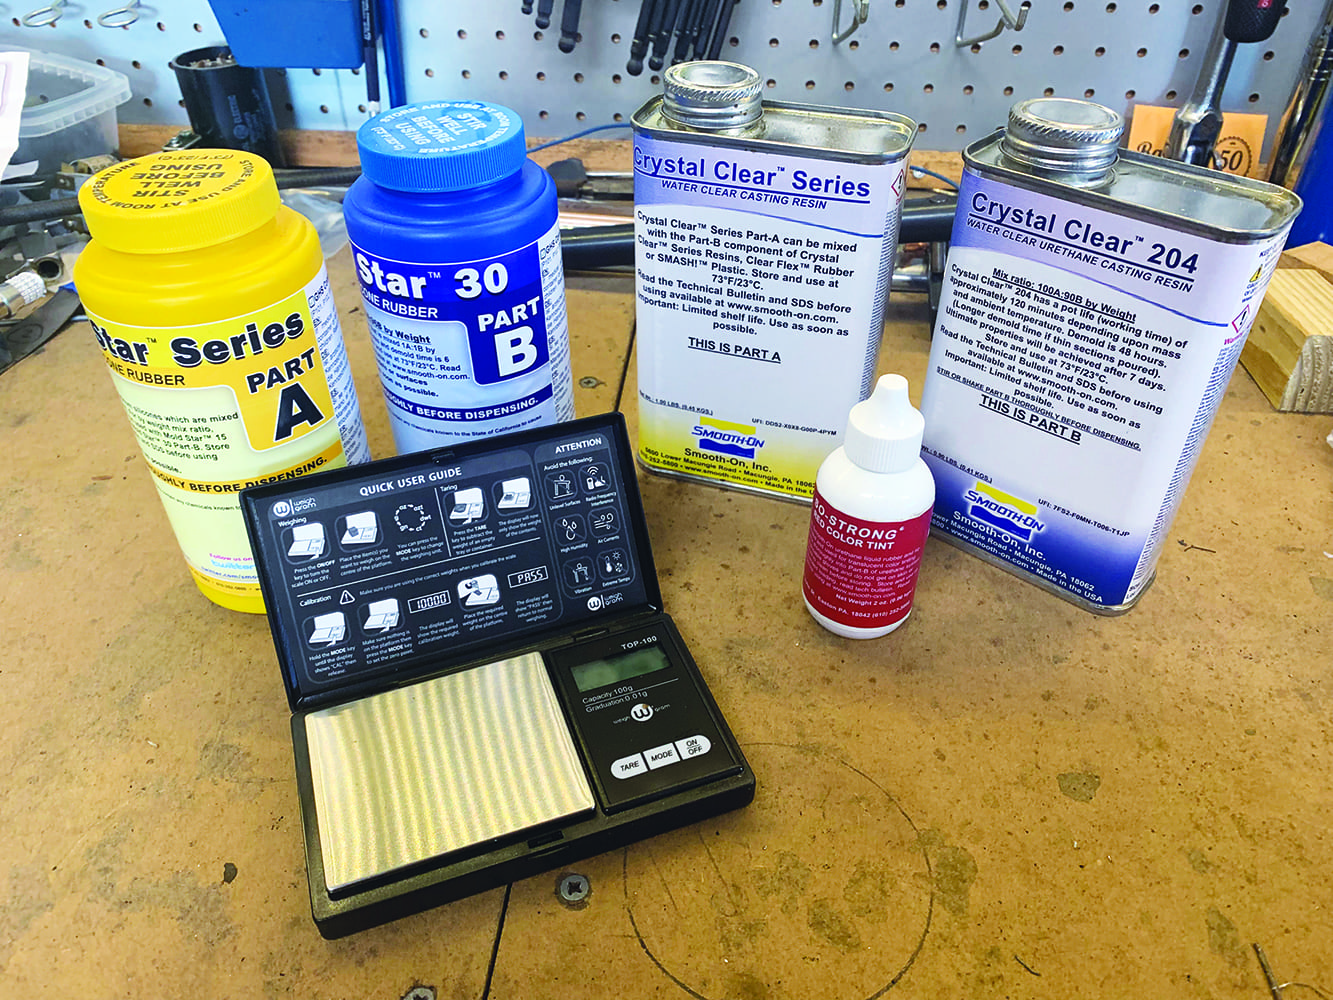
Next, it was time to make a mold of the guard’s face—the area where the lens will sit. As mentioned, silicone rubber mold materials can be found online or at most art supply stores. One popular product we’ve had good luck with is Smooth-On’s Mold Star 30—a two-part system that’s mixed one-to-one by volume and poured over or around the part you’re copying.
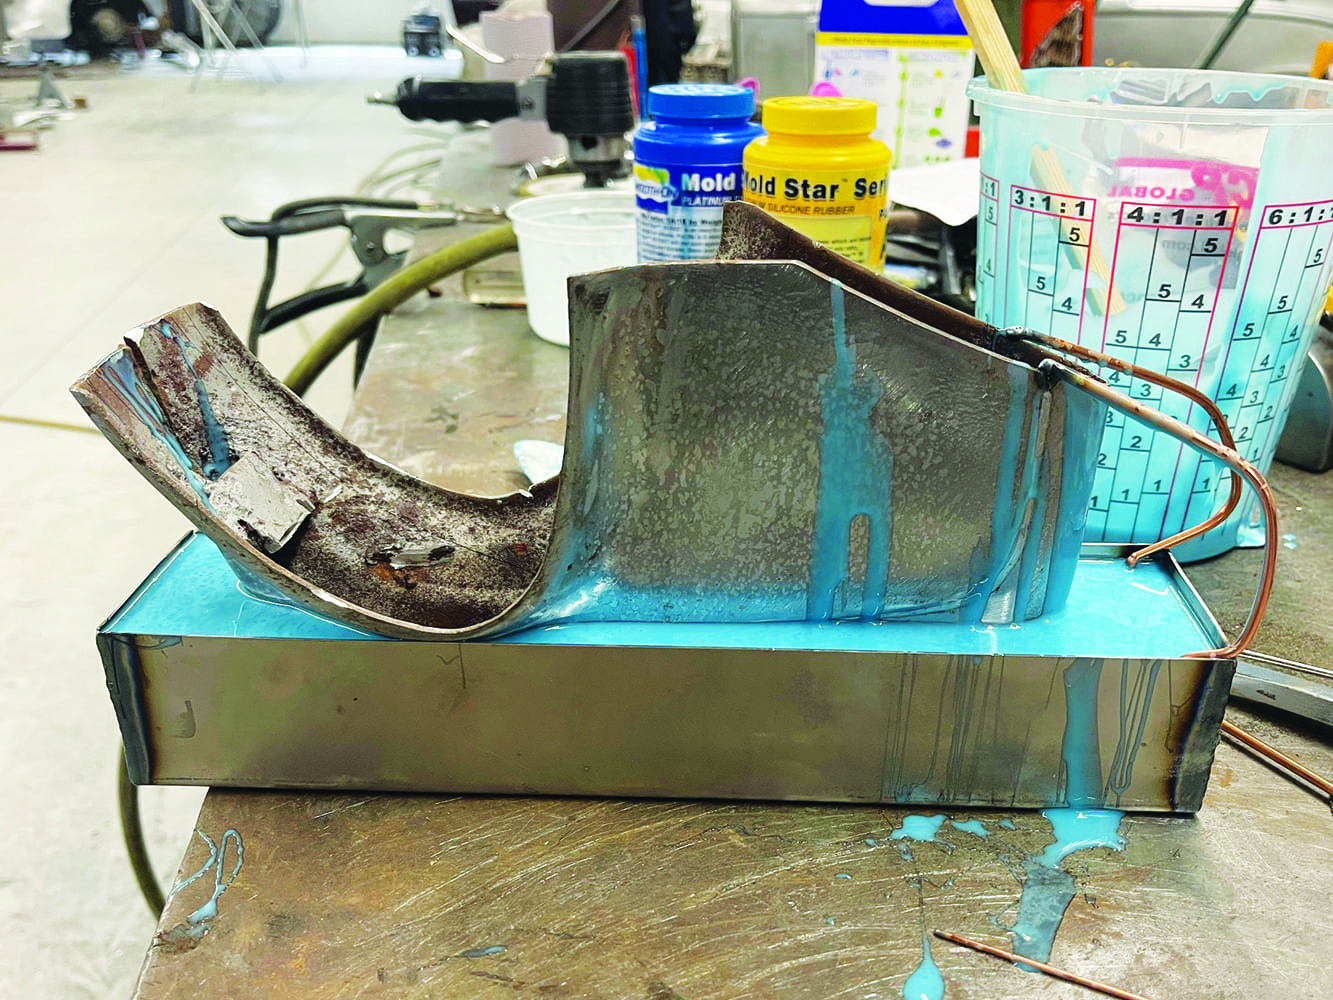
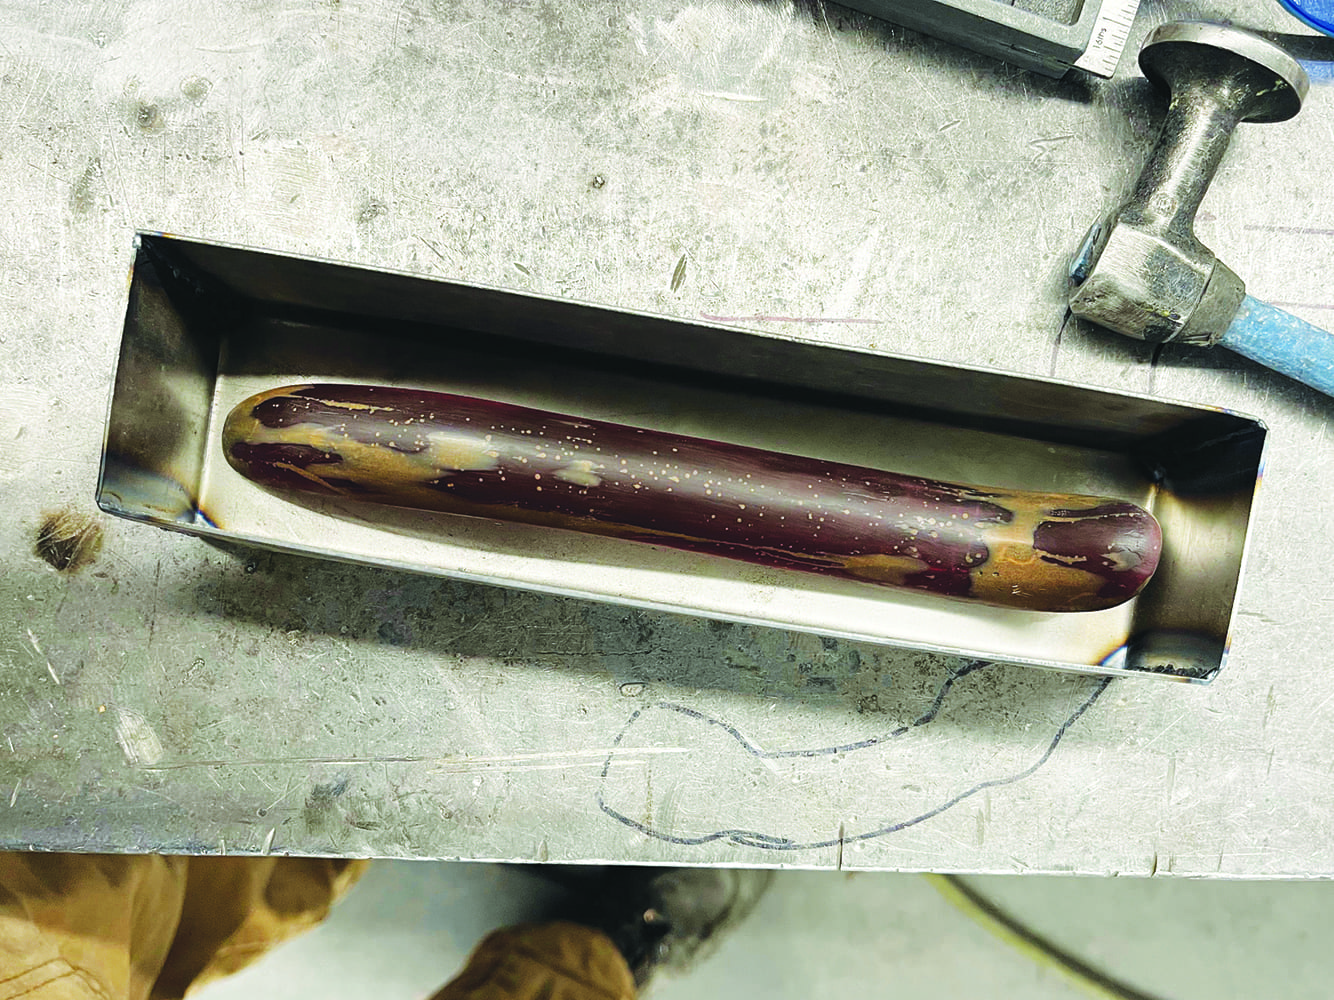
To create the mold, first find or make a container to hold the part you’re replicating and the liquid mold material. Walls built a tall pan from sheetmetal and then tack-welded rods to the guard and the pan to suspend the guard over the top with its face lowered inside the walls of the container. This way, when the liquid silicone is poured, it will capture the shape of the guard.
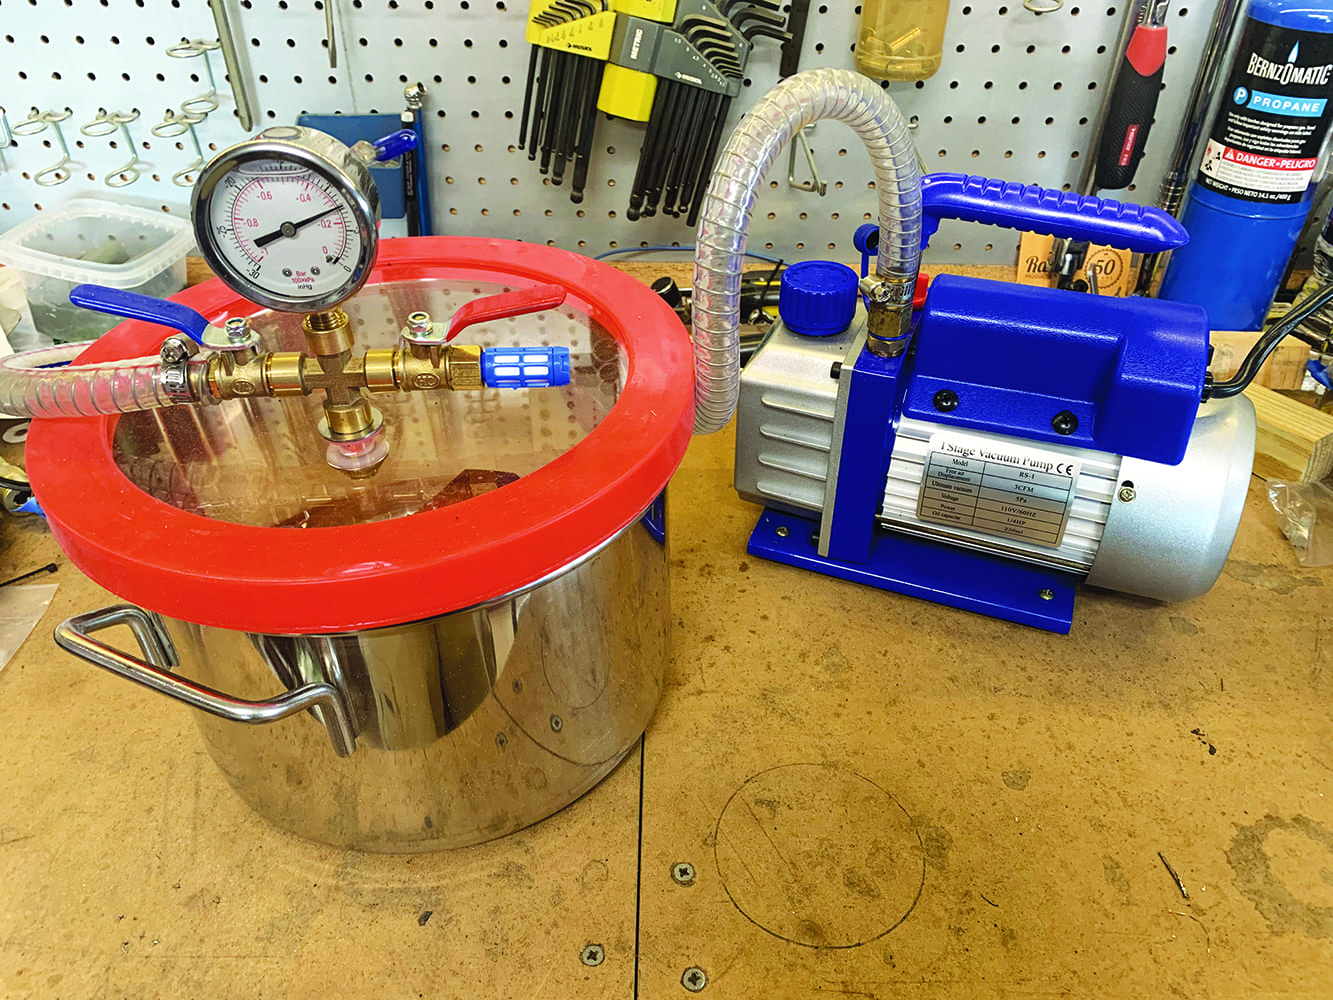
Smooth-On recommends degassing the silicone mixture before pouring to remove bubbles or air pockets that could cause voids in the mold. This can be done either with a small, inexpensive vacuum chamber, available online, or a pressure chamber, which can be made from a simple Harbor Freight–style paint pressure pot. Both methods achieve the same goal in different ways: vacuum removes air from the mixture, while pressure compresses air bubbles to reduce their impact on the mold. We’ve found that mixing the two-part silicone slowly and pouring it carefully through a mesh strainer produces good results without needing extra degassing. However, as you’ll see, using a vacuum or pressure chamber can be helpful when pouring resin for the lenses, so it’s a good idea to take that extra step during the mold-making process as well.
Once the silicone cures, the guard can be removed to reveal a mold of its face into which the liquid plastic resin can be poured. But first, you’ll need to define the shape of the lens itself. In the early days, when guys were forming lenses from heated Plexiglas, the shape had to be fairly simple. The advantage of using flexible molds is that you can get creative, adding contours that would have been much more difficult and time-consuming to create from flat Plex.

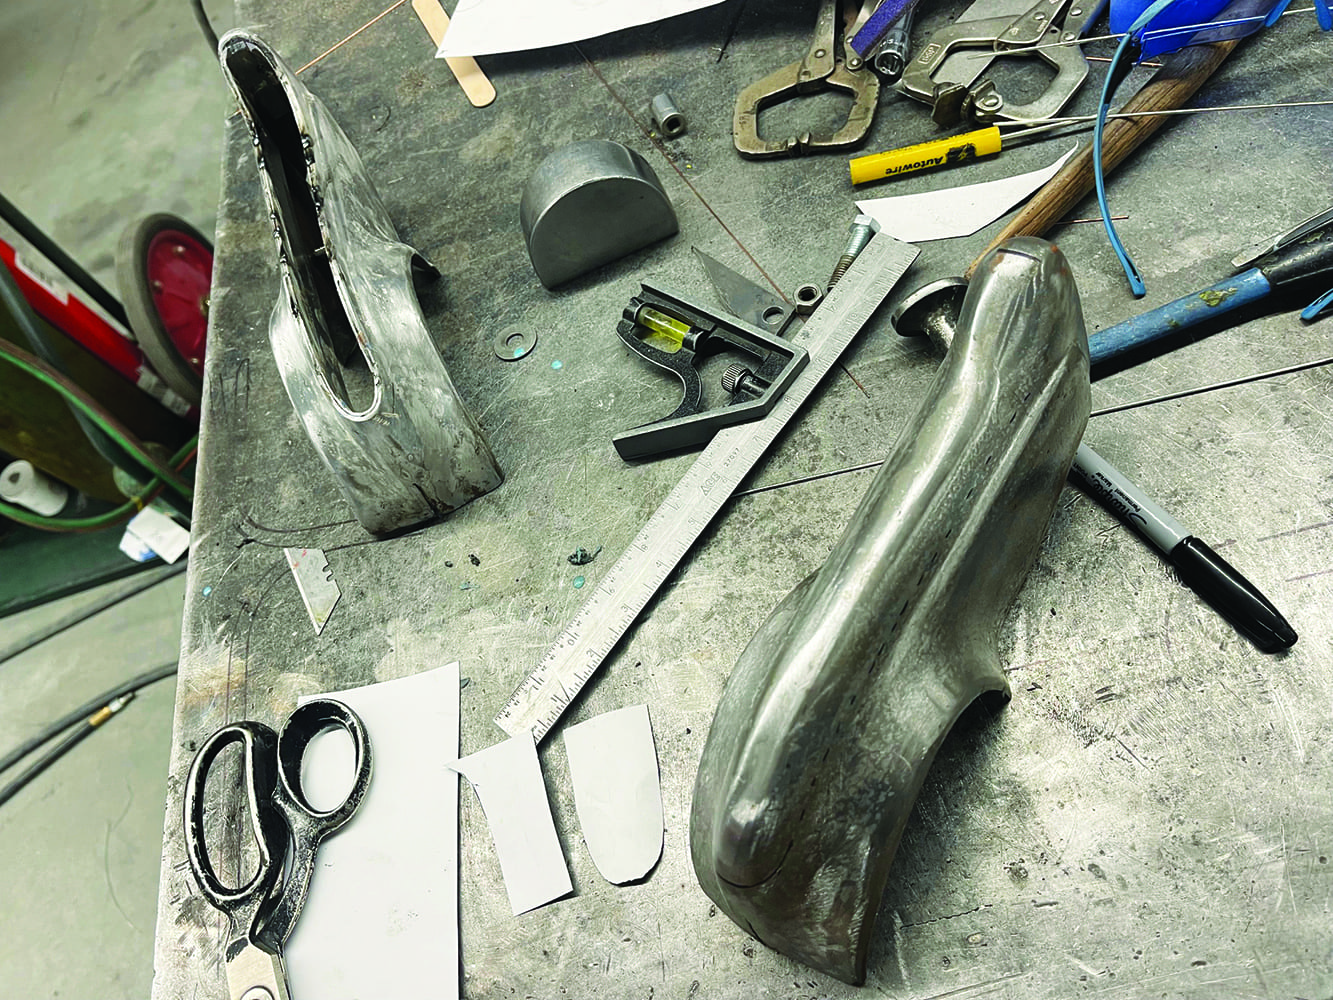
Take a look at the shape of the bumper guard and use a Sharpie to draw a lens profile that looks cool from every angle. Remember that the more illuminated surface area you create, the brighter and more visible the light will be. Once you find a shape you like, use tracing paper to trace it and duplicate it on the other bumper guard (flipping it over to mirror it if it’s asymmetrical). The cut-off wheel works well for making a rough cut of the opening. Just be careful to stay inside the line you’ve scribed and don’t go too far—the last thing you want is to move too quickly and end up having to weld and finish your mistakes. Once the rough opening is set, various tools can be used to fine-tune the exact shape you want, from hand files and angle grinder pads to thin pneumatic belt sanders.
To determine the size of the inner part of the lens (the part that fits inside the guard and isn’t visible), Walls welds sheetmetal inside the guard to form a rectangular shape. Then, he places the guard back into the original mold and secures it with an additional tacked-on rod. This process turns the guard into a “container” where resin can be poured to create a plastic pattern or model of the taillight lens. Before pouring the resin, a spray-on release agent is applied inside the guard to prevent the resin from sticking to the metal perimeter or to the flexible mold below.
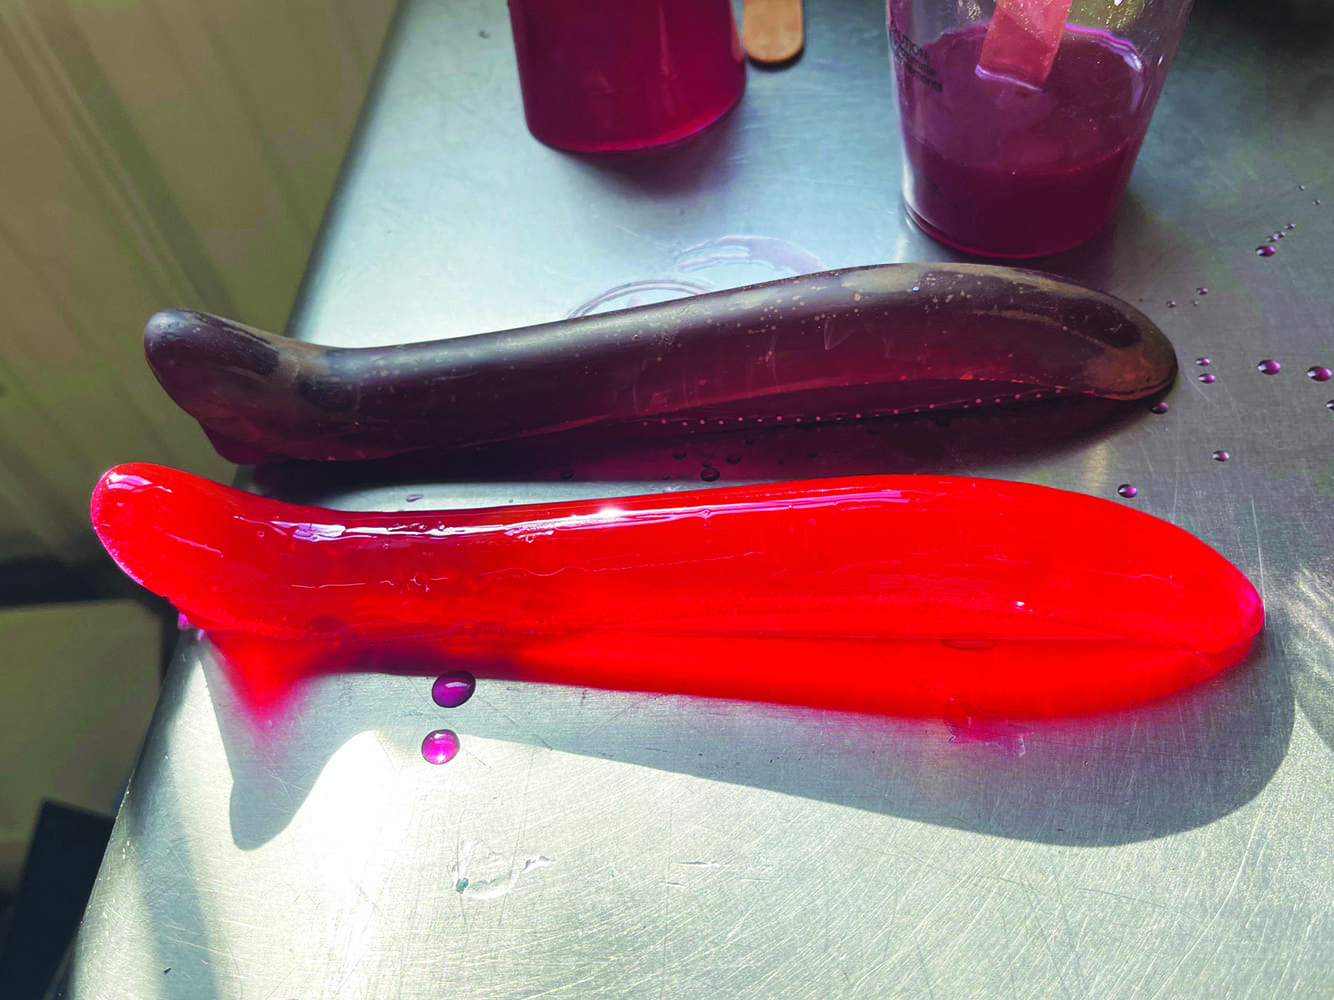
There are many different resins available for casting parts, such as lenses, and they’re formulated based on the thickness of the part. Therefore, be sure to know how thick you’ll need to cast it. We’ve found from experience that if you push the limits of the resin—for example, trying to cast a 3/4-inch part with a resin rated to 1/2 inch—you’ll wind up with a sticky mess. The resin itself is usually transparent, and different-colored, translucent, and opaque dyes can be added to achieve the desired hue and opacity for the job. Experiment with dyes to achieve the desired color, keeping track of the number of drops used so that you can replicate the result for both lenses (or for future replacements).
The resin walls used were Liquid Glass Deep Pour 24-Hour Epoxy because it has a very hard, durable finish, is UV resistant, and, as the name suggests, is suitable for thick parts. Like the silicone mold material, casting resins are two-part mixtures that are either mixed by volume or by weight. For the latter, an inexpensive kitchen scale for measuring ingredients is sensitive enough to detect the slight differences in liquid weight these two-part mixtures require. Take your time to measure precisely and be sure to degas the mixture once it’s dyed and mixed to a consistent hue. When it comes to resins, those tiny air pockets may not be immediately visible when you first demold your lens, but they’ll stand out as soon as a light bulb is behind them.
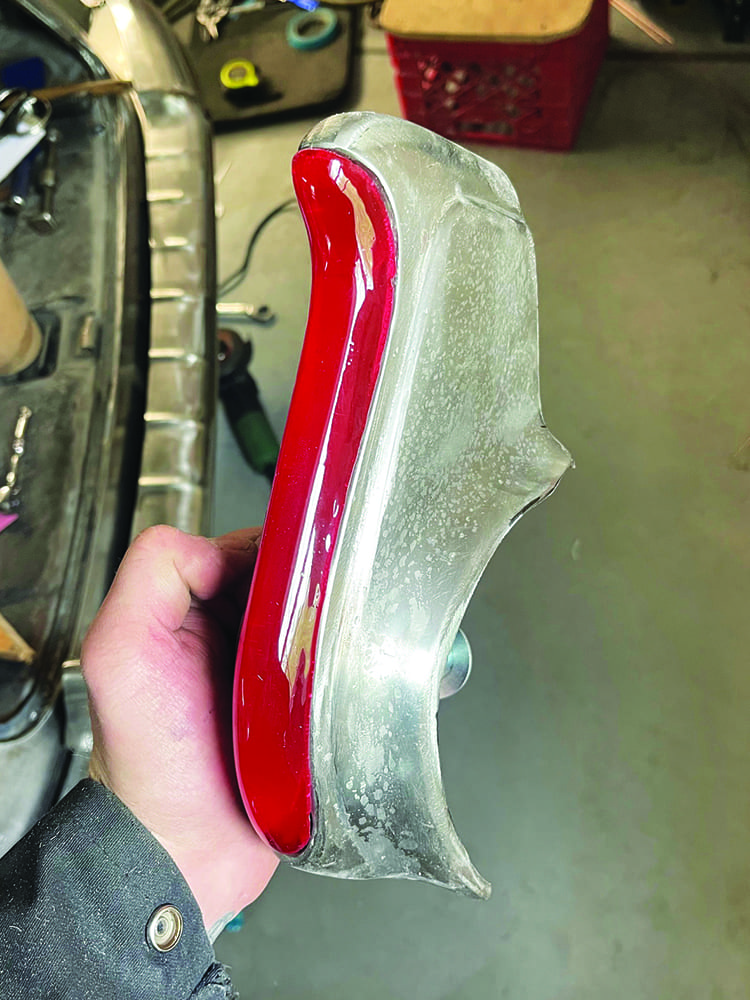
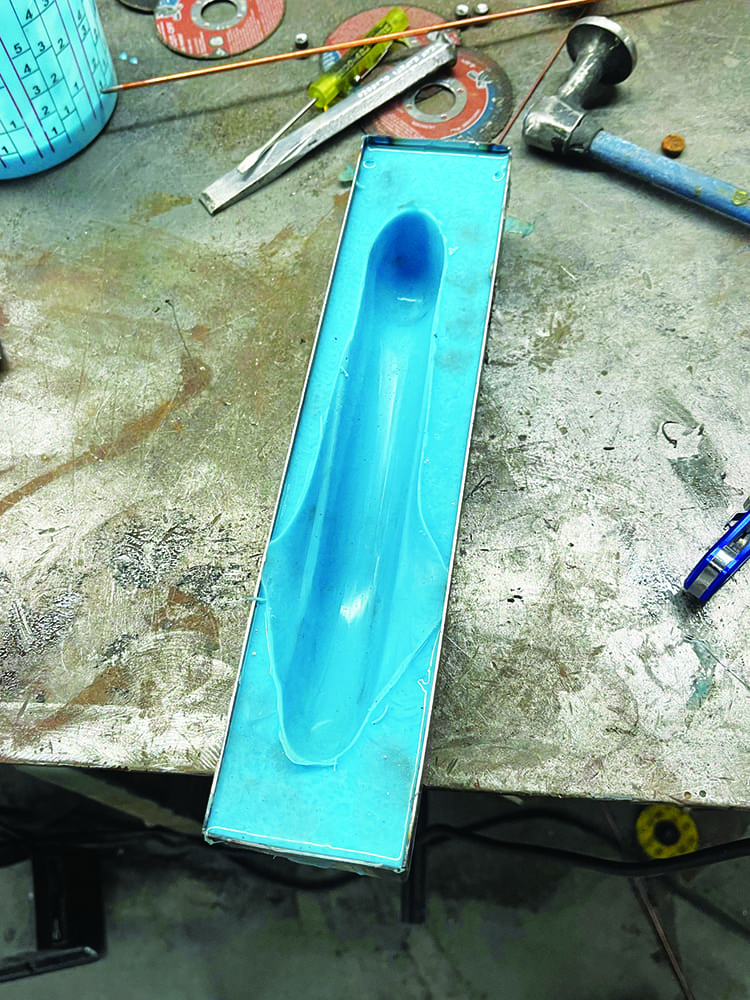
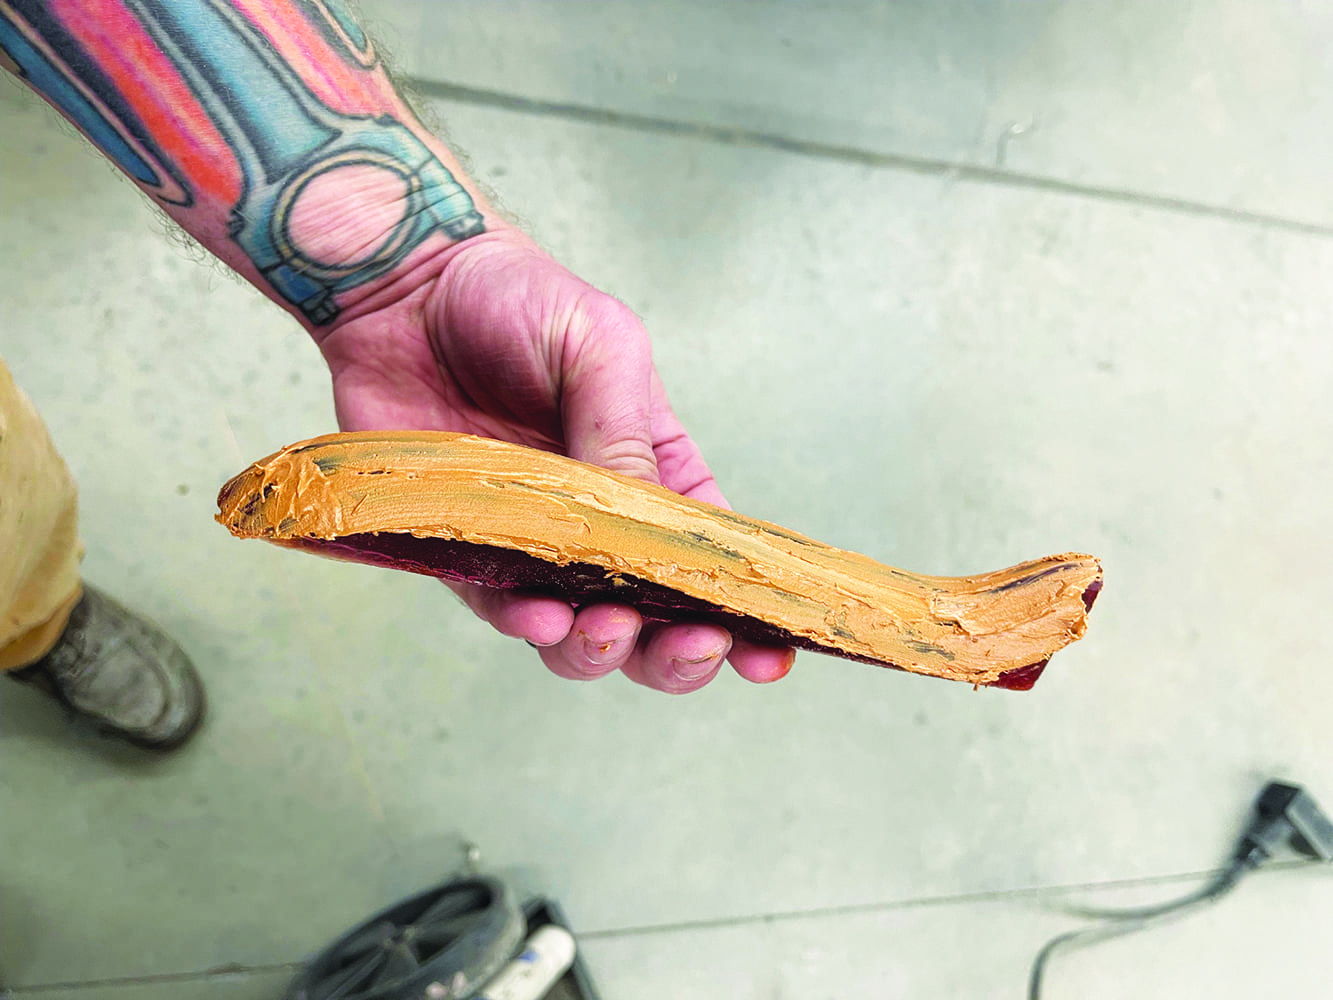
With the bumper guard mounted in the original mold, Walls poured resin into the back of the bumper guard and allowed it to cure. The resulting casting, or pattern, captured the shape of the final taillight lens, complete with a stepped “lip” that allows it to fit snugly into the perimeter of the lens opening. A thin layer of body filler was then applied to the pattern before reinstalling it into the guard and sanding the face to ensure it was perfectly smooth and flush with the guard’s face.
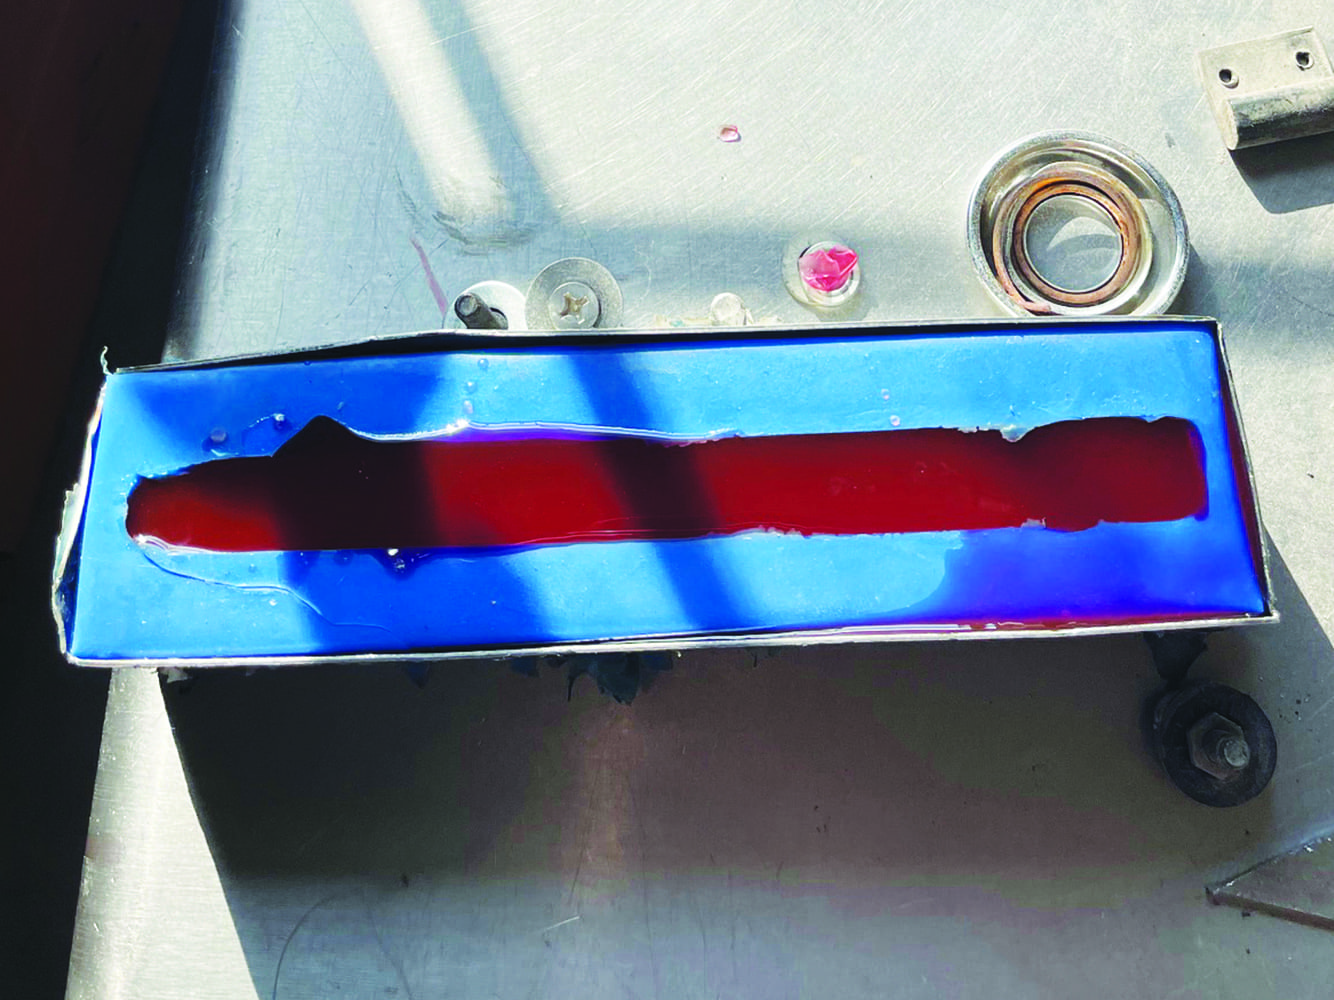
Finally, to create the final mold for the lenses, the pattern was placed face up inside a small pan, and then a fresh batch of liquid silicone was poured over it. Once the silicone cured, the mold was removed from the pan and the lens pattern was demolded. What remained was a cavity that captured the perfectly smooth shape of the lens, ready for pouring fresh casting resin to make the final lenses. Since flexible molds are reusable, you might want to pour an extra lens or two— and you’ll definitely want to store the mold in case you need more lenses later.
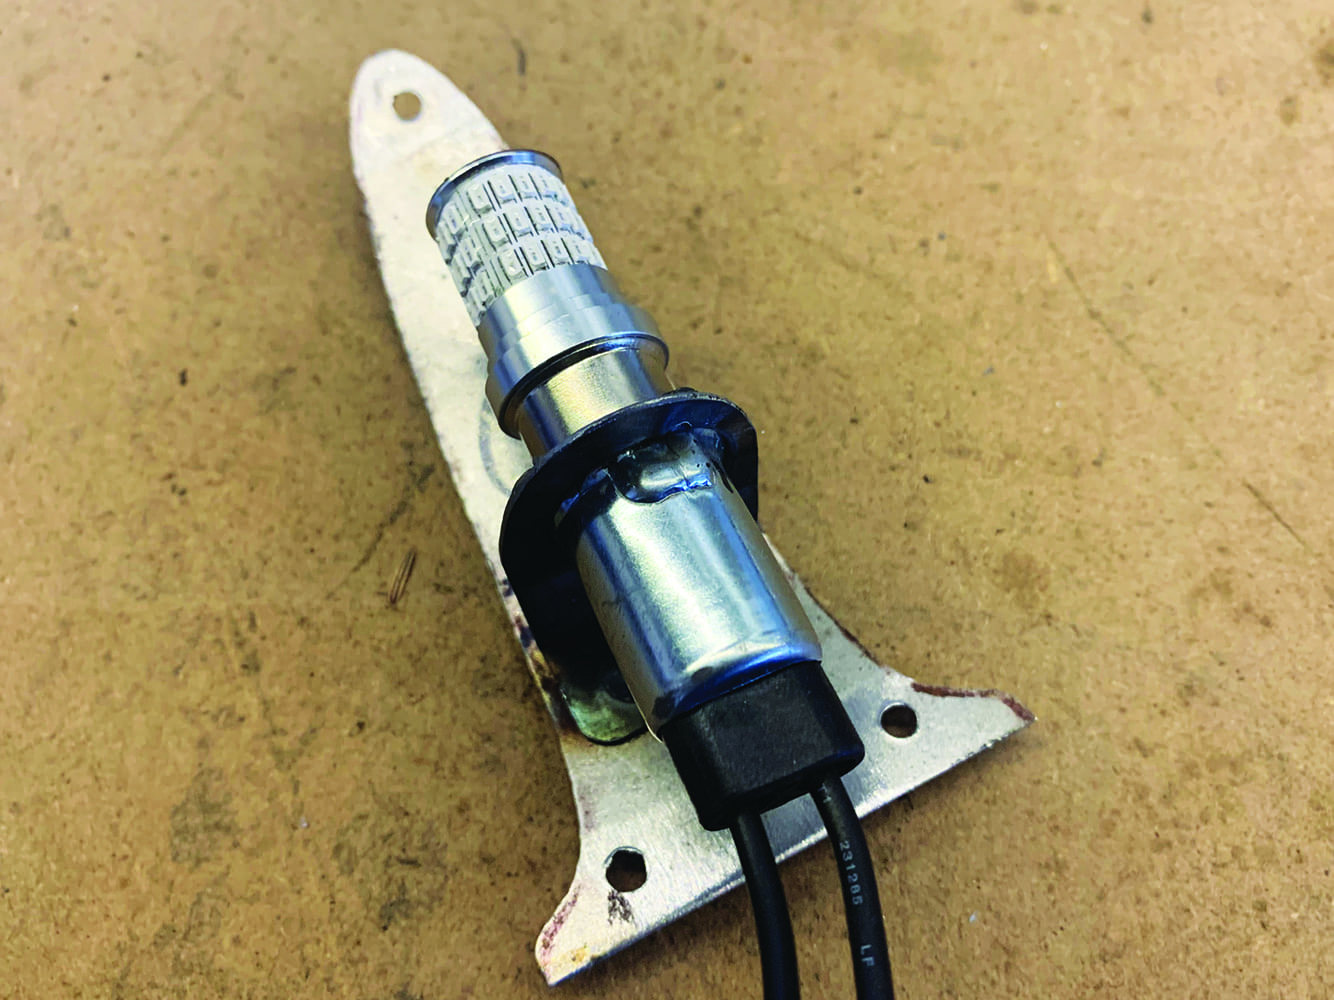
Illuminating your new taillights involves fabricating a small bracket and installing a standard taillight socket inside the bumper guard behind the lens. There are many LED options that are brighter than the standard 1157 taillight but still maintain that warm tone of an incandescent bulb. Look for bulbs with a high number of LEDs placed closely together, preferably with LEDs on the sides and top of the bulb. The brighter the bulb, the better.
The simplicity and ease of creating flexible molds and forming custom plastic parts open up many possibilities. Besides tail and parking light lenses, this process can be used for recreating various plastic interior pieces as long as you have a solid original to make a mold from. For more complex shapes, two-part molds are an option—there are plenty of tutorials on mold material manufacturers’ websites and on YouTube that can guide you. The only question left will be, what custom or replacement parts should I cast next? MR
Check out this story in our digital edition here.