By Jefferson Bryant – Images by the Author
Fiberglass is a very misunderstood material. Most people can just think of the itch, followed by the sticky mess and simply don’t want to fool with it. The reality is that it is far more forgiving than metal, but repairing fiberglass is where many DIYers get spooked. Fiberglass moves differently than metal, so bodyworking it requires different materials and techniques. The fibers swell in the heat and can print through paint in the sun, but that goes away in the shade. Fiberglass sticks to itself quite well, but it has to be properly prepped to get solid adhesion. These inherent differences tend to scare off less-experienced body shops from working on the early true fiberglass Corvettes (1953-72).
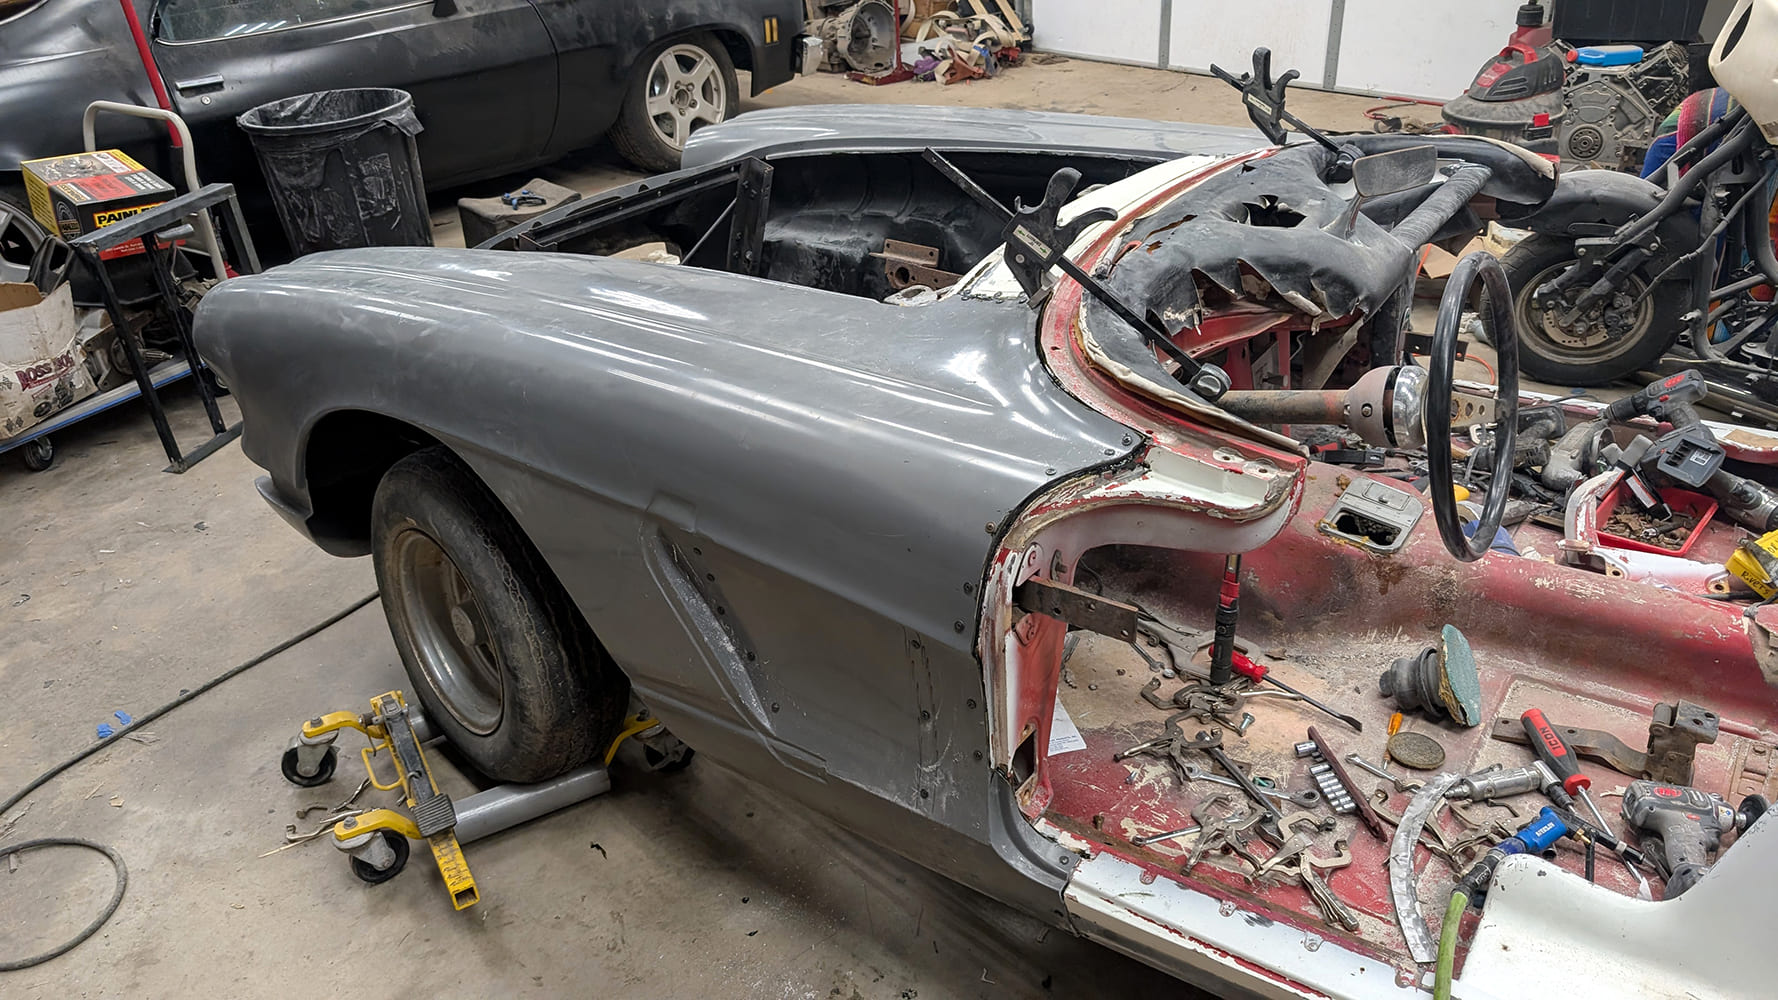
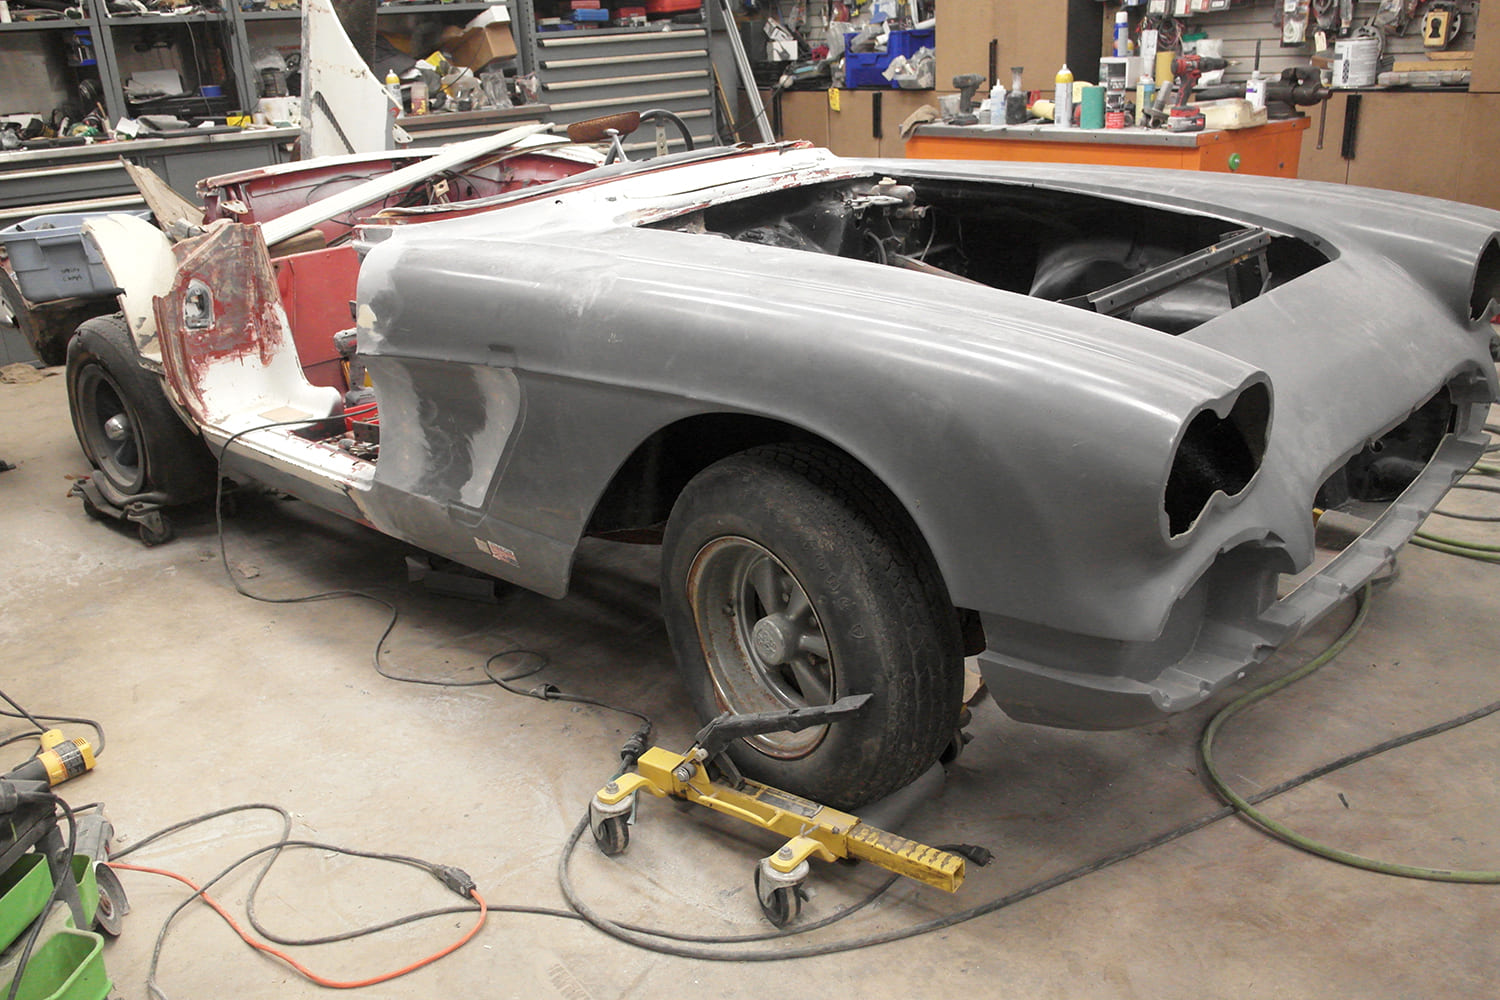
BMF Bodies LLC builds replacement bodies and repair panels for C1 Corvettes (1953-62), as well as custom work. We visited the shop to document a front clip replacement on a 1962 Corvette. This car had been poorly repaired 30-plus years ago, and most of the bonds had failed. The crew at BMF Bodies stripped the original panels and showed us the entire process. This is something that anyone with basic bodywork and fabrication skills can do, you just need some patience and a couple of special tools.
Separating the Fiberglass Panels

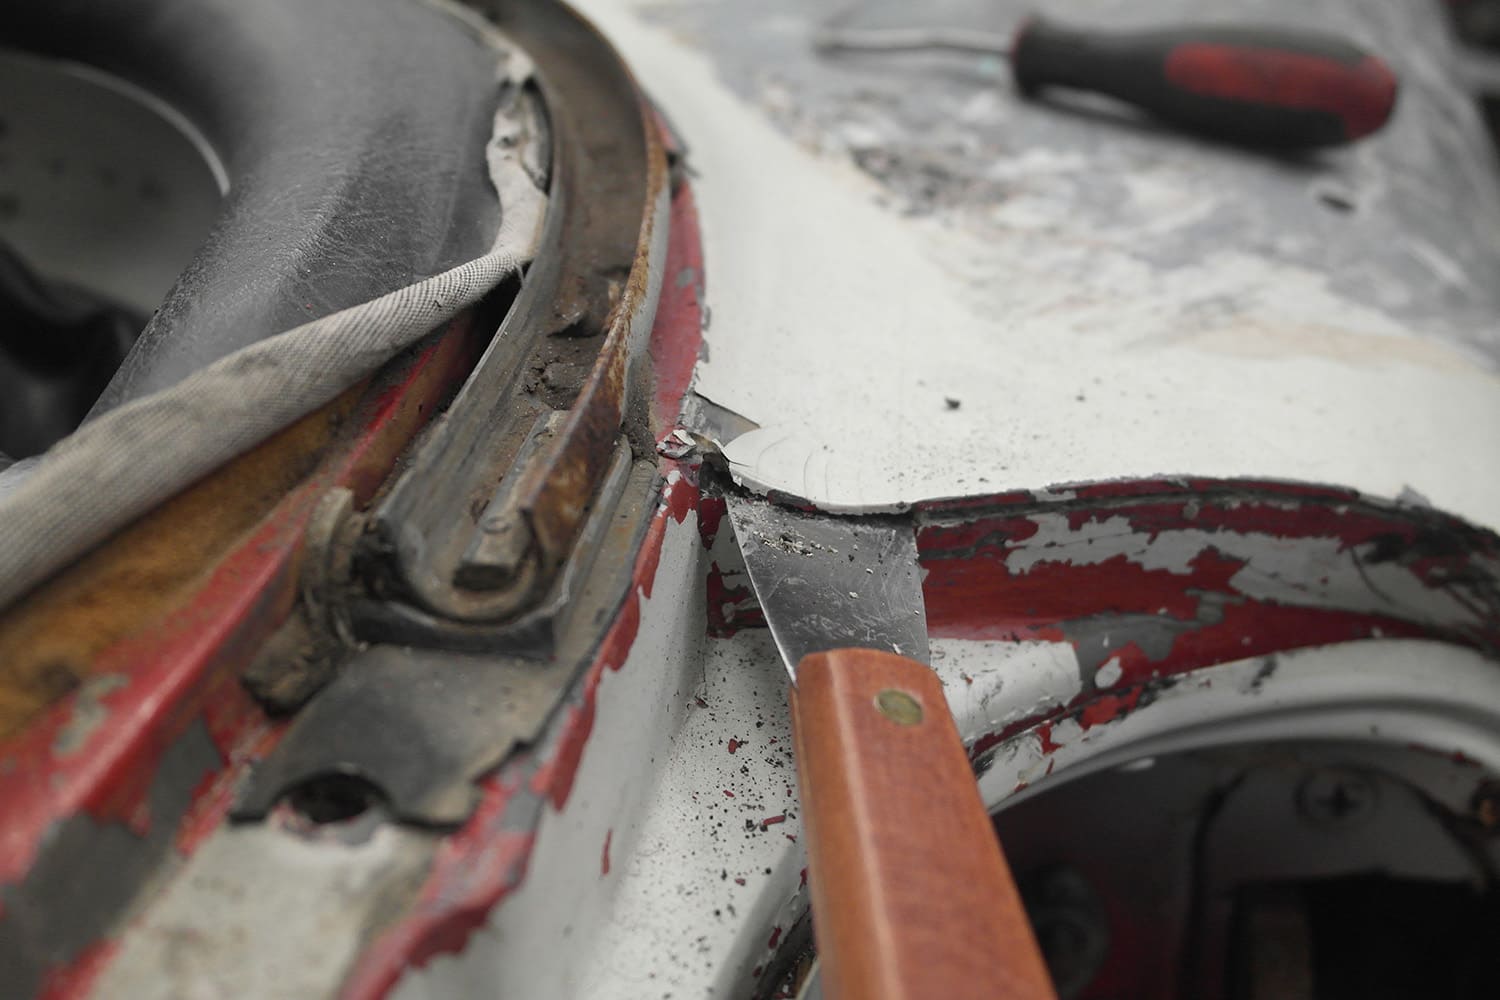
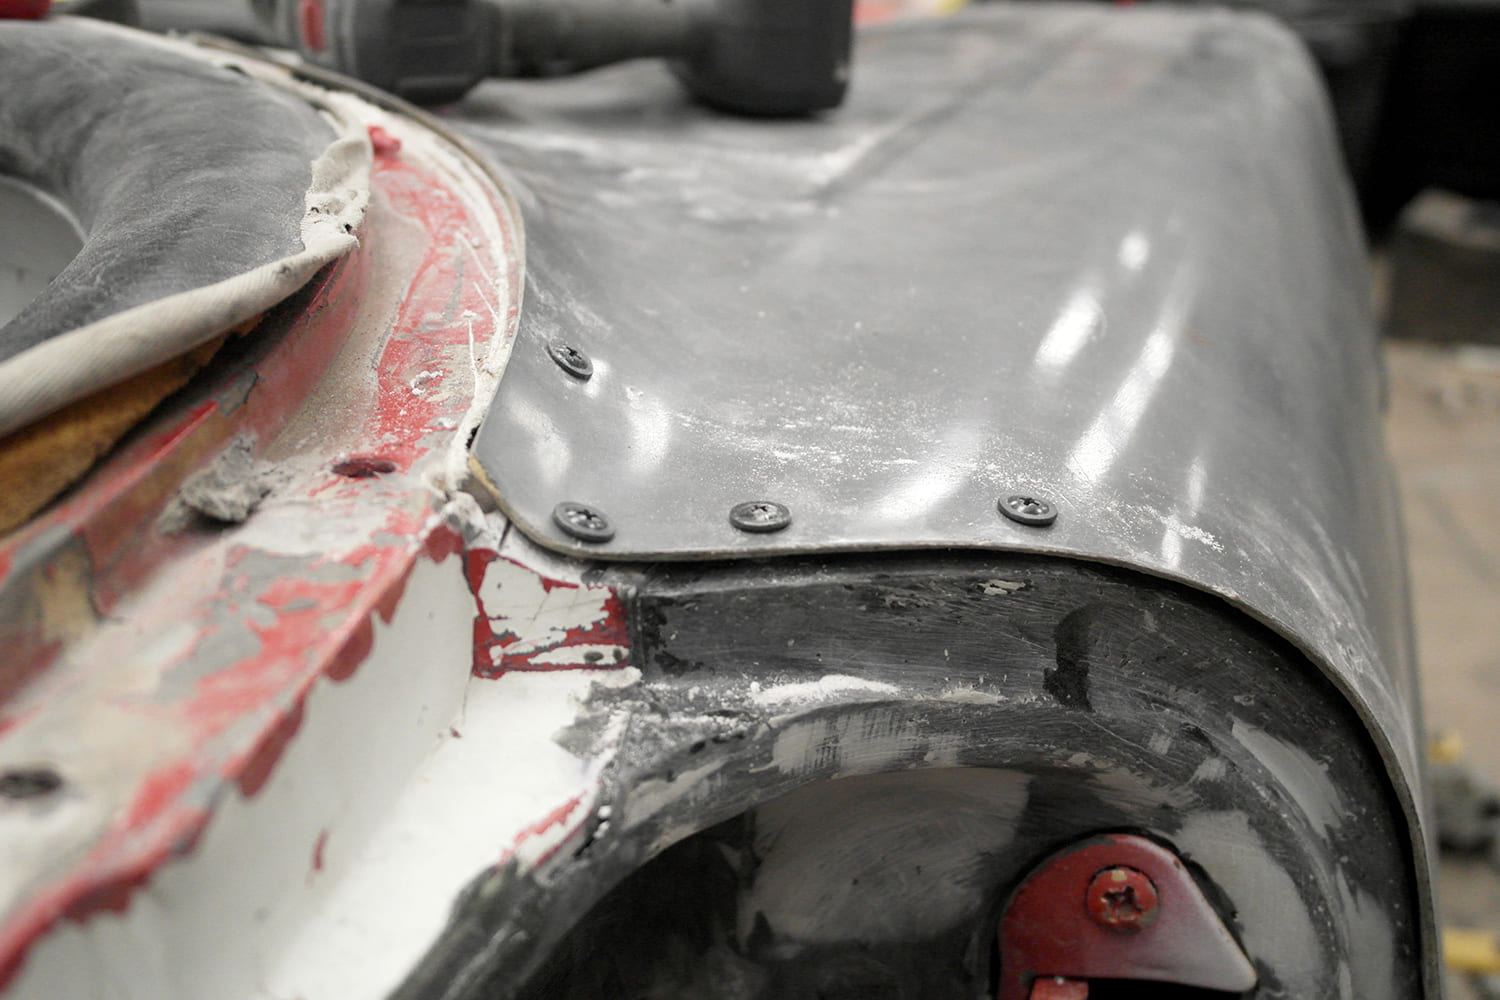
Most replacement parts are sold as full sections; a front clip is the entire nose and fenders (some, like BMF’s, include the entire cowl, dash, and A-pillars), where the original bodies were built with multiple pieces. You must find bonding areas to begin the separation process. How much you have to remove depends on the damage. Our ’62 needed a full replacement, which starts with the A-pillars. The fenders bond to the A-pillar hinge panels, a little heat and thin metal scraper work great to separate the original bonding adhesive.
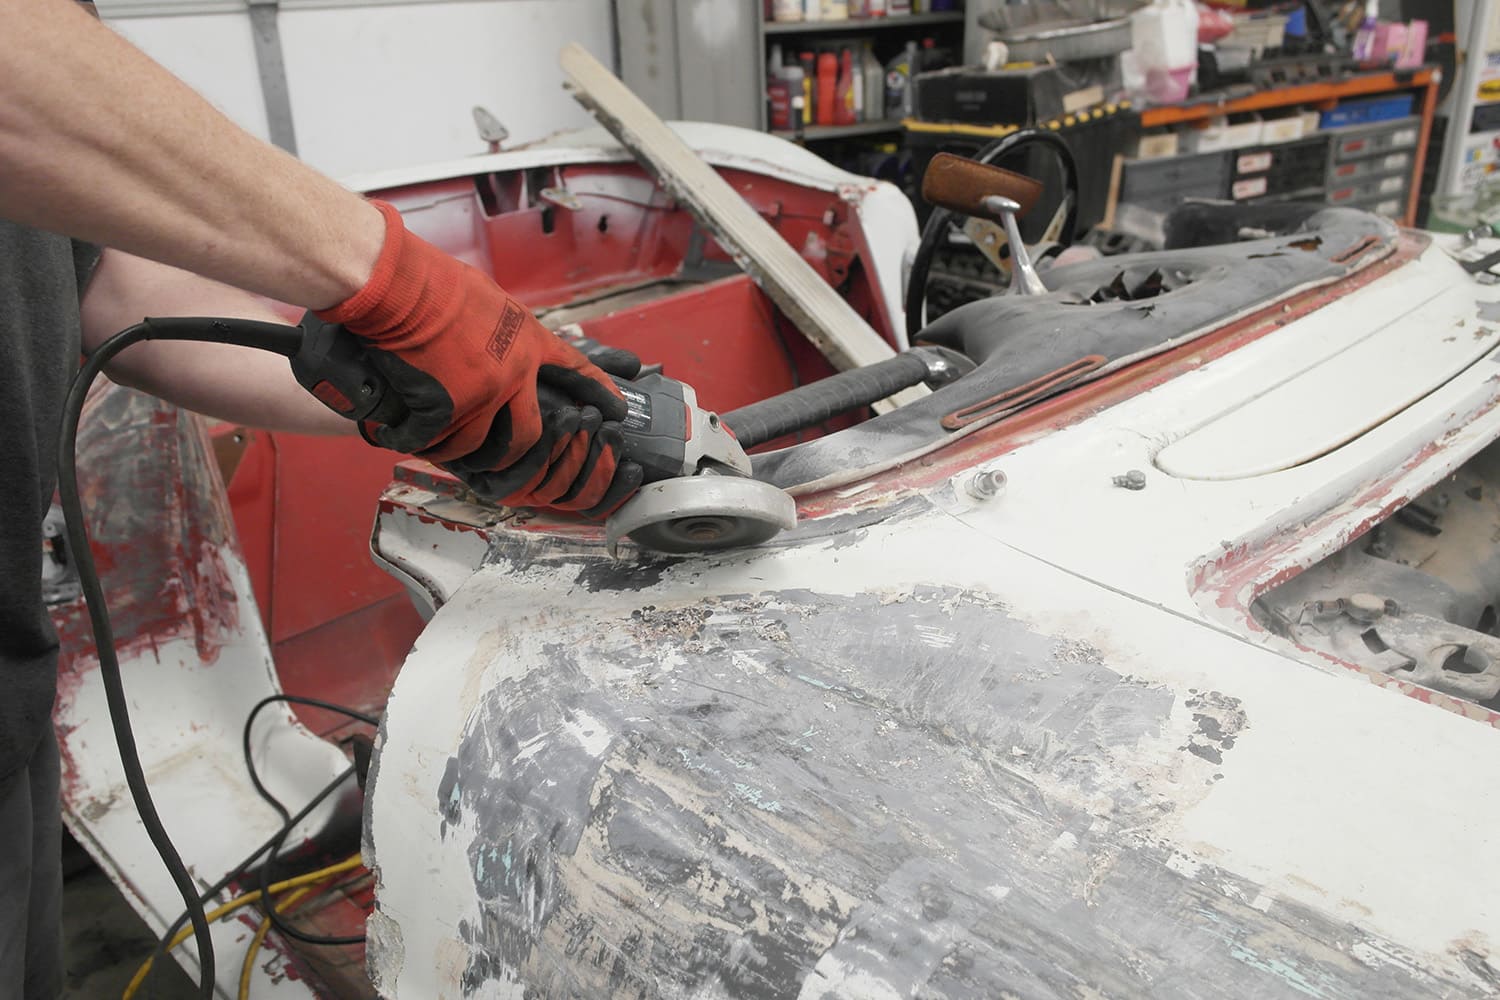
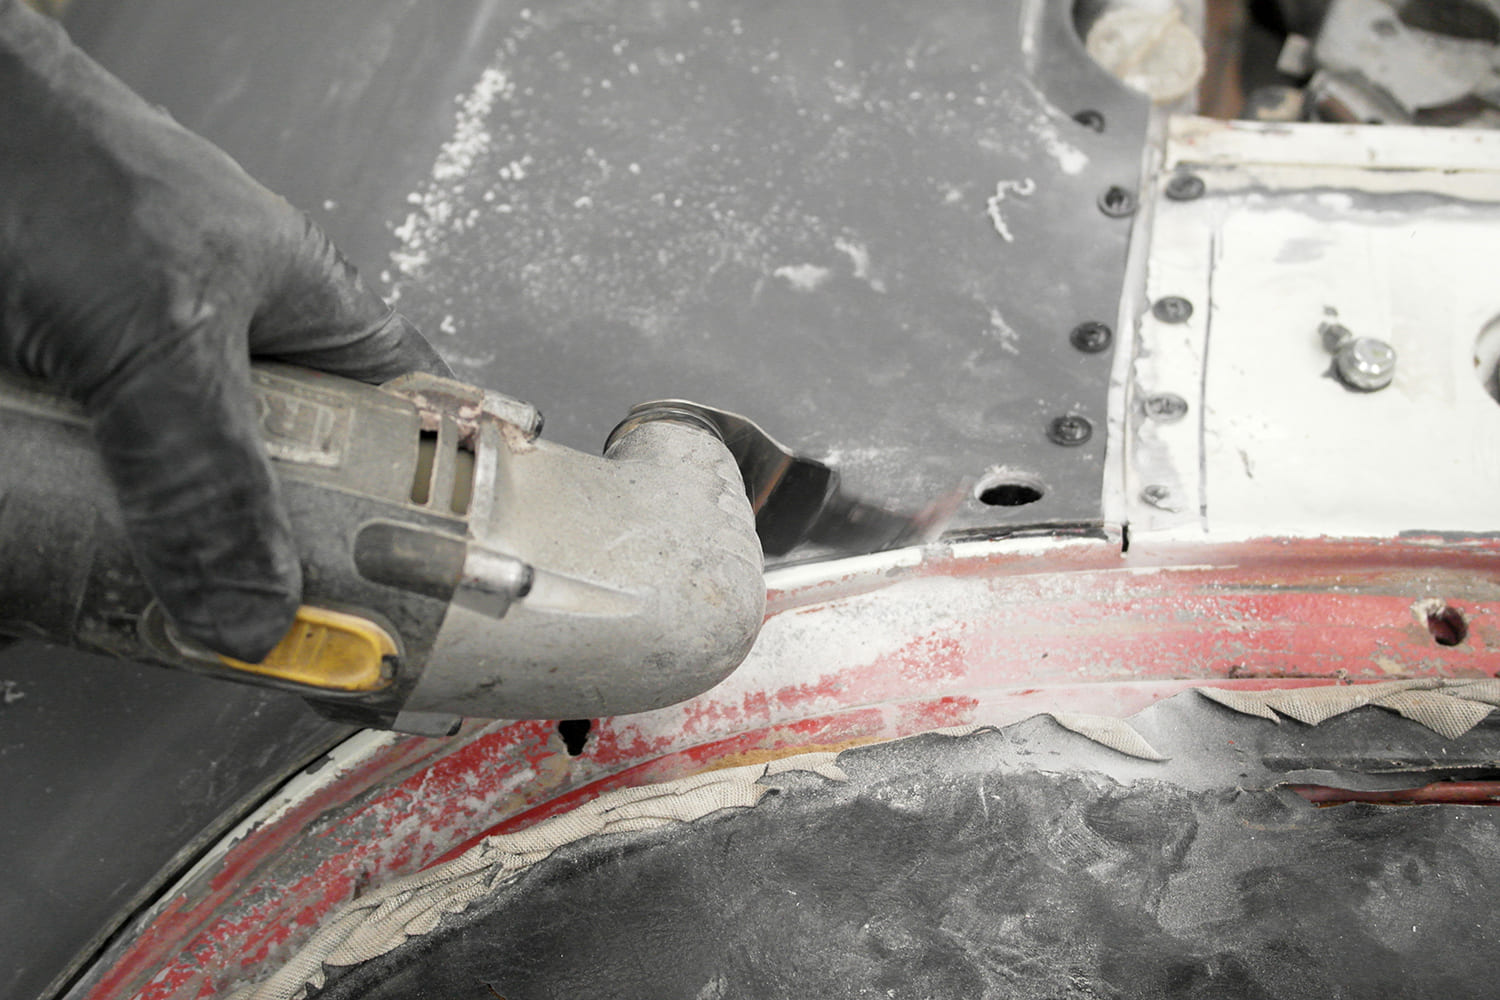
The top cap of the front end is all one piece, essentially the top of the fenders from the front hood opening all the way back to the upper dash is one piece. The front clip the customer brought to be installed (this one was not made by BMF Bodies) does not include the dash or center cowl, which means we will reuse the original cowl and dash. Because there is not an original separation line, we have to cut it. For the initial fitment, we cut this back a couple of inches from the actual intersection point, so we have plenty of material available to get a clean fit. The bulk of the original glass was cut away with a cut-off wheel. This is way faster and easier than anything else. We will get to the details as needed during the fitment process.
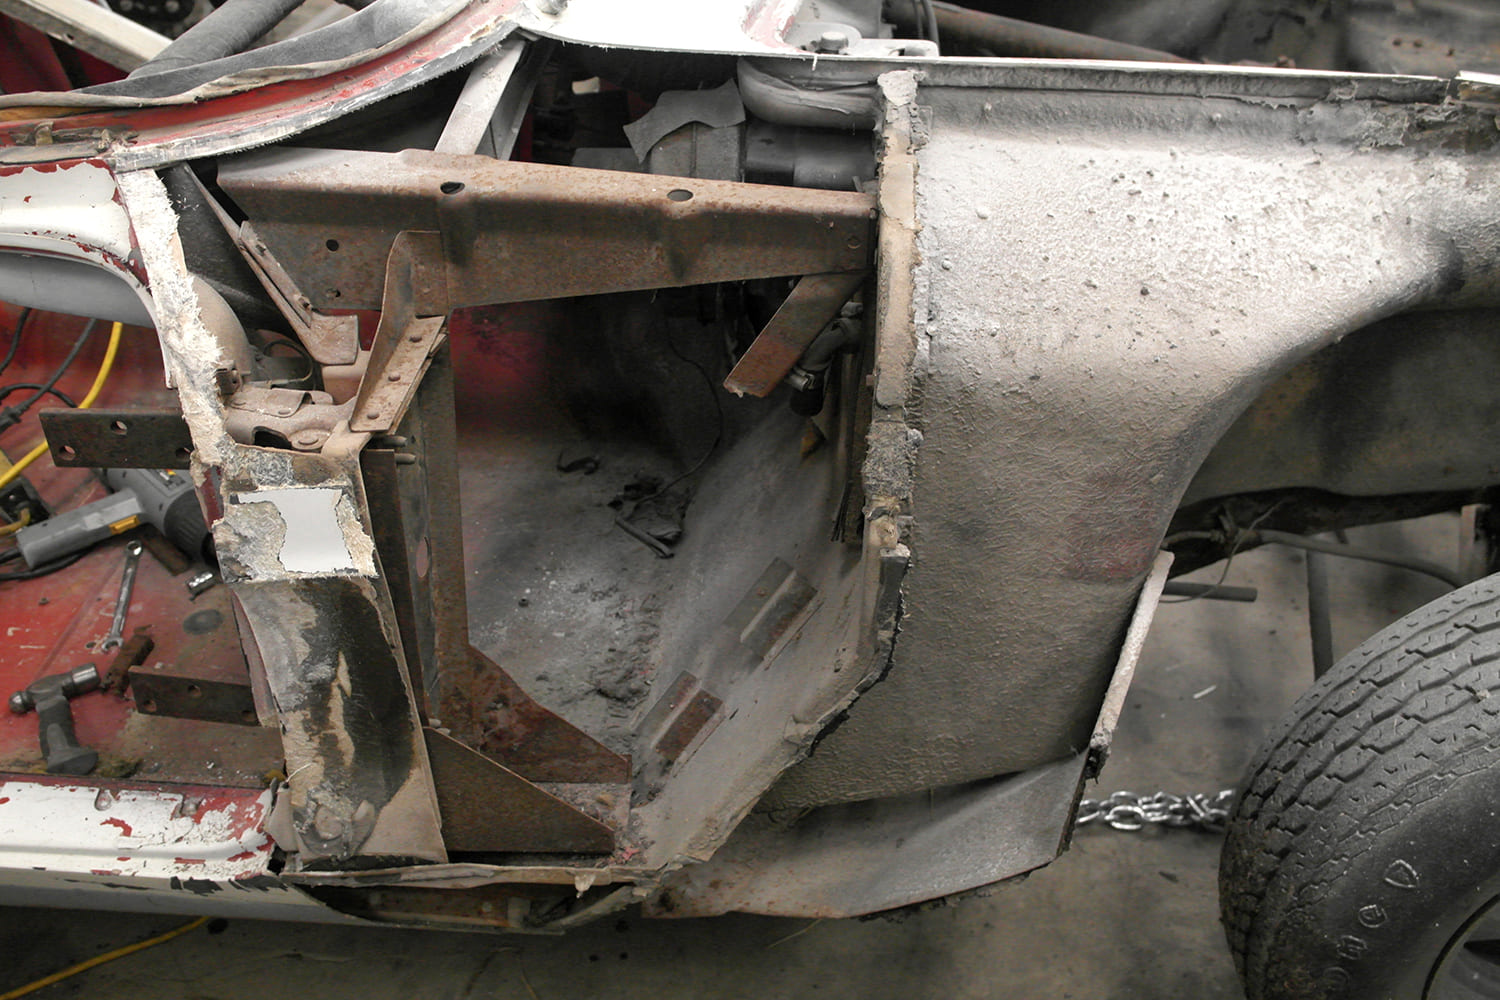
Take special care around the doorjamb area. The cove of the fender bonds to the main structure in three places: the firewall/floor, the A-pillar, and about 3-4 inches behind the A-pillar (door hinge support). If you cut through the bonding edge you will have to repair it, so be careful. Look behind everything, there are lots of hidden bonding areas.
If the inner fenders are in good shape, they can be reused. We replaced them on this car, but the process is about the same. The inner fenders bond to the front clip at the sides of the hood opening and along the front edge of the nose. C1s often had some large gaps from the factory, so don’t put too much into getting the perfect fit, as long as you have a tight fit at the hood opening. The fiberglass was hand laid into the molds and then pressed. The tolerances are wild; you can find C1s with over 1-inch gaps between certain panels, and they were left as-is. These cars were not well-built, which is why every C1 is just little bit different.

Preparing the Body
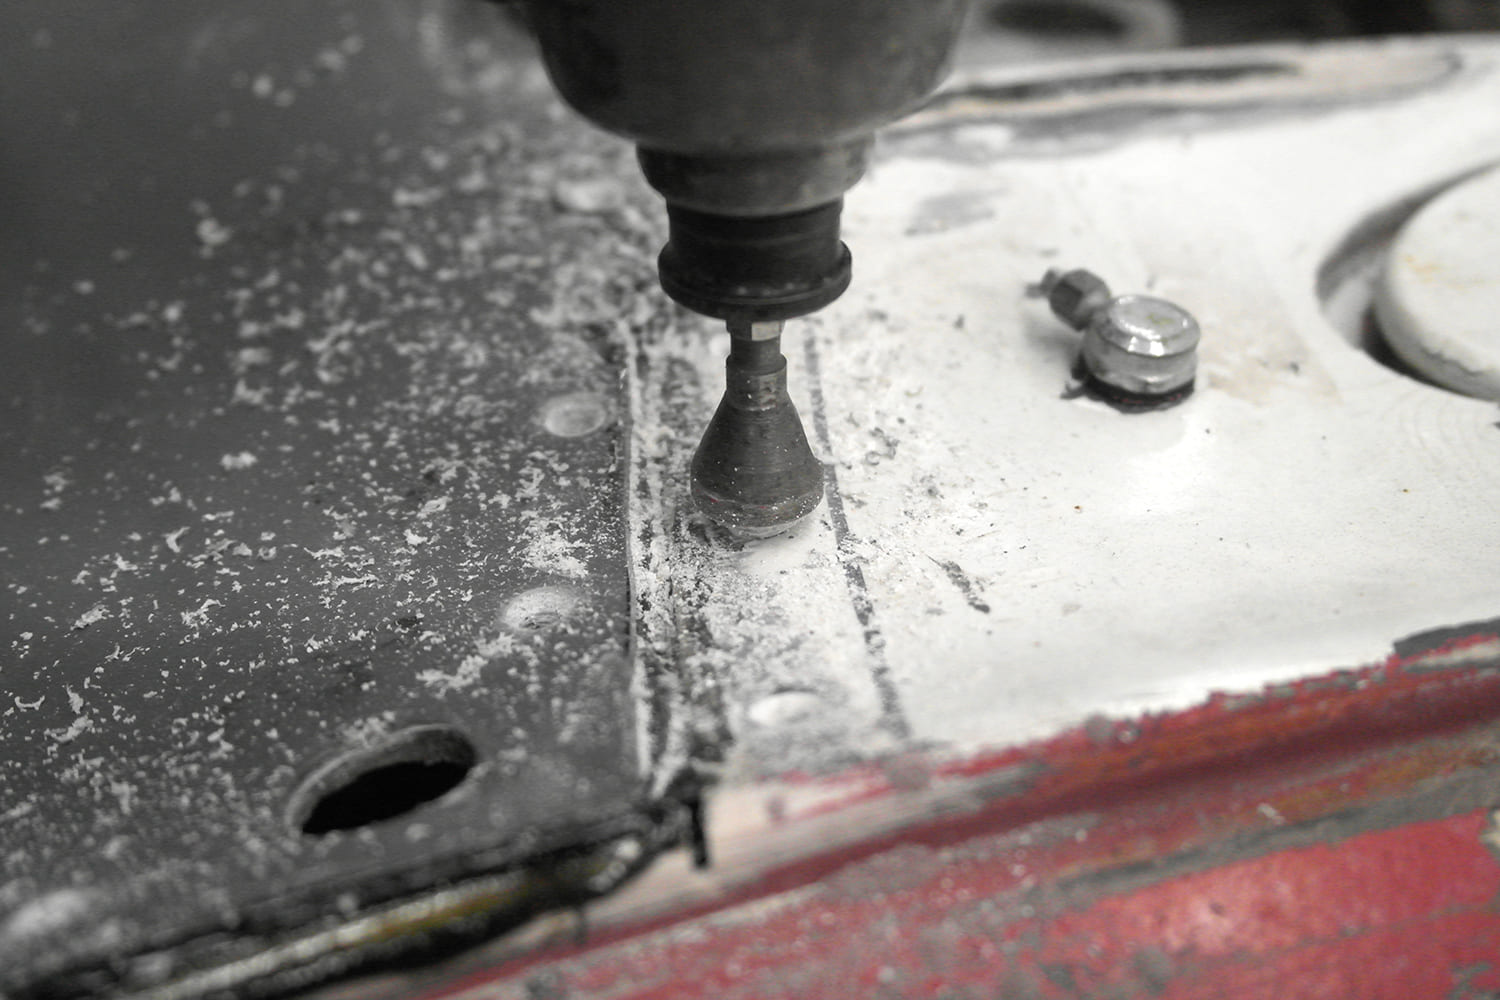
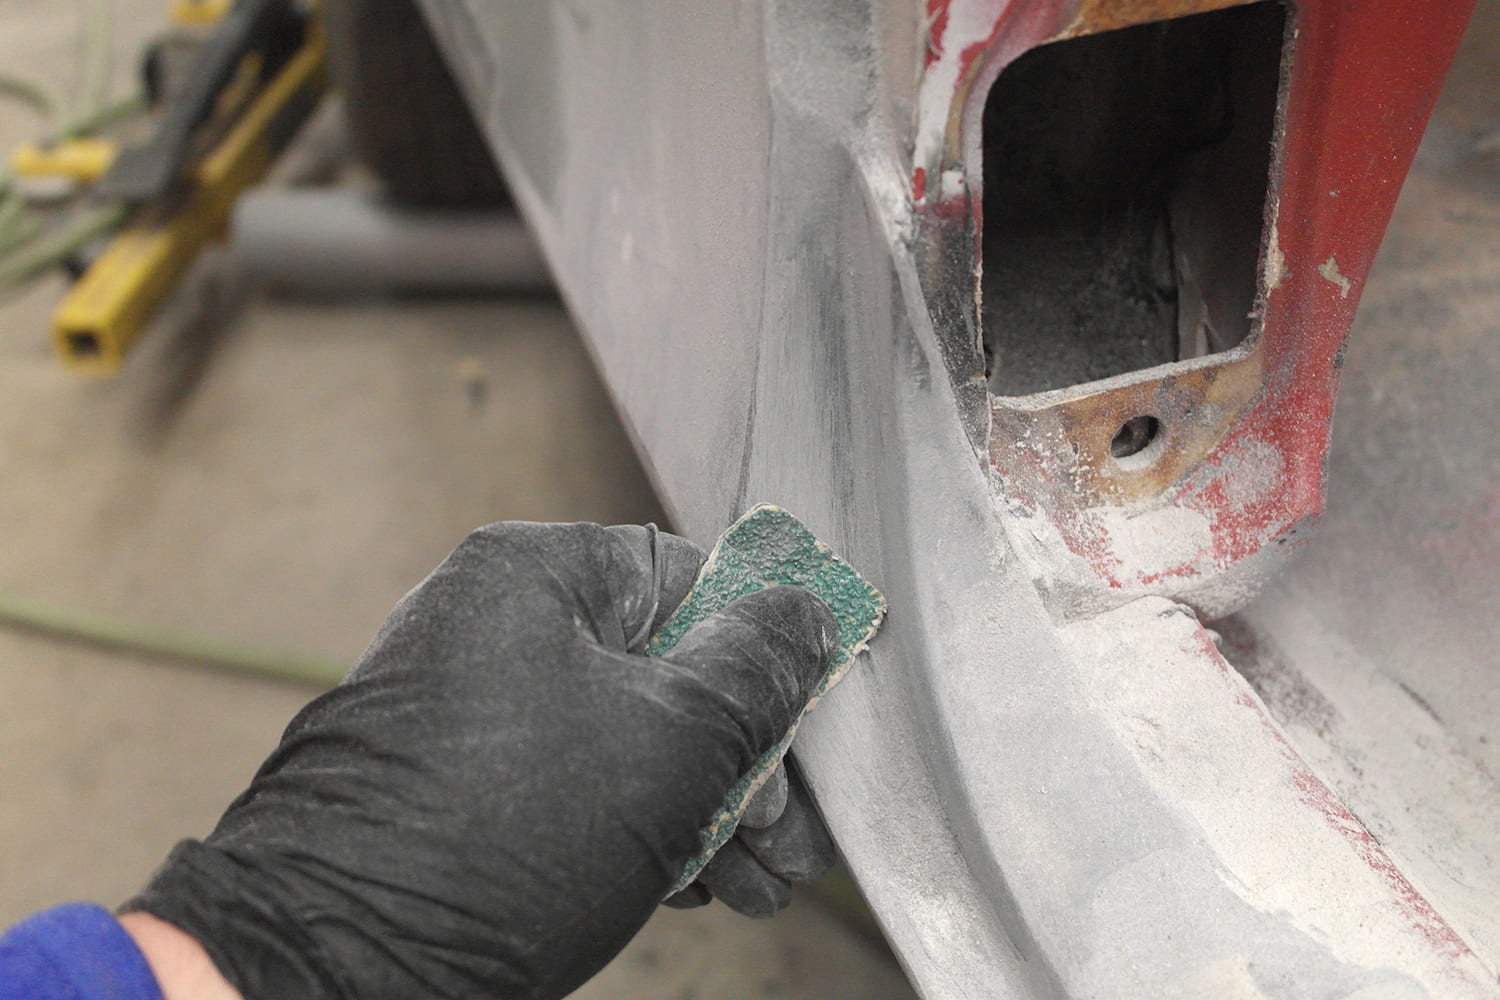
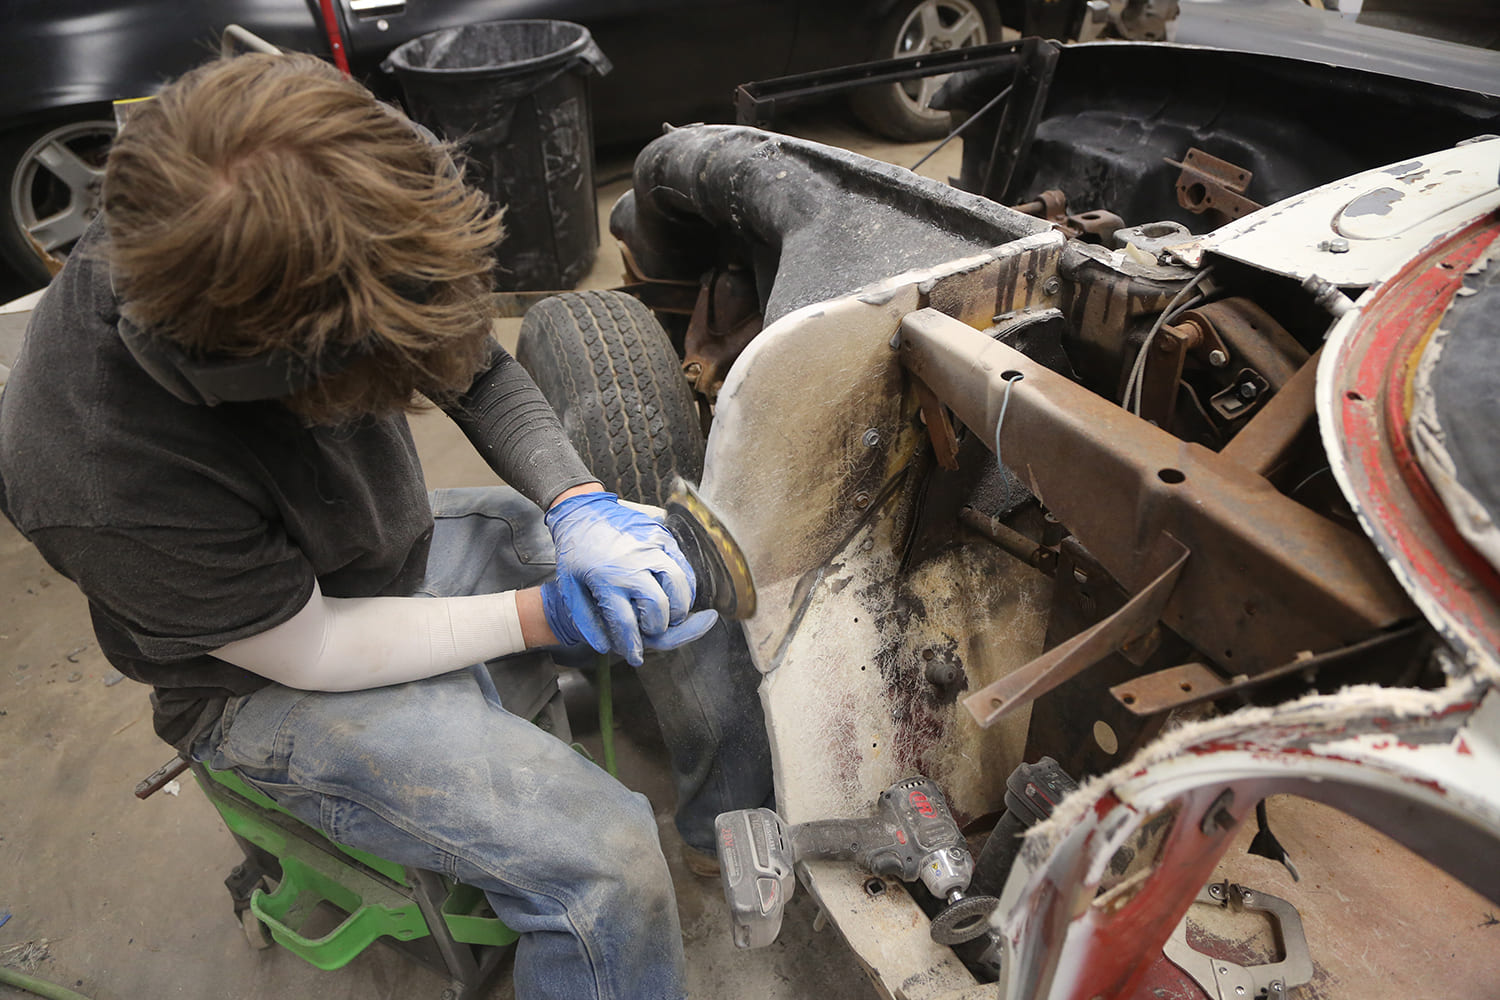
Once the old clip was removed, the bonding areas were prepped. There was lots of old bonding adhesive, old repairs, and 60 years of grime to be removed. A DA sander with 80-grit is your best friend, along with a small belt sander (for bodywork), and a high-speed rotary tool. We used an Ingersoll Rand cordless polisher/sander with Roloc discs, but you can use an air die grinder as well. Every bonding surface needs sanding with 80-grit all the way down to raw glass to yield the best bond. You don’t want to bond over paint or body filler.
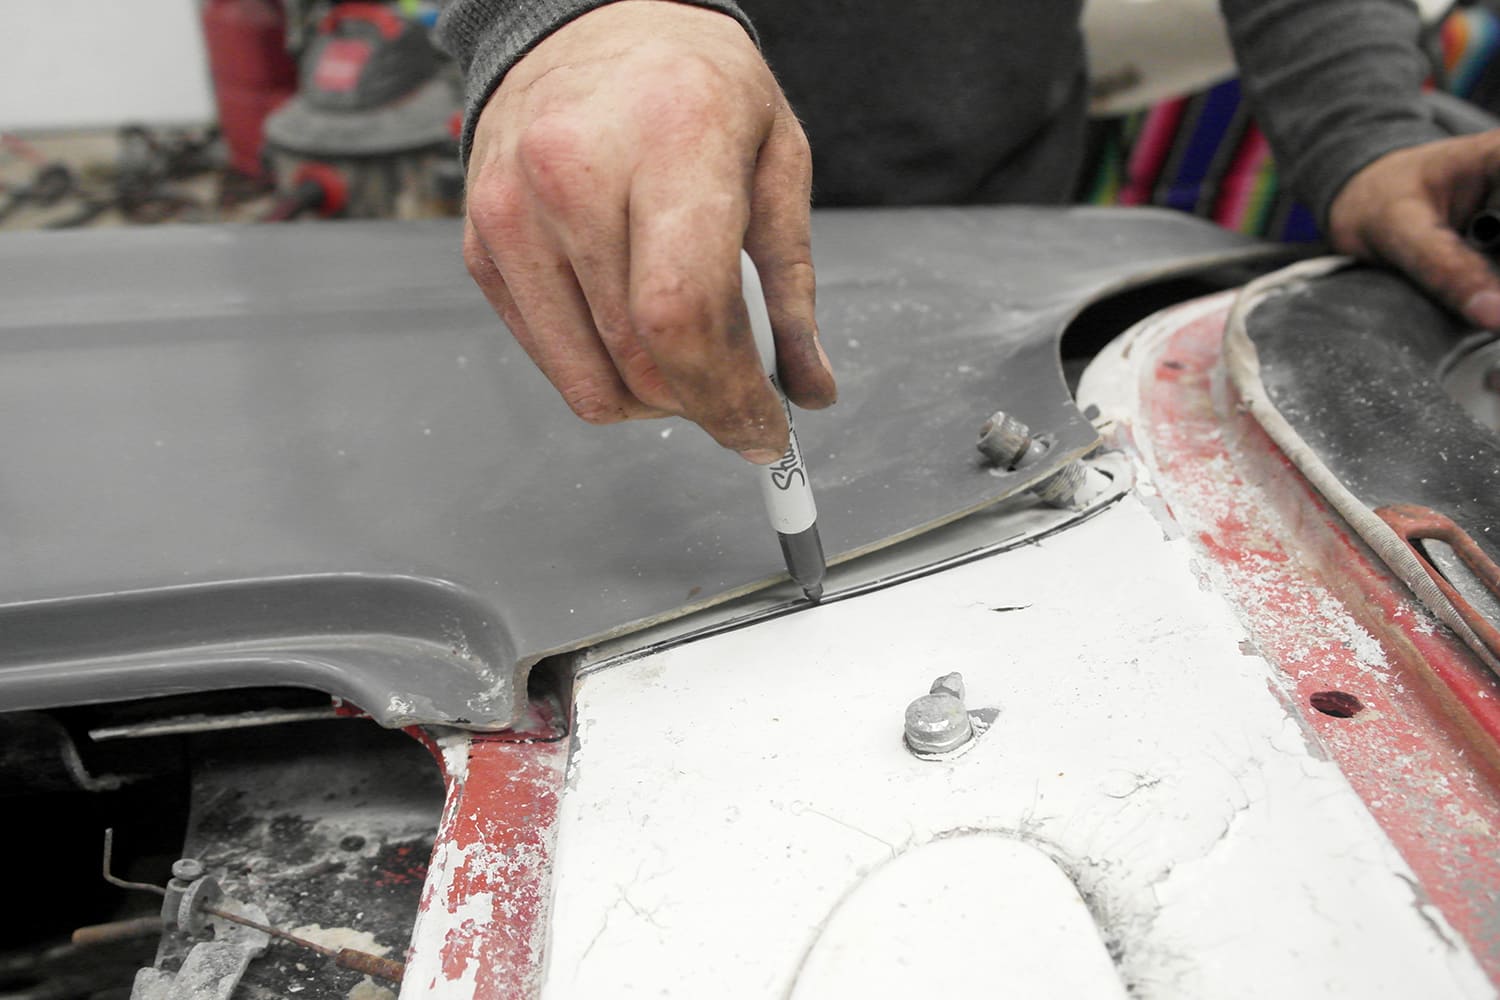
Next, the new clip gets set into position and all the joints are marked for trimming. For this style of replacement clip, the main areas are the rockers and cowl. Trim away the bare minimum and test the fitment. The inner fenders and core support must be installed for this process, as the inners are what locate the fenders to the body.
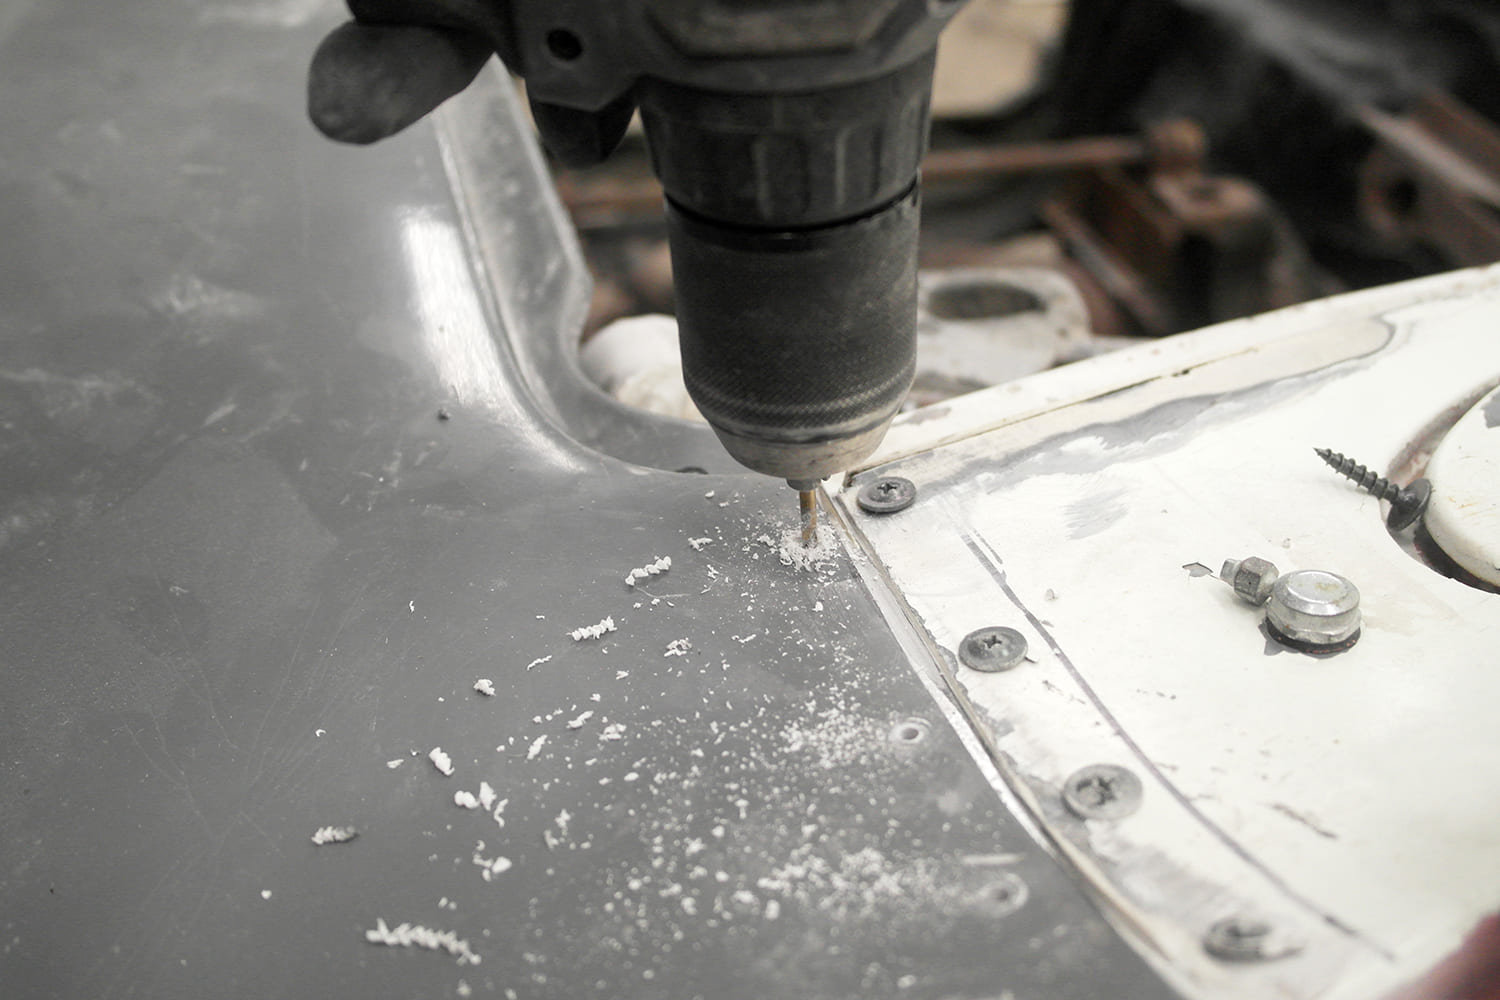
Once the body and clip are trimmed and fitting right, all of the bonding areas were drilled and screwed together. You can use self-tapping screws, but it is best to drill 1/8-inch pilot holes through both pieces. This helps reduce cracking and splitting, which will reduce the clamping force. The screws get removed after the adhesive cures. You can use clamps around the hood opening and inner fender to nose, but the rest require screws. By pre-drilling and mounting all the screws first, you can remove the clip to apply the adhesive and know that it will go right back into position. Don’t wait until you have added the adhesive to drill the holes, you will not have enough time before the adhesives starts to set.
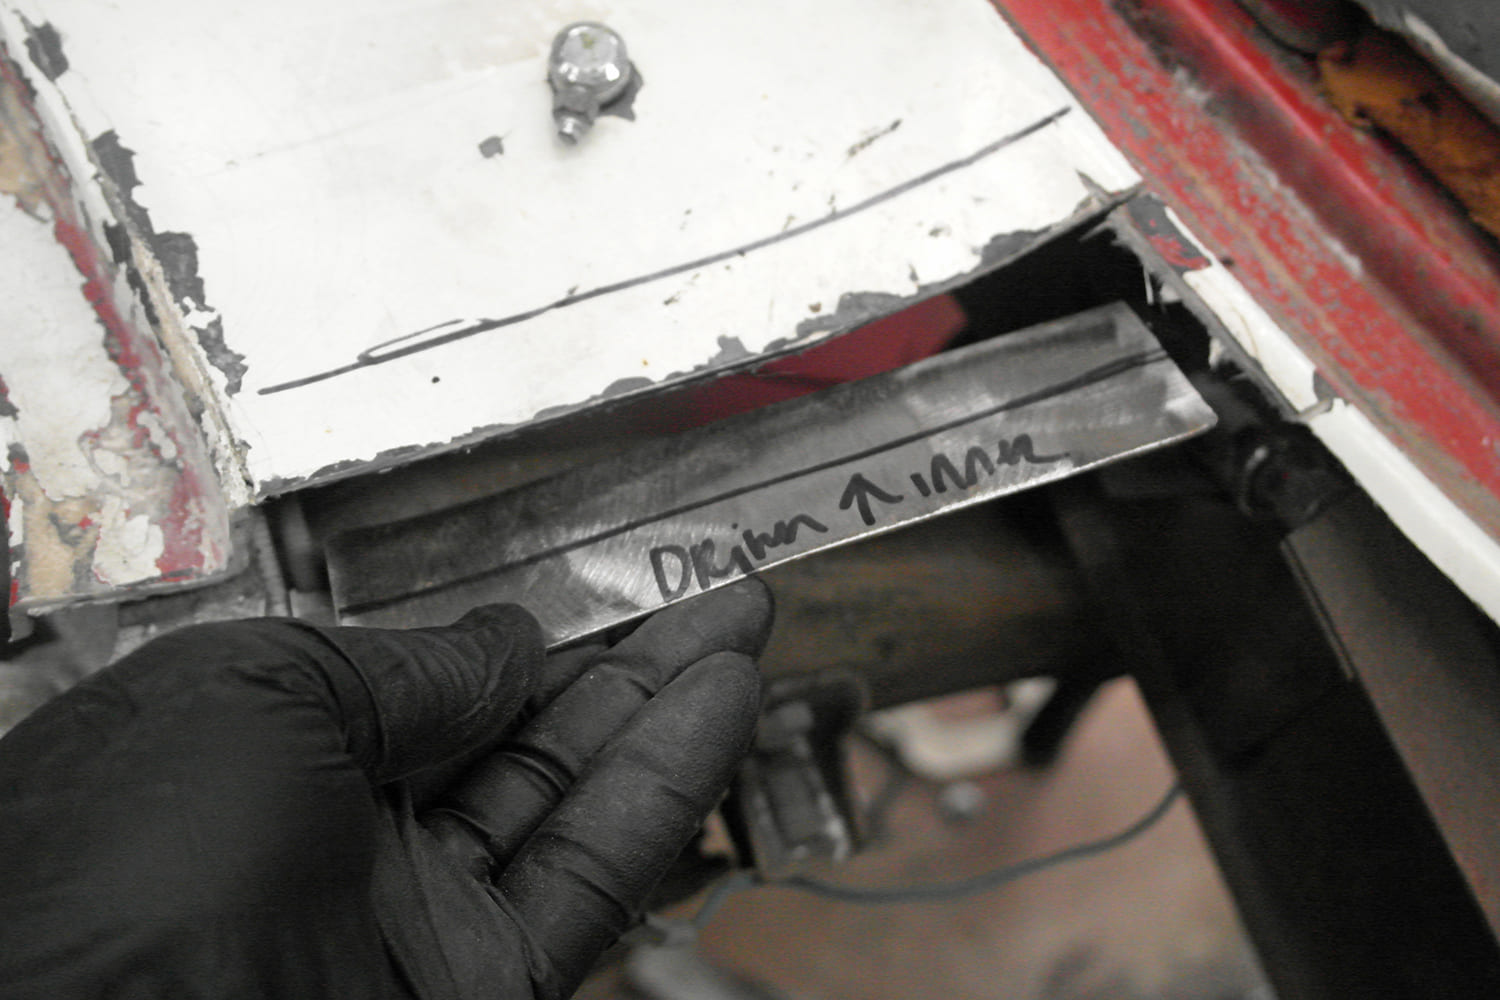
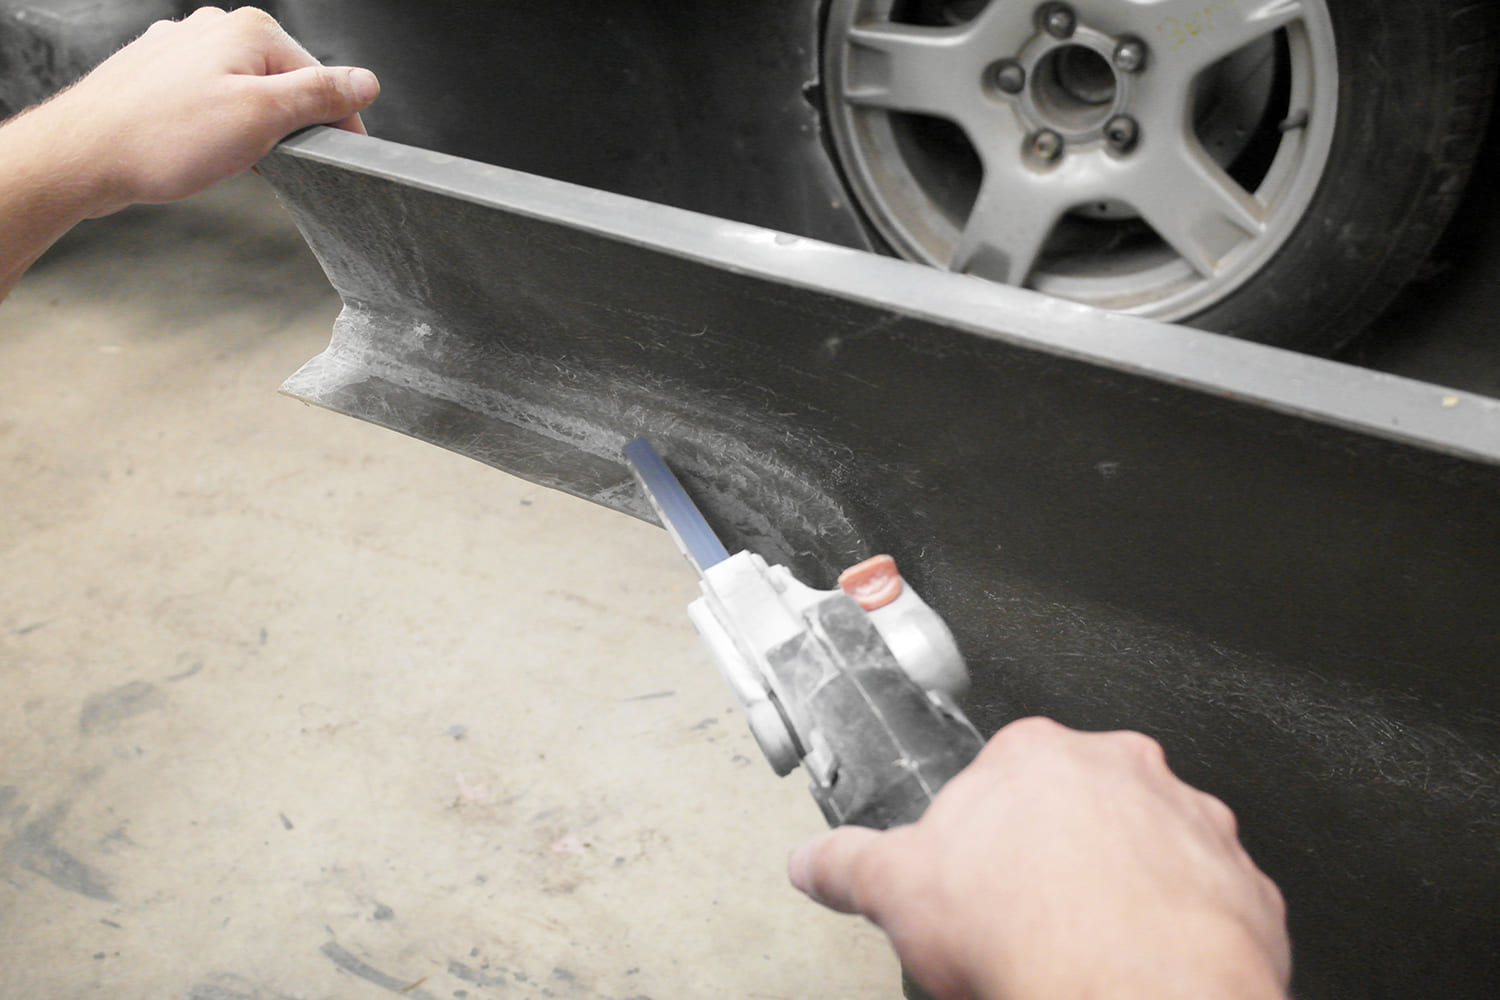
You will need to create a bonding strip for the rockers and cowl edges. You can use metal or fiberglass. BMF Bodies used both, a section of the original rocker was trimmed off, prepped, and bonded to the inside edge of the remaining rocker panel, and a 2-inch-wide strip of 18-gauge sheetmetal was cut for the cowl bonds. The bonding strips should be bonded to the main body before the rest of the clip.
Bonding the Panels Together
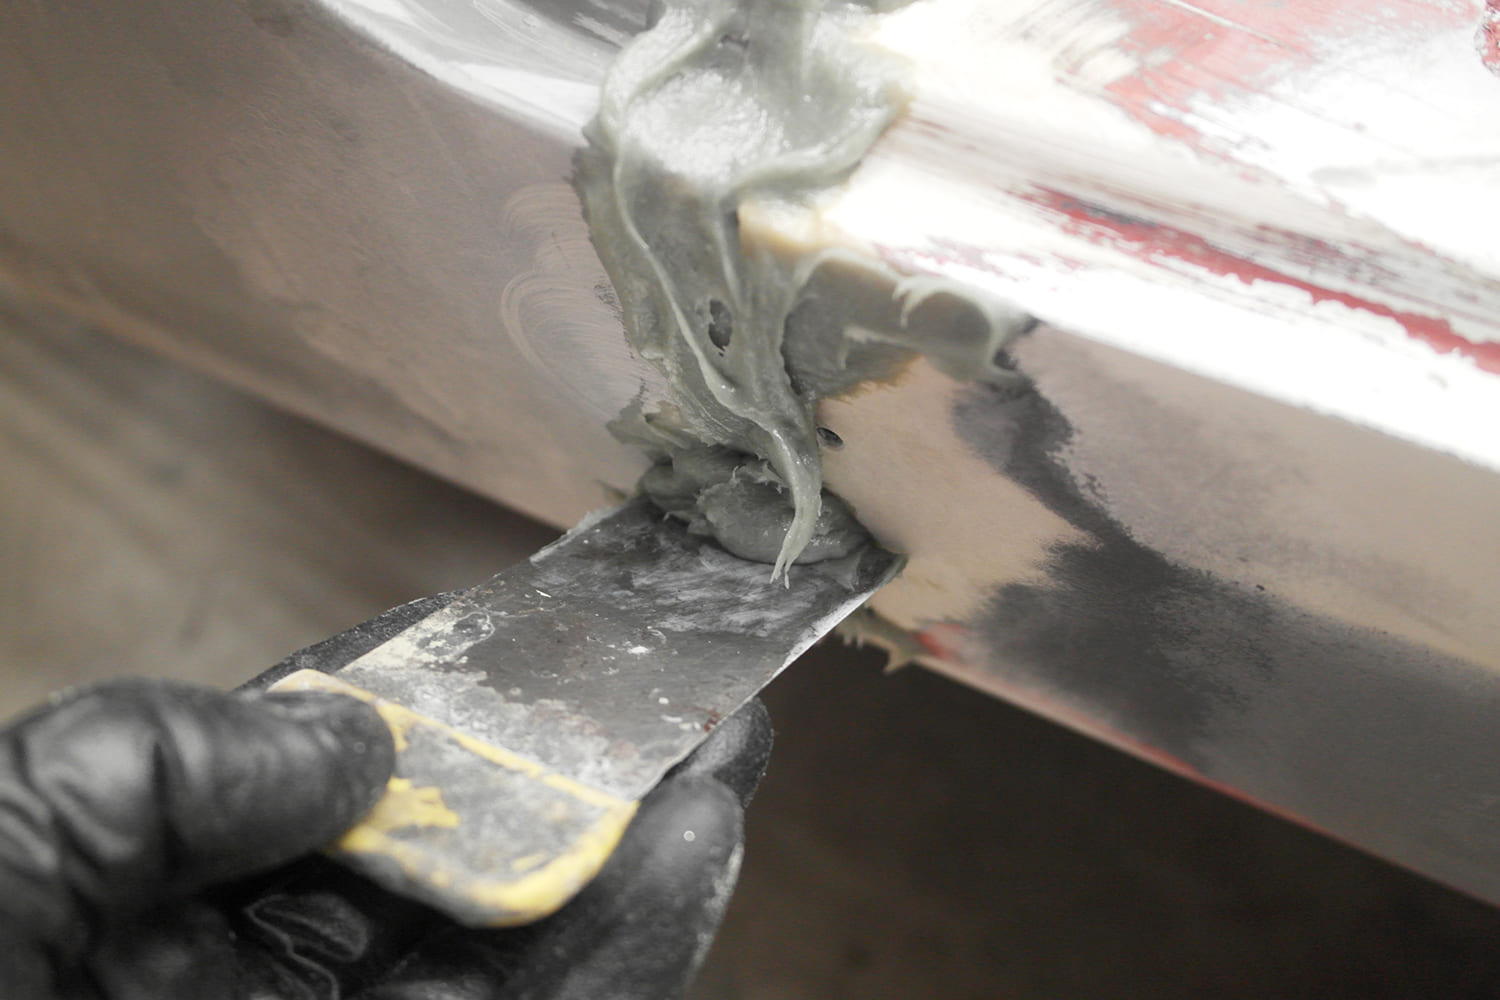
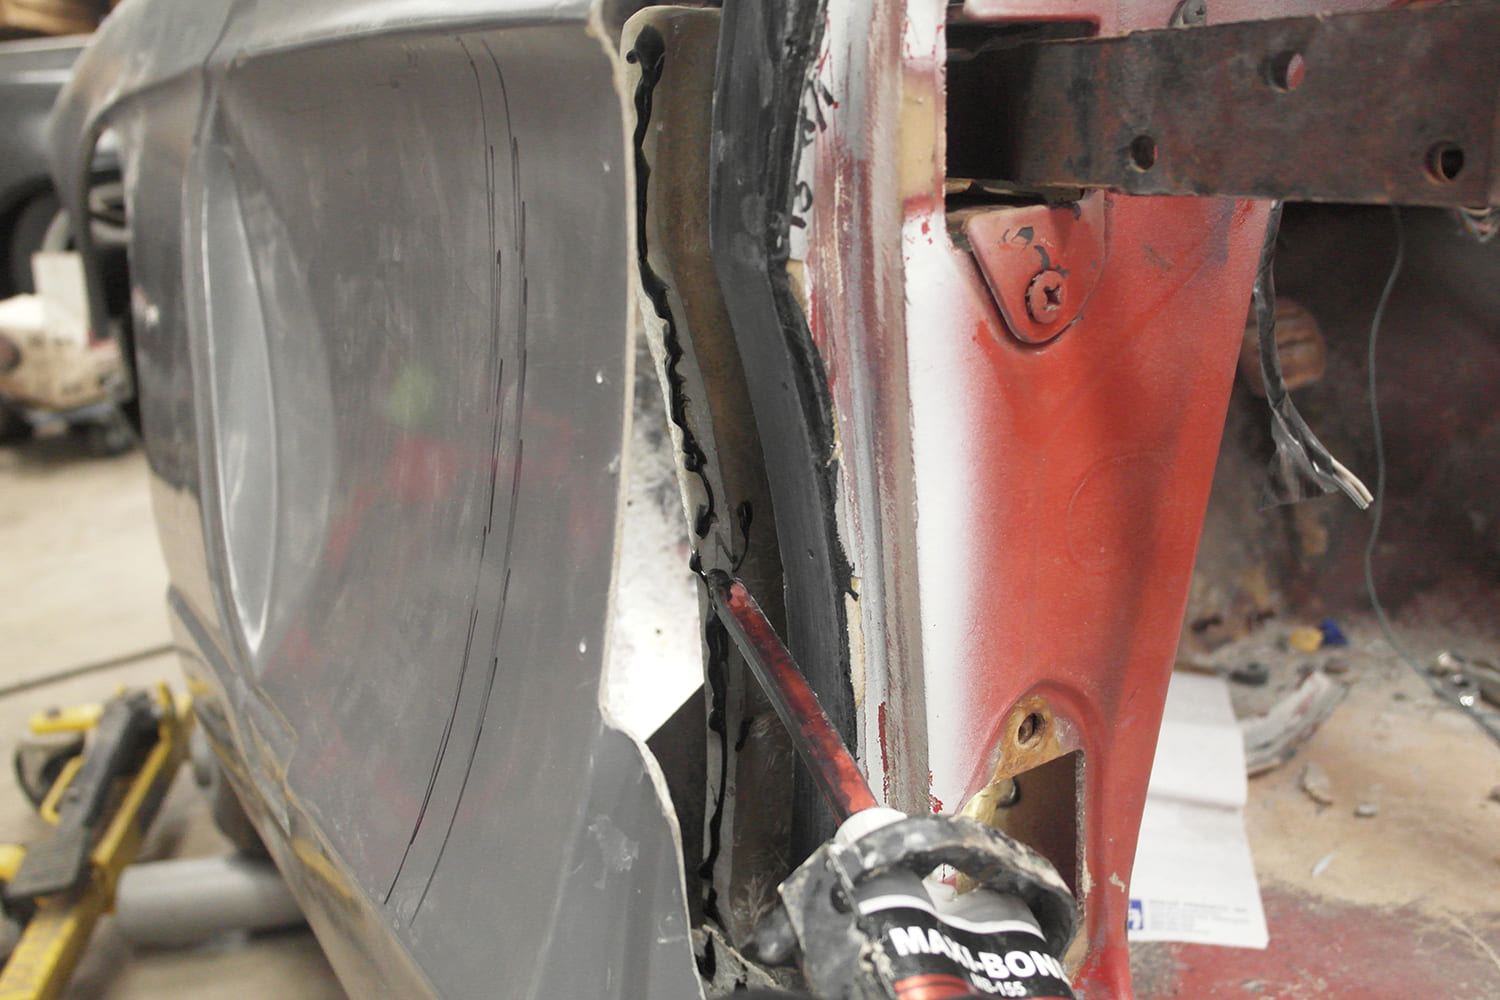
GM originally used a product currently sold as “Vette Bond,” which is essentially fiberglass resin mixed with milled fiberglass fibers, much like Duraglass or Kitty Hair body fillers. You can use it, but we recommend using a modern panel bonding adhesive (PBA) made for fiberglass. This is the same stuff that all modern vehicles are glued together with. It is stronger than the metal itself and is the best stuff to use for any Corvette repair. We used Maxi-Bond MB-155, which has a 50- to 70-minute work time, 3- to 4-hour clamp time, and 24-hour cure time. PBA comes in many different time ranges. Small projects can use the five-minute stuff, but this large project requires at least one hour of working time. Beginners would be better off with 60- to 90-minute work time PBA. The key to all PBA epoxies is to squeeze about 6 or so inches of adhesive onto a piece of scrap material as waste. The mixing tubes are great, but the first few inches don’t mix as well, and you end up with uncured PBA. We used one full 200ml tube, and about 1/2 second on this project.
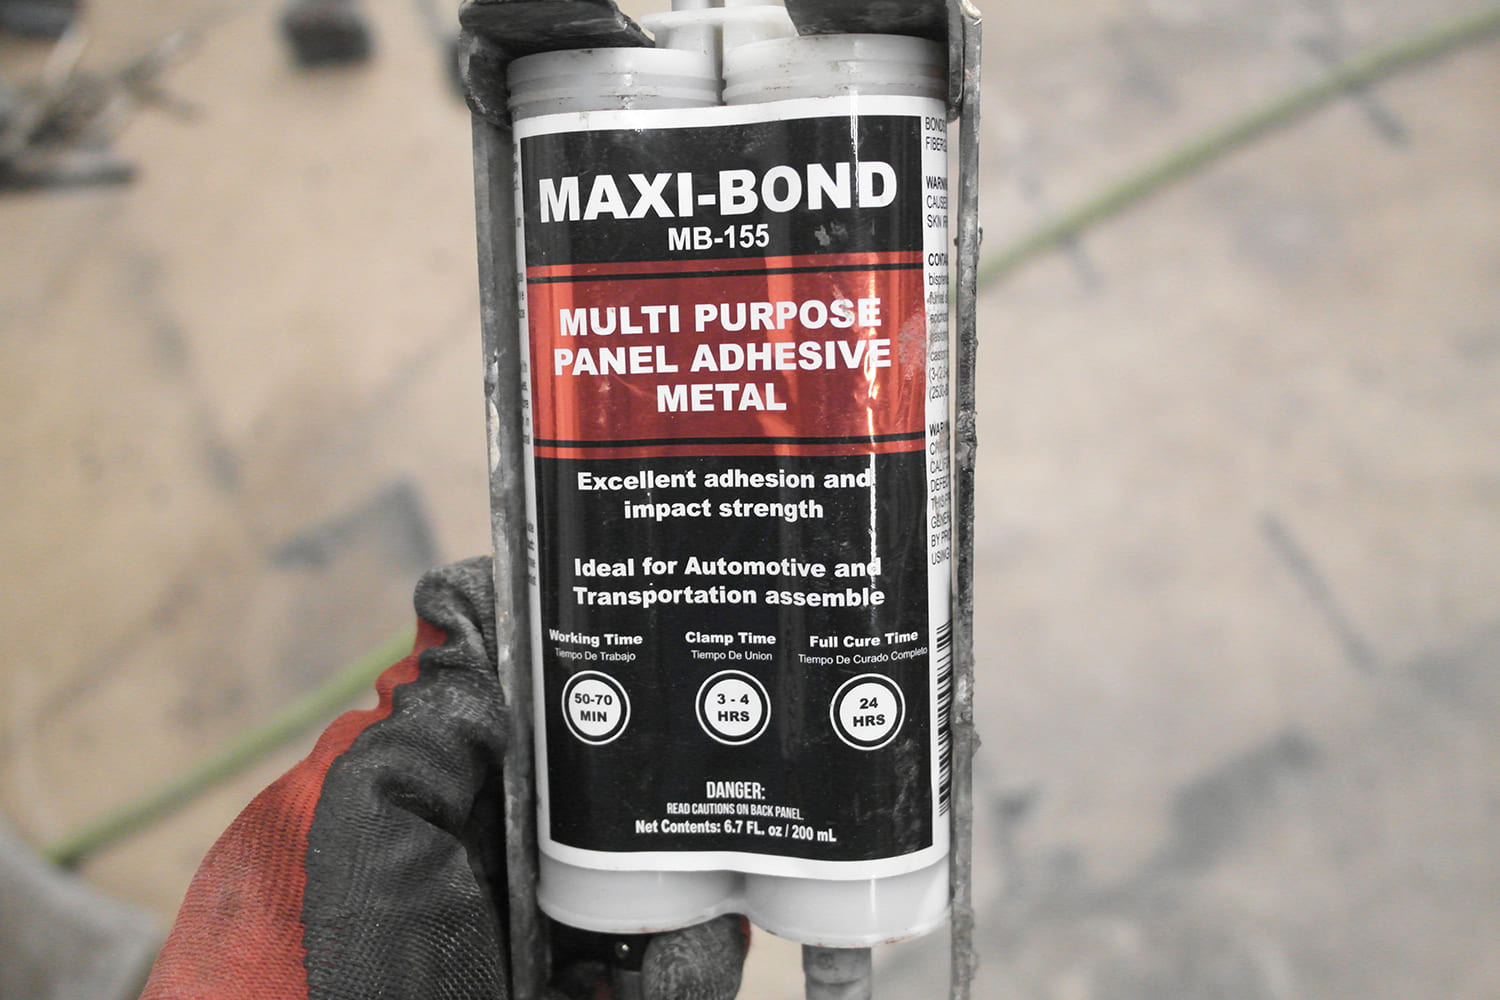
PBA comes in cartridges and requires a special gun. The gun needs to match the tube. These vary wildly, so buy a gun that matches the PBA system you select. 3M, Lord Fusor, Maxi-Bond, and Evercoat/SMC all make good-quality PBAs. Wear nitrile or latex gloves and keep a good amount of acetone on hand for this, as you will need it for cleanup. BMF Bodies recommends wiping the bonding areas with acetone immediately (allow it to flash off) before applying the PBA to get the cleanest bond.
Finishing the Repairs
Once the PBA has cured, the clamps and screws are removed and the bodywork starts. We are showing the basics for the repair only, not the finish bodywork. All fiberglass repair panels require bodywork, being there will be waves, dips, pinholes, and so on, that require bodywork before paint. BMF Bodies recommends using a polyester resin-based fiberglass filler, such as Cor-Grip or Duraglass to fill the holes and seams, as this acts the same way the fiberglass does in the sun. Filling these gaps with regular body filler usually leads to cracking down the line, which will ruin the paintjob.

An experienced shop can do this job in a few days, a novice DIYer may take a week or more. This is not a weekend project; it takes 60 or so hours to get it right. The bonding portion takes about an hour. It is the prep and fitment that makes the difference between a good repair and a poor one. Don’t be afraid to try repairing your own fiberglass, it only seems hard at first. The best thing about fiberglass is that you can always remove it and do it again if you make a mistake.
Check out this story in our digital edition here.