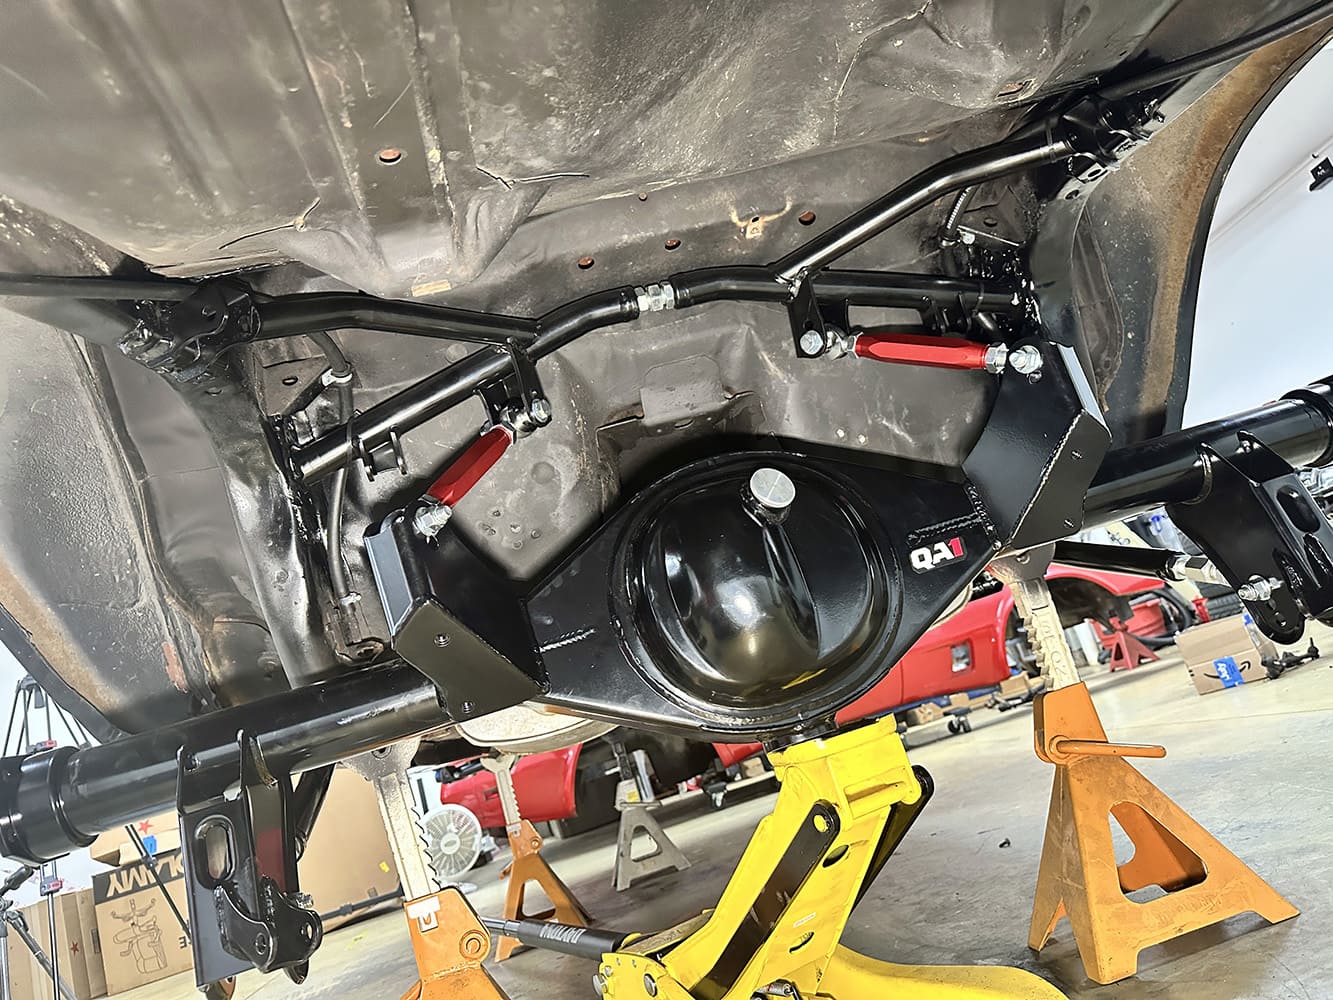
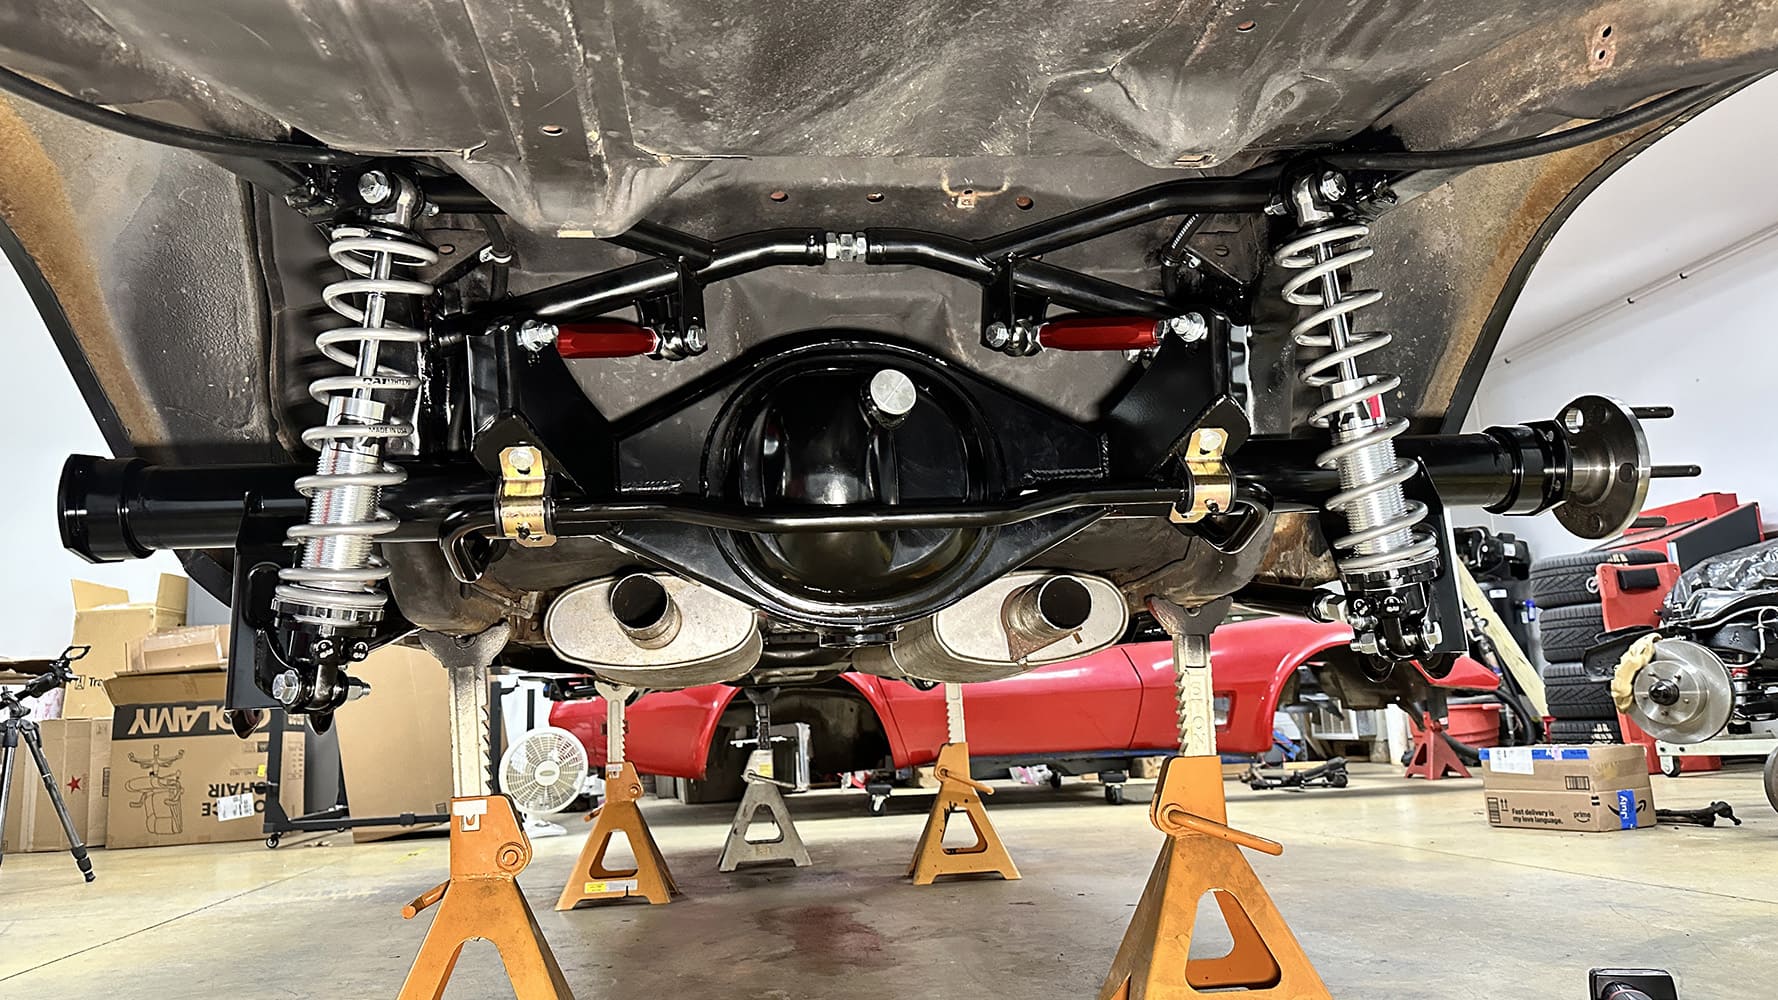
QA1’s handling kit for second-gen F-bodies replaces the old leaf spring setup for a modern four-link suspension with tons of adjustability. We even went with QA1’s fabricated 9-inch rearend housing and extra beefy axles to handle tons of power.
In the first installment of our 1978 Camaro buildup, we laid out our plans for a complete suspension upgrade thanks to a Level Two handling kit from QA1 along with a massive upgrade in braking capabilities thanks to an all-new system from Wilwood. By the way, we’re also using a built third member for our 9-inch rearend from Quick Performance and new 18-inch wheels from Rocket Racing Wheel.
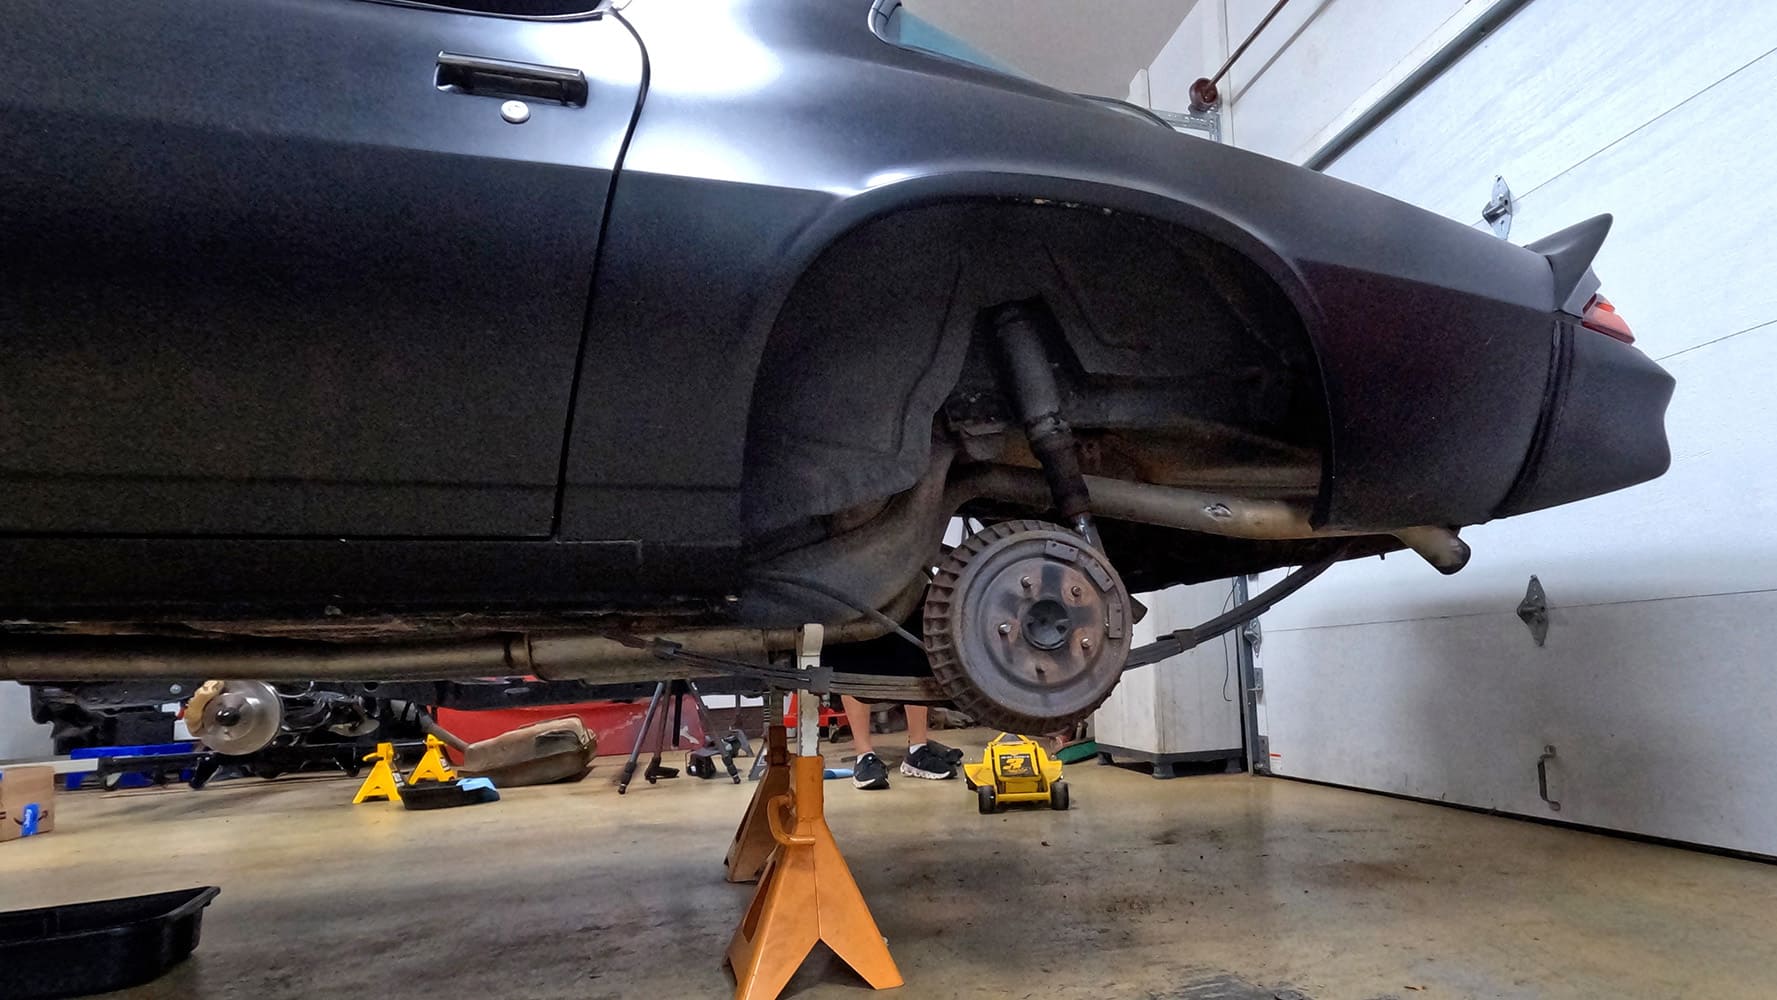
The original stock setup with leaf springs, a GM 10-bolt rearend, and drum brakes.
In that issue, we also managed to do a few baseline braking tests, stripped the old stock suspension out from under the Camaro, and even got the new QA1 suspension installed up front. This time around we’re tackling the rear suspension and also installing the new, high-strength 9-inch rearend.
Up the front, the stock leaf spring mount completely unbolts from the car and is replaced by new ones from QA1.
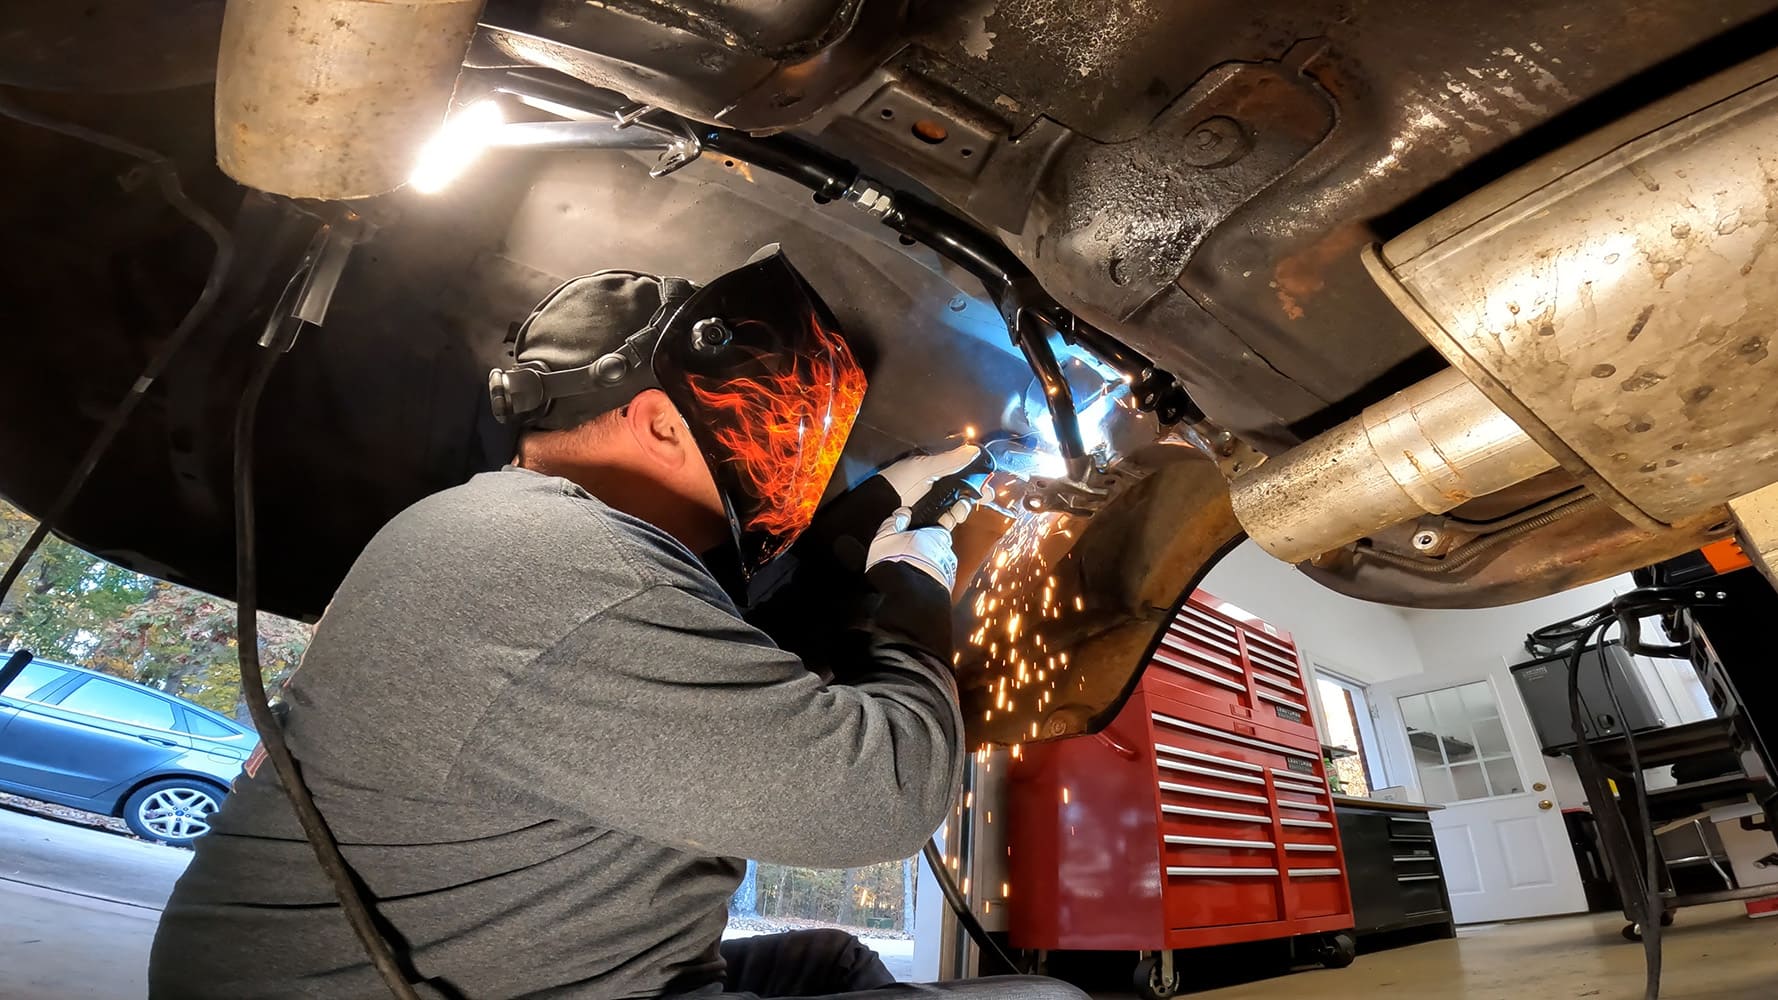
This is also the first point in our build we’ve run into that requires a bit more than simple hand tools. To get the absolute most out of the Camaro, QA1 switches out the dated leaf-spring rear suspension for a very cool, adjustable four-link. This should make the handling capabilities much better. But in order to make it happen, a cradle must be installed that provides mounting points for the upper trailing arms, shocks, and even the new rear sway bar endlinks. The cradle must be welded in place between the car’s framerails, so if you don’t already own a welder or aren’t comfortable using one, you may need to bribe a friend who is a competent welder to help out. This fact, however, doesn’t keep this from being a very doable build for practically anyone with moderate mechanical skills. As you can see, we’re doing it ourselves with the car on jackstands in an ordinary garage.
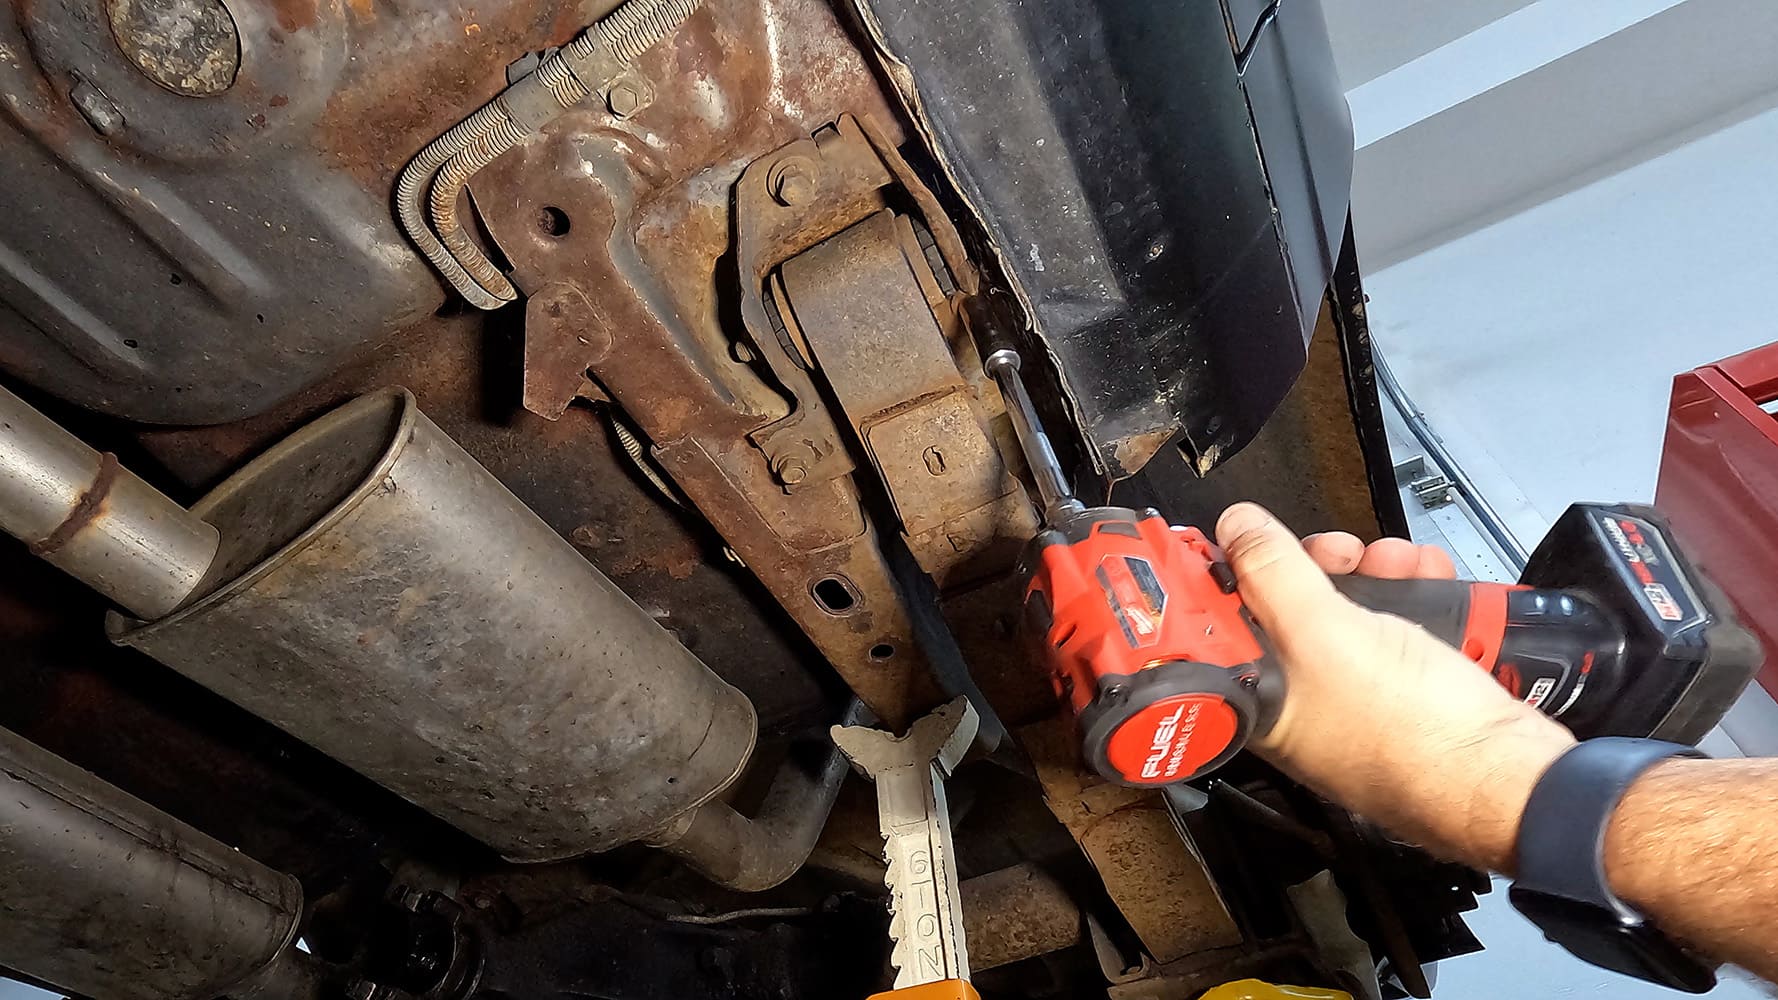
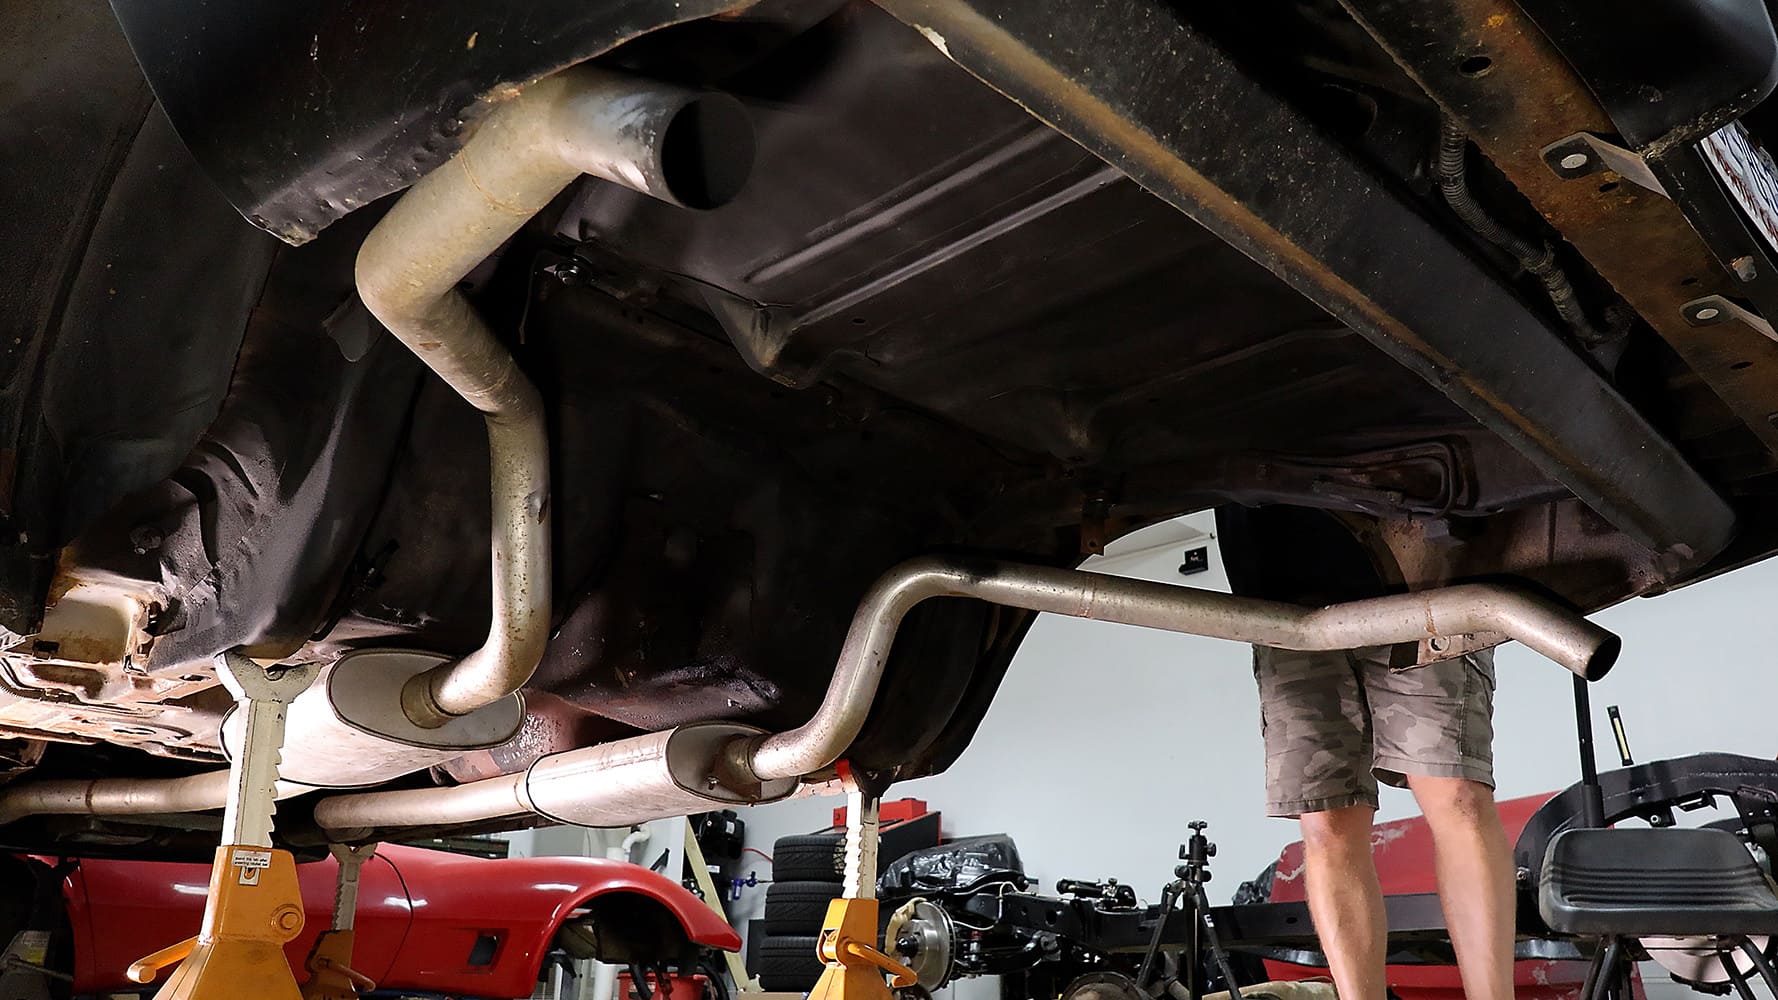
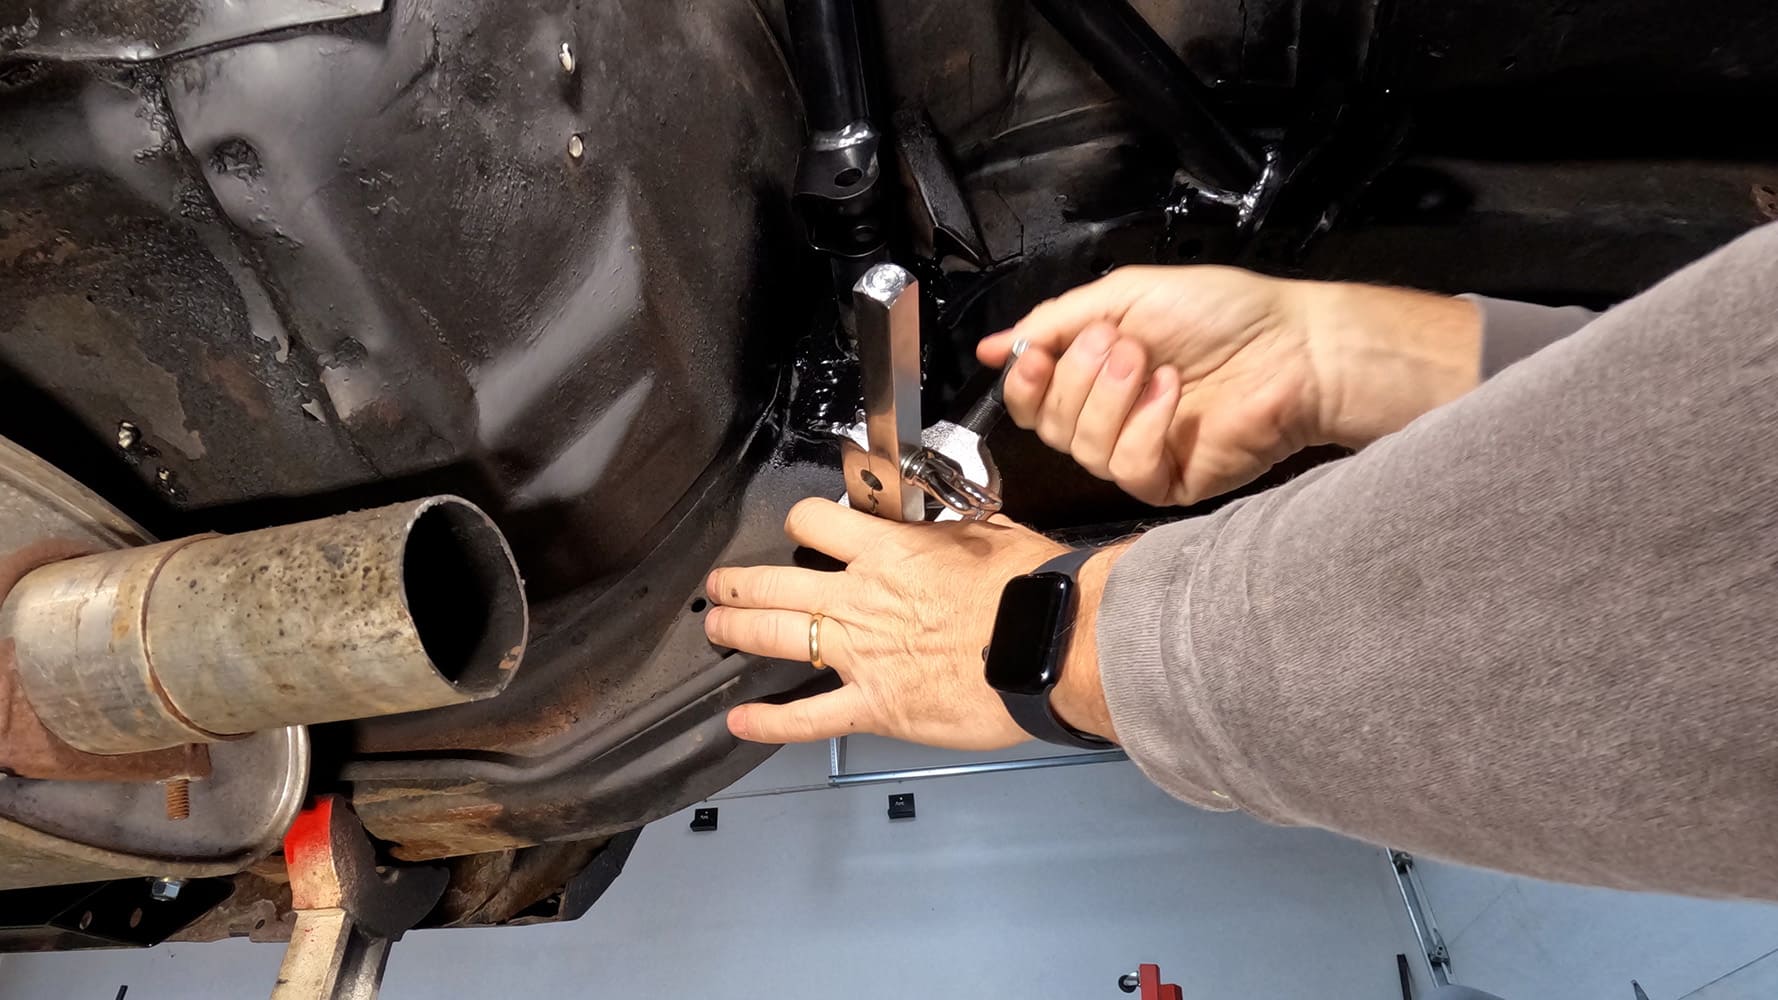
Switching from a leaf spring suspension to a modern four-link is a big change, and it’s impossible for it not to affect other systems. This definitely applies to the exhaust system, which gets in the way of the new suspension components. I cut off the exhaust just behind the mufflers and likely will run exits just in front of the rear wheels once everything is complete.
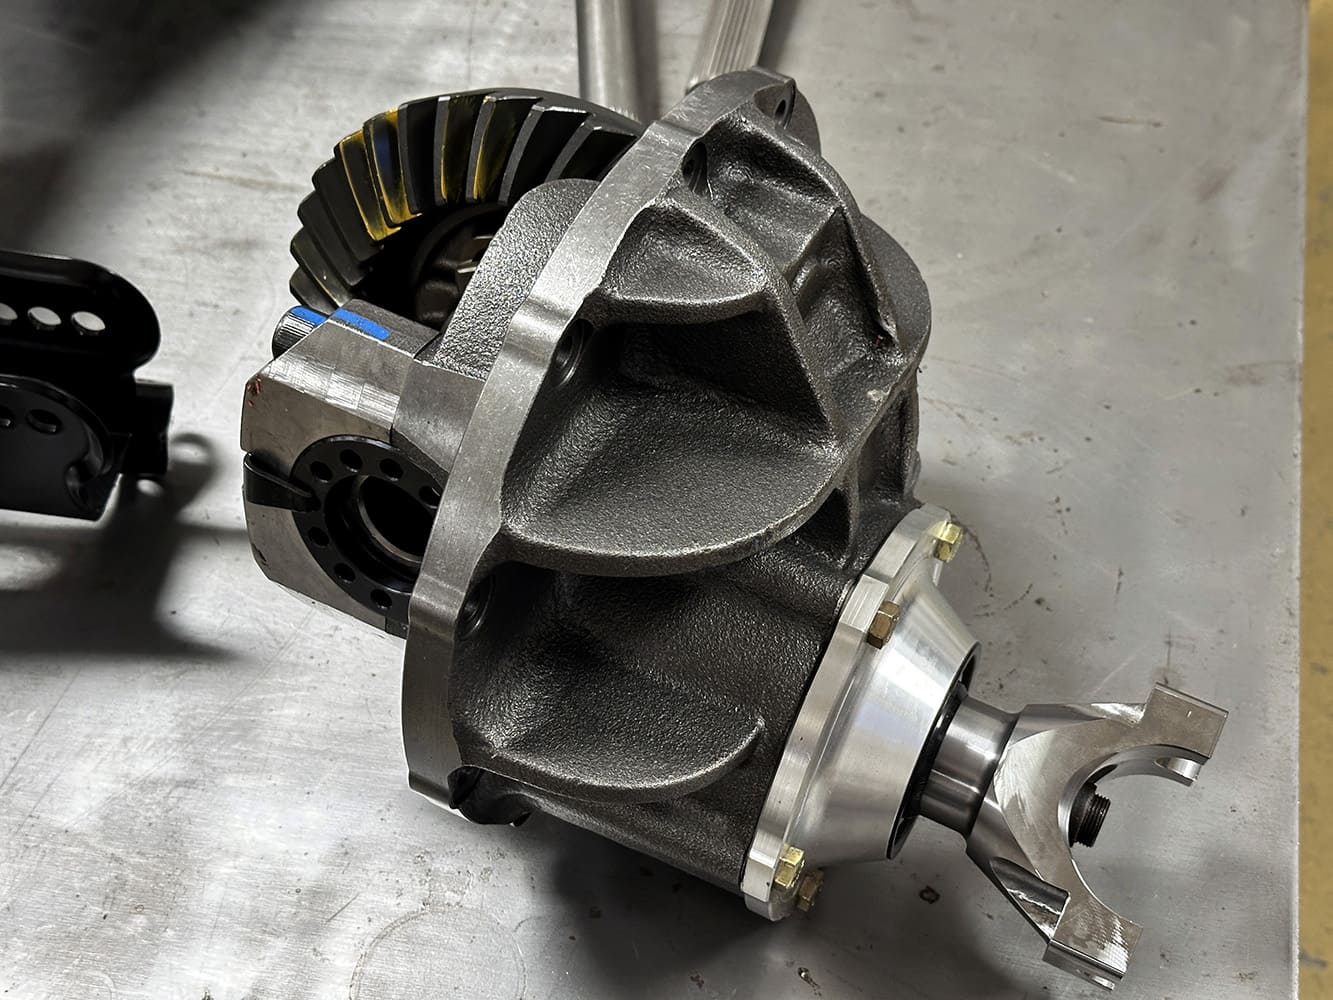
Practically, the only component you will see in this chapter of the buildup not from QA1 is the centersection from Quick Performance. The gearset is a 3.70:1 ratio using a Motive Performance ring-and-pinion. It all goes together in a nodular iron Yukon Gear and Axle Case with the high-performance “Daytona” pinion support. And critical for us, they set it up with an Eaton Truetrac differential. These units lock the rearend using sets of helical gears, so there are no clutches to wear out or require regular service. Under light load, they operate as comfortably as an open diff, but when the go pedal is mashed, they drive both rear wheels reliably. Anyhow, the unit comes from Quick Performance assembled with the proper lash, and all we need to do is drop it in place.
Follow along as we get one big step closer to turning our dated and well-worn Camaro into a wicked-handling street machine.
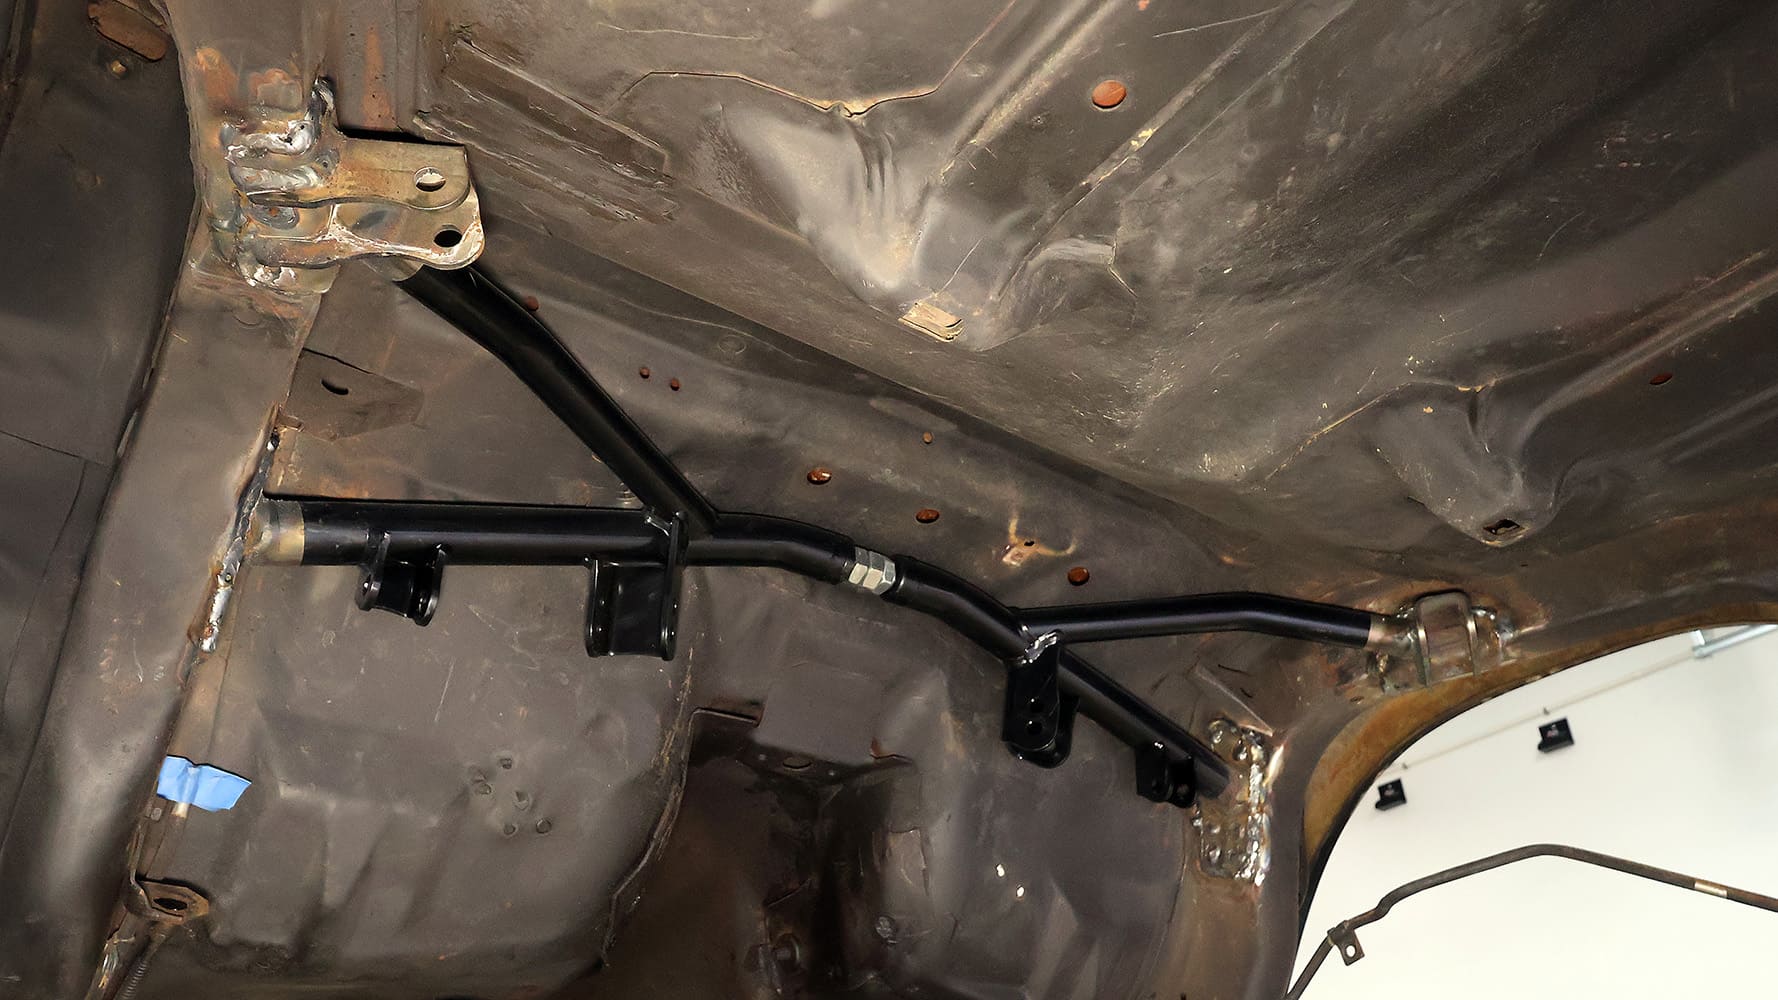
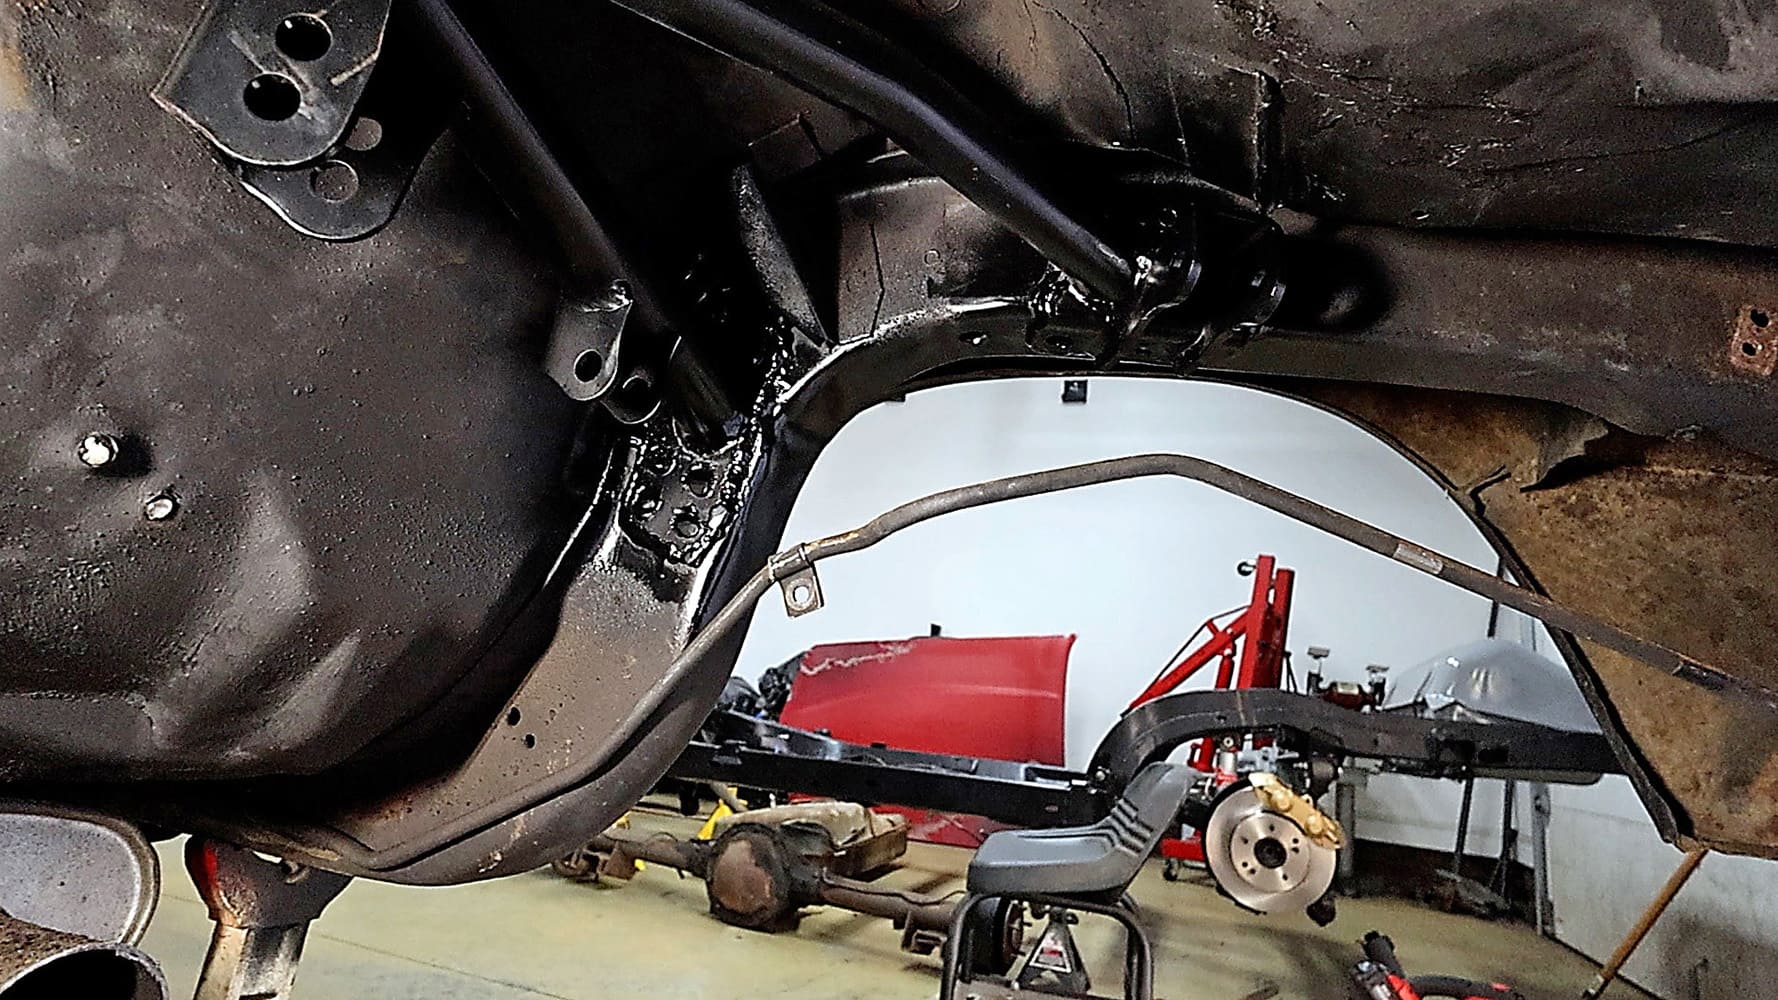
Just about everything on the new rear suspension locates off this fabricated crossmember. QA1’s instructions provide specific measurements for locating the crossmember, and a really nice touch is it’s built in two pieces so you can adjust the width to fit your specific car. Once it is in the right spot, we marked the mounting locations then removed the crossmember and ground away the paint and any undercoating to get to bare metal.
Most of the crossmember is powdercoated but QA1 leaves the mounting flanges bare to encourage a clean weld. There are also lots of holes cut into the mounting flanges for additional welding area. Working with the car on jackstands makes for some difficult overhead welding positions, but it can be done. Just remember, a strong weld is better than a pretty weld eight days a week.
Here is the crossmember finish welded into place and ready for a good coat of paint over the bare metal areas.The lower trailing arm bolts into the car with its own mounting box and connects to the QA1 subframe connector with three fasteners for extra rigidity.
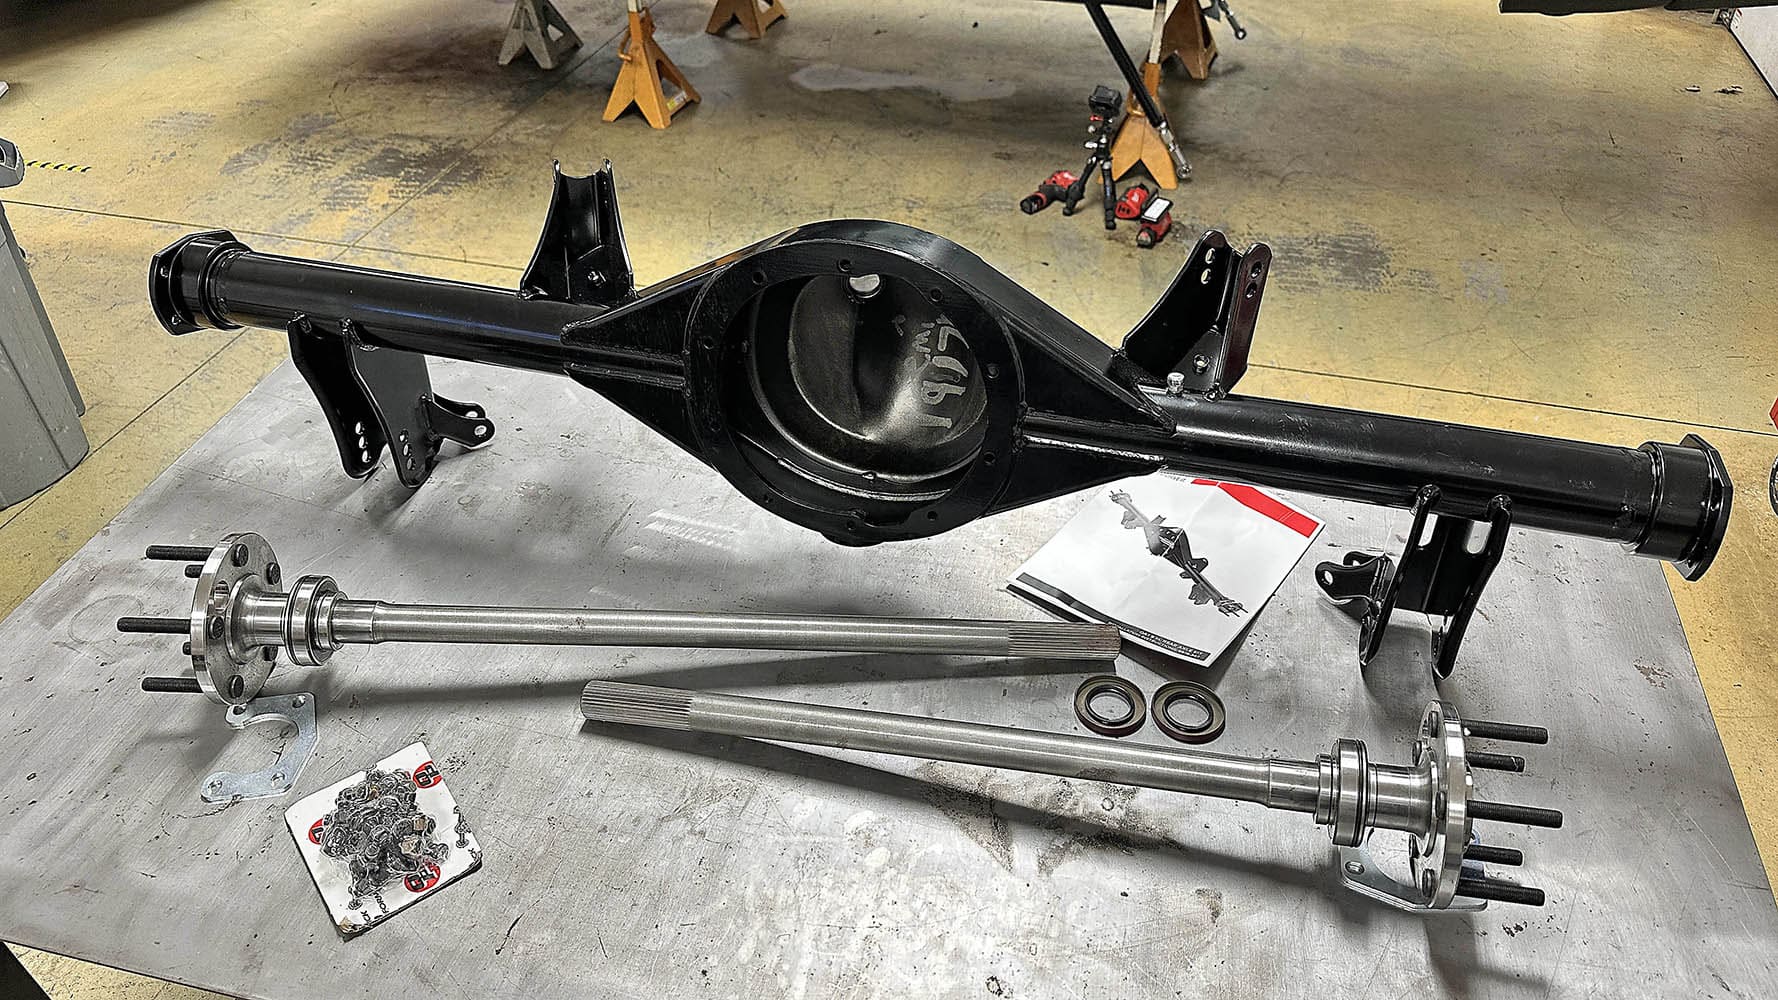
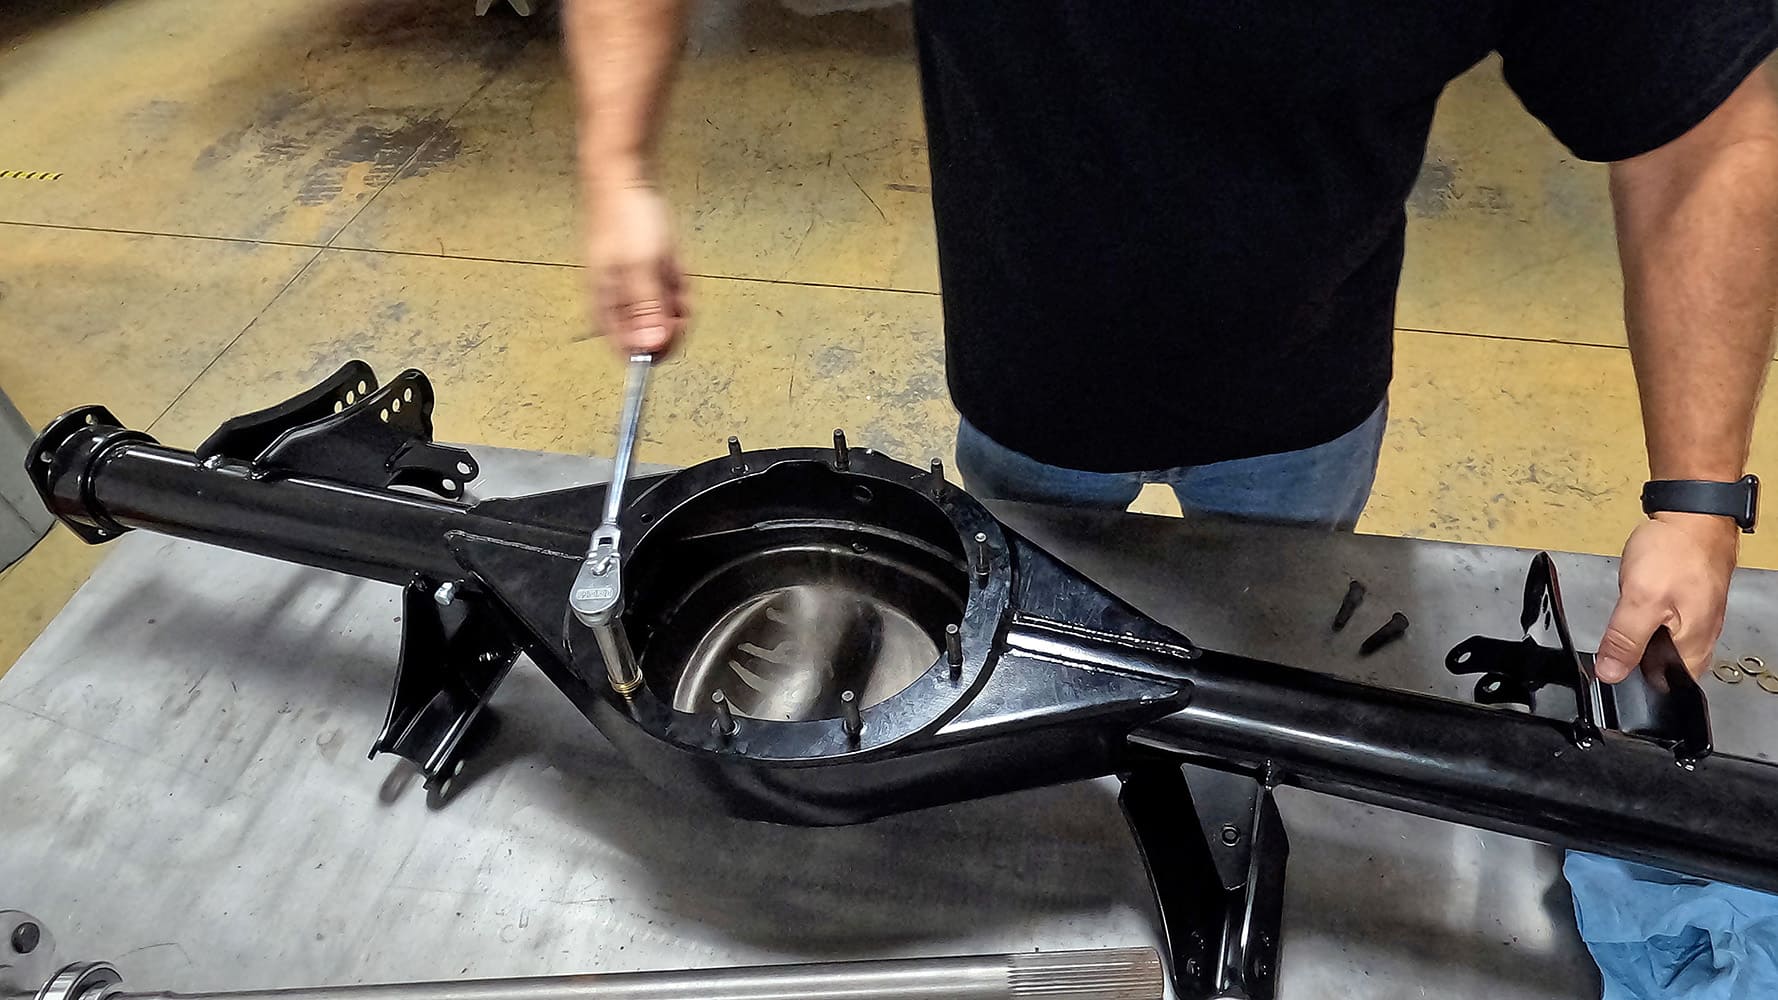
QA1’s 9-inch rearend housing is quality throughout. This includes a fabricated centersection, 3.0-inch steel axles tubes that are a 1/4-inch thick. Proper, high-strength mounting flanges already welded into place, new-style Torino flanges that work with popular aftermarket brake systems, and more. They also include beefy 31-spline axles that are rated to handle up to 650 hp.A third member isn’t included because there are just too many variables when it comes to gear ratio, differential type, and so on, but practically everything else needed to get up and running is included. Here, we are seating the housing studs so that we can bolt up the third member. We prefer to do this by hand rather than with an impact just to minimize the chance of warping the mounting face.
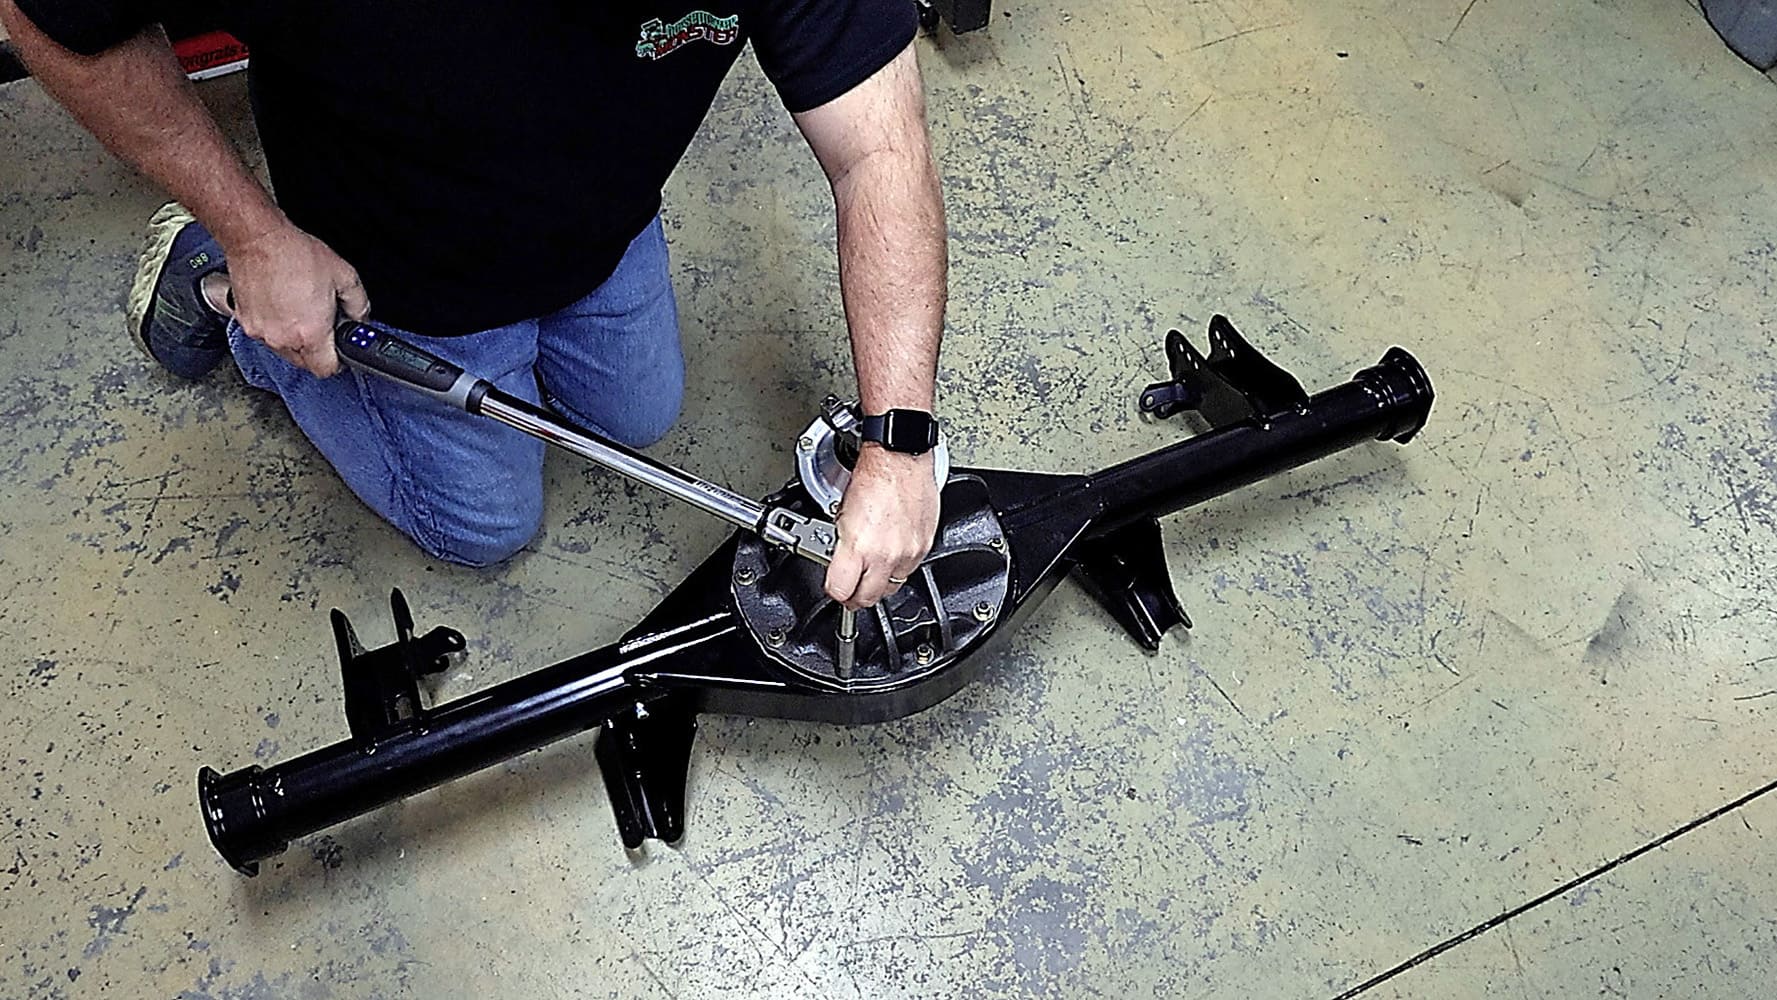
Quick Performance was our choice for a third member. It arrived built to spec with a 3.70:1 gearset, high-strength nodular iron case with a Daytona pinion support from Yukon Gear and an Eaton Truetrac diff that works like a locker without the maintenance necessary for clutches.The third member drops right into place and secured with nuts torqued to 33 ft-lb on the studs.
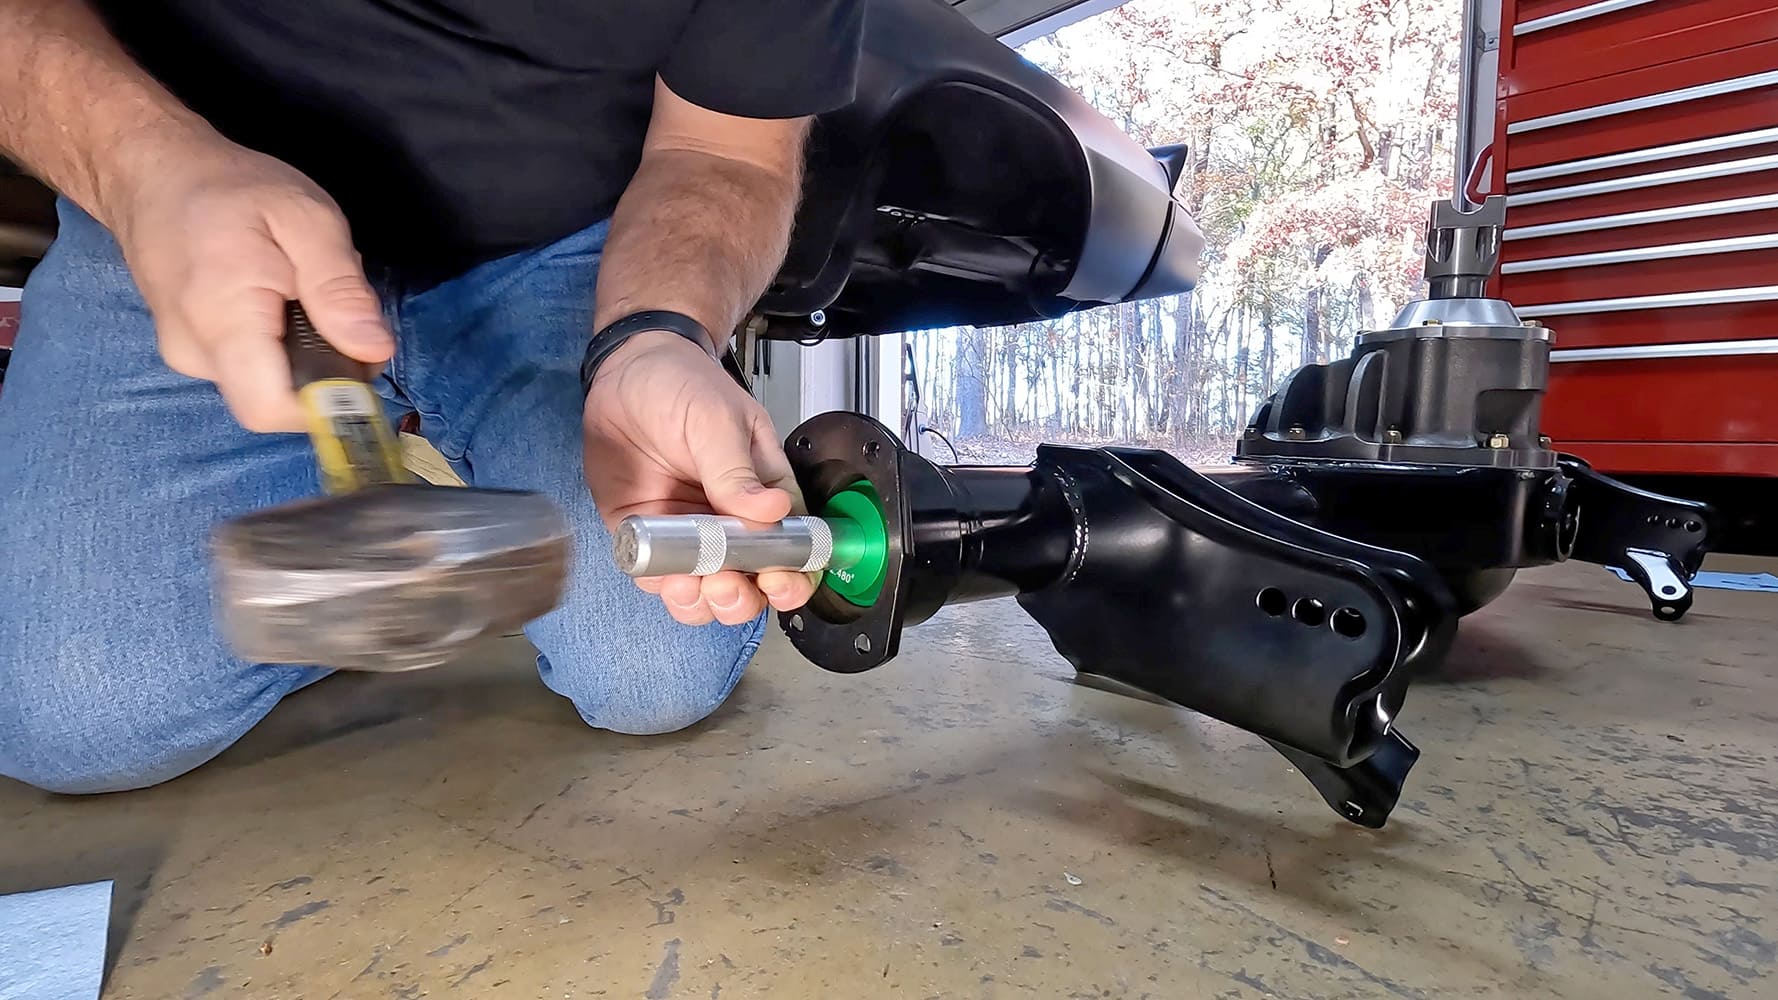
QA1 provides a set of axle seals with the kit. They popped right in place with a few taps from a seal driver.
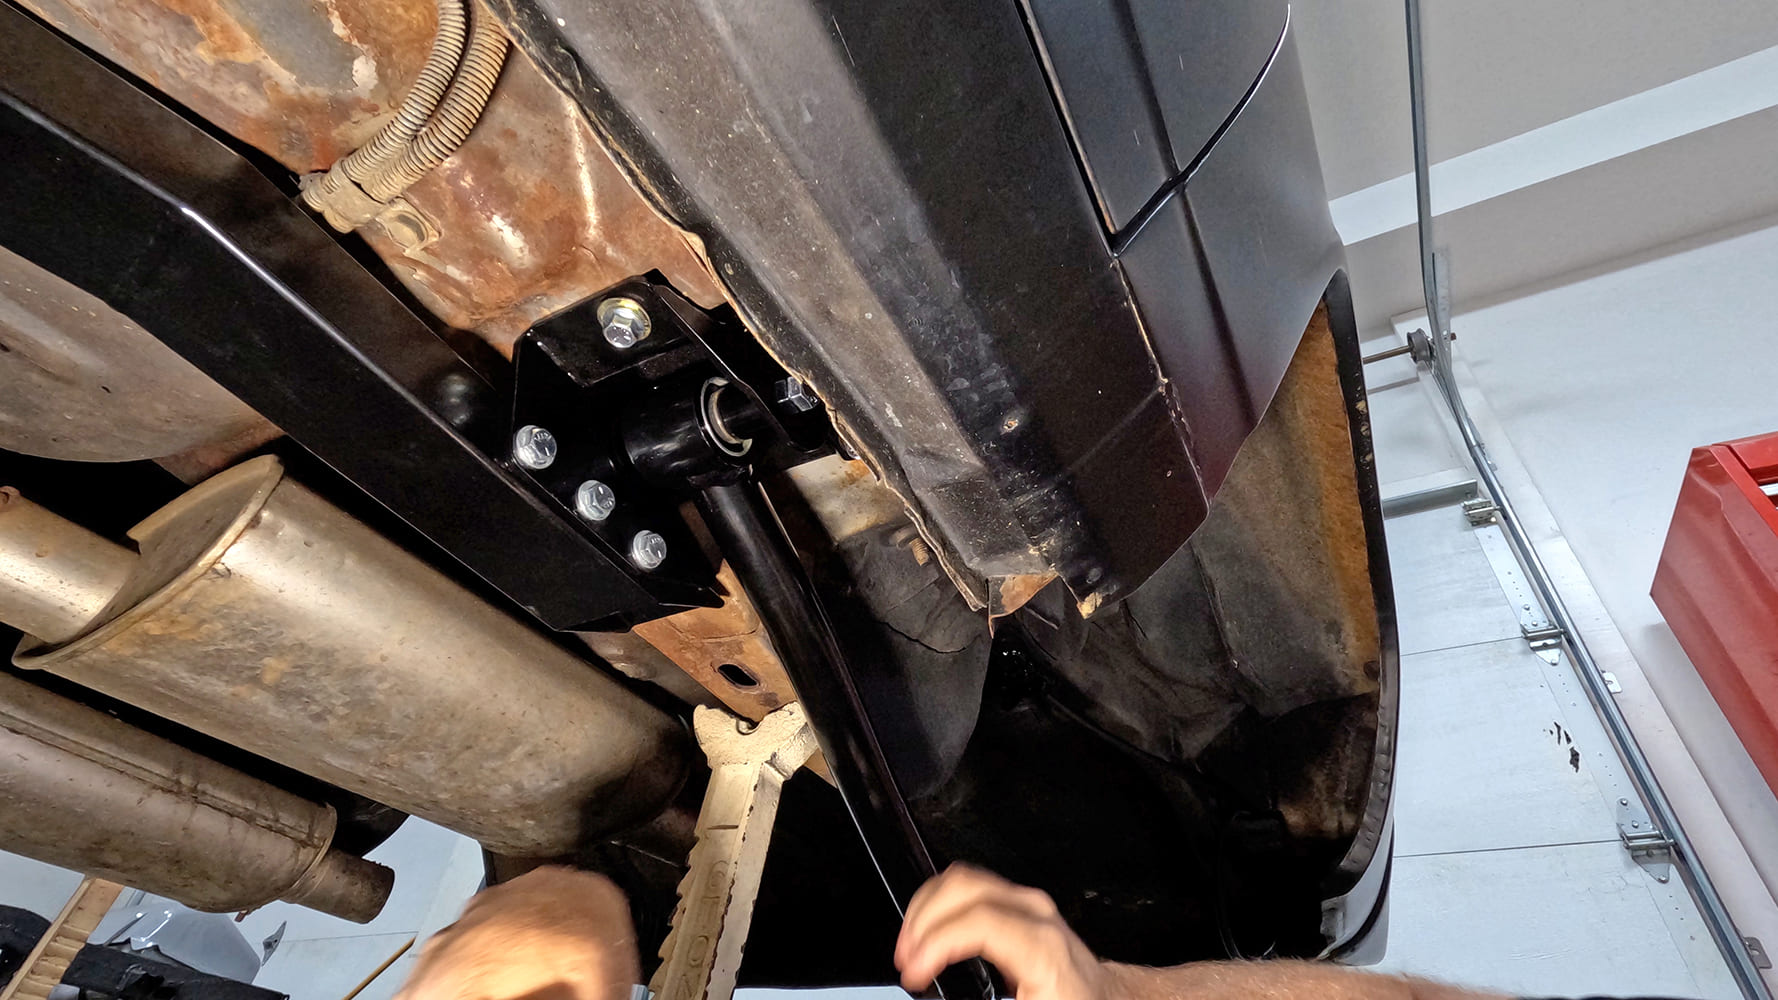
Before we can install the rearend and the new upper trailing arms, something must be done with the fuel lines. The stock hardlines are routed along the inside of the passenger-side framerail, which will no longer work with the crossmember welded in place.After cutting the fuel line, we needed some type of ridge in the end of the line to keep the flex line from popping off. No matter how tight you squeeze the hose clamp, never trust a smooth hardline. We were able to put a small bump into the end of the line using a brake flaring tool and just clamped it into the 5/16-inch fitting and gave it a couple of turns until the line started stretching. No need to put in a complete flare. Now we can slide on some flex line and route it behind the crossmember.
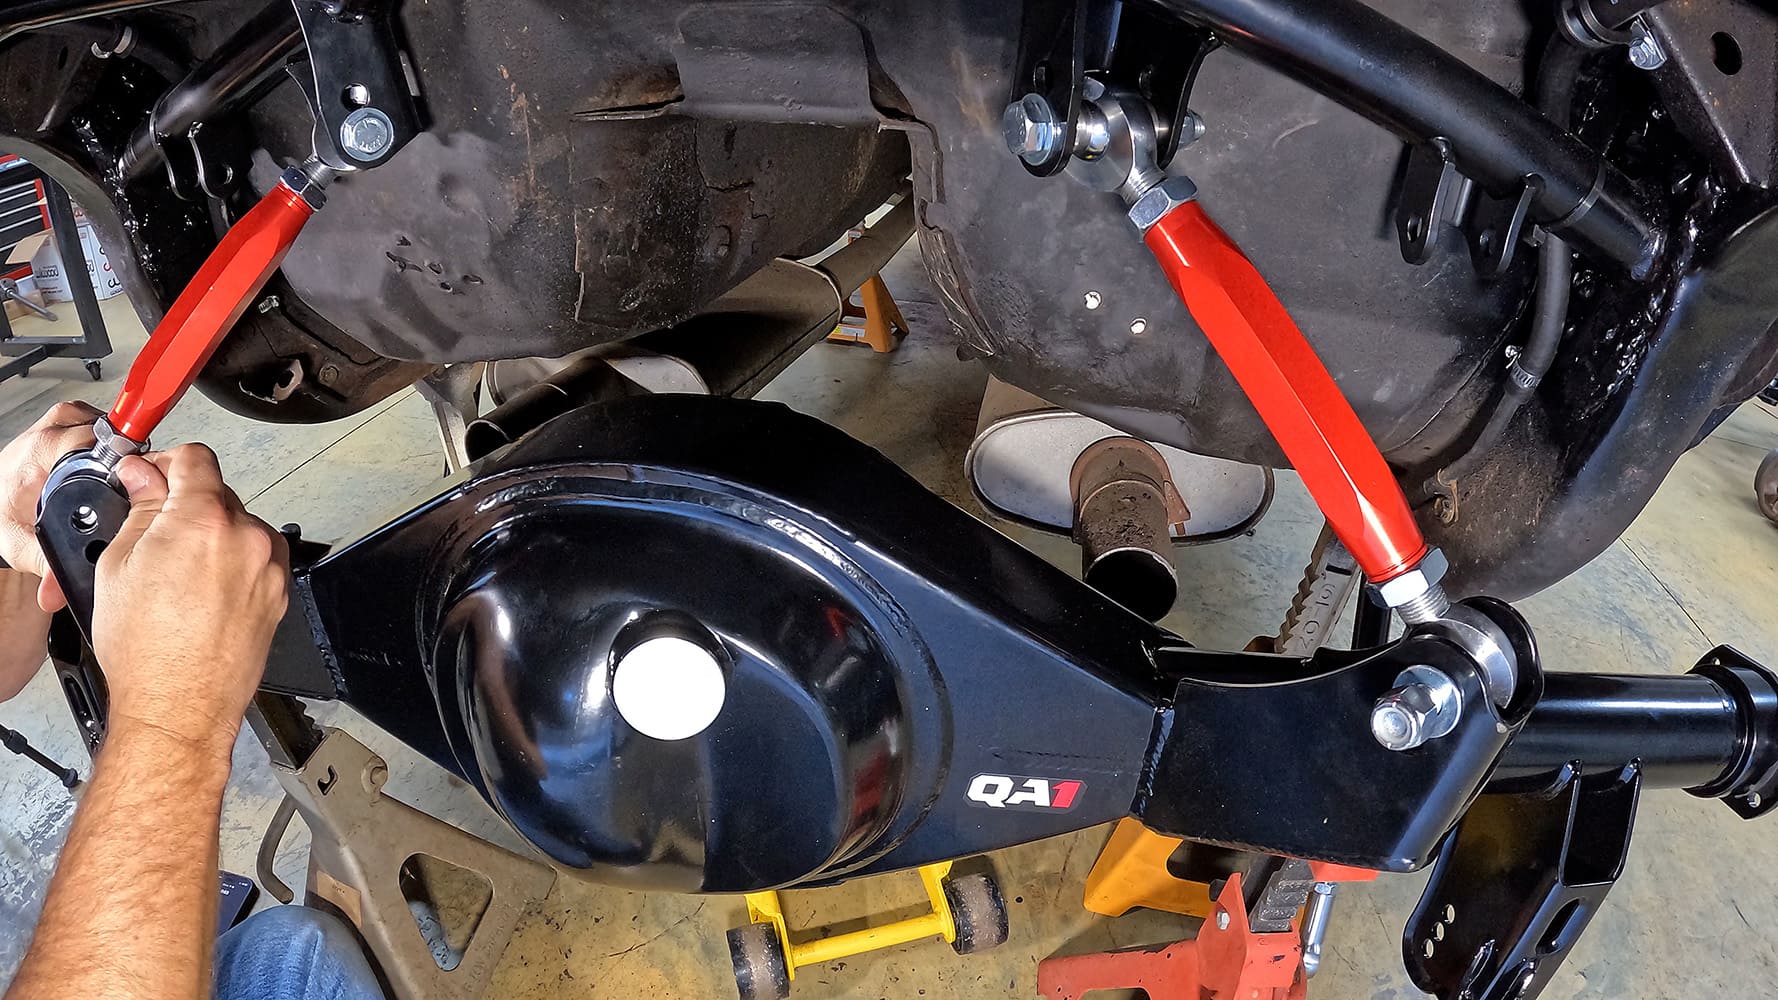
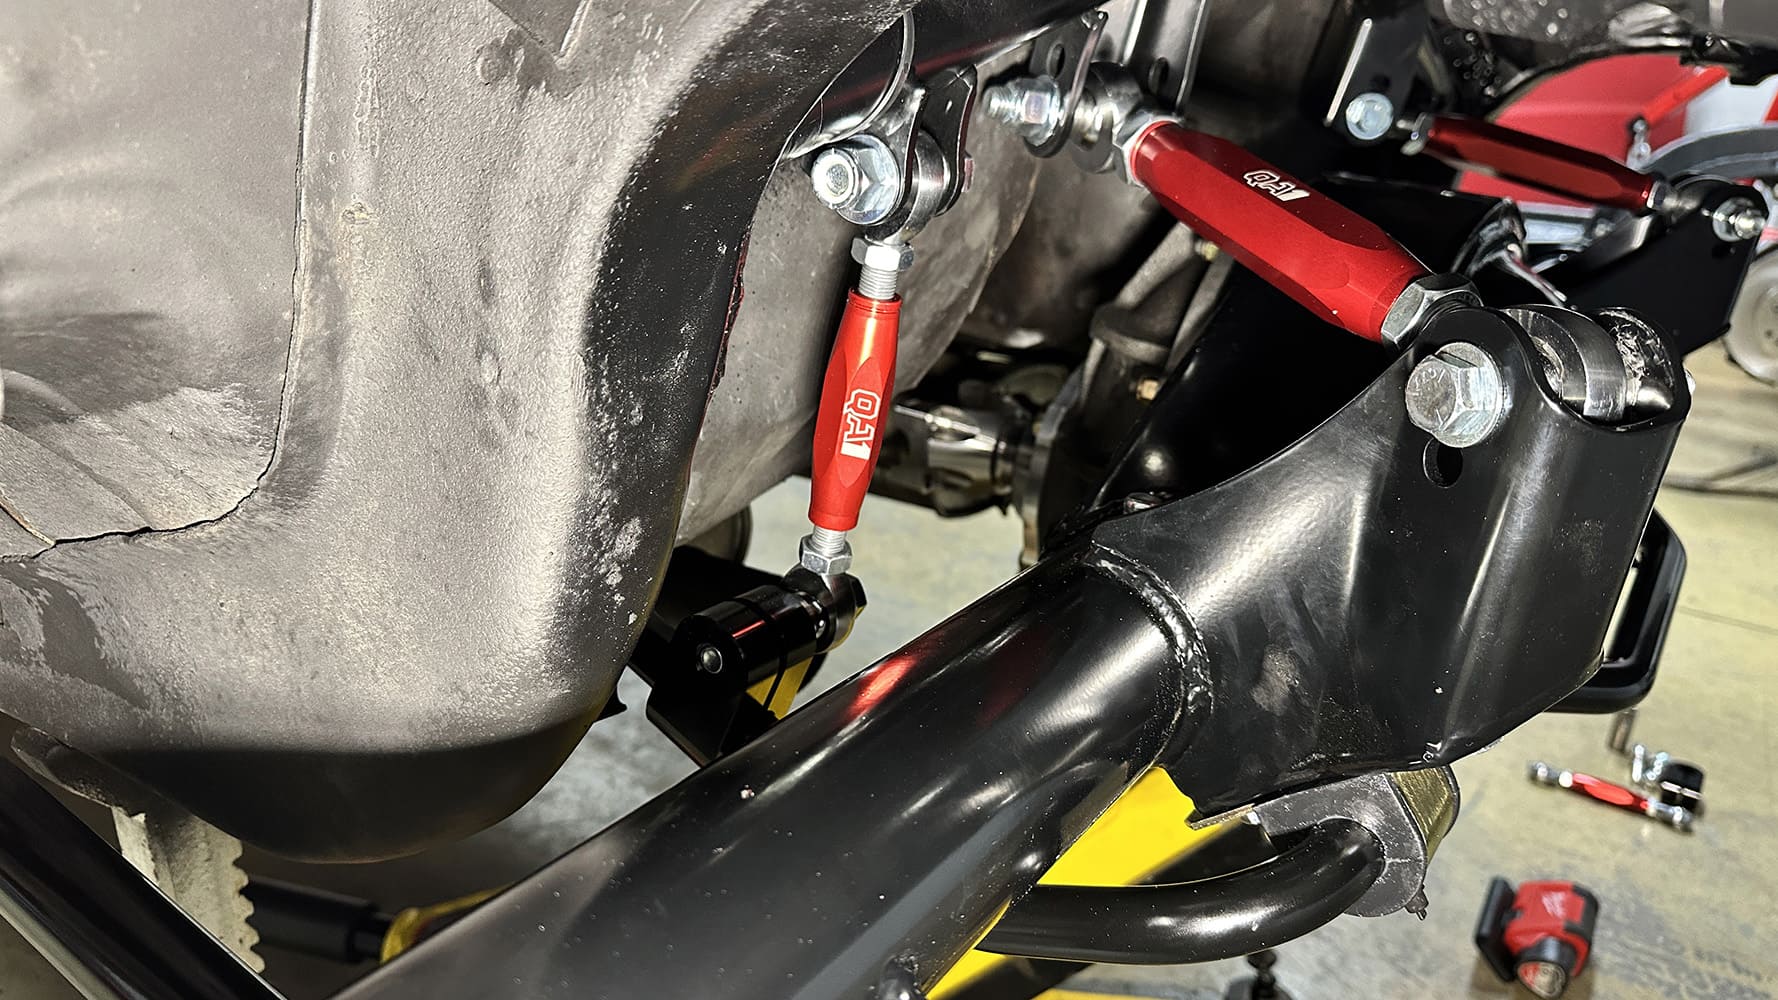
The upper trailing arms are fully adjustable and use machined spacers on either side of the Heim joints to allow for lots of articulation without binding.The lower trailing arms are also adjustable and outfitted with low-drag Heim joints. These are also super beefy to hold up to plenty of hard launches and intense cornering.The four-link rear suspension locates the rearend through full suspension travel without requiring a lateral Panhard bar. Compared to the leaf spring rear that was in the car, it is much less prone to wheel hop, eliminates axle wrap, makes the car more predictable, and improves ride quality.In this photo the rear sway bar has been installed. Originally, the Camaro had no rear sway bar at all, which should make for a big improvement. The endlinks are fully adjustable both for length and position on the sway bar. If you want the sway bar to feel softer, just slide the connectors closer to the end of the bar. Want it stiffer? Move it away from the ends to shorten the sway bar’s arms.
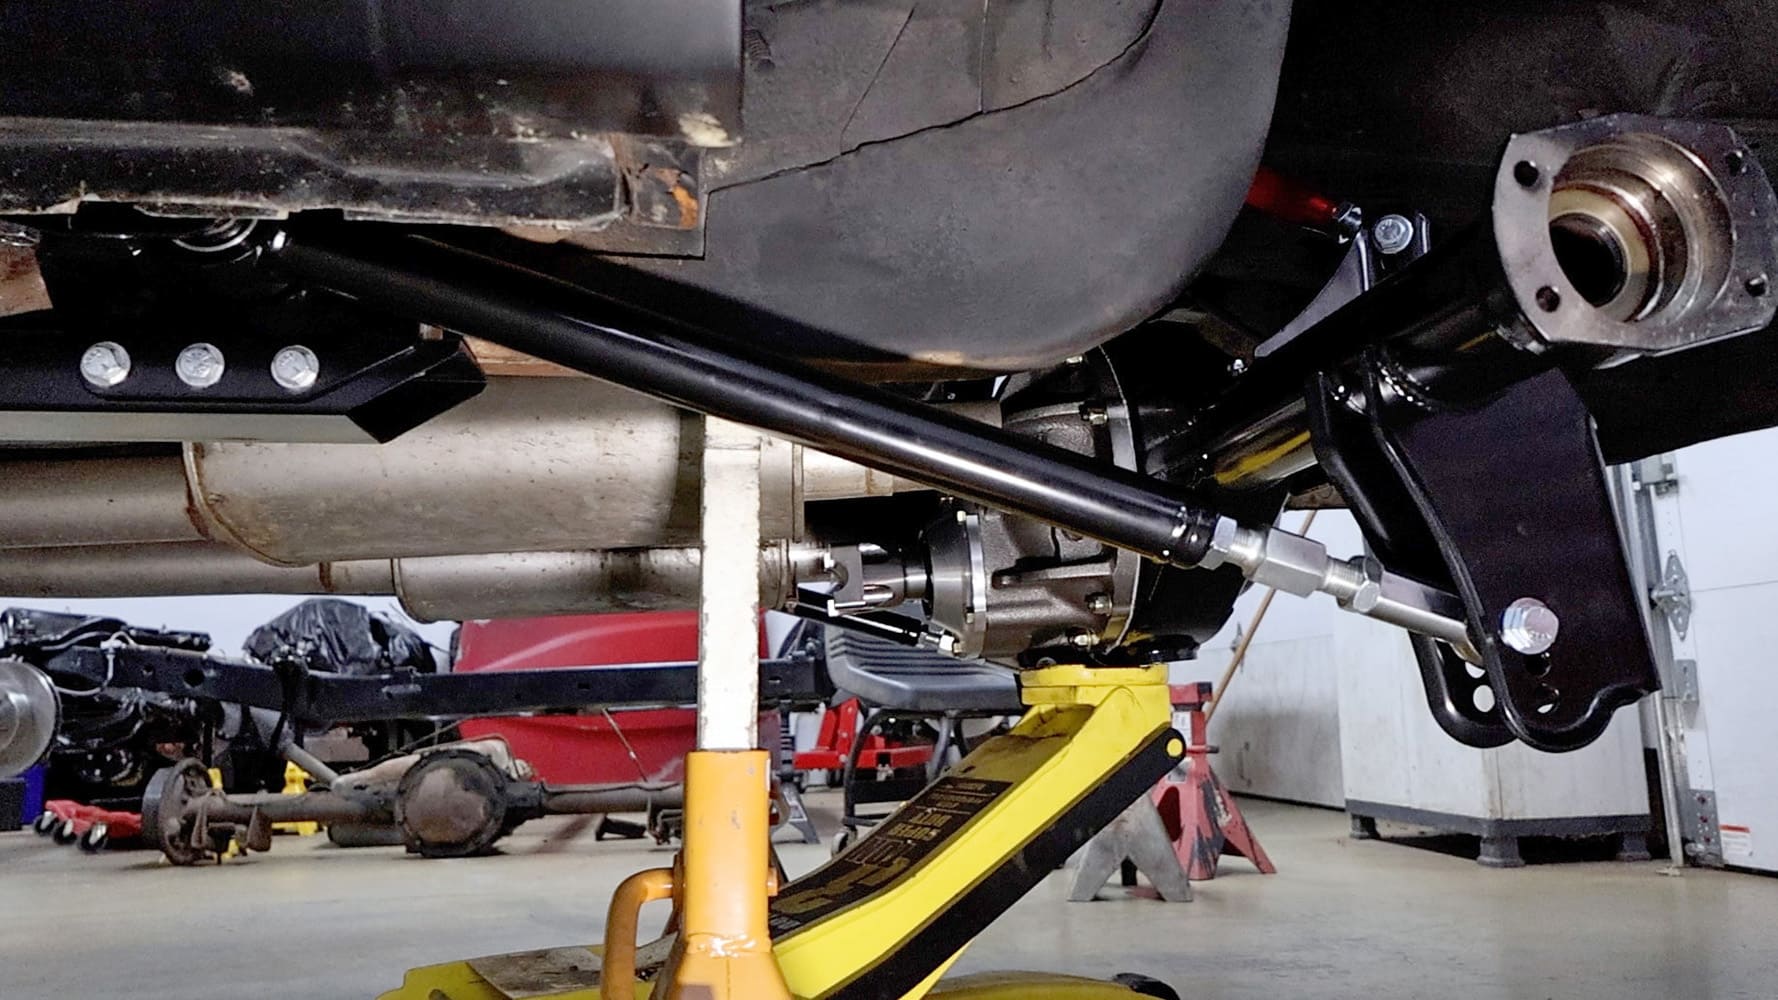
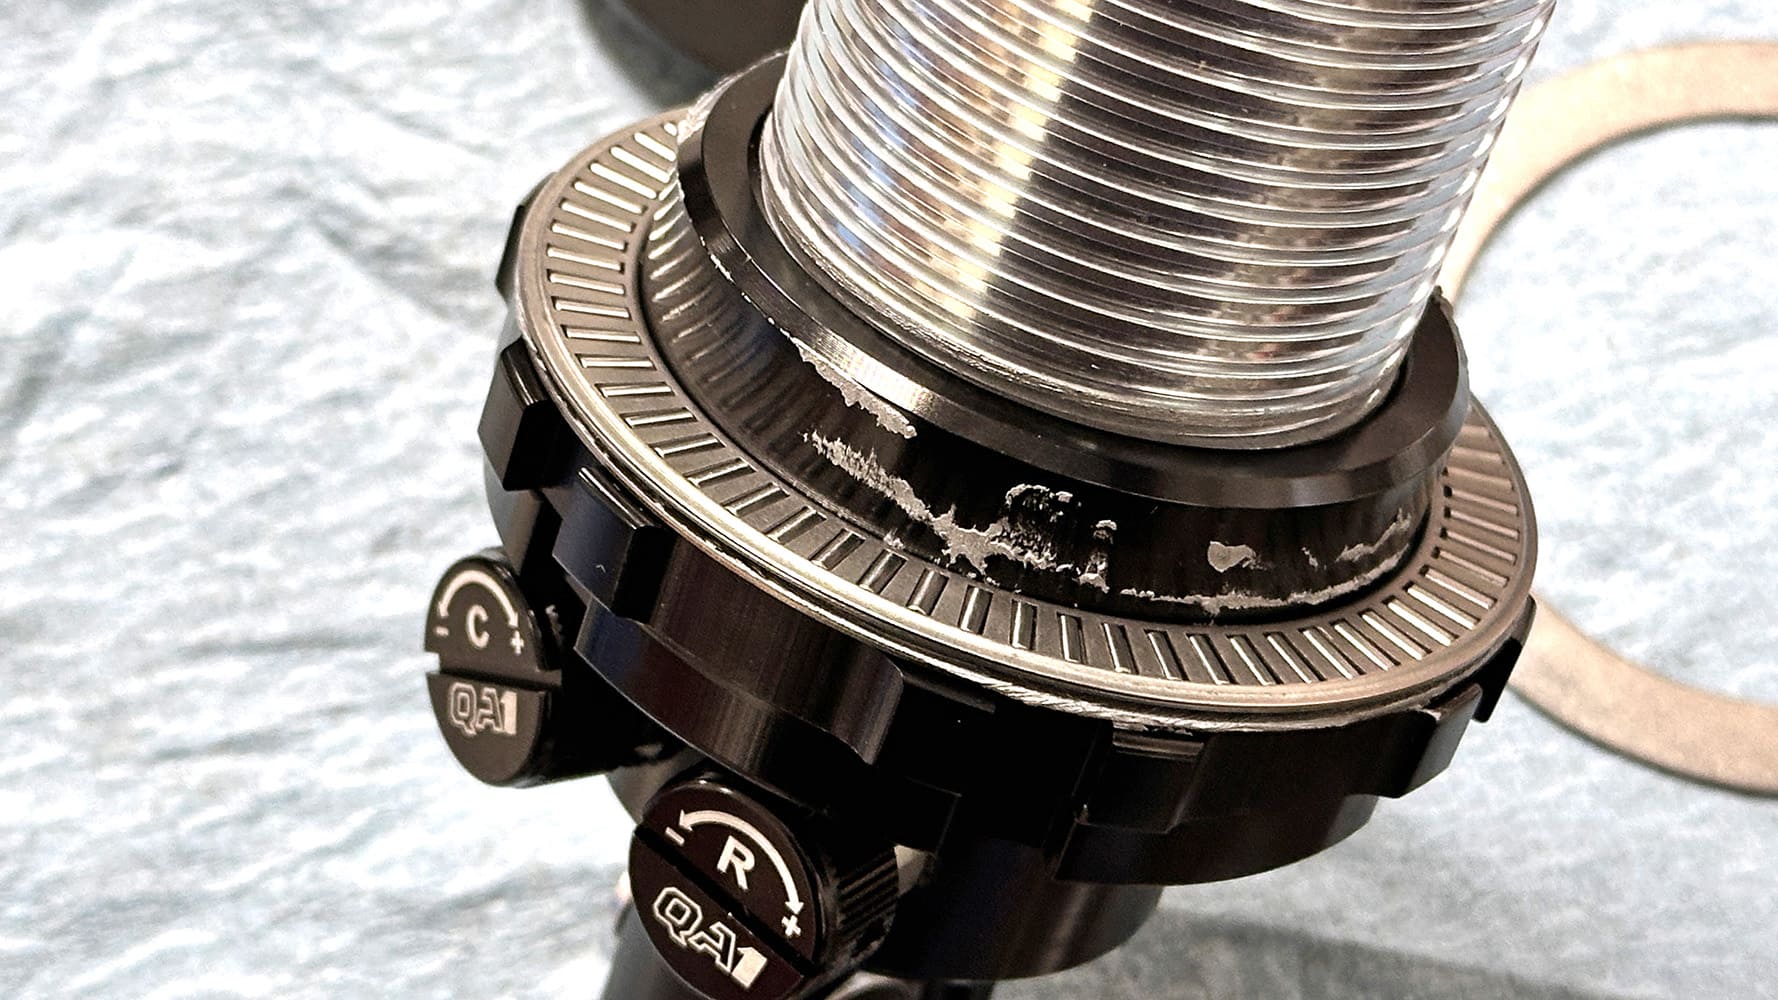
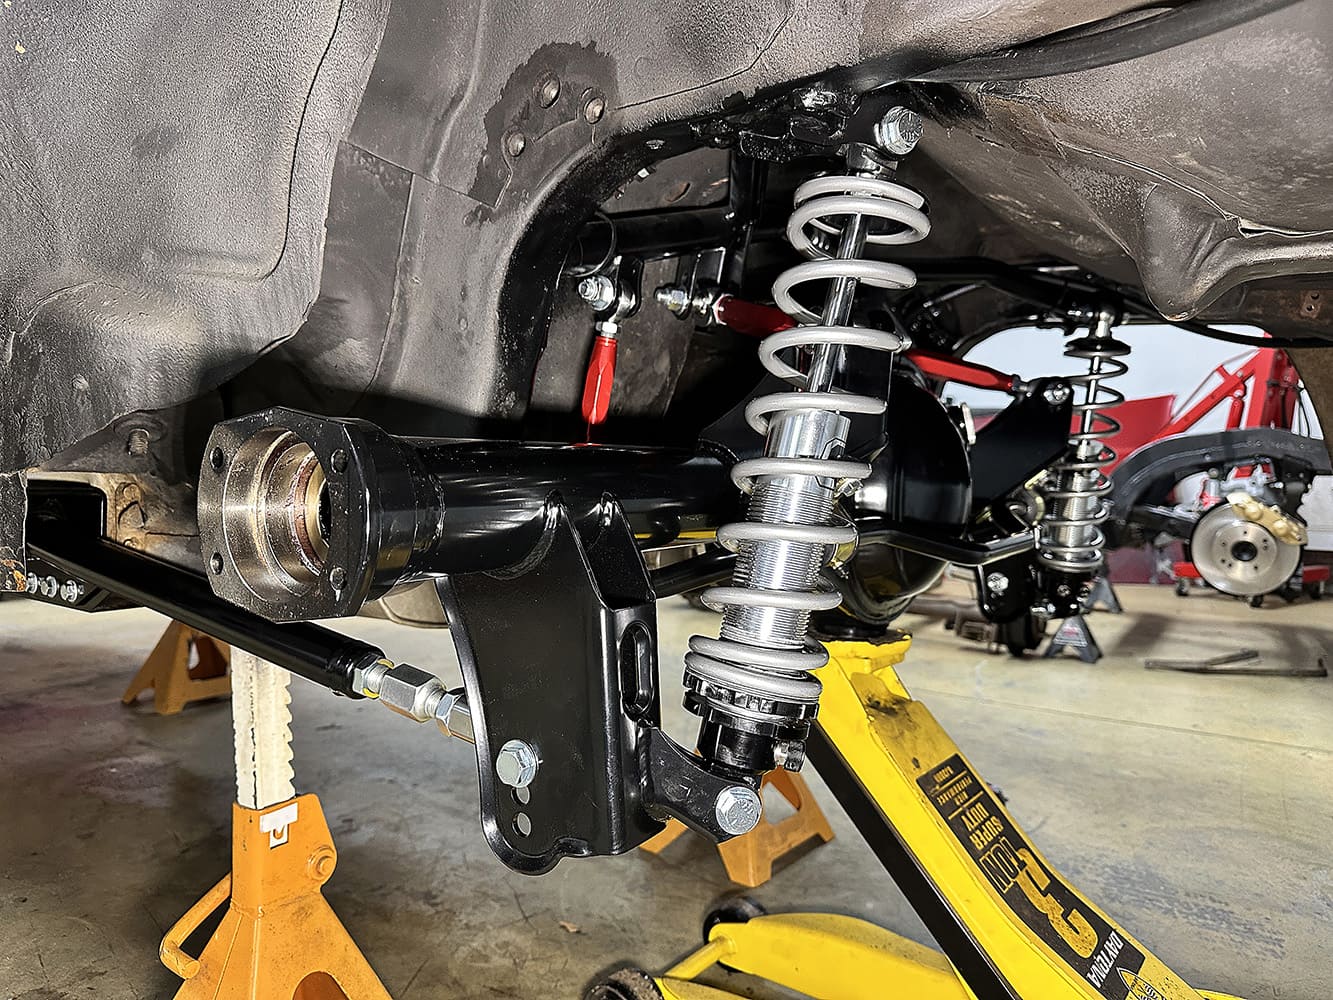
The rear coilover QA1 shocks are independently adjustable for both compression and rebound. We’re using their optional thrust bearing kit with needle bearings to significantly smooth out ride height adjustments by spinning the collars up and down the body of the coilover shocks.The rear coil spring is 12 inches with a 2.5-inch diameter with a 170-pound spring rate. The shocks mount to an arm off the crossmember up top and this bracket on the rearend at the bottom.The rear suspension assembled. We’ve just got one of the high-strength 31-spline axles slid in place because they will have to come out again to install the Wilwood brakes system. That’s coming up next, so stay tuned!
We use cookies to ensure that we give you the best experience on our website. If you continue to use this site we will assume that you are happy with it.