ITGMw
SUBSCRIPTIONtext
ProgressArrows
digital issues
ProgressArrows
online store
ProgressArrows
SUBSCRIPTIONtext
ITGMw
ACPnew header logo
CTP LOGOs
all cars

Updating Your Charging System—Even Your Mopar

By Ron Ceridono   –   Photography By the Author

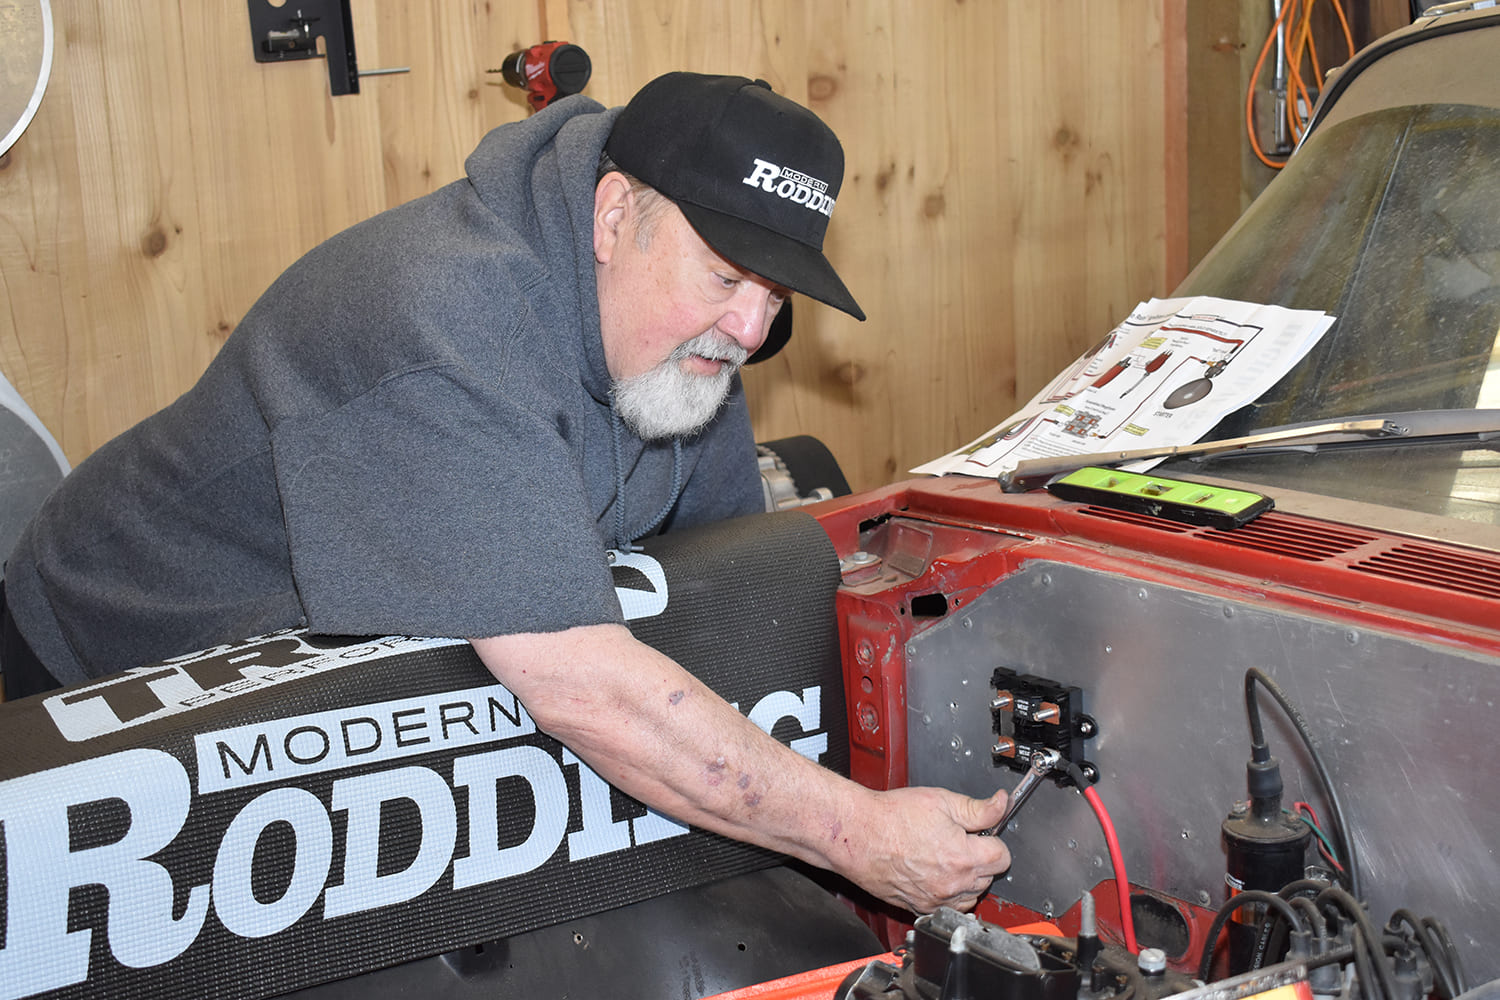
Hidden in a dark corner of Modern Rodding’s super-secret Northwest Research and Development center (also known as the storage building where languishing project cars collect dust) is our 1960 Dodge Dart station wagon. Editor Brennan has dubbed it the magazine’s version of the Wagon Queen Family Truckster seen in National Lampoon’s Family Vacation, and after years of his verbal abuse about the lack of progress, we’ve decided to drag it into the sunlight and take the necessary steps to make it roadworthy once more. That first step is replacing the dilapidated wiring with a new American Autowire Highway 22 Plus kit.

02 american autowire highway 22 install rodding usa man wiring firewall fuse panel
American Autowire’s installation instructions are easy to follow. We began the update by installing the Mega Fuse assembly underhood.

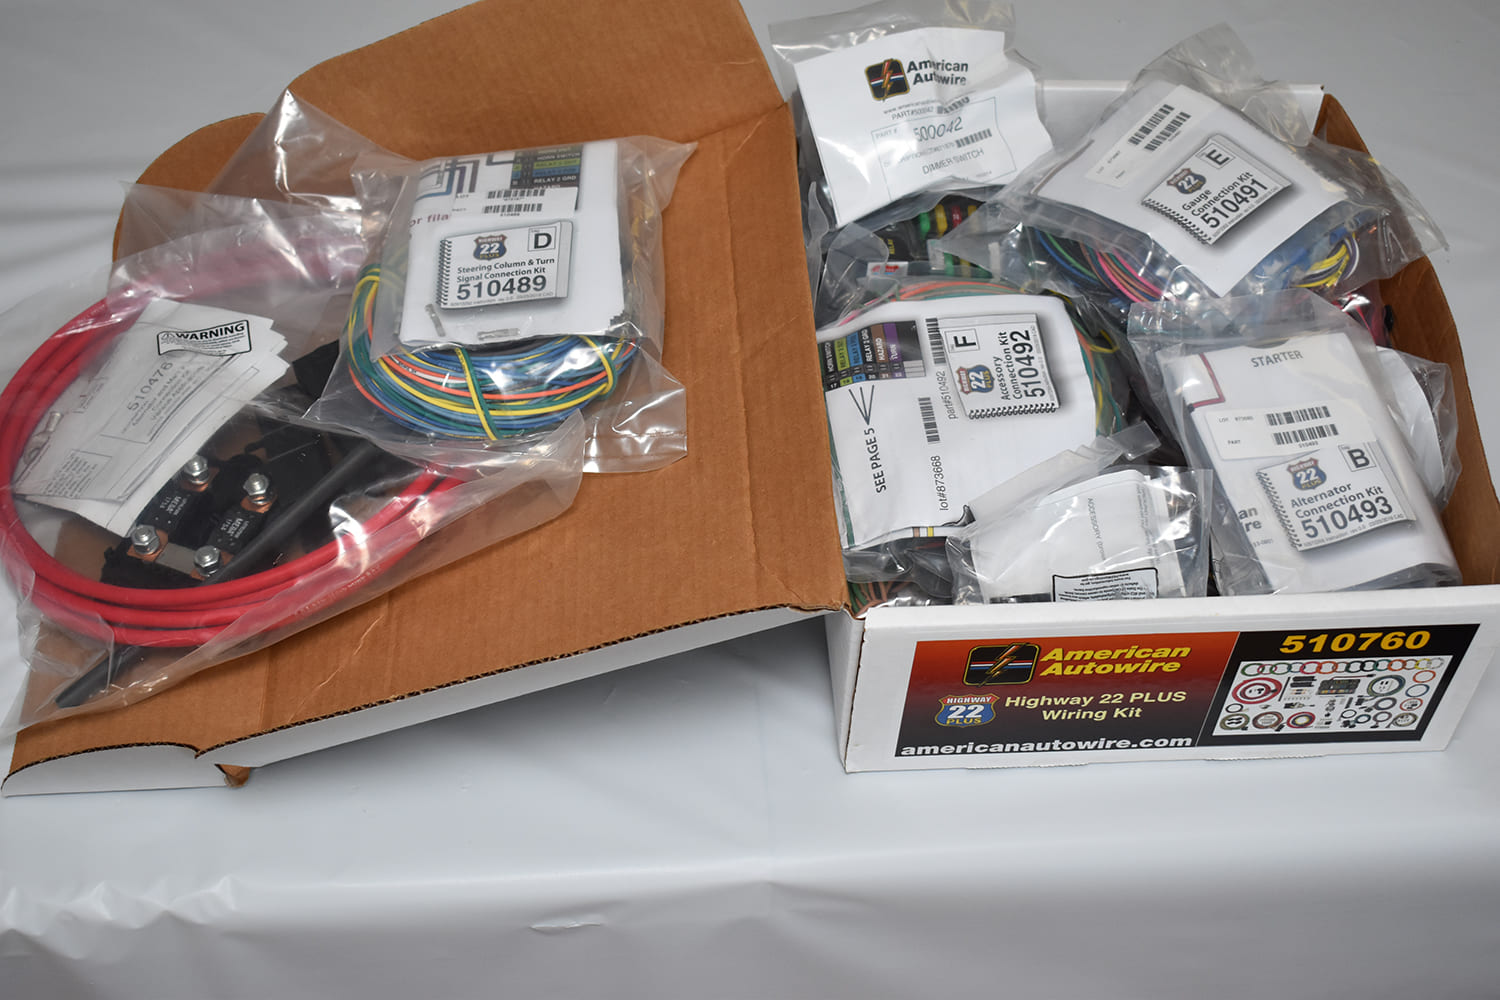
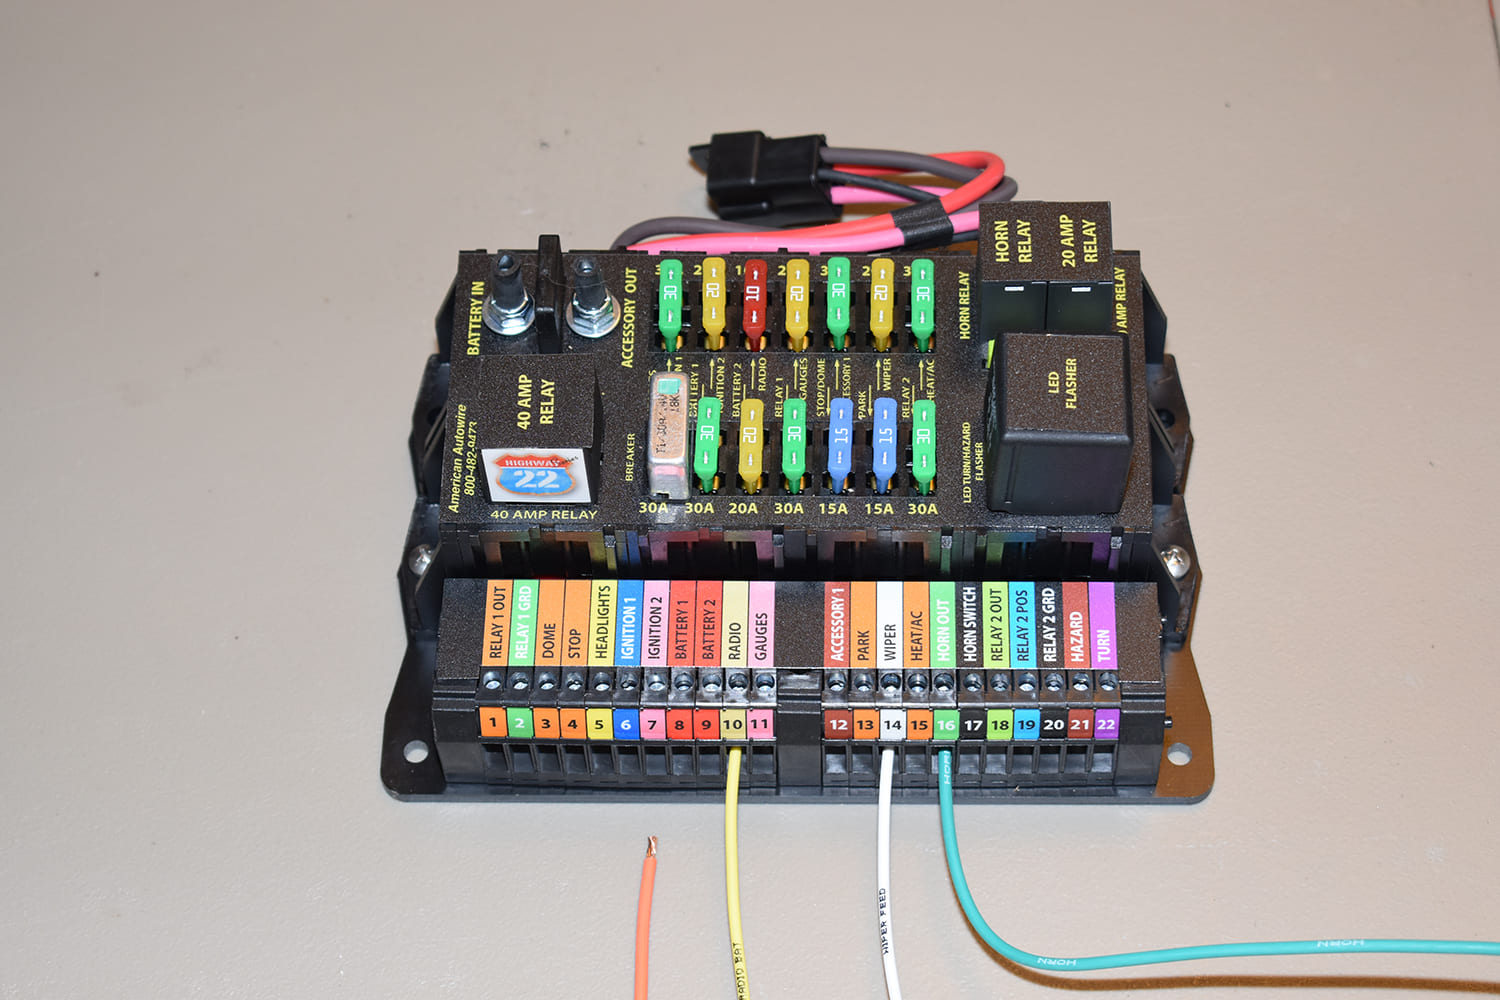
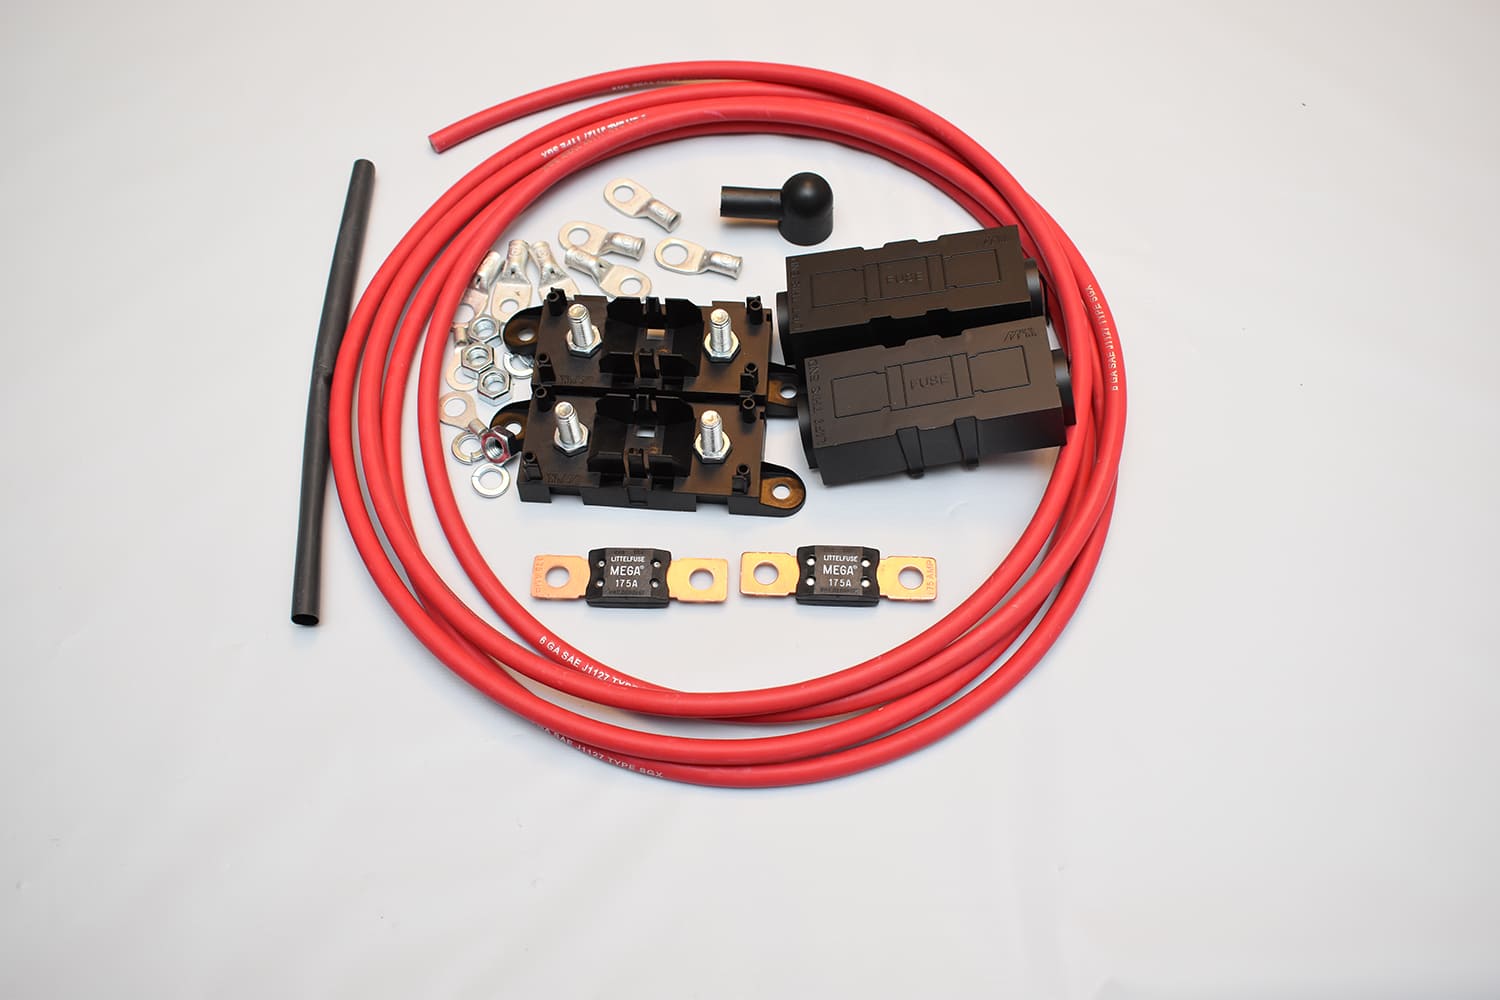
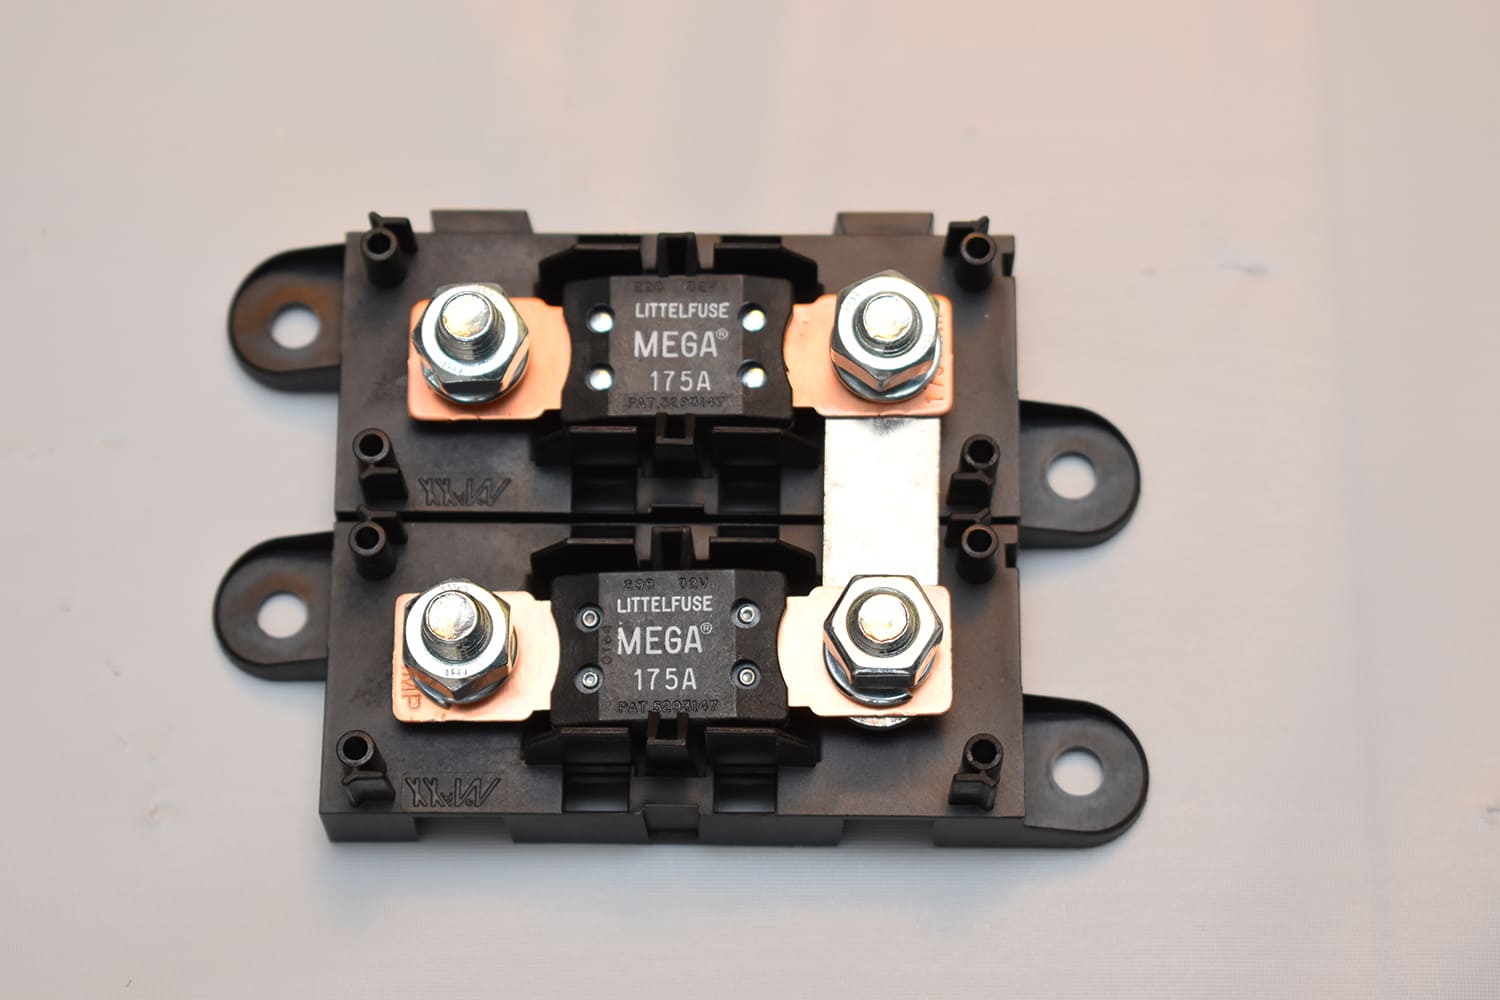
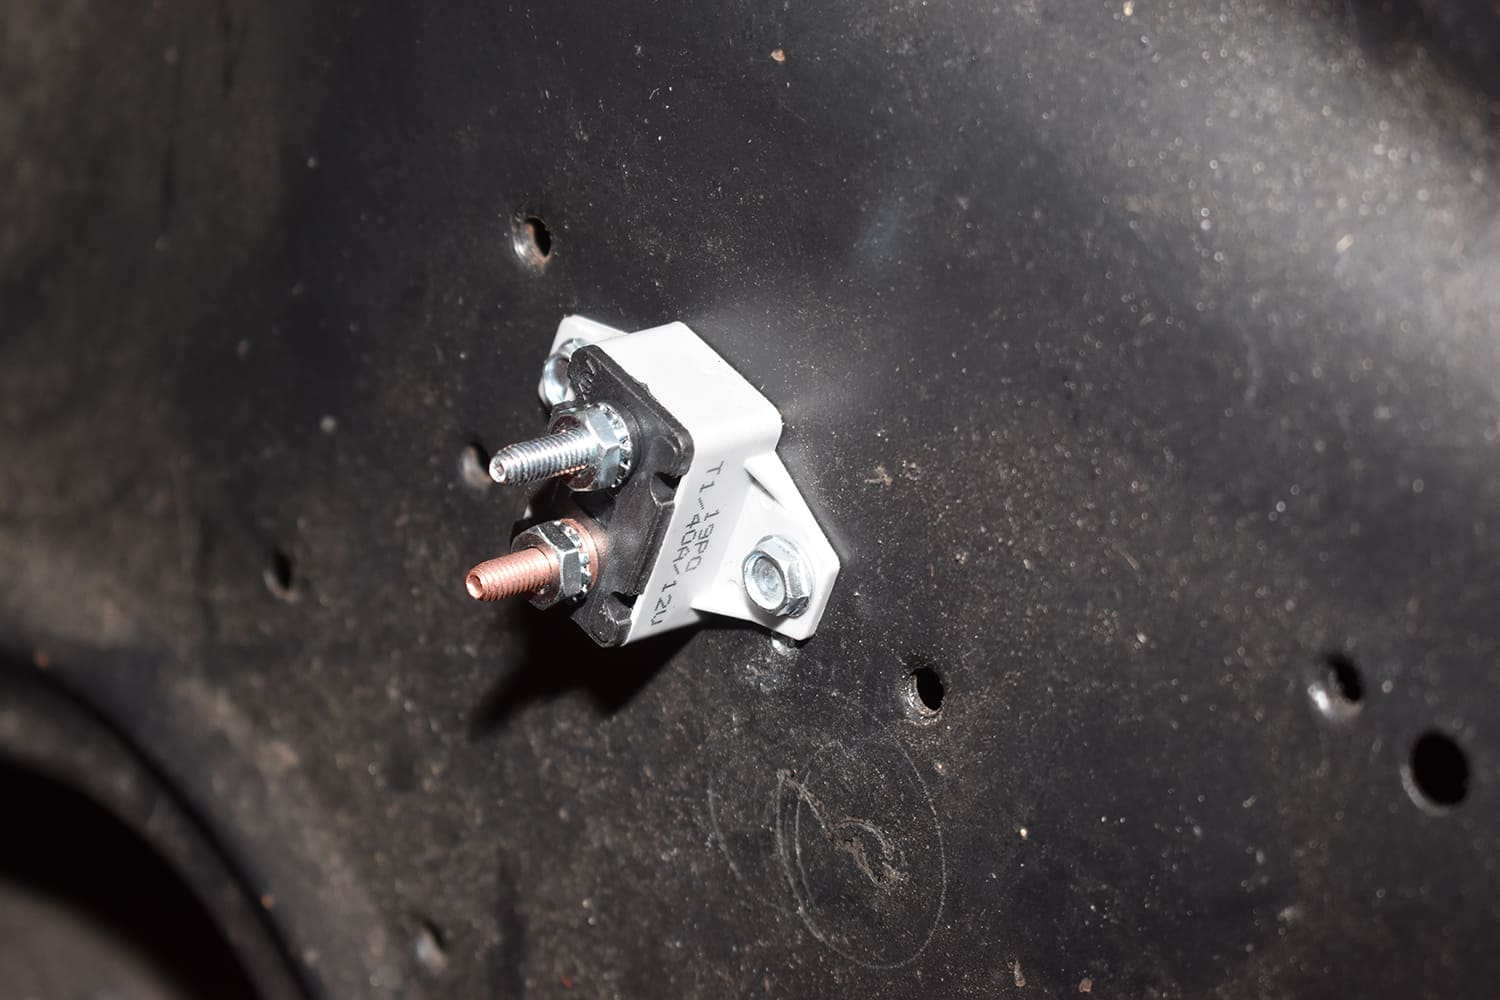
Chrysler Corporation had a unique method of protecting the electrical system of its cars of this era. Rather than one central fuse block, there was a main circuit breaker and a number of inline fuse holders—all cleverly hidden to make finding them a challenge. By contrast, the replacement American Autowire has is a modern fuse panel with 13 circuits that mount the headlight, horn, accessory relays, LED turn signal, and hazard flasher.

03 highway 22 plus wiring kit american autowire labeled component packs connectors organized in box
Each Highway 22 Plus wiring kit section is individually bagged with specific instructions for that harness section.

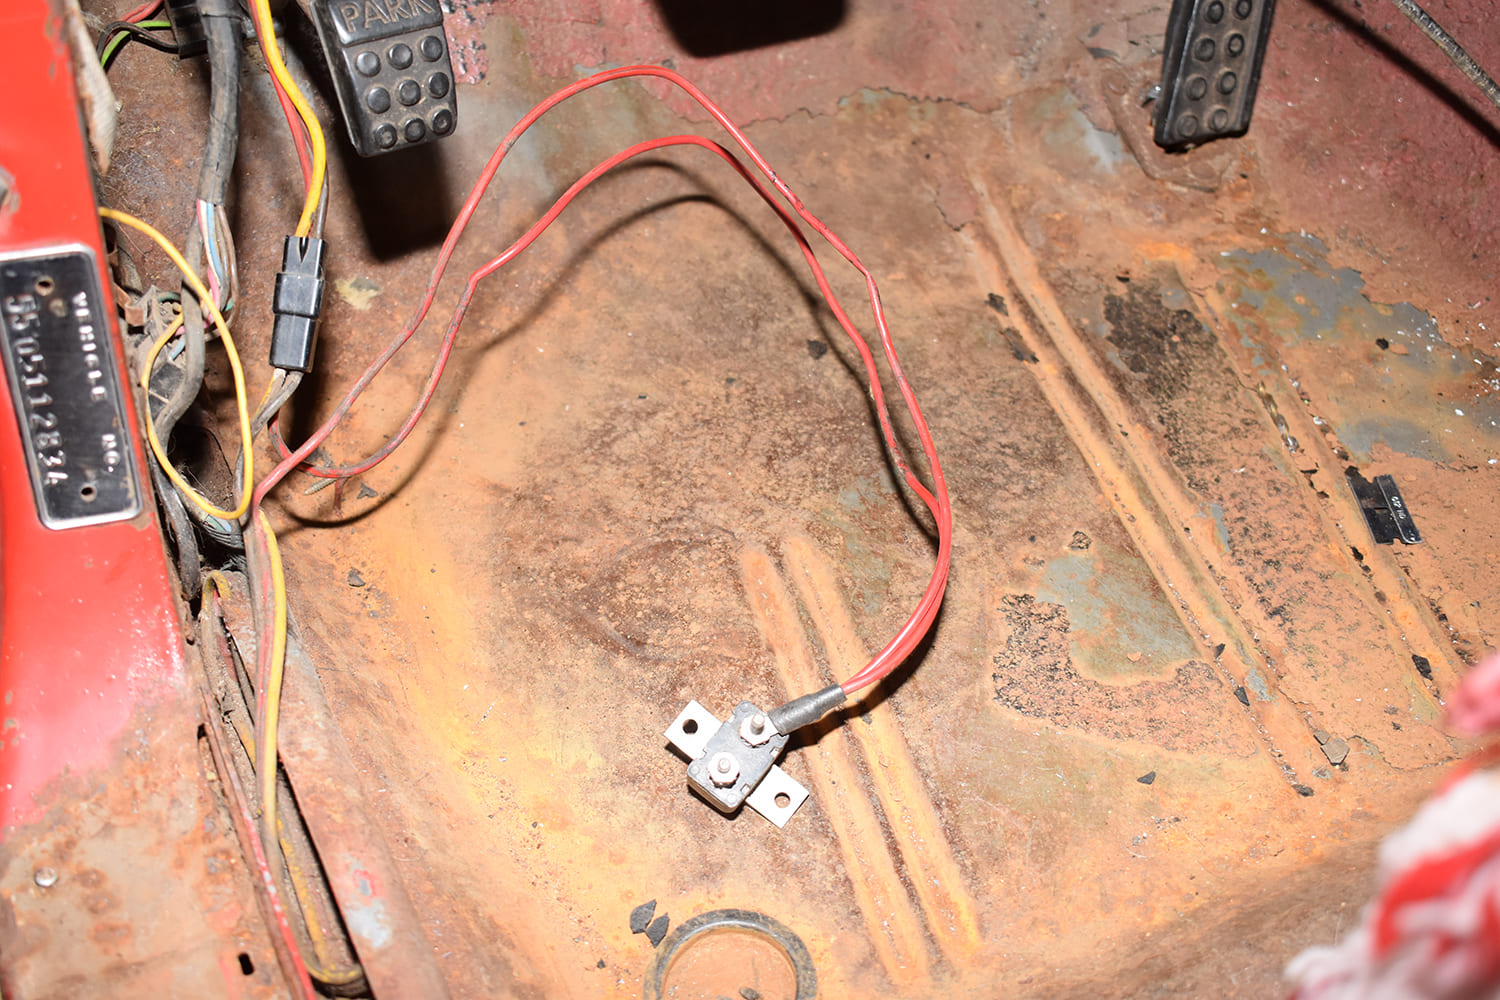
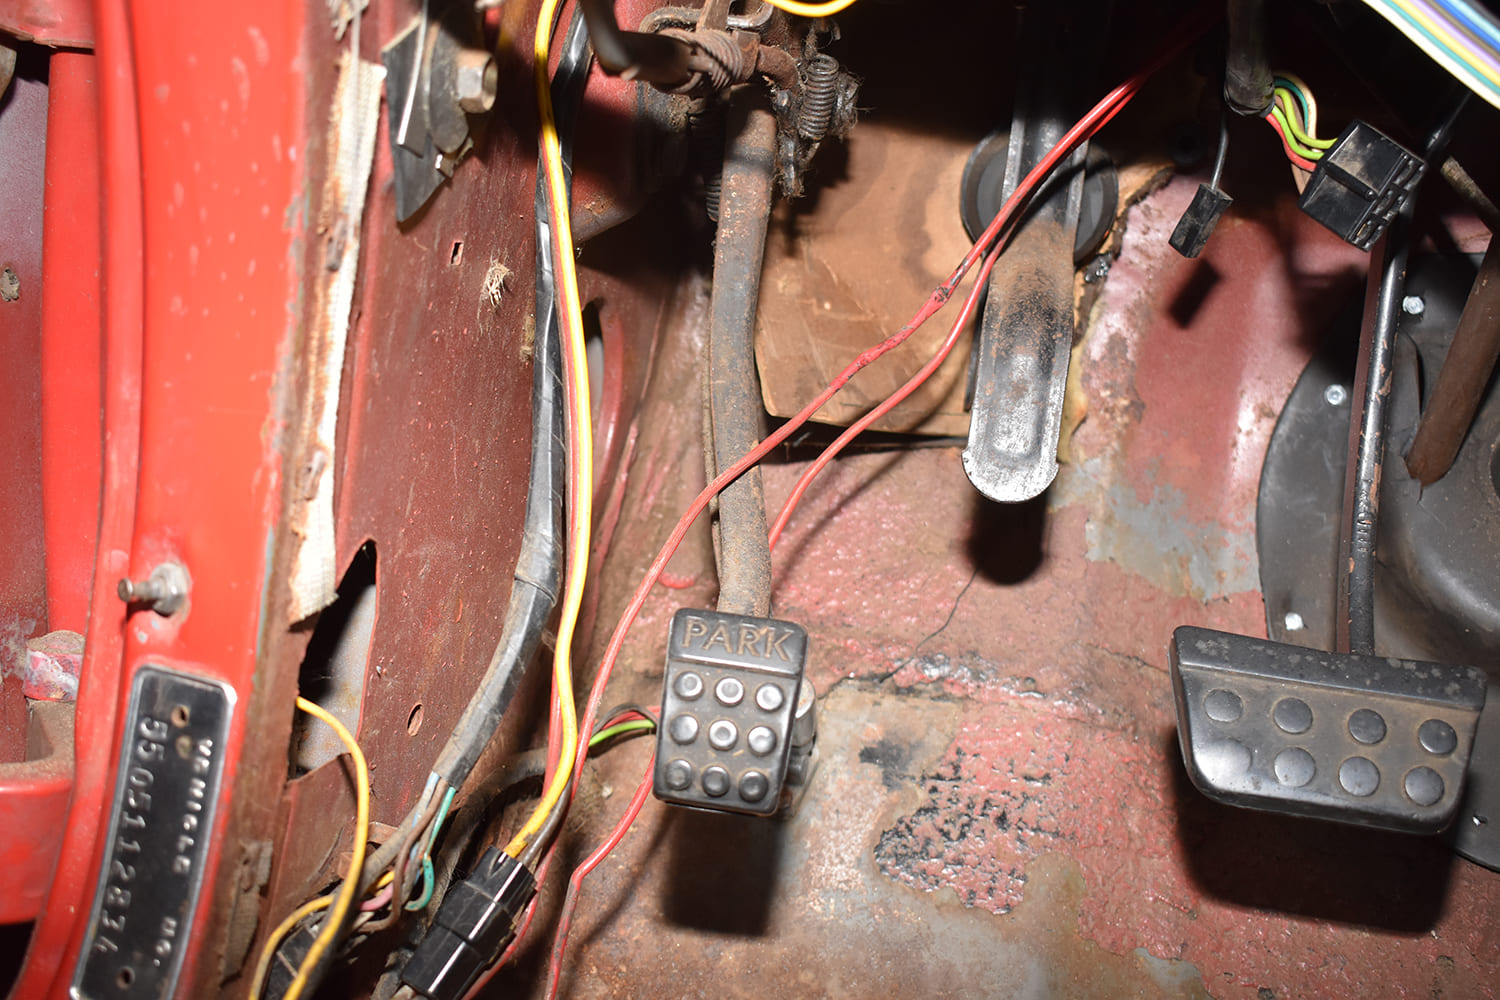
Generally, when installing a new fuse panel in a project such as this, the first concern is often hiding it from view. However, if you’ve ever had to lie on your back upside down under a dashboard to replace a fuse, it becomes obvious that easy access is equally important. Ironically, for a vehicle that is roughly the size of the Queen Mary, finding a spot under the dashboard of the Dodge to mount the fuse block was a challenge. Most of the space on the left side of the steering that would be considered the “normal” location for the fuse block was taken by the foot-operated parking brake, an odd mechanical mechanism for the windshield washer pump, and the clutch pedal assembly.

04 old wiring under dash dodge rusty floor parking brake pedal exposed red yellow wires
This was Chrysler Corporation’s alternative to a fuse block, a single-circuit breaker.

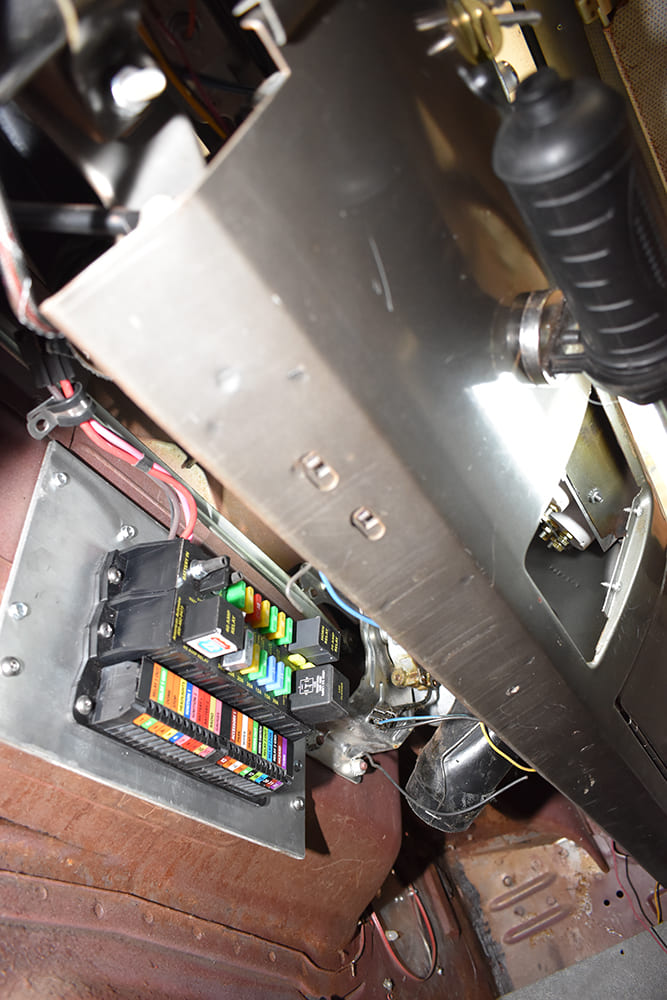
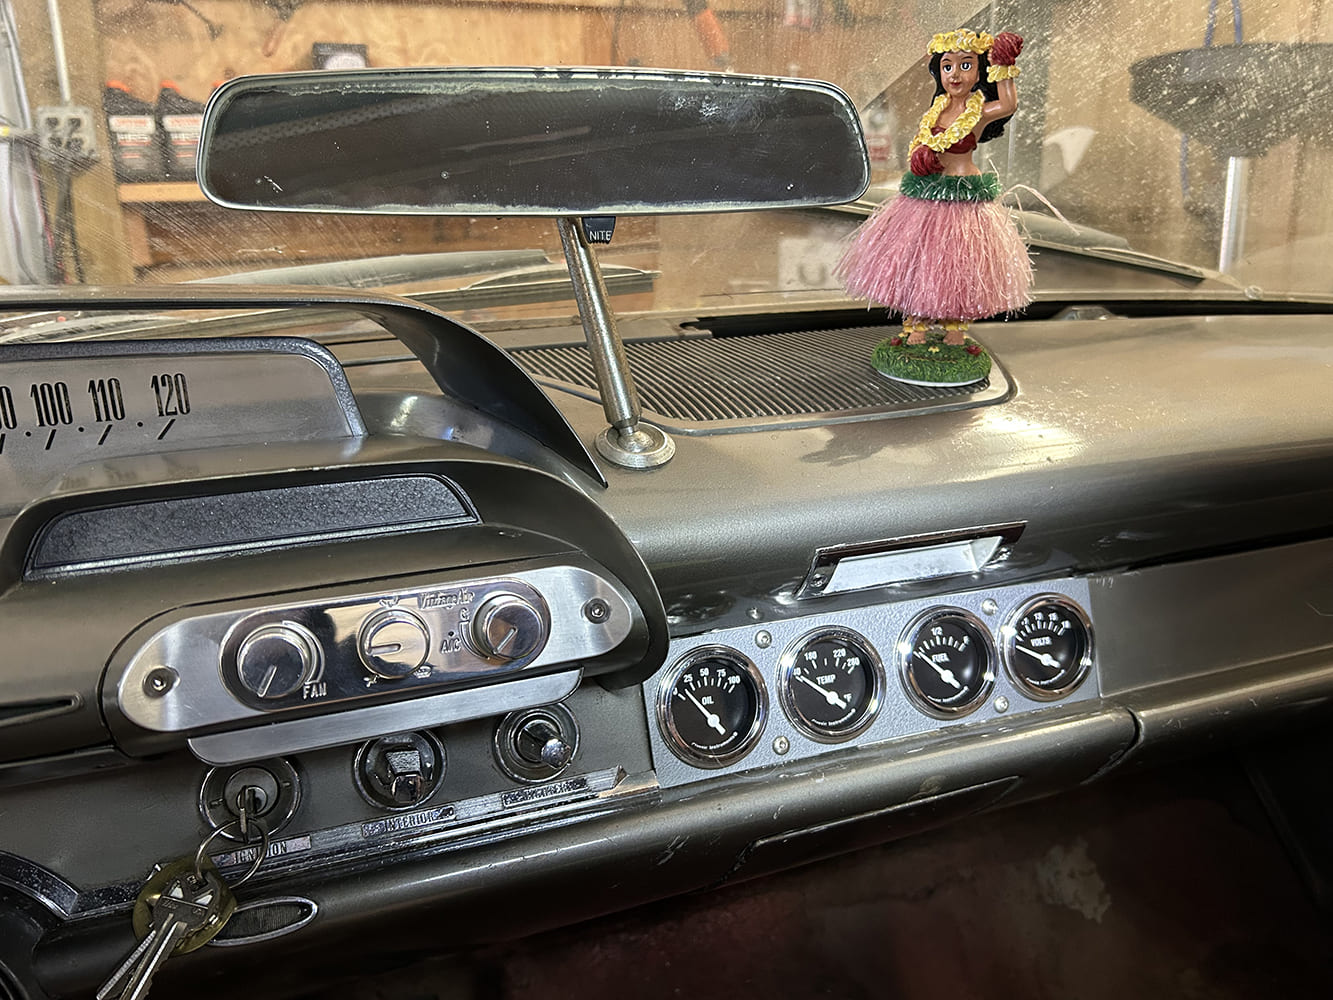
Locating the fuse block on the right side of the steering column looked to be our only option, but there was a large vacuum-controlled rectangular vent for the heater in the way. However, as we had planned on removing the factory heater and replacing it with a Vintage Air unit, a block-off plate was made for the opening from aluminum, allowing us to mount the new fuse panel above the transmission tunnel. While unconventional, locating the fuse block under the center of the dashboard turned out to have several advantages—it was out of sight, and it’s easily accessible due to pure dumb luck by removing the ashtray. Sometimes it’s better to be lucky than good.

05 vintage wiring pigtail black connector adapter harness loose terminals close up
Besides the main circuit breaker, our Dodge had individual electrical circuits, such as the wiper motor and heater, protected by inline fuses.

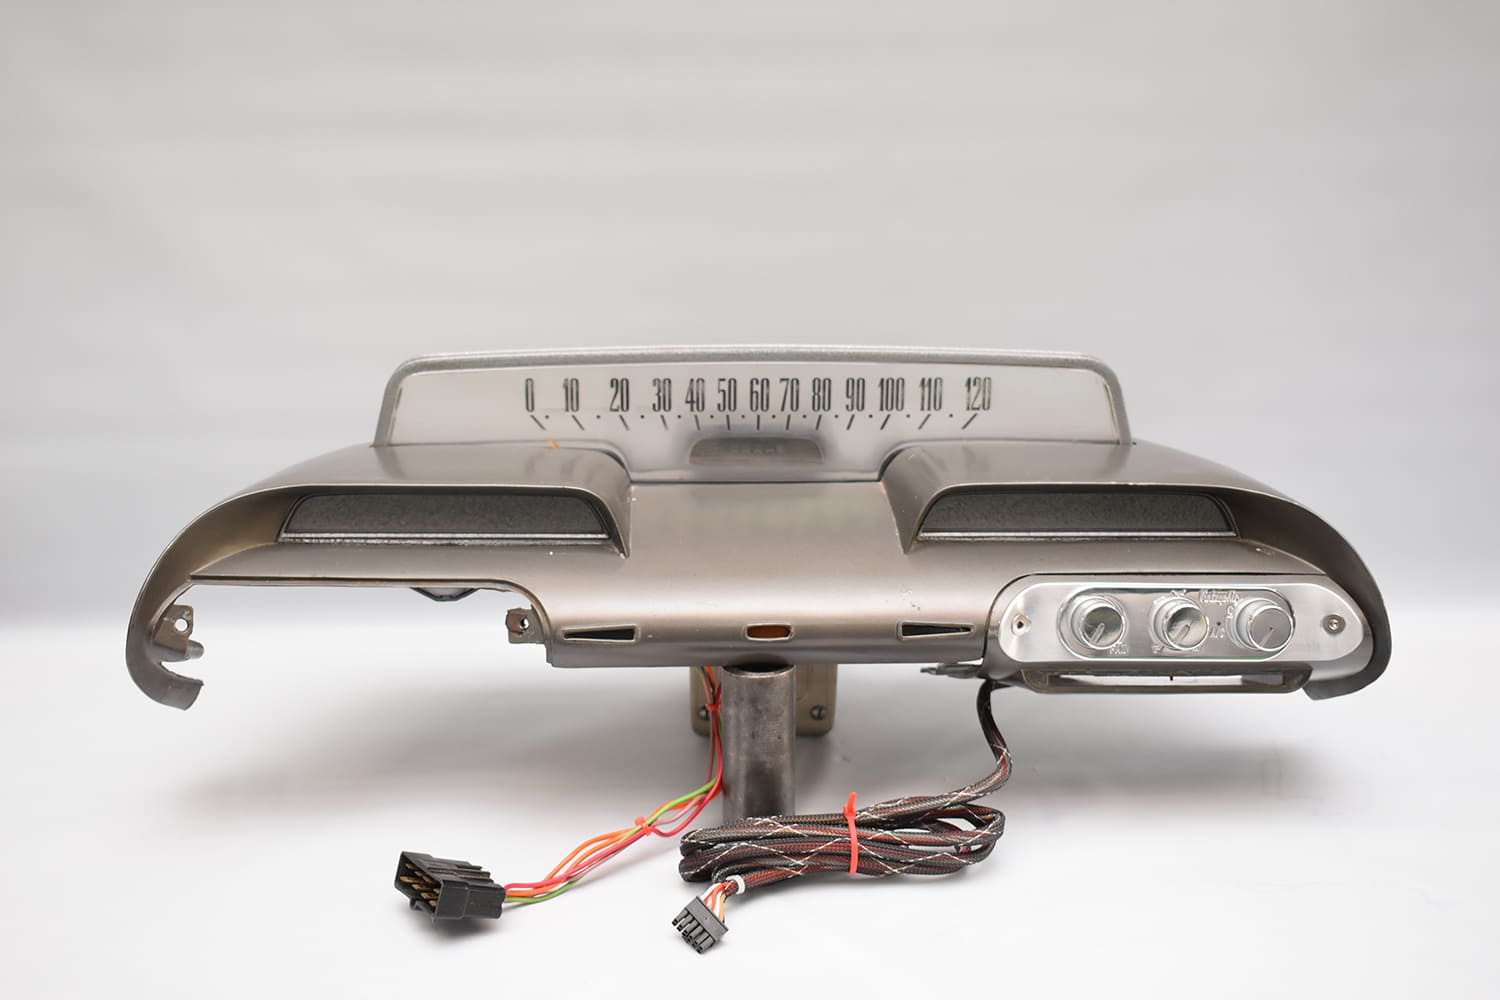
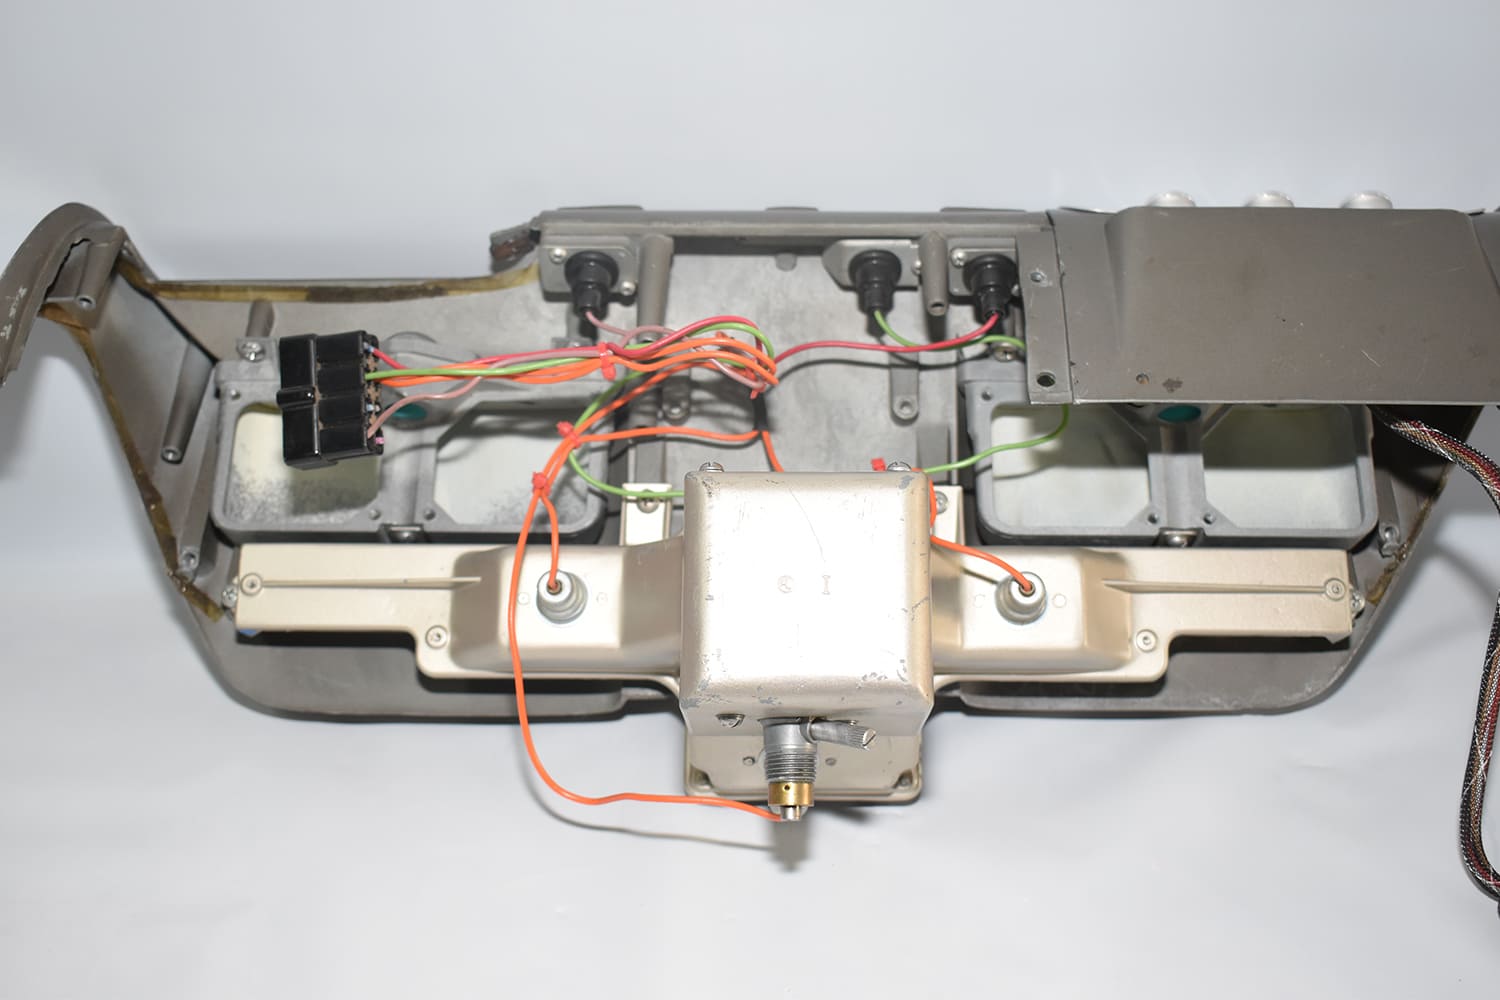
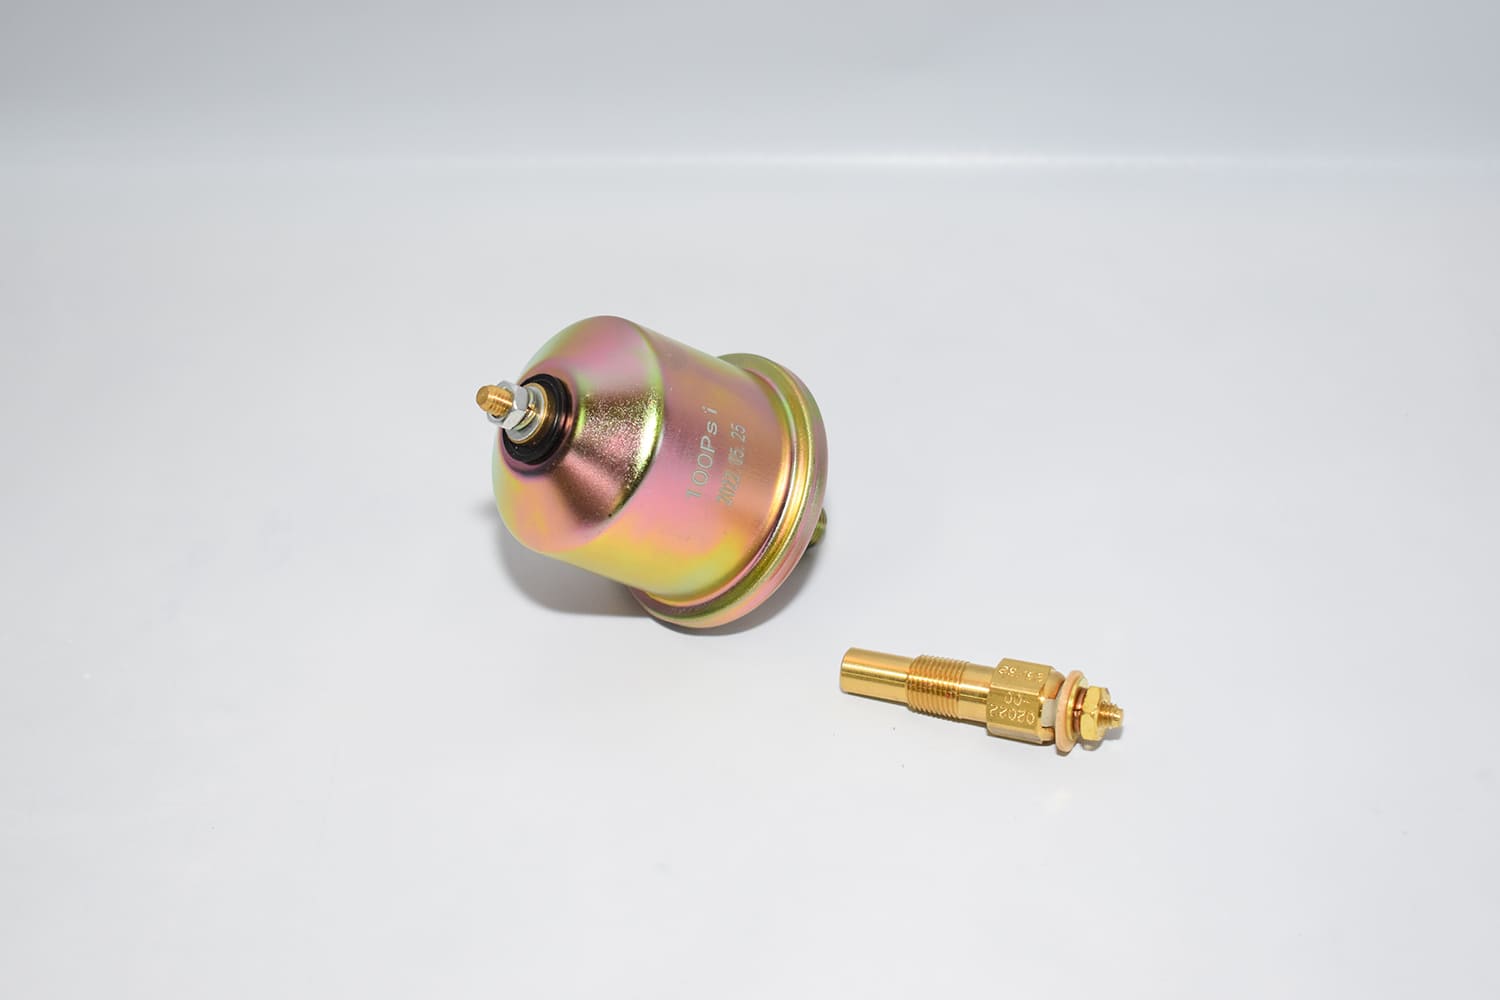
Another challenge we were facing with our wagon was the instrument panel. Along with warning lights for the charging system and oil pressure were temperature and fuel level gauges, none of which worked, so they were all eliminated. The faulty instruments and warning lights were replaced with gauges from Classic Instruments that are housed in the space once occupied by the original AM radio. The knobs for the Vintage Air system to come are mounted in a custom aluminum panel where the factory heater controls were once located.

06 dodge pedal assembly old wiring exposed linkage worn insulation stripped interior view
The crowded confines on the left side of the steering column meant we had to find another location for the new American Autowire fuse panel.

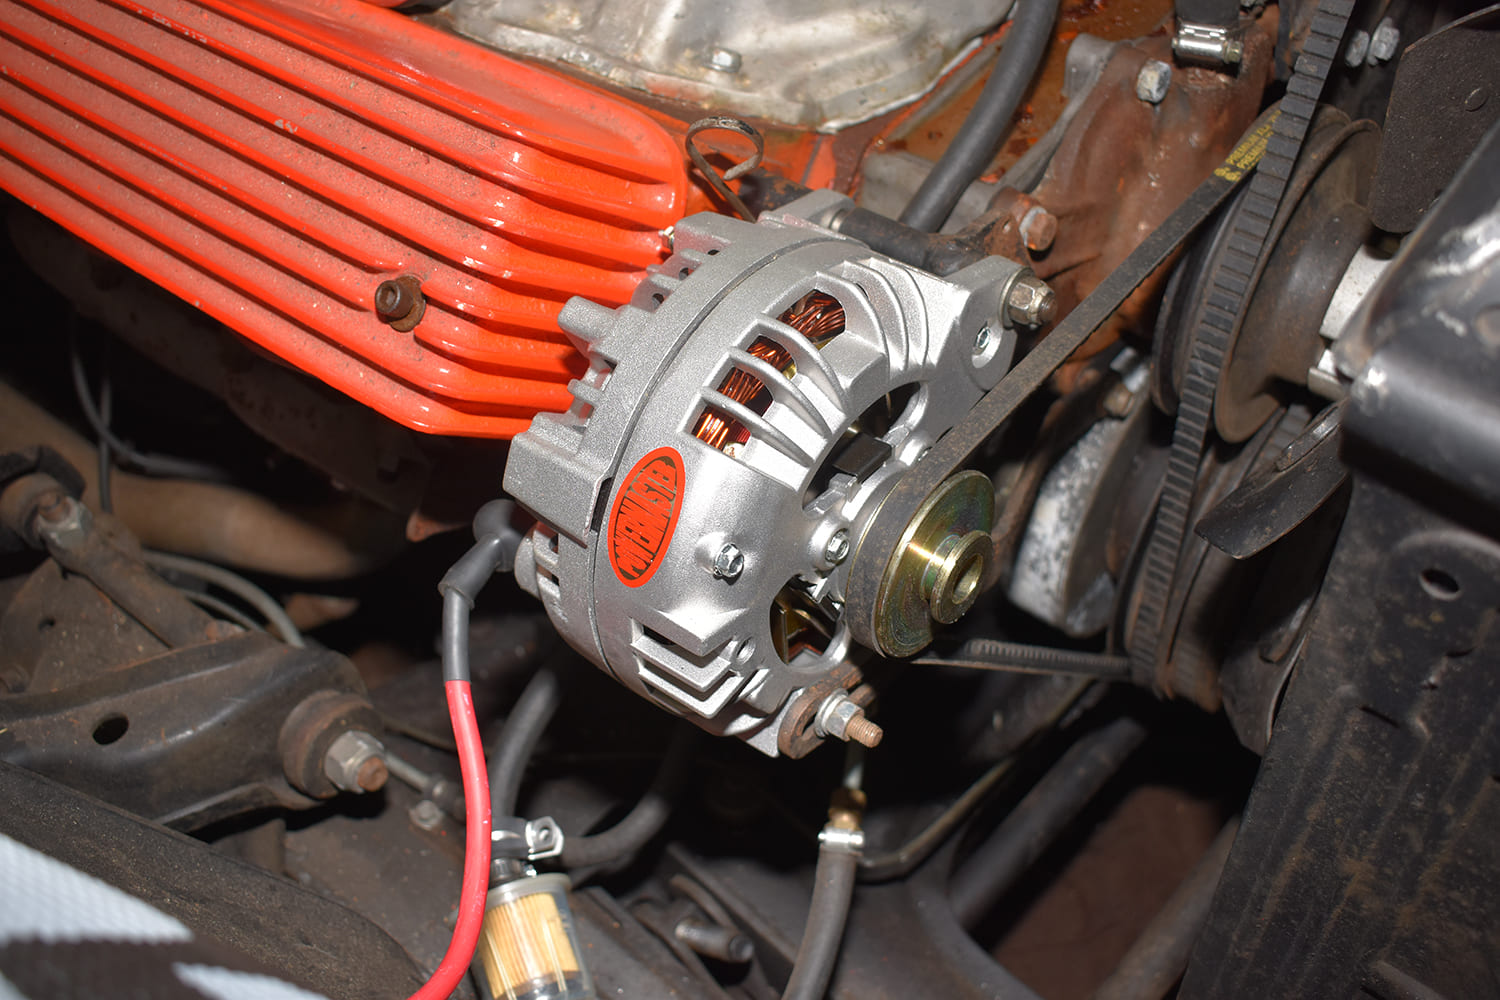
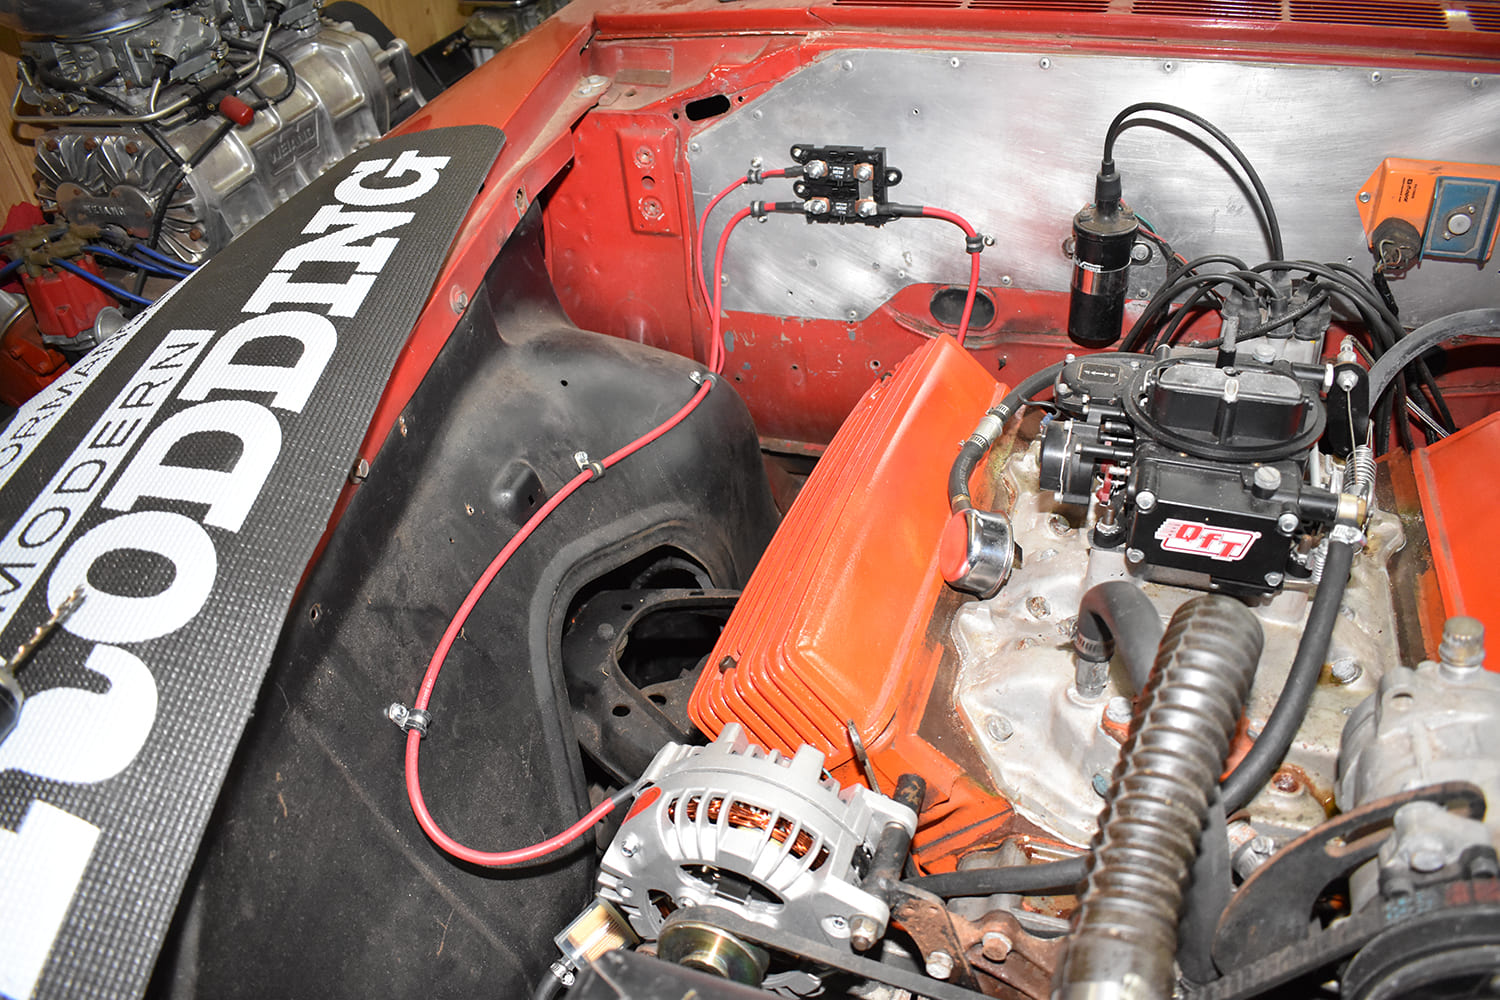
As a part of the electrical system upgrade, we replaced the original generator with a Powermaster, one-wire alternator. Rather than go with the more often seen GM alternator, we elected to stick with the Mopar theme and install a Chrysler “original look” alternator. They are available for use with external regulators or in one-wire configuration, which is what we opted for.

07 cowl vent door interior view metal flap linkage maroon dash panel
This is the vacuum-controlled vent in the center of the firewall that was part of the original heating system. It was blocked off with an aluminum plate as it will no longer be needed.

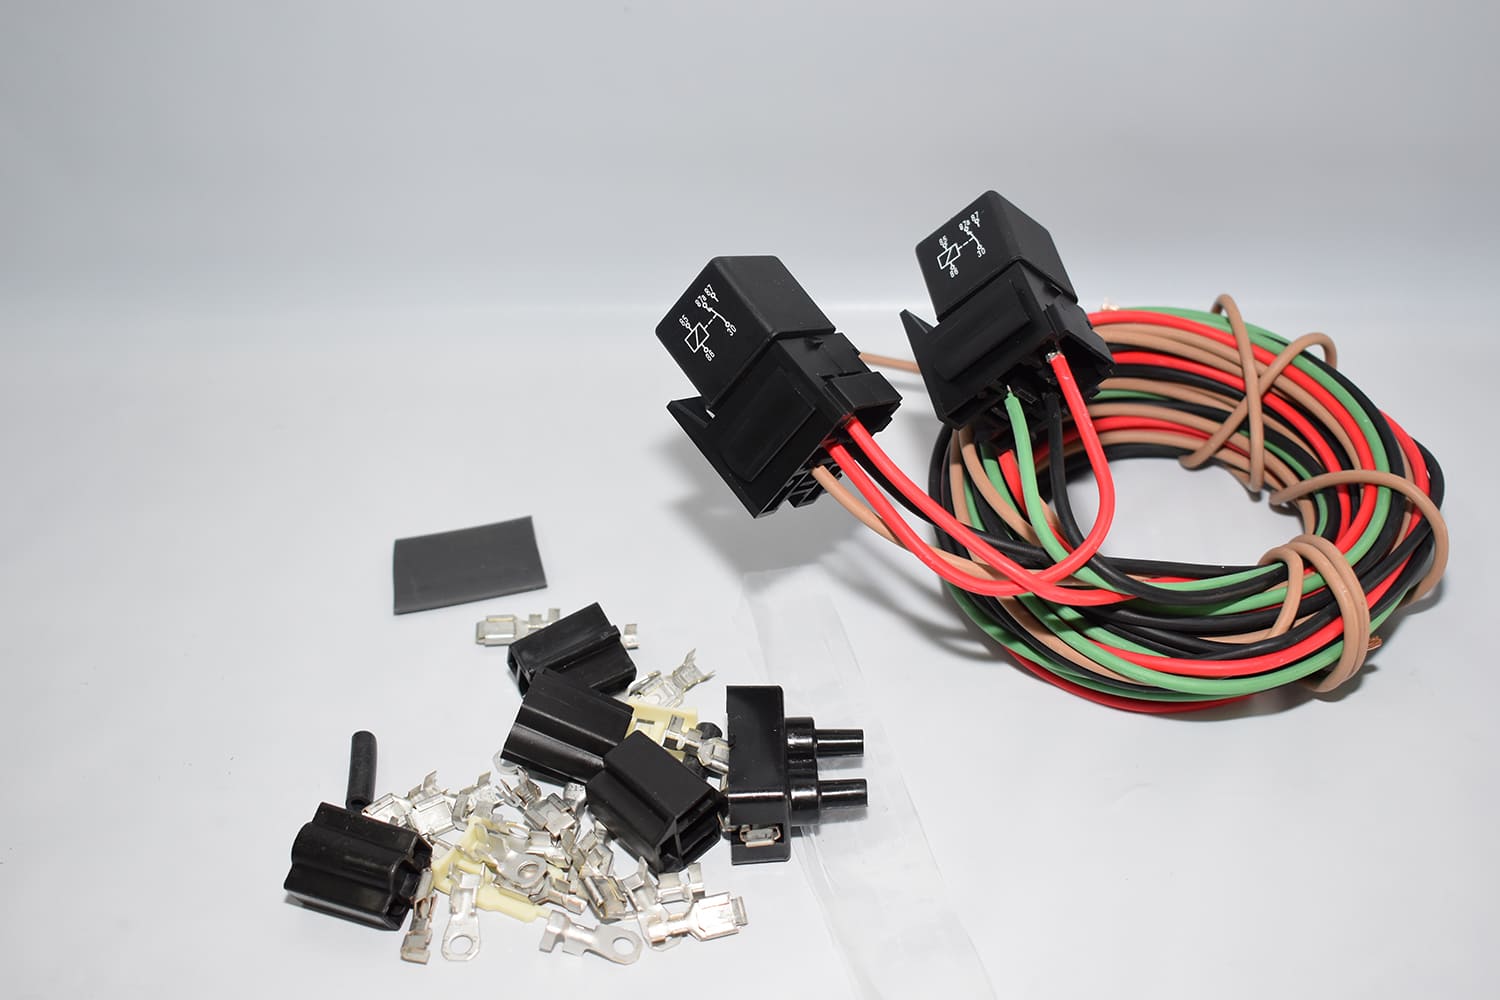
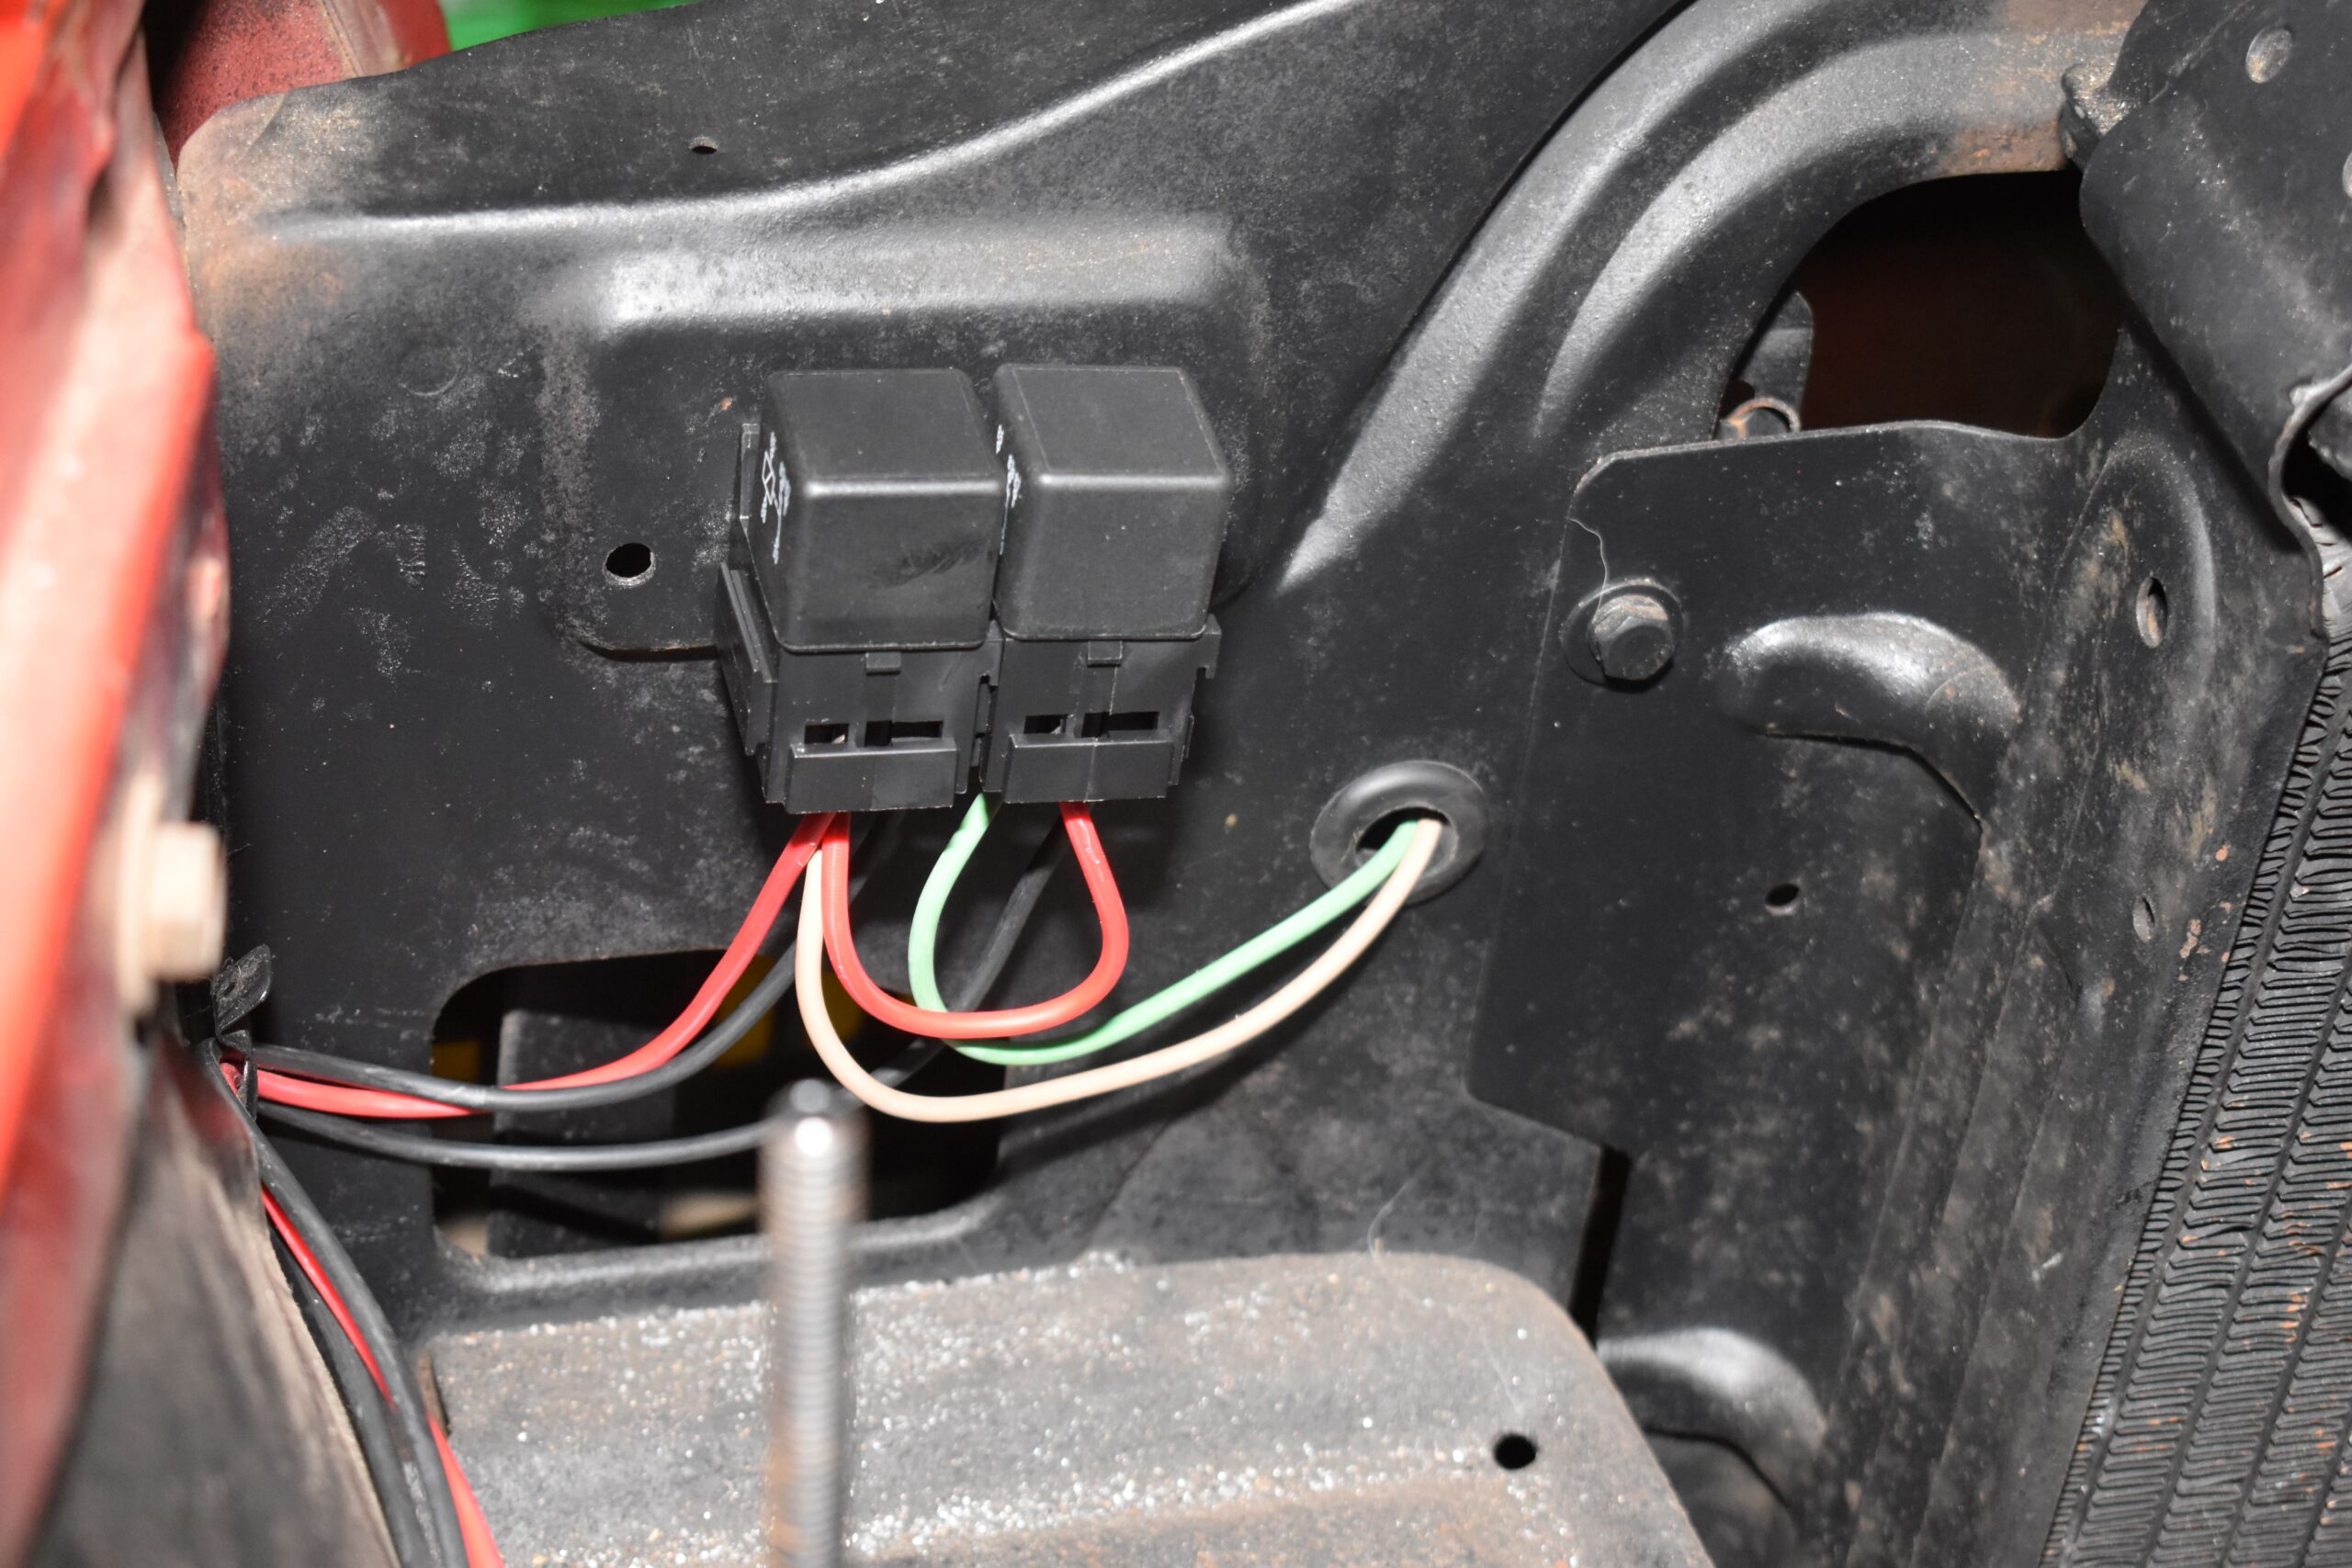
Another upgrade we made was the addition of American Autowire’s Headlight Enhancement Relay kit. As we elected to maintain the original light switch, this relay kit reduces its electrical load. The light switch now operates a pair of relays that control the lights.

08 fuse block mounted under dash custom bracket relay wiring harness install
Mounted to the aluminum plate, the American Autowire fuse block is hidden from view yet easily accessible.

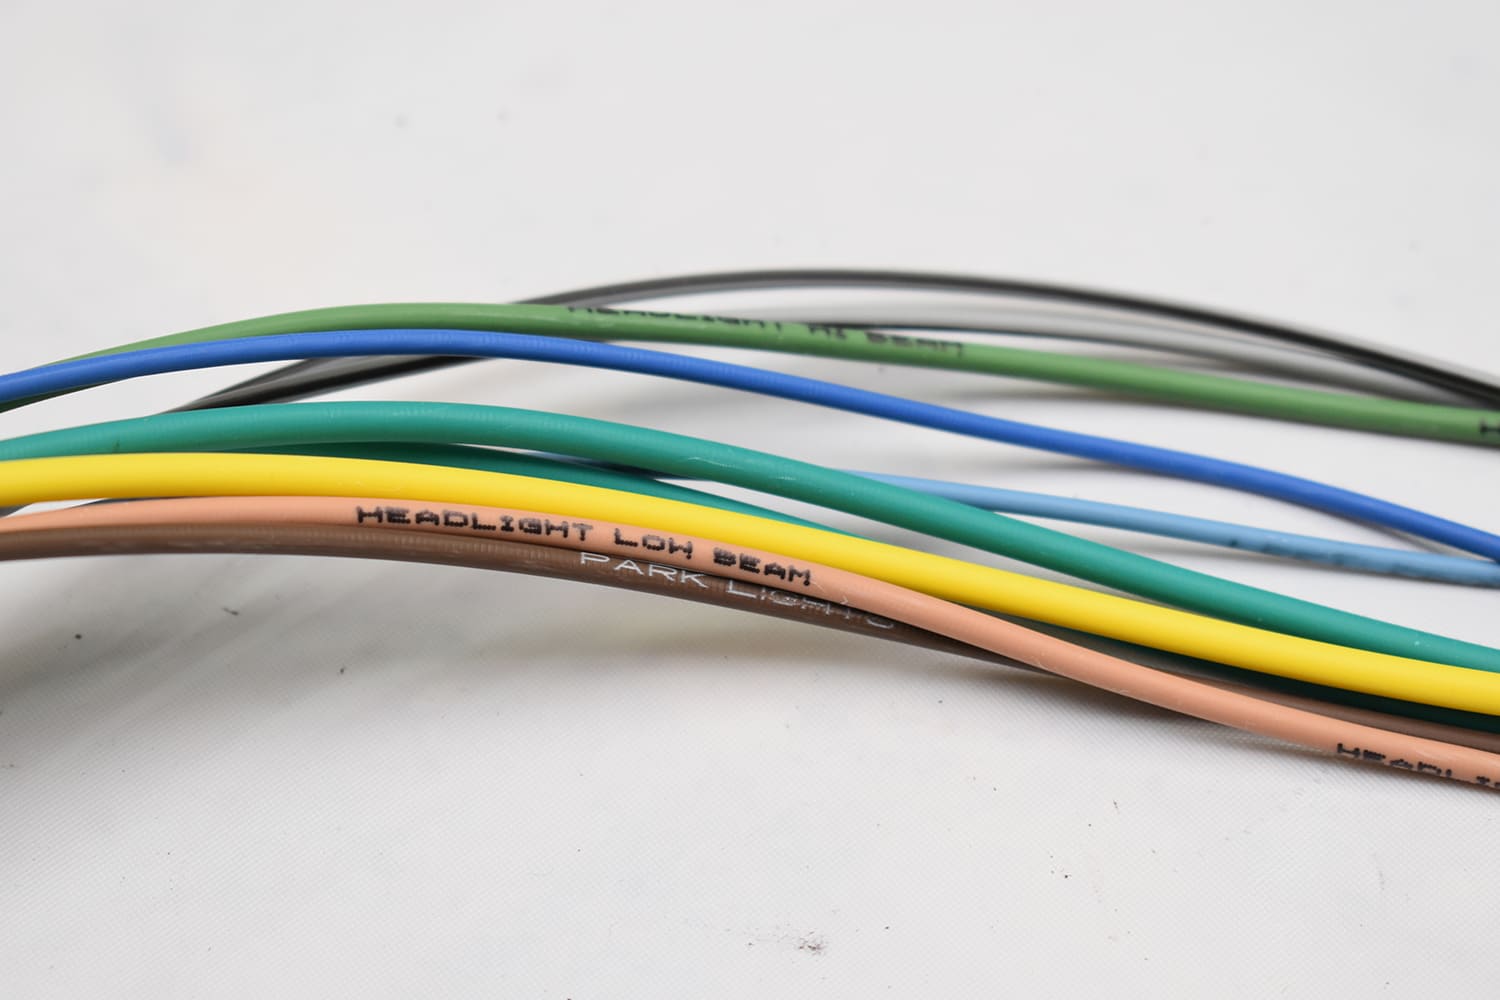
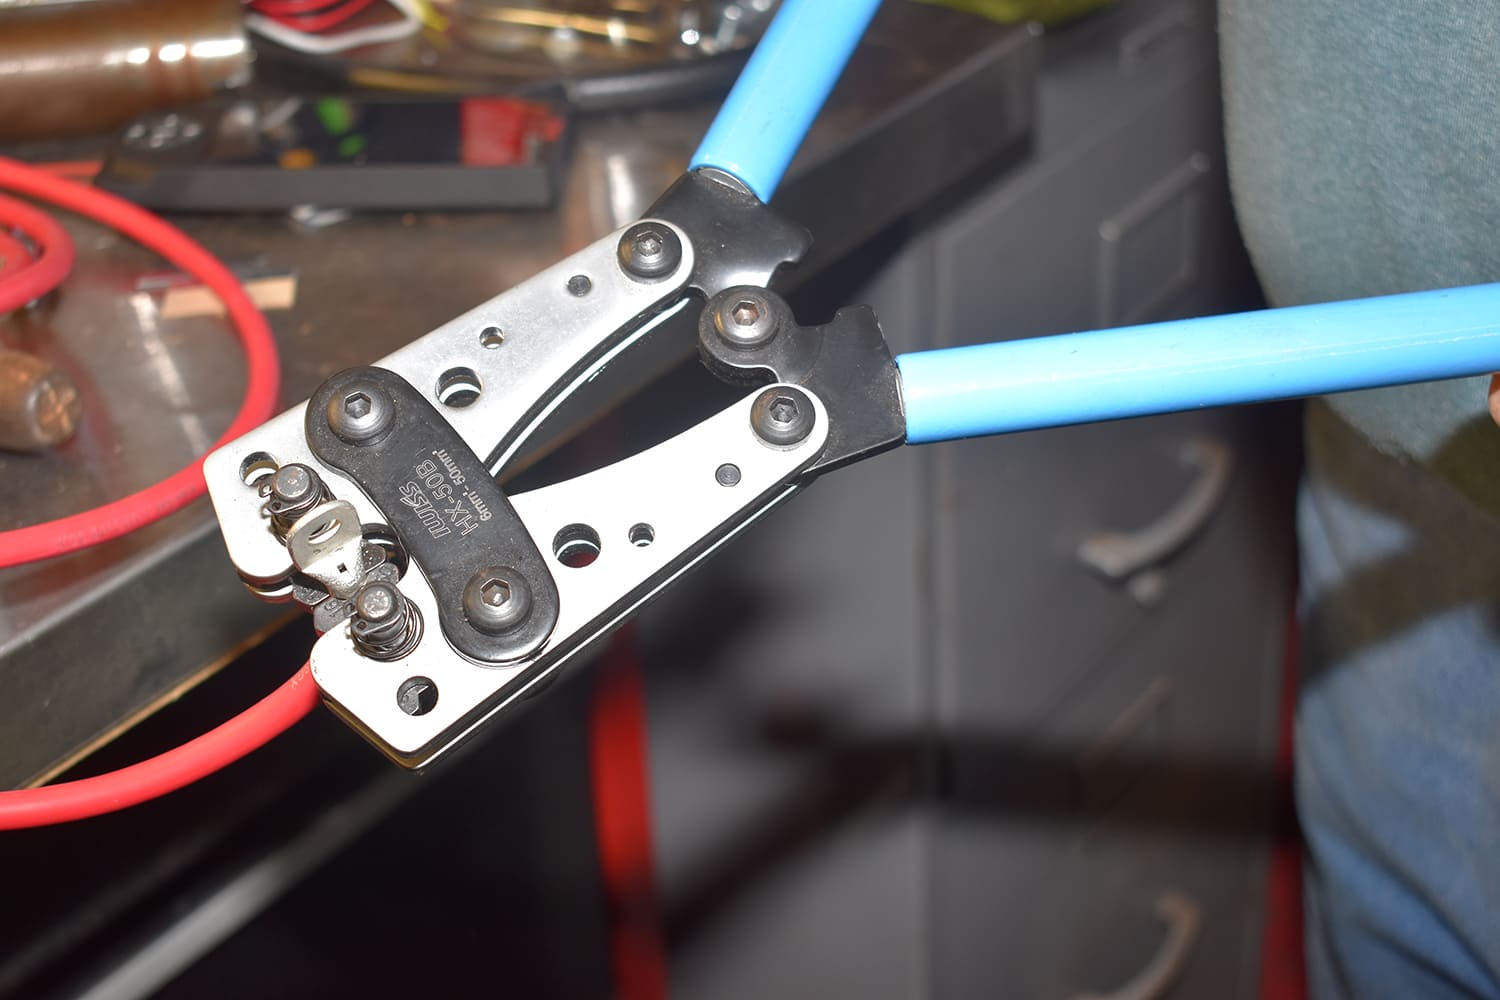
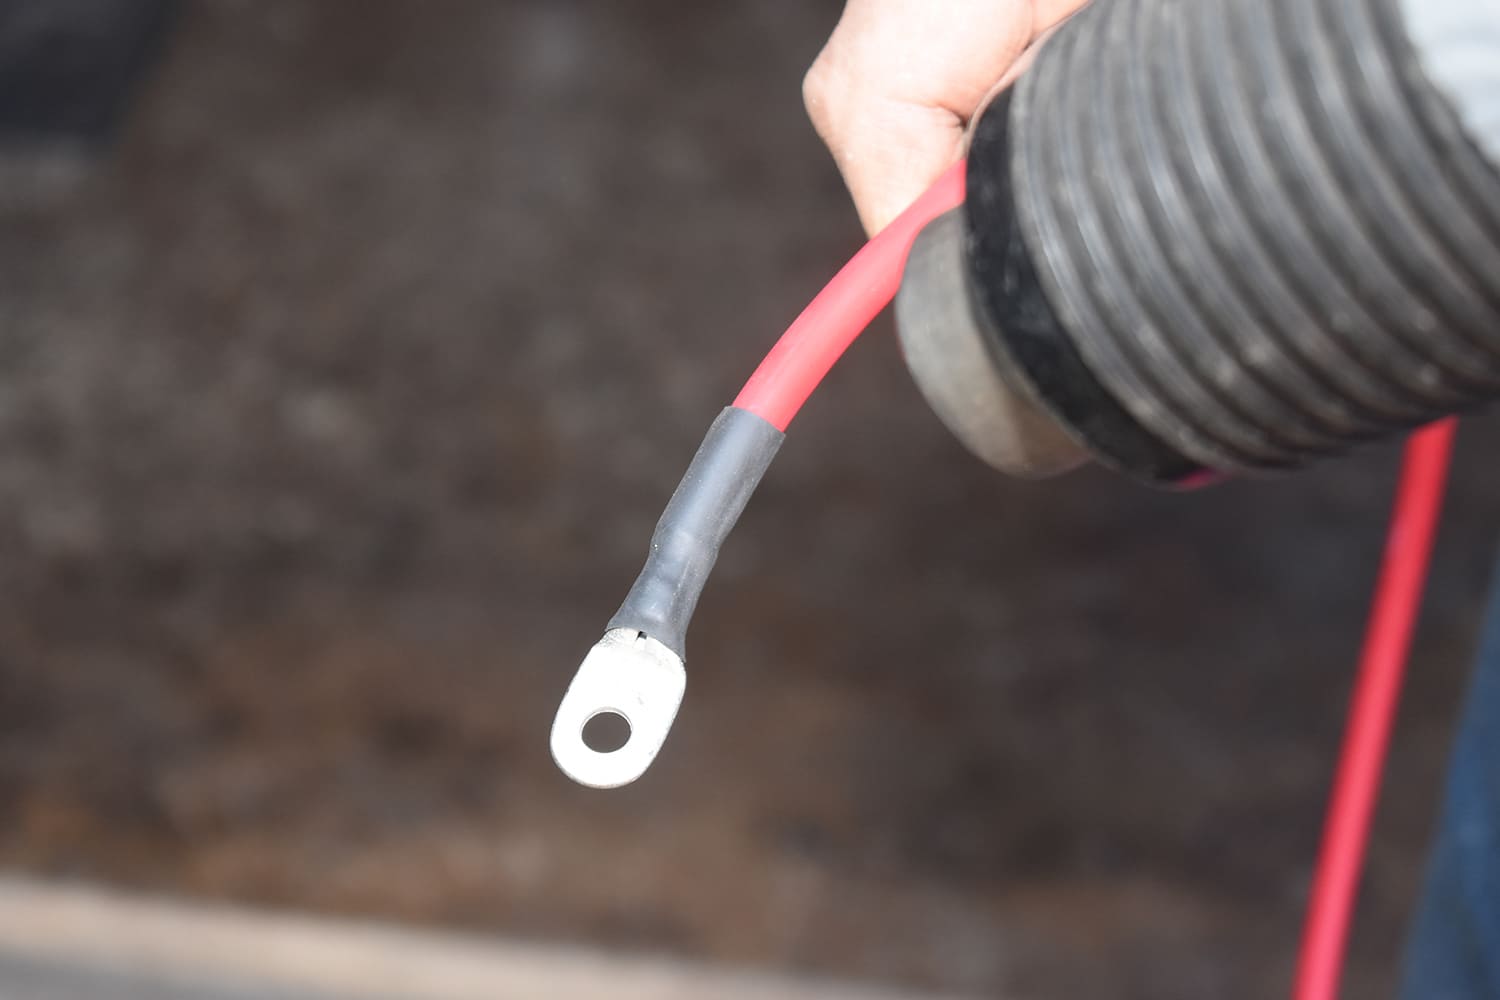
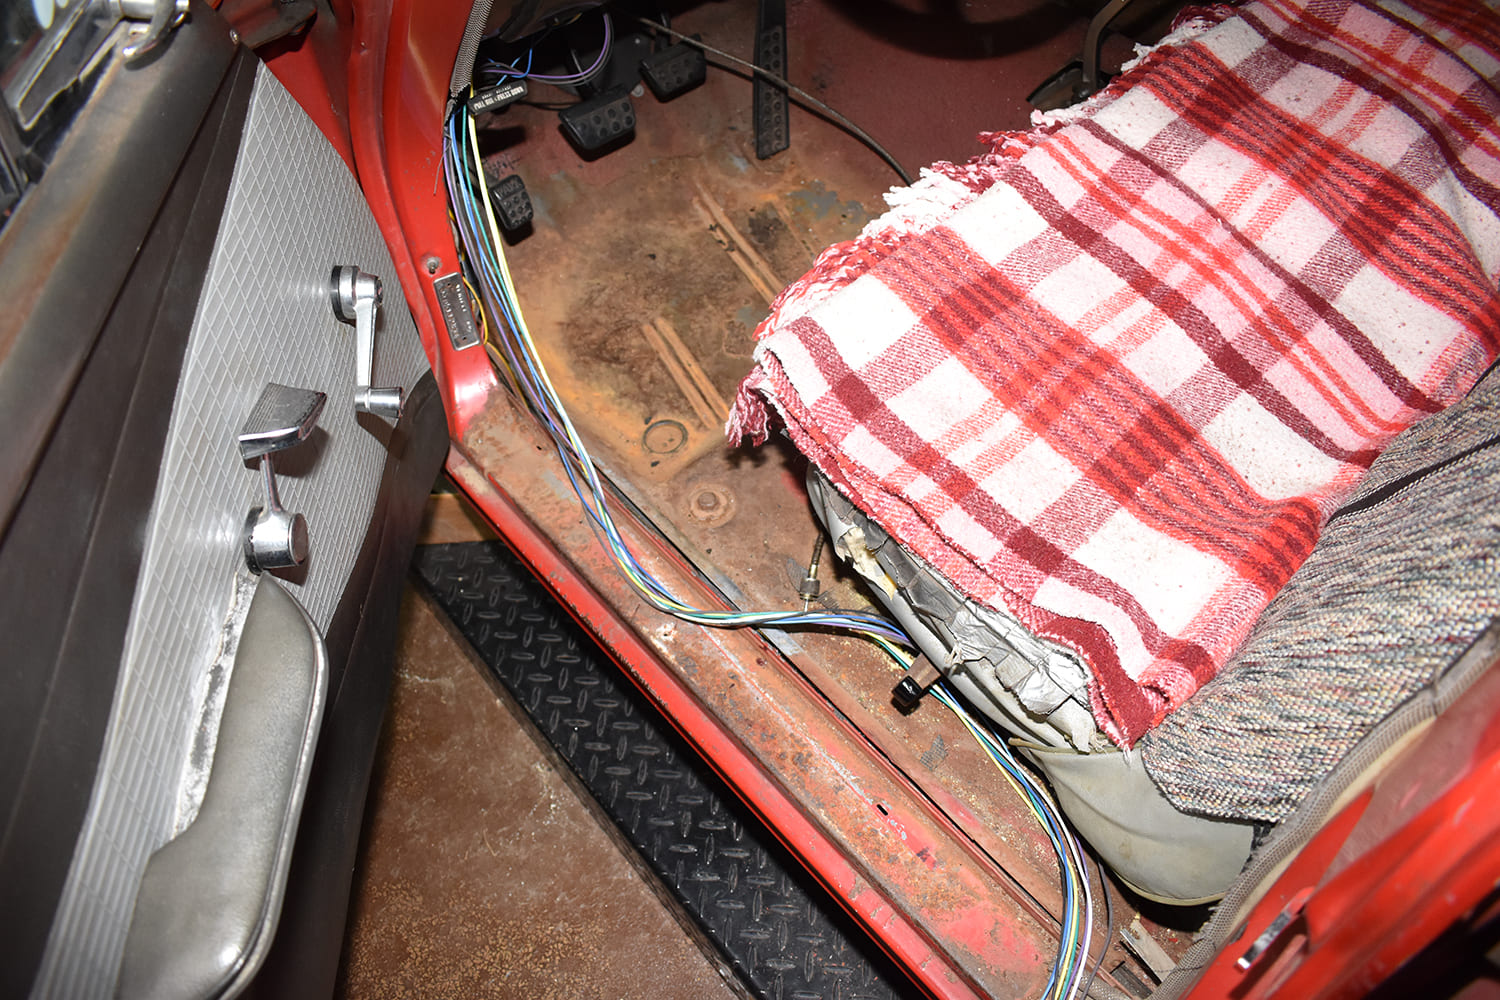
Our Highway 22 Plus wiring harness came with groups of wires packaged in labeled bags indicating what they operate and where they go. In addition, the individual wires are labeled and color-coded; a real plus is the large-format instructions that are easy to follow. When it comes to updating an electrical system, American Autowire has made getting connected as easy as possible.

09 american autowire labeled wires headlight low beam park lights multicolor insulation close up
The American Autowire kit’s wires use GM’s color code and are labeled every few inches.
10 highway 22 fuse panel installed labeled terminals relays fuses ignition accessory wiring setup
Connecting the Highway 22 Plus fuse block wires is virtually error-proof. The terminals are numbered, labeled, and color-coded.
11 dodge dash cluster vintage horizontal speedometer climate controls wiring harness
We removed the entire instrument panel for access behind the dashboard. The original gauges’ warning lights were eliminated, and new controls for the Vintage Air system were added.
12 backside view dodge gauge cluster wiring bulbs speedometer drive cable
To make installing the instrument panel easier, we repurposed the stock wiring harness plug to connect the dash, turn, and high-beam lights to the new wiring harness.
13 dodge dash interior installed cluster vintage air controls triple gauge pod hula girl
New Hot Rod series gauges from Classic Instruments are in the original radio location. The mounting panel will be painted to match the dashboard.
14 oil pressure sender brass sensor fitting 100psi electric gauge sender
The Classic Instruments oil pressure and temperature gauges came with senders. The voltmeter doesn’t require a sender, and the gas gauge matches the Dodge tank sender (73/10 ohms empty/full).
15 mega fuse kit red power wire fuse block terminals ring lugs electrical hardware
American Autowire’s alternator and main power connection kit includes a dual mega fuse assembly, 12 feet of six-gauge wire, and terminal ends.
16 littelfuse 175 amp mega fuse dual mount block close up view
On the right side of the fuse assembly is a jumper; one of the terminals connects to the starter solenoid. The two single connections on the left are for the alternator and the fuse panel.
17 iwiss hx 50 crimping tool lug terminal red power wire bench setup
It’s overkill, but we used our IWISS cable crimping to install the terminal ends.
18 crimped battery cable red wire heat shrink ring terminal finished end
After installing, the terminal ends were shrunk to protect them from corrosion.
19 alternator install tekman wiring serpentine belt small block mopar valve covers
A one-wire Powermaster Chrysler-style alternator replaced the original generator.
20 dodge engine bay red valve covers alternator wiring bulkhead mounted fuse block
To provide strain relief for electrical connections, wires should be secured in addition to their attachment points.
21 headlight relay kit dual relays wiring harness terminals pigtails with connectors
American Autowire’s headlight enhancement kit activates the headlights using relays. The wires from the dimmer switch control the relays.
22 battery cutoff switch firewall mount heavy duty isolator two post connection
This circuit breaker takes power from the battery to supply the headlight relays, taking the heavy load off the original headlight switch.
23 mounted relays on inner fender wiring harness routed with firewall grommet
The headlight relays are mounted to the radiator core support. Note the rubber grommet, which must be used in any holes to protect the wires from sharp edges.
24 dodge interior wiring under seat routing new wire harness installation
All the wires leading to the car’s rear (lights, gas tank sender, and power tailgate window) pass through a channel in the left rocker panel. We taped the new wires to the old and pulled them into place from the rear.
25 relay sockets and terminals four way connectors and metal terminals for wiring
For some connection points, such as the headlights, it’s necessary to crimp the ends onto the wires.
26 american autowire crimpers yellow and blue handle terminal crimping pliers
American Autowire offers PN 510587, which includes a single crimper for wire sizes from 20 to 14 gauge and a double crimper for sizes from 10 to 18 gauge.
27 close up crimped terminal on yellow wire showing clean copper connection
Here is an example of a proper crimp. Note that the conductor and the insulation are captured in the connector.
28 battery cable kit red and black heavy gauge wire with terminals and boot
American Autowire’s one-gauge battery cable kit (PN 500725) comes with terminals, shrink tubing, and a crimping tool. Side post kits are also available.

Choosing an OPTIMA Battery

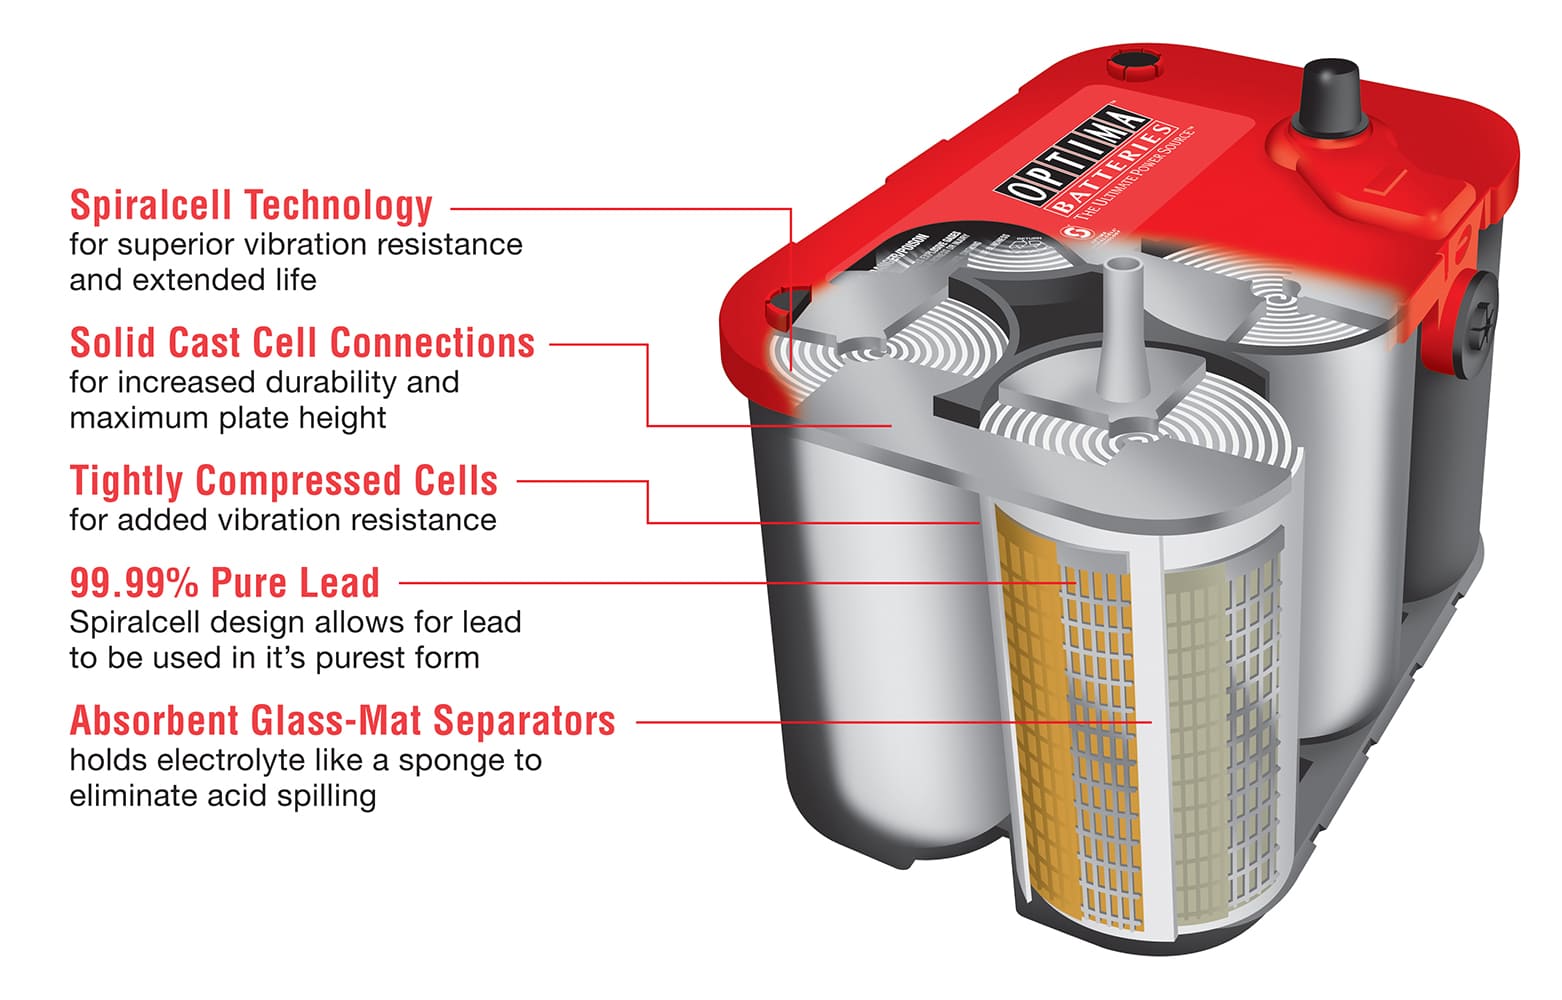
The final step in our wagon’s electrical evolution was the installation of an OPTIMA battery. These AGM (absorbent glass mat) batteries hold acid in place by absorbing it like a sponge, preventing spills. Using spiral cell technology, OPTIMA batteries combine pure lead plates, fiberglass separators, and electrolyte wound, giving them their unique “six-pack” appearance.

29 optima batteries full product lineup including redtop yellowtop bluetop models
The OPTIMA family of products includes starting, deep cycle, marine, lithium batteries, and a line of chargers.

OPTIMA batteries are renowned for their longevity and durable construction. The only question is, which one to choose? The color of the top can easily identify OPTIMA batteries:

REDTOP provides the strongest 5-second burst of starting power. These batteries provide reliable cranking power for stock and modified vehicles with properly sized alternators.

30 optima redtop battery internal construction diagram showing spiralcell technology
This cutaway of an OPTIMA REDTOP battery shows the typical internal components.

YELLOWTOP is designed to handle the extreme cycling demands of modern vehicle accessories, which means it can repeatedly withstand deep drains. It is ideal for vehicles that may sit for extended intervals.

31 optima lithium battery mounted in tool cart with nearby screwdrivers and markers copy
OPTIMA’s ORANGETOP is a new lithium-cell battery with various features, including OPTIMA’s CPR, which automatically disconnects the battery before it’s drained and reserves enough power to start the vehicle.

BLUETOP can repeatedly recover from deep discharges, making them perfect for onboard electronics and RVs with creature comforts that drain batteries quickly.

32 optima digital battery charger maintainer with display for AGM and lithium systems
Due to their low internal resistance, REDTOP, YELLOWTOP, and BLUETOP batteries require “smart chargers,” as conventional chargers won’t “recognize” a discharged OPTIMA battery. ORANGETOP batteries also require a specific type of charger; OPTIMA offers the Digital 400+ that works with AGM, lithium, and conventional batteries.

ORANGETOP is OPTIMA’s new lithium cell battery. Due to its unique design, conventional chargers/maintainers cannot be used with ORANGETOP batteries. OPTIMA offers the Digital 400+, which works with AGM, lithium, and traditional batteries. MR

Check out this story in our digital edition here.

Sources

American Autowire
(800) 482-9473
americanautowire.com

OPTIMA Batteries
optimabatteries.com

Powermaster Performance
(630) 957-4019
powermasterperformance.com

Vintage Air
(800) 862-6658
vintageair.com

Related Articles

Search Our Site