By Jeff Smith – Images by the Author
This is a generational story. For those readers long in tooth who grew up with carbureted engines with distributors, this story may seem simplistic. But consider that there is a whole generation of car guys weaned on LS engines fitted with distributorless ignition. Now consider those enthusiasts faced working on a small-block Chevy and having to correctly time the distributor to the engine. But even for our more veteran readers, there may be a tip or two here that you could employ. Or maybe you just want to see if we can detail this procedure correctly. That is great sport for older readers.
For the sake of this story, we will proceed as if we are building a new engine that is complete except for a distributor. We chose this approach because for a fresh build, the engine needs to fire on the first or second revolution of the engine. This requires accurate ignition timing to fire instantly.
We will also make a couple of assumptions. First is that the harmonic balancer and timing tab are correct and that zero timing or top dead center (TDC) is accurate. If you are not sure, this would be a good time to ensure its accuracy. The next assumption is that our distributor functions properly and will trigger the spark when properly timed. The distributor in this story employs a PerTronix ignition point conversion that we’ve tested to ensure it sparks when triggered.
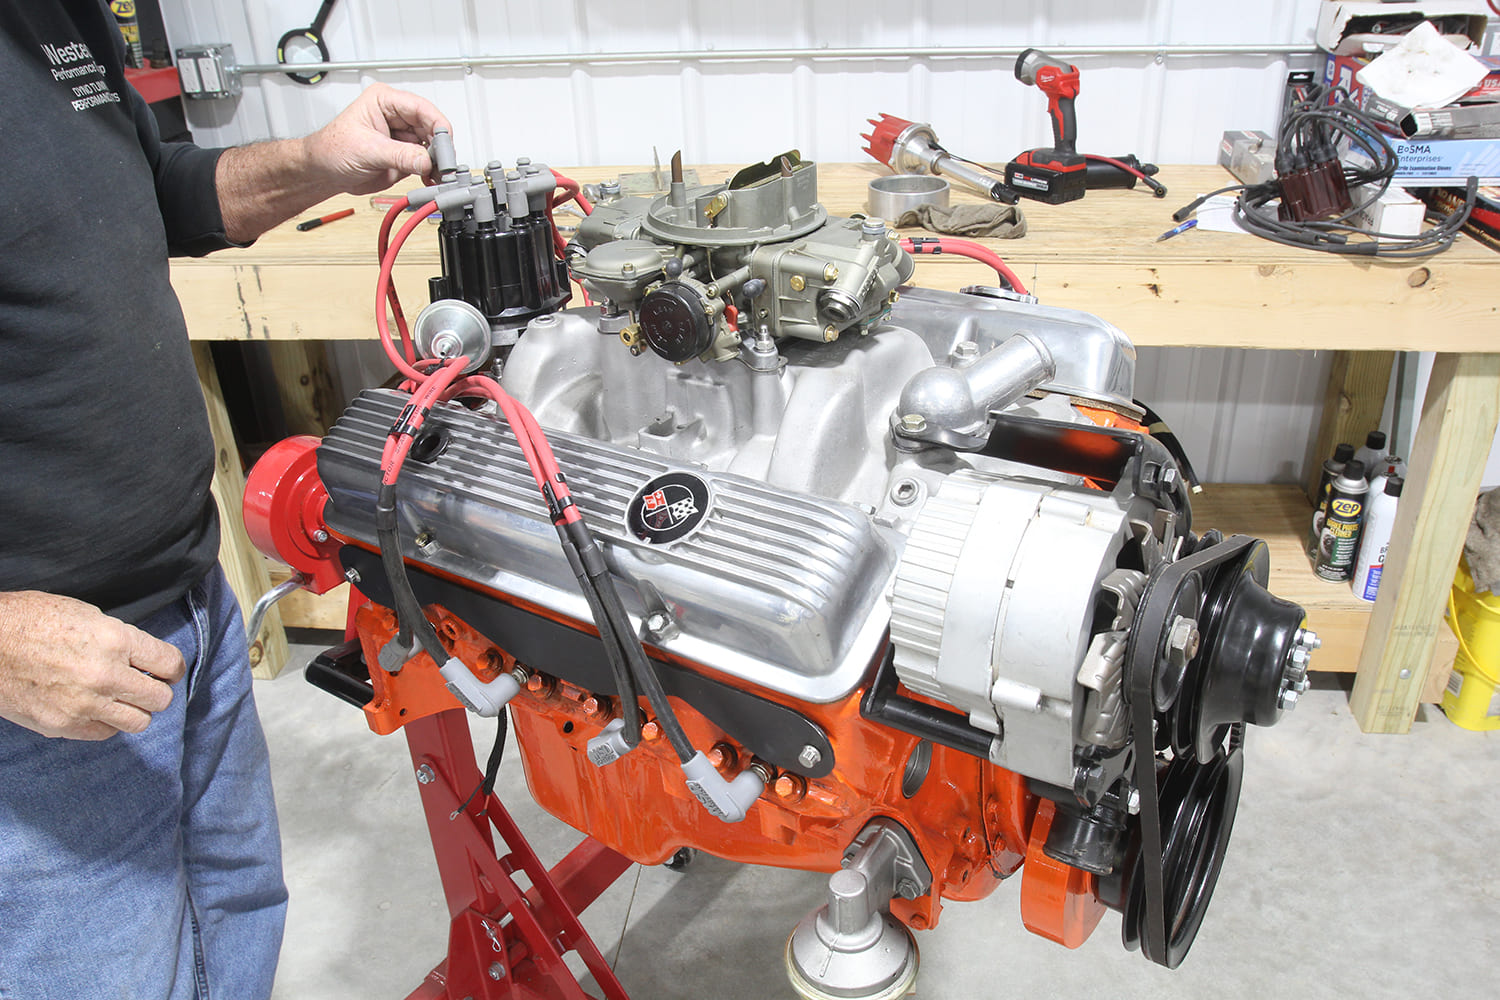

Before we get started, this is a good time to test-fit the distributor in the engine. We’ve run into a couple of small-blocks that refused to accept the distributor into the engine because the intake manifold was slightly out of alignment. It’s rare, but this can happen and may require you to reinstall the manifold to ensure the distributor slides into the engine easily.
With that taken care of, the first step is to remove the number one spark plug, which is the front plug on the driver side of the engine on all GM V-8 engines. Turn the engine over clockwise by hand and place your finger on the spark plug hole until you begin to feel pressure building in the cylinder. Move the crankshaft slowly until you place the timing mark at roughly 15 degrees before top dead center (BTDC).

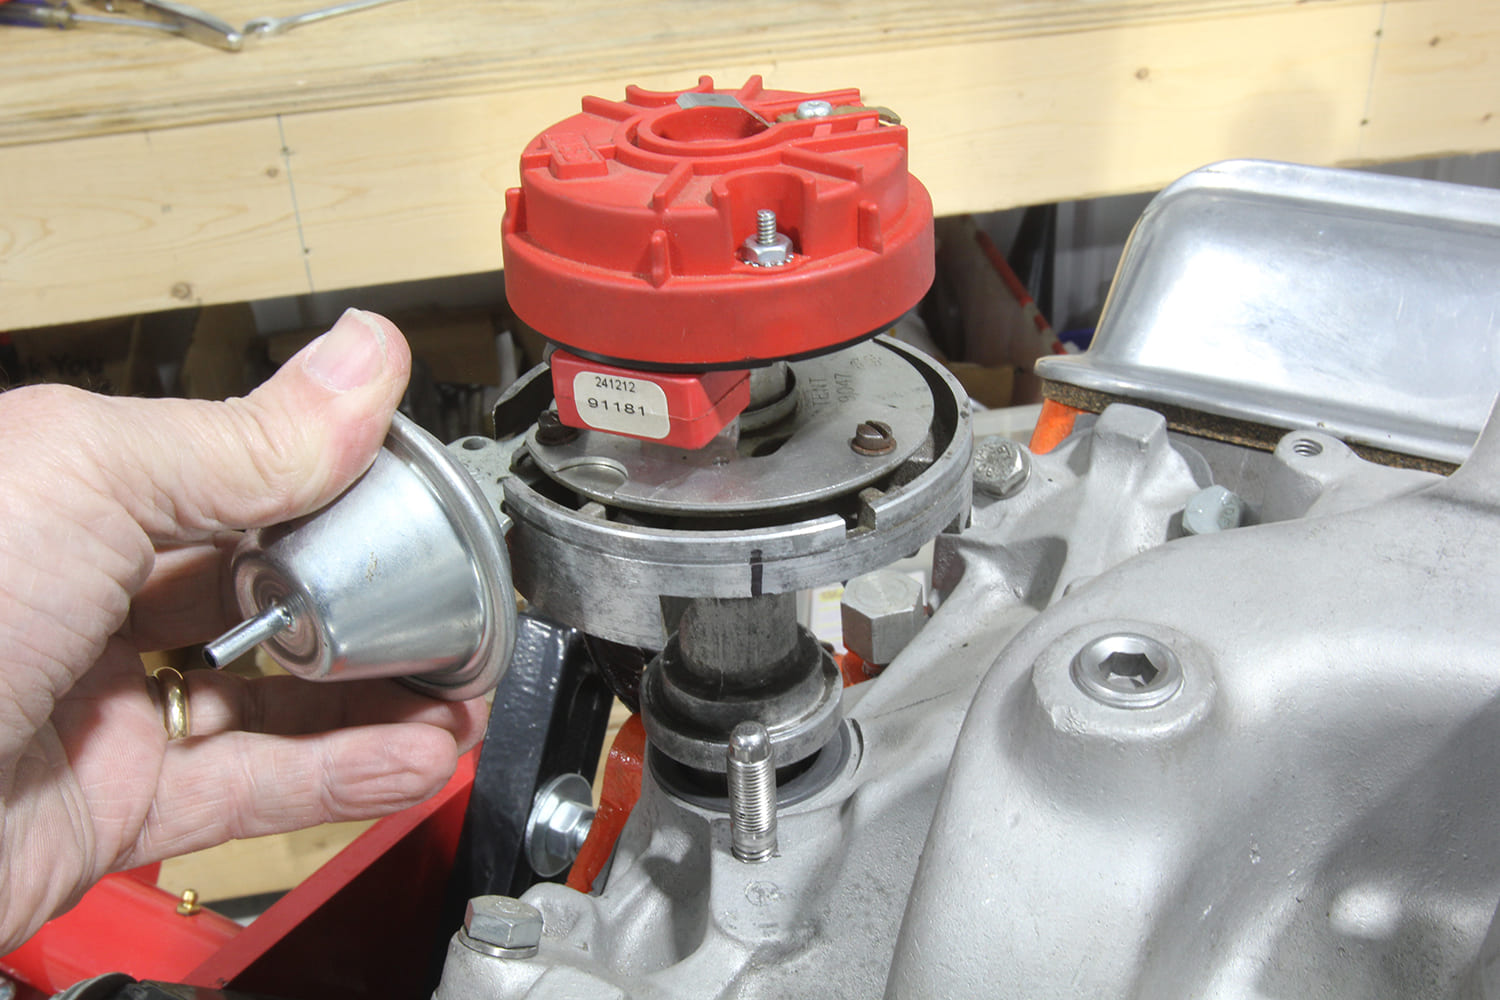
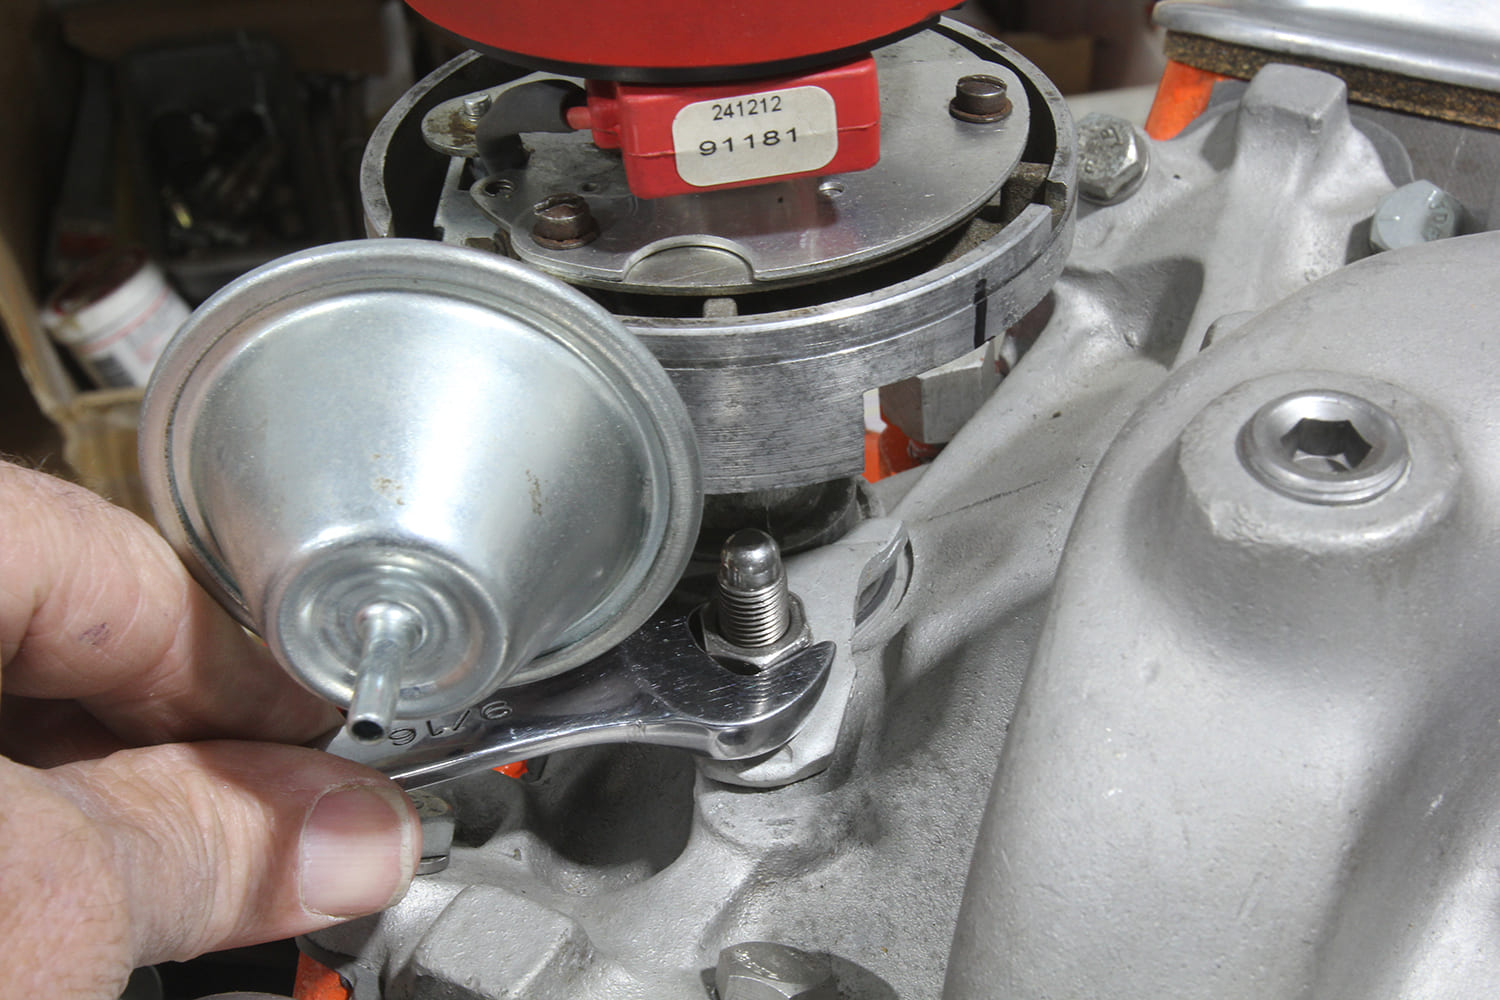
The next step is to orient the distributor in the position you desire. The factory and Chevy V-8 traditionalists place the distributor in the engine with the vacuum advance canister pointing forward at roughly the 9 o’clock position when viewed from above. This position should allow full range of distributor motion for setting the initial timing. If the vacuum canister is rotated too far forward, it may hit the intake manifold runners and not allow the range of motion needed to set the initial timing. But you can position the distributor in any position, it does not have to be located as described above, especially if it is not equipped with a vacuum advance canister. But with a vacuum canister in place, be prepared to be chastised by car guys if the distributor is oriented anywhere except the factory position!

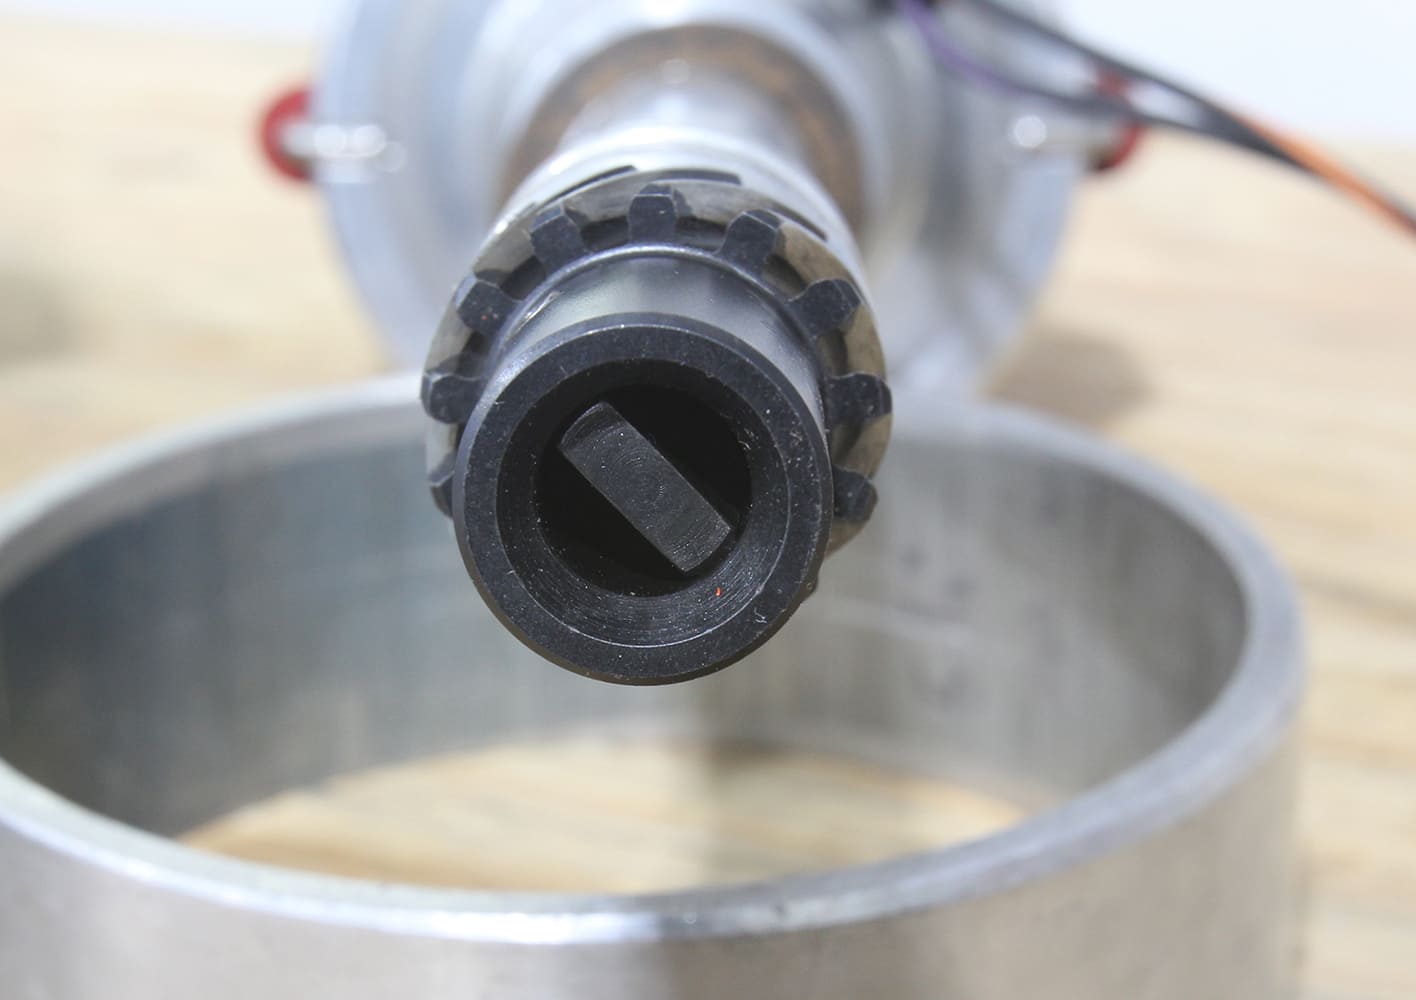
With the distributor orientation set, turn the distributor body upside down to locate the drive tab inside the distributor gear. This tab fits into a slot in the oil pump driveshaft inside the engine. Once you locate the tab in the distributor, you can use a long, straight-bladed screwdriver to turn the oil pump driveshaft slot until it matches the distributor’s orientation. This extra step makes it much easier to allow the distributor to fully drop into the manifold.


With the harmonic balancer still at 15 degrees BTDC, install the distributor gasket and drop the distributor into the opening with the vacuum advance canister and rotor oriented in the correct positions. Because the distributor gear is cut in a helical fashion, you will need to begin the process with the rotor pointed slightly counterclockwise from its final position. This may take a couple of attempts to locate the gear and rotor in their proper positions.
If you are lucky, the tab in the distributor gear will align with the slot in the oil pump drive and the distributor will drop all the way down and seat on the intake manifold. More often, the distributor will not fully drop into place and there will be a ¼-inch gap between the distributor and the manifold. This is because the tab didn’t align with the slot in the oil pump drive. If this occurs, you can try to realign the oil pump driveshaft with the screwdriver or you can merely crank the engine by hand while applying a slight downward pressure on the distributor body to seat it when the tab aligns with the oil pump drive slot.
If you choose to spin the engine over, it should require only a half revolution of the distributor to seat, which may require one full turn on the crankshaft since the distributor turns at half crankshaft speed.
It’s also possible that after several spins on the crank the distributor will not seat on the intake. This can happen for two reasons. The first, and more common, is that the oil pump driveshaft is not centered in the opening in the block. We’ve only run across this a couple of times in hundreds of builds, but it does happen. This will require using your long straight screwdriver to center the shaft in the block. This is usually caused by a loose collar that connects the driveshaft to the oil pump.
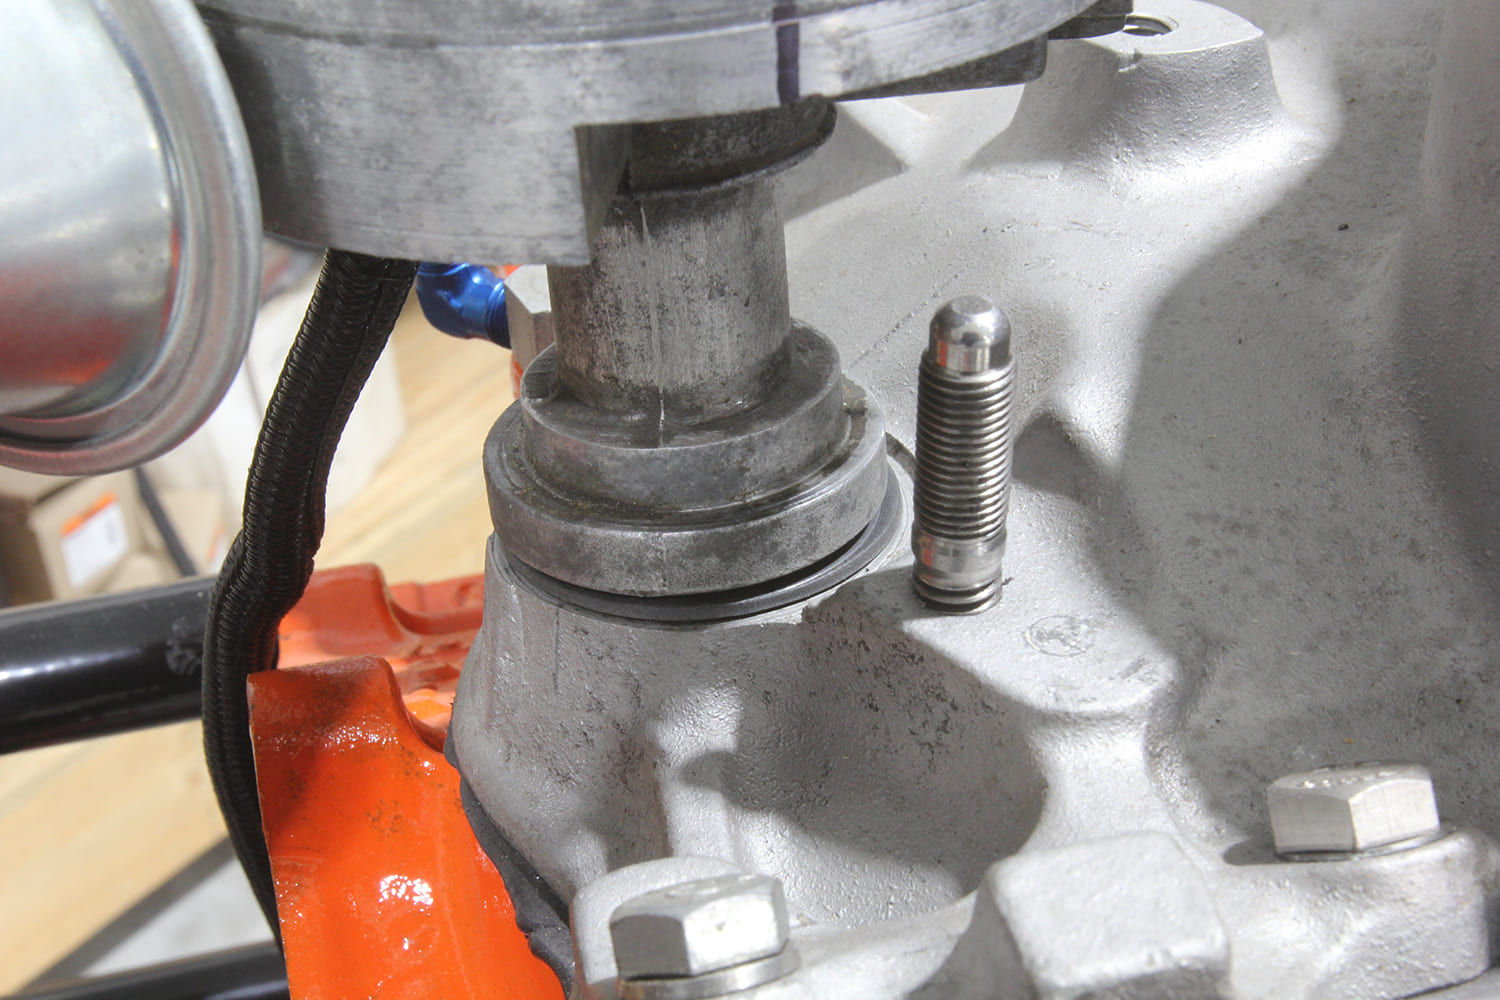
In more rare cases, the distributor drops in place but sits slightly off the manifold base by 1/16 inch or so. This is caused by the oil pump driveshaft pushing up on the distributor. If this occurs, you will need to remove the distributor and use a distributor shim or just add a second distributor gasket to provide the proper thickness to seat the distributor body to the intake manifold. This is important because if you ignore this gap and tighten down the distributor hold-down clamp, this can place undue load on the oil pump and cause it to fail.
With the distributor properly seated, we’ll assume that the crankshaft has been turned, so it’s best to double-check your work. Again, turn the engine by hand with your finger over the number one spark plug hole until you feel pressure. Now set the initial timing on the harmonic balancer to 15 degrees BTDC.

Now mark your preferred position of the number one spark plug wire on the distributor cap to the distributor body with a Sharpie. This mark will serve as a reference for the position of the number one spark plug wire in the distributor cap. You can rotate the distributor body until the rotor aligns with the mark on the body. Now you can tighten the distributor clamp so the distributor will not move.
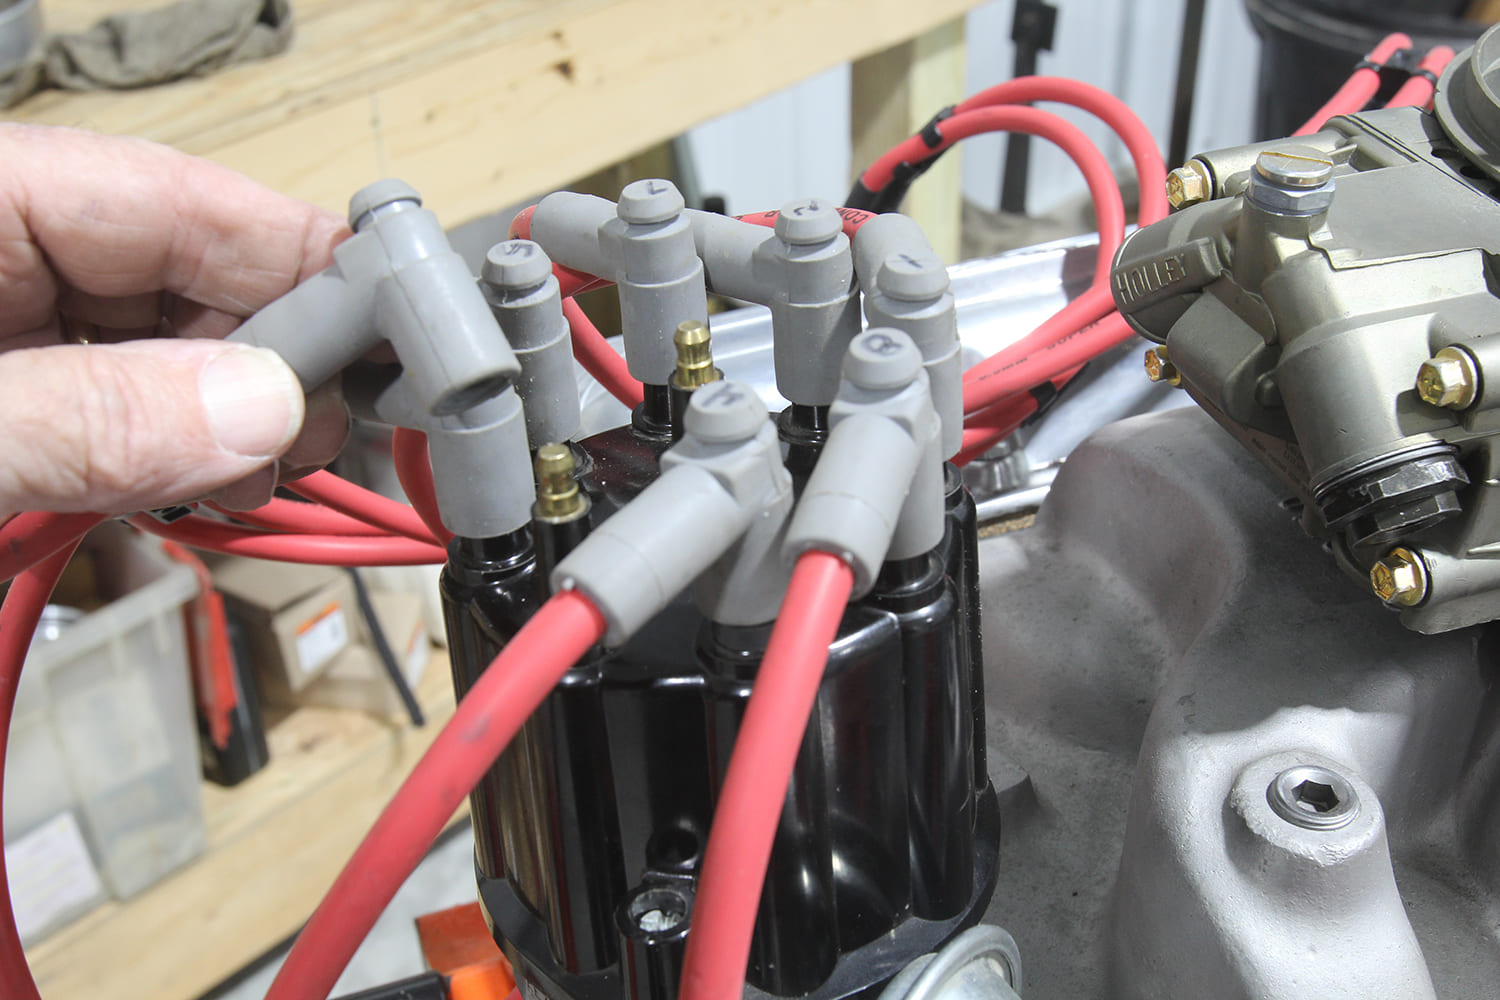


The next step is to install the spark plug wires in the proper Chevy V-8 1-8-4-3-6-5-7-2 firing order with number one aligned with the Sharpie mark. With that accomplished, you can now reinstall the number one spark plug and hook the plug wire up. If you are using an HEI distributor, merely plug in the switched 12V power wire and you’re ready to go. In our case, the PerTronix conversion uses a separate ignition coil. The red wire from the distributor connects to the positive (+) side of the coil, which will also have a switched 12V connection. The black wire from the PerTronix hooks to the negative (-) side of the coil. With a coil wire connecting the ignition coil to the distributor, you have successfully completed the process and you are ready to rumble!
Check out this story in our digital edition here.
For more great Engine and Drivetrain tech, click here.