ITGMw
SUBSCRIPTIONtext
ProgressArrows
digital issues
ProgressArrows
online store
ProgressArrows
SUBSCRIPTIONtext
ITGMw
ACPnew header logo
CTP LOGOs
all cars

How to Install a Custom AccuAir Suspension e-Level System

By Jason Mulligan   –   Images by the Author and Marcel Venable

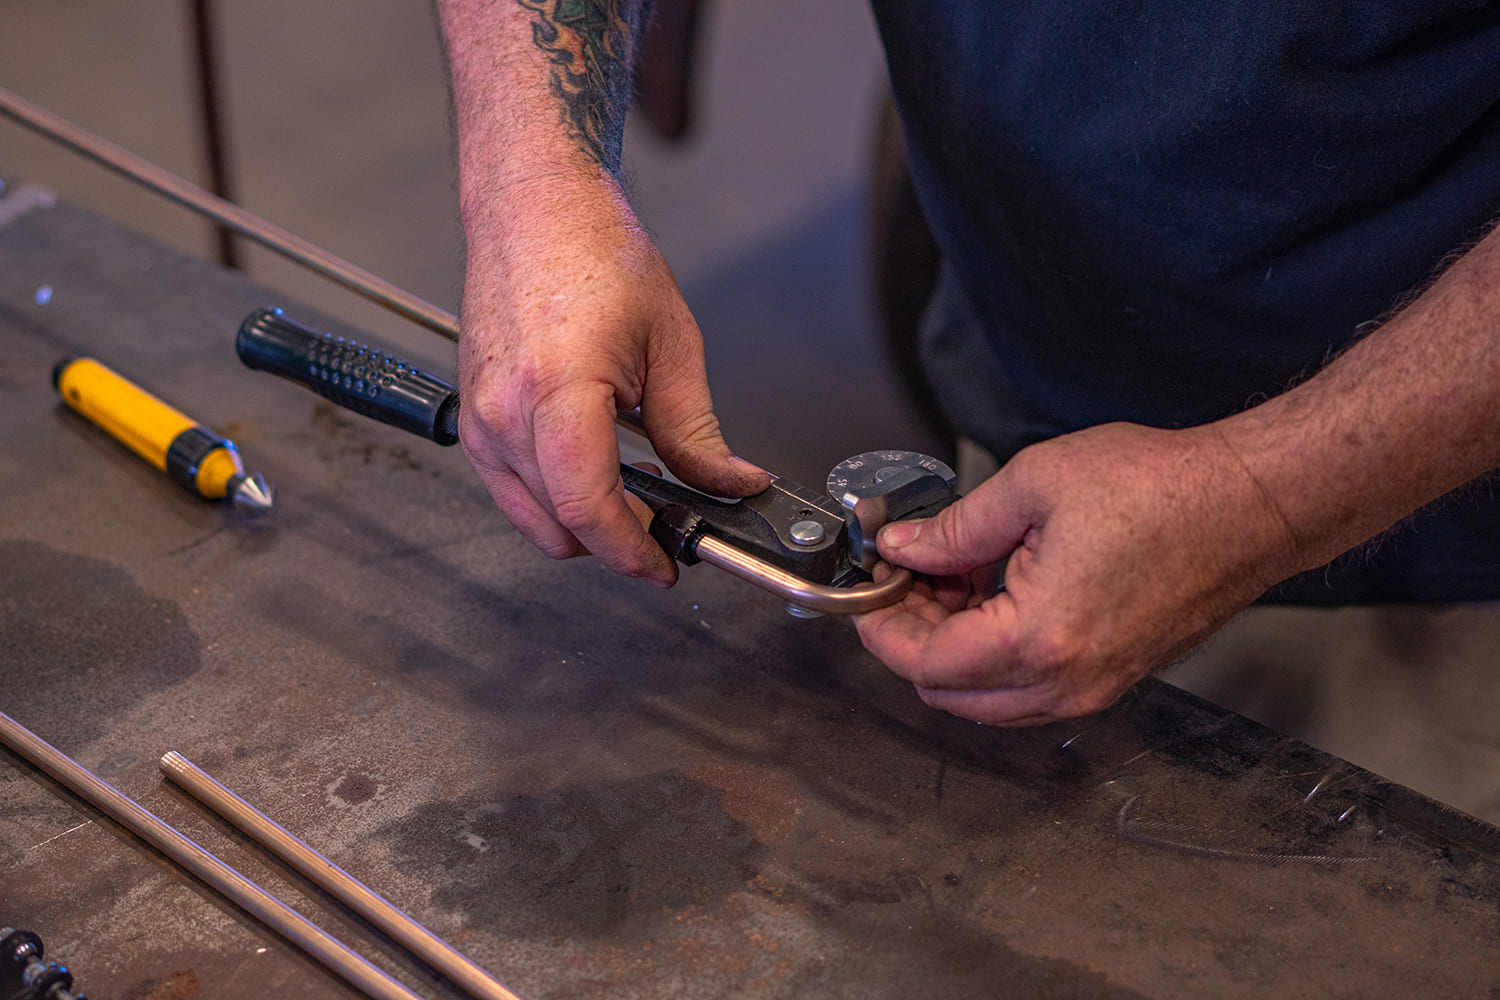
With Jason Fonte’s 1959 Chevrolet Apache, the fire-scorched body of the truck was maintained with its historic character from the Paradise Fire in Northern California. But underneath, Fonte had the crew at Devious Customs in Riverside, California, completely transform the classic farm truck–style suspension into a modern show truck with a full Roadster Shop chassis that was kept in bare metal using a clear powdercoating to protect it. Naturally, a full air-ride suspension setup was called for and Fonte opted to upgrade it to the latest air management setup from AccuAir Suspension.

One of the standout features of the AccuAir e-Level+ system is its ability to provide an exceptional ride quality that is also consistent. Using their Height+ Leveling Sensors and intelligent algorithms, the Ride Monitor system will adjust the air suspension in real time, ensuring a smooth and comfortable ride, lessening bottoming out or scraping even if more weight is added to the truck or rough road conditions.

This level of control also allows you to tailor your suspension settings to several preset heights, from a low cruising ride height that matches your optimal suspension setup to a near-scraping low setting raised up to handle speed bumps, driveways, and sharp turns. And of course, a one-button, fully laid out setting.

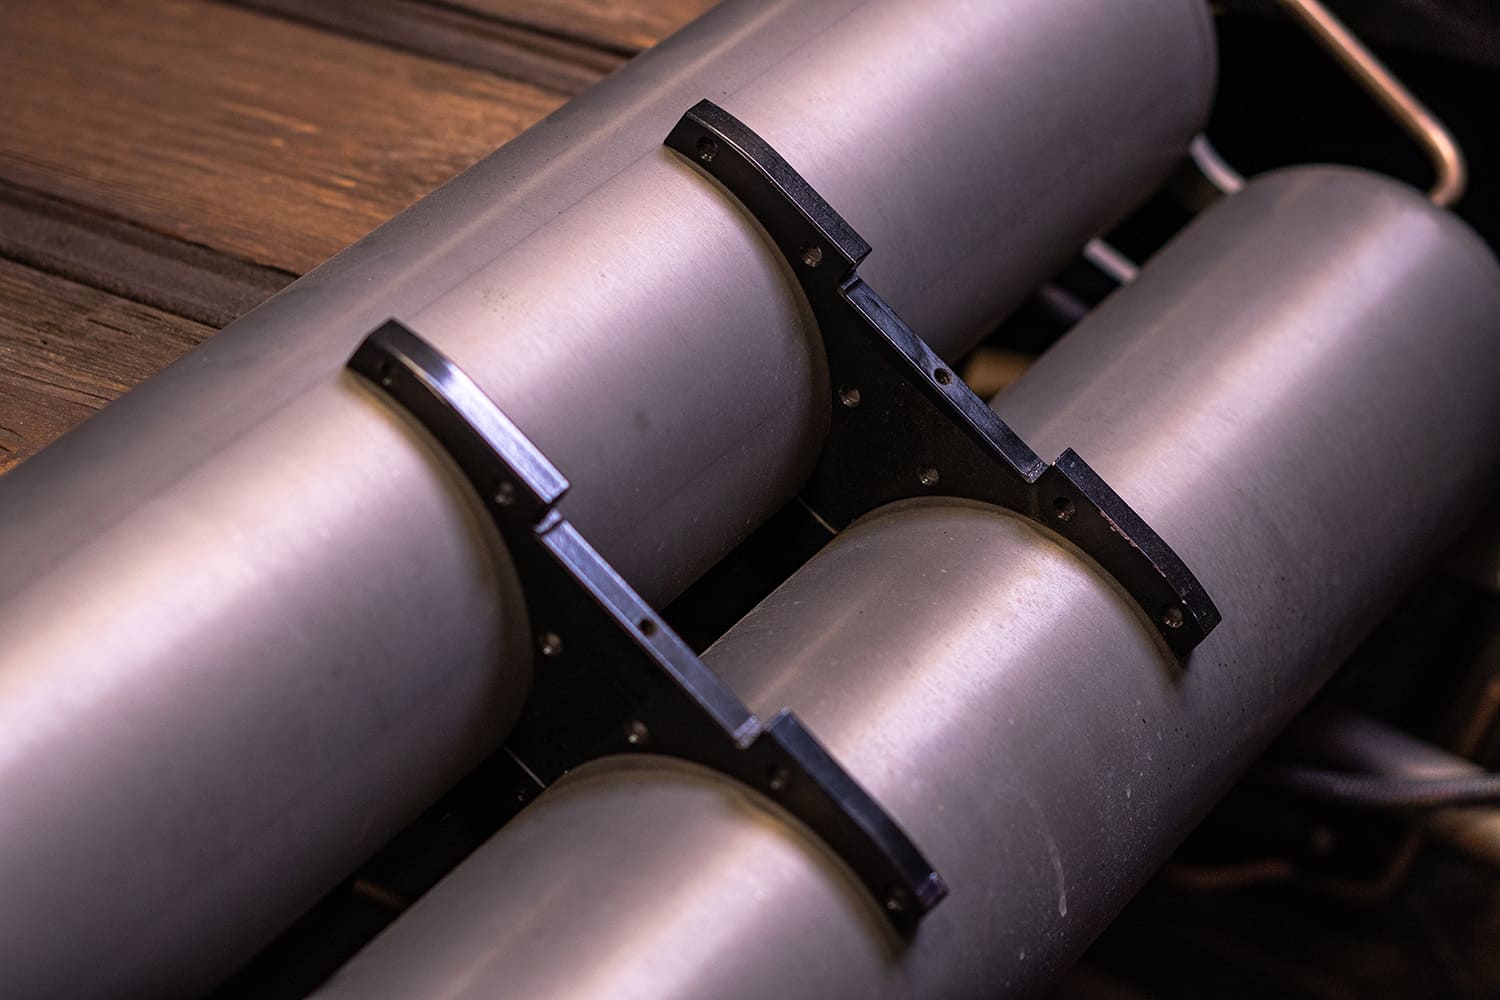
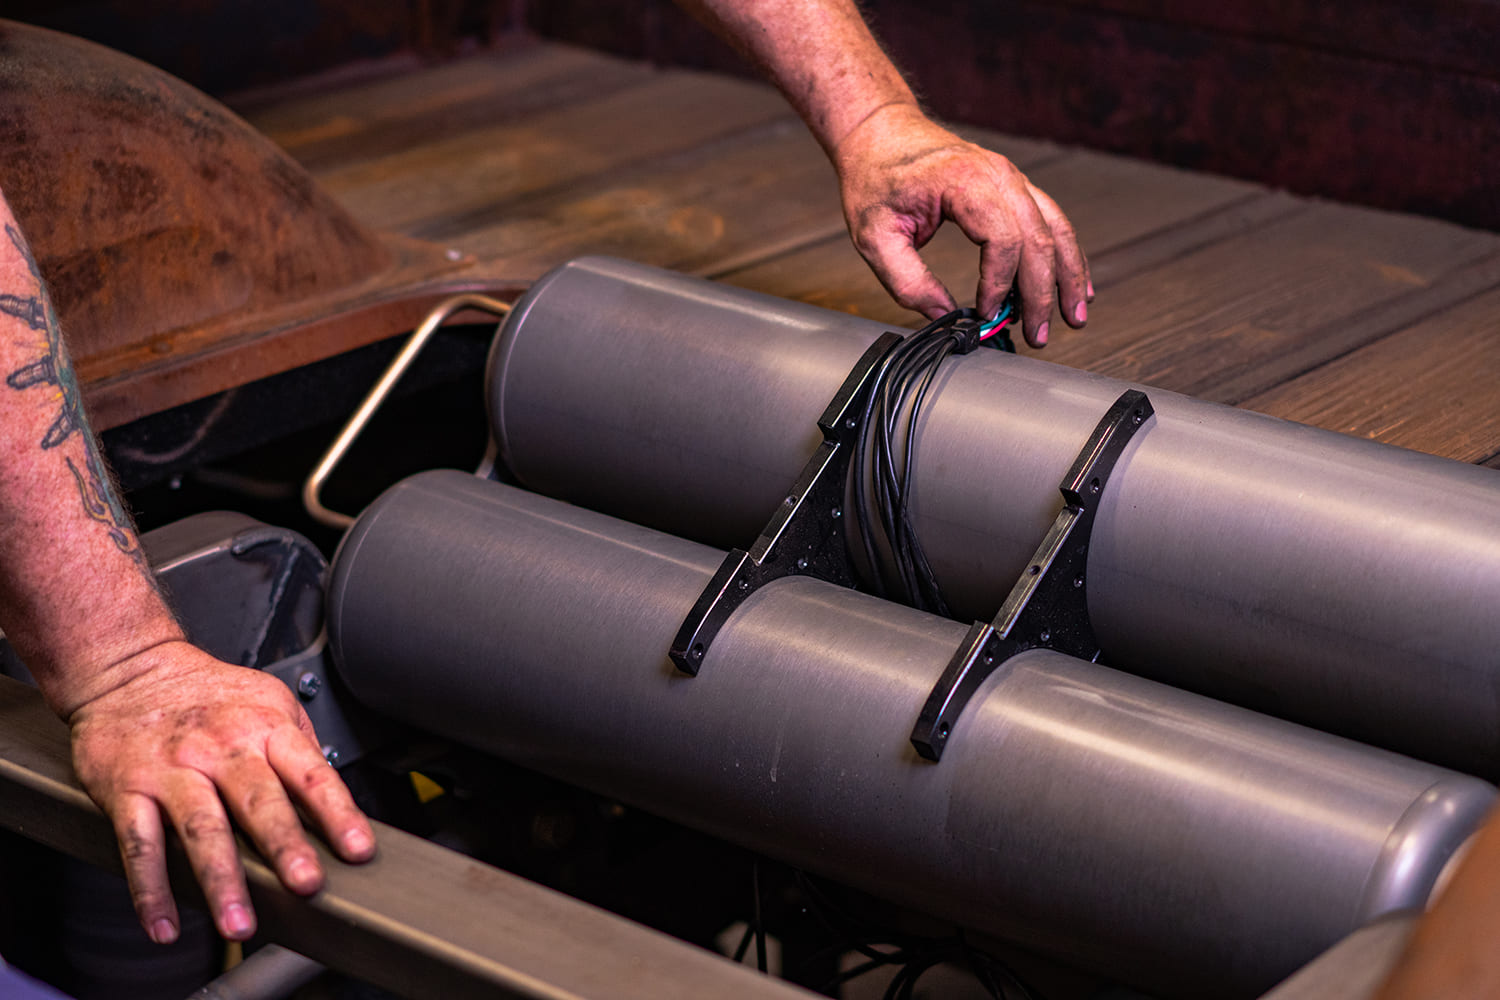
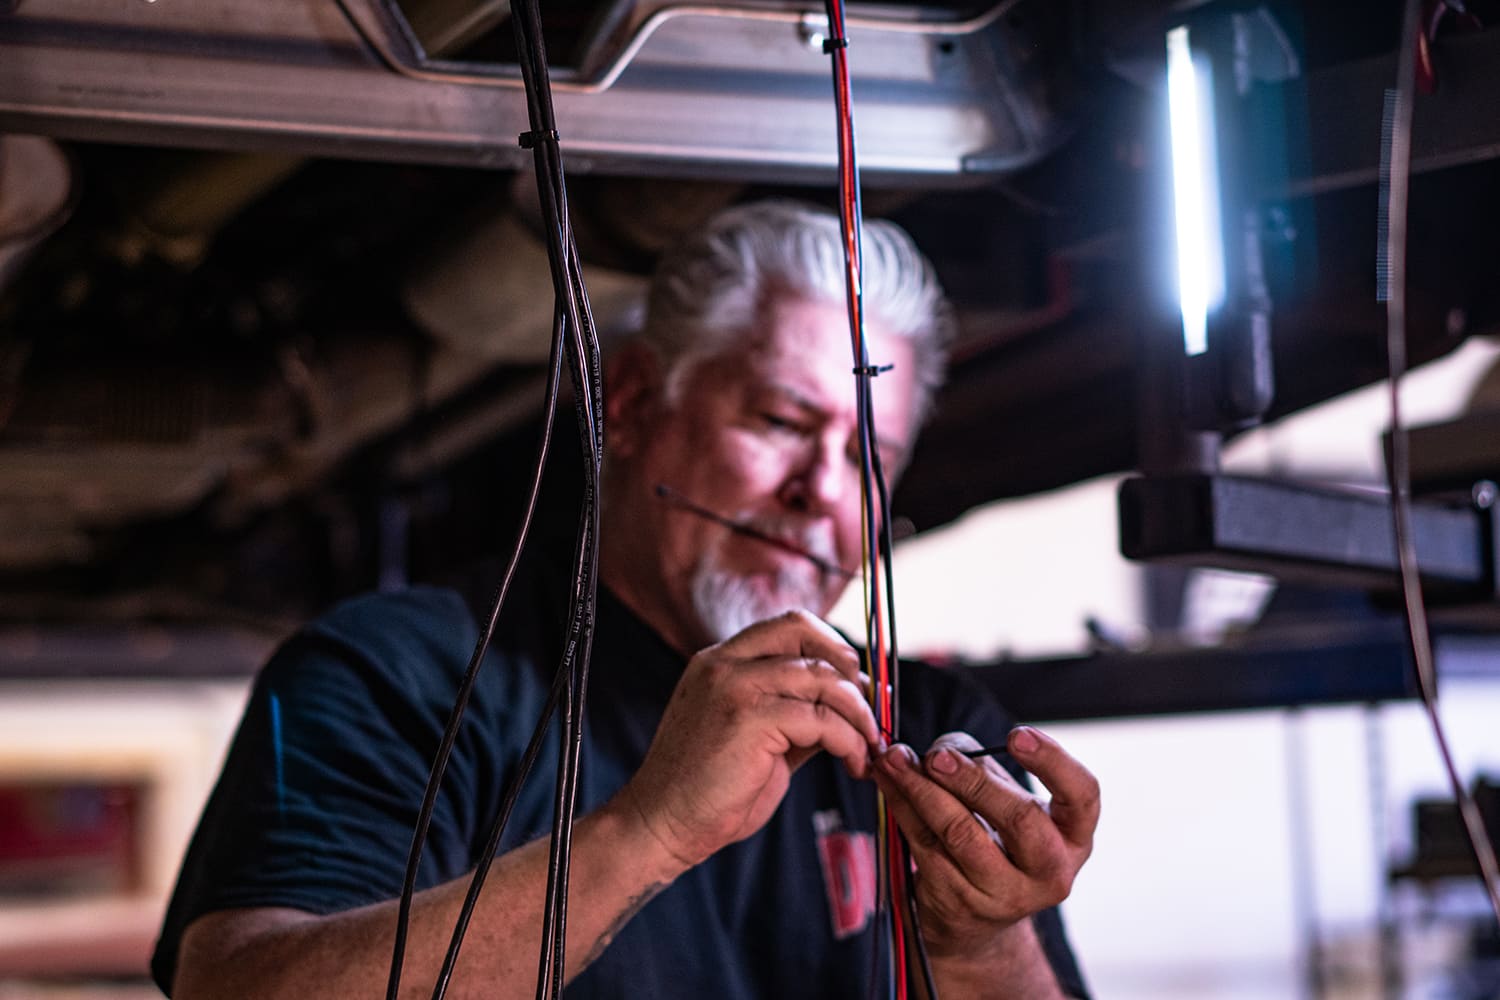
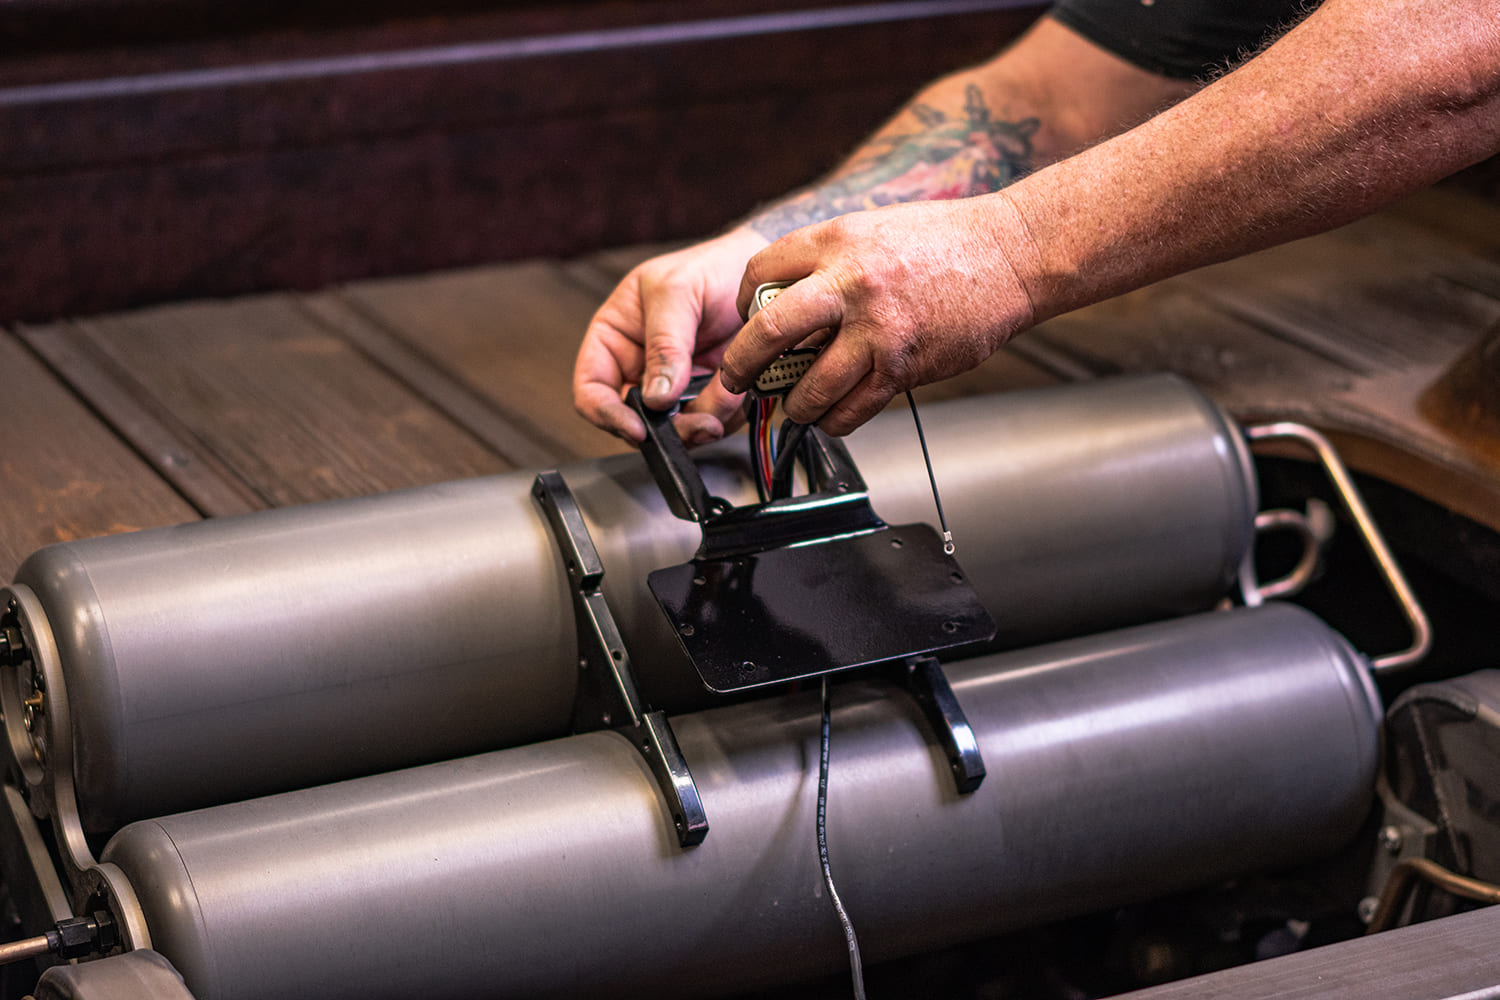
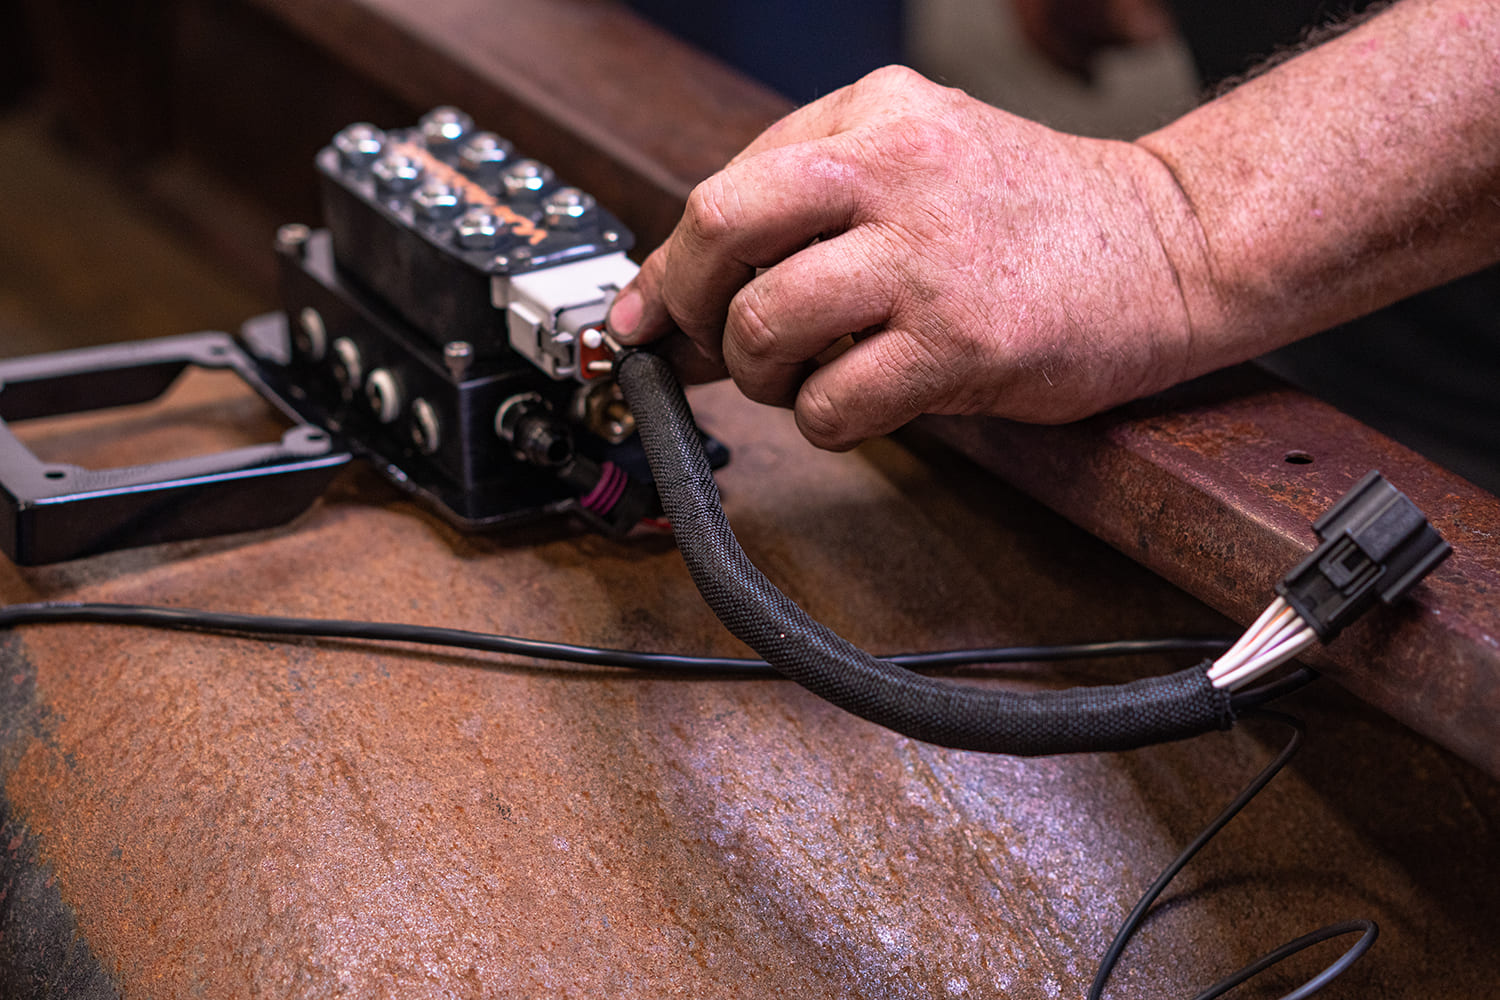
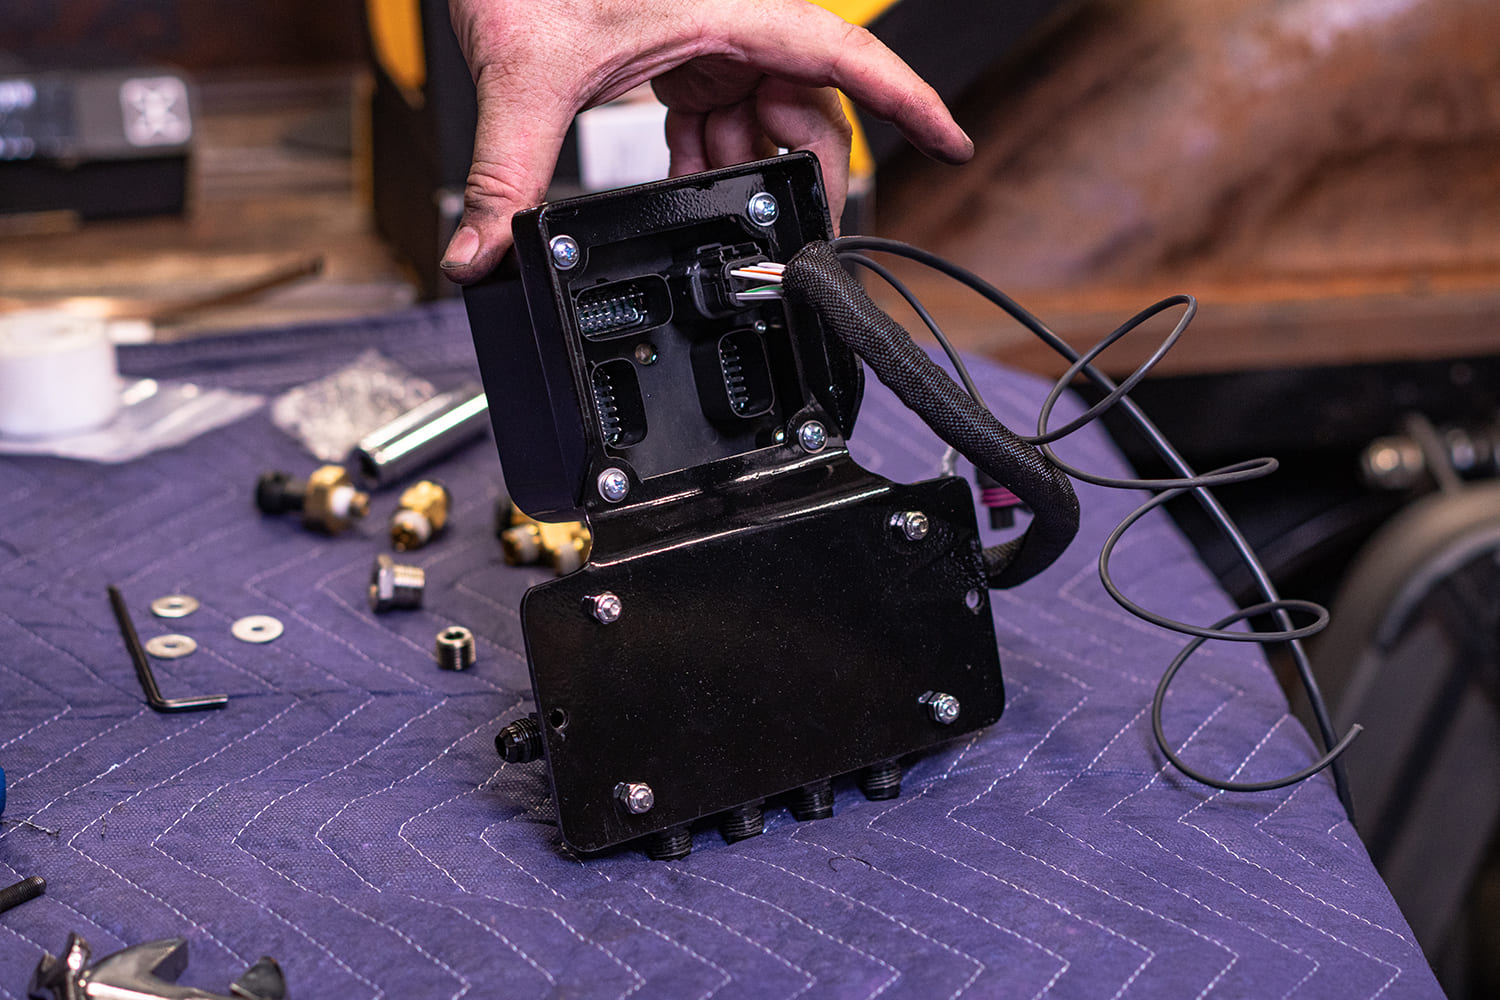
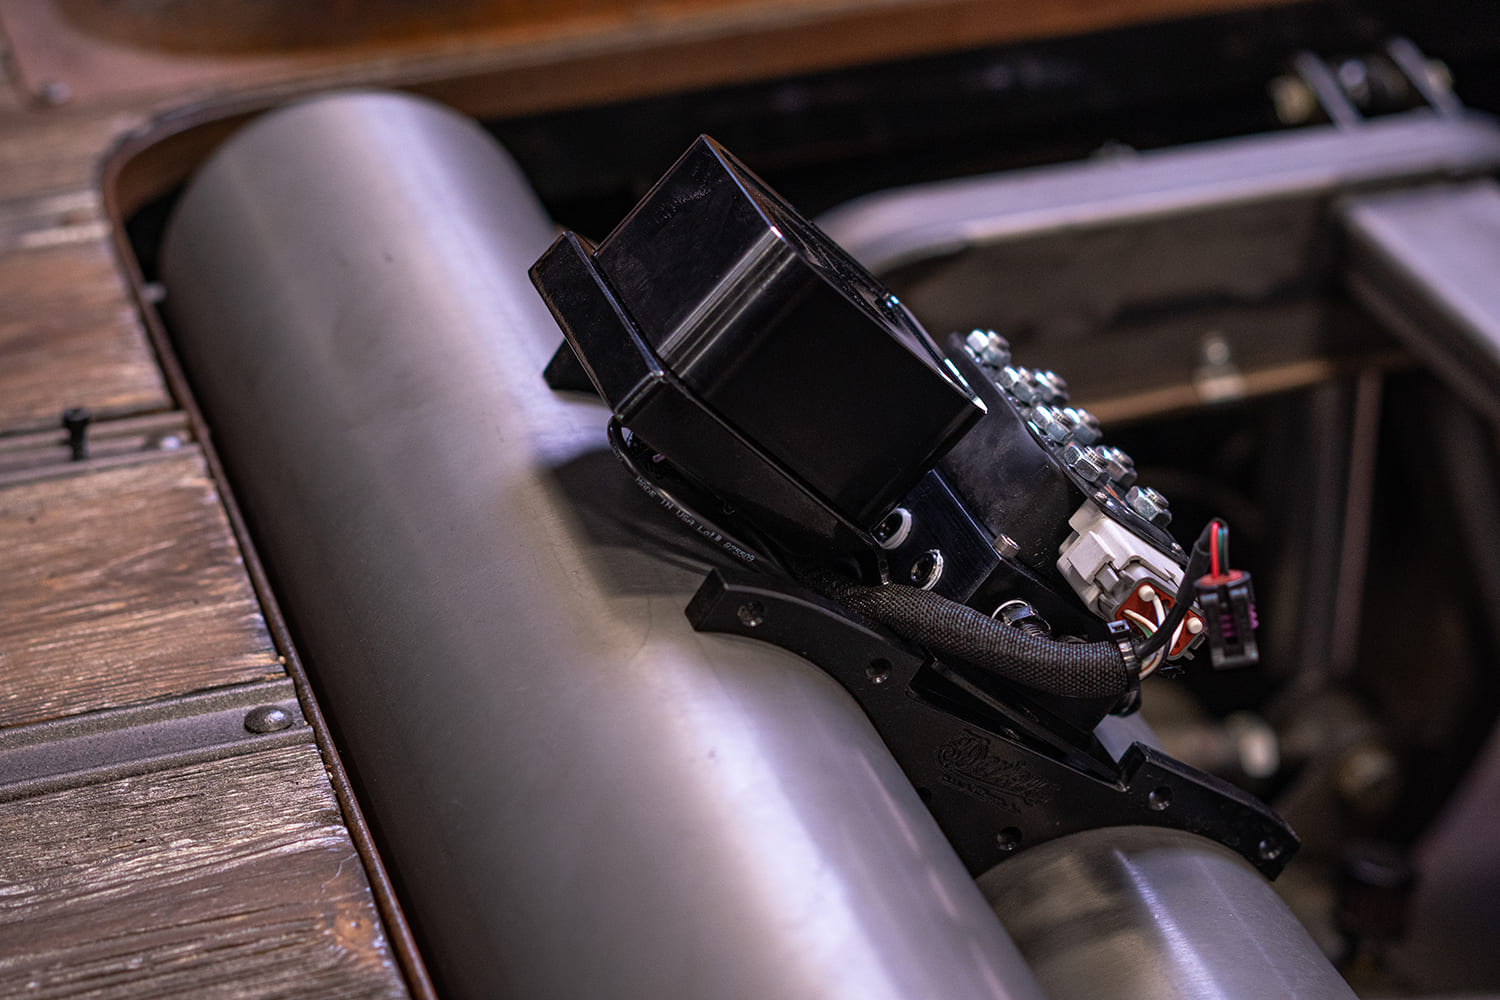
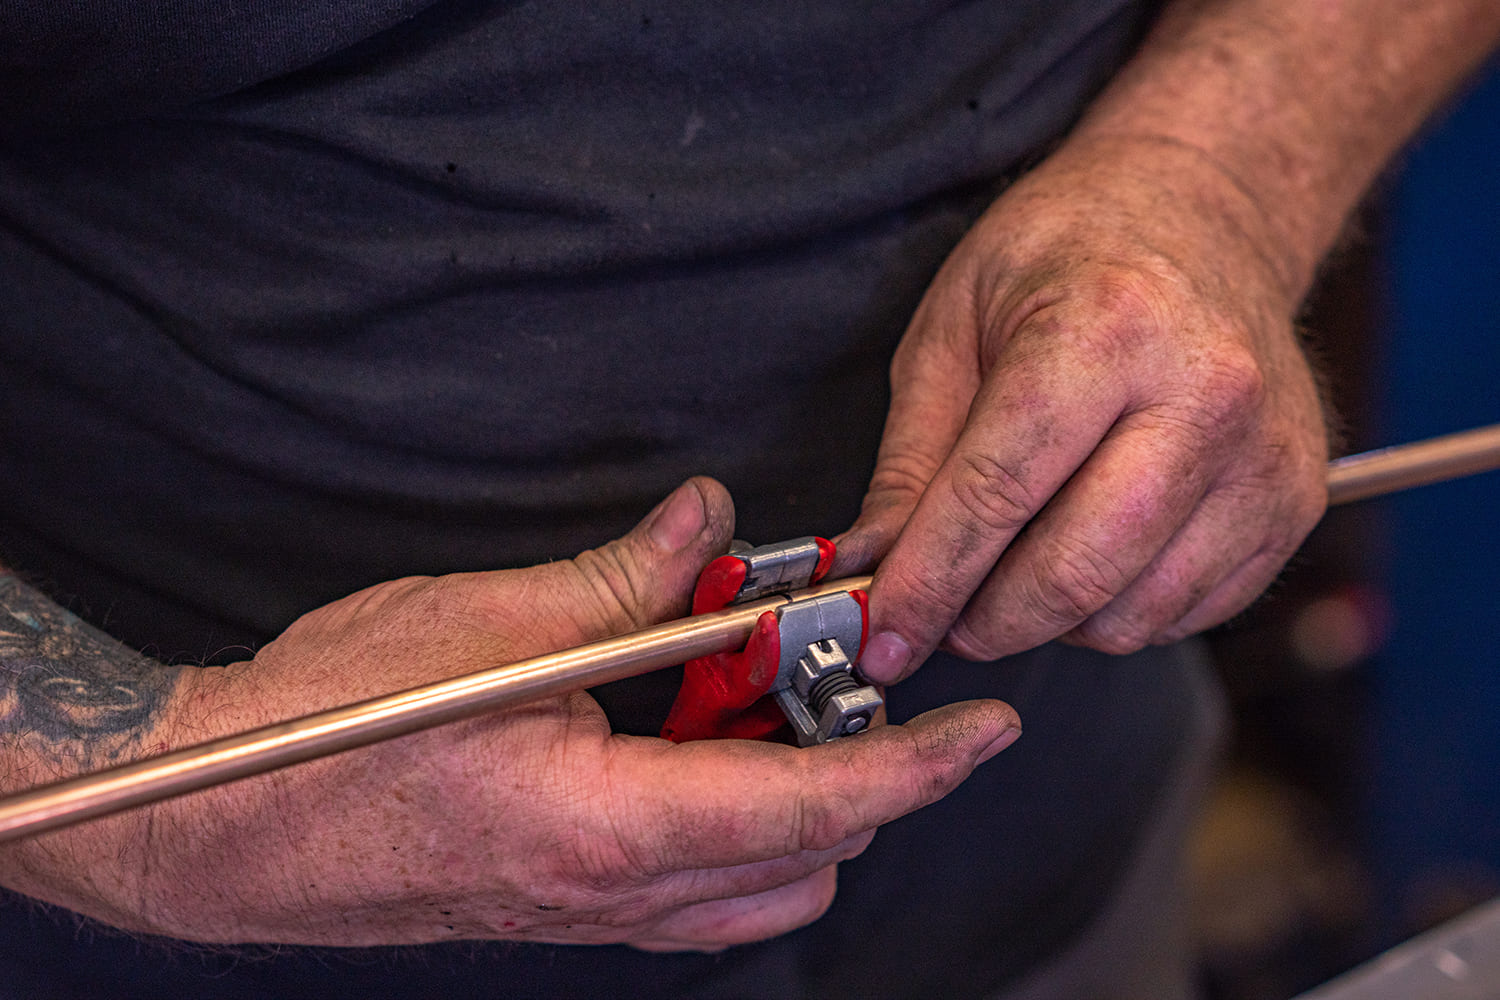
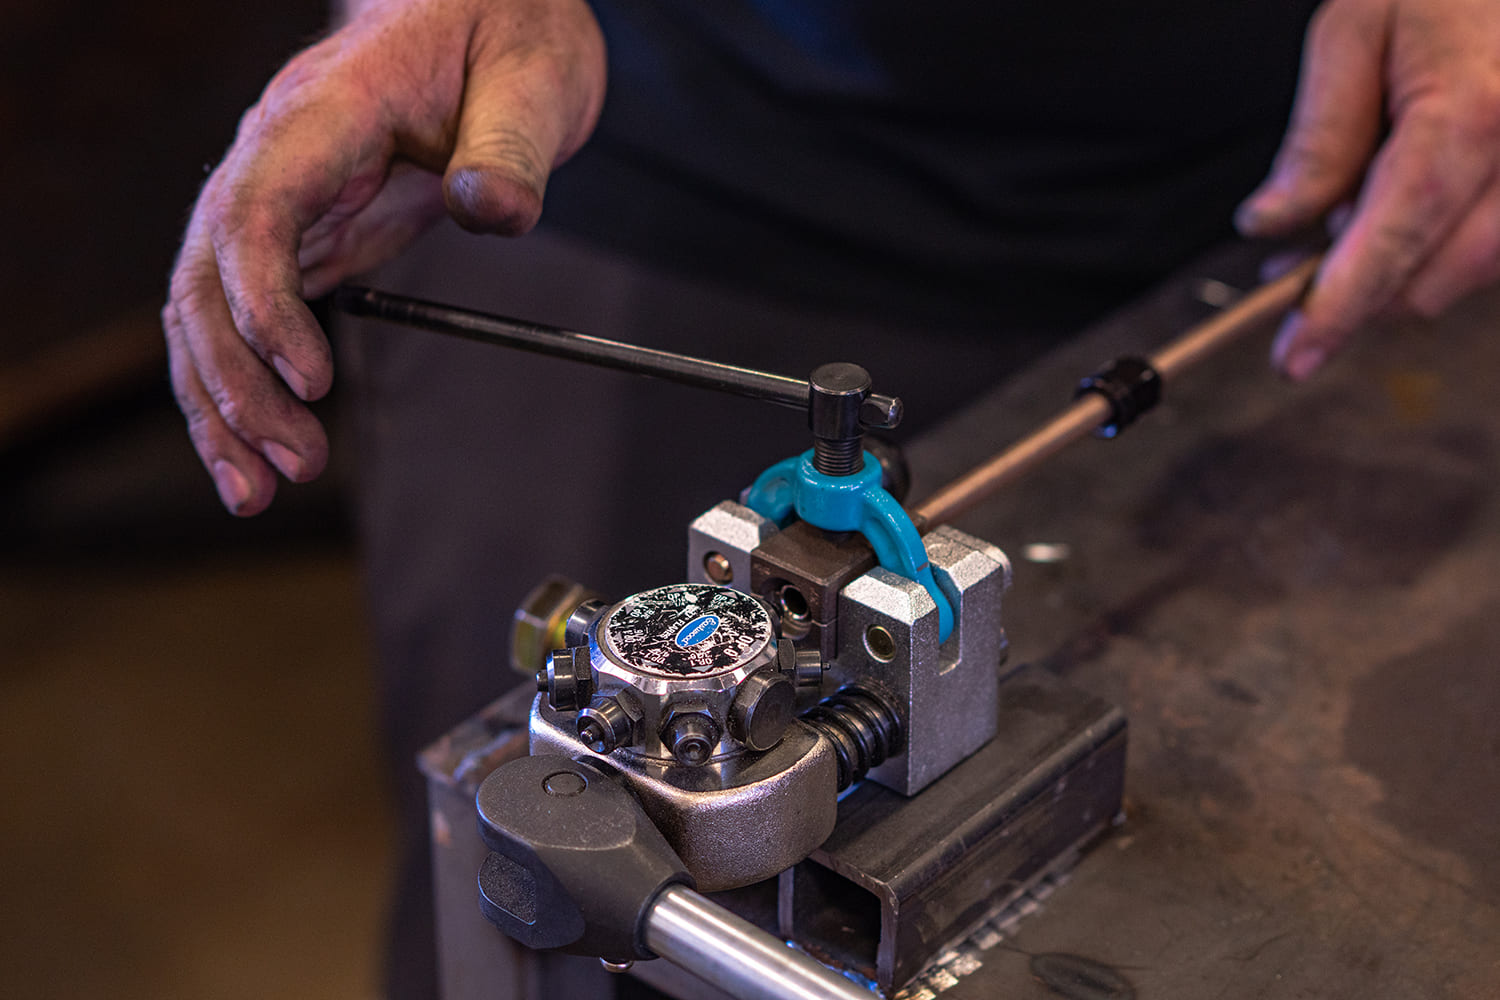
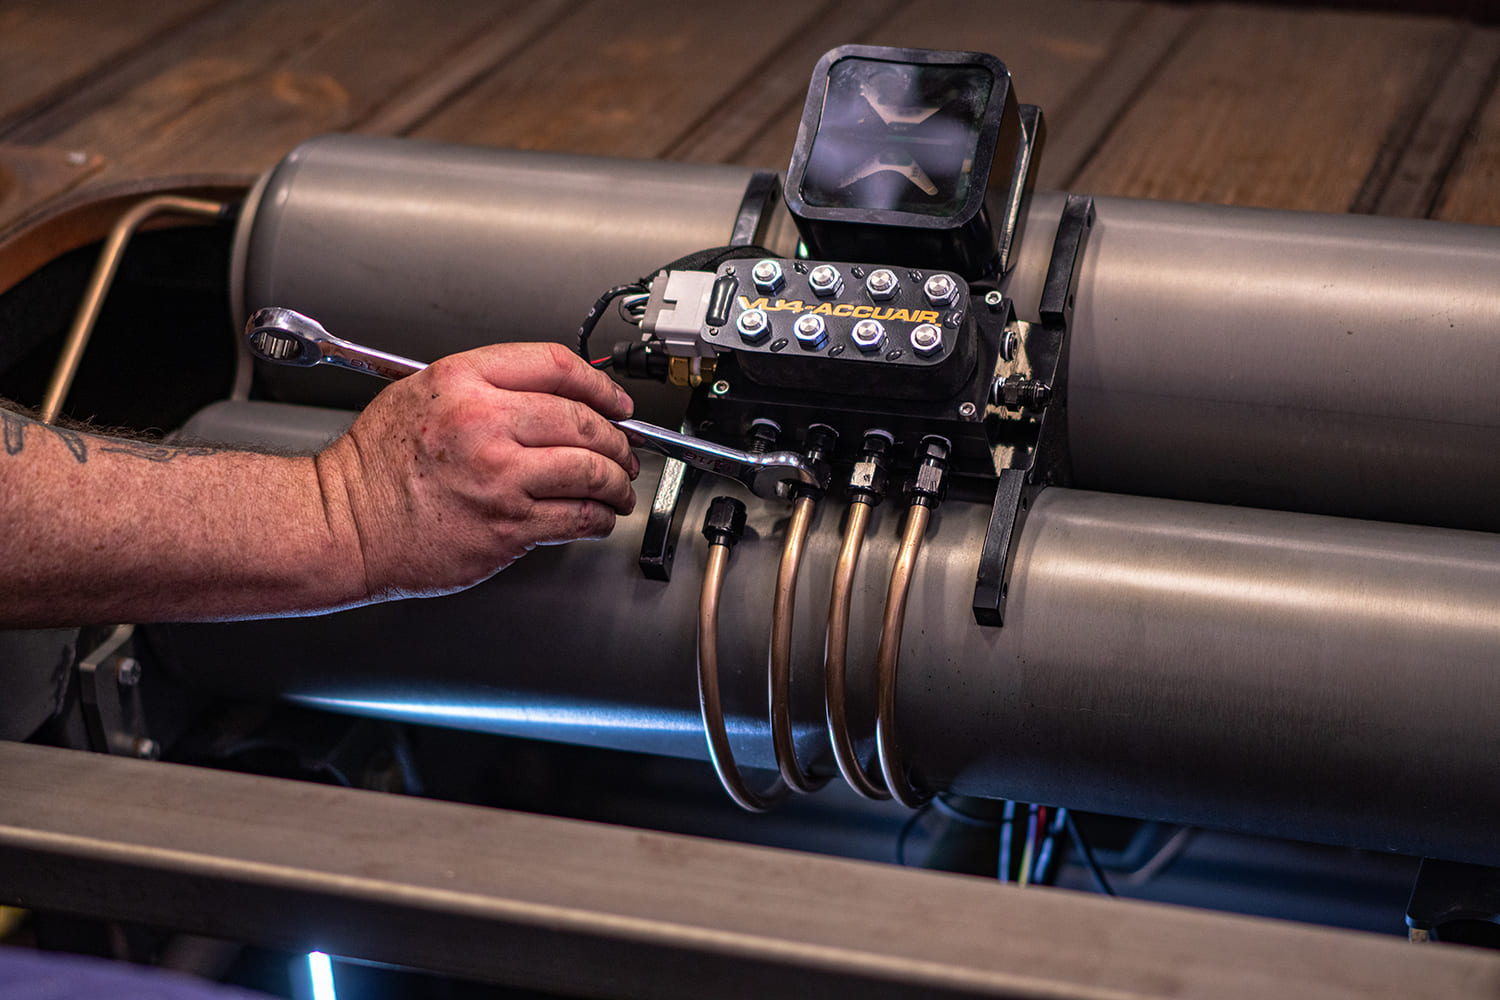
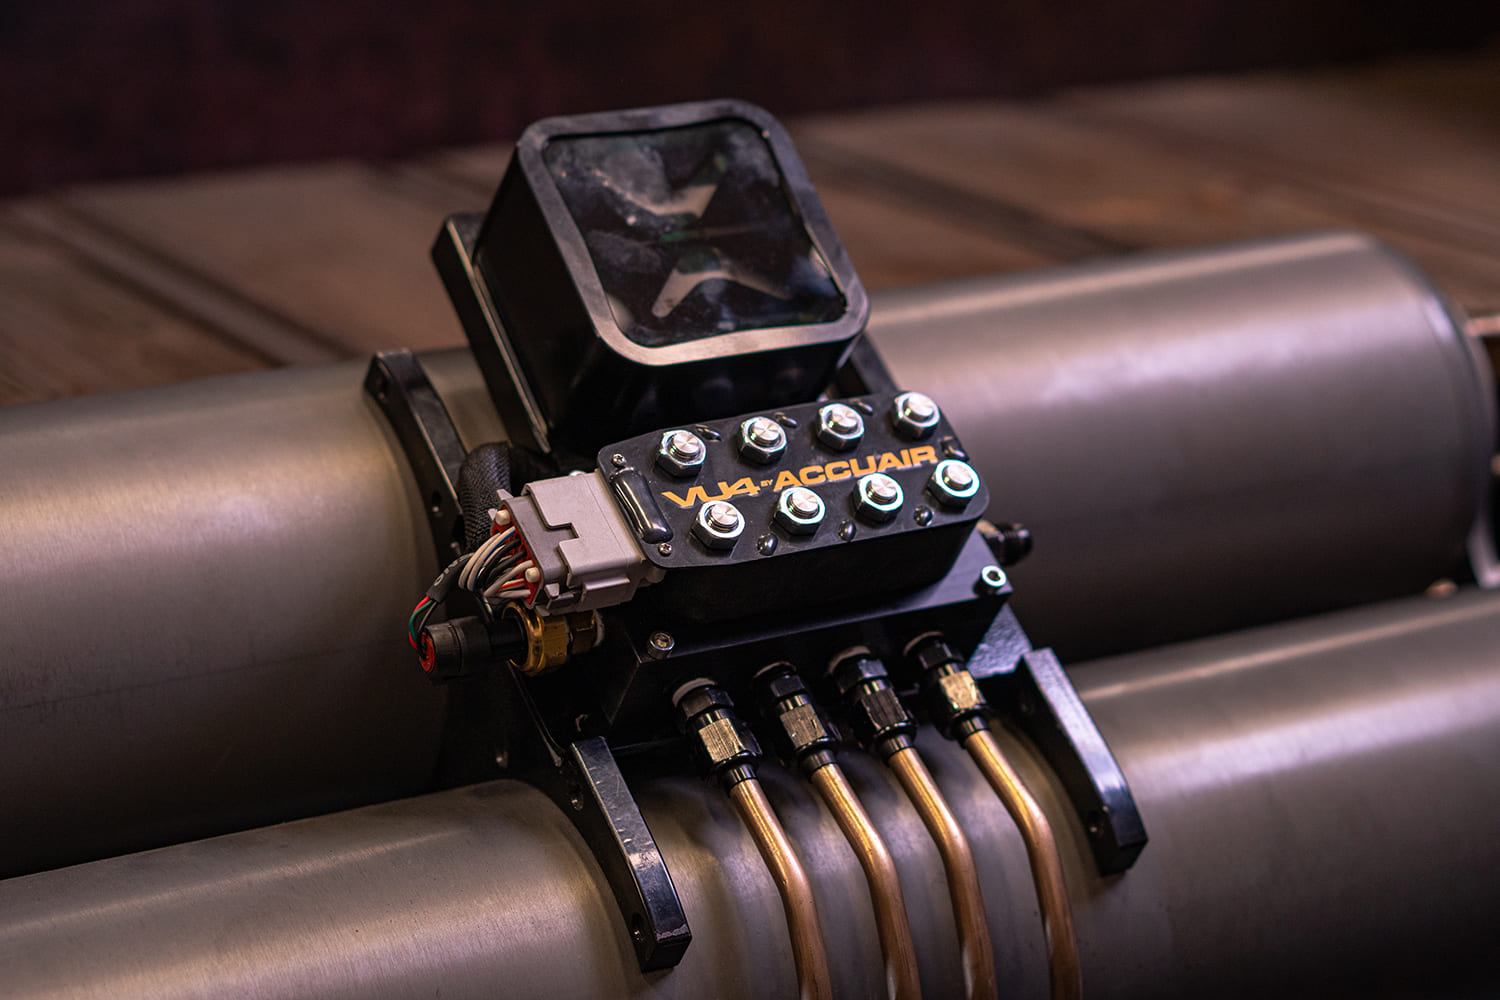
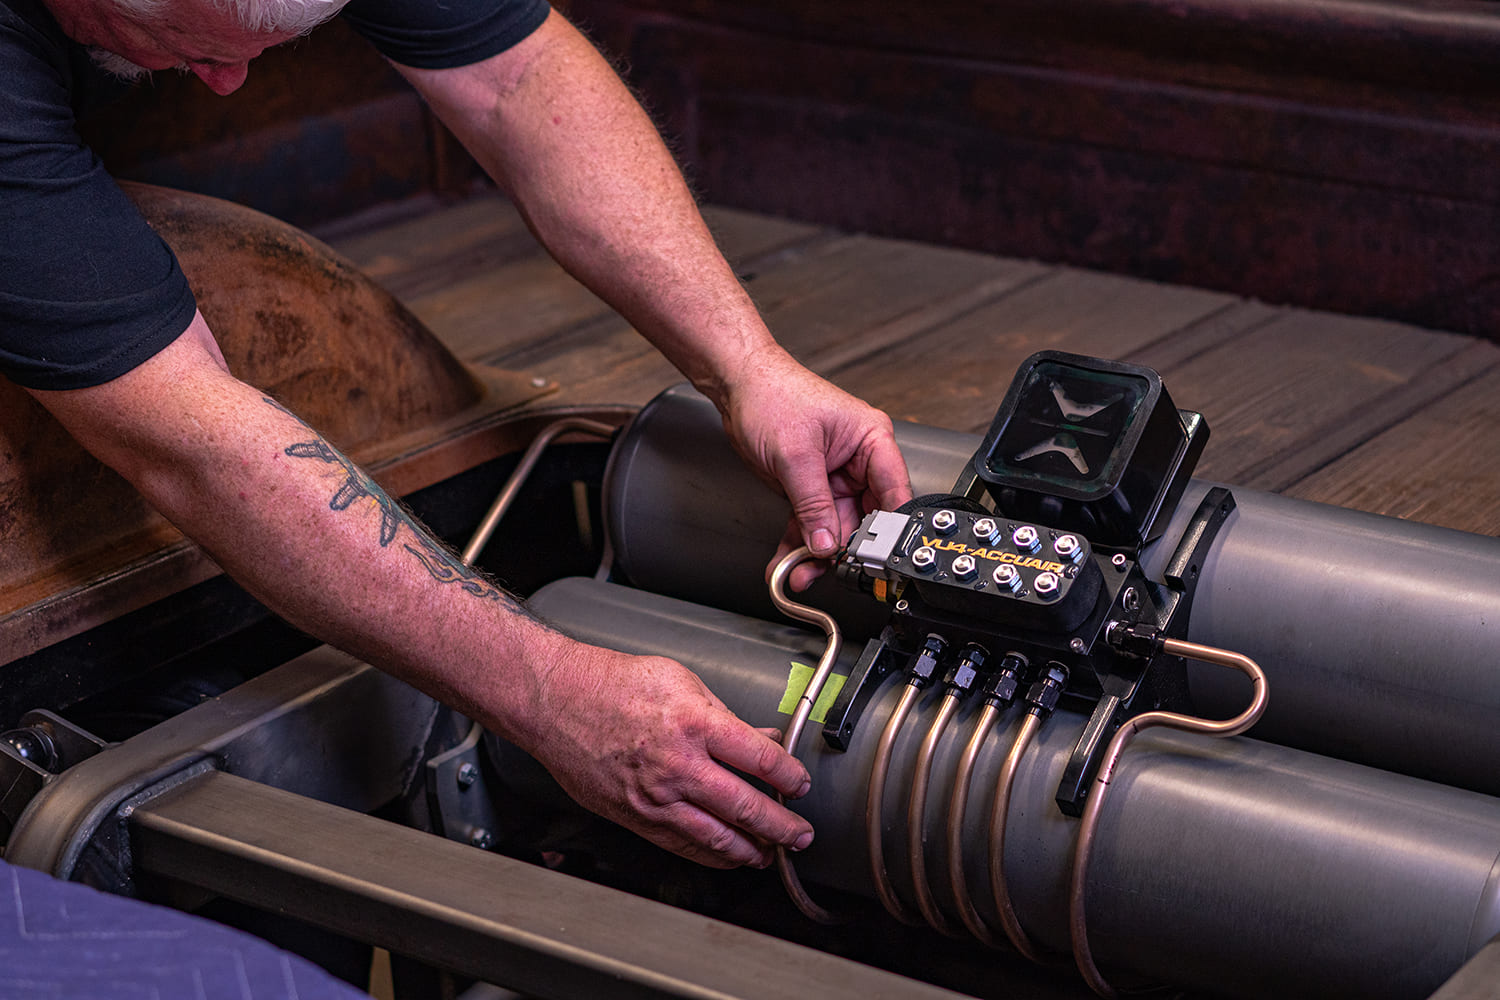
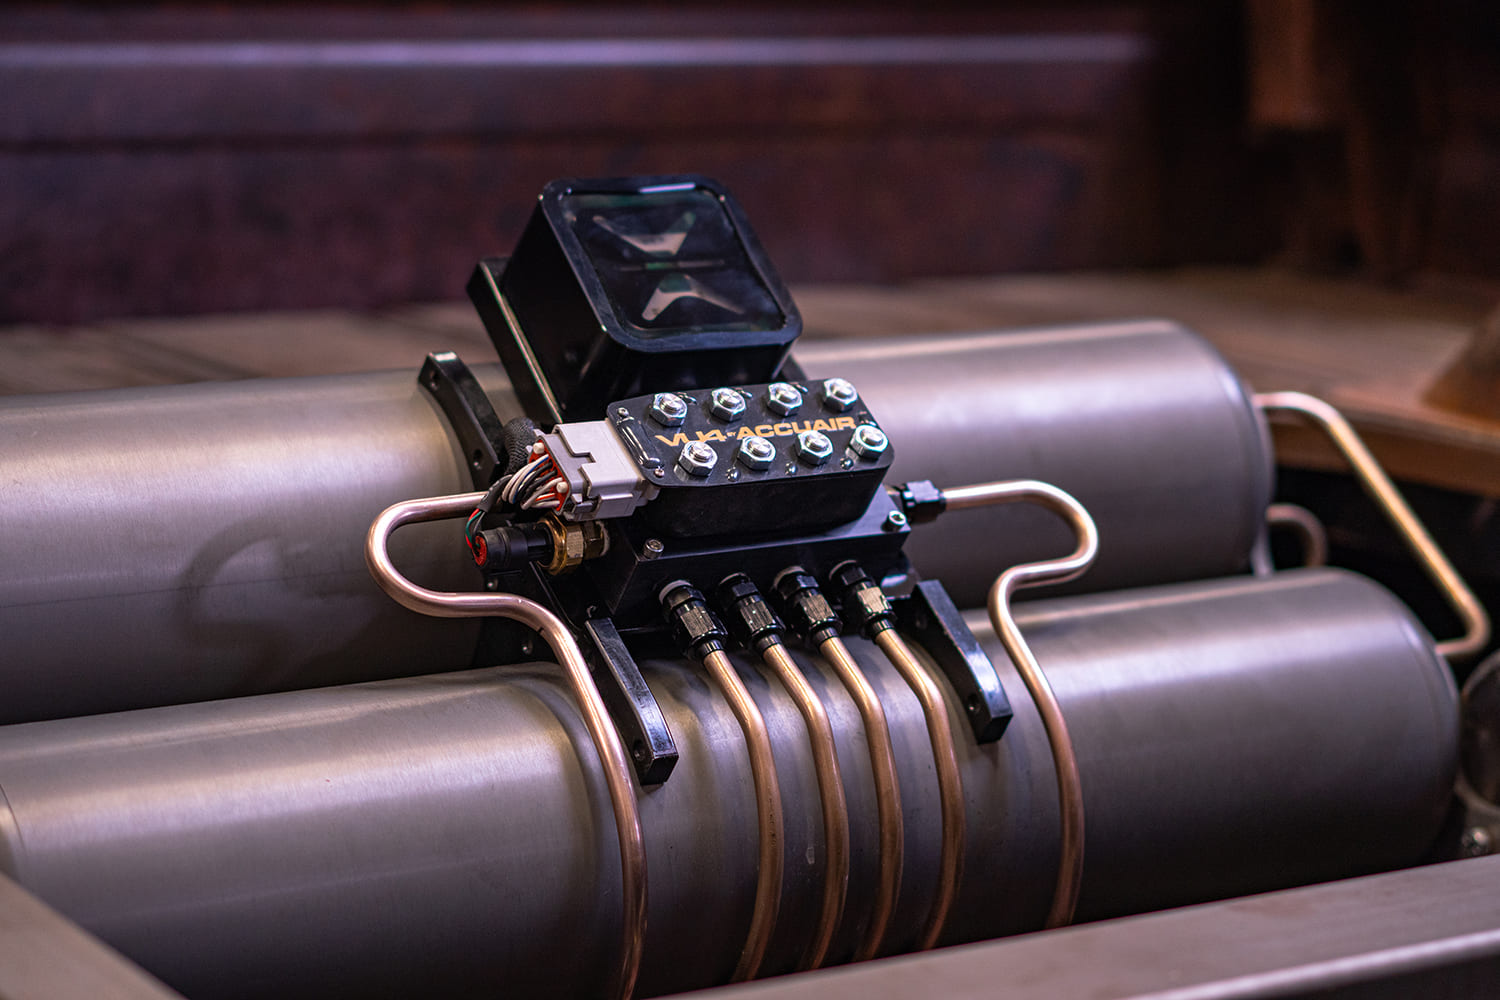
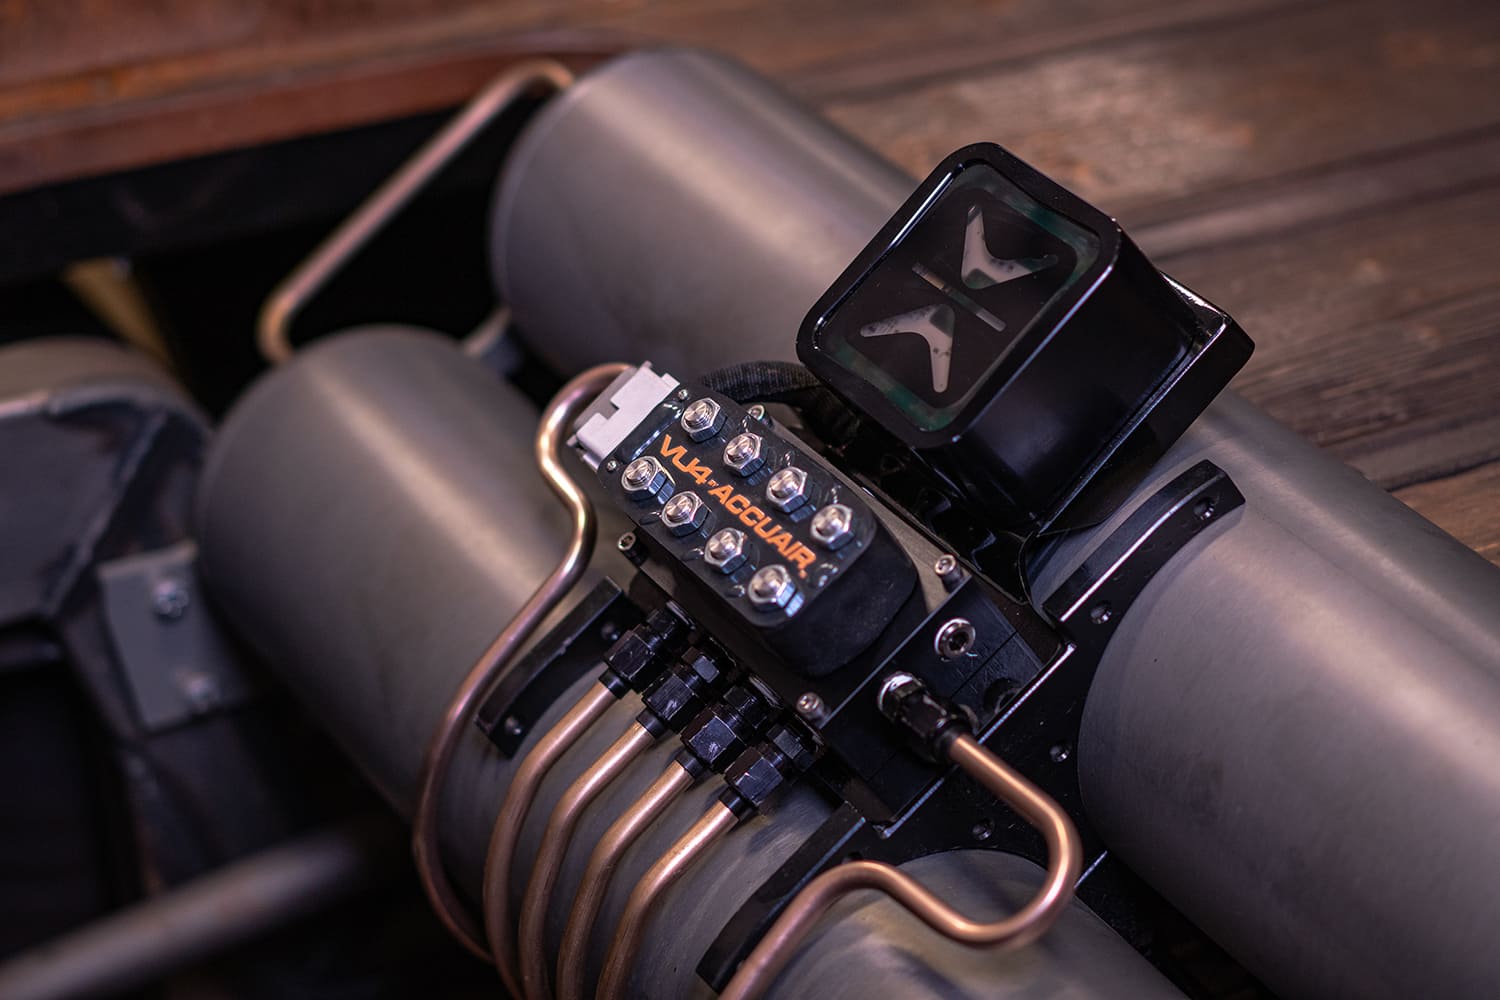
Of course, the AccuAir system was installed with a few custom touches by Devious Customs, including a custom mount for the ECU and air manifold. Hard line copper tubing was chosen to connect the valves to a manifold under the bed. The eye-catching copper lines matched the overall look of the truck and engine parts underhood.

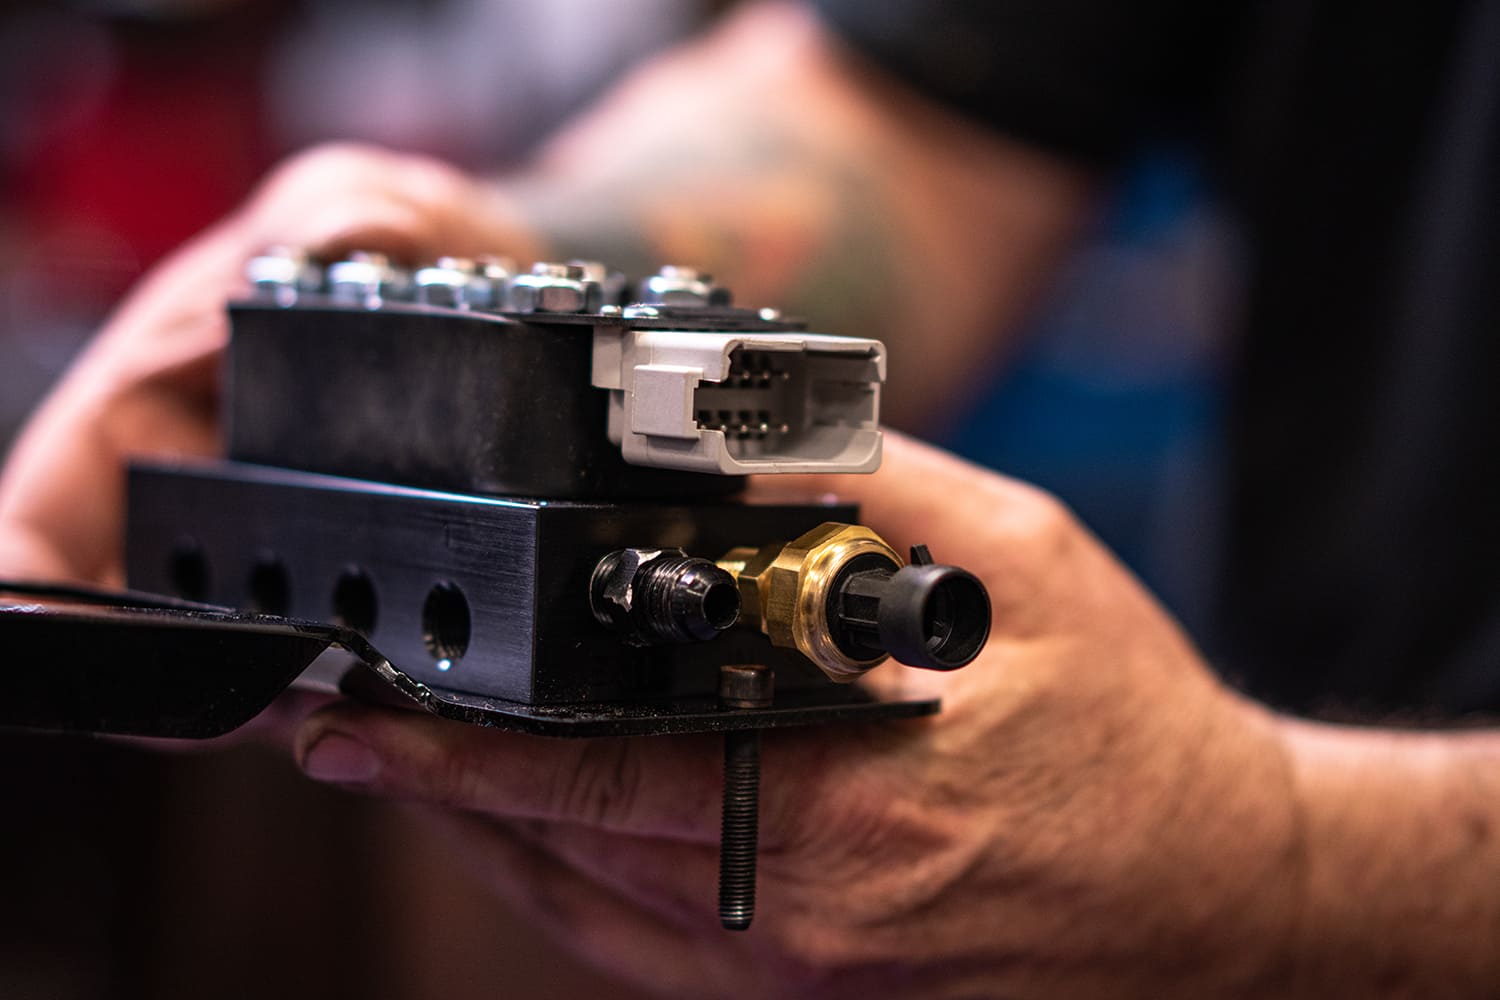
 e-Level+ Air Management ECU

The brain of the operation is the e-Level+ ECU that controls all the air operations and height sensors. The self-contained, weatherproof unit and harness recently saw some upgrades, including a battery-saving feature that shuts the system off after 24 hours when not in use. Color LEDs can be picked and will display certain troubleshooting codes when needed. The system also will adjust to your set ride height when starting up your vehicle.

02 Dual air tanks mounted with AccuAir VU4 valve manifold and copper hard lines in truck bed
The ECU and VU4 manifold will both be mounted off the Devious Customs dual air tank mount. This will also allow for most of the wiring harness to be hidden from view underneath the tanks and custom mount.

03 Close up of mounting brackets securing dual air tanks to custom wood truck bed

04 AccuAir VU4 valve block with wiring harness Craftsman hex key set and wrench on padded surface
The custom bracket to hold both units is programmed into their plasma table, cut out, welded, and powdercoated black.

05 CNC laser cutting brackets for AccuAir install on custom air ride setup06 TIG welding bracket for AccuAir tank setup precise beadwork on aluminum mount

07 Routing wiring harness over AccuAir tank mounts inside wood lined bed
The AccuAir wiring harness is run through the bracket and underneath the truck. This will allow for power to the manifold and ECU and connect to the four Height+ leveling sensors.

08 Technician wiring AccuAir system under truck tying electrical lines to chassis

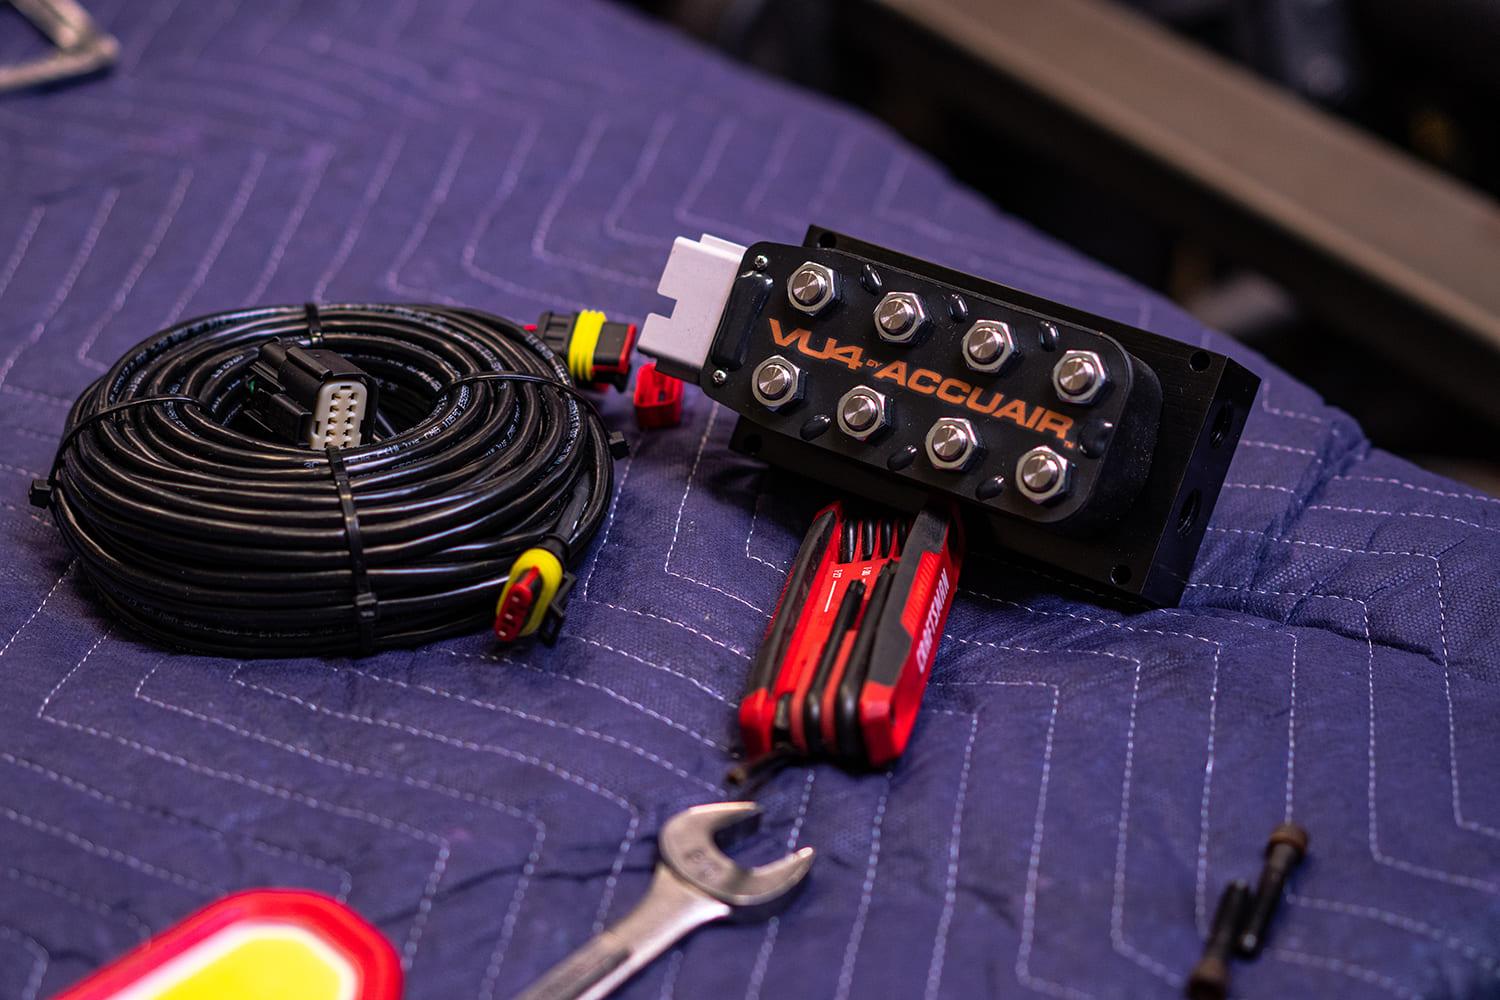
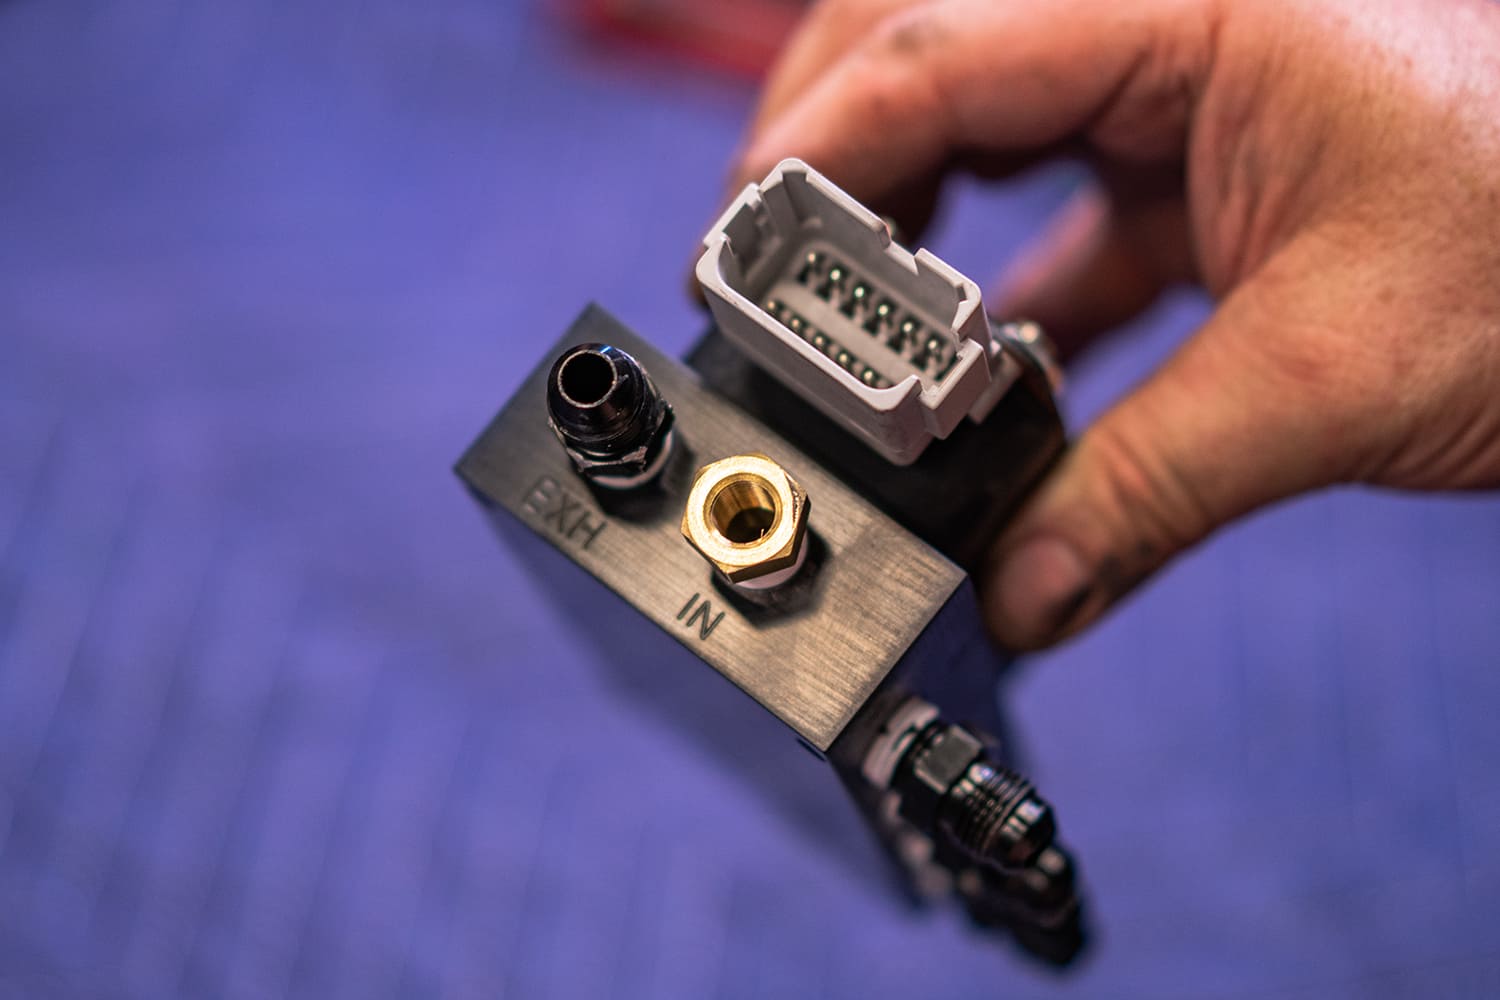
Plug-and-Play VU4 Air Manifold

The high-quality VU4 valve manifold eliminates the need to mount multiple solenoid valves throughout the air suspension system. It is a four-corner setup to individually control each airbag independently. The 200-psi capable manifold is a plug-and-play setup with 1/4-inch NPT fittings.

09 Detail of AccuAir VU4 block showing labeled ports for EXH and IN with plug connector
The supplied 200-psi pressure switch is installed into the VU4 manifold. The wiring harness with weatherproof connections are plugged into the ECU and manifold.

10 Mounting AccuAir VU4 bracket between tanks on 1959 Apache wood bed air ride system11 Close up of AccuAir VU4 block showing wiring connector and brass air fitting before final hookup

12 Harness being connected to AccuAir VU4 block mounted on bed crossmember of the 1959 Apache
The bracket with the AccuAir components mounted is bolted up to the air tank mount.

13 Electrical harness routed into the AccuAir ECU mounted to the VU4 manifold on padded workbench14 AccuAir VU4 and ECU securely mounted between air tanks on bed floor with clean wire routing

15 Cutting copper hard line with tubing cutter during custom air line fab for AccuAir setup
Copper hard lines are bent and flared to install fittings to connect to the VU4 manifold.

16 Precision tube bender forming accurate bends in copper air line for clean install layout17 Final wrench tightening of VU4 fittings to complete AccuAir manifold hookup on dual tank system18 VU4 by AccuAir manifold finished and mounted between air tanks with complete wiring and plumbing19 Bending copper line using a dial style tubing bender to achieve tight consistent curves

20 Fine tuning copper line fitment into AccuAir VU4 block for clean install on Apache bed
The copper lines run to a manifold underneath the bed to supply air to braided air line going to each airbag. This setup allows for easy maintenance or fixing any issues without redoing the entire system.

21 Final VU4 by AccuAir setup mounted between dual air tanks with hard lines fully routed

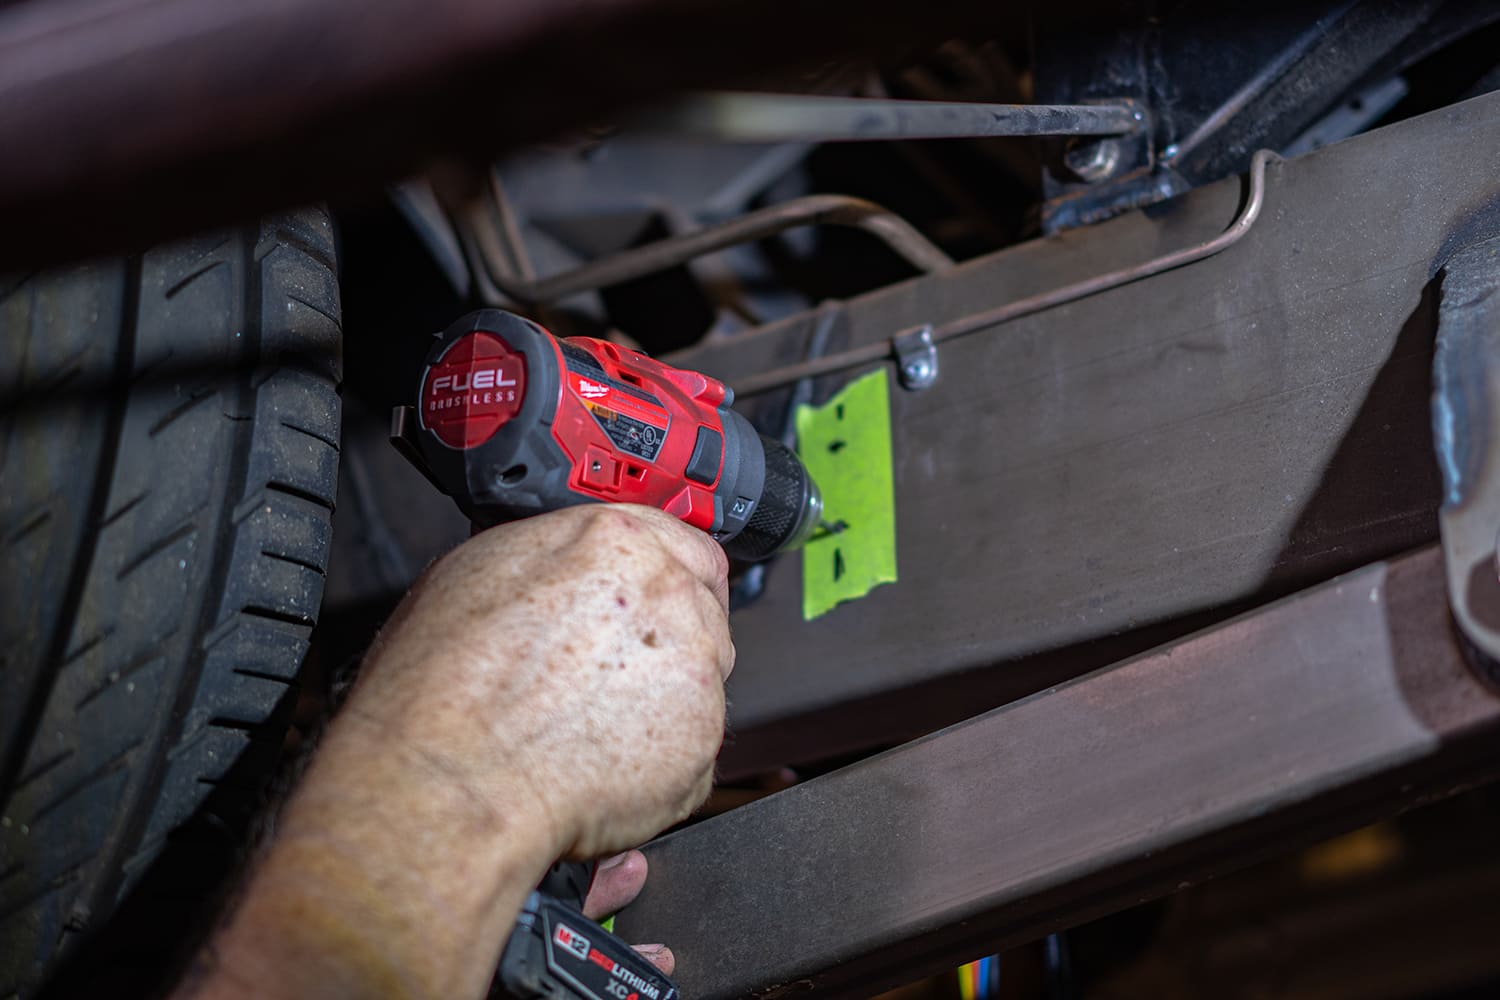
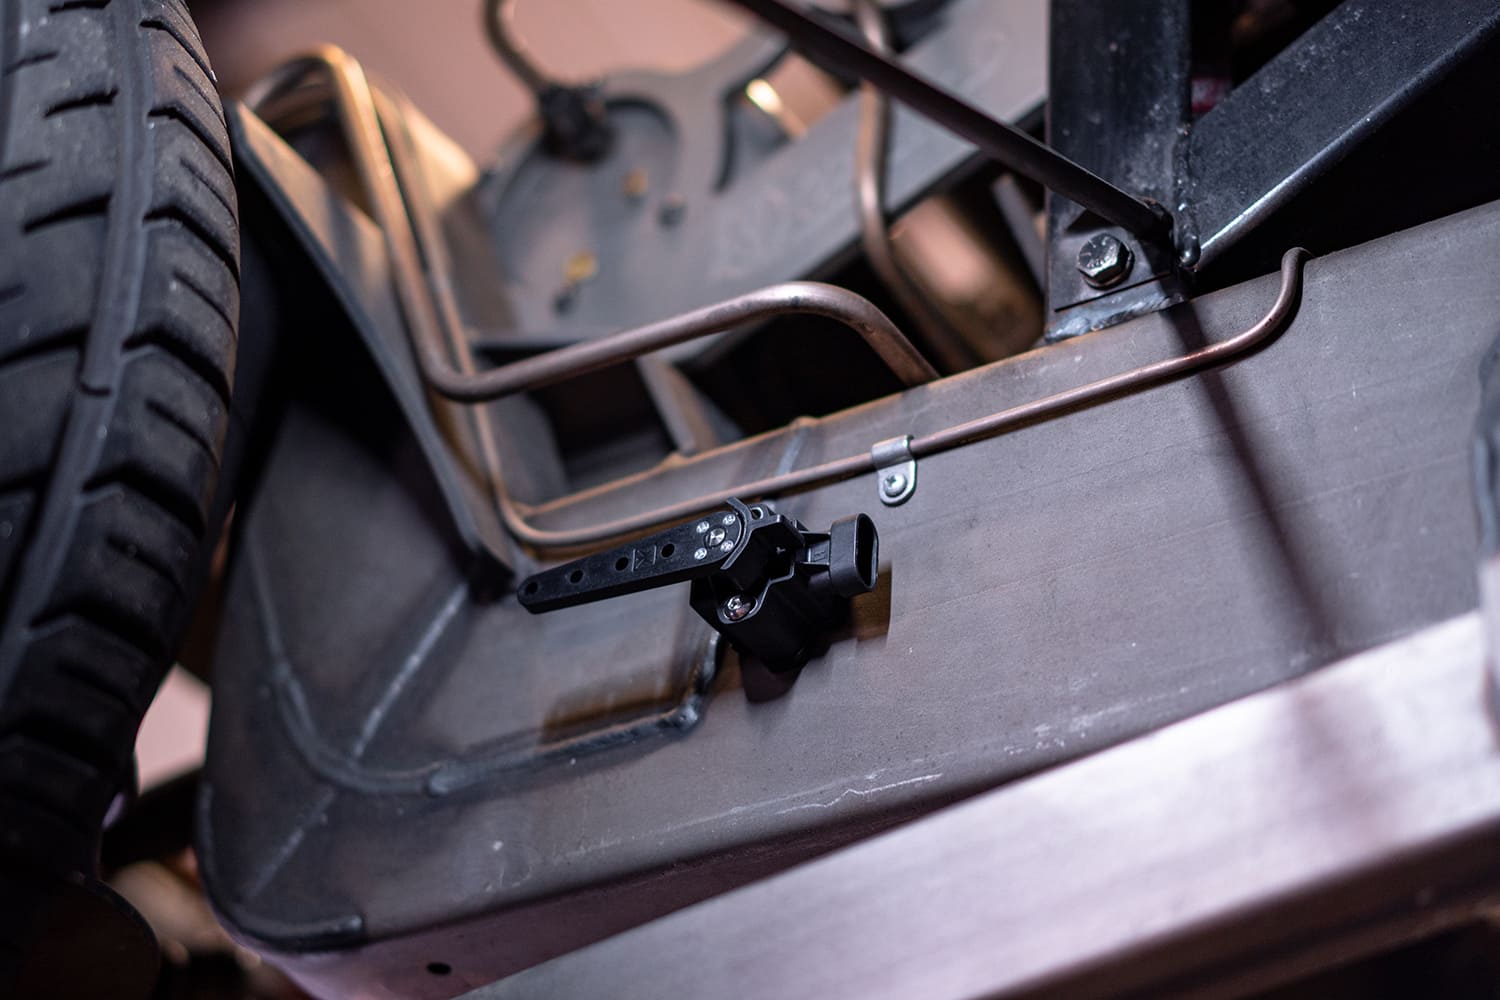
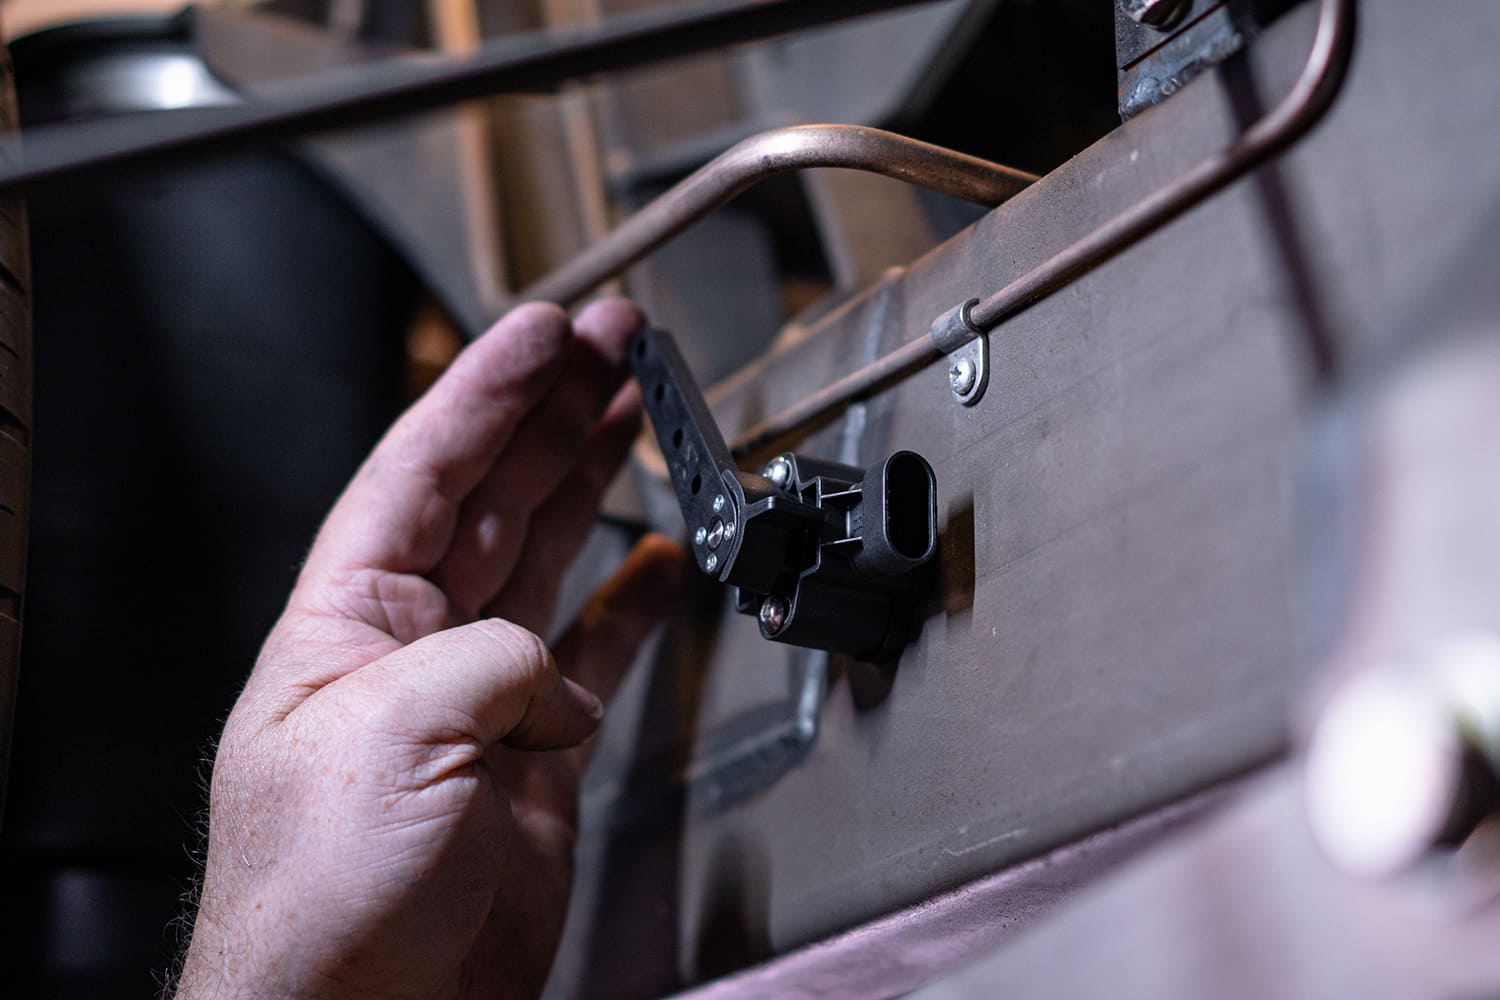
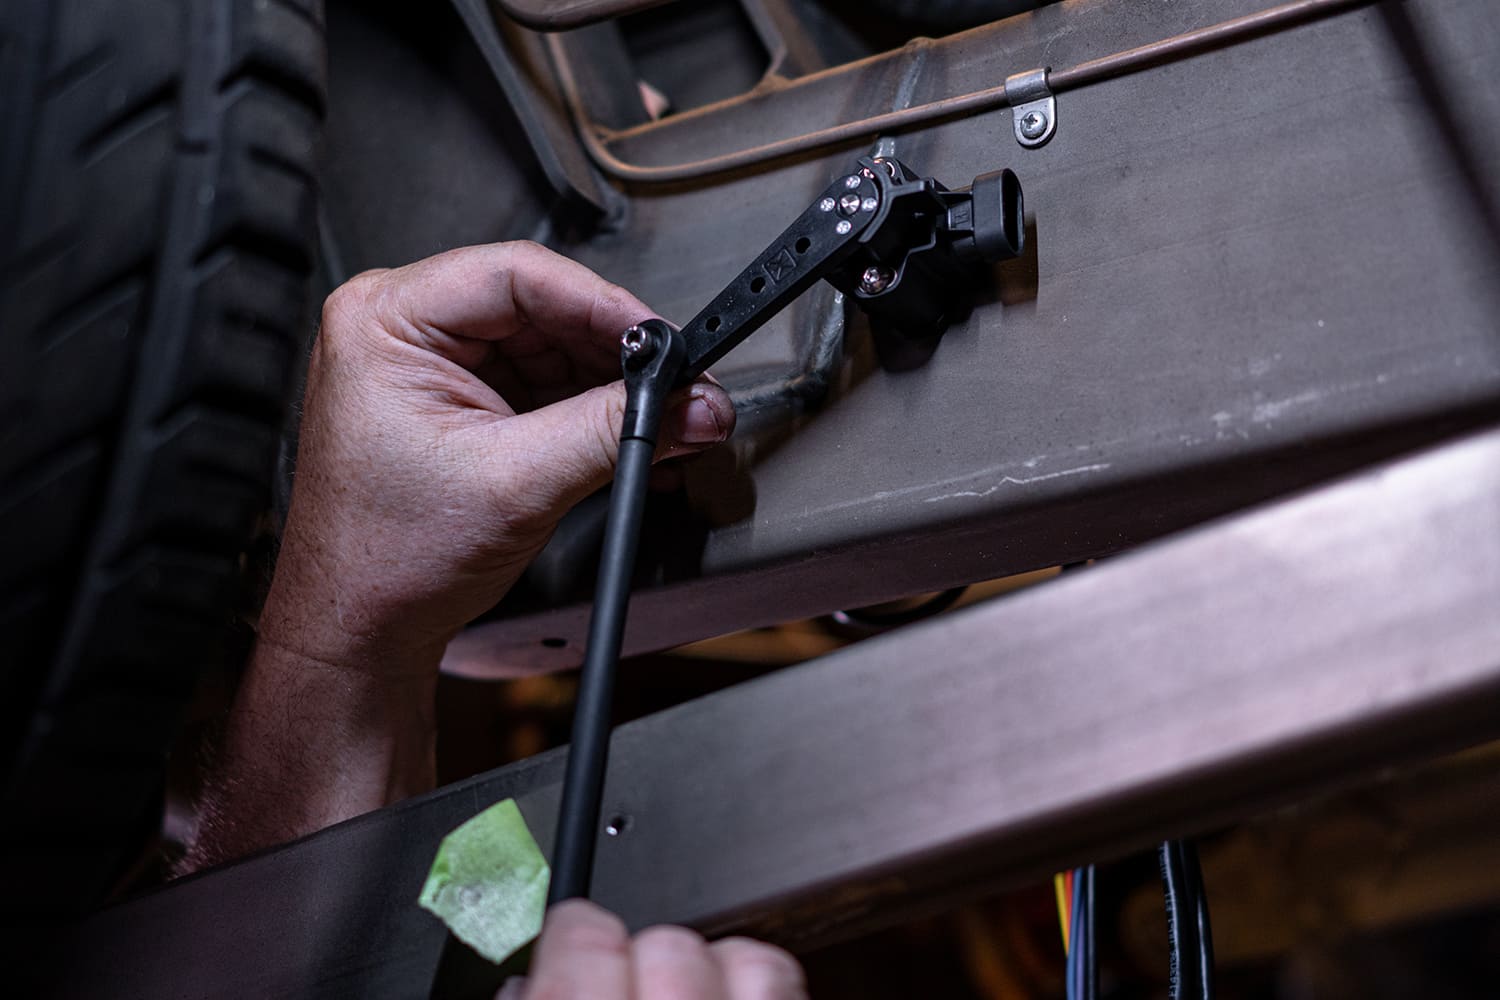
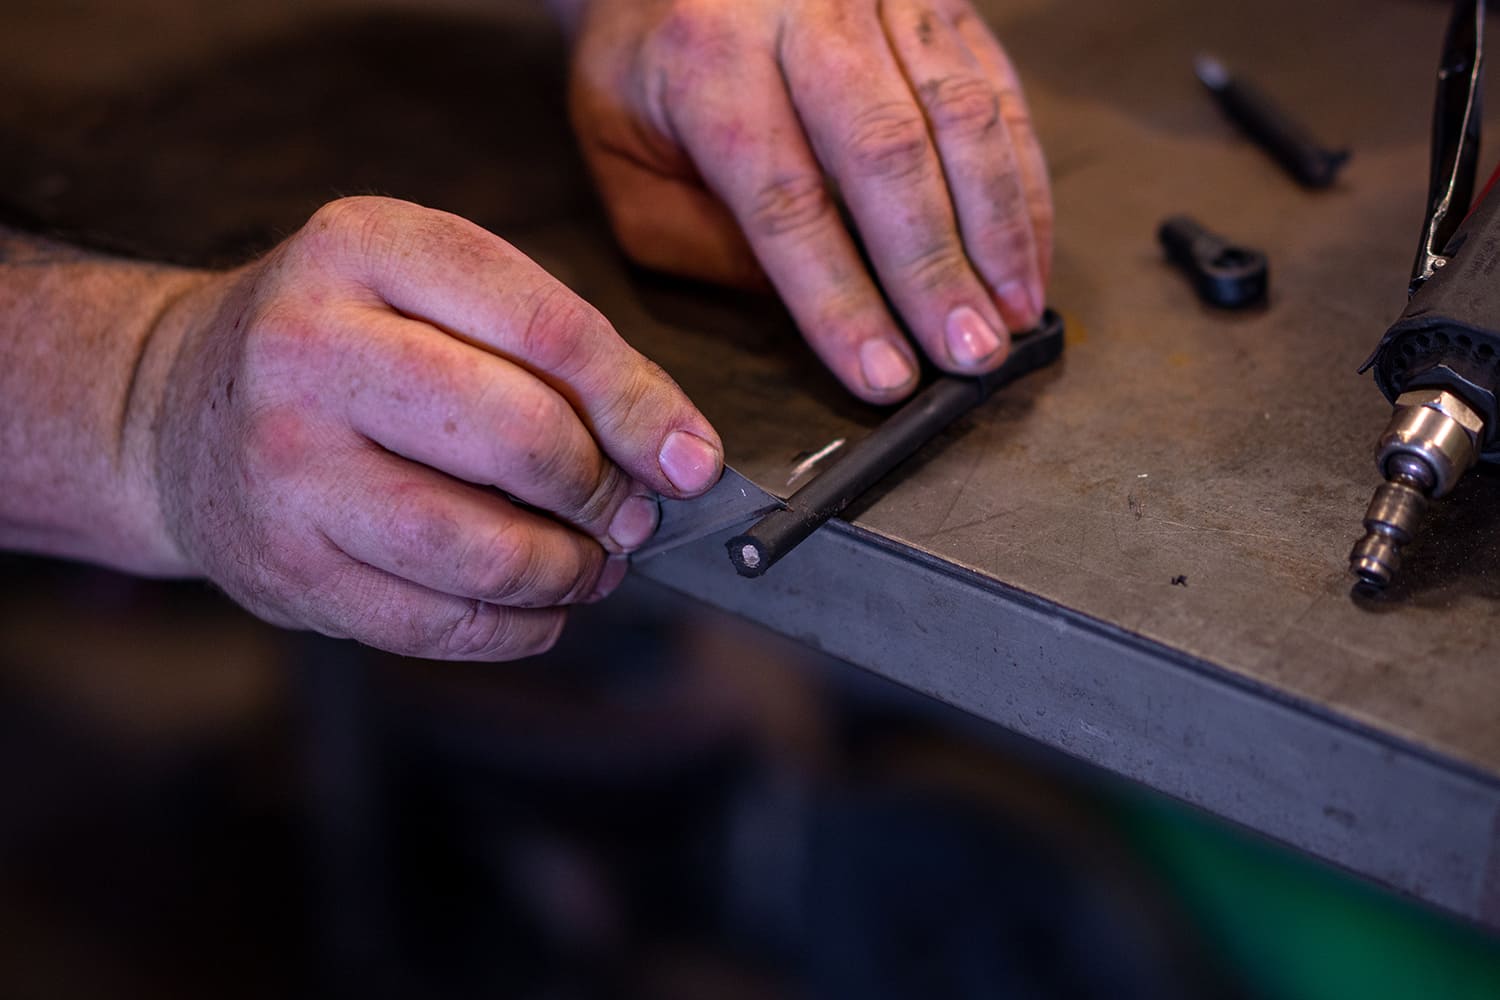
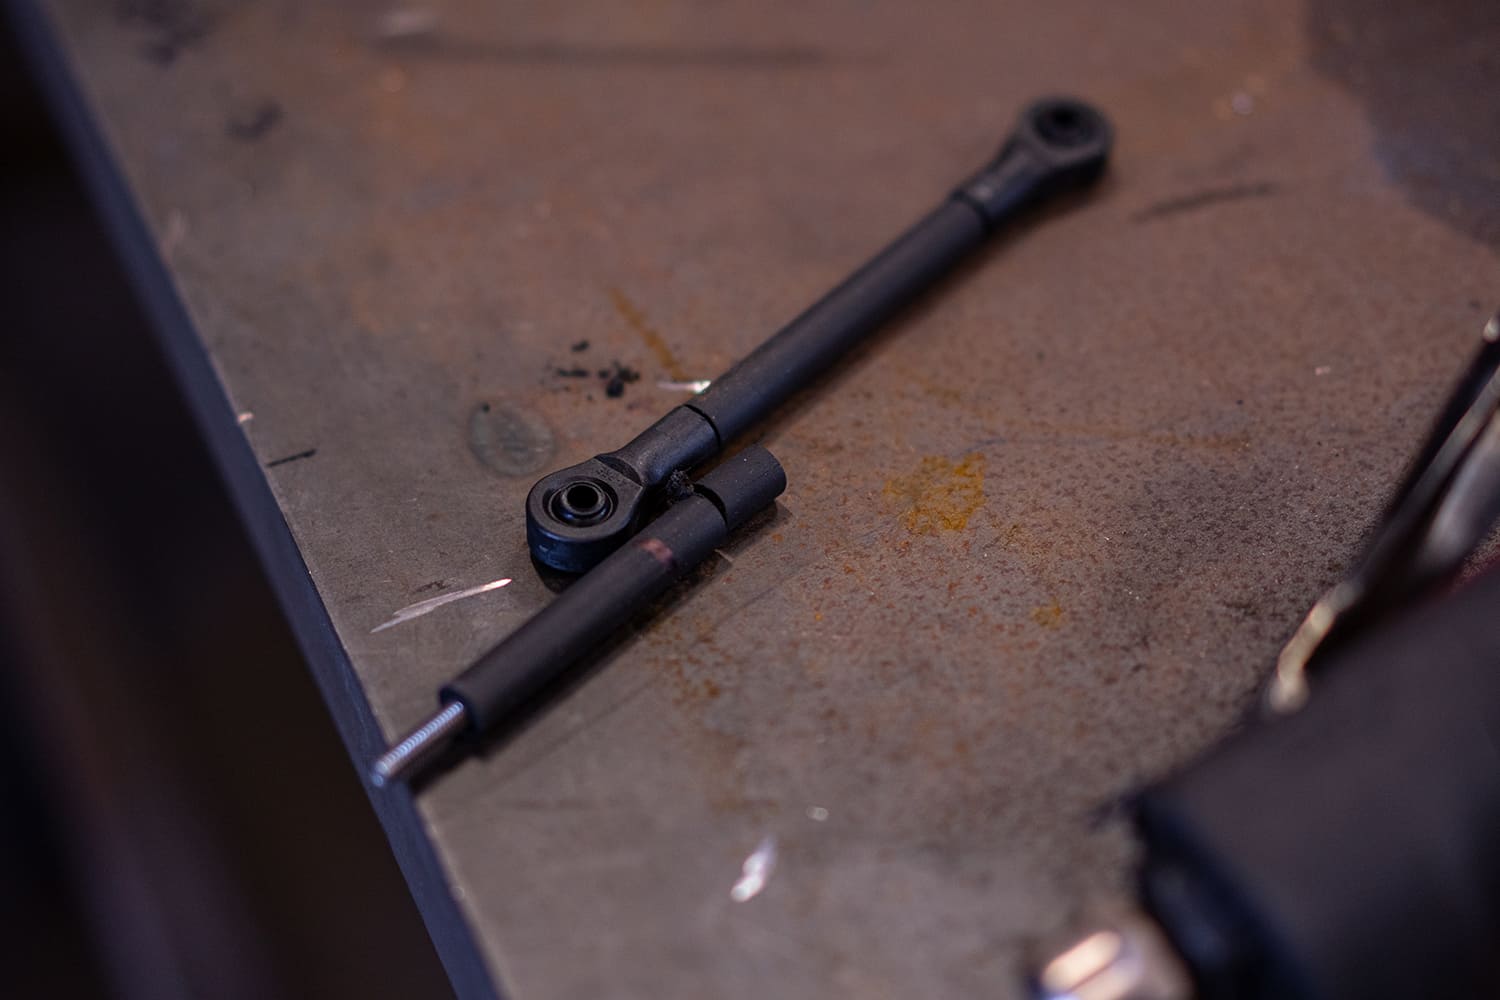
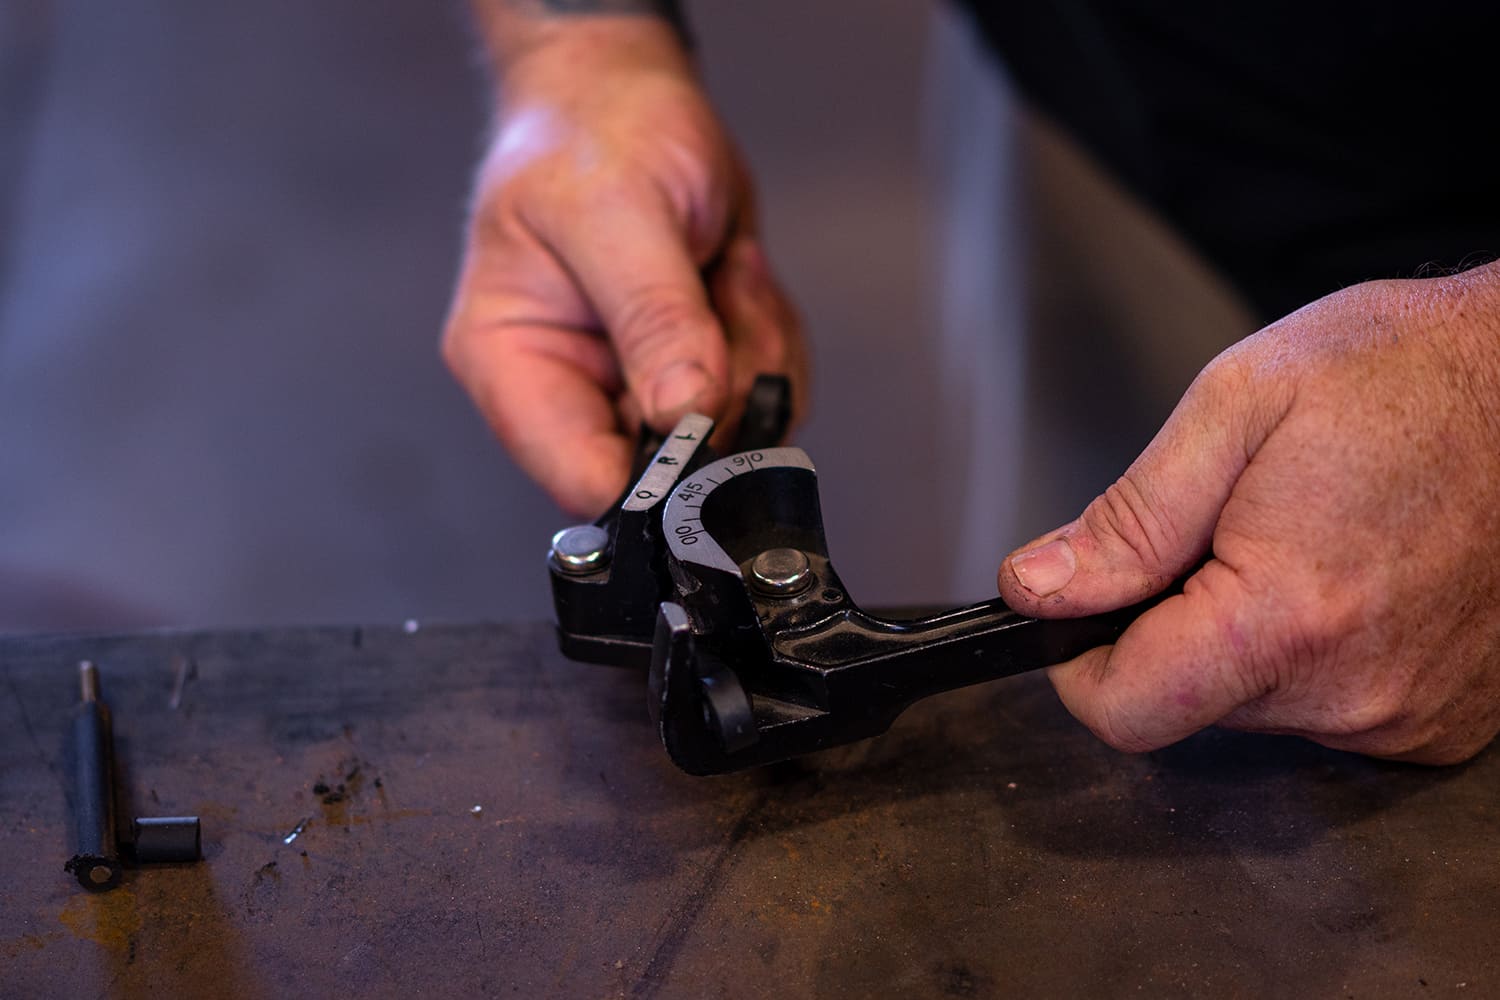
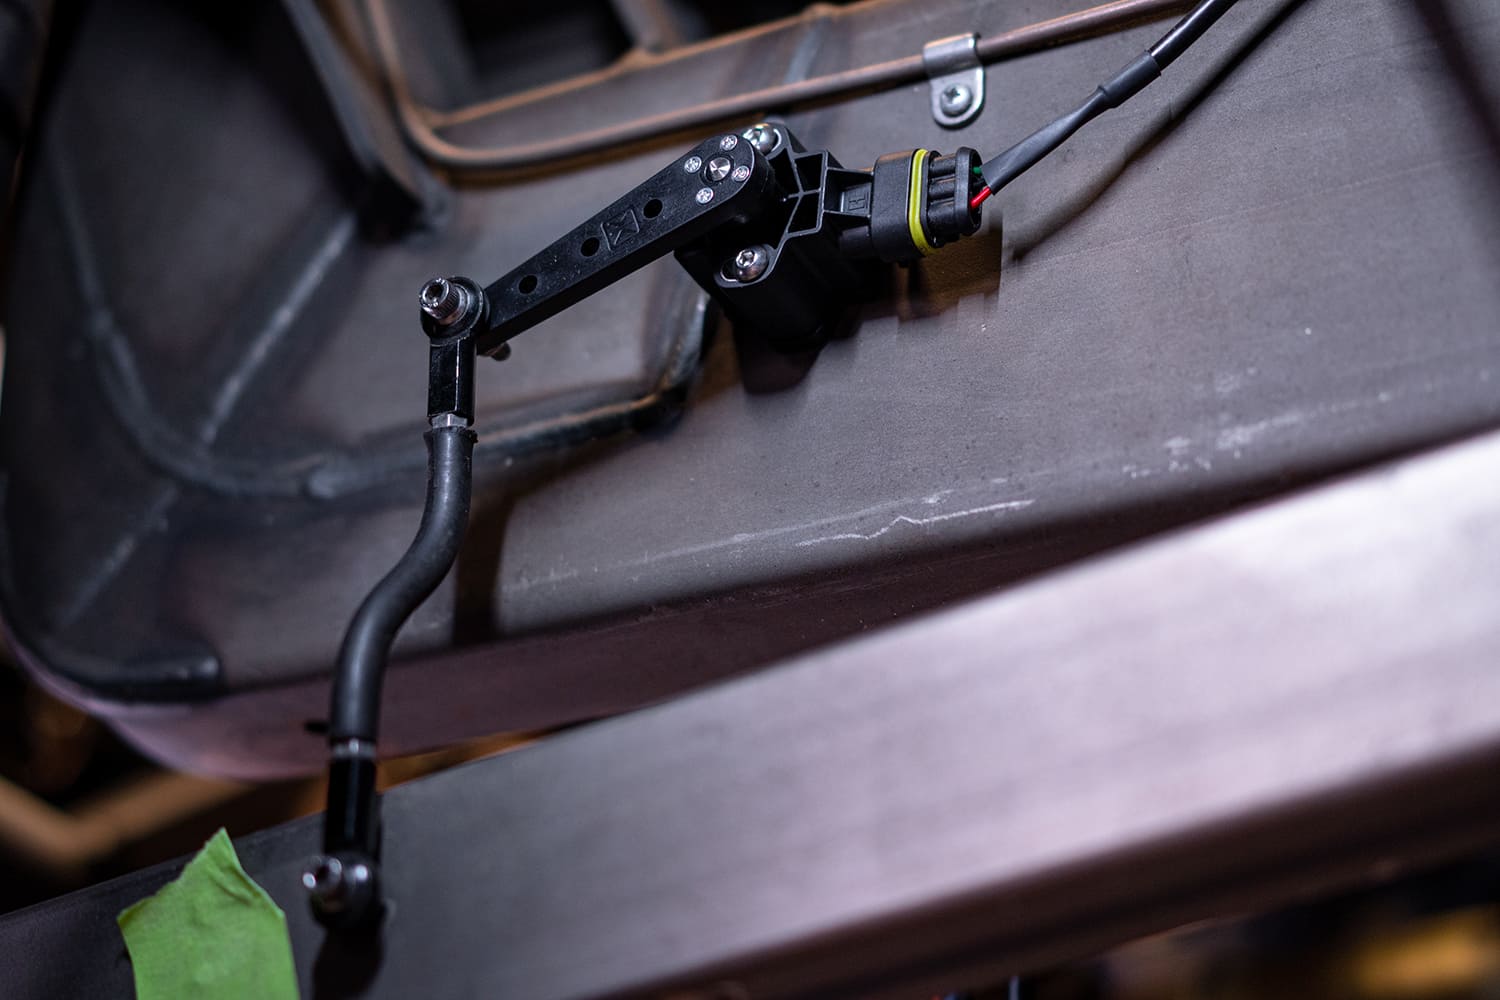
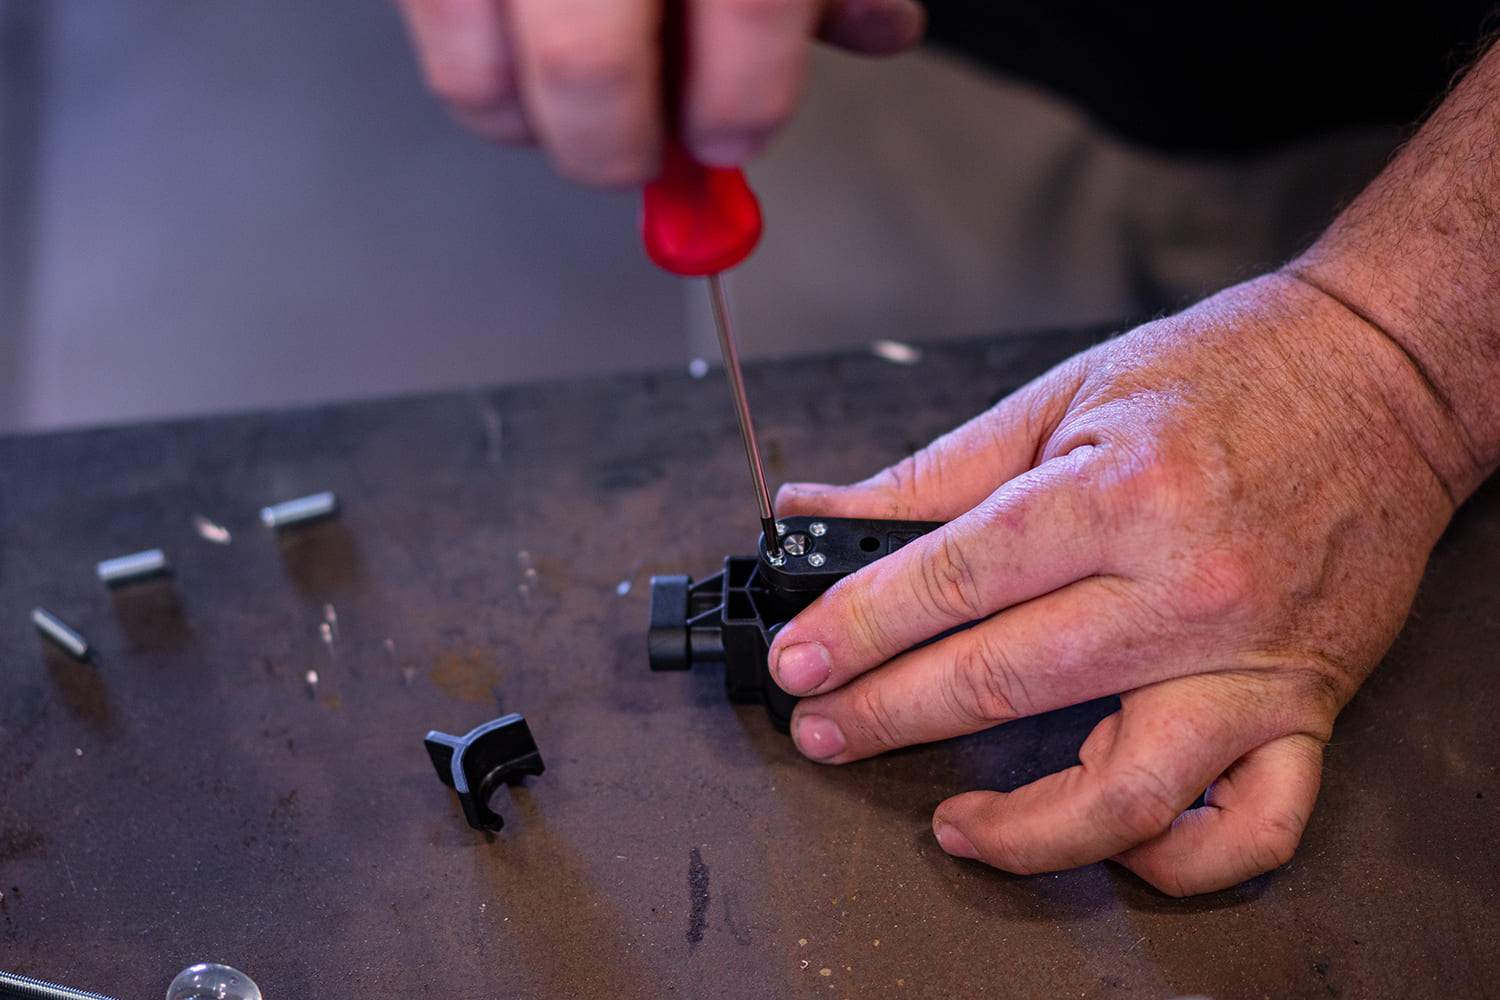
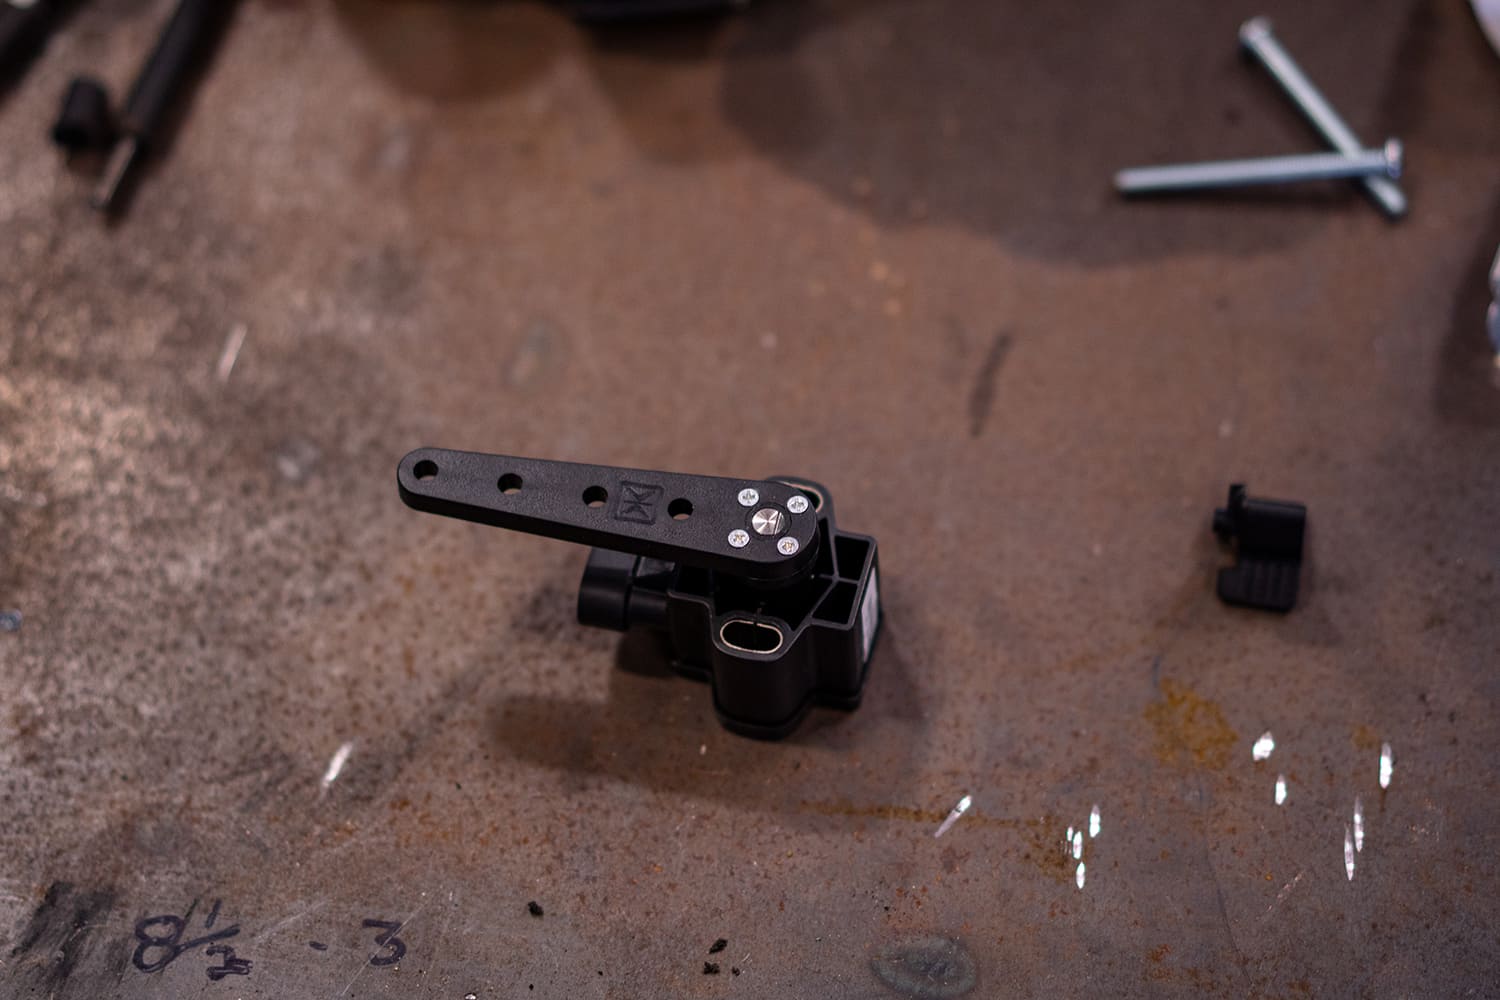
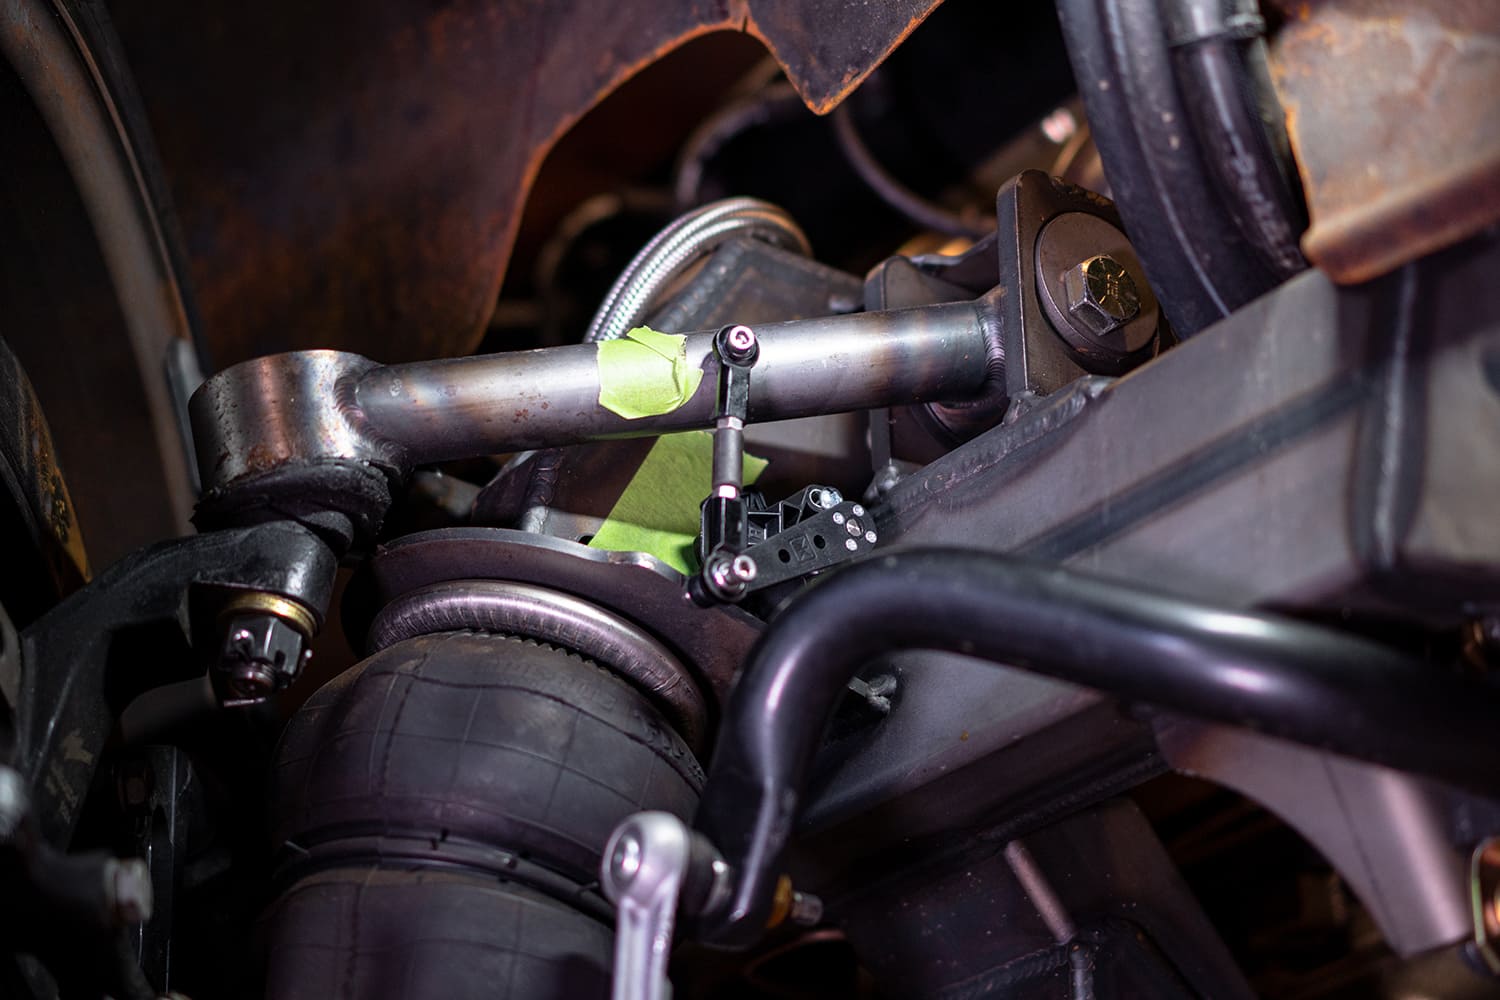
Height+ Height Sensors

The height sensors are the key component to the automatic leveling feature. The sensors measure the distance both directions from your suspension’s set ride height to map the distance between the truck and the pavement. That data is then transmitted to best adjust ride height based on your suspension level settings.

22 Hard air lines bend cleanly into a distribution block mounted underneath the bed
When installing the sensors, you will want the truck to be at the normal ride height so the suspension functions optimally at your regular settings and allows for the most range of motion for the sensors.
23 Overhead angle of VU4 install with symmetrical copper lines on a clean crossmember
The sensor is mounted to the frame in a location where no moving parts or air line will interfere.

24 Frame being drilled with Milwaukee drill for mounting height sensor components

25 Locating and test fitting the ride height sensor bracket to the side of the frame
The included stop guide is used to indicate the range of motion necessary without allowing the arm to be overextended. The extended and compressed suspension travel is measured to determine the length that the linkage needs to be.

26 Sensor bracket fully mounted and aligned with copper air line above it

27 Adjusting bracket linkage for AccuAir e Level height sensor on frame rail
The sensor rod is cut to the necessary length. The outer sleeve is cut away and then the threaded rod is cut as well before attaching the heim joint.

28 Connecting the link arm from suspension to AccuAir height sensor bracket29 Marking the plastic sensor rod to cut it to proper suspension travel length

30 Deburring the trimmed sensor link rod to prep it for final install
The linkage should cycle as straight up and down as possible to not bind and properly measure the suspension height. Standoffs can be used for this purpose, or as Devious Customs prefers to do, the linkage rod is bent to match up to the lower link bar on the Roadster Shop chassis. Make sure to consider the bend in the rod when measuring its height.

31 Cut and sized AccuAir sensor rods laid out with rod ends ready for linkage32 Manual tube bender adjusted for exact ride height sensor rod angle

33 Fully mounted height sensor linkage on frame and lower control arm
The sensor body itself should always be in the correct position and not mounted upside down, so the arm is removed and flipped for the front Height sensors to best fit the upper control arm mounting location.

34 Securing the arm to AccuAir e Level sensor housing with fine thread screws

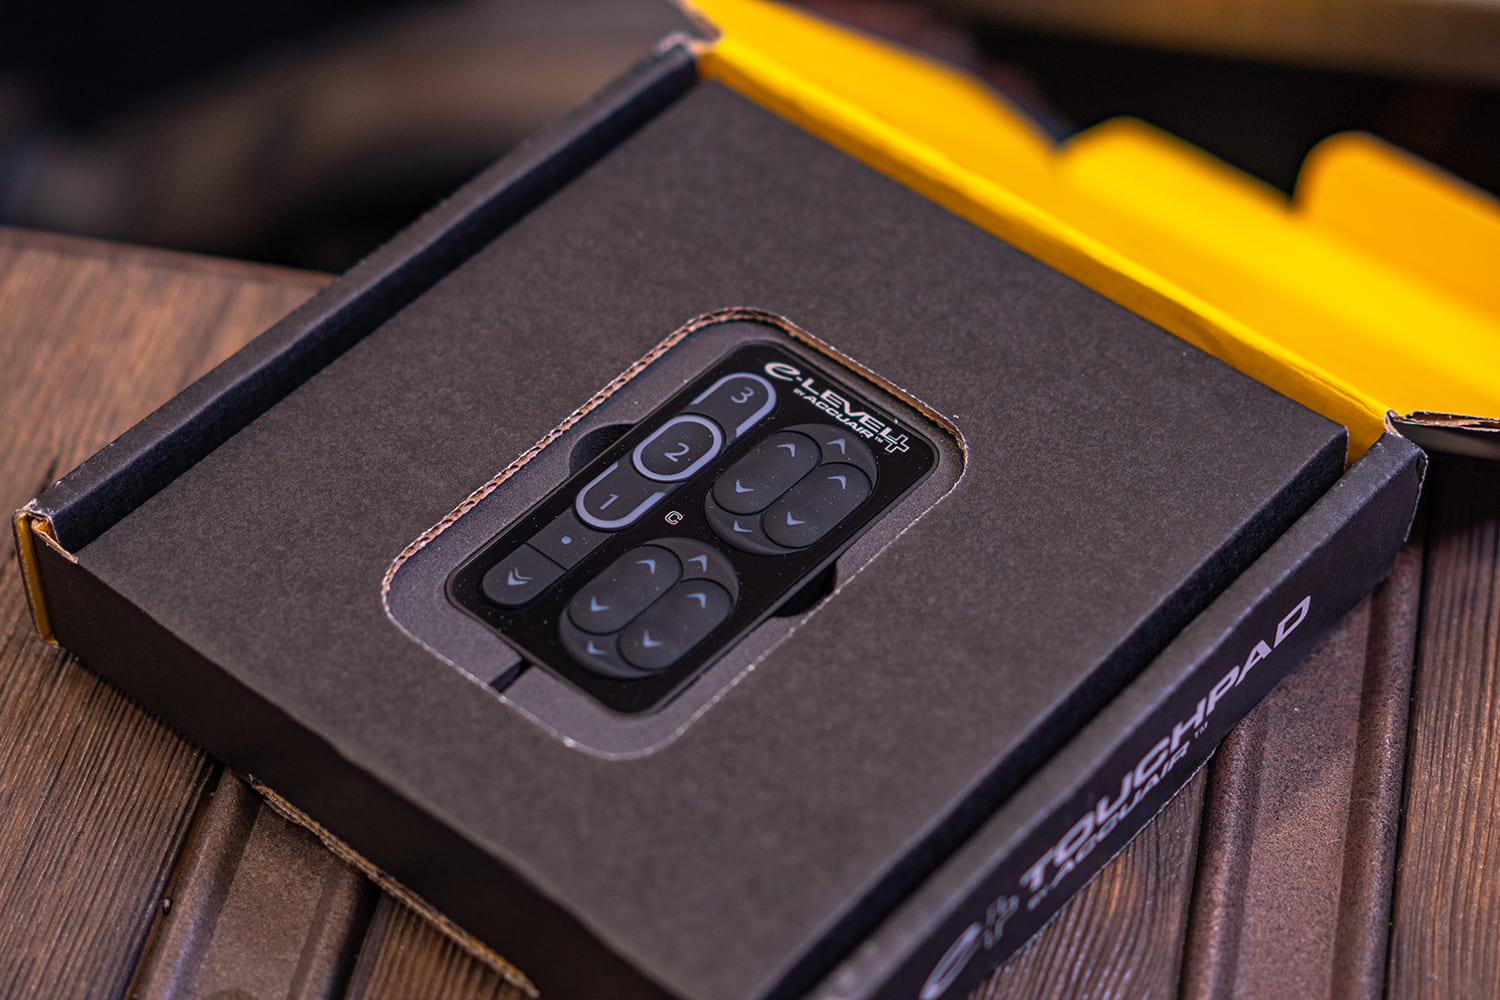
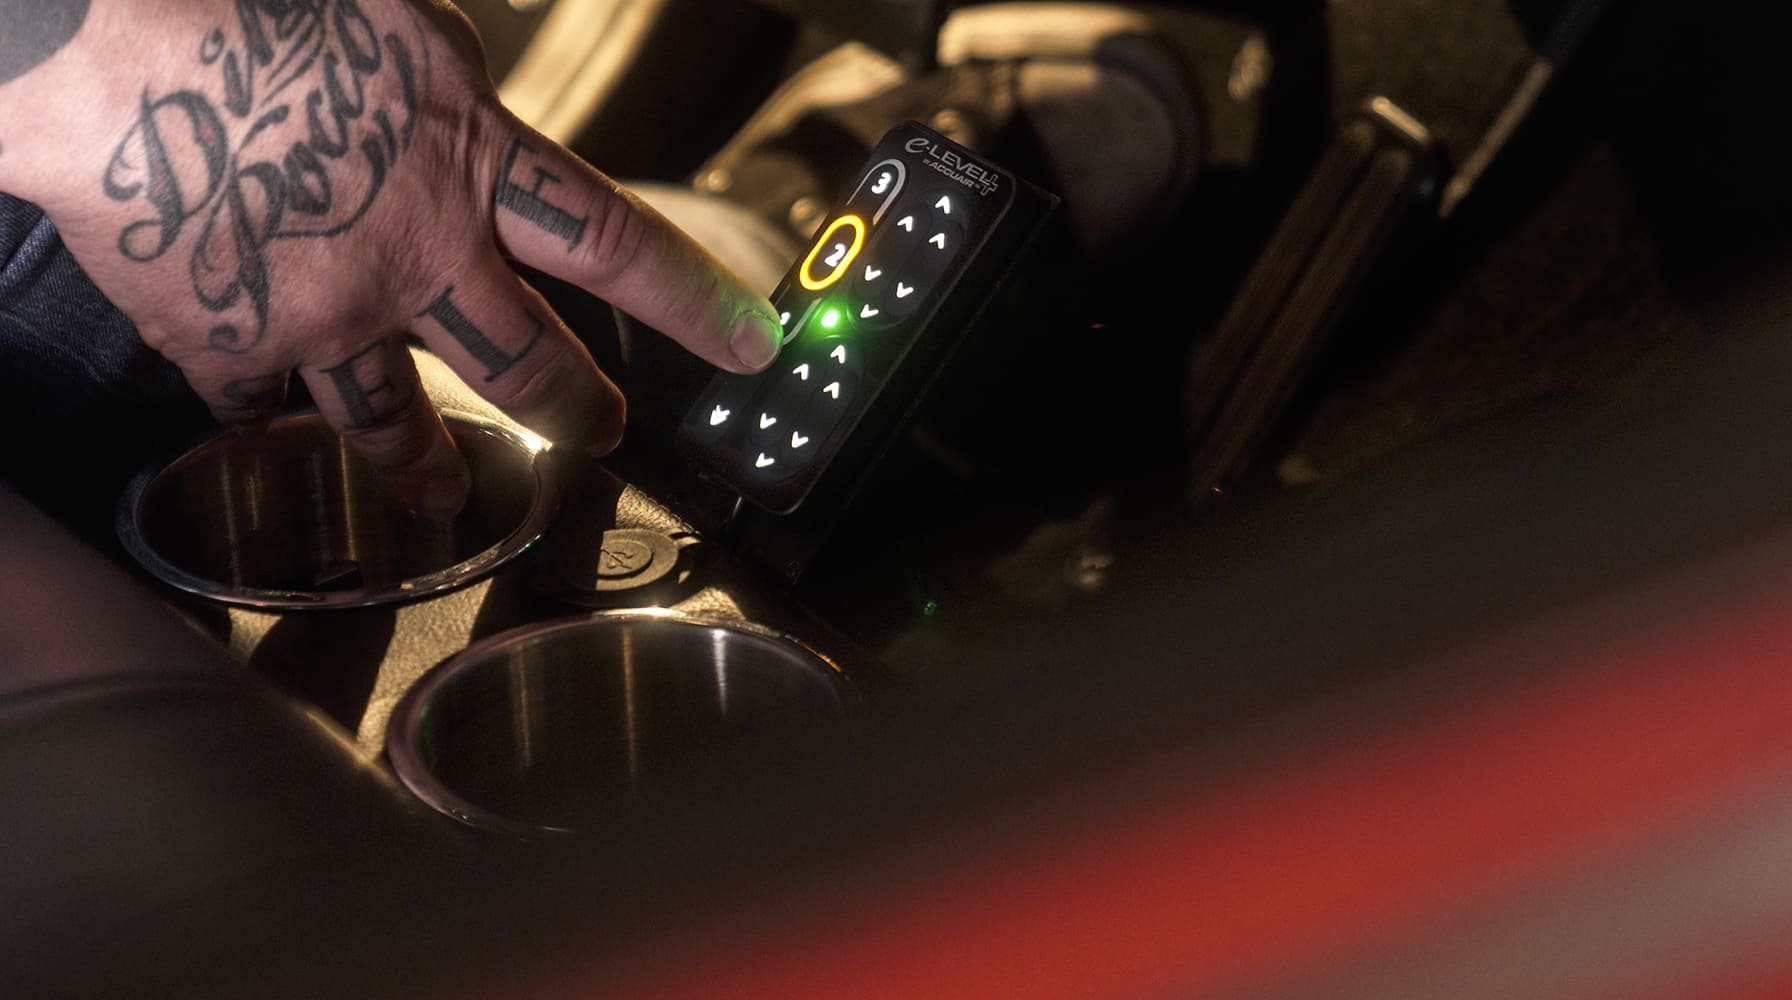
Touchpad+ Controller, App & Setup

Once everything is installed, the AccuAir e-Level+ system automatically calibrates itself and you are ready to roll. The plug-in Touchpad+ Controller or Bluetooth 5.0 phone app allows for the preset heights to be selected with just the tap of a button. Each corner can also be controlled independently.

Further protection to your vehicle’s electrical system was added to the controller with a colored LED indicating when your air compressor is running. This notification allows you to not only make sure your compressor isn’t having an issue but to know when you have enough air in your tanks to handle the pressure needed to cruise down the road.

35 Fully assembled sensor and linkage arm ready for suspension articulation
The e+ Touchpad Controller and phone app are used to start calibrating the system. The truck needs to be on level ground.
36 Rear height sensor installed on the 4 link bar with green tape mockup
Once calibrated, the Fire Apache is ready to roll!

37 New AccuAir e Level+ touchpad controller unboxed and ready for install38 Controller mounted inside cab with illuminated button indicating preset height 2

Check out this story in our digital edition here.

Sources

AccuAir Suspension
(833) 247-3696
accuair.com

Devious Customs
(951) 359-9666
deviouscustoms.com

Related Articles

Search Our Site