By Jason Mulligan & Marcel Venable – Images by Jason Mulligan
It is no secret that OBS trucks are becoming increasingly popular. While most seem to want that classic single-cab, shortbed sport truck, the 1990s SUV counterparts are even more accessible and most of the time allow for the same custom parts to be applied.
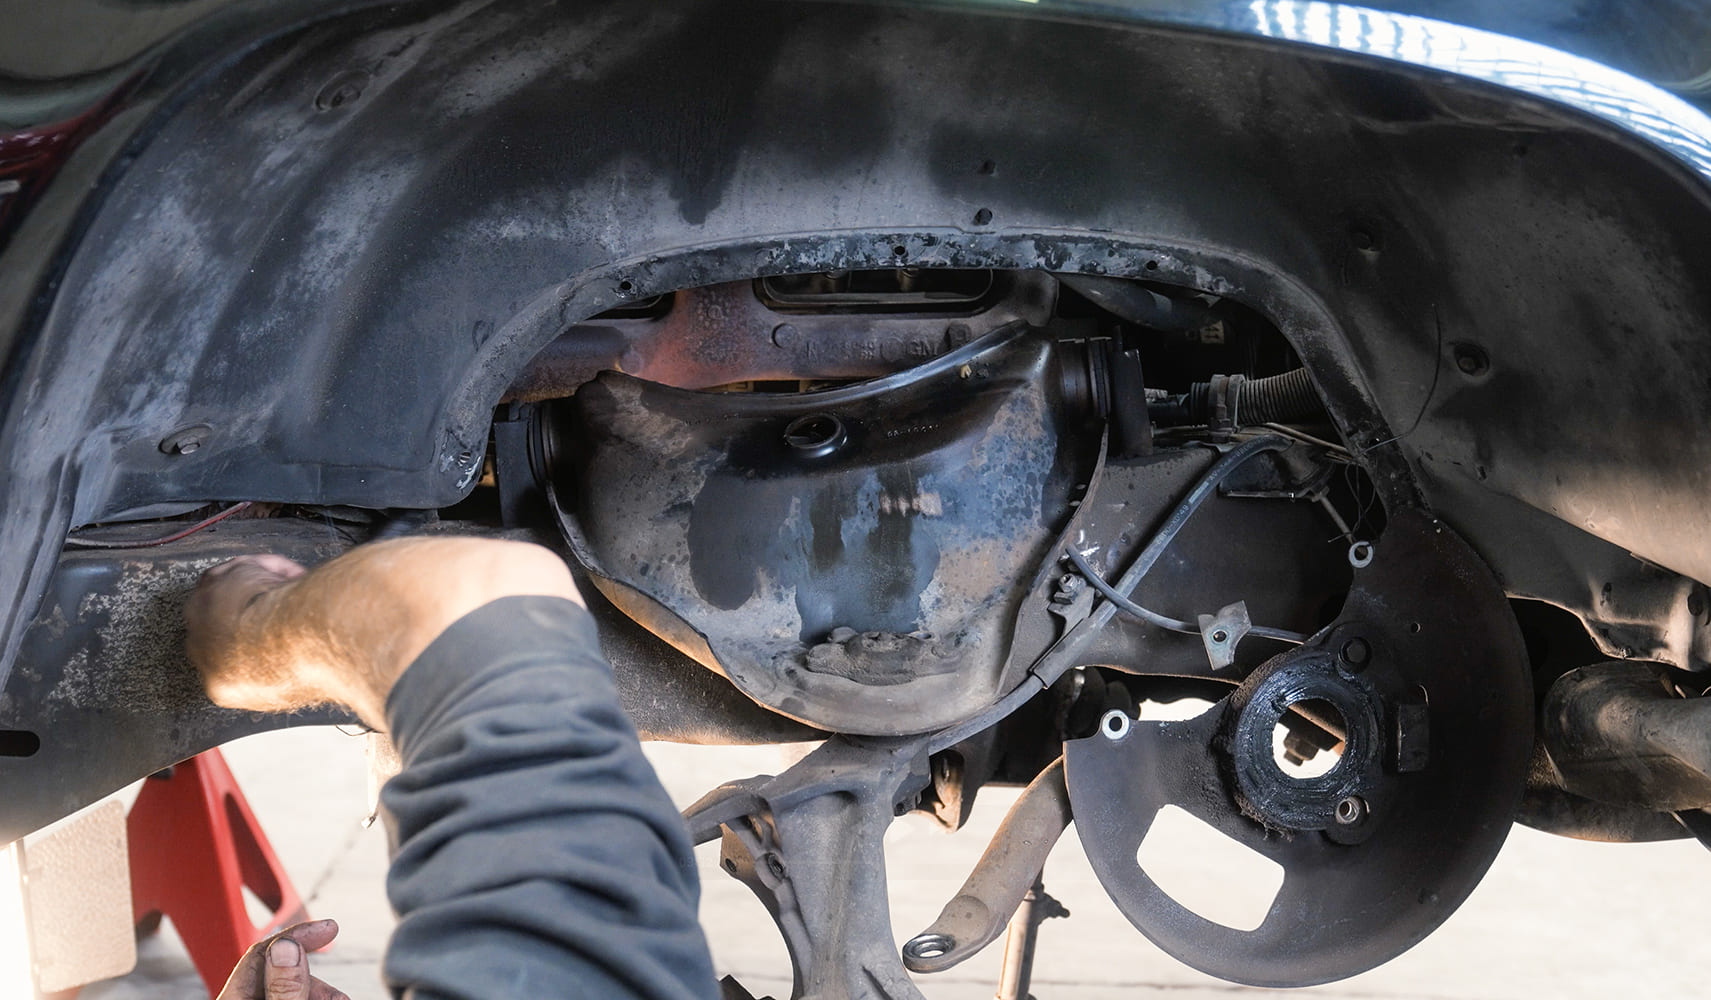
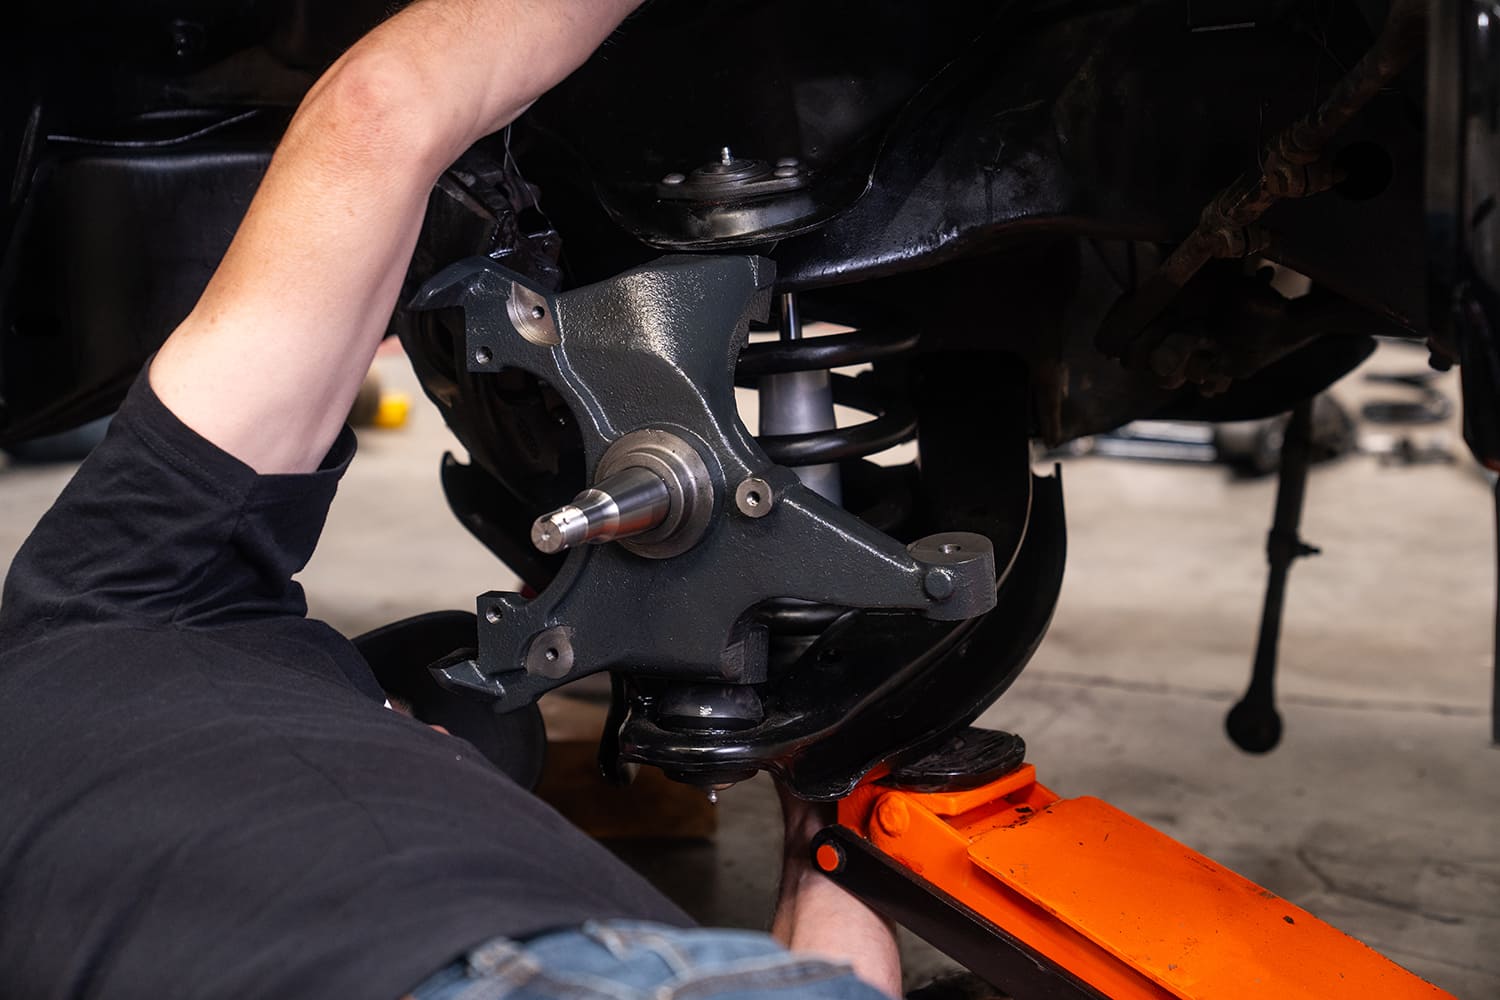
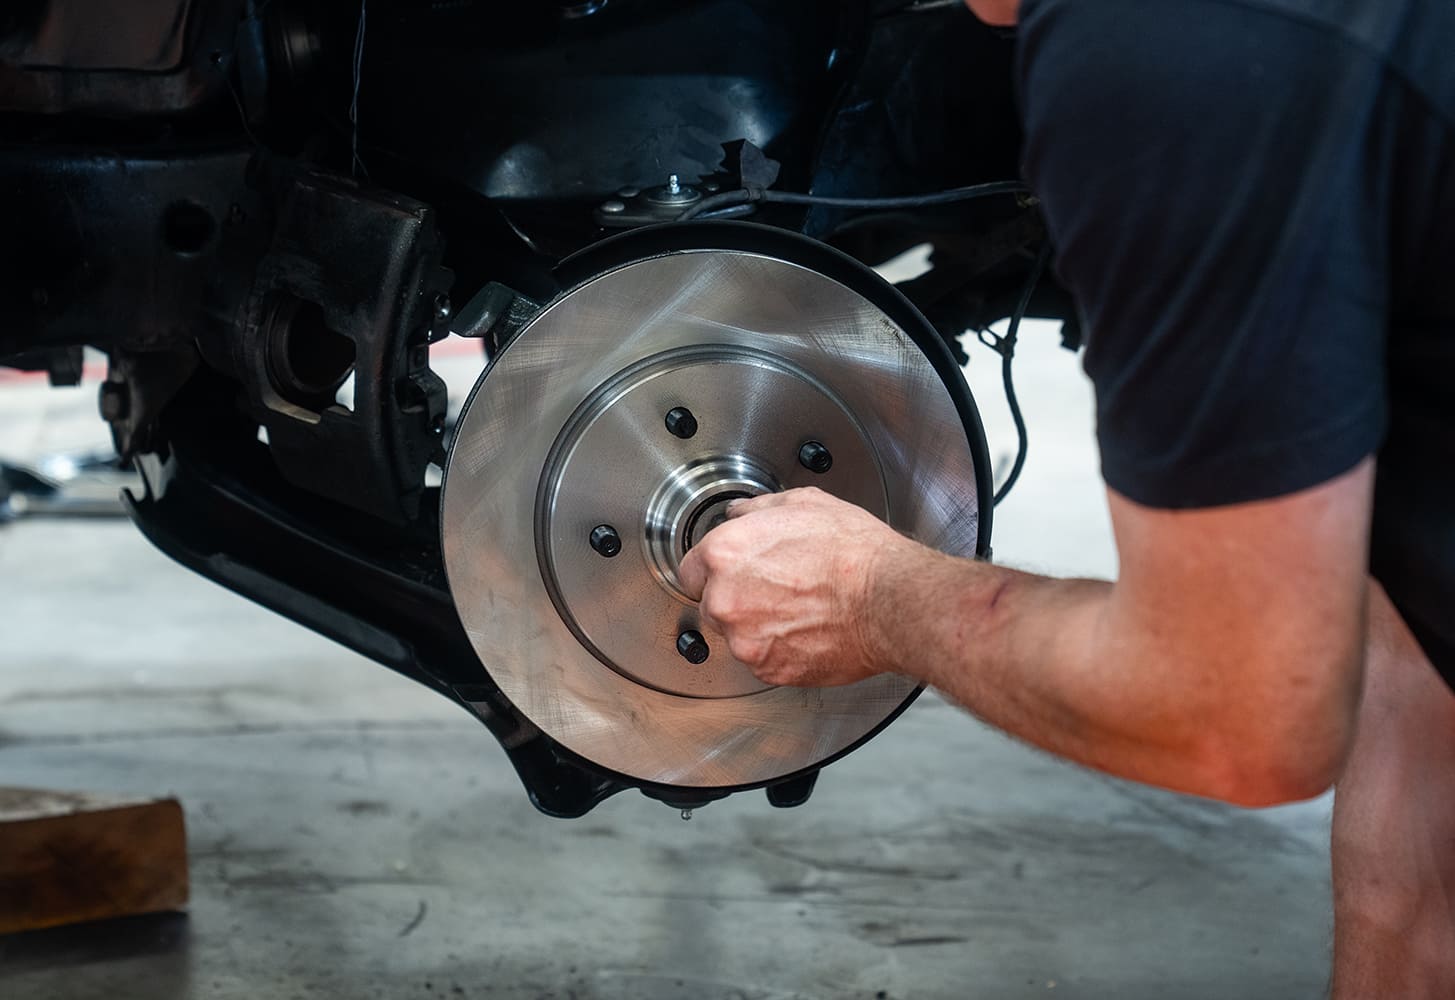
Starting with the front of the Tahoe, Mark Oja of OBS Headquarters removed all the factory suspension, including the upper and lower control arms. Although not required in this kit, we felt it was time to replace the 25-year-old ball joints and bushings as well when installing Belltech’s Street Performance lowering kit on this Tahoe.
When it comes to the Tahoe platform in particular, four-door versions took over for the sporty two-door Blazer option as more luxury-style SUVs became popular in the mid-to-late 1990s. Toward the tail end of the OBS line, Chevrolet used leftover Tahoes and parts to create a one-year-only Tahoe Limited Edition.
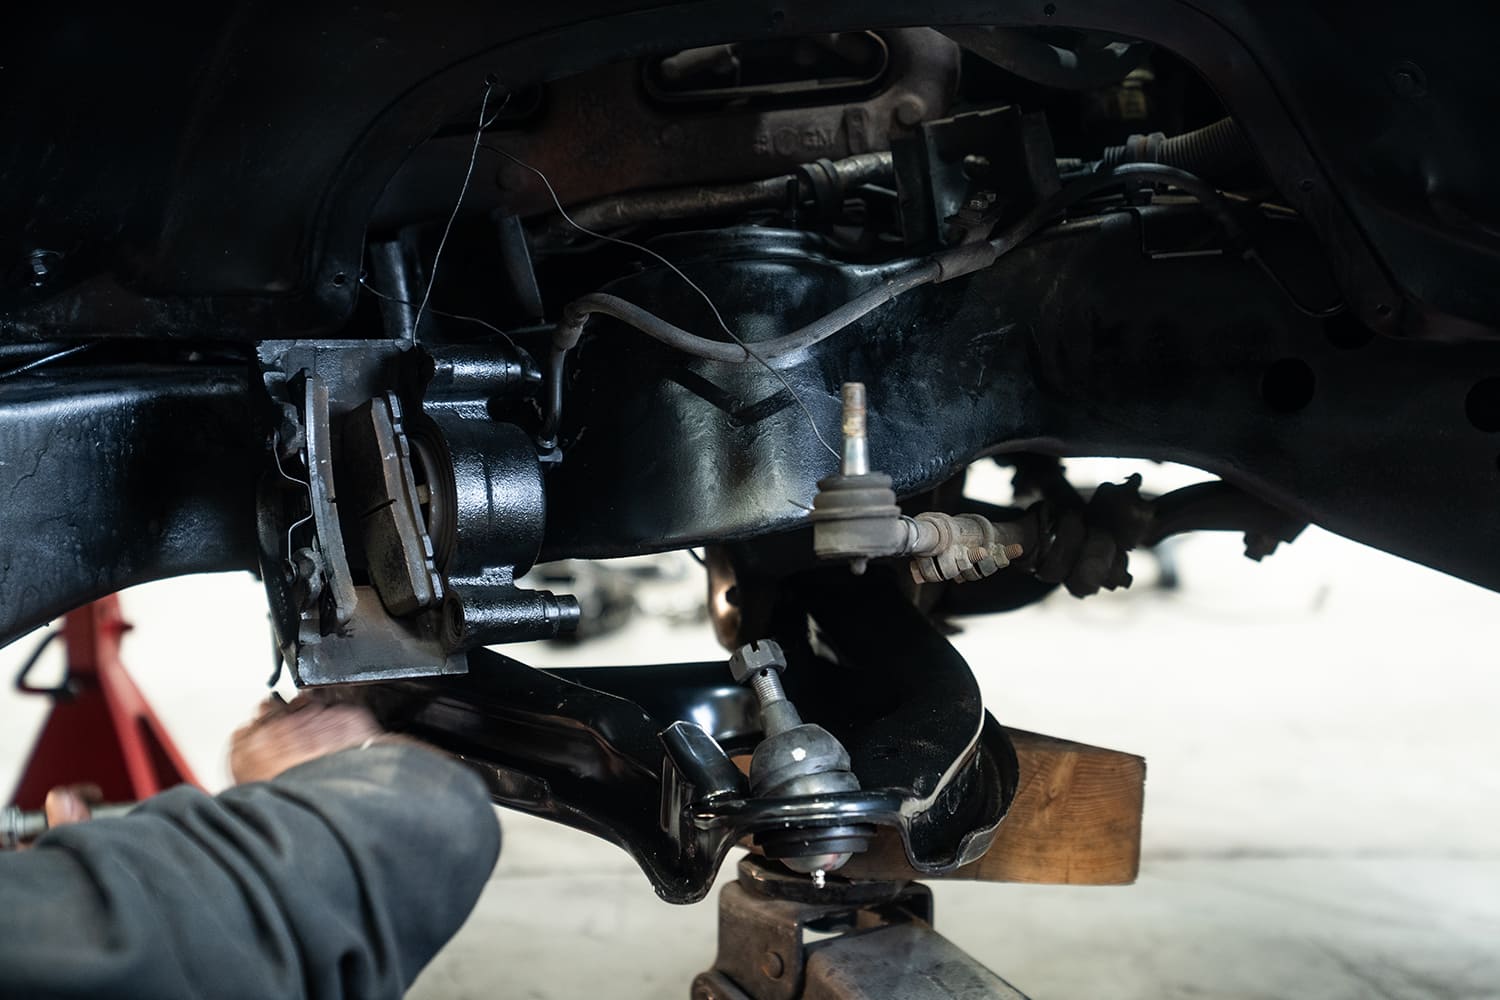
Rather than removing and pressing in new rubber, we picked up a set of replacement MOOG Suspension arms from Summit Racing. The bushings and ball joints are already pressed in and assembled. Installing the lower control arm back into the frame can be a little tricky, so with the assistance of a floor jack positioned over the lower control arm along with a scrap 2×4 allows an even amount of force, which will help guide the control arm back into the frame.
It is this optioned-out Tahoe that we started restoring and customizing. One of the first tasks on the agenda was replacing and lowering the suspension a mild 4 inches all the way around with Belltech components. Being that this Tahoe has 4-inch side skirts, we didn’t want to go much lower and run into any issues cruising around town.
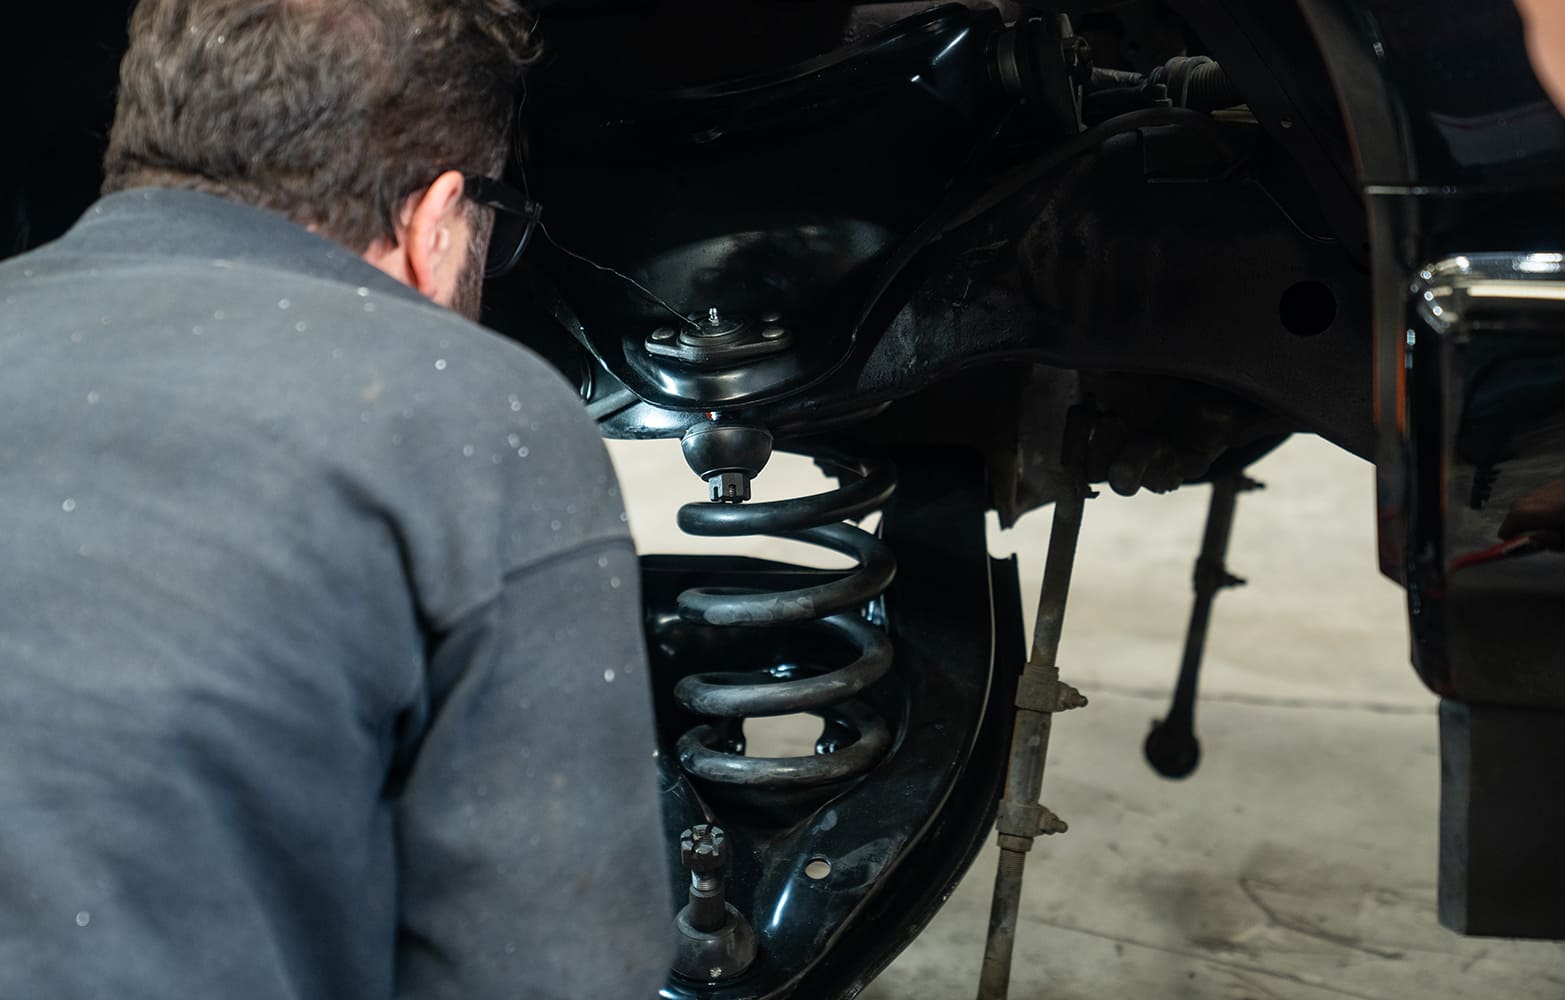
The first part of the drop comes from a Belltech lowering coil spring. Their Pro Spring is modular and can provide a 3-inch drop, or with the supplied spacer installed on top, a 2-inch drop. Make sure that the bottom end of the spring is clocked into the stop on the lower control arm.
The Tahoe Limited came about an inch lower than a regular Tahoe, but this was hardly low enough, and honestly no one could really tell anyway. This is thanks to the “Police Package” that consisted of heavier duty brakes, suspension parts, and a set of performance shocks, which of course were beyond mushy by this time. All of the “upgraded suspension” would be replaced with new MOOG parts from Summit Racing and we can use Belltech’s standard 4/4 Tahoe drop lowering kit on the Tahoe Limited.
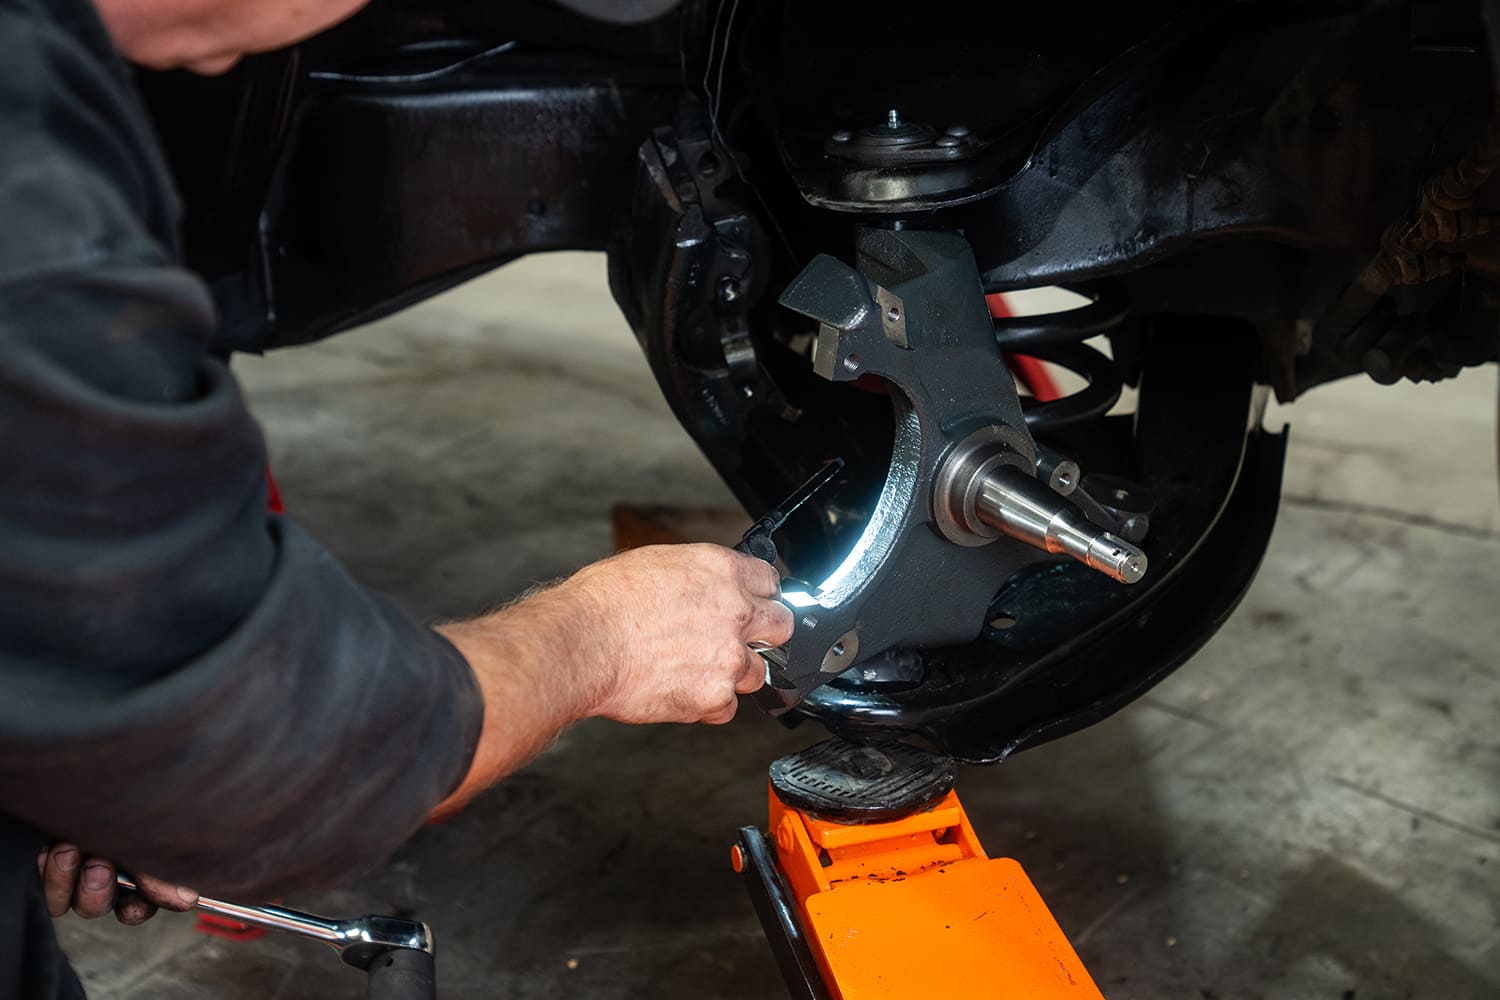
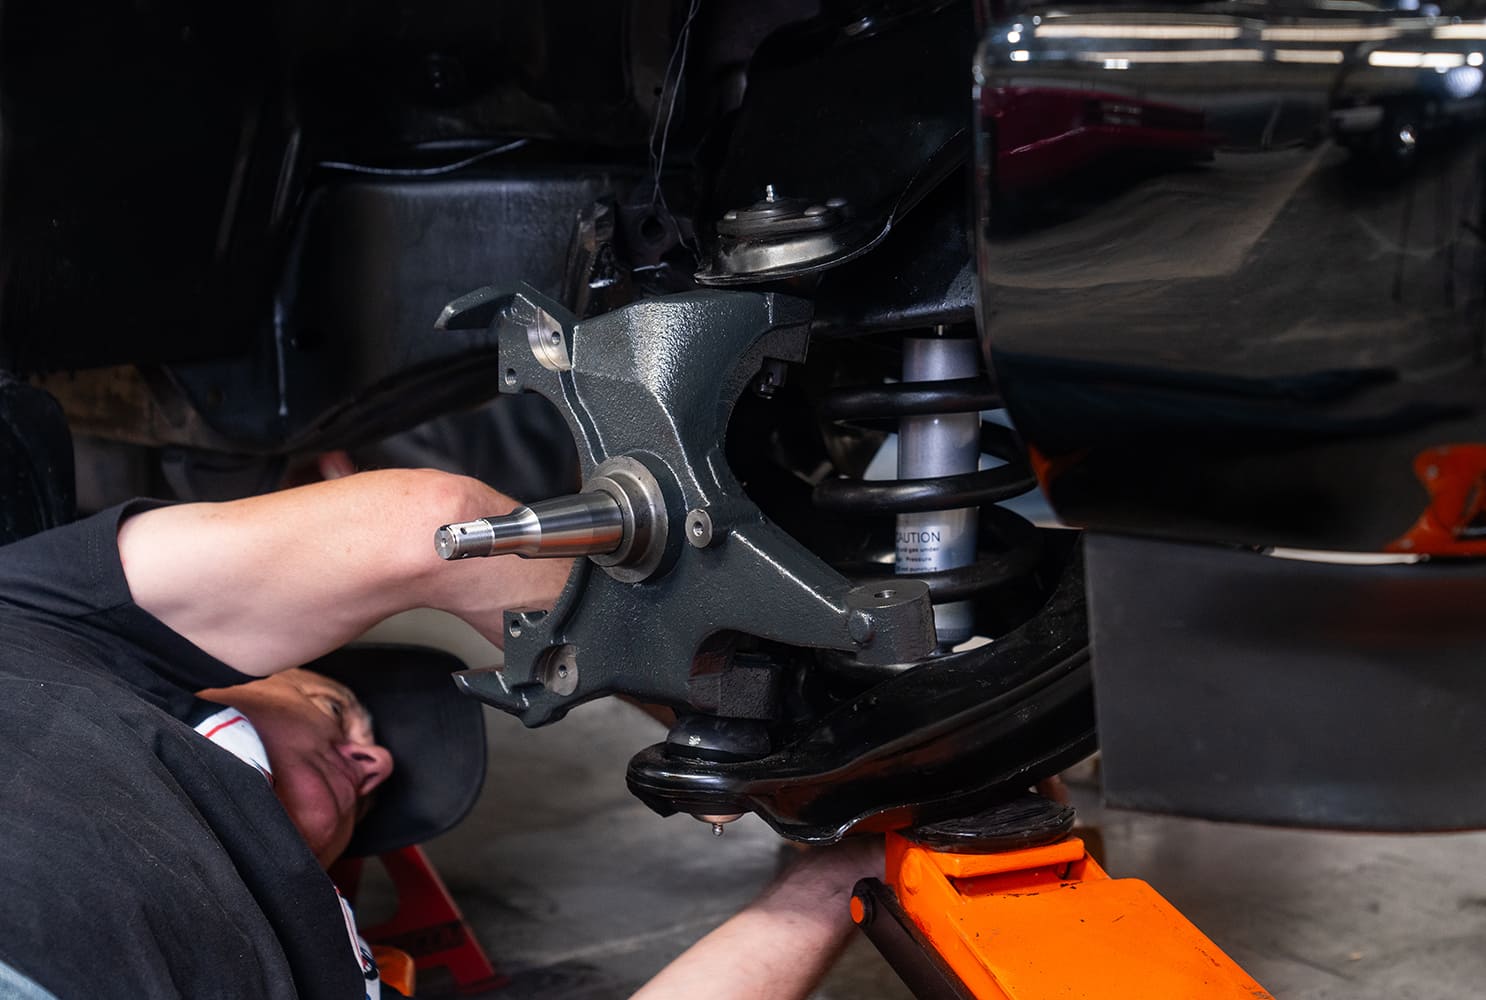
Now, using a floor jack to help stabilize the control arm/coil spring combo, install the 2-inch Belltech drop spindle to the upper and lower arms at the ball joints and install the castle nuts. Don’t forget the cotter pins!
Visit Auto Revolution on YouTube to watch the install videos.
To make things a bit easier on us, we went ahead and installed the front shocks, which will keep the coil spring in place, allowing us to ditch the floor jack out of our way for now while we tighten things up.
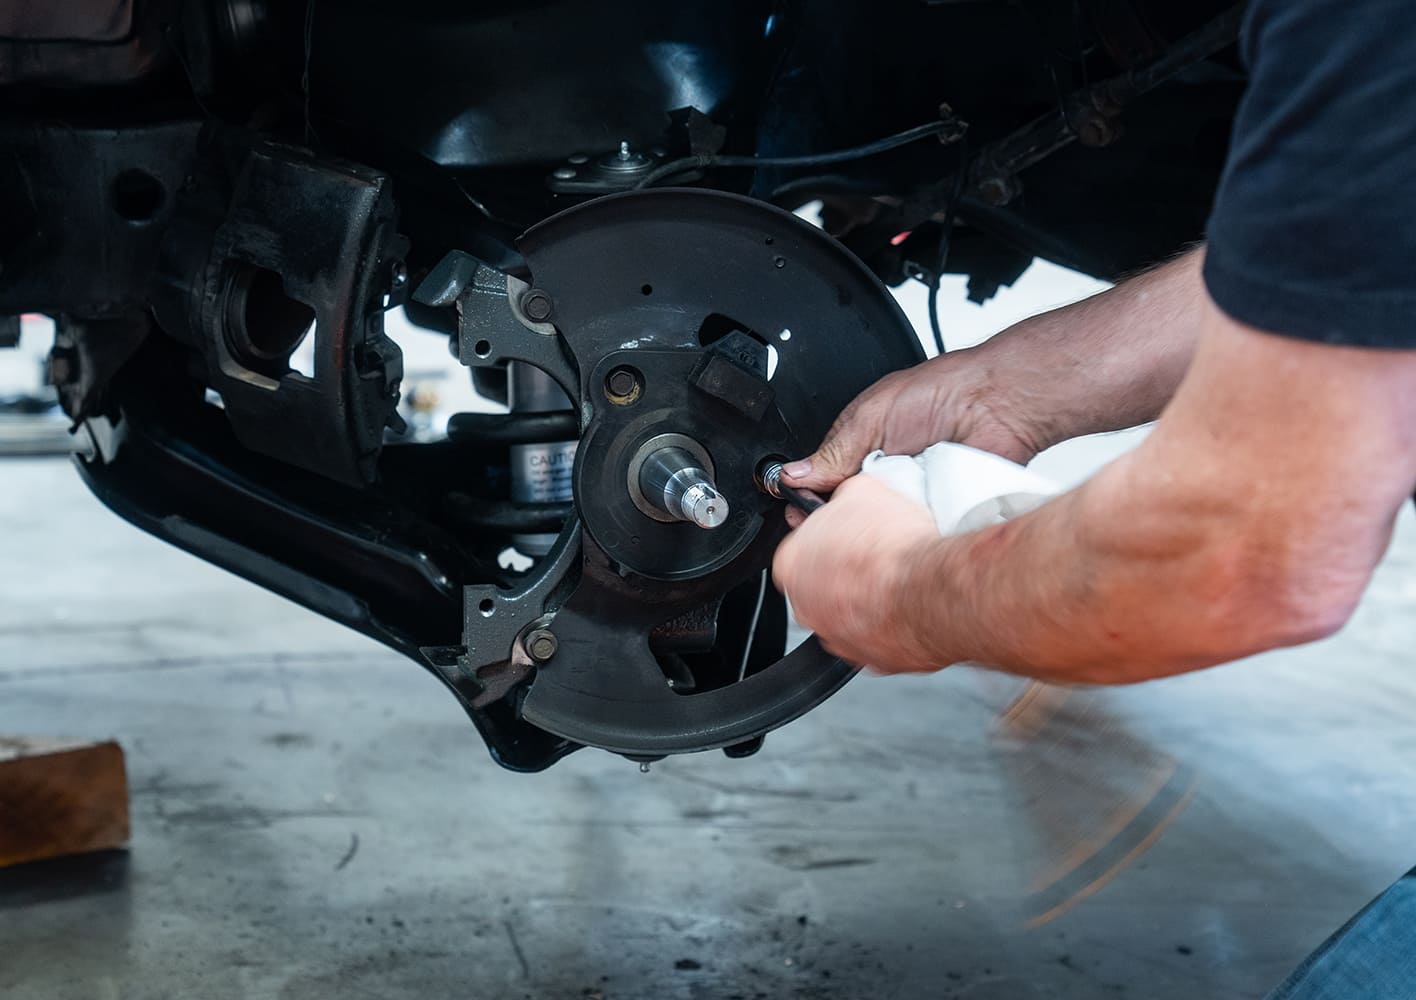
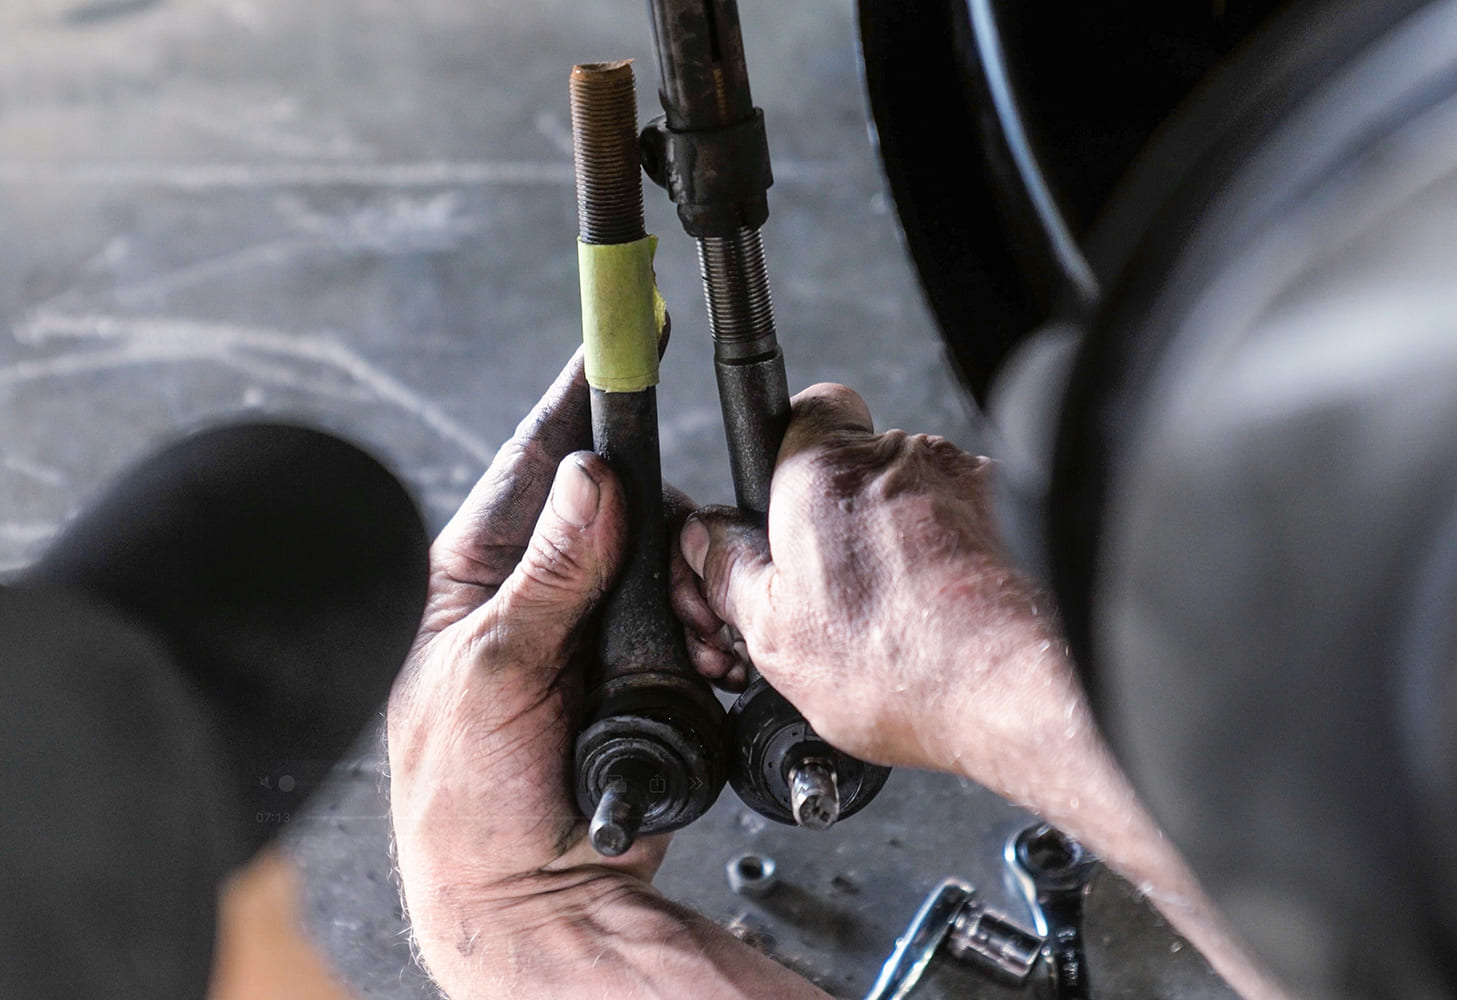
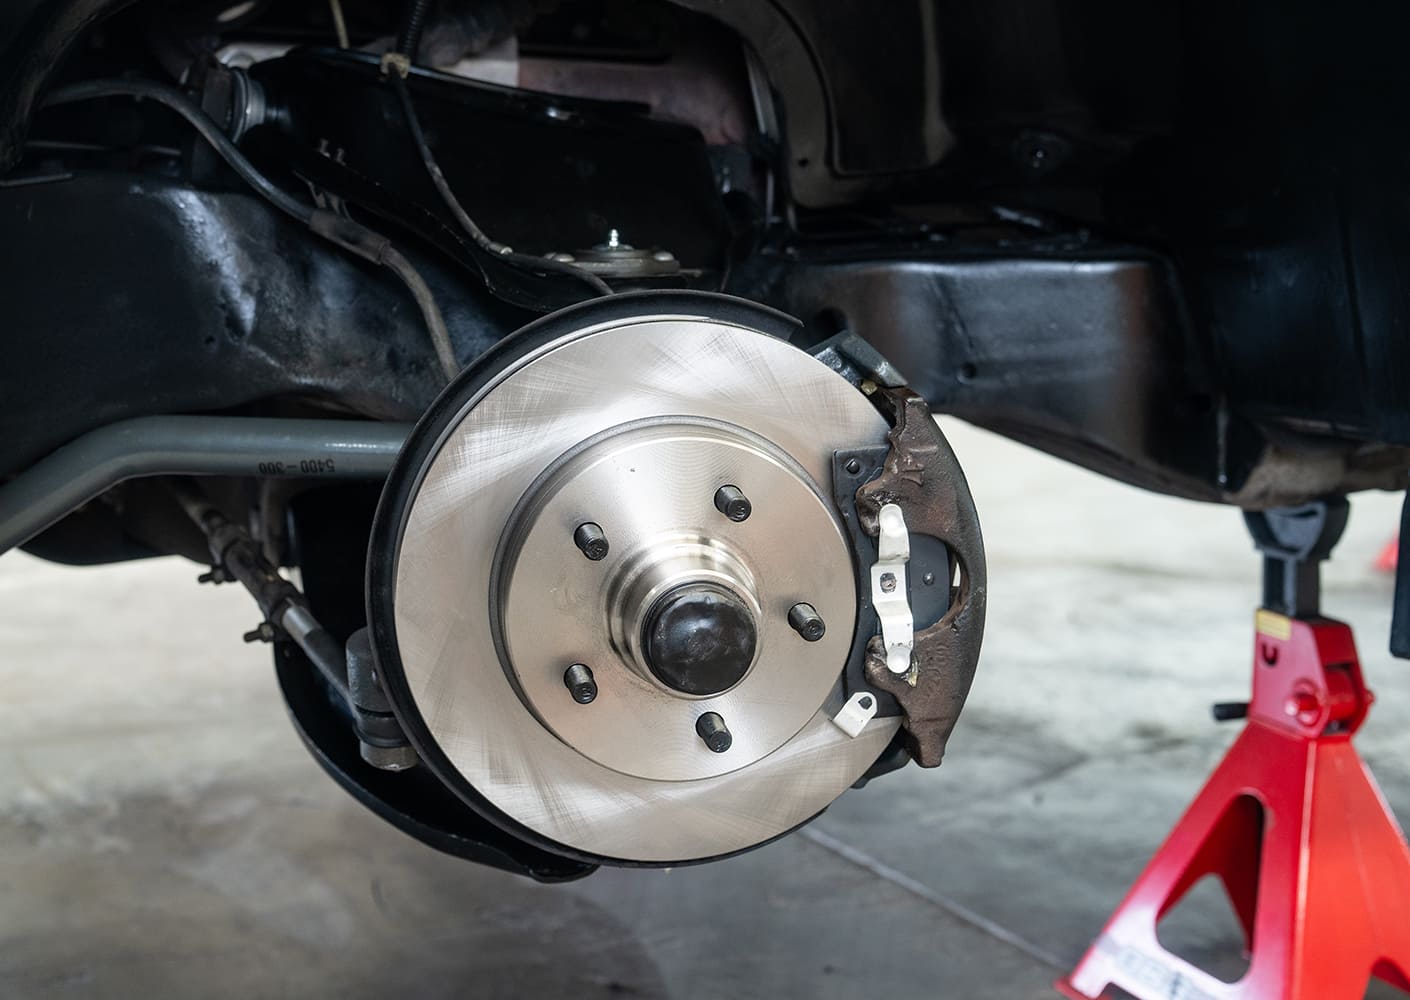
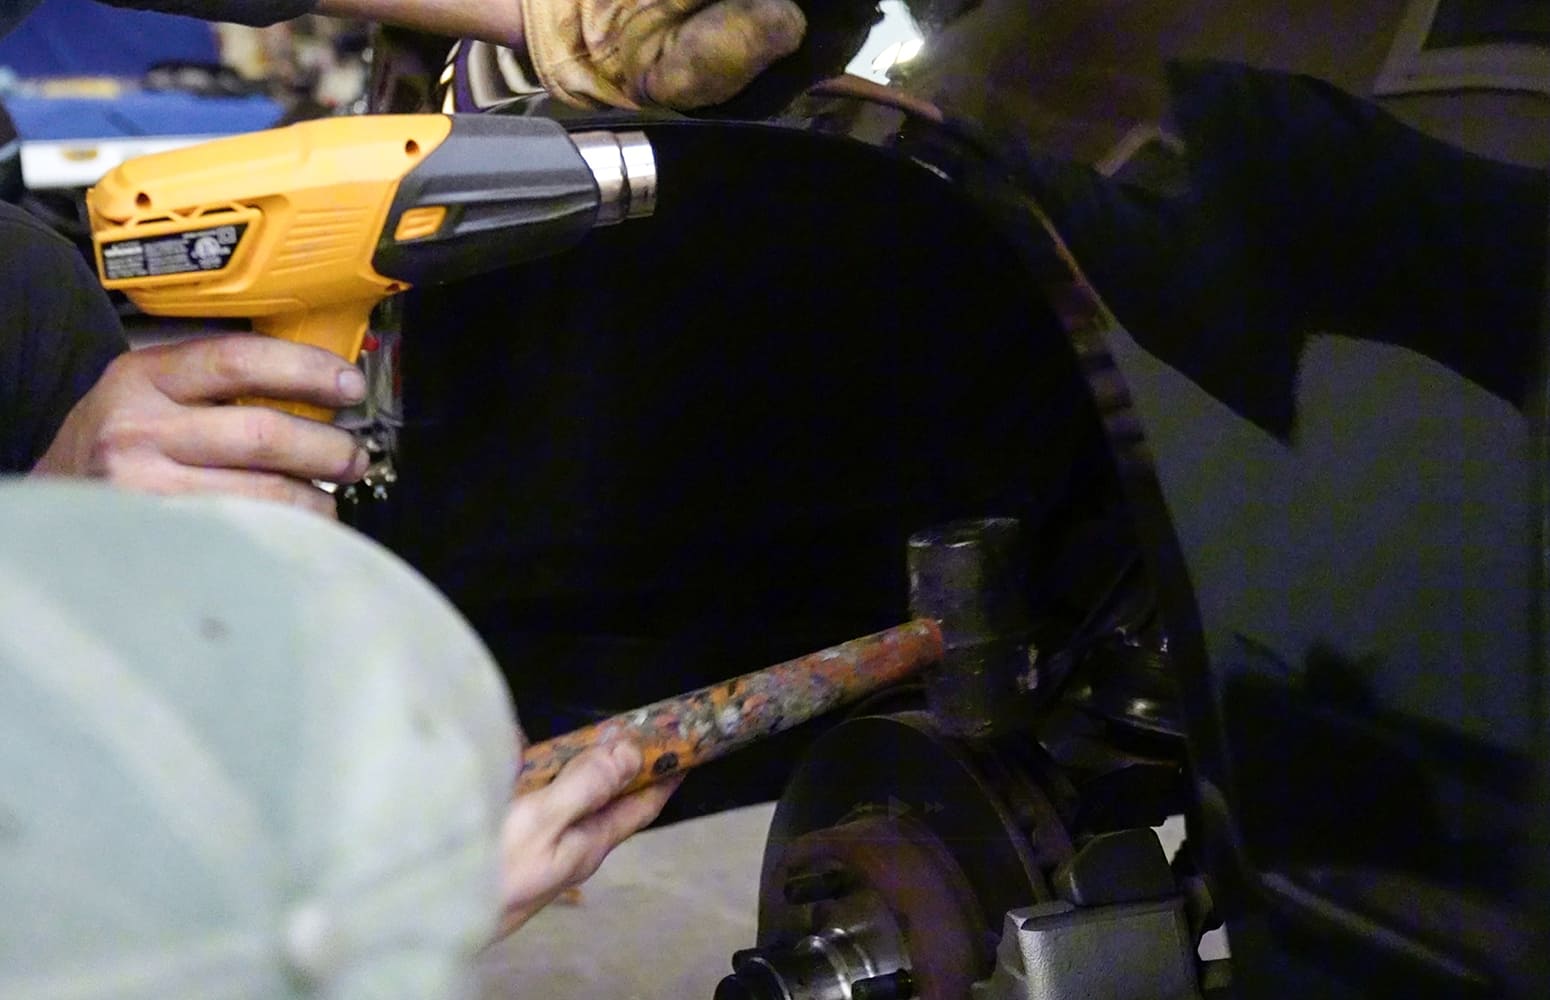
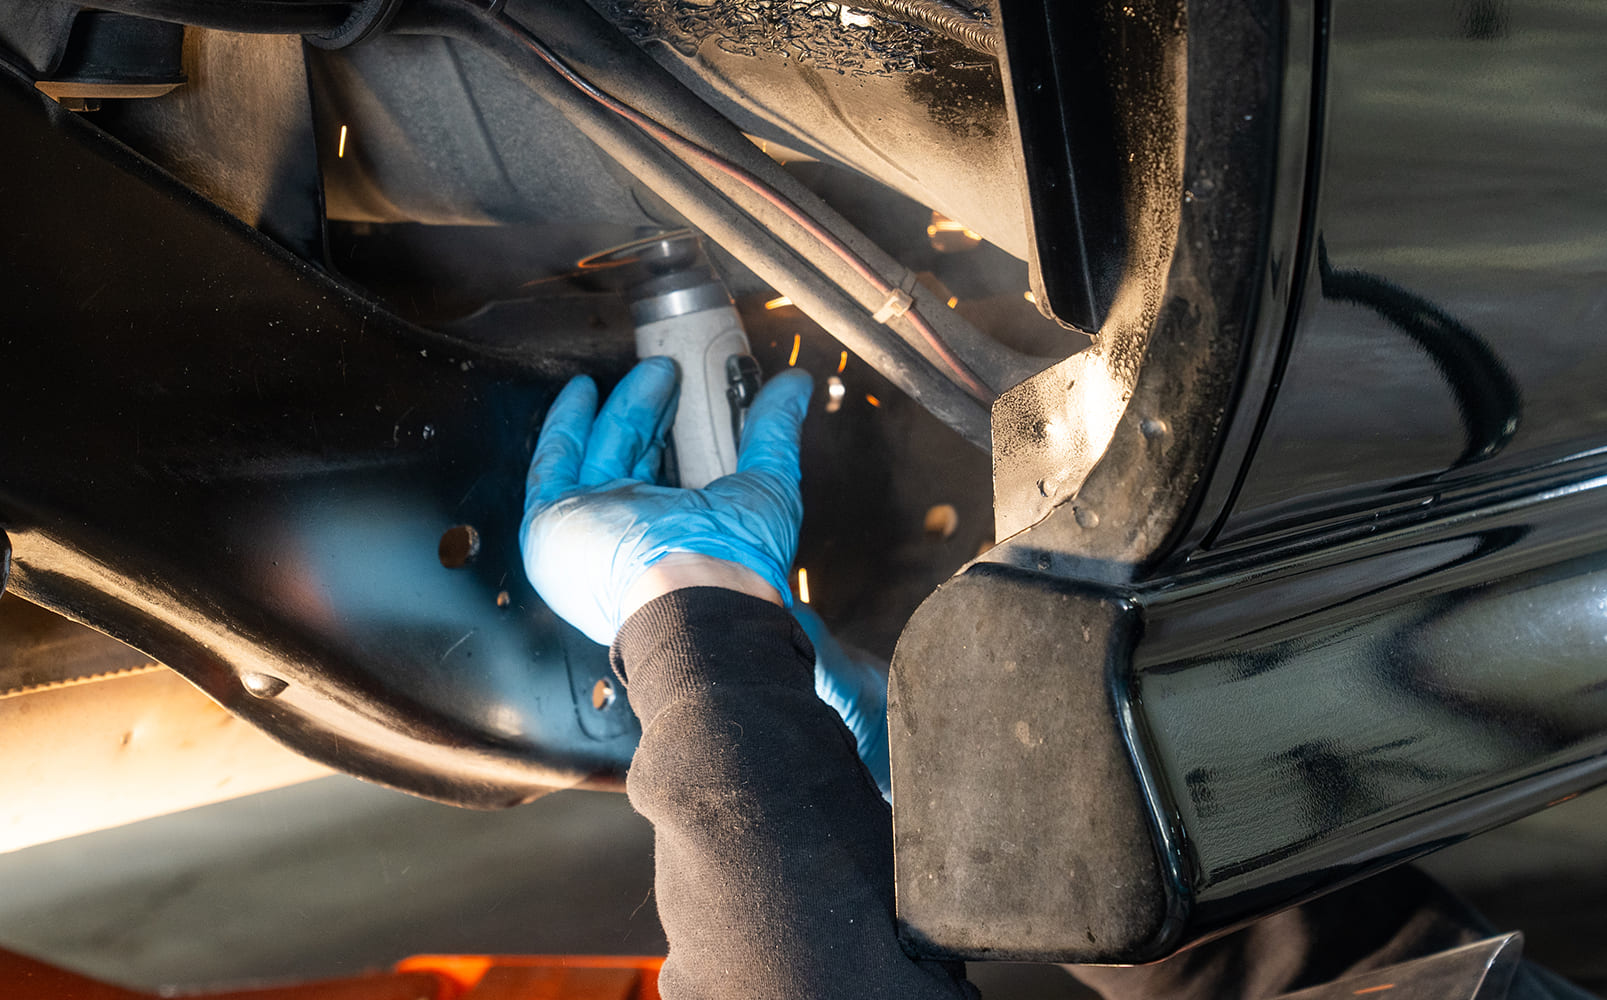
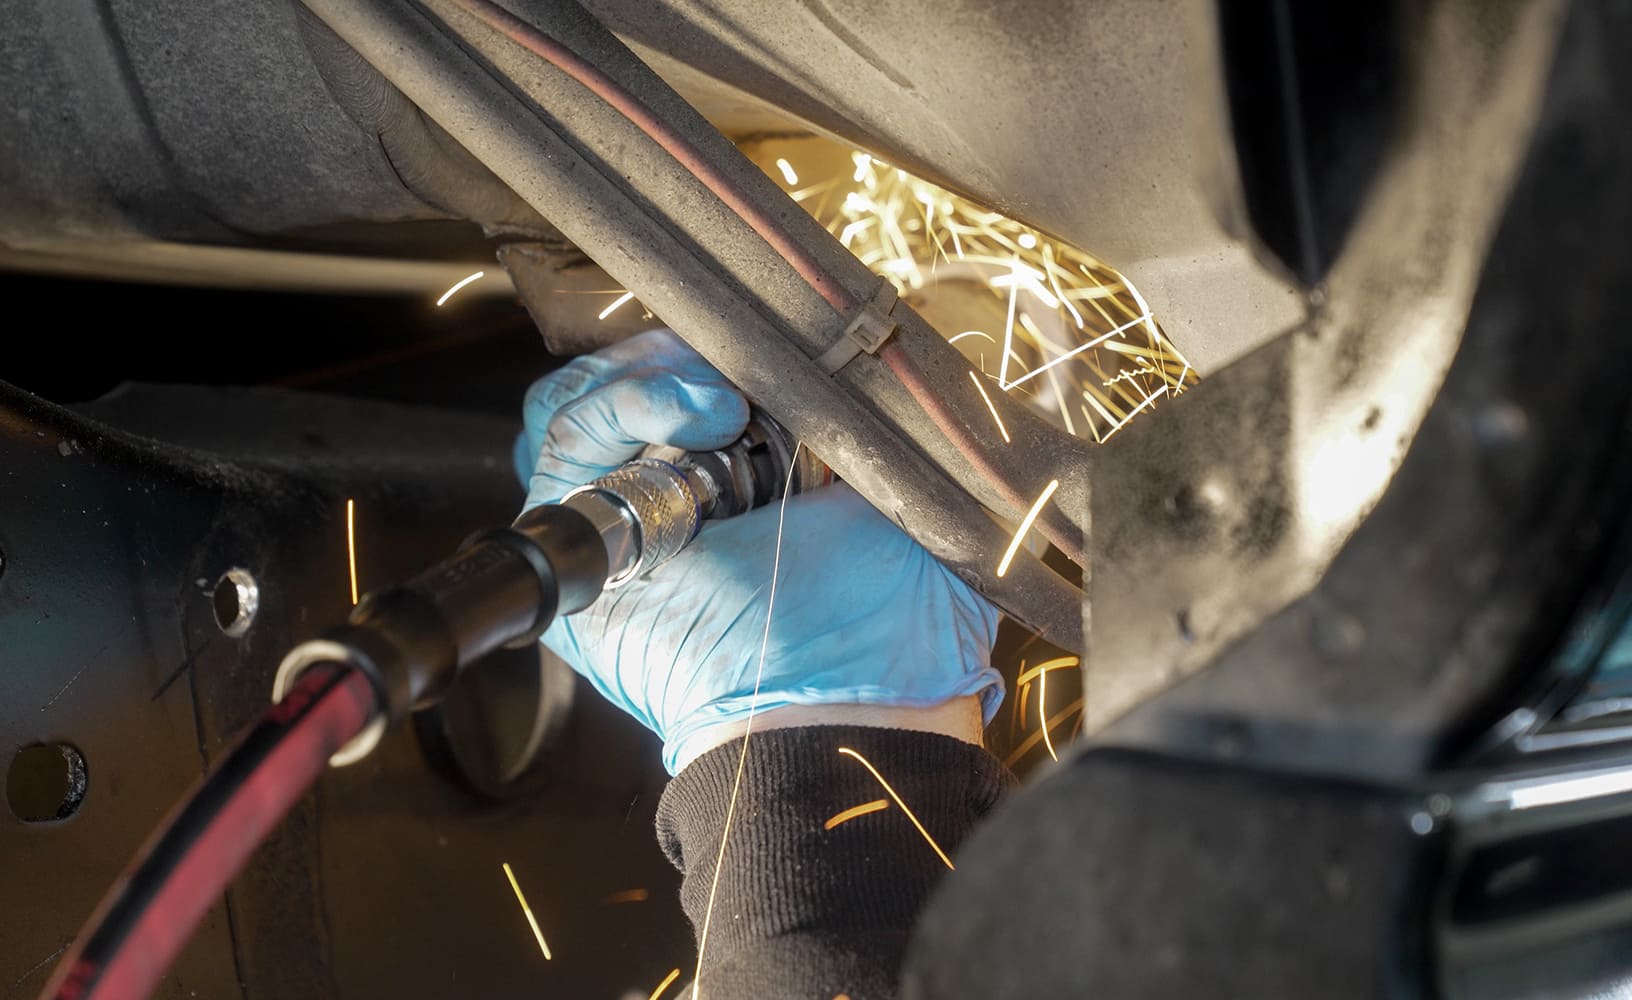
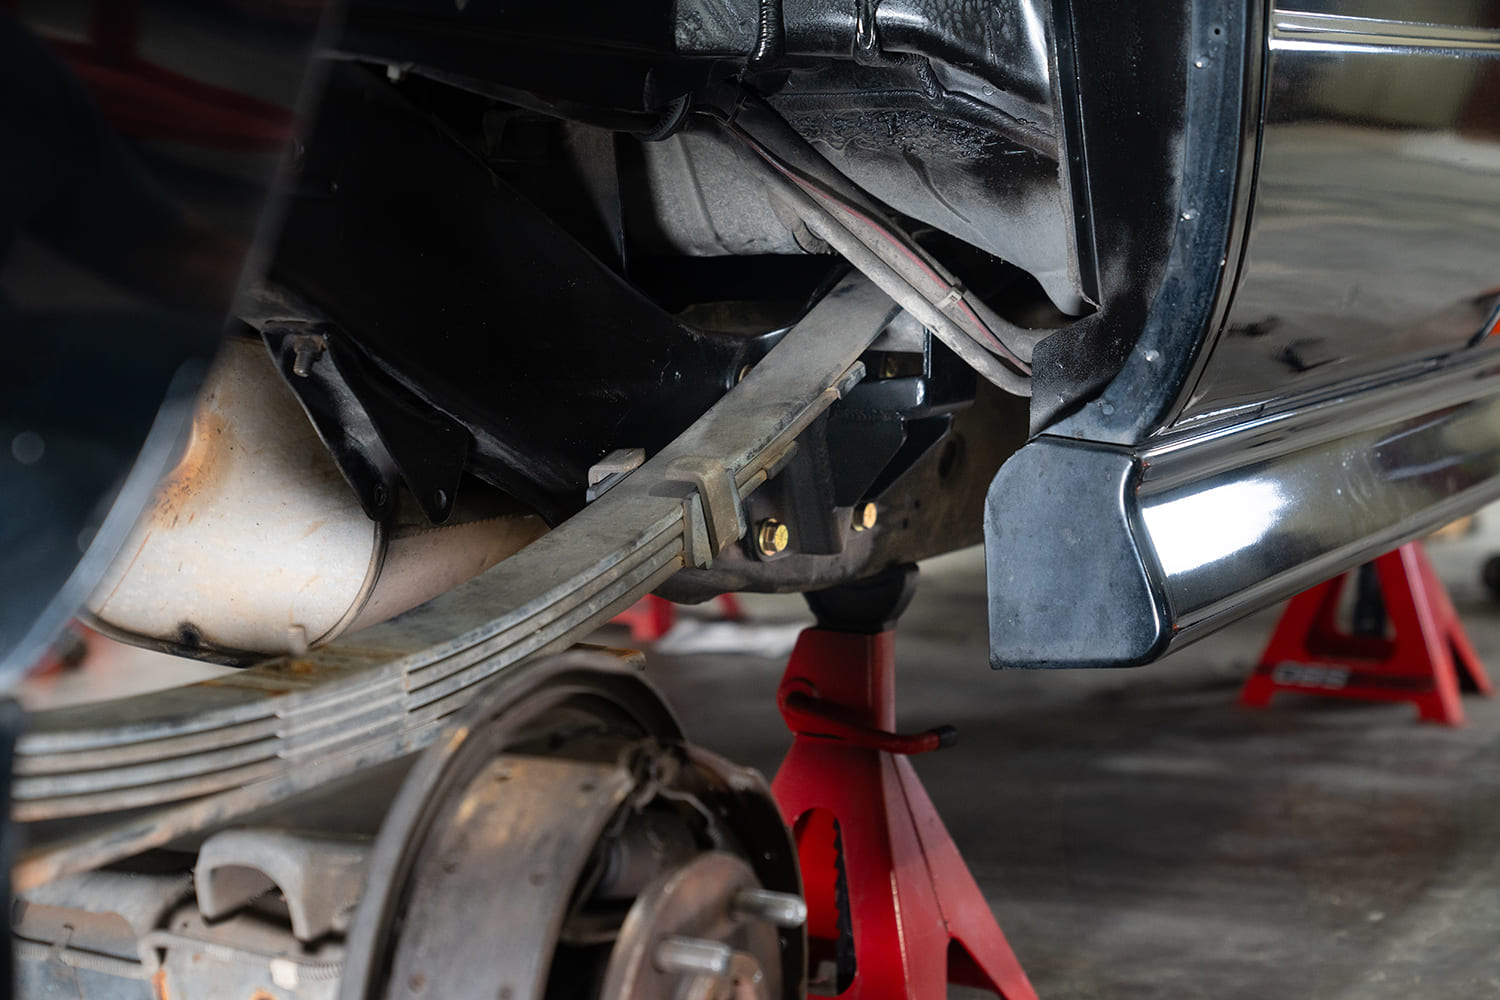
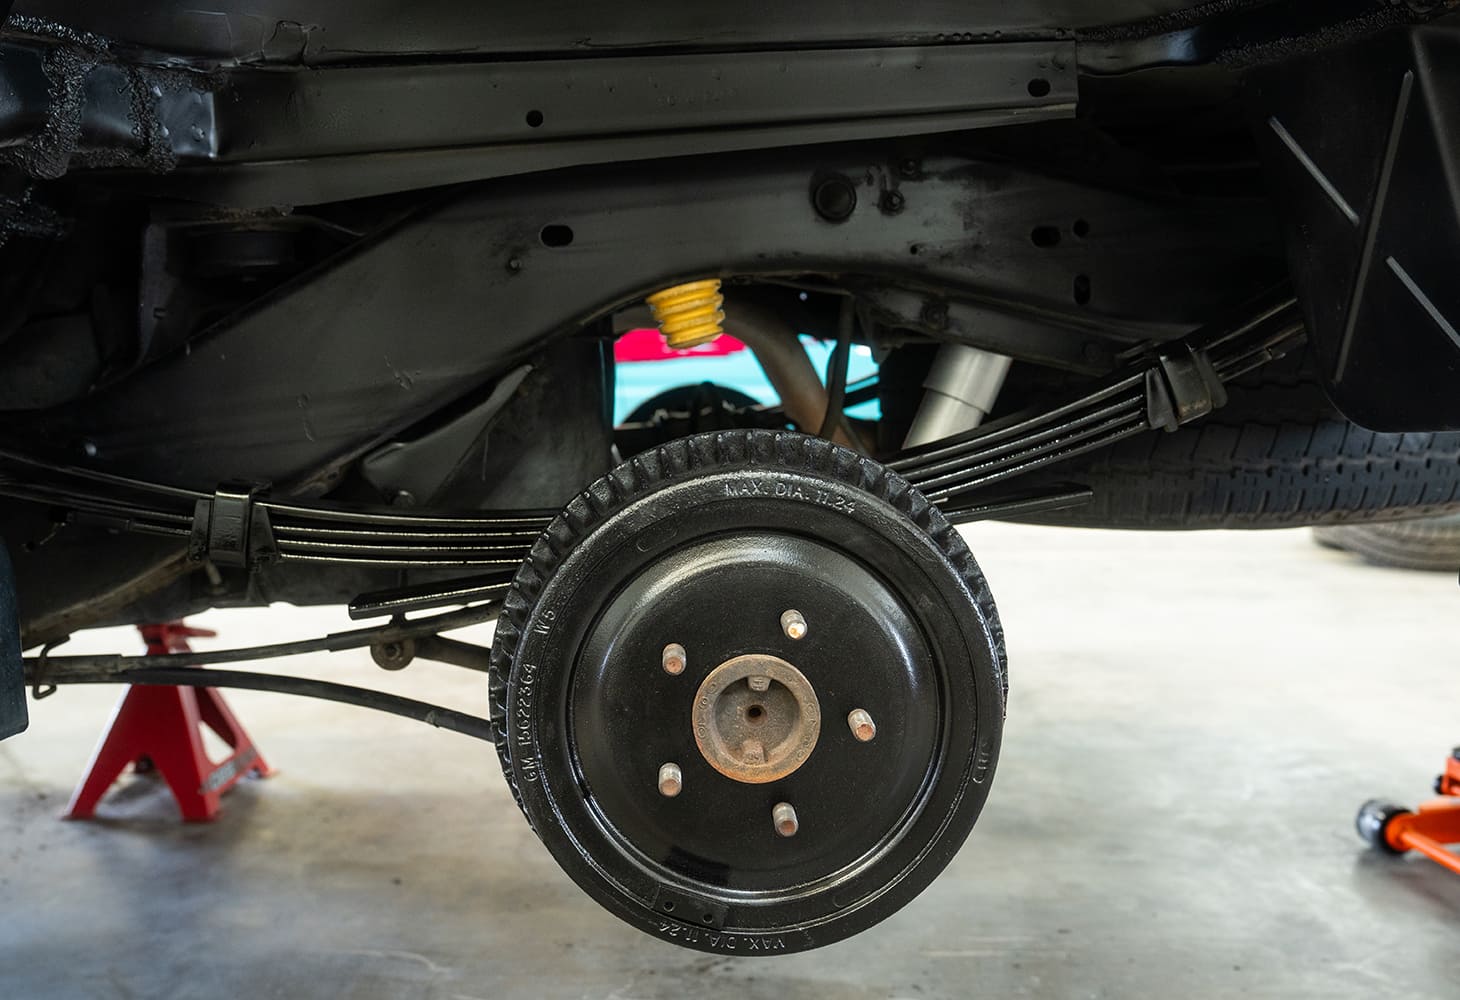
We cleaned up the factory dust shields and ABS brake sensor that bolted right up to the Belltech spindle using the factory fasteners.It made sense to replace the outer steering components as well, so we marked where the factory tie rods were adjusted to currently. This is so we can get the alignment “close enough to drive” when we take it over to a professional alignment shop after we finish with the drop kit.A fresh set of wheel bearings, rotors, and brake pads were installed to finish off the replacement of the front suspension.The factory antisway bar was taken off and replaced with all-new mounts featuring poly bushings and a much beefier antisway bar from Belltech.Rolling the front fender lip with the tire removed allows for the perfect opportunity to give enough clearance with the fender lip on OBS trucks. It might not be needed, depending on the tire sizes, but necessary to keep them from getting chewed up on dips and bumpy roads. Using a heat gun we brought the fender up to a temperature that makes the sheetmetal more pliable but not hot enough to damage the paint. Then we located the center of the fender opening and worked the fender lip with the non-marring hammer or rubber mallet in both directions about 10 inches forward and back from the fender center mark. Slowly work the fender lip over about 30 to 40 degrees to avoid any damage to the outside of the fender lip, carefully applying heat each time.Moving to the rear suspension, we’ll be installing a set of Belltech leaf spring hangers and shackles in order to gain 4 inches of drop in the back. The Tahoe’s frame houses fuel and A/C lines over the axle that would need to be relocated if we chose to do a notch in the frame. After removing the factory leaf springs, we set about removing the rivets holding the spring hangers in place. But grinding and hammering off the heads of the reviews before punching them out accomplishes this without needing a torch.
The Belltech spring hanger requires a bit more clearance as the mounting location is being moved up. A few inches of the factory floor pinch welding will need to be cut off and ground down.
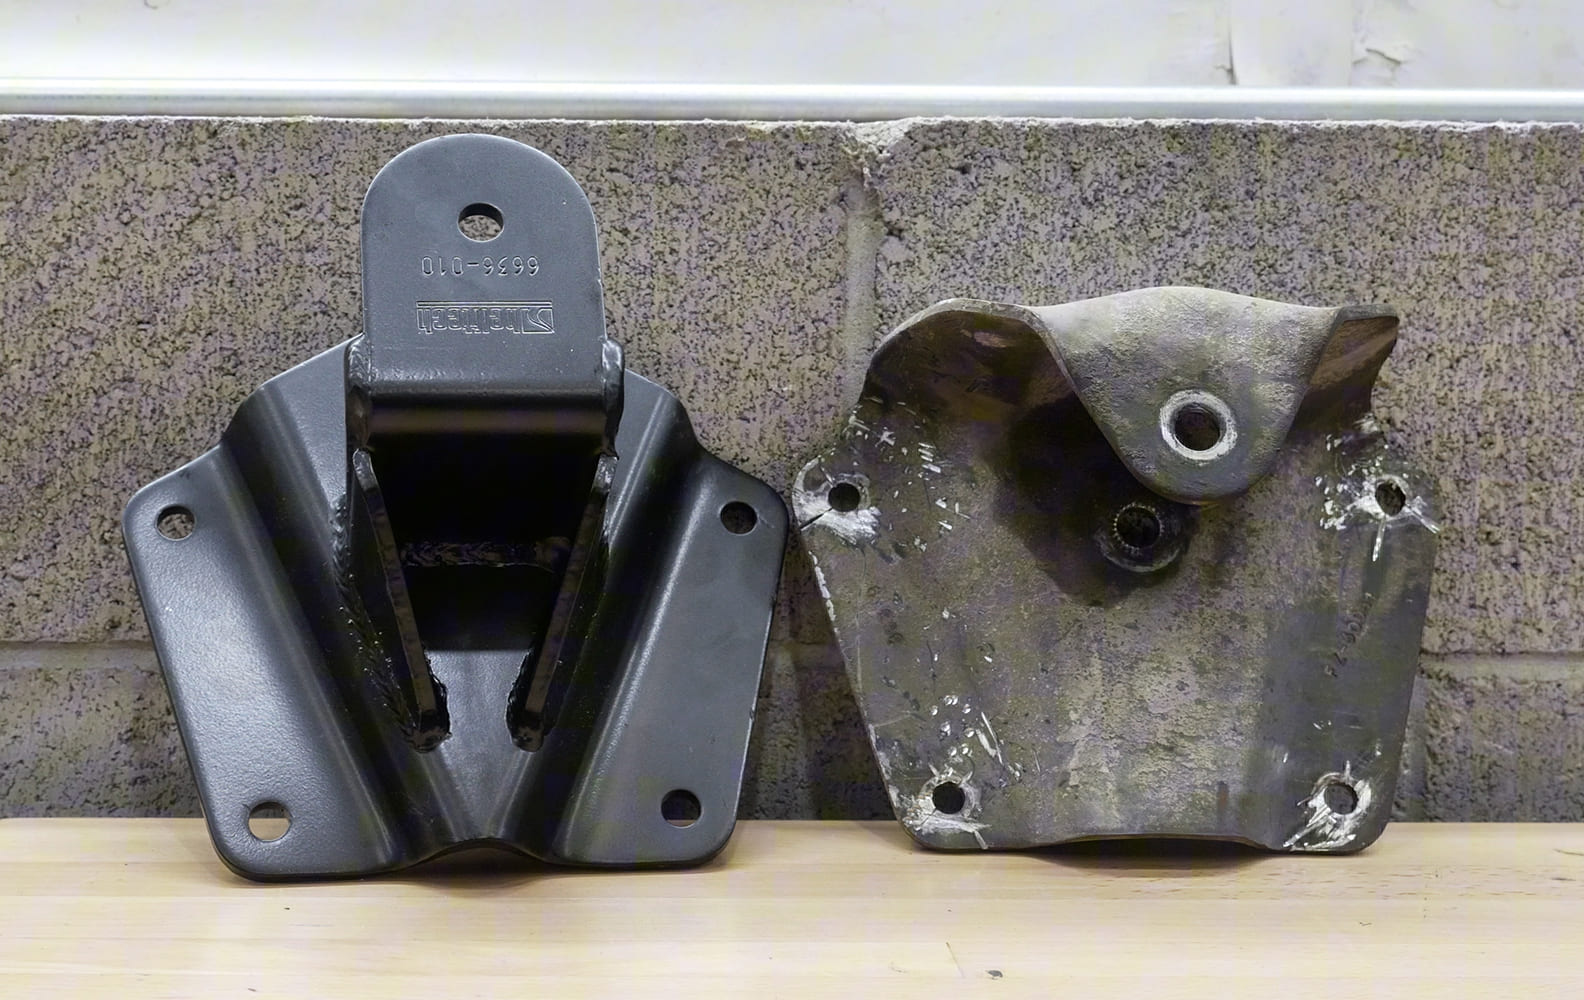
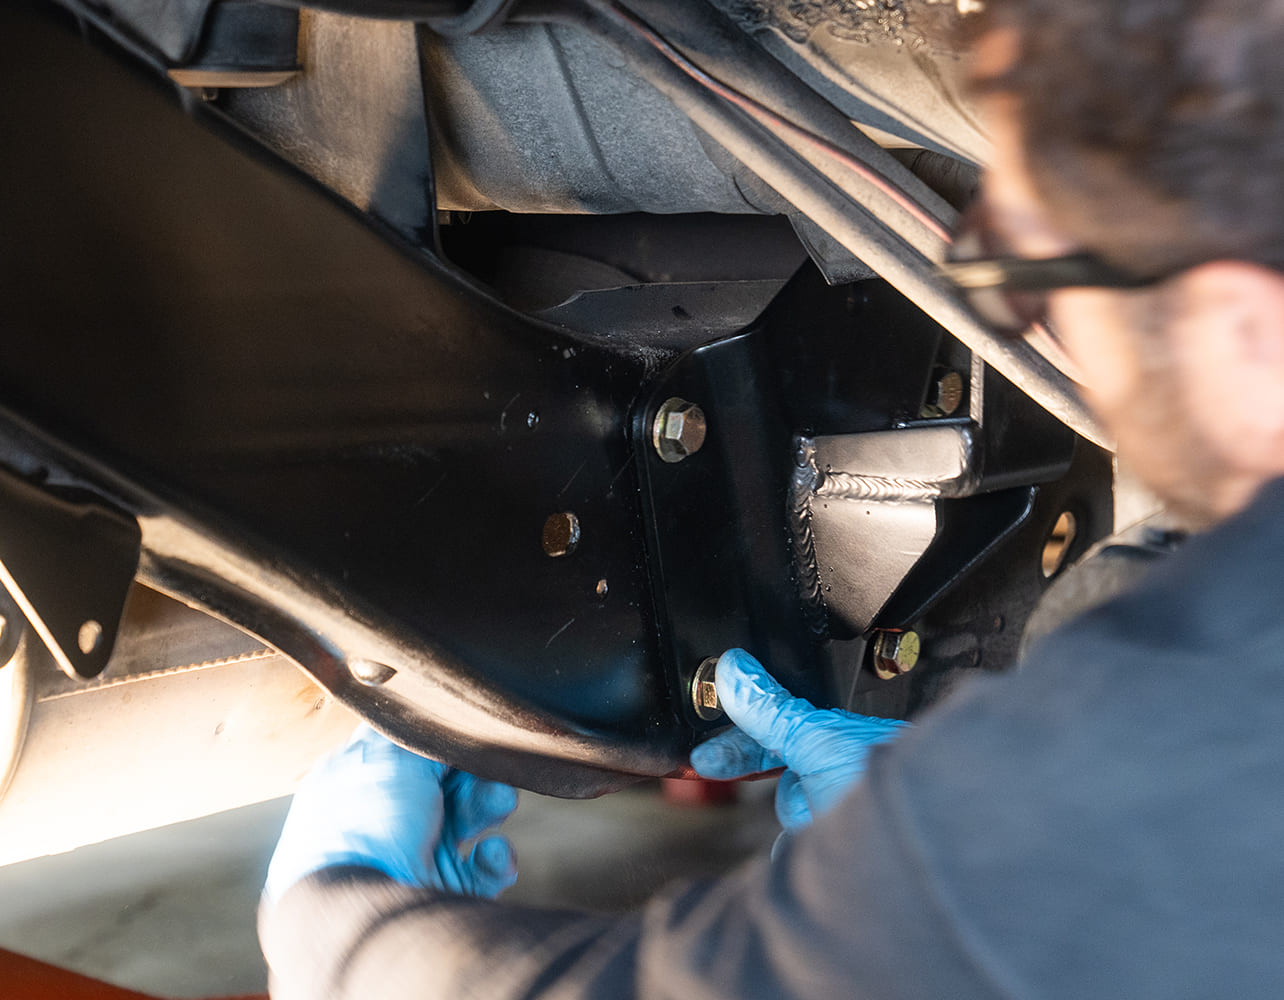
The new Belltech hanger mount slid right into place as we bored out the factory holds, installed the new hardware, and tightened them down to 80 lb-ft.On the driver side, in order to access the front hanger bolts we needed to loosen up and lower the gas tank on the Tahoe. Marcel advises that this should be done with the tank nearly on empty, not full of 20 gallons of gas.The factory leaf springs are installed back into the new Belltech drop hanger.
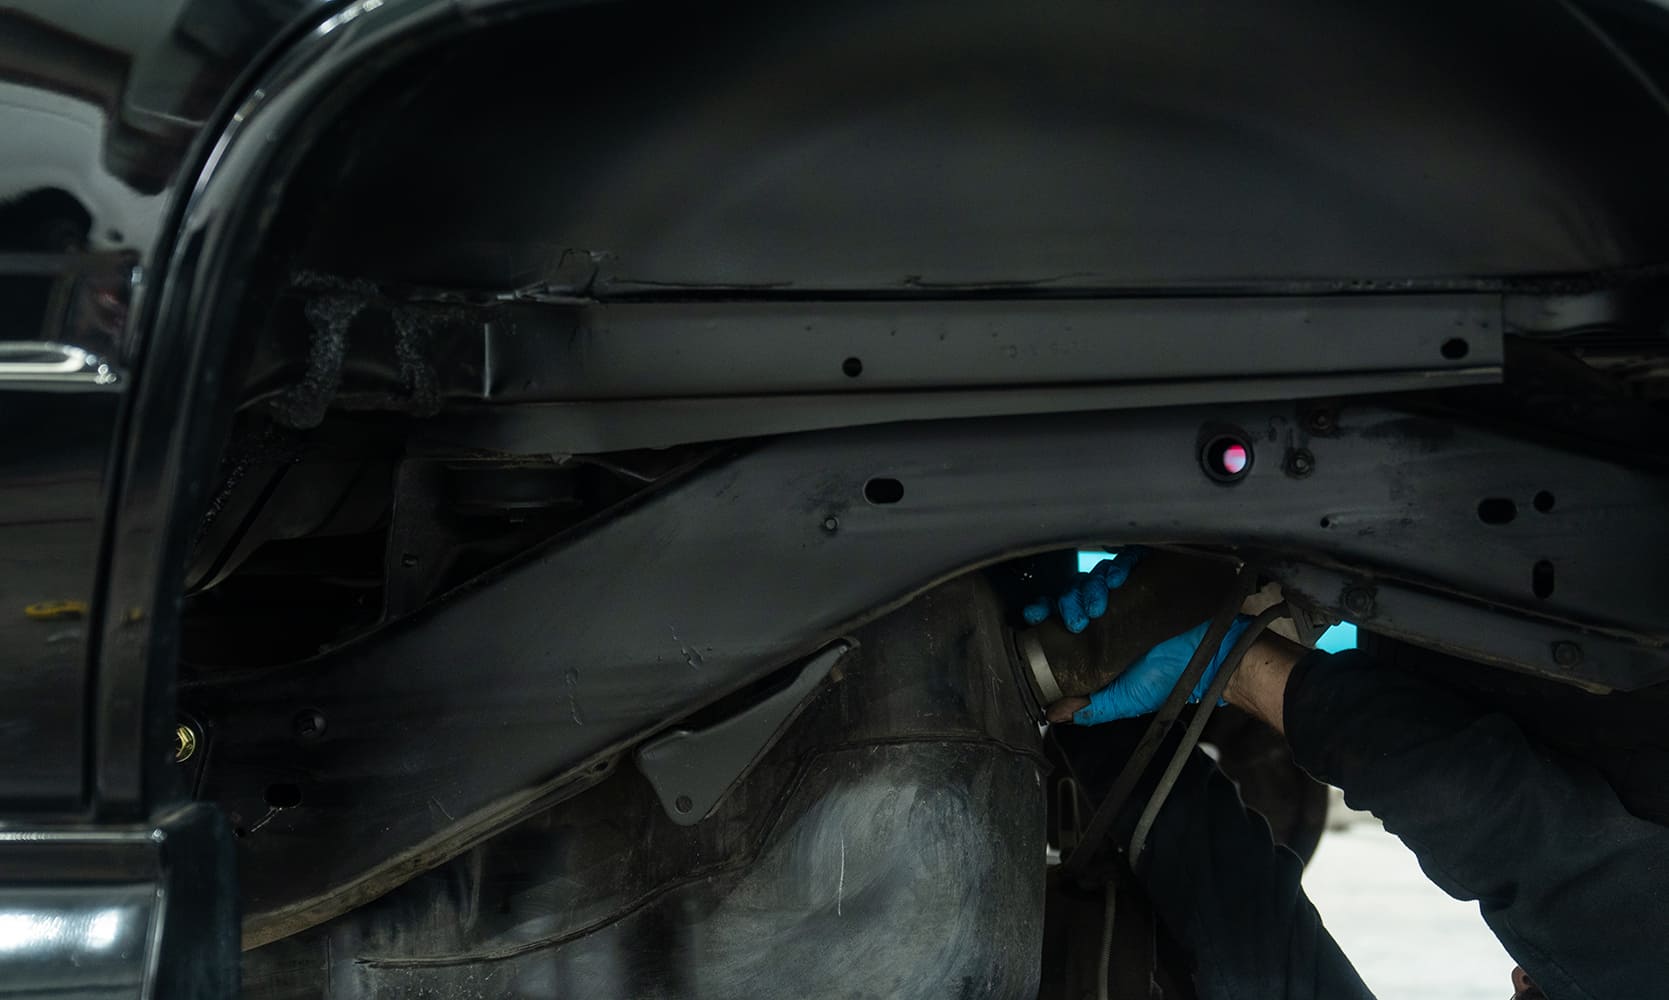
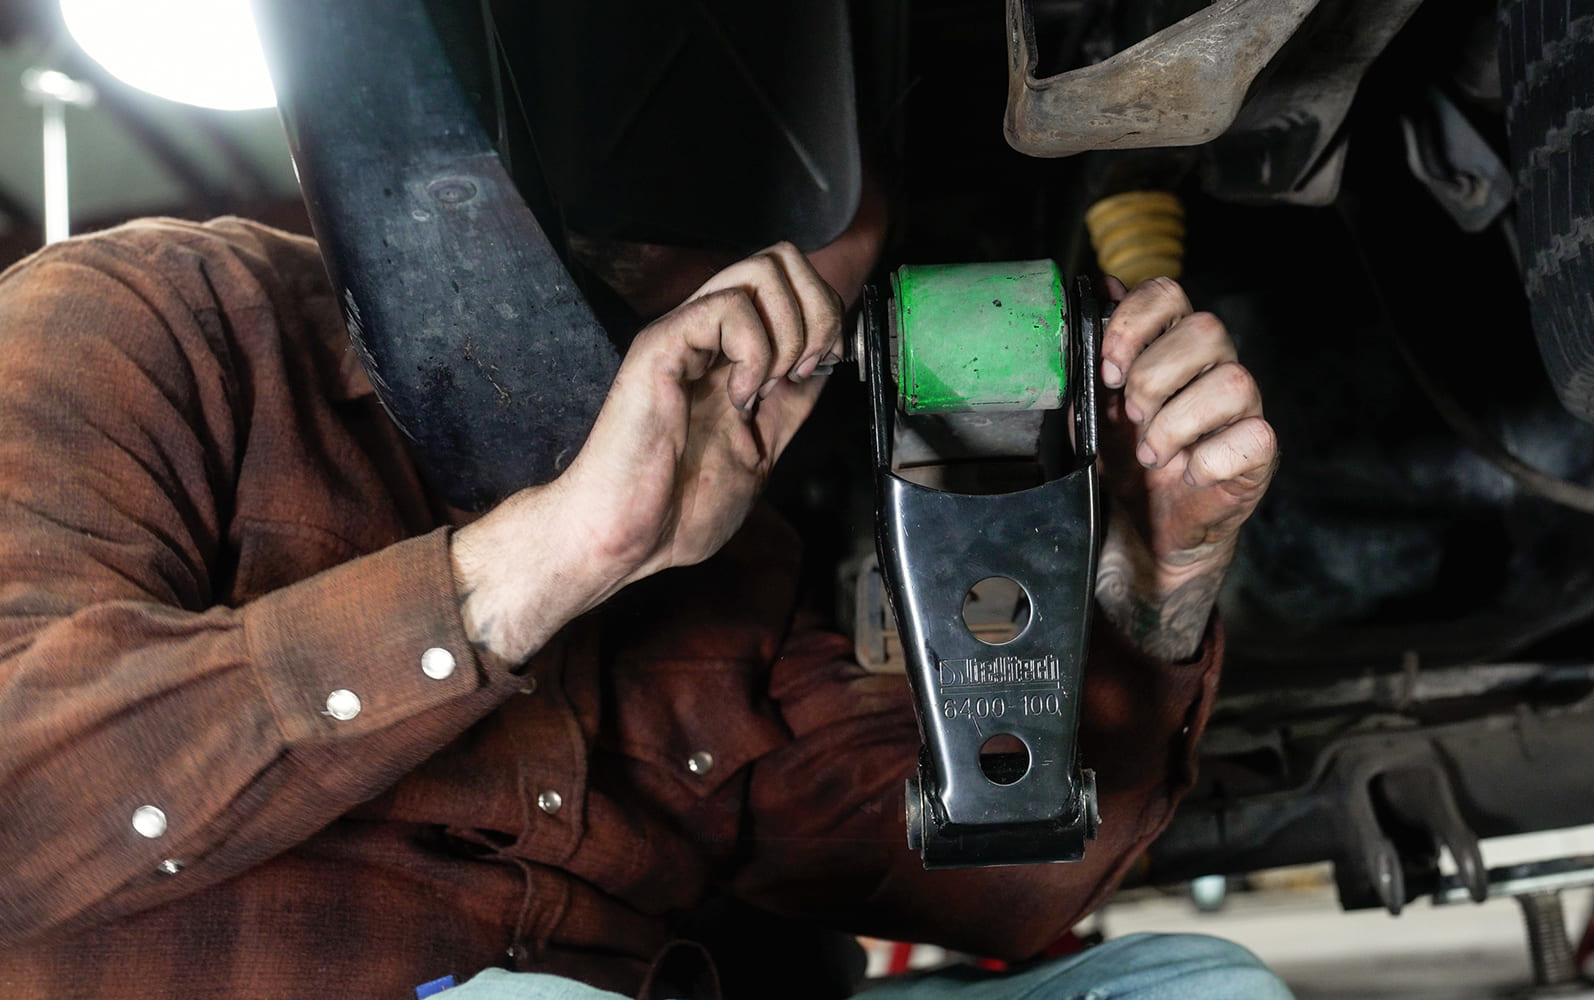
The rear factory shackles are tossed aside in favor of Belltech’s, which offers various mounting options to adjust the amount of drop in the rear.
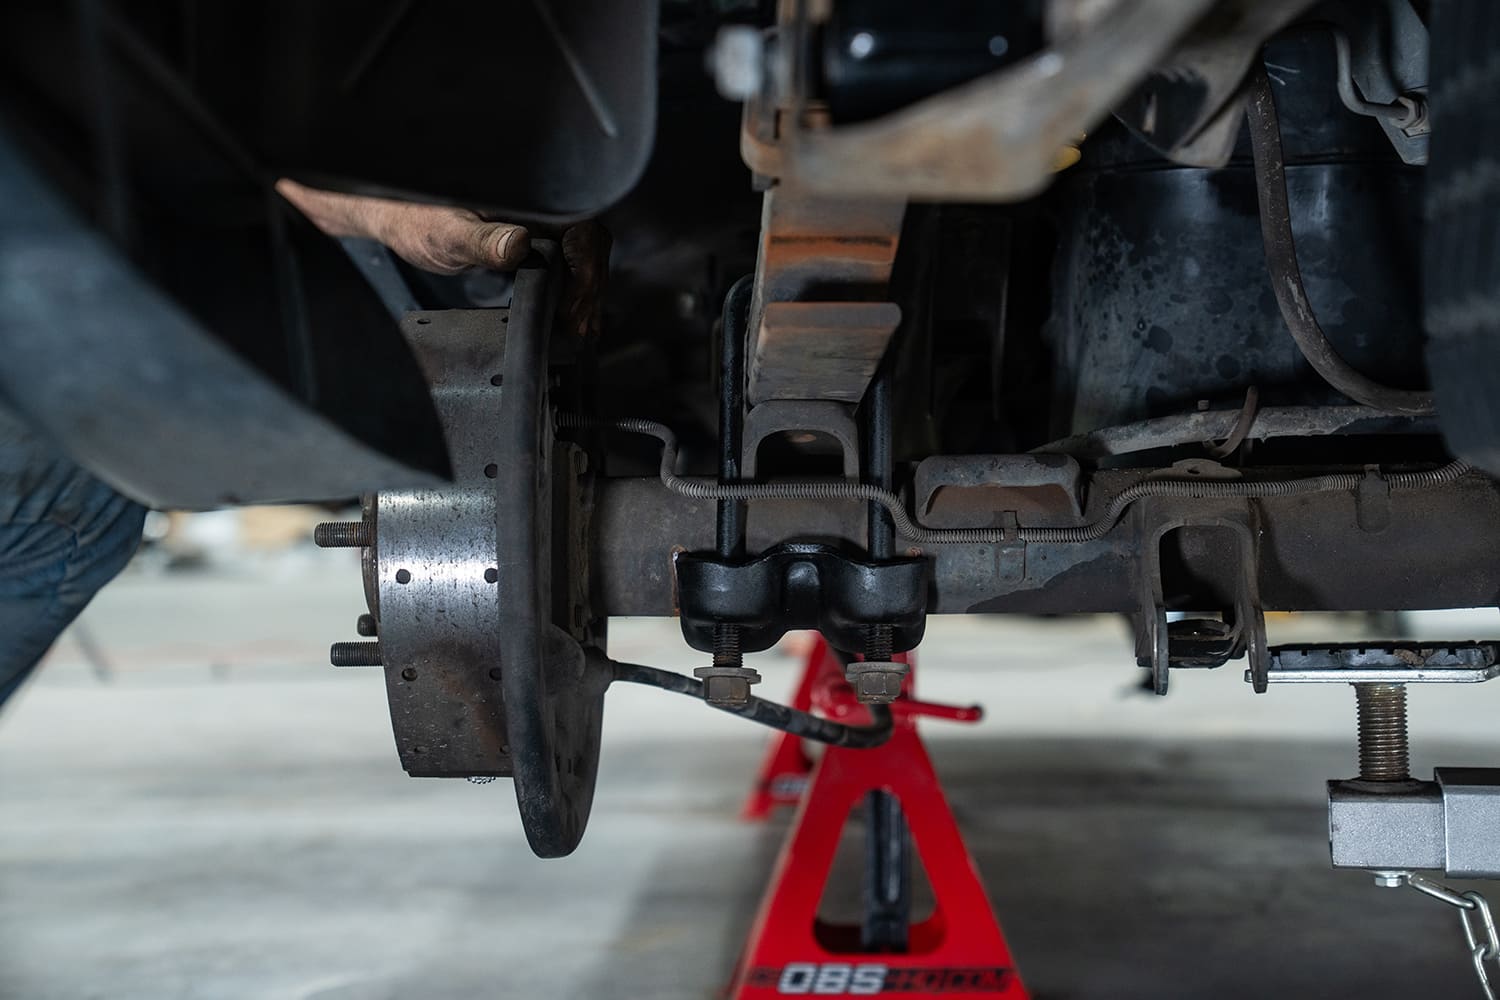
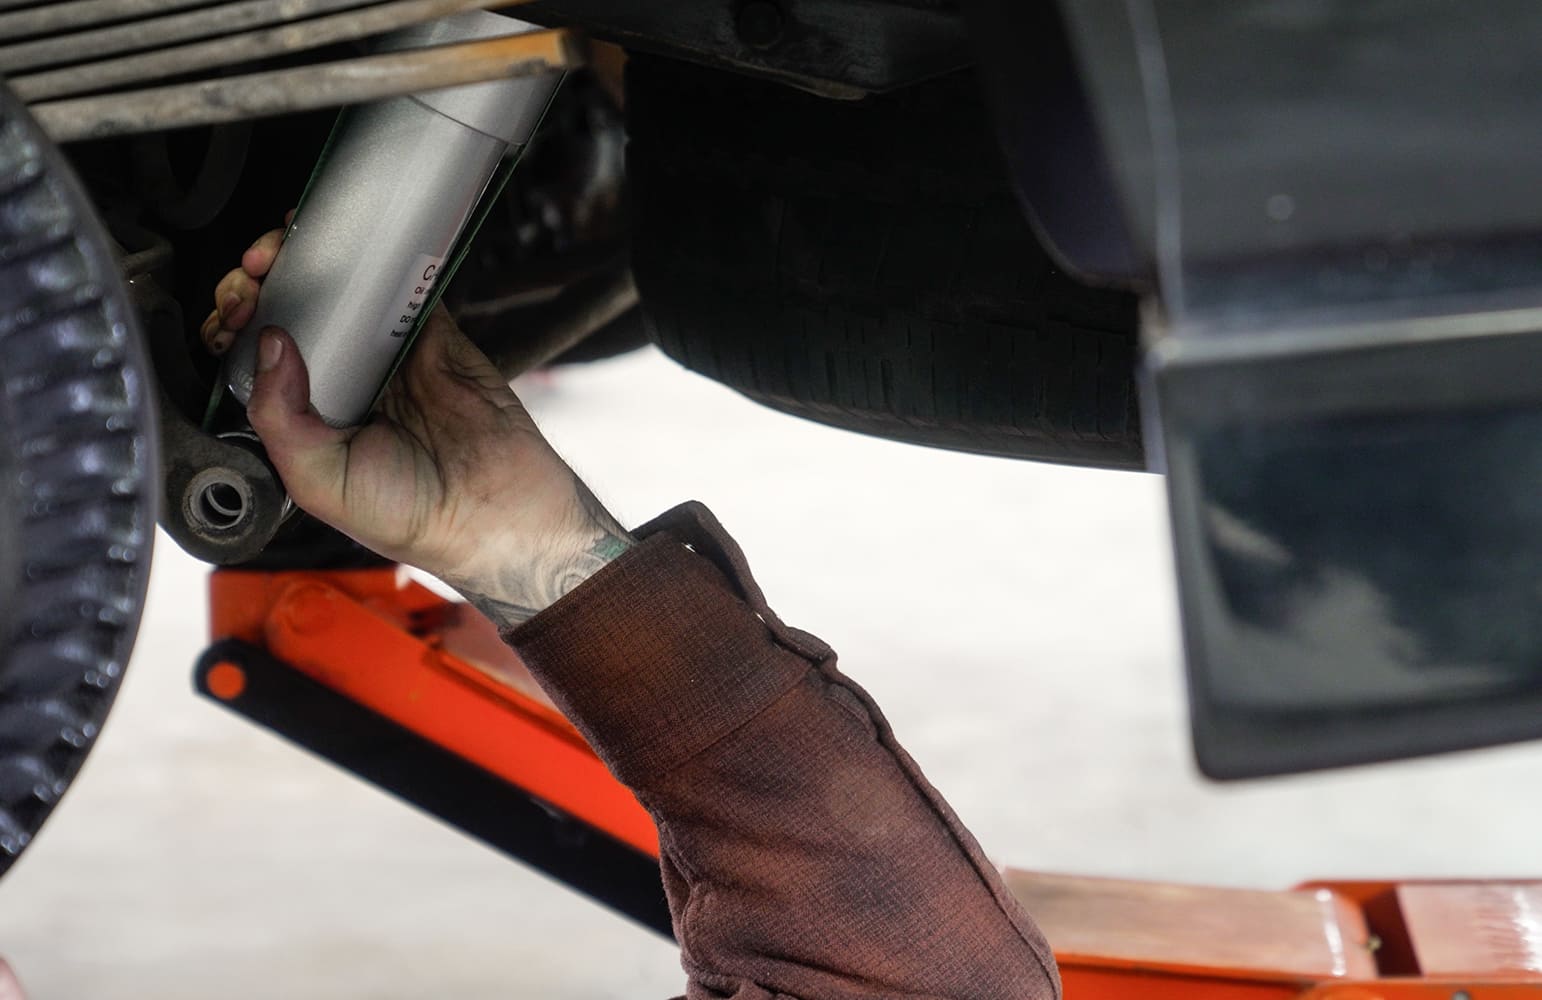
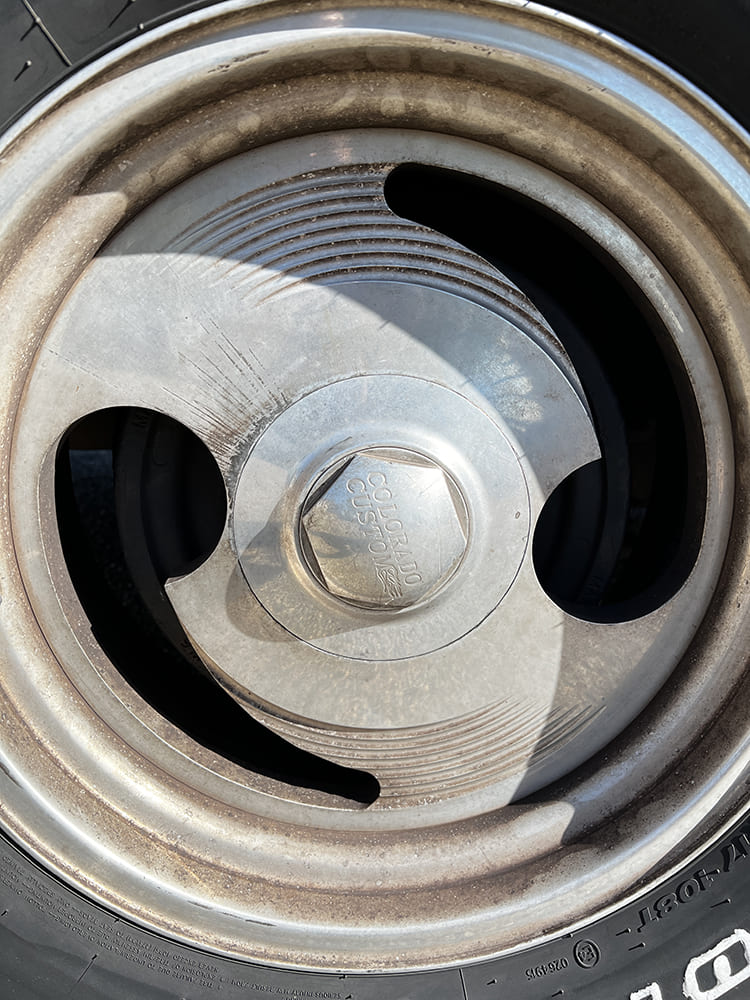
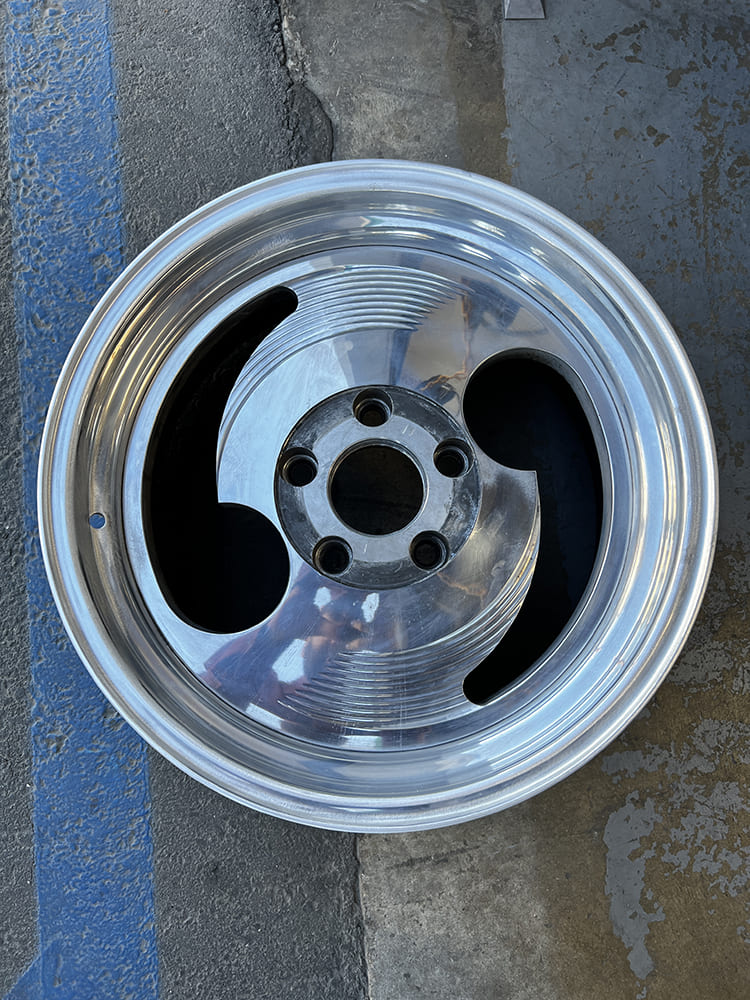
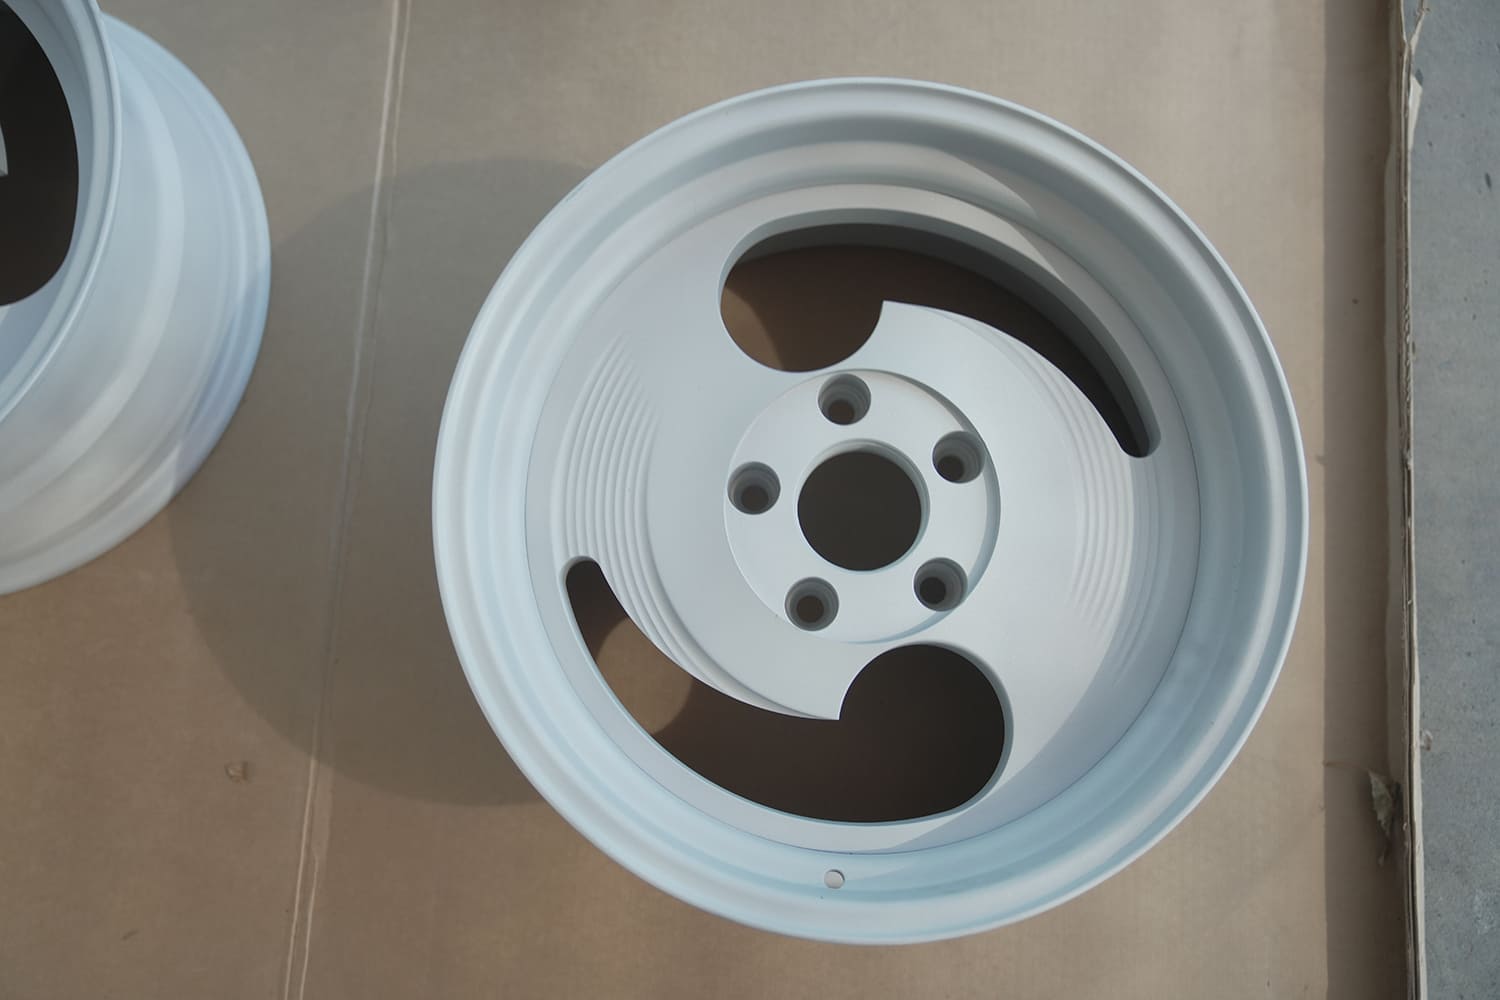
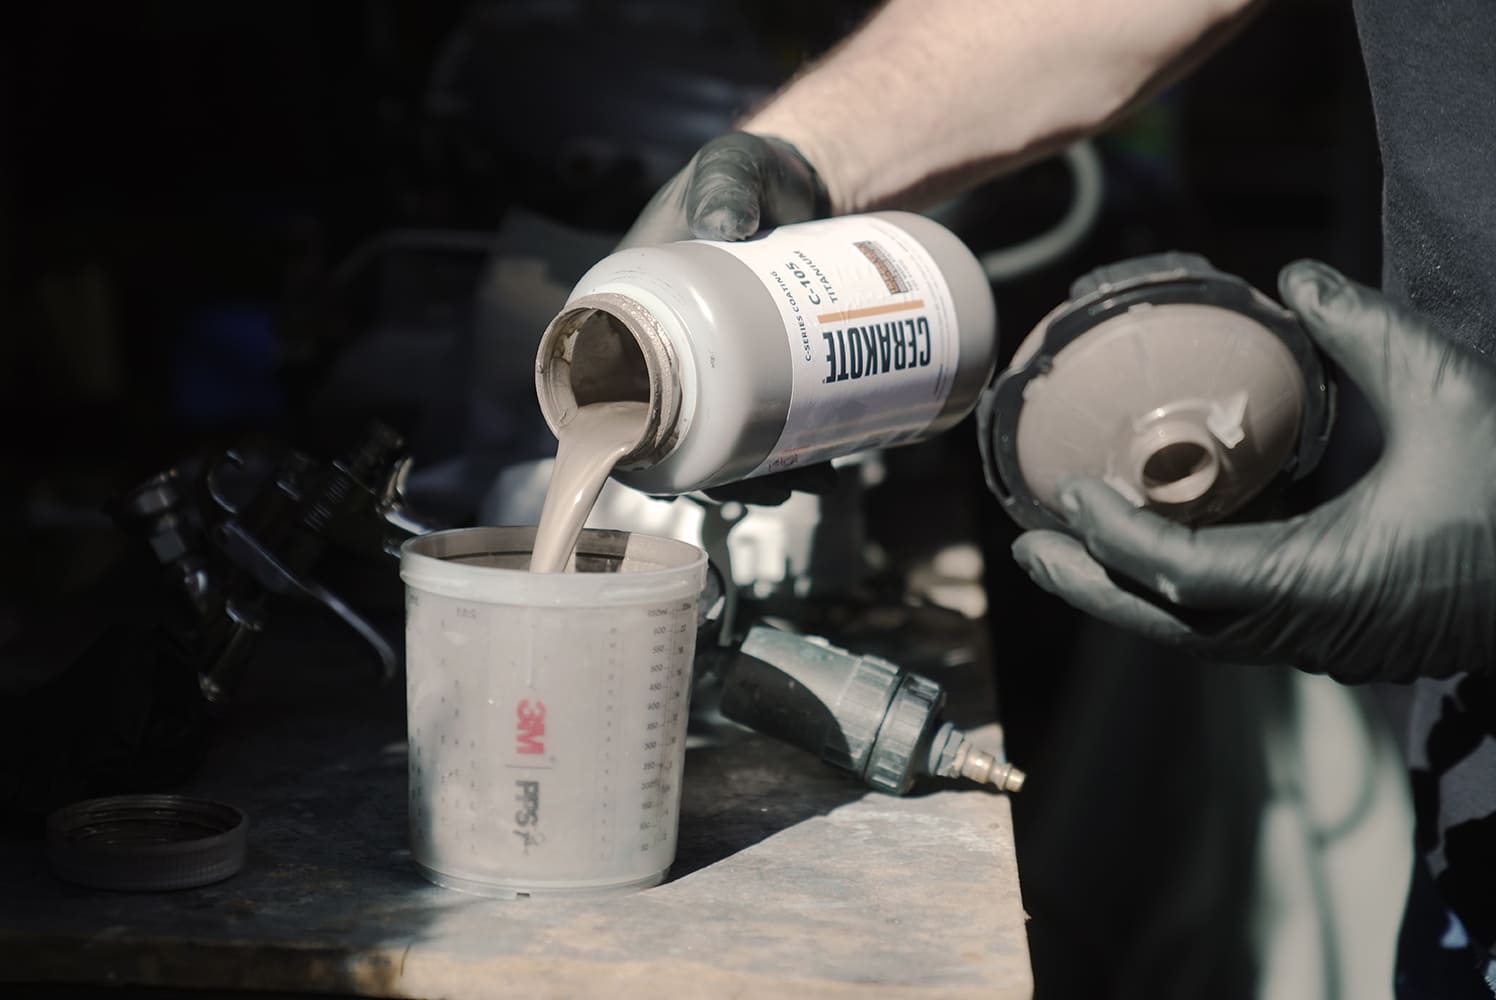
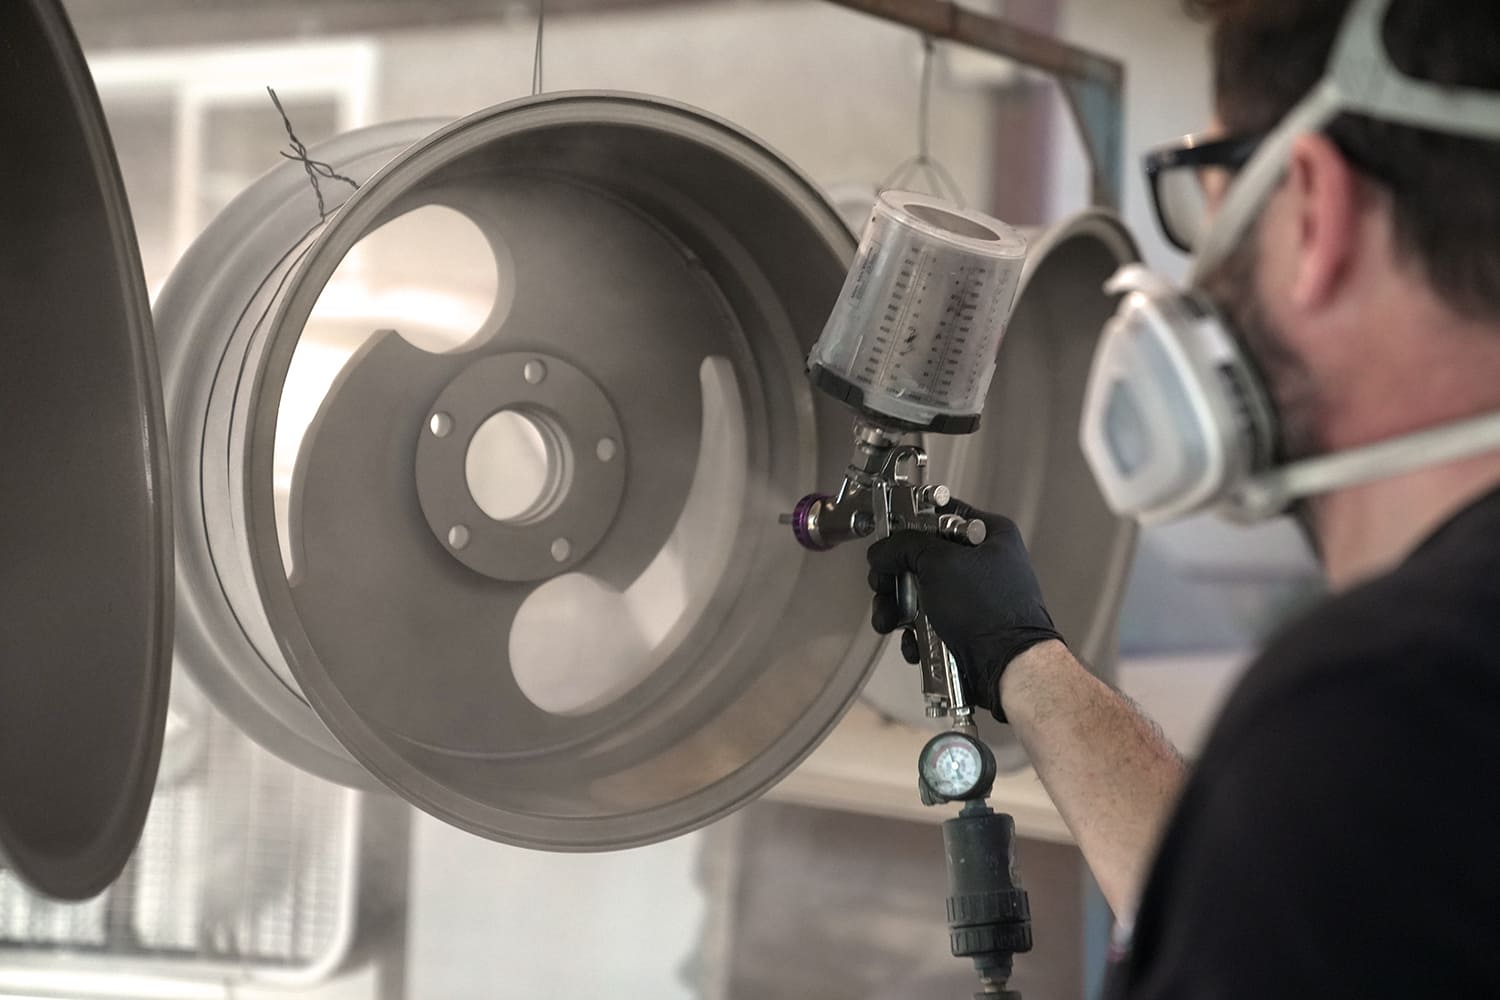
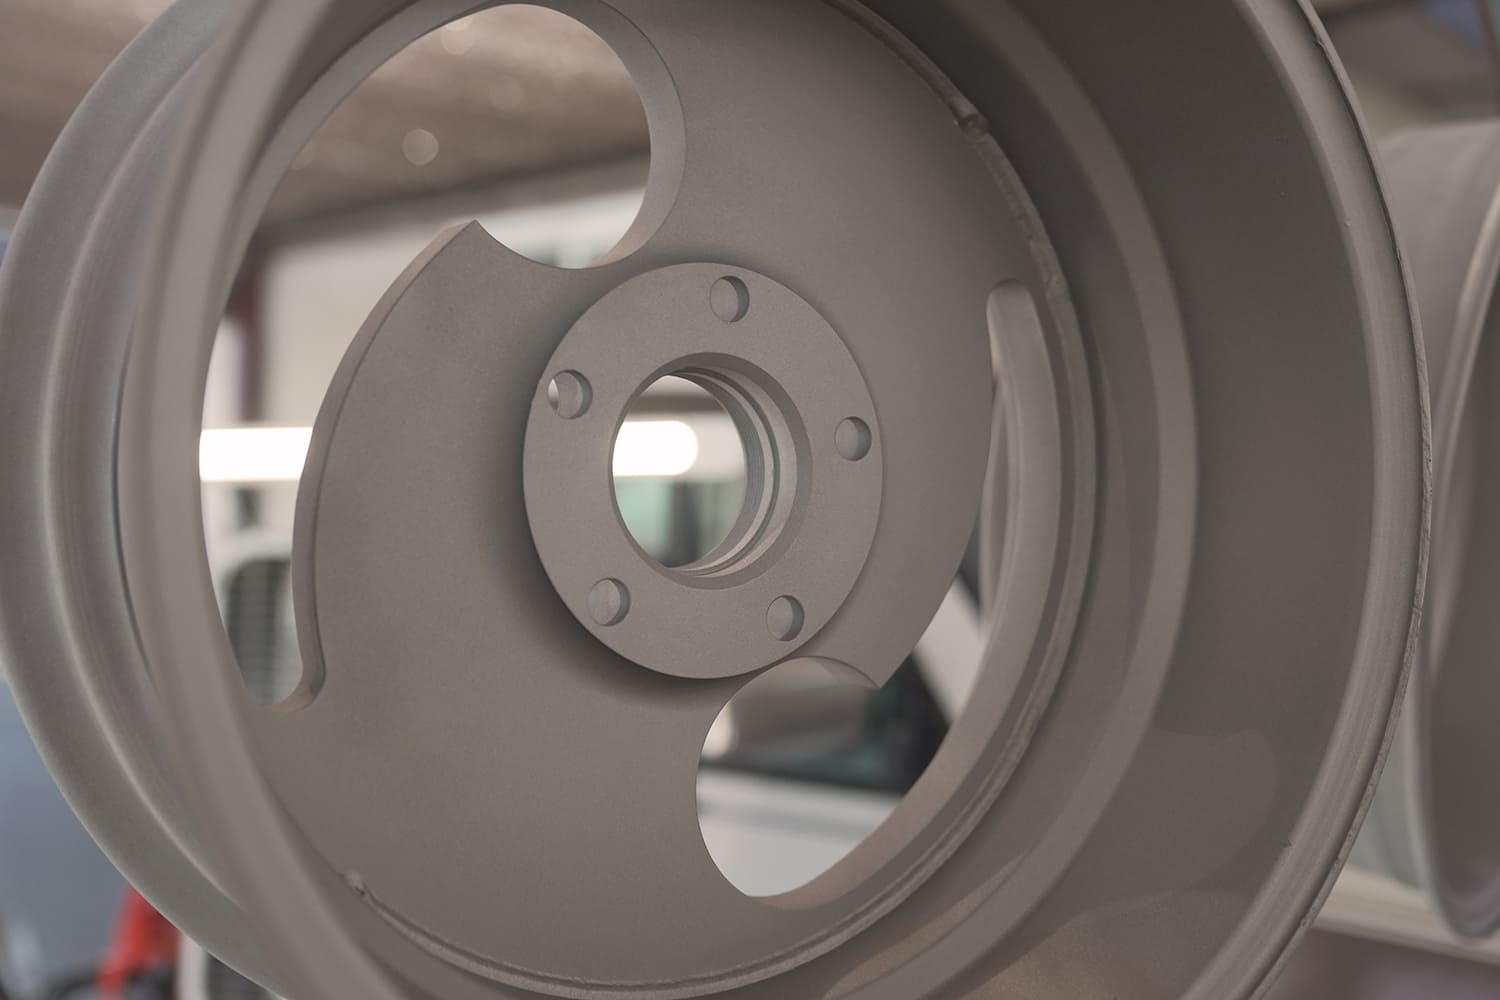
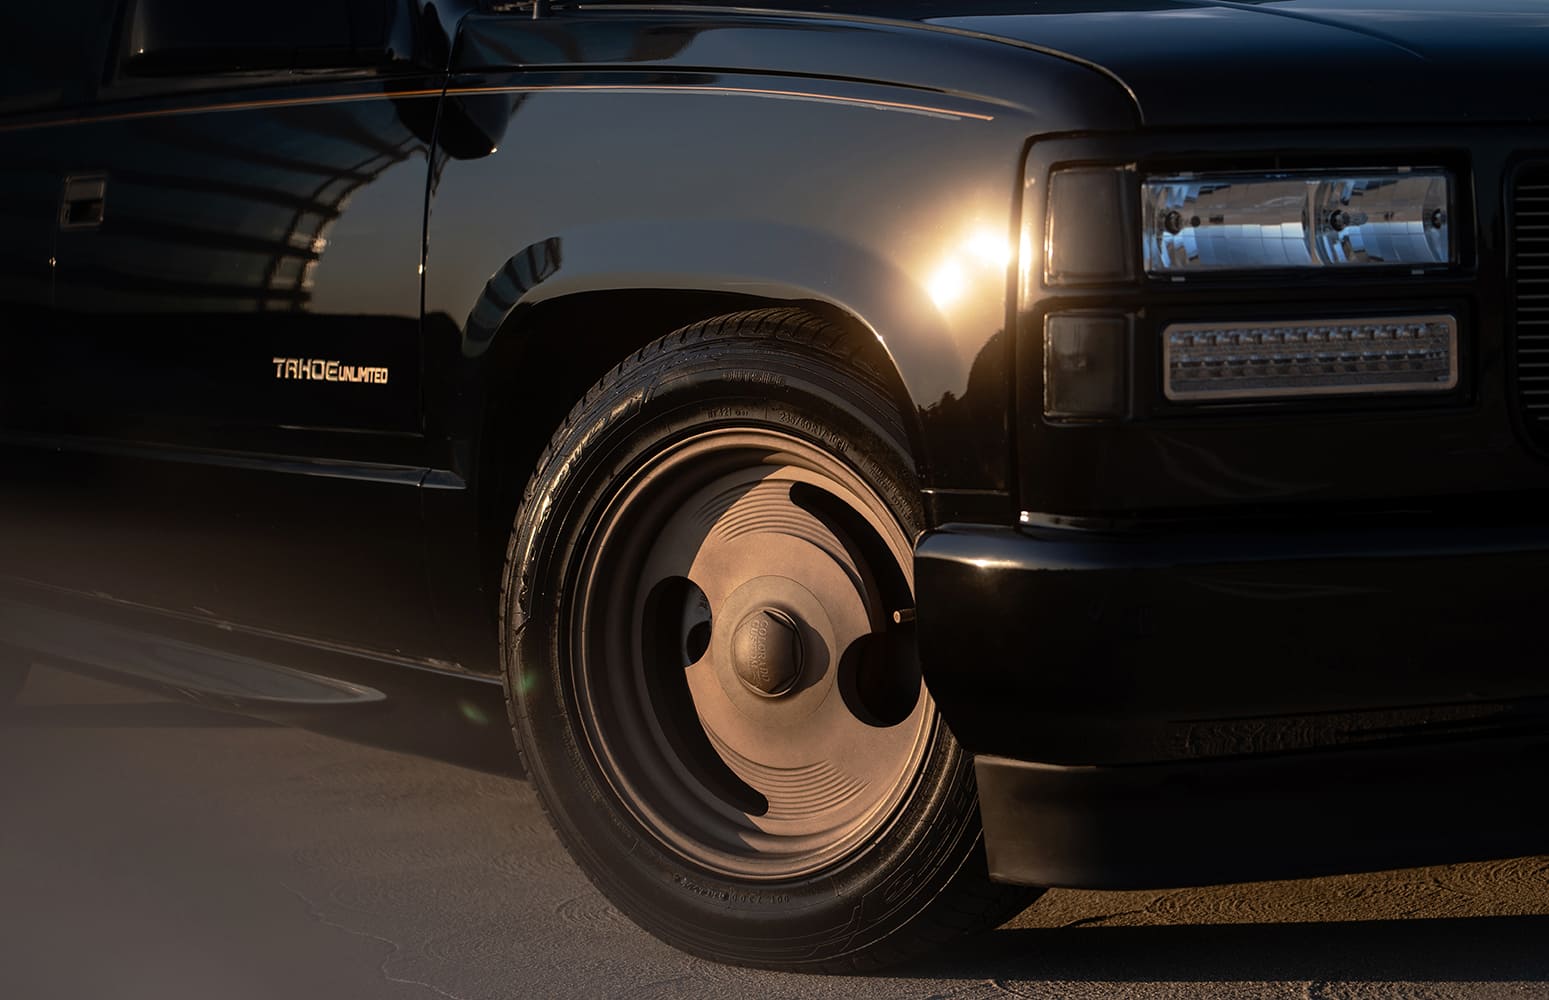
Belltech supplies new U-bolts and axle plates to finish up the rear suspension.Shocks are next on the list as we installed a set of Belltech’s Street Performance shocks in the factory shock mounts. Quick tip, leave the packing strap on the shock body while installing the top end of the shock first so you don’t have to fight the resistance of the new shock. Jacking up the rear end until everything lines up helps when installing the shocks as well.Make sure that you tighten everything up and check all the grease points on the suspension, such as the ball joints and bushings, before you drive off. Don’t rely on the alignment shop to do it for you. Inspect the brake and steering system as well; better safe than sorry.This set of Colorado Custom Blackhawk wheels are an example of true survivor parts right from the 1990s. That billet shine has long since faded on this set, so we decided to update the look by applying a spray-on ceramic coating called Cerakote.The billet wheels needed to be cleaned, the lips fixed, and sandblasted before being coated.Titanium was the color that we chose to shoot the wheels as it will match our billet grille insert and other billet items throughout the Tahoe. Cerakote has a wide range of colors in both air and oven-cured options. We are spraying air-cured Cerakote for an easy application.We’re using Anest Iwata’s LPH-80 spray gun, which is recommend by Cerakote. The material covers very quickly as one tack coat, followed by two medium coats, with a 20-minute drying window in-between coats to give the full coverage and tint and texture we wanted.The back of the wheels were sprayed as well. Make sure to spray in a well-ventilated area or paint booth and wear a mask as it is more caustic than paint.
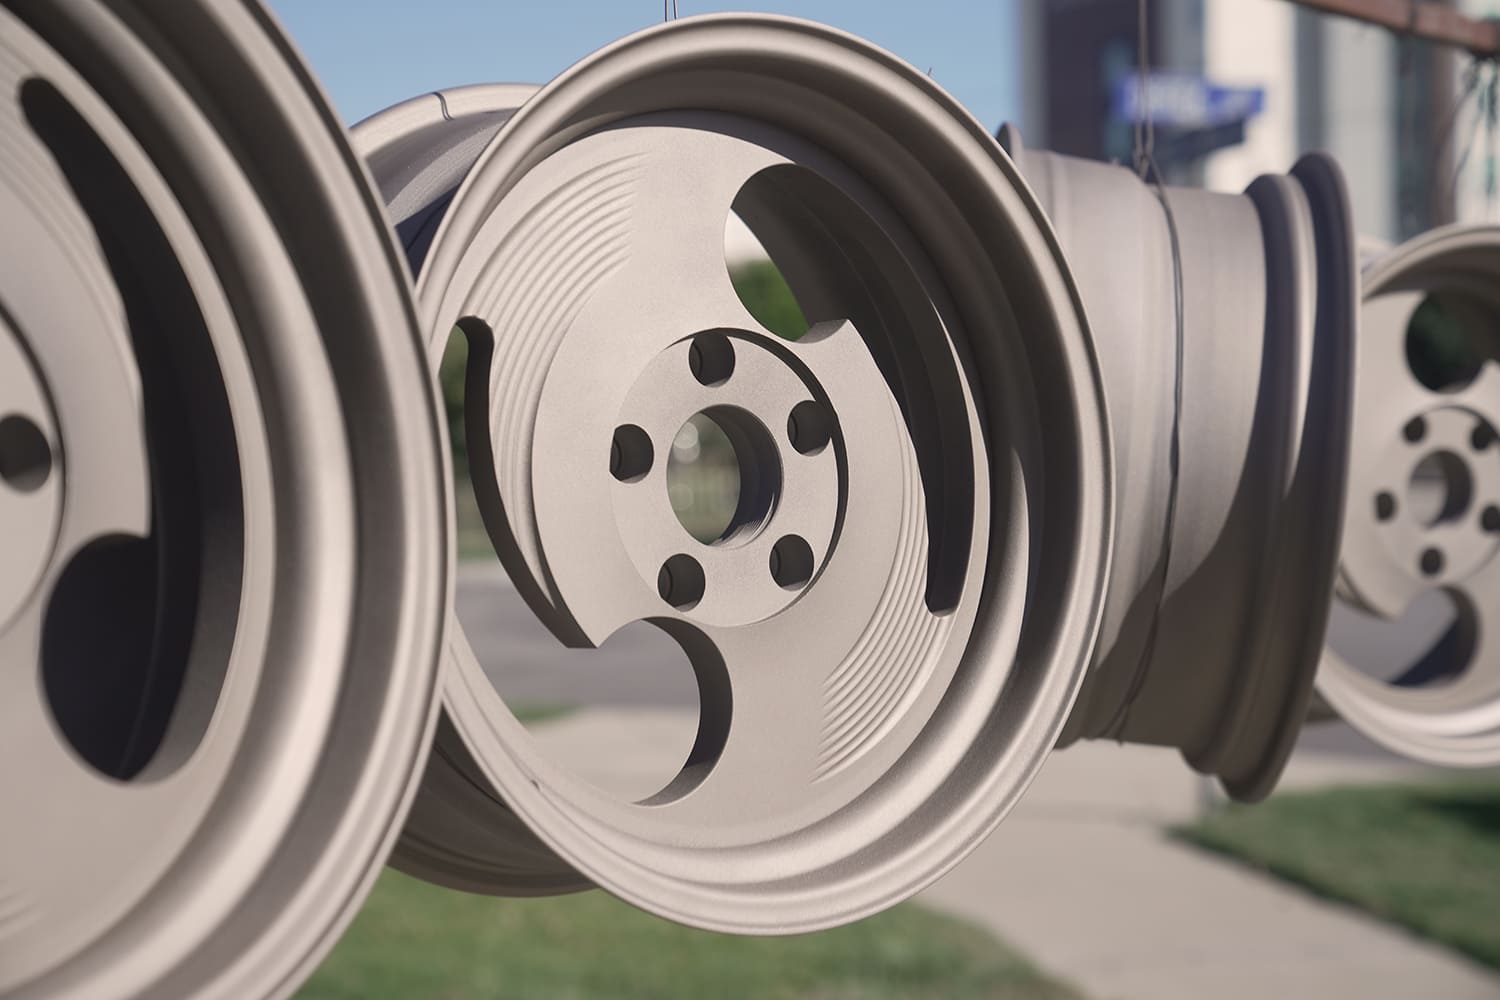
Per Cerakote’s instructions, we waited five days to let the coating fully cure before taking them to the tire shop to get mounted up.The billet wheels are all 17×8 so we were looking for a fairly square tire size to complement them because if we went too wide they would balloon out too much. While patiently waiting for the cure time to expire, we ordered up a set of 235/60R17 Nitto NT421Q tires that we had mounted on our new-and-improved Cerakoted Colorado Custom wheels.
We use cookies to ensure that we give you the best experience on our website. If you continue to use this site we will assume that you are happy with it.