Eric Black’s concept drawing of the coupe gives us a view into the future and what we can expect this ’35 Chevy coupe to look like–amazing.
Part Two: Ironworks Speed & Kustom Got It Just Right
By Ron Covell – Photography & Videography By Rodger Lee – Artwork By e. Black Design
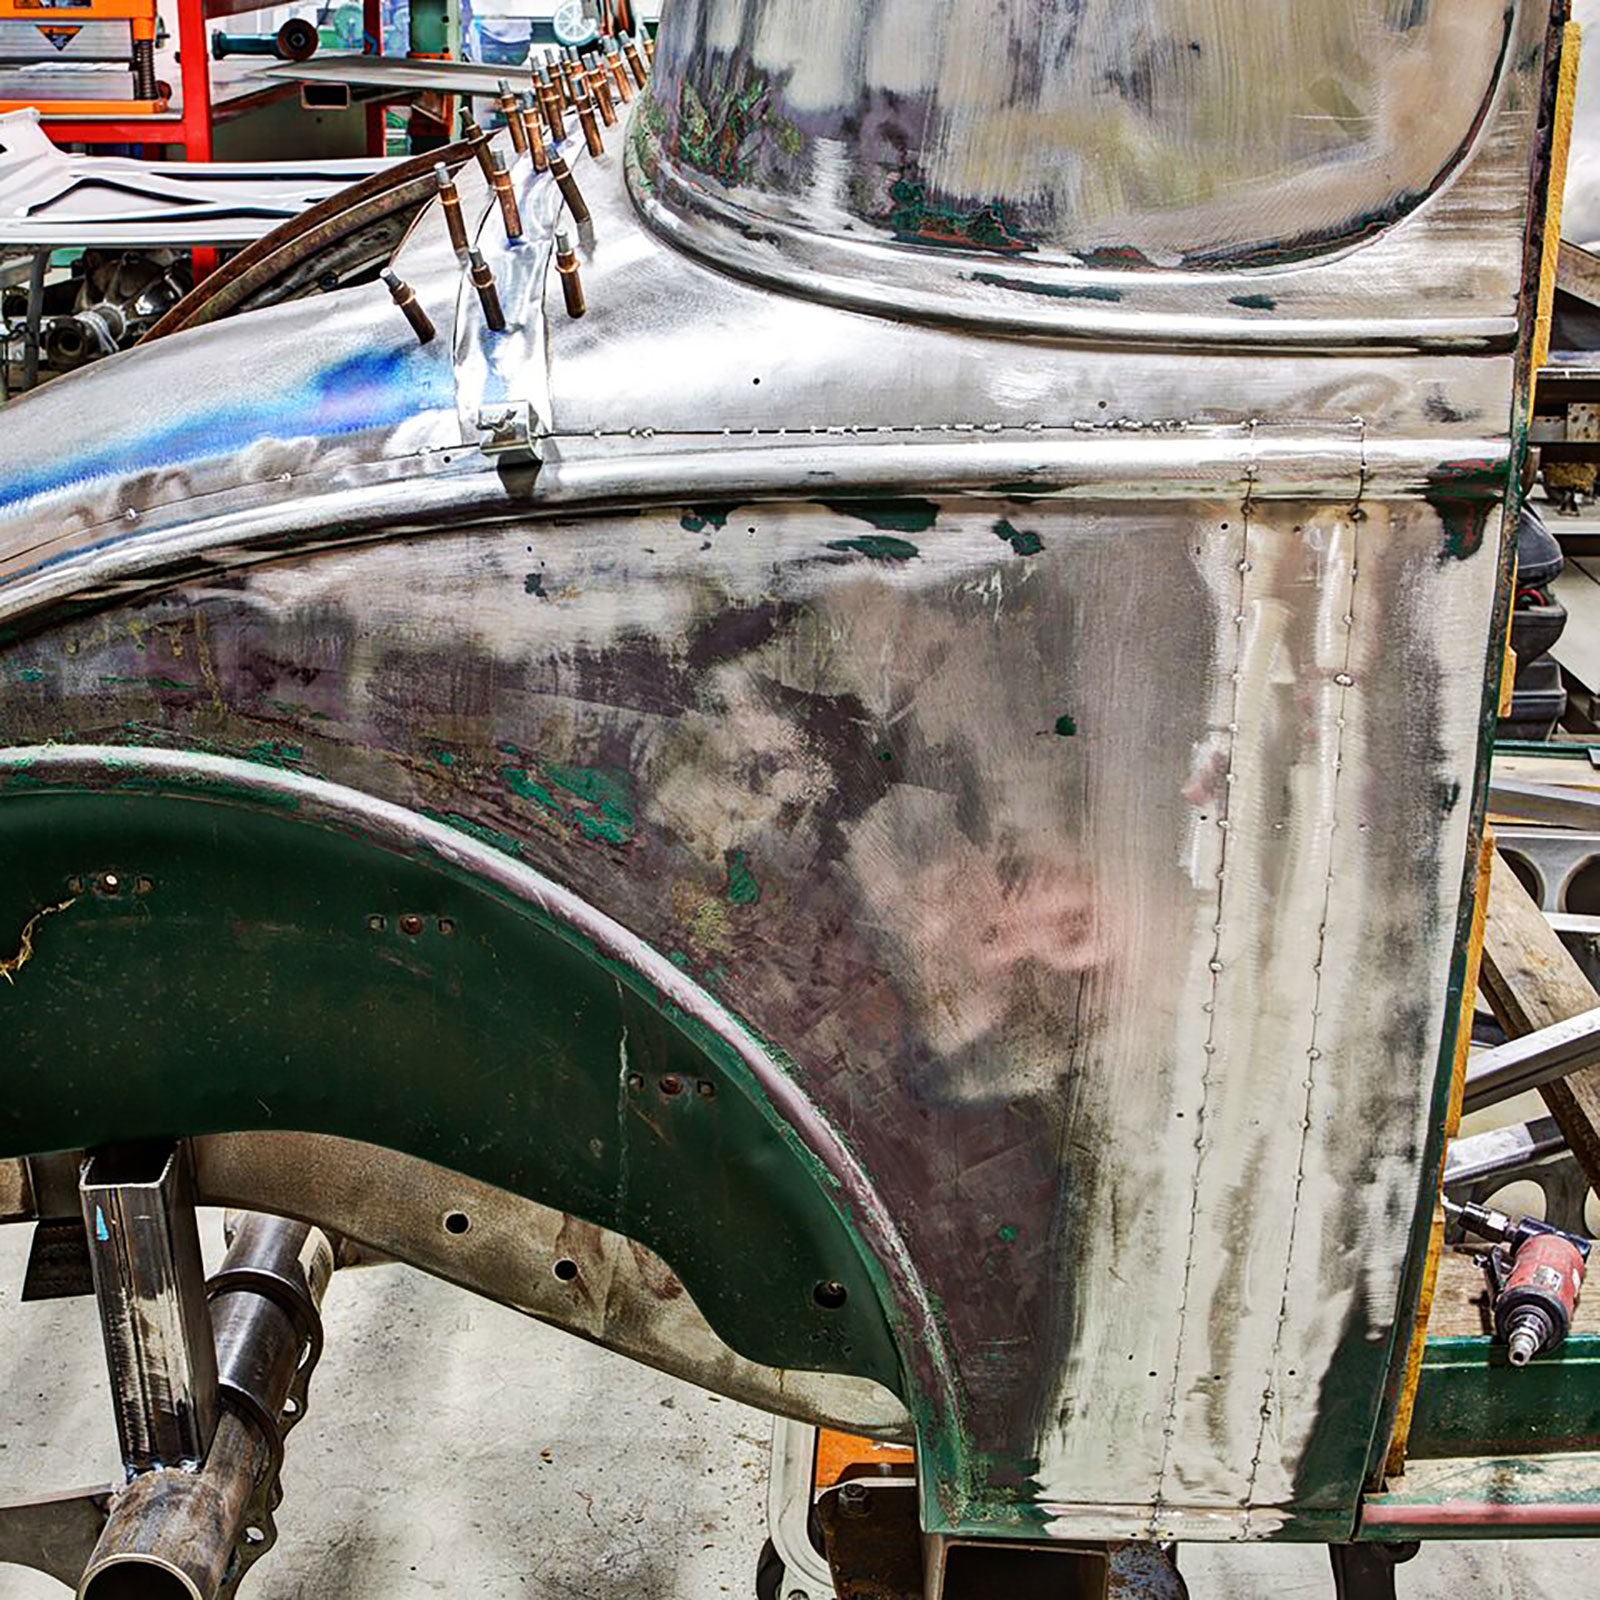
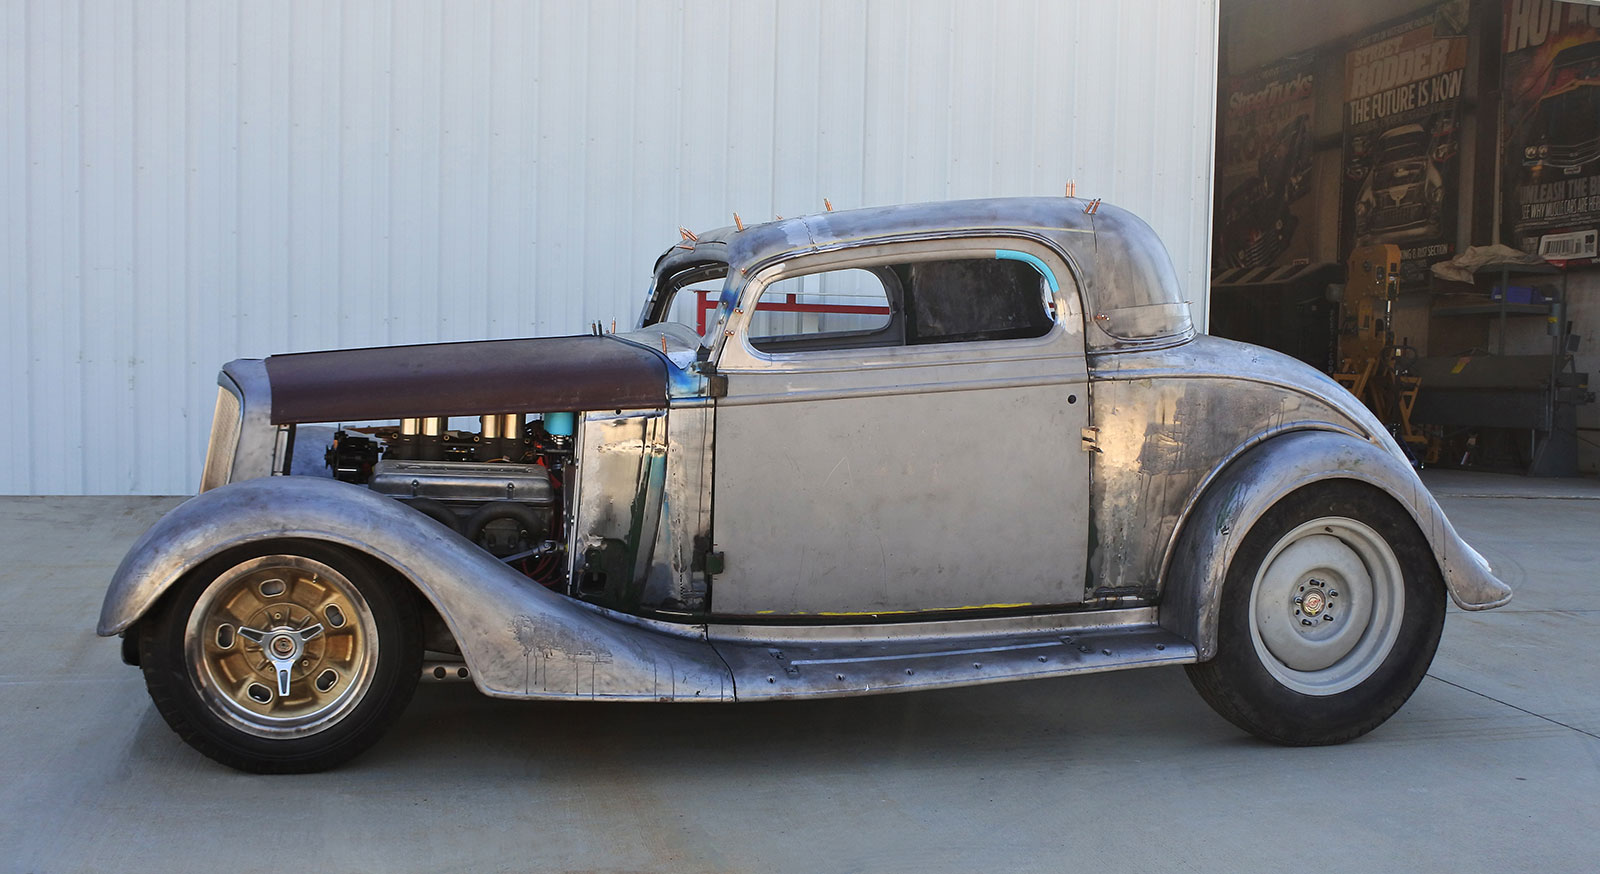
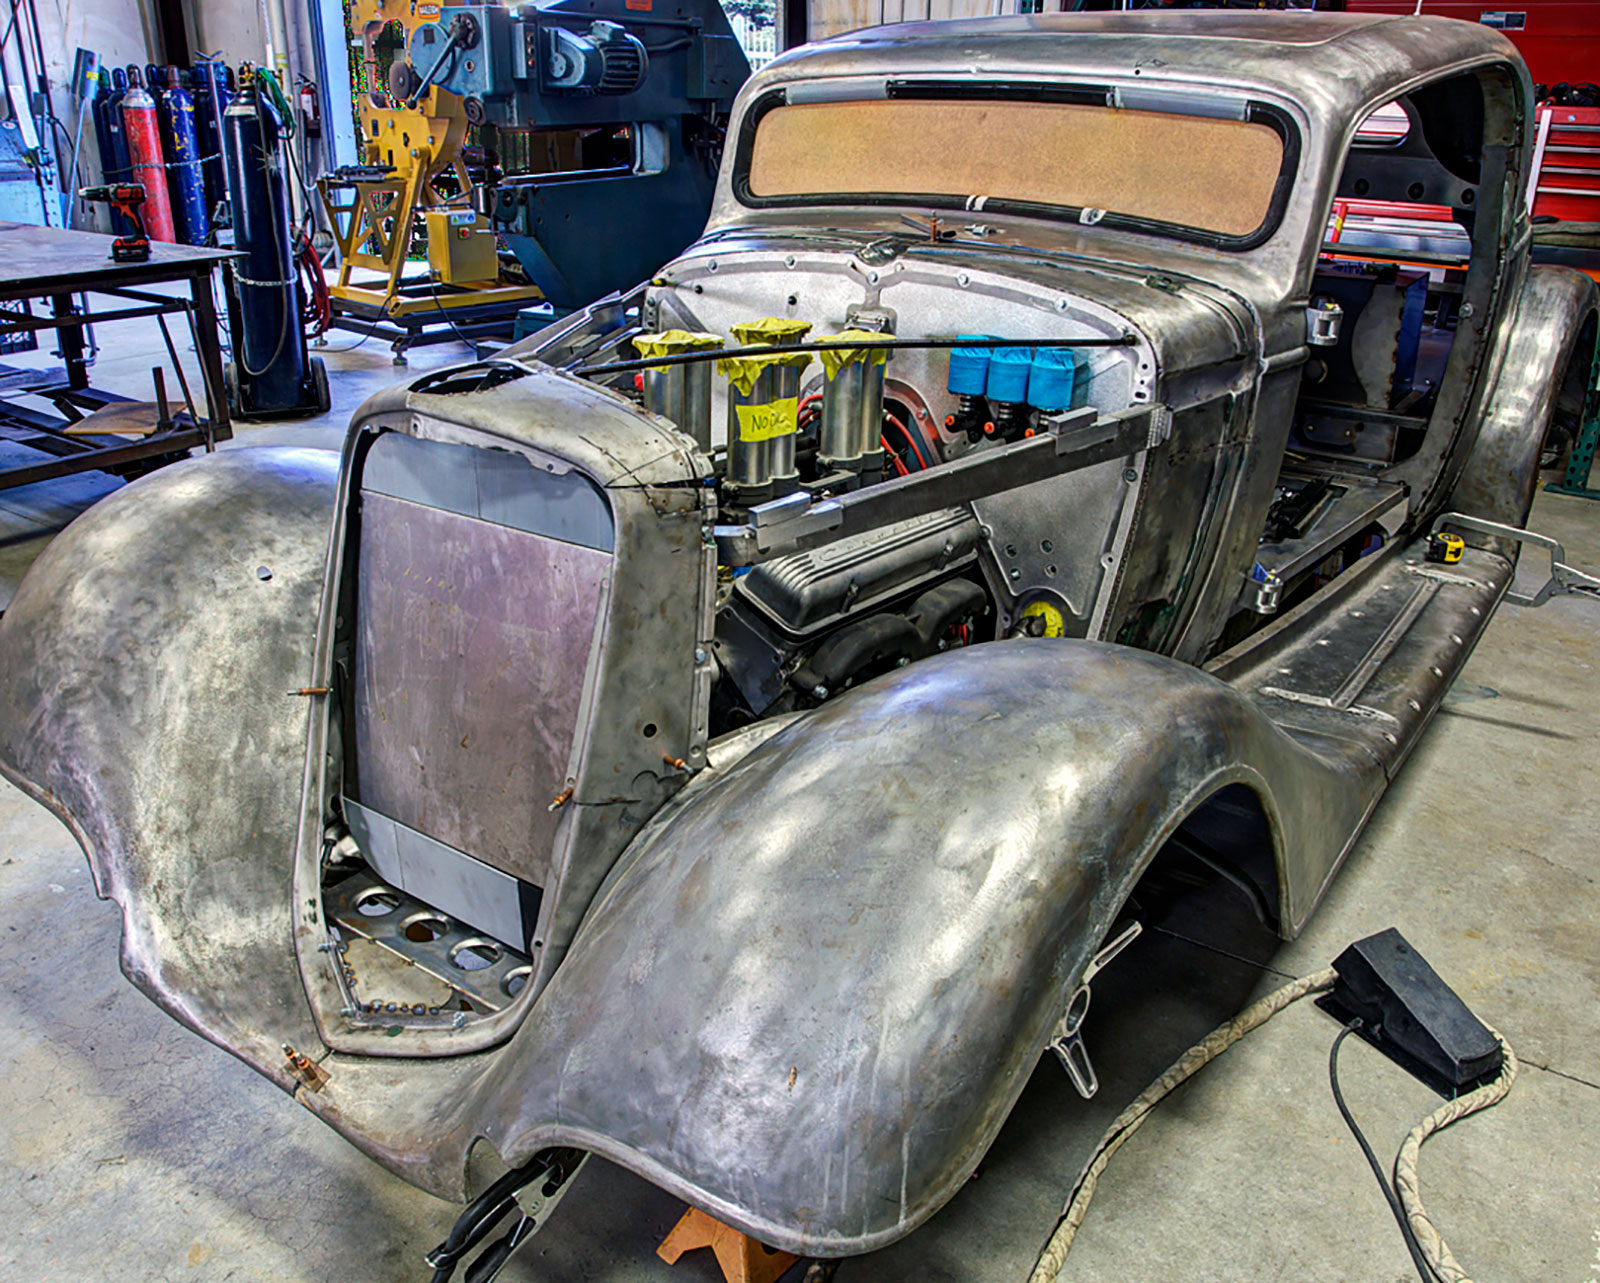
Work continues on Greg Heinrich’s outstanding 1935 Chevrolet coupe being built by Ironworks Speed & Kustom. This time we’ll focus on the extensive body modifications. The body is lengthened, chopped, wedge-sectioned, and all the fenders are extensively reworked to conform to the big ’n’ little wheels and tires.
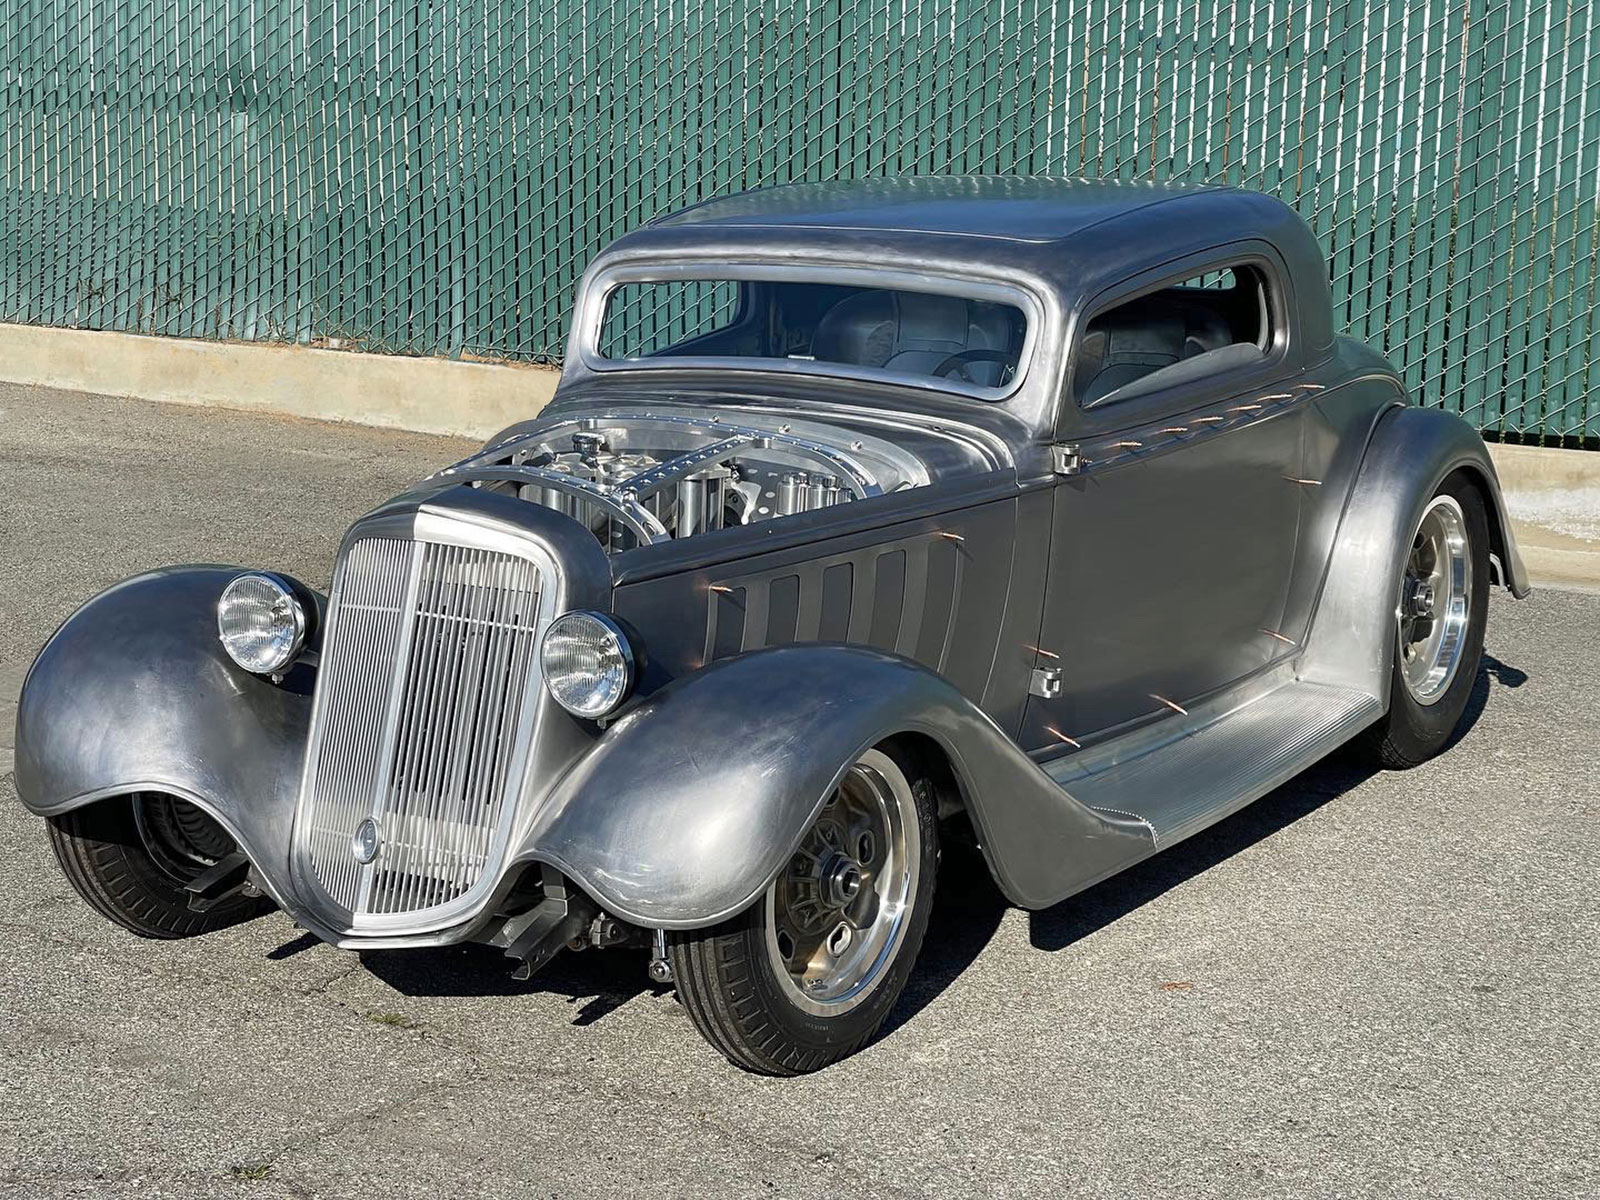
This gives you a good look at the proportions Ironworks has achieved on the Chevrolet coupe. In the next article, we’ll go into detail on the fabulous billet aluminum grille, hood support structure, running boards, and much more.
When doing extensive modifications, it’s important to know when to stop. If you chop a top too aggressively, the result is not likely to be well proportioned. Every element of a car’s body must work with the whole ensemble, so it’s a constant balancing act to keep everything flowing harmoniously. Rodger Lee and his crew at Ironworks have a long track record of getting it right.
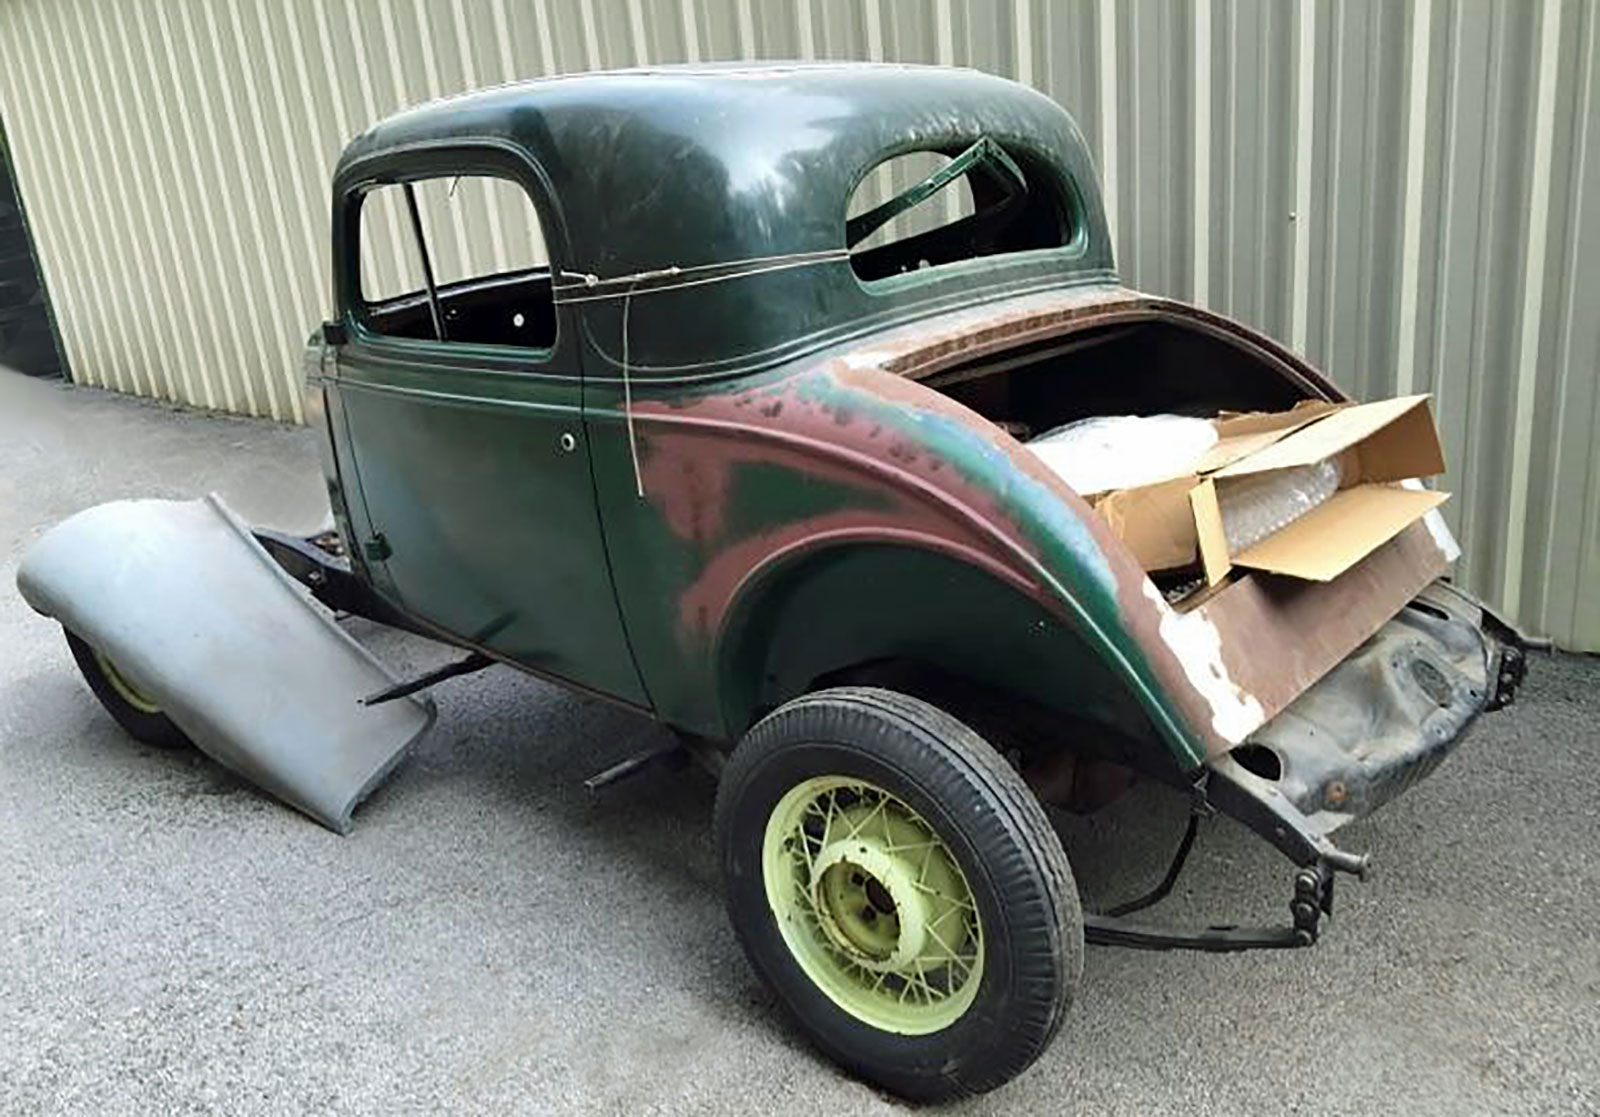
In the last article we covered the chassis construction. Here’s where the body portion of the project started, with a good, solid ’35 Chevrolet Standard body and fenders.
They did not use specific dimensions for most of the body modifications–they relied on moving each element in small increments and kept tweaking and adjusting until it looked “right.” This is often the best way to get exceptional results.
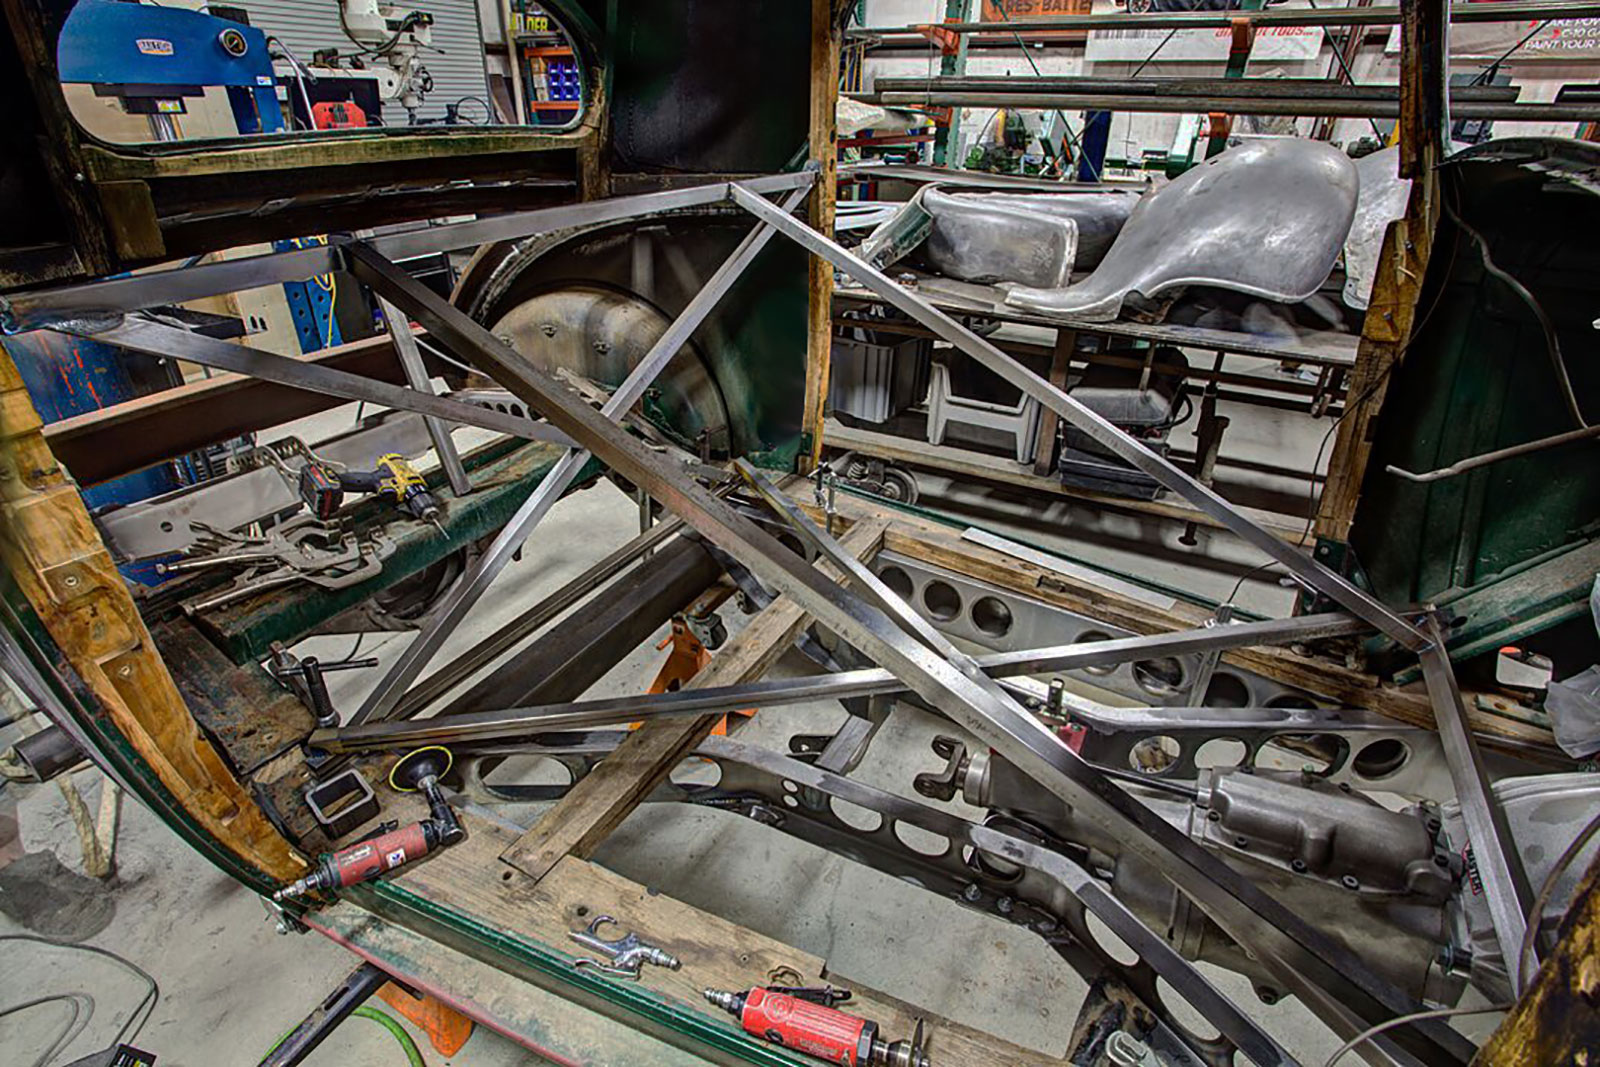
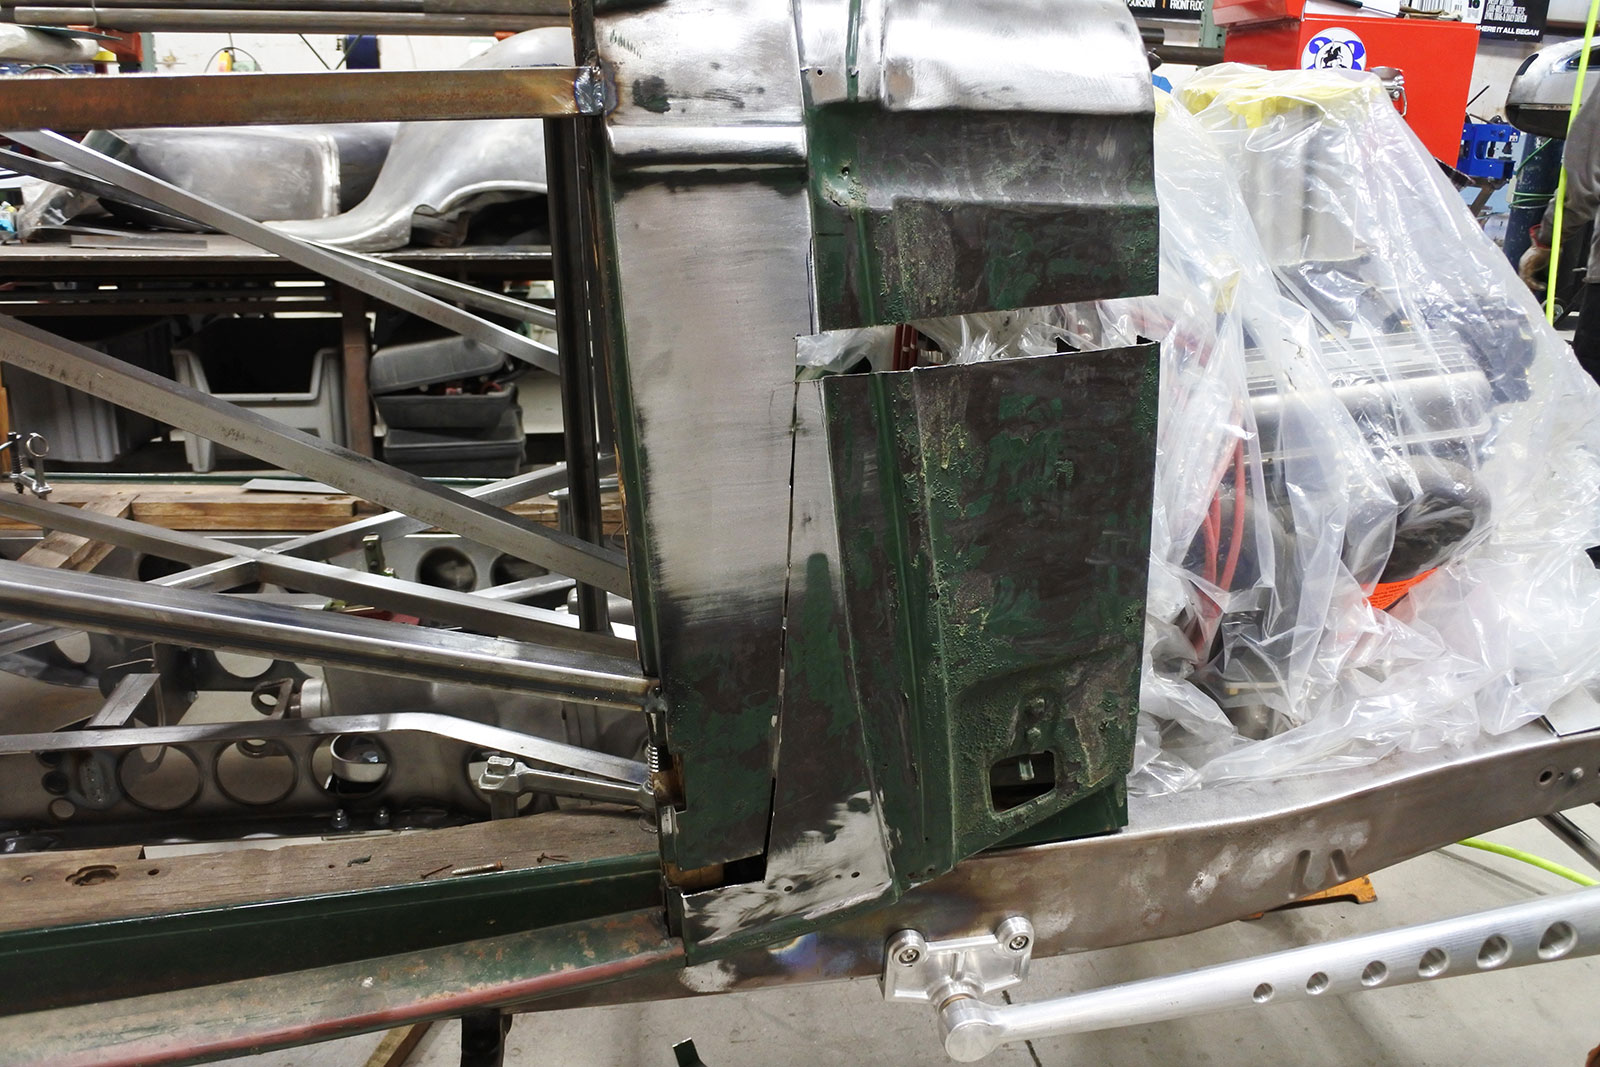
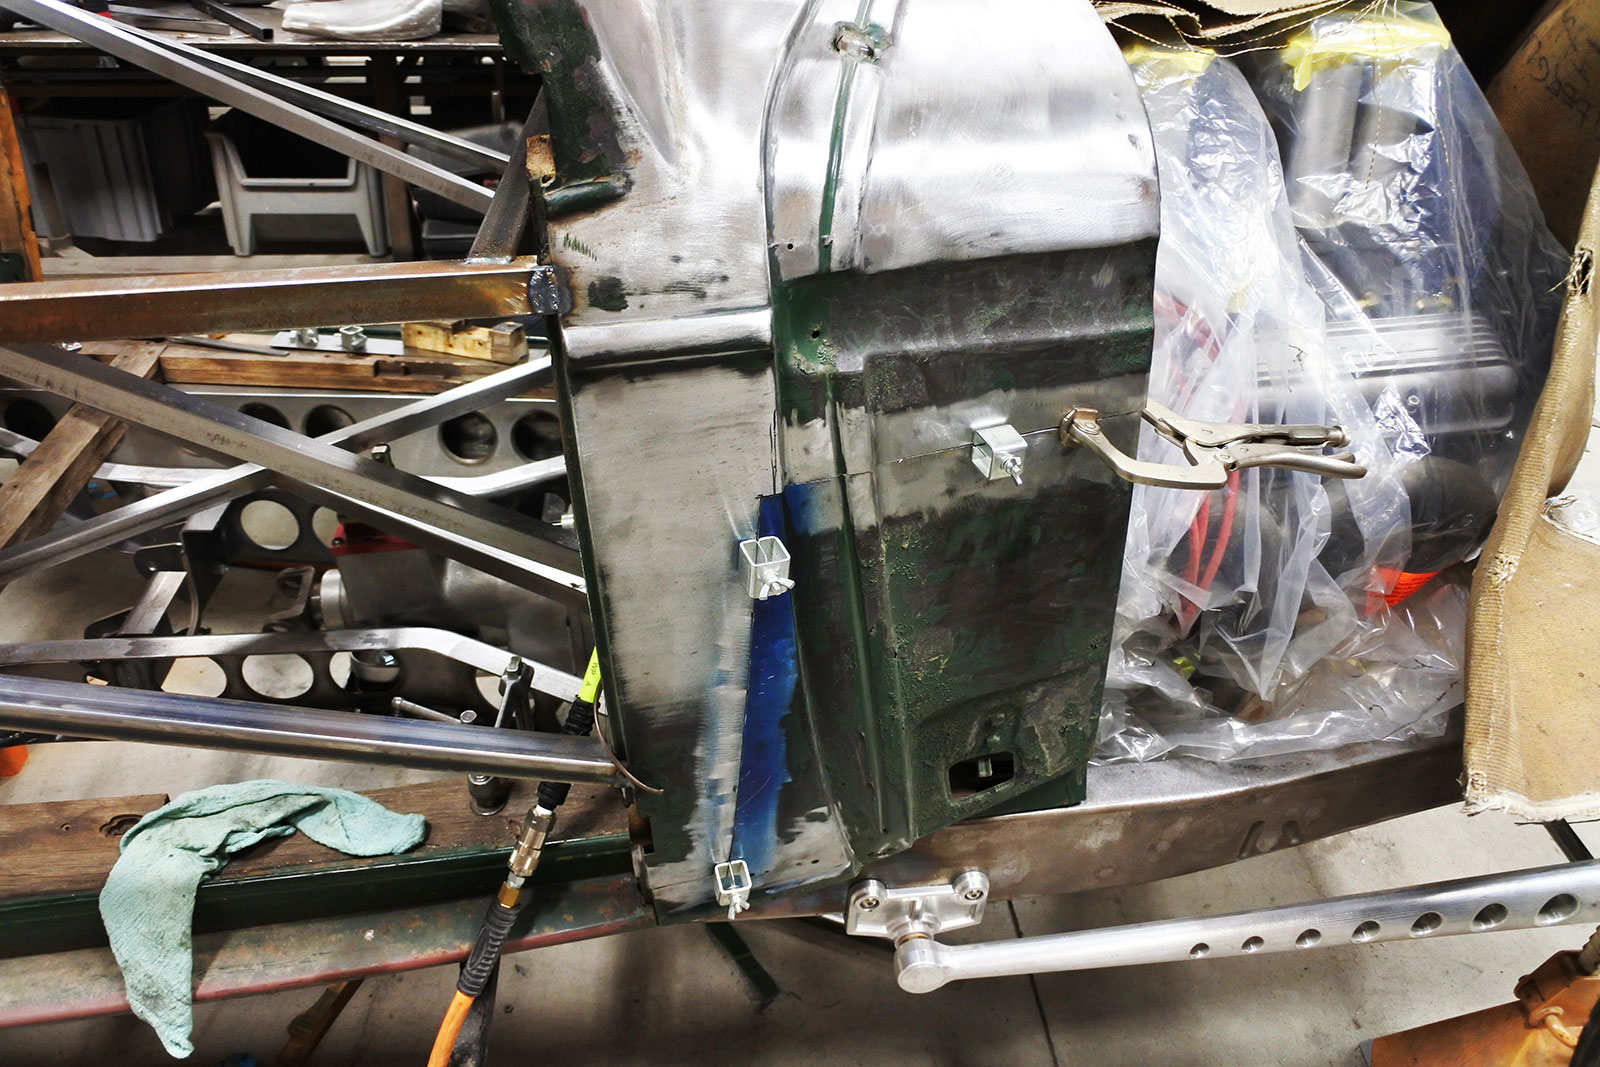
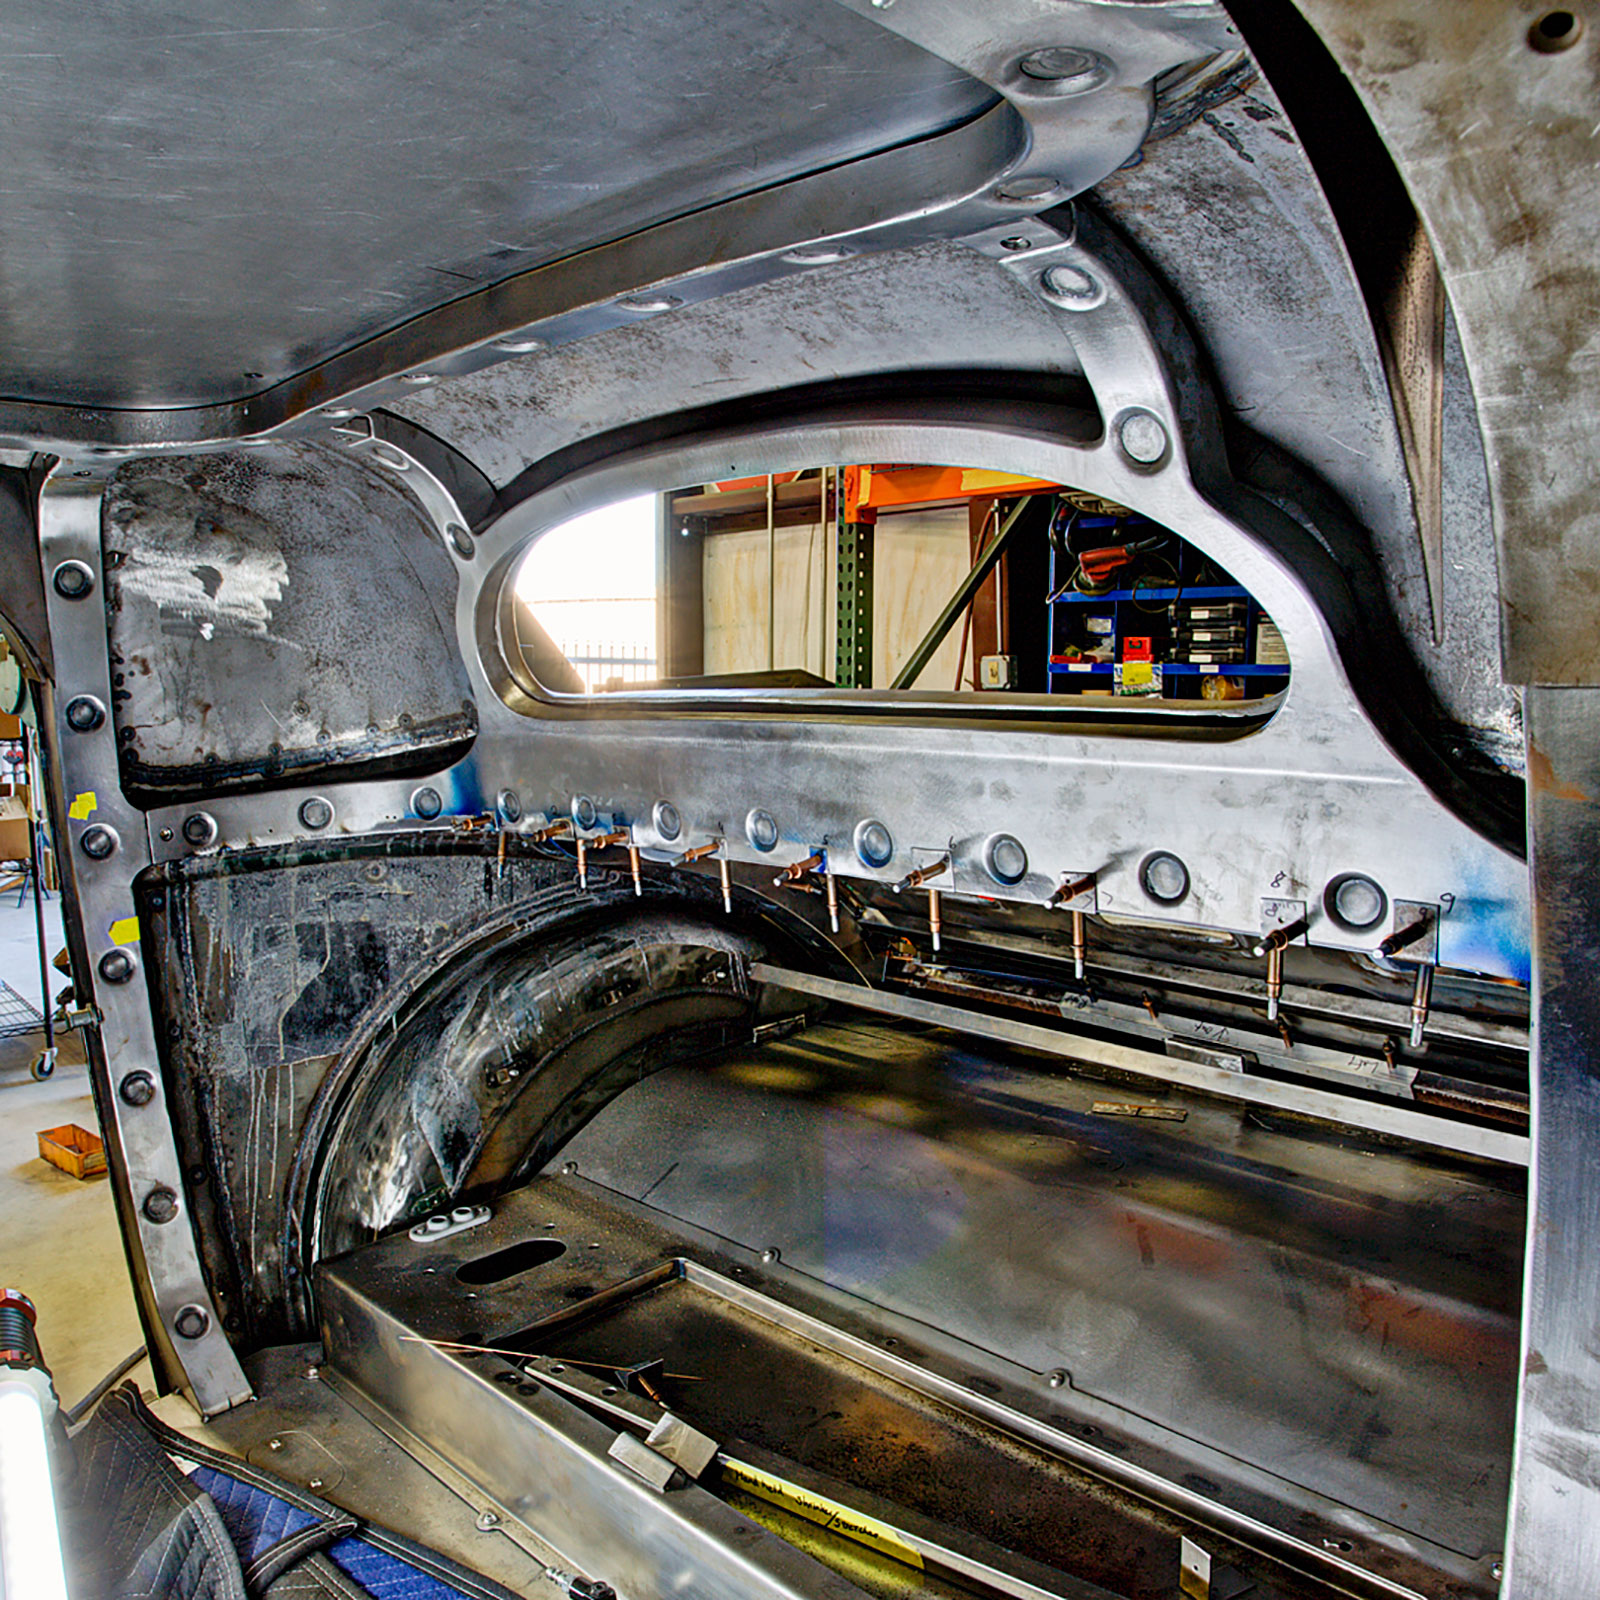
An essential first step for a project like this is squaring and reinforcing the body with tubing. Once the slicing and dicing begins, this will hold the key components in proper alignment.
If you’re going to cut a car body into pieces, the first order of business is adding reinforcements inside the body to maintain the alignment of the key components. Square tubing was used with lots of cross bracing to ensure everything stayed rigid.
The plan calls for the body to be lengthened roughly 2 inches. Tape is being used here to lay out the cut lines.
Lengthening the body was the first step, and cuts were made just behind both doors and across the tulip panel below the rear window. These cuts were joined with a horizontal cut, which maintains the alignment of the beltline when the rear of the body is moved. After some experimentation, they positioned the rear of the body back about 2 inches.
With the cuts made, the rear portion of the body is temporarily positioned for scrutiny.
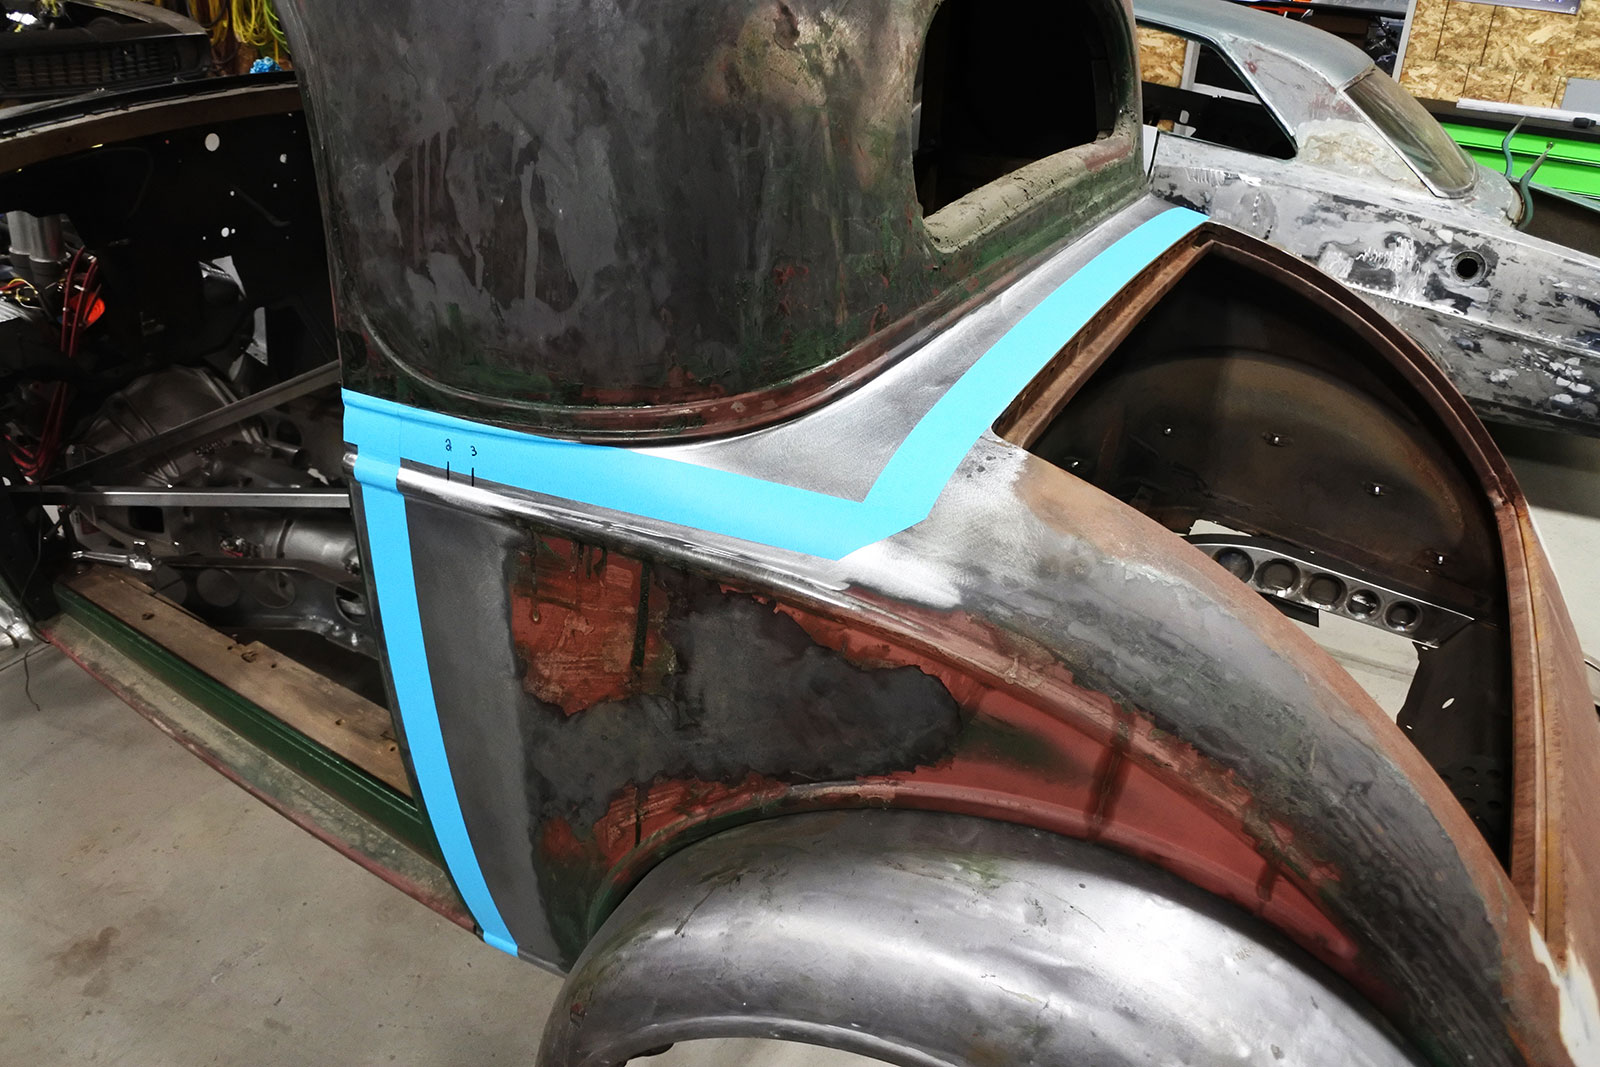
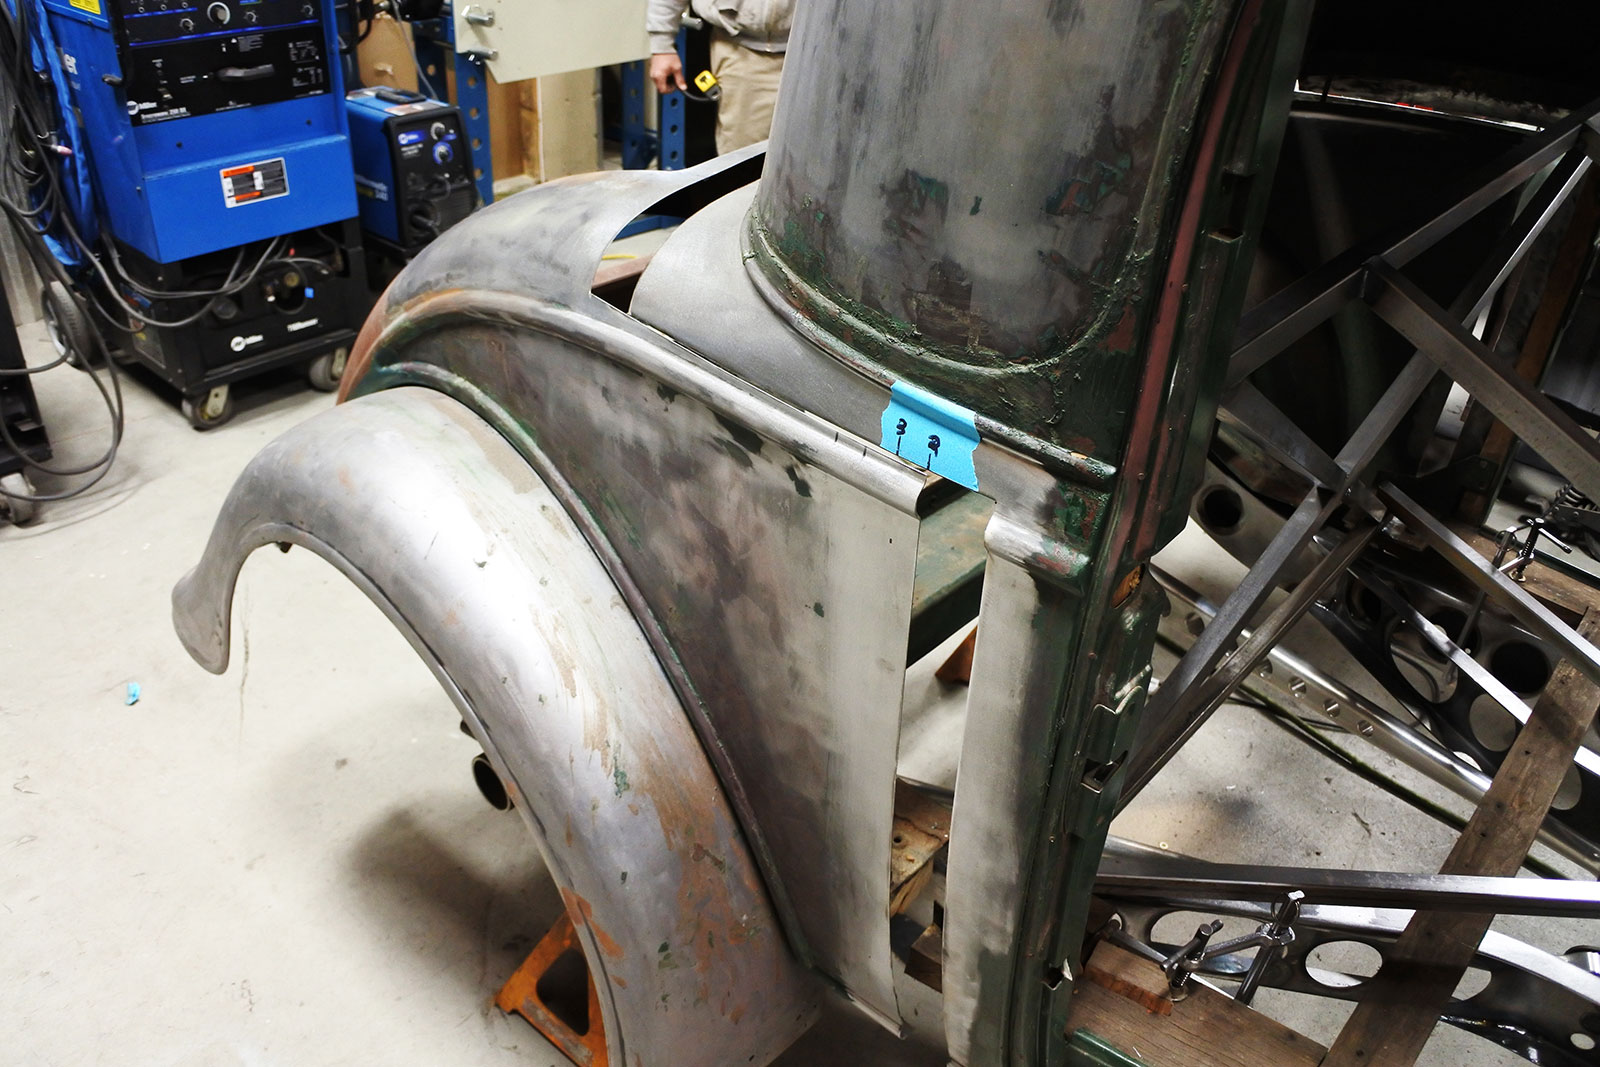
Next, the cowl was sectioned to give the body a nicely wedged shape. This was done by eye, and the cowl came down around 2 inches, which drops the nose of the car around 3 inches.
Once the proportions were visually verified, filler pieces are cut and tack welded into place to fill the openings.
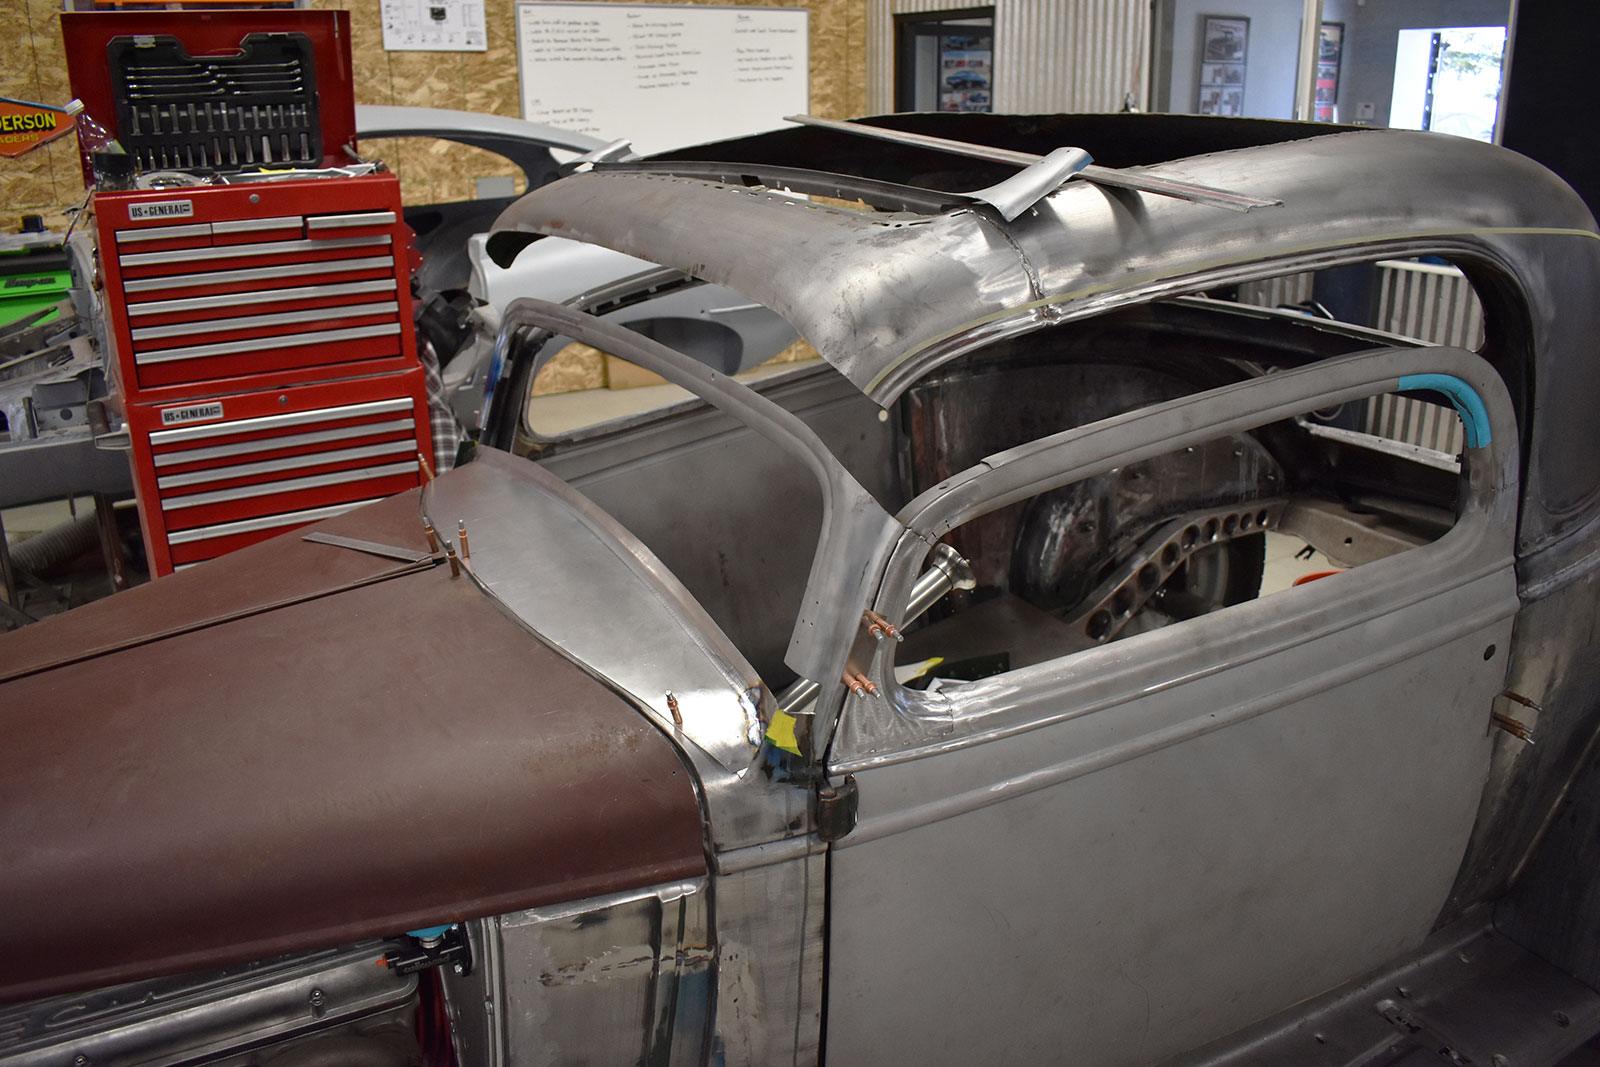
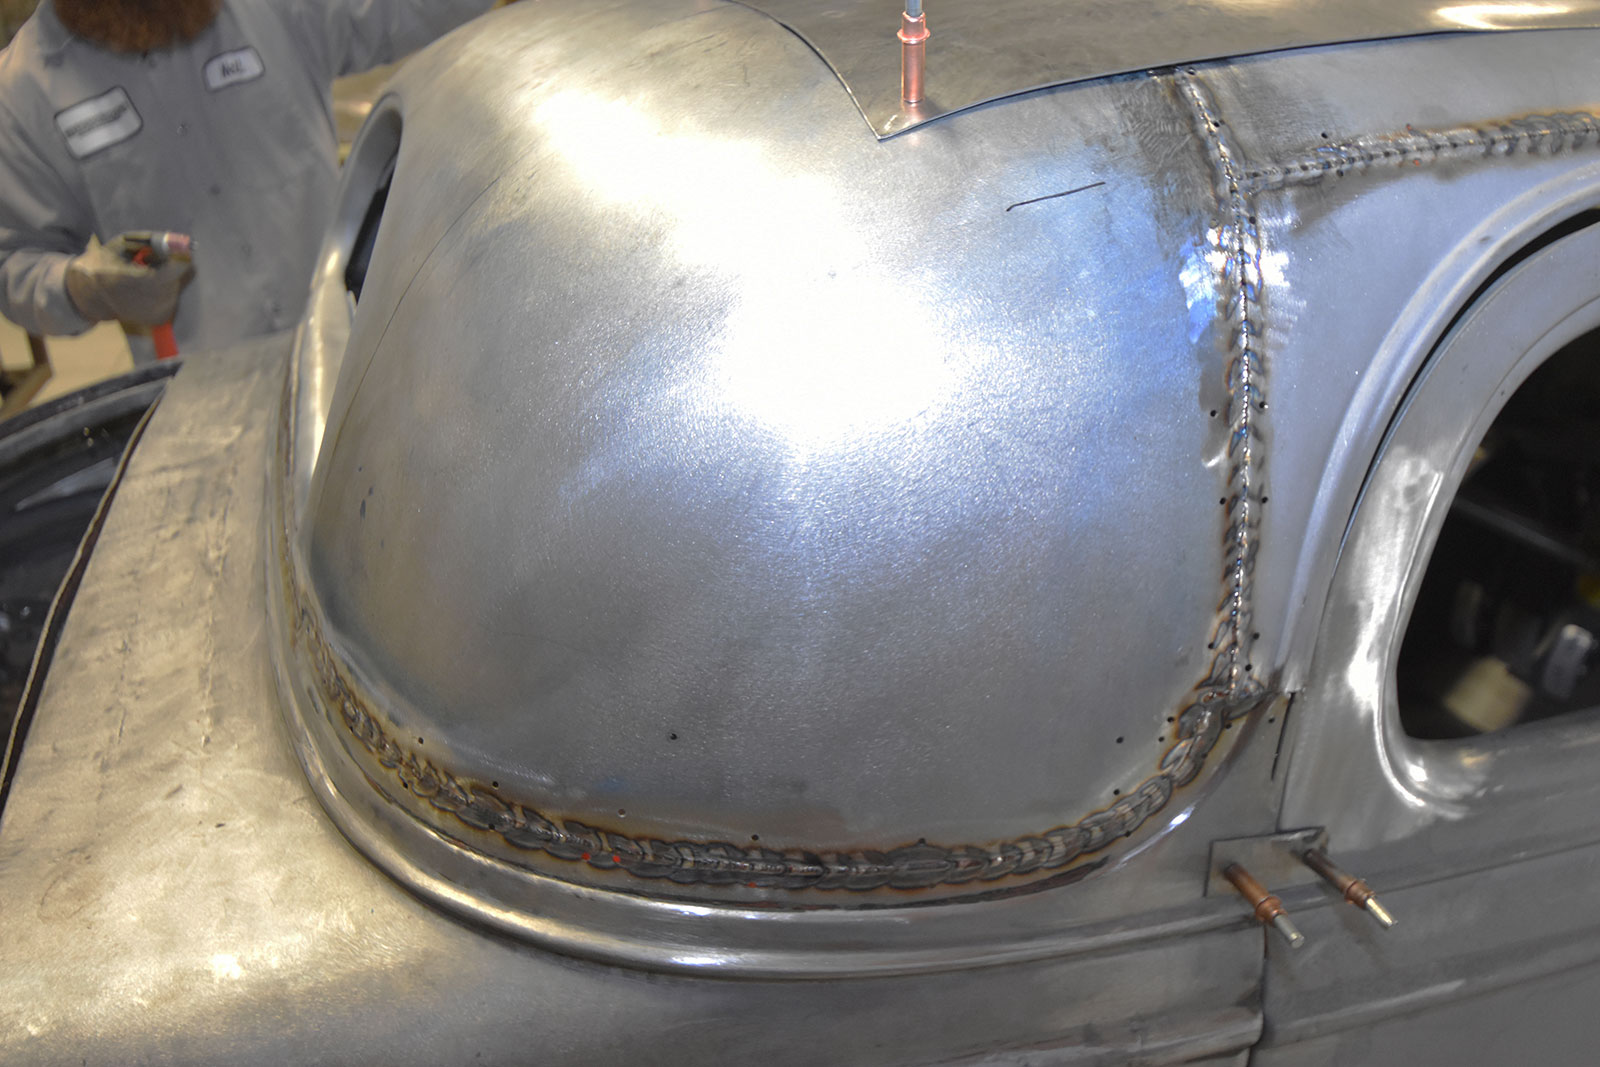
Once all the cuts were fully TIG welded and metal finished, they focused on chopping the top. They worked with the doors first, since it is hard to gauge the proportions of the top without knowing the precise size and shape of the side window. Once the doors were tweaked to have the perfect look the roof was cut to match.
The cowl is being sectioned roughly 2 inches to give the body a nicely wedged profile. The initial cuts in the sheetmetal have been made here.
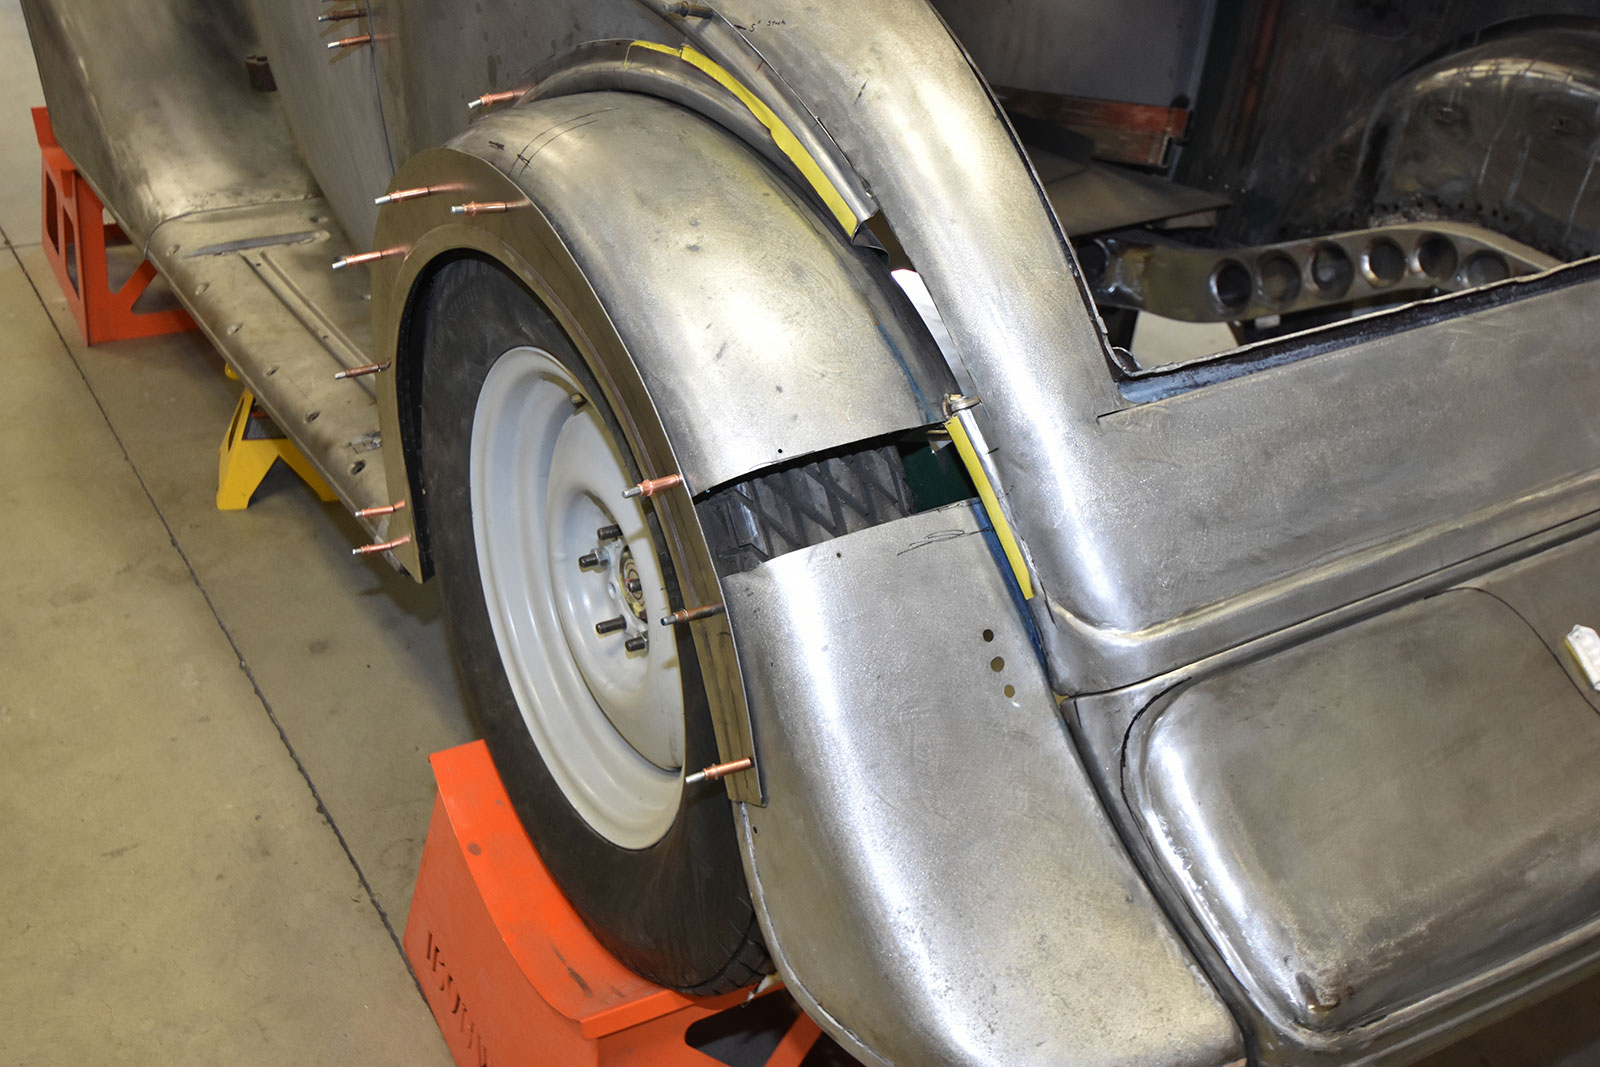
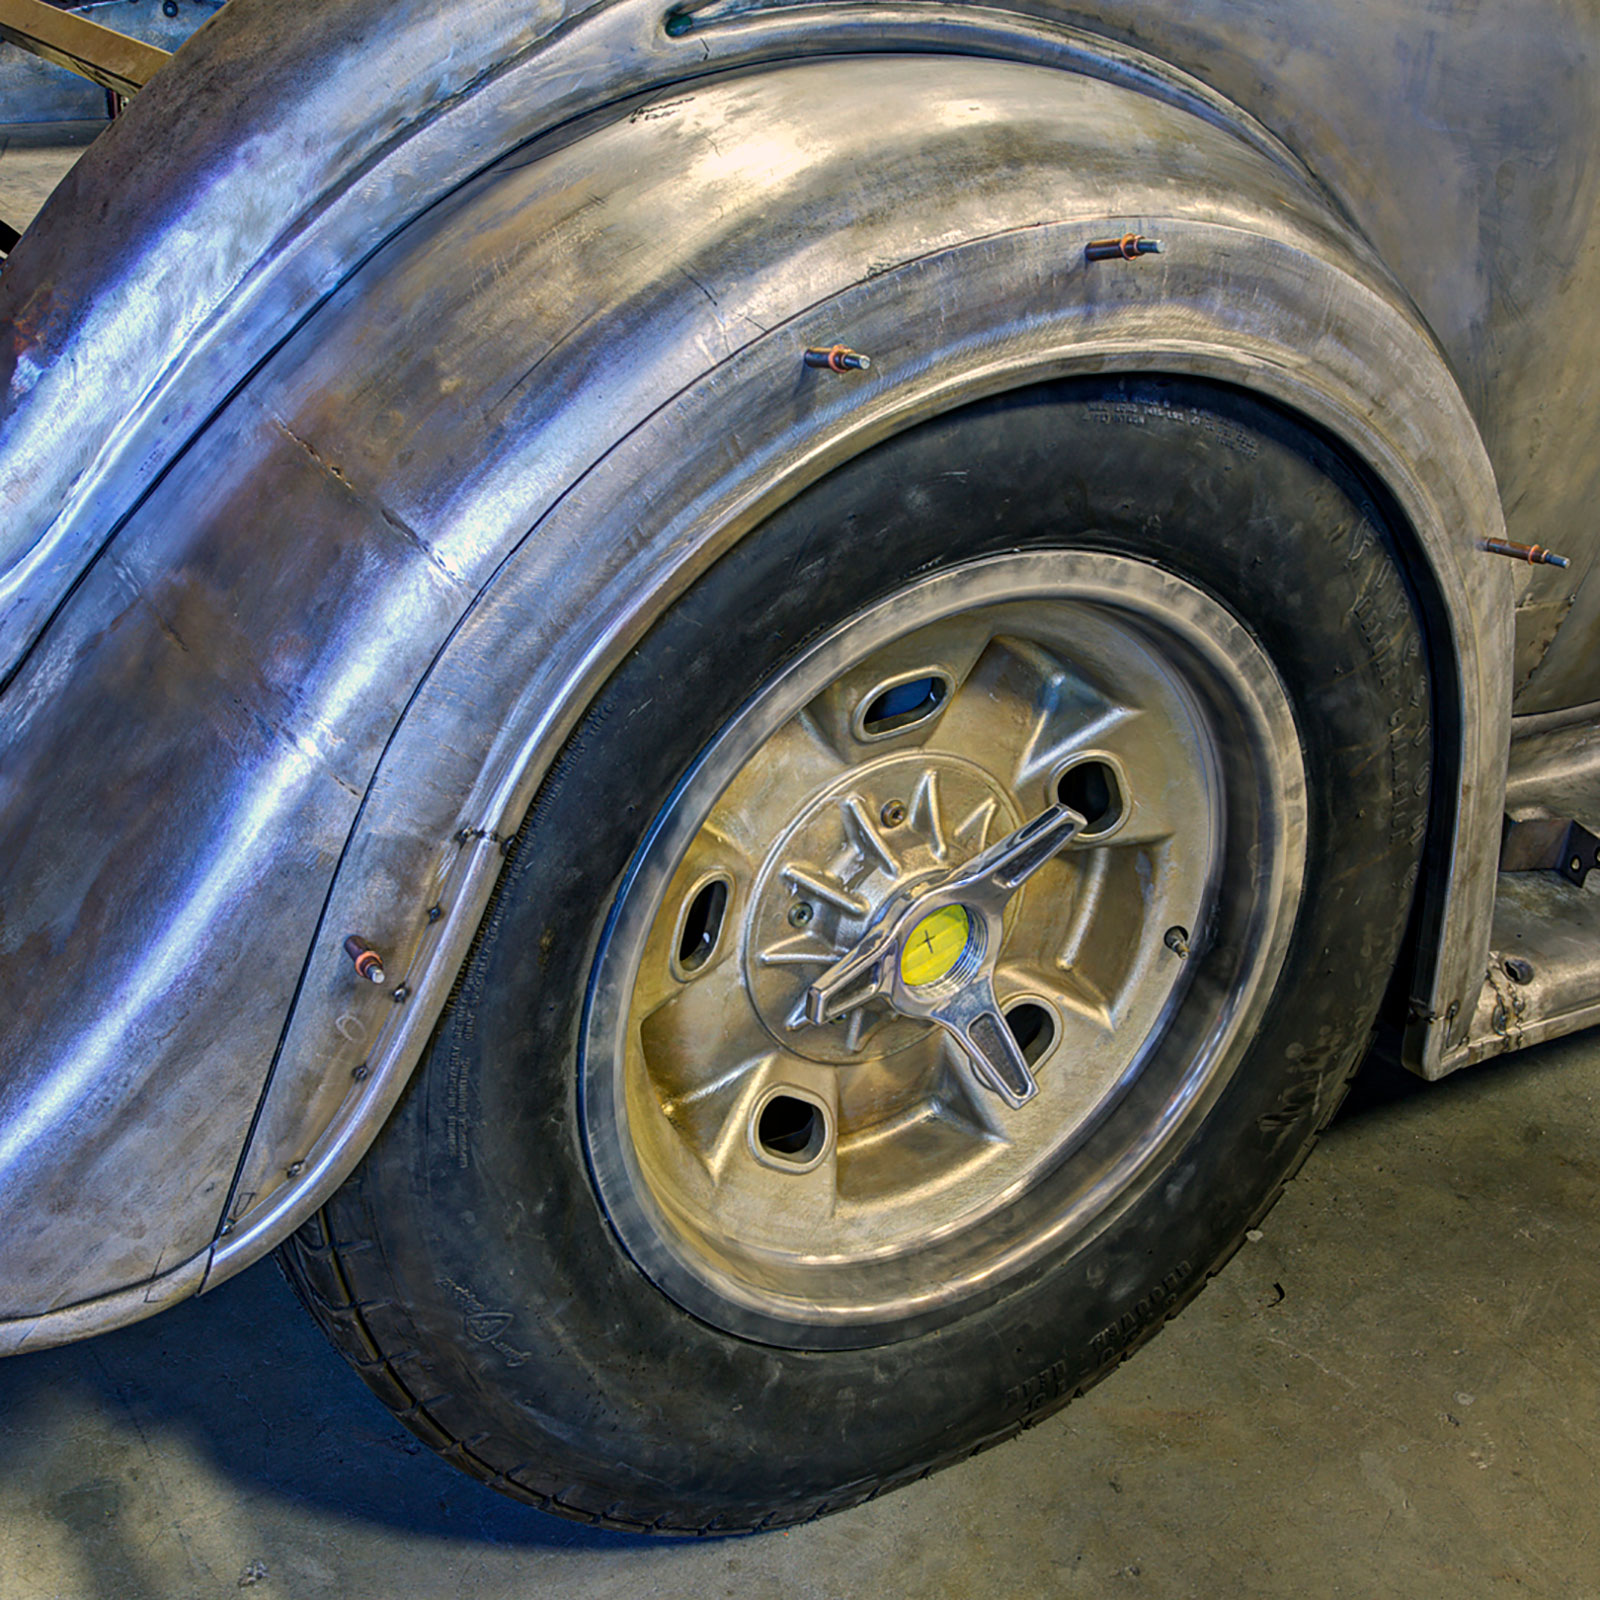
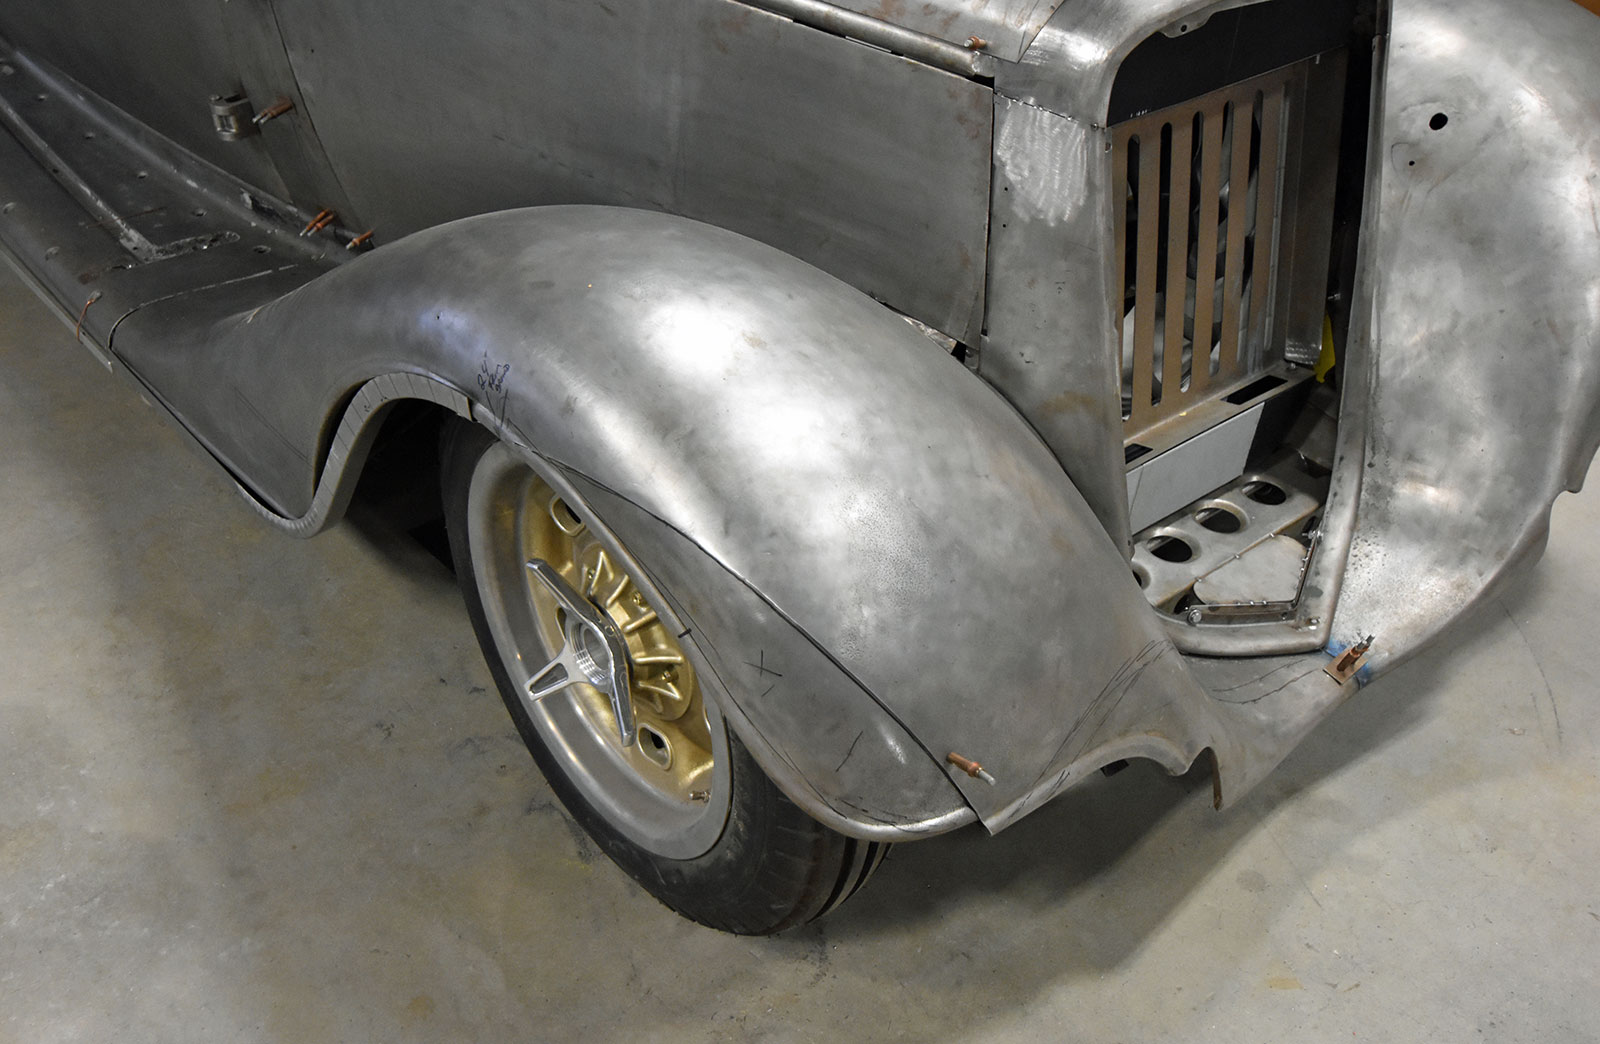
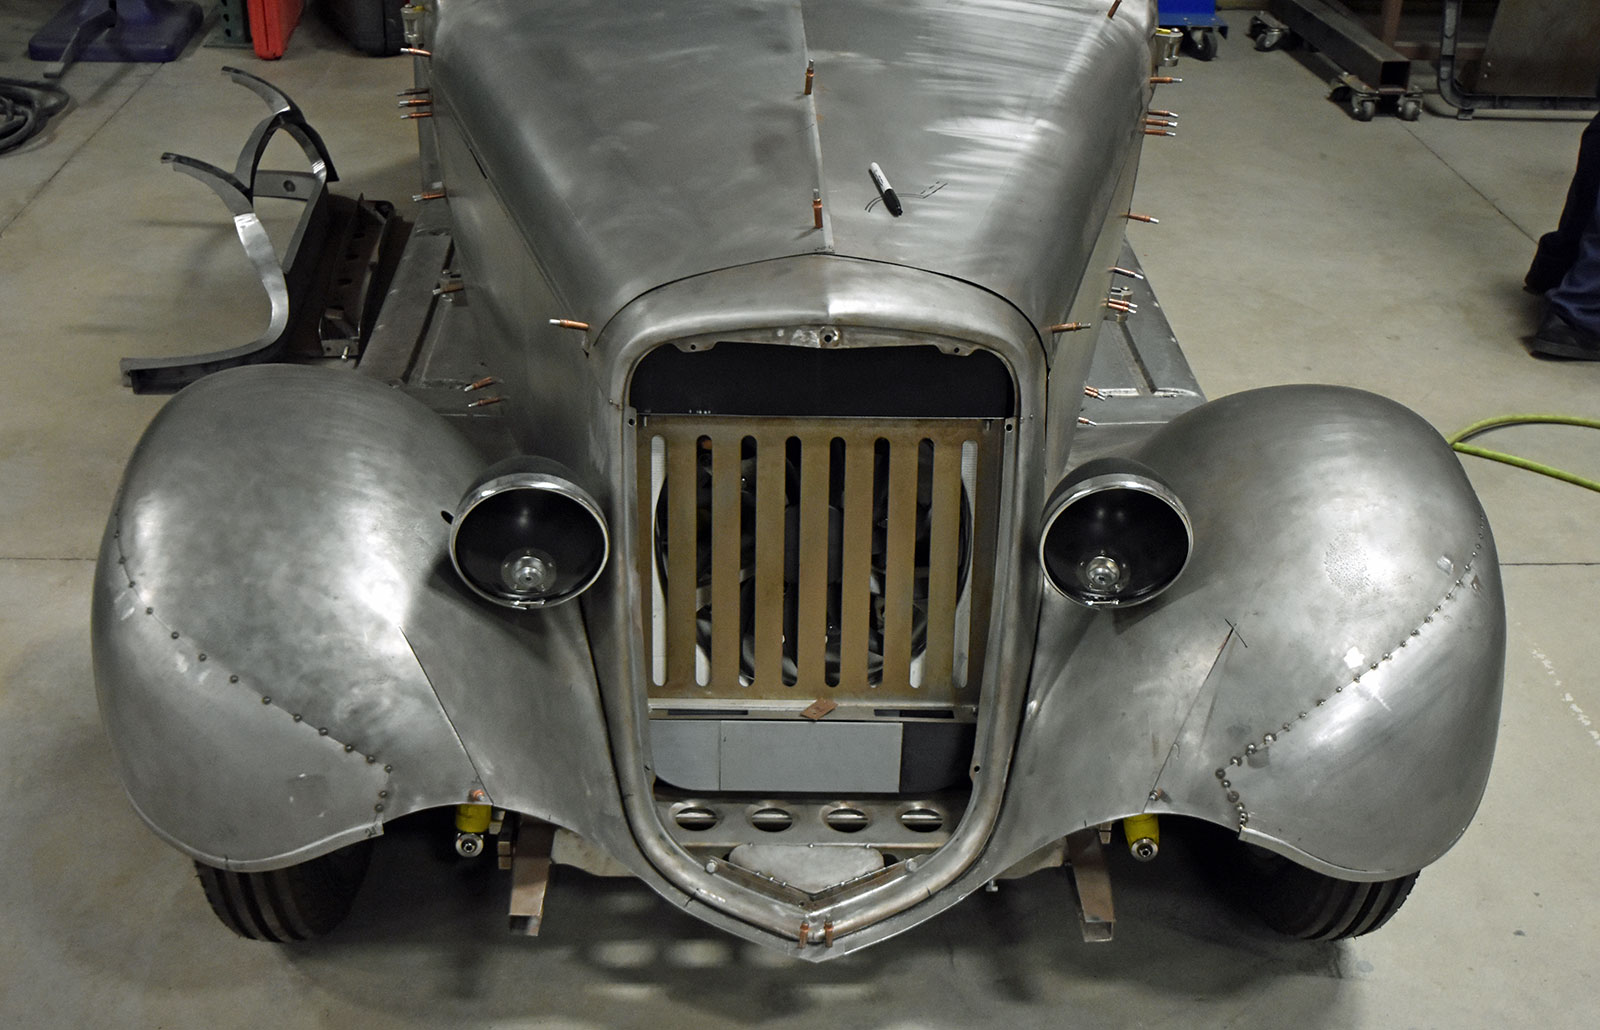
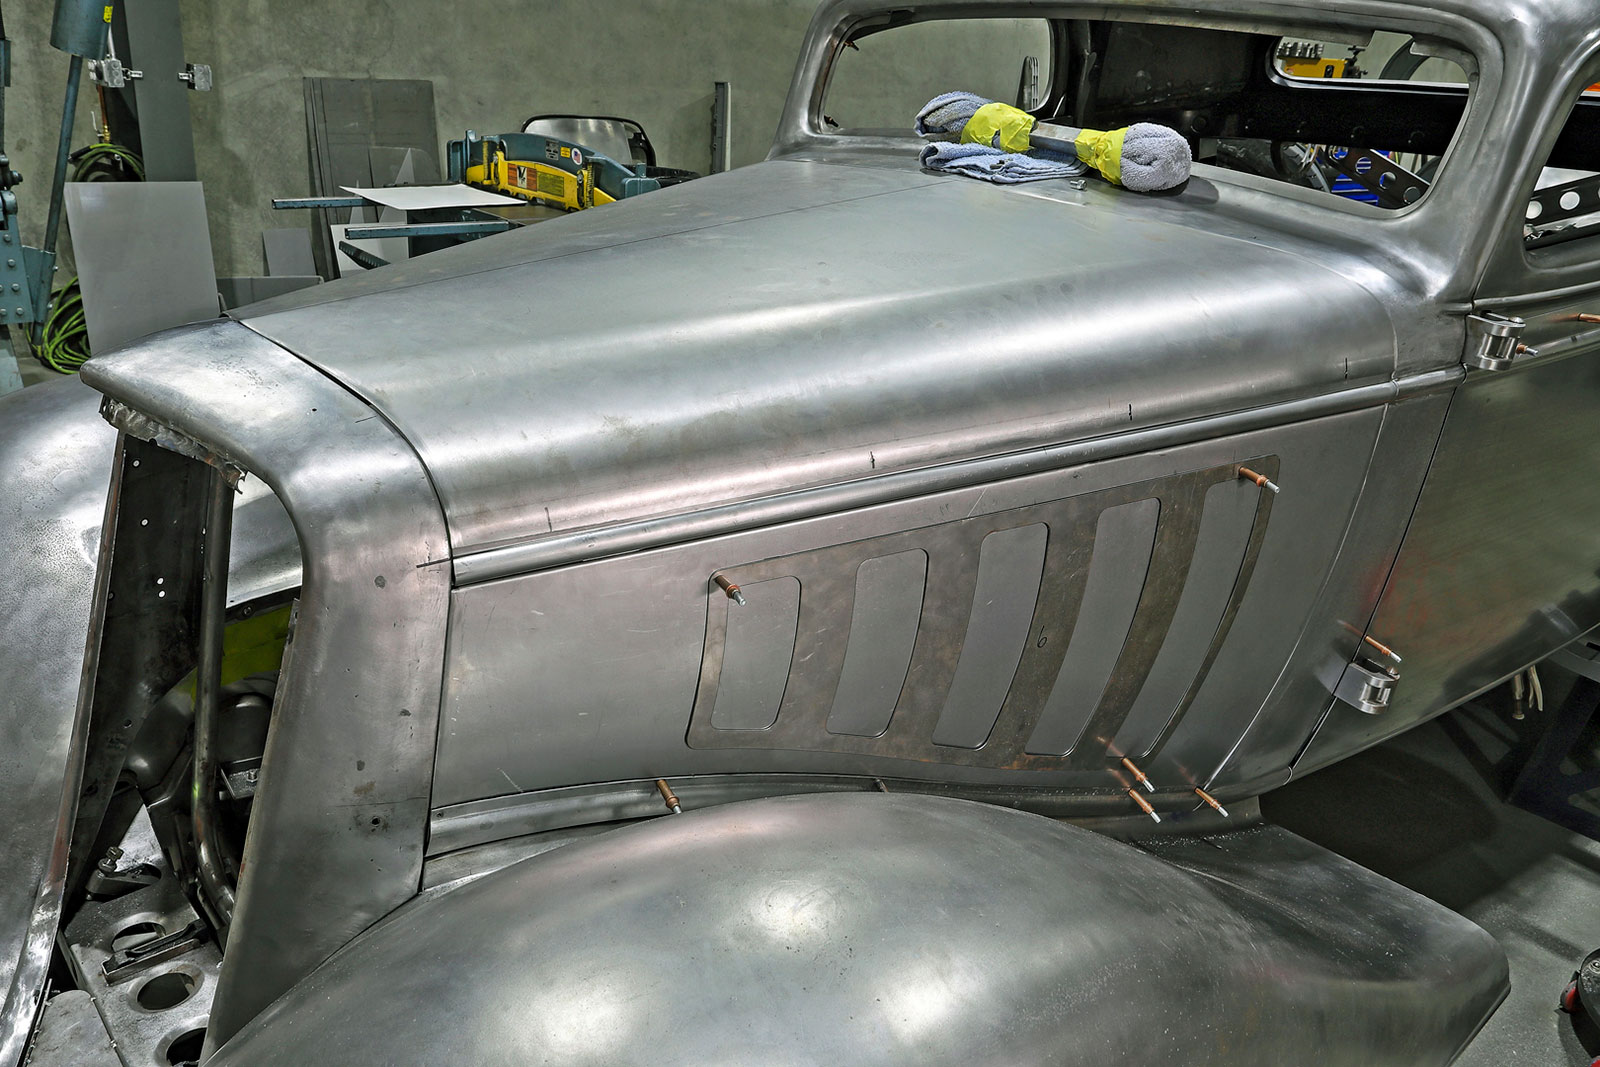
All the fenders were extensively modified, and you can follow the details in the accompanying photos. A completely new hood was made, which will incorporate elegantly hinged doors with a sophisticated linkage system that moves them in unison.
The cut edges are carefully fitted, then clamped together in preparation for tack welding.
In the next installment we’ll look at many of the unique details on this car, like the CNC-machined billet aluminum running boards, hood braces, bucket seats, and much more. MR
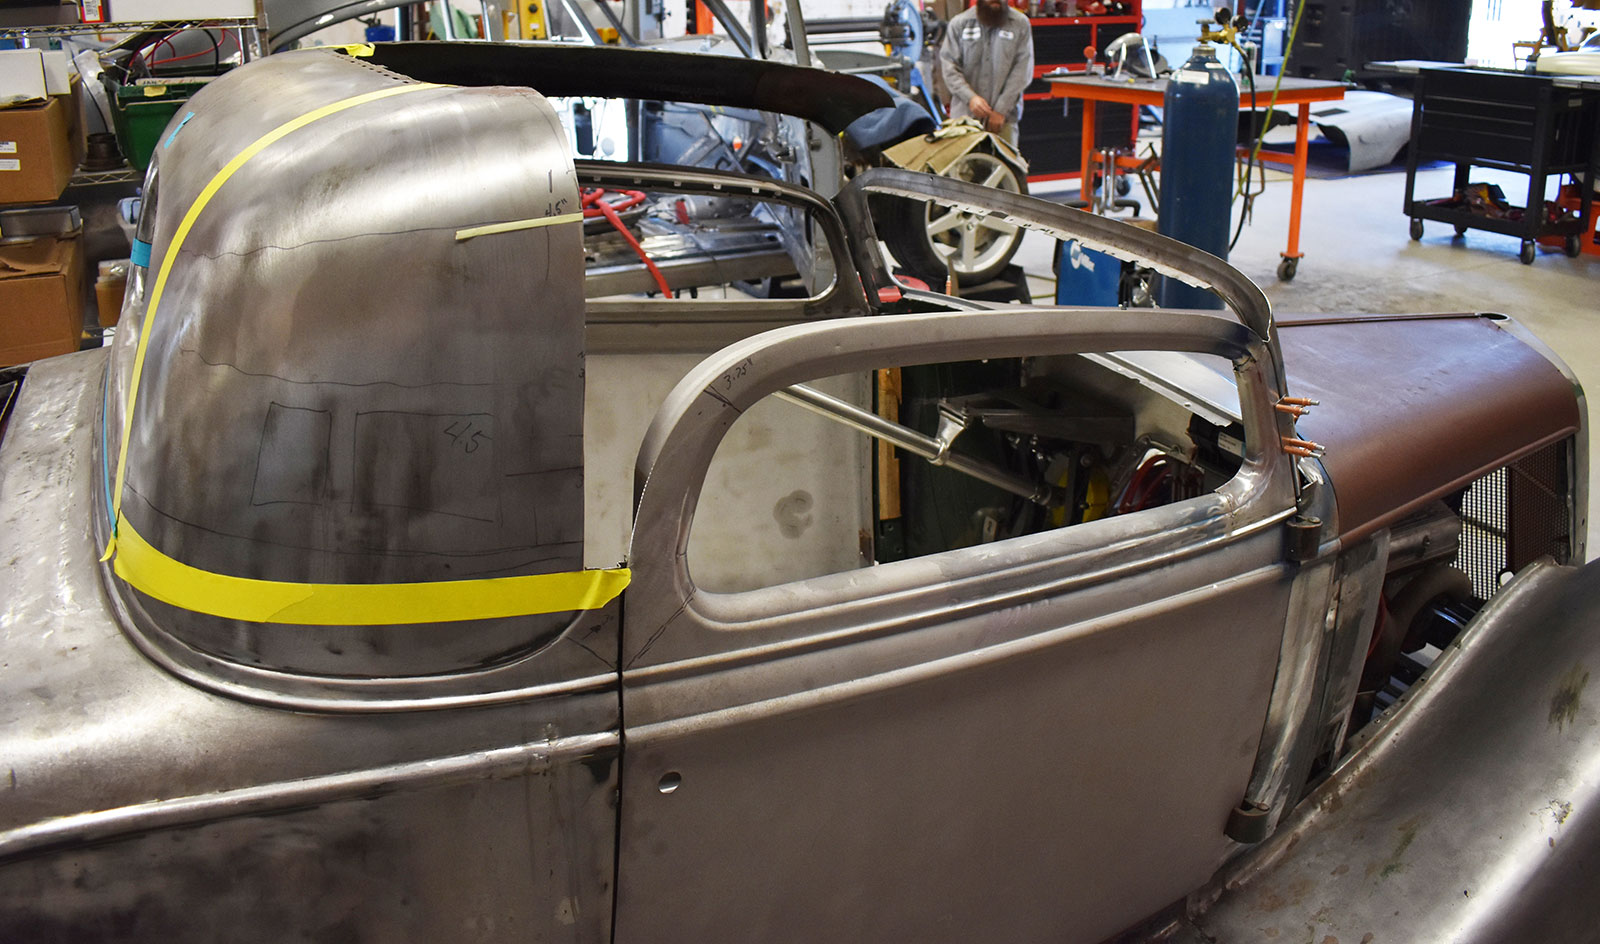
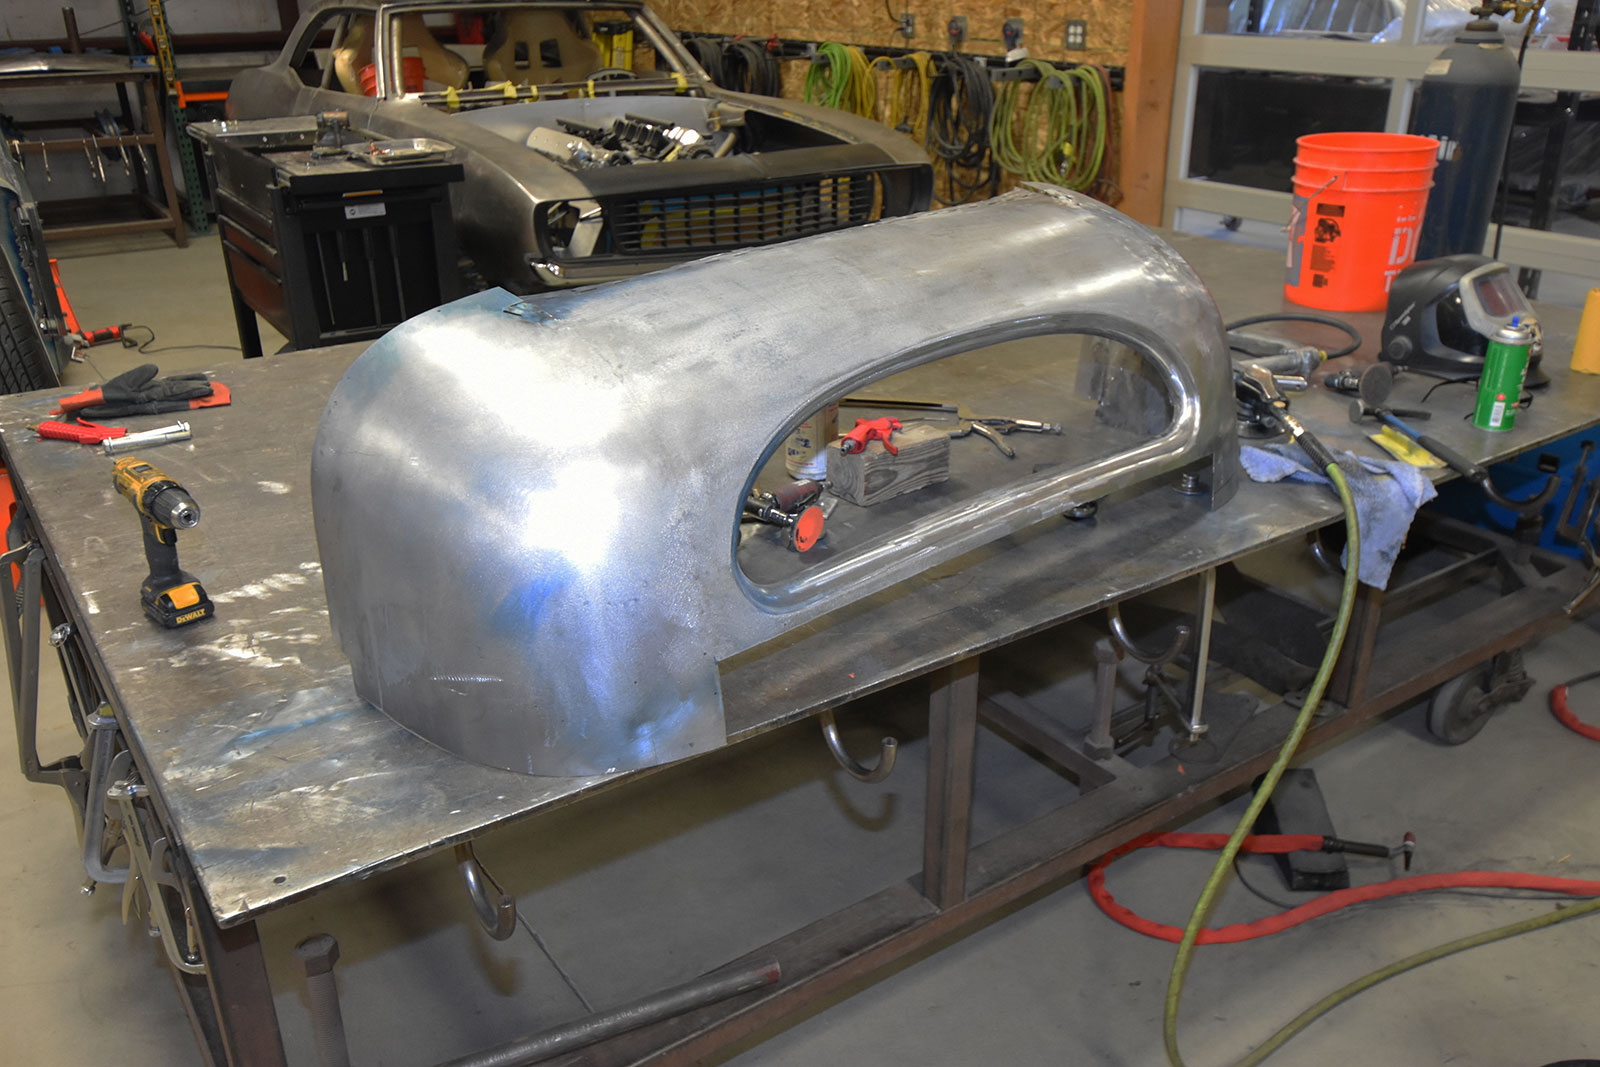
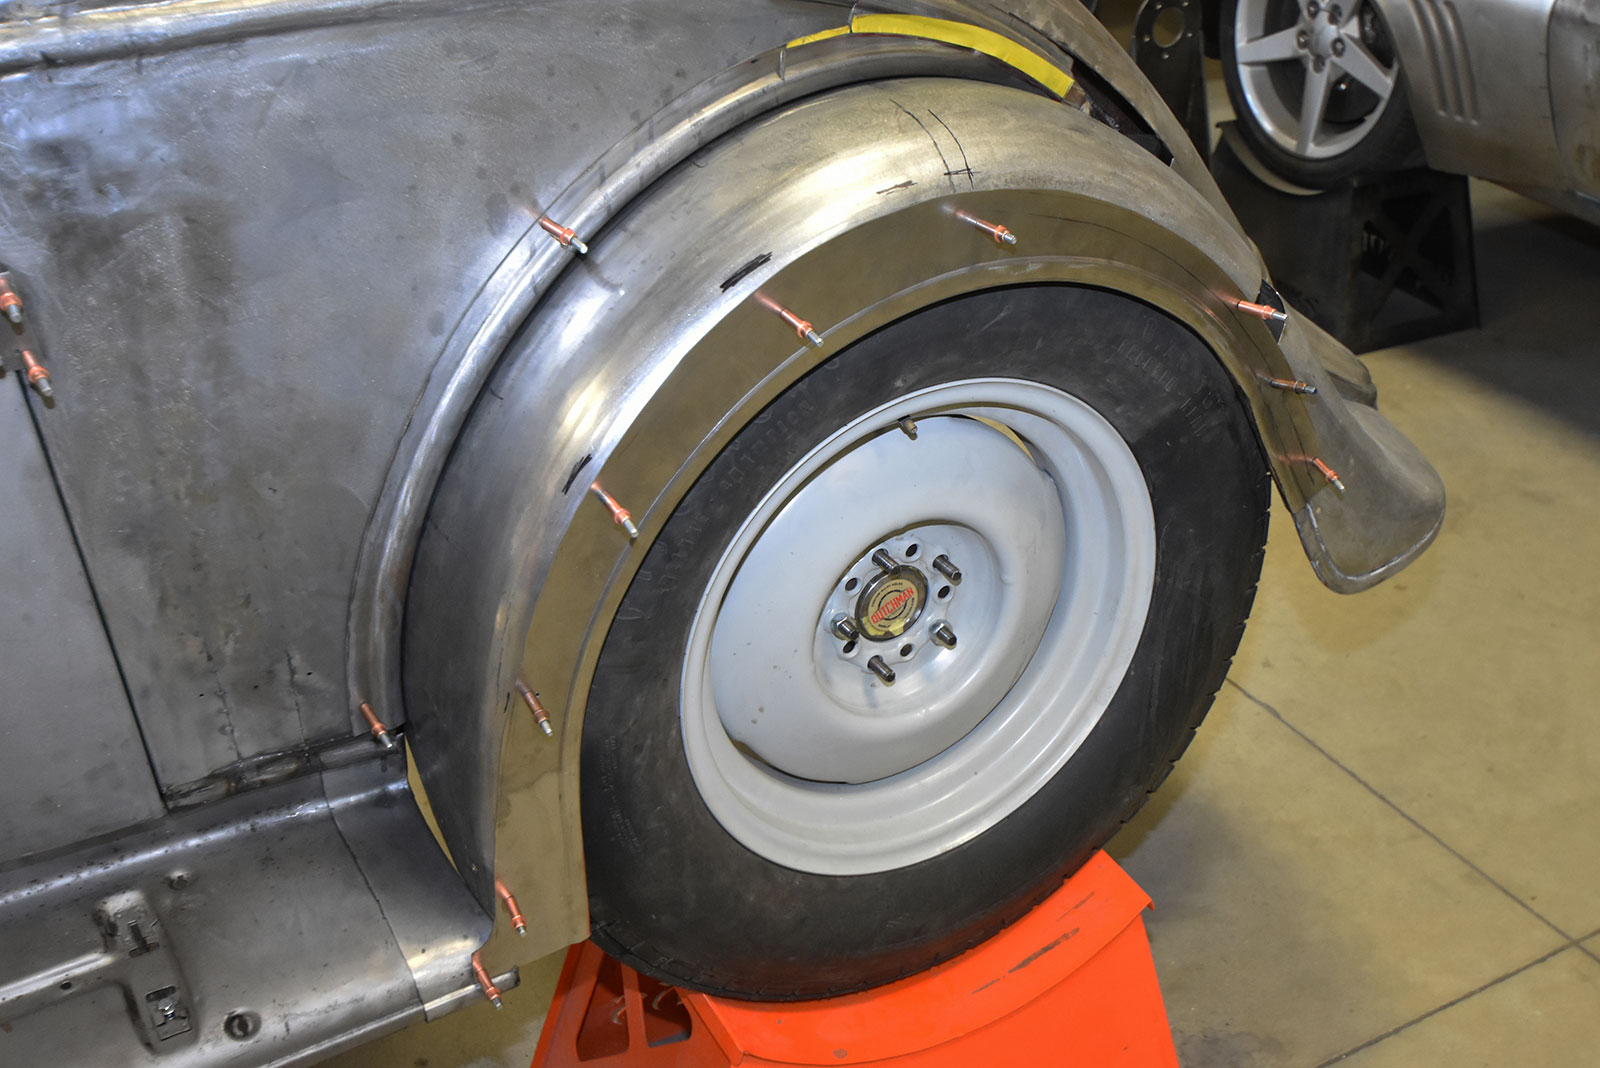
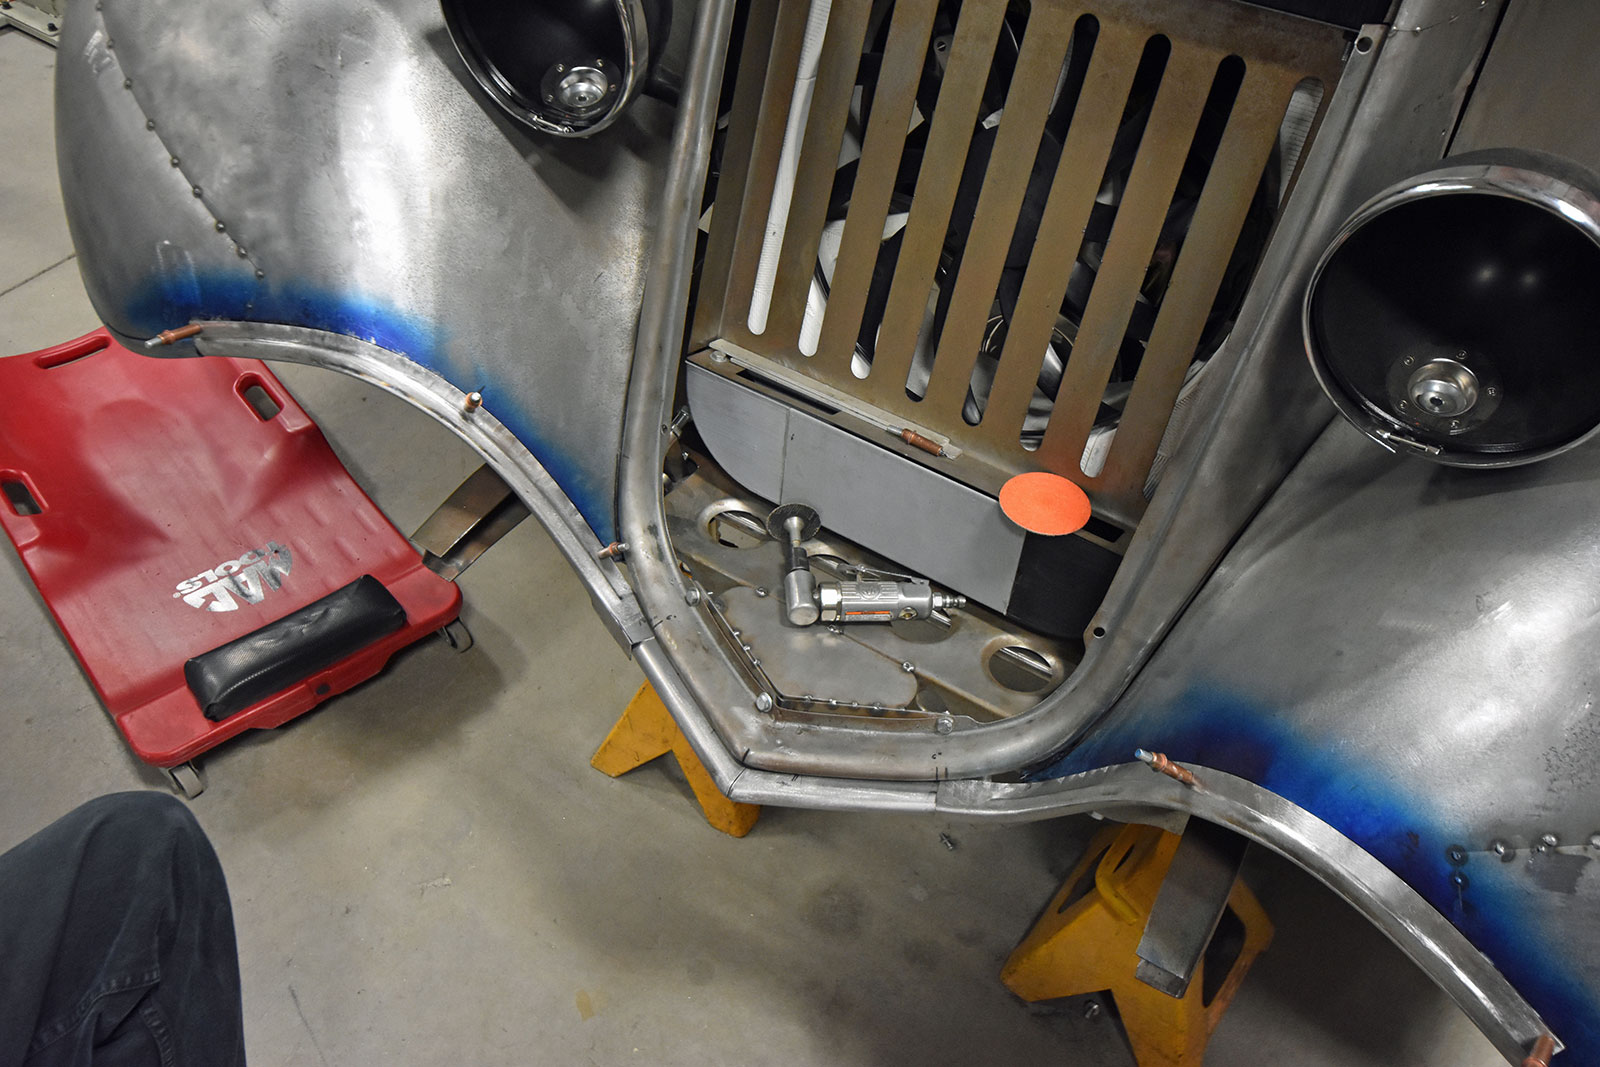
Chopping the top was next on the agenda. The doors were chopped first, using the profile of the side window to gauge the amount of material to remove, both front and back. A slight wedge was incorporated here, too.The center portion of the roof was removed first, then the cuts were plotted on the rear portion.The entire rear window was raised in the roof panel so it could remain full height.Before finalizing the chop, the car was wheeled outside to properly assess the proportions of the body profile. We’d say they nailed it!The rear portion of the roof was angled, so the rear window is laid down a bit more than stock. All the joints are TIG welded and will be completely metal finished.The rear fenders were lengthened and reworked, with an eye toward matching the size and curvature of the massive rear tires.A new piece of metal is being shaped to fit the side of the fender. It’s being checked against the tire here to ensure it follows the contours correctly.Here is the new Chevy Coupe fender side, temporarily held in place with Clecos, ready to be scribed and tack welded.The front fenders need extensive rework, too. You can see that they have a massive overhang, which will benefit from a “nip and tuck.”The front corner was cut off the fender and is being scrutinized here in a new position. A template is being shaped to guide the shape of the fender opening behind the wheel, too.Large portions of the front fenders were shaped from new metal and tack welded into place.The inner edges of the fenders were pulled in much more tightly against the grille shell. If you compare this with the stock fenders, you’ll see it has a much “sweeter” shape.The grille shell was extensively reshaped and a completely new hood was made. The vent doors in the hood side are mocked-up here; you’ll see these in more detail in the next article.All the wood bracing was removed inside the body and replaced with elegantly shaped metal reinforcements. This body will be extremely rigid, without question.
We use cookies to ensure that we give you the best experience on our website. If you continue to use this site we will assume that you are happy with it.