We looked at the chassis of Joe McGlynn’s Studebaker pickup project back in the Dec. ’23 issue of Classic Truck Performance. This time we’ll show the great work he has done on the firewall, floor, hood hinges, and some other details. Although McGlynn is a hobbyist who works from his home shop, he has invested in some good-quality tools that speed up the work. He recently purchased a power hammer, which he put to excellent use making the highly complex transmission cover, shaped from 16-gauge steel. Material that thick is a challenge to work with hand tools.
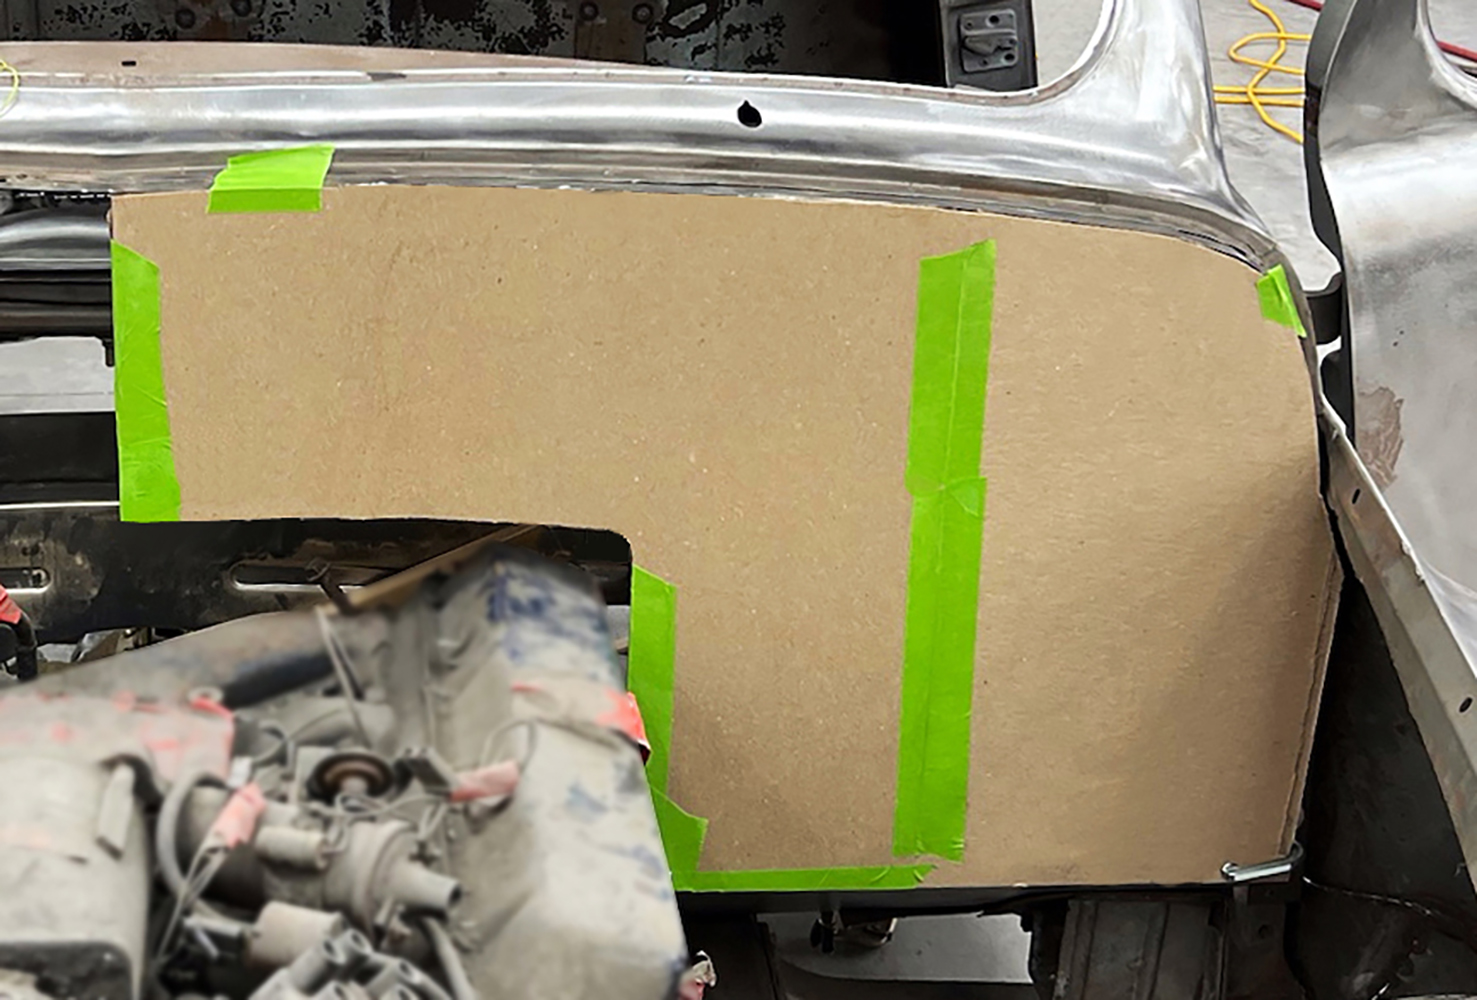
The first step for making a new firewall is to make a pattern from chipboard. This firewall will be made in two pieces with a slight peak in the center.
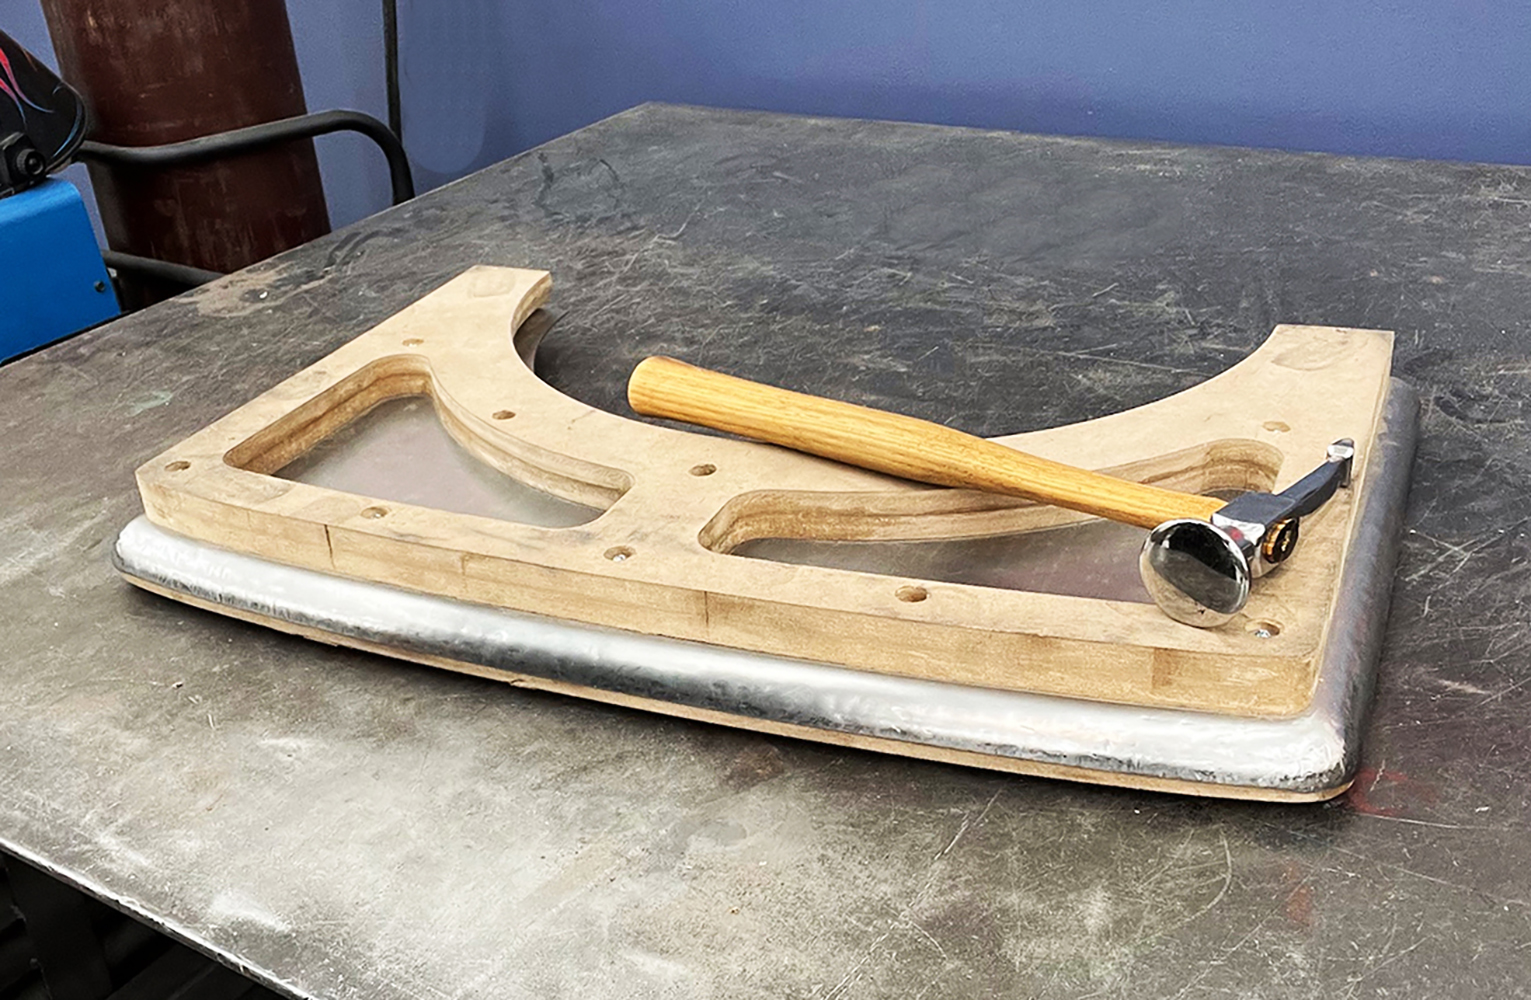
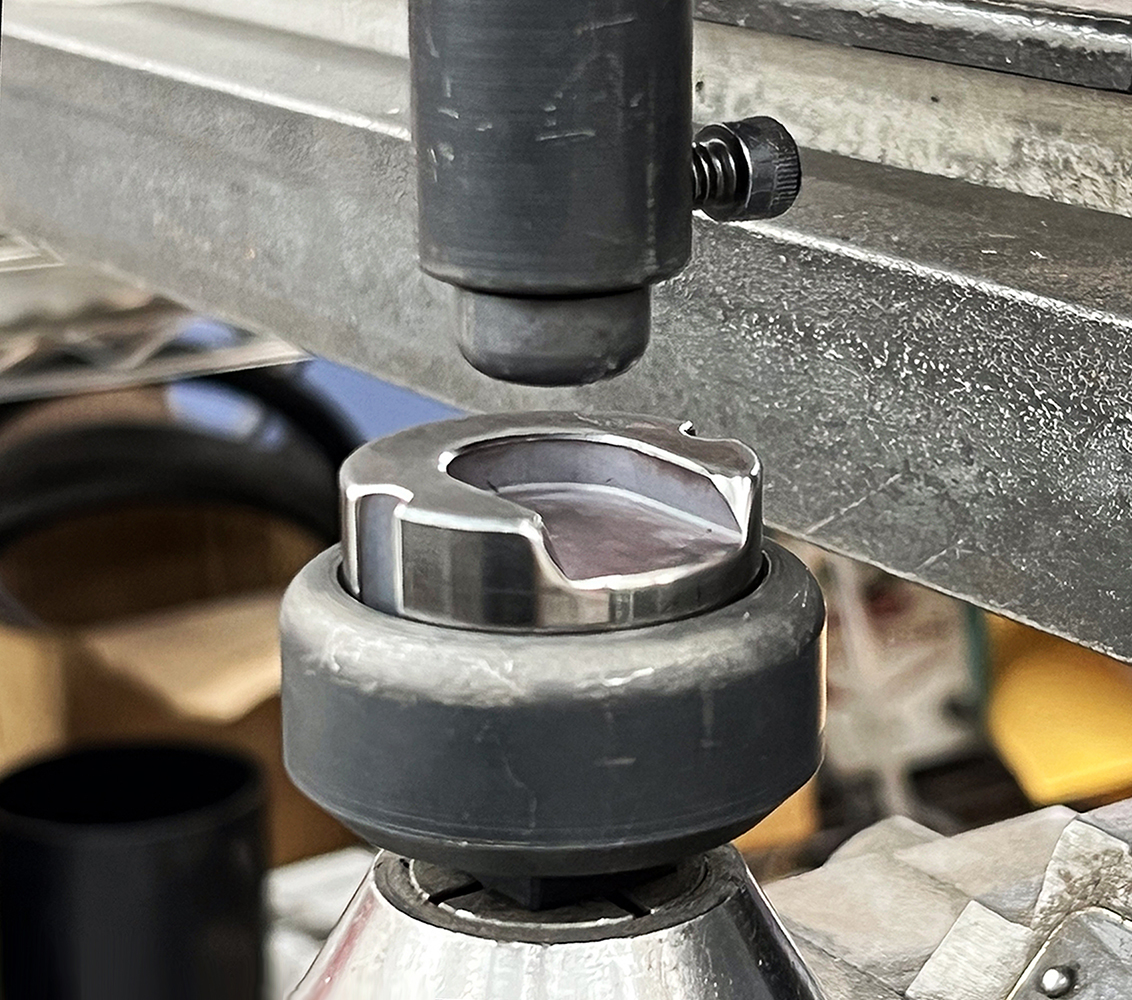
A two-piece pattern for the firewall was made from chipboard, which was then transferred to 16-gauge sheetmetal. The edges of these panels were shaped by hammering over forms made from MDF, which produce a smooth and accurate contour while maintaining the flatness of the panels.
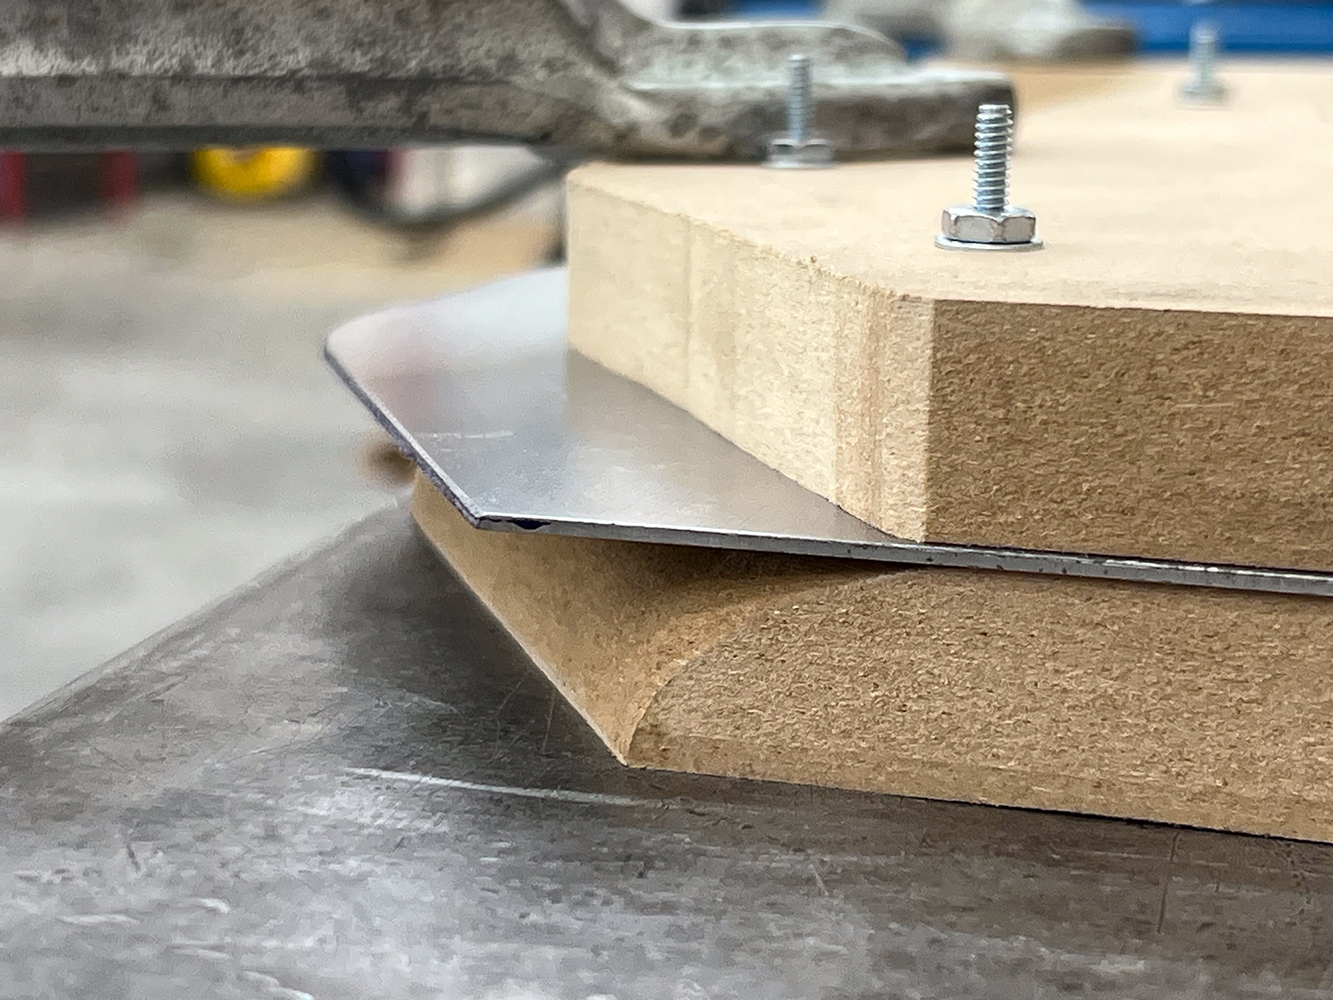
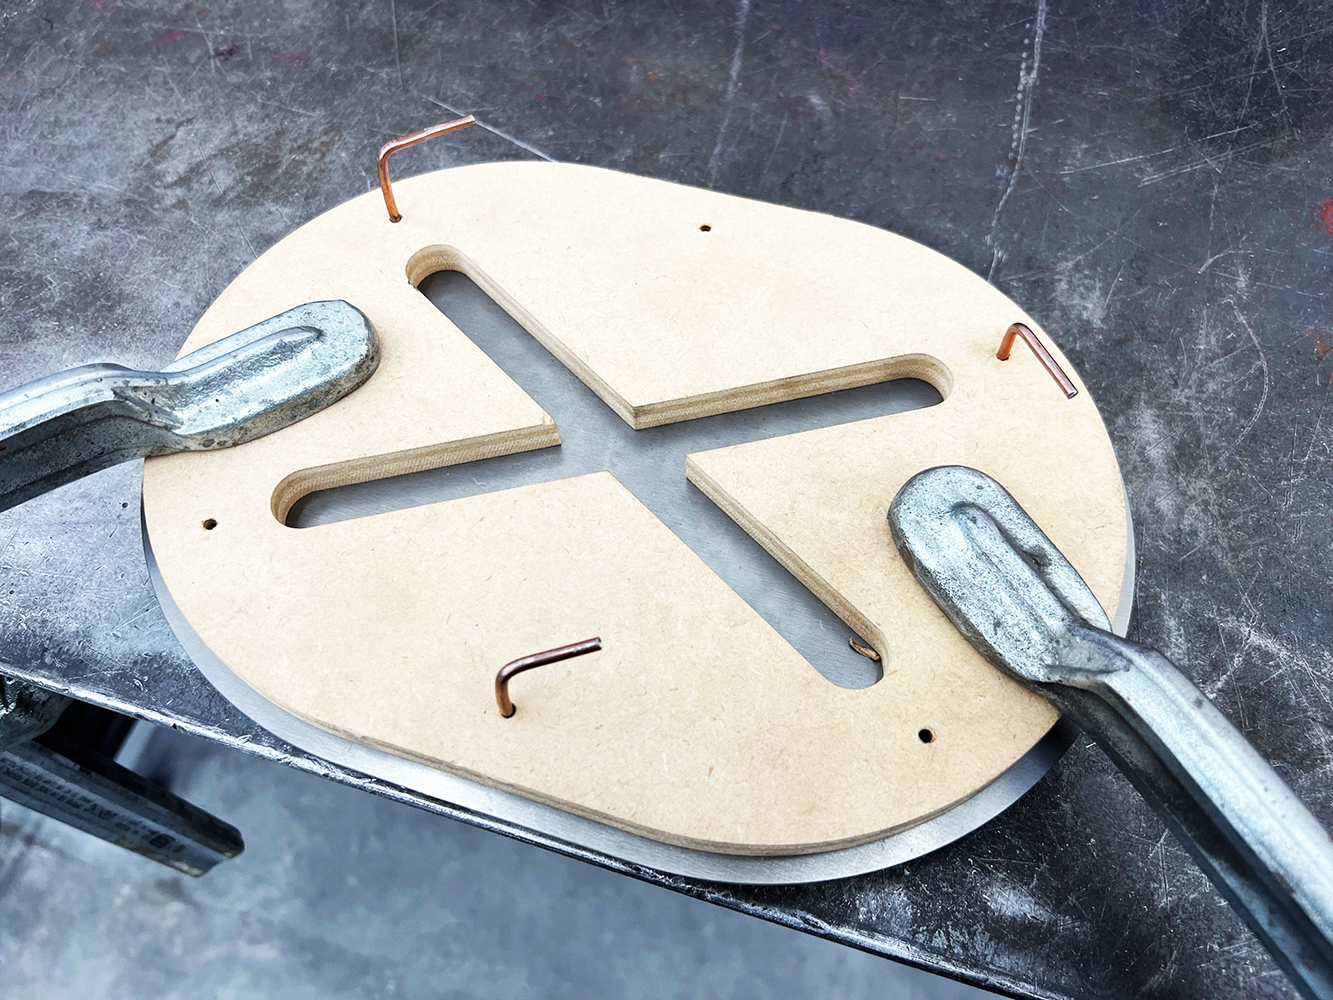
We use 3/4-inch MDF to make a hammerform for curling the edges of the 16-gauge sheetmetal blanks for the firewall pieces. A clamping block is used to sandwich the metal being formed, keeping it flat.
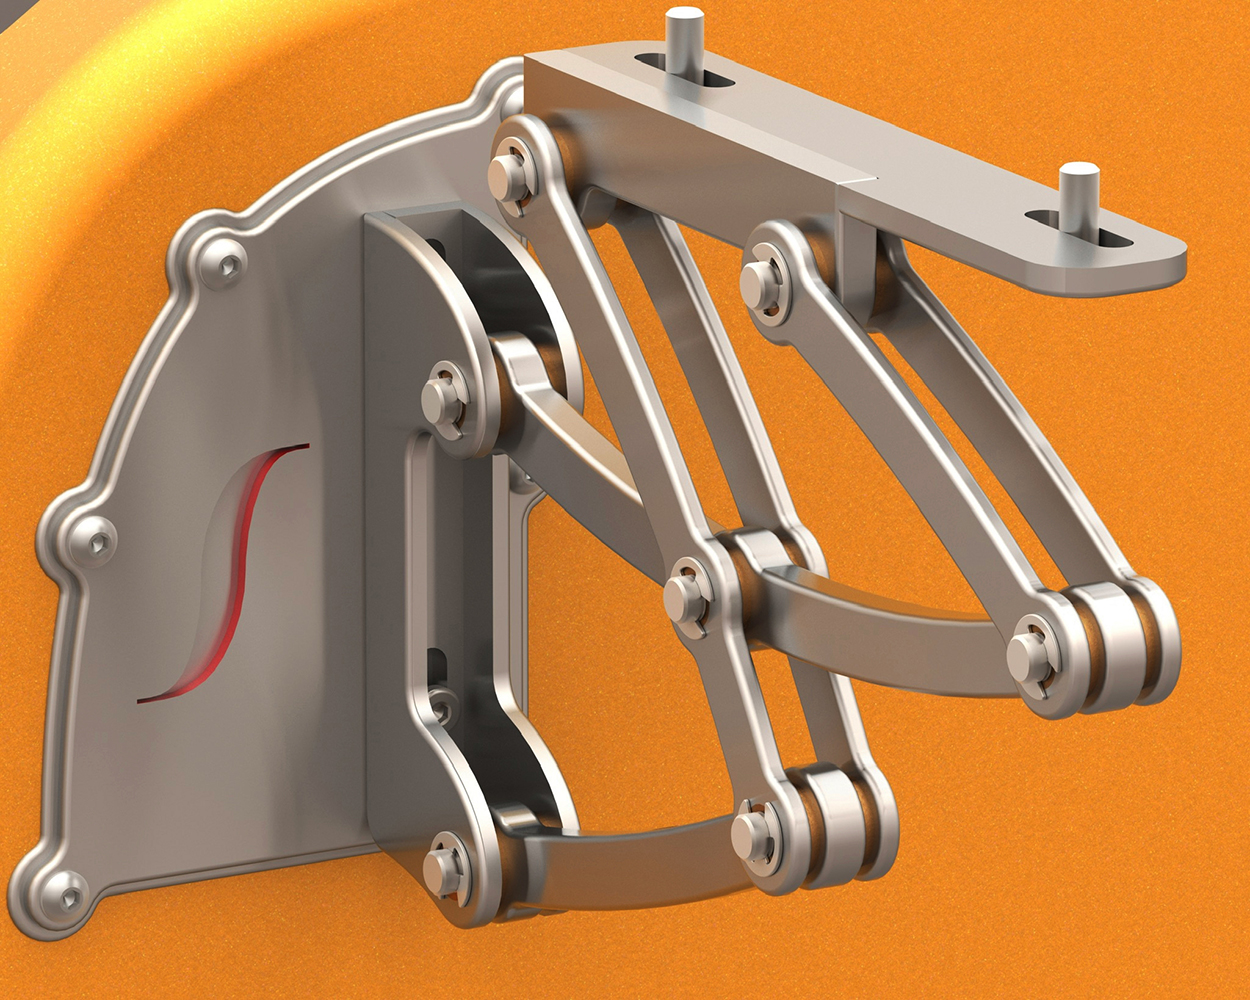
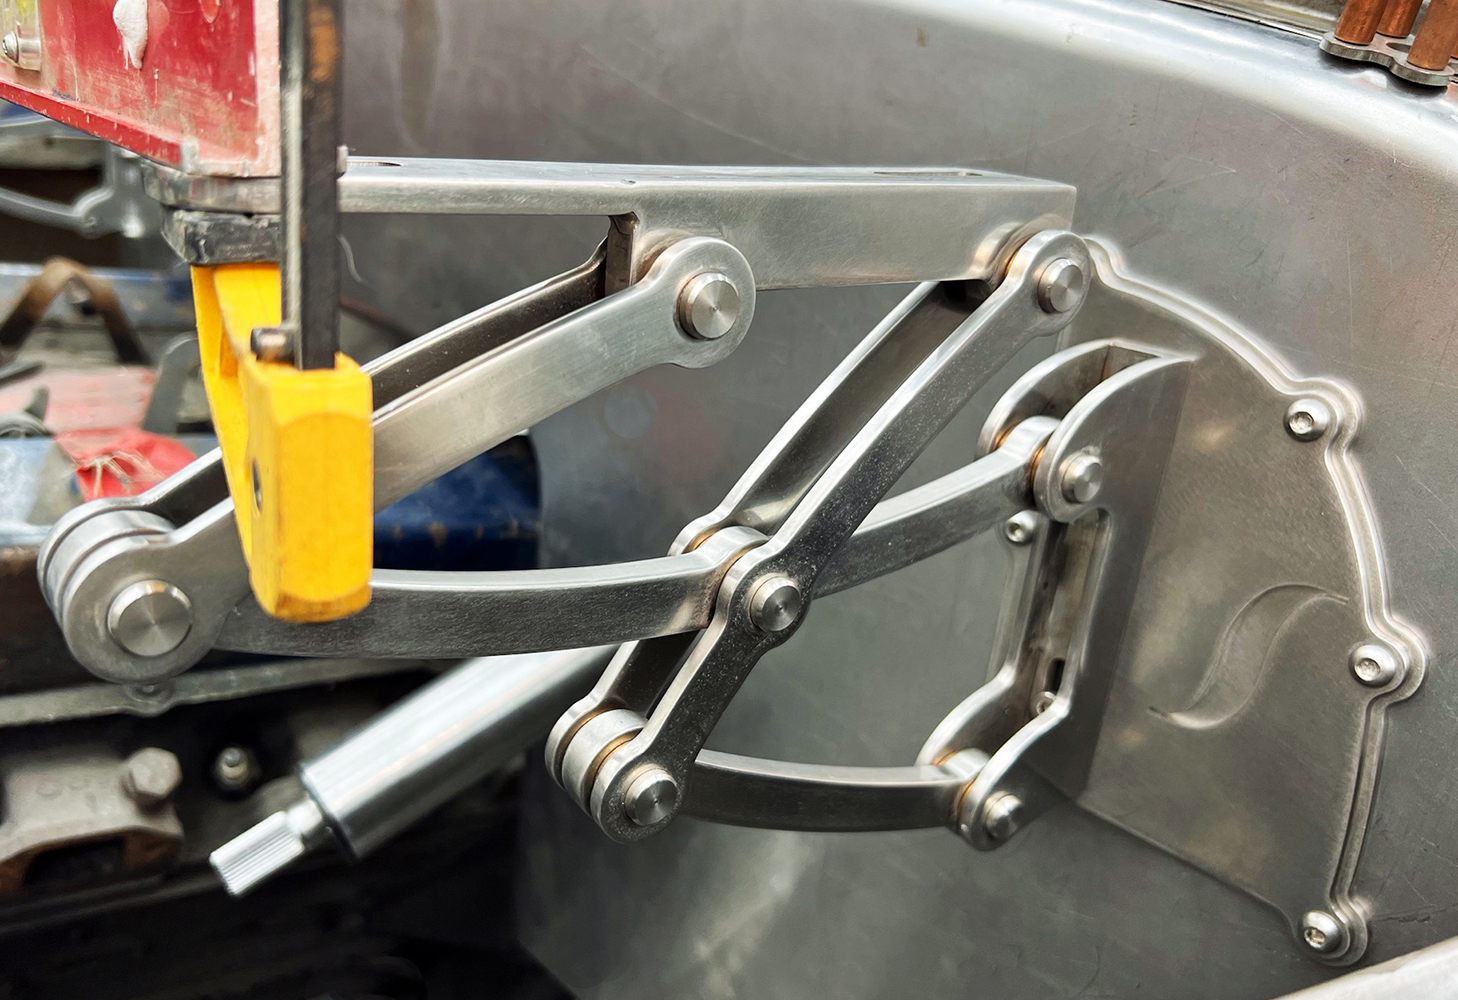
McGlynn designed his own hood hinges with CAD, which incorporate an elegant four-link mechanism. He sent his digital files to a laser-cutting service, and they produced the complex parts quickly and efficiently. The hinges mount to the firewall, which he reinforced with ¼-inch steel plates.
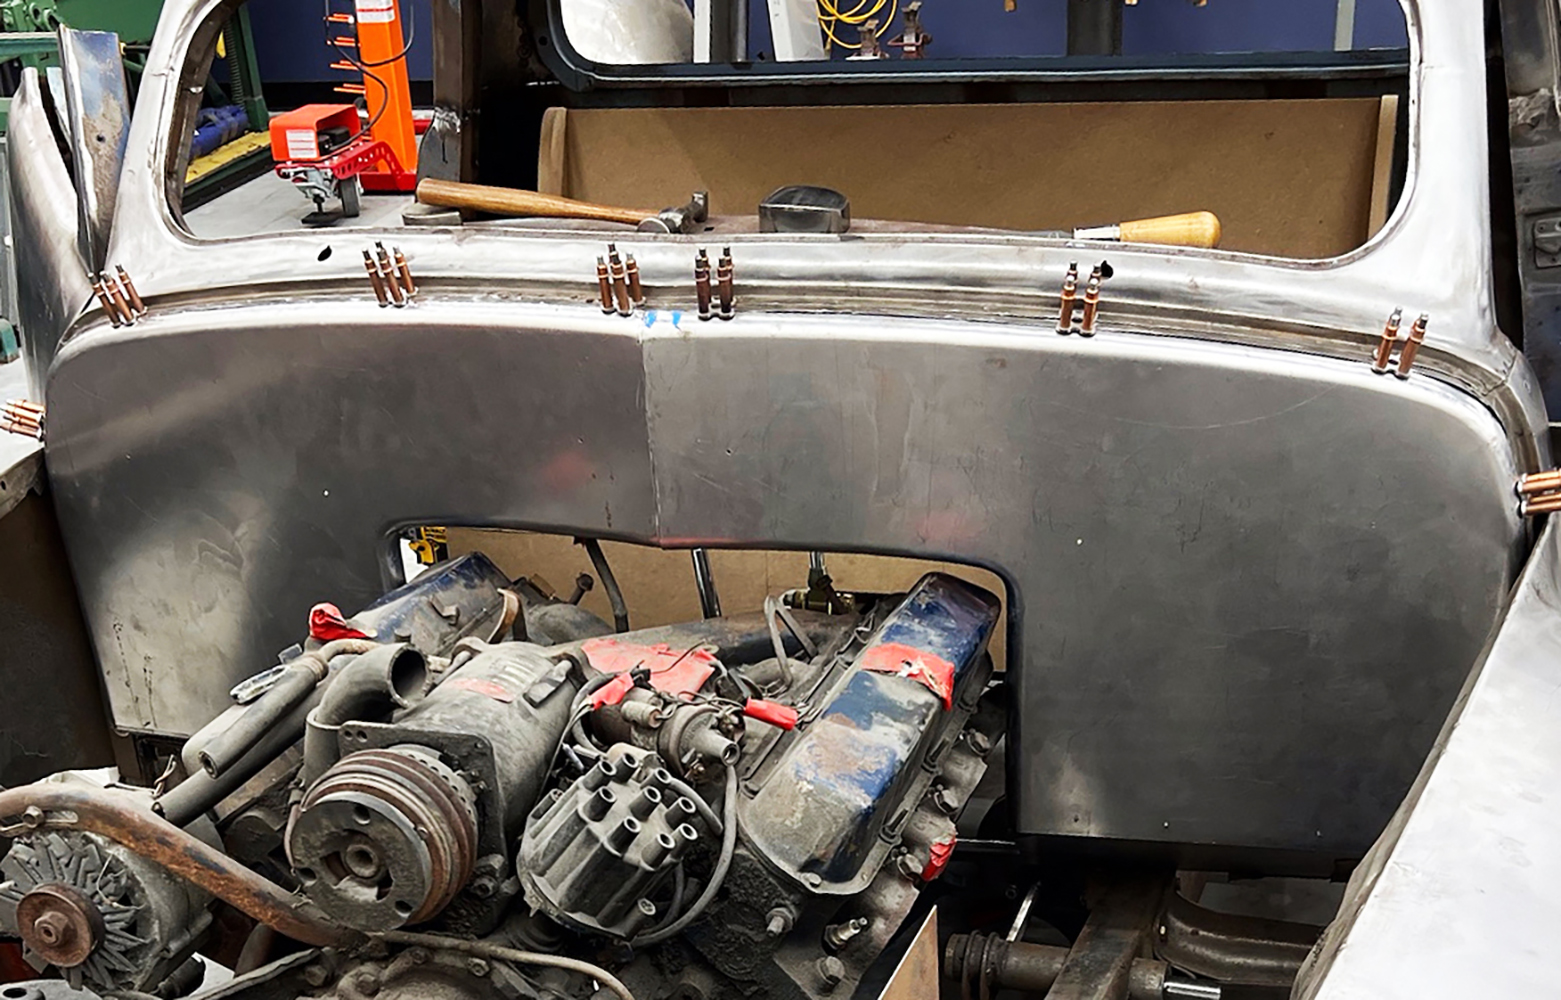
The hammerformed pieces are held temporarily into place with Clecos.
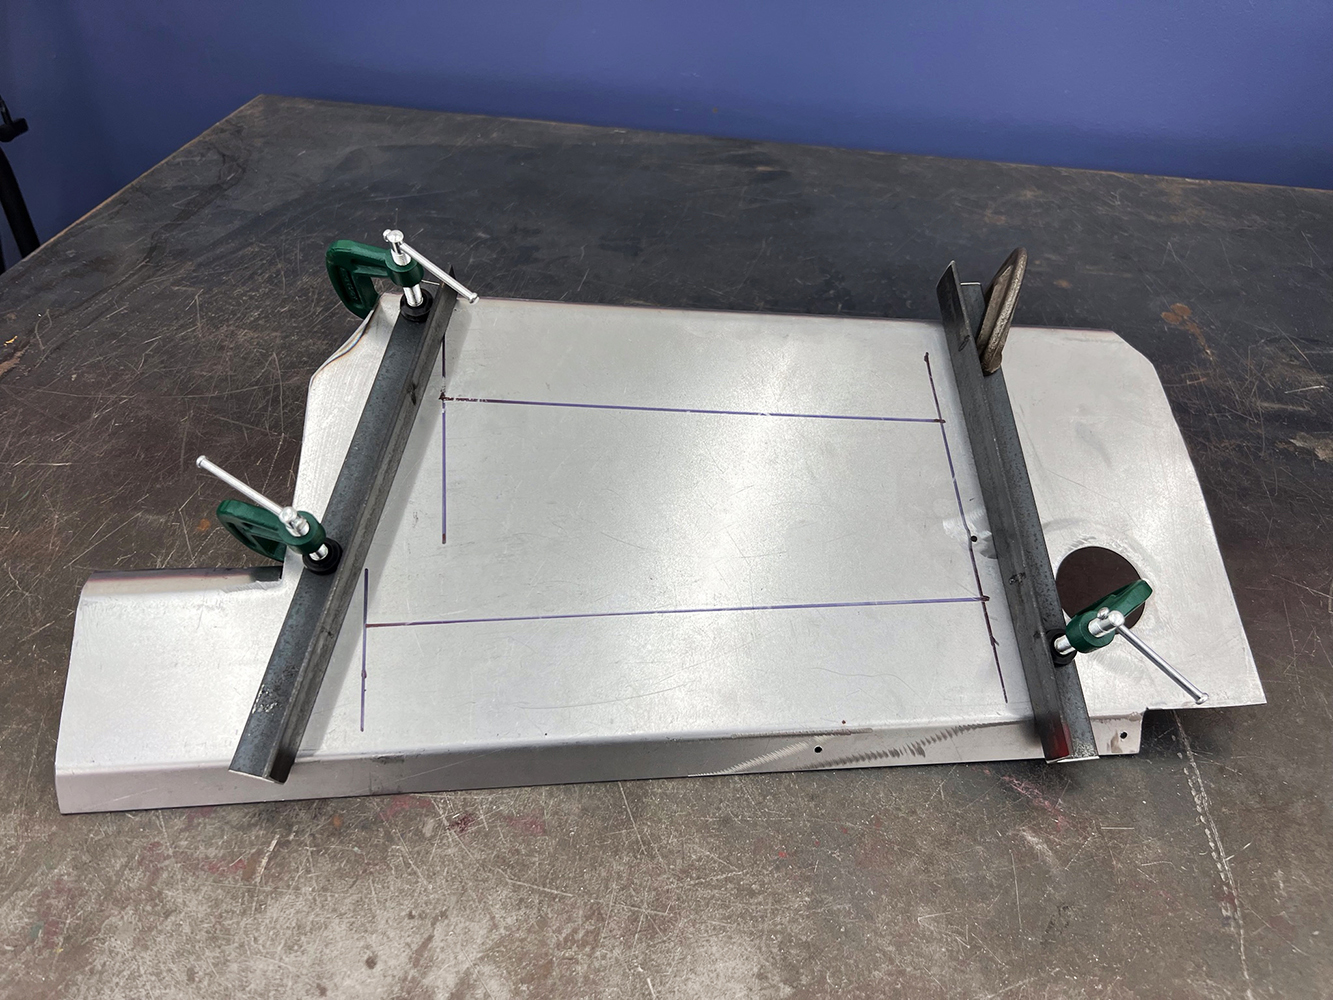
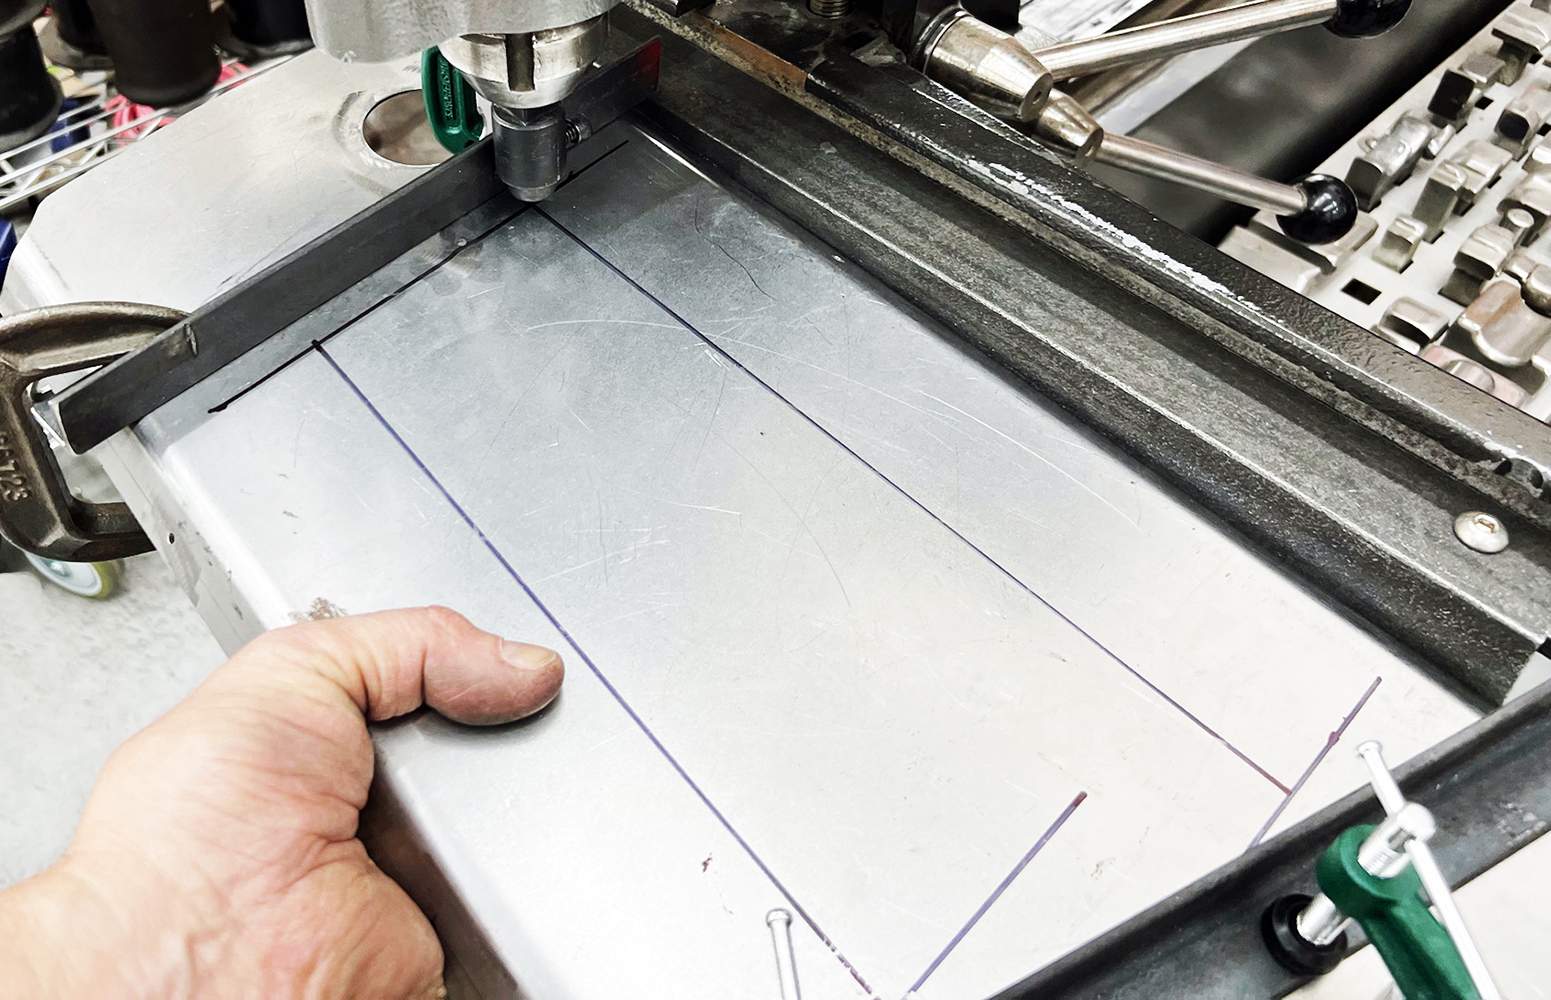
The toeboards were next. These were patterned with chipboard, and a brake was used to form flanges on the two long edges. McGlynn used his Pullmax machine with special tooling to form the beads that strengthen them.
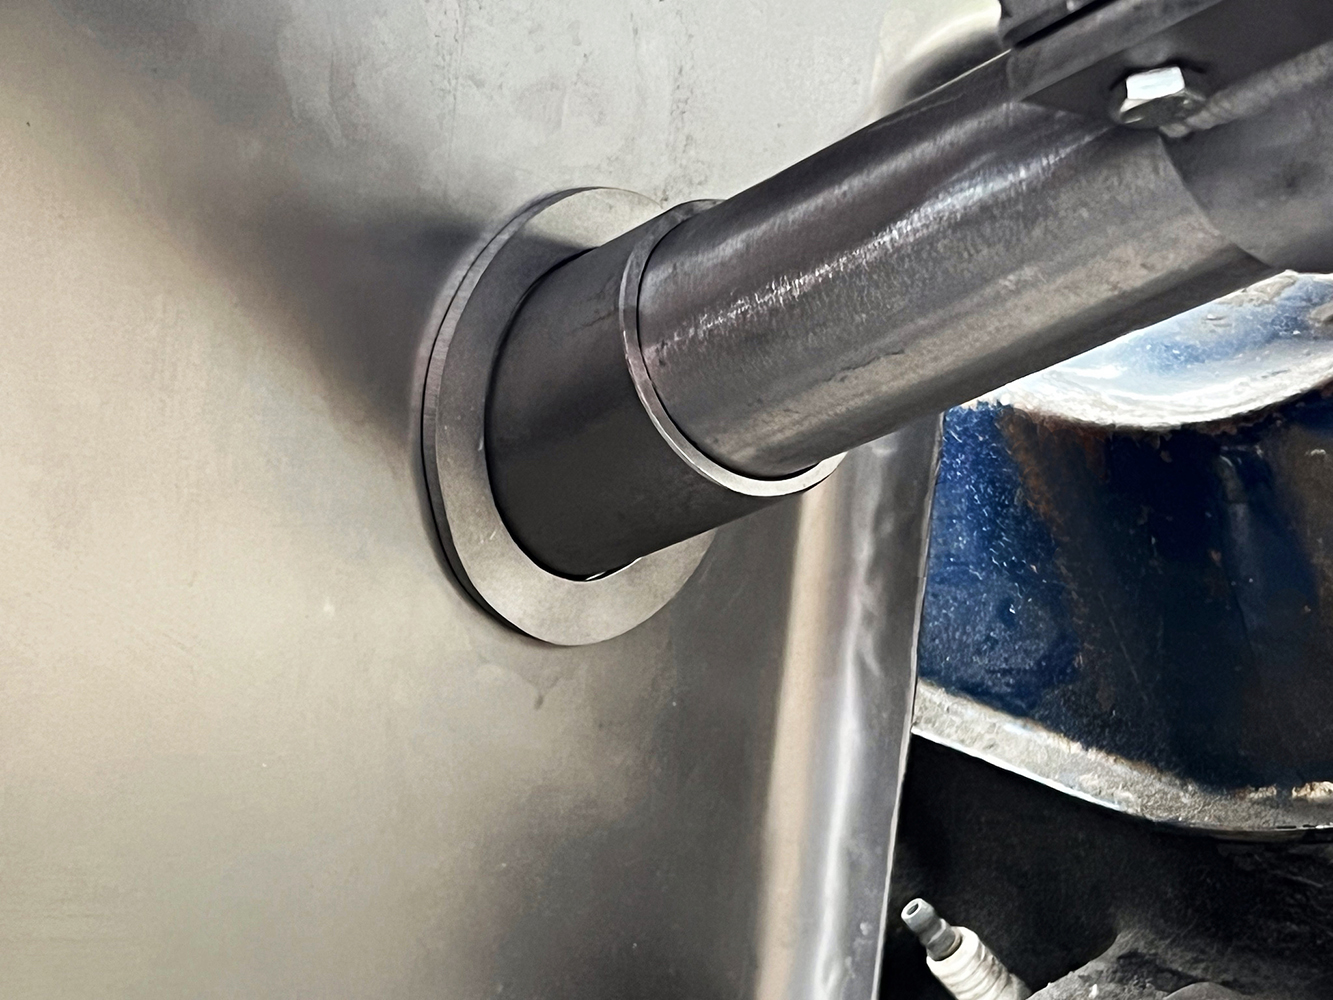
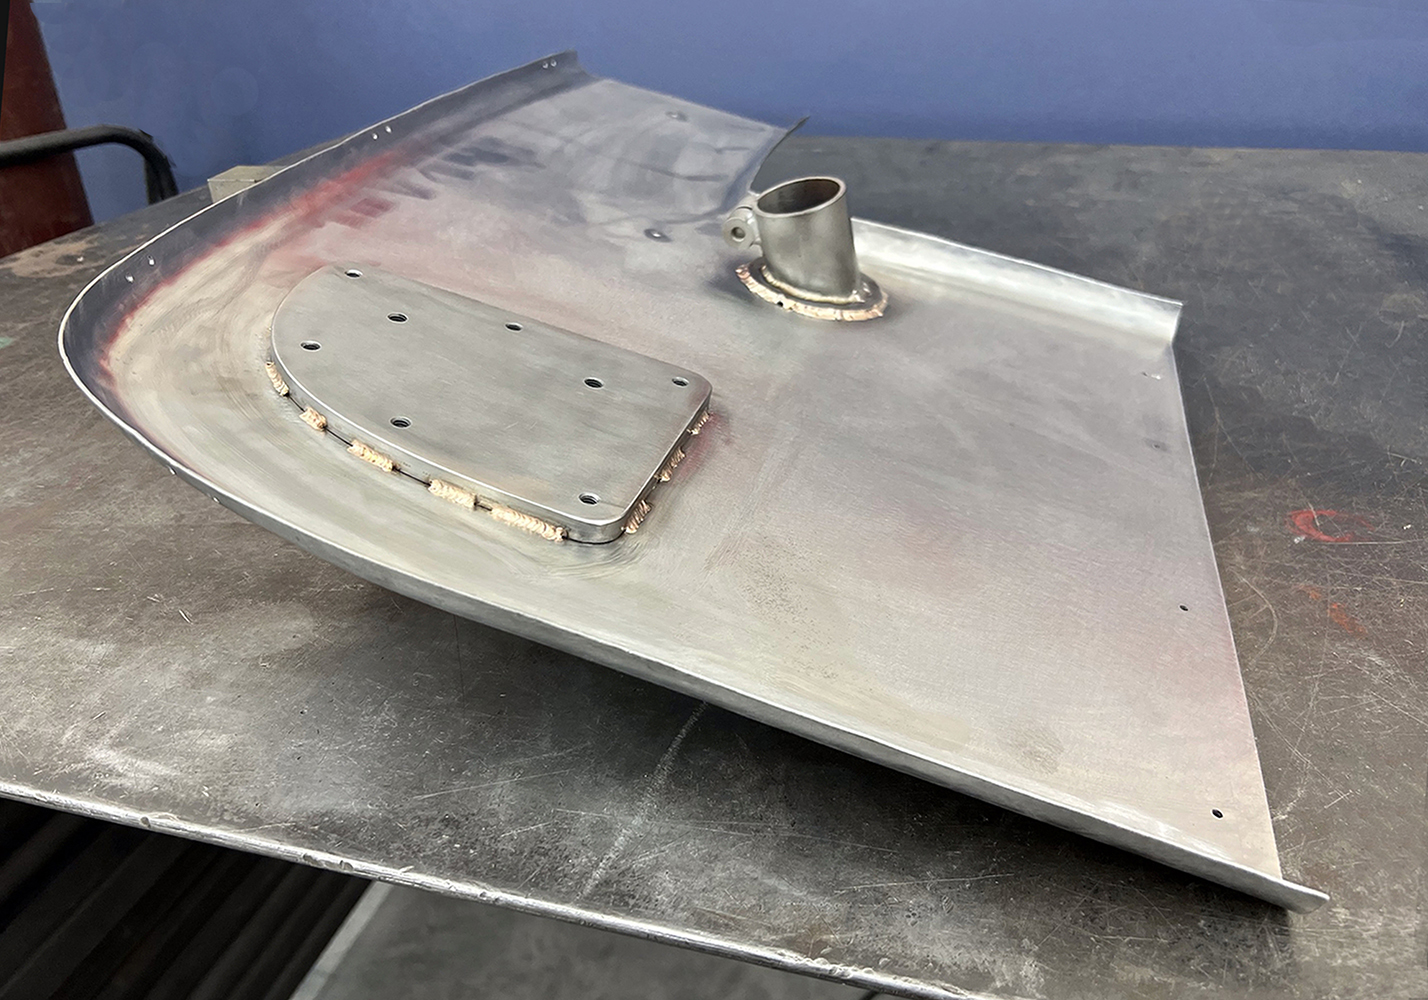
A sleeve is fitted to the steering column. This will be joined to the firewall, allowing the column to be removed.
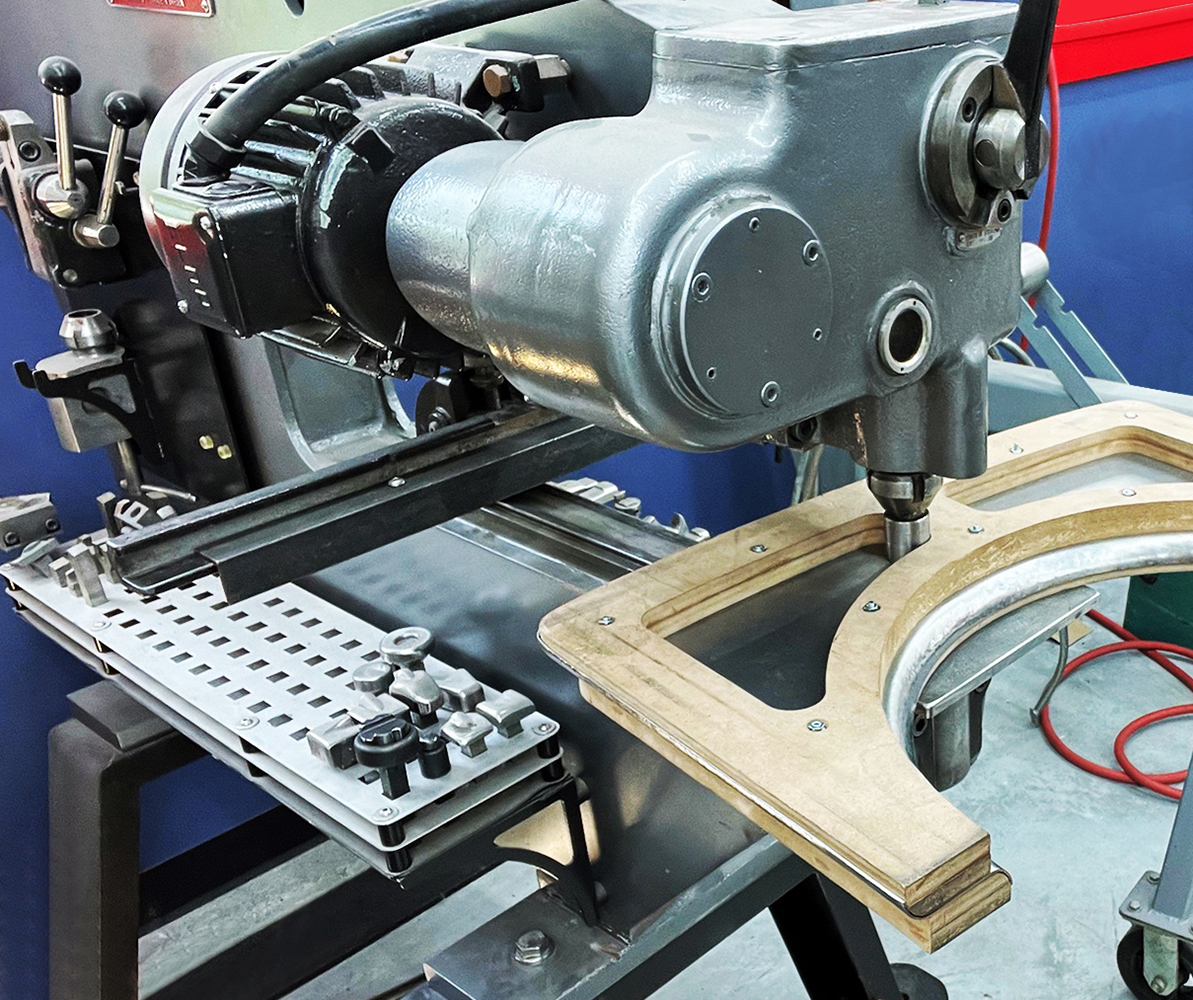
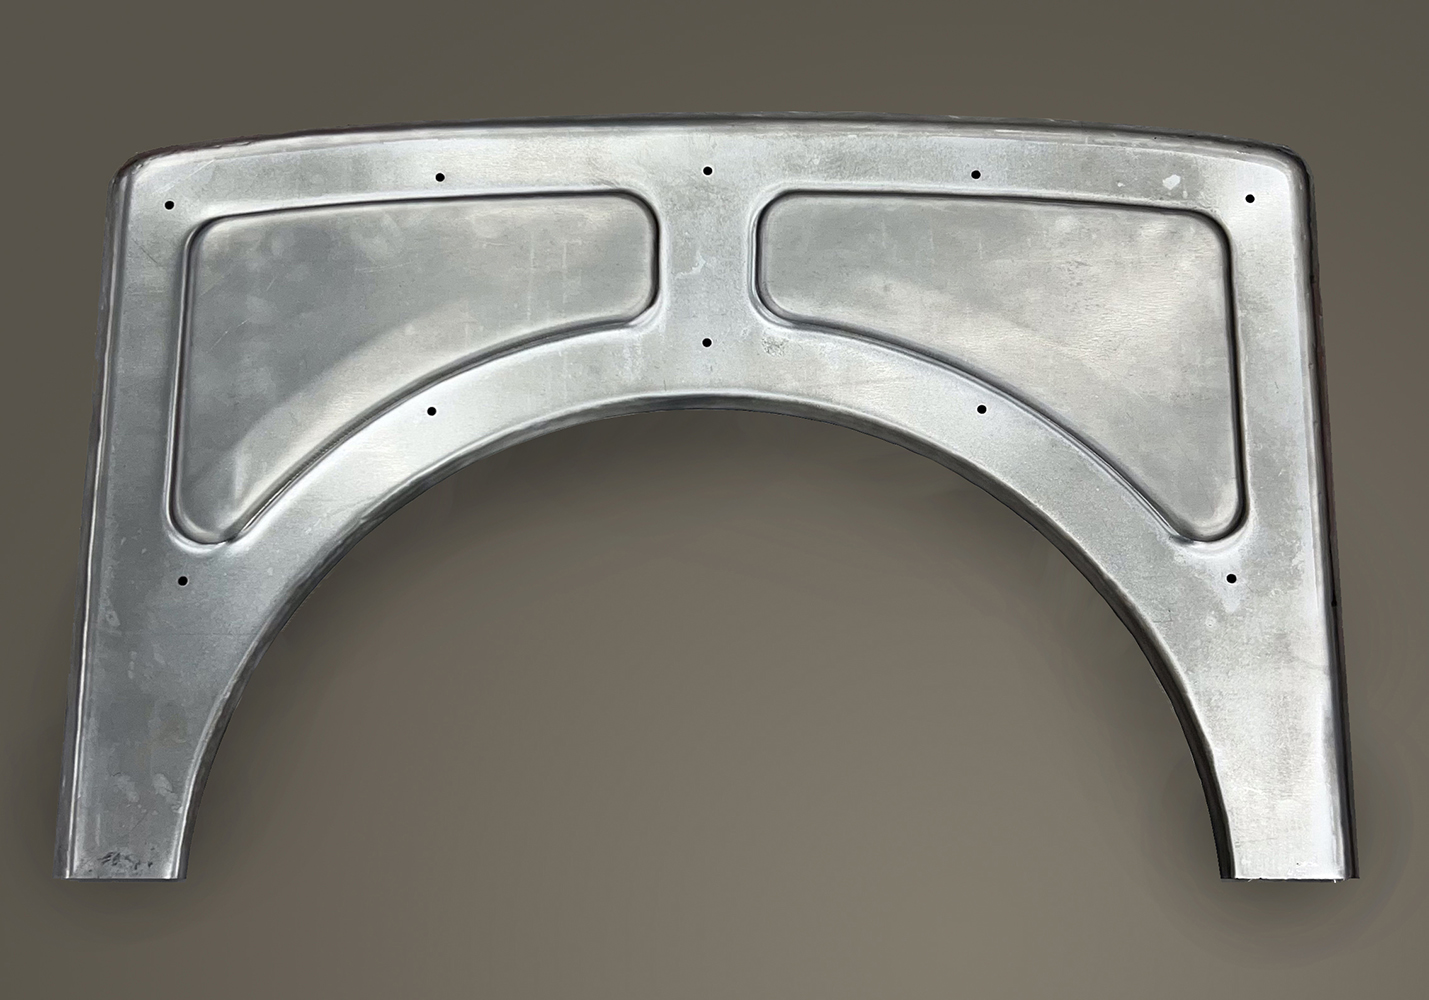
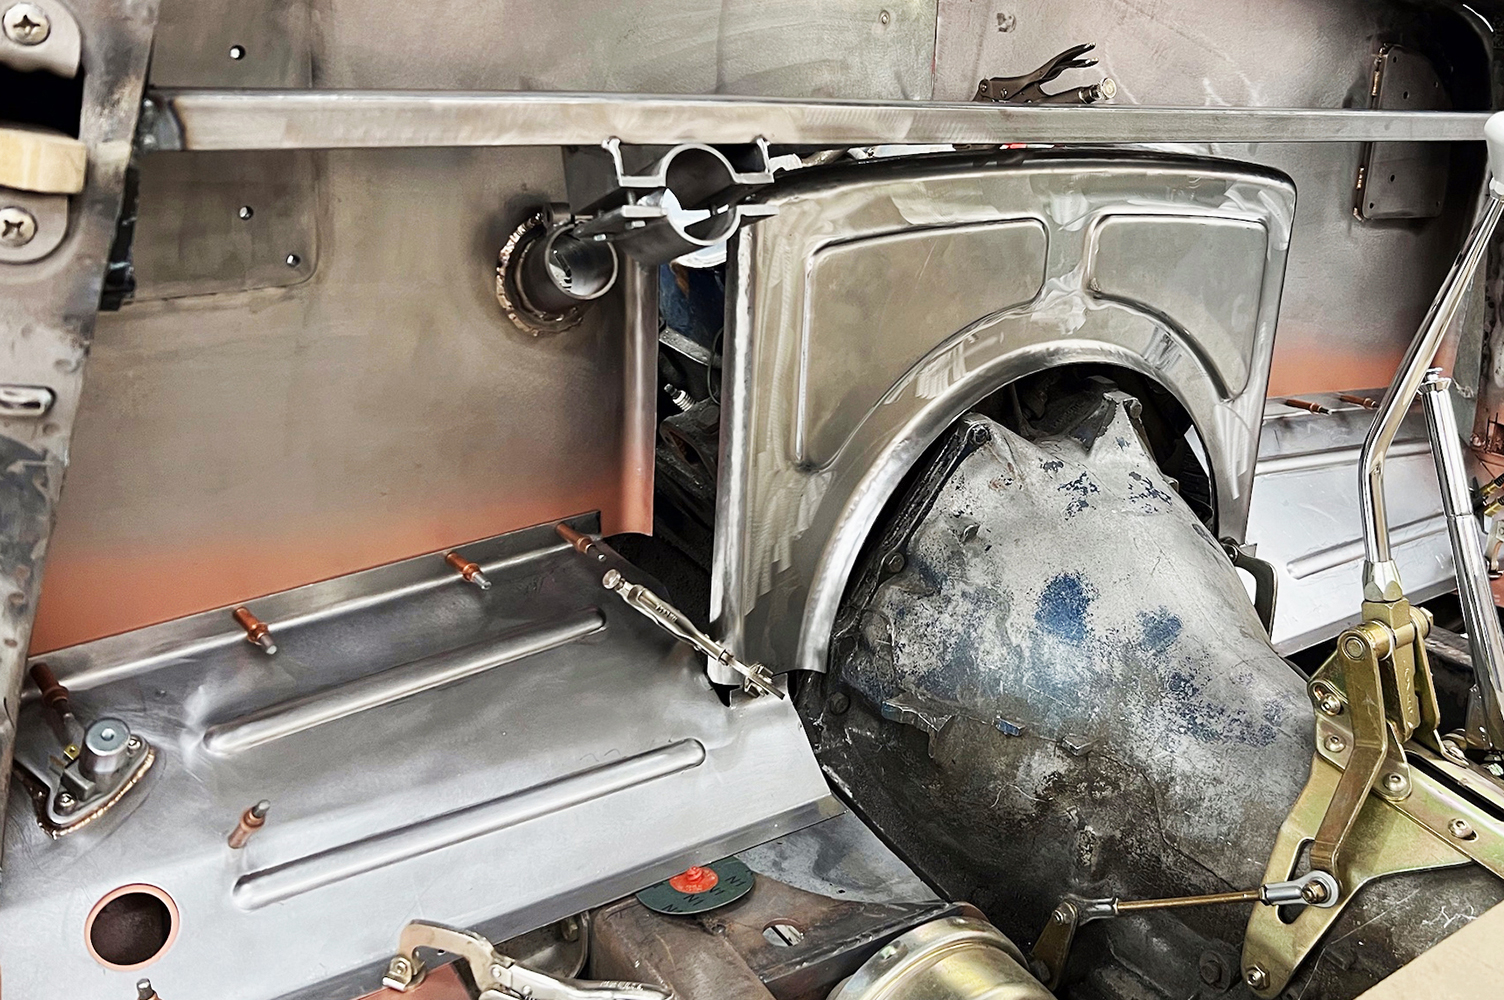
A recess was required in the firewall for the Cadillac engine. McGlynn built this in several pieces. The edges of the largest part were contoured with an MDF hammerform, and windows were put in this same form to guide the piece through a Pullmax machine to emboss kidney-shaped details for strength and style. Once the rear panel for the recess was completed, filler pieces were made to join it to the firewall.
Joe McGlynn used CAD to design his own hinges, with bronze bushings at each pivot. Once the geometry of the linkages was fully developed the parts were made by a laser cutting service.
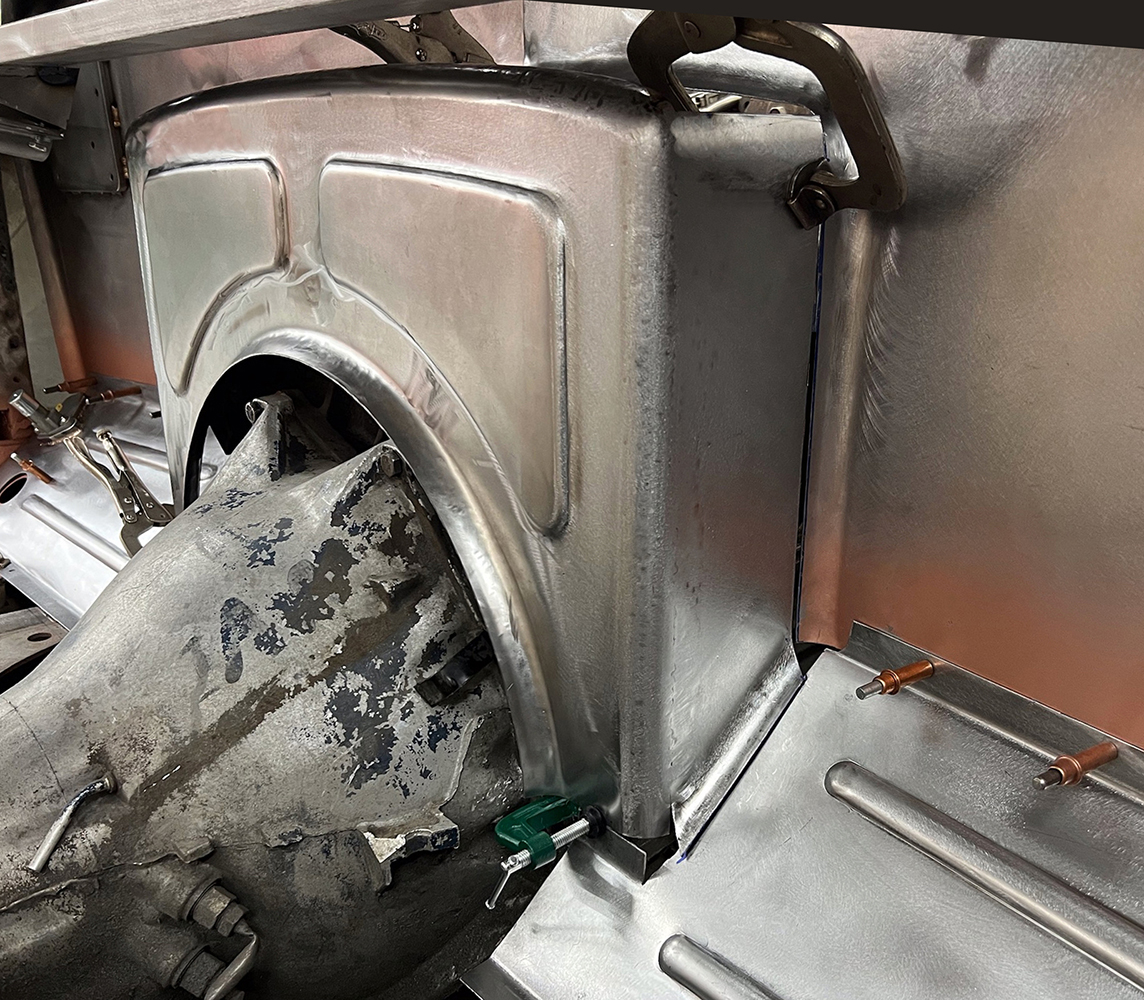
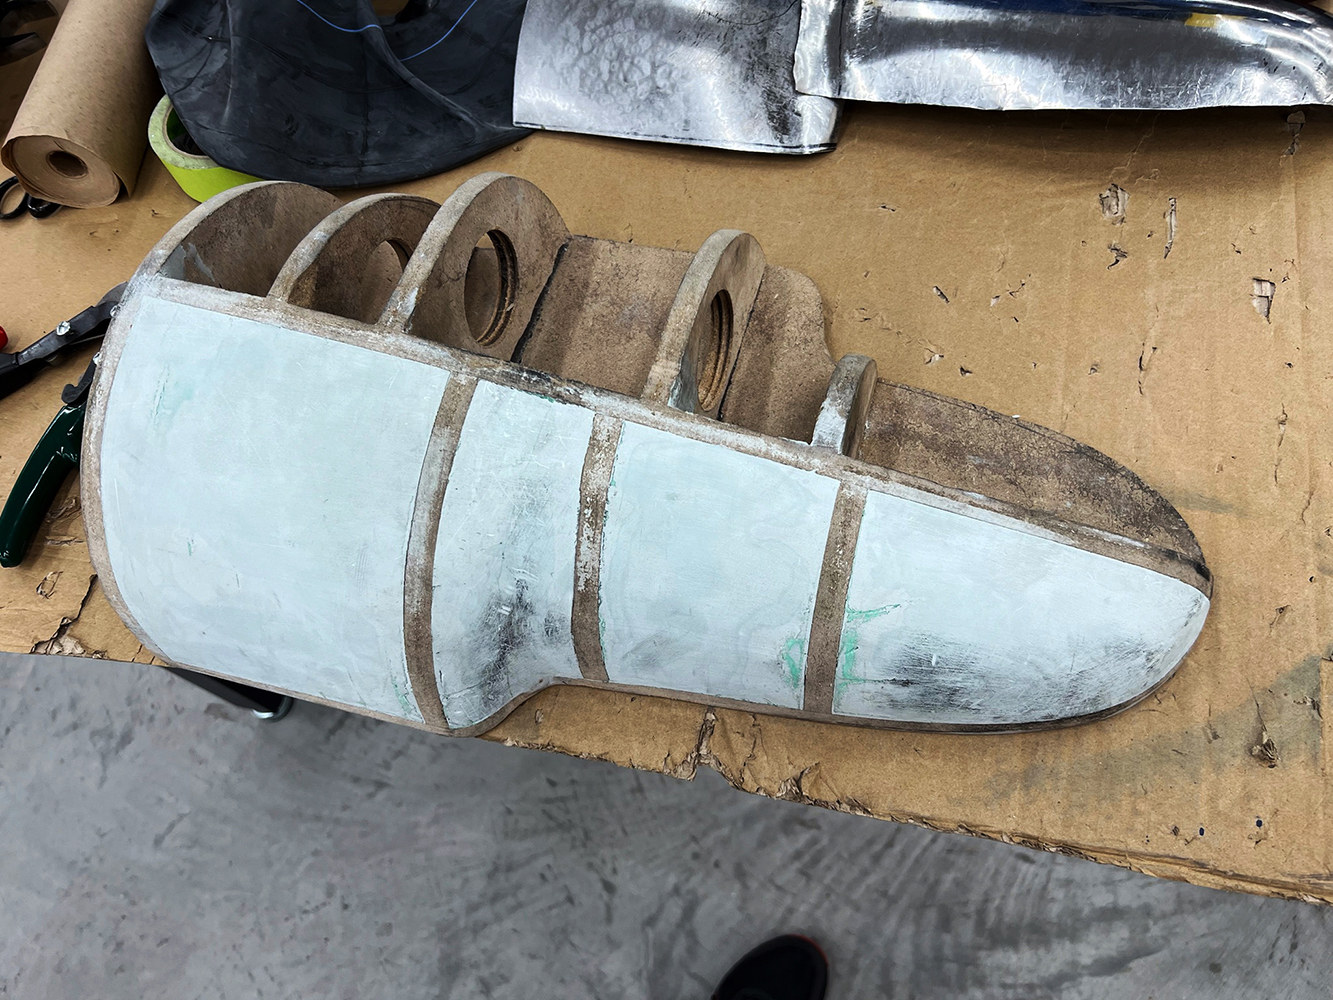
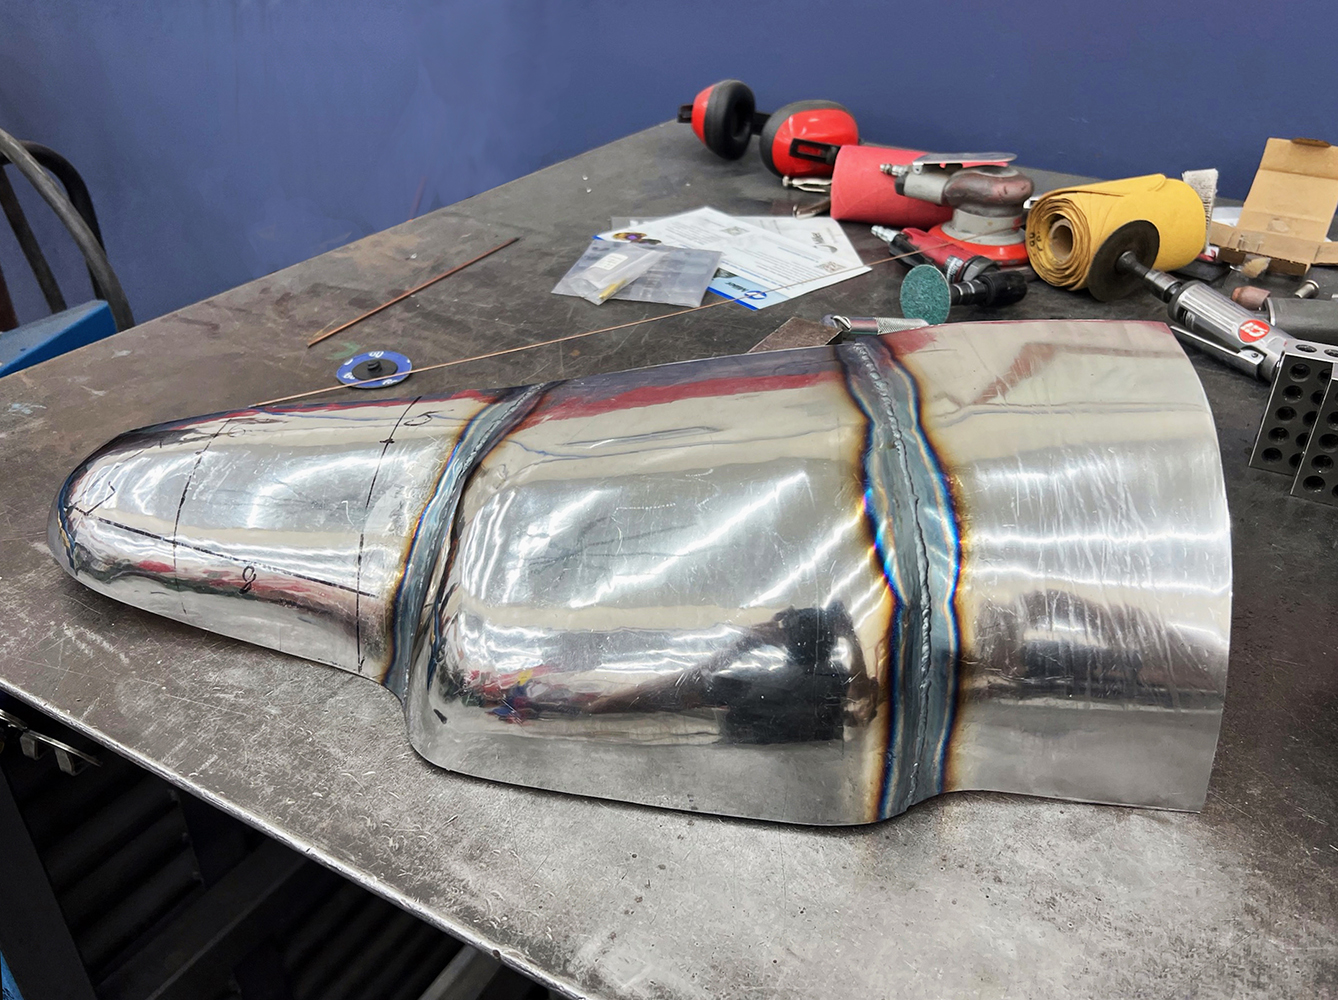
The biggest challenge was the curvy cover for the transmission. McGlynn made an elaborate buck for this, which showed him precisely the shape each piece required. He did the majority of the shaping with a power hammer, and the results are spectacular!
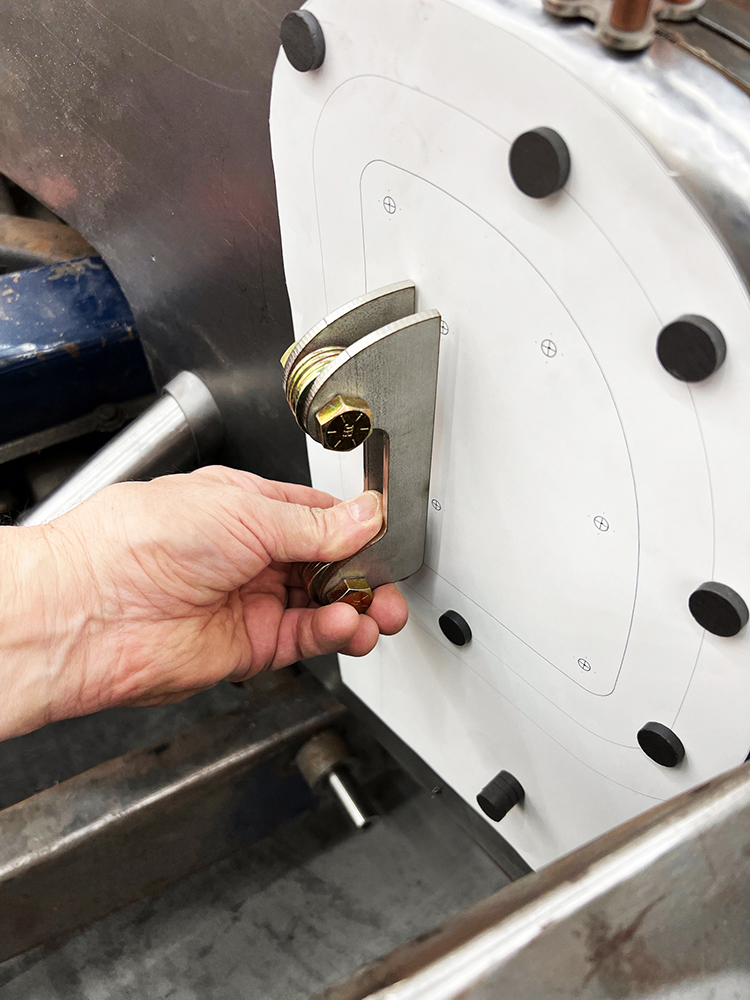
The position of the hinge pivot brackets is located on the firewall.
Although McGlynn’s shop is better-equipped than most, all of this work could be done with more basic tools, and the layout and fabrication techniques would be very similar.
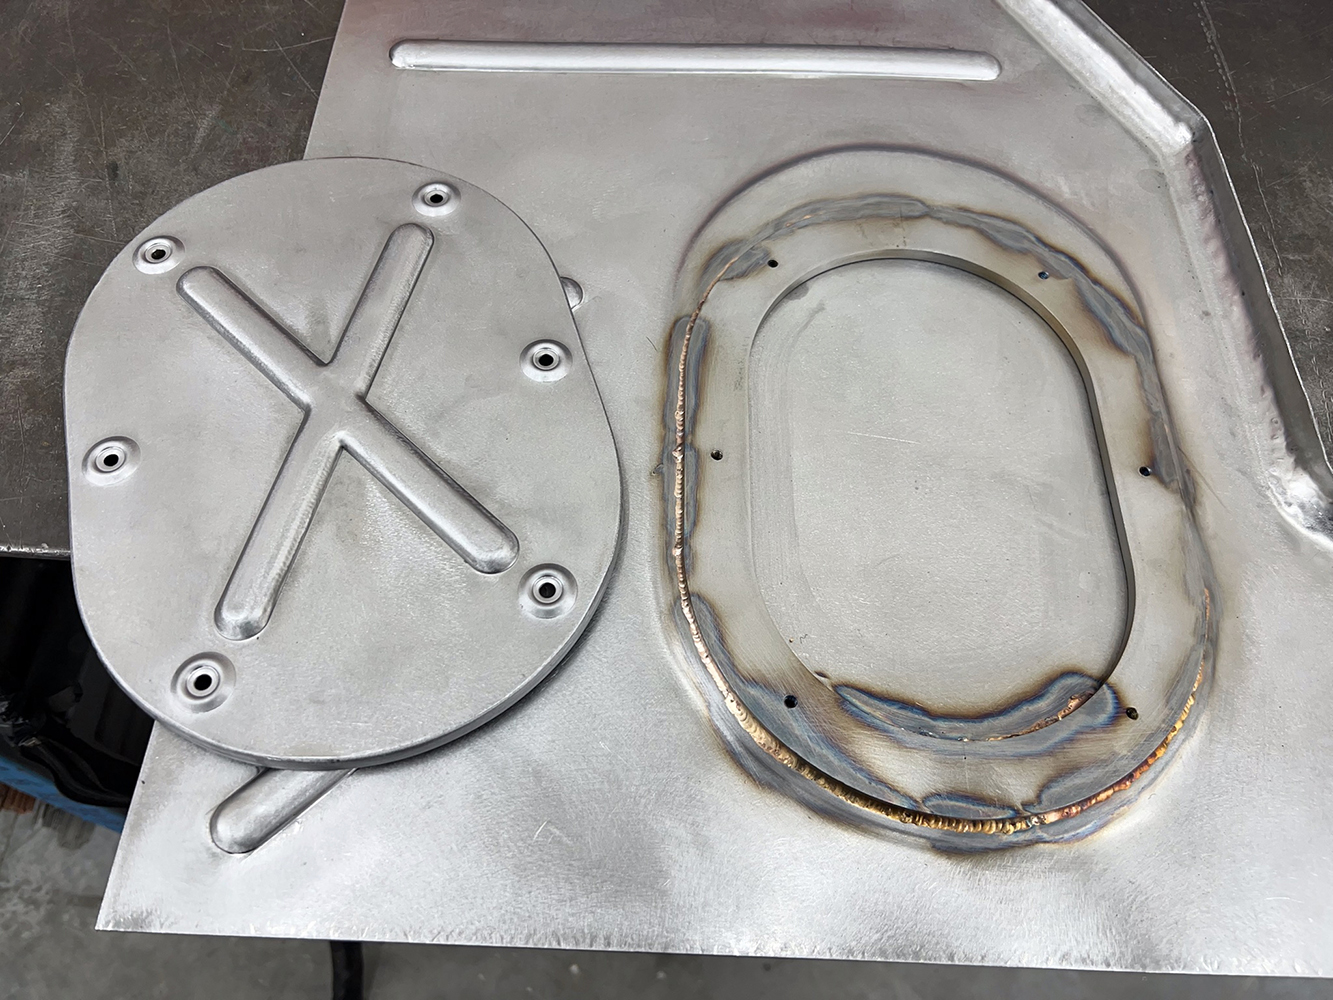
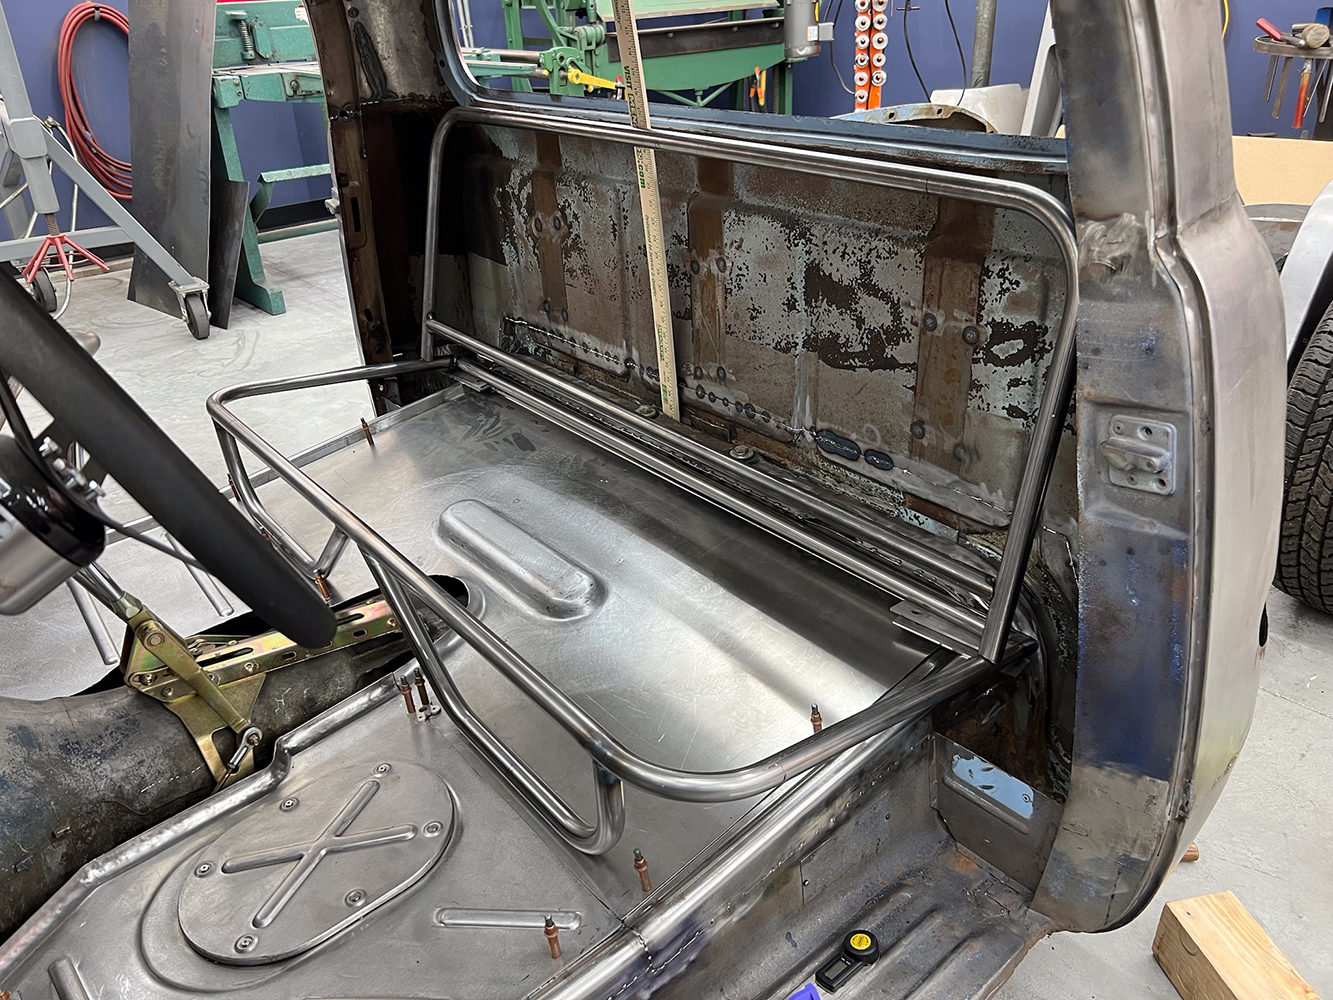
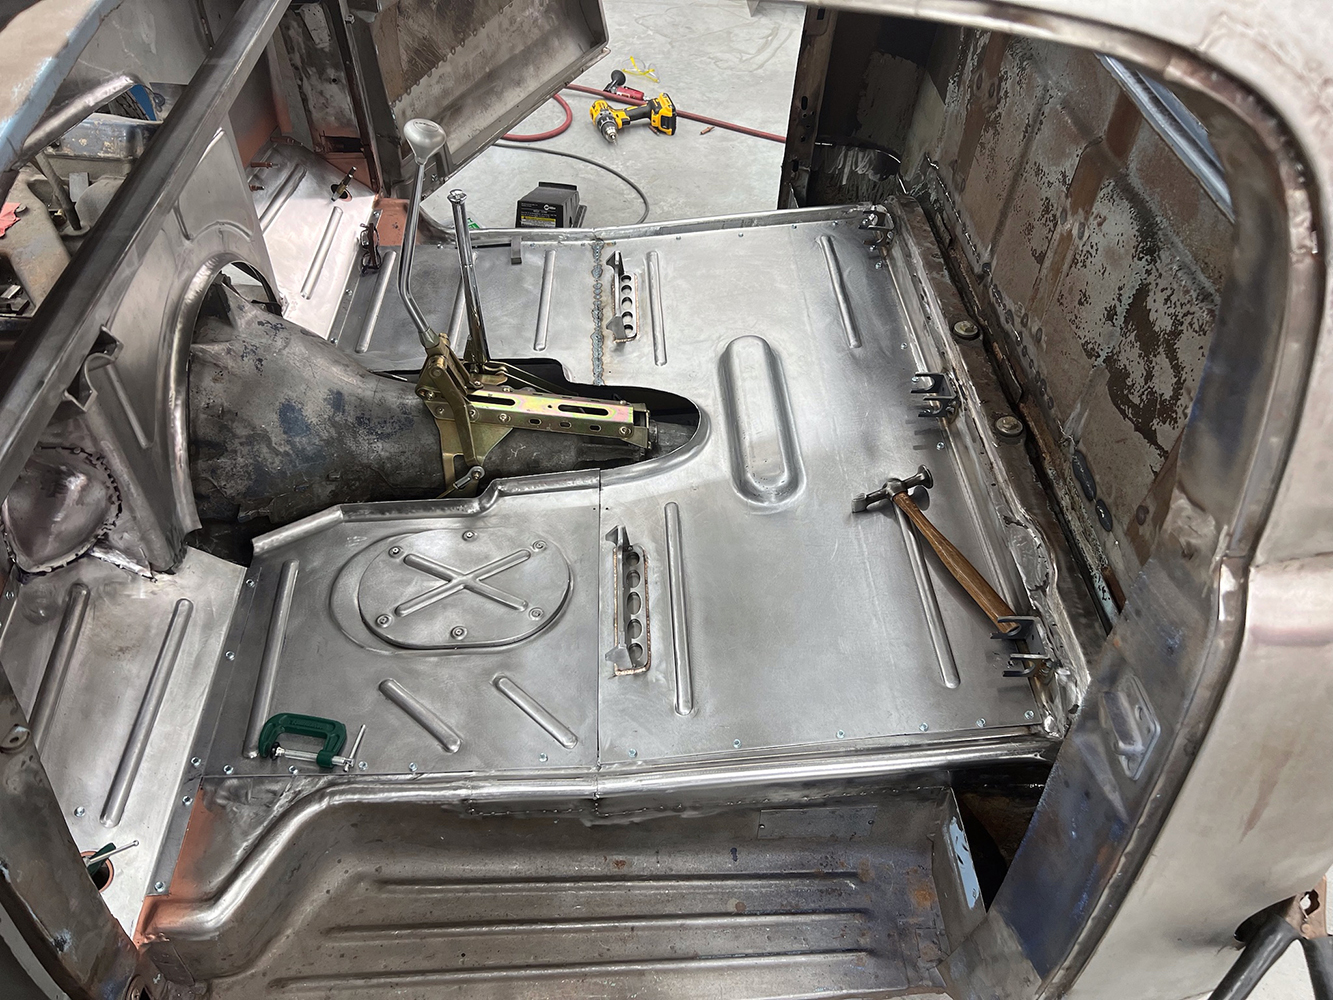
A piece of 1/4-inch steel plate with threaded holes was attached to the inside of the firewall to give the hinges sufficient stiffness. To lessen distortion they were TIG welded with Silicon Bronze filler rod along with the steering column sleeve.The hinges are test-fitted into place and checked for alignment and smoothness of operation.The firewall has a recess for the back of the engine, formed from several pieces of metal. The edges of the largest piece are being shaped over an MDF hammerform.Recesses are formed in the panel with a Pullmax machine. The windows in the hammerform are used to guide the work through the machine.Here’s the back panel for the recess with all the forming done. The holes for the screws that held the MDF sandwich together will be filled and ground smooth.The toeboards were patterned with chipboard and cut from 16-gauge steel sheet. Layout lines are in place here for the stiffening beads and pieces of angle are temporarily clamped to the work as stops for the bead-forming dies.This tooling, made by Fulton Metal Works, makes very crisp beads in a Pullmax machine. This die set is used to “coin” the ends of the beads as the first operation.A fence is used on the edge of the panel to locate the position of the coined ends of the beads.After the ends are coined, the lower die insert is swapped to this profile, which runs the straight bead profile between the coined ends.The panel is held temporarily into place with Clecos. Note the crisp definition all around the beads.The toeboard for the driver side is made in the same way.The side pieces for the firewall recess are formed and fitted, then welded and smoothed.The driver side floorboard is mocked up next using chipboard. This panel needs an access hatch for the master cylinder and a relief for the brake booster.An MDF form is made to shape the flange around the perimeter and locate the stiffening beads in the brake hatch cover.The beads, and the dimples for the fastening screws, were formed on the Pullmax. A raised section was formed in the floor for clearance and a plate was welded into place, which has threaded holes for the mounting screws.McGlynn made a seat frame from 1-inch-diameter thin wall steel tubing. The rear portion of the floor was made as a separate piece of 16-gauge steel and welded into place.More beads were added to the rear floor section, along with mounts for the seat frame.The transmission cover is a very complex fabrication on this truck. McGlynn made a buck from MDF and filled in the open areas with foam, then surfaced it with plastic body filler.The cover was shaped in a power hammer from 16-gauge steel. Multiple pieces of metal were used to ease the shaping process.The cover is held into place with Clecos, checking the fit with the parking brake lever and the mount for the shifter boot.The final step is shaping the cover for the bellhousing. The stepped detail was done in the Pullmax machine. This very professional-looking job was all done in a well-equipped home shop.
We use cookies to ensure that we give you the best experience on our website. If you continue to use this site we will assume that you are happy with it.