


Part II: The Finishing Touches
By Jeff Smith – Photography by the Author
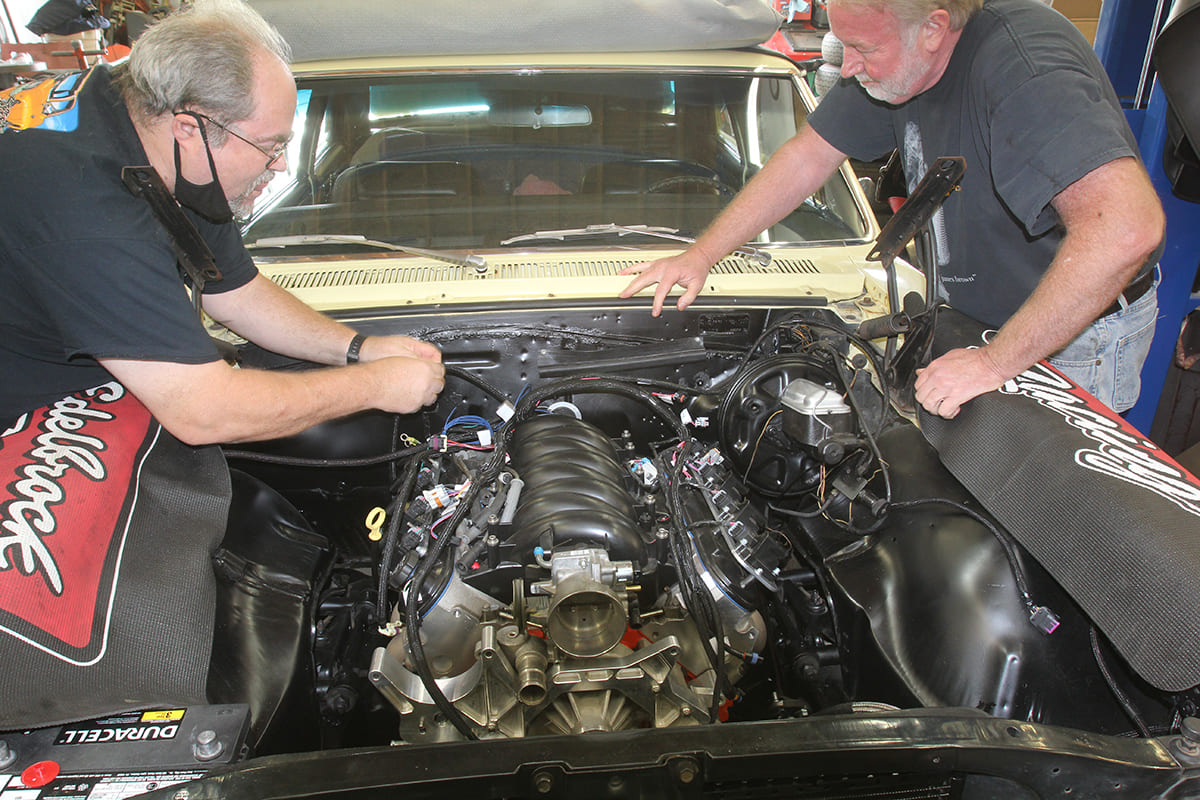
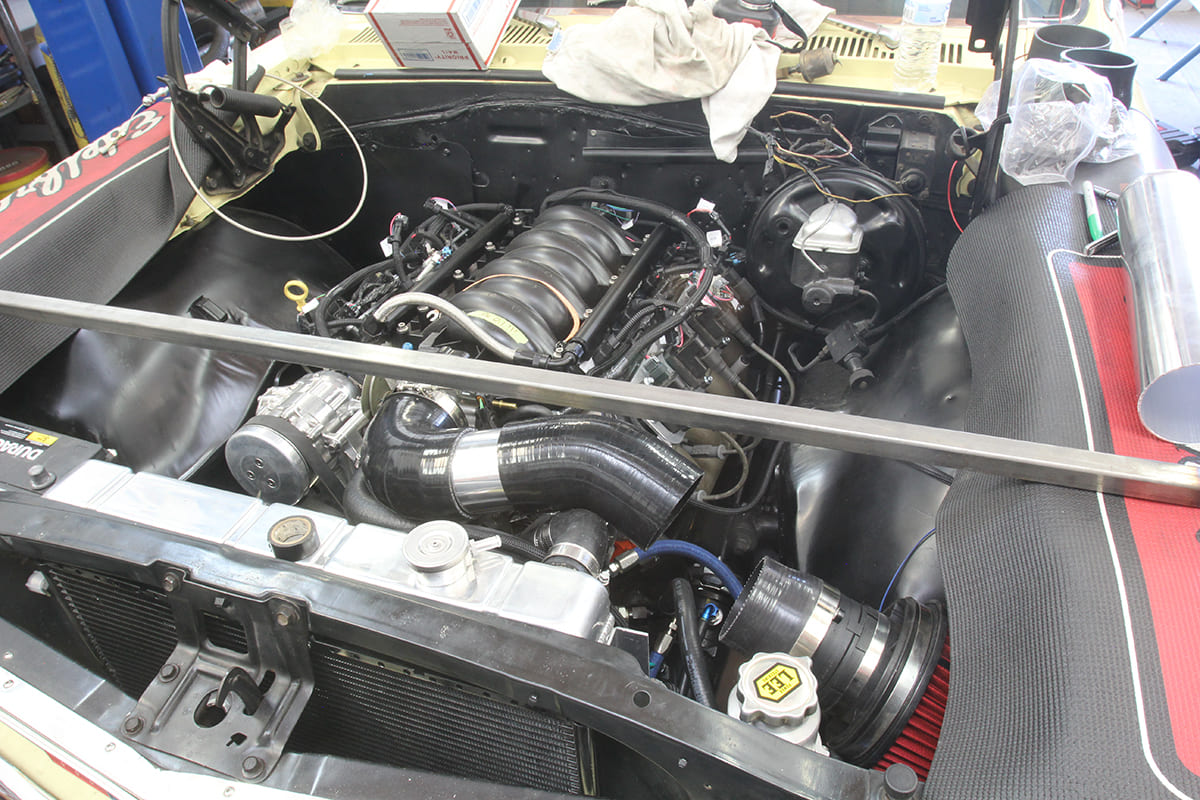
In Part I of our story, Eric Rosendahl wanted a 5.7L LS engine in his ’67 300 Chevelle that could easily be a daily driver. We bolted in the engine along with a fresh 4L60E. The rest of this story will document all the subsequent changes and fixes we had to create to bring this plan to a climax. The engine is really just a breathed-on Gen III LS truck drivetrain cloaked in a ’67 Chevelle 300 sedan body or, the best of both late-model efficiency and a cool muscle car image.
We have to admit that we were in such a hurry to drop the LS in place that we didn’t shoot any photos of the install, which is why you won’t see the classic image of the new LS going in–we just plain forgot! But you’ve seen the photo a dozen times in different scenes, so it’s no great loss.
With the new engine and trans in place, there were at least 500 details to work through. While it might appear that the PSI engine wiring harness would be a challenge, that turned out to be the easiest as the connectors are simple plug-ins. When we eventually tried to fire the engine, we discovered our take-out injectors were junk. Rather than mess around with cleaning parts that might not be salvageable, we invested in a new set of Holley injectors. This required converting the injector harness from the factory Multec injectors over to EV6, but that we handled by splicing new connectors on the existing harness.
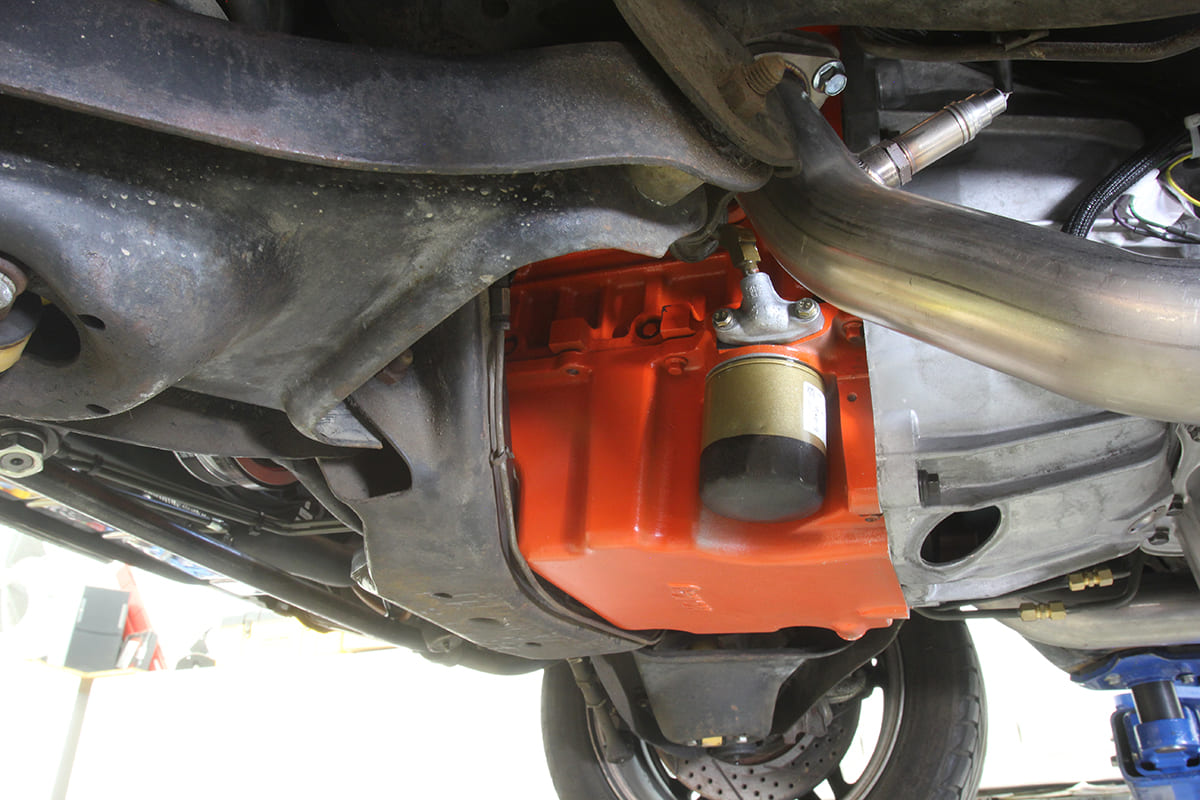
With the engine in place, we mounted the Lokar throttle pedal and attached the cable to the intake with a simple, homemade steel bracket. With the radiator and electric fans in place, Rosendahl spent a half day of bending and flaring 5/16-inch hard line tubing to connect to the existing radiator trans cooler along with a small auxiliary trans cooler. While we were under the car, Rosendahl also purchased a pair of Hooker lead-down pipes for a second-generation Camaro (the early Chevelle pipes were not available at the time) that worked with a minor tweak.

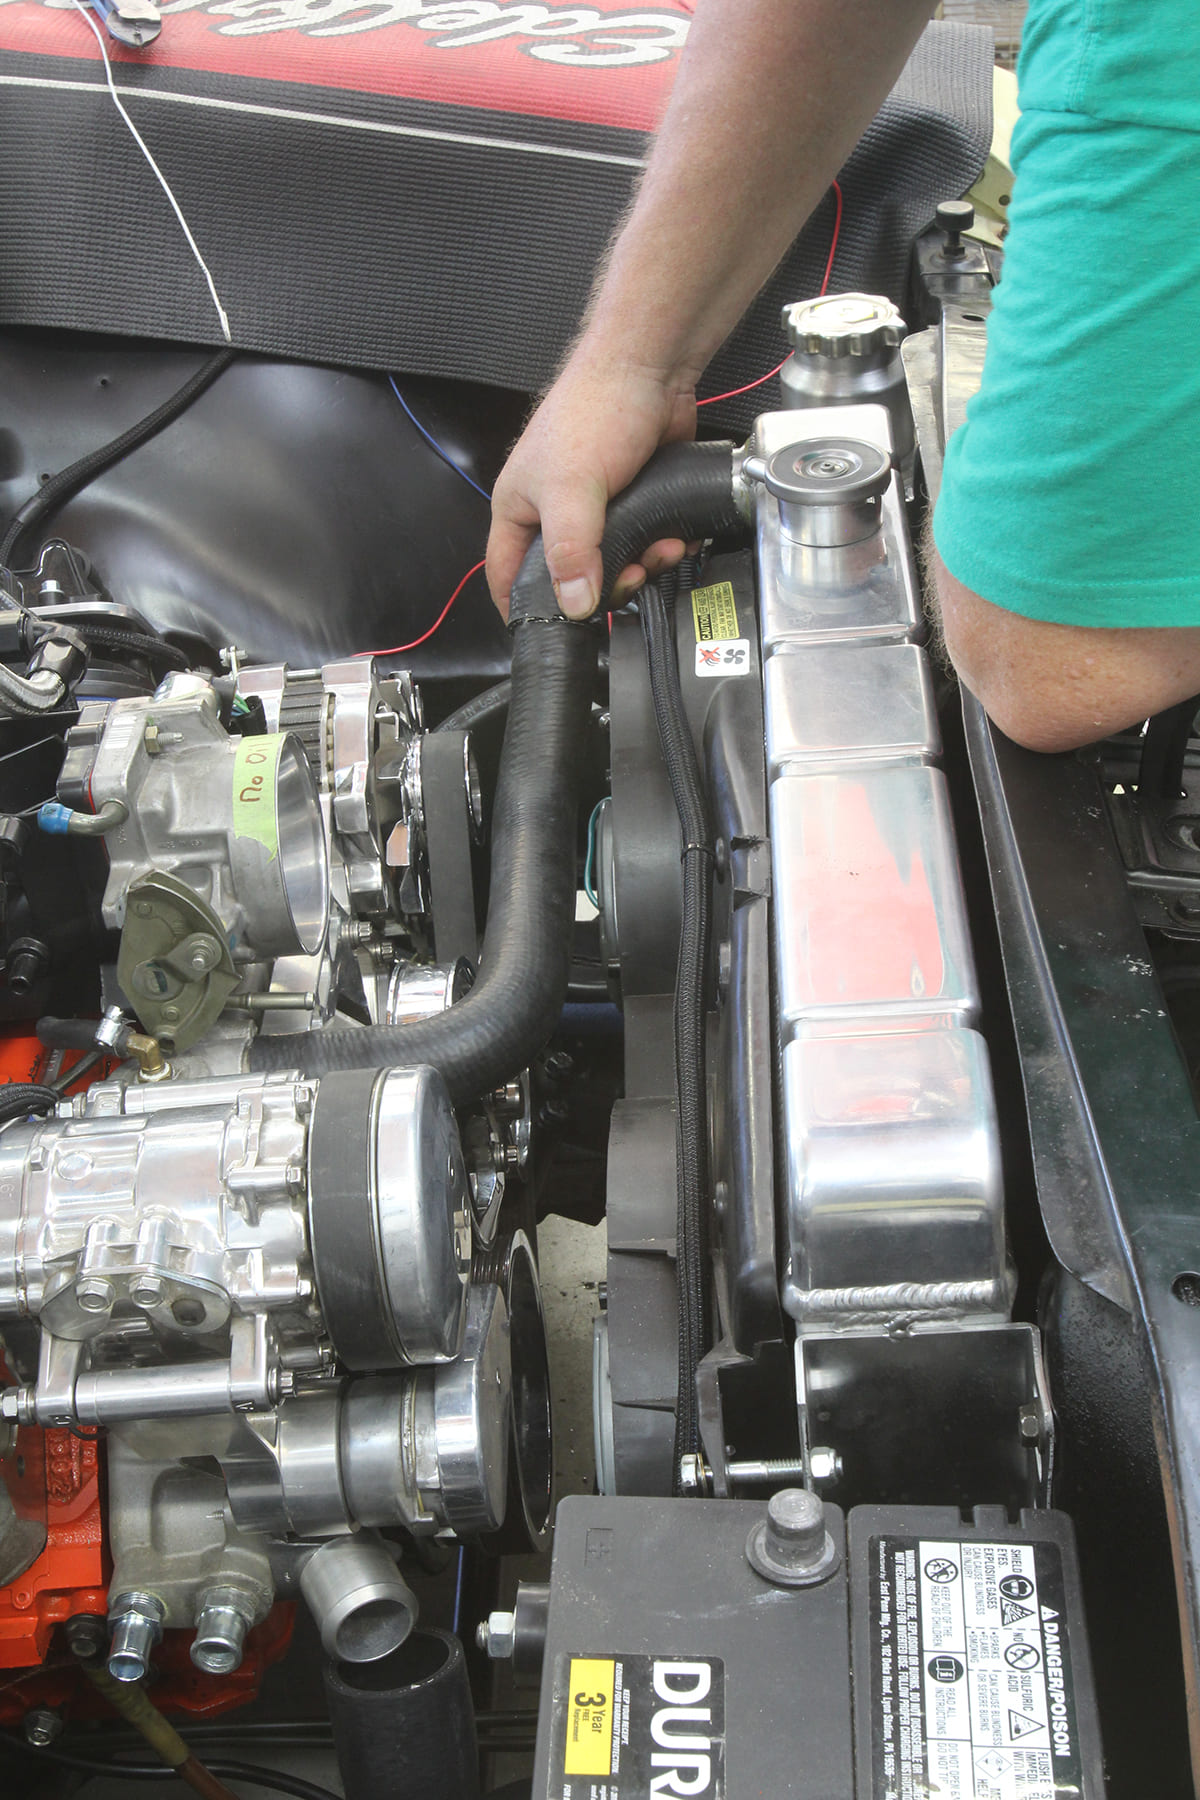
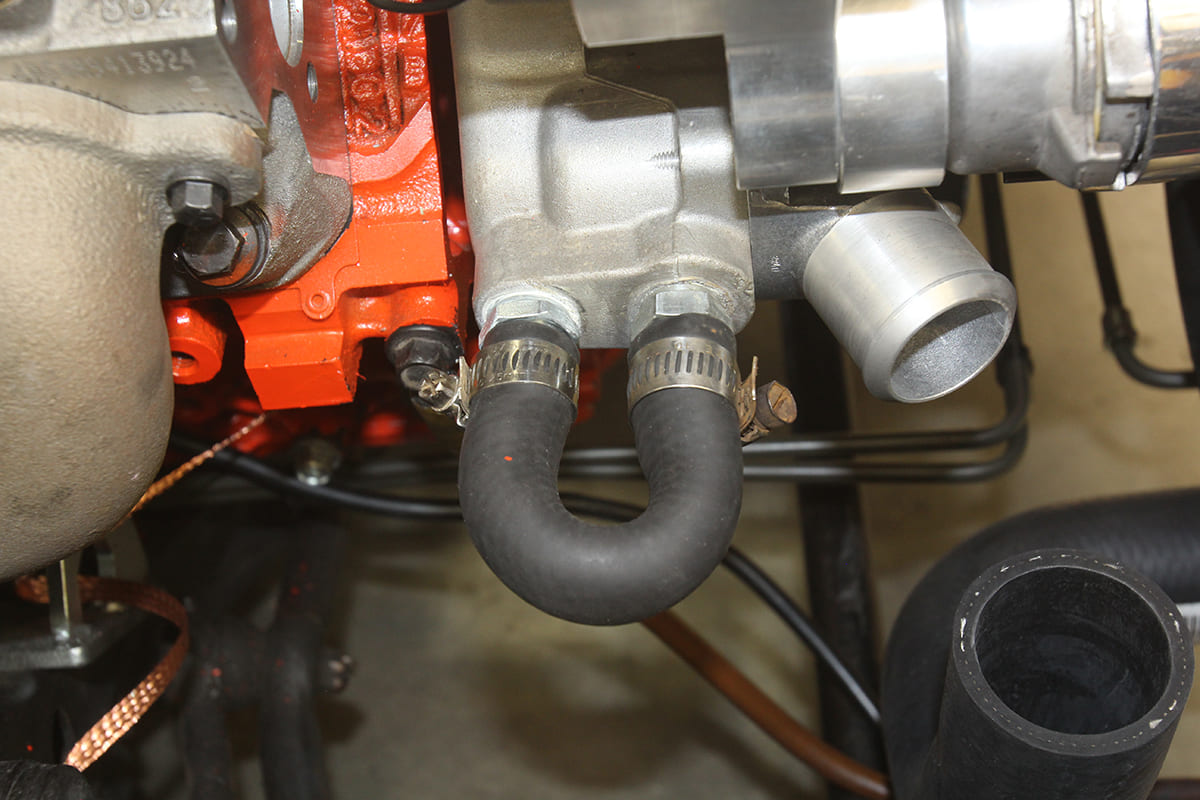
Back up in the engine compartment, one of the bigger challenges was to adapt the existing larger small-block radiator hose nipples to the smaller LS engine versions. The top radiator inlet measures 1½ inches while the lower is 1¾ inches. The LS outlet into the top is smaller at 1¼ inch while the thermostat connection for the lower hose measures 1½ inches. This means we needed to find adapters. Rosendahl found an ICT Billet adapter that allowed us to connect the lower hoses. In the case of the upper, Rosendahl’s research on a Chevelle forum revealed a hose that would adapt the two different sizes but it was far too long. We cut the hose in the straight middle section and used a 4-inch length of 1½-inch tubing, to which we rolled beads using a bead rolling tool from Graham Tool Company. If you don’t want to go that route, Rosendahl found a straight ICT Billet connector that will also do the splice task.
Rosendahl had already purchased the radiator, but to save the hassle of the hose splicing, Summit Racing sells a dual pass Frostbite radiator with both hose ends on the passenger side that eliminates the need to adapt differing hose sizes.
With radiator hoses attached and the engine filled with coolant and oil and 5 gallons of gas in the tank, we checked the fuel system for leaks and repaired several loose fittings and soon had 58 psi streaming through the system. However, as we mentioned earlier, the engine refused to fire. After many hours of running down potential problems and discovering a burned-out Malfunction Indicator Lamp (MIL), we eventually realized all eight take-out injectors were completely plugged. This appears to be a very common problem.
Most enthusiasts blame these plugged injectors on alcohol in the fuel but our research points toward the nasty chemical mix of additives that is present in much larger quantities in all pump gasoline compared to ethanol. These chemicals are benzene, toluene, ethylbenzene, and xylene, better known under the acronym BTEX. These are all nasty ingredients that are responsible for injector failures.

Back to the issue at hand, Rosendahl decided to invest in a new set of Holley fuel injectors with a set of 36 lb/hr versions that employ the EV-6 electrical connectors. This, unfortunately, also required us to modify the injector harness with new connectors since the previous injectors used a different, Multec connector. Rosendahl found the proper ones on the Internet and spent the time to create the new connectors.
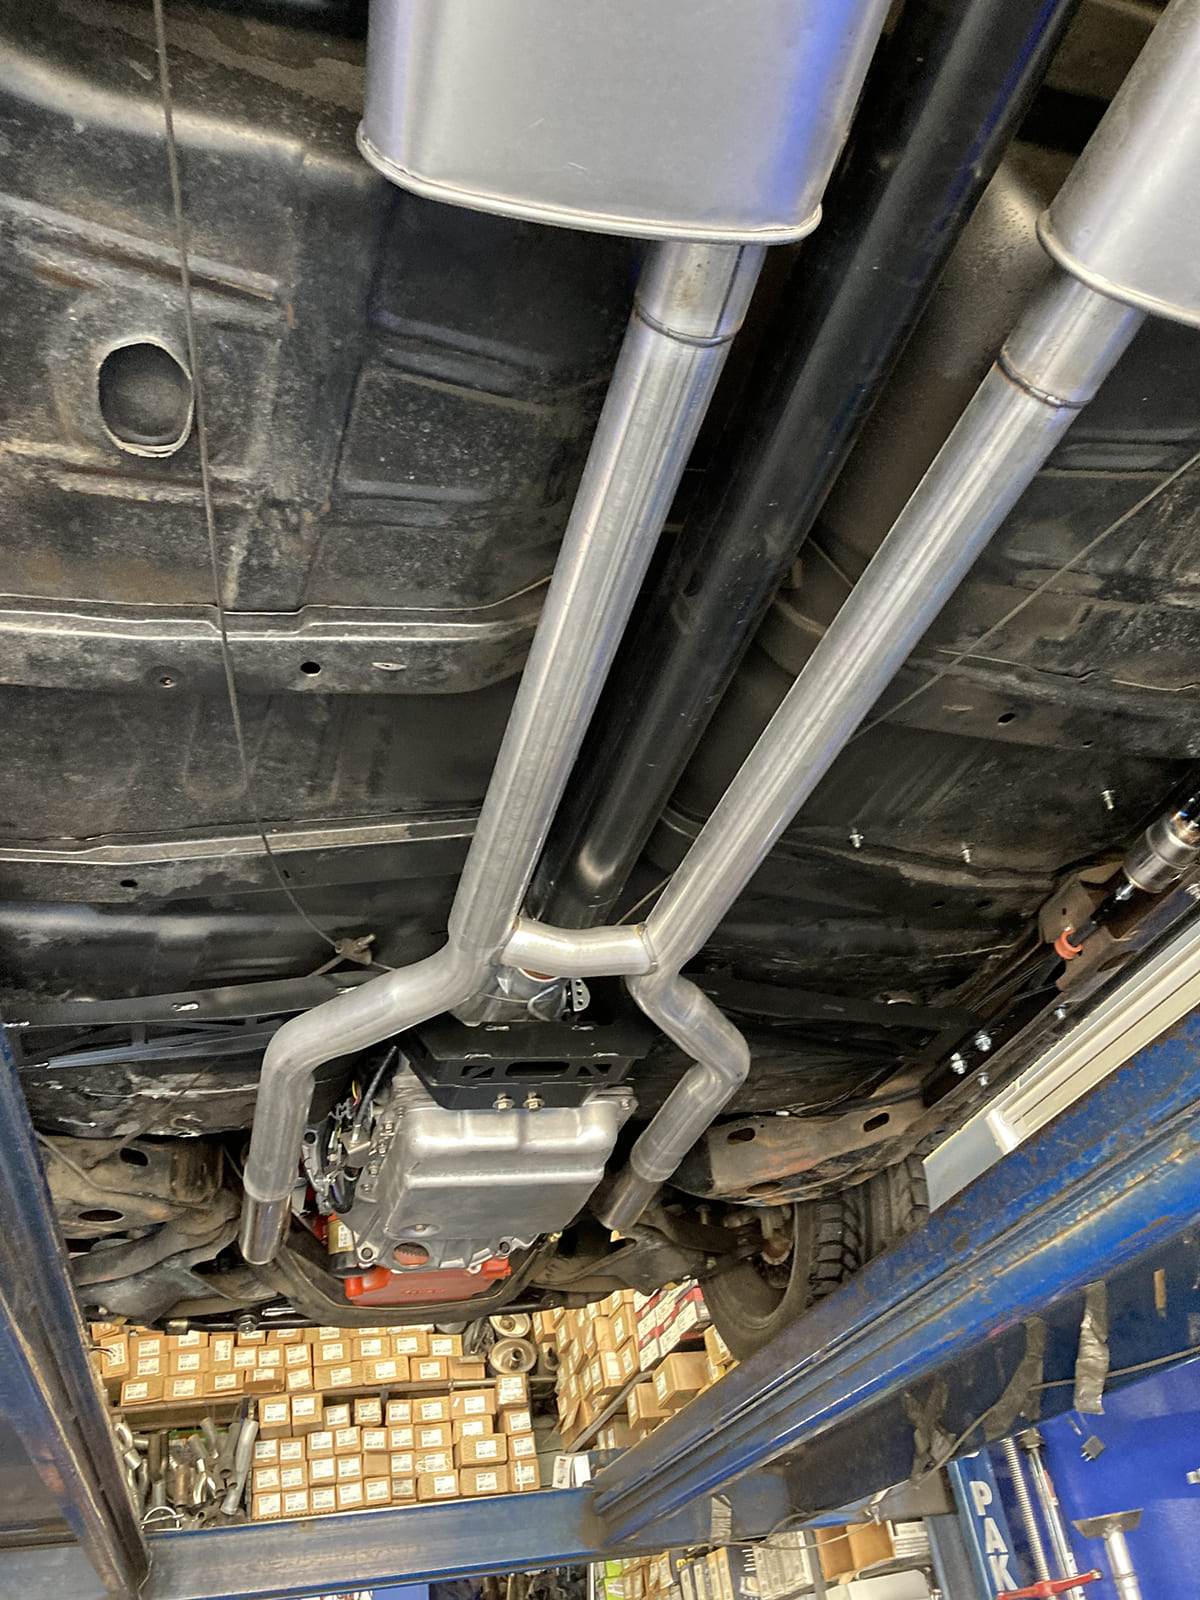
The new Holley injectors did their job and the engine instantly fired up but with a noticeable misfire. We chased that down to a pair of swapped coil connectors. The engine instantly responded by running much smoother and we took it out for a quick testdrive after filling our new RaceTrans 4L60E with Lucas semi-synthetic ATF. We jerry-rigged a pair of slip-on mufflers to the lead-down pipes for the testdrive, so the next step was to deliver the Chevelle to our local muffler shop to add the pair of DynoMax Super Turbo mufflers and complete the install with an H-pipe.
We decided to load the car on our trailer because the brakes suddenly required really high effort that we didn’t want to trust in traffic. This created a challenge when the car hung up on one of the mufflers while backing off the trailer and it took a half-hour to extract the car from the trailer. Within a few hours Reseda Muffler, in Reseda, California, built a nice H-pipe system for the car for an excellent price and we now had a much more pleasant sounding ride and with a complete closed exhaust system we could now have the ECU tuned.


The guys at PSI supplied the ECU calibrated for the larger injectors but that is a gross estimate and the engine still needed some final tuning. We took the Chevelle to Westech where the crew strapped the Chevelle to the SuperFlow electric chassis dyno and went to work. As with most stock tunes, we learned that LS engines only require max ignition timing set at 18 to perhaps 20 degrees and that additional timing does not improve the power, so the timing was left stock.
At max power, the guys quickly determined the engine needed less fuel, and after a few quick keystrokes, the engine picked up about 10 hp over the initial effort. Factory tune-ups at wide-open throttle (WOT) generally run quite rich to protect the catalytic converter. Because this car does not require a cat, we can lean the engine and gain a slight power advantage. The next dyno pass delivered 320 lb-ft of rear wheel torque and 317 rwhp at 5,800 rpm. Assuming a loss of around 100 to 120 hp through the drivetrain, this puts the flywheel horsepower at around 435. We built the 5.7L engine from a 5.3L base adding a mild Summit Pro Truck LS camshaft and retaining the stock heads using stock replacement 5.7L pistons.

With tuning complete, we thought we were ready for some test miles but first had to remedy a failed power brake booster. This required a replacement that Rosendahl obtained from NPD. After that swap, our friend Steve Strope at Pure Vision repaired and polished the original Center Line wheels, and with new set of 275/40R17 tires we were ready for the road.
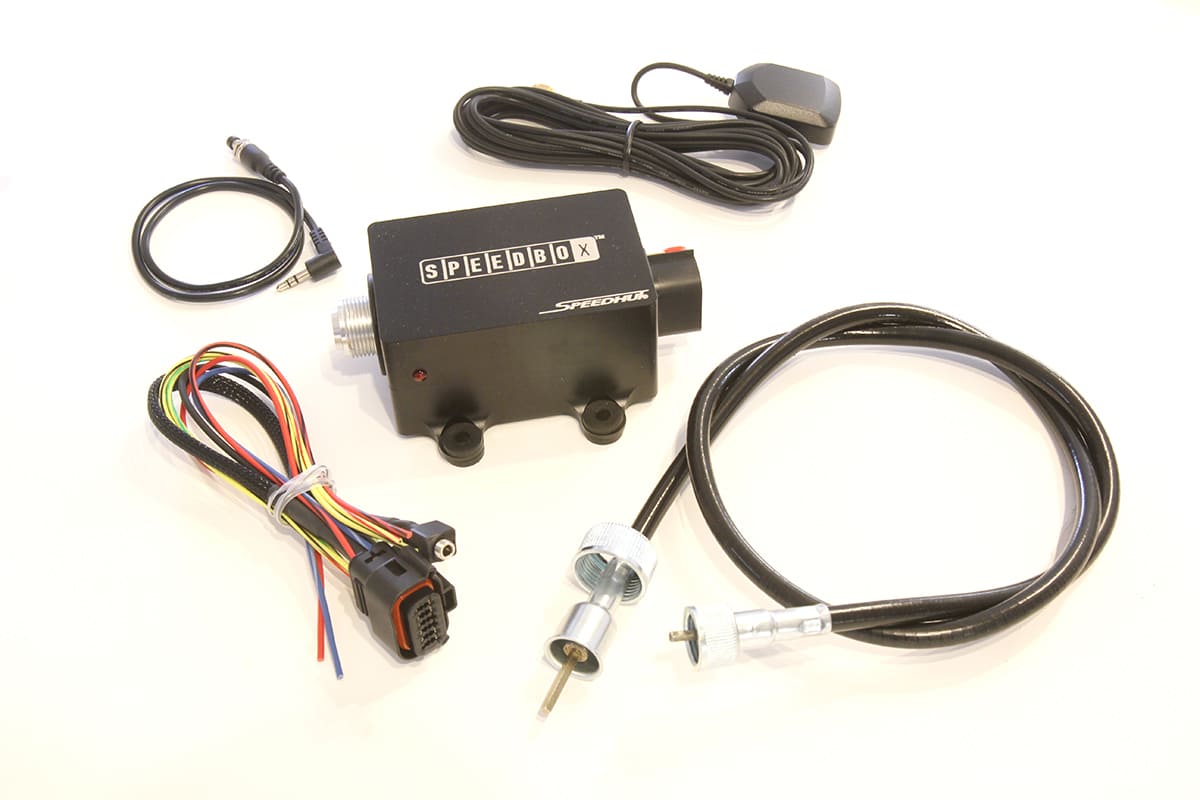
Another minor issue was that with the upgrade to the electronic 4L60E, the transmission does not provide a cable drive for the Chevelle’s old-school speedometer. Rosendahl wanted to retain the dash as it had already been converted to Shiftworks factory-style water temp, oil pressure, and voltage gauges along with the fuel level indicator. There are multiple avenues of how to approach this speedometer situation and Rosendahl chose to go with a Speedhut SpeedBox.
The SpeedBox is an electric motor that takes input from an external source, such as the VSS signal from the transmission or from an unobtrusive antenna placed on the dash, that sends speed signals based on GPS inputs. The speed input controls an electric motor in the box that drives the speedometer cable. Rosendahl mounted the box underneath the dash, which allowed easy access for the speedo cable. He reports that the unit is near silent in operation, and after calibration is within 2 mph of what his OBD-II (on-board diagnostics) display receives from the transmission VSS.
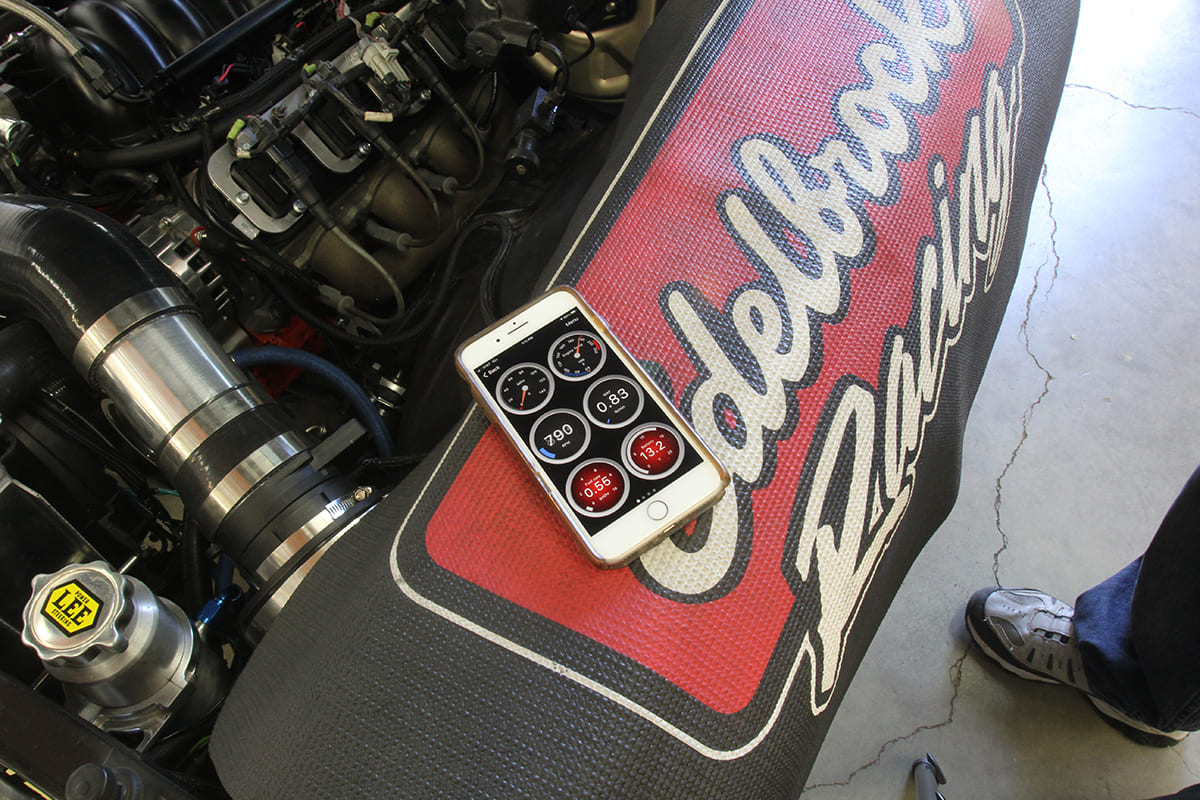
The Chevelle now purrs down the freeway courtesy of the 4L60E trans and the 12-bolt 3.55:1 gears. Rosendahl’s modifications to the interior included a slick little ECU monitor from ODB Link that plugs into the ODB-II port connected to the ECU. This offers Bluetooth connection to your smartphone to display sensor data or error codes much like a more expensive OBD-II scanner tool. Rosendahl can now monitor any factory sensor from his phone and the display is configurable in multiple ways.
Rosendahl put some quick miles on the Chevelle just as we finished this story. The Chevelle rides great on its Hotchkis suspension, and the mild 5.7L LS should be capable of 22-plus miles per gallon. We have not taken it to the dragstrip, but our simulator software predicts perhaps high 12s at around 106 mph based on good traction. Even with this mild power, the torque curve feels strong because of the 3.55:1 rear gears. With the converter locked up in overdrive, the 70-mph highway cruise rpm is a pleasing 2,200 rpm.
While we don’t have many miles on this combination yet, it really has turned out to be an exceptionally nice cruiser. It’s no race car but it would be easy to squeeze a little nitrous in this baby if the need ever arose to go quicker. But that’s a story for a later date …
PARTS LIST
| Description | PN |
| ARP bellhousing bolt kit | 134-0901 |
| ARP flexplate bolts, metric | 330-2802 |
| Holley 36 lb/hr fuel injectors, EV6 connector, set | 522-368S |
| Painless EV6 connectors | 60131 |
| Sniper LS2 fuel rail assembly | SNE-850005 |
| Hooker universal Chevelle trans crossmember | 71222008HKR |
| Lokar throttle pedal assembly | BAG-6129 |
| Dayco upper hose, 1½ in | 70081 |
| Dayco upper hose, 1¼/1 9/16 in LS side | 71085 |
| Dayco lower hose, 1¾/1 7/8 in | 70470 |
| Dayco lower hose to thermostat on LS | 71982 |
| Dayco heater hose bypass | 87629 |
| ICT Billet adapter for upper hose, 1½ to 1½ | AN627-24A |
| ICT Billet hose adapter for lower rad. 1½ to 1¾ | AN627-28-24A |
| ICT Billet square coil valve cover brackets | 551654 |
| ICT Billet metric starter motor bolts | 551681 |
| Holley Frostbite LS swap radiator, ’64-’67 Chevelle | FB300 |
| 4-inch 90-degree adapter from throttle body, Amazon | BRE000958 |
| Spectre air filter, cone style | HPR9612 |
| Spectre universal T-bolt air inlet bracket | 9710 |
| Standard Motor Products brake light switch, 4L60E | SLS159T |
| Walker Super Turbo mufflers, 2½-in, full offset | 17749 |
| M/E Wagner Dual Flow Billet PCV valve | DF-17 |
| JDMON universal oil separator, Amazon | JLACZ335-SL |
| Lucas ATF semi-synthetic ATF, 1 qt | 10052 |
| Hype-Kuhl anti-corrosion additive | see No-Rosion.com |


Sources
Applied Chemical Specialties (HyperKul)
(402) 571-3360
no-rosion.com
Automotive Racing Products (ARP)
(800) 826-3045
arp-bolts.com
American Autowire
(800) 482-9473
americanautowire.com
Dayco Products
(800) 848-7902
daycoproducts.com
DynoMax Performance Exhaust
(800) 325-8886
dynomax.com
ICT Billet
(316) 300-0833
ictbillet.com
Lokar Performance
(877) 469-7440
lokar.com
M/E Wagner Performance
(570) 899-4544
mewagner.com
OBD Link
obdlink.com
Paint Over Rust Products (POR)
(800) 457-6715
por15.com
Shiftworks
(585) 924-2700
shiftworks.com
Speedhut
(801) 221-1460
speedhut.com
Summit Racing
(800) 230-3030
summitracing.com
Spectre Performance
(800) 821-4868
spectreperformance.com
Speedway Motors
(800) 979-0122
speedwaymotors.com
Westech Performance
(951) 685-4767
westechperformance.com


