By Rob Fortier – Images by Jason Matthew
For some, it’s the thrill of the hunt; for others, it’s the build process; while others, myself included, find their four-wheeled Zen behind the wheel/on the road with the finished projects. Pennsylvanian Mike Correll seems to be one individual who finds all three aspects to be equally rewarding, as evidenced by his 1948 GMC project he just wrapped up (in more ways than one!) this past year.
“On the morning of October 15, 2023, I was in the garage scrolling through Facebook Marketplace when I came across a listing for a stalled project,” Mike told us. “I was eager to go look at the project, however, we were leaving for Daytona Bike Week the following day—while I enjoy Bike Week, I was really looking forward to seeing what all was included with the sale. On October 28, I finished up work early, went home, hooked up the trailer, and set out to make the 12-hour drive to Evansville, Indiana. When I arrived at the seller’s, there were bins, boxes, and piles of assorted parts. It wasn’t much more than an hour later before I was back on the road heading home—at one point, I pulled over just to look in the trailer to see what I’d just purchased! I definitely had quite the project ahead of me.”

OK, with stage one of search and acquire out of the way, the next and surely the most rewarding of the project was literally laid out in Mike’s garage for him to conquer.

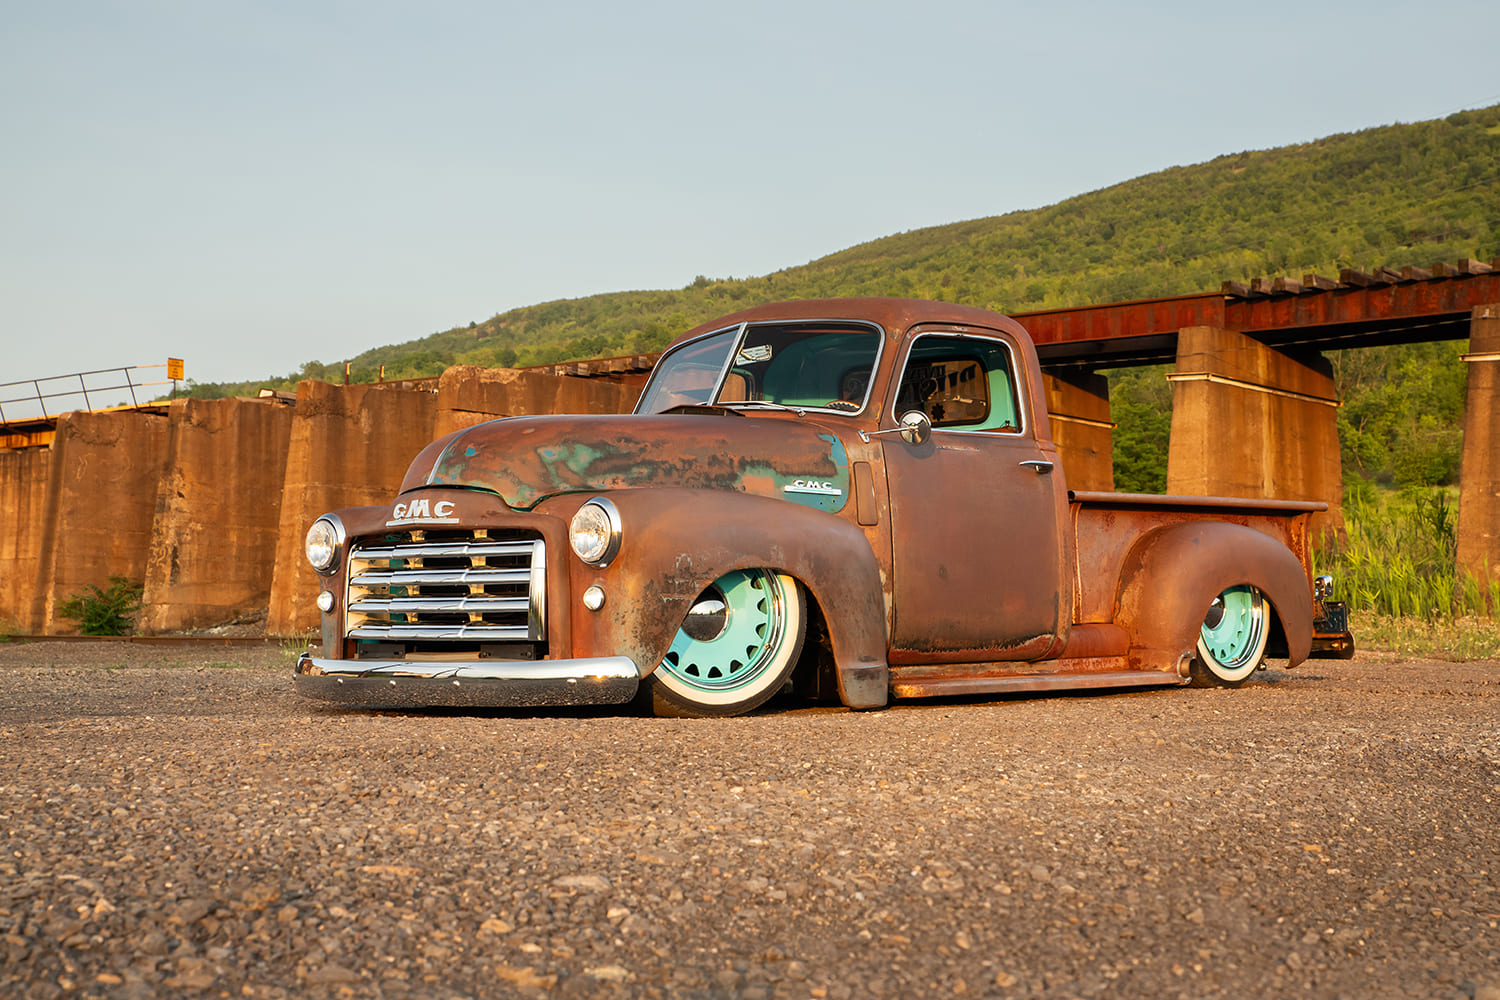
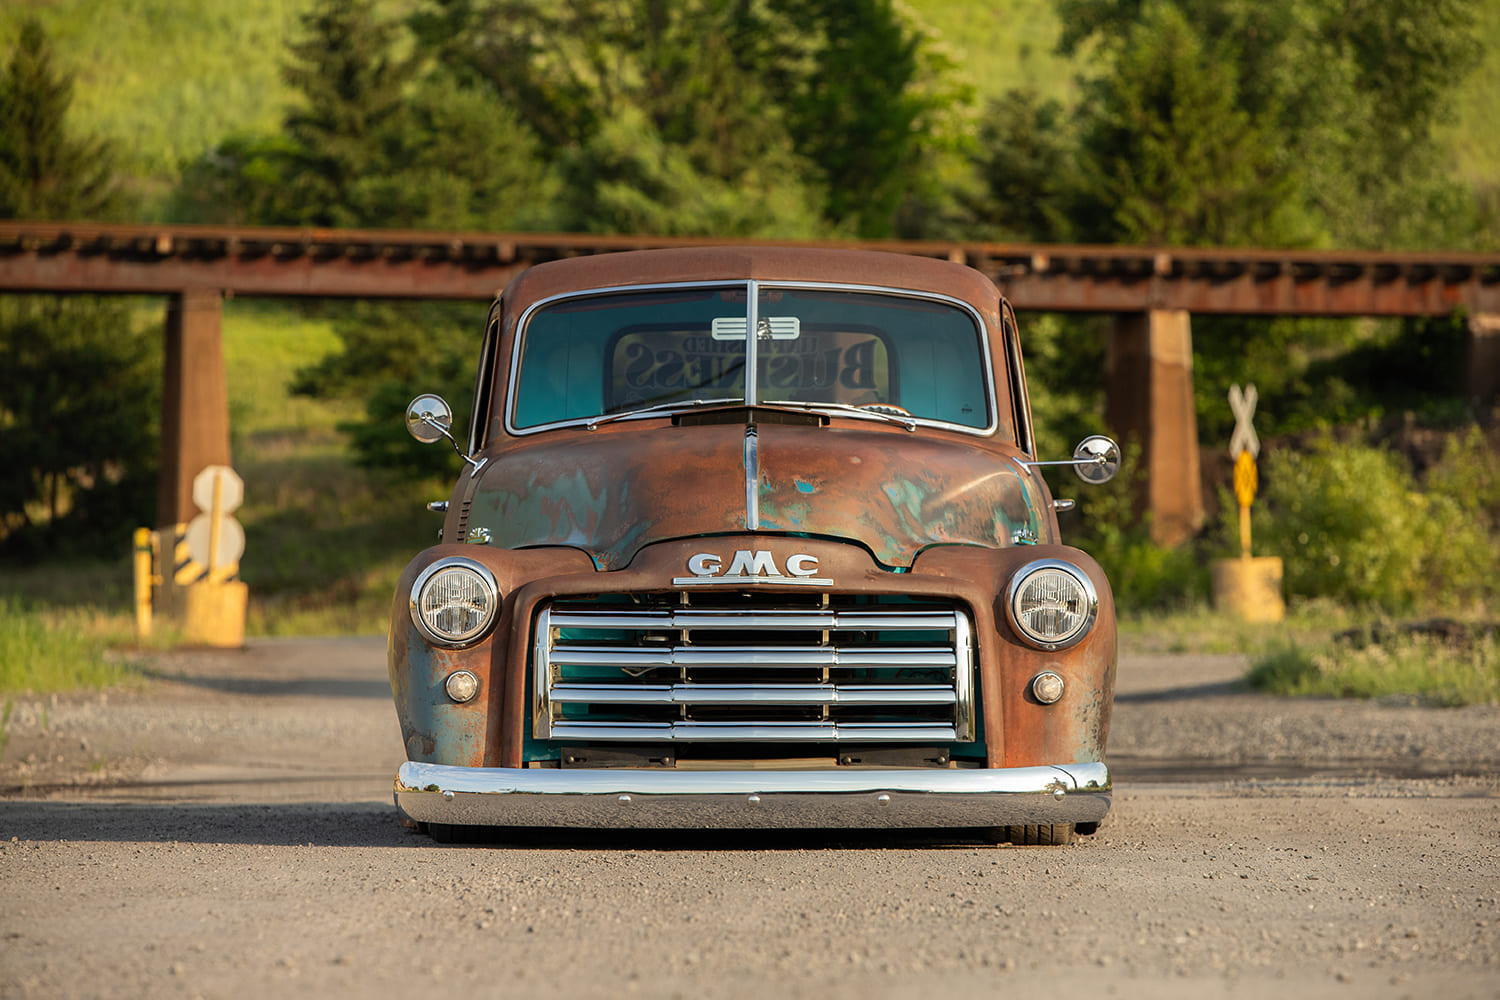
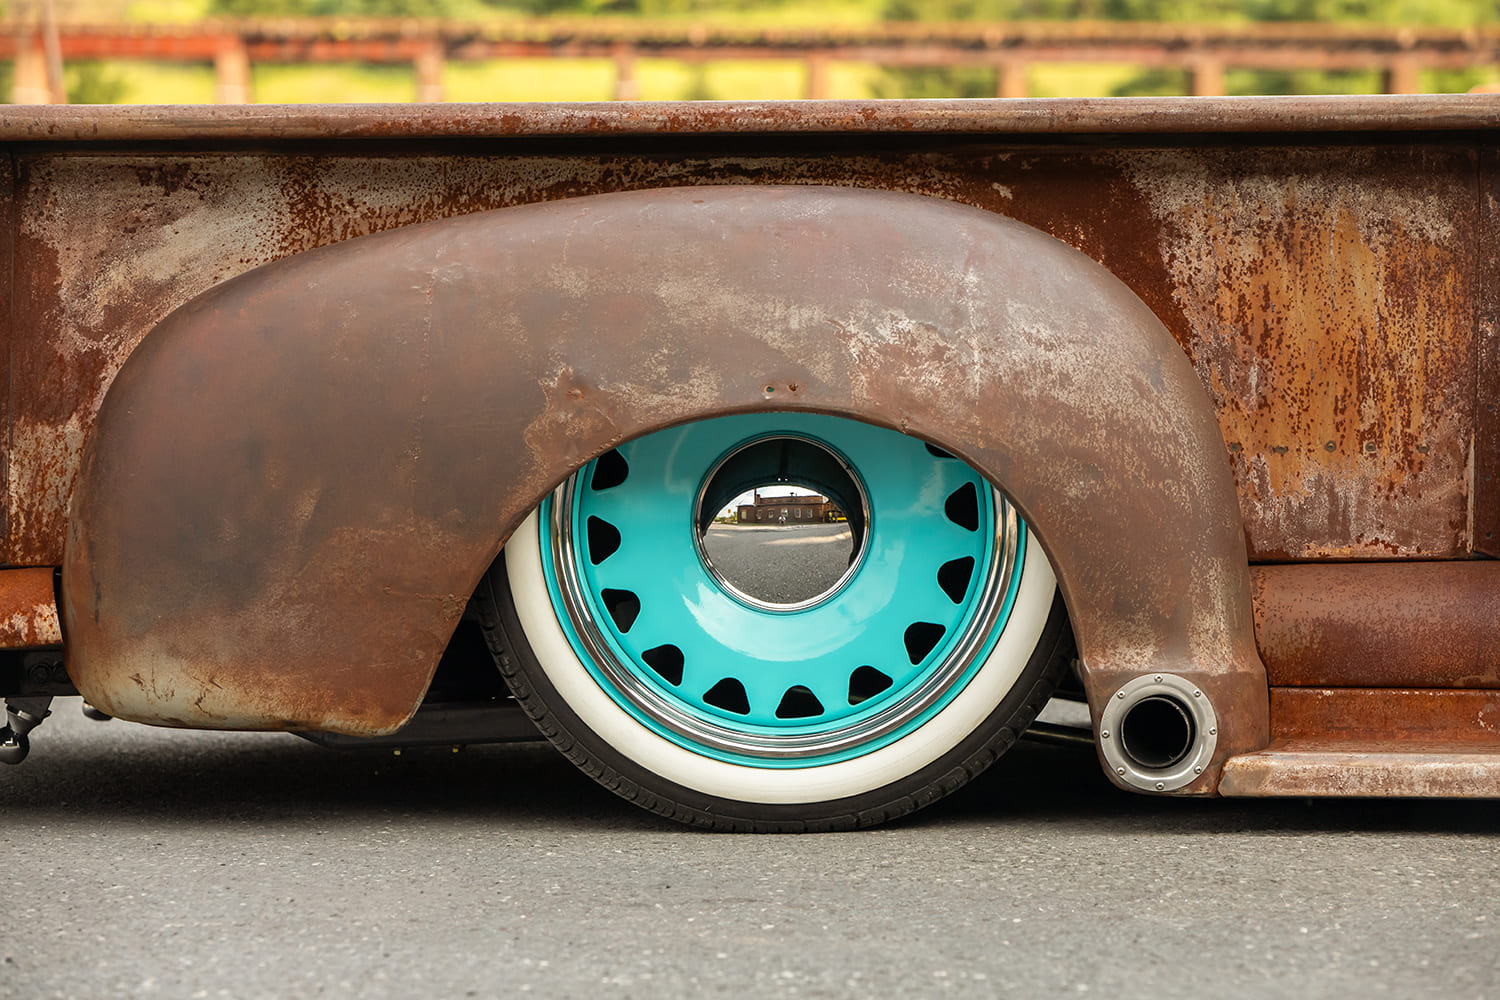
Mike continues, “I started the build with the installation of a KP Components six-link with Slam Specialties ’bags [onto the existing ’90s S-10 chassis], which required using a C-notch to allow the truck to lay frame; up front I had to cut the spring pockets to accept another set of SS ’bags. With the suspension in place I was able to start working on the body—and from the body assembly, my vision for how I wanted the truck to look was forming … my thought process was to leave the outside as untouched, 77-year-old metal, while everything beneath would be new [including the whitewalled, 20-inch Detroit Steel Ambassadors doused in Omni Licks Hot Turquoise]. I now had a plan!”

But despite having that plan, of course Mike ran into some speedbumps as the project was taking shape—they all do!

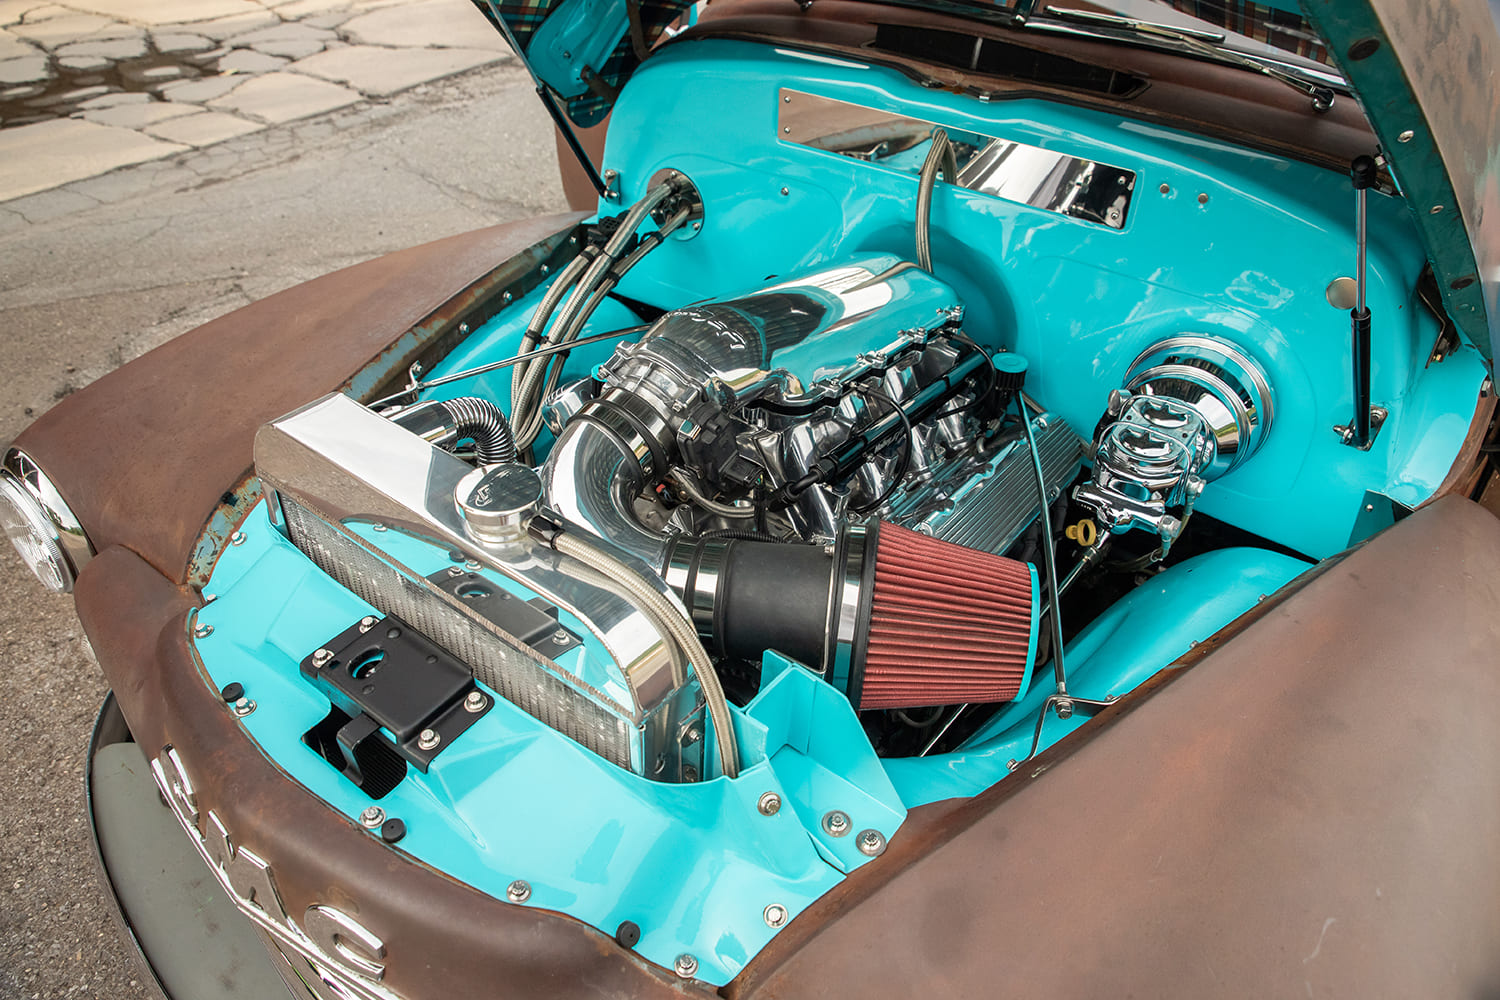
“An early stumbling block was getting the 2016 LT1 and 8L90E to run as a standalone setup. Initially, the LT was fitted with LS parts in hopes of an economical solution to enabling it to run—but the issue was the LS platform didn’t commonly use the 8L90, and this presented the problem of not having a way to control the transmission (and at this point, Holley didn’t have anything on the market that would run the eight-speed). So, the LS parts were removed and the factory LT fuel delivery system was reinstalled. With the use of a Current Performance standalone harness and HP Tuners, everything worked as hoped for.”
Once the drivetrain issues were solved and Mike had the ’48 up and running, he refocused his efforts inside the three-window’s cab.
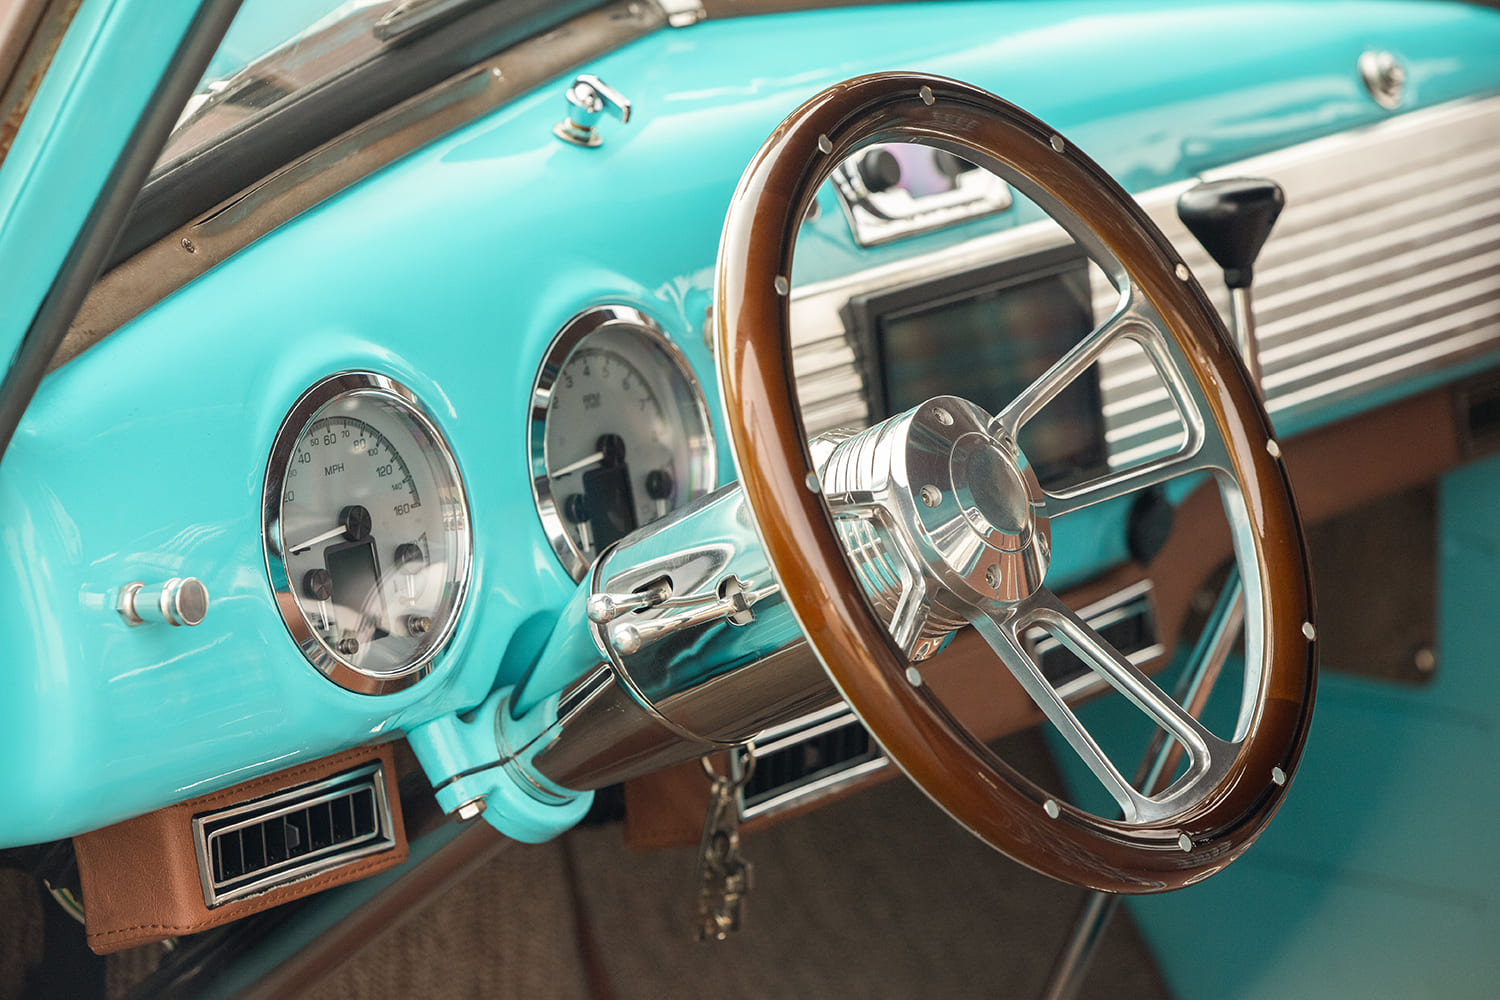
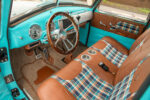
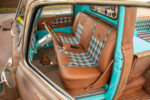
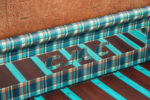
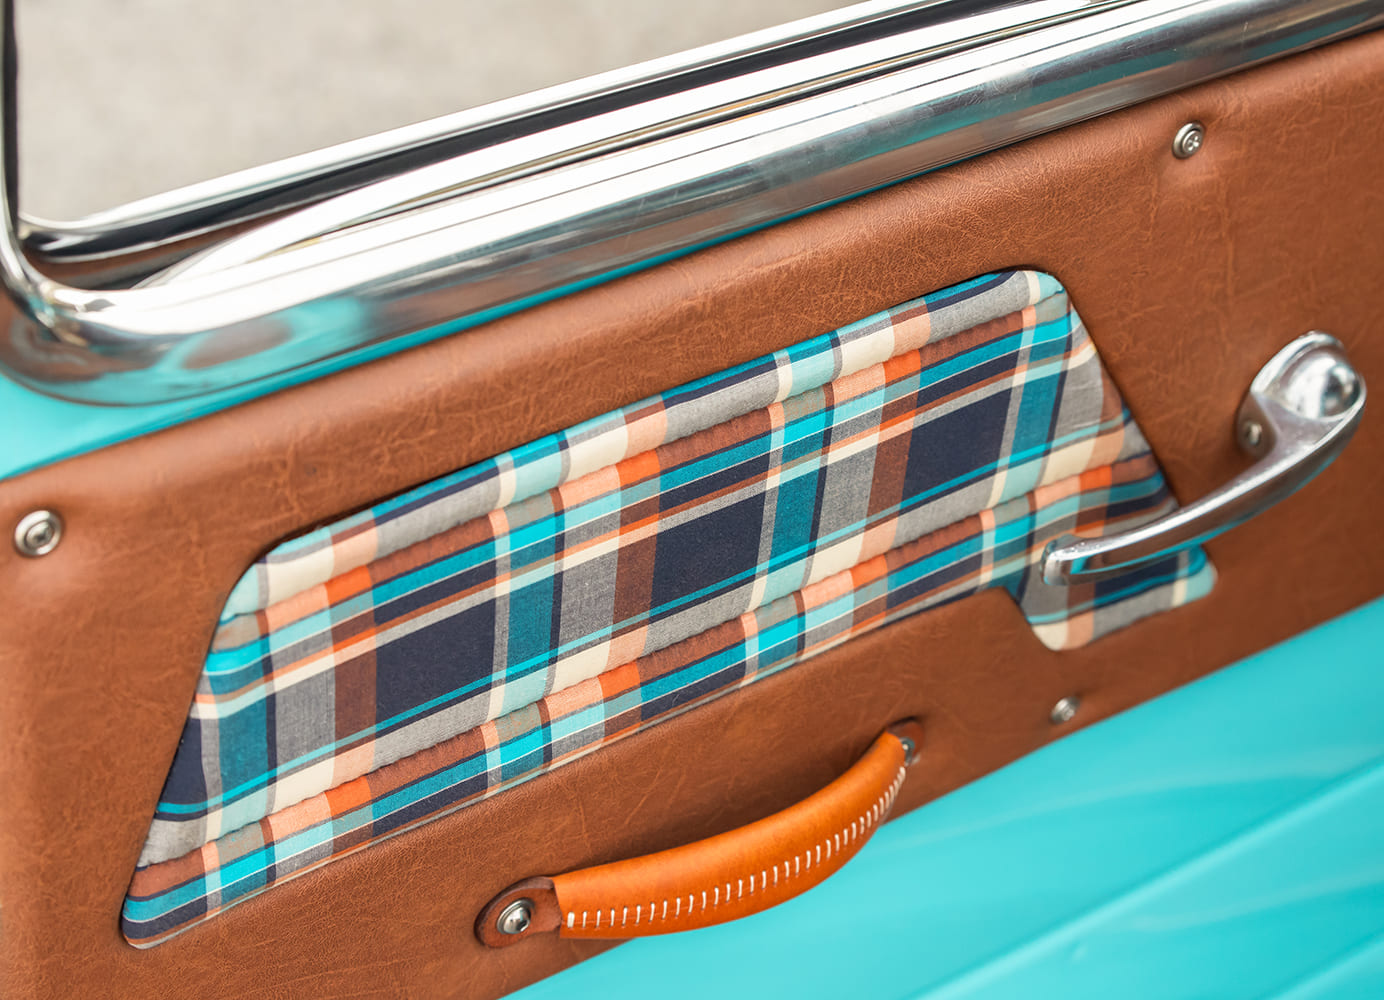
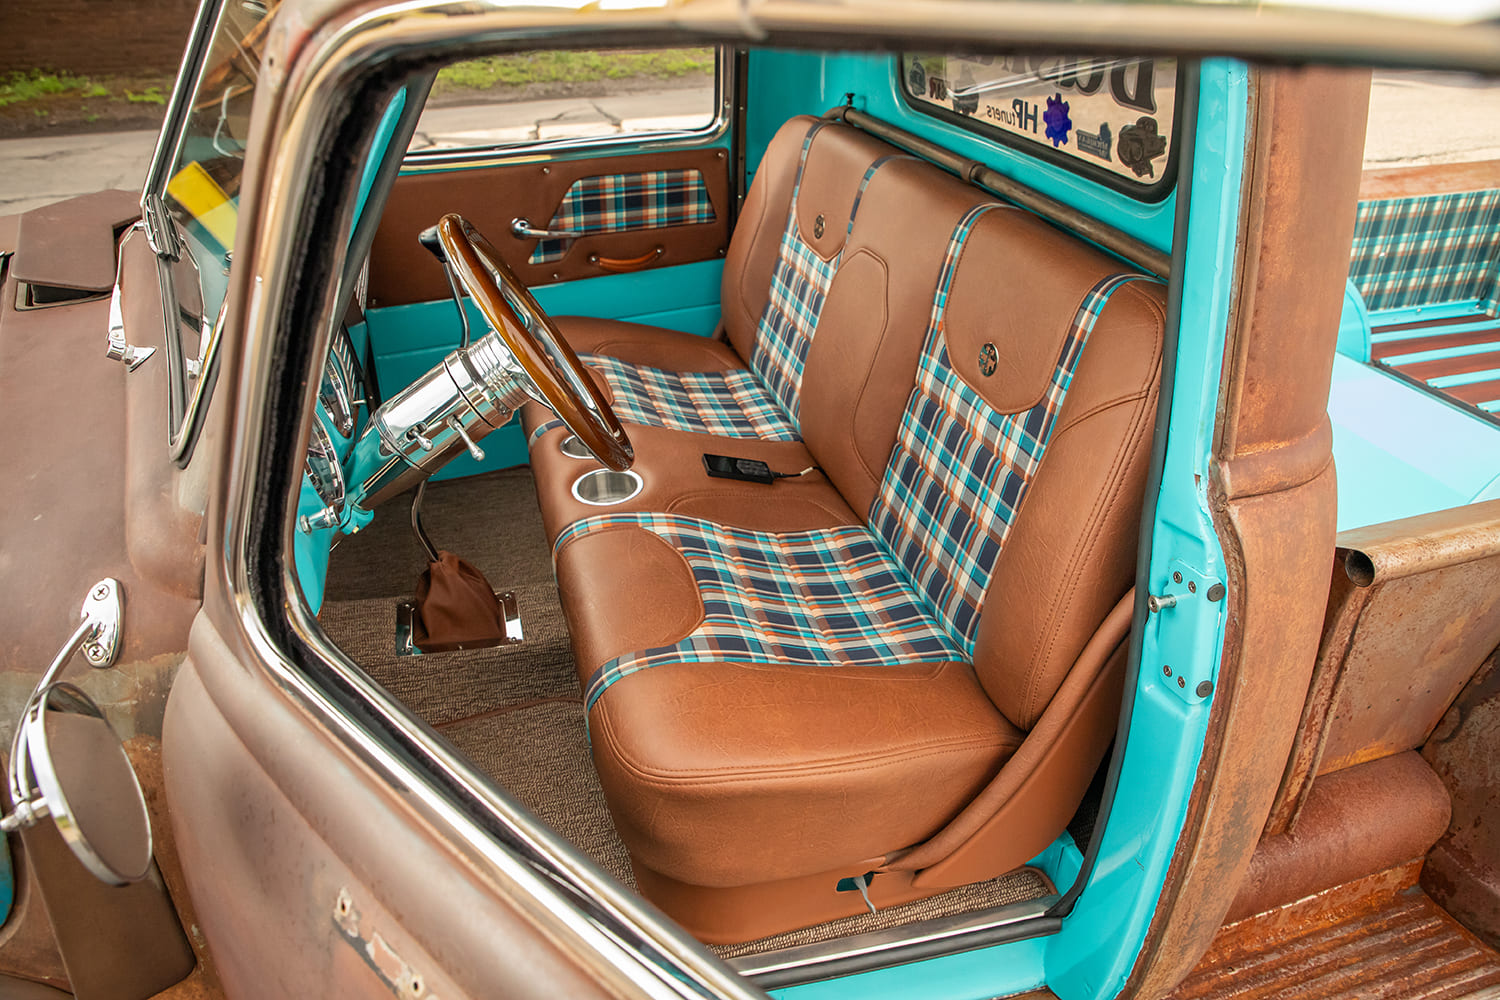
“With the interior covered in sound-deadening material, the Dakota Digital HDX gauges were installed along with a set of Altman door latches—at which point, it was time to prep for upholstery. I had some general ideas of what I was looking for, but nothing specific. Jose at J&A Custom Interiors in Nazareth had done the work in my ’56 3100, so they were my go-to for the ’48. I spent a couple weeks going over the colors before we felt we had the right combination—and totally uncharacteristic of me, I left the entire interior build up to Jose to come up with. I’ll admit, that was pretty nerve-racking, however, he knows far more about interior design than I do. Ultimately, the attention to detail and addressing things that no one will ever see is just one of the reasons why I’m a repeat customer.”
Before Mike could “wrap” up the ’48 and finally put some miles on that LT, there was one last “attention to detail” that needed to be taken care of.

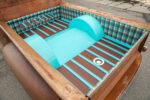
“With the truck running, the interior done, and a painted and polished engine bay and bed, there was just something missing. I had an idea of how I could tie the bed and engine bay together with the interior—have a vinyl wrap made to look like the plaid seat inserts? A late-night inquiry to Bay Image in Brodheadsville, Pennsylvania, asking them if my idea could be done was ultimately answered and, within a few days of dropping off sample material, I had a piece of vinyl to compare. Initially I had thought about installing the vinyl myself, however, that thought quickly went away after watching a few videos of how to install vinyl wrap—so I left it up to the professionals!
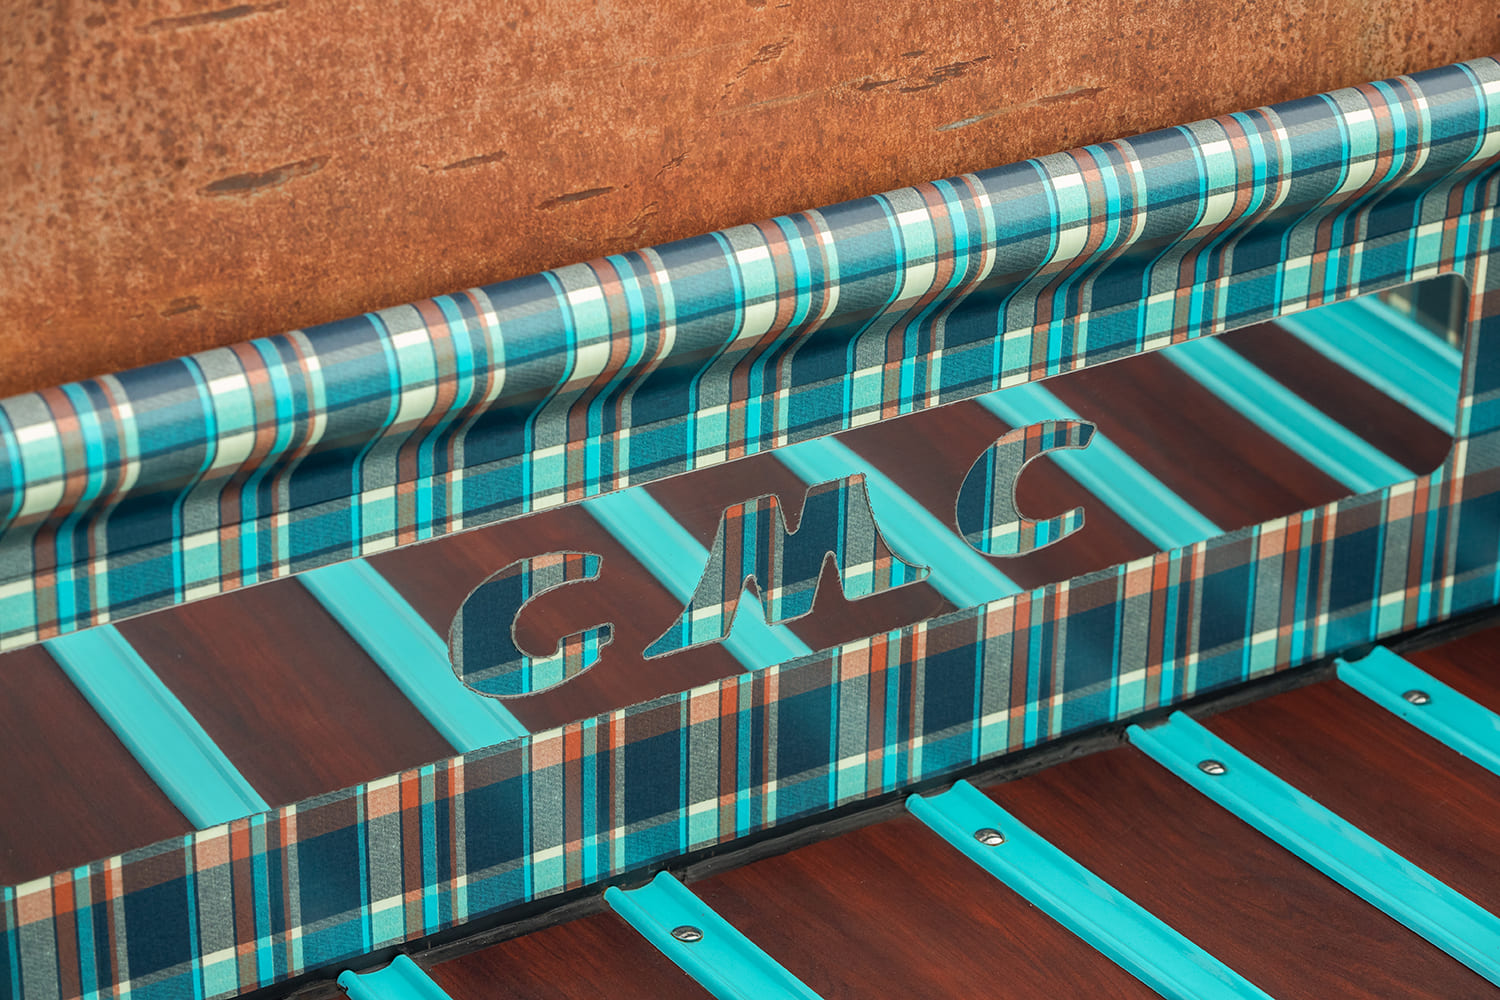
“After the vinyl was installed, I looked at the bed and thought to myself, ‘that’s a lot of plaid … I need to break it up some!’ I had an idea that would require the help of a couple people to execute: I wanted the truck name and the GMC logo cut into pieces of polished stainless steel to be used like the medallions in the seats. Bill Treible at Future Signs in East Stroudsburg, Pennsylvania, was tasked with recreating the logo, which was something I thought was as simple as downloading the image and we’re good to go—I thought wrong. It took a day’s worth of time to create a new file matching the tailgate logo exactly, but once done, that was sent to Mark at Keystone Fabricating in Bethlehem, Pennsylvania, to water-jet the stainless steel. Keystone’s responsible for several custom pieces and parts throughout the truck, including all of the stainless under the cab/hood and in the bed.”
If you look closely at the images, you’ll notice quite a bit of custom fabrication throughout that he didn’t mention—from the engine bay to the interior to the bed, and everything underneath that wasn’t farmed out. That interior also features Vintage Air SureFit climate control, LS Fab dash inserts, Lokar 23-inch nostalgia shifter, and Ididit/Forever Sharp steering components. All in all, Mike managed to piece together this project in well under a year—curious to see what’s next!
Check out this story in our digital edition here.