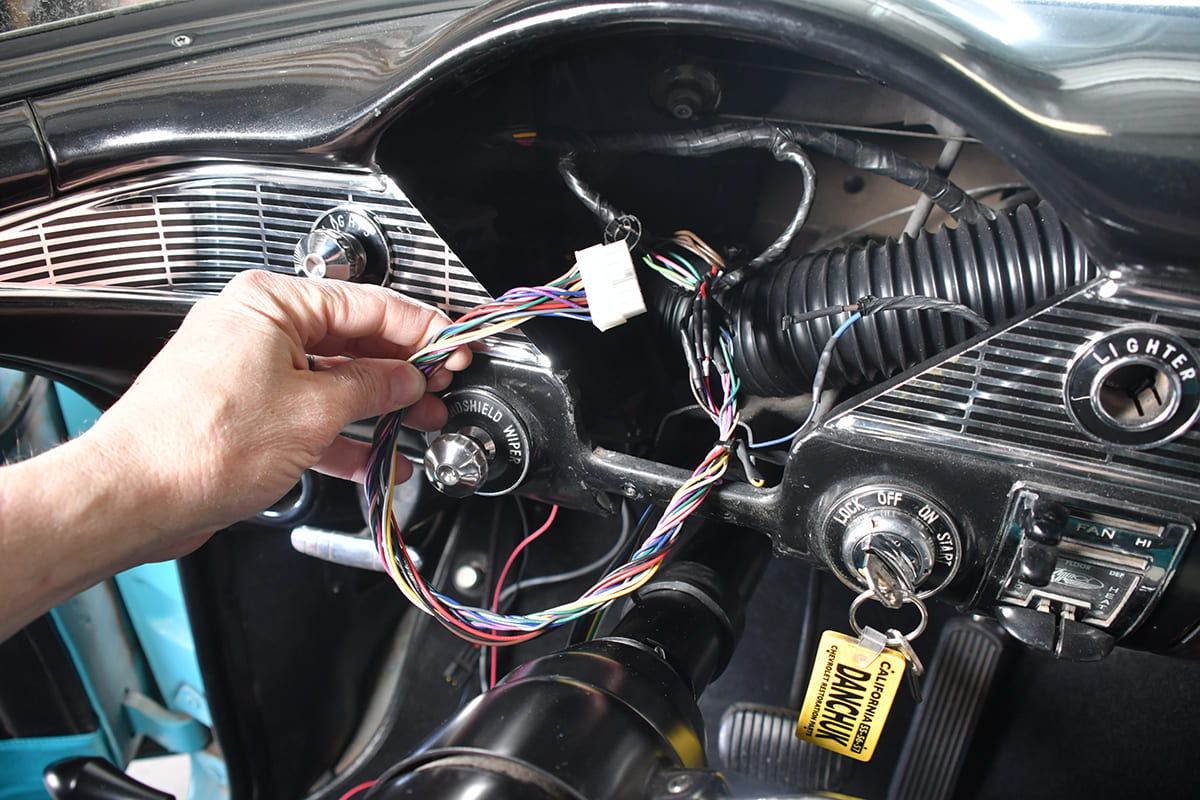
Relaying information about the engine to the driver was never really of huge importance to Chevrolet or the other OEMs. They figured a temp gauge was worthy of being in most instrument clusters and maybe a couple of warning lights, just in case. We install modern gauges for a classic car, with the new Classic Instruments Bel Era III gauges in a 1956 Chevy.
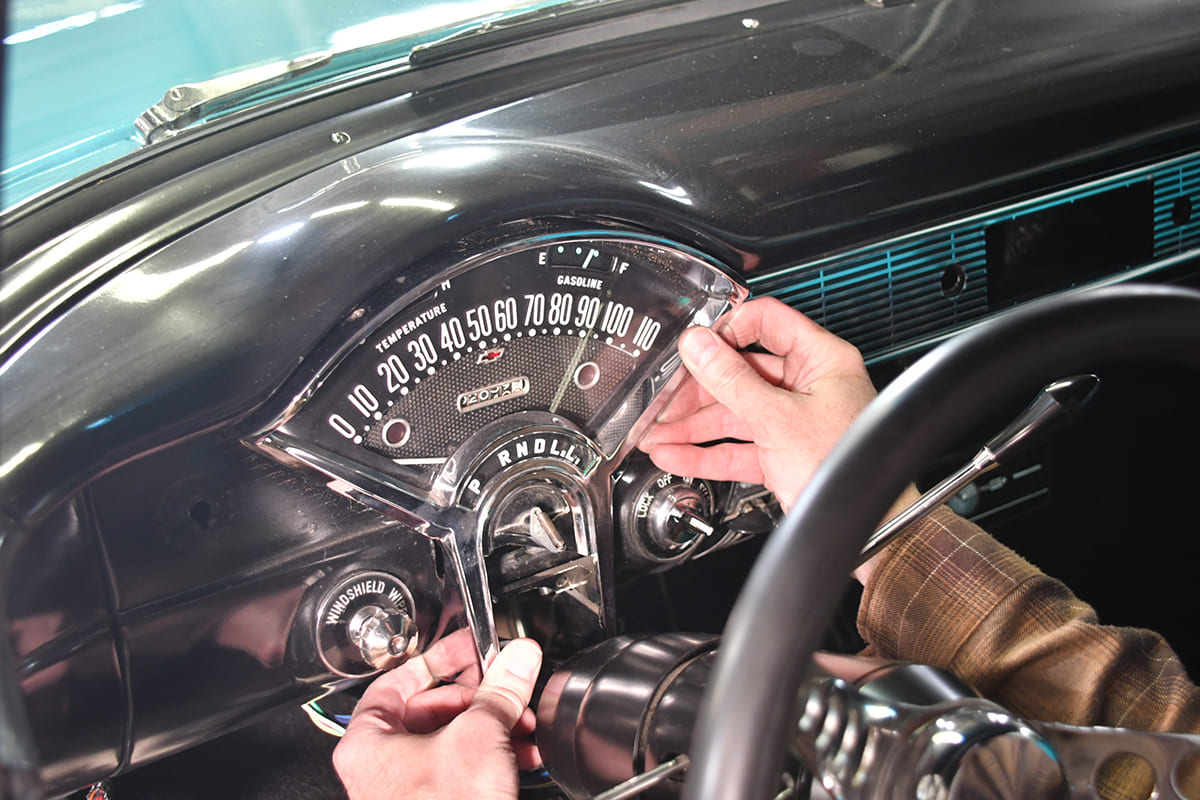
Case in point is the dash of a 1955 or 1956 Chevy. A temp gauge, with the values of simply C and H, was included in the dash along with the fuel gauge placed above the Chevy speedometer span. A warning light would glow to let you know there was no way the car would start again, as the generator was not charging. If the oil psi warning light came on, it was likely to let you know that something very expensive just failed. In a Tri-Five there was no tach, no voltage, no oil pressure, not even as an option. This is why hot rodders have always hung a few gauges under the dash.
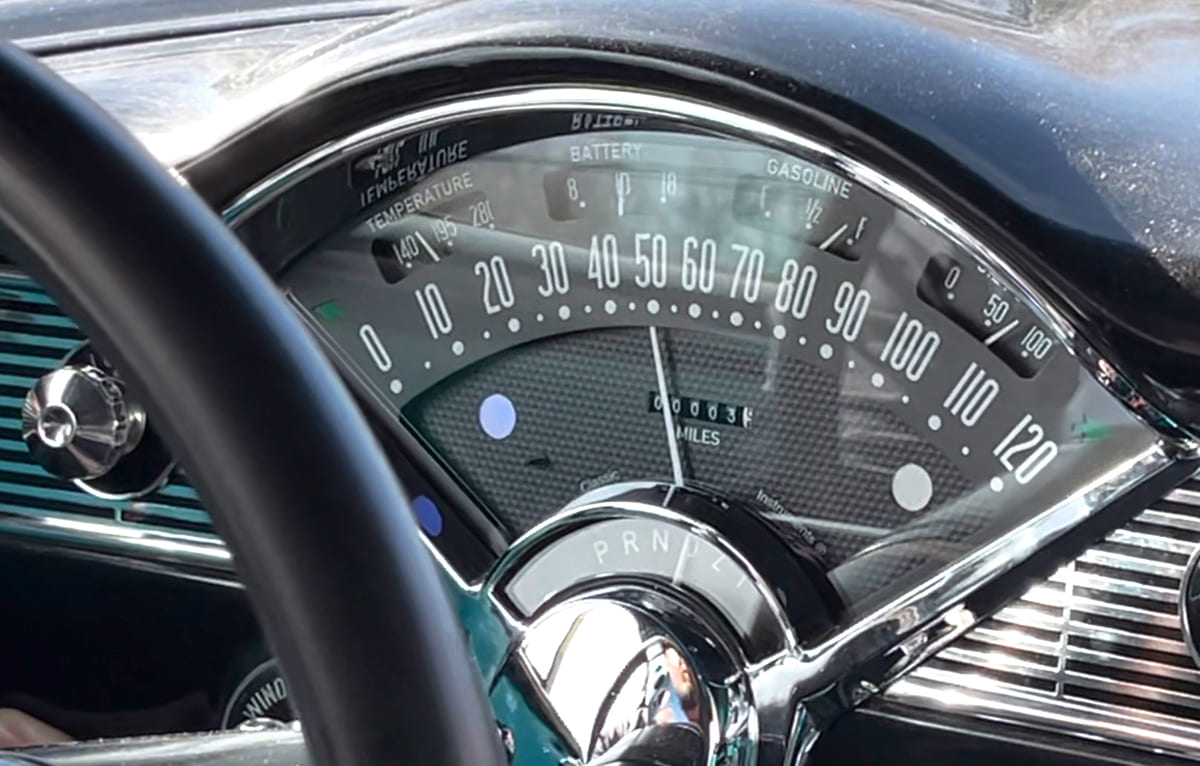
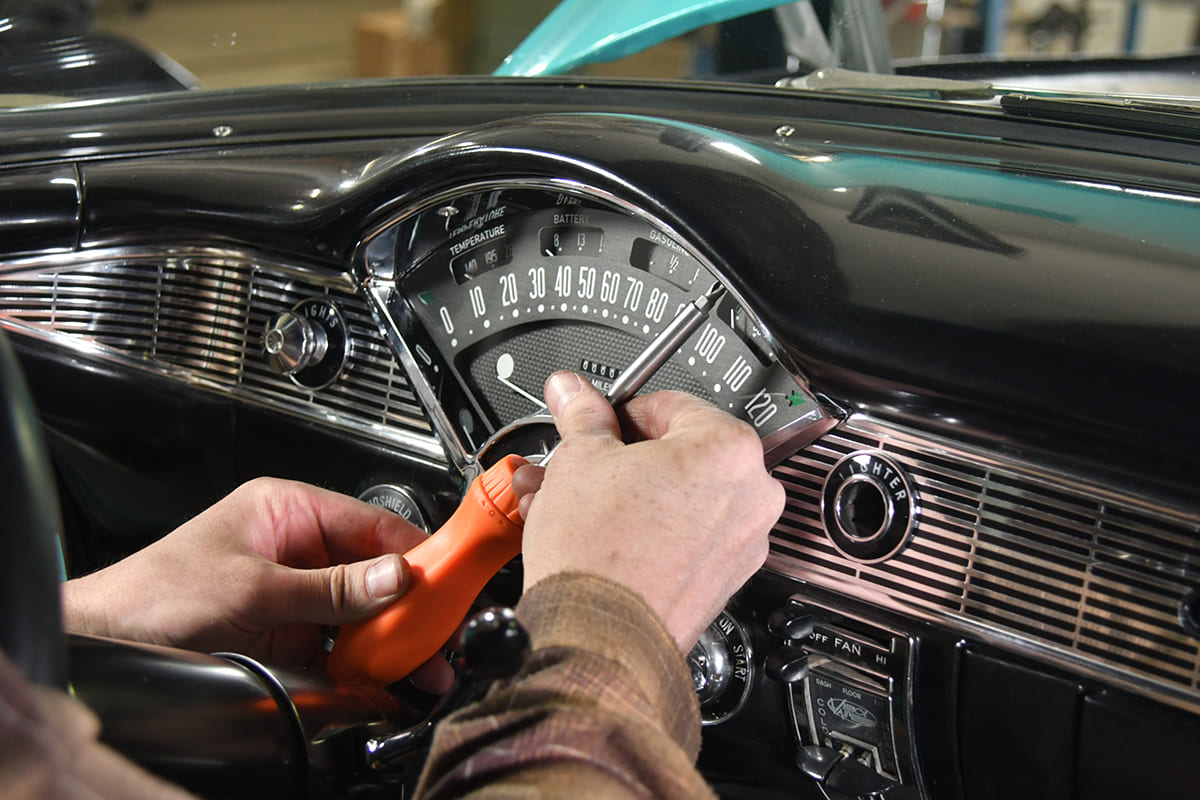
The original speedometer only had a temp gauge and fuel level plus the gear indicator had never really worked right once the TH350 was installed. It was long overdue for a serious upgrade to the dash.
Though Classic Instruments offers standard-size individual gauges that can be mounted in a pod under the dash, they’re known mostly for manufacturing modern gauges for a classic car, as direct-fit instrument clusters. These assemblies generally house a full set of gauges that are designed to fit into the factory location on the dash. Case in point is their line of Bel Era panels for the 1955 and 1956 Chevy.
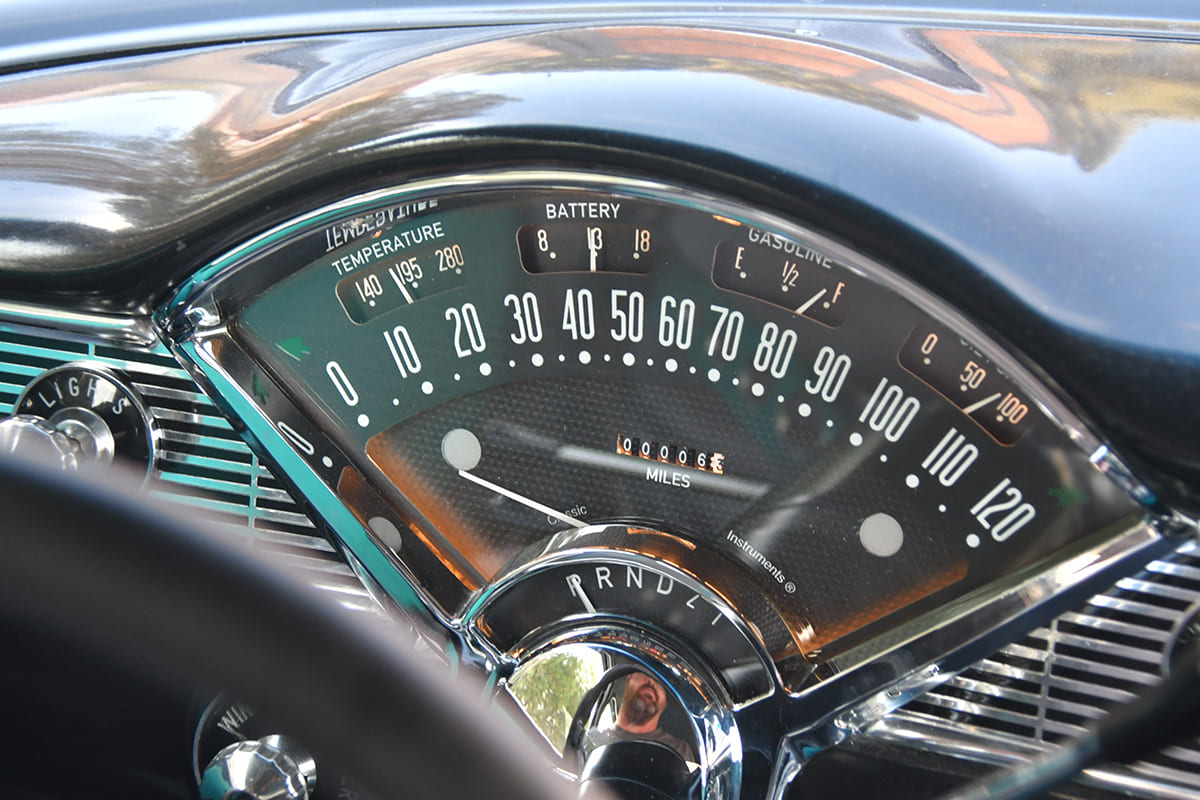
Classic Instruments offers three different Tri-Five systems, each with its own look and style with a direct fit into the 120-degree swept form of the original dash. The Bel Era III version is designed to look considerably like the factory gauge cluster, yet features modern oil pressure, temp, voltage, fuel level, and speed. Note there’s no tach but that is available in their other models.
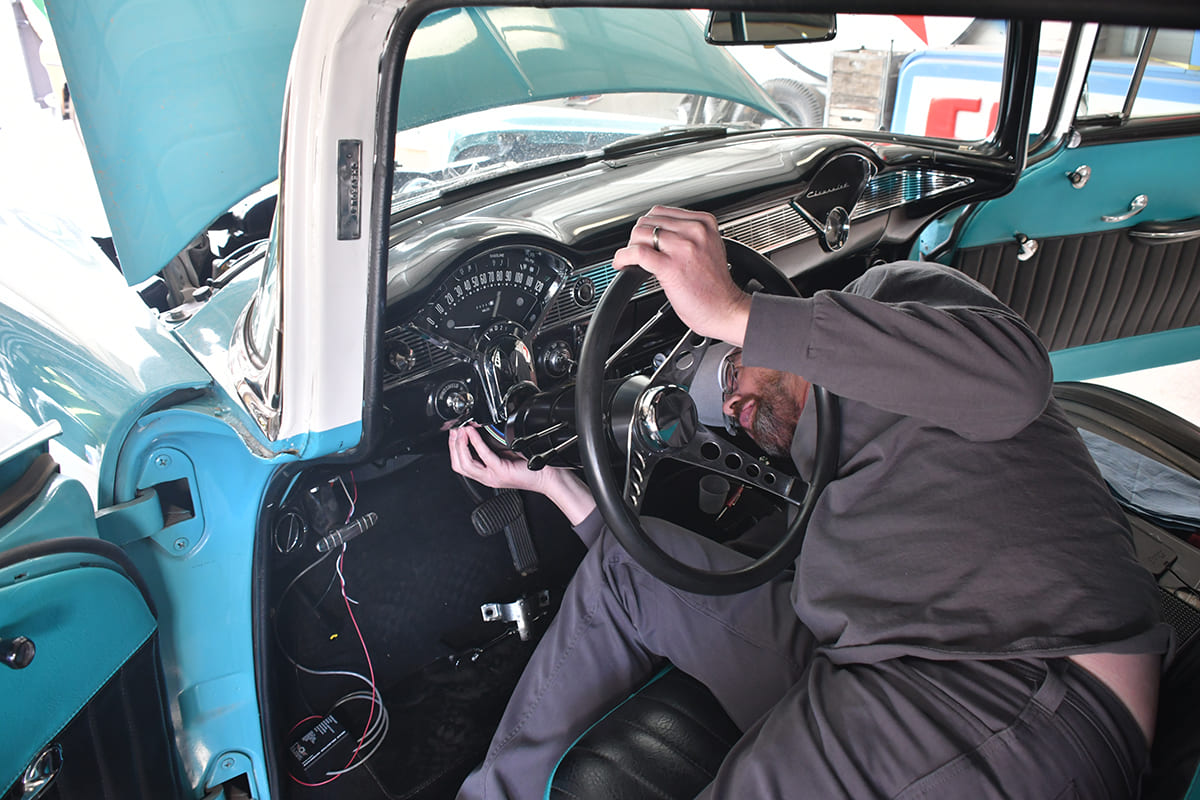
Our buddy Justin has a sweet-cruising Handyman 210 wagon that was in dire need of an instrumentation update. The speedo was off, half the lights didn’t work, and the cheesy trio of no-name store gauges below the dash just didn’t seem to be honest. He wanted something with original style so it wouldn’t look dated in 10 years. Enter Classic Instruments with the Bel Era III. We got to sit back and watch as he did the installation.
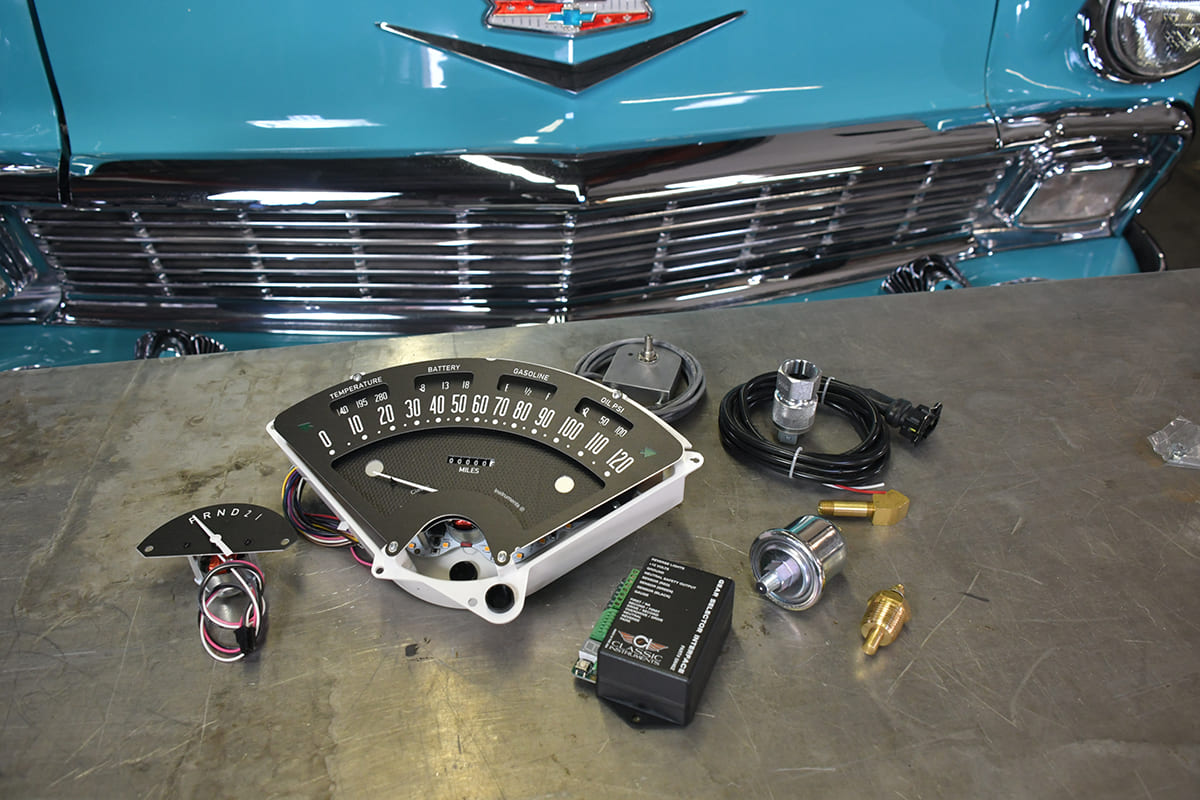
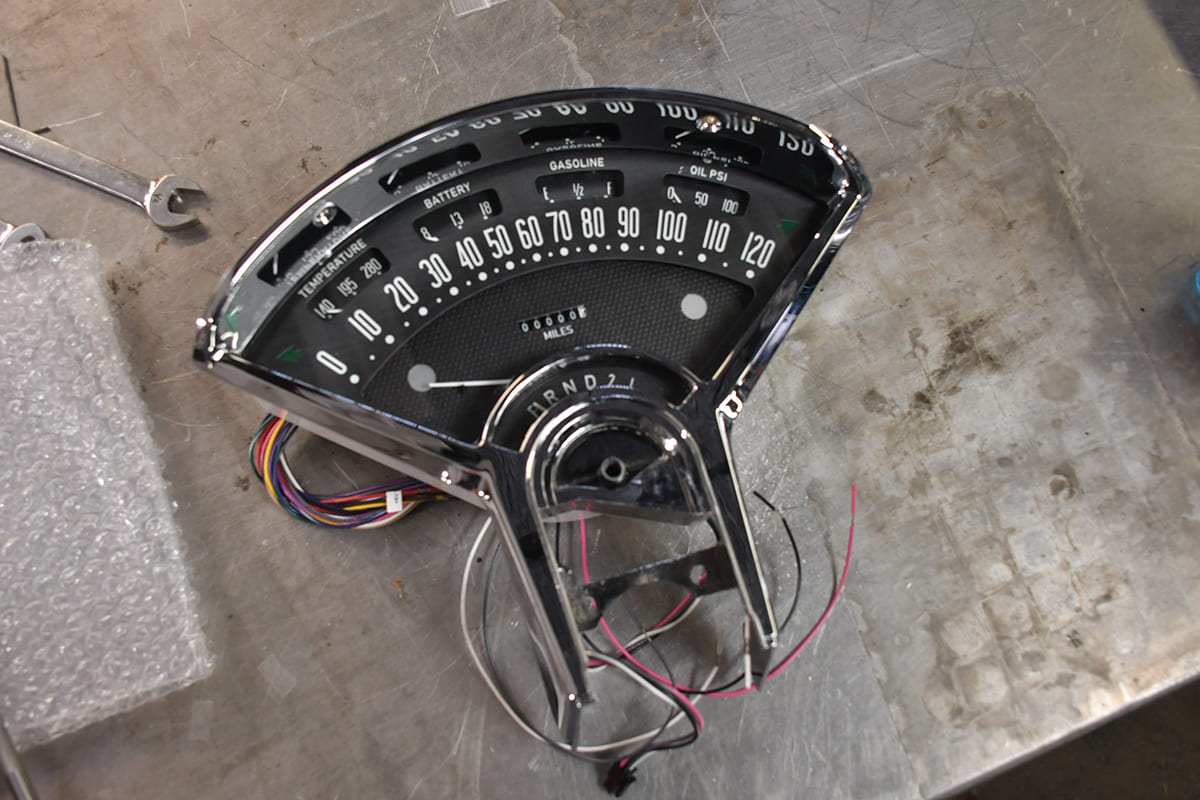
Without the chrome bezel and printed glass, it’s hard to compare the original cluster with the new Bel- Era III from Classic Instruments. The stock pattern on the background looks the part, and notice the nicely positioned gauges across the top, which means we can remove the trio of gauges hanging under the dash.
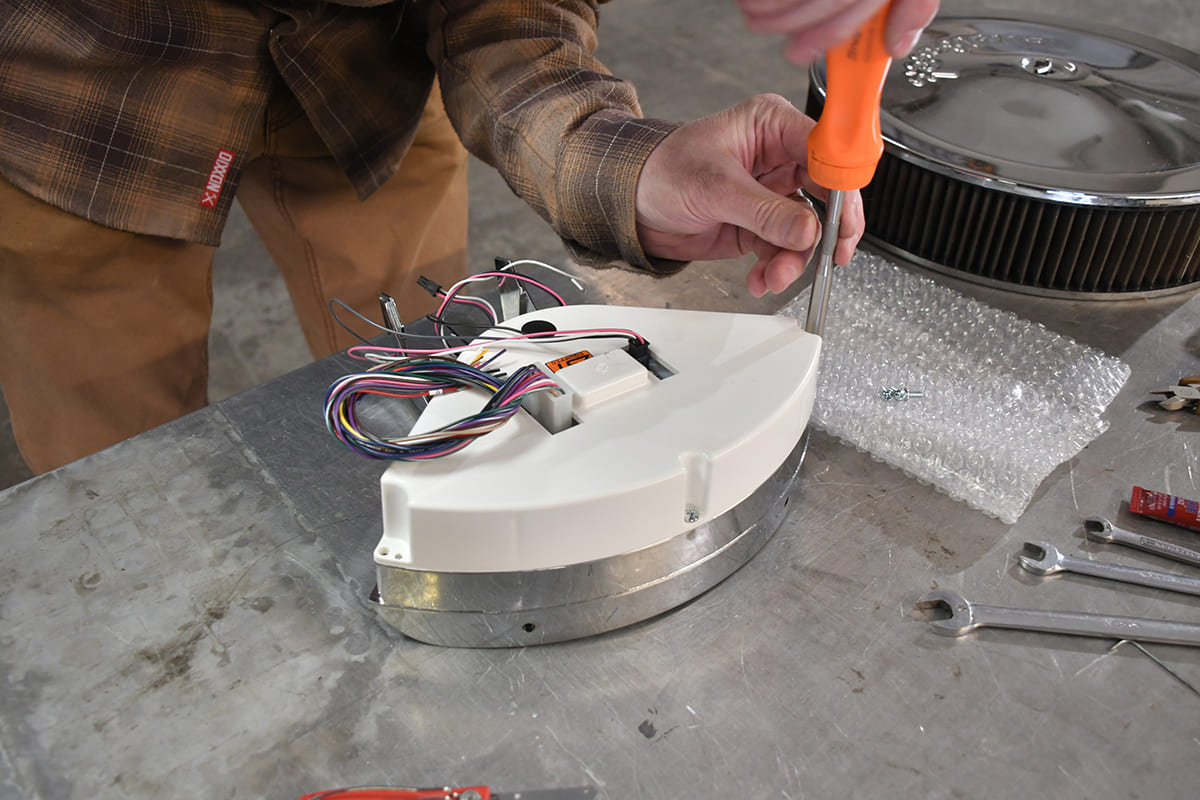
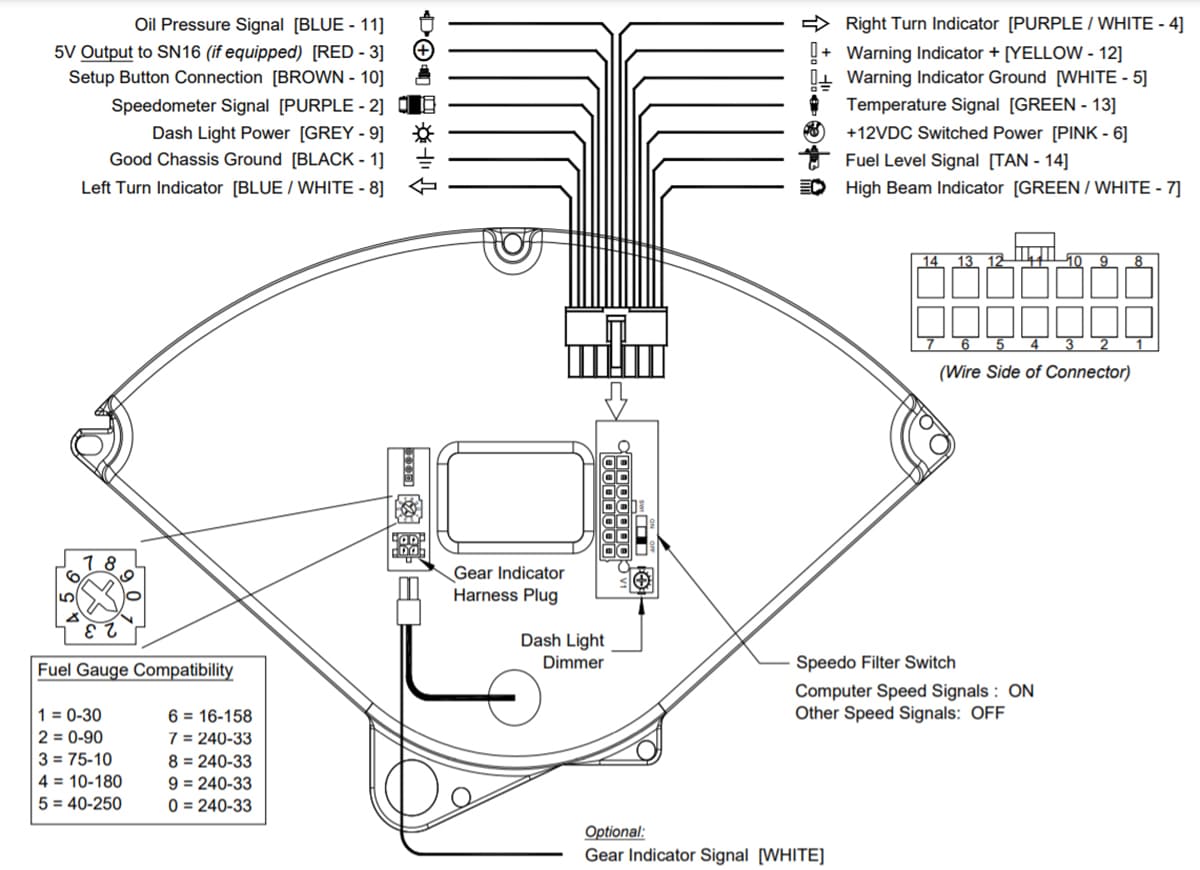
When you open the box, the Bel Era III is fully assembled into a rigid injection-molded housing. This provides a solid foundation for each gauge, and all of the wiring is put into a single 14-pin connector. Sure that’s a lot of wires, but remember, you’re connecting four gauges, a speedometer, LEDs, turn signals, a warning light, and high-beam indicator. The nice thing is that you can finish the wiring and then simply plug in one connector.
Convert Analog to Digital – Speedometer
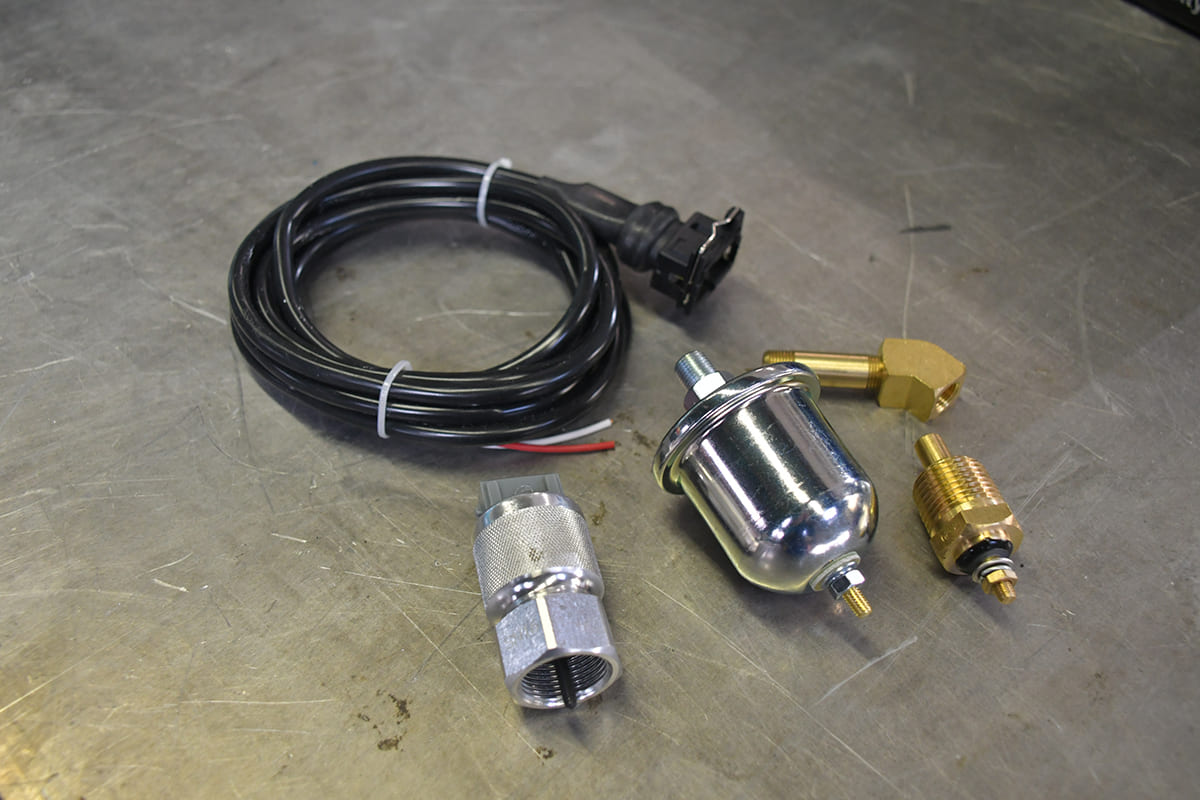
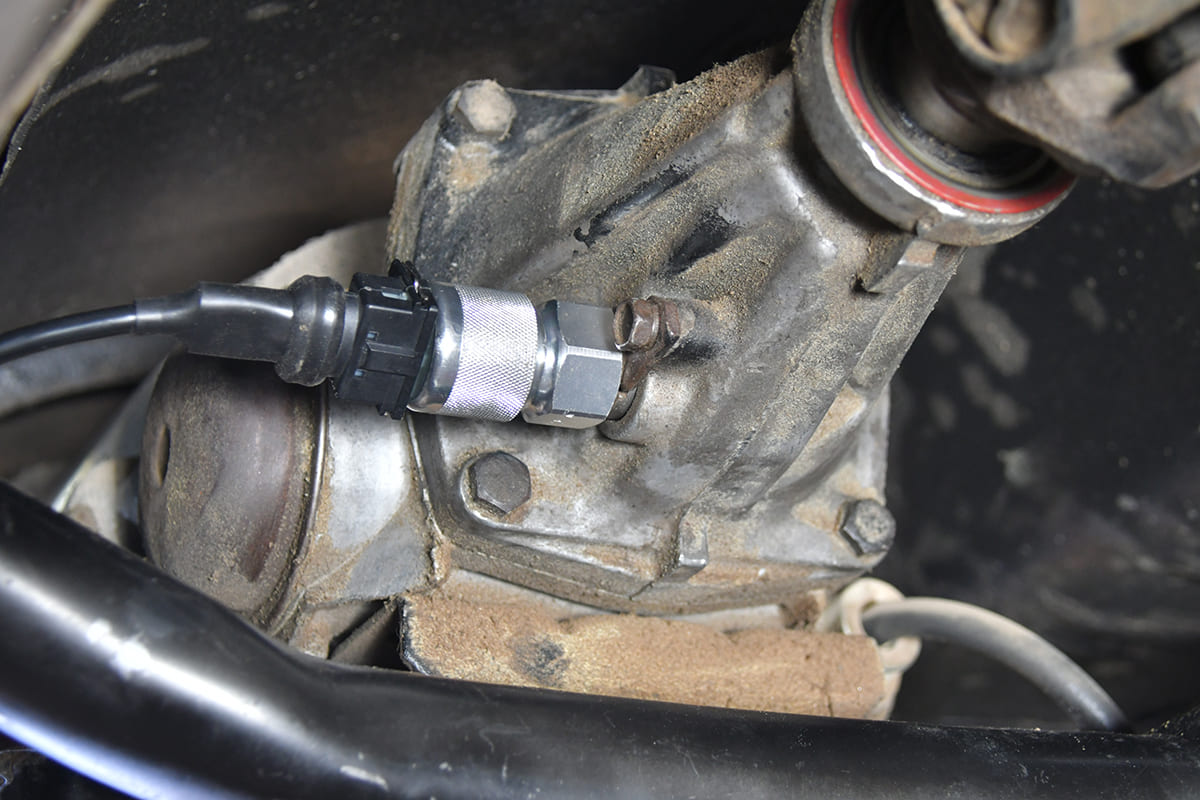
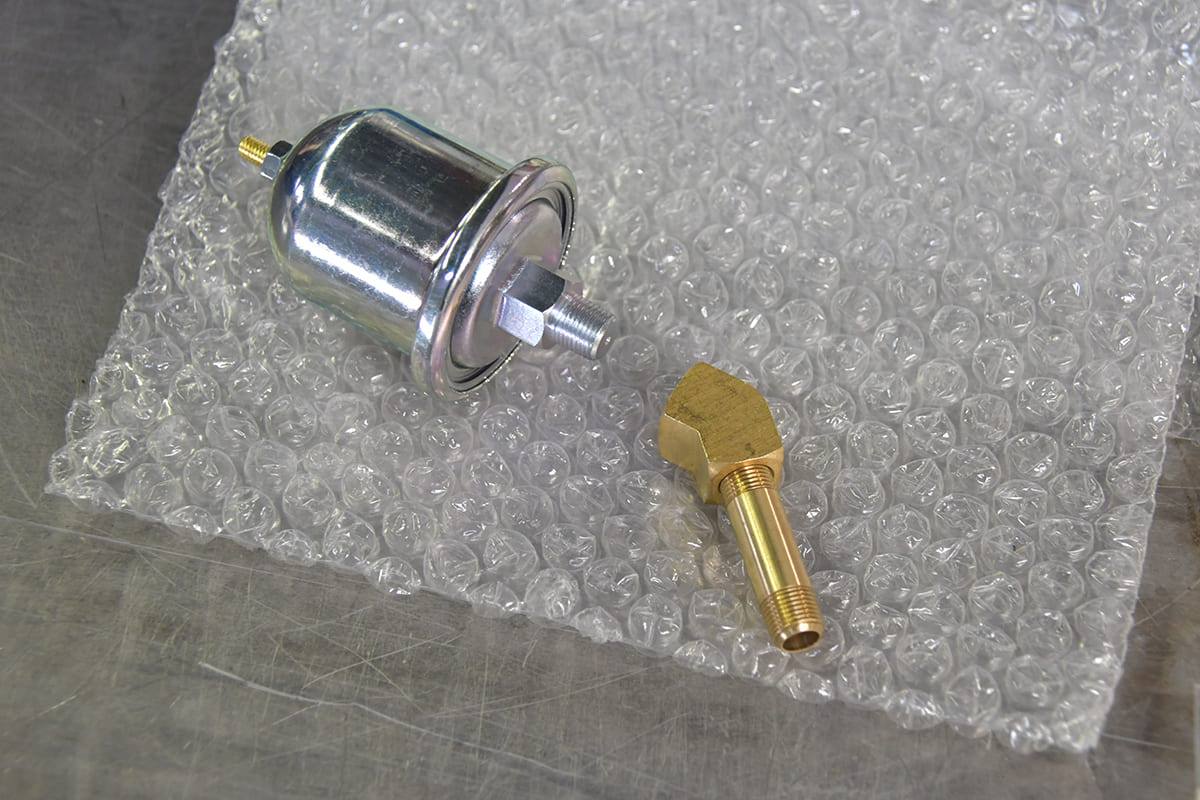
As for the speedometer, the 1956 Chevy received a TH350 trans long before Justin owned it, so it had a traditional speedometer cable spinning the needle. Classic Instruments does nothing but electronic gauges, including their speedometers, but making the upgrade is simple with a pulse generator sensor that screws right in place of the cable on the trans. The sensor, called an SN16, is supplied and connects with a three-wire harness that ties into the single connector of the dash.
Classic Instruments supplies a new oil pressure and temp sensor while the fuel gauge is set to match the factory resistance of the 19’56 (or can be adjusted to match aftermarket sending units). An SN16 transmission adapter converts the mechanical output of our TH350 trans to electronic for the new speedometer.
The Bel Era III dash comes out of the box ready to connect to any transmission (or tach if equipped). Classic Instruments introduced their Zeus Speedometer Technology (ZST) a few years ago, which allows the speedometer to easily display speed through a pulse signal generator, like ours with the SN16, a Vehicle Speed Sensor (VSS), as well as the output from an electronic trans control or ECU. This makes for an easy installation with no external boxes or accessories to wire, and if Justin ever upgrades to an electronic overdrive, the dash is ready to accept the new signal for speed.
For the first time since he’s owned the Handyman, our pal now has fully functional gauges in the classic dash, an accurate speedometer, and gear indicator. At night the assembly lights up evenly and the stock appearance will never fall out of style. Welcome to the modern era, thanks to Classic Instruments for modern gauges for a classic car.
Sidebar
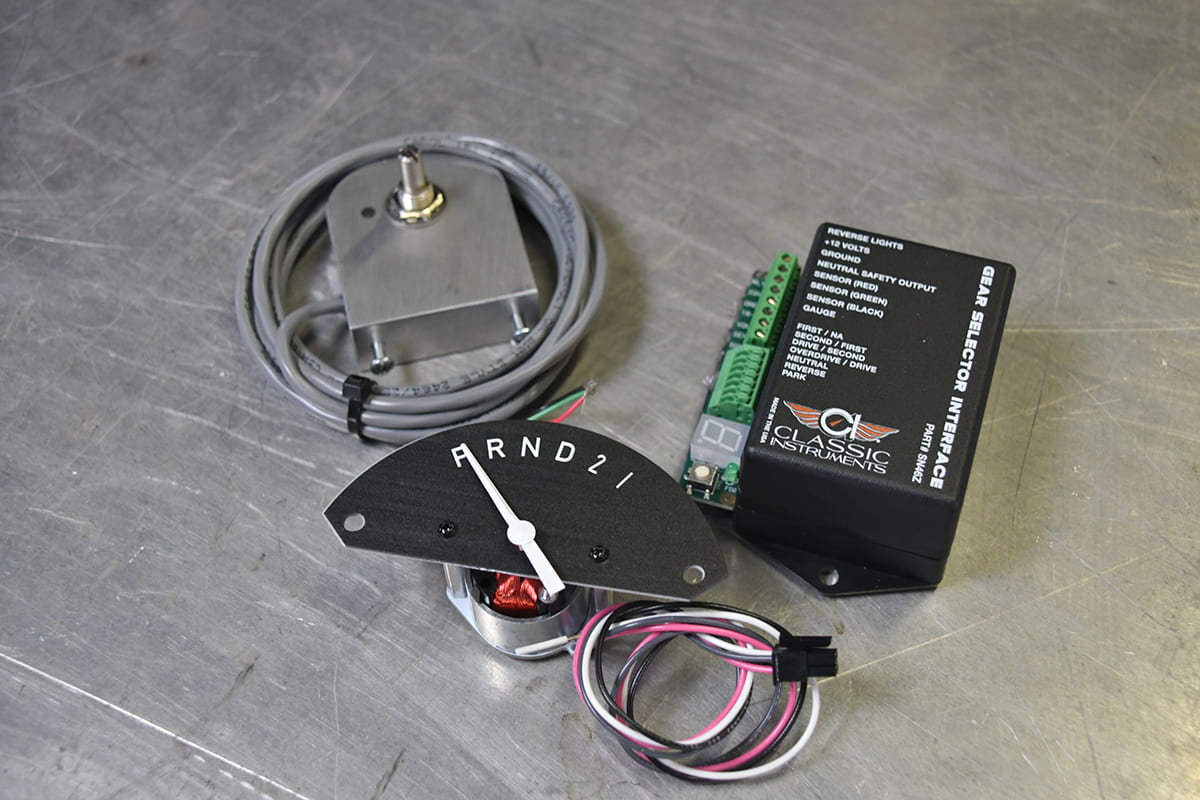
An option for the Bel- Era series of instrument clusters is a new electronically controlled gear indicator. This setup uses a potentiometer that mounts on the trans and connects to the shift linkage to relay the gear position to the Gear Selector Interface, which is responsible for moving the needle of the new indicator.
Modern Gauges for a Classic Car: Electronic Gear Indicator
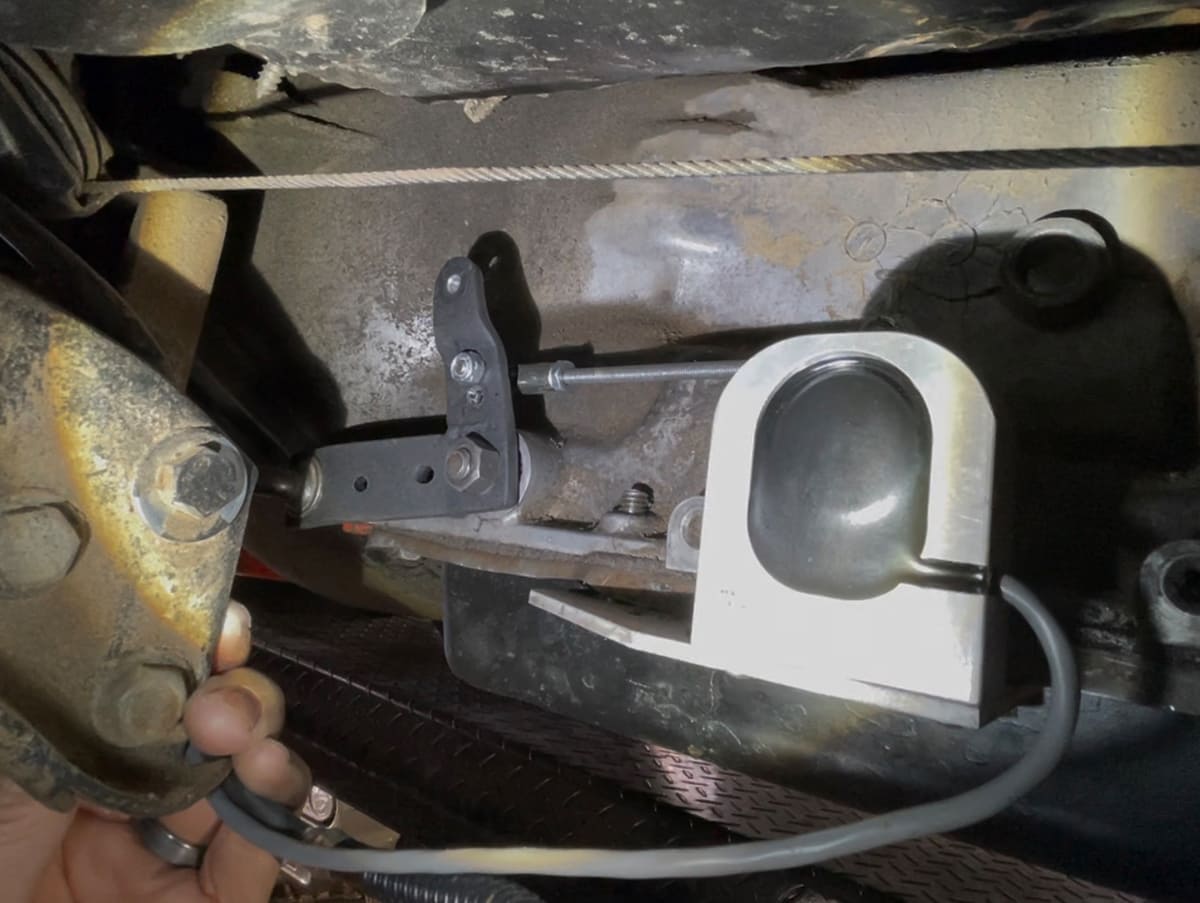
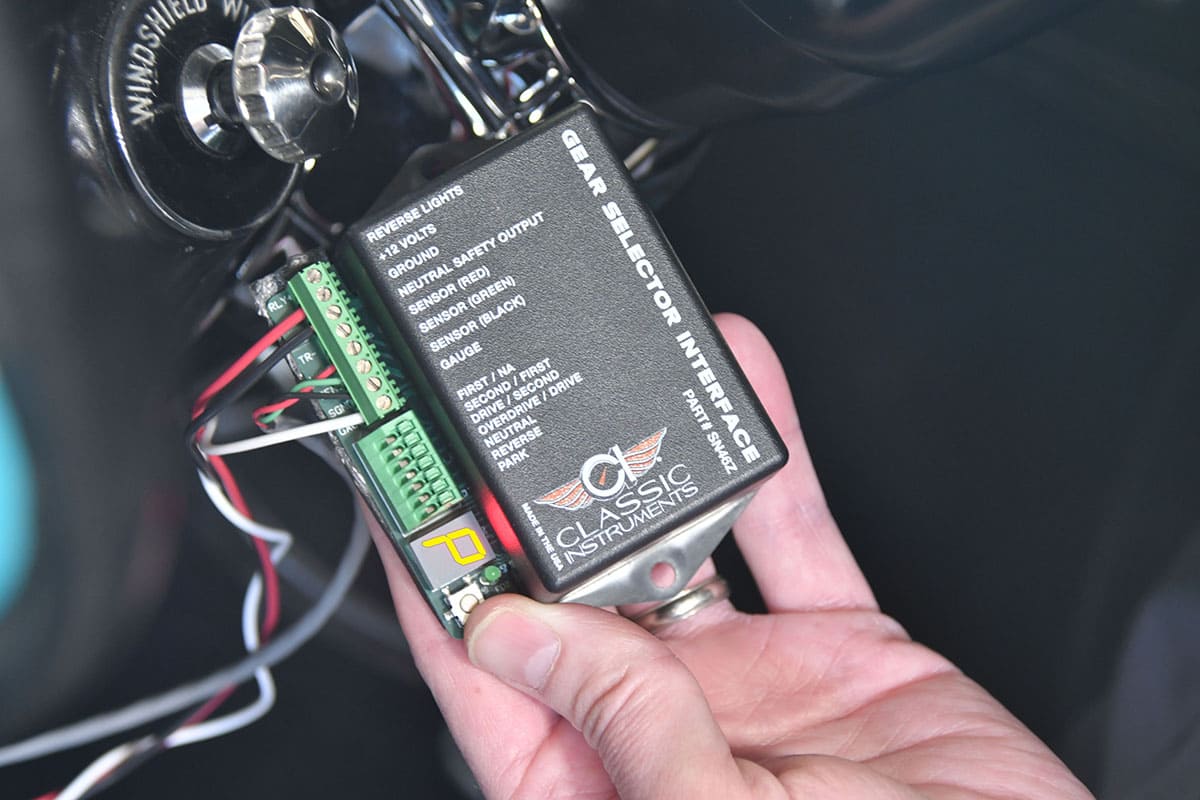
For the 1955 and 1956 Chevy there is an optional electronic gear indicator, which we opted to try out as the stock indicator was never even close due to the driveline swap. This kit, which can even be used with a floor-mounted shifter, consists of a potentiometer that connects to the shift arm of the trans through the supplied linkage, then sends its signal to a small interface module. This device is programmable for the number of gears and the position of each gear to electronically move the new pointer.
Due to the trans and column replacements on our subject, the shift arm geometry was not conducive to moving the potentiometer enough, so we easily adapted a second shift arm in a vertical position that worked like a charm. It should be understood that cars with a variety of parts may need a little fab work here and there. Once connected, the interface module needs to be programmed, which is done through its LED and moving through each gear position.
Sidebar 2
When put into calibration mode, the speedometer swings up to indicate 50 mph and the high beam indicator glows. Once rolling, the speedo should sense movement and the high beam indicator and turn signals flash, and once the speed is set, the turn signals will light up solid to indicate a successful calibration.
Speedo Calibration
There are three ways to calibrate a new speedometer from Classic Instruments when installing modern gauges for a classic car: Instant, Real-Time, and the Measured Mile. We chose the Instant manner, which means you’ll need a GPS signal from a phone app (or pace car). Following the steps to put the speedometer into calibration mode, you simply drive at 30 mph then push the calibration button for a few seconds. The speedometer is then set.
The Real-Time calibration is exactly as it sounds; have a friend drive at a set speed then you can set the gauge to match as you drive. You can probably guess how to calibrate the speedometer using the Measured Mile procedure. It’s great to have the different options available and Classic Instruments supplies a small calibration button that simply connects between the dash and ground.
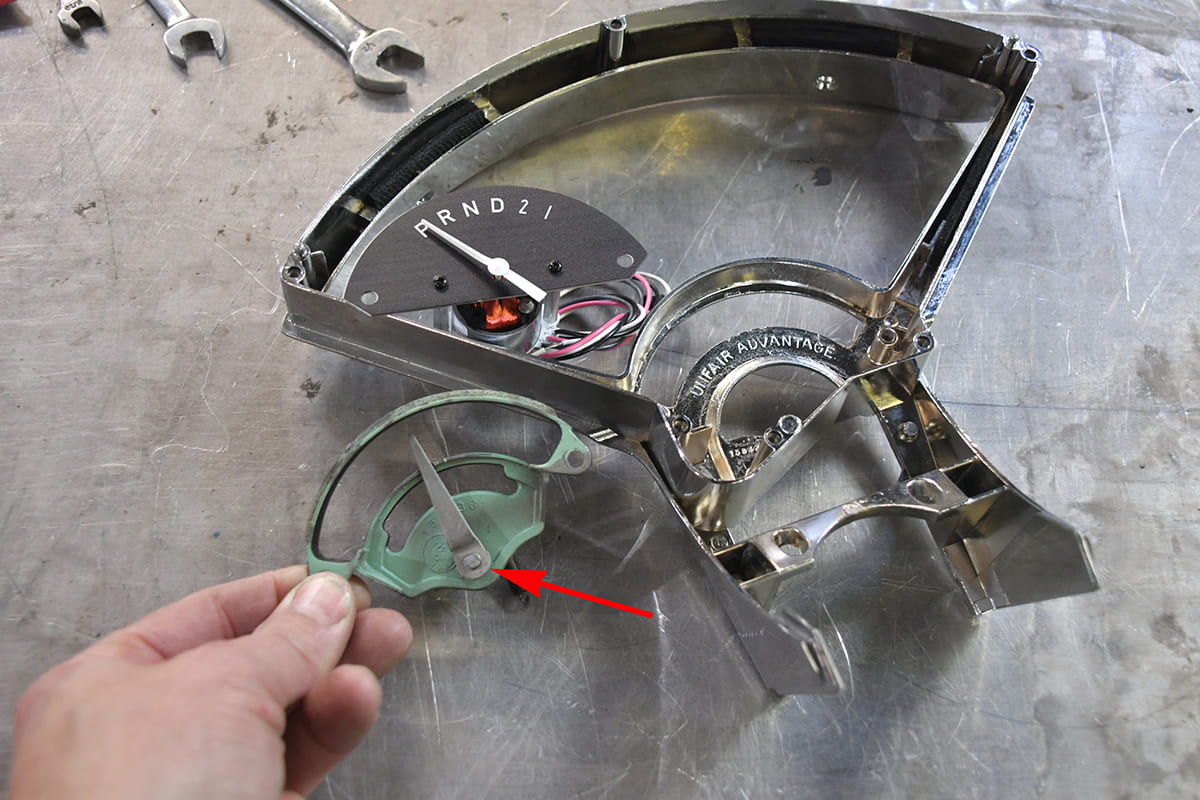
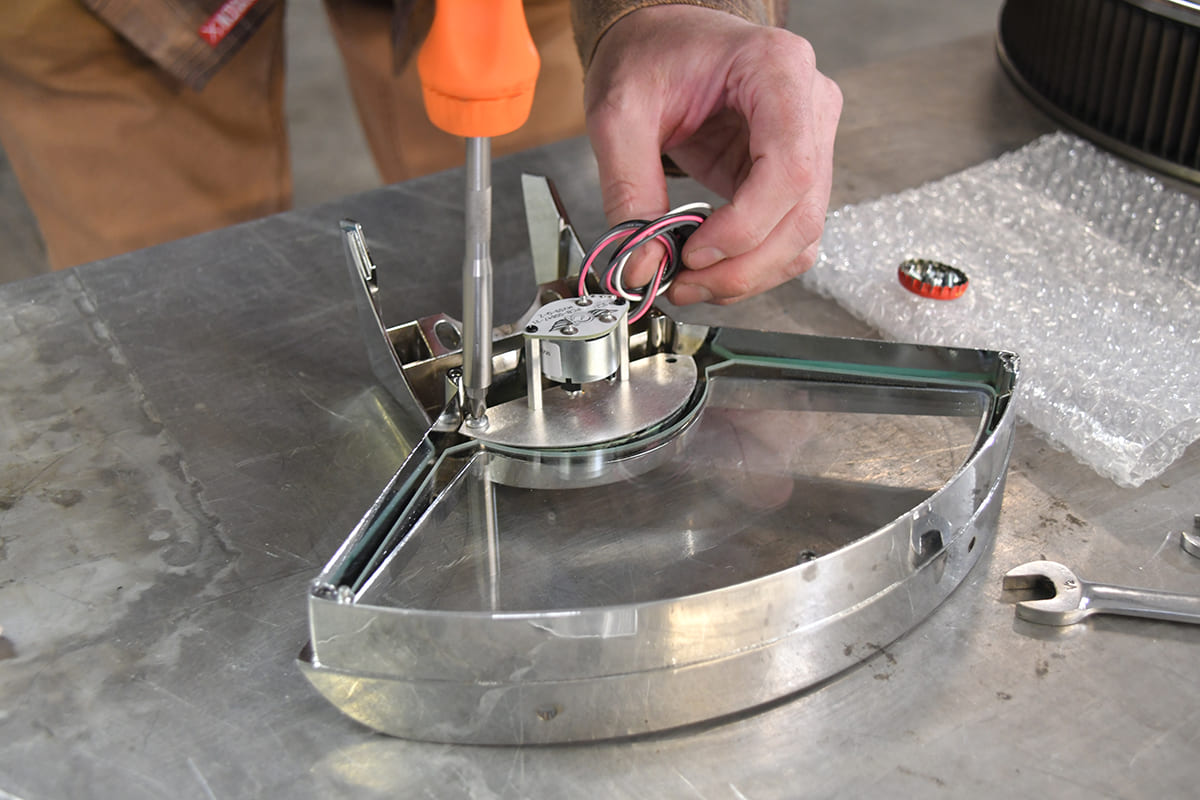
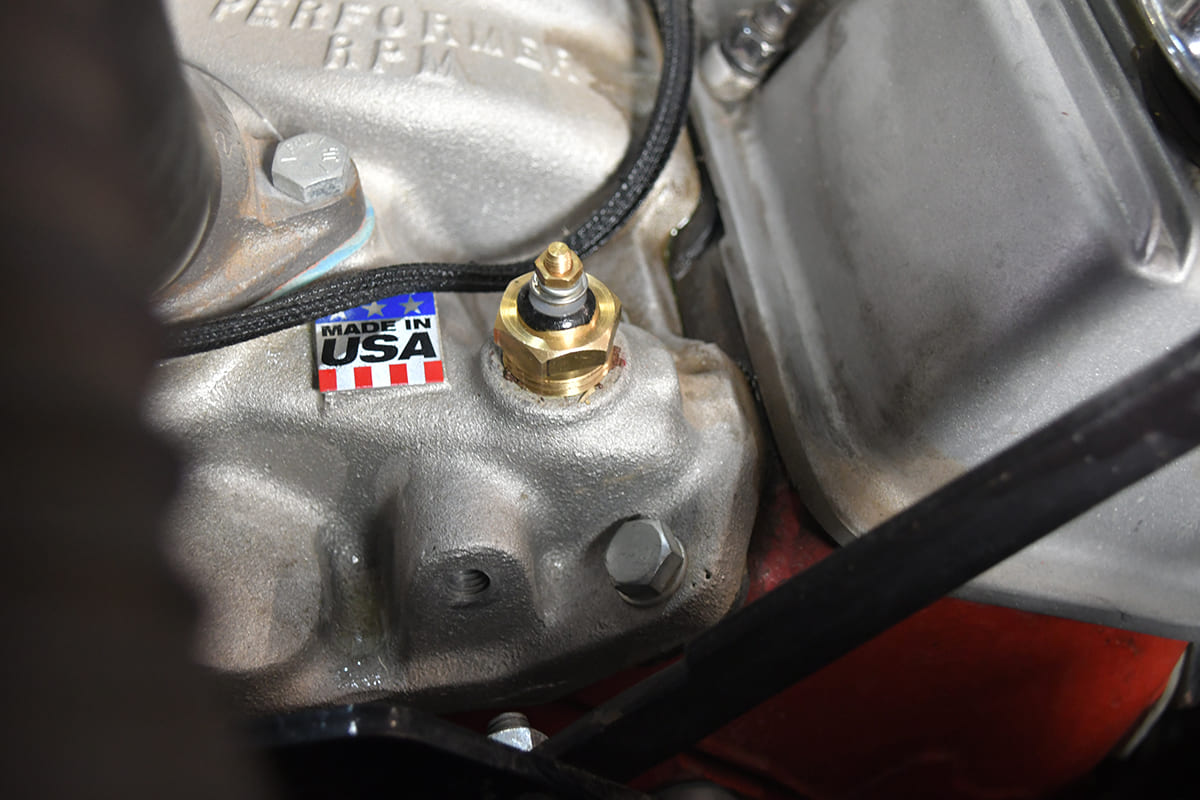
The SN16 speed signal converter simply screws to the old cable drive. A shielded harness is also supplied for a direct plug -in to the sensor with three wires that connect to the instrument cluster.Back up top and working on assembling the new gauge cluster into the factory chrome bezel. The new gear indicator requires the original pointer housing, though you need to remove the pointer, which is easily done with the aid of a small die grinder. Once removed, the frame mounts back in its original position to help secure the new electronic assembly.Back up top and working on assembling the new gauge cluster into the factory chrome bezel. The new gear indicator requires the original pointer housing, though you need to remove the pointer, which is easily done with the aid of a small die grinder. Once removed, the frame mounts back in its original position to help secure the new electronic assembly.Before installing the gear indicator, clean and position the new lens glass. Classic Instruments supplies several small strips of foam tape to apply in a few spots to cushion the lens. There are also four small rubber bumpers to place on the edges of the gauge bezel to mate against the lens before securing the assembly with the six screws supplied.Before installing the gear indicator, clean and position the new lens glass. Classic Instruments supplies several small strips of foam tape to apply in a few spots to cushion the lens. There are also four small rubber bumpers to place on the edges of the gauge bezel to mate against the lens before securing the assembly with the six screws supplied.The new gauge assembly and gear indicator look right at home in the original bezel and it’s amazing what a new piece of glass does for an instrument cluster.The new oil pressure sensor (and temp sensor) receives ground through its threads so Classic Instruments cautions against using a thread sealant. If you absolutely have to use a sealant, make sure it is a conductive compound.Classic Instruments has done a lot of testing on temperature sensor positions and determined that the front of the intake near the thermostat is the most consistent. Of course, you may not have a choice due to your engine combination, but the Performer RPM intake had a port available right up front.When you consider all of the functions of the dash, there are quite a few wires to connect, but the nice thing is they all come into a single connection to the back of the gauge housing. You’ll be connecting power and ground, temp, oil pressure, fuel level, turn signals, high beam indicator, and speed. Classic Instruments supplies a detailed diagram with factory wire colors.We recommend using high-quality terminals and a professional crimp tool along with heat shrink sleeves to ensure solid wiring connections. With all of the wiring spliced into the single harness of the dash, we’re ready for assembly!The dash assembly mounts as easily as it came out of the car. This is the point you start to get excited about the update. Any old wires or light sockets were routed away and sealed or removed.The lower bracket and steering column were brought back into position and secured.First, we simply turned on the headlights and were pleased to see the LED dash lights come on. Next, we fired up the engine and it was a relief to see oil pressure, fuel level, and voltage come right up, followed by the temp gauge as the engine warmed up. Next was a drive around the hood to calibrate the speedometer. We’re stoked about our new dash, with its stock looks but full brace of drivetrain gauges!An option for the Bel- Era series of instrument clusters is a new electronically controlled gear indicator. This setup uses a potentiometer that mounts on the trans and connects to the shift linkage to relay the gear position to the Gear Selector Interface, which is responsible for moving the needle of the new indicator.As with most old cars, who knows what has been modified or changed in previous ownership. The shift linkage on our 1956 had been modified with the trans swap and did not provide the swing required for the potentiometer to indicate a gear change. We simply added a vertical bracket that was much more conducive to working with the potentiometer and indicator.The optional electronic gear indicator is controlled by this compact unit. You’ll need to program it for the number of gears of your transmission (2, 3 or 4), then set the gear location by moving the shifter through each gear position. Note the tiny button next to the LED indicating a P for Park.When put into calibration mode, the speedometer swings up to indicate 50 mph and the high beam indicator glows. Once rolling, the speedo should sense movement and the high beam indicator and turn signals flash, and once the speed is set, the turn signals will light up solid to indicate a successful calibration.
We use cookies to ensure that we give you the best experience on our website. If you continue to use this site we will assume that you are happy with it.