Roadster Shop has an outstanding reputation for building state-of-the-art chassis and complete cars. We’ll look at a recently completed project based on a 1970 Chevelle. While there are no major body modifications, the work on refining this car’s details is exceptional, as you’ll see. This time, we’ll focus on how the bumpers fit the body and the scratch-built taillights and flush-fitted marker lights.
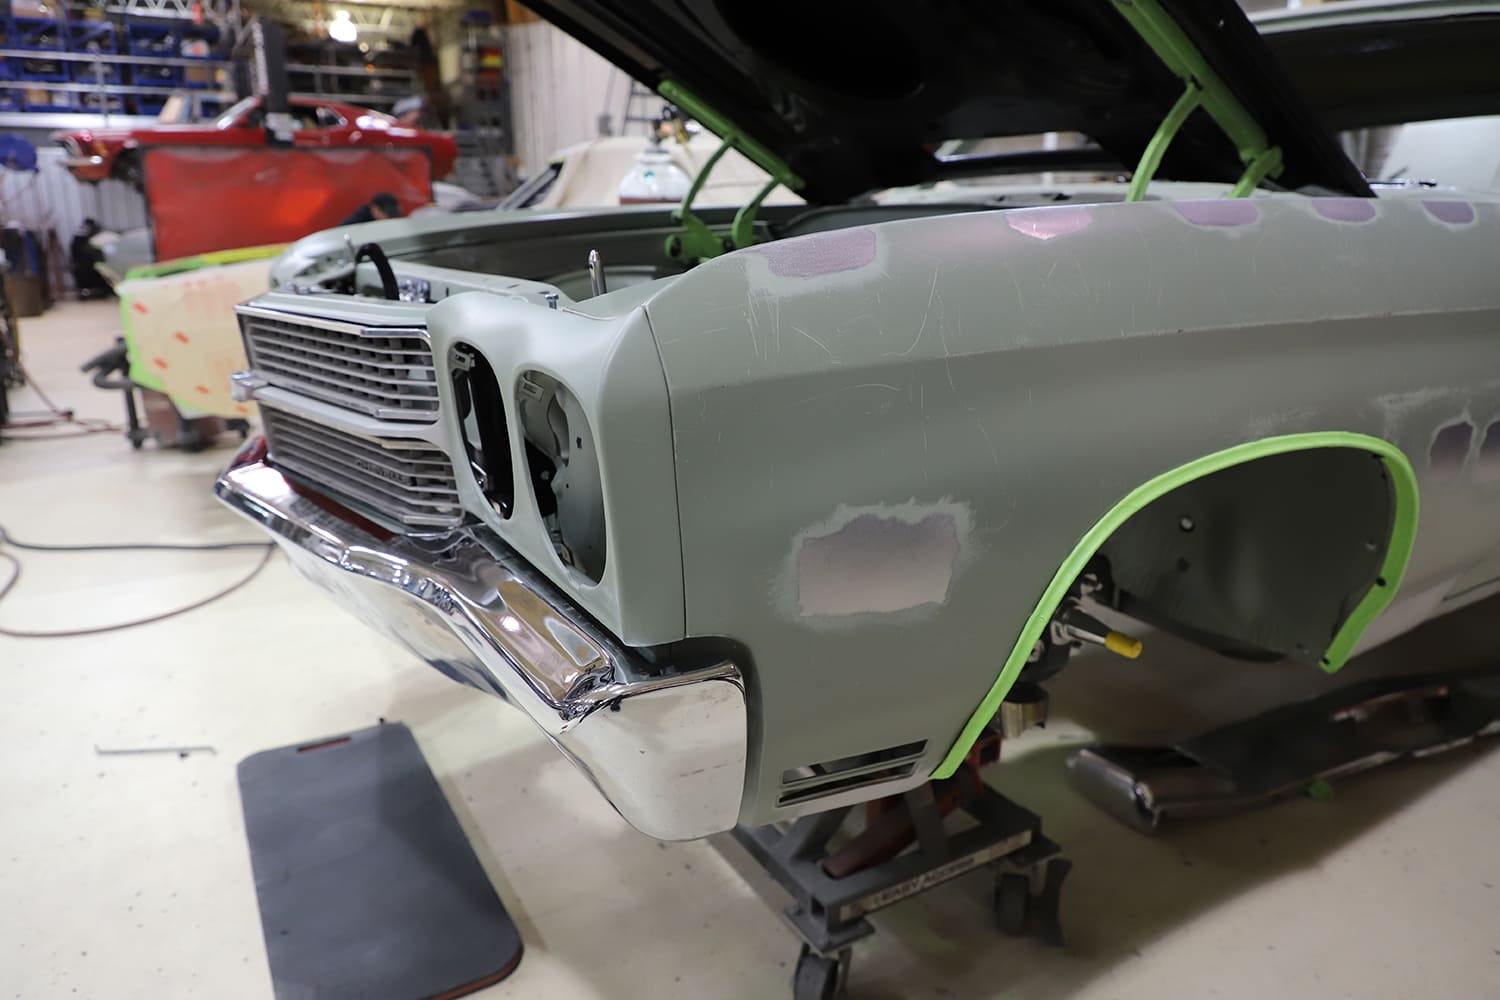
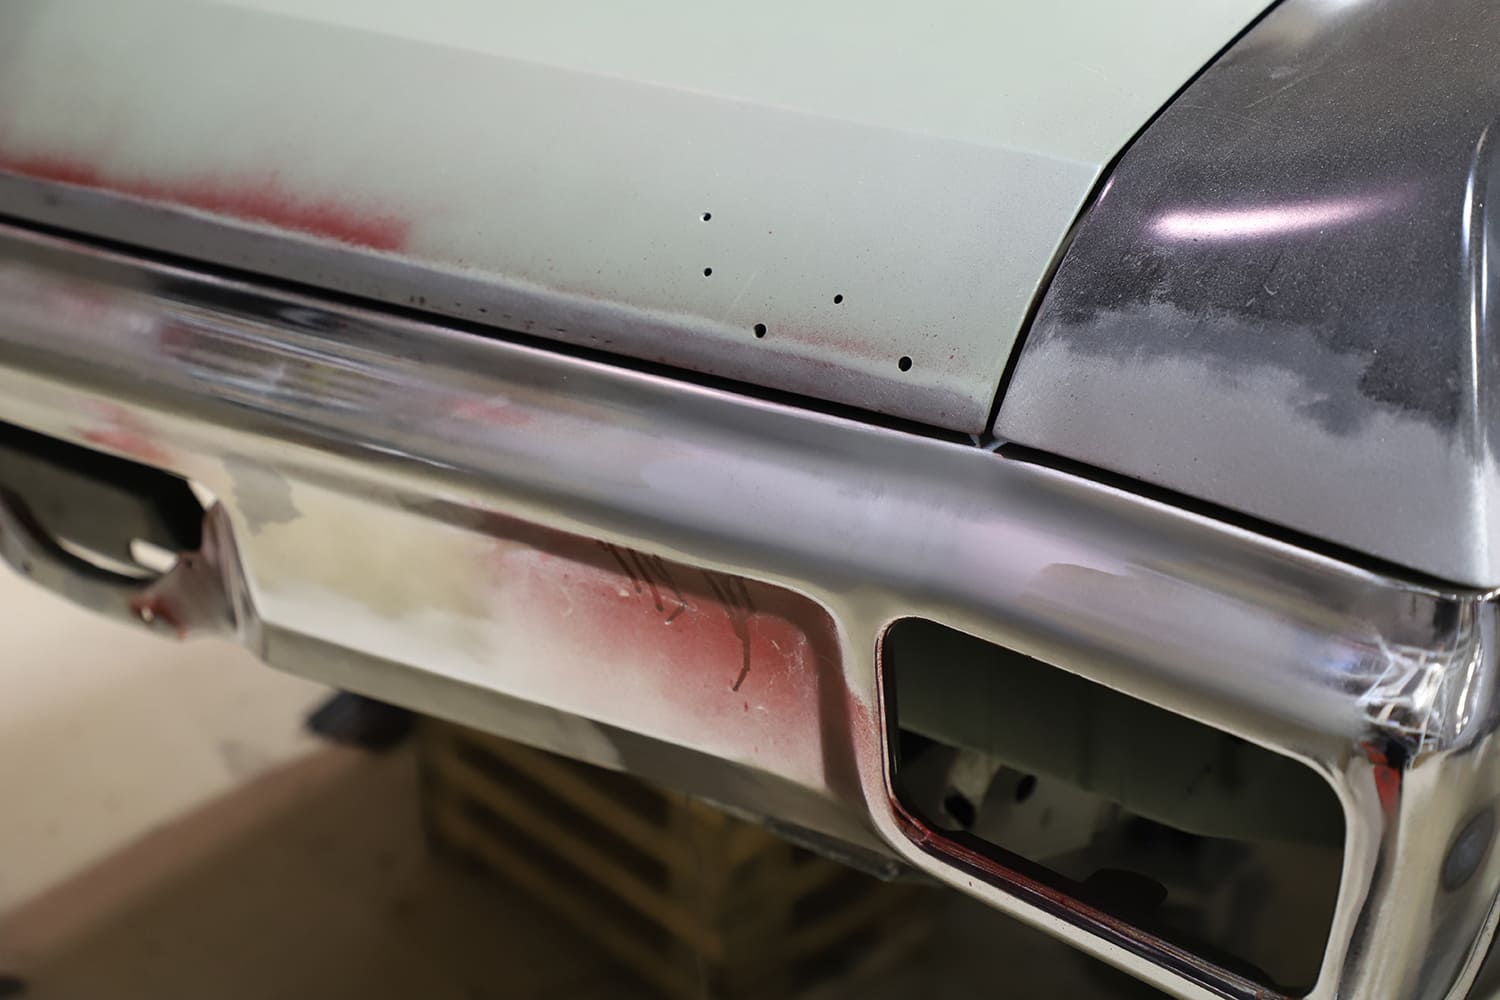
As is common with production cars, there is a significant gap between the bumpers and the body. This area needs to be refined when constructing a high-performance street machine.
Back when cars had chrome bumpers, manufacturers thought of bumpers as being for bumping, so a generous gap was left between the bumper and the body. Now that these cars are being lovingly updated, many people want these gaps tightened to achieve a sleek look. This means that more care must be taken when driving and parking these cars, but many owners believe that the svelte appearance they can achieve justifies the extra effort.
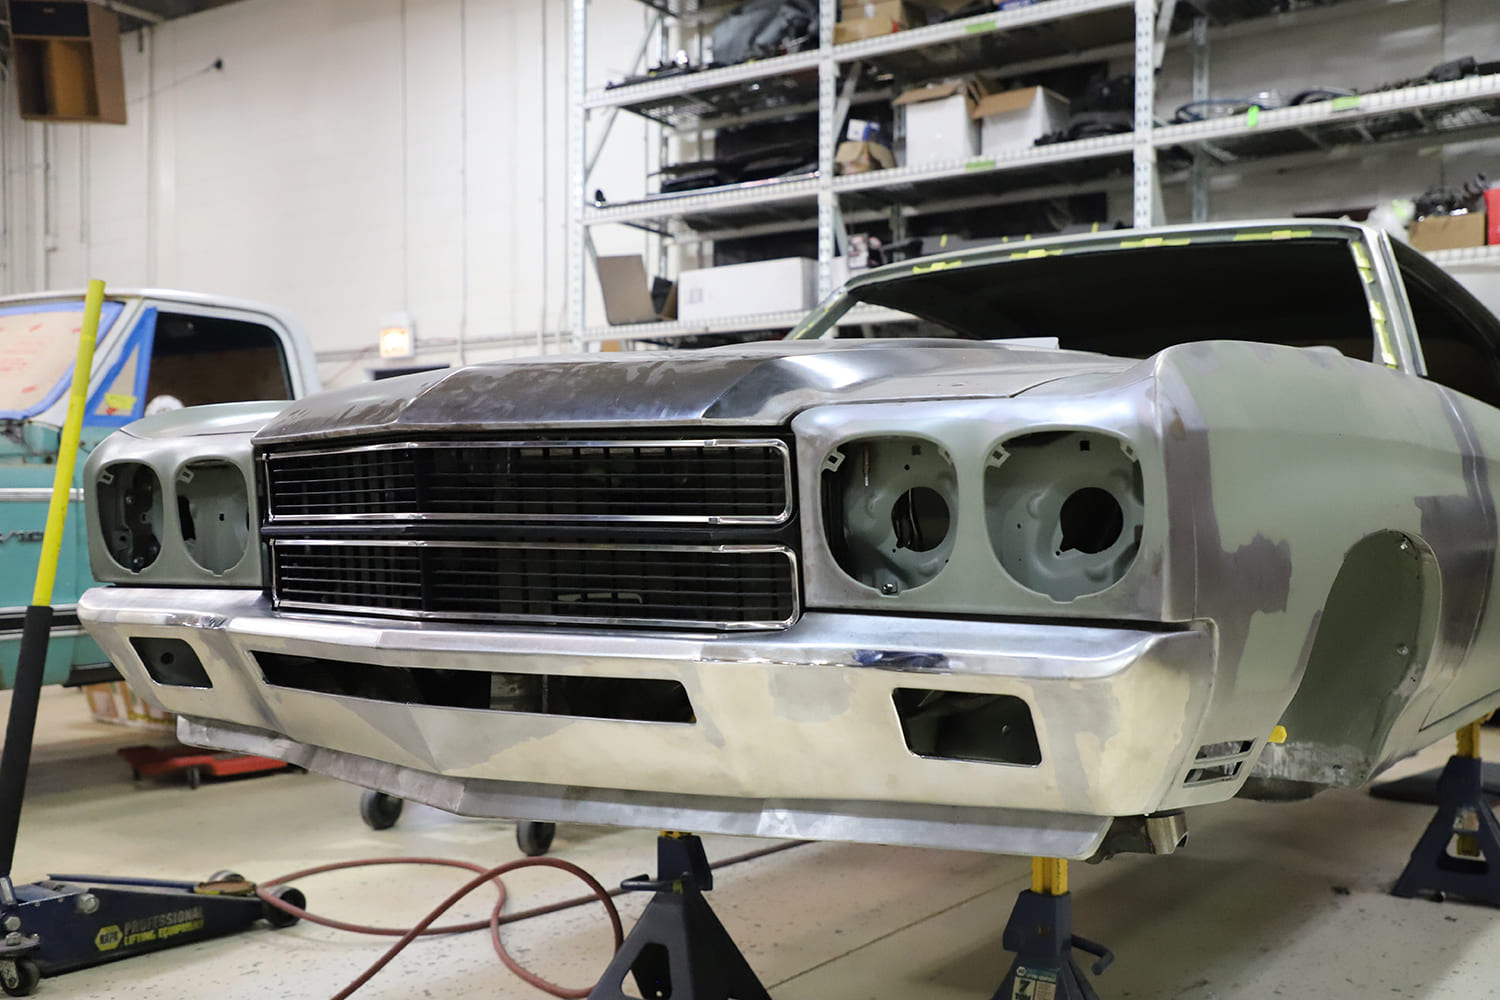
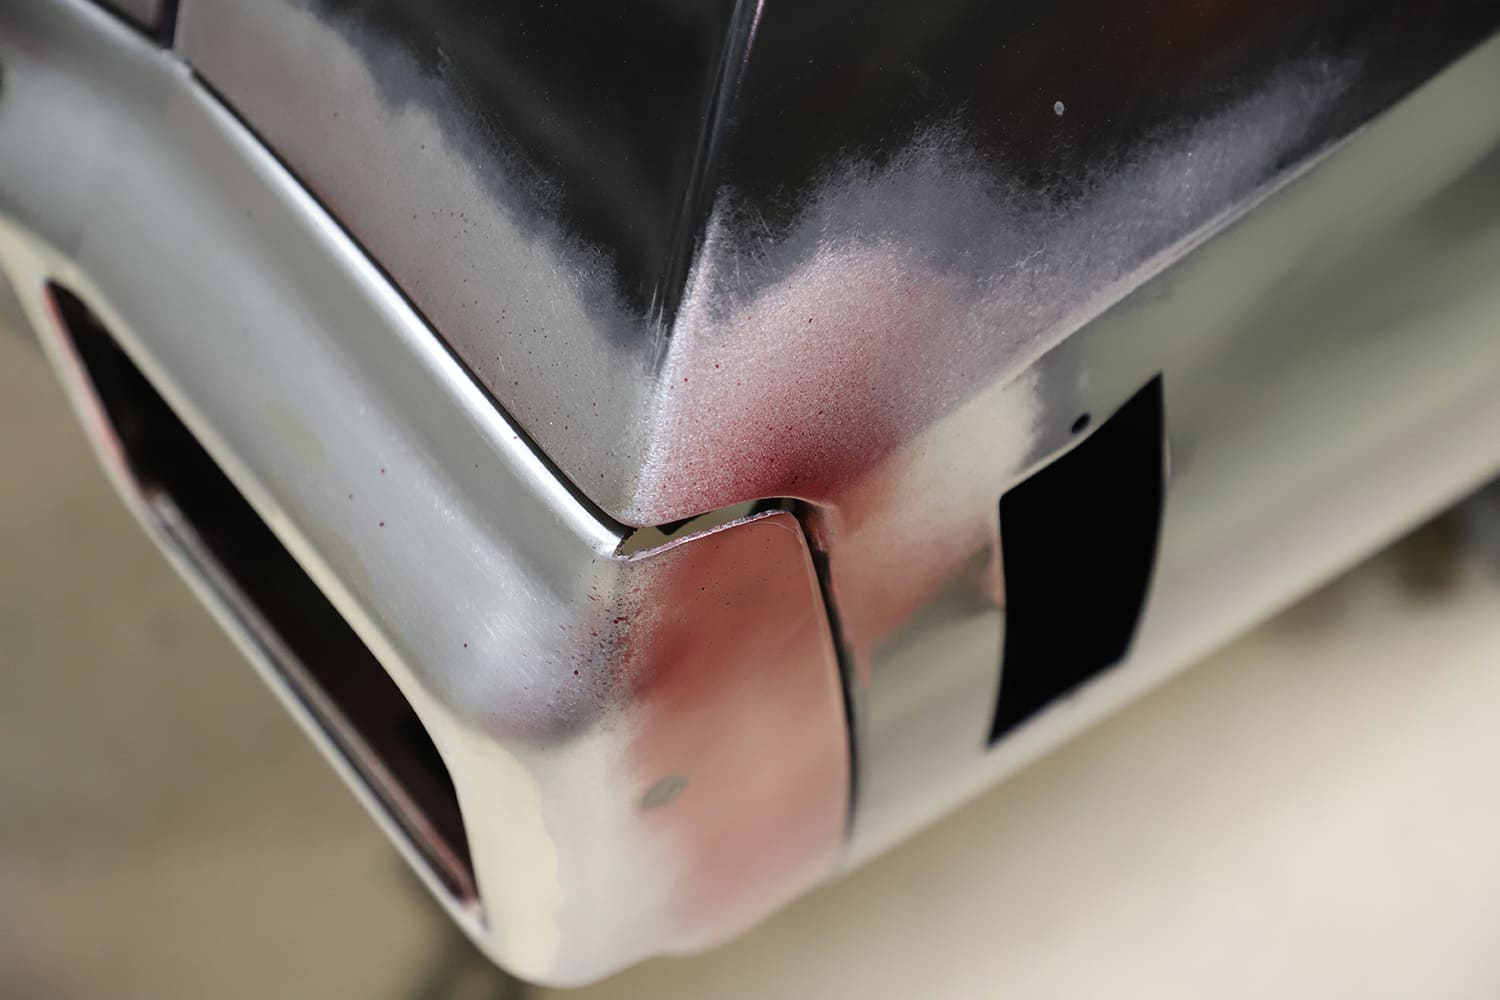
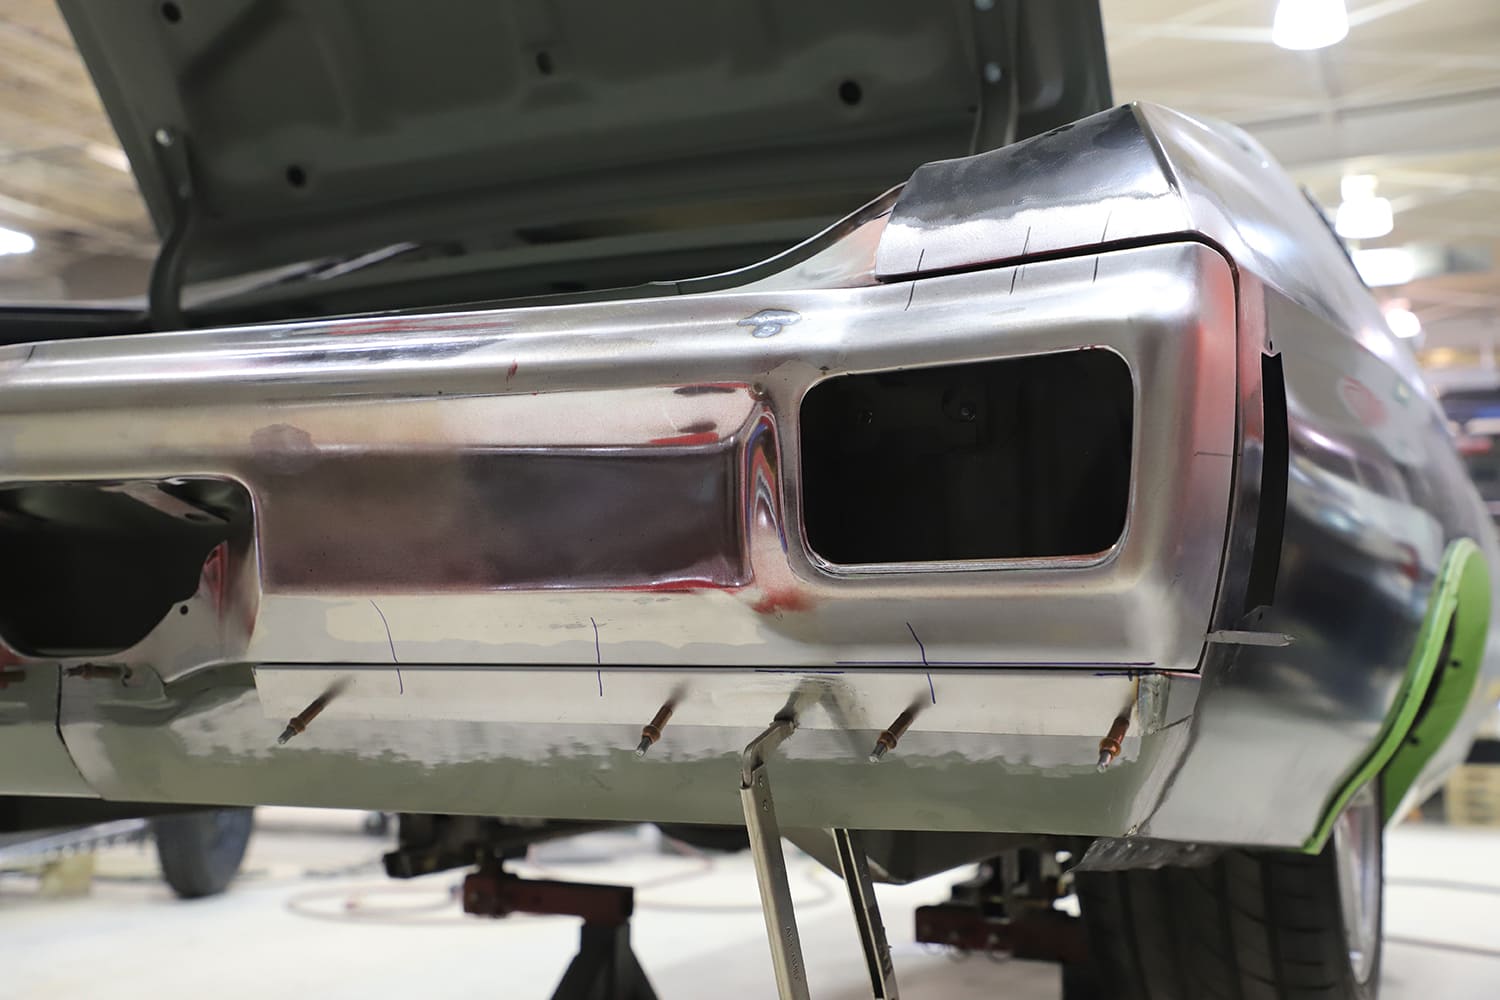
The front bumper has been moved back and up, marking the first step in tightening the gaps. The rear edge of the bumper has been cut off, trimmed, and repositioned to create a snug, uniform gap. Additionally, note that the bottom corner of the headlight bezel has been extended, and that 1/2 inch will be sectioned from the bottom edge of the front fender.
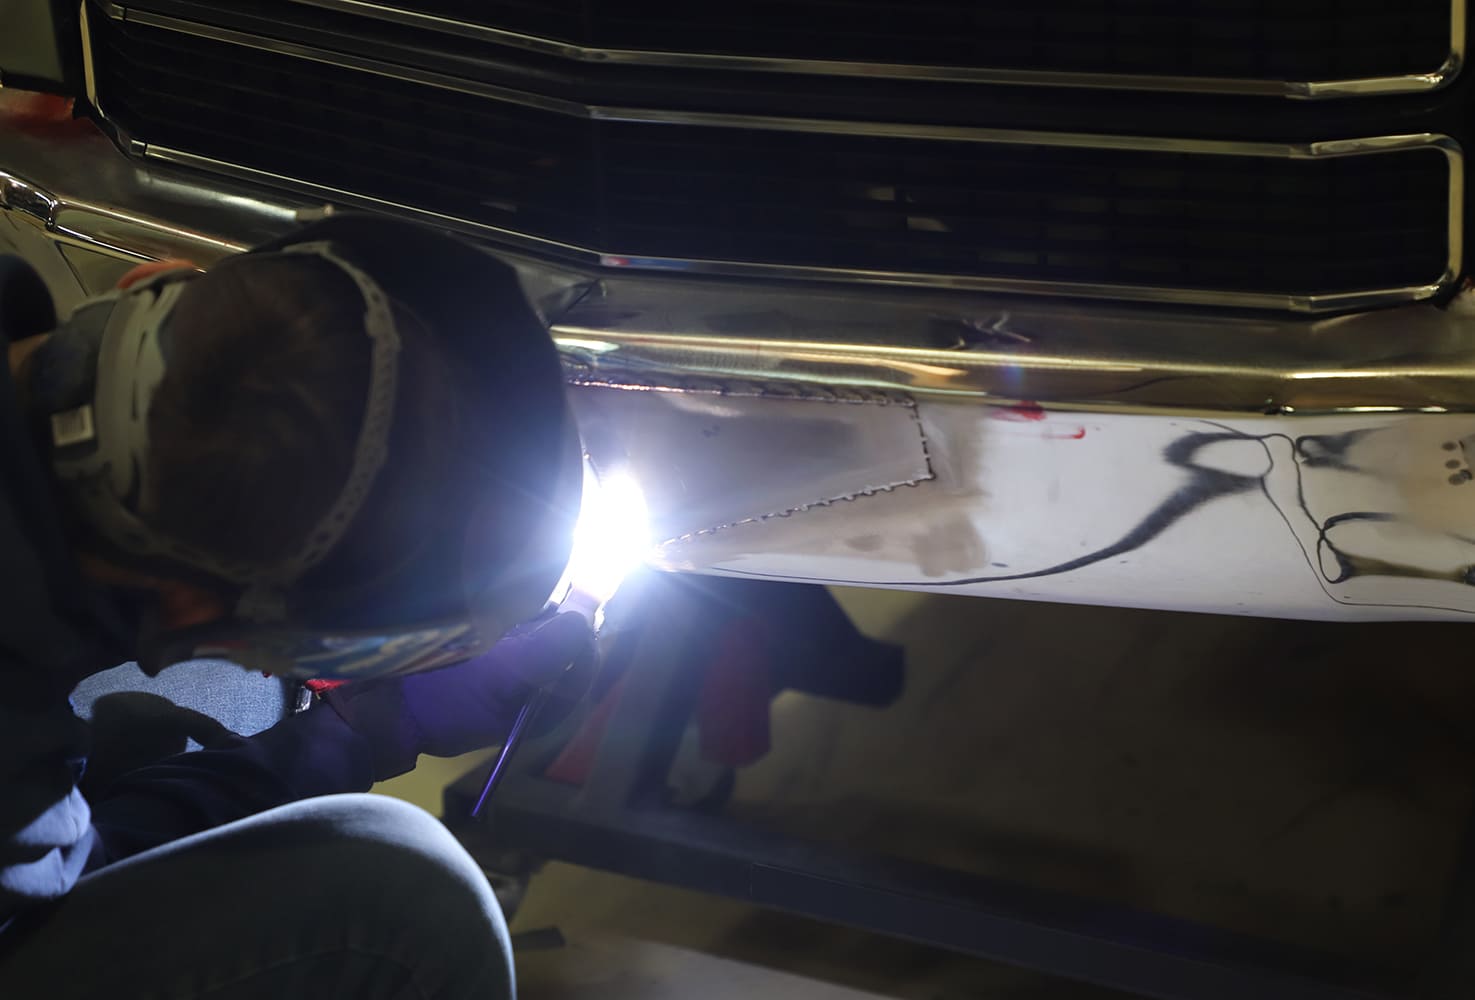
Most bumpers from this era were made from 1/8-inch-thick steel. Of course, this is considerably more difficult to move than body-thickness metal. Still, it tends to stay in place once you move it, and the extra thickness is an advantage when the surfaces are metal finished since more material can be removed without compromising the bumper’s integrity.
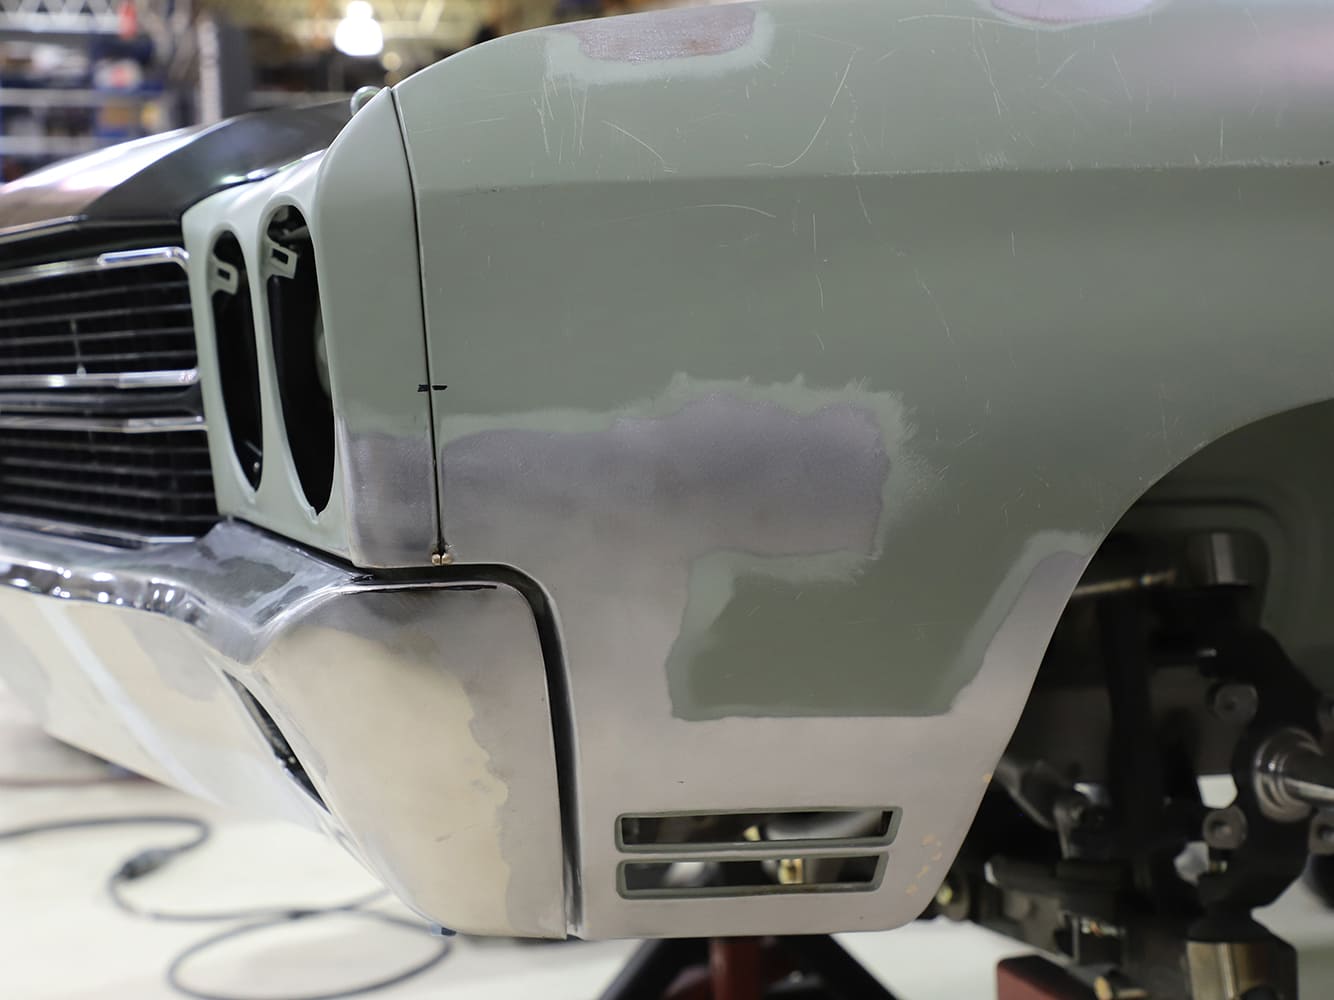
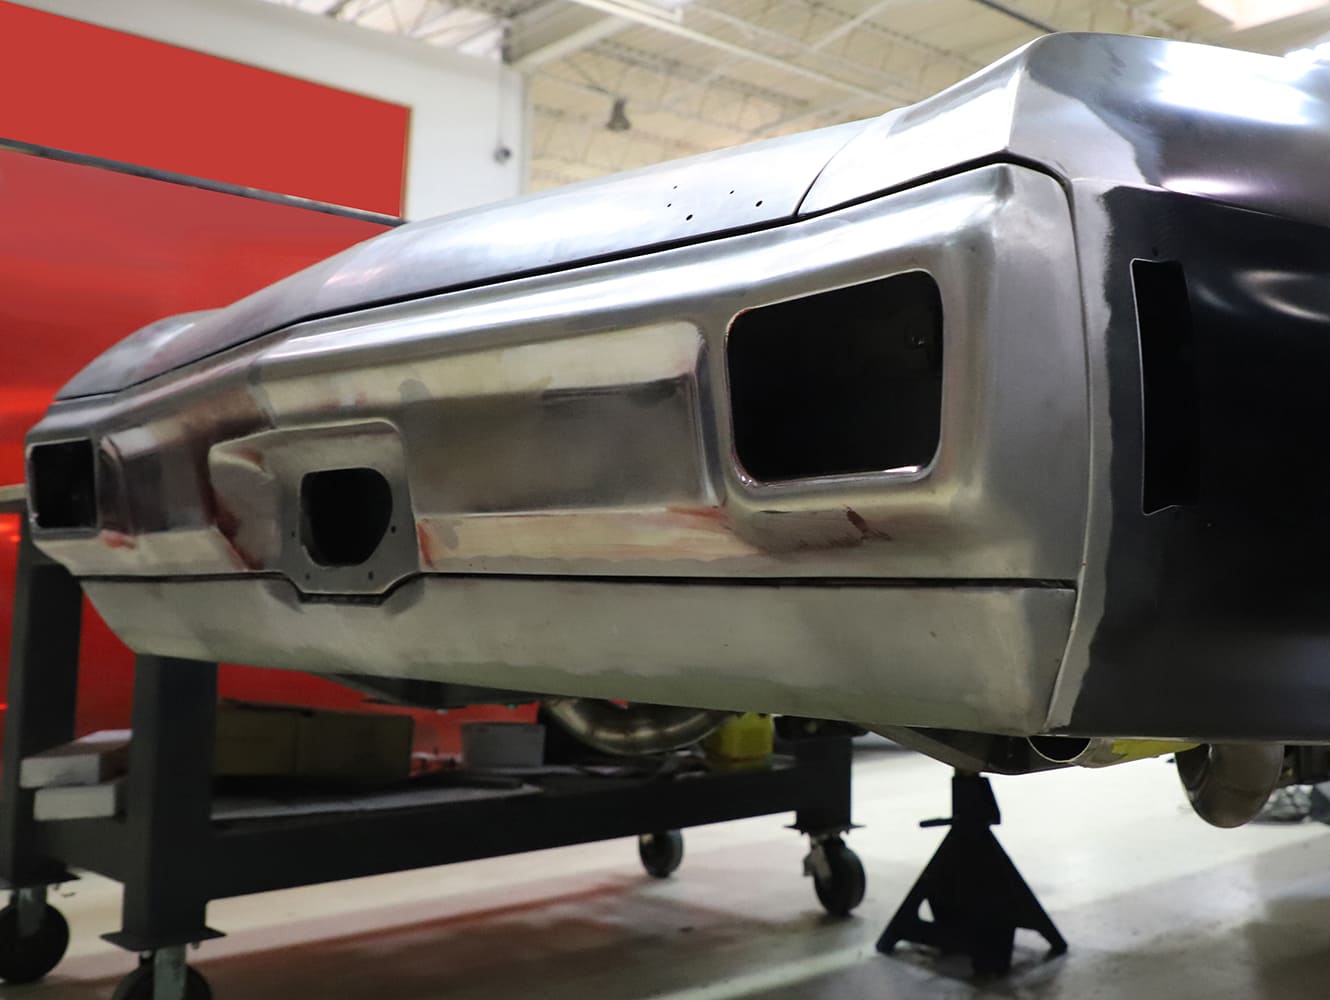
The fender has been sectioned to flush the bottom edge with the bumper. Additionally, the recess in the fender for the top corner of the bumper has been refined.
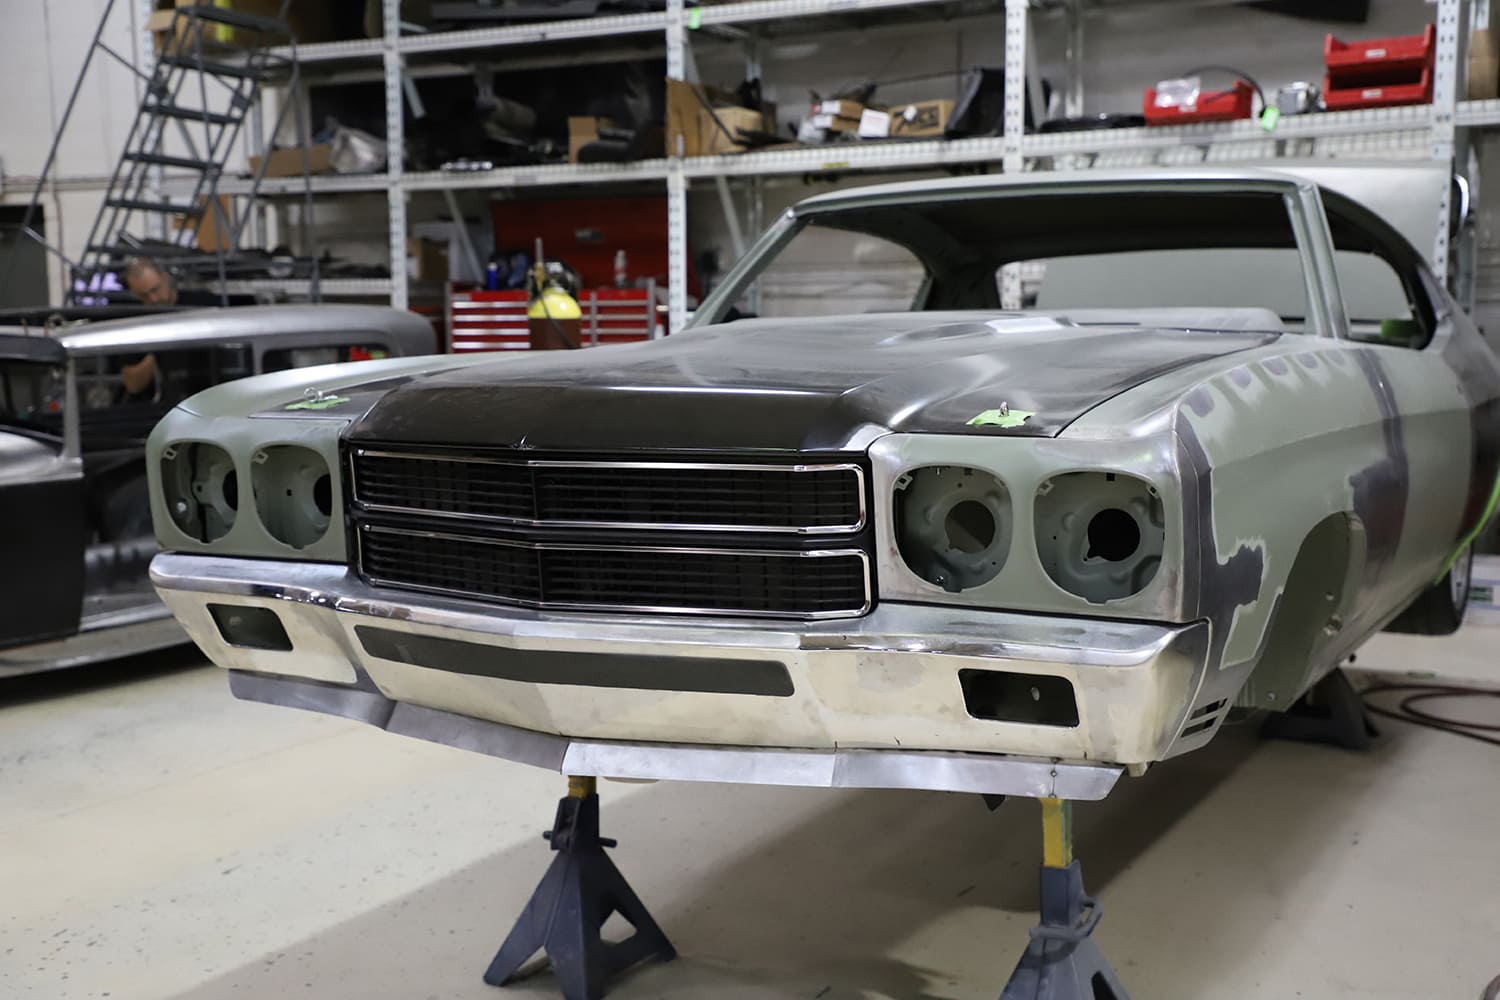
The photos illustrate how much “slicing and dicing” was needed to perfect the fit against the body. Unique details were added to both the front and rear bumpers, giving this car a distinctive appearance. The filled-in front bumper (with an extra slot positioned just below the grille) enhances the front of the car, making it appear as though it could have come that way from the factory.
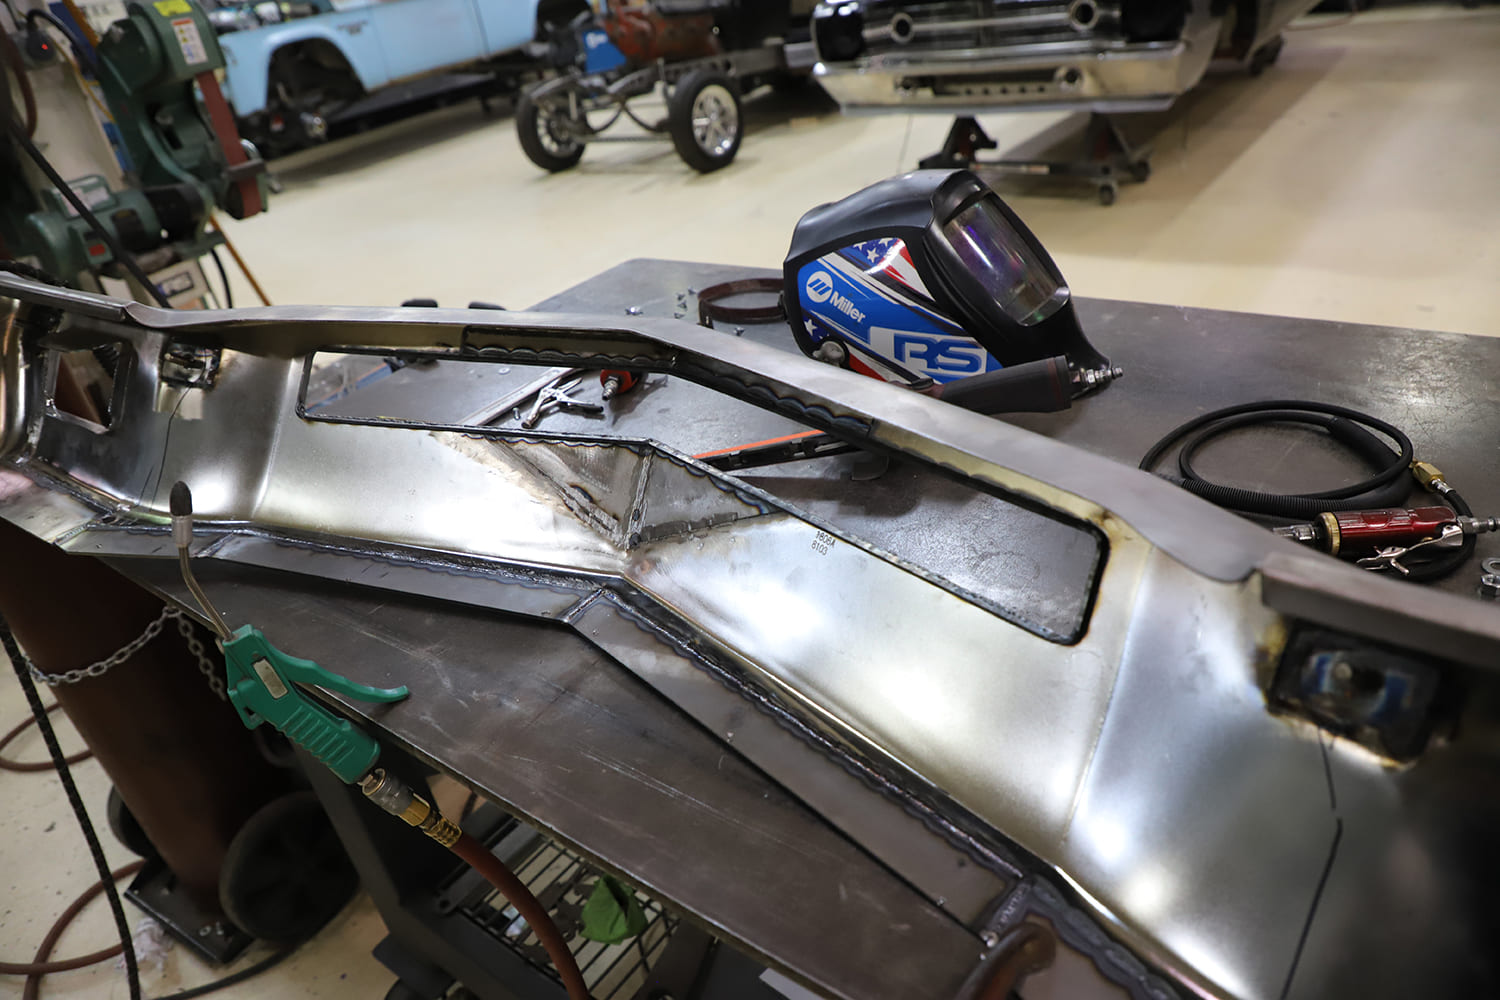
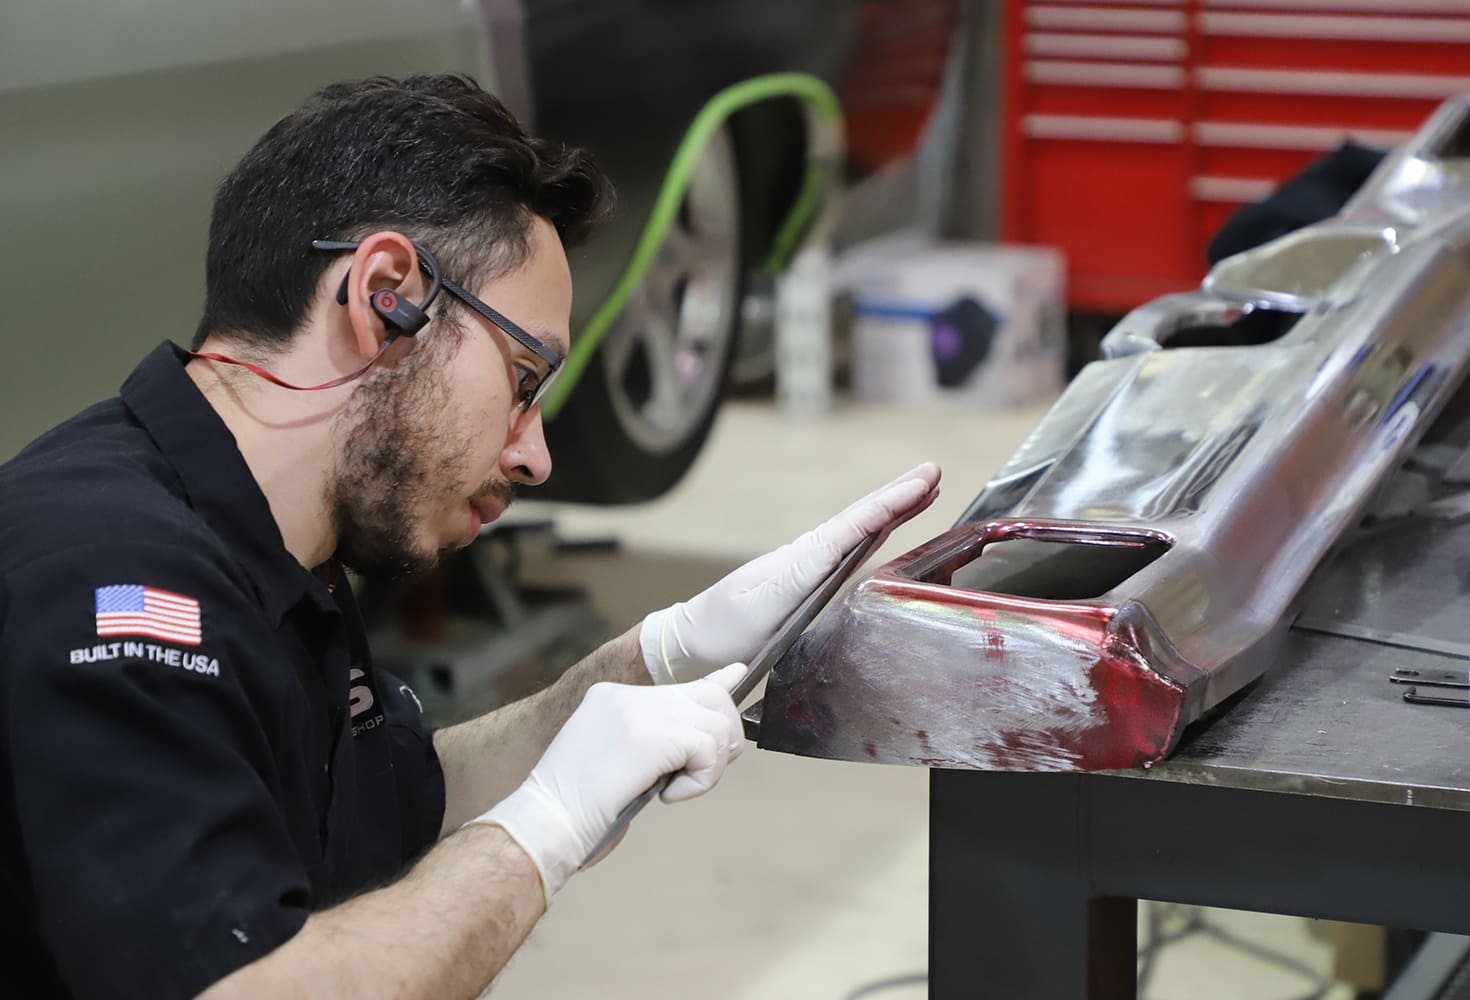
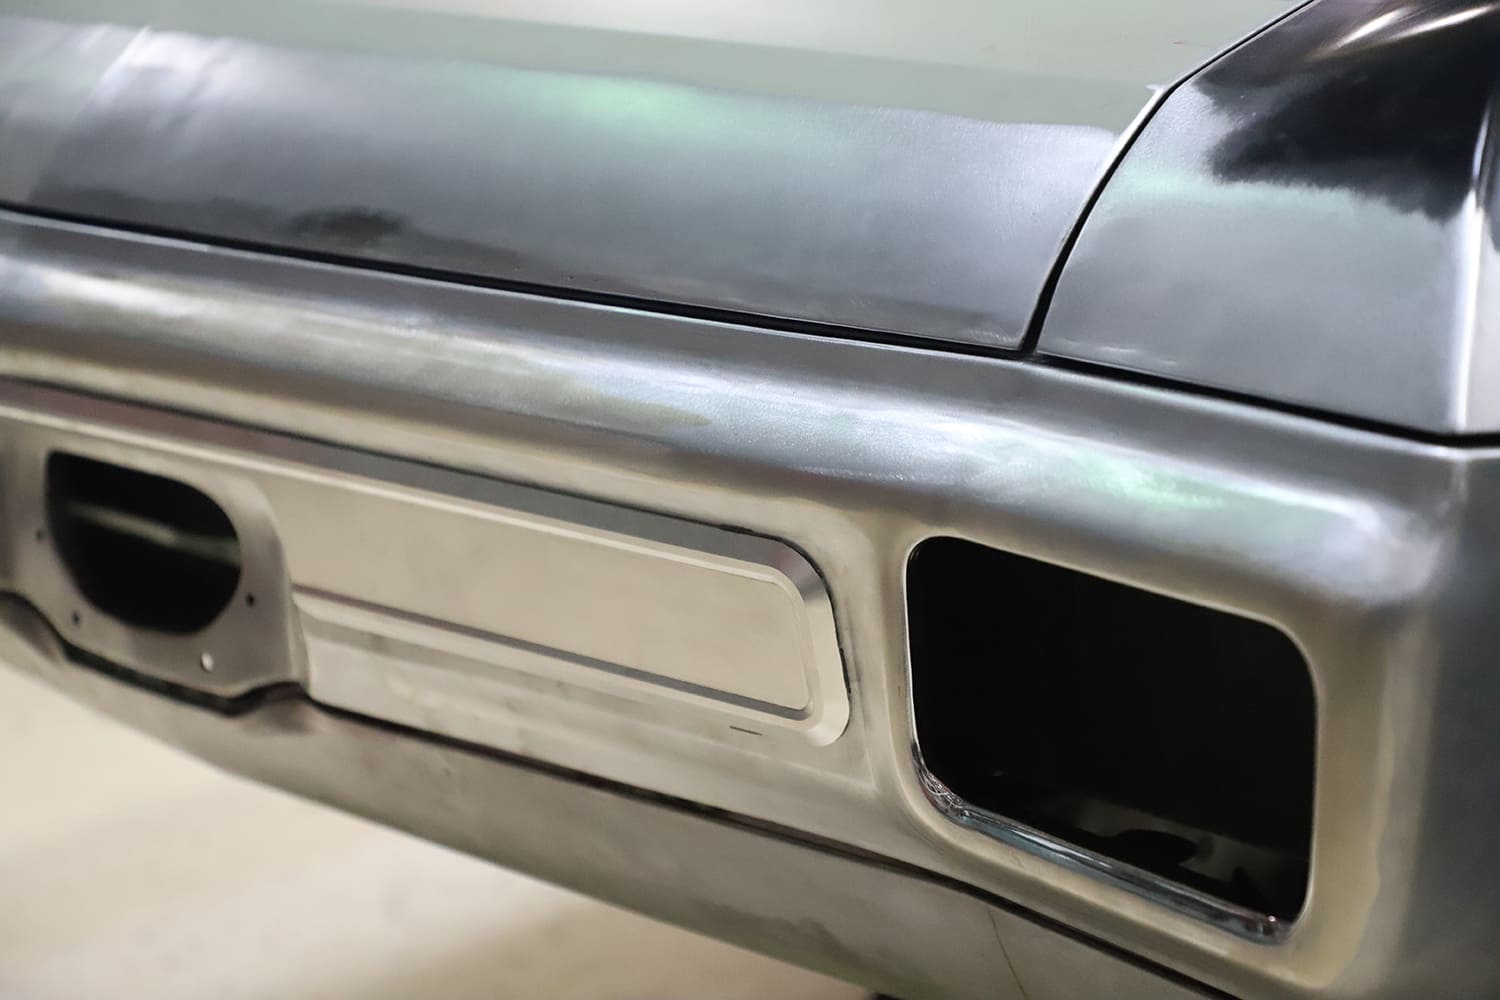
The original bumper featured a large recess for the license plate. This was removed, and 1/8-inch cold-rolled steel plate sections are being welded into position.
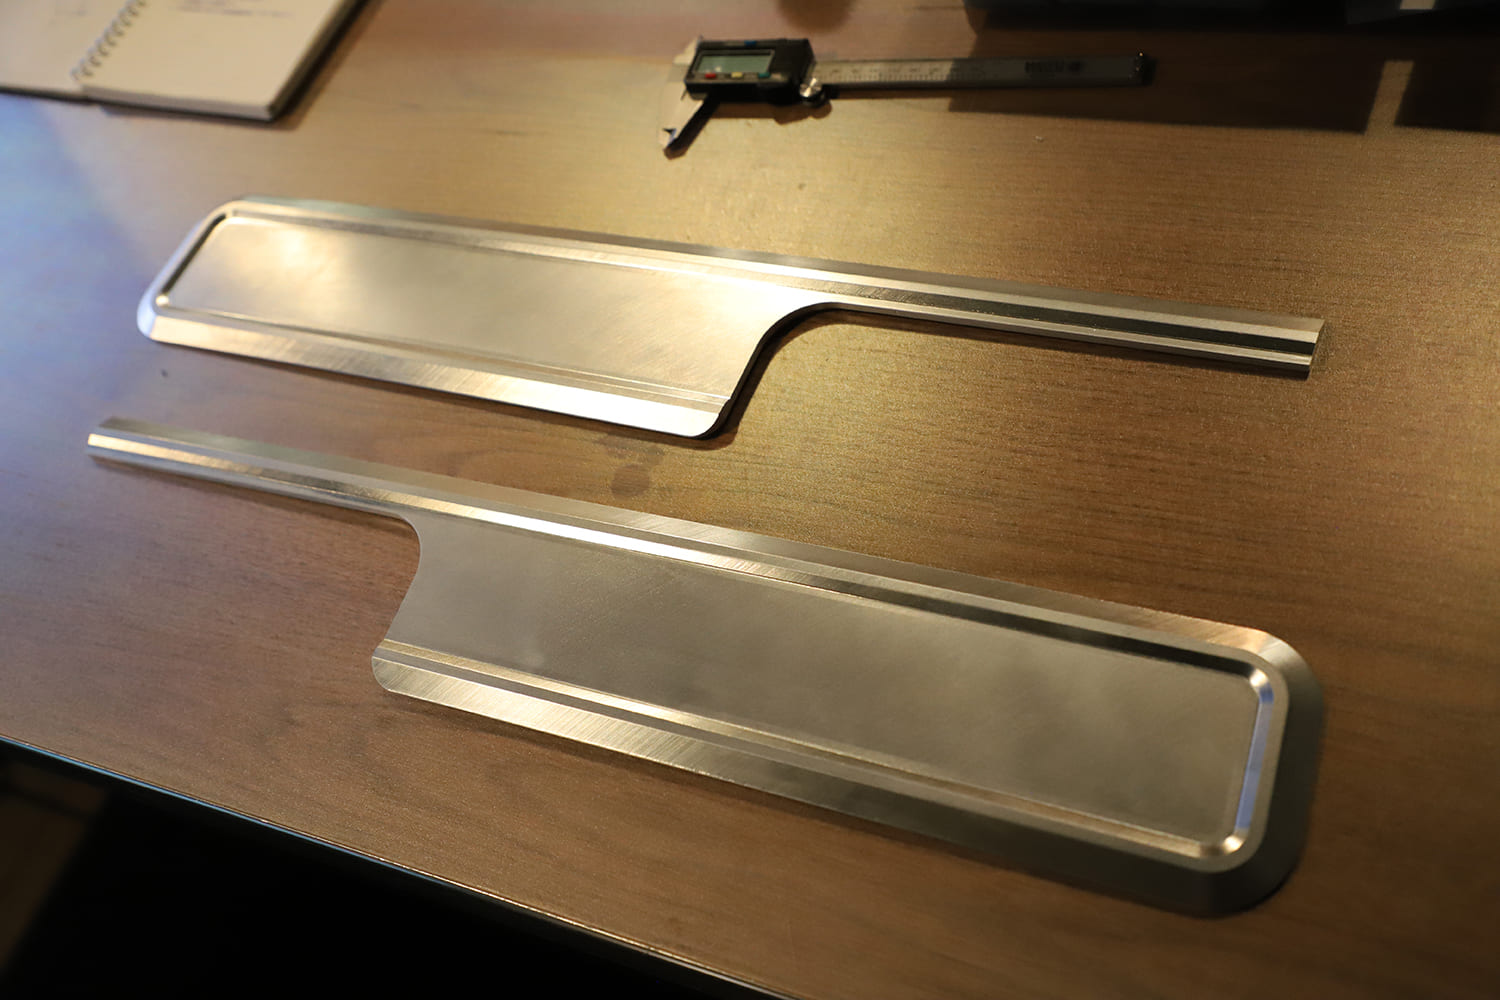
To further reduce the gaps in the rear, custom raised panels were machined to fit in the center of the bumper. Once again, these appear as though the factory could have designed them.
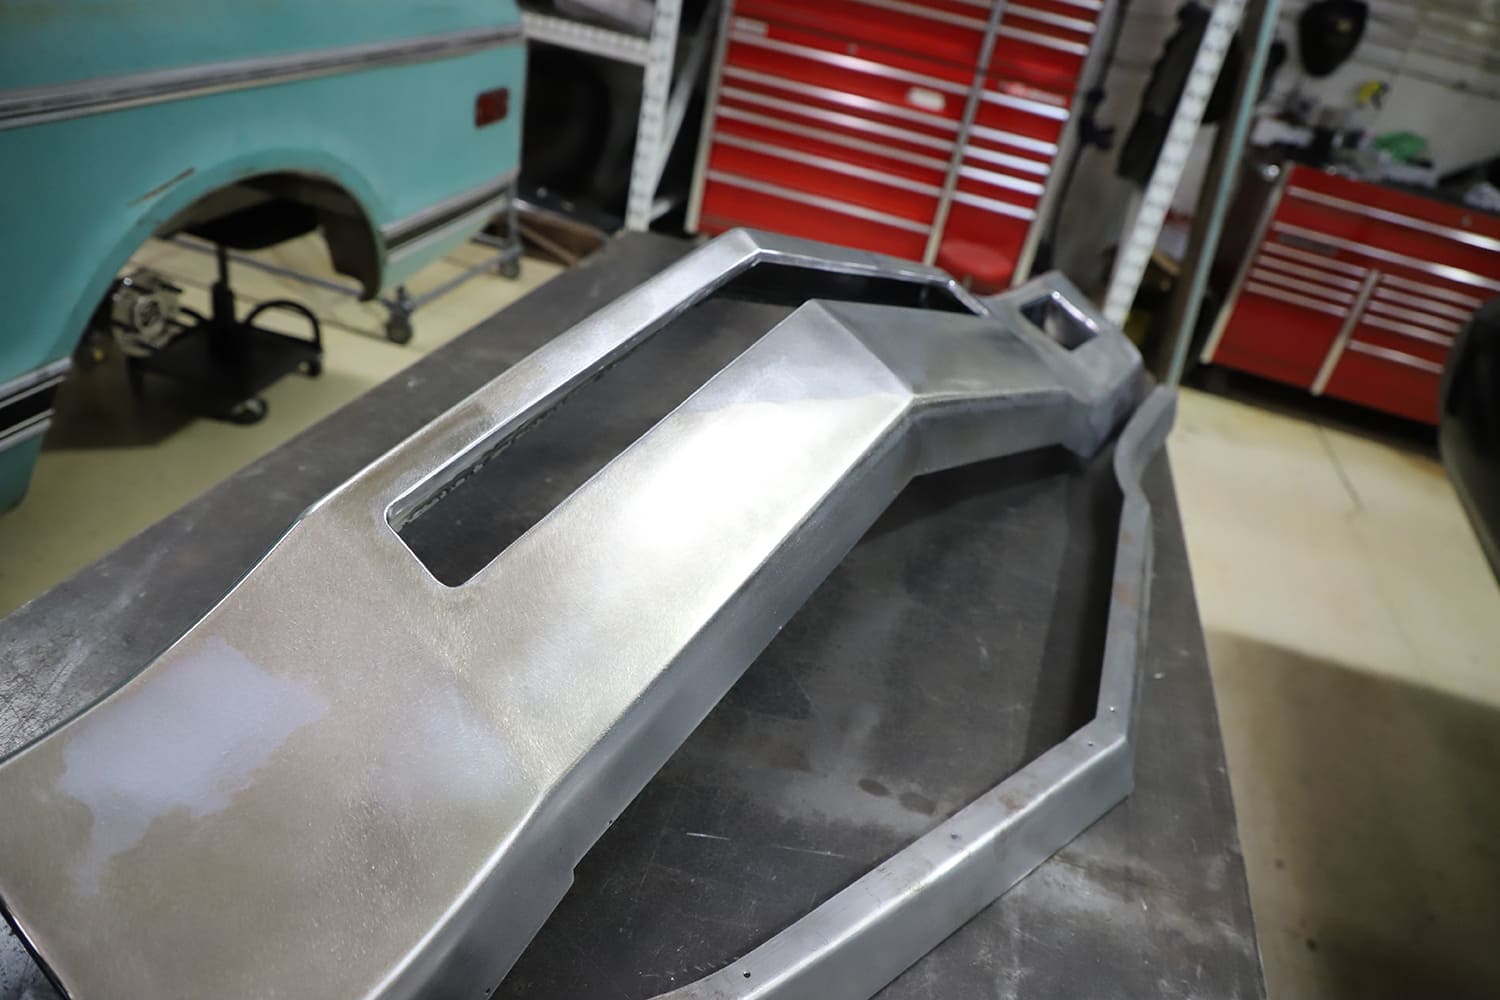
With the center of the bumper filled and the metal finished, a pattern is created for a new opening just below the grille. This lightens the bumper’s appearance and allows more air to reach the radiator. You can see the beginning of a small spoiler, which will sit below the bumper.
We’ll explore many more details in future articles, but the work presented this time should whet your appetite for what’s ahead.
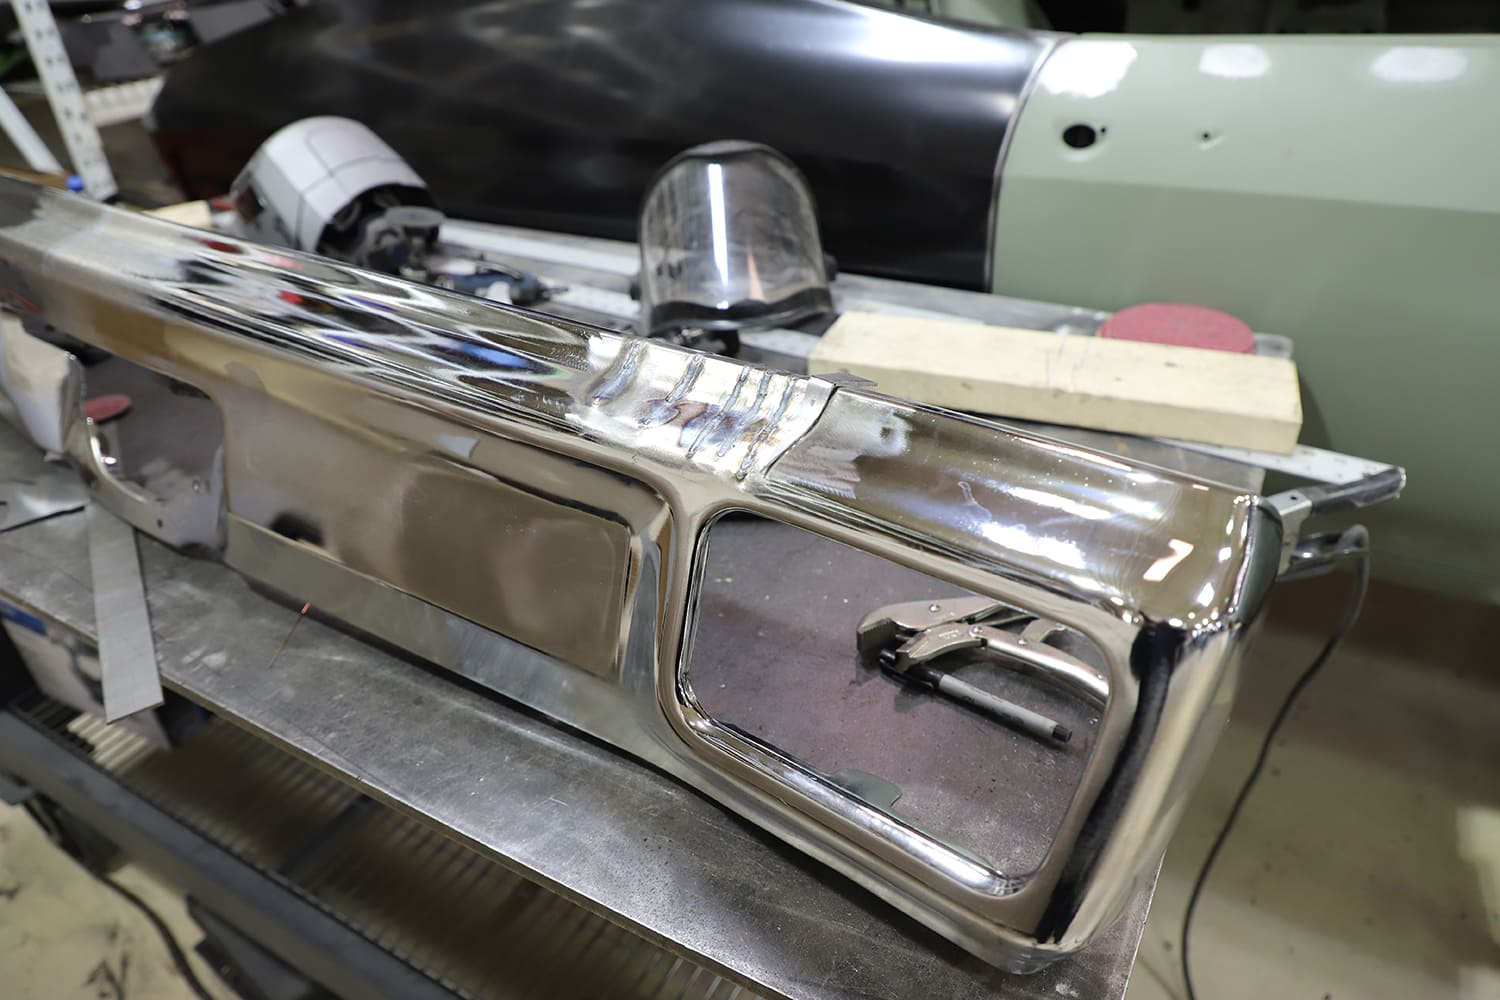
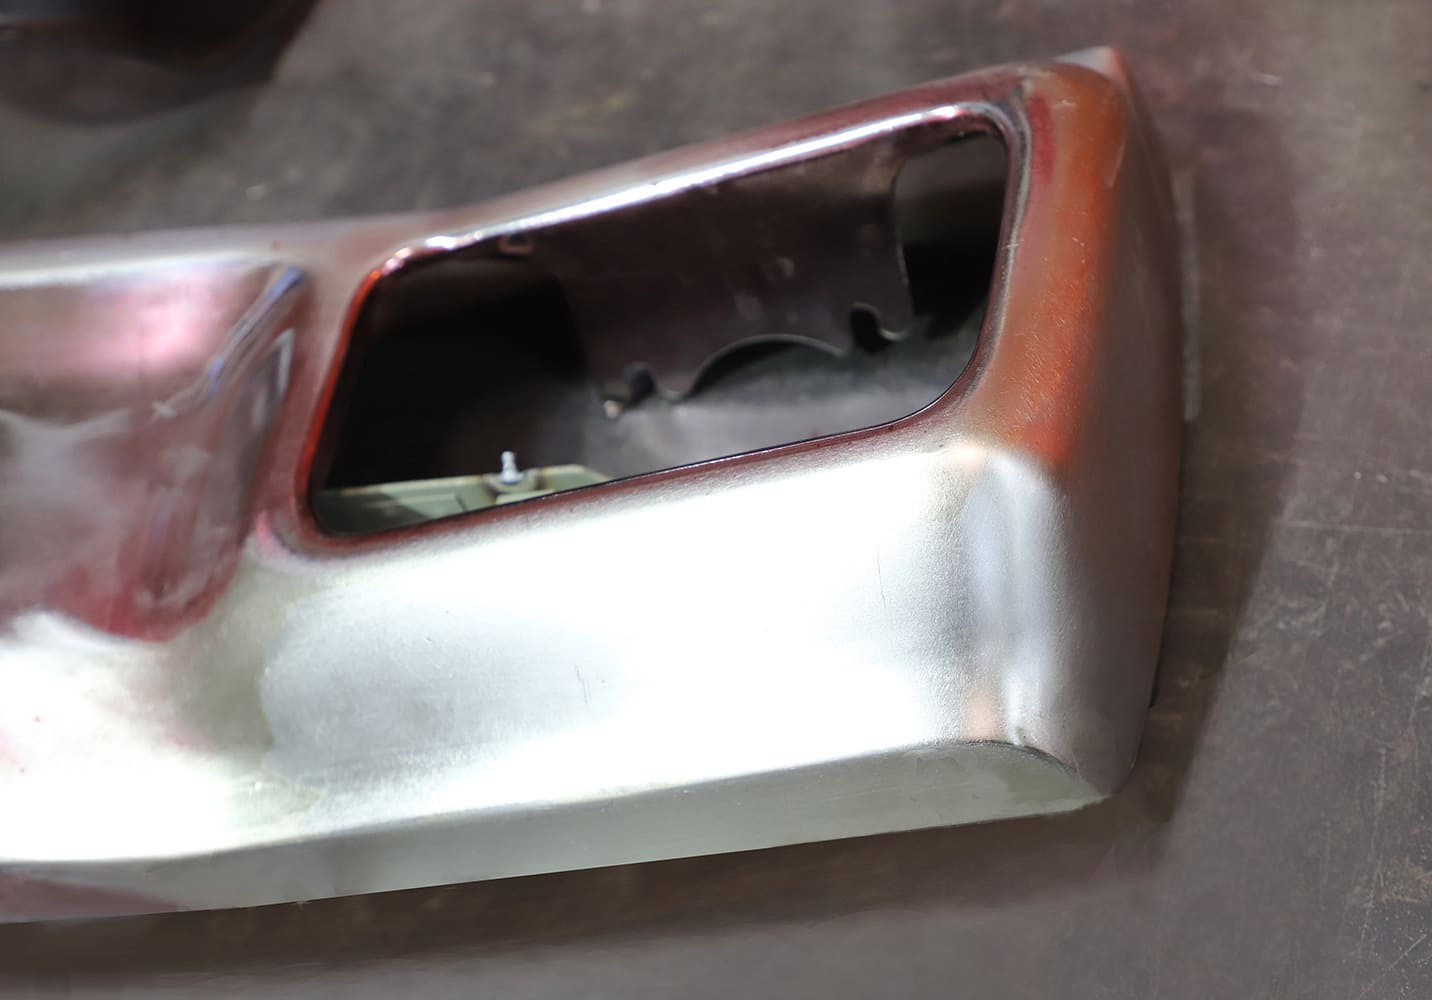
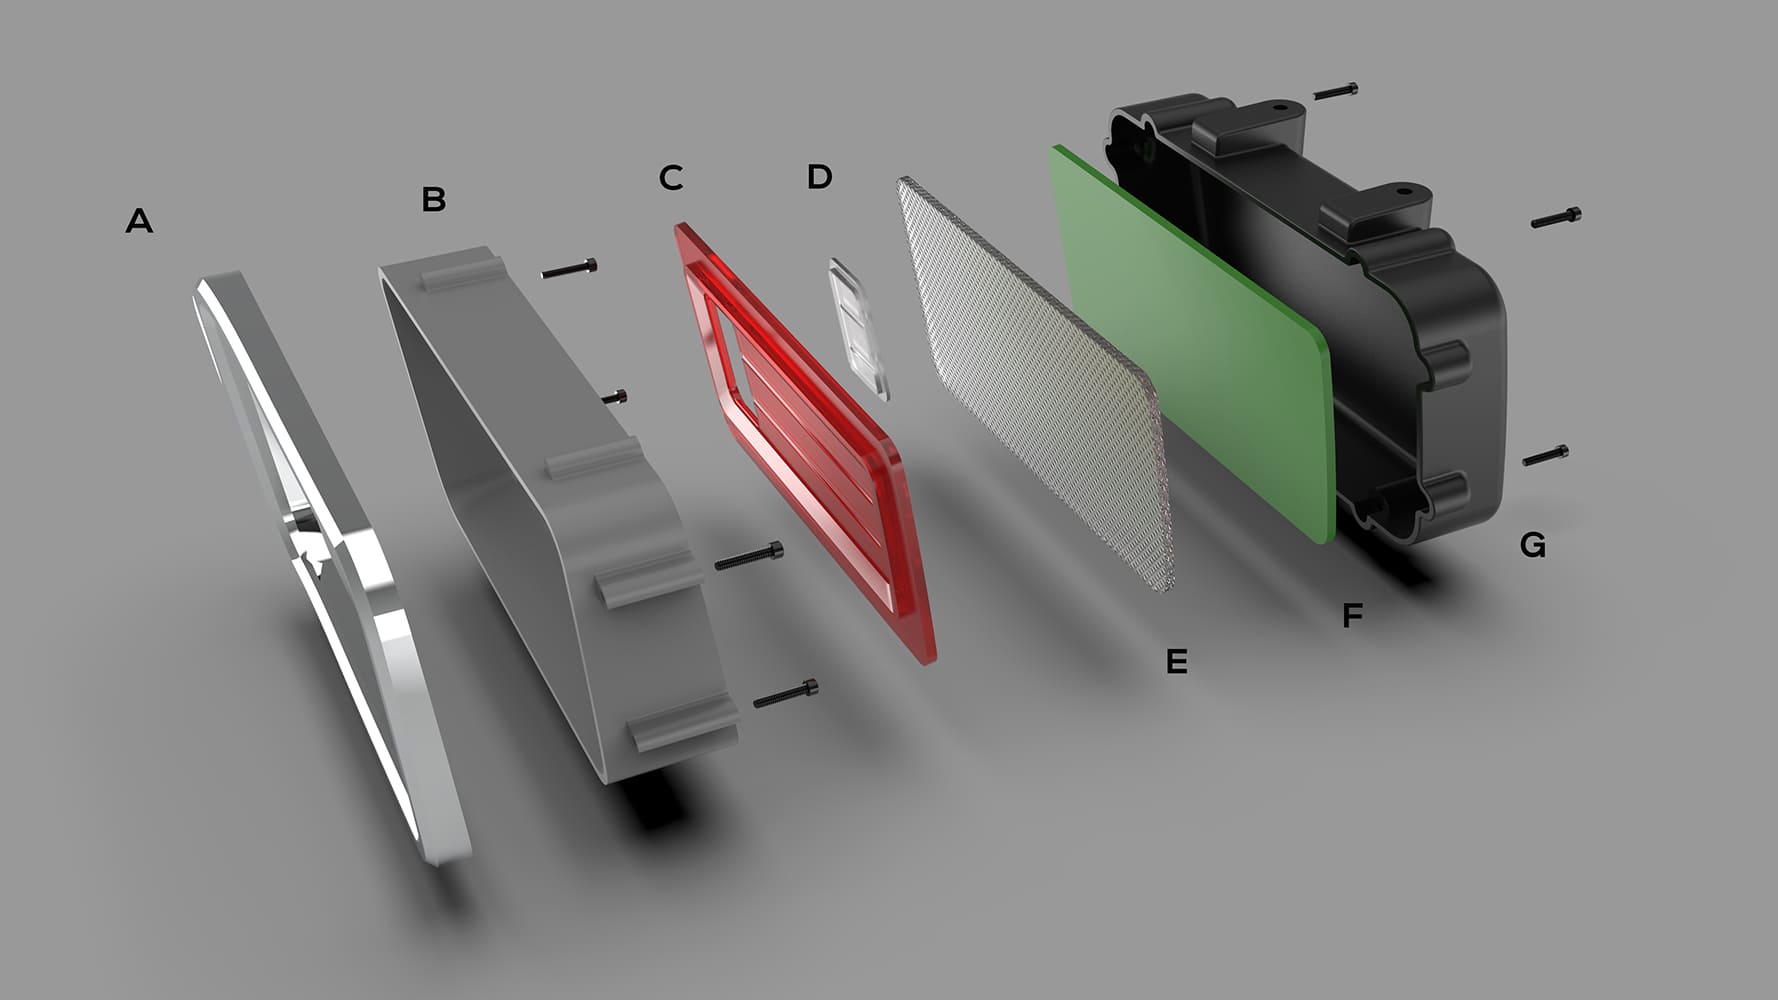
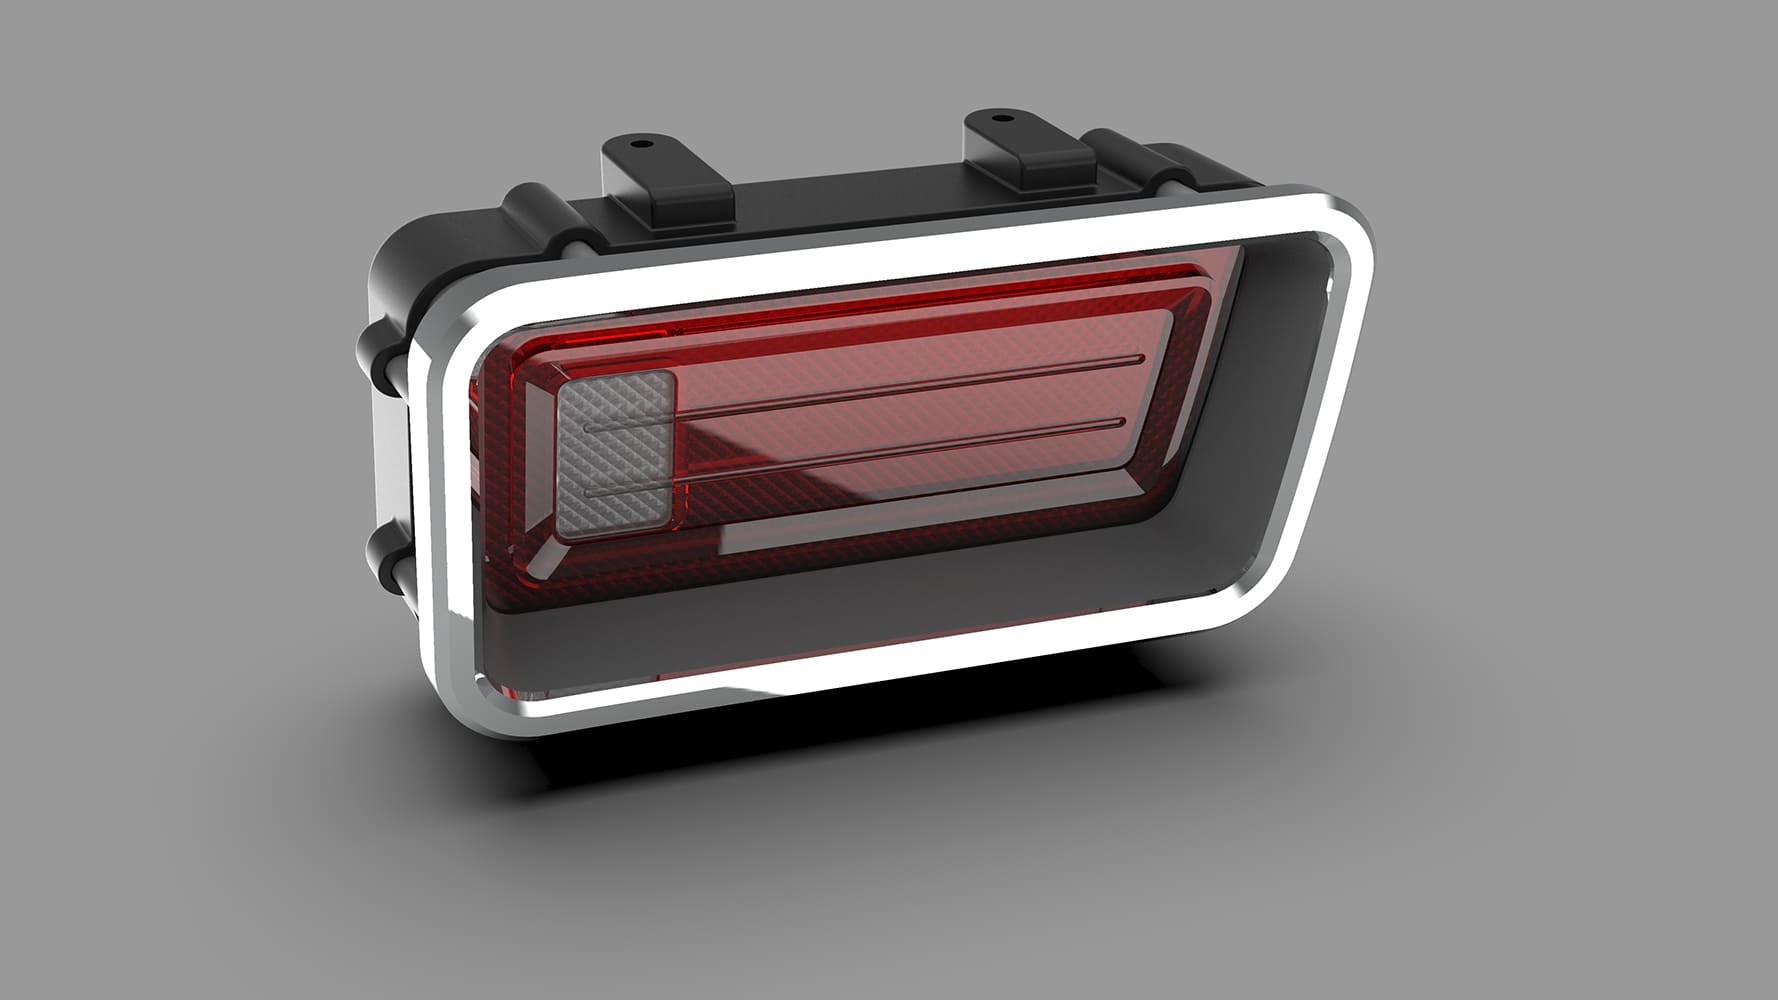
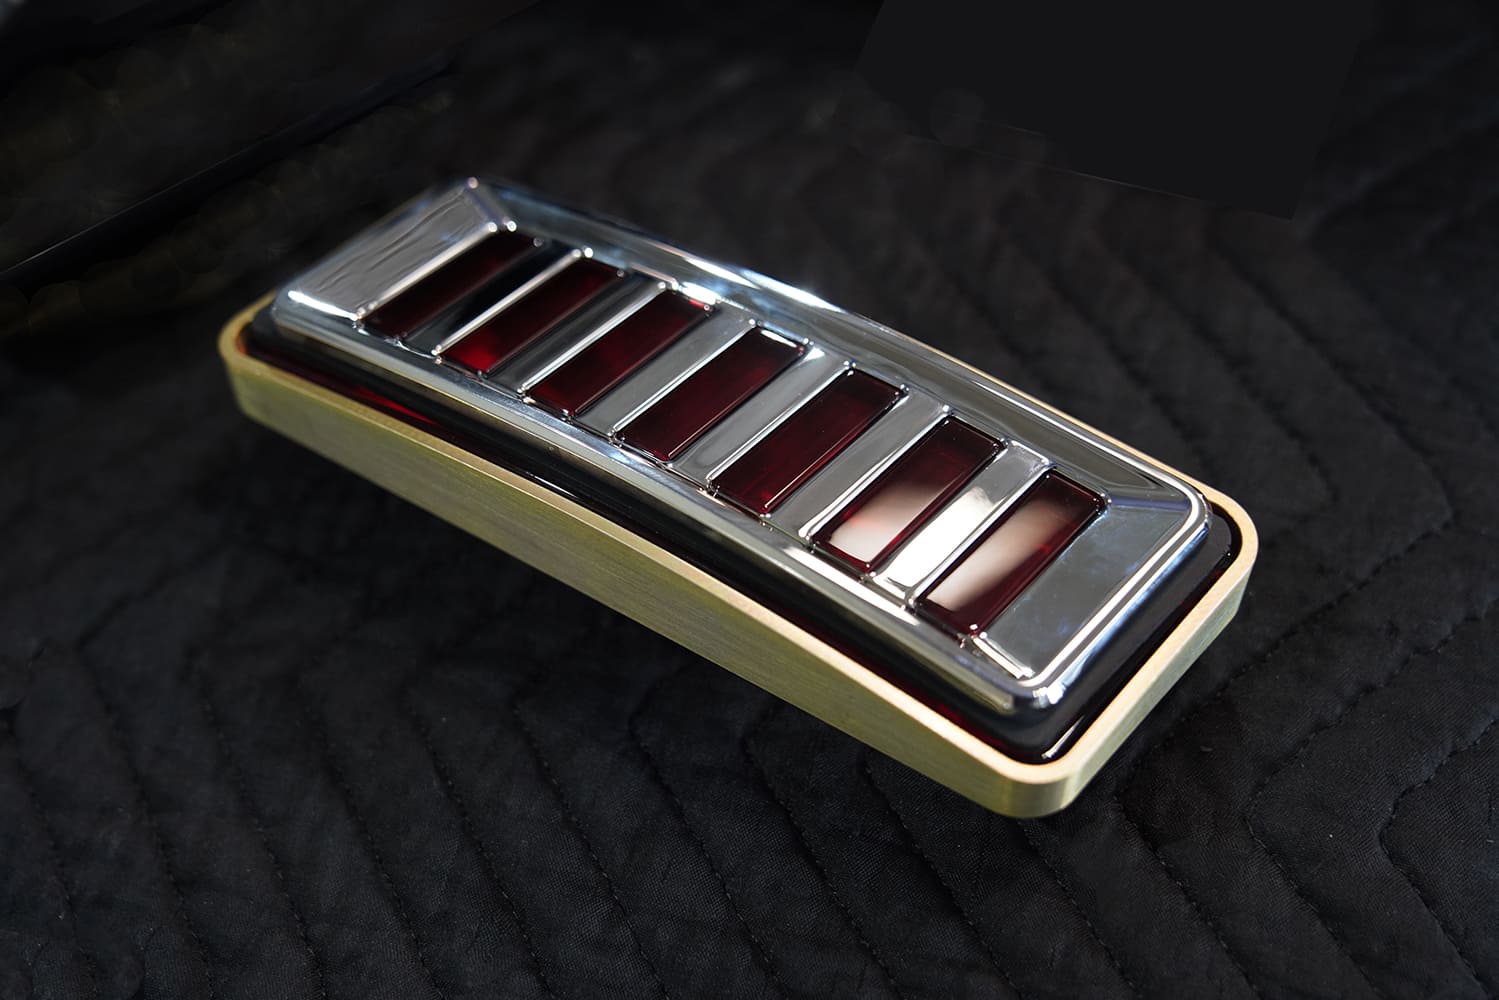
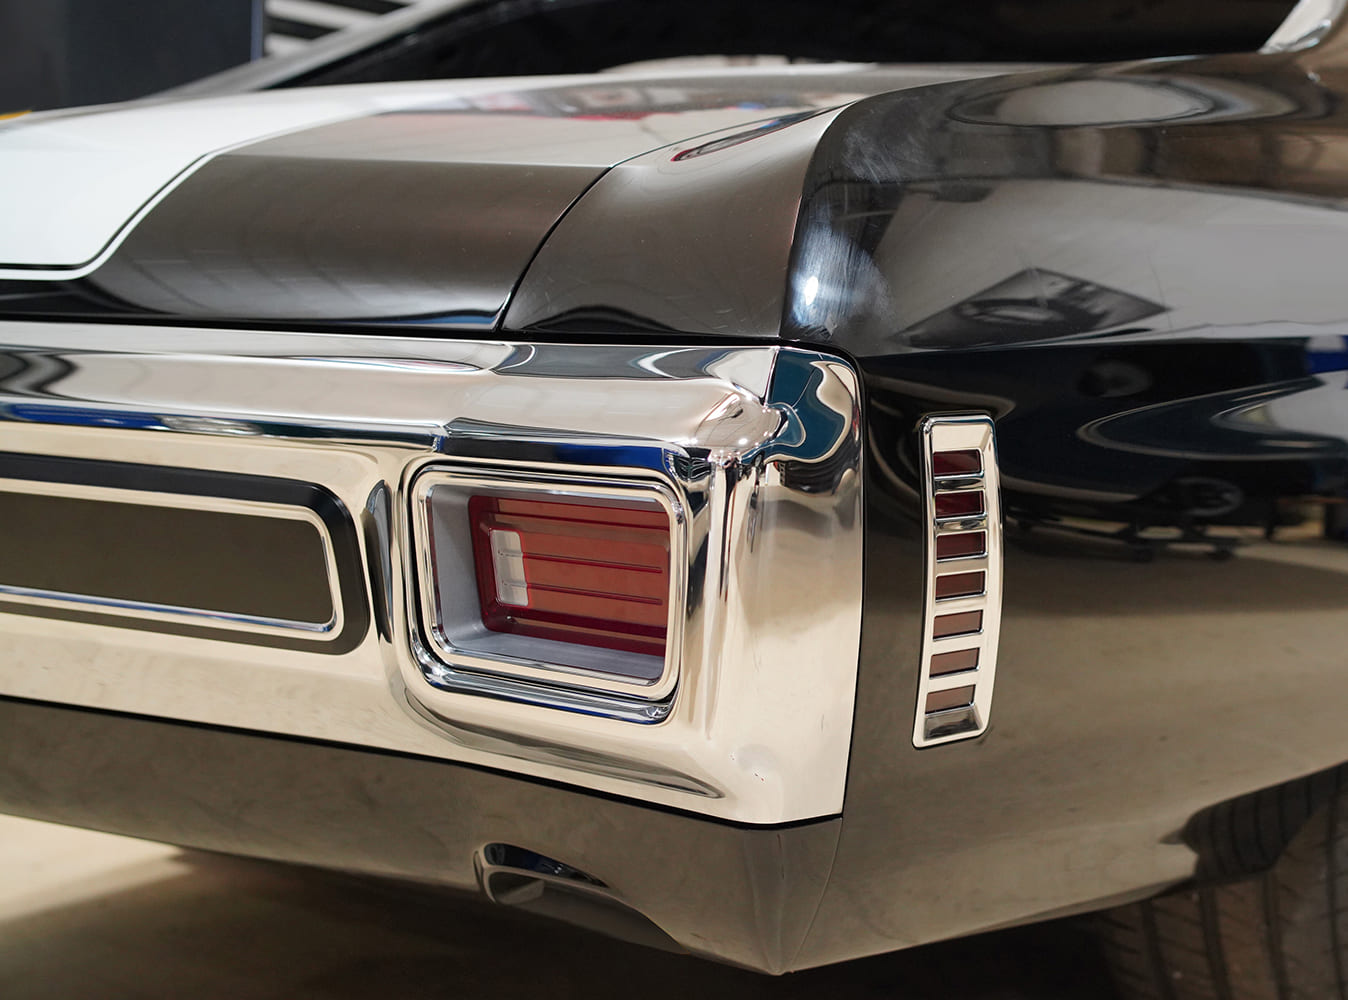
After cutting the opening in the bumper, all the edges were reinforced with flanges made from 1/8-inch steel plate.Notice how flawlessly the front surface of the bumper has been smoothed and metal finished. The spoiler is complete and ready to be attached.Now that the bumper and spoiler are mounted, you can appreciate the advantages of securely fitting them to the body.The rear bumper has several fitment issues that will be addressed individually.The contour of the bumper’s top surface did not match the body, so several slices were made in the bumper to correct the fit. All these slices will be TIG welded and metal finished.After smoothing, you can observe how well the bumper’s contour aligns with the body.A file is one of the best tools for fine-tuning and blending welded areas.The bumper’s fit is nearly perfect here, but the flange on the top corner still requires a bit more work.After careful metal finishing, this corner is nearing perfection.Two unique panels were machined to add an elegant detail to the rear bumper. These will be attached with screws coming through the bumper from the back so that they will be hidden.Much work was required to flatten and smooth the bumper in the areas where the new panels will be attached. Note the braces temporarily holding the bumper to the workbench keeping everything aligned.With the bumper completely smoothed, the accent plates fit to perfection. When the final finishes are in place, this detail will have an OEM look.The valence panel below the bumper needs work to get a snug fit. Here a freshly shaped piece of sheetmetal is held temporarily with Clecos to check the fit before welding.With the filler panel welded into place and metal finished, you can appreciate the uniform gap between the bumper and the lower panel.Completely new taillights and marker lights were designed in CAD, then CNC machined from solid materials.This is a CAD rendering of the assembled taillight assembly.These new marker lights and bezels are completely CNC machined from solid stock. The original marker lights protruded from the body, but the new ones are recessed with the bezels fitting flush.With gloss black paint and fresh chrome, the bumper, lights, and trim’s first-class fit and finish are really appreciated.
We use cookies to ensure that we give you the best experience on our website. If you continue to use this site we will assume that you are happy with it.