By “Rotten” Rodney Bauman – Images by the Author
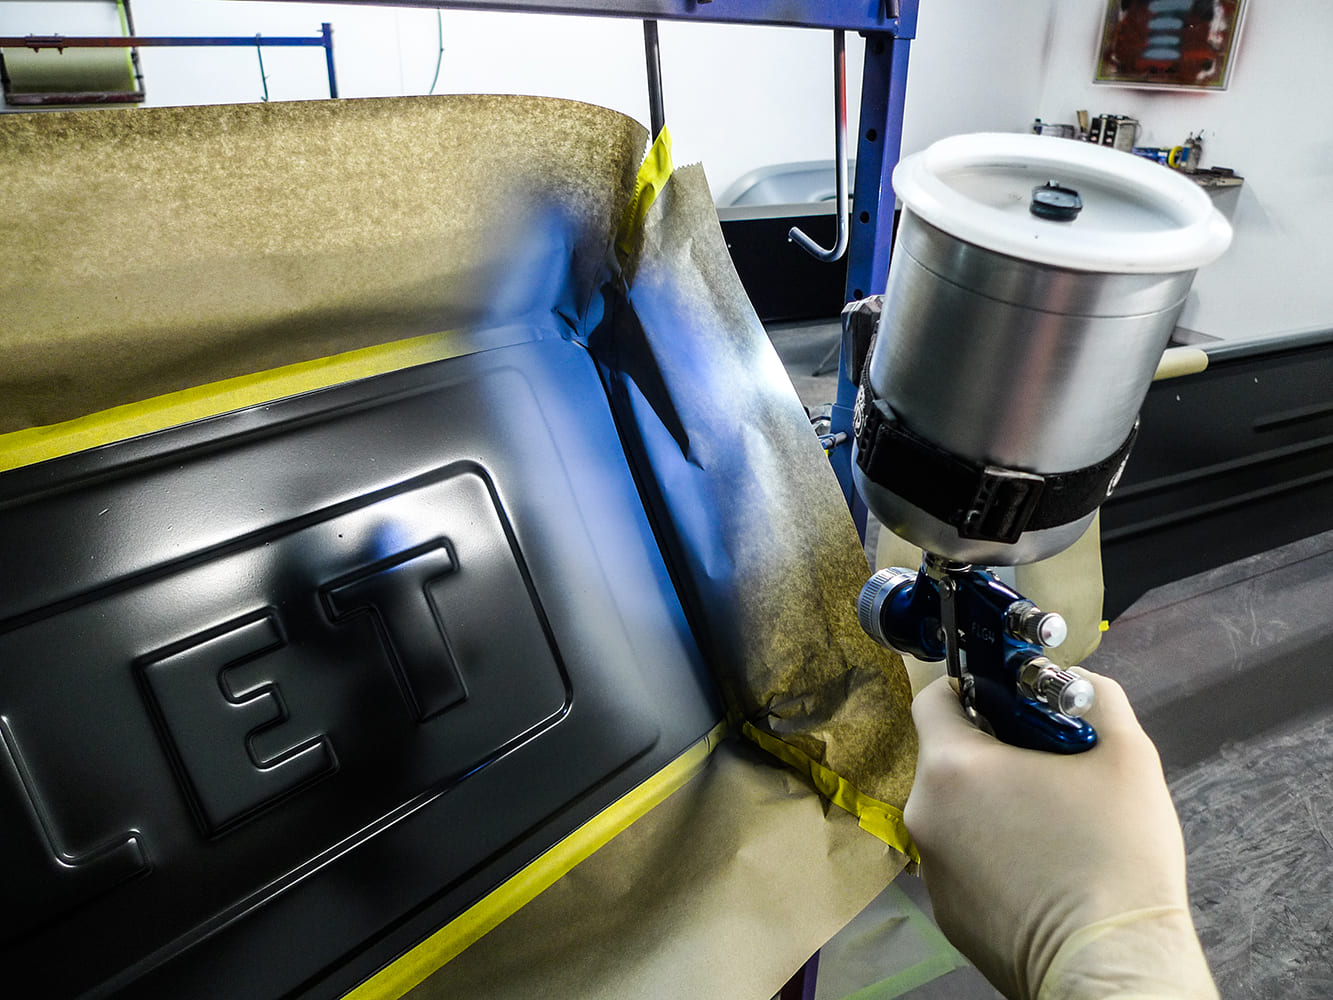
In anybody’s paint shop, being the painter comes with its pressures. Here in our own shop, for example, our subject 1955 Chevy second-series project’s finish had better look good—and it had better endure the elements well, as well.
Assuming you’ve been with us, you know that we’re taking advantage of available aftermarket sheetmetal. It’s nice to have the option. In this instance it’s quite necessary, but as the painter here, I must wonder if faraway factory workers truly give a hoot about the work that I must do. Perhaps they do, but since I can’t be absolutely sure, I’m somewhat reluctant to trust whatever coating a brand-new panel might arrive with.
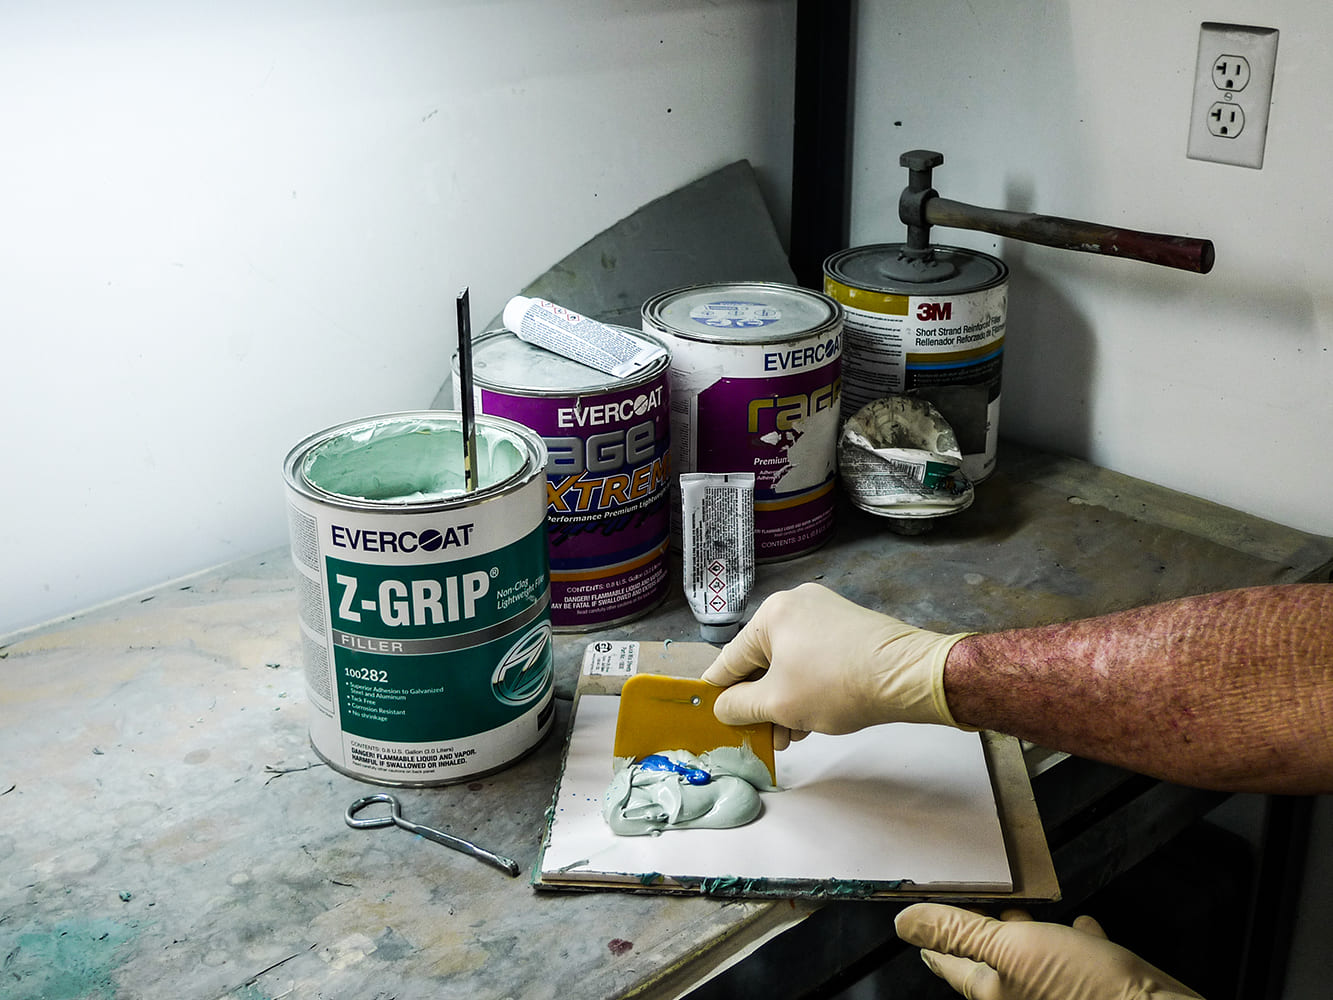
As we’ve understood, reproduction panel manufacturers sometimes use a black “paintable” Electro-Deposit primer coating, or “E-coat” as it’s commonly called. The familiar black E-coat can be prepped and recoated at the painter’s own discretion. Some painters work with it, while others strip it away for a fresher start and proper peace of mind.

During the course of our ongoing build we’ve used a number of black E-coated body parts. Our left door, however, came with a questionable silver coating. It failed the solvent test. Oddly, the wimpy silver stuff had a black coating beneath it, but we opted to strip that door to bare steel.
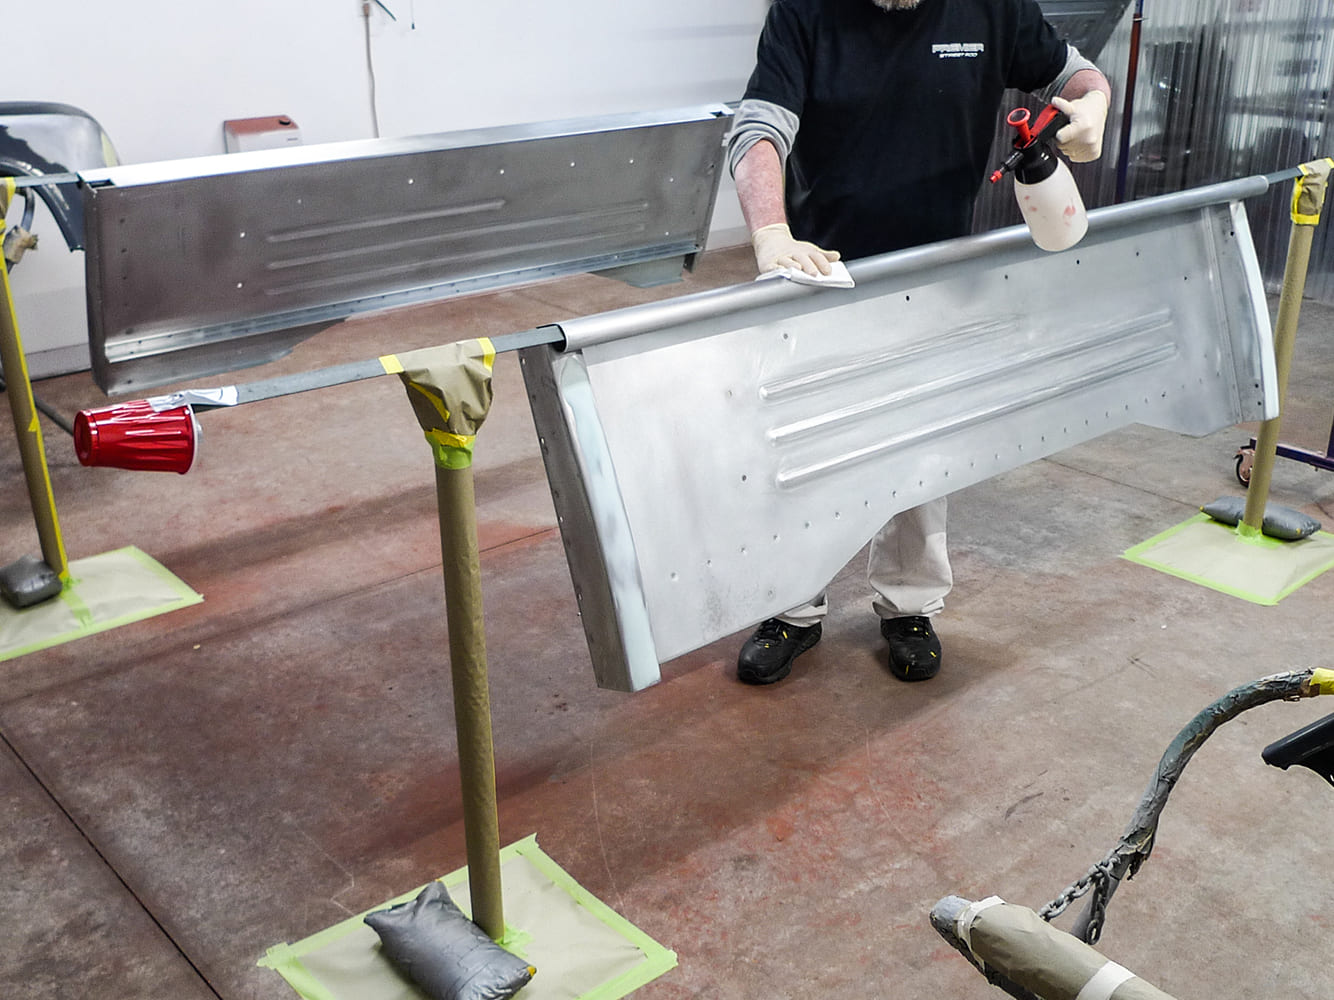
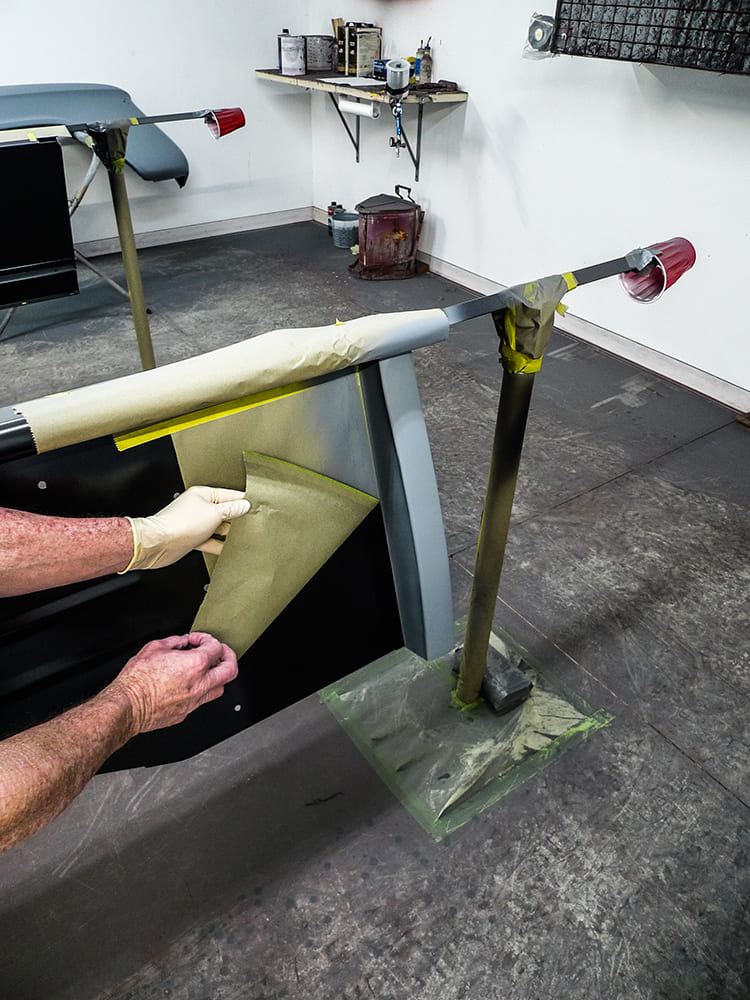
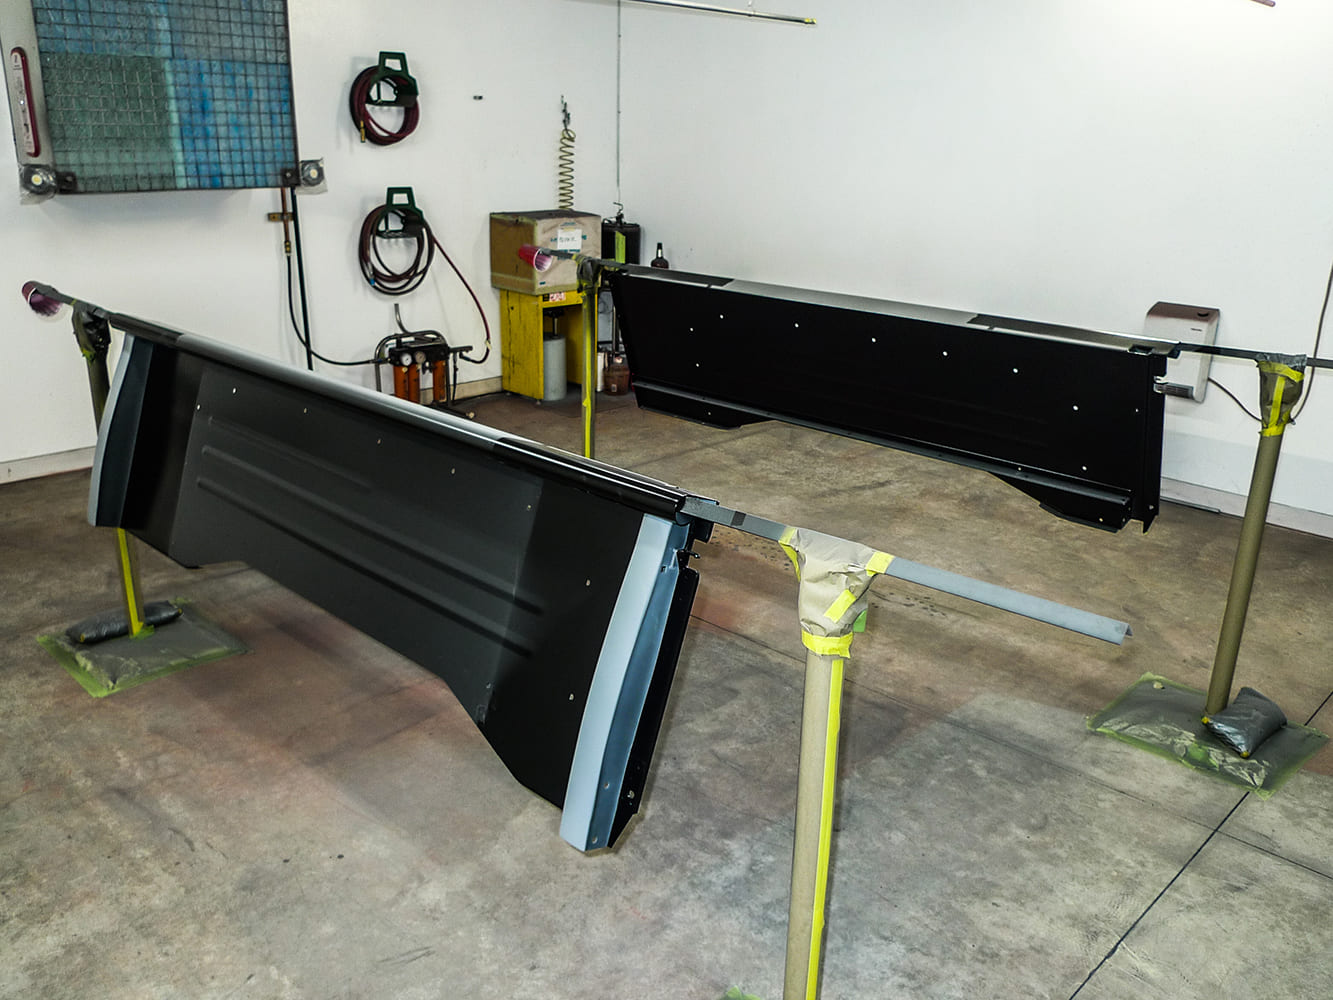
Currently, with the little truck’s cab, doors, and frontal sheetmetal painted, cut, and buffed, it’s finally time to address a brand-new short Stepside bed. Yes indeed, it’s all the same stuff that I went and picked up a while or two back from Premier Street Rod.

Having now been dry-fit assembled once already, the bed is back in pieces for paintwork. Coming up, we’ll attempt to illustrate a dramatically different procedure. This won’t be anything like the new panel prep methods we’ve previously touched upon.
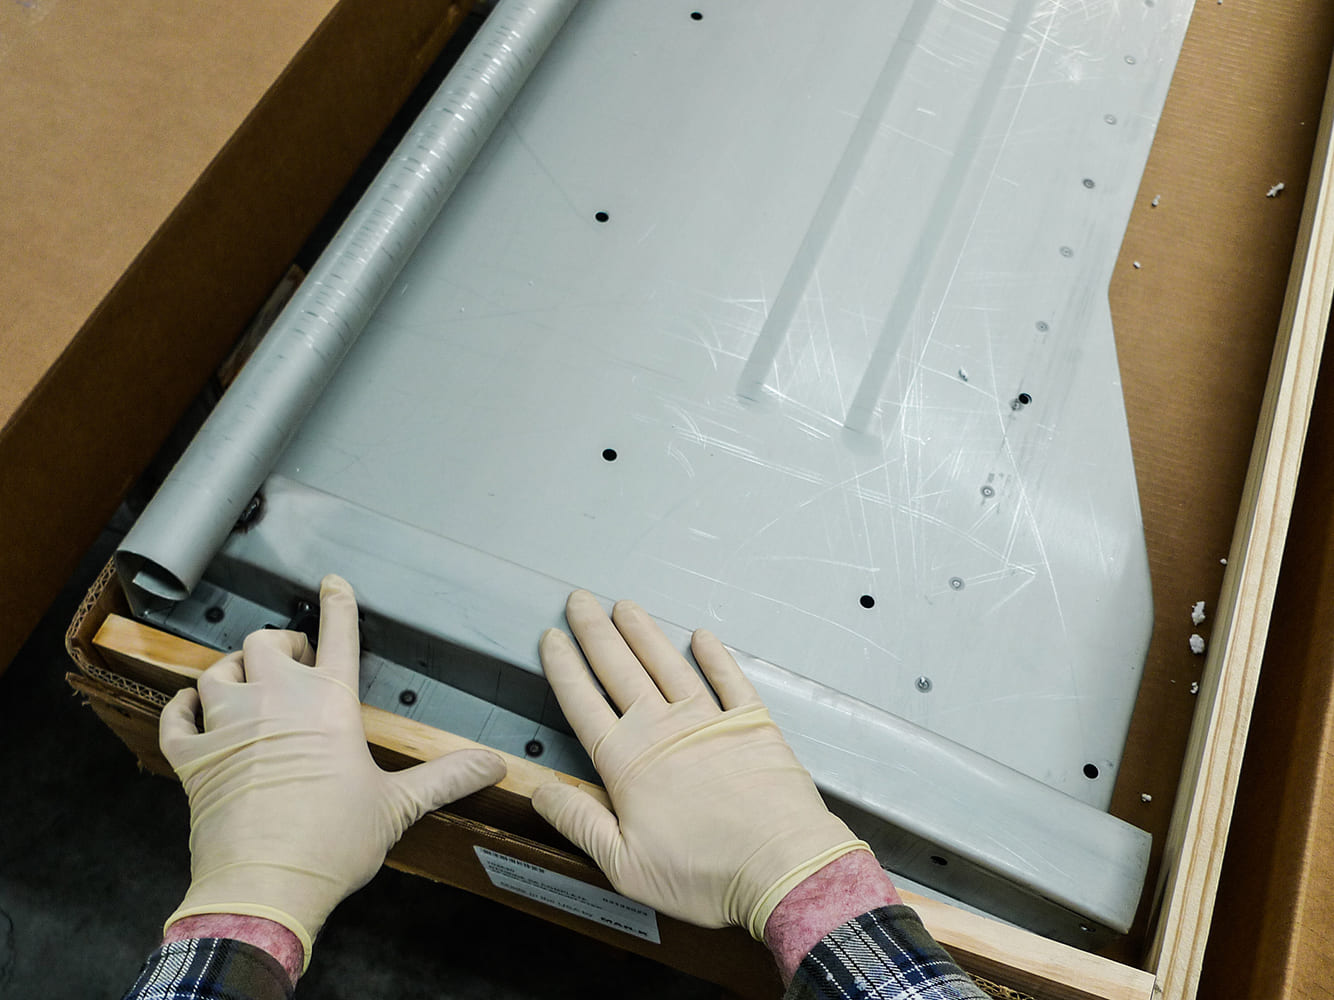
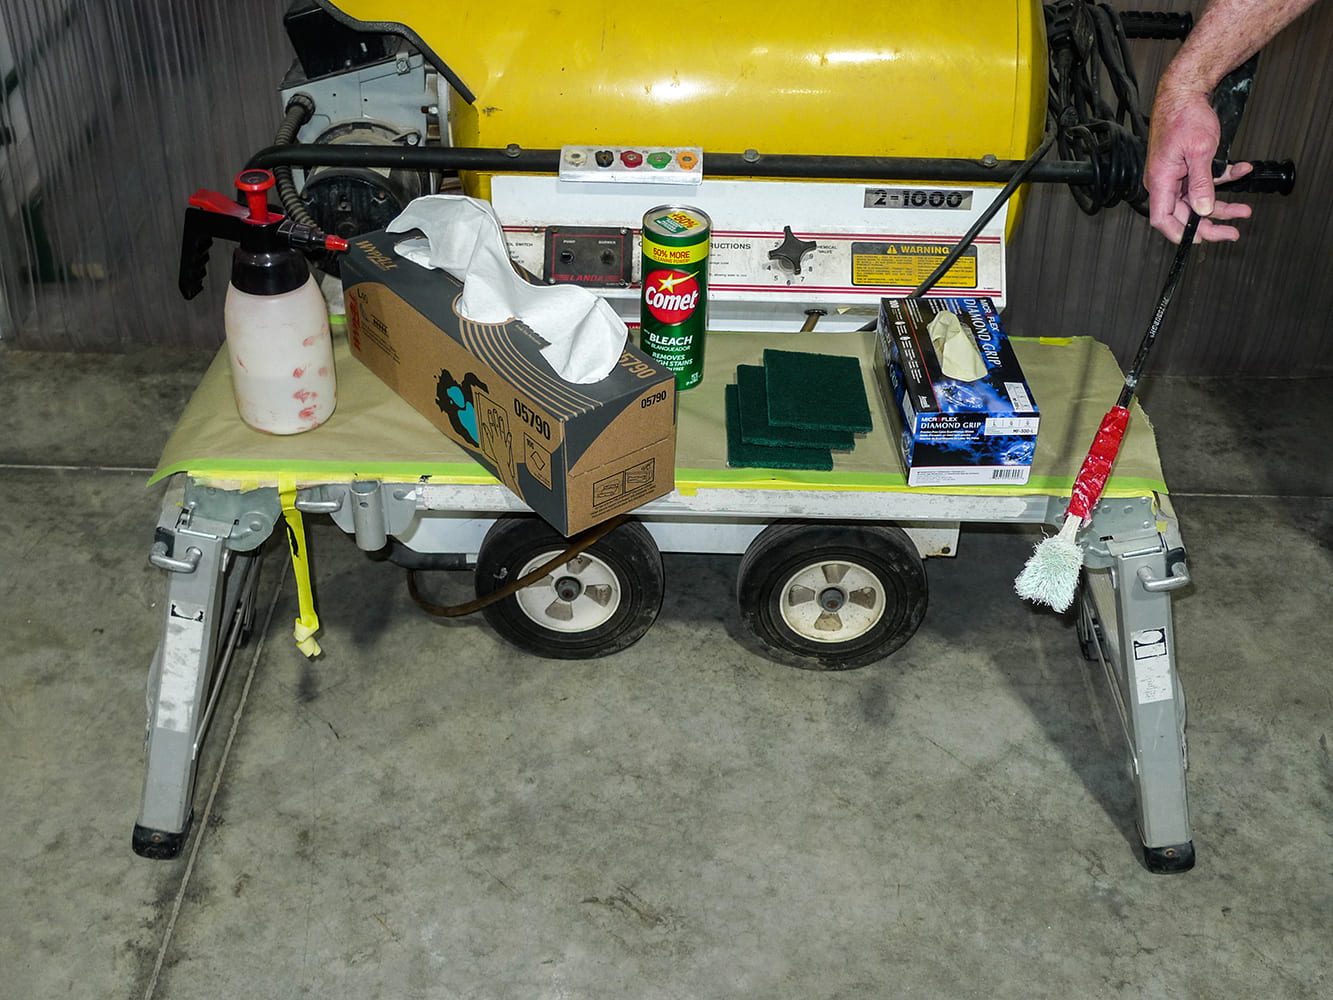
The new bed panels are galvanized with zinc plating. Also, from the stamping process there’s oily residue left behind, which won’t be easily rinsed, scrubbed, or scoured from within crooks and nannies—particularly those of the bedsides’ stake pockets.

On the upside, we’re not totally on our own to figure out the special prep required for brand-new bed panels. Their manufacturer (Mar-K) does provide instructions for the job. It’s really pretty straightforward stuff that a good painter should already know. Speaking of good painters, it’s nice to know others to confer with on occasion.
Since this’ll be my own first time working with a brand-new galvanized pickup bed in pieces, I’d kind of like to confer with an expert on the subject. In the paint department of Premier, Isaac Wilde works with these types of bed panels routinely, so, we’ll confer from time to time as we go.
Also, as we go, we won’t try to make any of this look easy. Whether we like it or not, a new bed’s paintwork begins as pure drudgery. For best results, expect to use chemical cleaners repeatedly before switching to household cleaning products, and steaming-hot water to rinse away the oil.
Right about now it’d sure be nice if I hadn’t parked our big steam cleaner in an enclosed car trailer for winter storage. Come to find out, there’s always water remaining inside the pump. Sure enough, when that water froze, it wrecked the pump, and oh my goodness, a replacement pump is spendy!

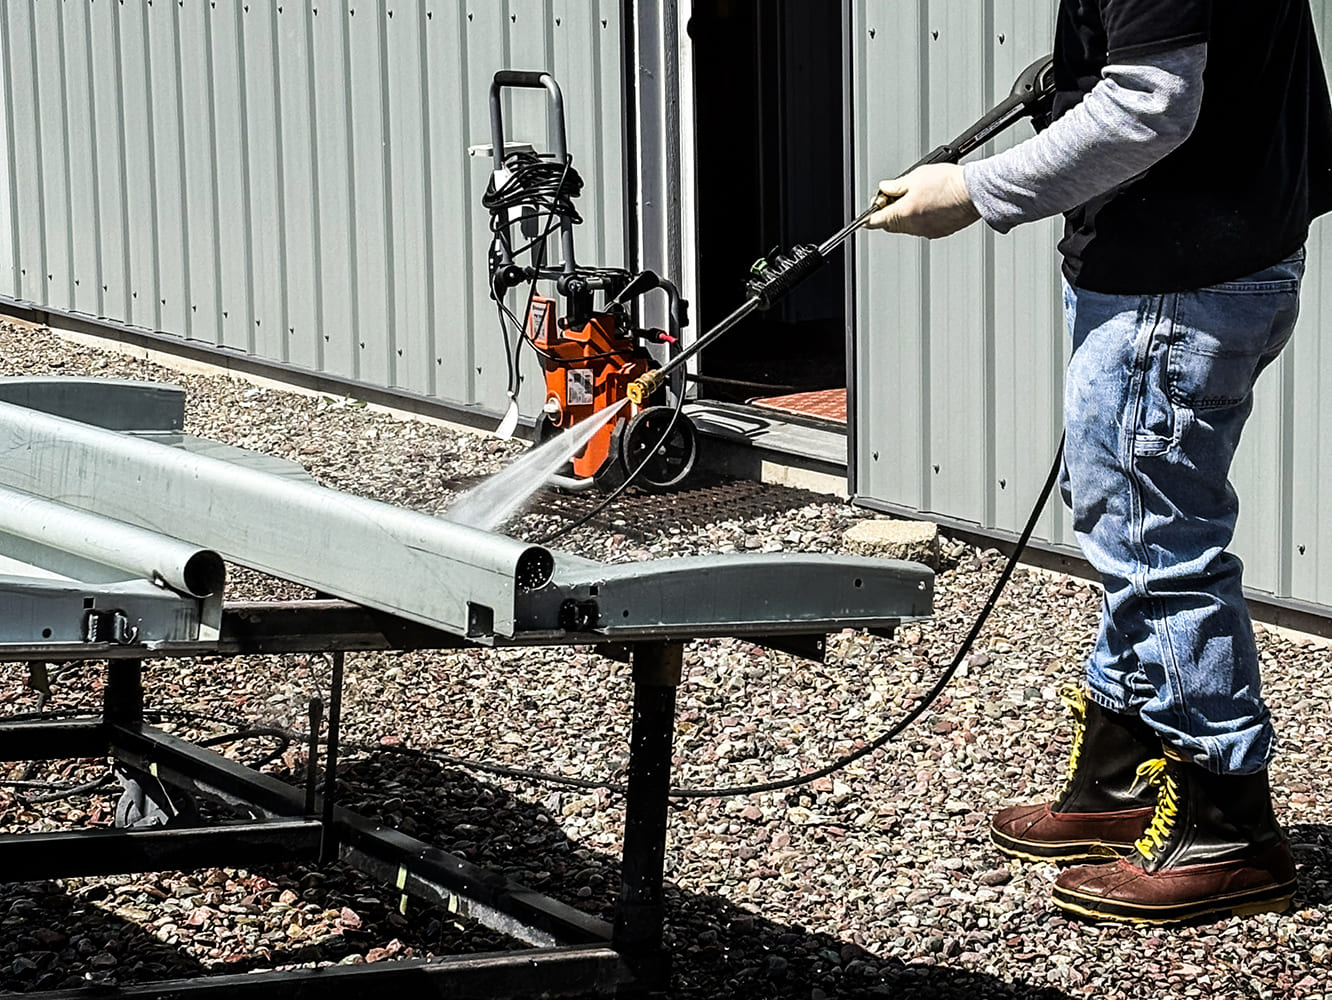
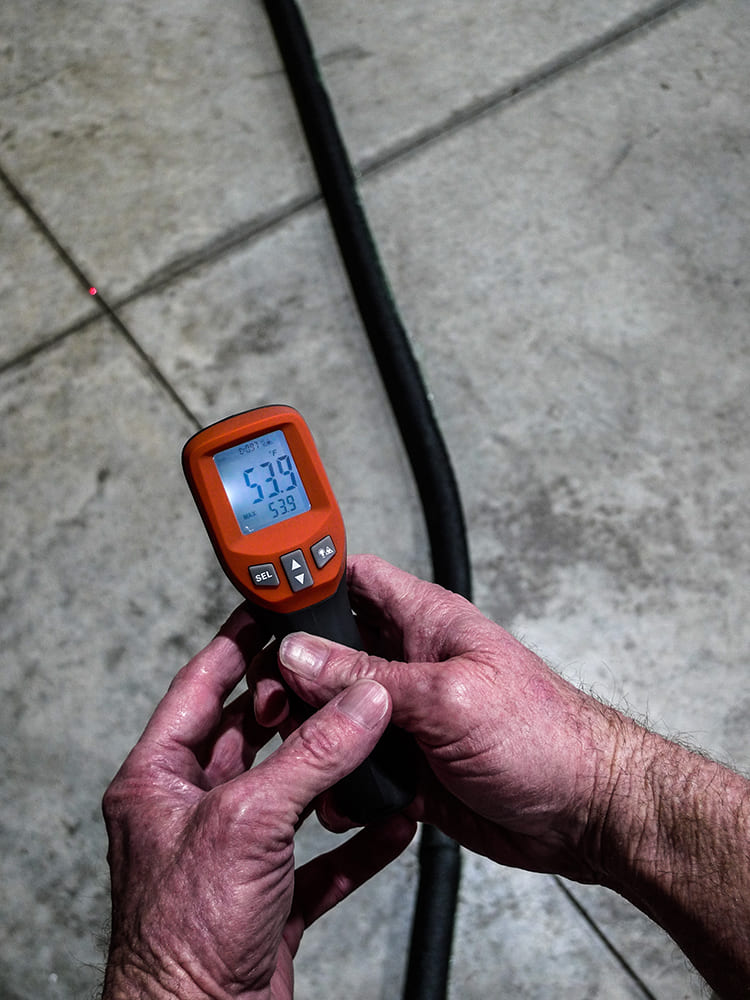
So, where we happen to be, we get a few painter-friendly months per year. At the time of this typewriting it’s springtime, and there’s no time for downtime. To keep our priority job moving along, our big steam cleaner’s repairs must wait, but we’ll still need steaming-hot water. Our shop’s water heater is a real hot rod. A garden hose could be connected at the washing machine. What if we try hot water through our little cold water pressure washer? We’ve read the entire operator’s manual, and nowhere in there does it say we shouldn’t.
As a disclaimer, we’re not exactly suggesting that anyone should try this at home. So far, we don’t know what hot water will do to our own little cold water pressure washer. We do know, however, that oily residue removal is imperative for good results in the paint shop. In this instance grease ’n’ wax remover isn’t enough on its own. For the soapy steps, steaming-hot water at a fair pressure is a must, even if our little cold water pressure washer must croak for the cause.
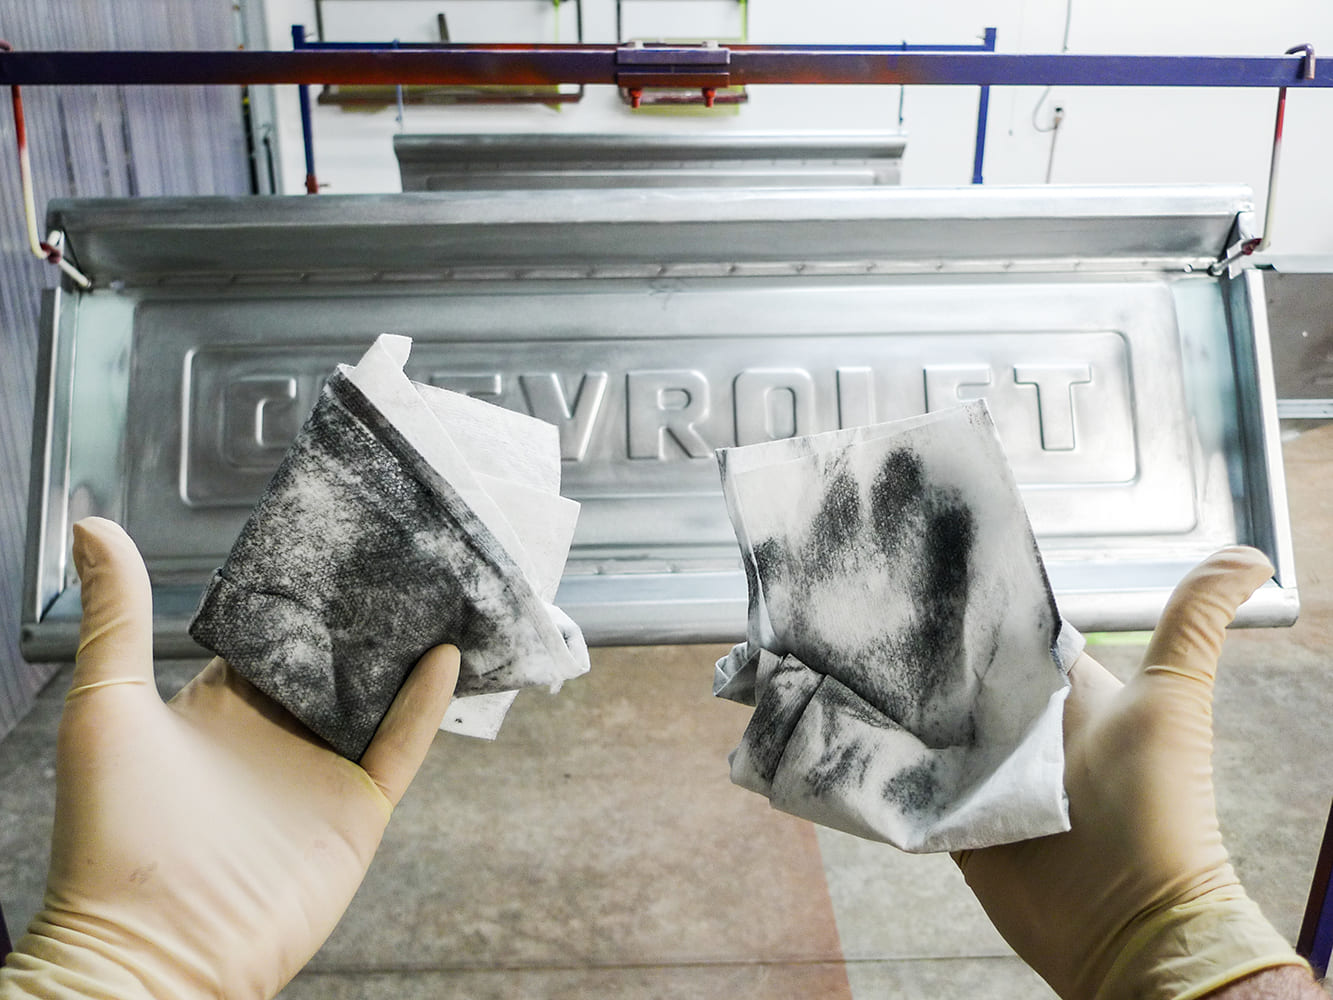
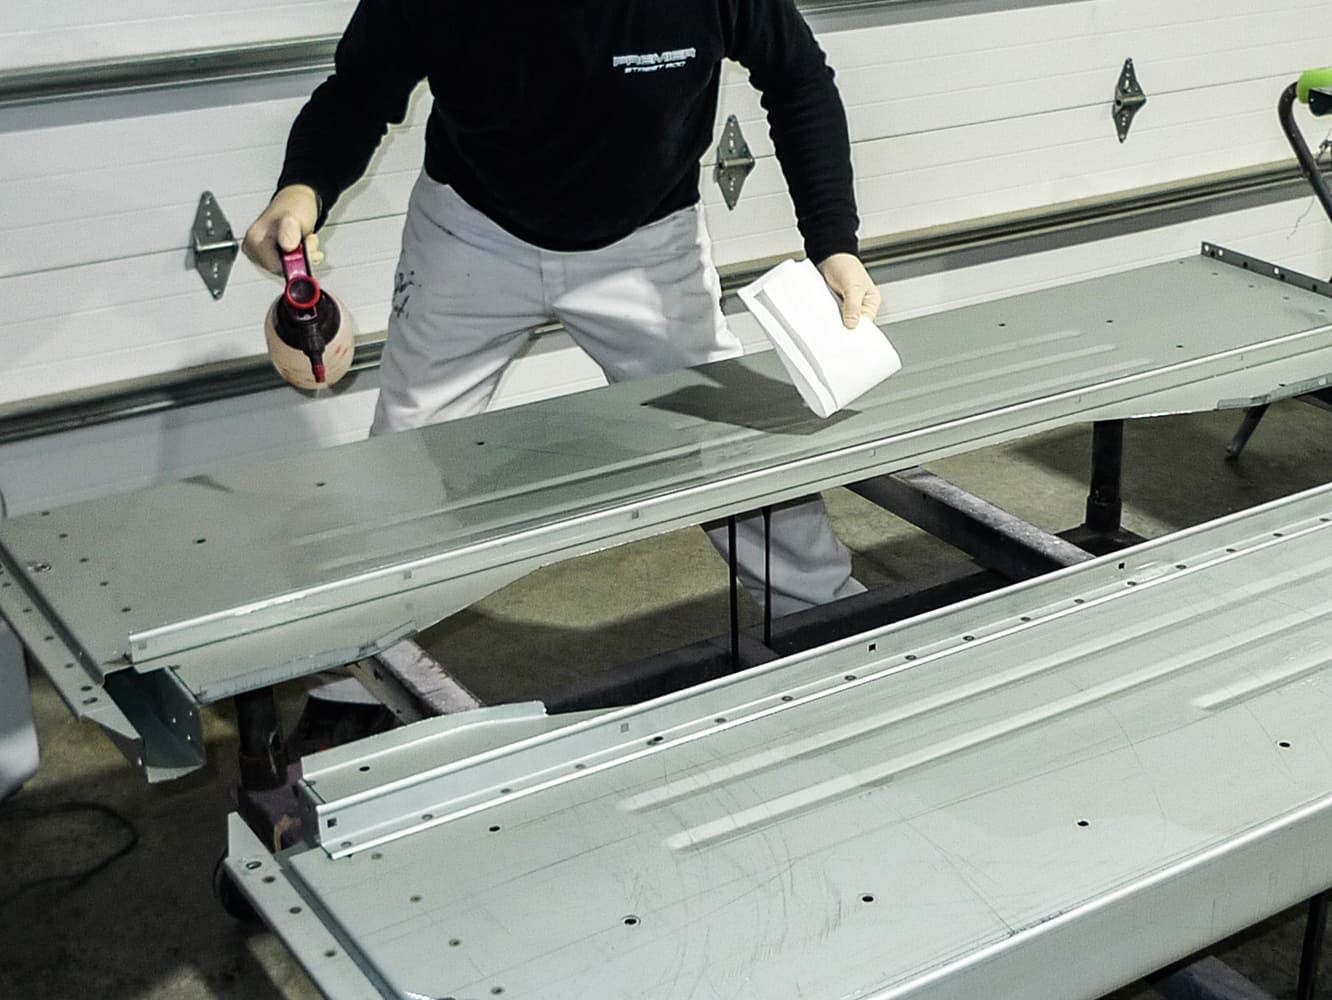
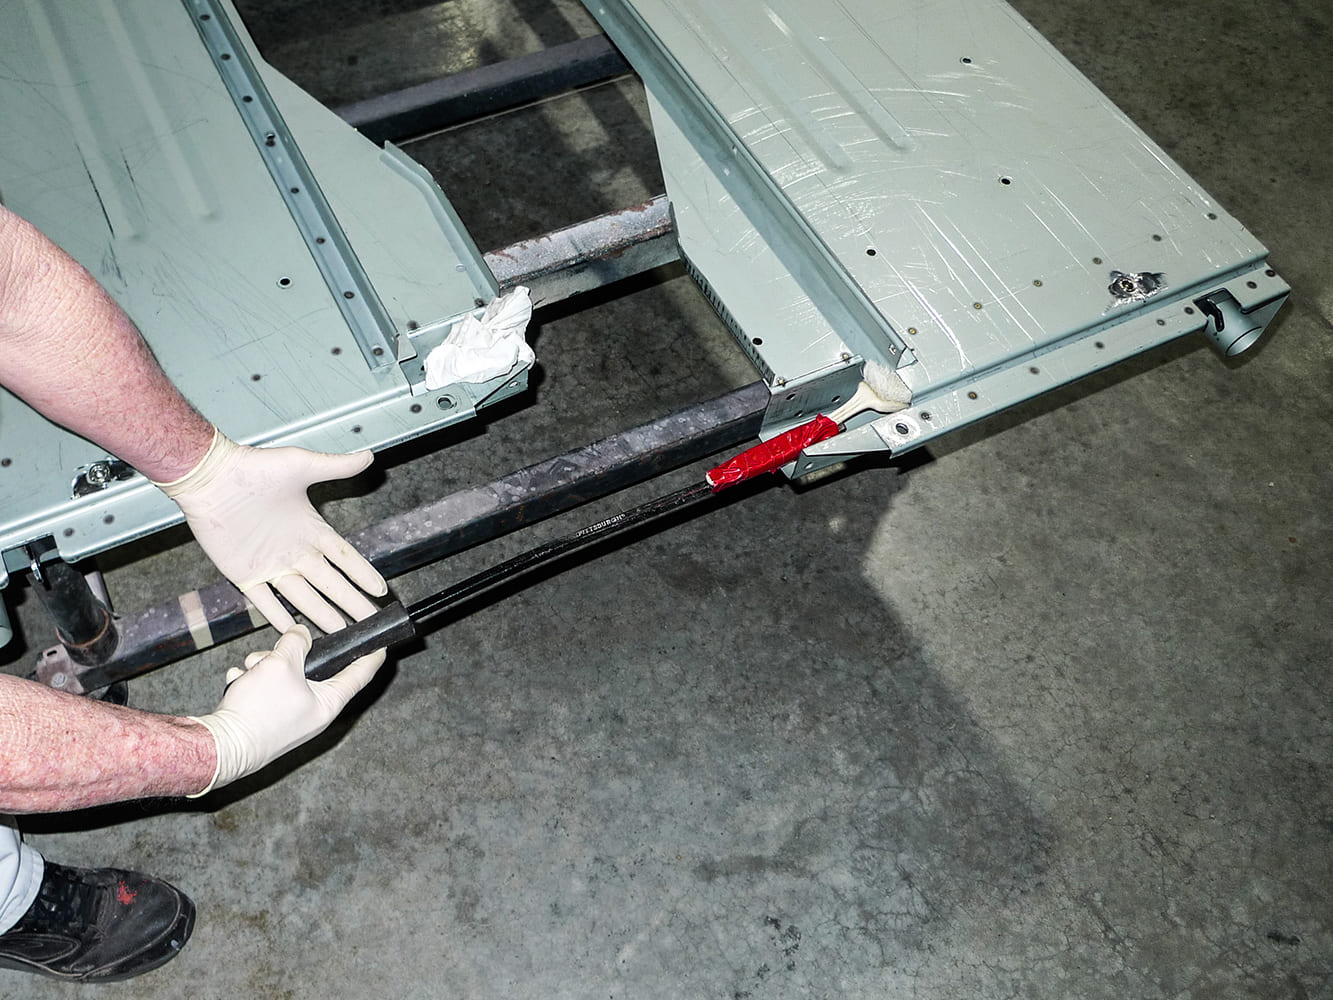
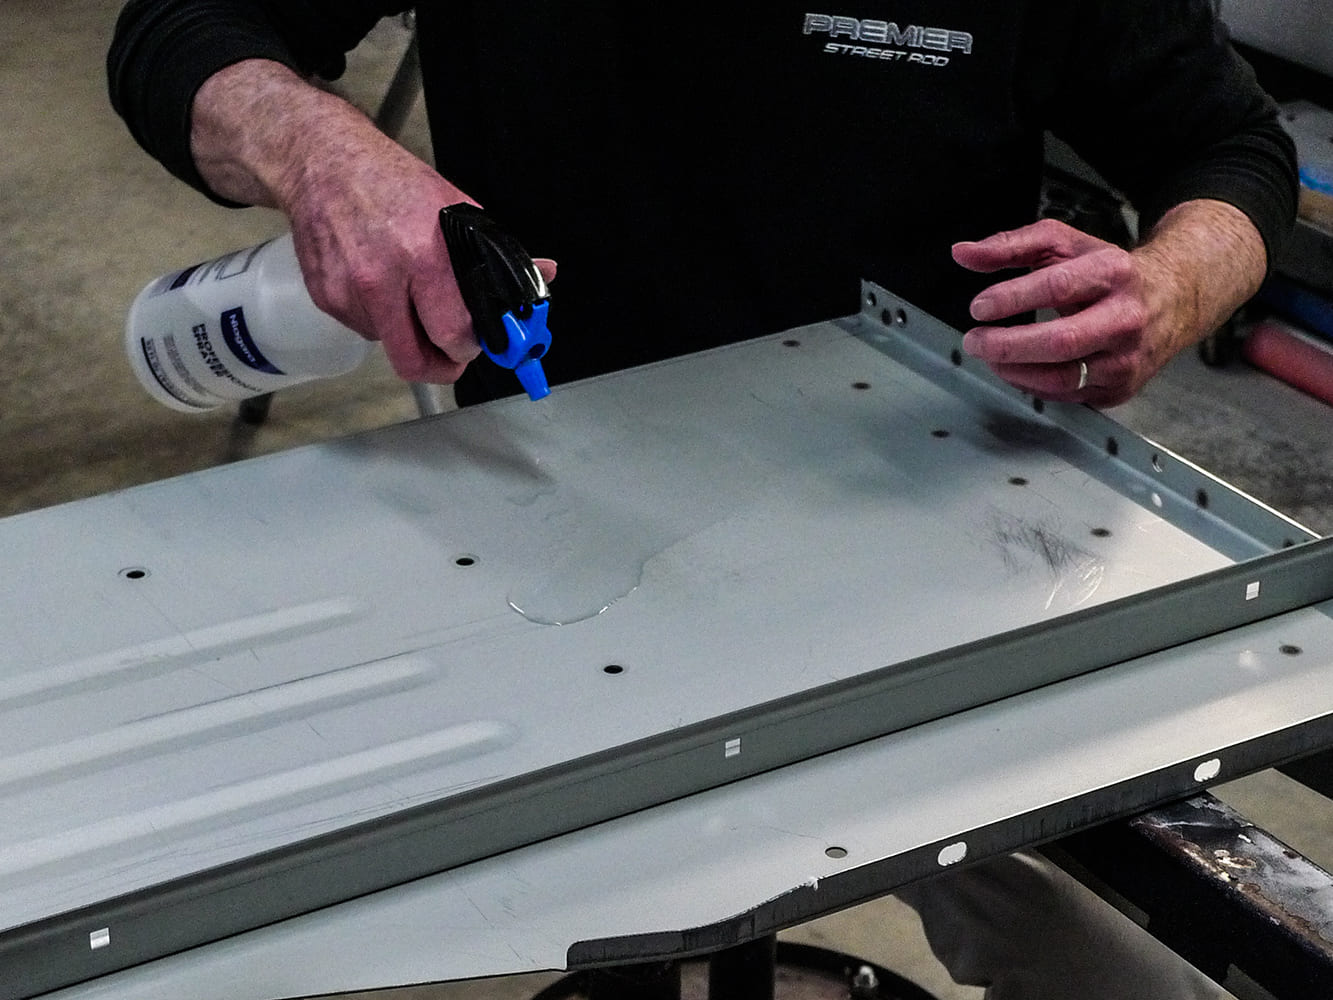
Initial cleanup of our new bed panels will begin with solvent-borne grease ’n’ wax remover. Before that evaporates, we’ll wipe the panels dry with clean disposable toweling and repeat as necessary.
Next, for the outdoor steam-cleaning marathon I’ll have my hands full enough without moving a tripod around, and really, I’d rather not spatter a perfectly good camera with hot, soapy water. To illustrate that bit of action I could draw stick figures later, or perhaps I’ll ask Mrs. Rotten to snap phone photos from a safe distance away.
While outdoors, we’ll have two go-rounds with scuff pads, scouring powder, and lots of steaming-hot water. Then we plan to repeat those steps (also twice) with leading-brand dish detergent, which, by the way, does not contain animal-derived ingredients.
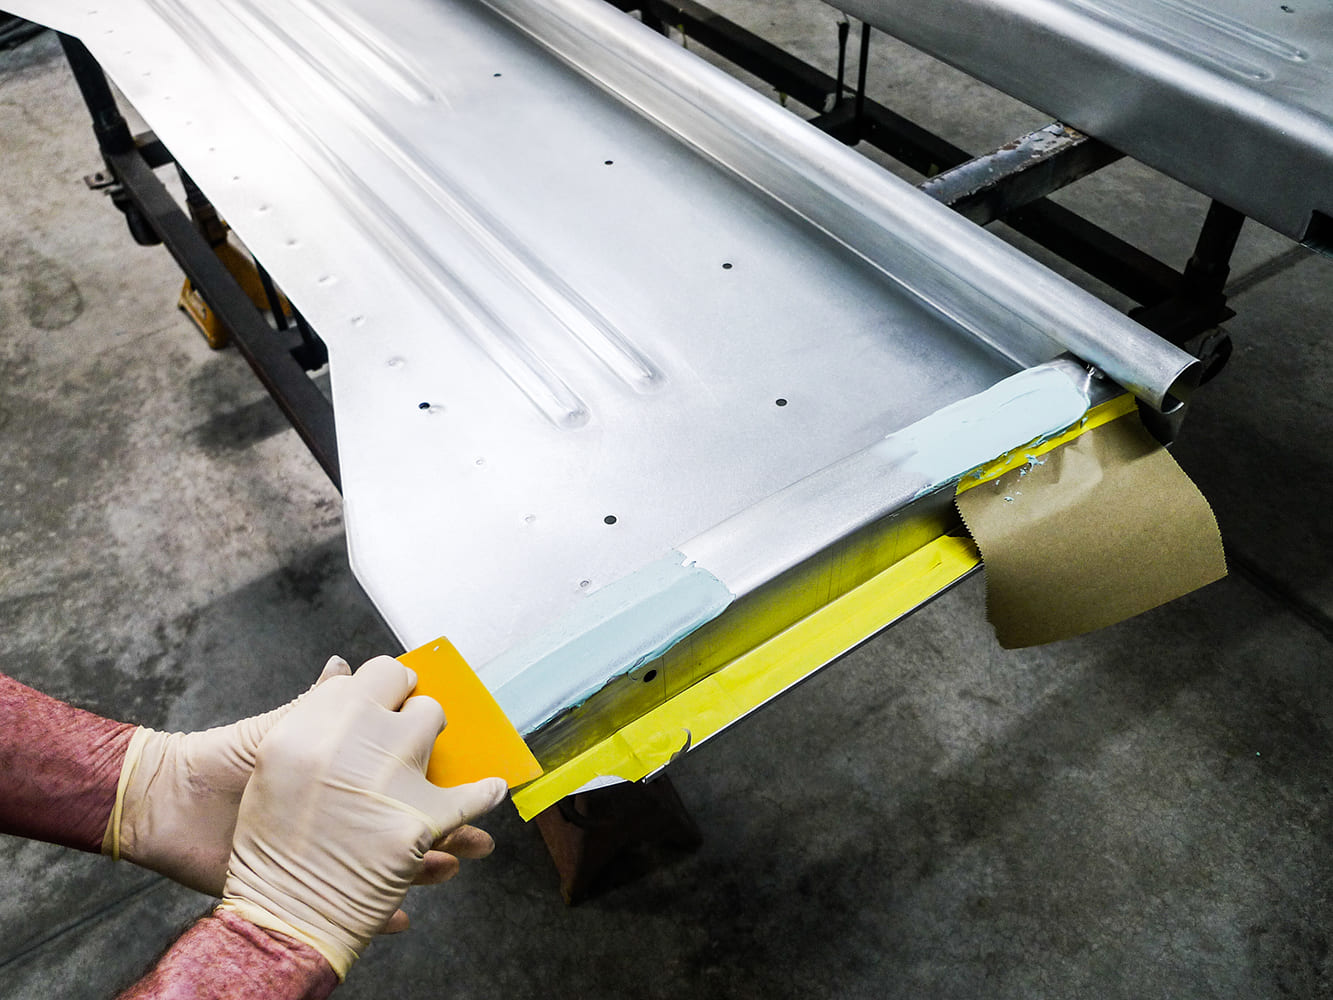
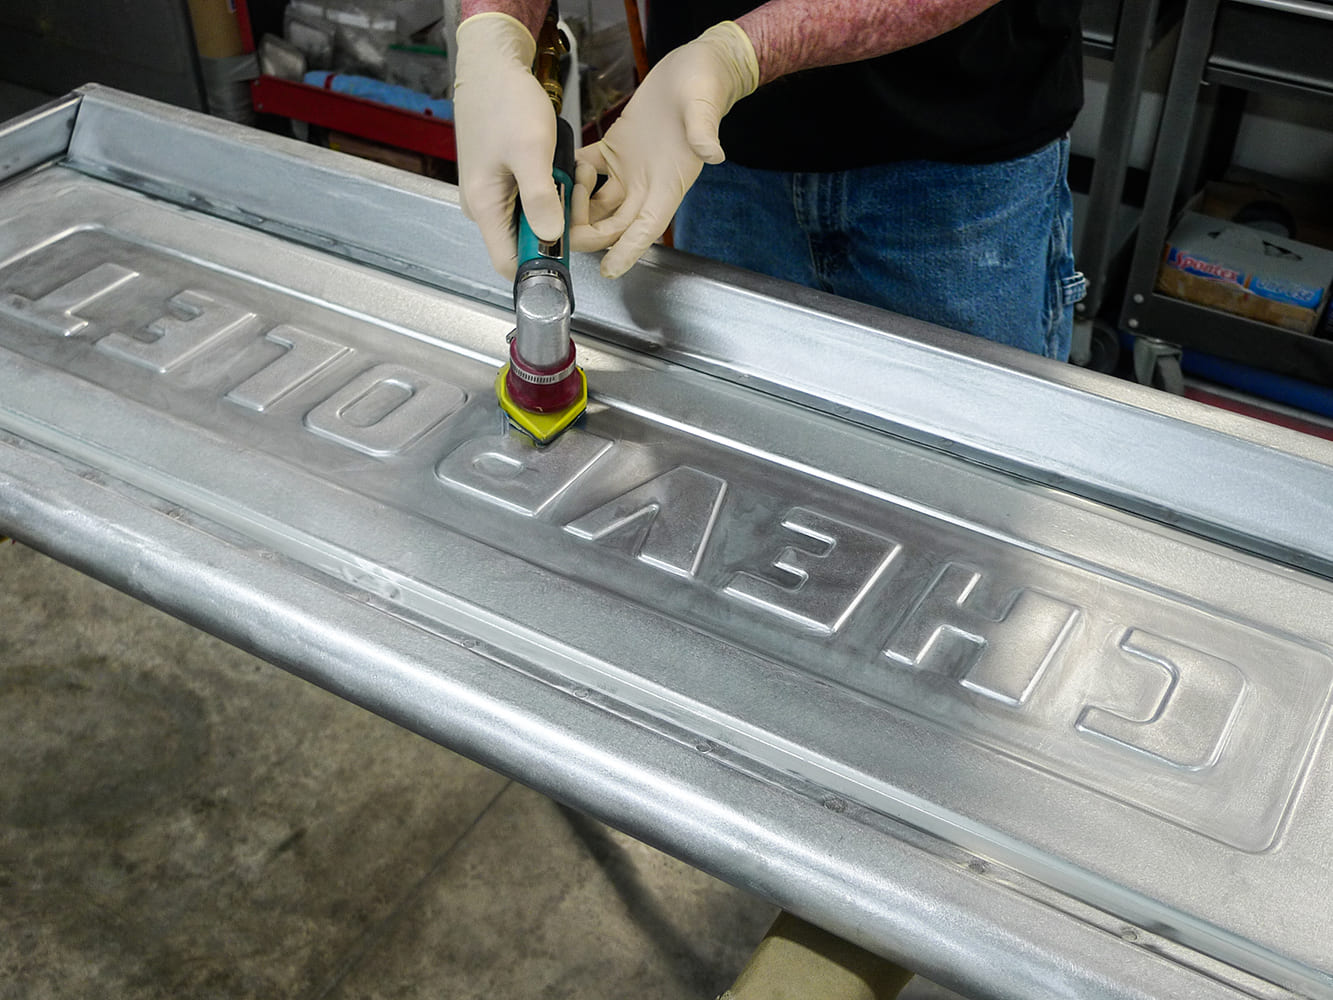
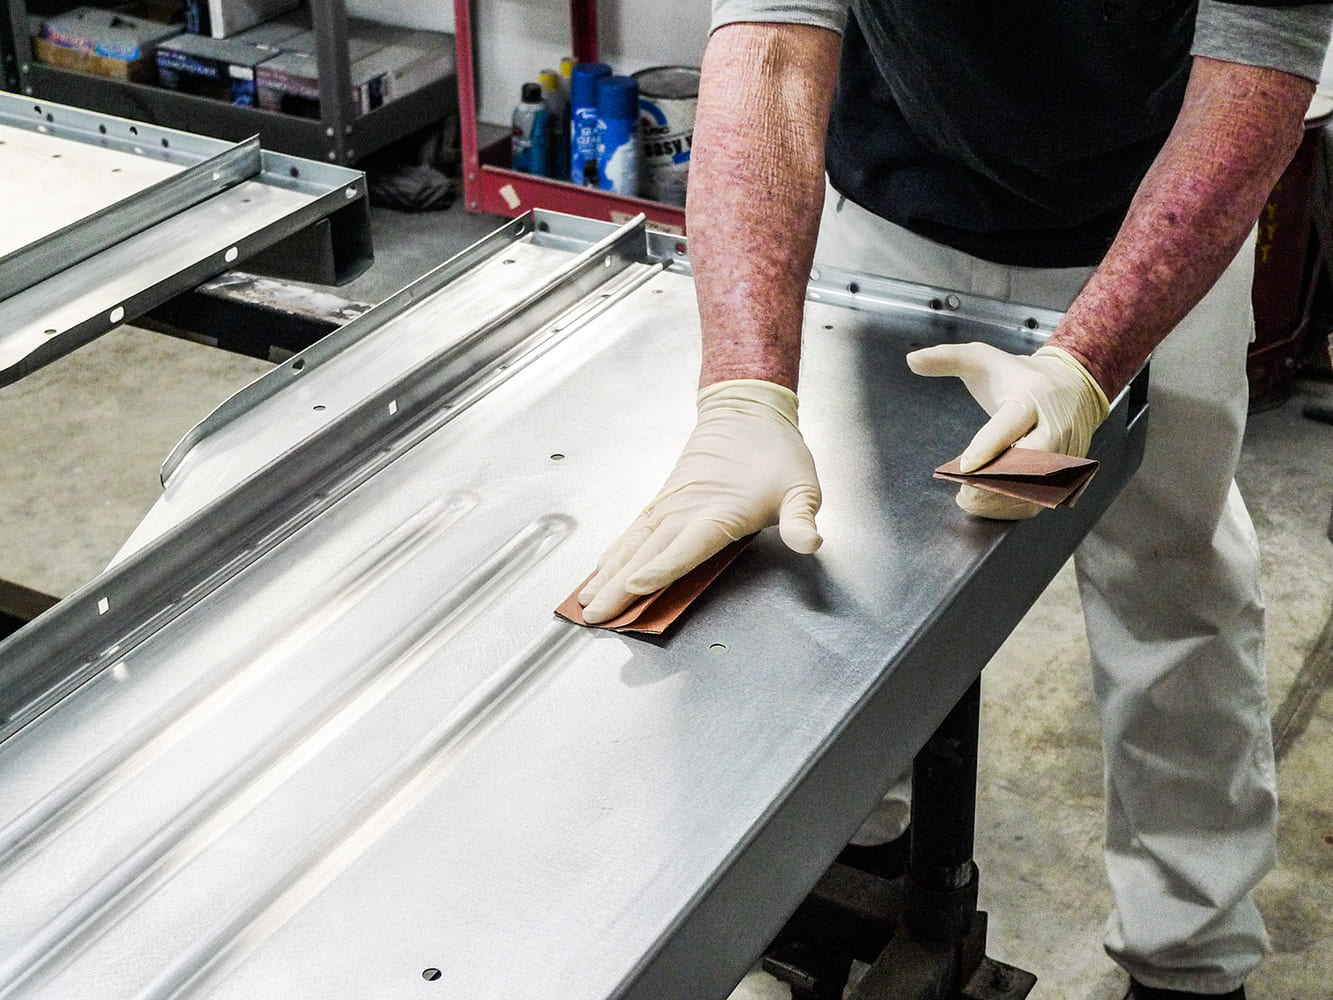
When the new panels do eventually make it to the body stall, they’ll be set up at a comfortable working height where they’ll be cleaned with solvent-borne grease ’n’ wax remover and clean disposable toweling—again, before tedious sanding and minor bodywork begin. In this instance, overkill is good, and it sure beats fisheyes later in the booth.
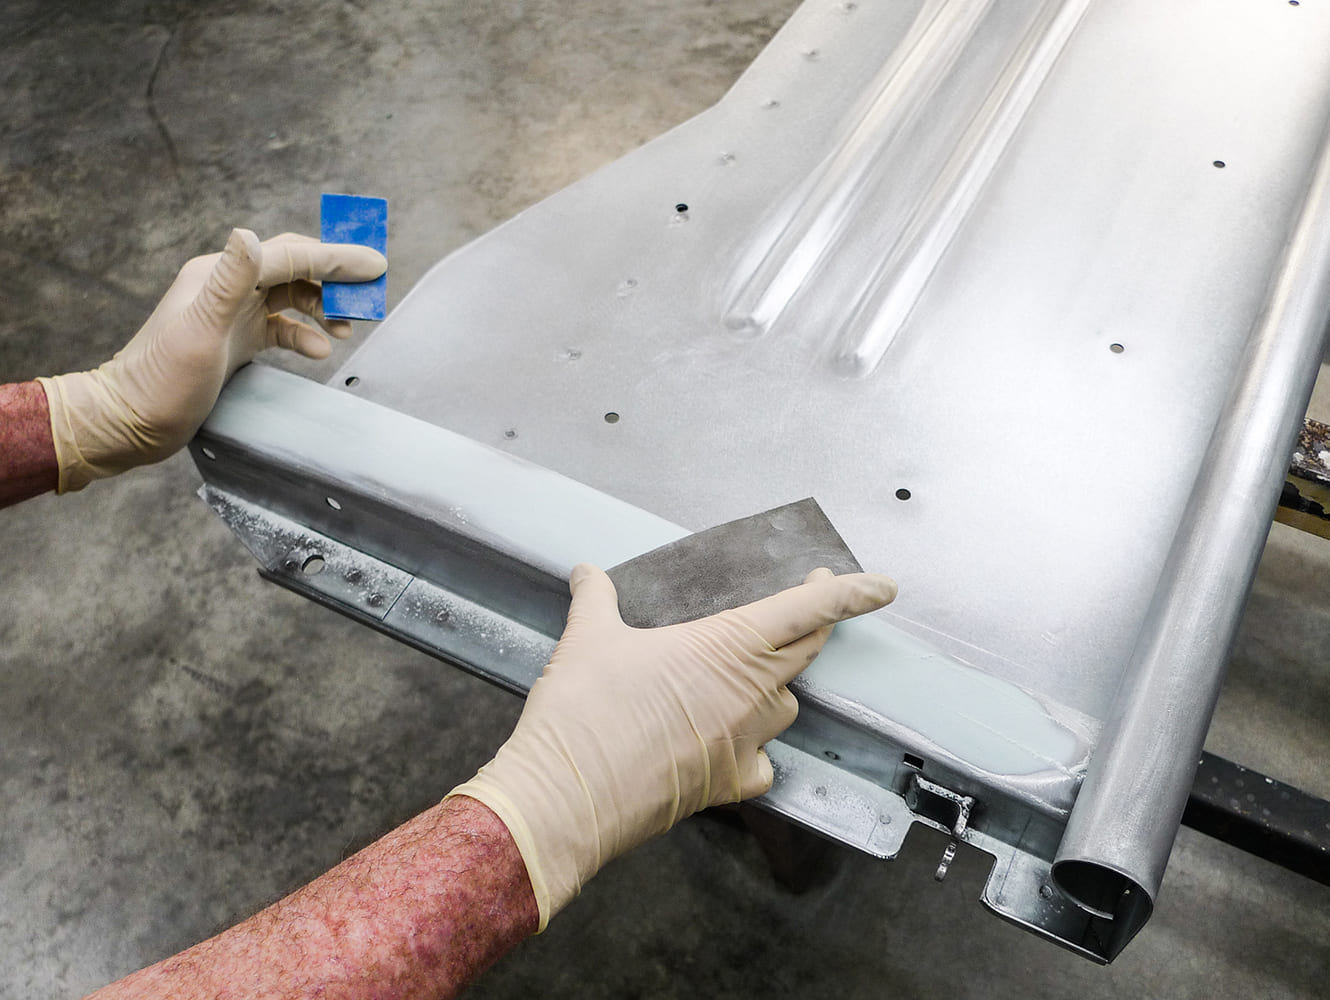
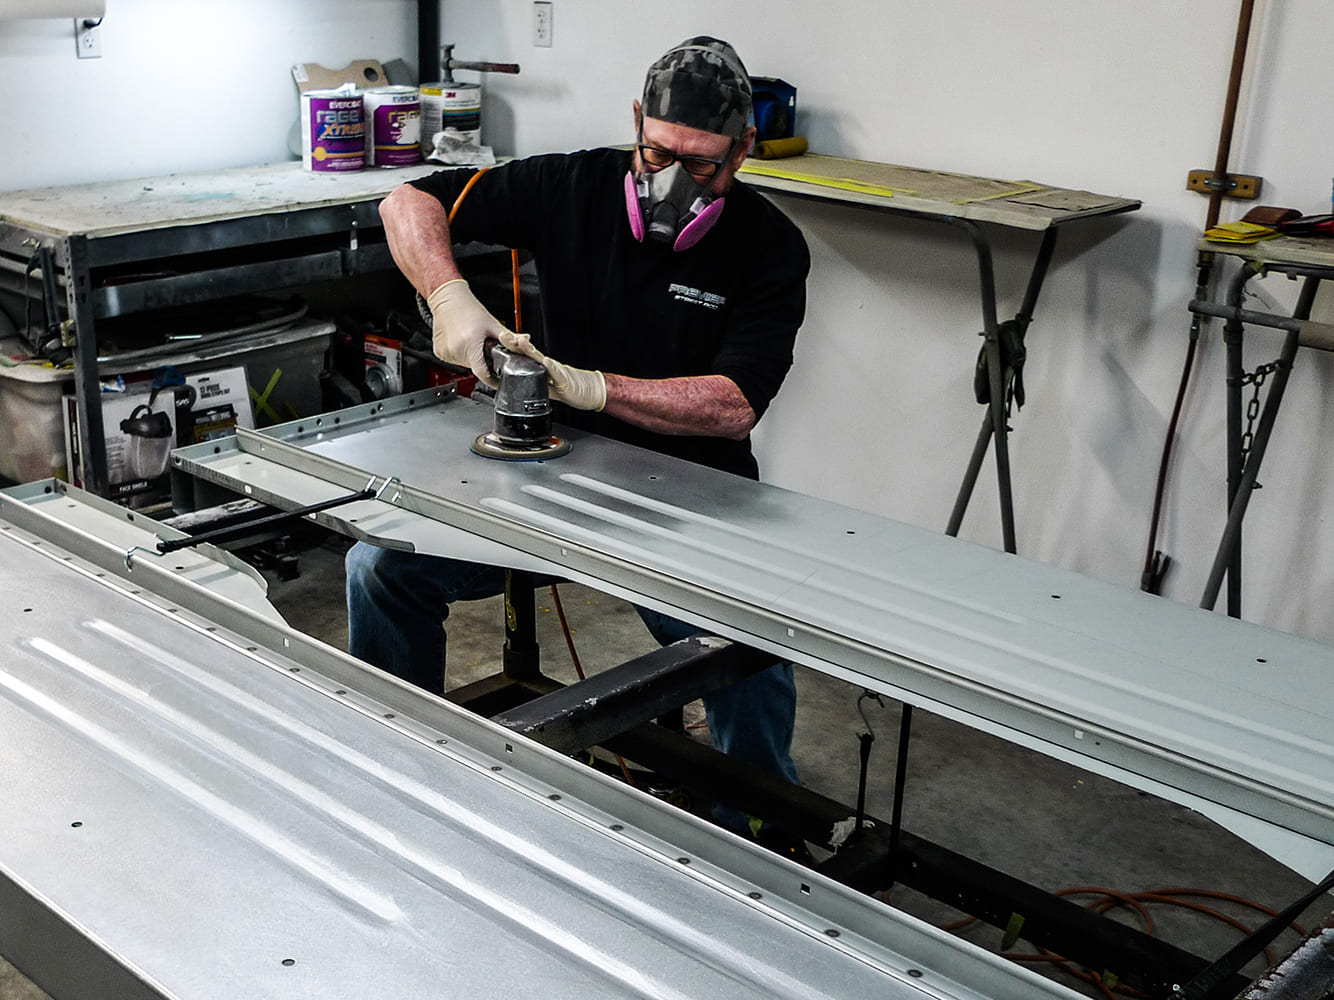
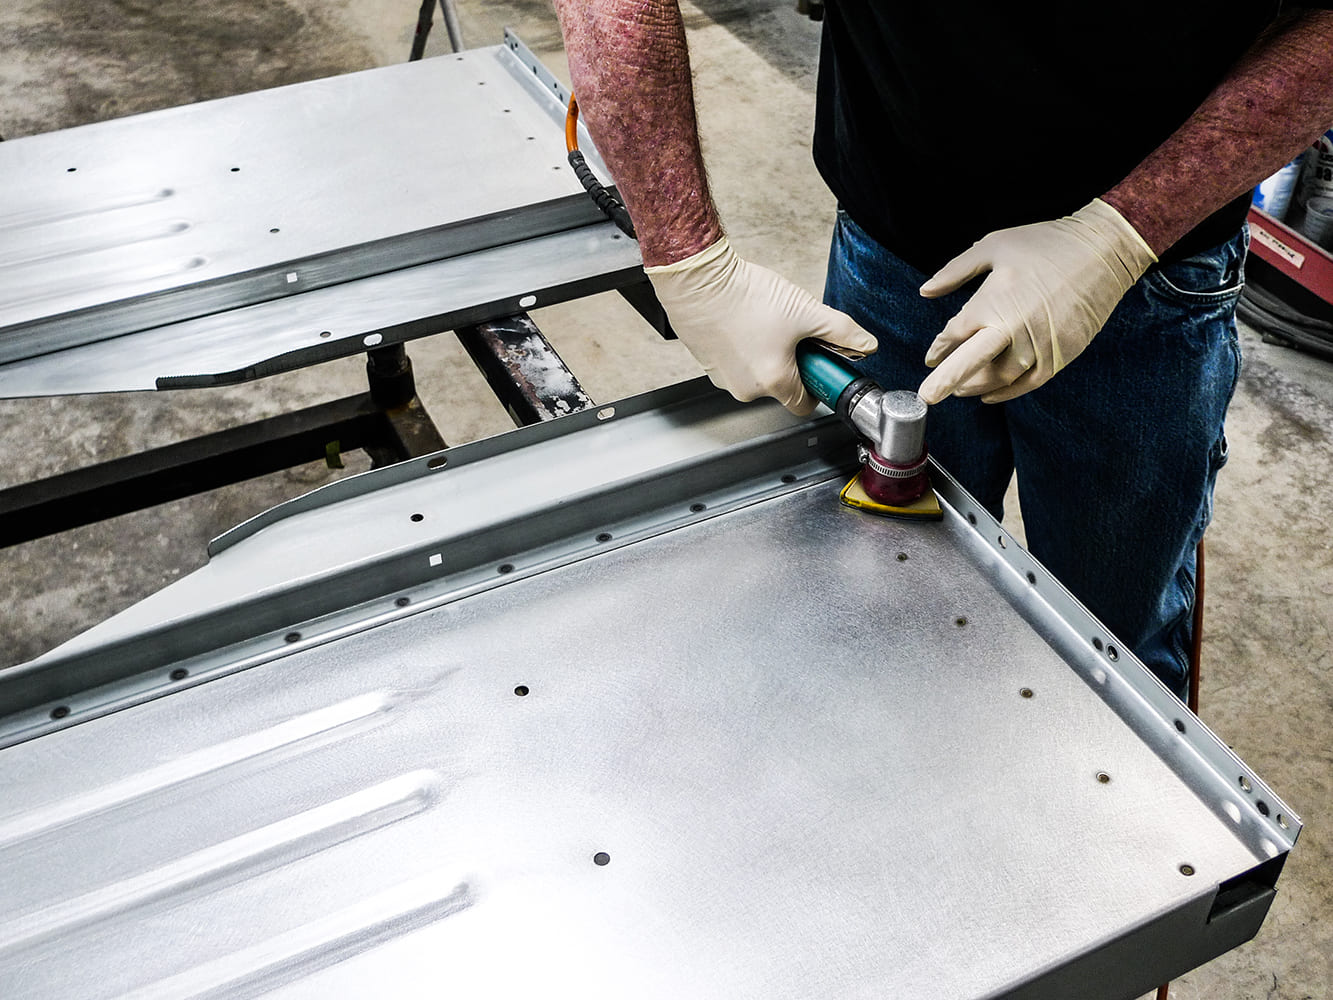
So, on that note, shall we get on with the step-by-step stuff? Along the way we’ll cover proper sanding for clean, galvanized panels, materials to some degree, and the order in which these steps should be taken.
Check out this story in our digital edition here.