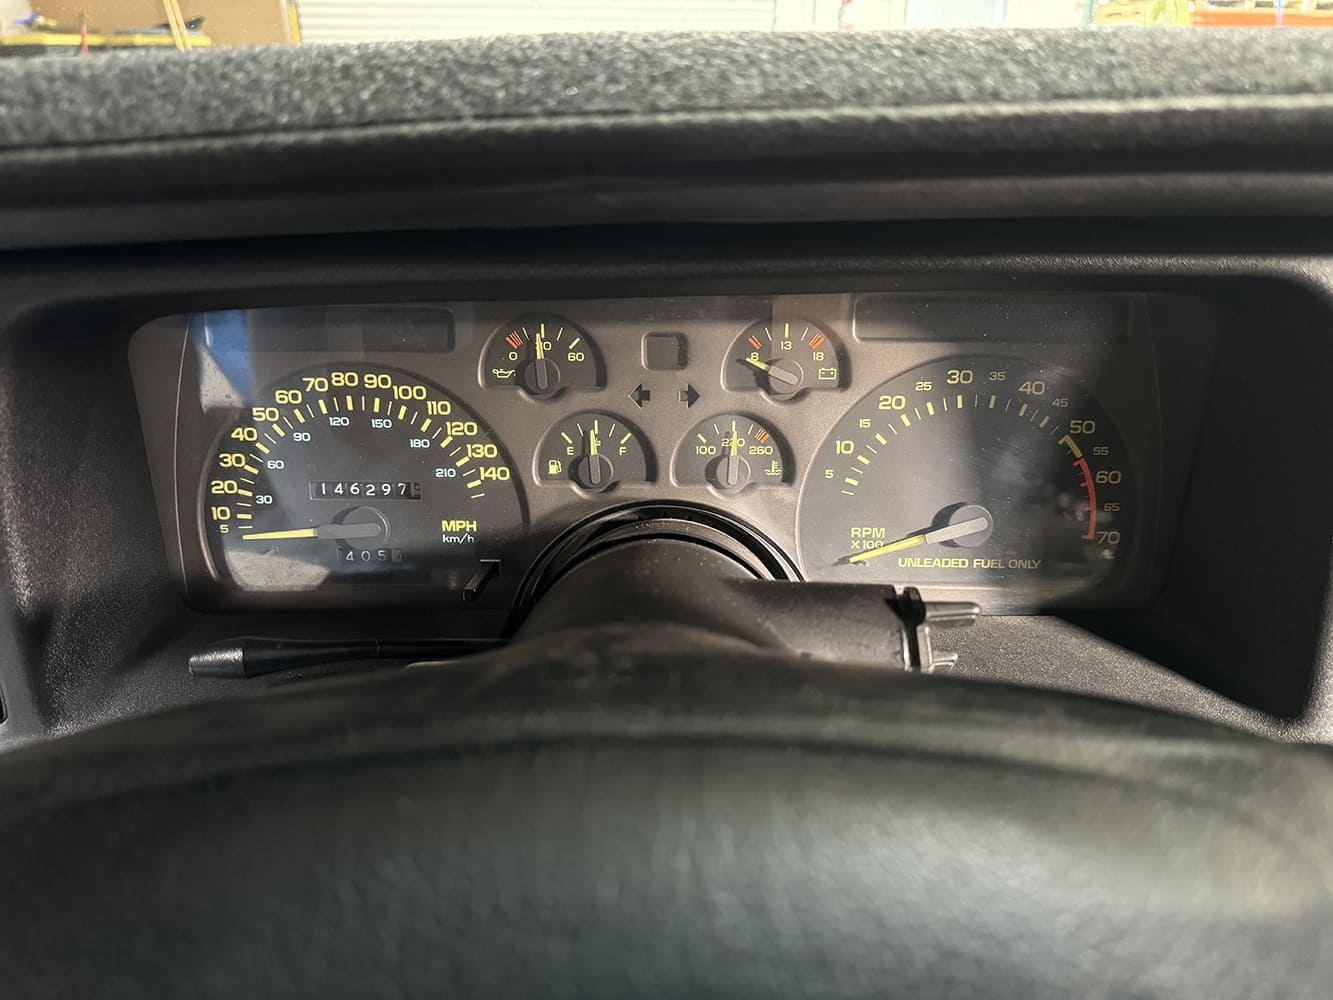
When our buddy Ryan Foss first purchased his 1992 Chevy Camaro, affectionately known as “Copmaro” due to its past life as a high-speed pursuit vehicle busting moonshiners, speeders, and truck drivers hauling Coors outta Texarkana, Texas, it became apparent that there was more to be desired from the instrument panel. While it displayed most of the information that most of us would require, it didn’t present it accurately. The tach and speedo were off and one of the auxiliary gauges wasn’t functioning whatsoever. A new cluster was in order, so a call to our buddies at Dakota Digital was made. Turns out, they had just released a new cluster for the 1990-92 Camaros as part of their trick RTX line.
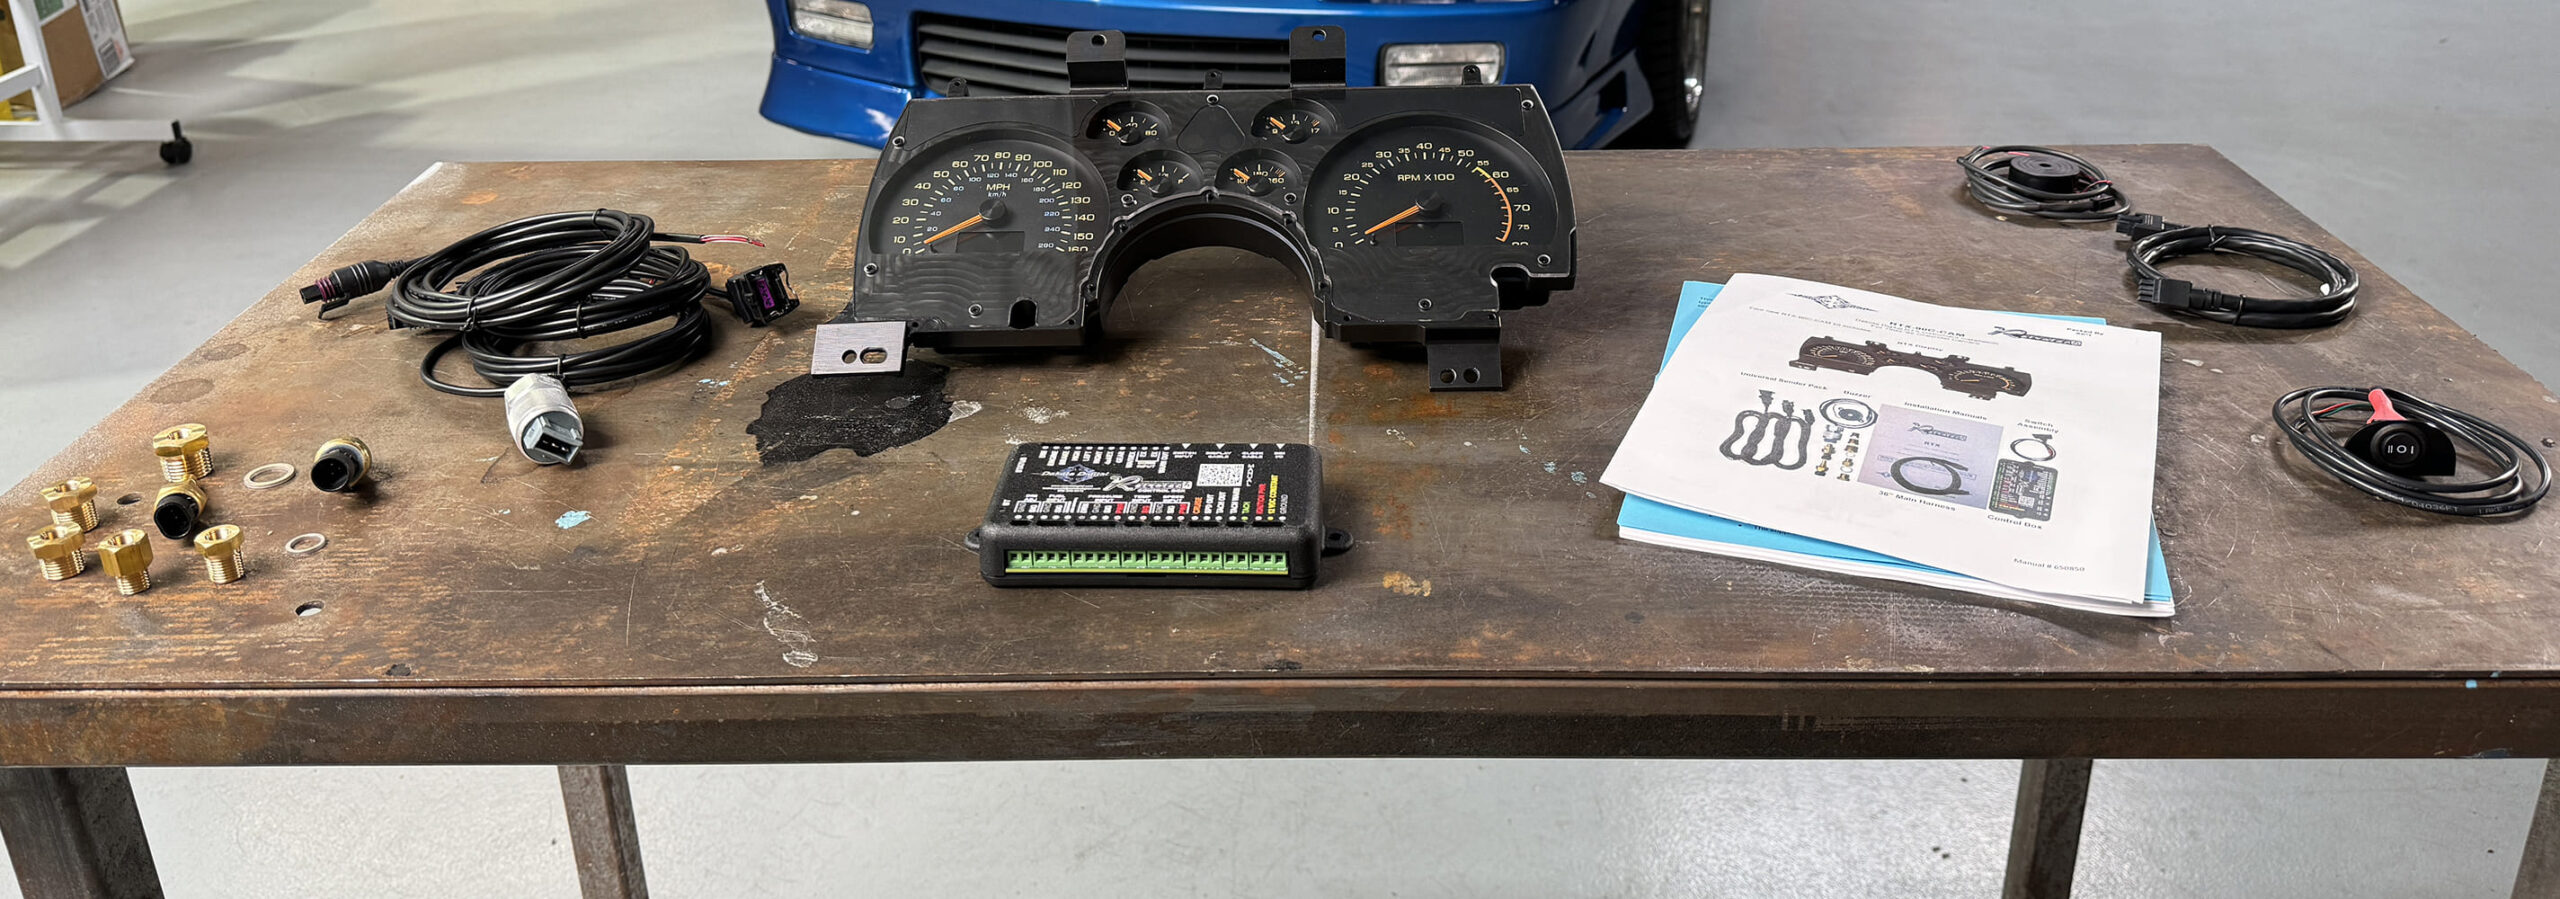
Dakota Digital’s newest gauge offering in its RTX line is this killer cluster for 1990-92 Chevy Camaros (PN RTX-90C-CAM-X). Designed with a nod to the original cluster, these RTX gauges feature modern upgrades, such as dual backlit, TFT color displays, RGB lighting to match color preferences, and even built-in Bluetooth technology allowing the end user to program the gauges via their smartphone. A single control box receives all the information and transmits it to the gauge cluster via a single cable, reducing dash clutter. Special sending units and cabling are provided for the oil pressure and water temp, along with the proper hardware for an electrical speedo, if necessary.
Designed with the OE cluster in mind, Dakota Digital’s RTX line blends classic form with modern function by utilizing a single control box to process all the information received from a handful of sensors and sending units, transferring said information to the RTX gauge cluster via a single communication cable. Fully programmable with a myriad of color combinations and additional information presented on the TFT message centers, the RTX gauge cluster fits the classic lines of Ryan’s Camaro, until the key is turned and the LED backlighting illuminates the modern cluster.
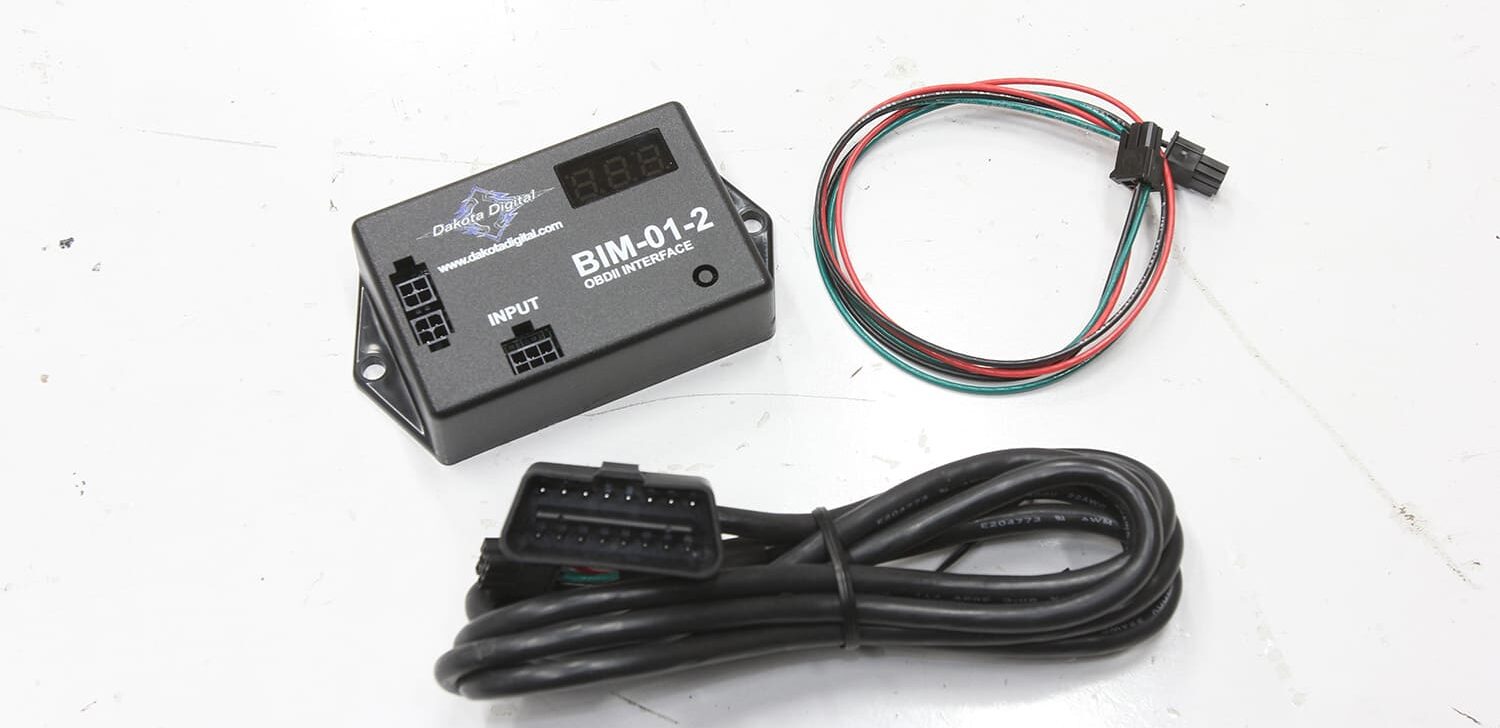
In addition to the primary instrument cluster, Dakota Digital also offers an array of BIM modules, allowing the end user to integrate information such as compass, outside temp, EGT and/or head temp, GPS speed, and more, directly to the programmable TFT display. Other BIM modules are also available that connect to a variety of OE and aftermarket EFI systems, allowing information that is already being received by the ECU to be transmitted to the Dakota Digital control box, such as tach, engine coolant temp, intake/manifold pressure, fuel pressure, air/fuel ratio, and more. The BIM module pictured here is an OBD-II/CAN Interface (PN BIM-01-2) and transmits many of the aforementioned signals to an GRFX, RTX, HDX, VHX, and VFD3 Dakota Digital system by simply plugging into an existing OBD-II port and connecting to the gauge’s control box, simplifying late-model applications or engine swaps by using the OE sending units and decoding the information provided from the factory ECU.
CNC-machined housings are filled with modern electronics designed and built in-house at Dakota Digital, resulting in some of the most advanced instrumentation available in the aftermarket. Utilizing a central control box to process all the information makes installation and setup simple and fast, requiring less than a full day from start to finish.
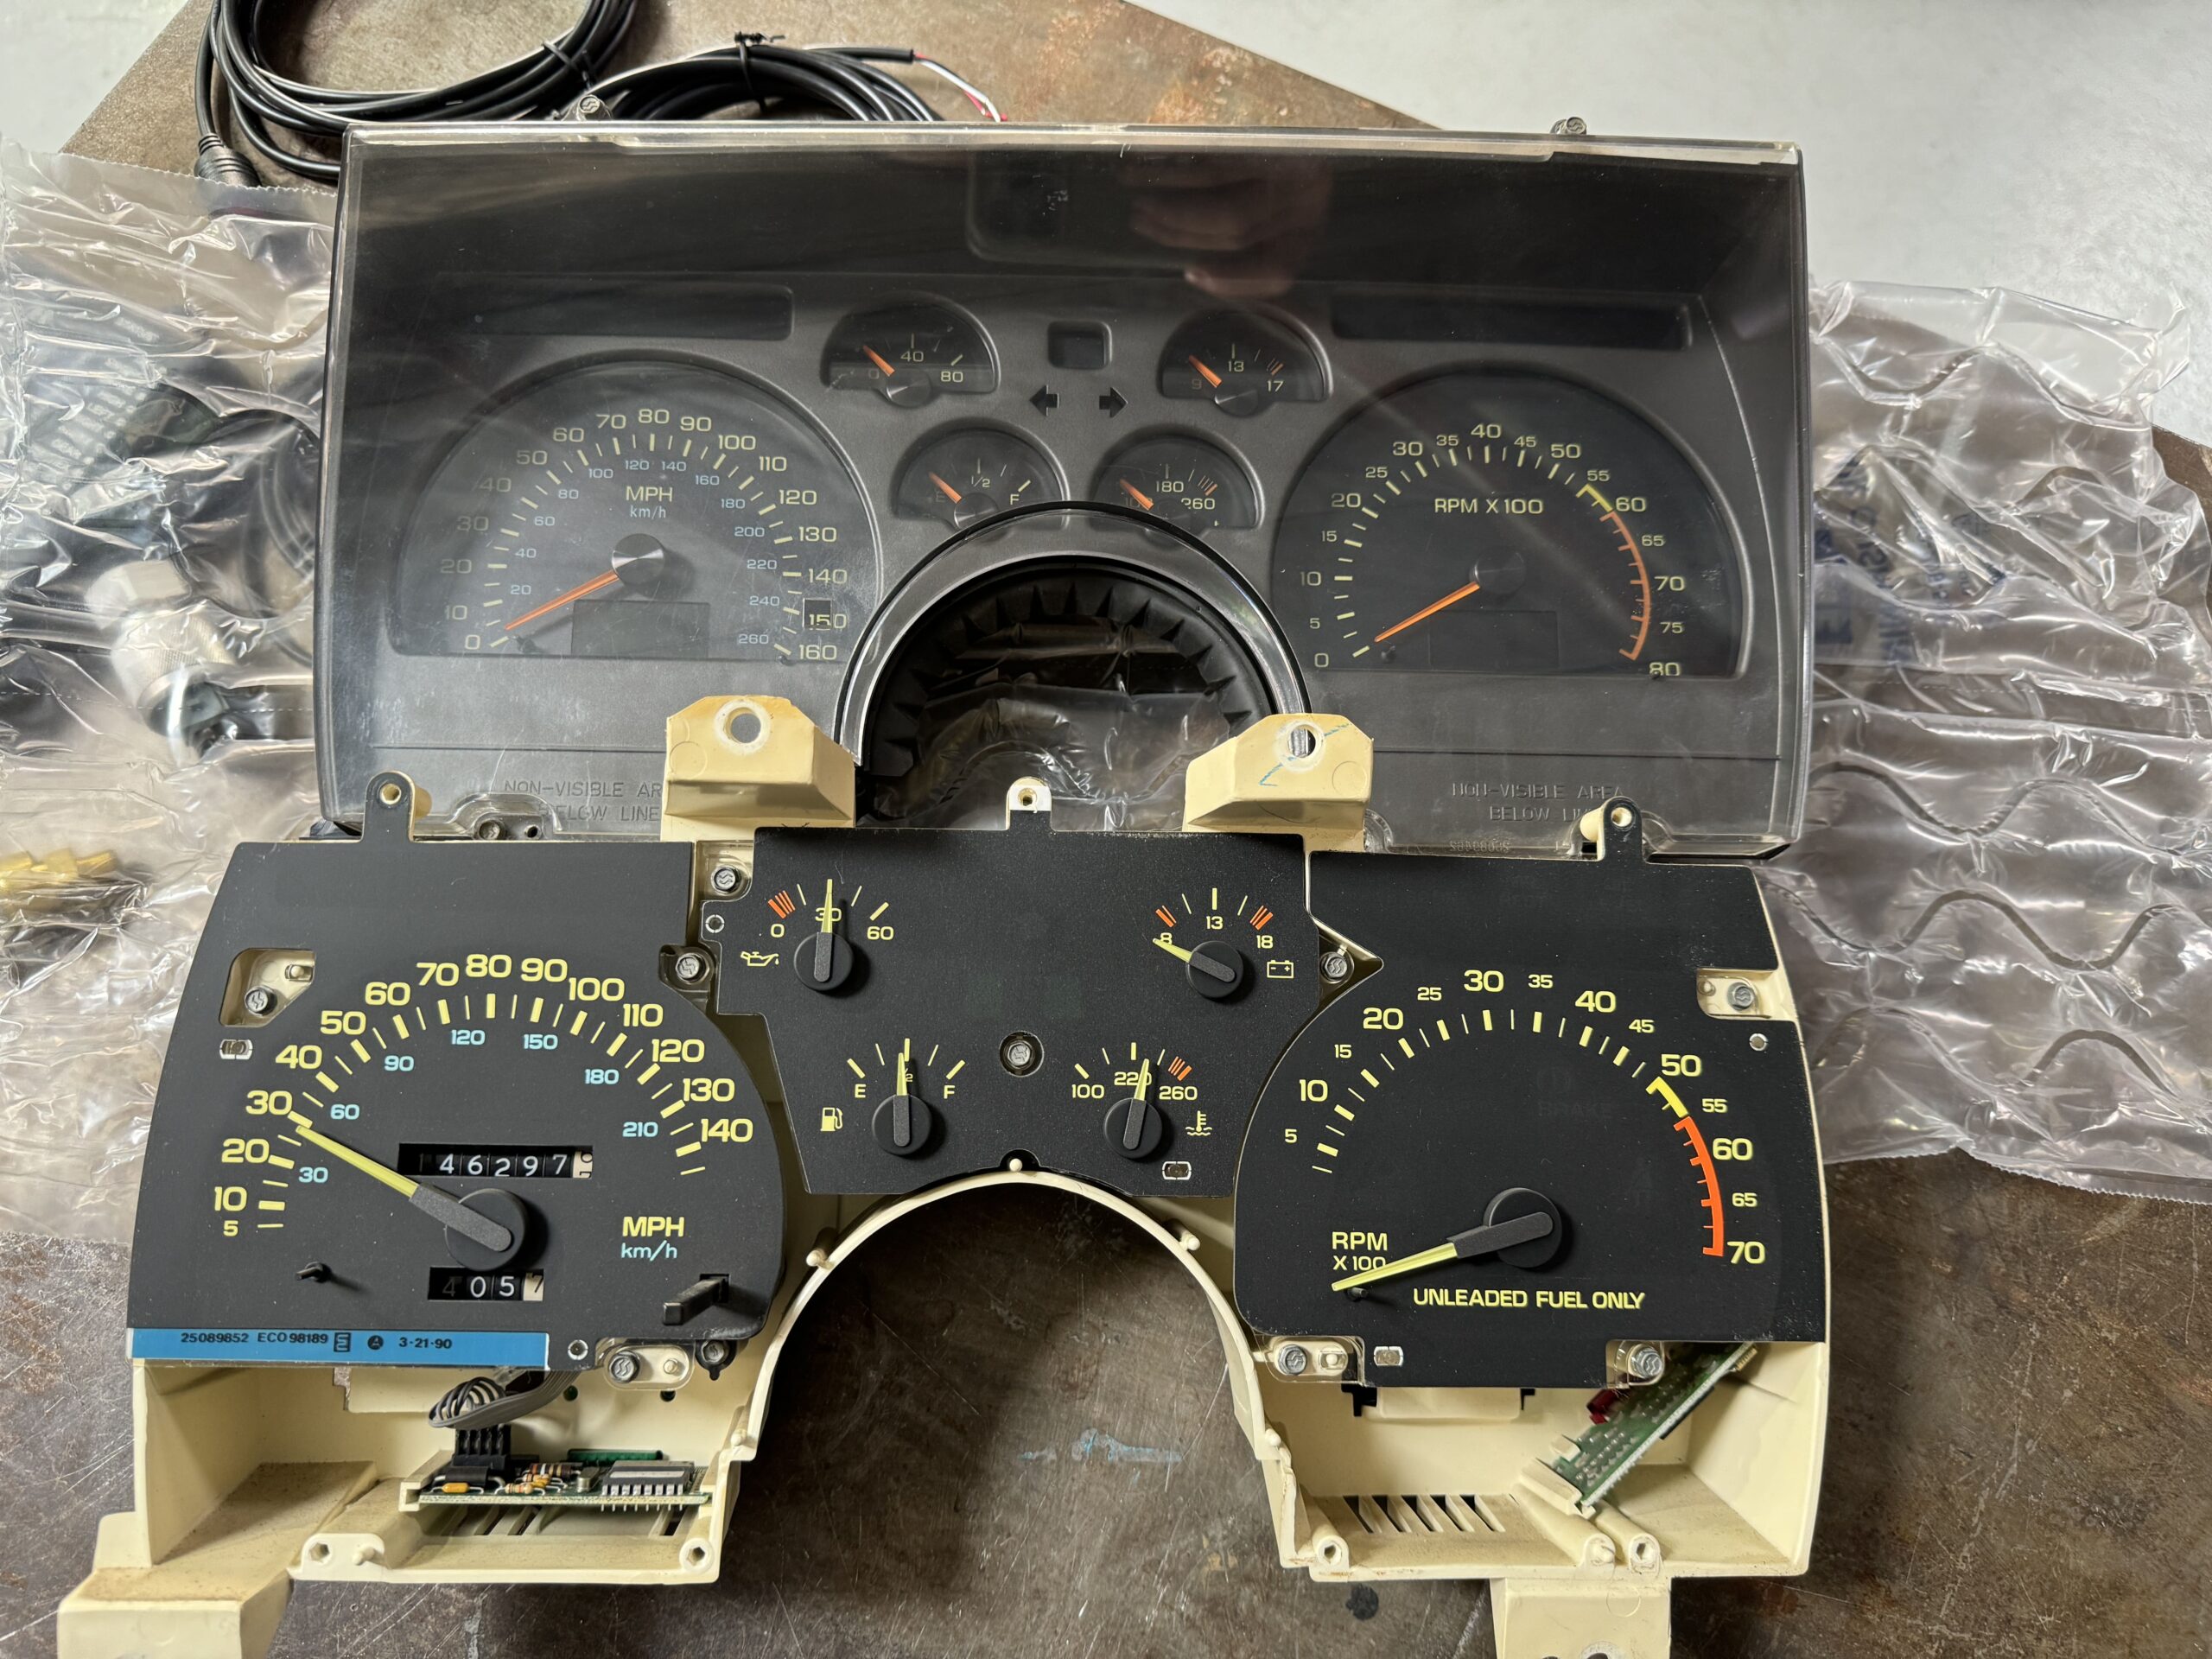
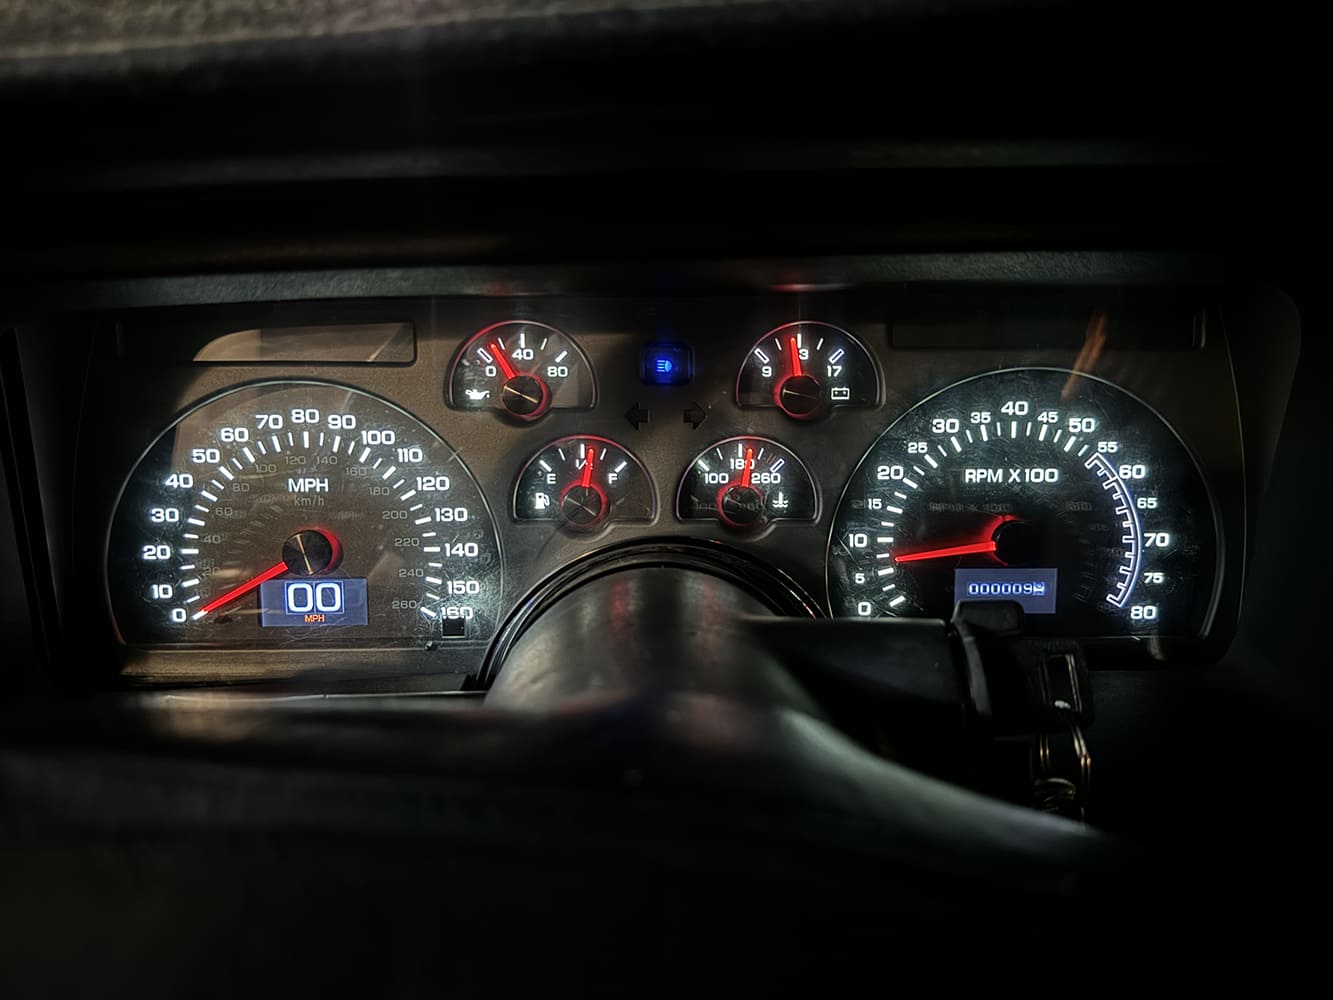
Our Camaro cluster wasn’t too worse for wear, but the tach reads nearly double the actual engine speed, while the speedo reads 7 mph fast. Thankfully, the new RTX gauges are fully programmable, so we can adjust the readings until they’re absolutely accurate.
Modernizing a classic Chevy muscle car is what we’re all about and adding a gauge cluster with contemporary technology fits our modus operandi perfectly. ACP
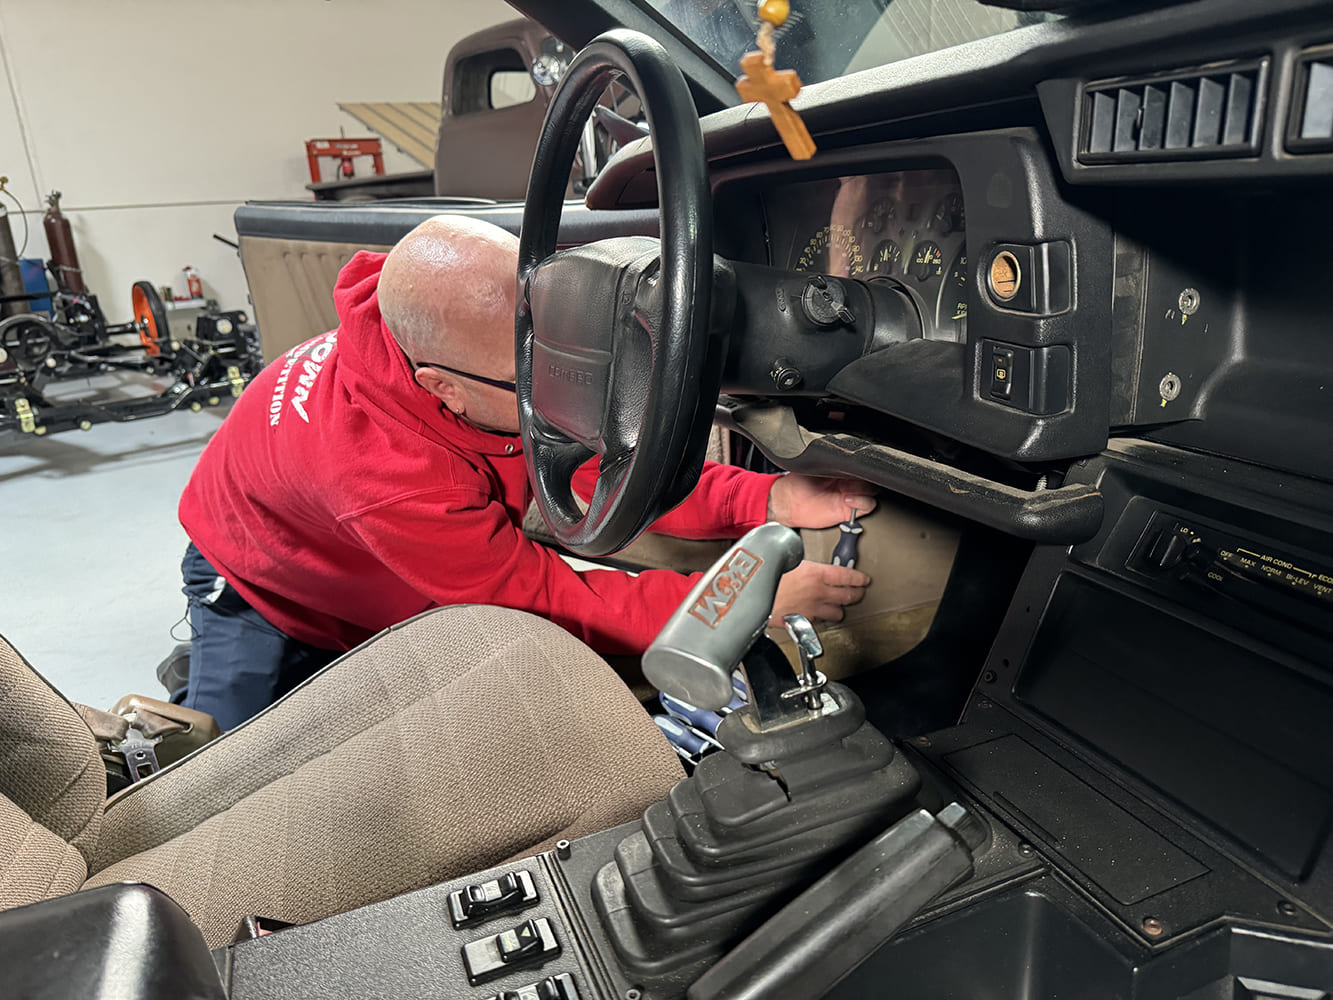
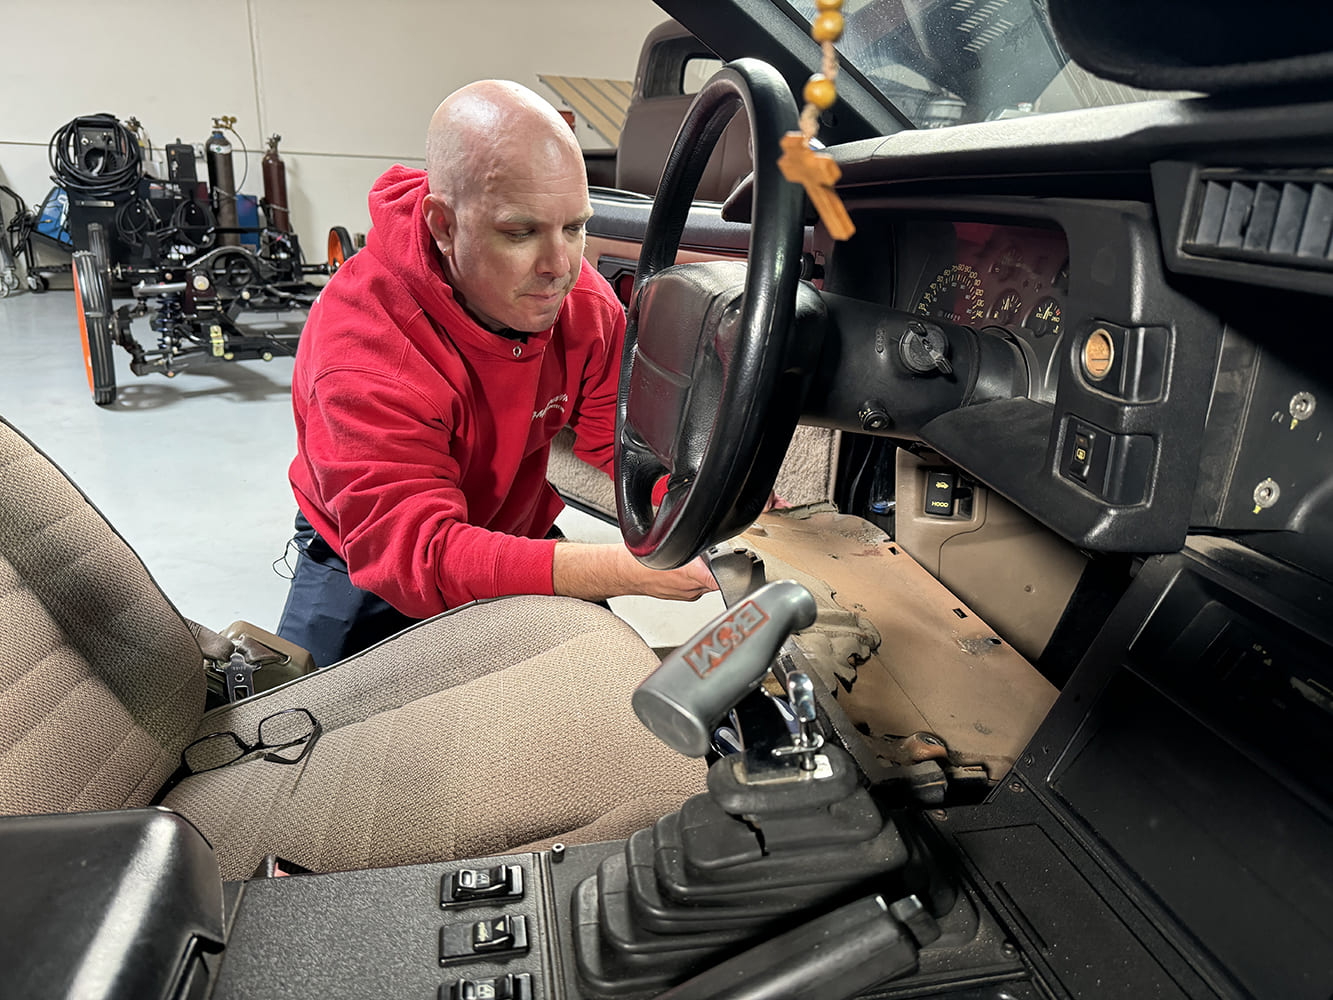
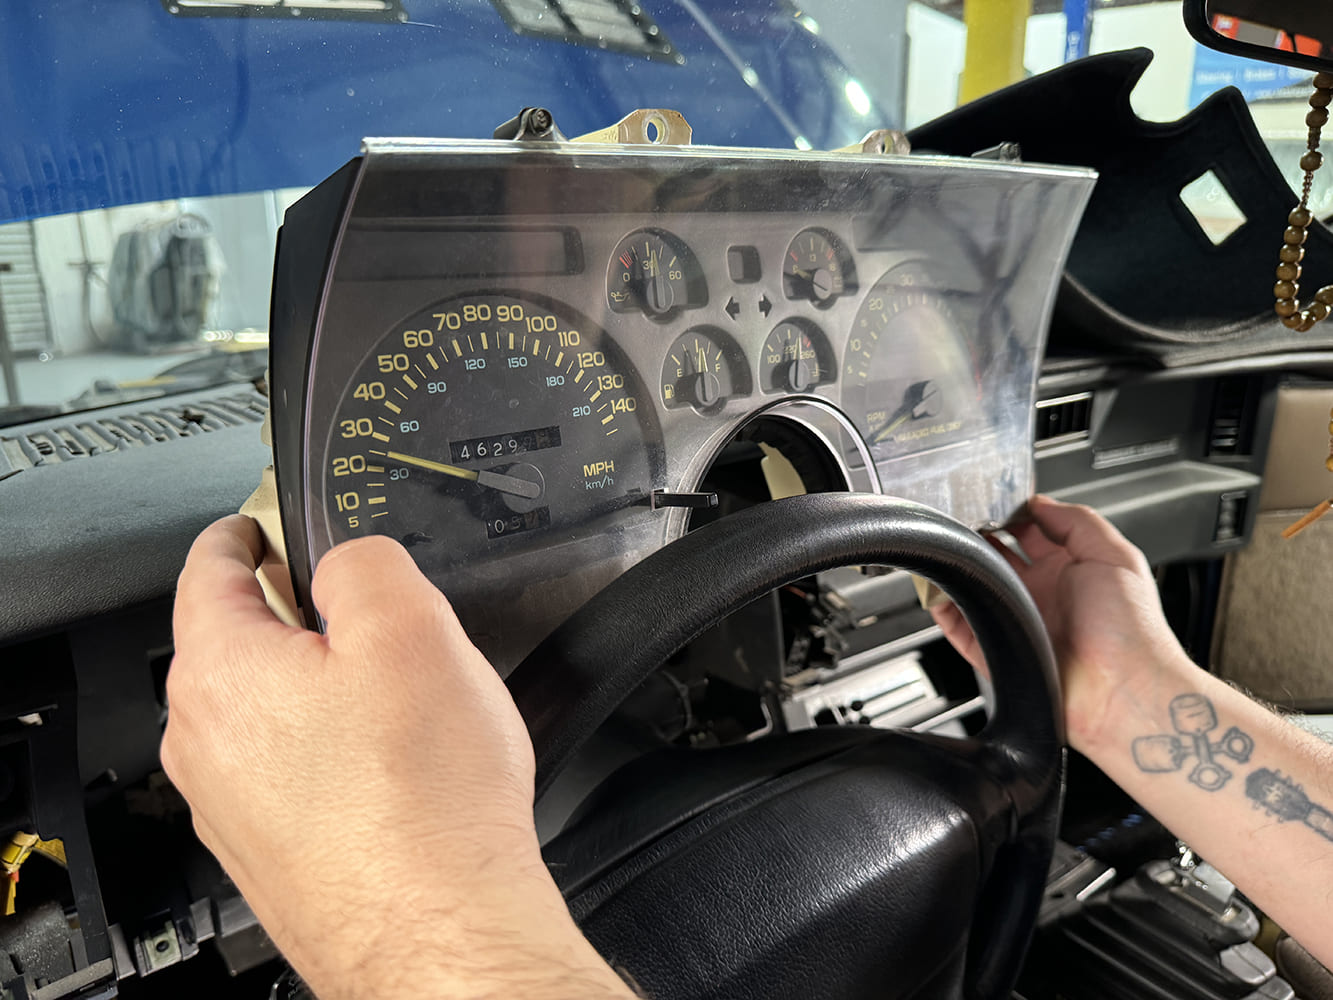
Before we can remove the gauge cluster, we need to remove a couple items. First up, the under-column pad. There are a handful of Torx fasteners that hold the under-column pad in place that need to be removed before it can be set aside.
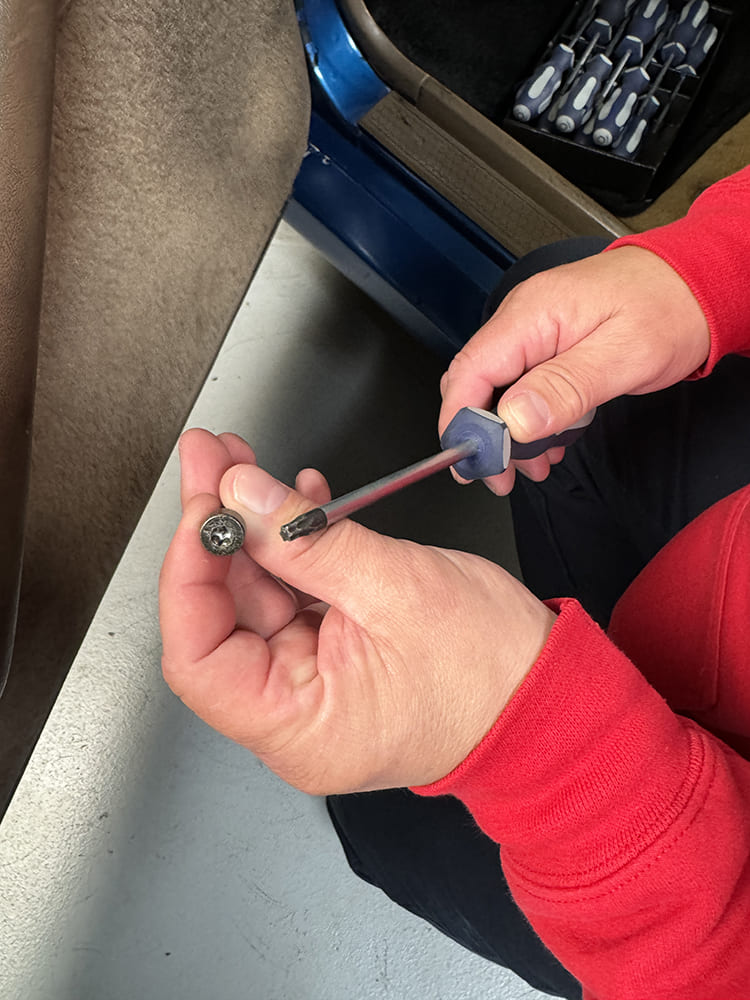
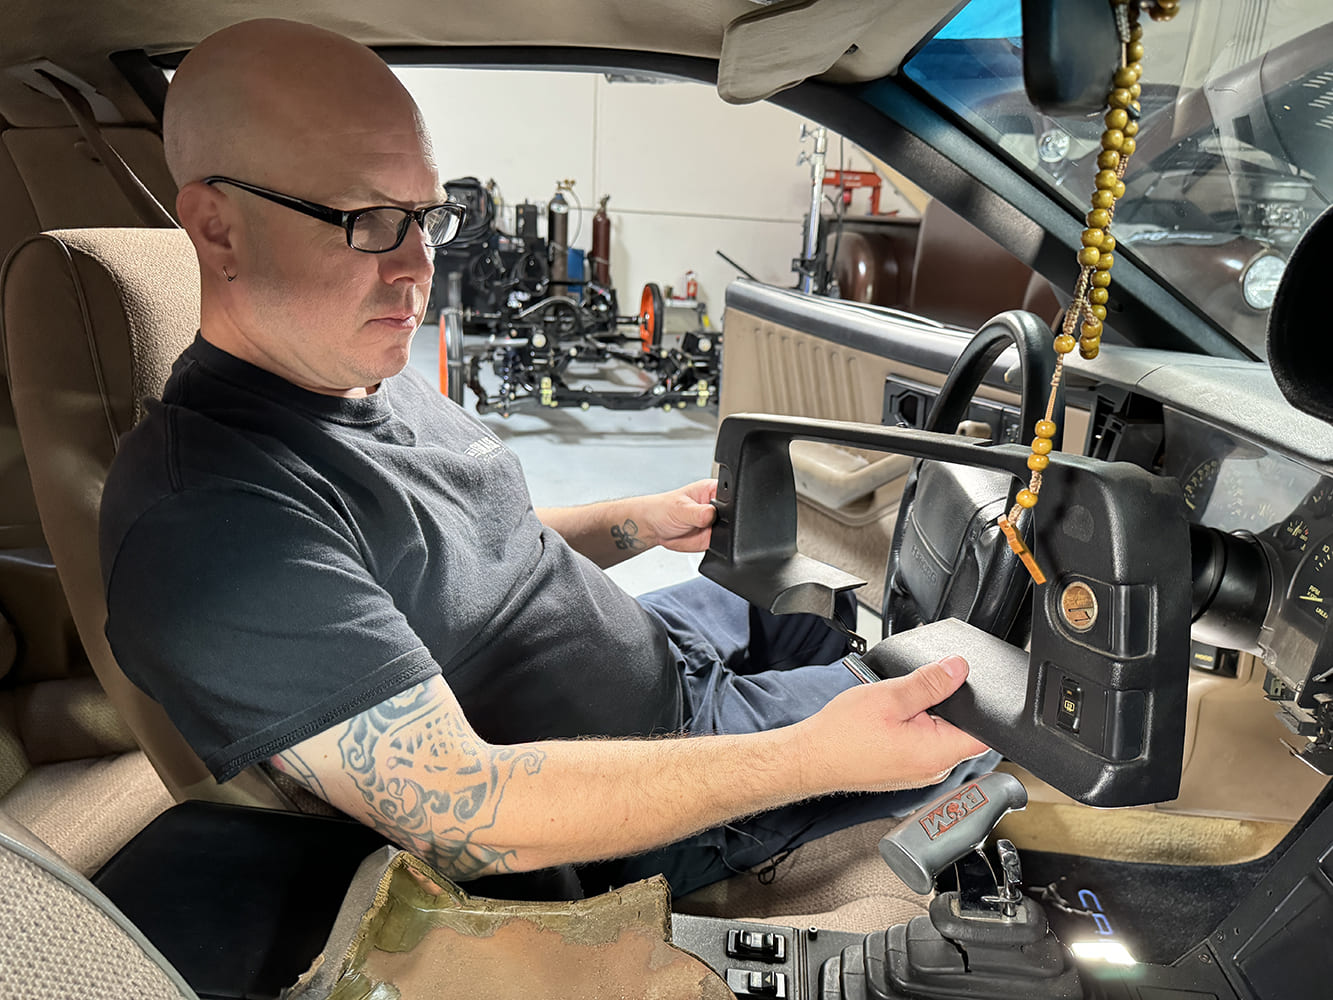
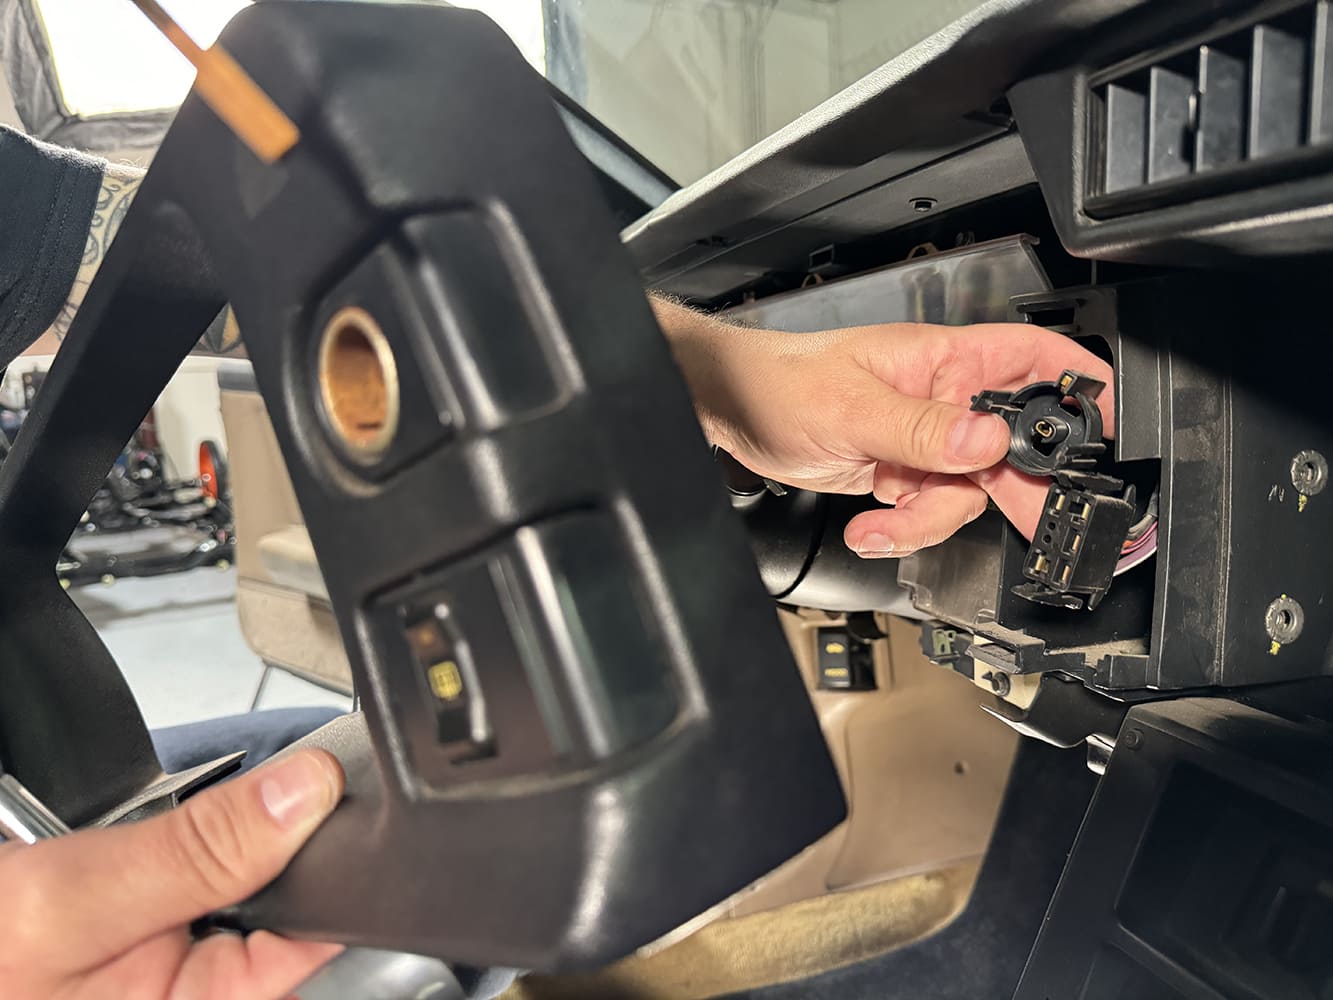
Next, the gauge bezel needs to be carefully removed. A couple more Torx fasteners and some careful prying will pop it free of its clips.There are two connectors that need to be disconnected for the gauge bezel to be removed; the lighter and defrost switch.With those items out of the way, the stock gauge cluster can be removed.We need to reuse a couple stock items from the gauge cluster, which means we need to remove them. First, the six screws that retain the clear lens are removed, followed by three additional screws that hold the inner gauge panel in place. We’ll be reusing the inner gauge panel and the rubber dust seal.
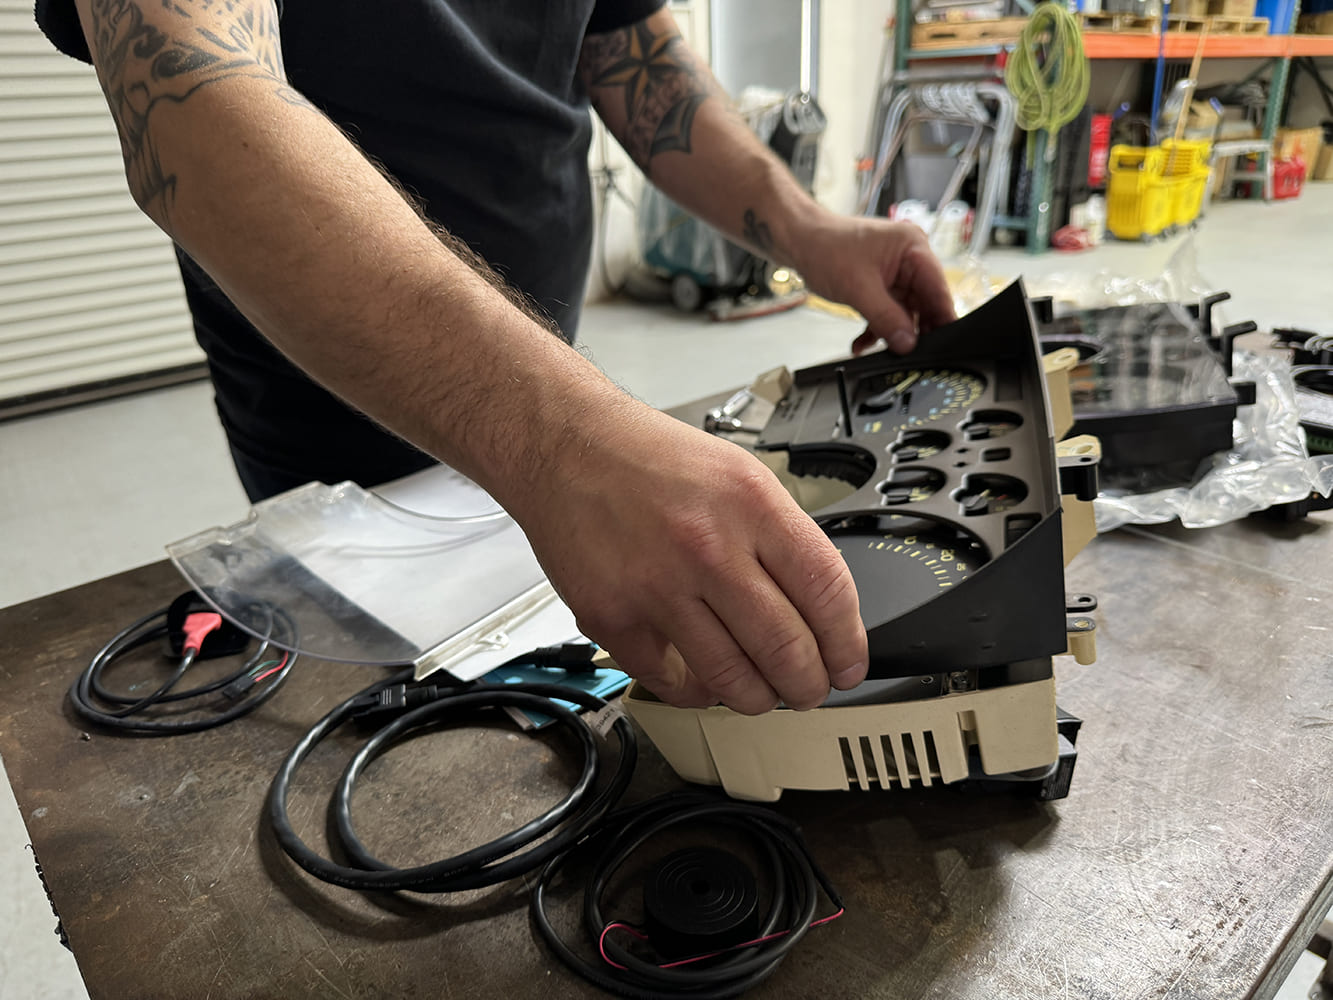
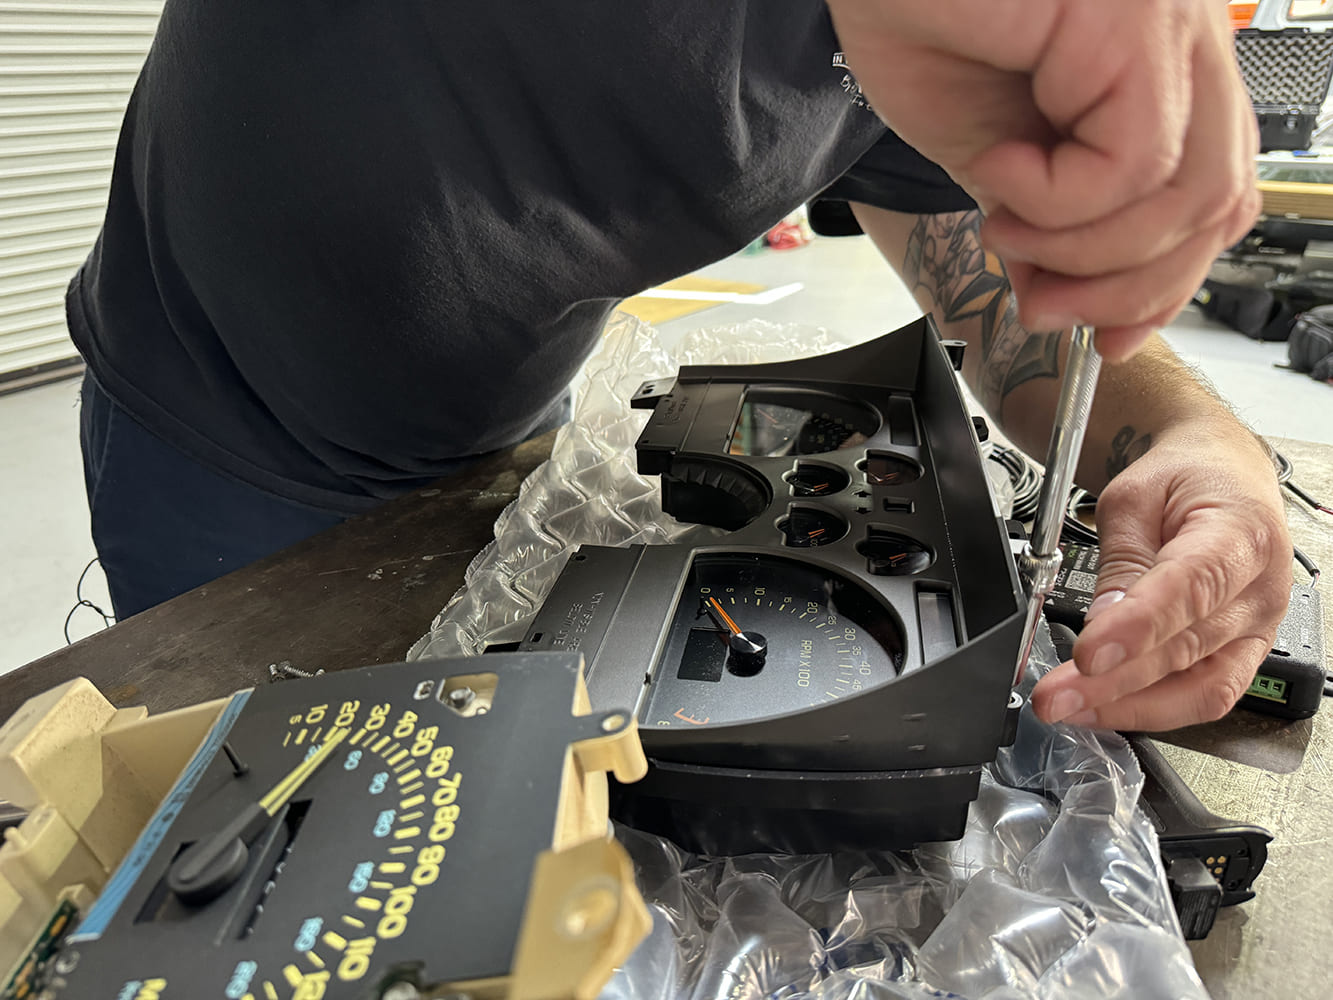
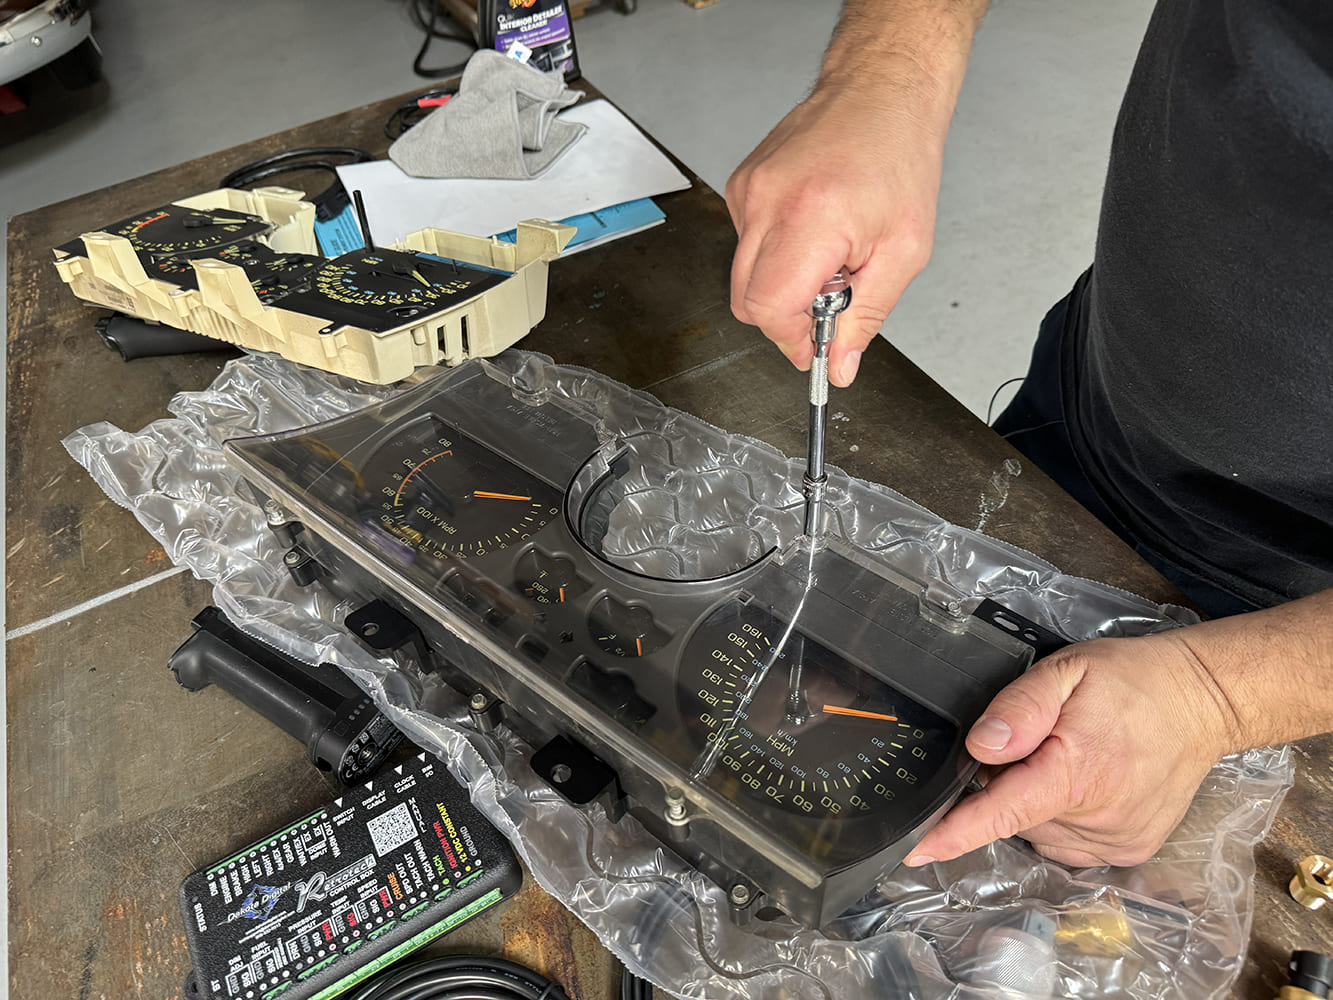
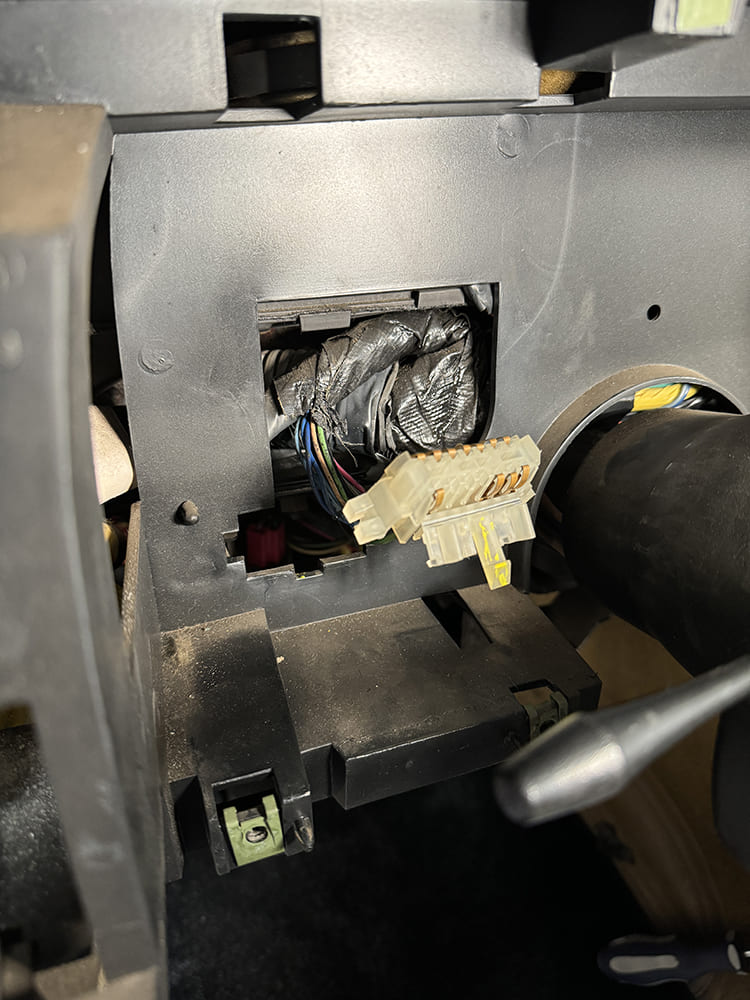
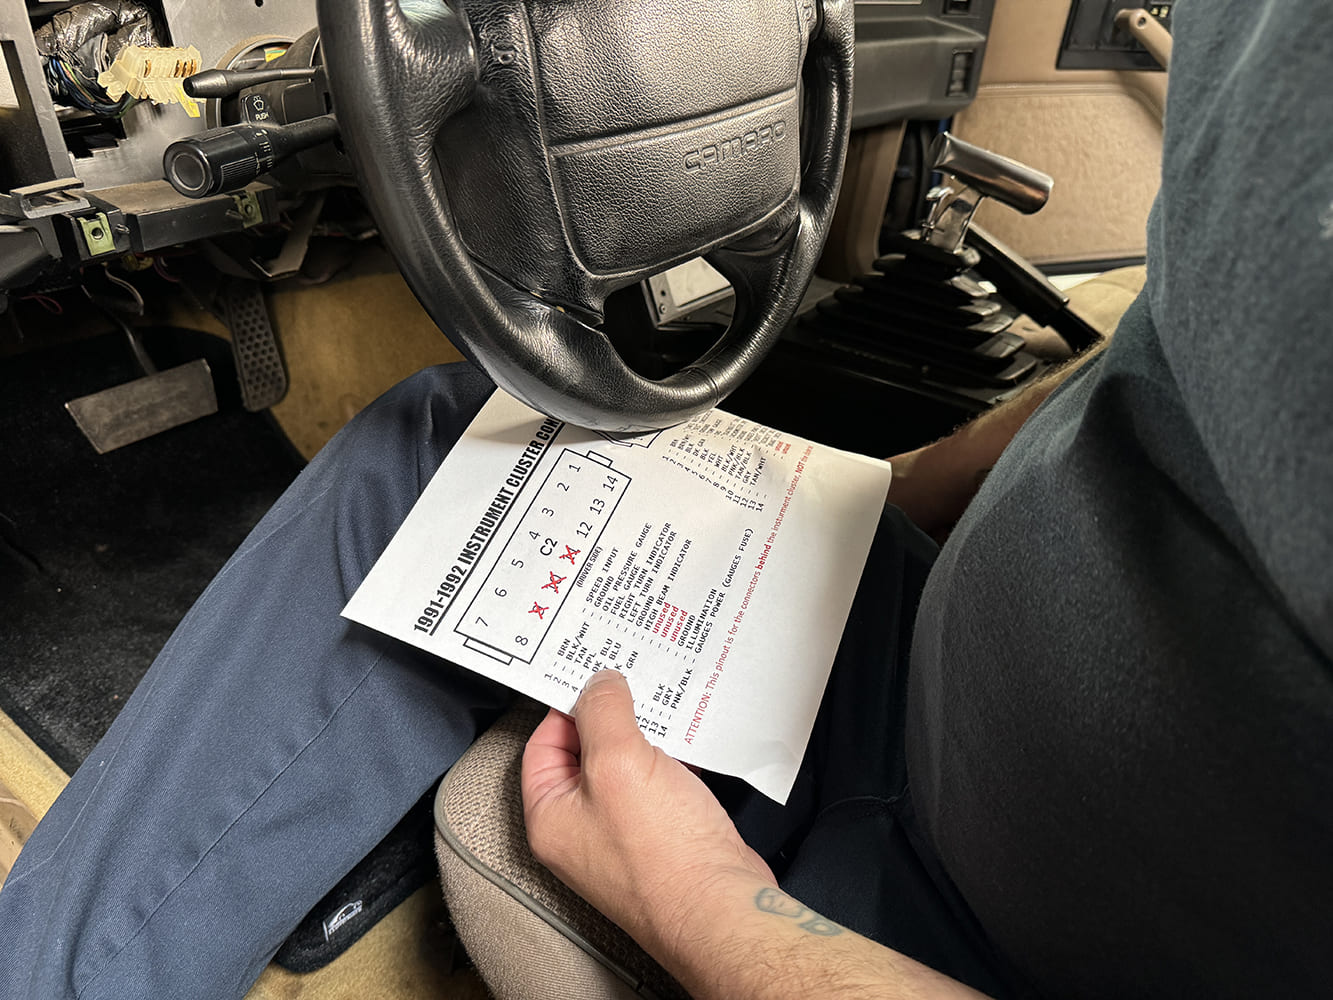
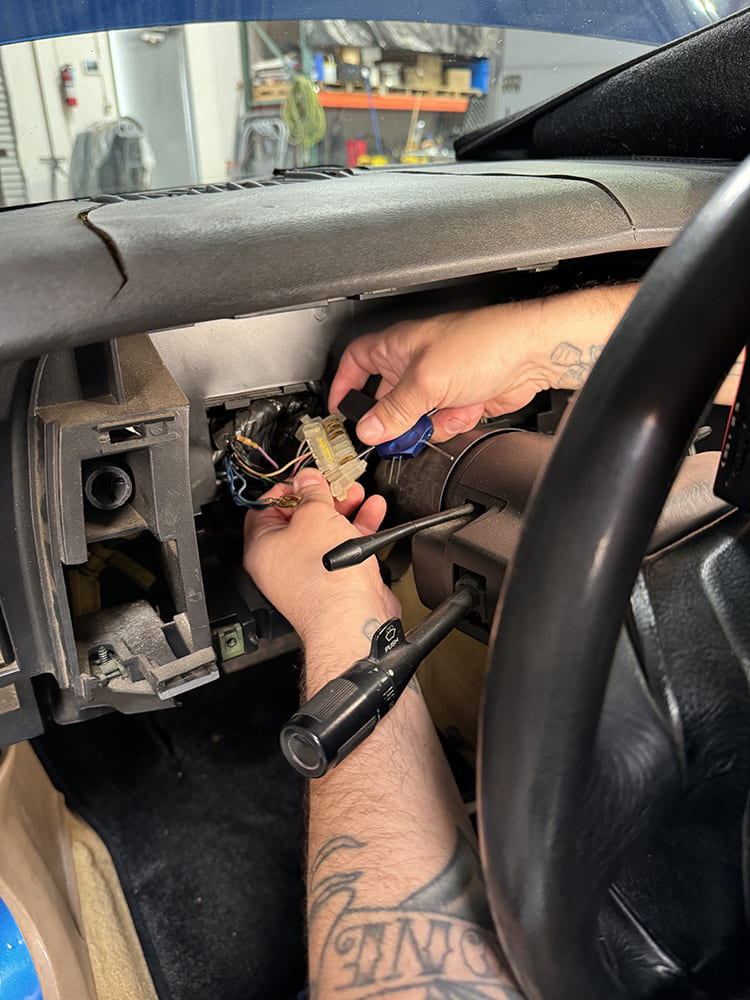
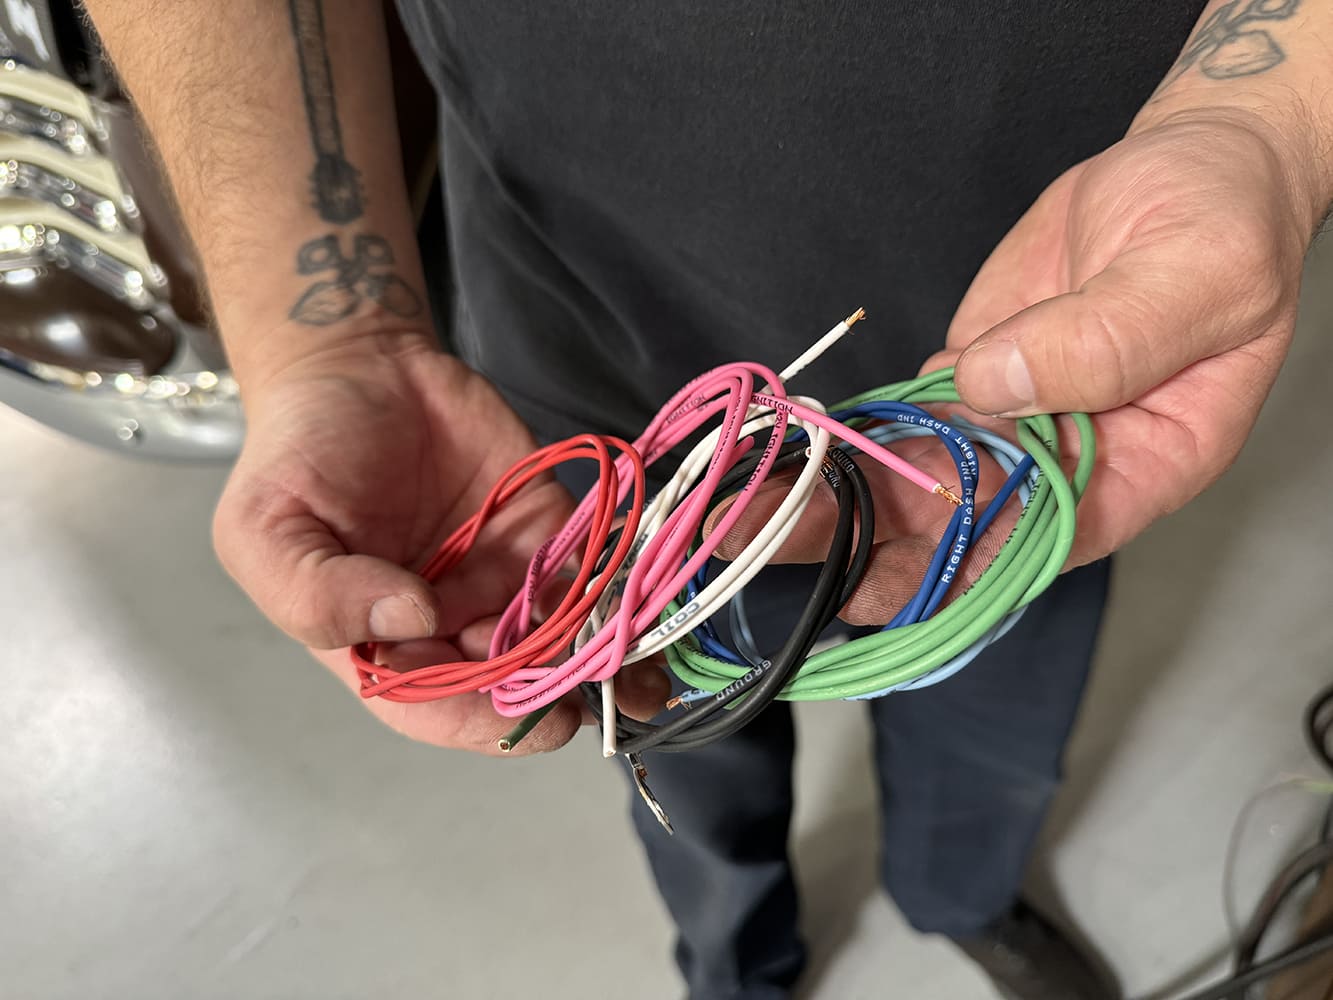
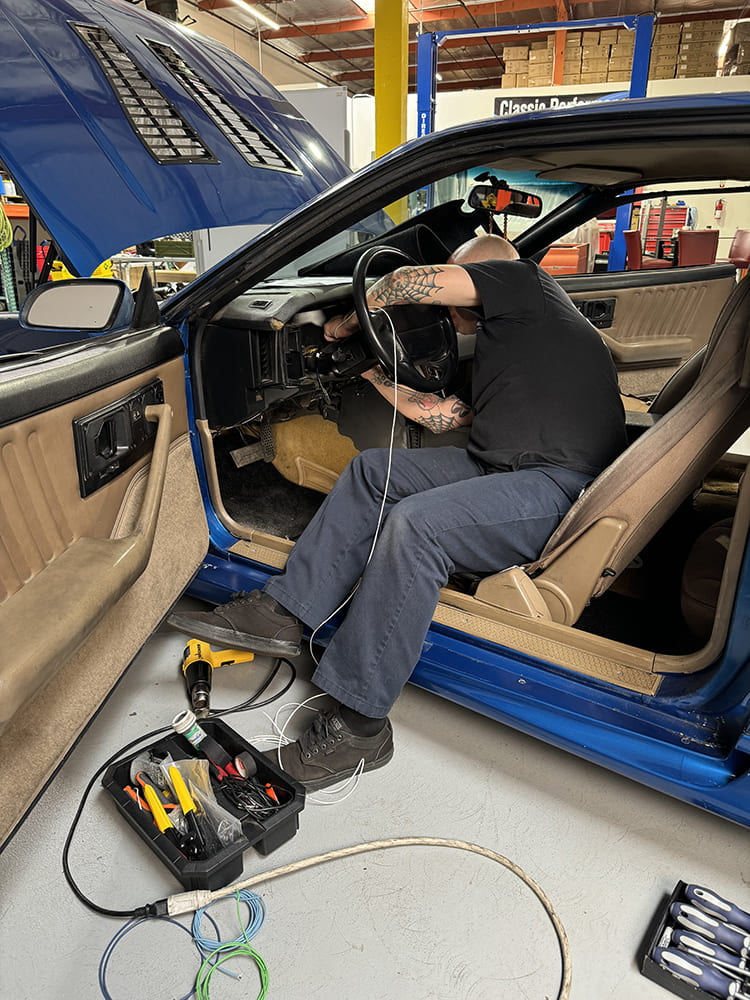
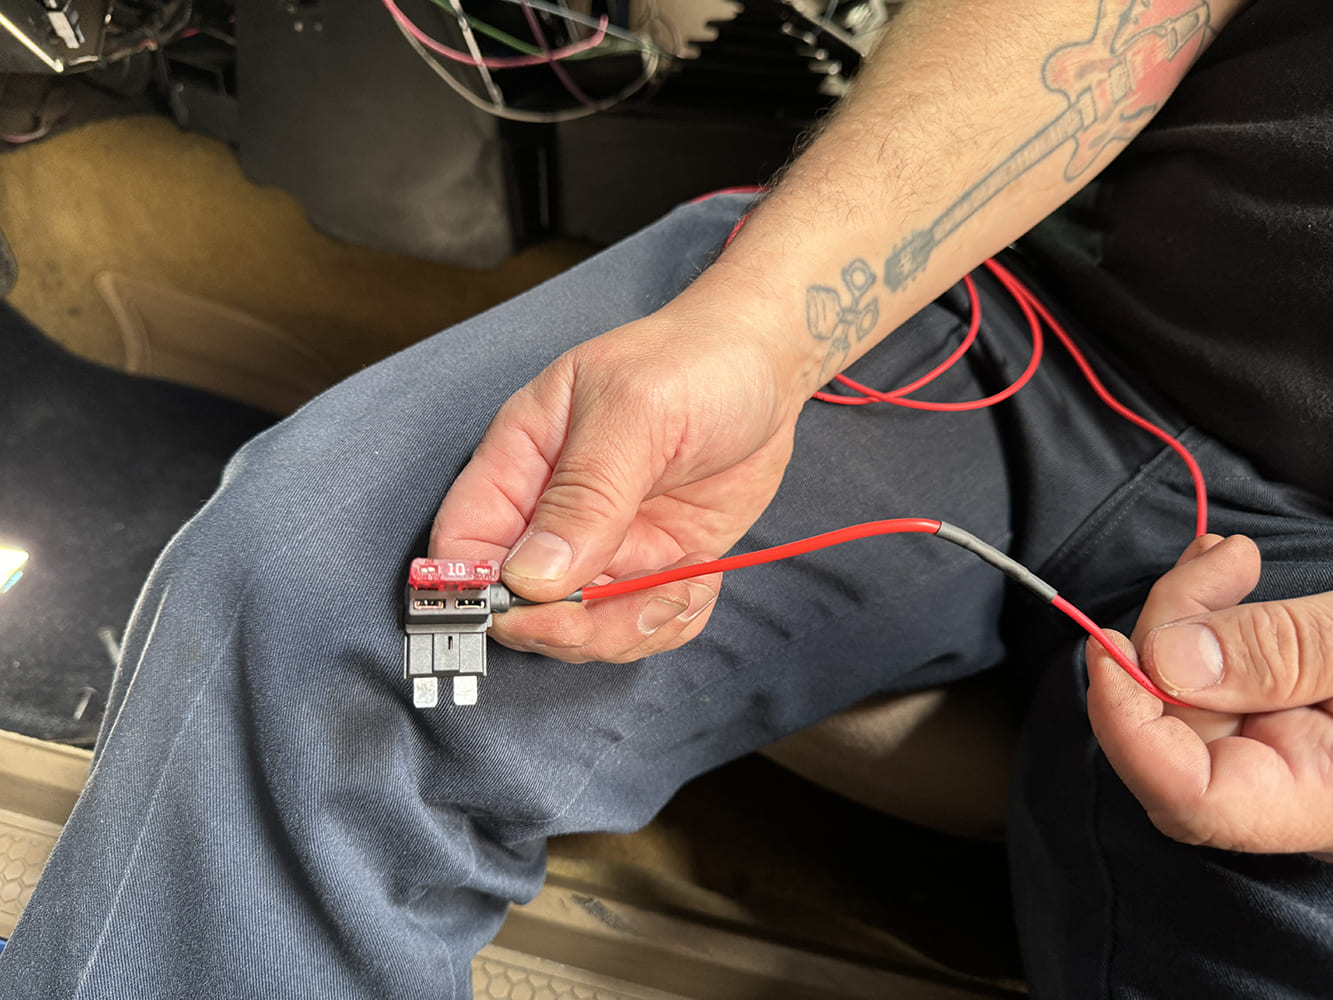
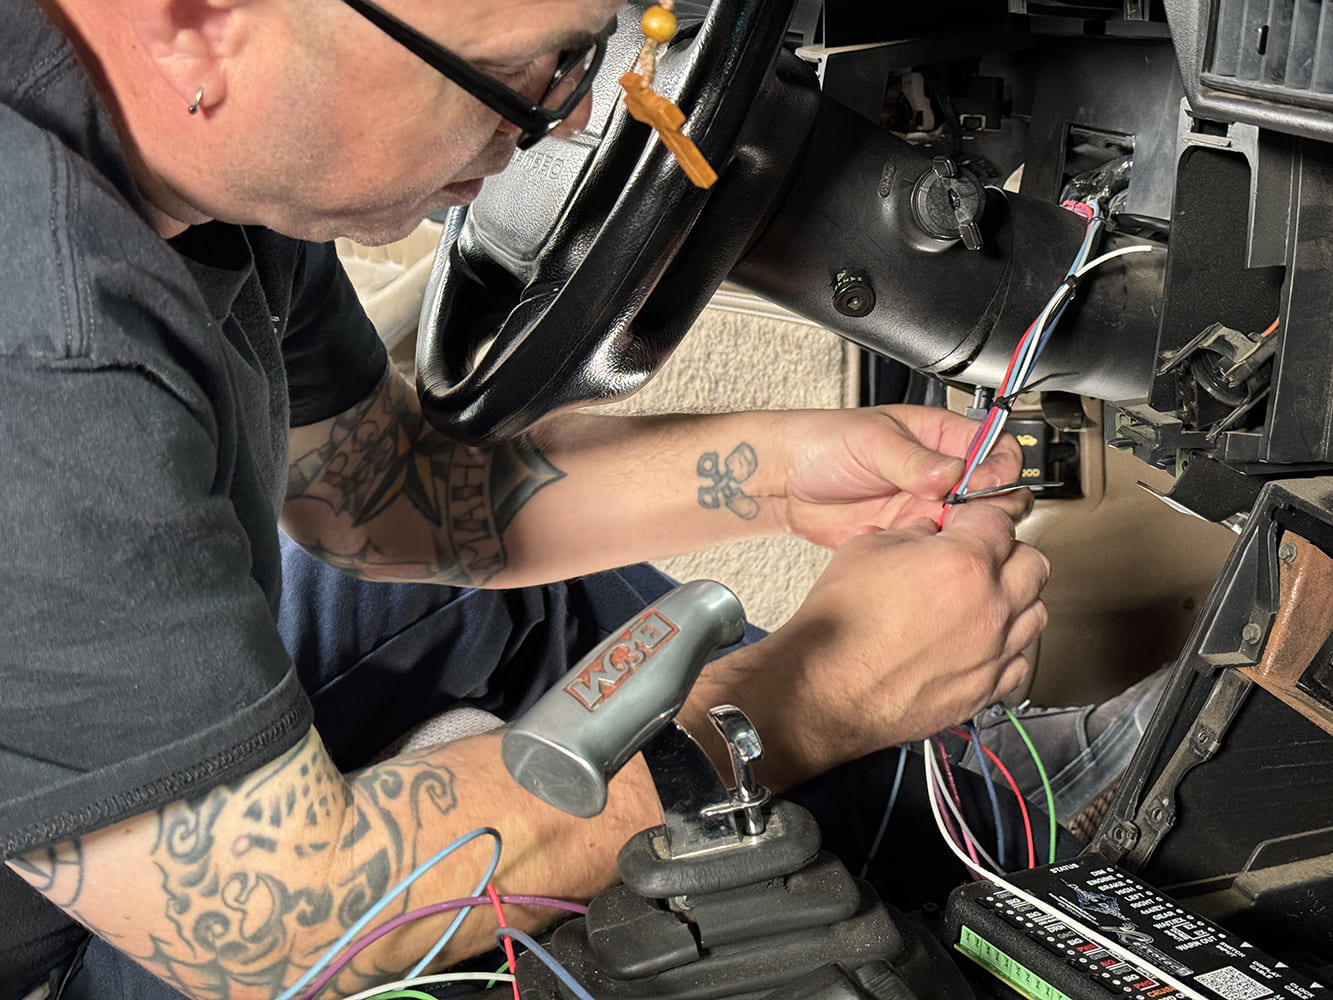
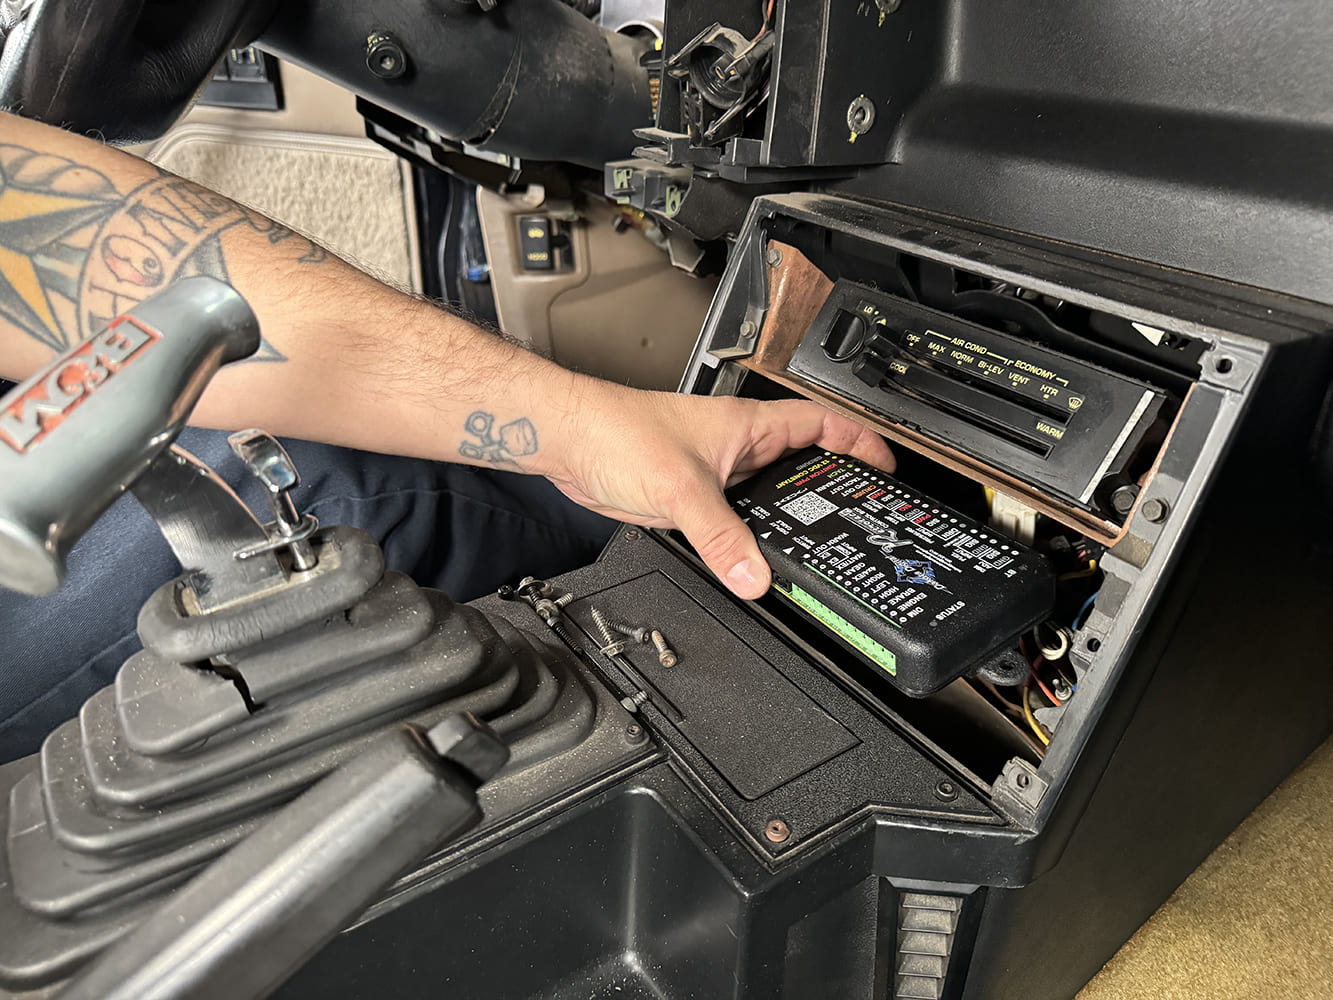
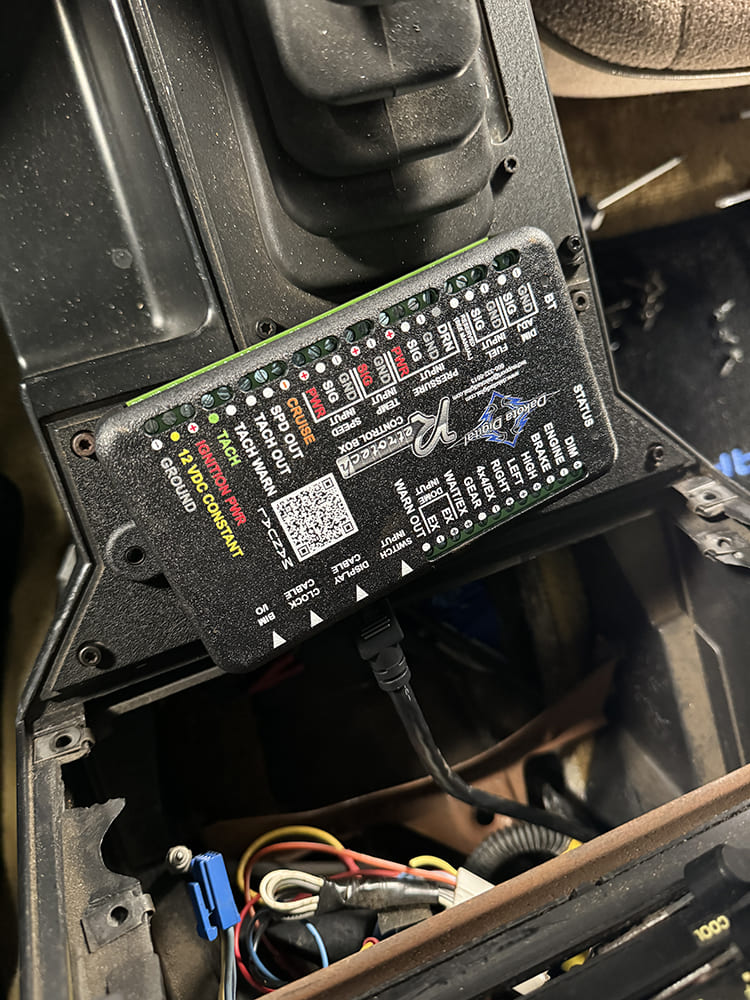
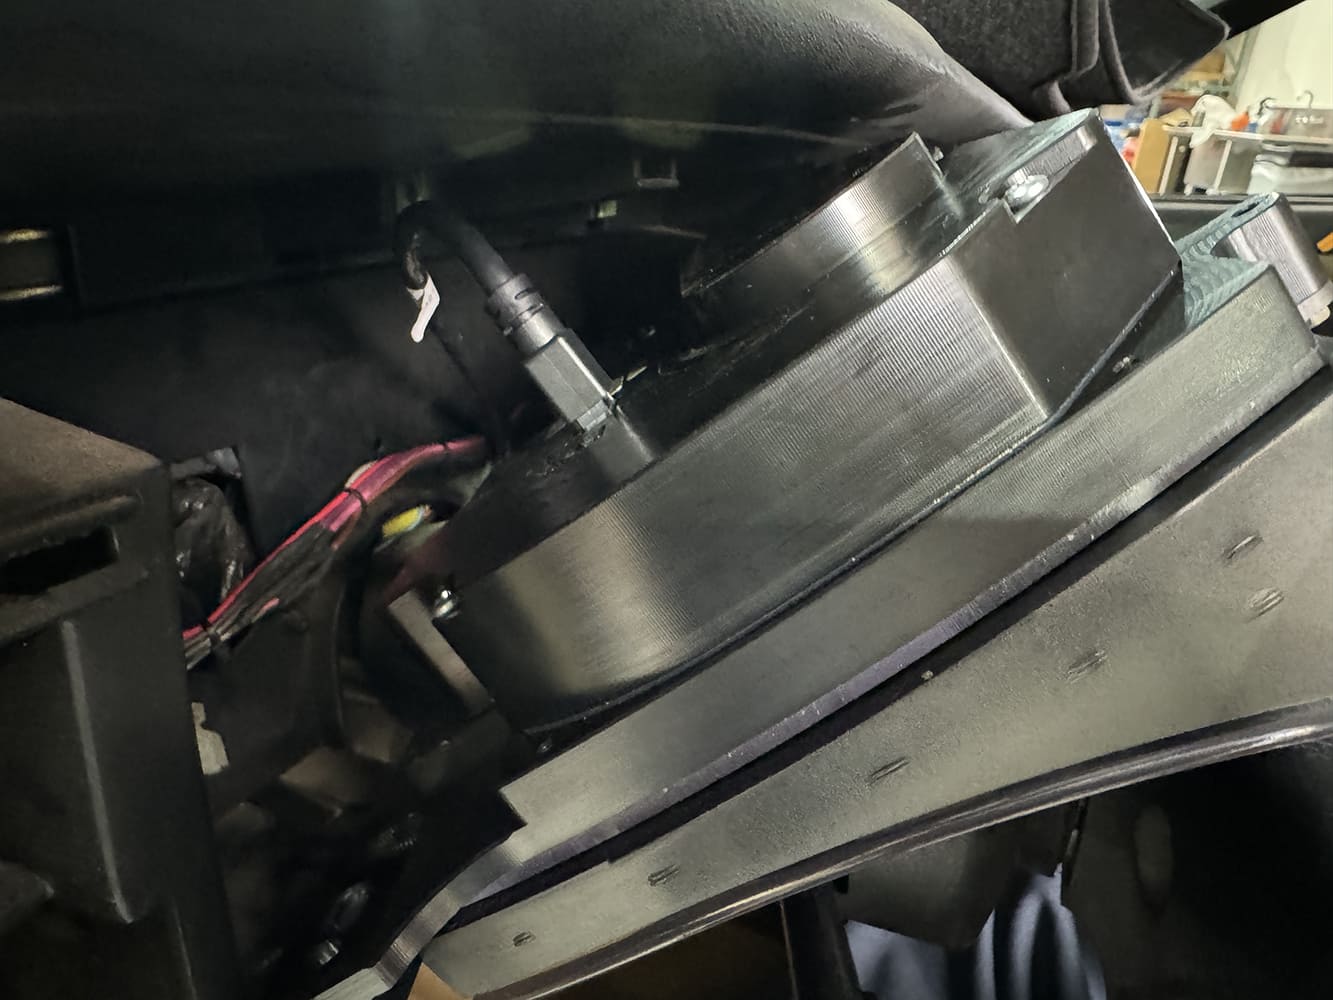
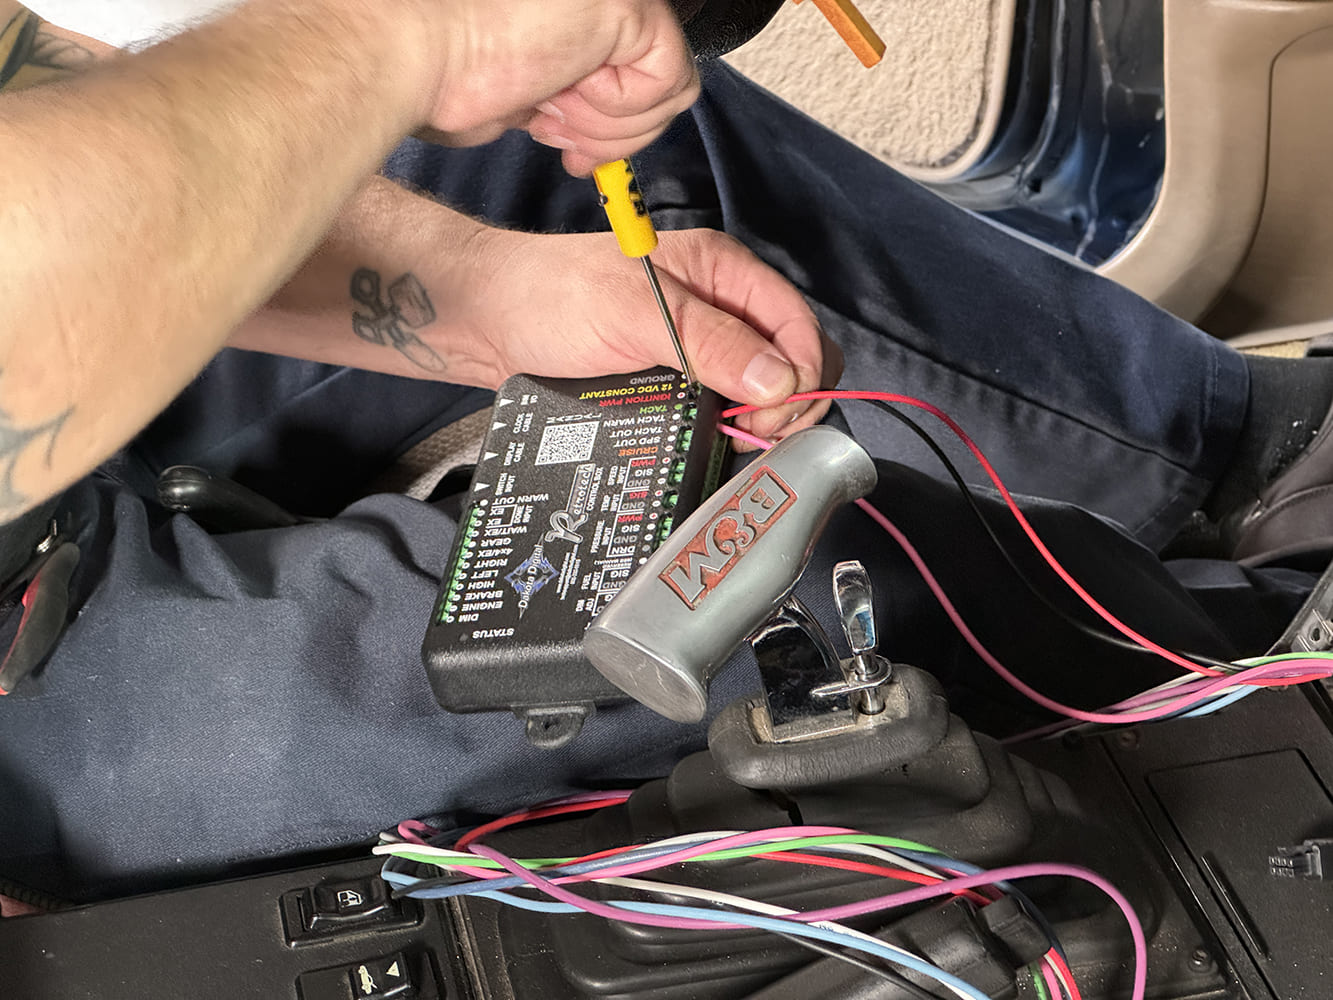
The inner gauge panel is attached to the RTX gauge cluster using the original screws.Though not necessary, we thought it would be cool to also reuse the original clear lens, further enhancing the OE appearance of the RTX cluster.A quick comparison between stock and aftermarket shows the similarities in appearance between the two, as Dakota Digital purposefully designed the RTX line in that regard. However, a much more robust suite of electronics separate the two.While it’s entirely possible to run all-new wiring, a number of inputs can be picked up by tapping into the stock gauge cluster’s connectors. Speedo and tach signal as well as turn signals and high beam indication are but a few that we’ll be tapping into.A diagram picked up from the Internet makes easy work of determining what wire provides what info.Since the connector does us no good at this point, we de-pinned each wire and cut the individual connectors off. What won’t be used will be carefully taped up and tucked away.We need to extend the wires we’ll be using so that they can reach the location where we’ll be locating the gauge control box, which is where each wire will terminate. Here, I’ve arranged a variety of matching colored wire for each circuit.The cut wires are then attached to their respective extensions with a crimped butt connector covered in a section of heat shrink tubing.While we were able to pull the required 12V switched and ground circuits from the stock cluster connector, the RTX gauges require a fused 12V constant connection as well. After locating a circuit on the Camaro’s fuse panel that provides battery constant power, we used a fuse tap to provide the necessary power to the control box.All the wires coming from that section of the dash were neatly grouped together and ran toward the center console.Before being retired, the Copmaro was stripped of all its law enforcement goodies. Turns out, cops don’t like to rock, so the Copmaro didn’t have a stereo in the center console. After removing the blanking-off plate, we found the perfect location to house the gauge cluster’s control box.The control box receives every signal and transmits this information to the gauge cluster via a single cable.
Every single wire terminates at the control box. Here, we’ve pulled fuel and tach signals; 12V switched, constant, and ground; turn signal and high beam indication; and DIM, which switches the cluster between day/night mode, all from the original gauge connectors.
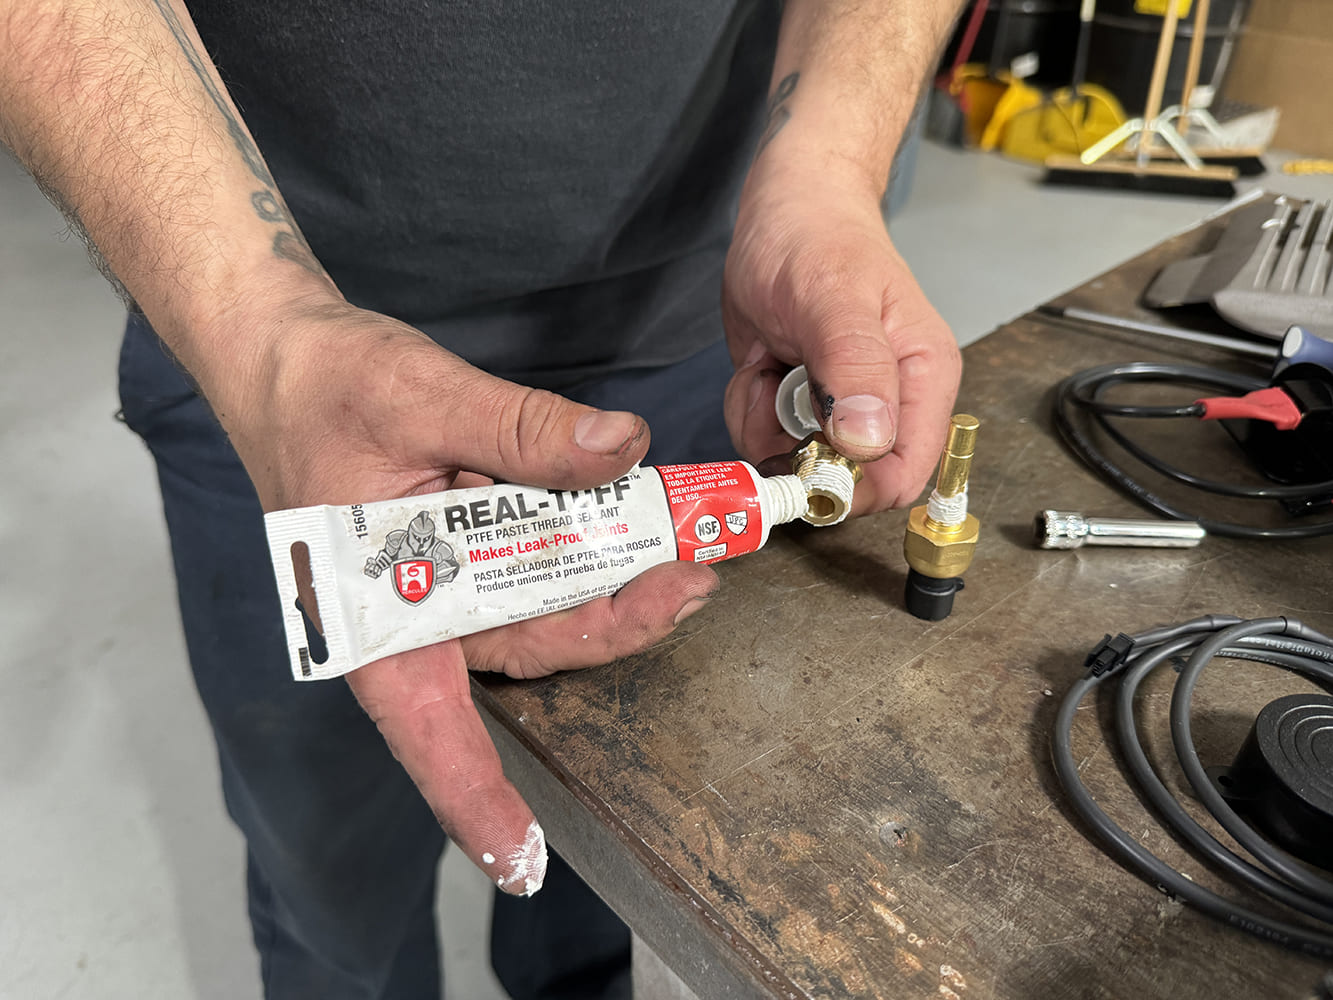
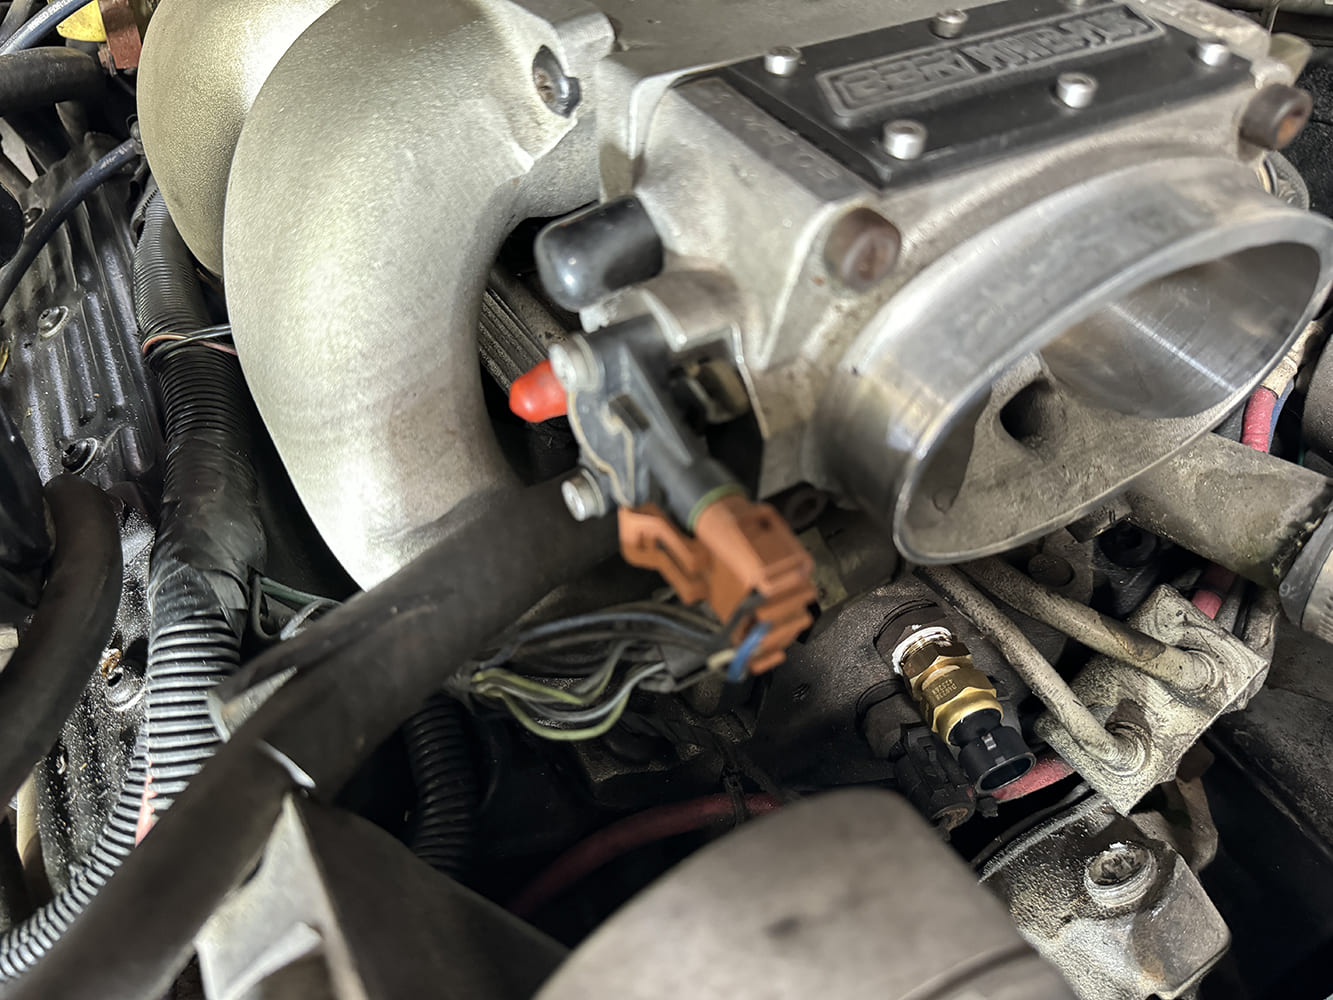
There are two signals that we couldn’t tap into using the stock connector as Dakota Digital requires use of their specific sending units; oil pressure and water temp.The stock water temp and oil pressure sending units were simply replaced with Dakota Digital’s unit.Final installation of the RTX cluster is just like disassembly but in reverse. Fully lit, the beauty of the Dakota Digital cluster is revealed. Accurate readings abound with additional, programmable information available in each of the TFT display windows.
We use cookies to ensure that we give you the best experience on our website. If you continue to use this site we will assume that you are happy with it.