


Adapting 1940 Packard Taillights to the 1936 Ford Fender
By Gerry Burger – Photography by the Author
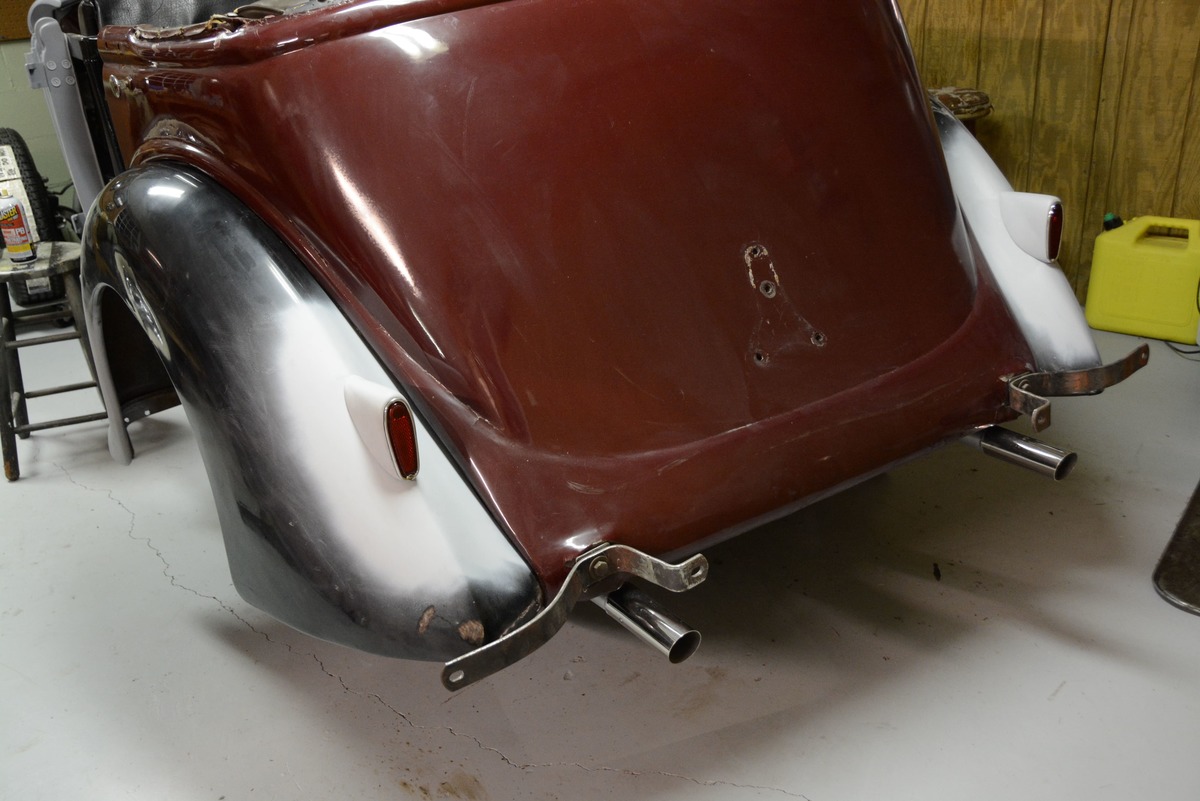
Like most projects, our 1936 Ford phaeton has found its own direction. When we purchased the car, we knew this would be a traditional hot rod with a ¾-race Flathead underhood. Like all hot rod projects, this one seemed to be talking to us and it has slowly morphed into an early hot rod/custom. We have a set of 1941 GMC headlights waiting to be adapted to the front fenders, and of course that got us thinking about the rear lighting. When the 1936 first rolled into my garage I actually thought the stock lights were very cool, long sweeping arms; simple design. However, after permanently removing the spare tire to expose that sweeping back panel those long arms suddenly looked too long; we’ve heard the 1936 taillights compared to wheelbarrow handles.
And then you have friends. In a simple exchange with longtime friend Rick Love at Vintage Air, he simply asked, “What are you going to do about the taillights?” It may have been formed as a question, but it was also at least a suggestion. That did it; the stock taillights would have to go.
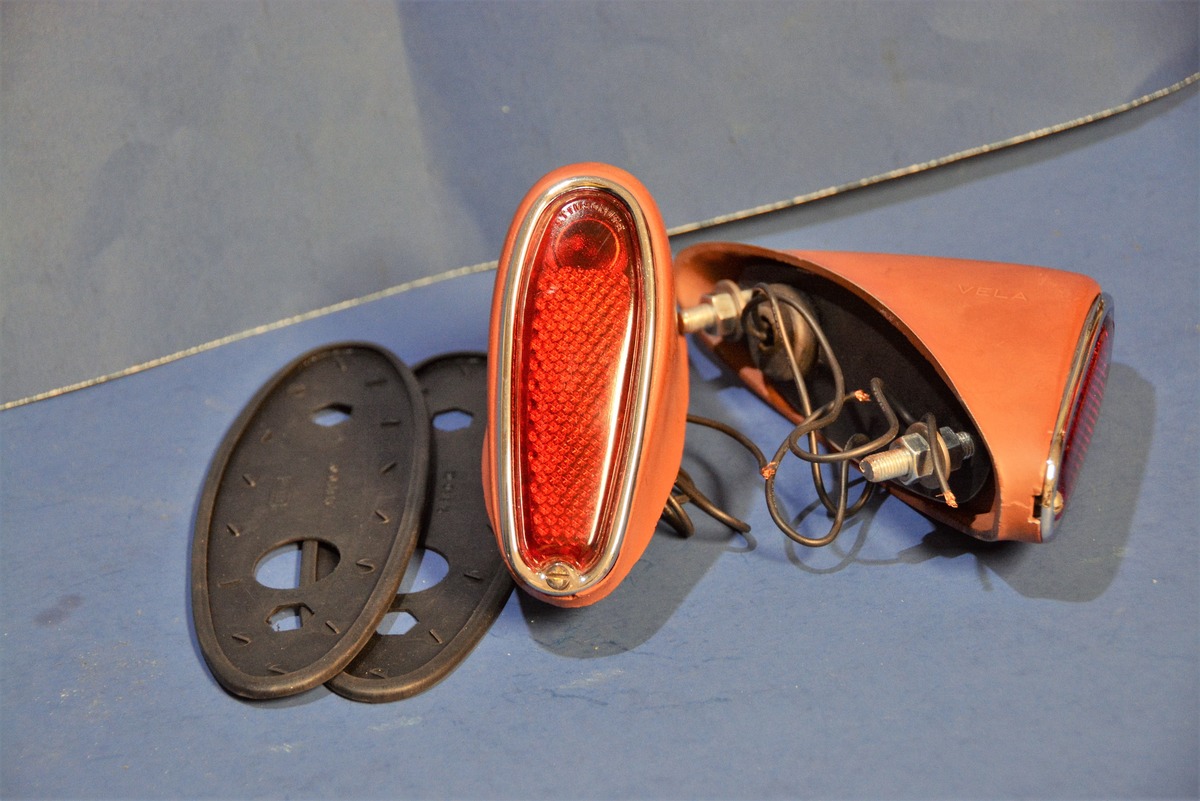
And so we began searching for a suitable replacement. We looked through old books and scrolled around the Internet in search of a taillight that would be simple yet elegant. An old trick from early customizers was to add bits from expensive cars to give the car a more expensive look—that became our goal. It was pure happenstance that led us to the 1940 Packard. I was online looking at expensive vintage cars for ideas when I came across the 1940 Packard. I instantly recognized the lights, although I had long forgotten about them. They were exactly what the car needed, slightly newer than the fender with a clean, elegant design. An added bonus is the lights are familiar looking yet most people will be left scratching their heads. So, I knew I wanted 1940 Packard lights, the next chore was finding a good pair. Once again, the Internet took us where we wanted to go. We secured a pair of original lights from Tucson Packard, a vintage Packard parts dealer. After securing a nice pair of lights we ordered a pair of taillight pads from Steele Rubber Products.

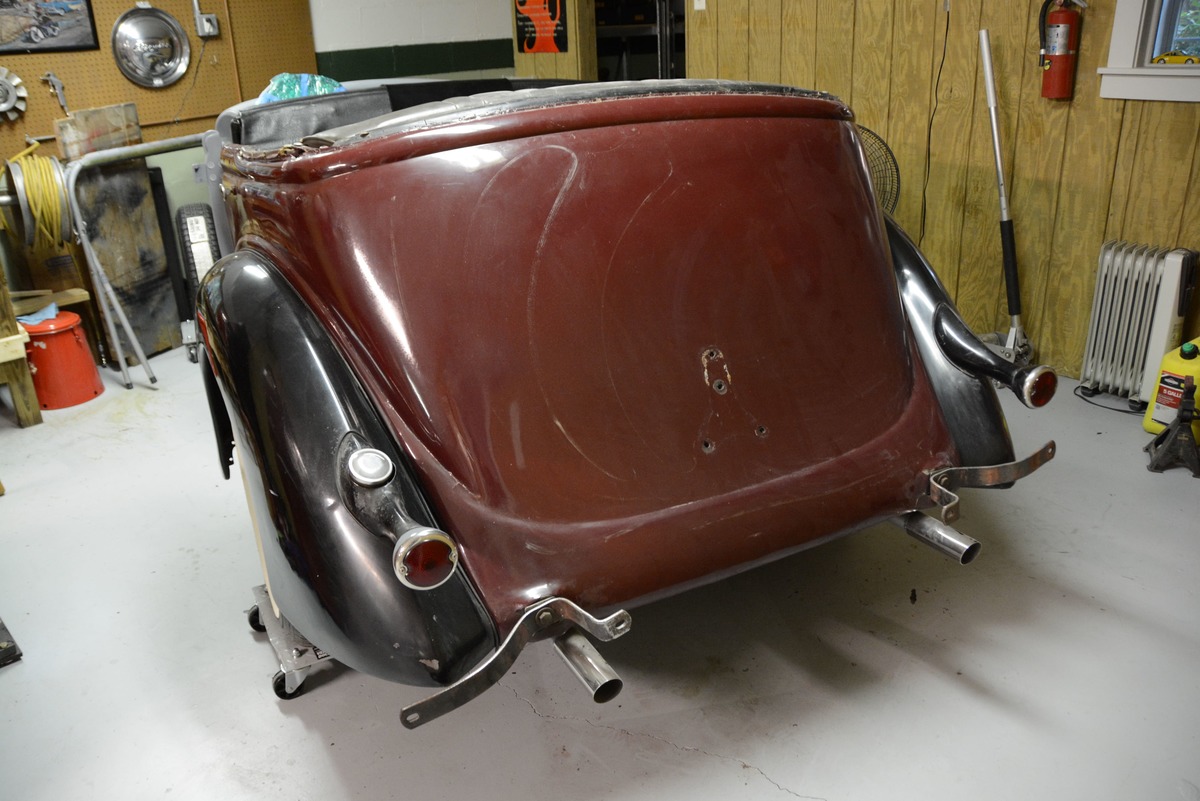
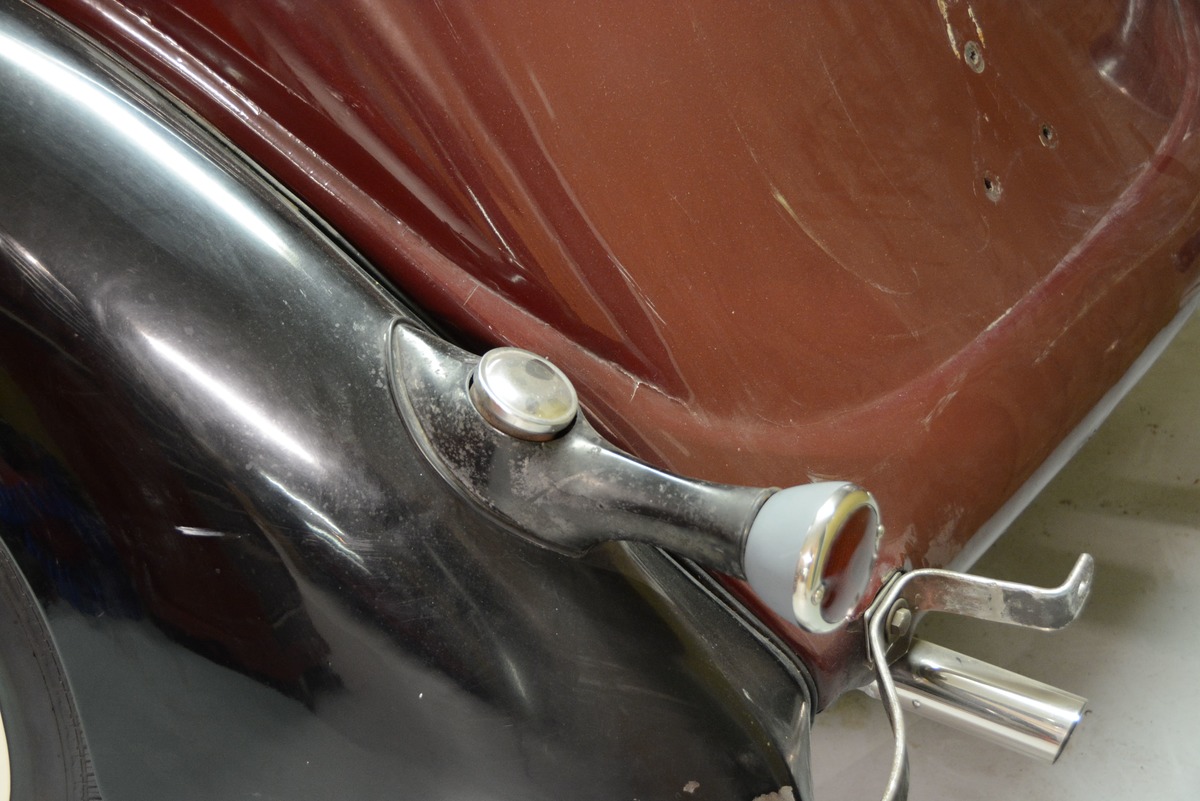
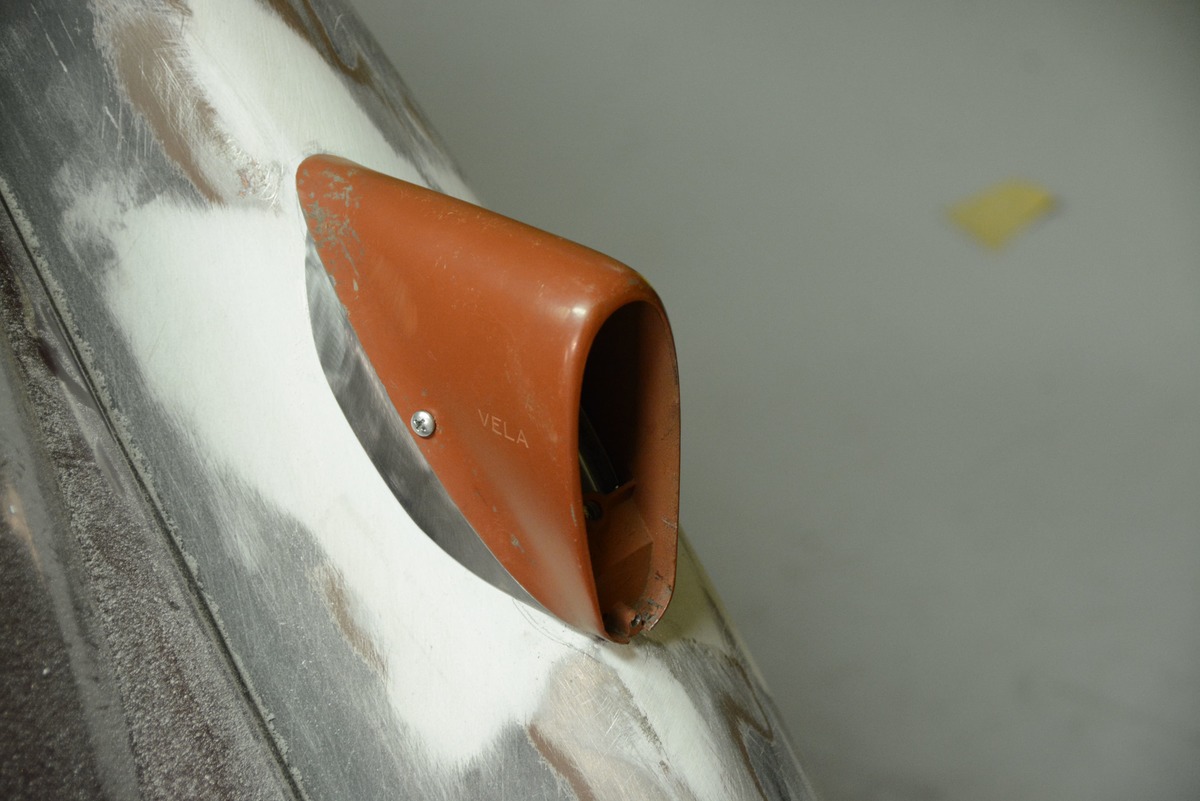
Armed with a very nice set of taillights and gaskets, it was time to adapt them to our 1936 Ford Phaeton fender. The lights originally mounted to the inside of the fender peak on the Packard, between the fender peak and the body. It is possible to mount the Packard lights in that position on a 1936 Ford coupe or sedan, but our phaeton fenders are narrow in that area and in our opinion the lights looked too crowded in that location. With that thought in mind we opted to mount the lights centered on the rear peak of the fender. This would involve filling the original fender holes and then mounting the Packard lights. On the driver-side fender, the gas filler is part of the taillight, so we would have to relocate the fill tube too. That’s another story for another time.
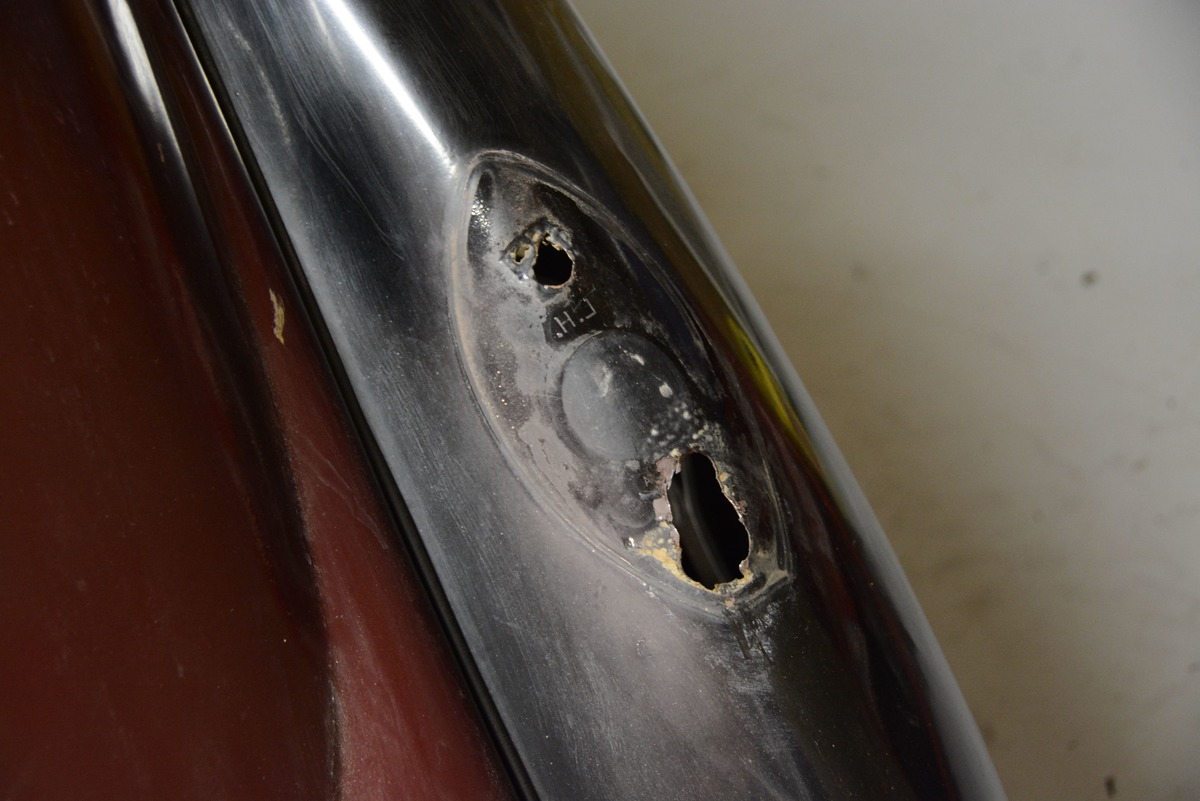
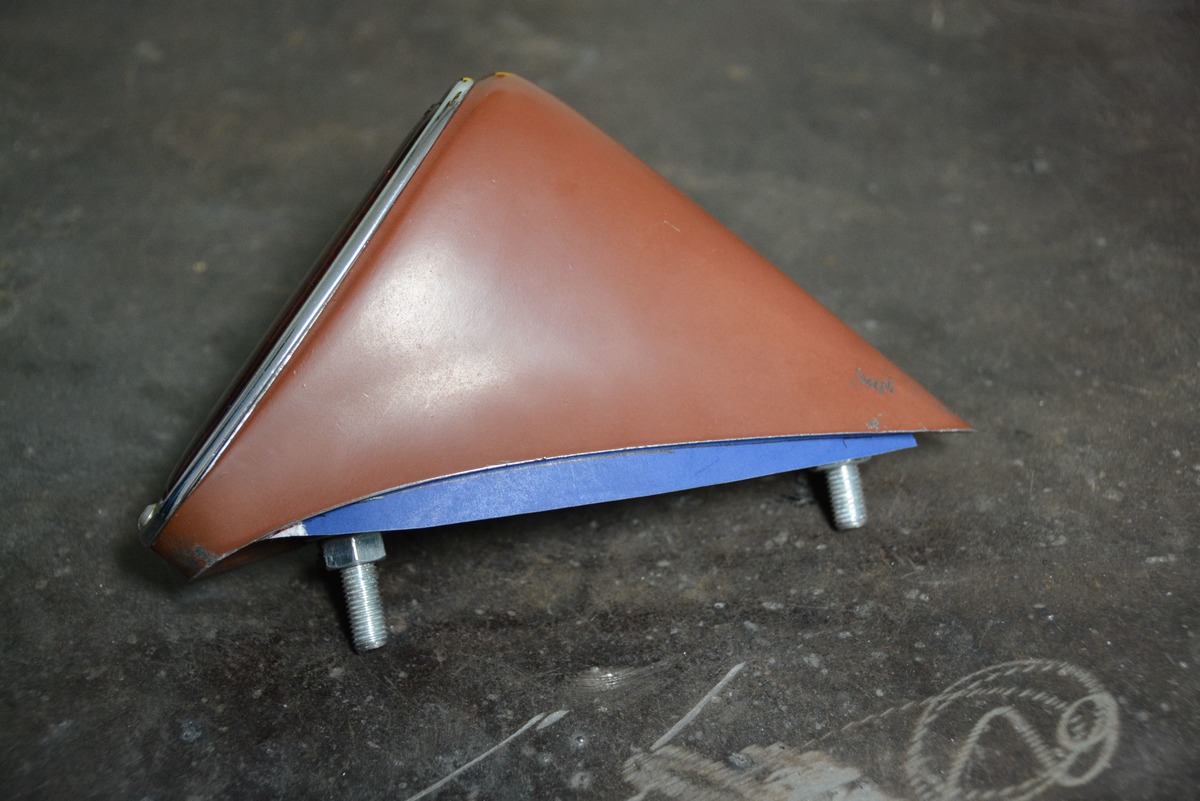
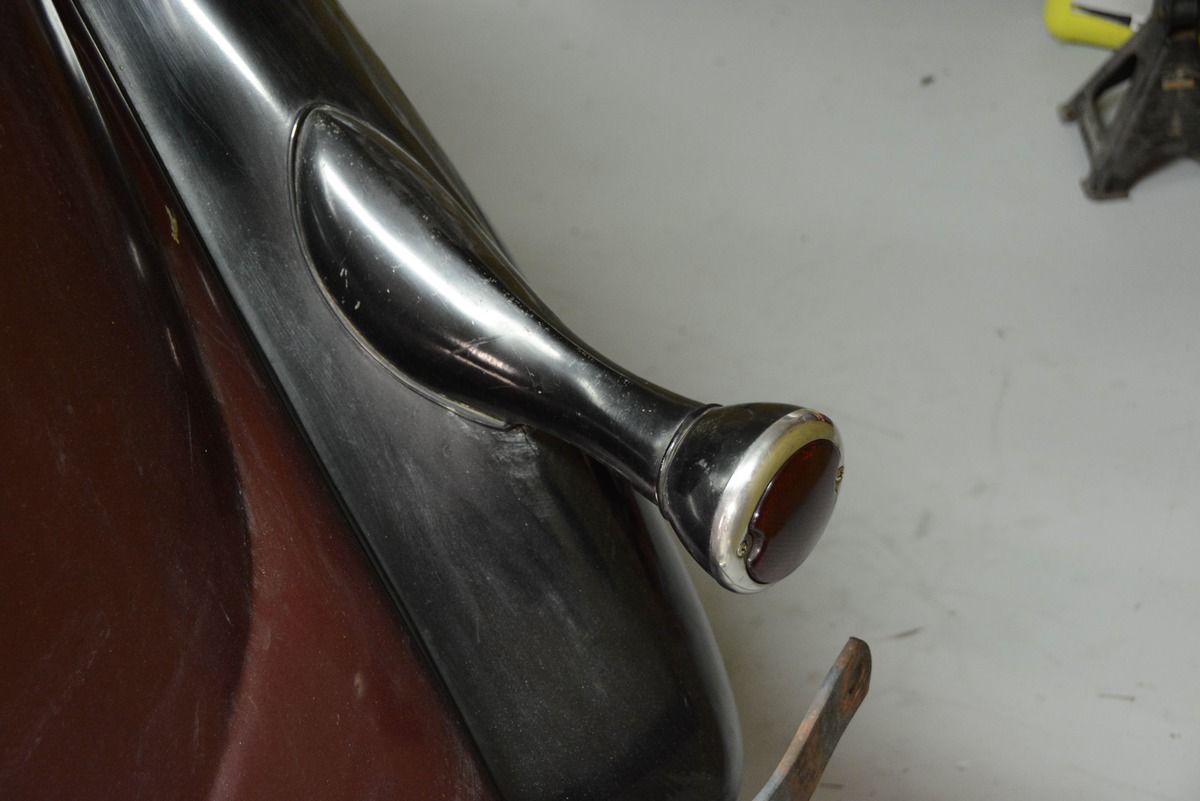
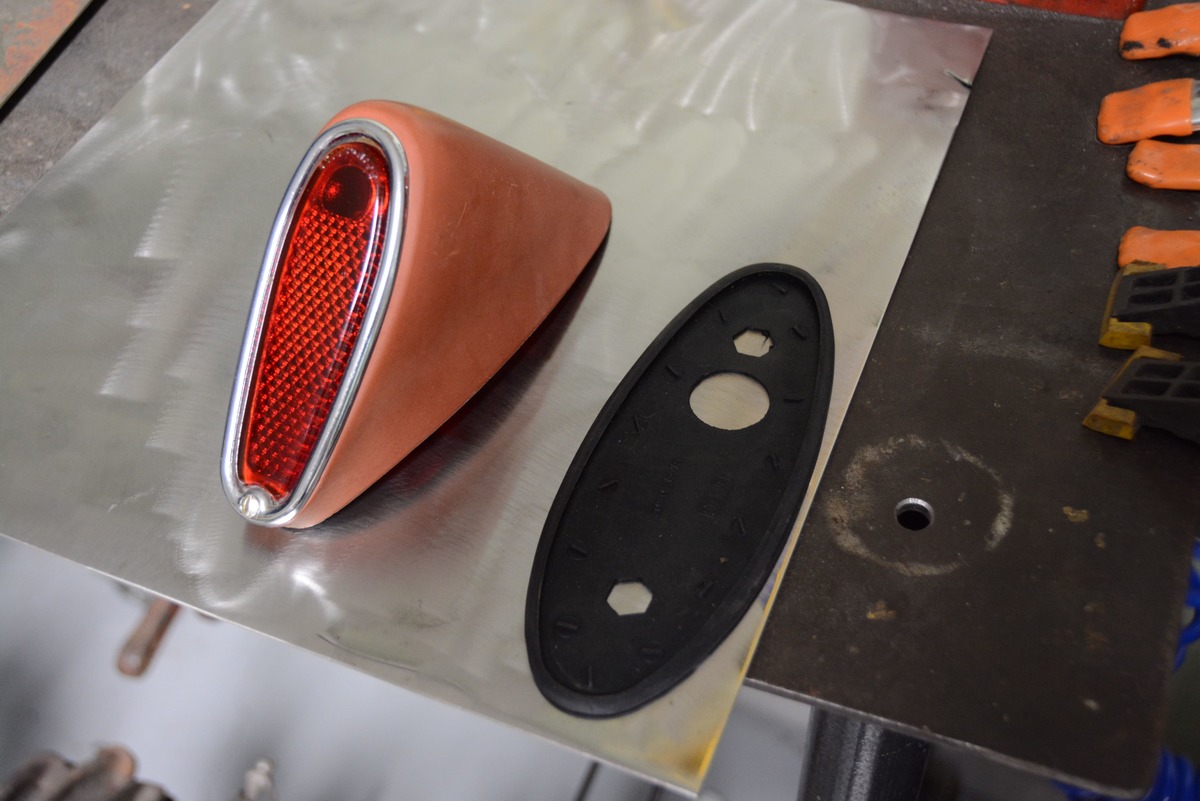
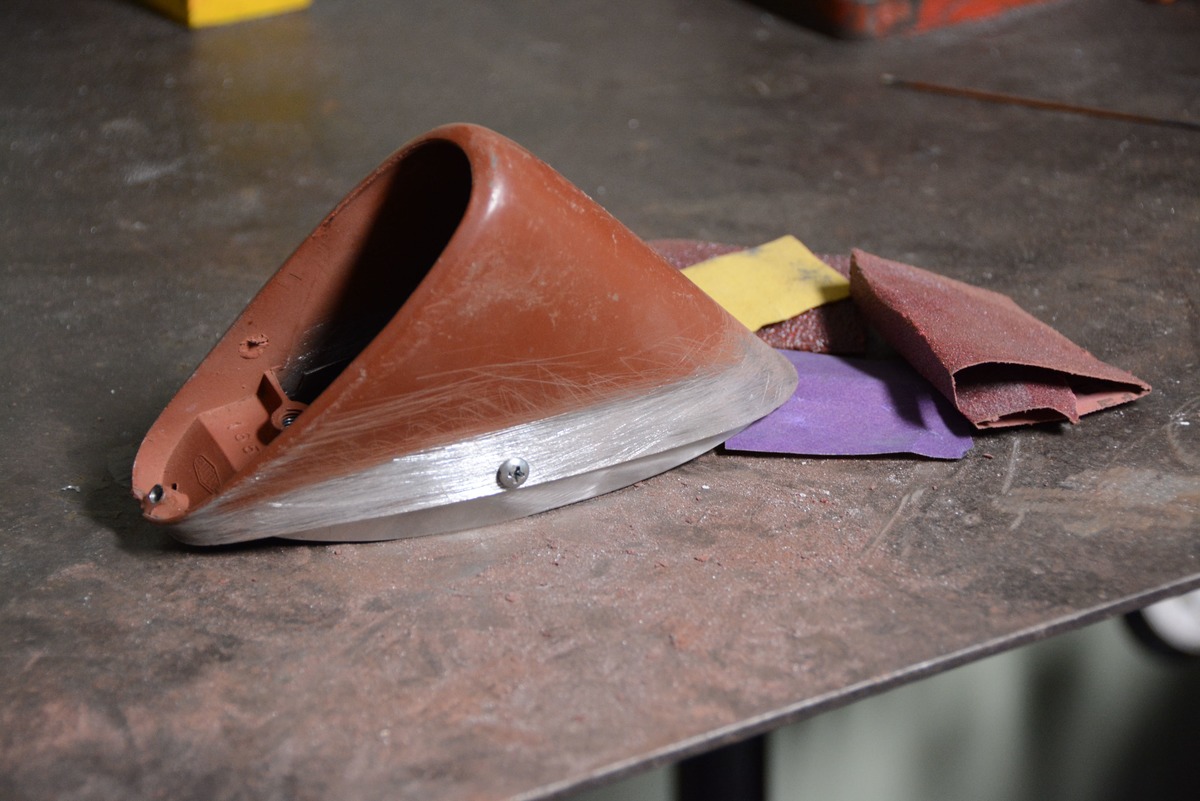
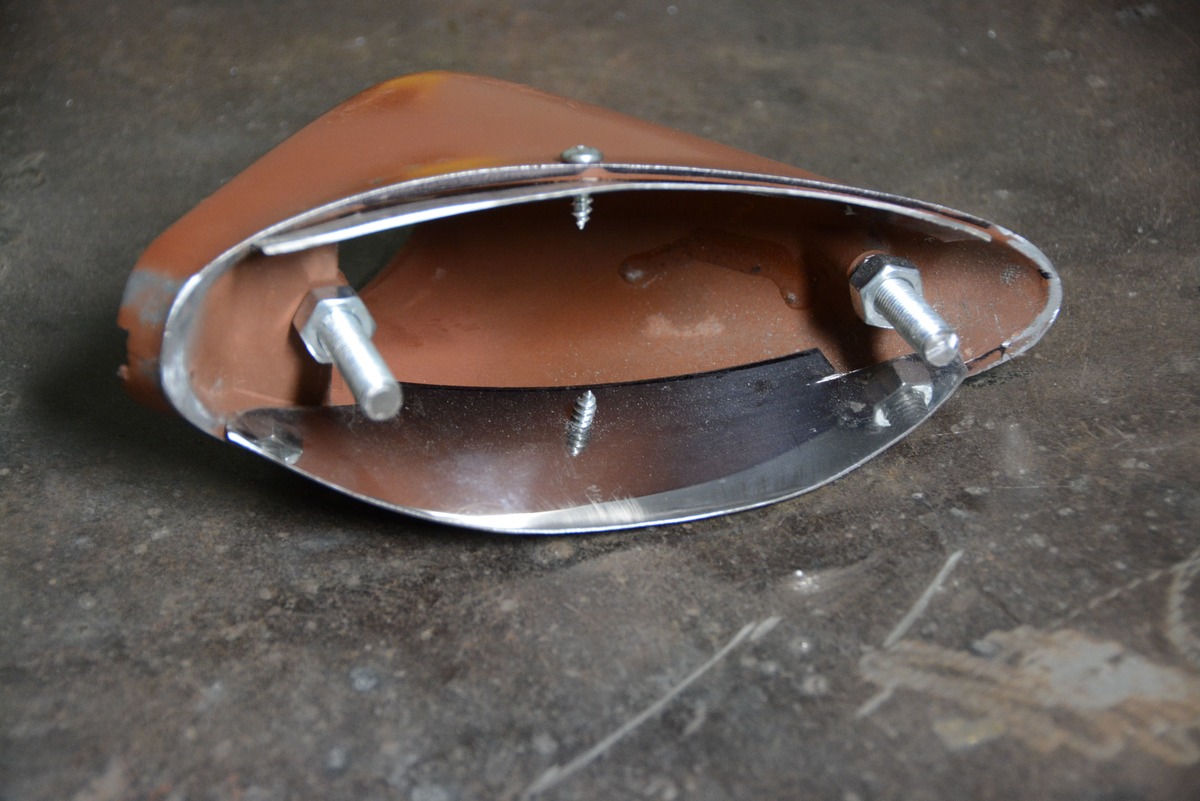
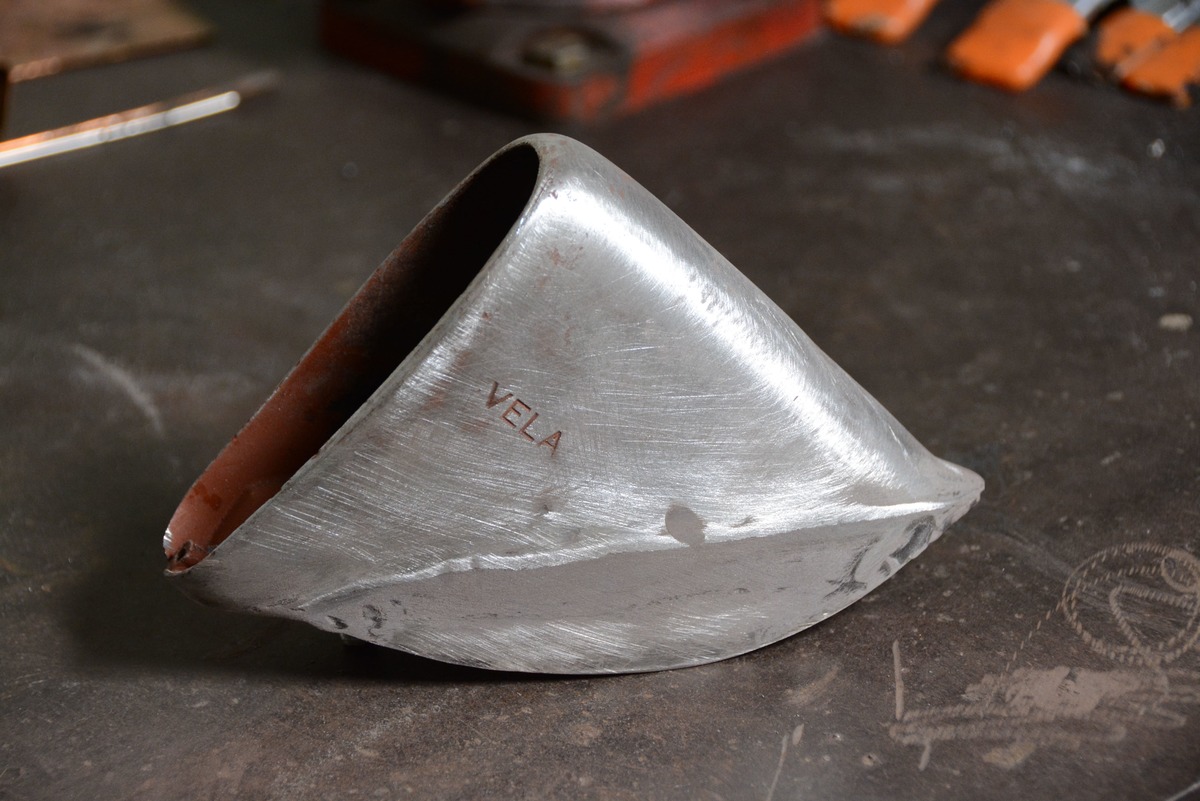
The Packard taillights are very nicely built by VELA. They consist of a cast-aluminum body (not pot metal), a small chrome rim, and a glass lens. In some applications it may be possible to reshape the bottom of the taillight to conform to the fender. In our case that would not work, we would have to add a “filler skirt” to the bottom sides of the light to conform to the shape of the 1936 Ford fender. We mentioned the taillights were elegant; well, elegance doesn’t come cheap, so the thought of attempting to weld the cast-aluminum housing was quickly set aside. Hey, it’s 2021, there are modern methods of bonding metal that work great with zero risk. First, we must form the properly shaped panels.
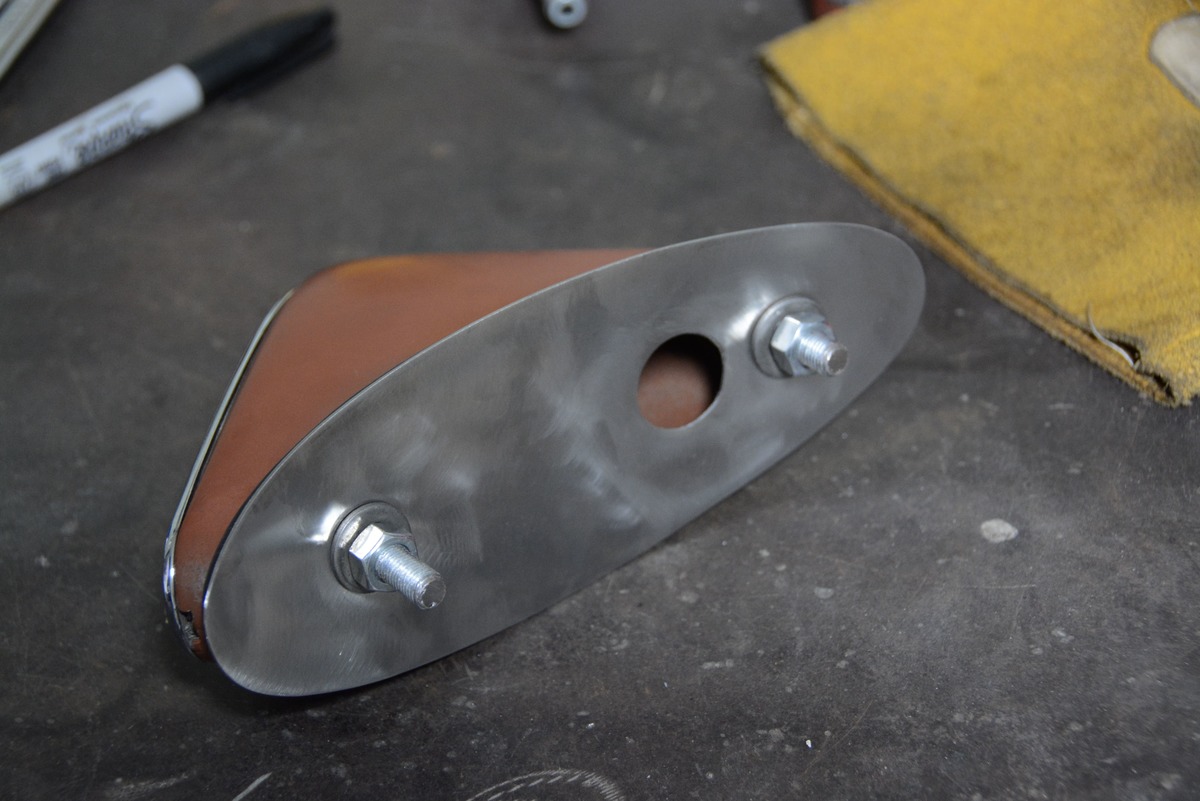
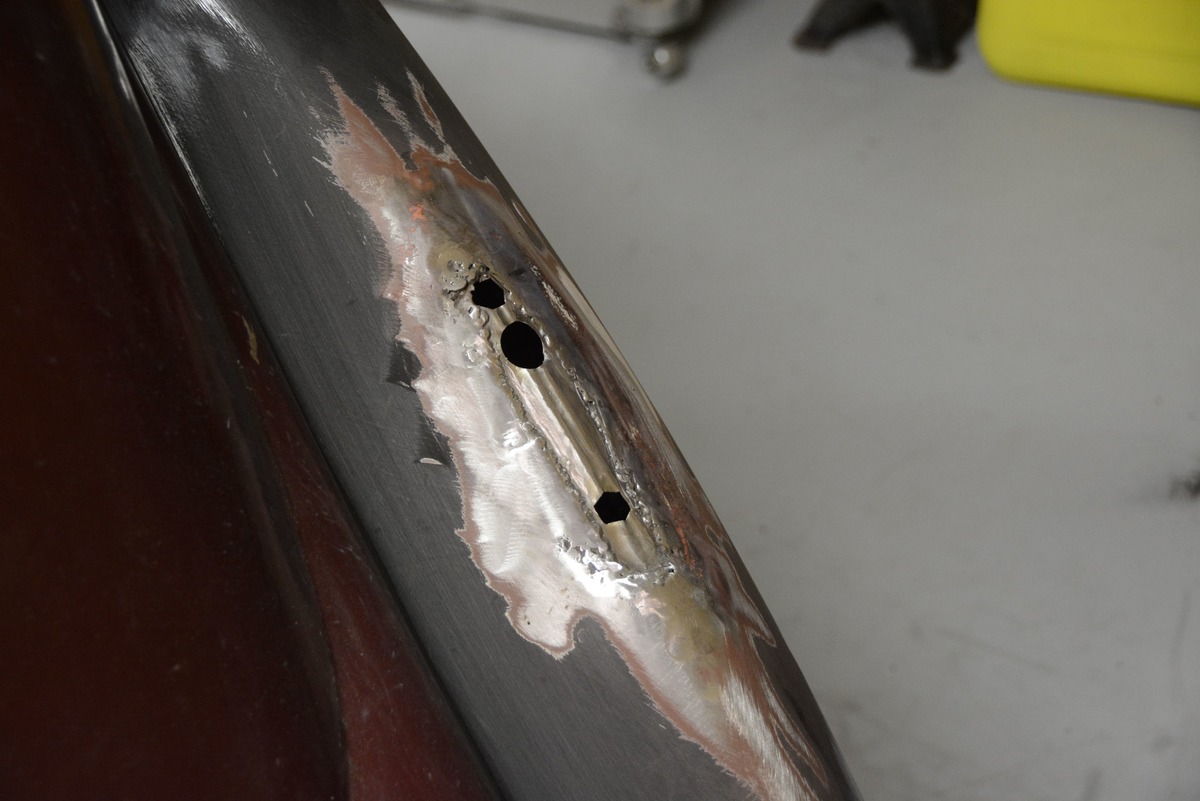
To that end, a piece of 18-gauge sheetmetal was cut to fill the fender opening. Then using the taillight gasket as a guide, we drilled the mounting holes for the taillight, along with a hole for the wiring. Our metal brake formed the needed ridge down the center of the plate, aligning with the ridge in the fender. This panel would fill the original taillight holes in our fender and provide proper mounting holes for the new Packard taillights. The panel was welded in place. Full disclosure and apologies to Ron Covell, I did not flush-fit the panel to the opening and butt-weld, metal finish the seams. I simply formed the piece slightly oversize, clamped it in place, and tacked it in place with my Miller MIG welder, then used my Miller TIG welder between the tacks. Yes, the seams could have been butt-welded, dollied, and metal-finished for a better job, but since most of the panel is under the light, we took the easy way out. A quick hit with a grinder and a skim coat of filler completed the filling operation. This provided us with the final fender contour so we could now match the taillight to the fender.
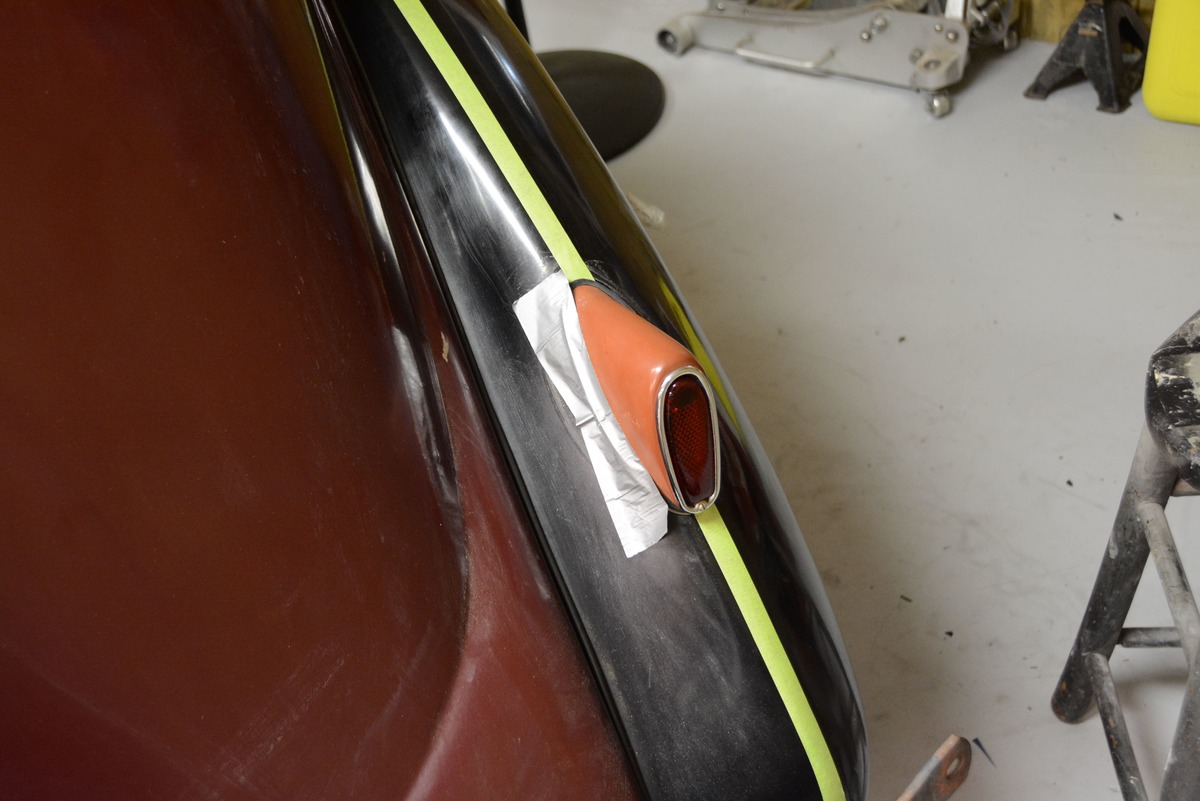
Building the filler panel “skirts” on either side of the taillight was done with pieces of 18-gauge mild steel. First, we taped the taillight to the fender to see how the light would be reshaped. A piece of poster board was used to form a template for each side of the light. This shape was transferred to the sheetmetal to form the filler panels. The filler panel goes inside the taillight housing and it was held in place with one sheetmetal screw. With the panel screwed in place we did the final fitting of the light to the fender, carefully grinding and filling the skirts to perfectly match the fender contour.

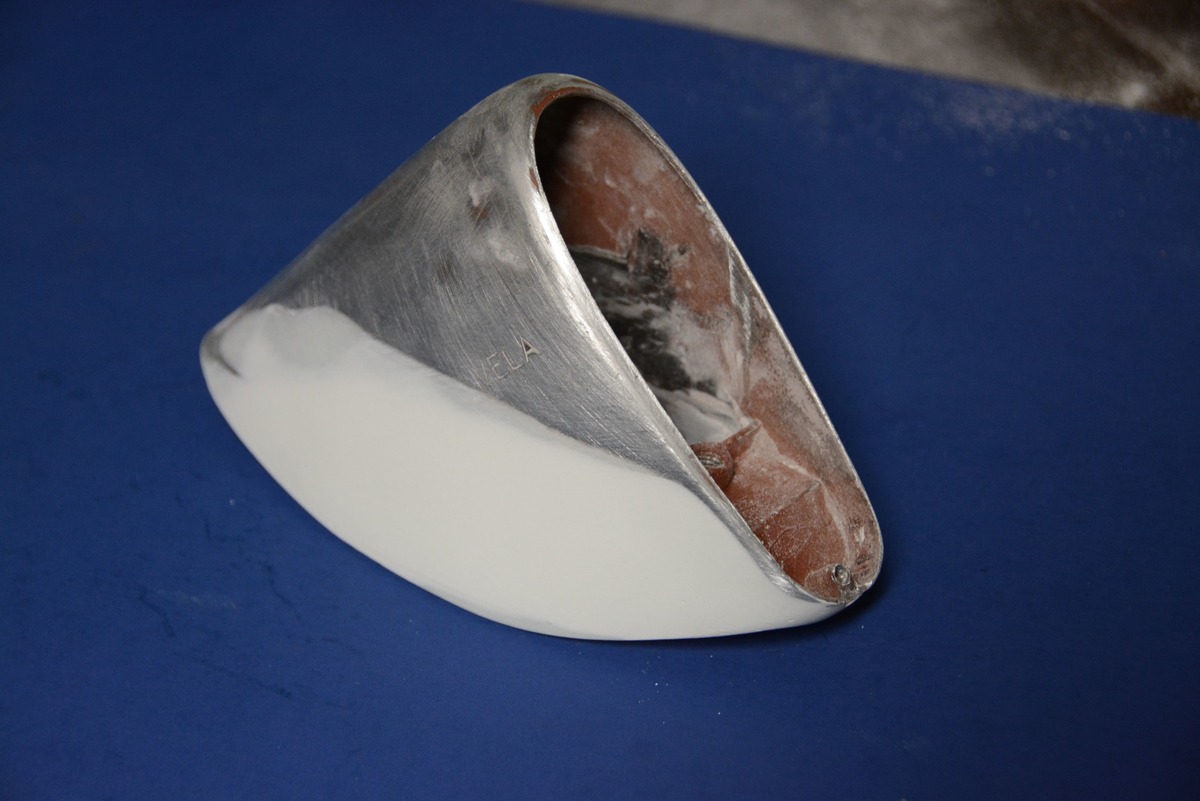
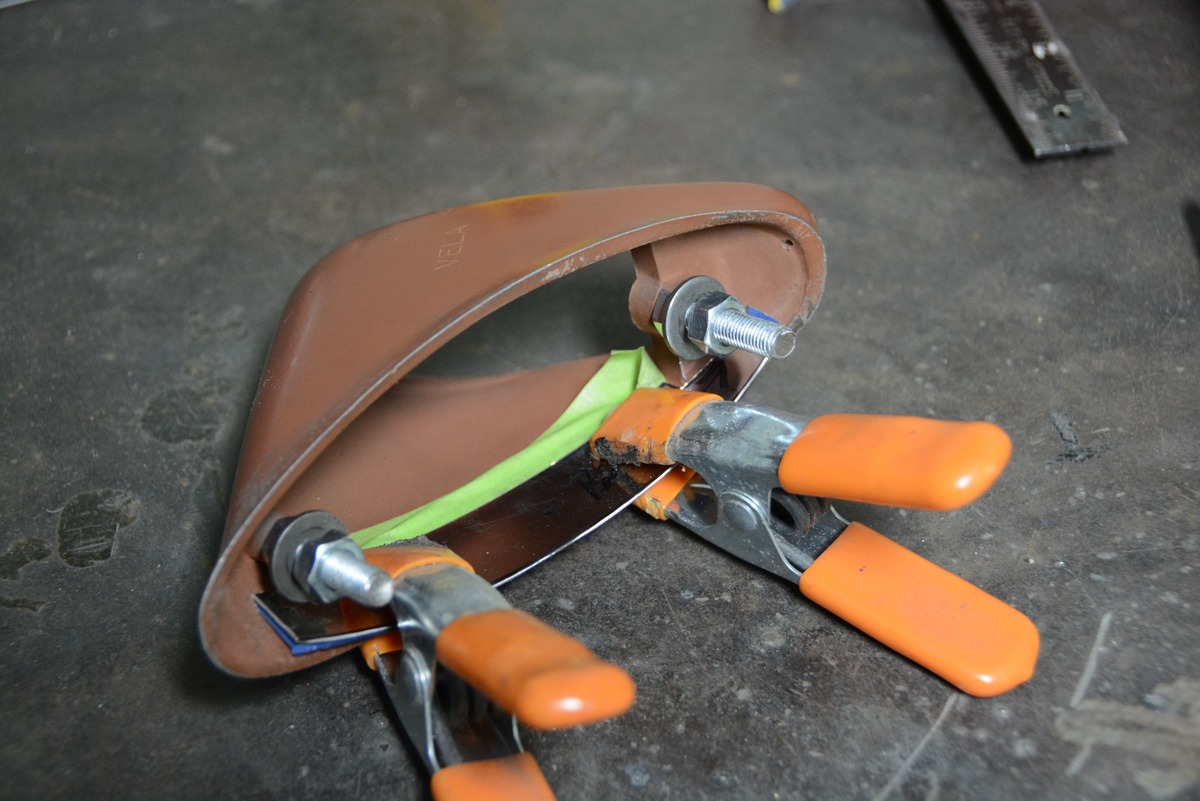
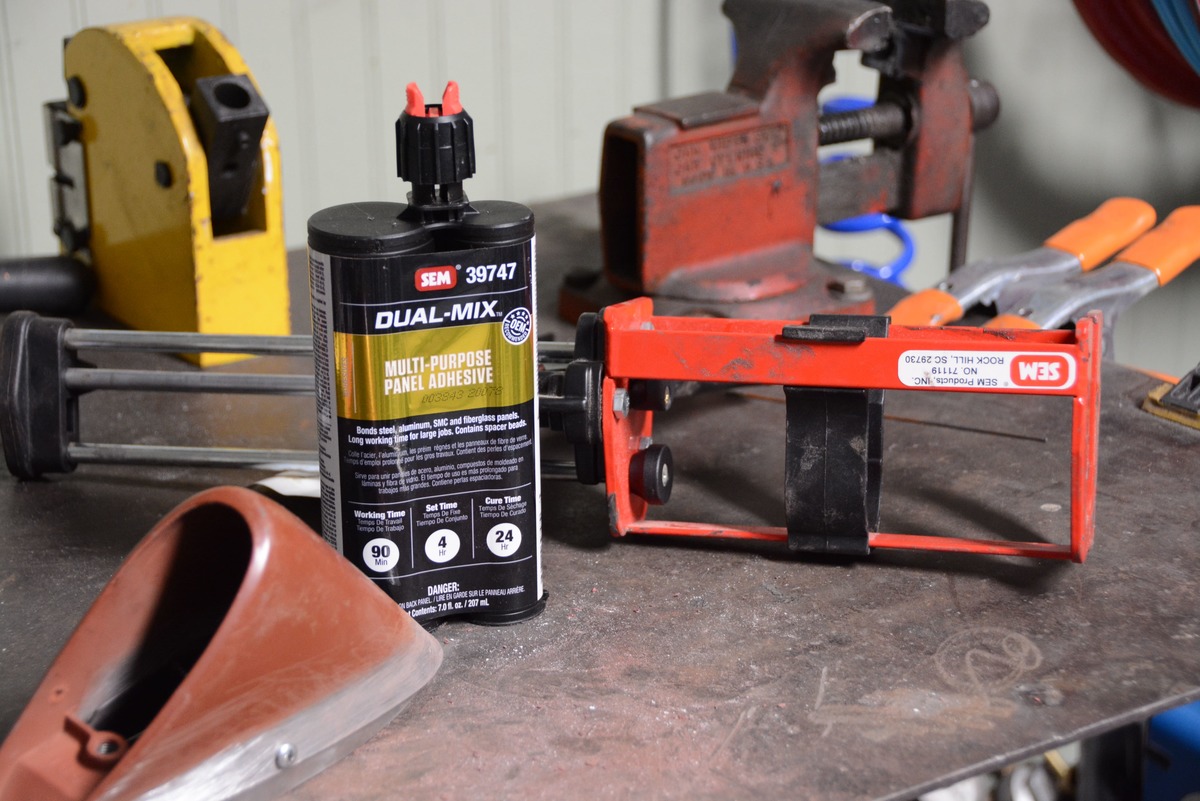
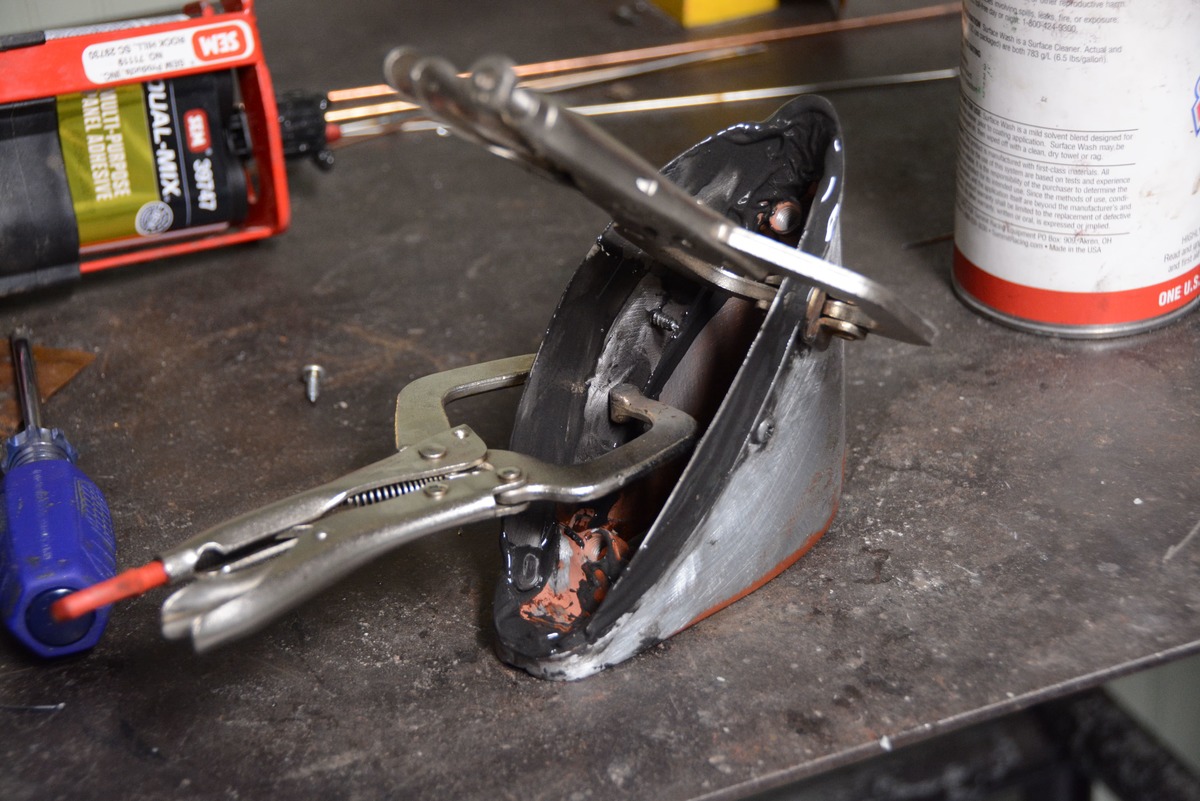
Satisfied the filler skirts were properly shaped, we mixed up a small batch of SEM 39747 Dual-Mix Panel bonder. This two-part adhesive is dispensed from a special gun that distributes the correct amount of the hardener with the filler. We got our bonding agent and the mixing gun from Summit Racing. With the sheetmetal and the taillight down to bare metal and perfectly clean, we spread the mixed bonder on each piece. Then we installed the single sheetmetal screw and used a couple pairs of vise grips to squeeze the filler skirts tightly against the taillight housing. We used a squeegee to smooth the adhesive and fill the transition from sheetmetal to taillight housing. The SEM instructions show set time to be four hours with a 24-hour cure time. We opted to allow the adhesive to cure a full day before removing clamps and sanding. We sanded the adhesive smooth, did some minor final fitting to the fenders, and then did a skim coat of body filler on the light housings to smooth the seam between the taillight and our sheetmetal filler skirts.
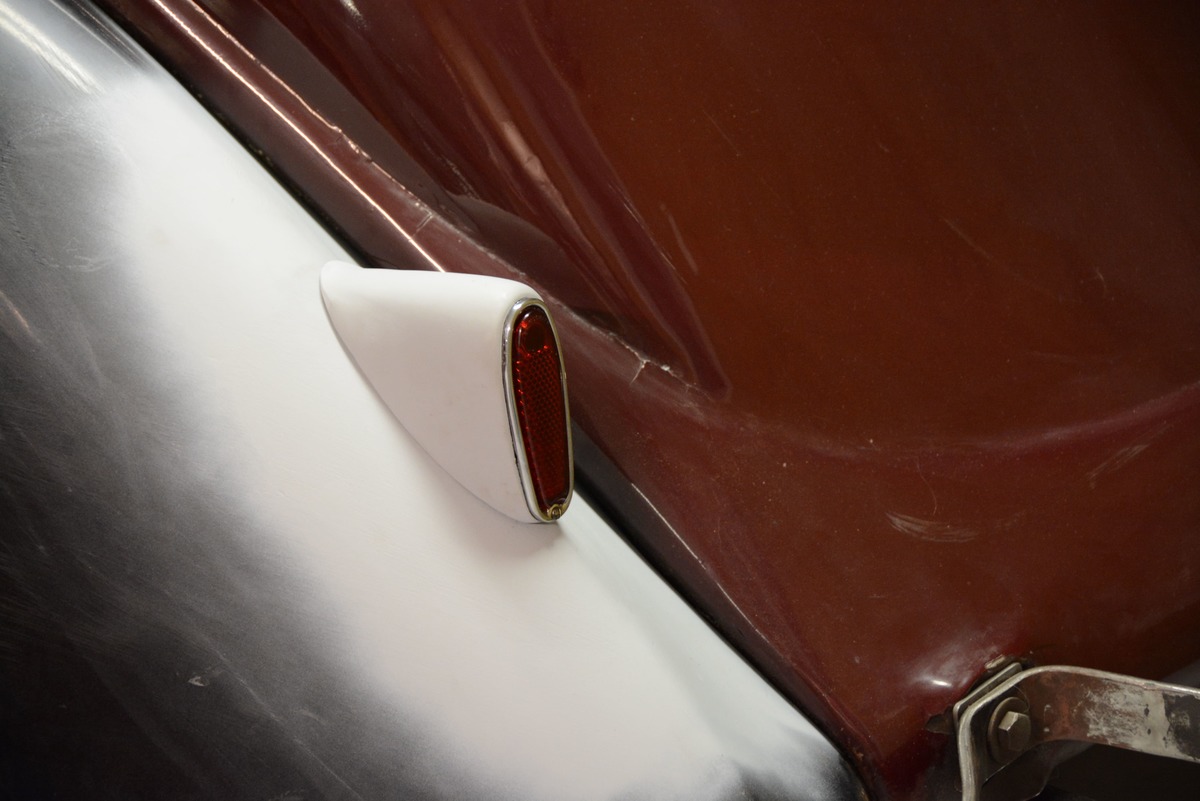
We did it; we added the elegance of a Packard (“ask the man who drives one”) to our Ford fender for a clean and simple appearance. Adding luxury car accents to Fords and Chevrolets was a popular trick with the early customizers, and so our 1936 tub is morphing into a traditional-style early custom in the Westergard tradition.
With both lights fitted to the fender we can now turn our attention to locating a proper gas filler door along with a brand-new gas tank. MR
Sources:
Miller Electric Manufacturing Company
www.millerwelds.com
Steele Rubber Products
(800) 447-0849
www.steelerubber.com
Summit Racing
(800) 230-3030
www.summitracing.com
Tucson Packard
(520) 730-2246
www.tucsonpackard.com


