Everyone knows how one thing leads to another. When we’re thinking outside the box, we might as well color outside the lines, right?
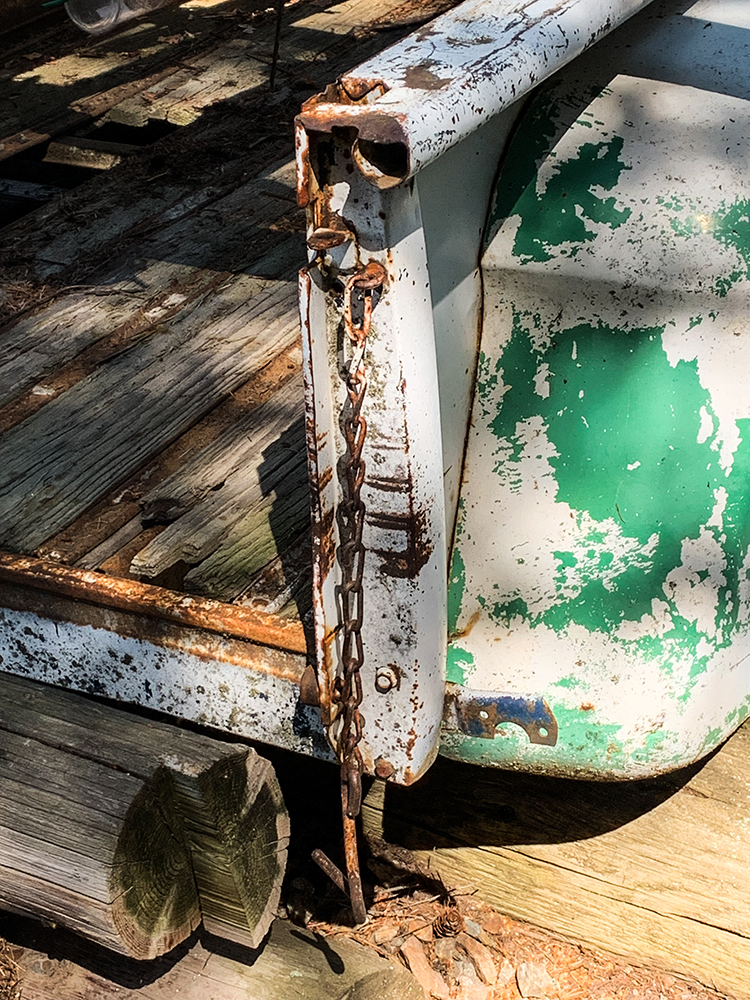
We should all be familiar with GM chain-type tailgate latches. Here in the great outdoors, these’re about as ugly as they get. Even in pristine condition, they’d still be hard on the eye, and harder yet on pretty paint.
Just a while or two back we dry fit assembled a Task Force Chevy reproduction Stepside bed, beginning with its squared-up wooden floor. We know; that’s not the way most builders go about that. It’s just how we did it that time, and as you may’ve even noticed, it worked out mighty fine.
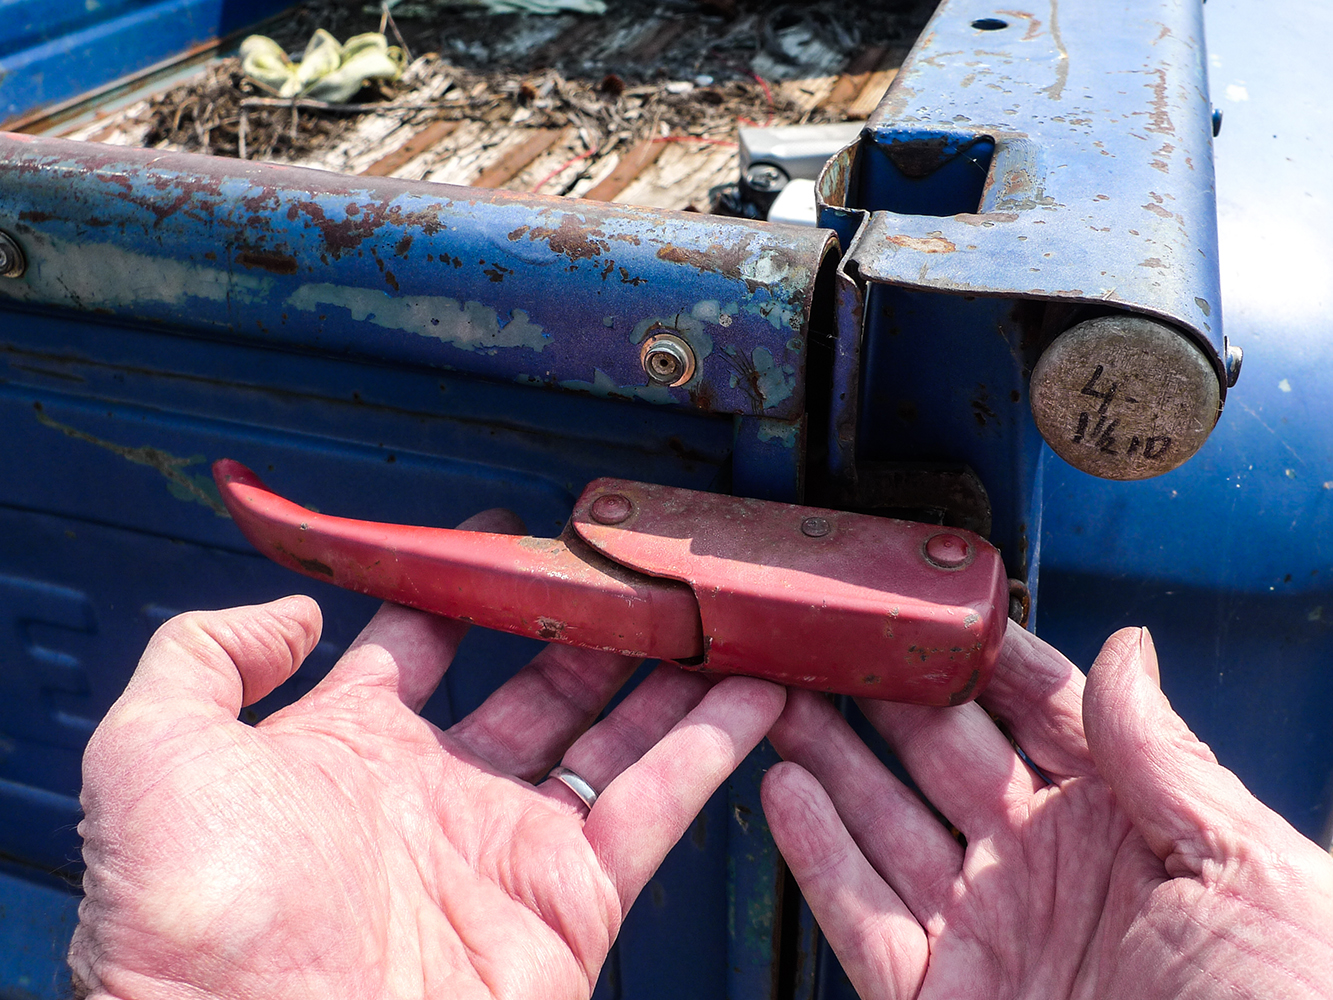
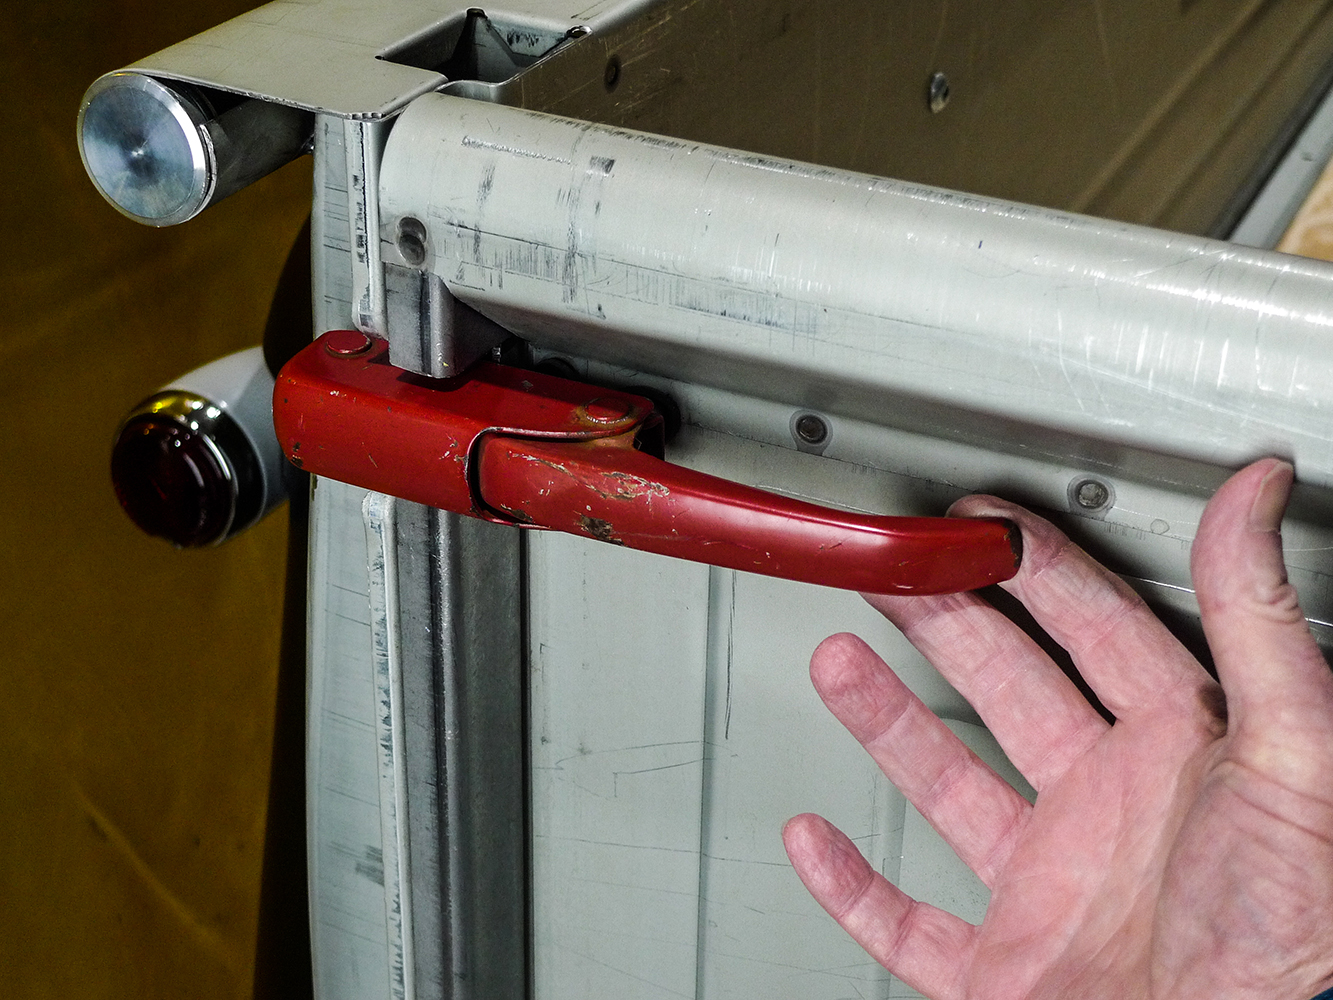
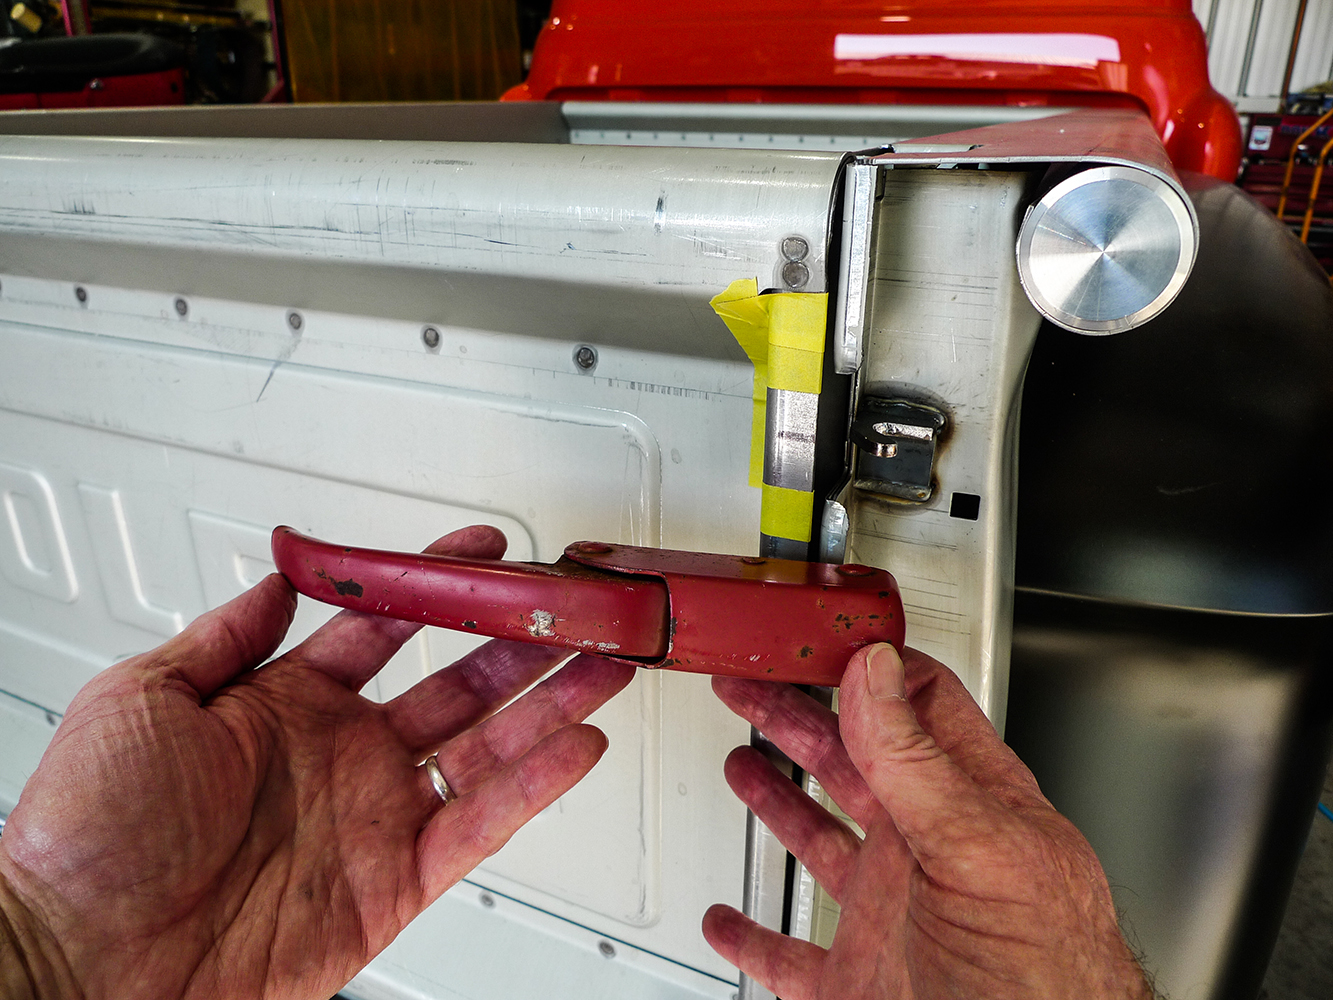
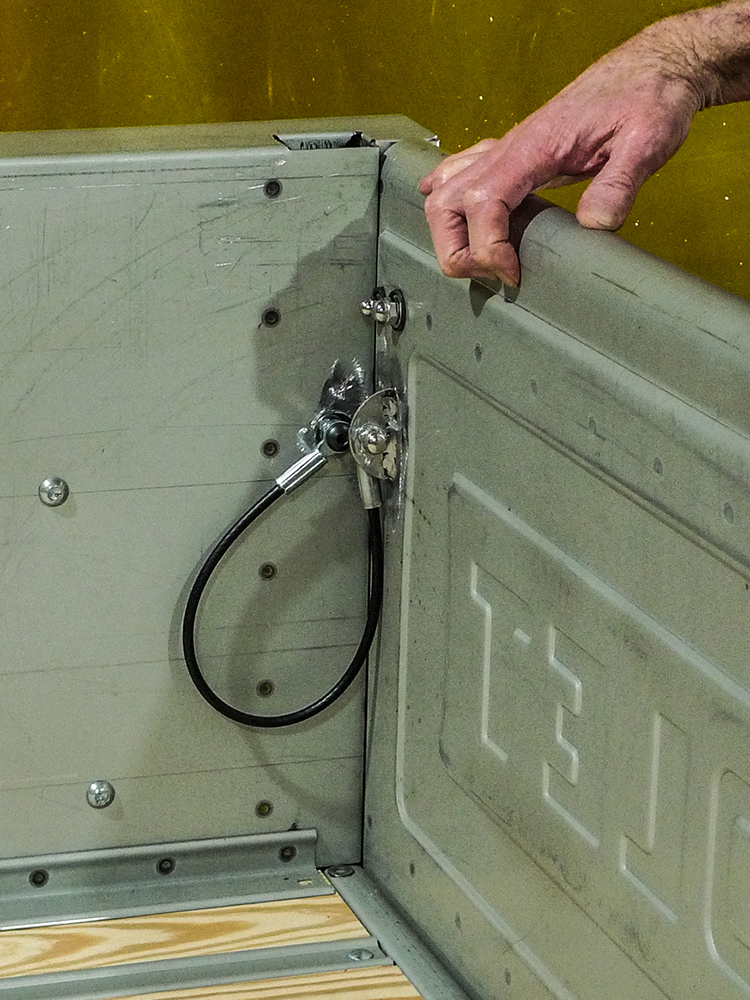
These are Datsun 620-series tailgate latches. While they’re somewhat less stealthy than current aftermarket options, they’ve got the look that I personally happen to like. They’re strictly business but they’re not rattlin’ chains.
Recently, we’re wrapping up some mild custom touches for the same all-new Stepside bed assembly. If you caught this story’s part 1 (Jan. ’25 issue), you may recall taillights and tailpipes near the tail end, but there’s still a little more in store. We’ve still got some custom tailgate latches and catch cables to figure out.
Do you see what I see? This might sound easier than it might end up to be, but with a few surgical slices in just the right places this’ll likely work—again.
Now, before we move forward, let’s take a spendy step back. This one’s on yours truly. It’s about the brand-new tailgate that we already have. Instead of one with the stock-configuration hook-and-chain latch setup, I should’ve ordered the same ’gate sans (that’s French for without) unnecessary hardware. To make the job at hand much easier, we’ll go on and purchase another ’gate.
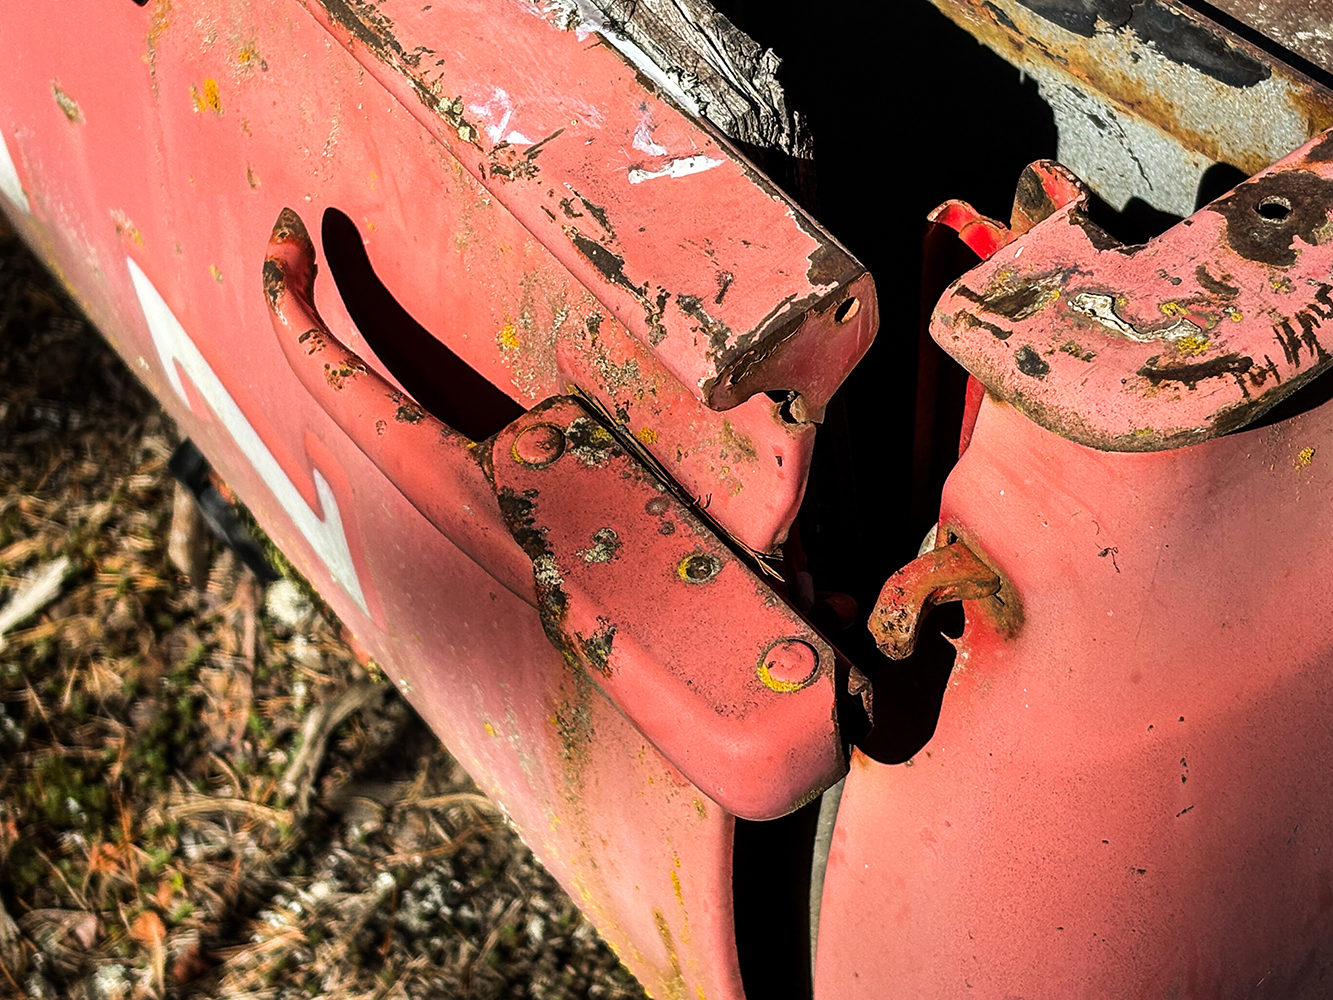
Our first new tailgate was configured for chain-type latches. Just in from Speedway, here’s our second new ’gate sans (pardon my French) heavy chain latch hardware through its upper corners. It’s a cleaner start, and now we know.
As much as we still prefer the old-fashioned eye-to-eye parts procurement procedure, this time we’d rather not drive cross-country for it. At the same time, we’d still rather not have our customer pay today’s shipping costs. One way around that is to purchase the next tailgate from Speedway Motors. If you don’t already know, orders above $149 ship for free. Even though our needed item ships directly from the manufacturer, it also ships for free.
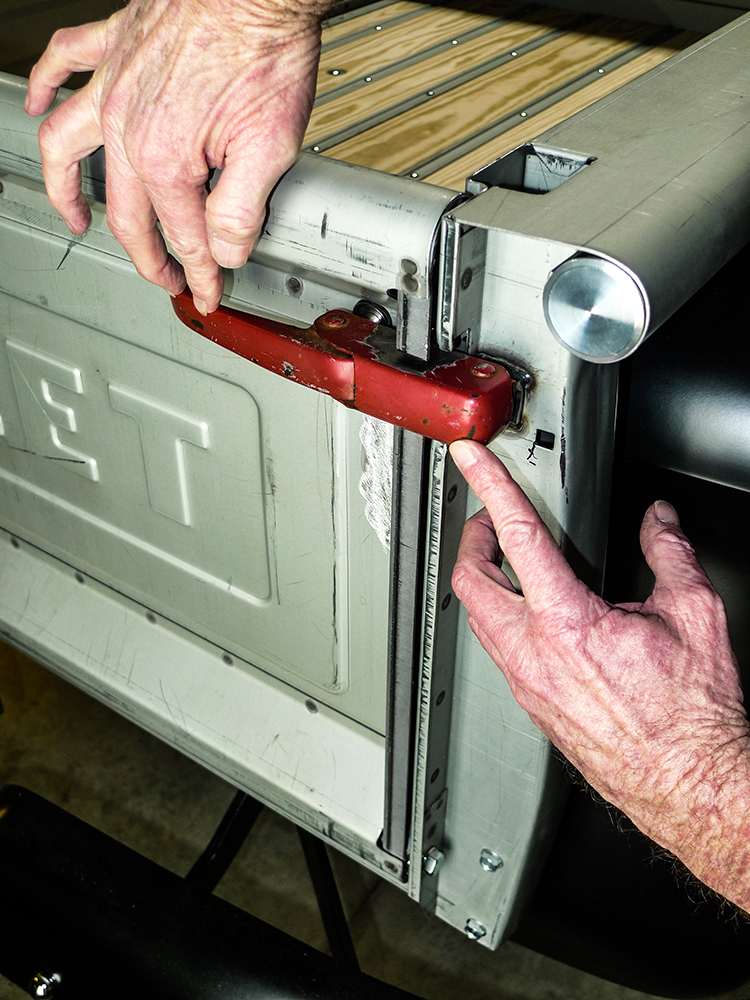
With the second ’gate squarely adjusted, we’ve made some brave incisions, and our A-side latch is functioning well. Now that we’re certain it’ll work, we’ll illustrate each step for the B-side.
For quite some time I’ve had a recurring notion for custom tailgate latches, but it’s not an approach that we commonly see. When it came time to breeze the plan by the project truck’s owner, the pitch went out as a newfangled phone photo—and his instantaneous reply was, “Do it!” He then went on to say that he’s not the biggest fan of those rattling chains. These days, those are plain unpopular, period.
As we go, you may spot some Harbor Freight tools in the mix. At the time of this typewriting there’s a parking lot sale going on there, but first things first. We have a job to do here.
This won’t be what we’ll do, but who remembers seatbelt buckles affixed inside of bedsides to function as semi-discrete push-button tailgate latches? That was good old wrecking yard resourcefulness, and it was right in line with the times.
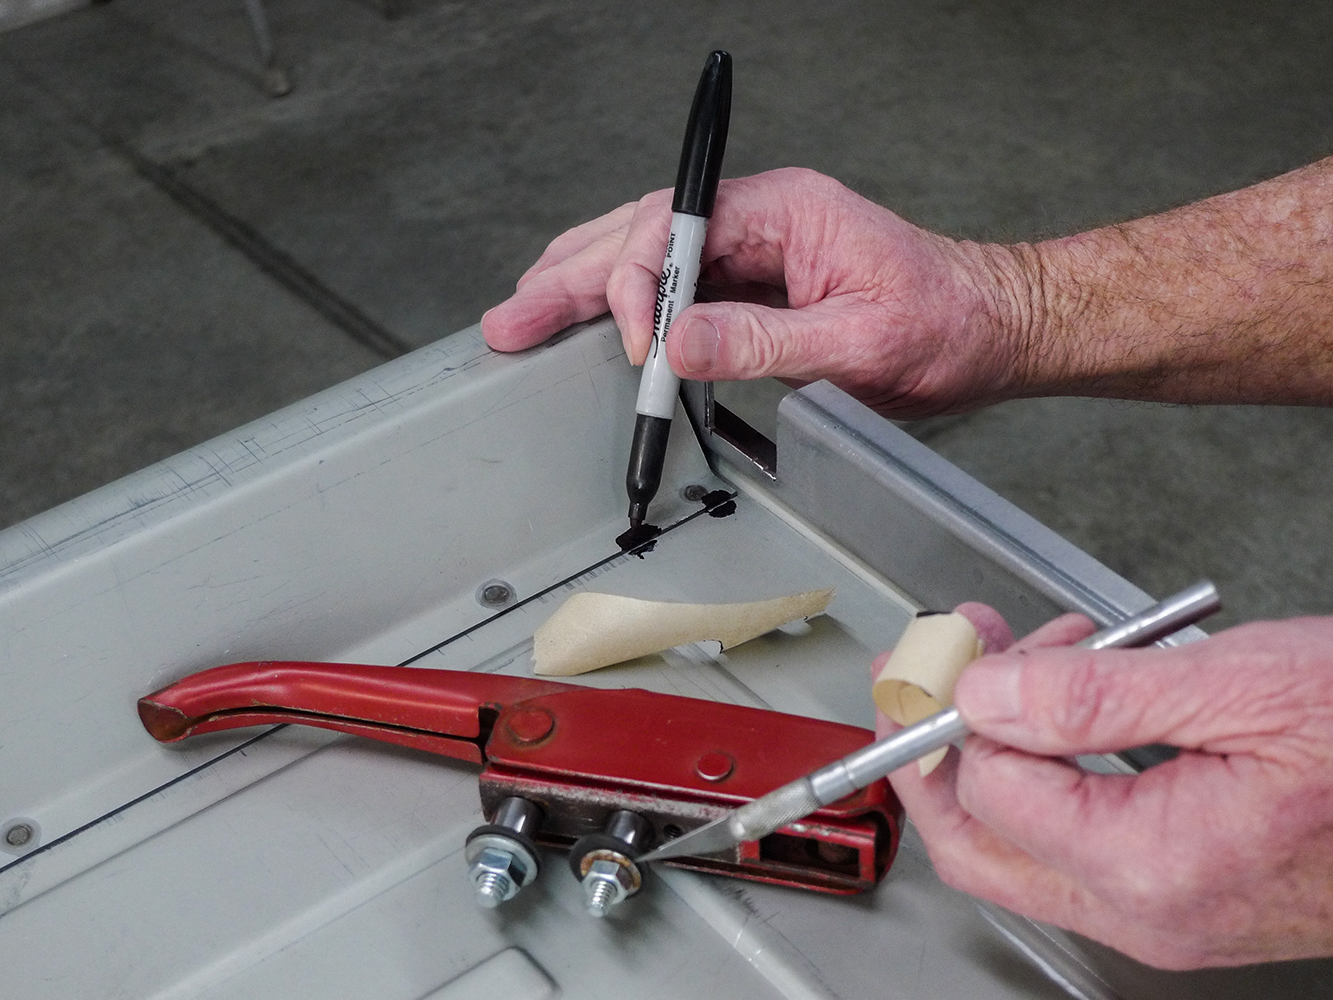
To begin, let’s take a small slice from existing chain latch hardware. It’s the loop we’d ordinarily drop the hook’s end through. When we’re finished it’ll have a compatible angle for the Datsun latch.
Today’s way would more likely involve kit form hidden latches. Granted, that’s the cleanest and easiest way to go, but it’s just not what I’ve had in mind. To flow with the flavor of this lower-than-high-tech build, ’gate latches won’t need to be invisibly hidden. They’ll only need to look as though they belong.
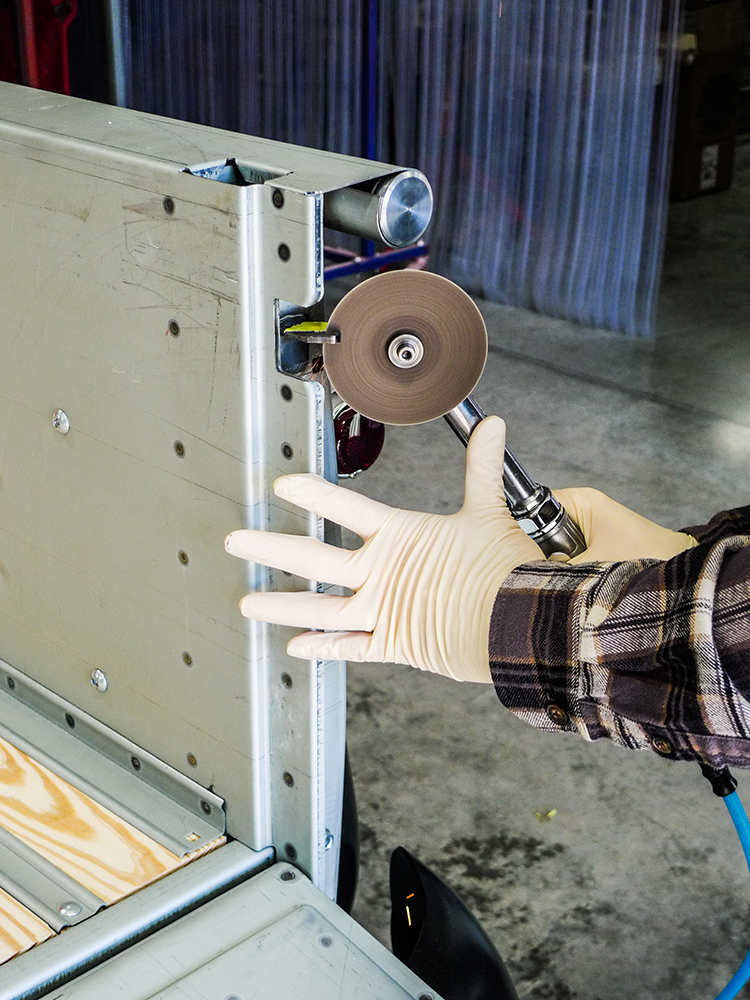
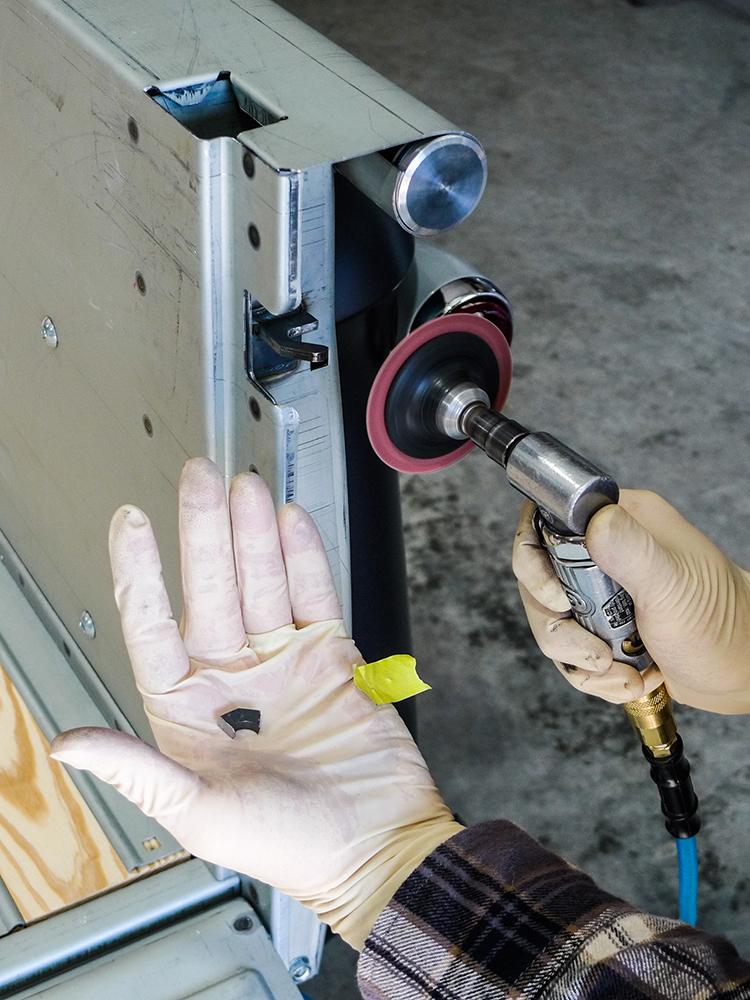
At this point the remaining section of steel resembles the striker portion of the latch we saw earlier in photo 2. Next, before we go much further, let’s smooth the fresh-cut edges. By doing so now, we’ll conserve on bandages
Like it or not, I’m particularly partial to tailgate latches from 1970s-era foreign-job pickups. Years ago, for a 1957 F-100, I used latches from an early Ford Courier. This time for our customer-friend’s 1955 second-series Chevy, let’s try latches from a 1973-79 (620-series) Datsun. They’re somewhat similar, they work the same way, and I happen to know where we’ll find a pair.
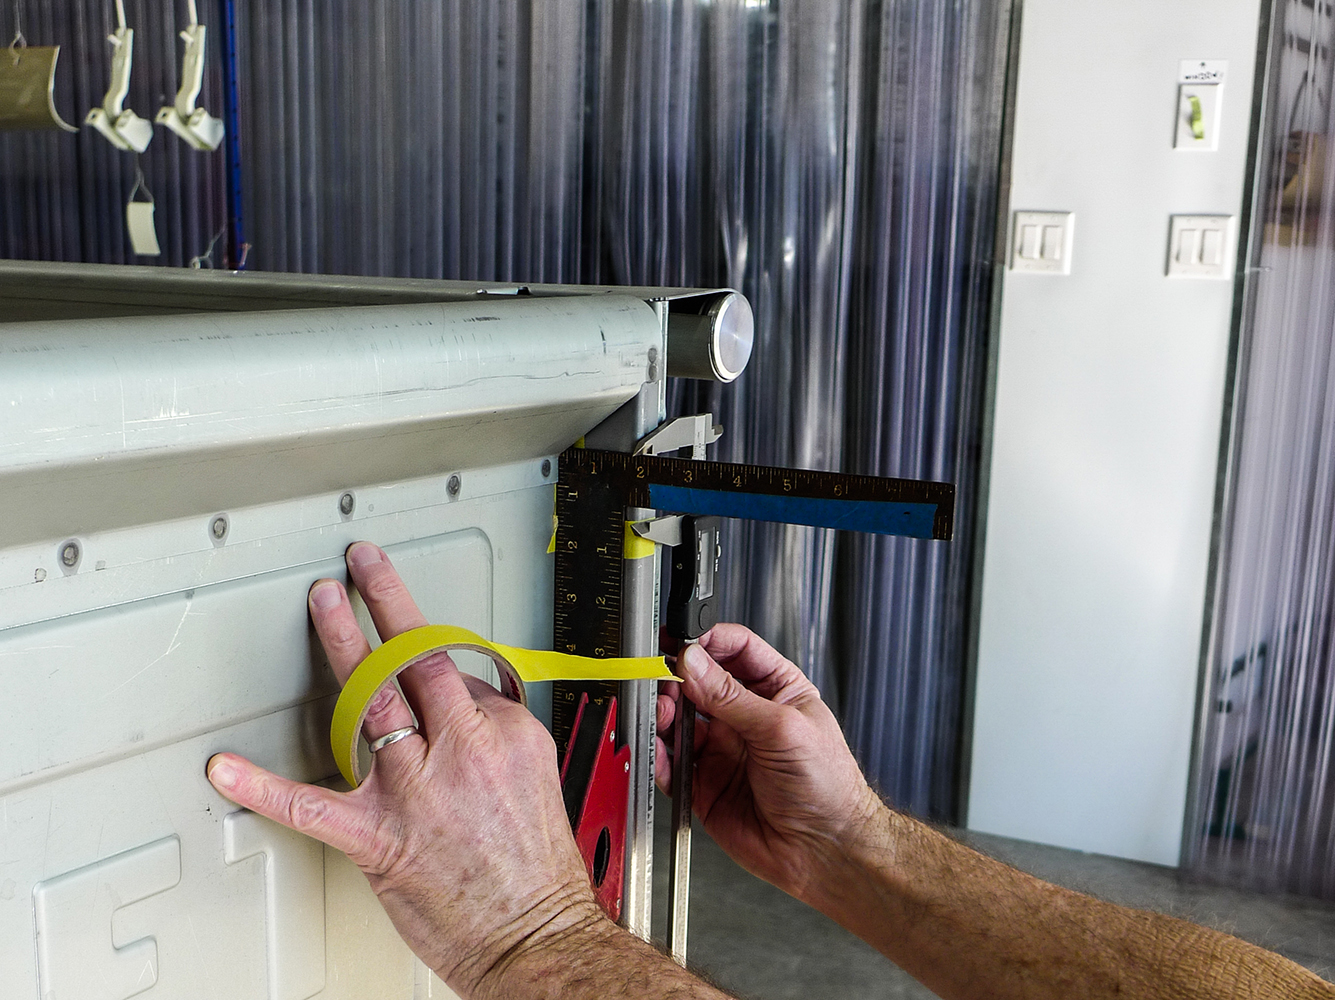
Finishing the A-side latch involved some eyeball engineering. The tricky part will be matching what we’ve already done. Like a lot of fabricators, I’ll use a dull Sharpie now and then. Like a lot of painters, I’ll make straighter lines with masking tape.
Since our new Stepside bed assembly has very tight ’jamb tolerances, there’s no place to cleverly conceal folding stop straps. Since the project truck’s owner restores and races vintage motocross machinery, we’ll need to come up with something strong enough—just in case he opts to use his toy truck to haul another toy to the track.
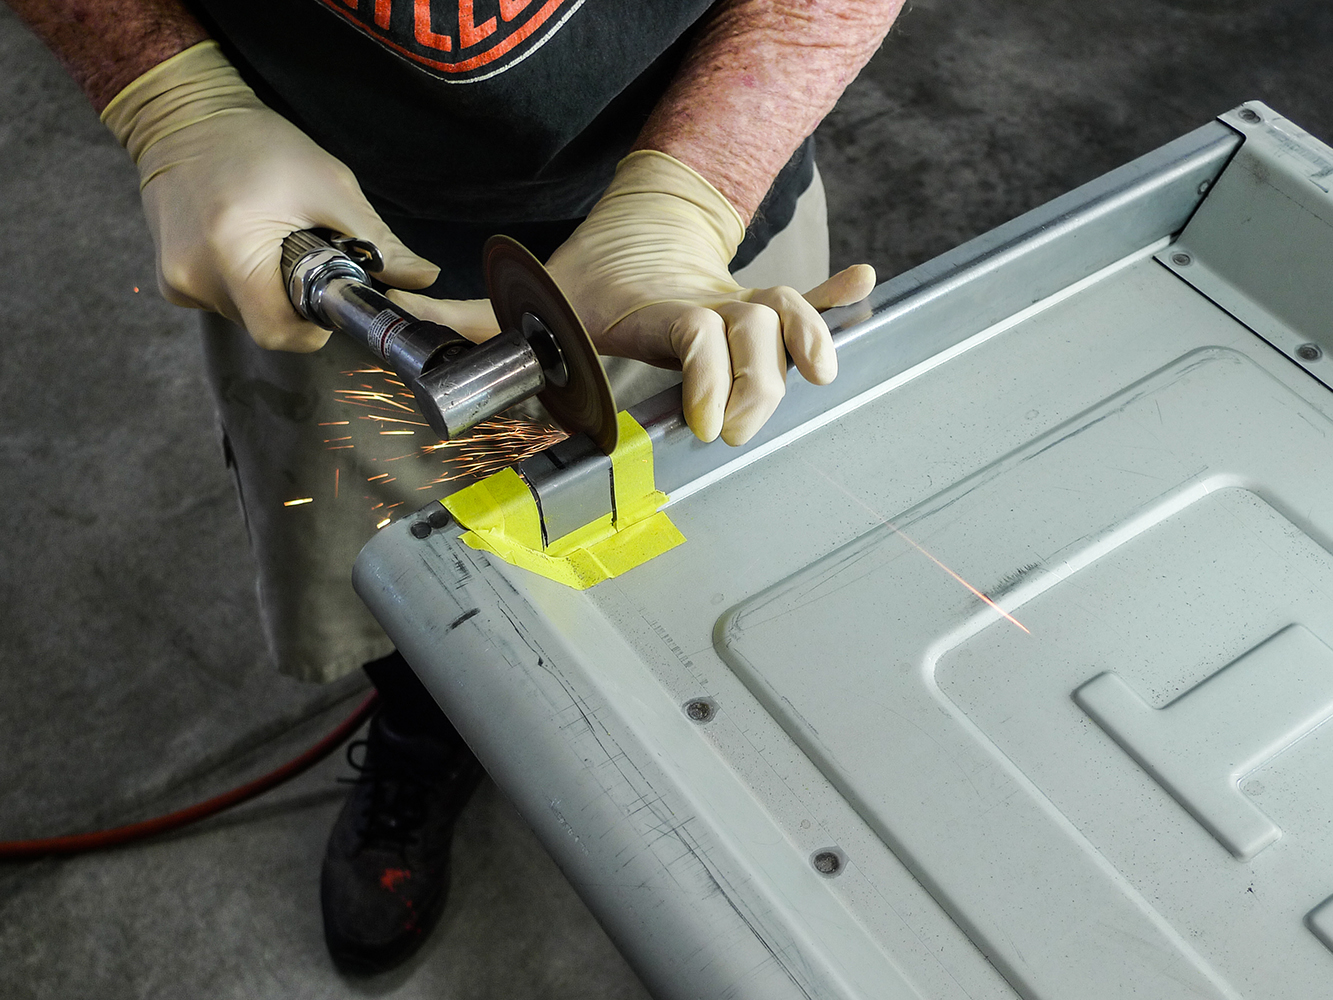
Let’s have one last gunsight gander before cutting along our tape lines. Then let’s take the ’gate to the body stall where we can really throw some sparks.
Last time, for cable-type catches, a pair of catch cables from a Dodge D-50 worked perfectly. Those are harder to find in wrecking yards today, but what we’ve found on an early S-10 Blazer would fit the bill—if only they weren’t so worn and frayed. As it works out, reproductions are affordably available, so this time that’s the way we’ll go.
Here we’re getting committed with our first of several cuts. Have you ever tried this with fingers crossed? For safety’s sake alone, let’s resist the urge to do that.
Once again, for custom latches and catches, we do have easier options today. Even so, I think I’ll stick with my own notion. Like most of my own notions, this one was birthed in my favorite old wrecking yard. On that familiar note, let’s begin part 2 of our story there.
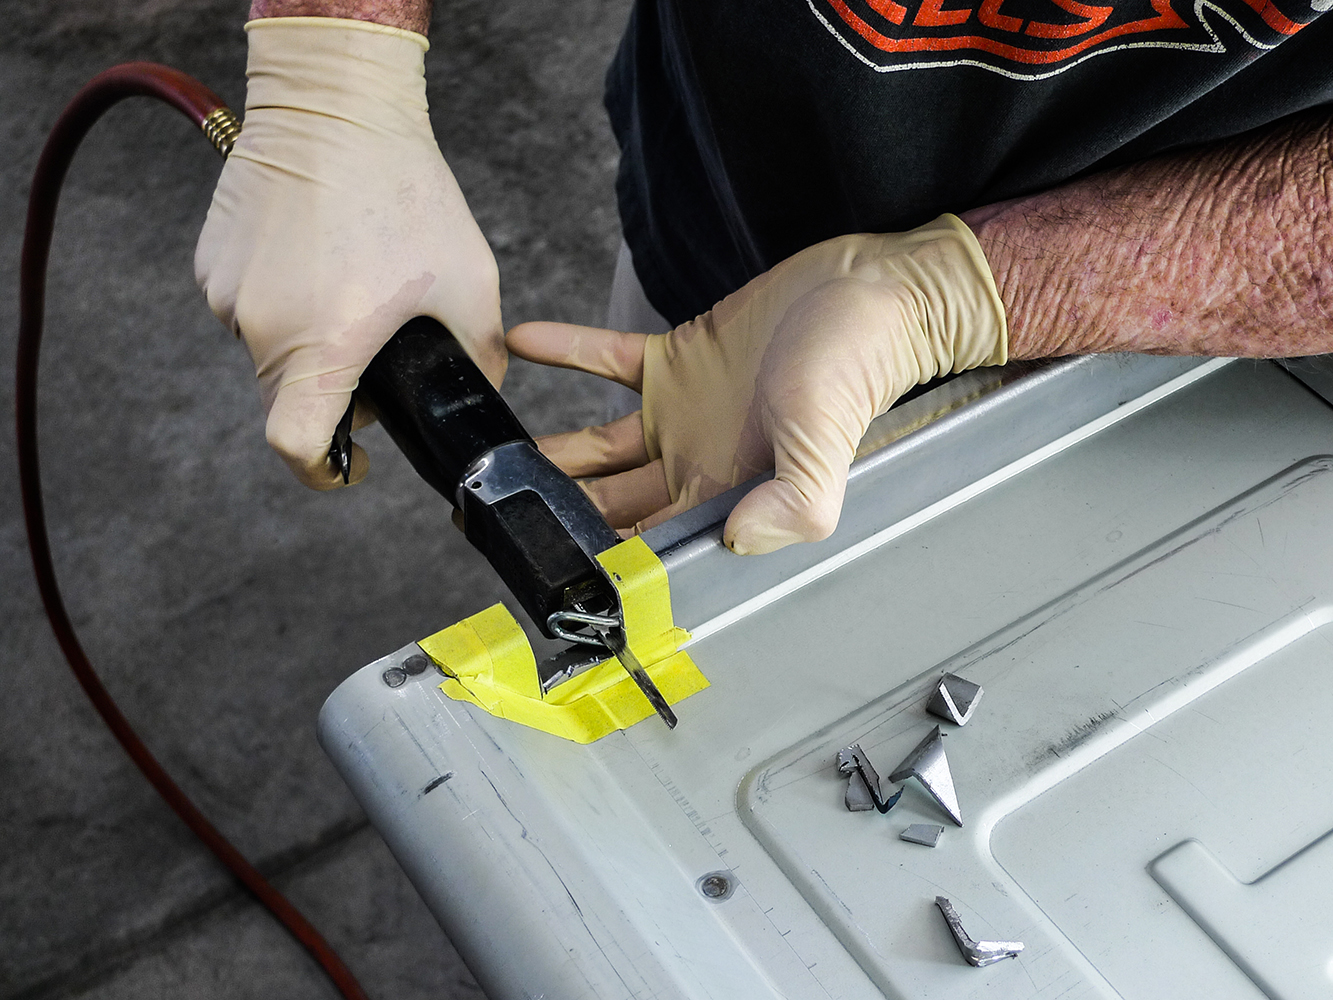
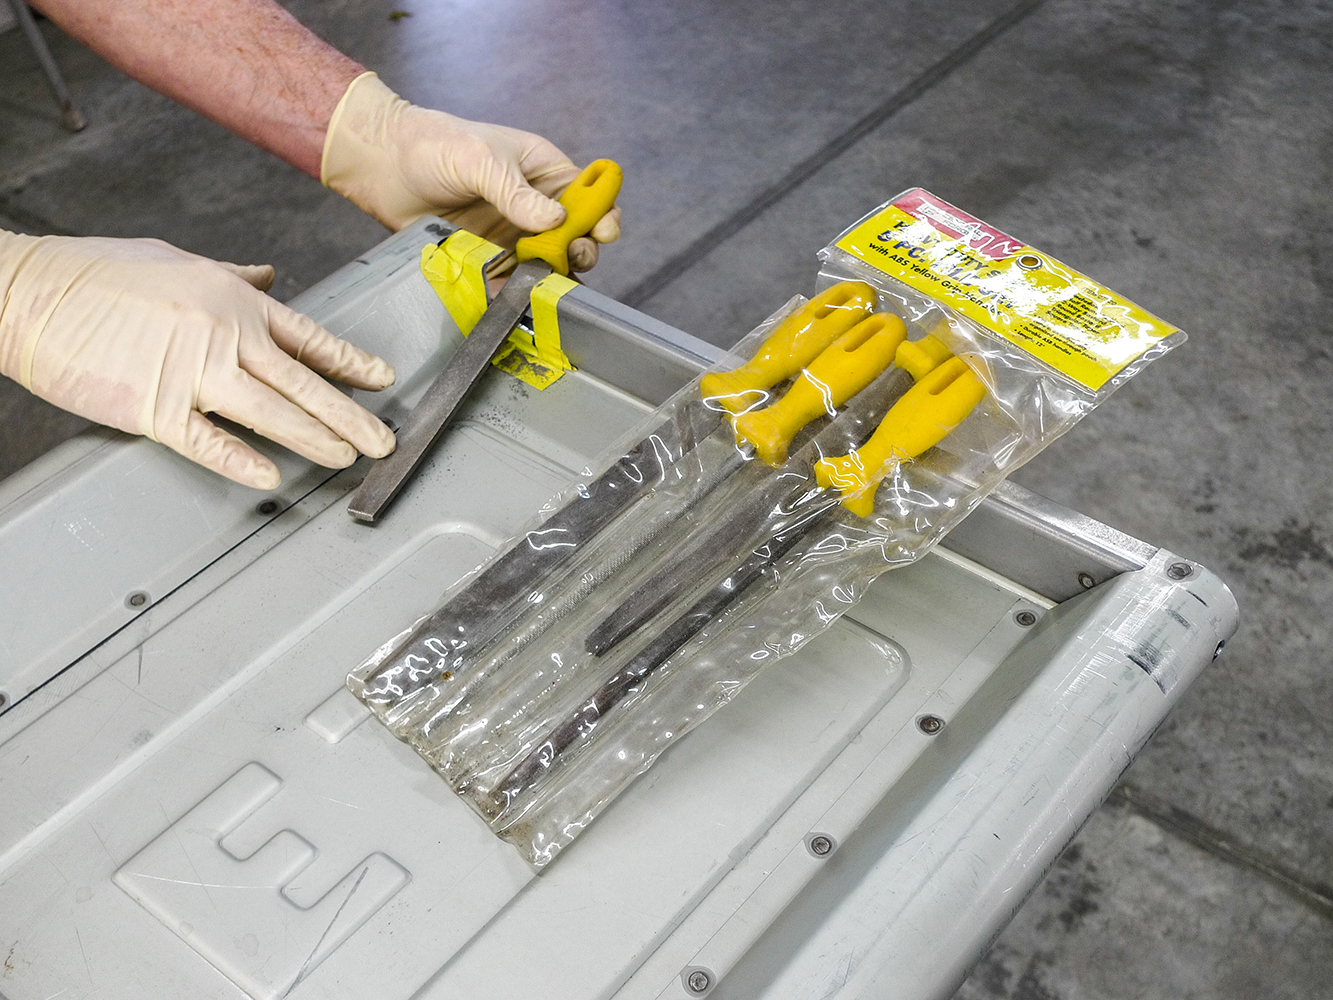
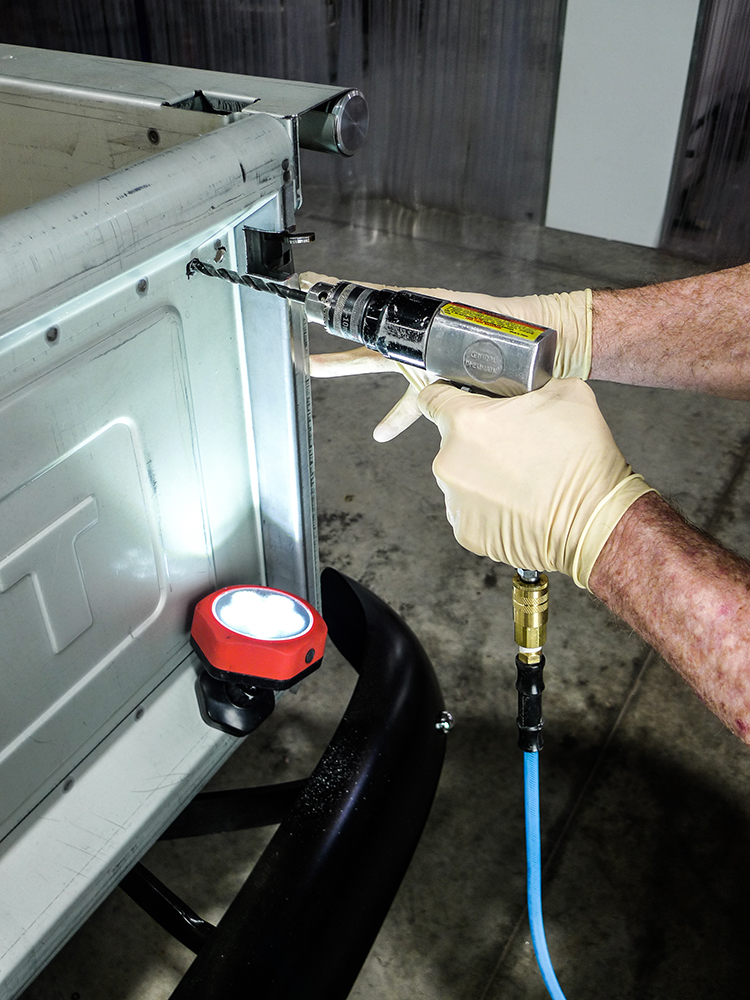
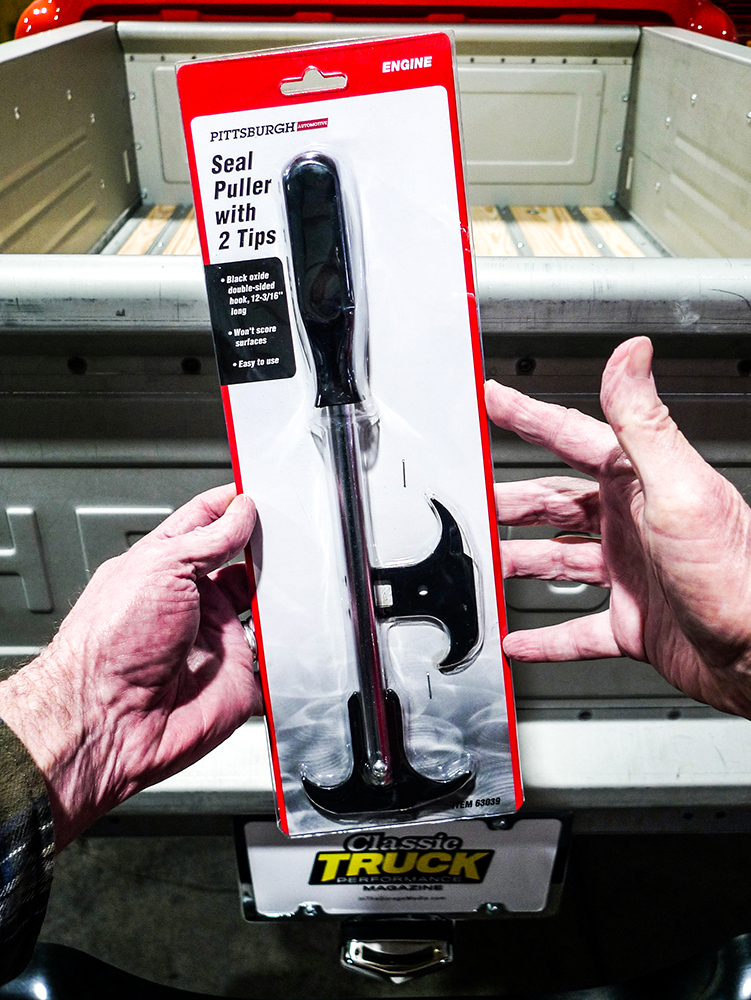
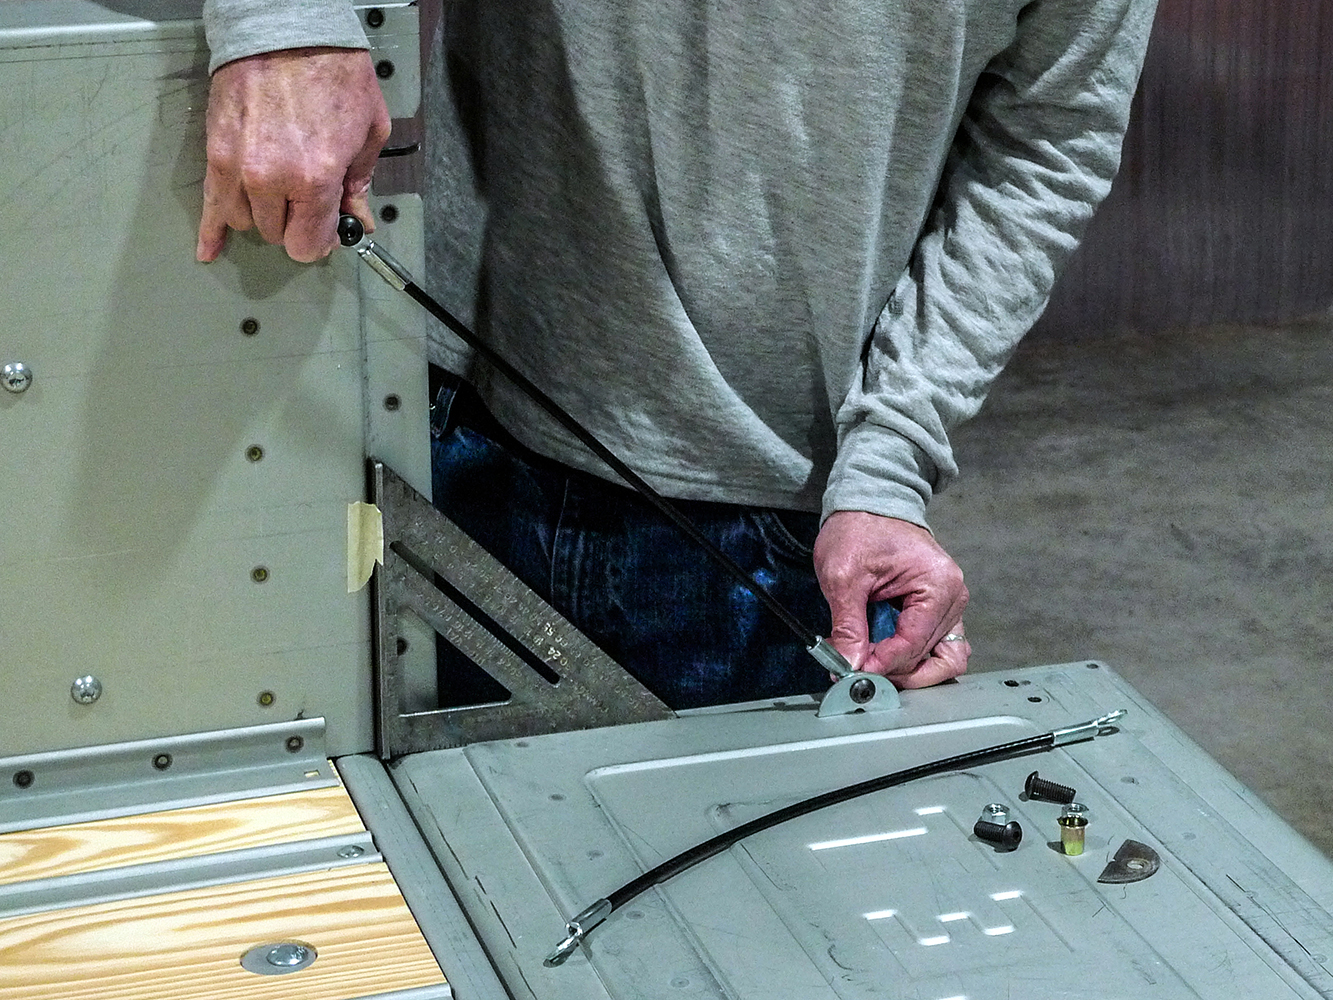
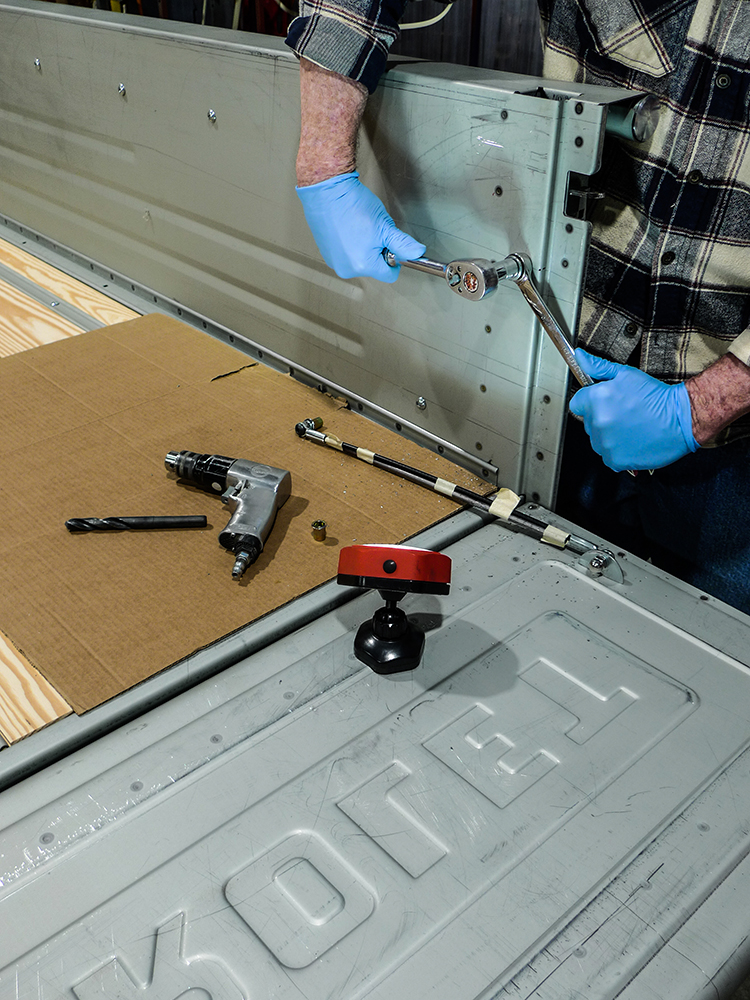
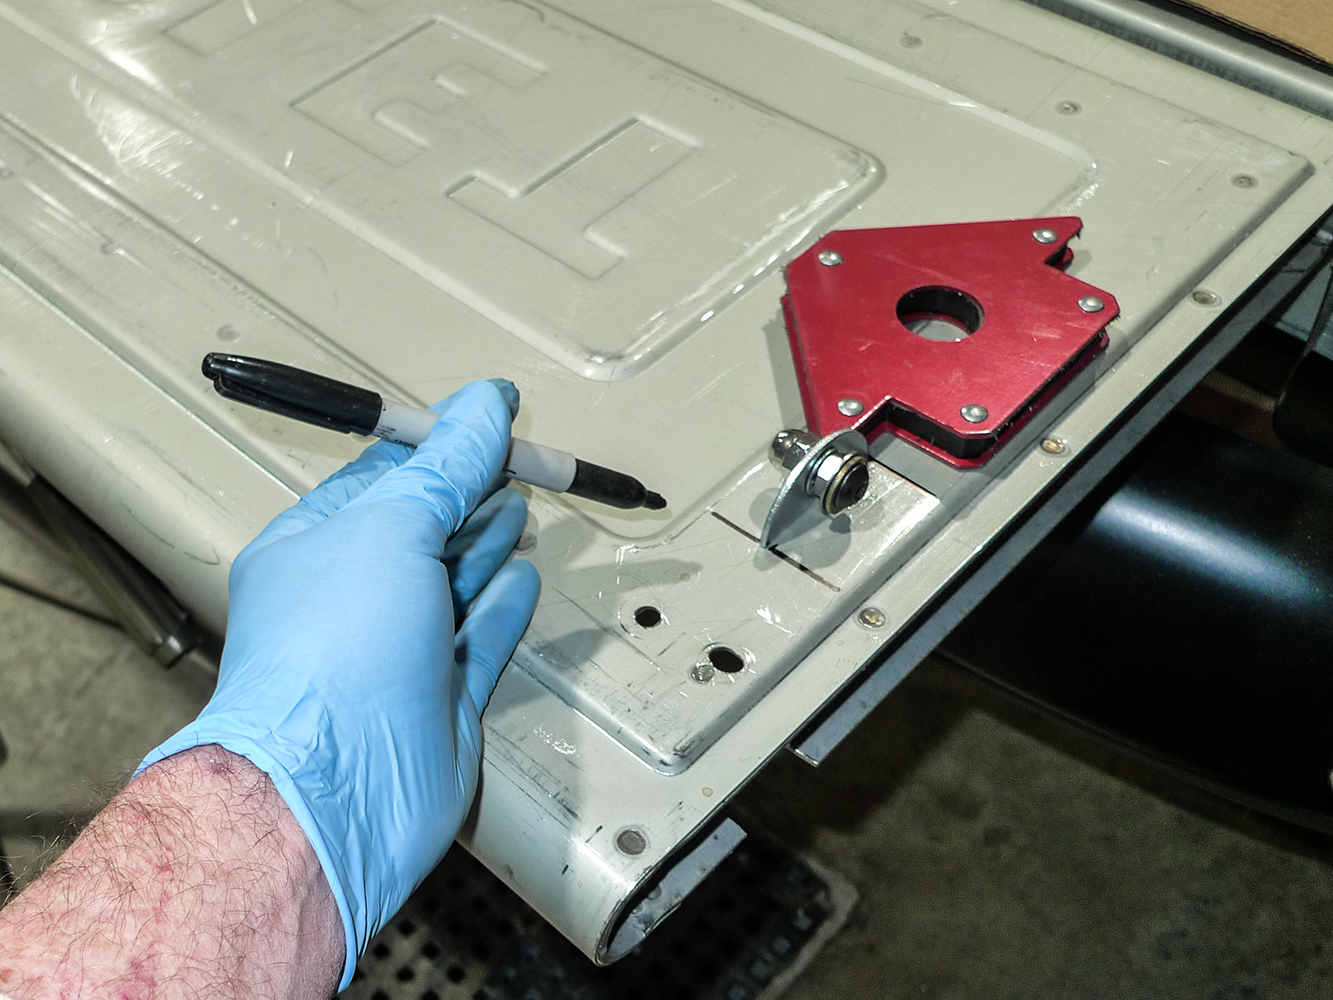
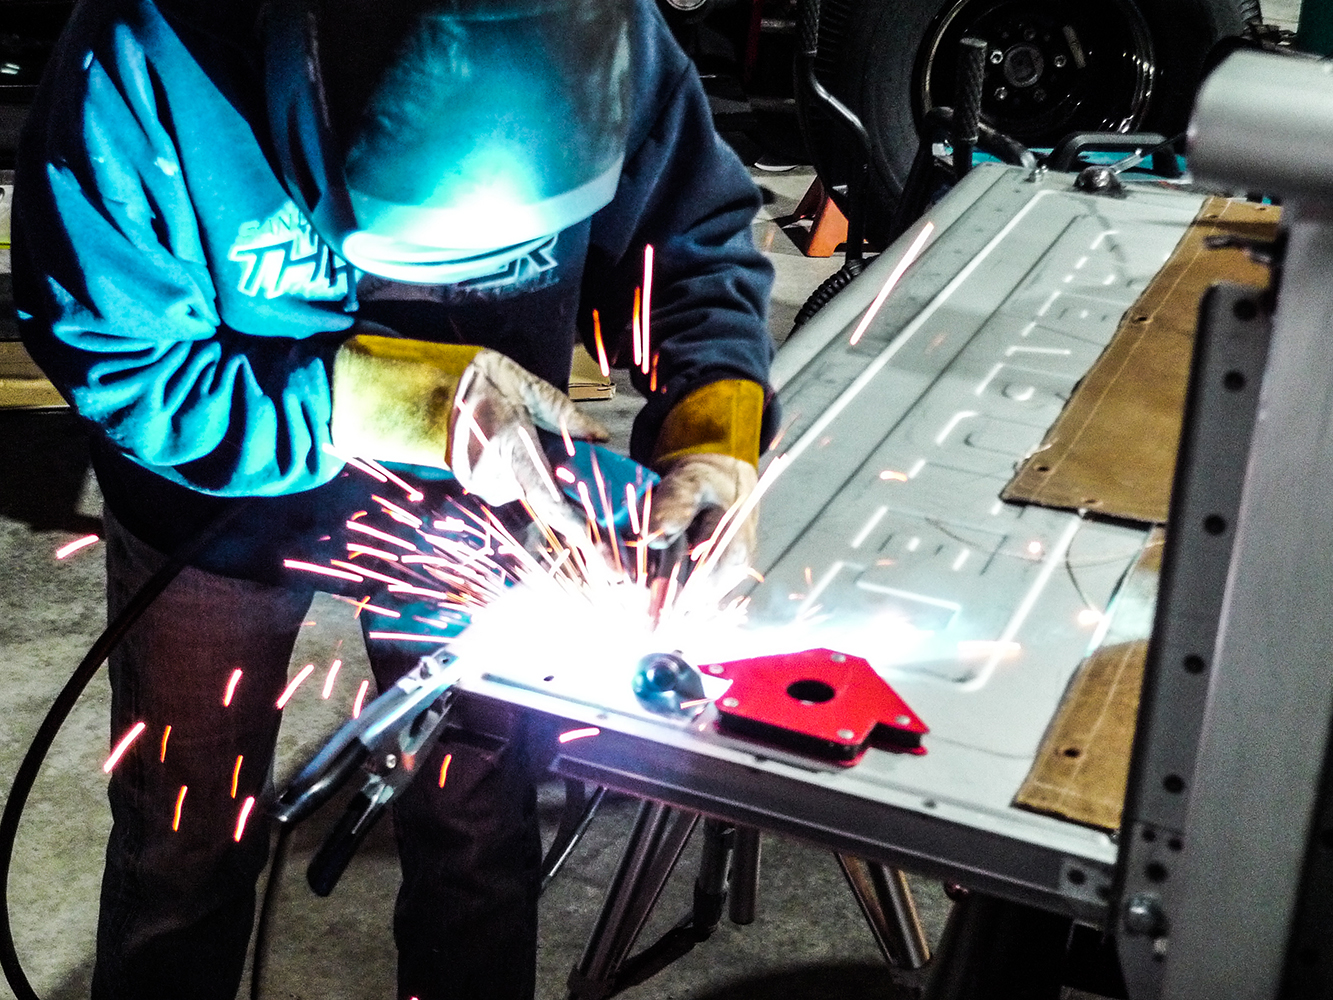
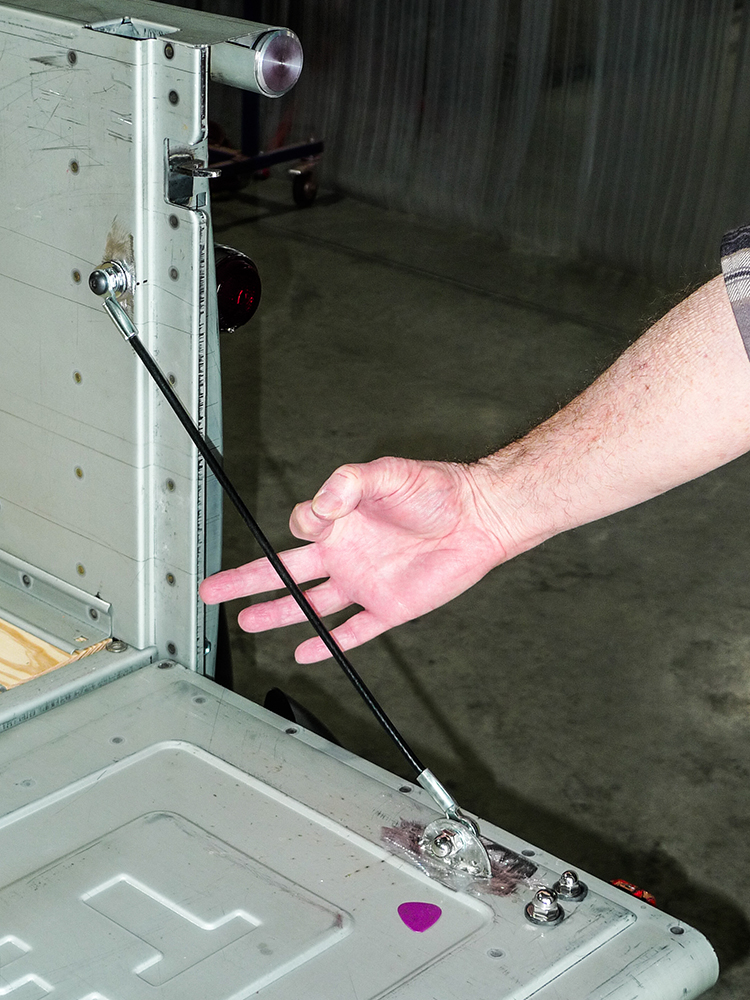
For the slot we must create, no one tool does it all. Here this handy little air saw takes over for the extended-reach cutoff tool as unwanted steel is whittled away in bits.Inevitably, it comes down to this as our latch slot’s ragged edges are final finessed in a manual manner. From here we’ll move on to locate our latch. That’ll be our chance to spotlight undocumented details.See the little wad of masking tape? That was an adhesive template for matching hole locations. So the latch aligns with strikers, we’re using 9/16-length stainless spacers. For fine-tuning later on, flat washers may come into play as shims.With the ’gate back in place, let’s go on and drill as necessary to fit the latch, which has already been redrilled as necessary to fit the ’gate. This begins the usual way with 1/8-inch pilot holes and so on.So, wouldn’t you know it? Here we got caught without a proper seal puller. Do we need one for this job? No, of course not. We just wanted to go to the aforementioned parking lot sale at Harbor Freight.Settled back in, we’d like the open tailgate supported at a proper 90-degree angle. Last time with somewhat wonky repaired parts, stop cable tension was tough to get uniformly tuned.This time let’s begin with 3/8-16 carbon steel rivnuts. With 12-gauge fender washers trimmed to fit within stake pockets, we’ll gain backup strength for the slight bit of leverage that our pivot point bolts have on 16-gauge steel.Cut in half, a big fender washer makes a stop tab. To ease location, we’re holding our cable straight with masking tape and a length of steel fuel line. If we don’t match our work from the A-side exactly, we’ll make this B-side adjustable.Like other reproduction bed panels, our tailgate is galvanized with protective zinc plating. Instinct says remove it where we’re welding. This little angle die grinder was within reach. Let’s see if we can keep it between the lines.This is where the designated welder (Mrs. Rotten) steps in. She’ll give us three tack zaps for now. If cable tension turns out right, we’ll send the ’gate to her side of the shop where she’ll finish necessary welding.The flick of a finger confirms we’ve done well. Our B-side stop cable’s frequency of vibration is nearly in tune with that of the A-side. It’s close enough that it’s sharing the load, so this time adjustability won’t be needed.With the tailgate closed our pivot bolts line up nicely. Maybe it’s just me, but that didn’t come easily. Complete truth be told, this job beat me up pretty good, and don’t think I didn’t consider bailing in favor of a proven kit form option.At the end of the marathon, I’m glad I stuck with it. I’m tickled with the hard-fought battle’s results. Without gap distortion, the ’gate easily latches tight with no jiggle at all. Perhaps best of all, it’s different, and a good fit for this particular truck.
We use cookies to ensure that we give you the best experience on our website. If you continue to use this site we will assume that you are happy with it.