Wilwood’s XRS for OBS, Part Two: Bringing Up The Rear
By Jessica Roach – Images by the Author
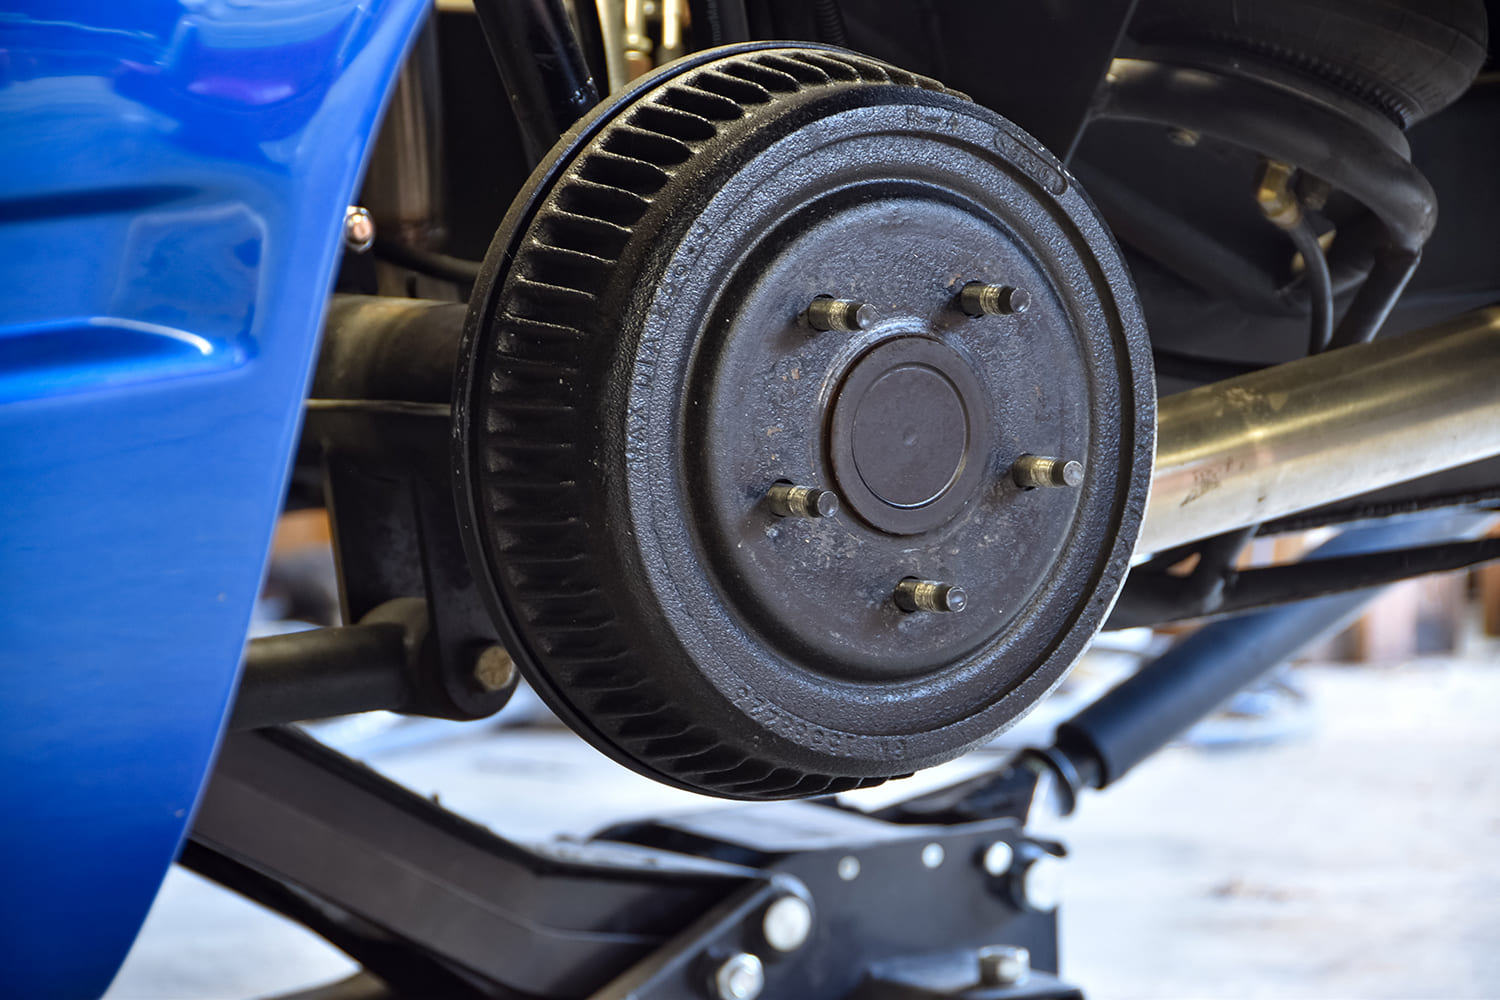
Let’s complete our OBS Wilwood XRS disc brake conversion by focusing on the back of our truck. The improvement is dramatic. When it comes to worthwhile upgrades on the beloved 1988-98 Chevy, the rear brakes are one of the most overlooked—but most rewarding—places to start. Anyone familiar with these trucks knows the factory rear drums aren’t exactly confidence-inspiring. Sure, you can tweak them, adjust them, clean them, and follow countless DIY videos on how to squeeze a little more life out of GM’s original setup. But eventually, the brake fade, uneven stopping, constant adjustments, and overall clunky feel make it clear: it’s time for something better.
Prepare the rear for the wheels and rear brakes to come off. The rear is a little more in-depth as far as install, so make sure you are prepared to get a little messy.
A rear disc brake conversion may sound like a big step, but, in reality, it’s one of the easiest ways to improve consistency, braking power, and overall driveability. Rear discs mean less maintenance, cleaner operation, and far more predictable stopping—especially if your truck actually gets used the way these trucks were meant to be used. And, let’s face it, an iconic workhorse like the 1988-98 Chevy deserves modern braking performance, not 30-year-old drum technology. The real question becomes: who offers a complete rear disc kit that upgrades performance without adding unnecessary complications?
First off, unbolt the housing over a catch pan. We will be pulling the axles out to get the rest of the brakes off.
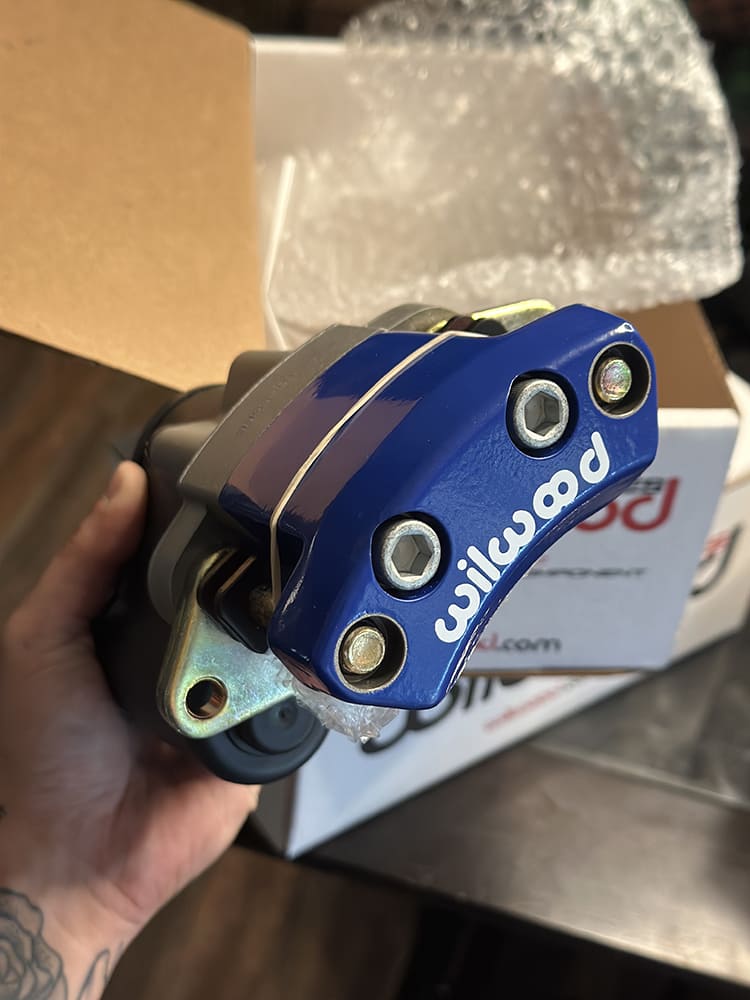
After more than two decades personally installing Wilwood systems on muscle cars, hot rods, and daily driven trucks, we were eager to see what they brought to the table for this platform. That’s when we came across the XRS calipers—a street-friendly evolution of the XRZ race calipers—built from forged aluminum, impressively stiff, and incredibly lightweight. We also made the necessary switch to their Compact Tandem Master Cylinder, which included the option to color-match the calipers. In this rear-brake conversion and master cylinder walkthrough, you’ll see how Wilwood managed to put together a clean, high-performance, and surprisingly simple rear disc kit—one you can absolutely install in your own garage, just like we did.
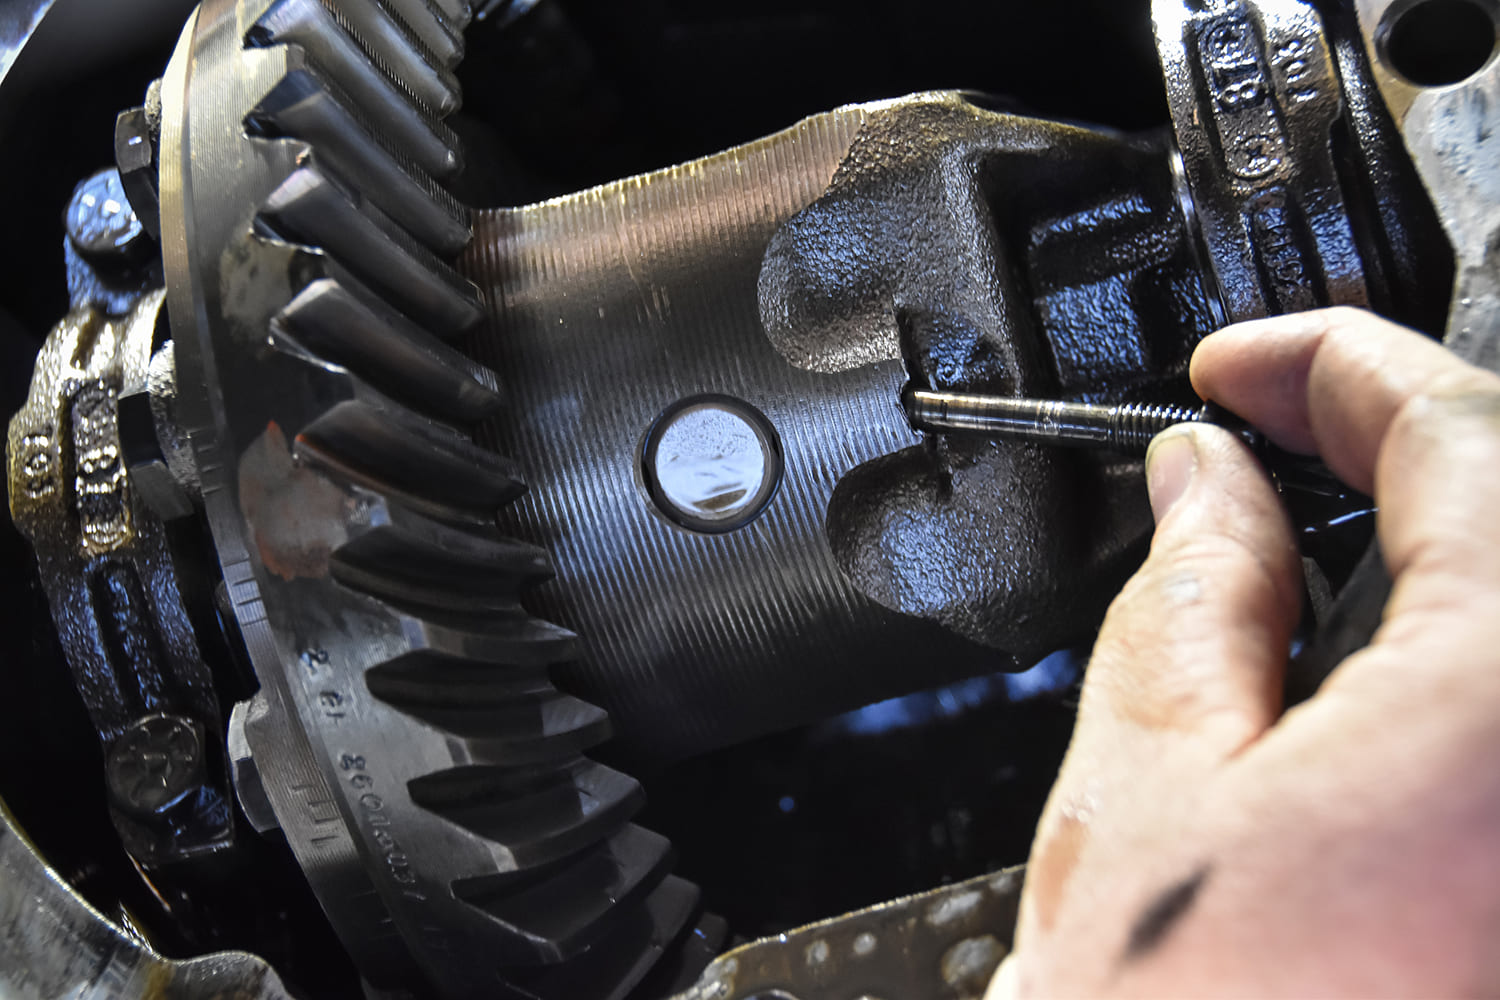
Locate the pin shaft bolt on the centersection, remove it using a 5/16 wrench. Locate the cross-pin shaft, push/pull to remove and it should slide out. There are two retainer clips on either end of the axles, remove by sliding them out. This is difficult to photograph but once you stick your head in there you can see each retainer.
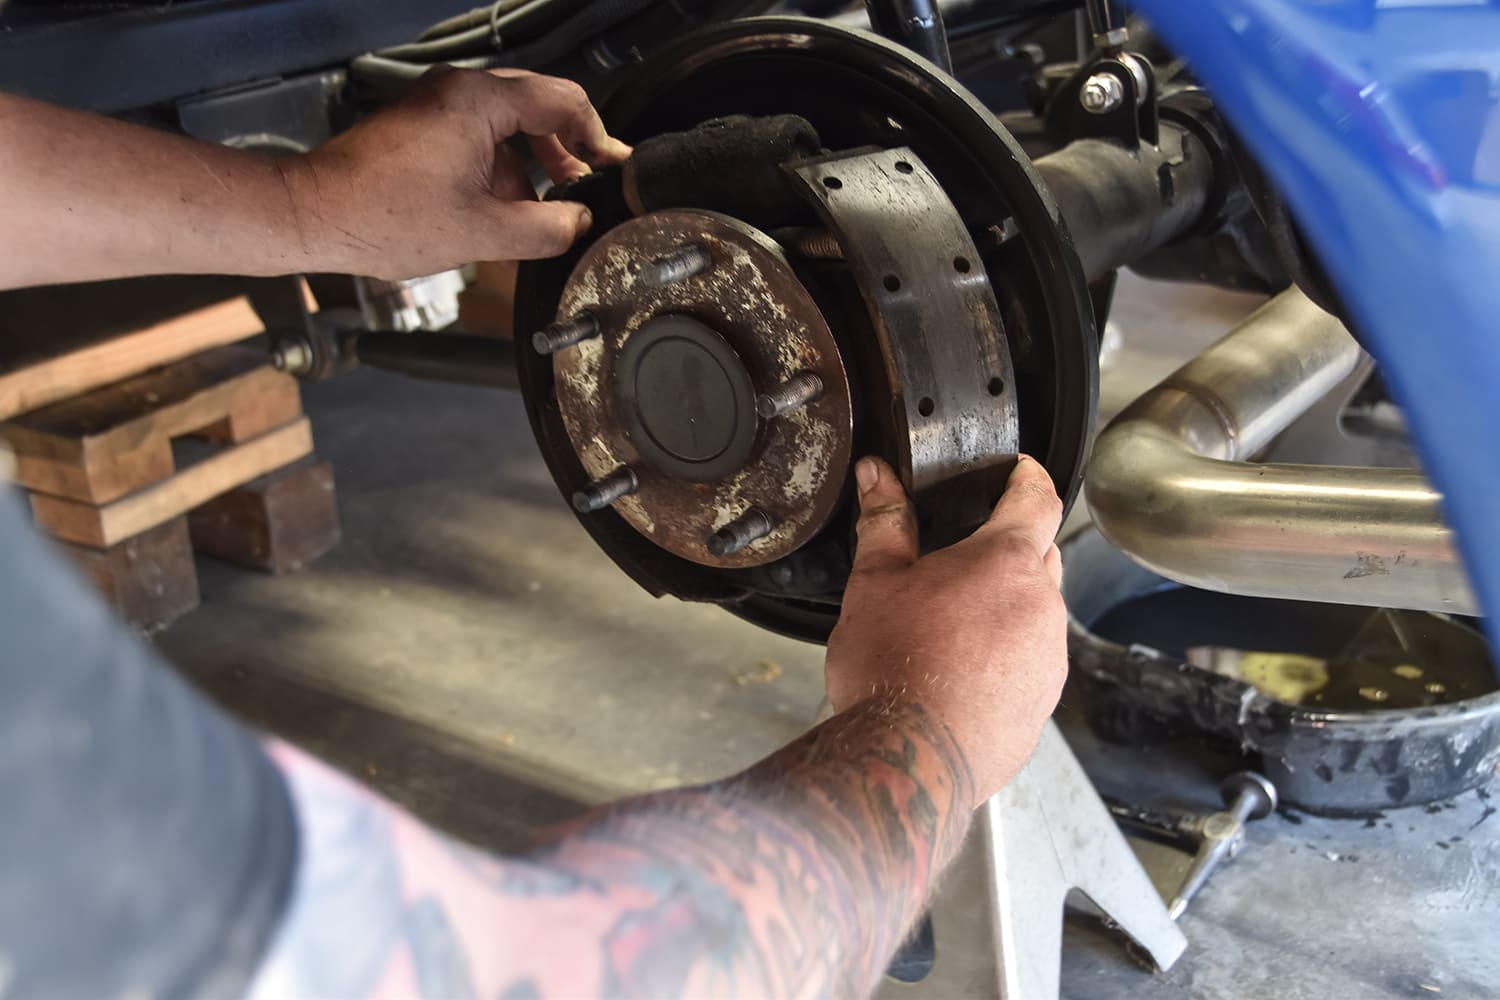
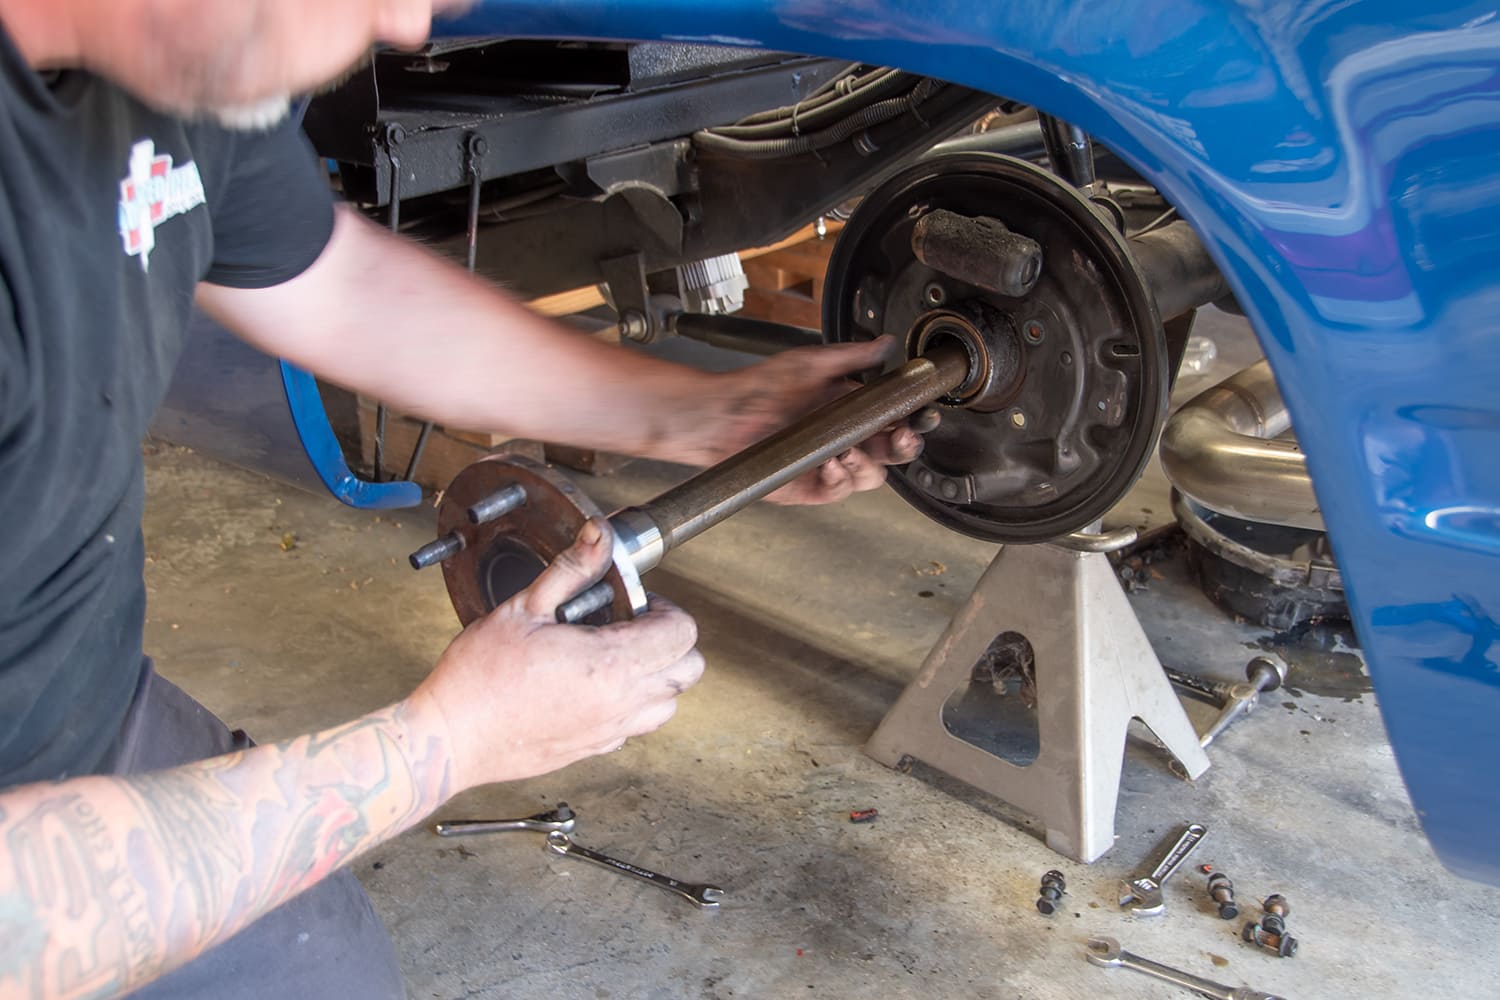
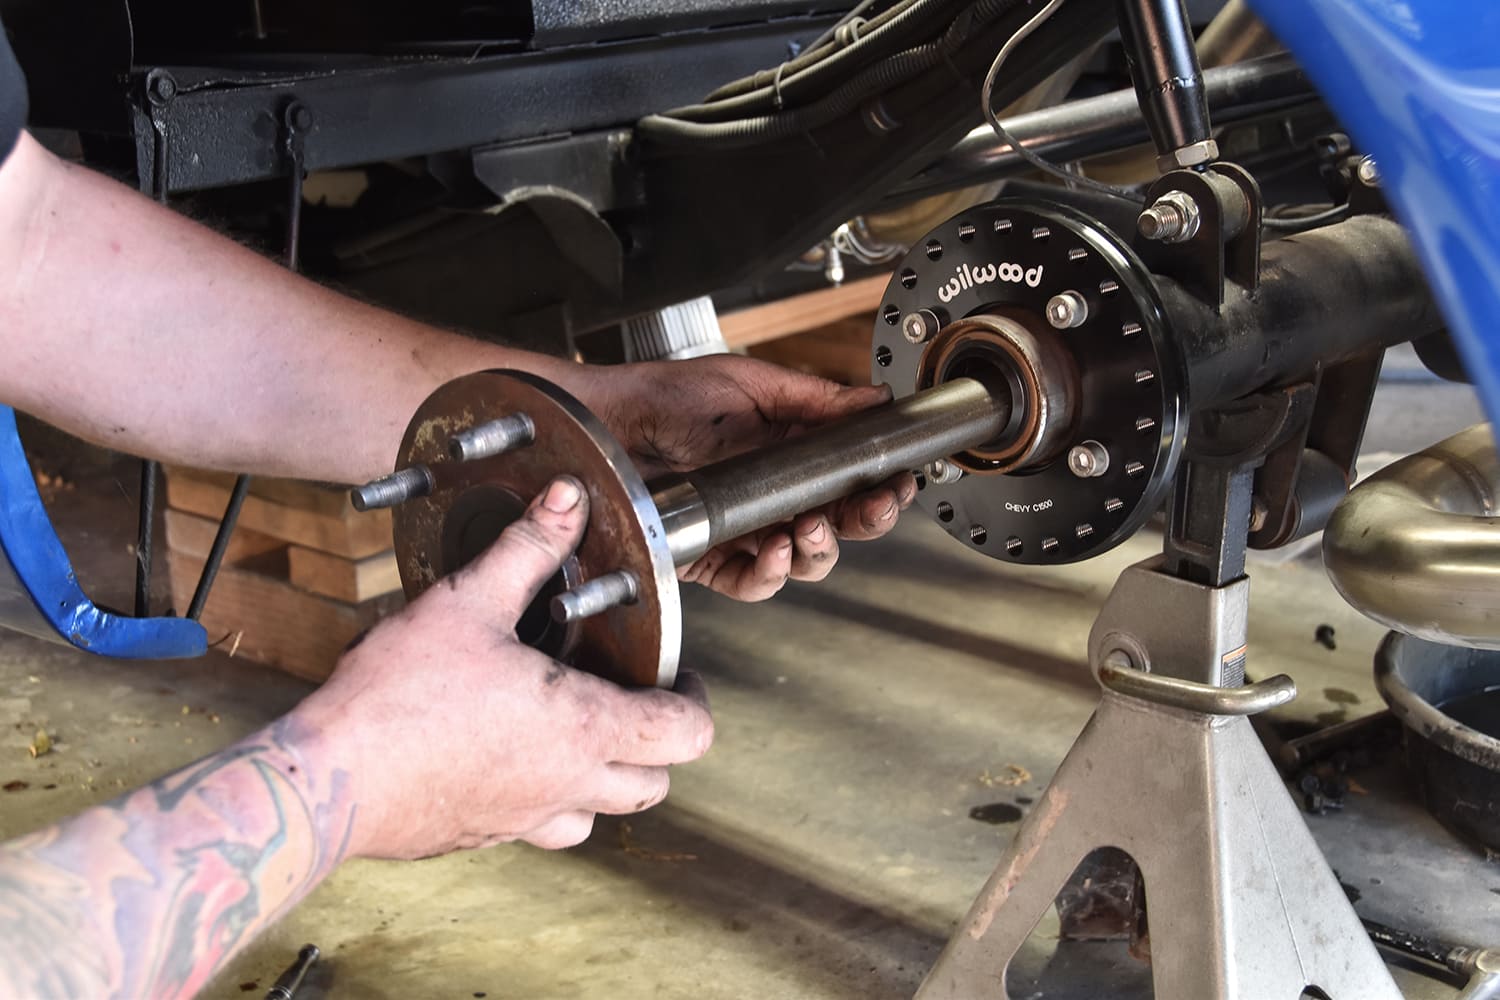
Begin removing what’s left of the rear brakes on either side, along with the axles. We decided to leave the cylinders attached to help prevent any brake fluid from bleeding out and getting on the floor. We are doing this in our home garage and not on a lift.
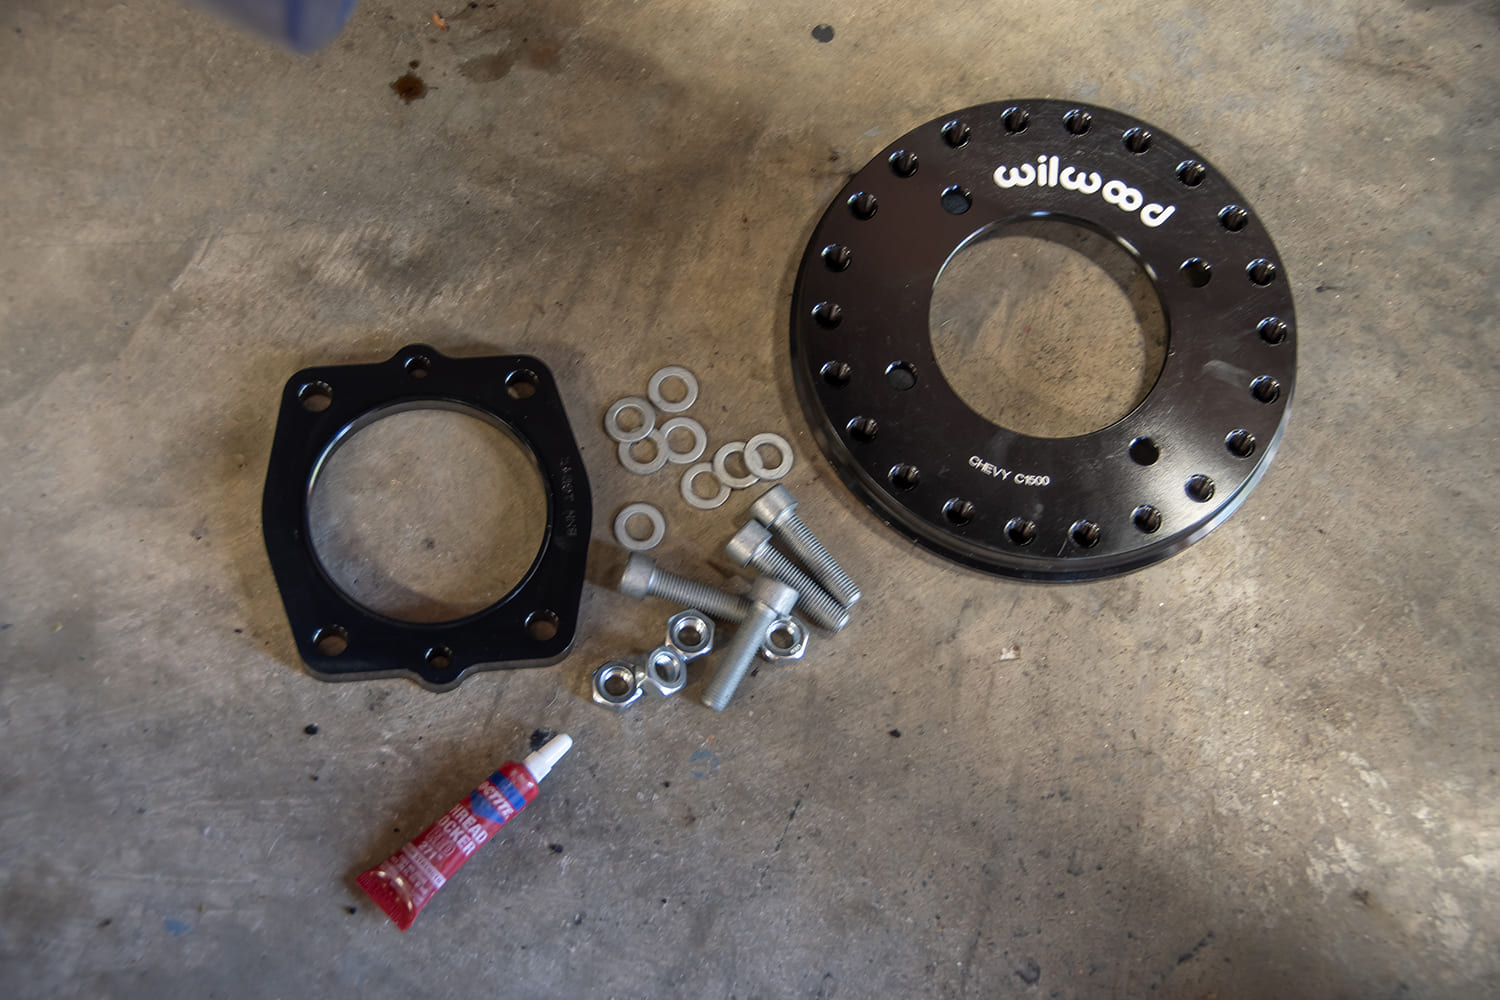
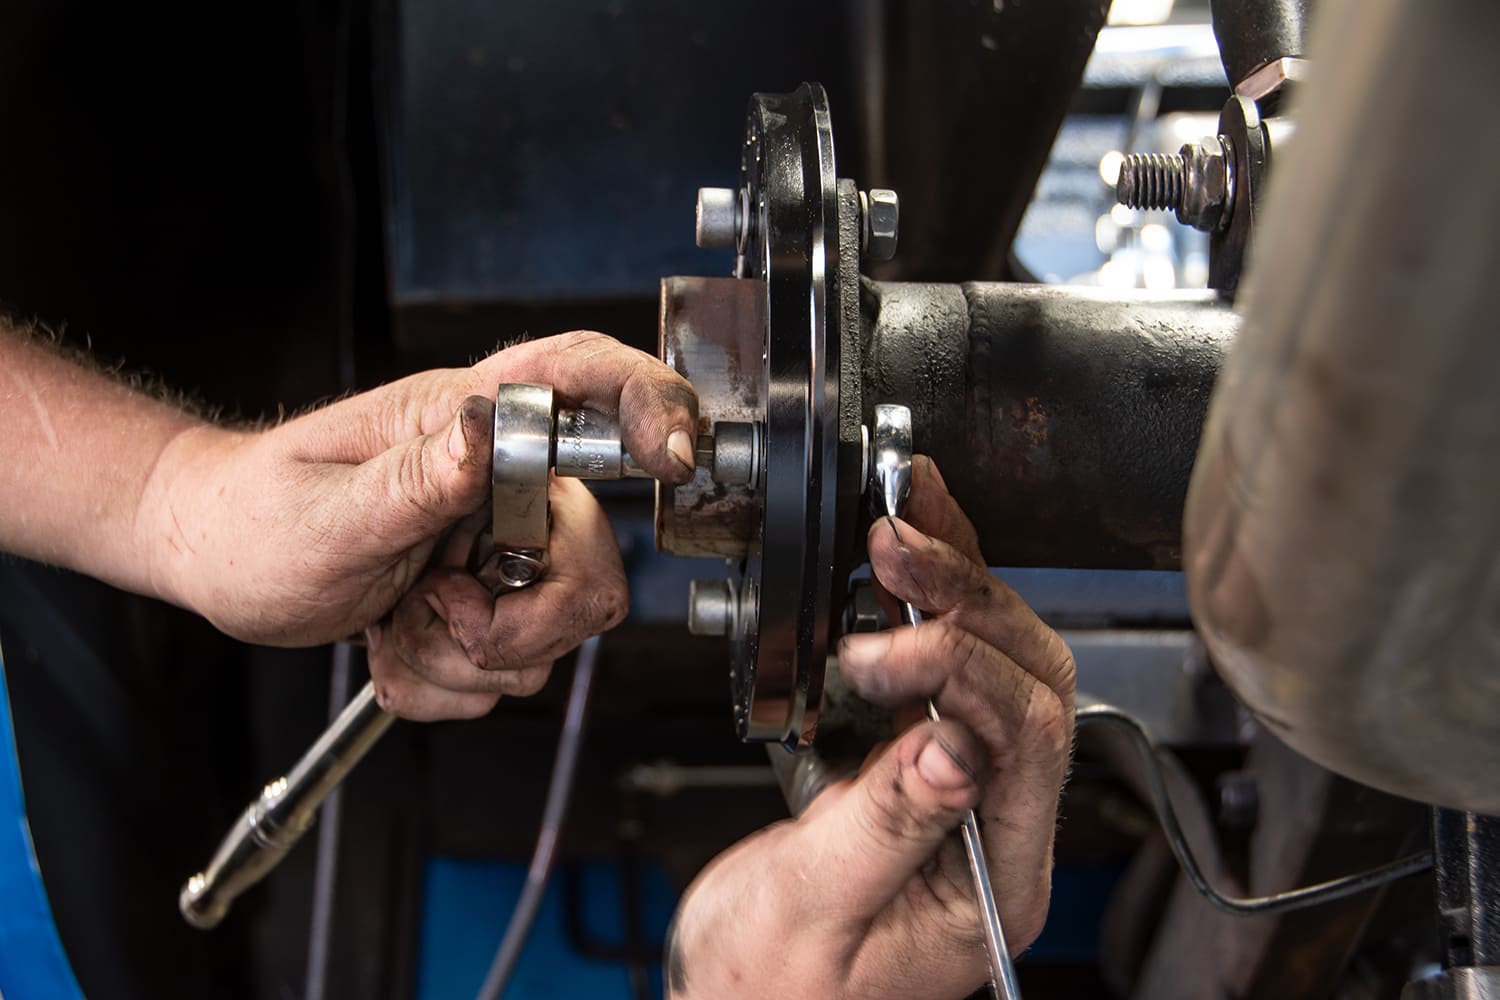
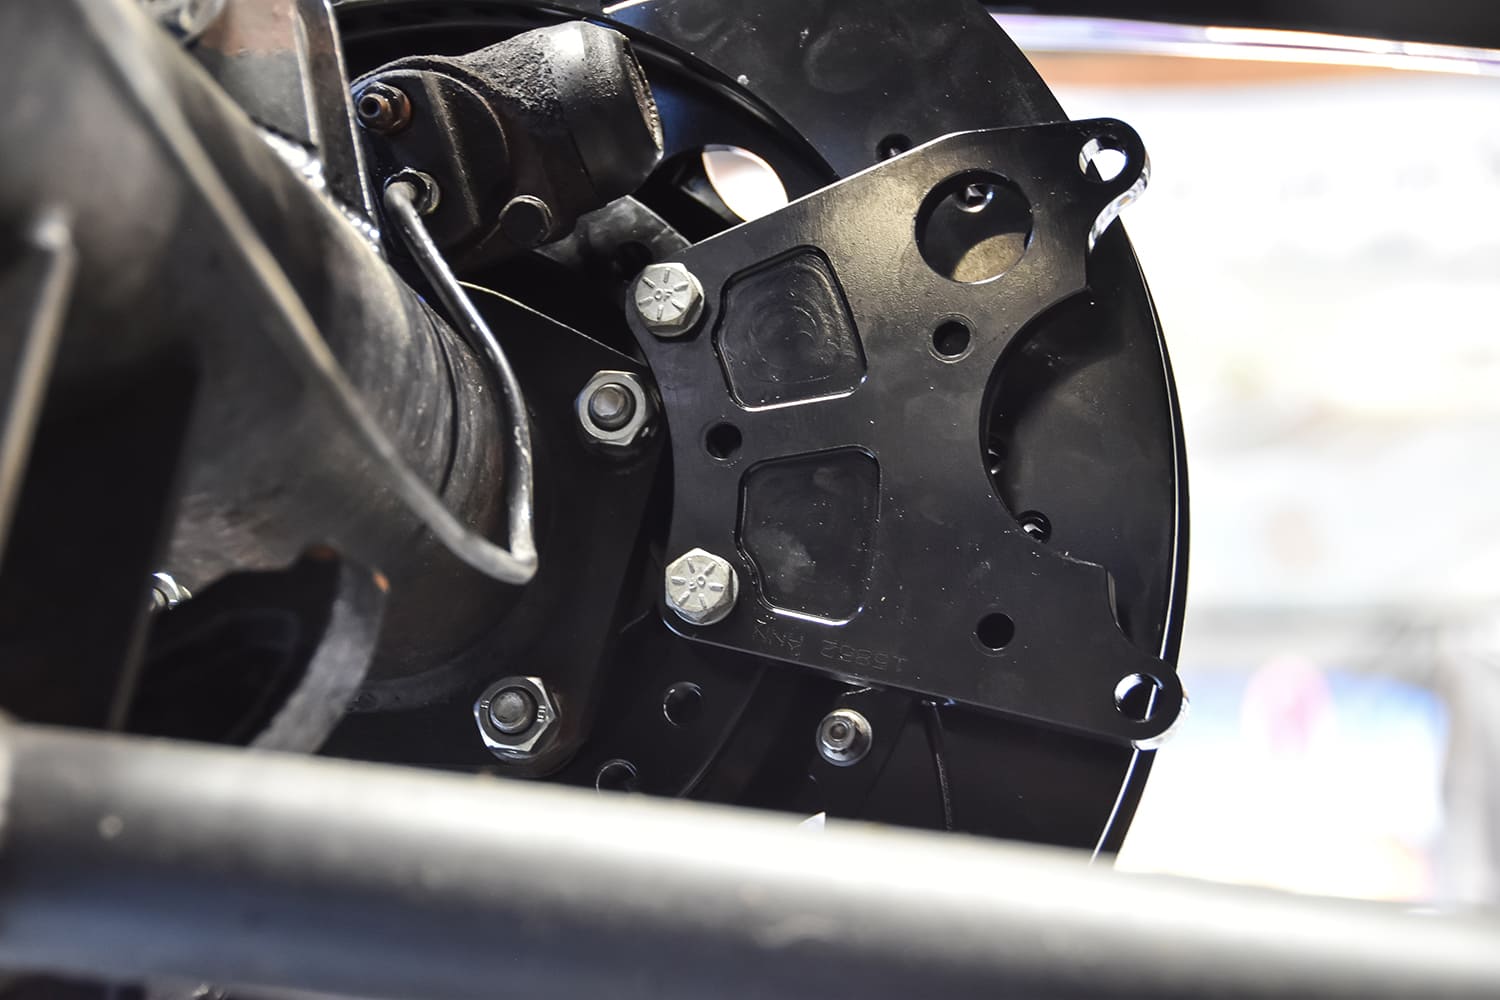
Gather the axle retainer and adapter that houses the caliper bracket and emergency brake bracket, along with the supplied hardware and some red Loctite.Slide the axle retainer first and then the adapter onto the axle flange housing, slide bolts into the four holes with appropriate washers, and tighten to supplied torque specs with the red Loctite.
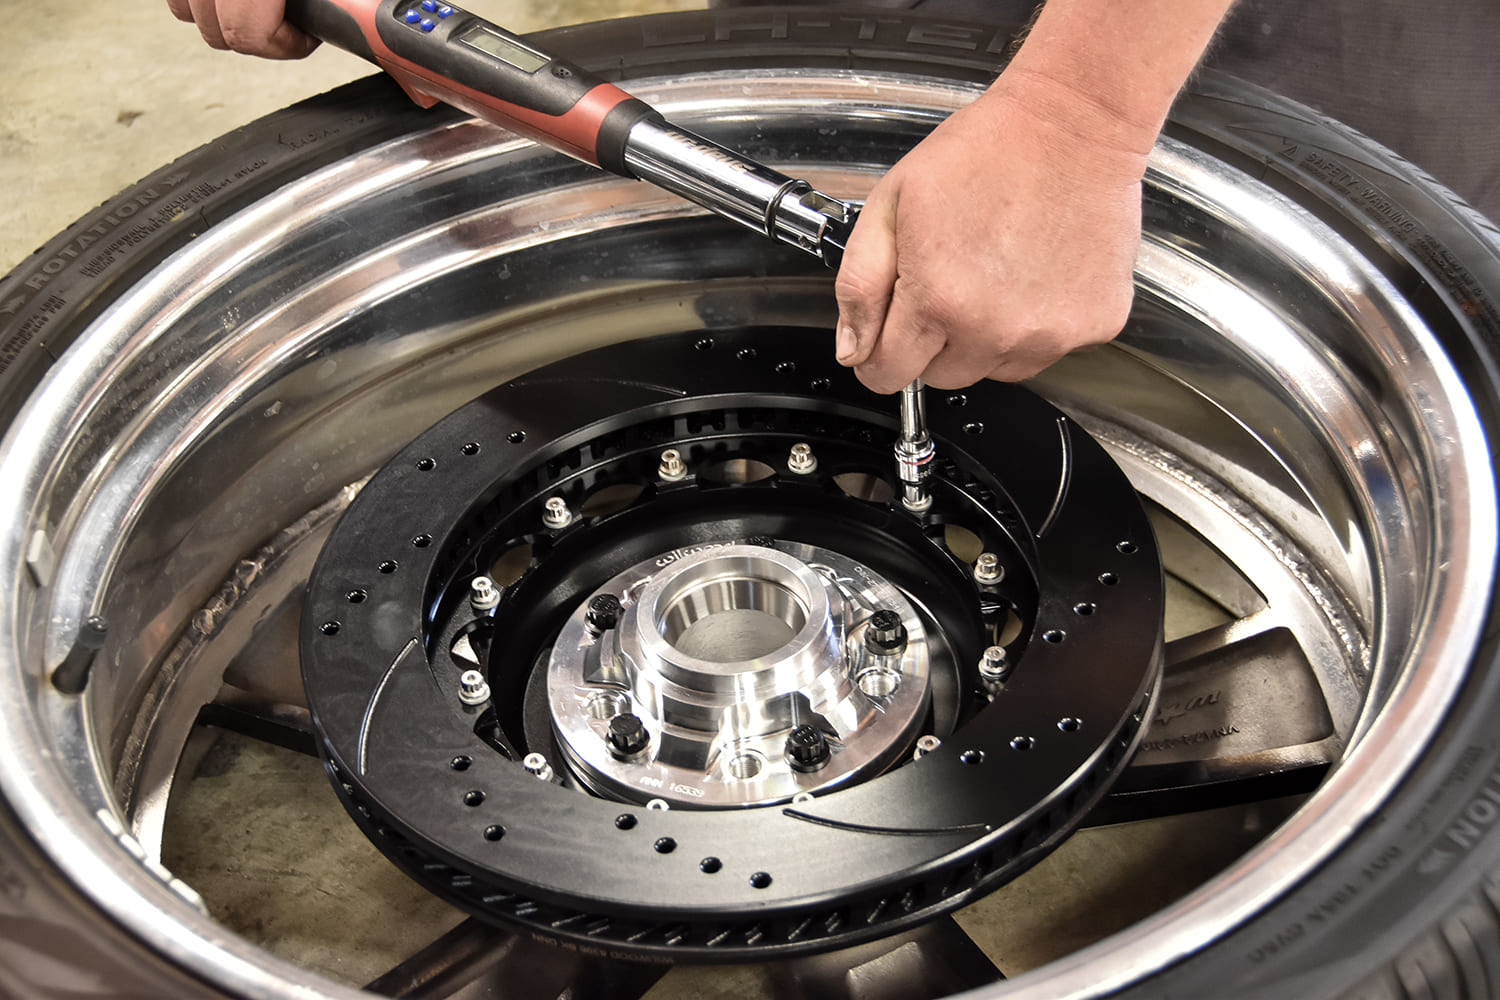
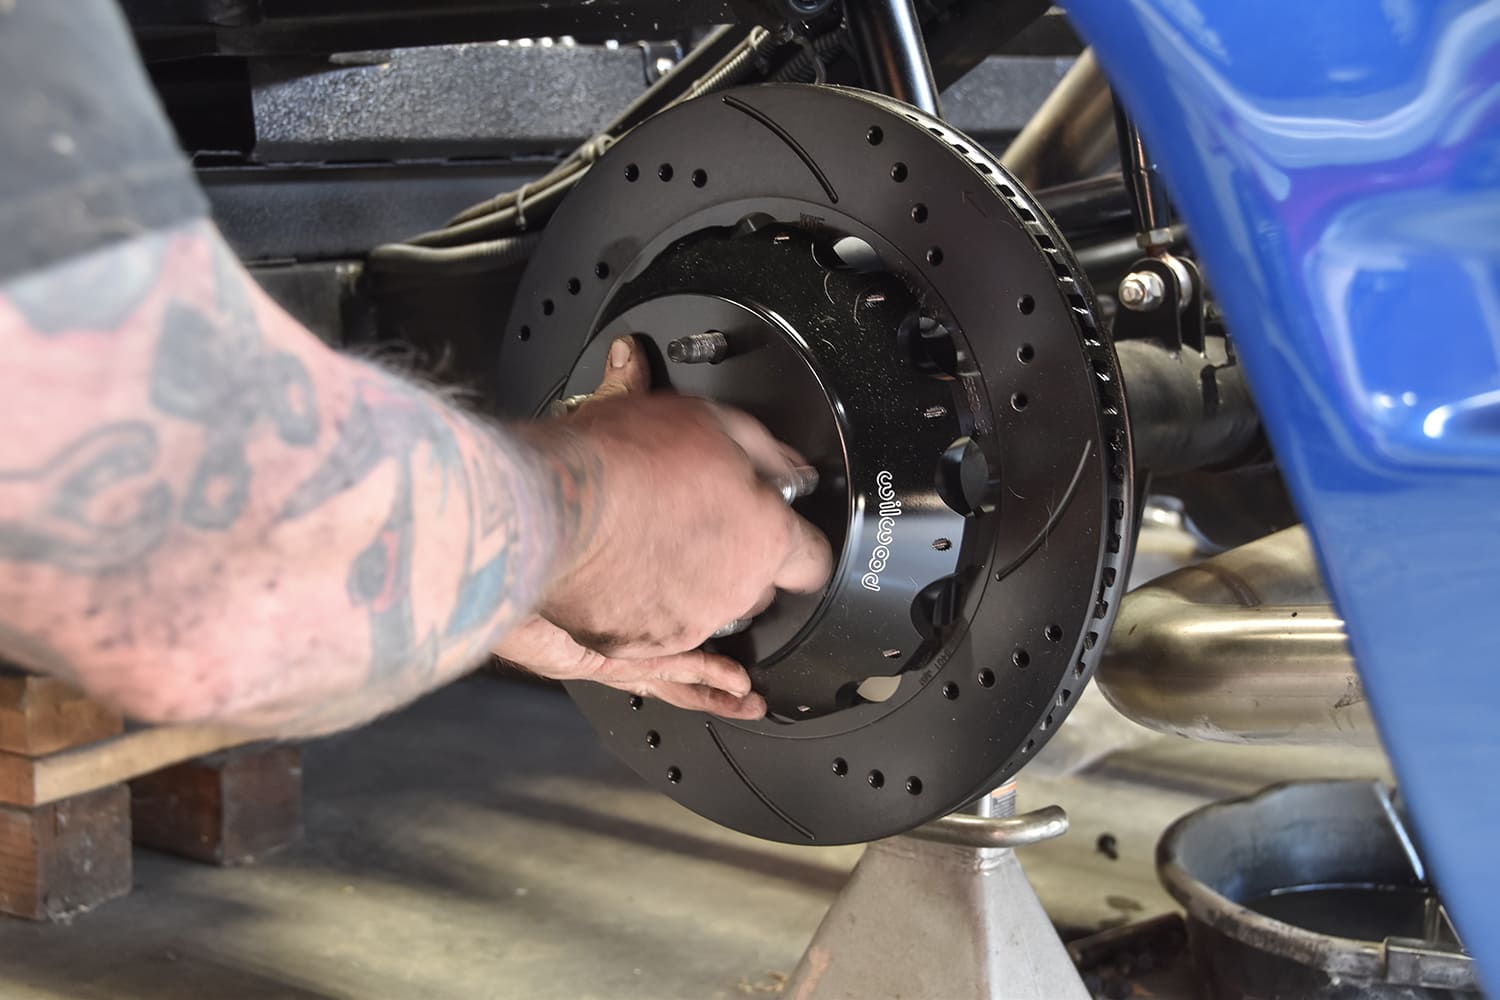
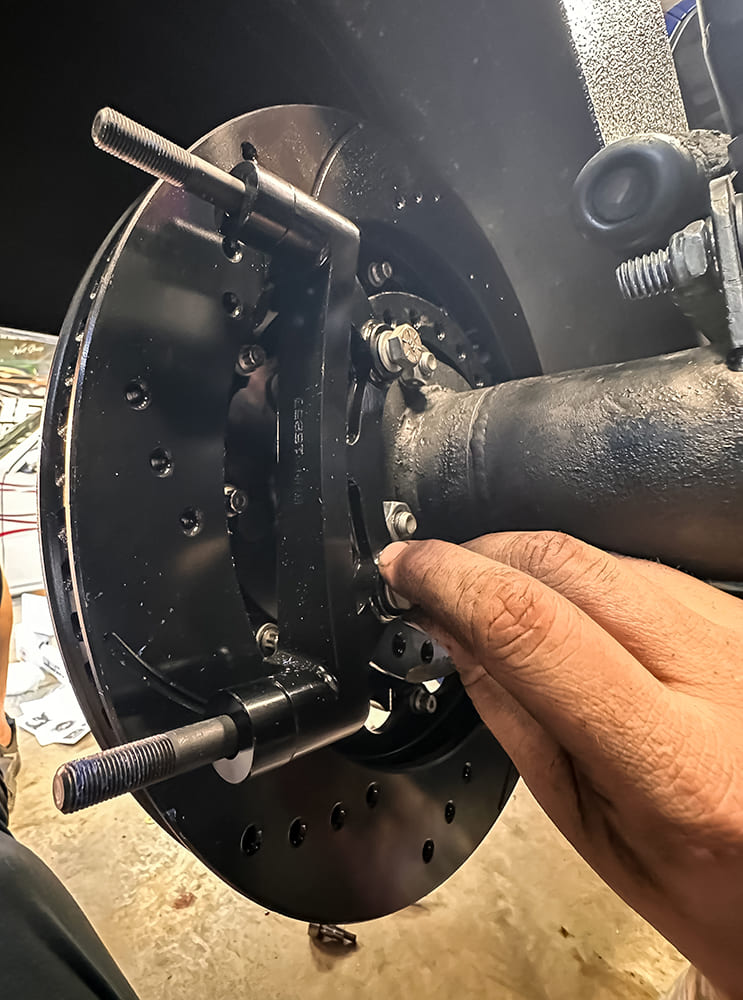
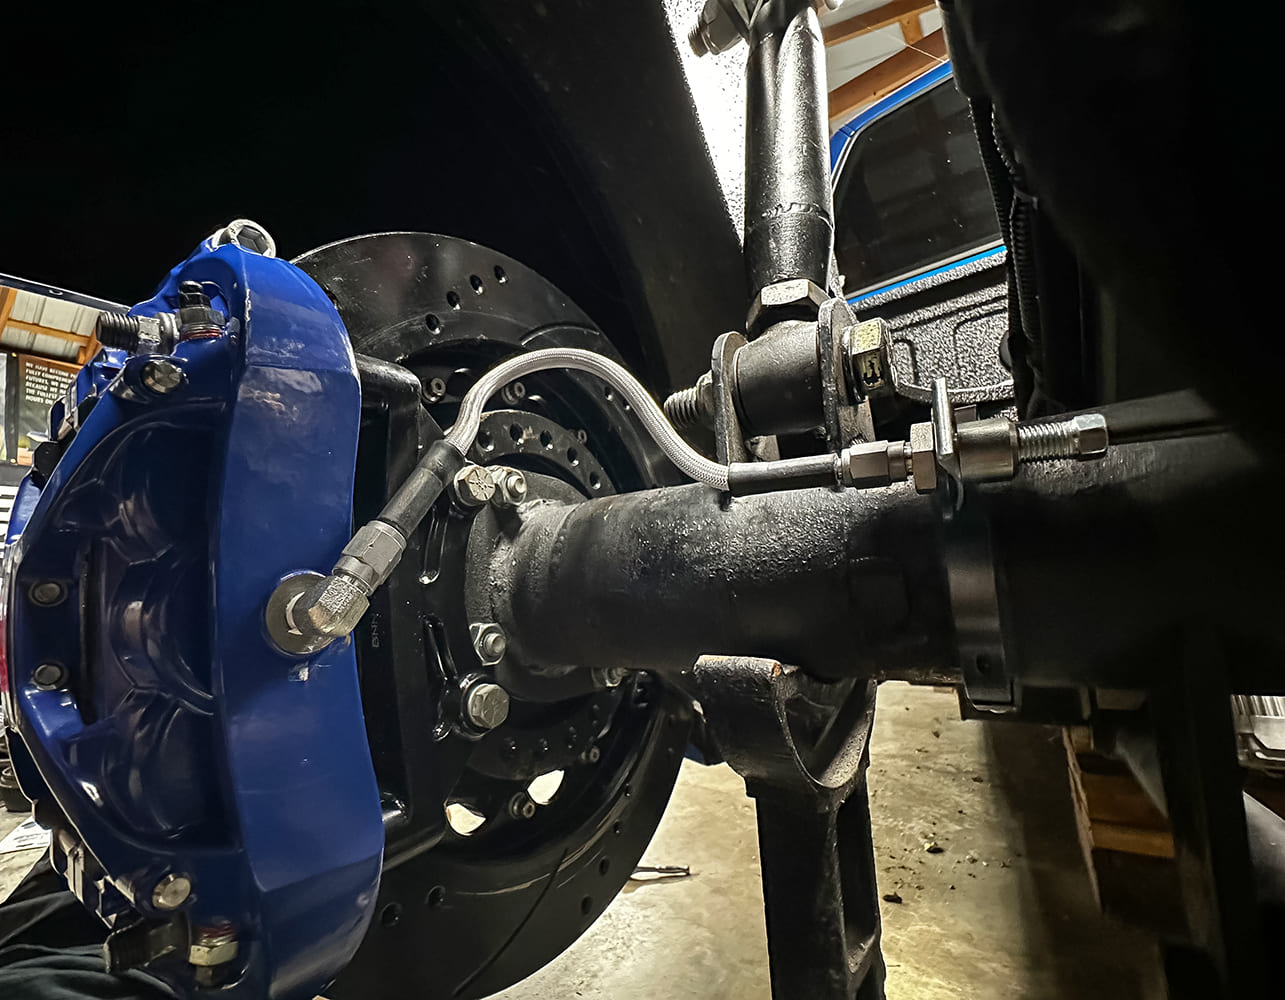
At this point you are ready to slide your axles back into the housing, along with the pin shaft bolt, cross pin shaft, and retainer clips for the axles. You can also take this time to re-seal your cover back onto the housing.We took the time to assemble all the rotors in the beginning with the front hub available to help prevent damage and save some time. Remember to torque them to the supplied specs. You don’t have to do it this way; we just know what works for us.Slide the rotor on (make sure you have the correct side, they are directional), use your lug nuts to keep it on, and keep it seated against the axle. Locate the caliper bracket in your kit, slide it on as pictured. Using supplied hardware loosely, we will have to come back and shim it like we did the front.
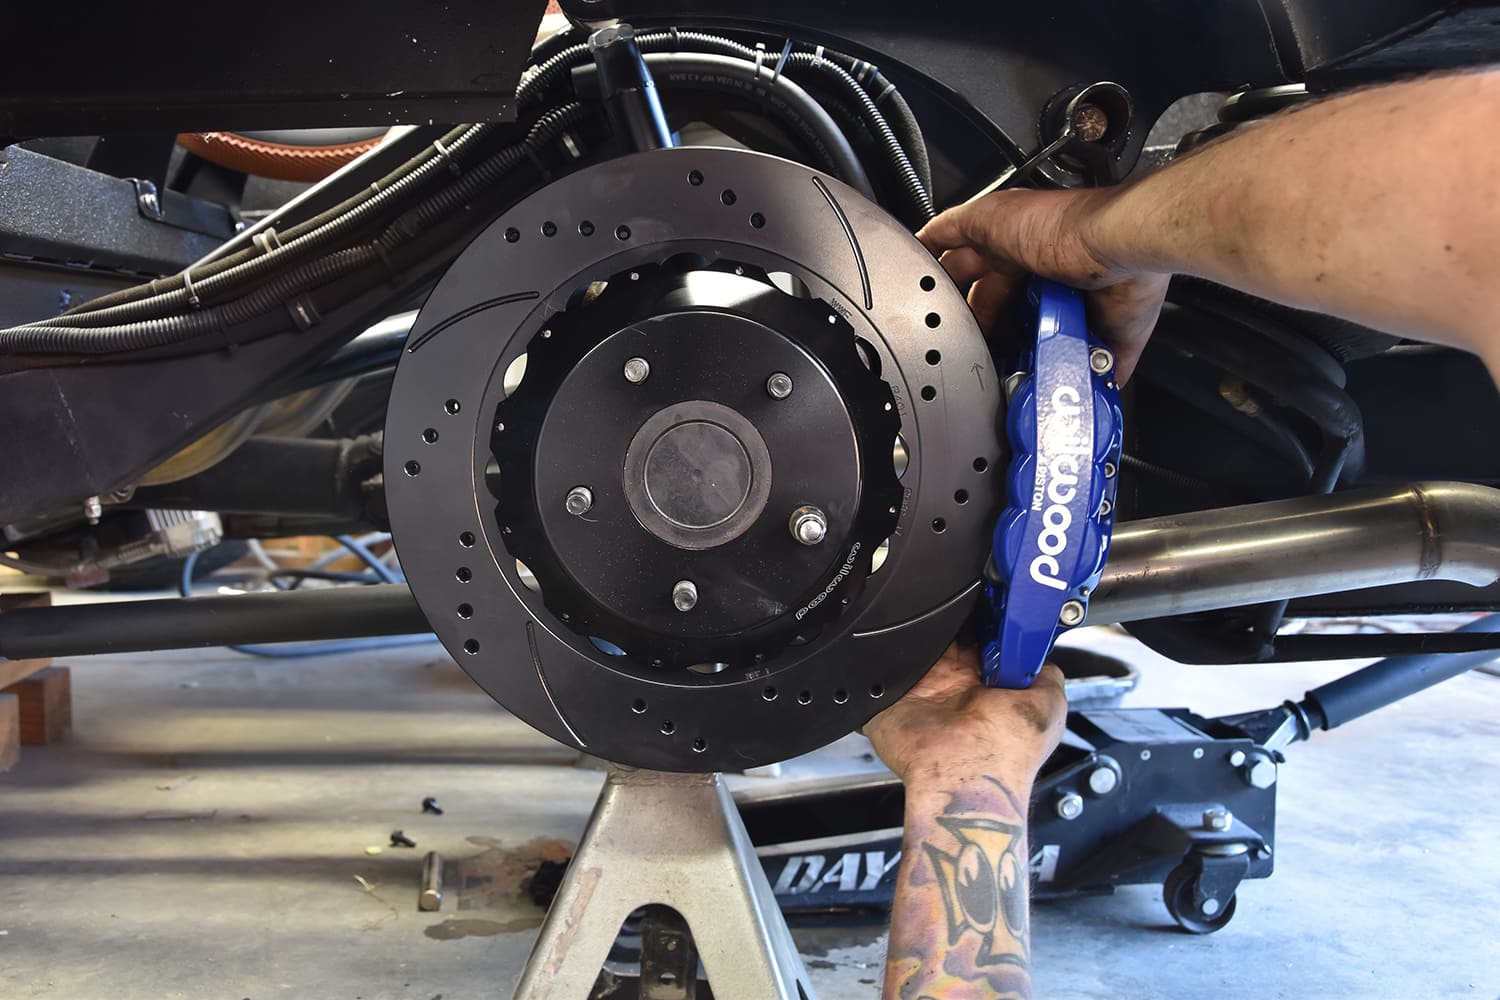
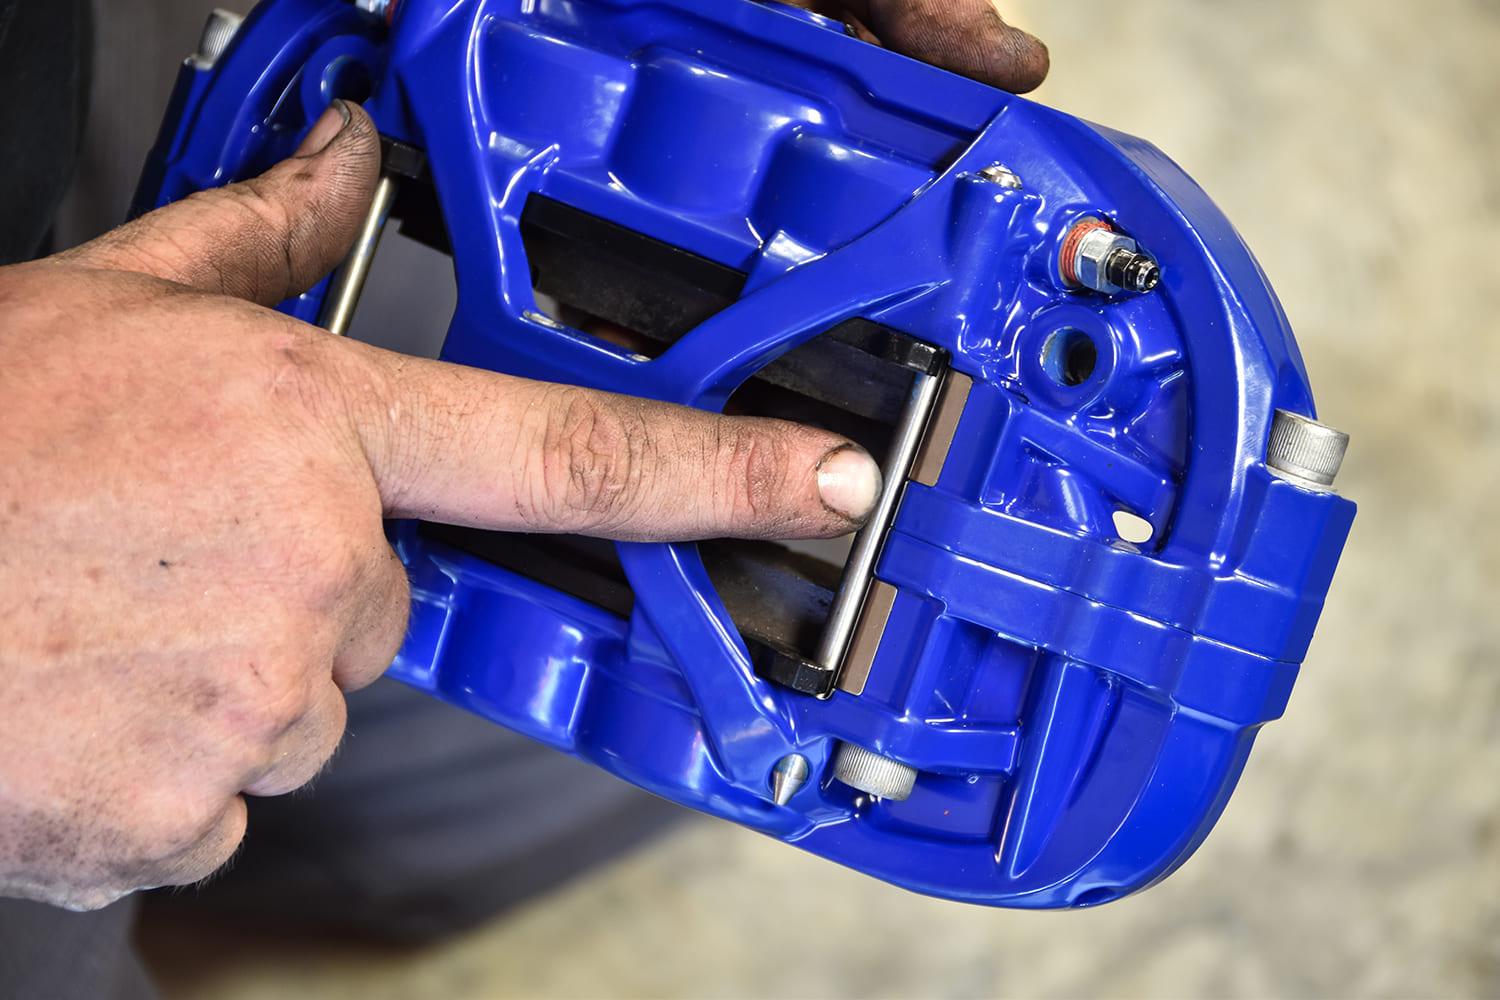
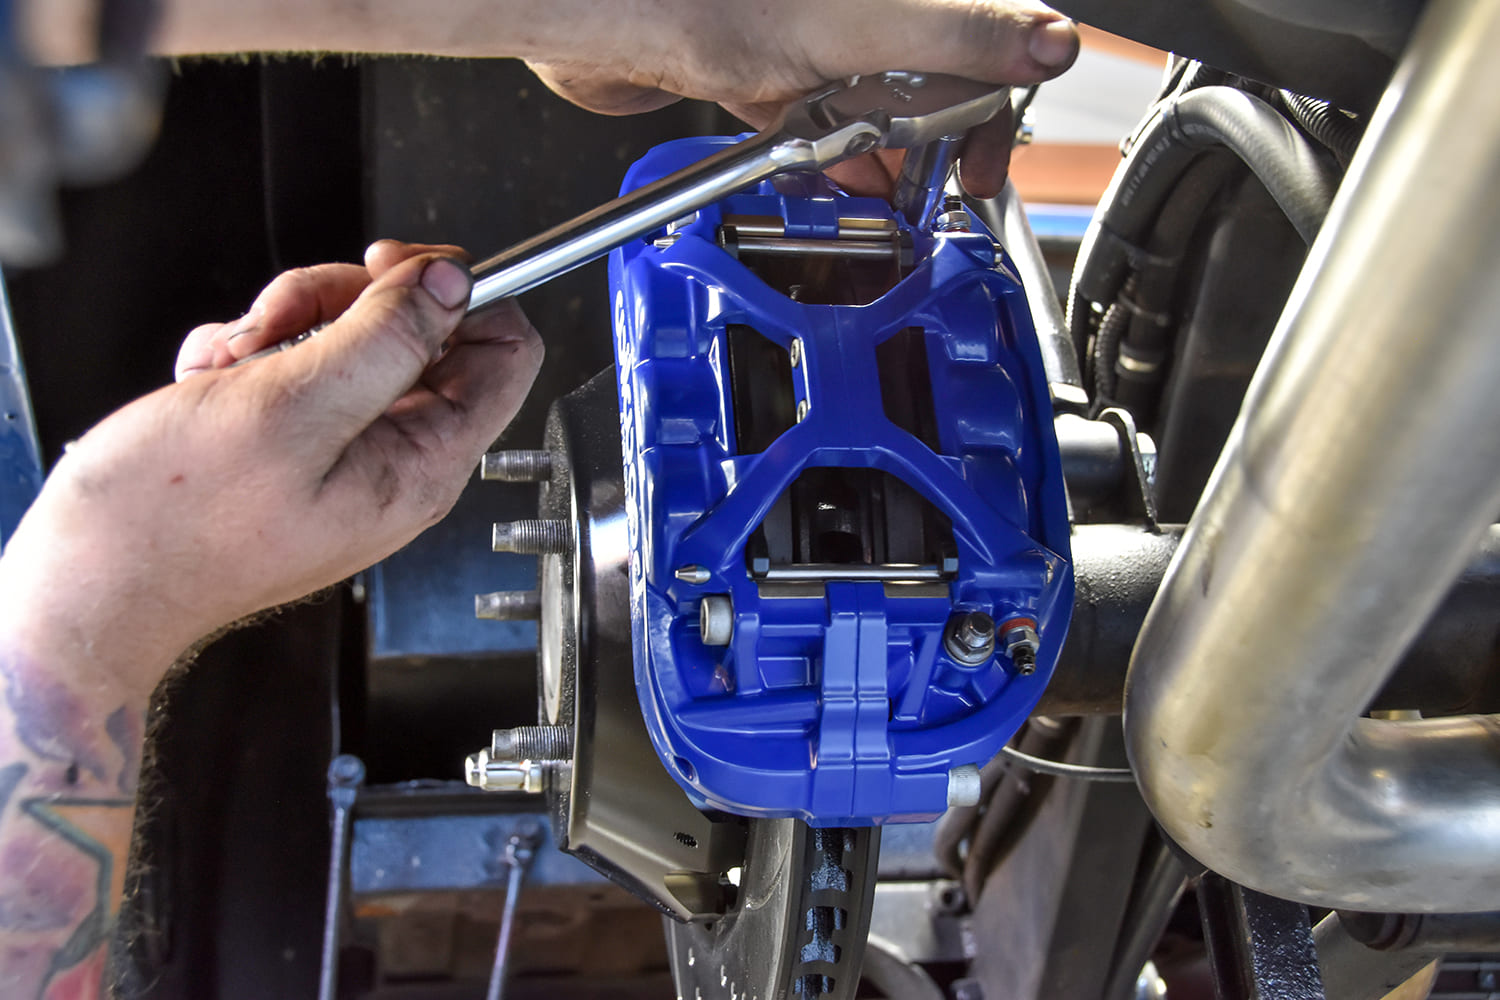
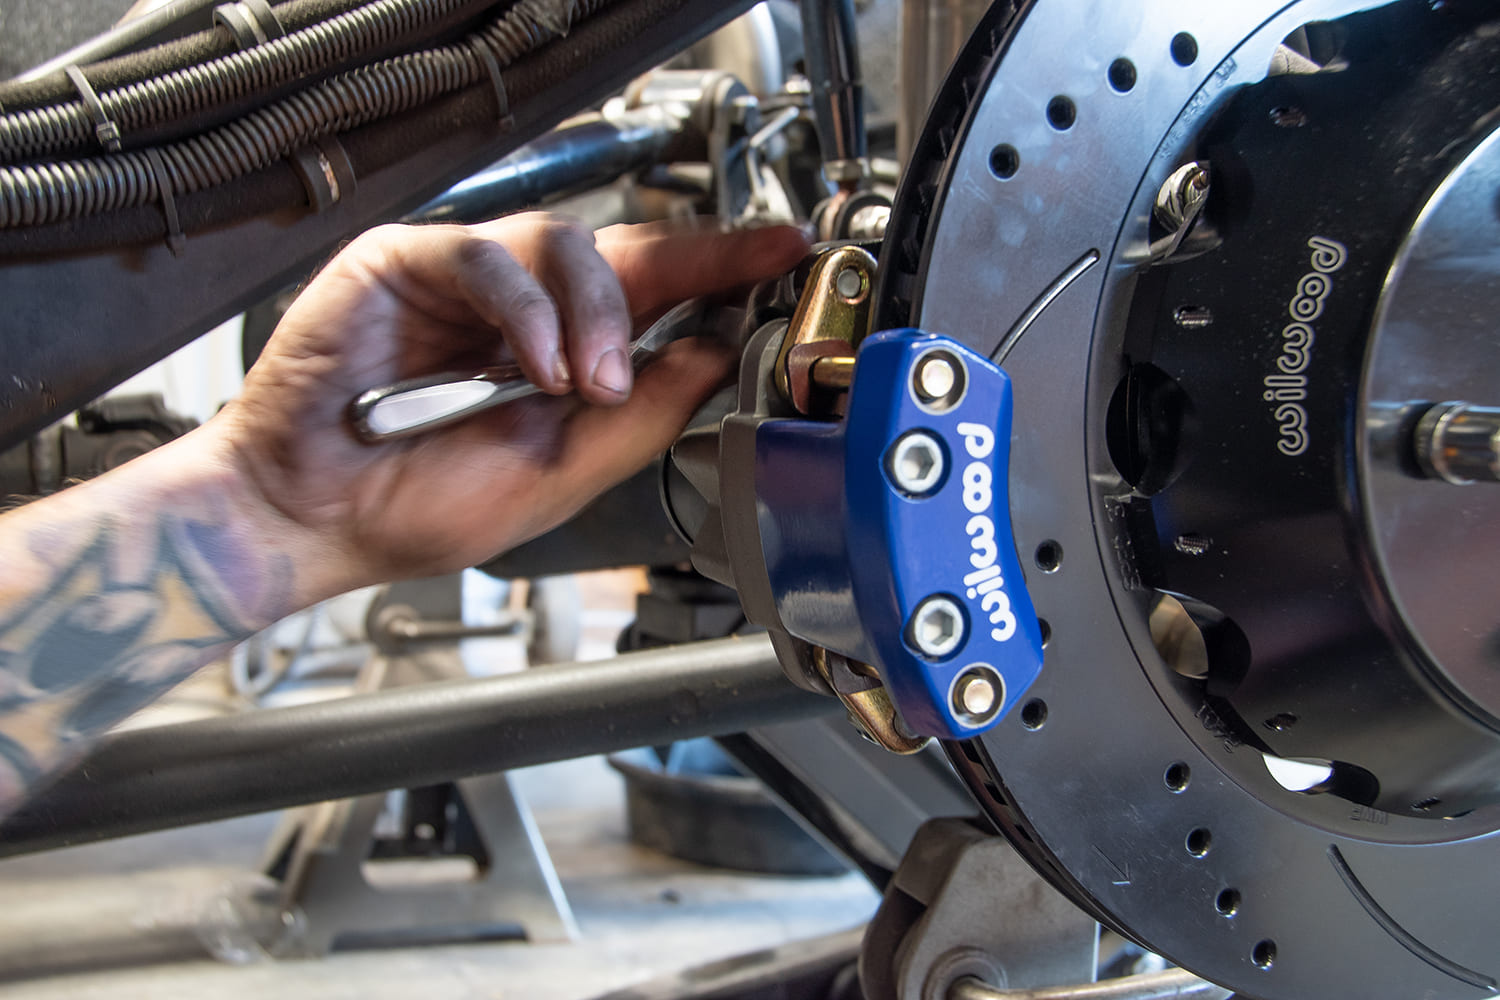
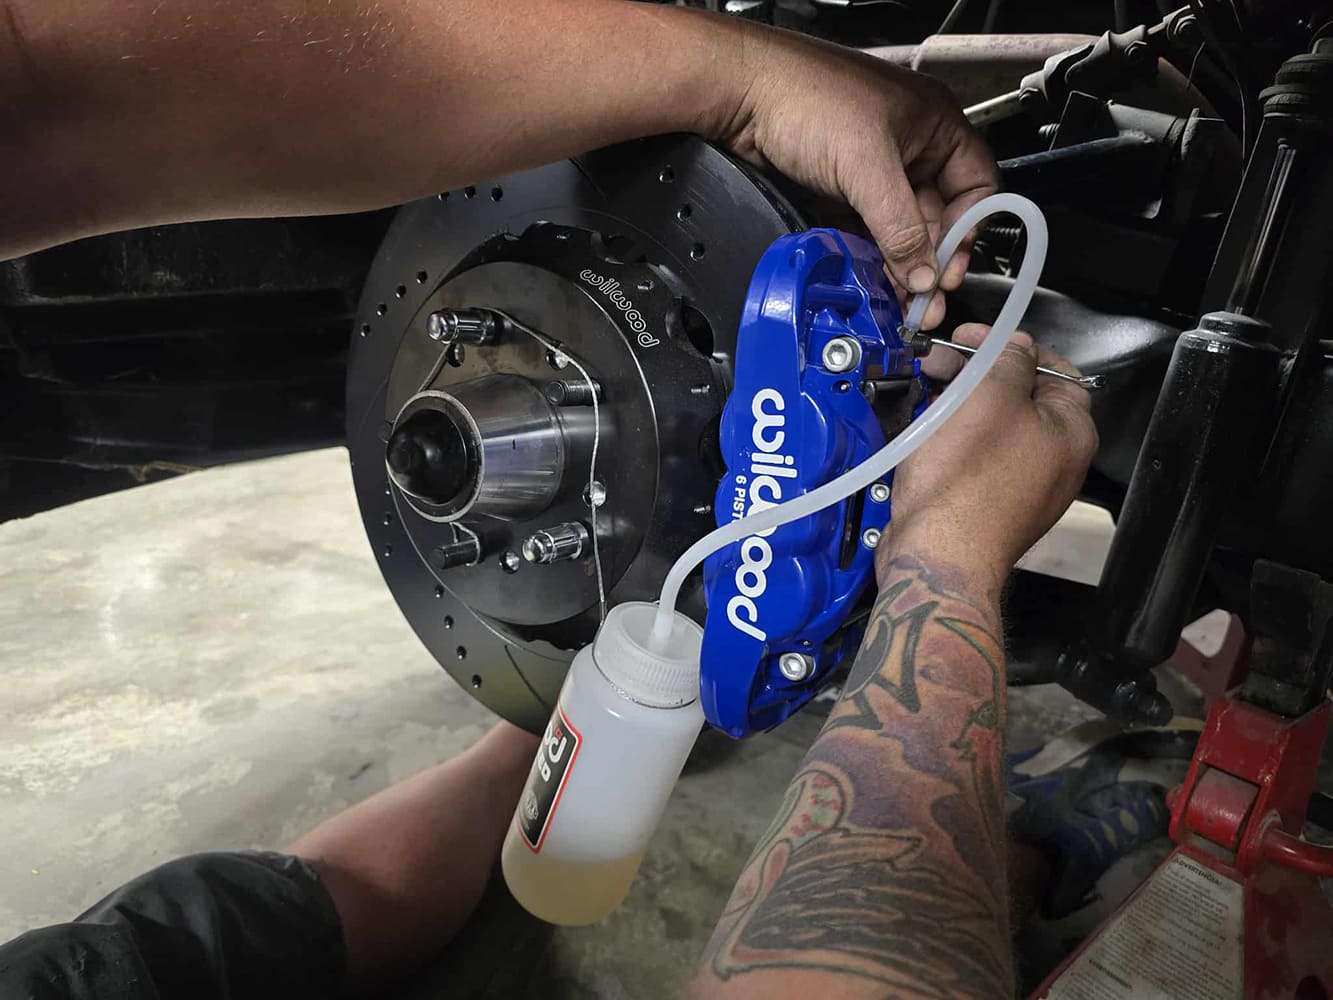
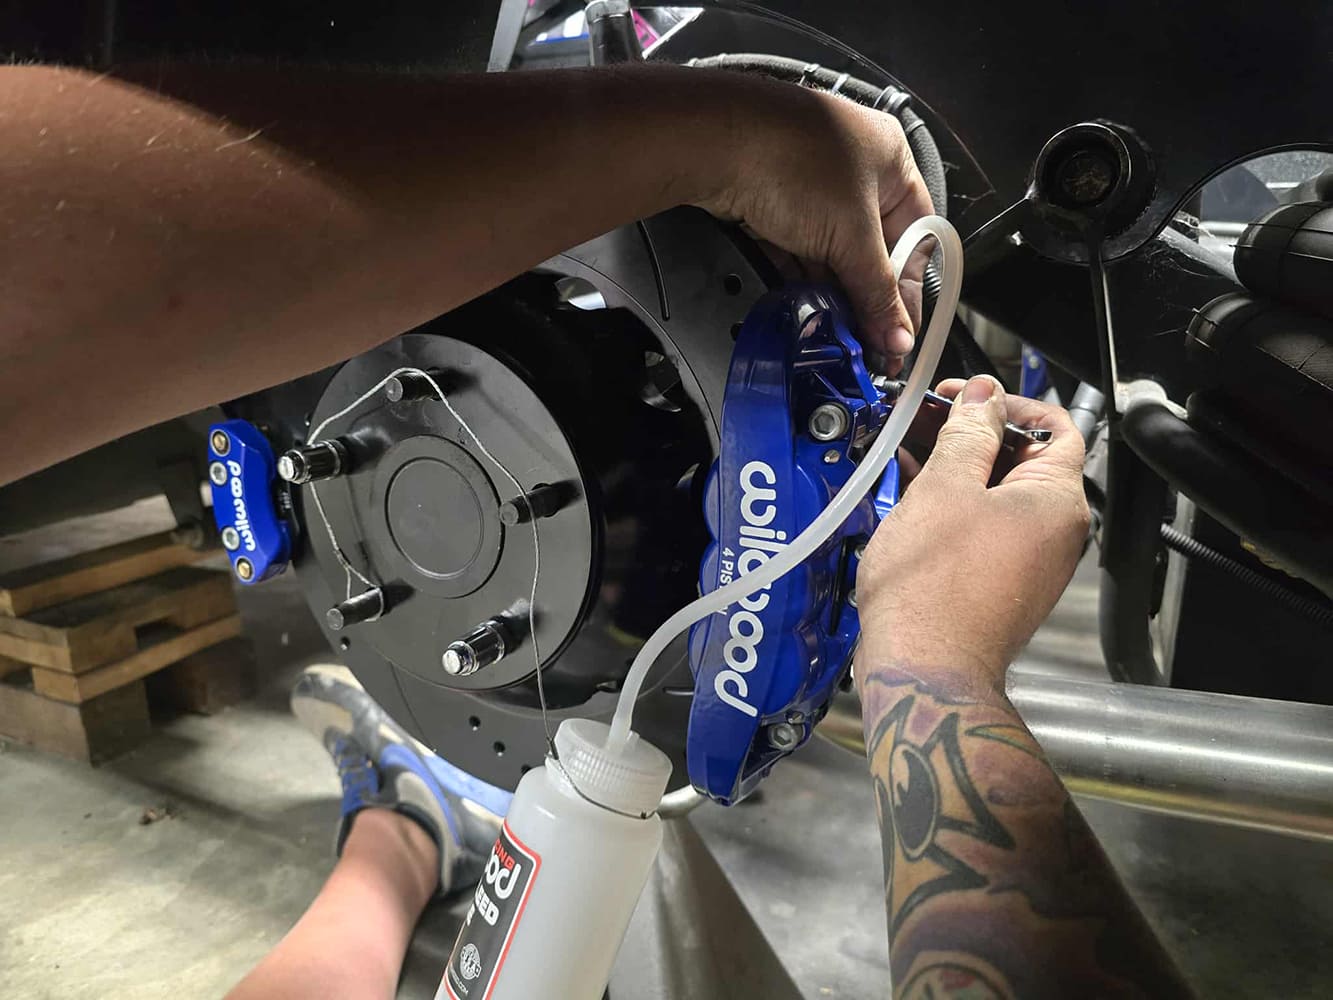
Grab your caliper, slide it on, and repeat your process from the front brake to center the caliper to the rotor.Once your calipers are centered on the rotor, remove the caliper and install pads using Wilwood pad retainers. Gently bump them in with a small hammer.Remove hardware on the bracket one by one and re-install with shims, red Loctite, and supplied torque specs. Install the caliper using supplied nuts and washers, with red Loctite and supplied torque specs.This truck is also getting the new Wilwood Superlite 4R Electronic Parking Brake. The E-brake bracket will mount easily on the already-placed adapter plate sandwiched between the flange and rotor. Loosely install with supplied hardware, because we will have to come back and shim it.
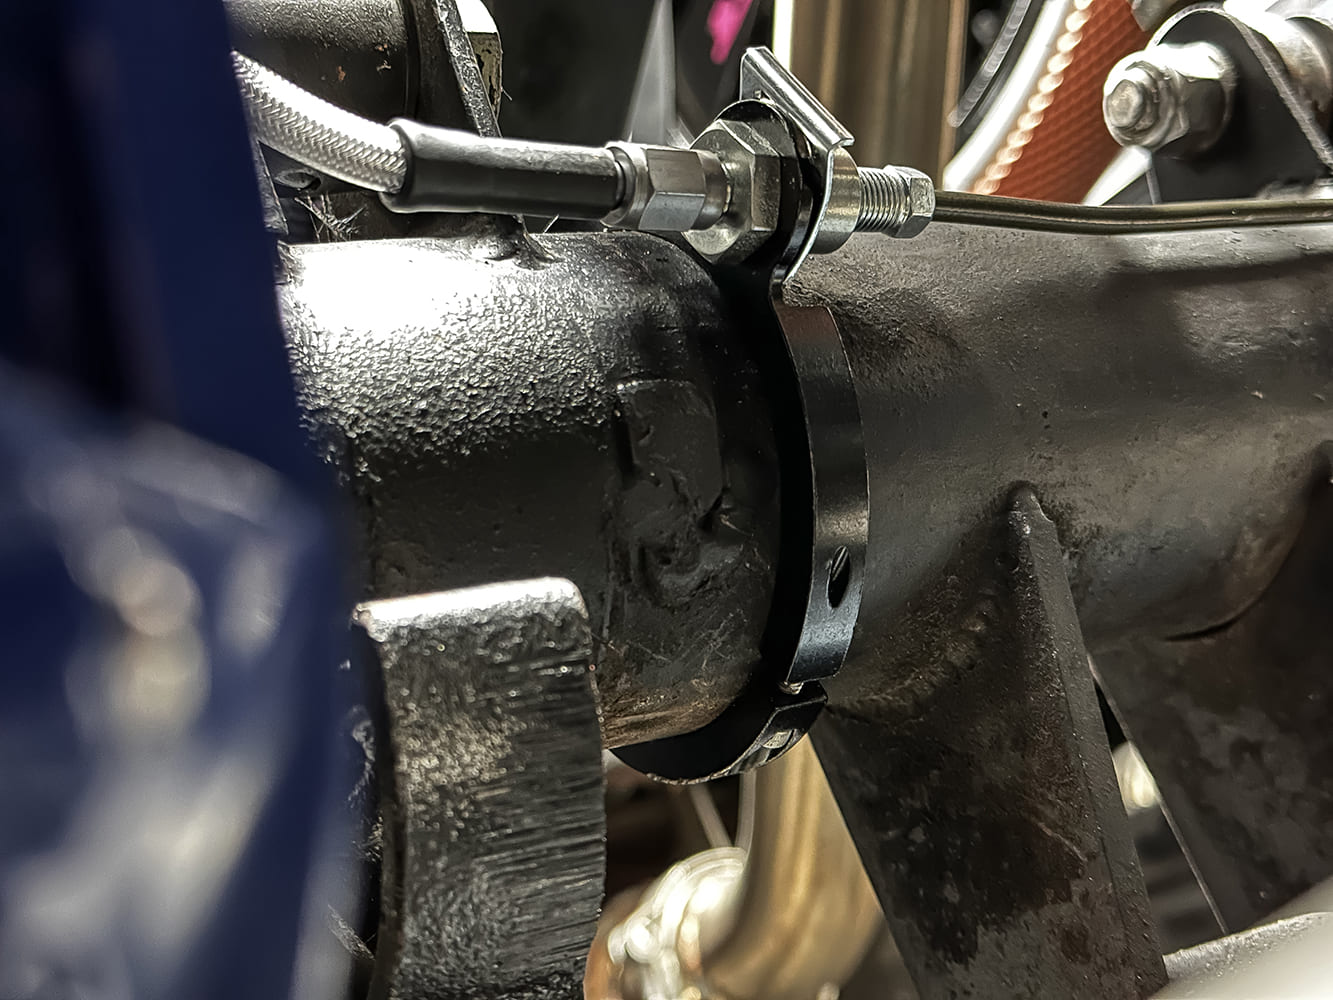
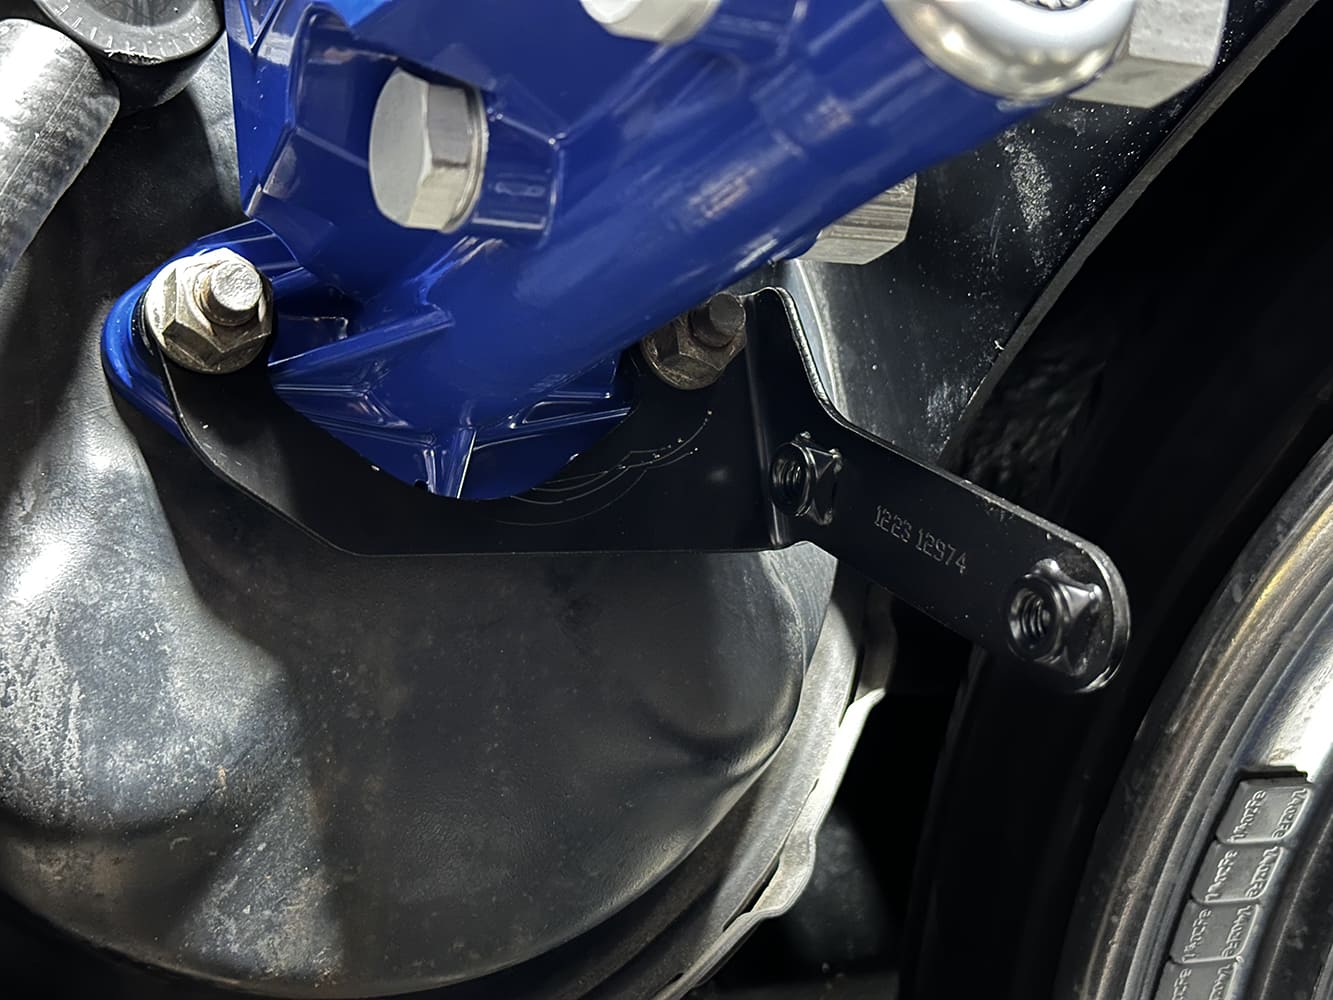
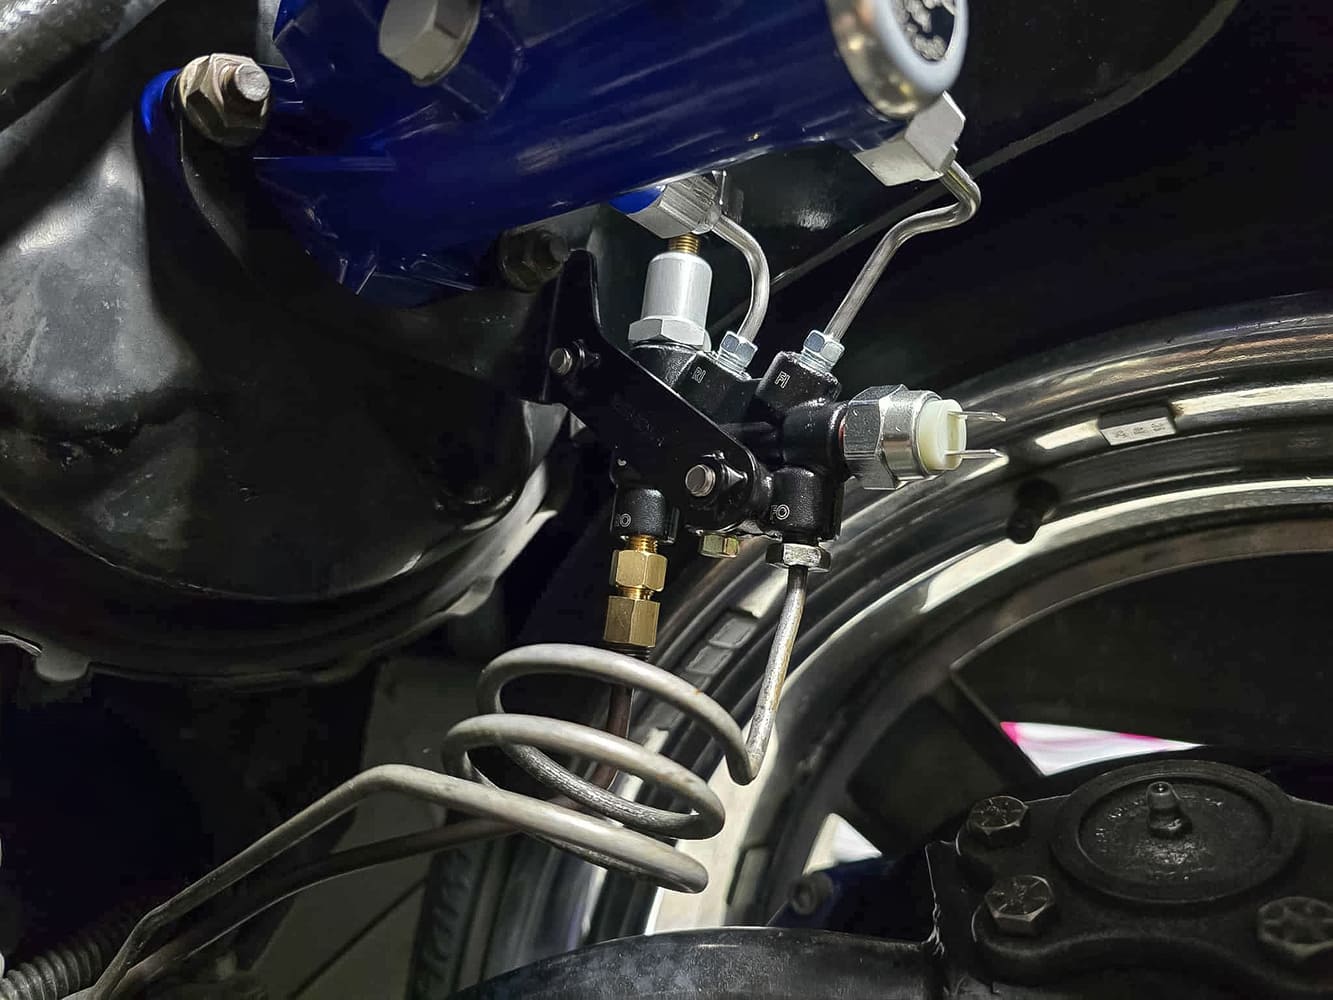
Install the e-brake anywhere you want it … literally. The adapter plate allows you to go all the way around. Loosely install with supplied hardware and center the caliper on the rotor with supplied shims. Once you are satisfied, take the mounting hardware off one by one and reinstall with red Loctite and supplied torque specs.Remove the cylinders you left behind if you had chosen to do so. A modified rearend narrowed 3 inches on both sides causes us to use a flexible brake line and very convenient aluminum clamp-on tab (Wilwood PN 220-17289). We purchased new steel brake lines bought at our local parts store because the old ones are an eyesore. In most stock cases, you typically would cut back and re-flare the lines instead.
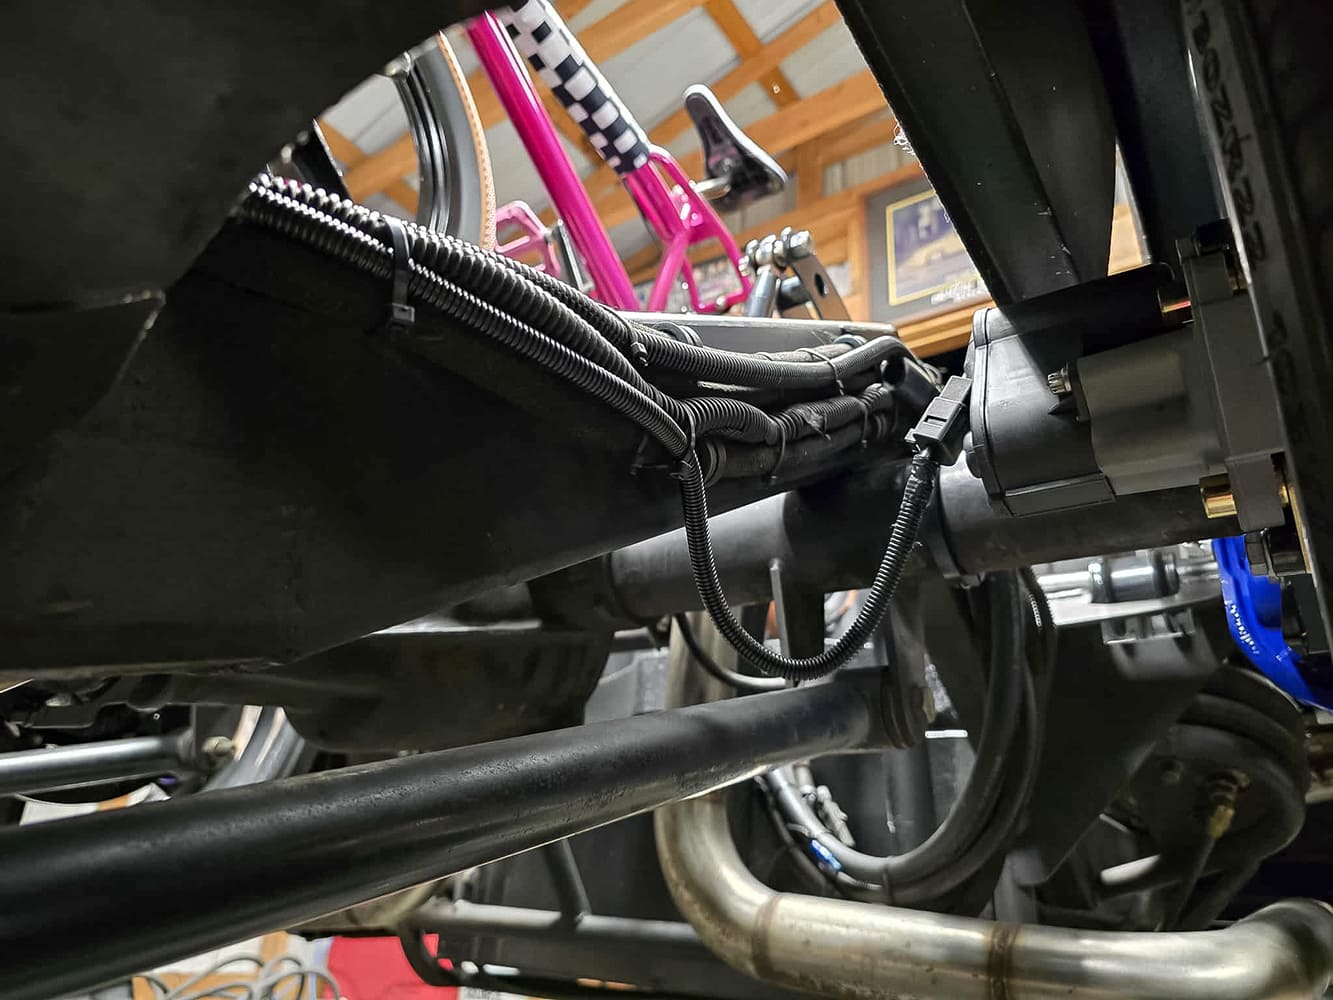
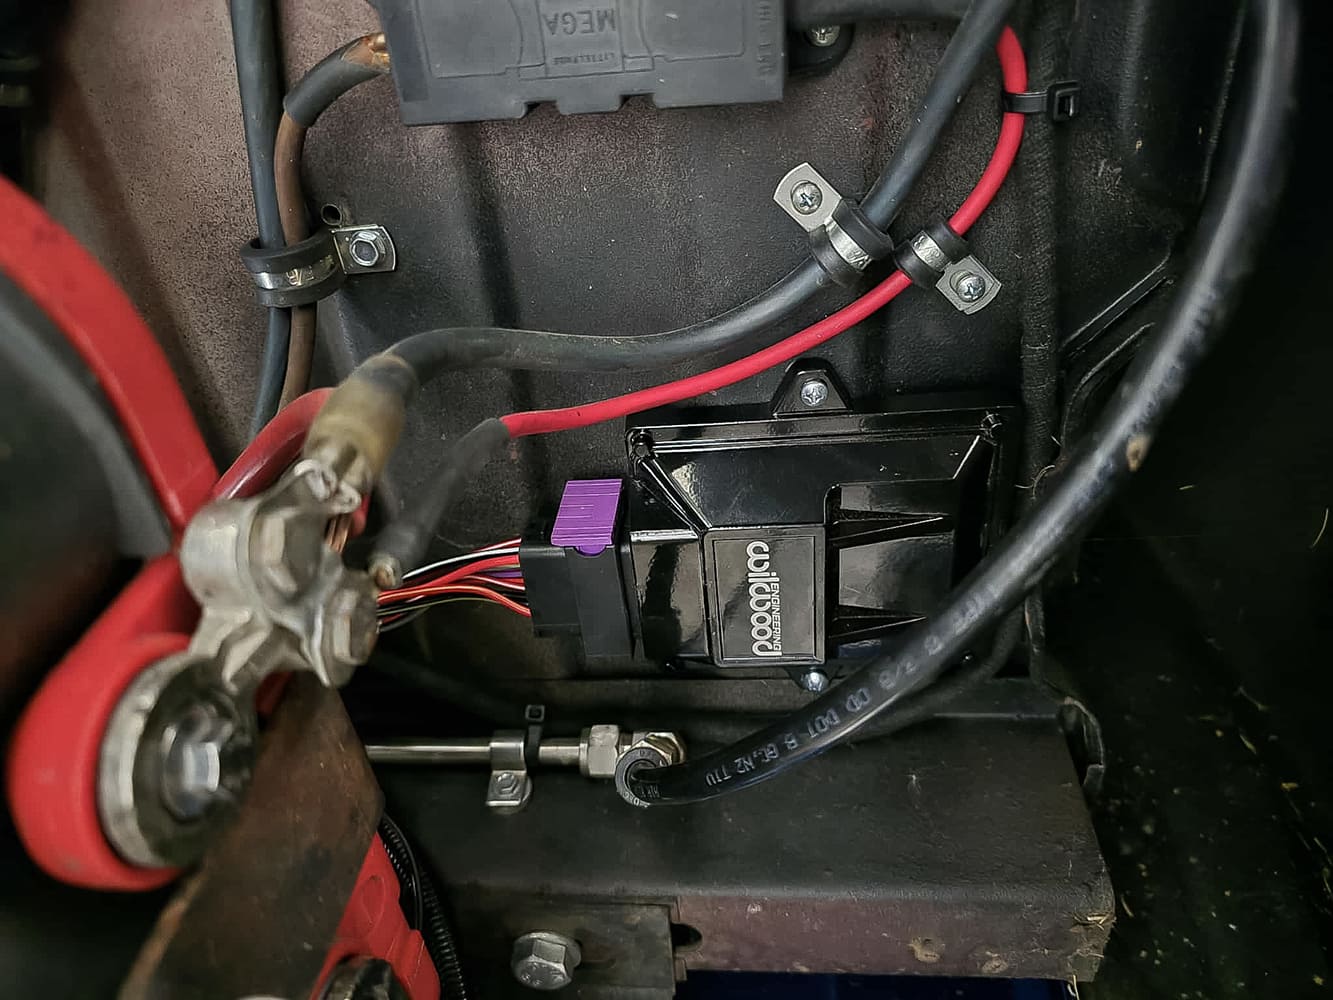
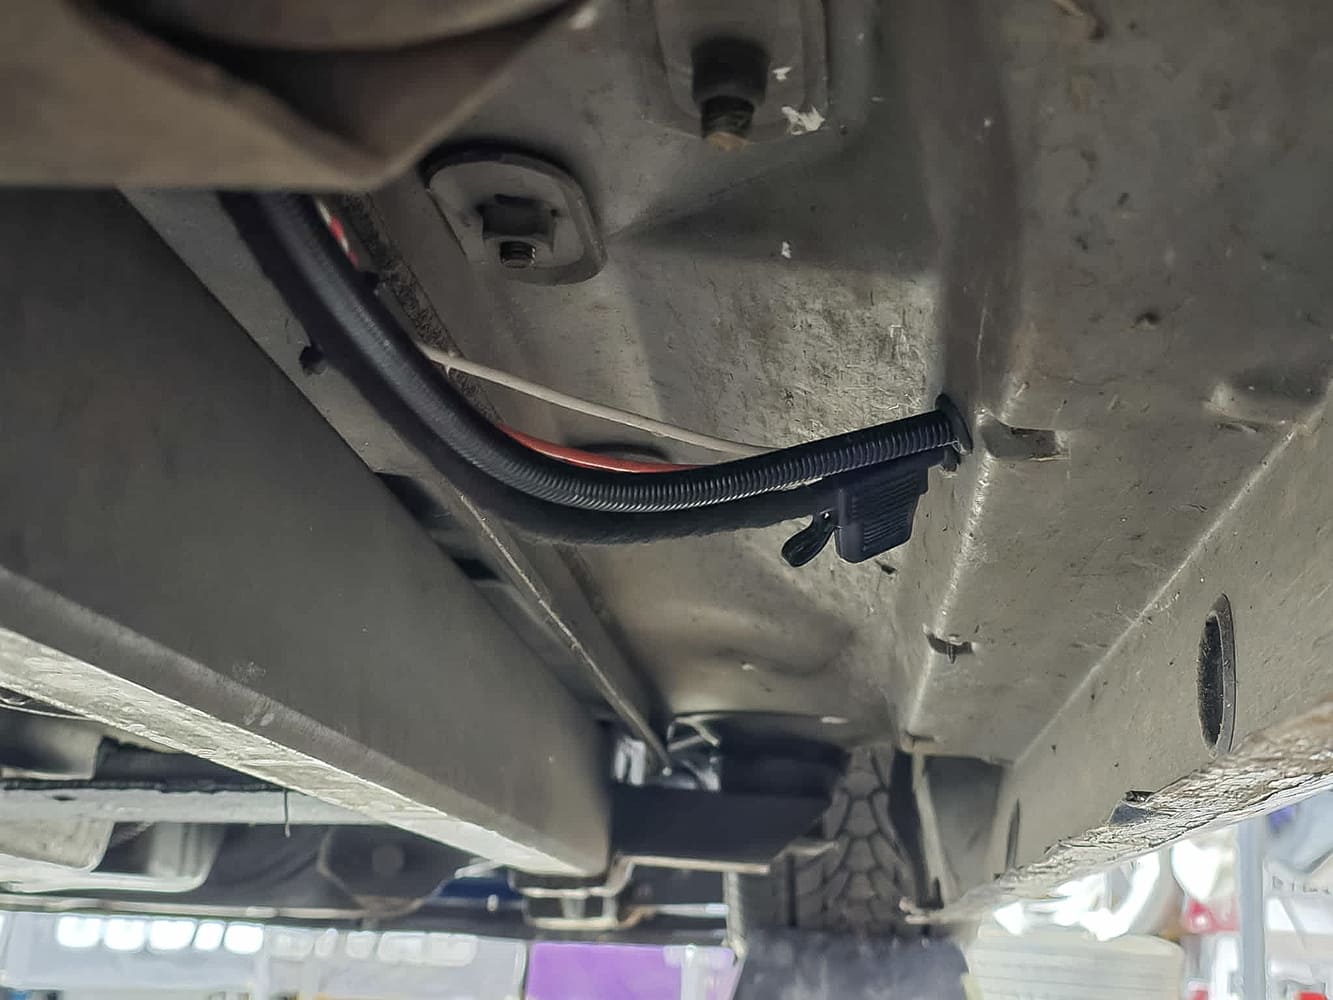
Now that all the lines are mounted, we can begin running the wiring for the e-brake. This setup will be a little different than most should and will apply, but we are dictated by a truck that is body-dropped and lays completely on the ground, which is why we left a section drooping down to allow for suspension travel. It is recommended to mount the control module inside the cab for weather purposes, but we obviously had limited choices on where to mount because the harness is meant for the stock battery location (ours is under the bed) and meant to mount anywhere under the dash. We will custom build a close-out panel that will help protect the control module.
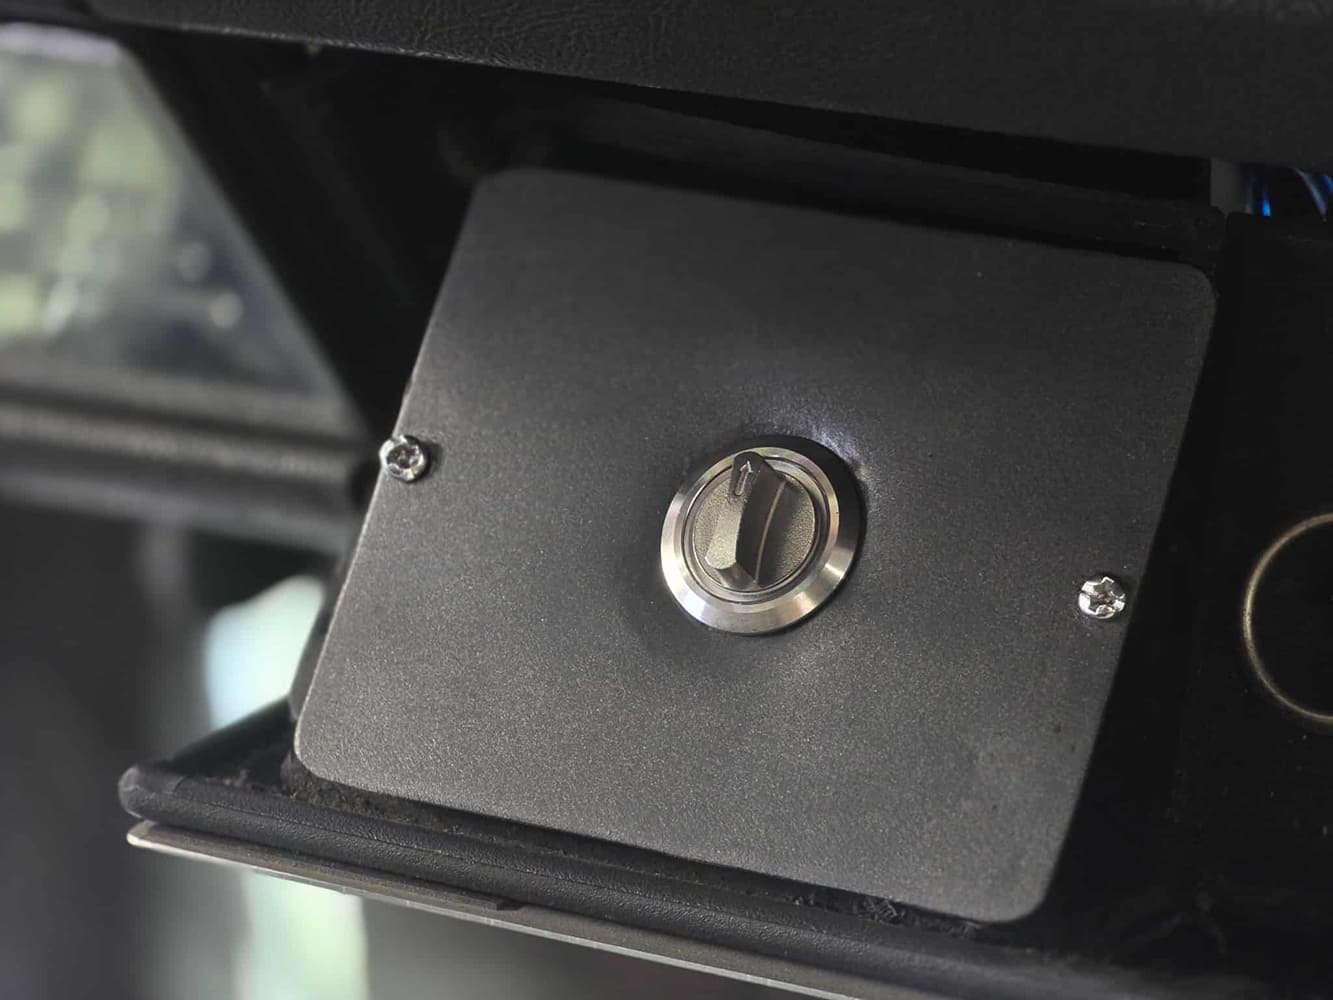
We drilled a hole on the bottom side of the cab and applied a rubber grommet, running the wires through the hole and to the desired area we wanted the e-brake switch. We extended the wires by hand to give us the option of mounting under the dash where your ashtray would typically be.
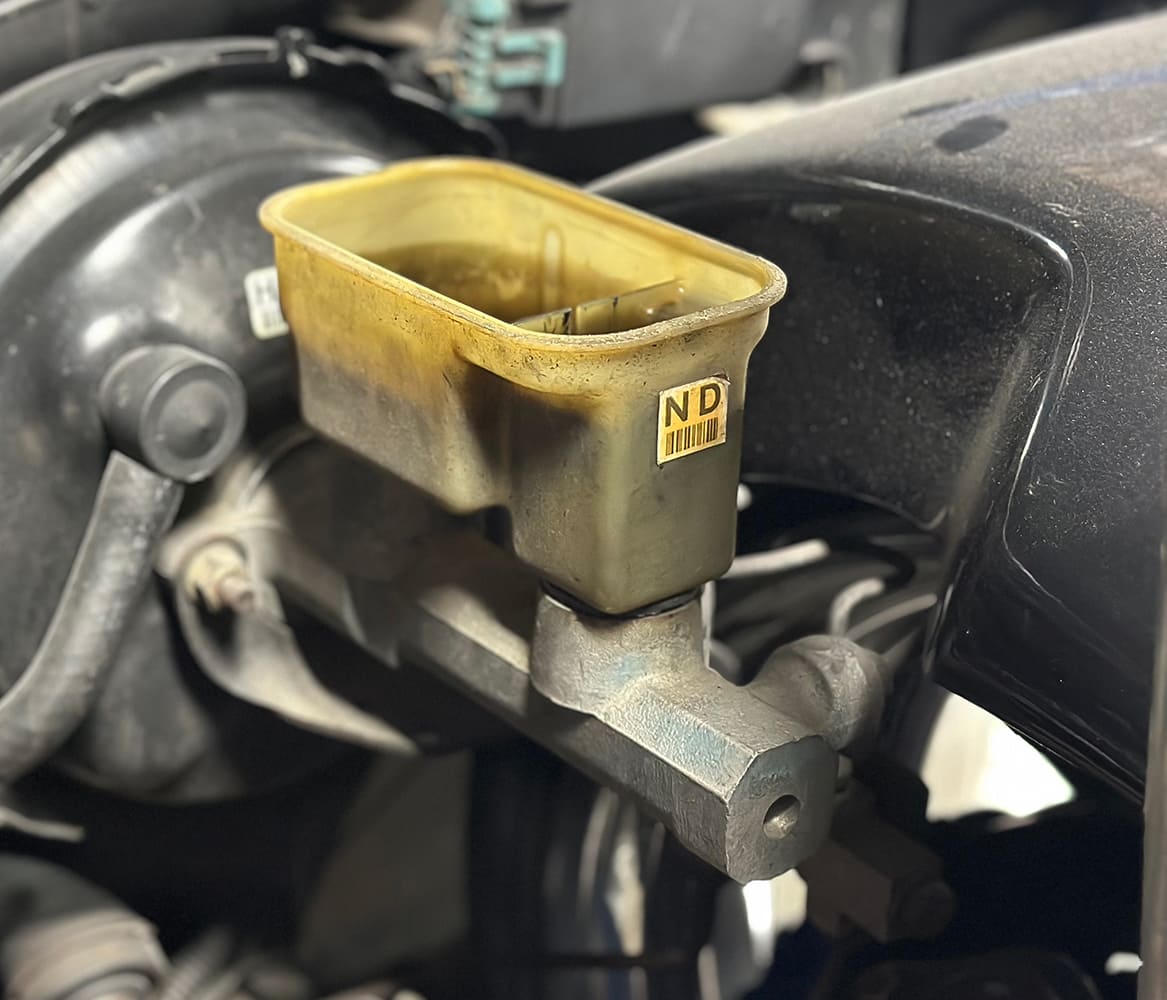
MASTER CYLINDER
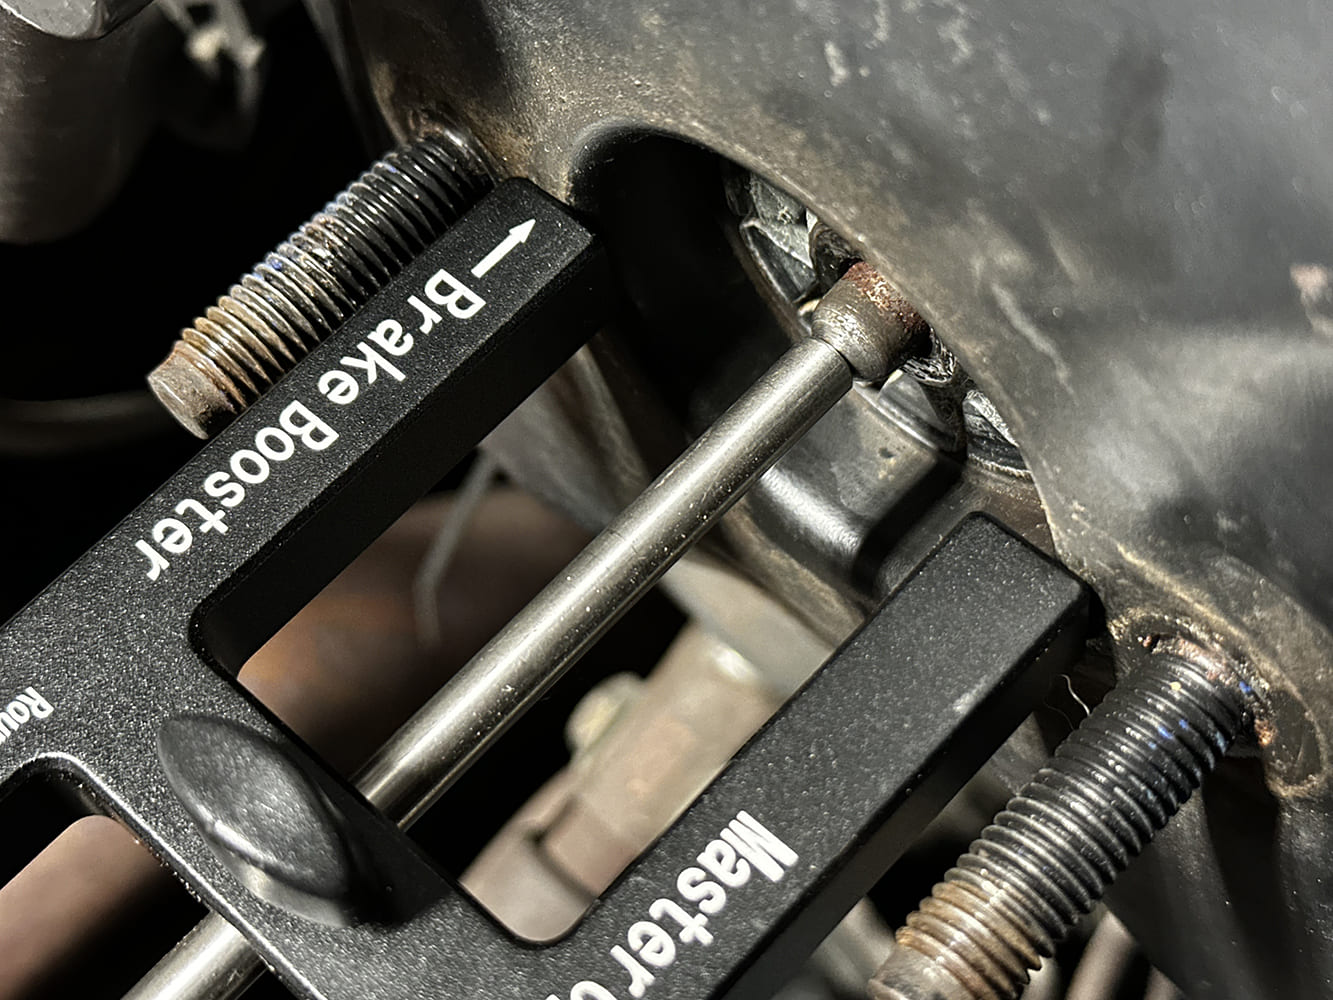
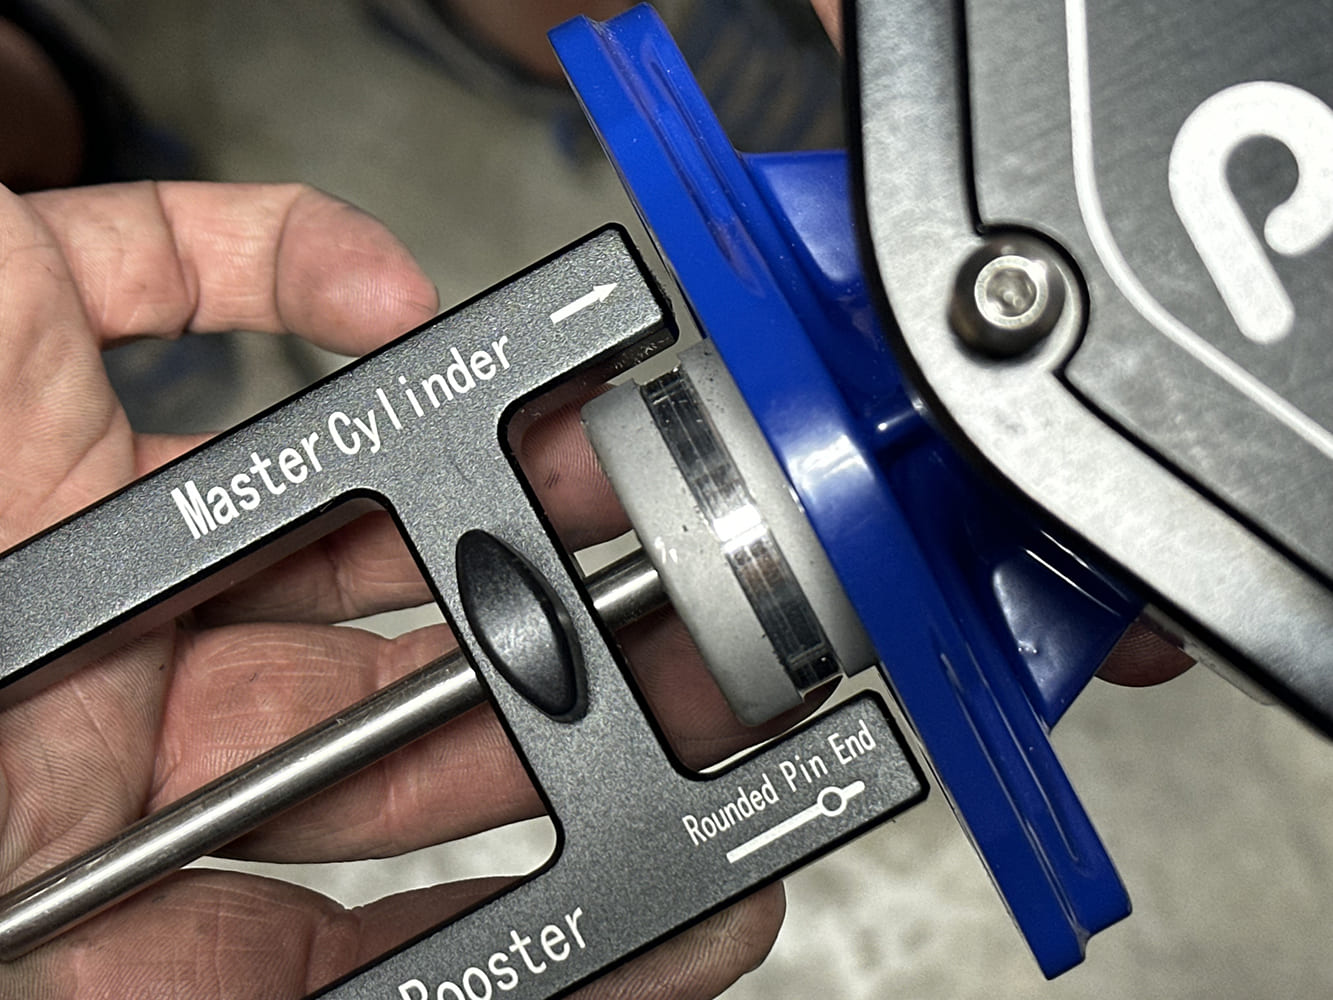
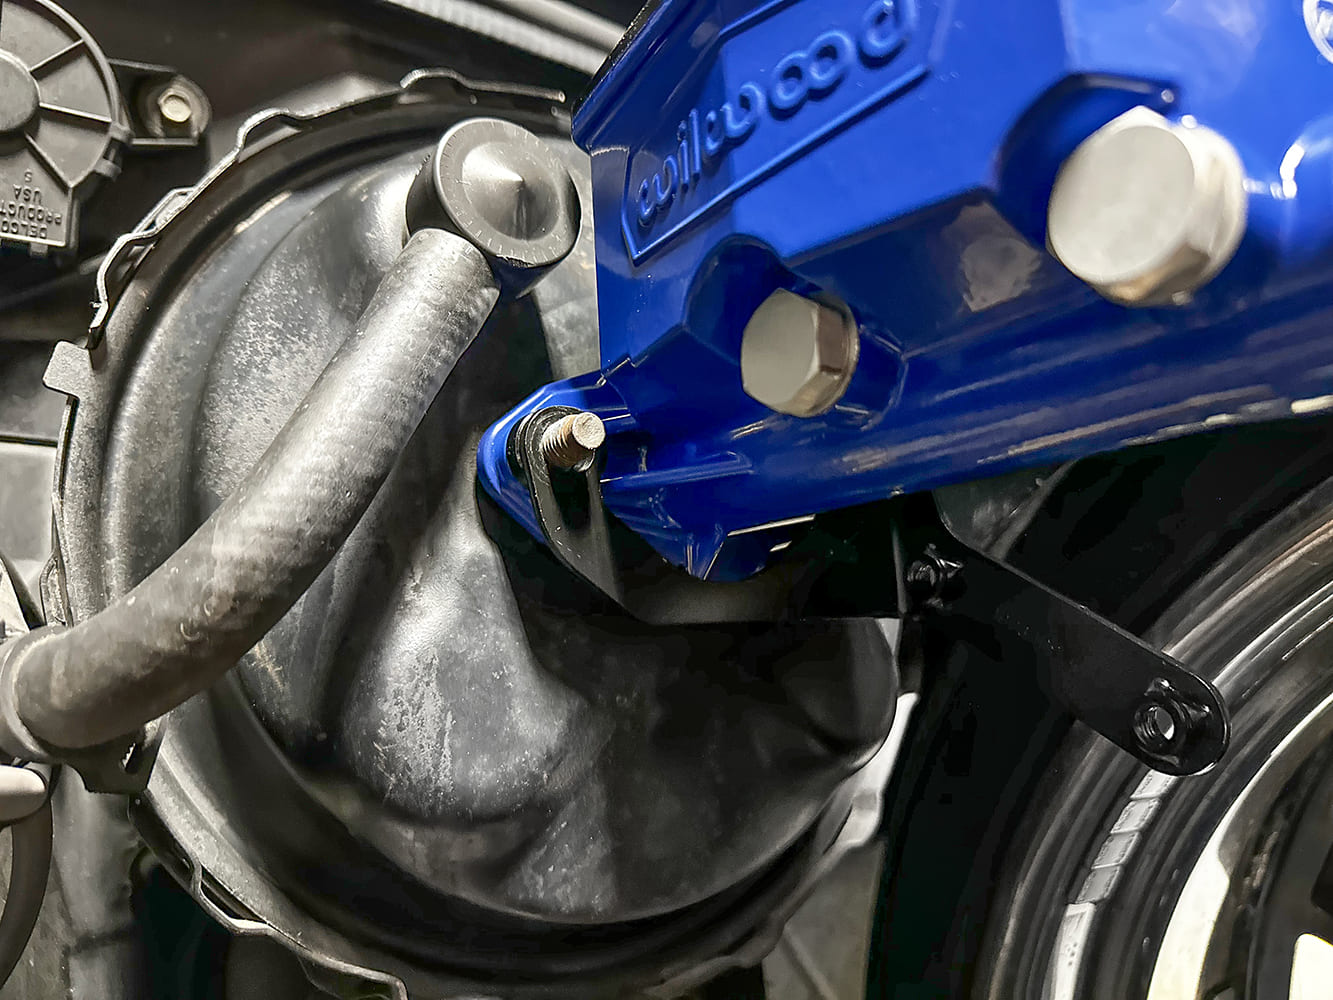
Installing the Wilwood Compact Tandem Master Cylinder: Remove old brake fluid, remove stock brake lines from the master, and unbolt the master from the booster.Using the supplied tool from Wilwood, measure the depth of your push rod inside your power booster and tighten the tool using the thumb screw.Flip the tool around, bottom the pin out in the master, and measure your gap between your mount surface and the face of the tool.
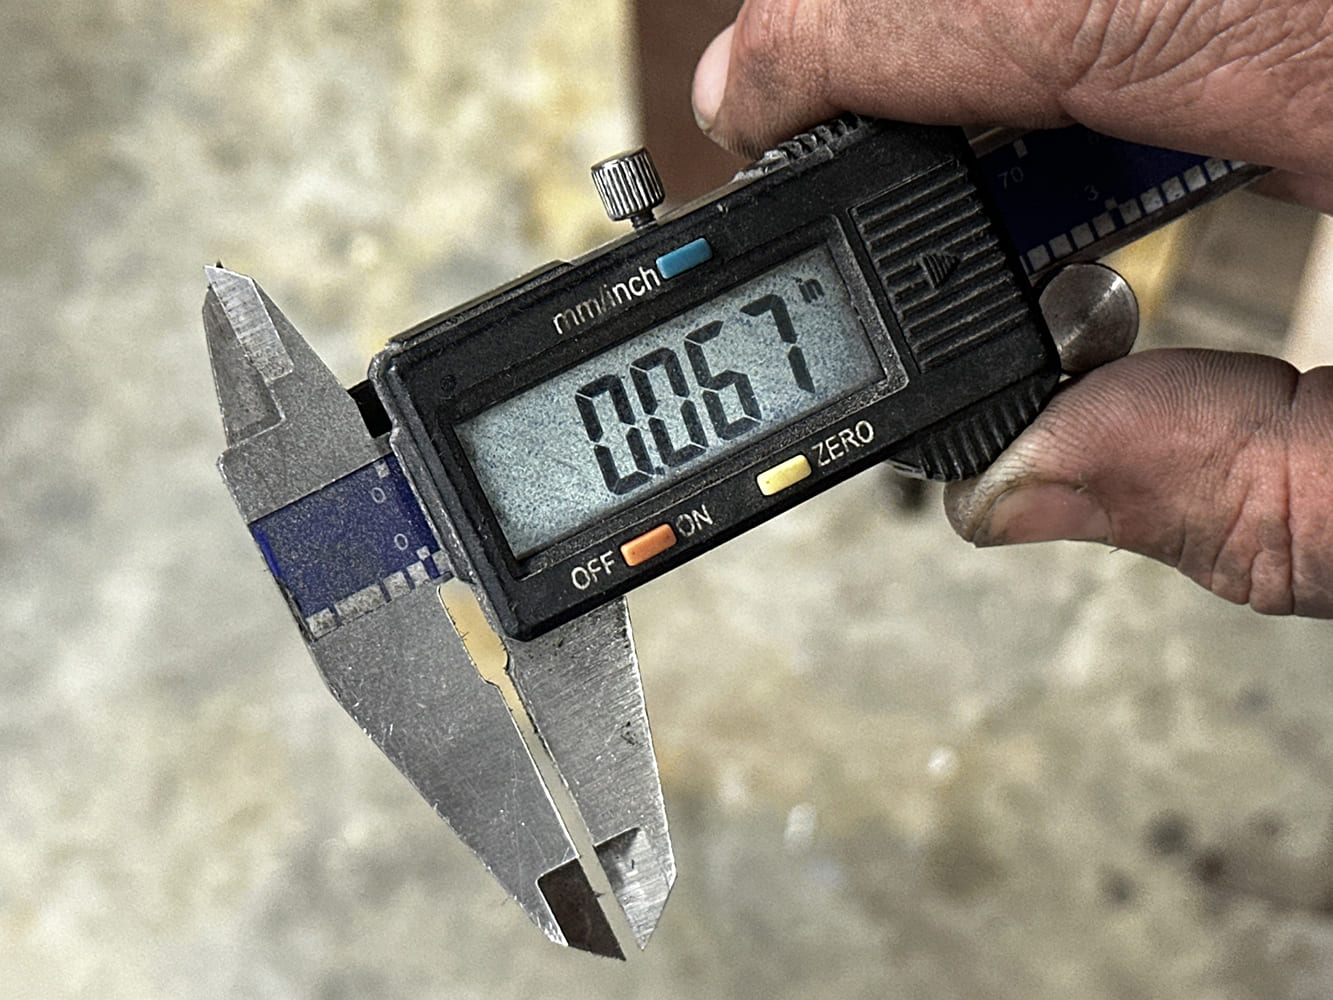
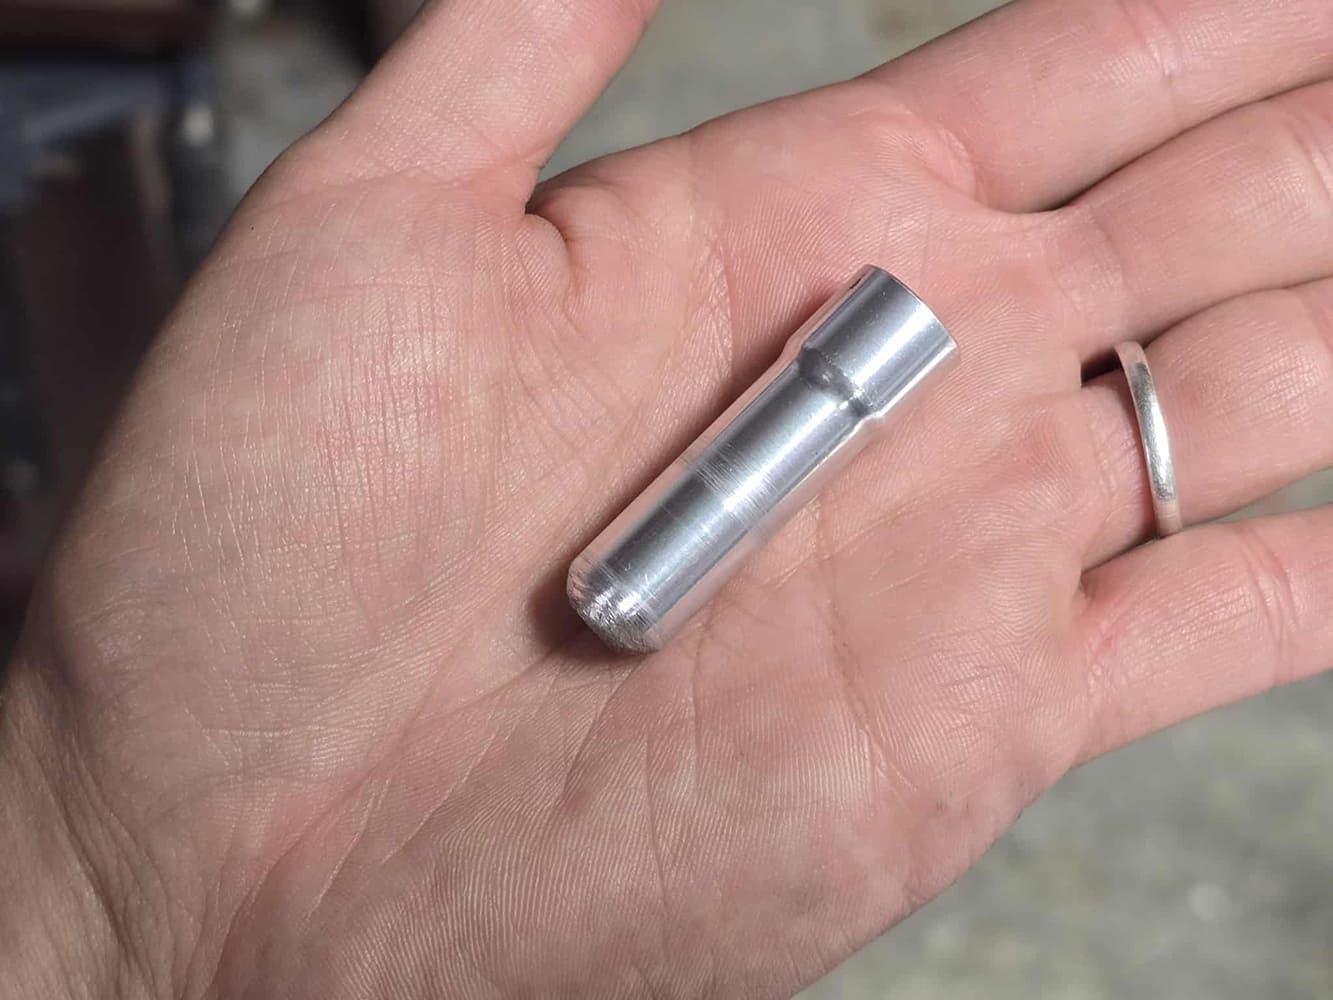
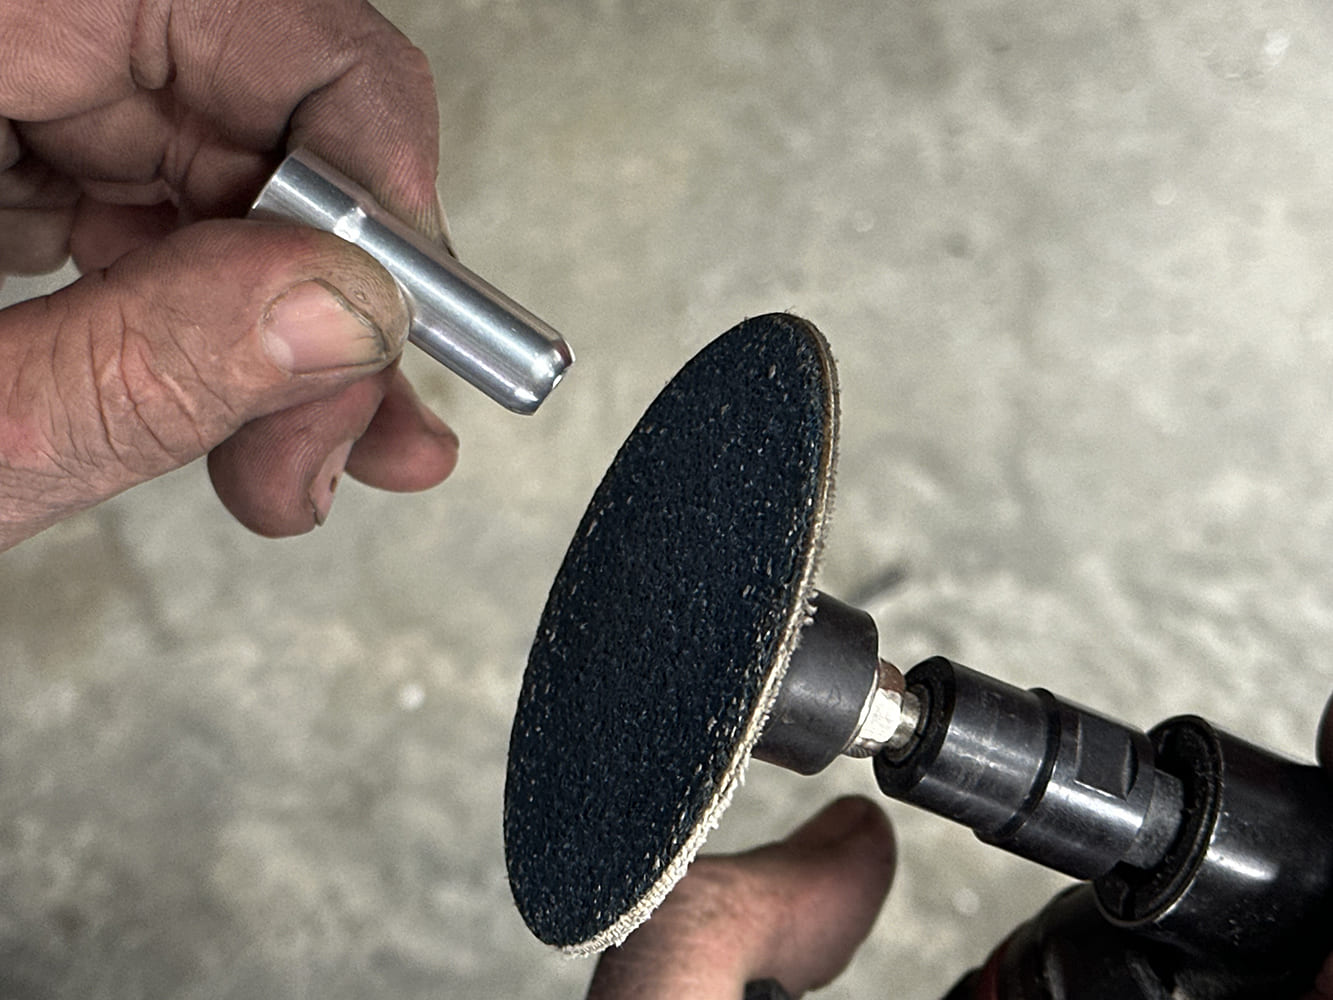
Our gap measurement ended up being 0.067, and the recommended gap between the pin and bottom of the master is 0.030 and 0.100. For the least amount of pedal play, we decided to go with 0.030, which required us to remove 0.097. Remember to put the radius back in the pin after you get the desired length you want.
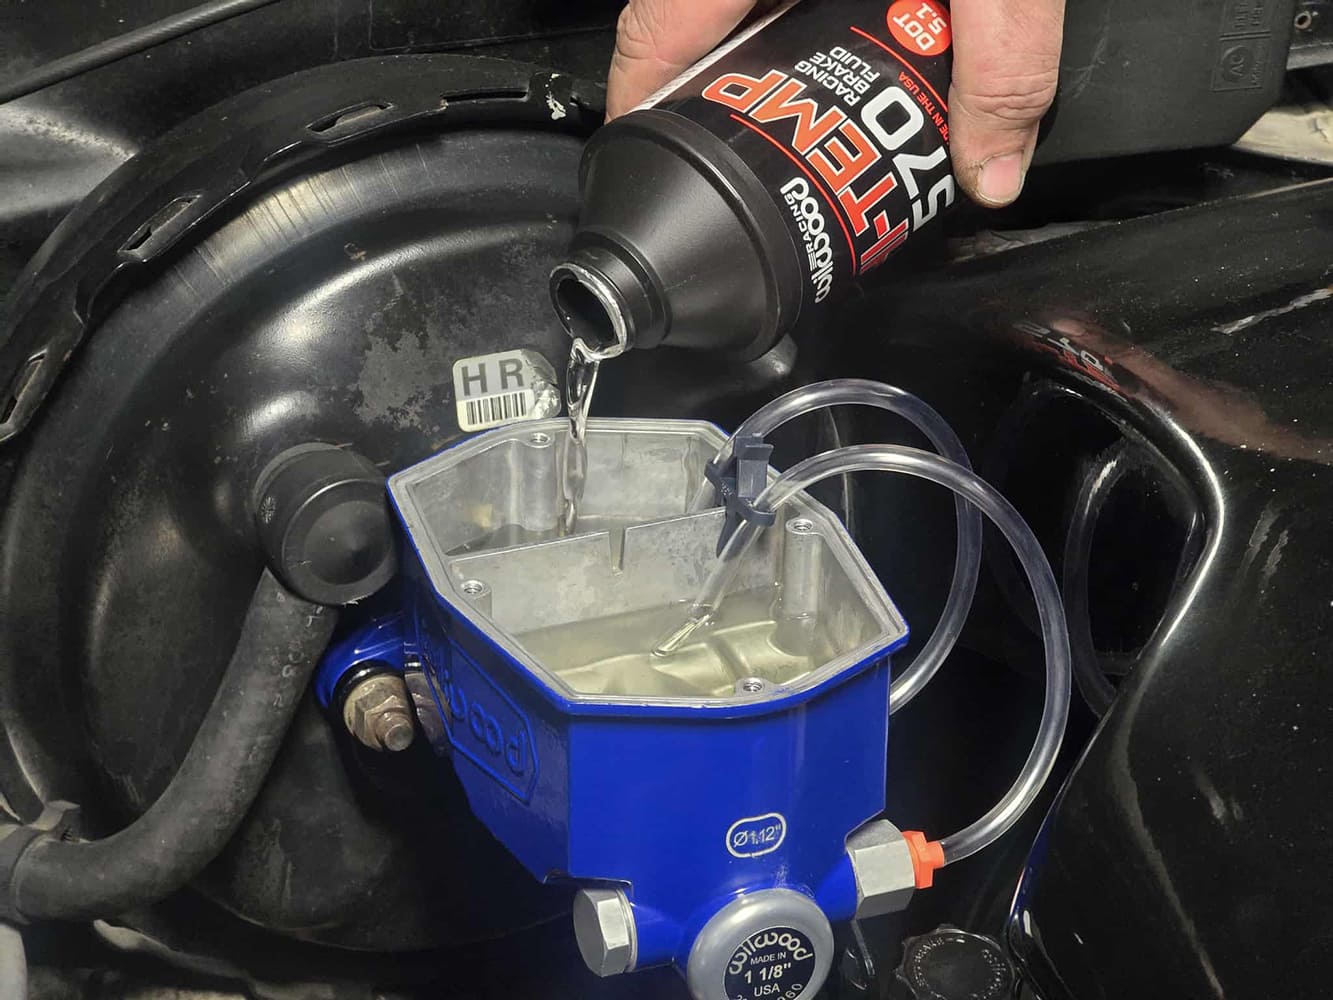
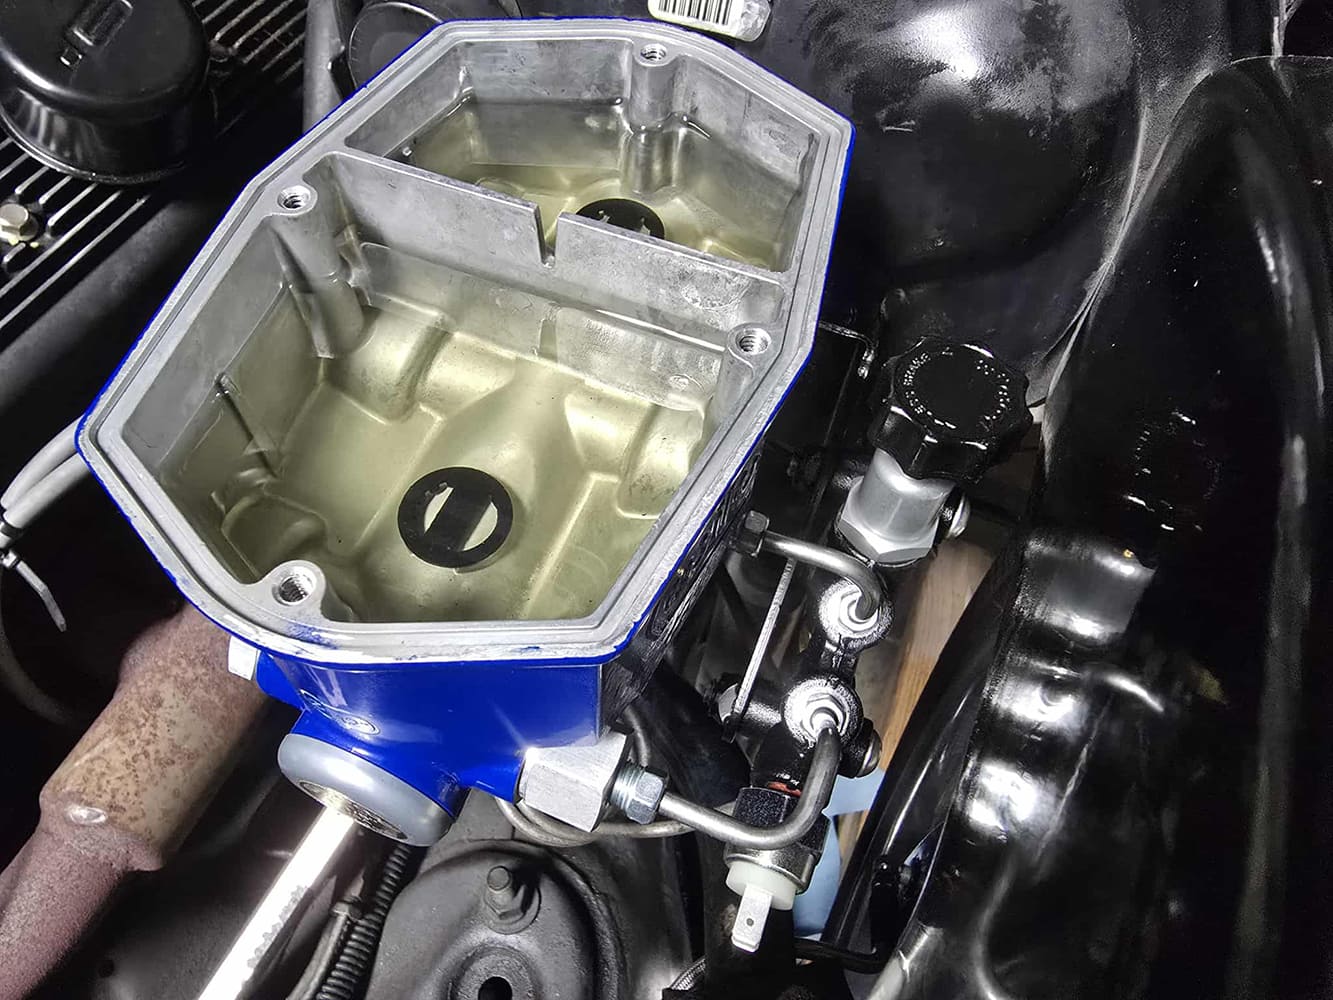
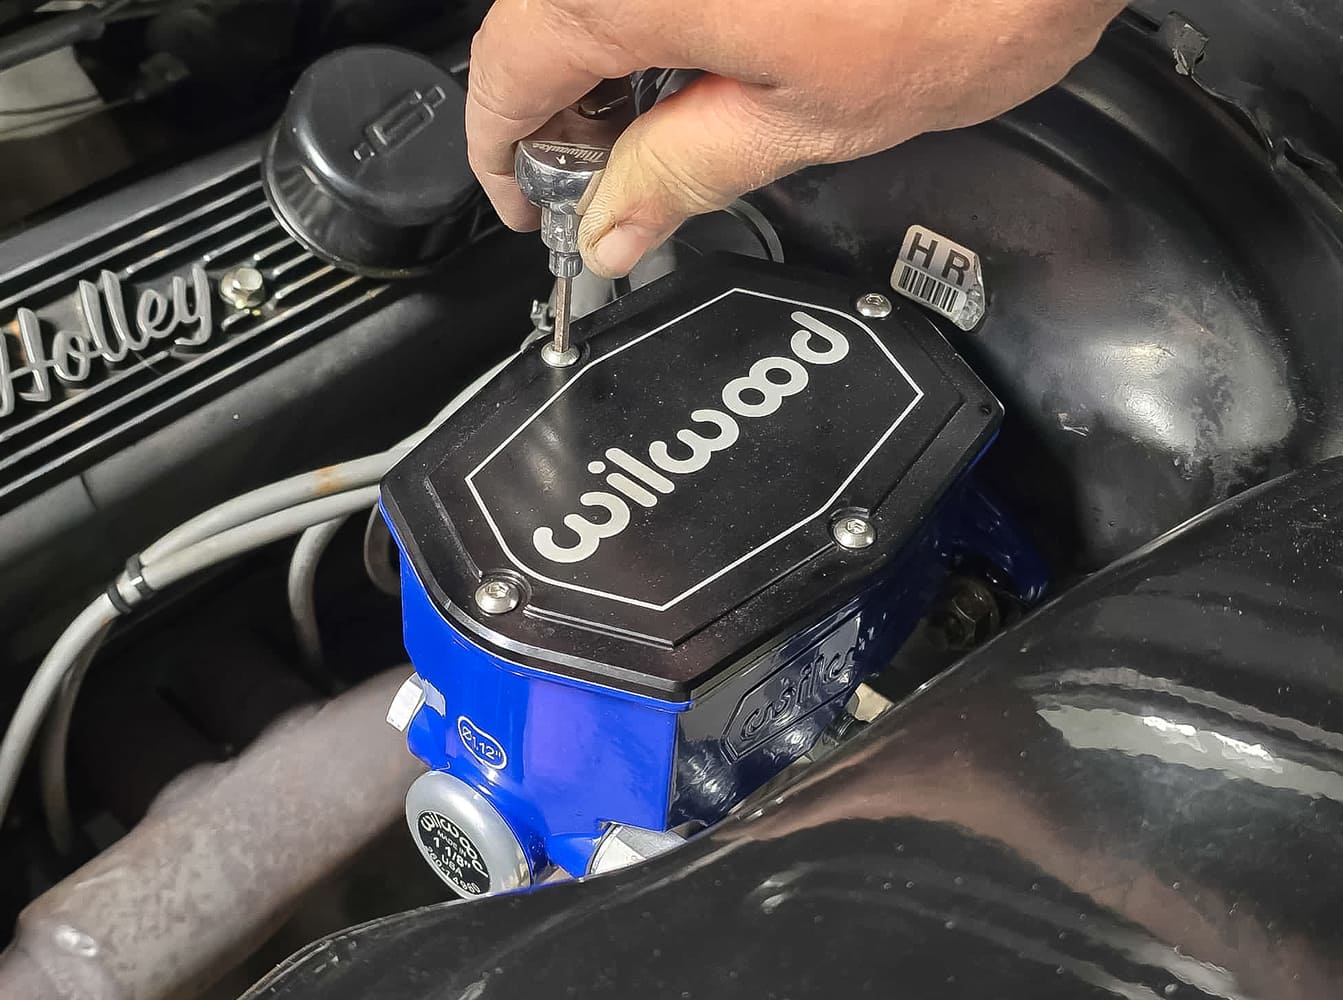
Once the pin is modified, your master should slide on and bottom out to the booster. Slide the proportioning valve bracket below the master before adding your nut and washer. Your master bore size is determined by the amount of vacuum that your engine is making.Slide the supplied washers and nuts onto the bottom of the booster and tighten.We can now bleed the master. Install the supplied Wilwood bleeder kit and clip, allowing for an easy and clean way to bleed. Make sure you have someone with you that can help push on the pedal. We used Wilwood Hi-Temp 570 Racing Brake Fluid Dot 3.Just to be safe, put a towel down in case a few drops leak out of the fittings. Install the supplied stainless lines from the master to the proportioning valve.The rear brake line can vary from year to year on these trucks, and that required us to get a reducer from our local parts store (PN BLF-23B and BLF-17B) for the proportioning valve. Now attach your brake lines into the bottom ports of the valve. Open your proportioning valve fully to allow flow.Hook your bleeder bottle up to the right rear corner brakes and have someone push up and down on the pedal slowly until there’s no air coming through. Work your way around the truck ending with the front left.
Once your pedal feels good, fluid is full in the reservoir, and bleeders are tight, bolt your lid onto the master.
We use cookies to ensure that we give you the best experience on our website. If you continue to use this site we will assume that you are happy with it.