Cleaning up the Rear End of a ’65 Nova With a Custom Pan and Tucked ’69 Camaro Bumper
By Kev Elliott – Photography by the Author
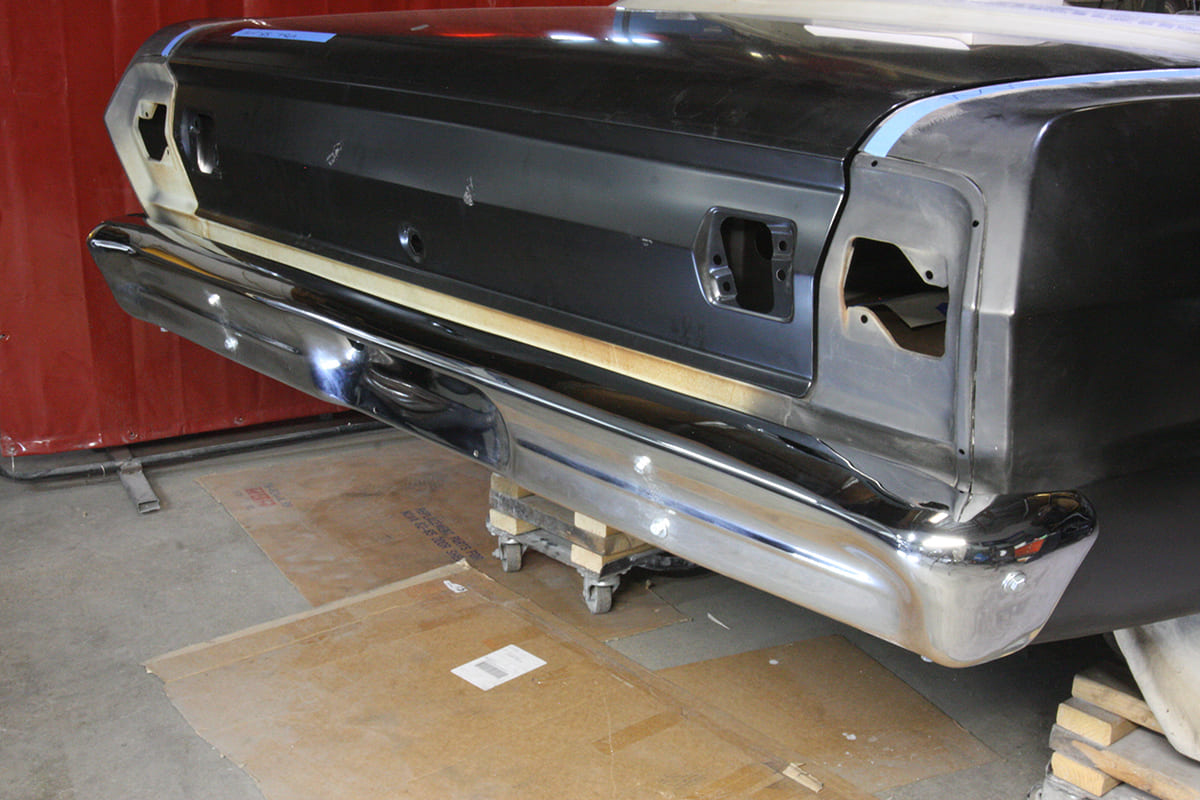
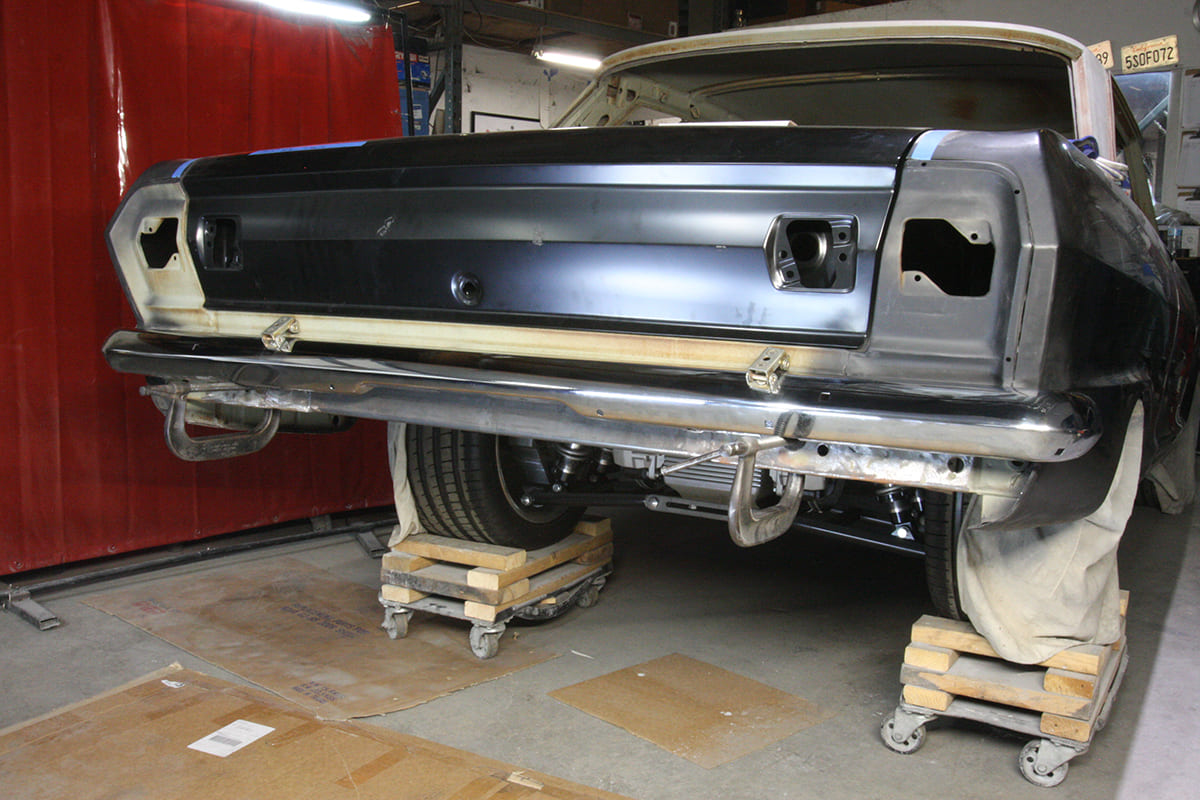
When Jim Chamberlain brought his ’65 Nova to Kev’s Rod and Custom to have all-new outer panels fitted and gapped (except the hood and roof), he knew he wanted to do something about the huge stock bumpers. Initial discussions involved trimming the bottoms, but when a Camaro bumper was offered up against the body the decision was made to use a pair of them, but narrowed, smoothed, and tucked in closer to the body.
Just to remind ourselves before we start, the stock Nova bumper looks like this.
The latter then became “recessed” rather than “tucked.” The work began once the other panels were all aligned and a pair of new ’69 Camaro rear bumpers were sourced from Classic Industries; then the chrome was removed.
The stock bumper compared to a clamped-in-place Camaro bumper. The latter is certainly a lot cleaner in profile.
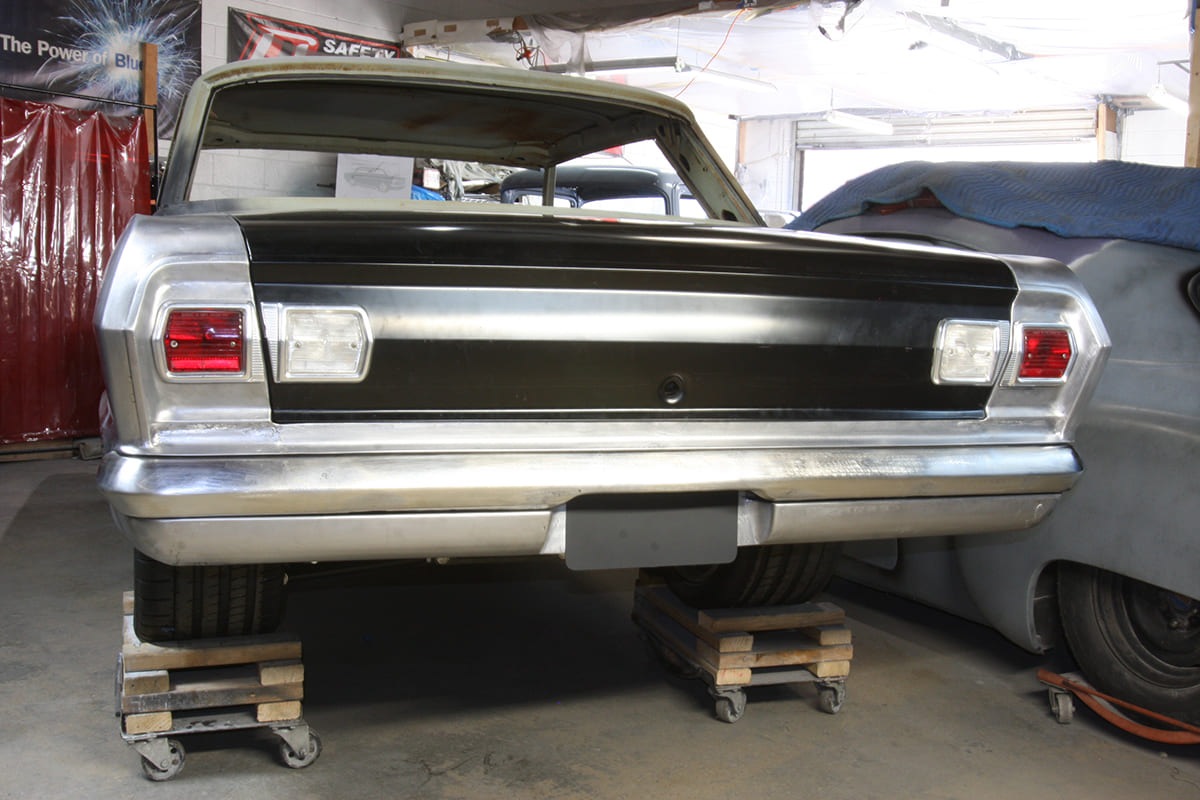
Once the bumper was installed to everyone’s satisfaction, work progressed on a custom-fabricated pan with recessed license plate to match the indentation in the bumper, the intention being for it to look like the Nova had come from the factory that way. We think it does, the owner thinks it does, so mission accomplished!
The stock bumper compared to a clamped-in-place Camaro bumper. The latter is certainly a lot cleaner in profile.
Now to repeat the process at the front, albeit slightly differently as the pan has to be removable.
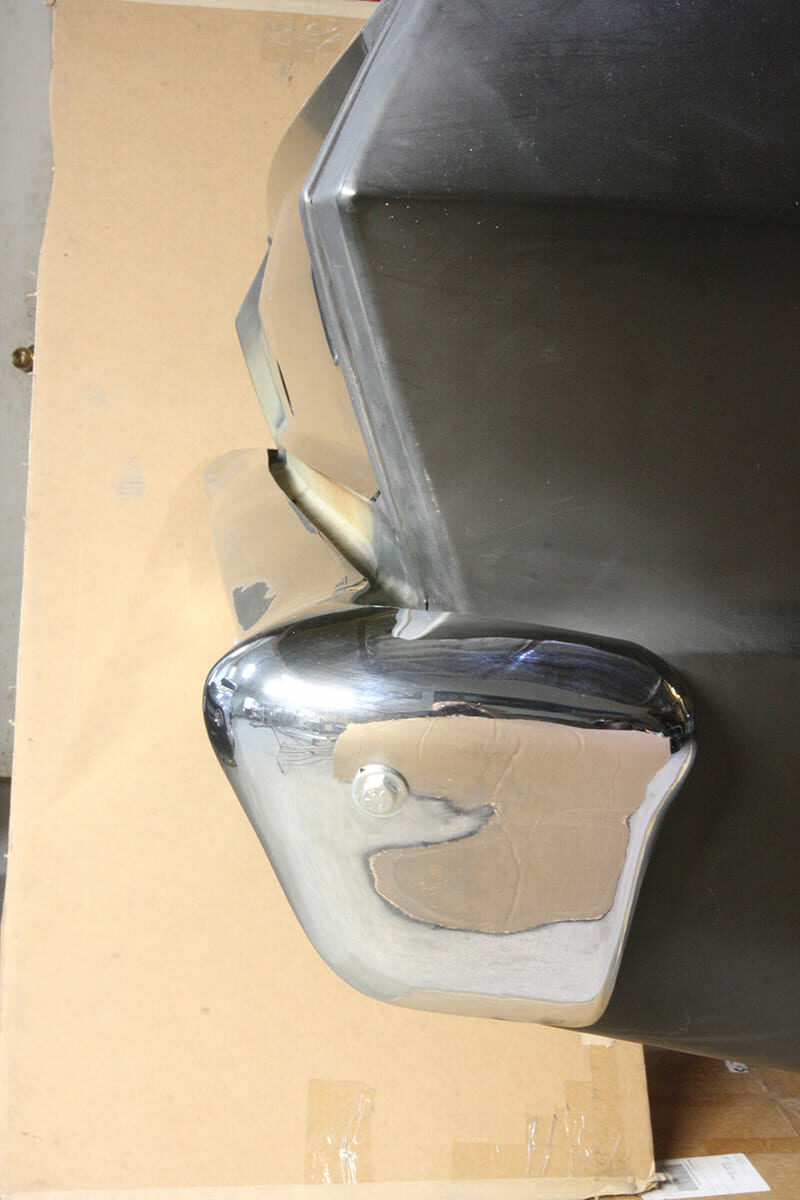
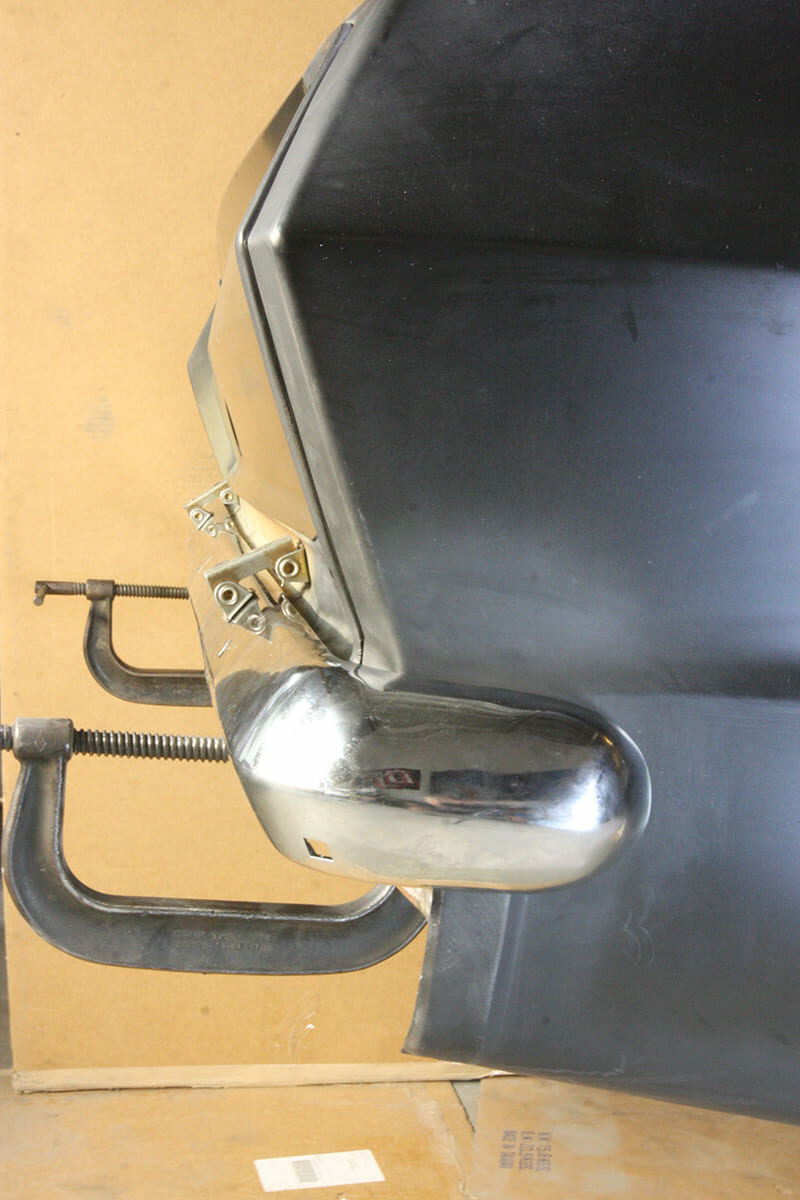
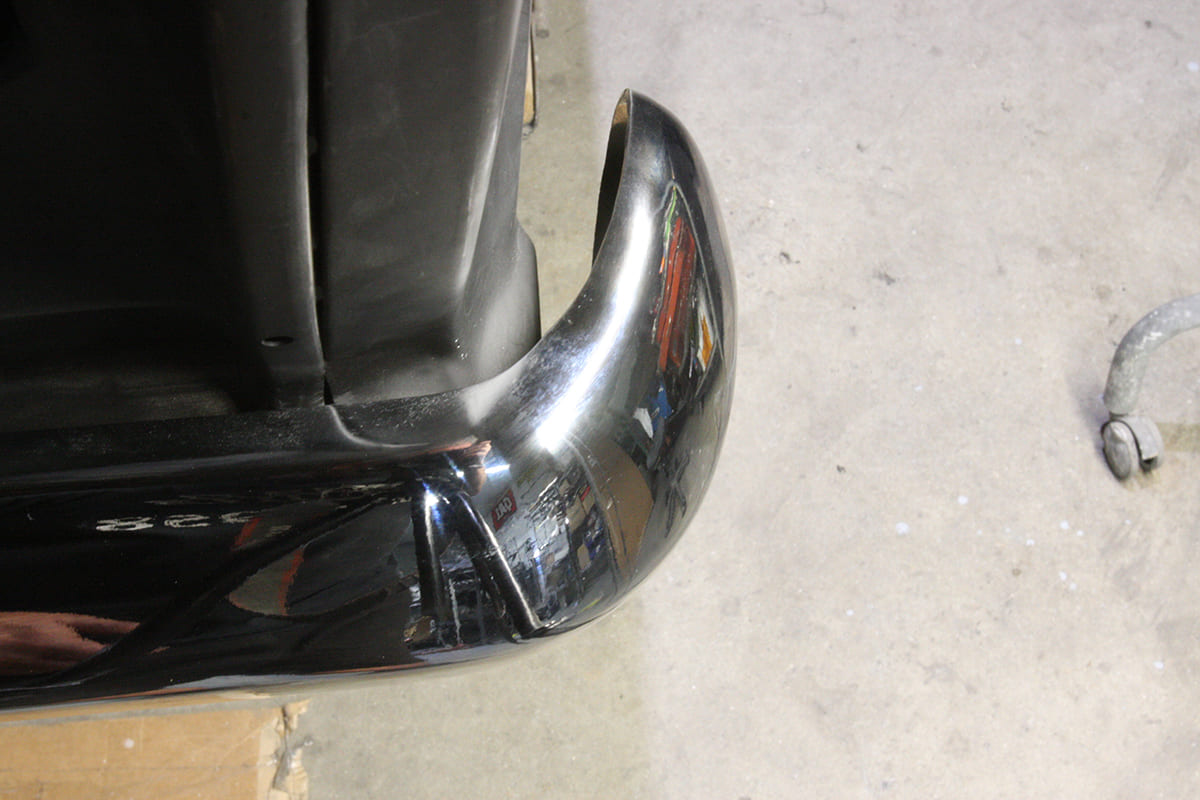
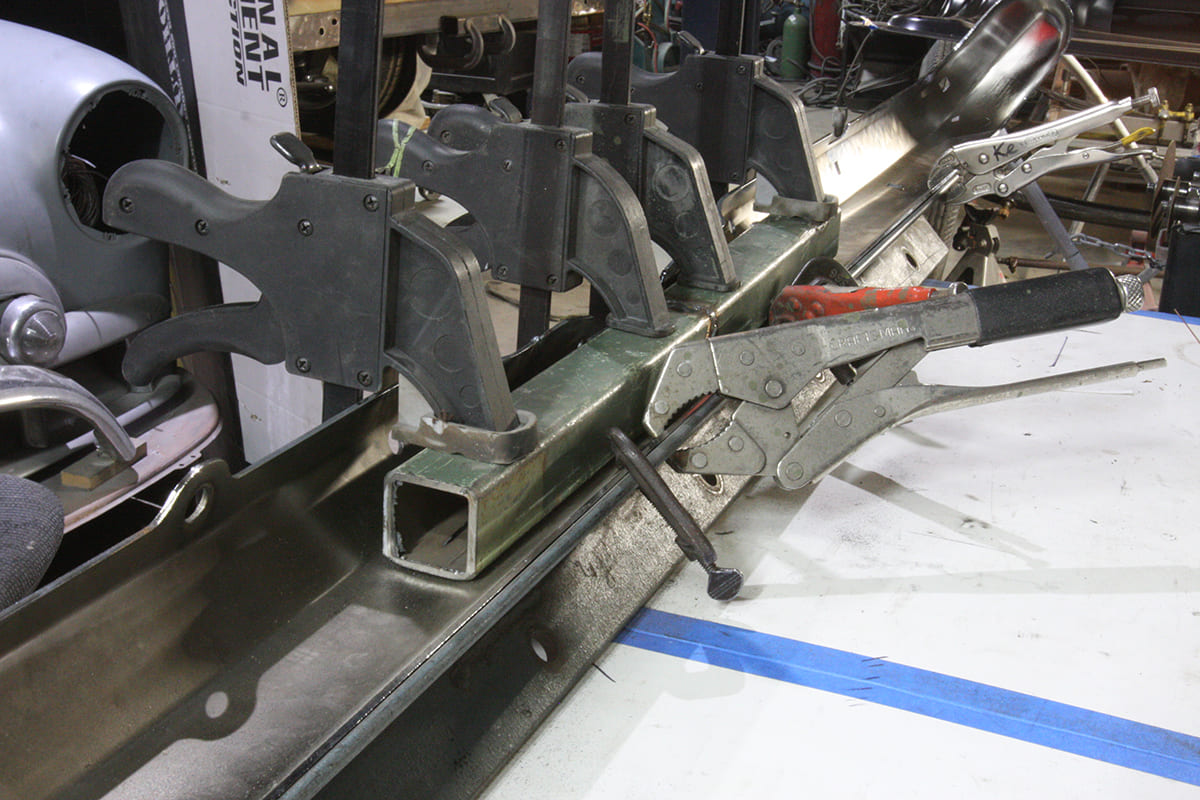
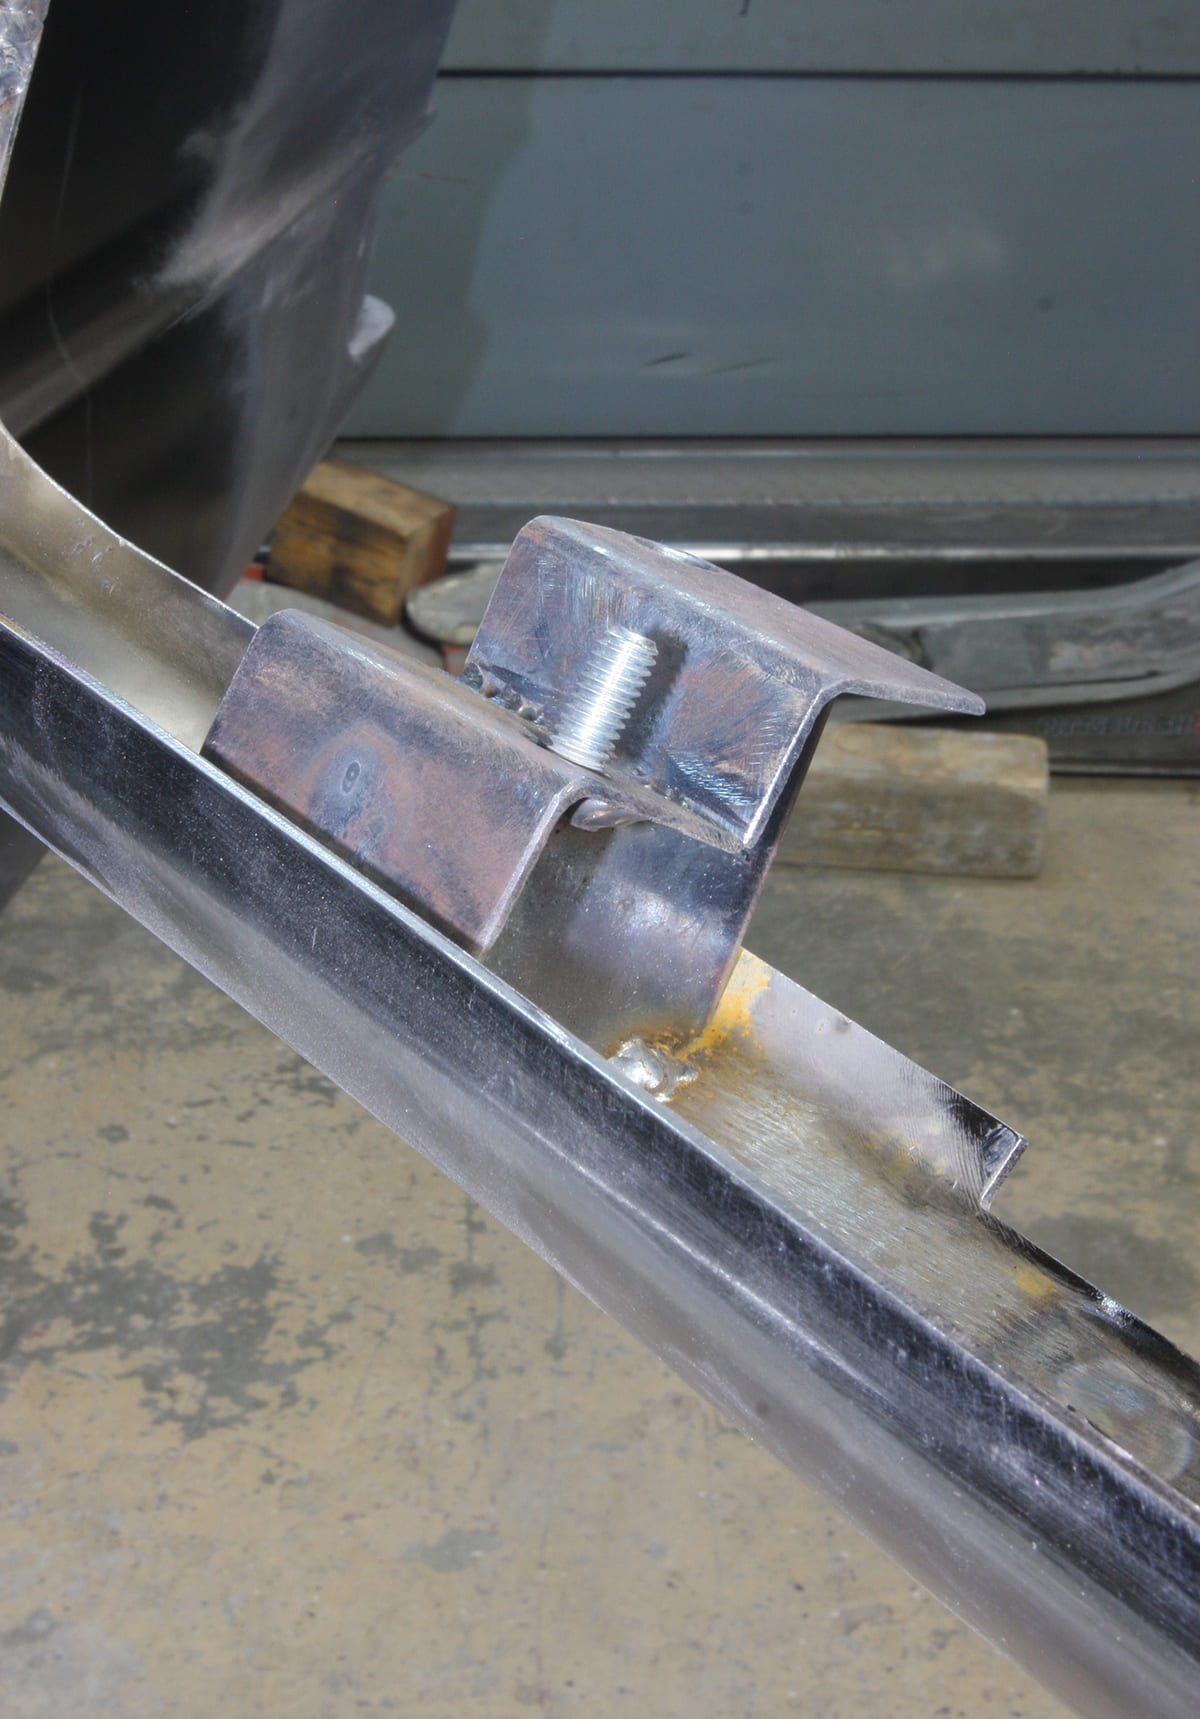
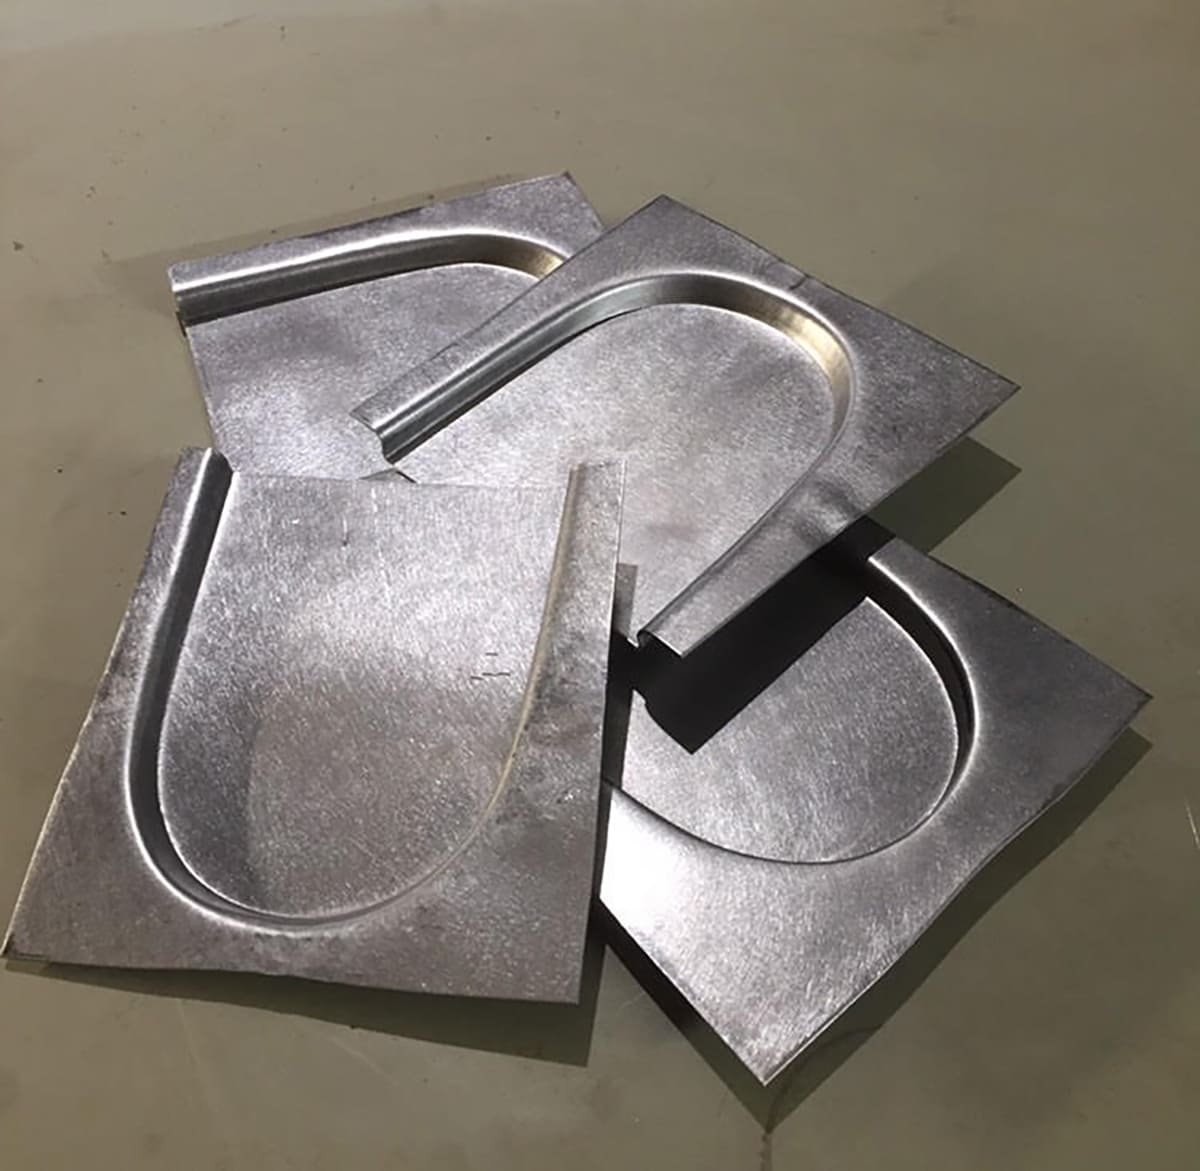
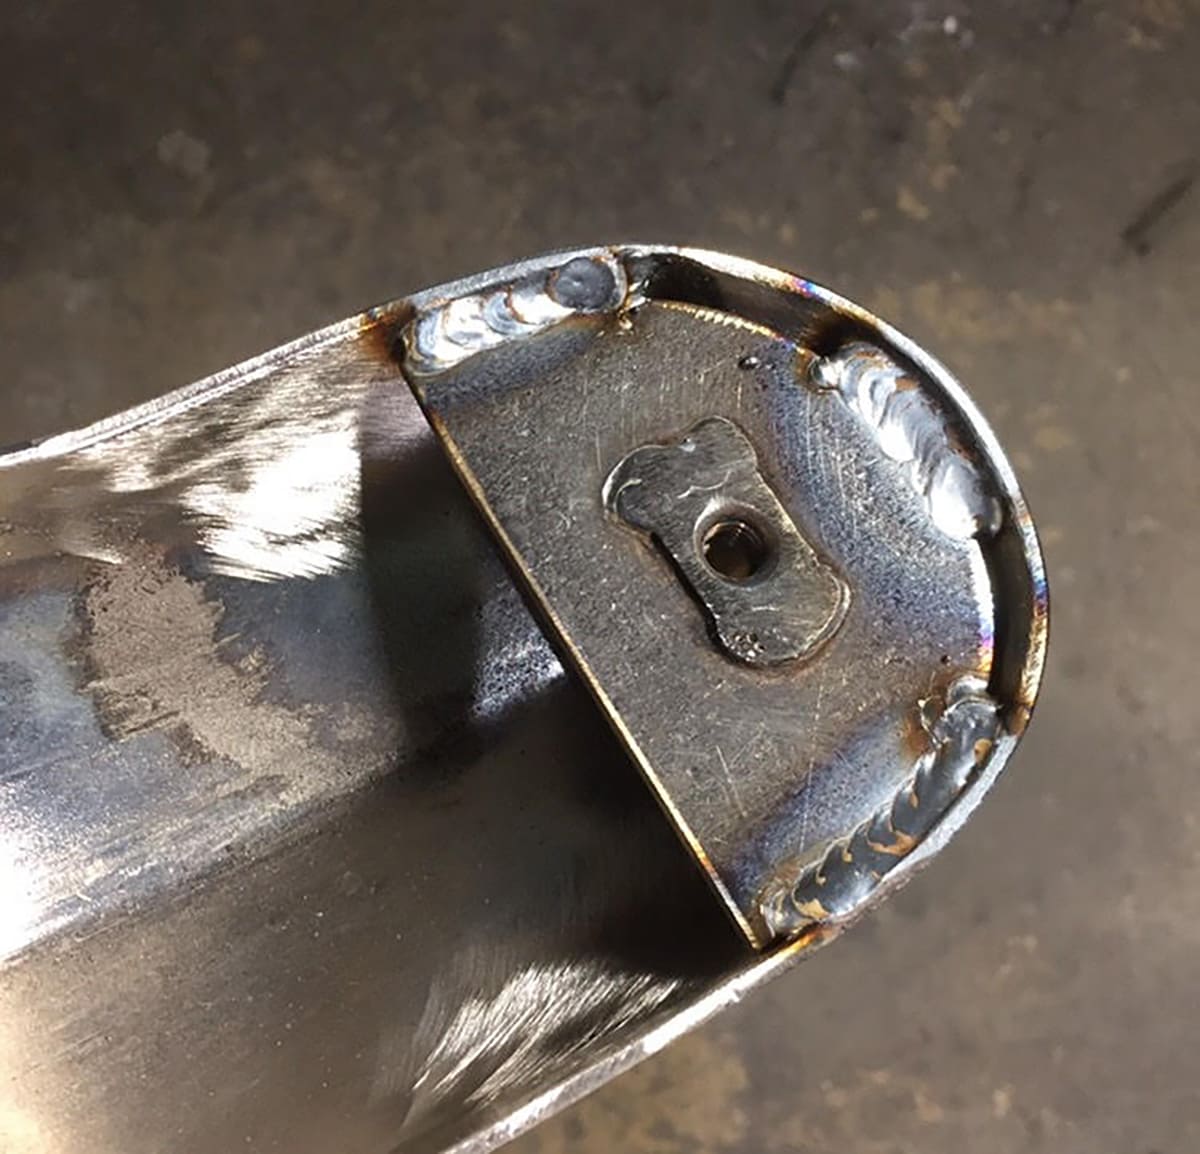
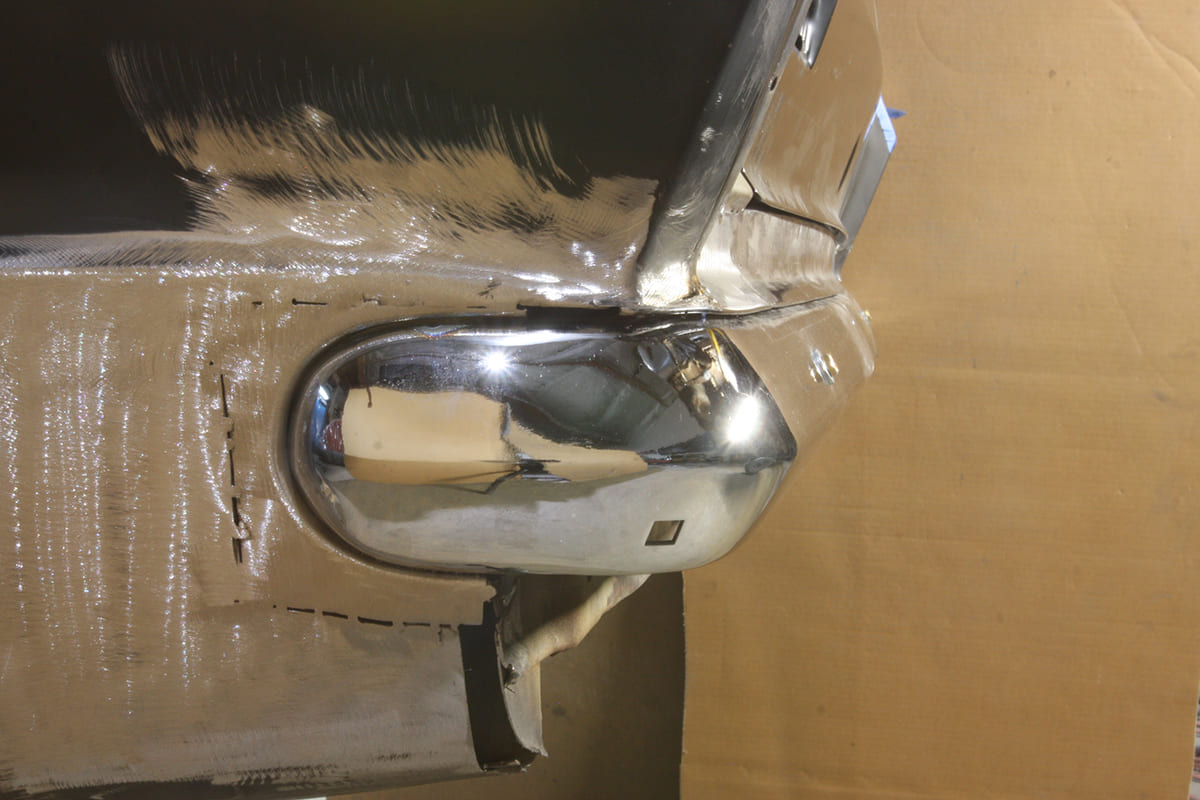
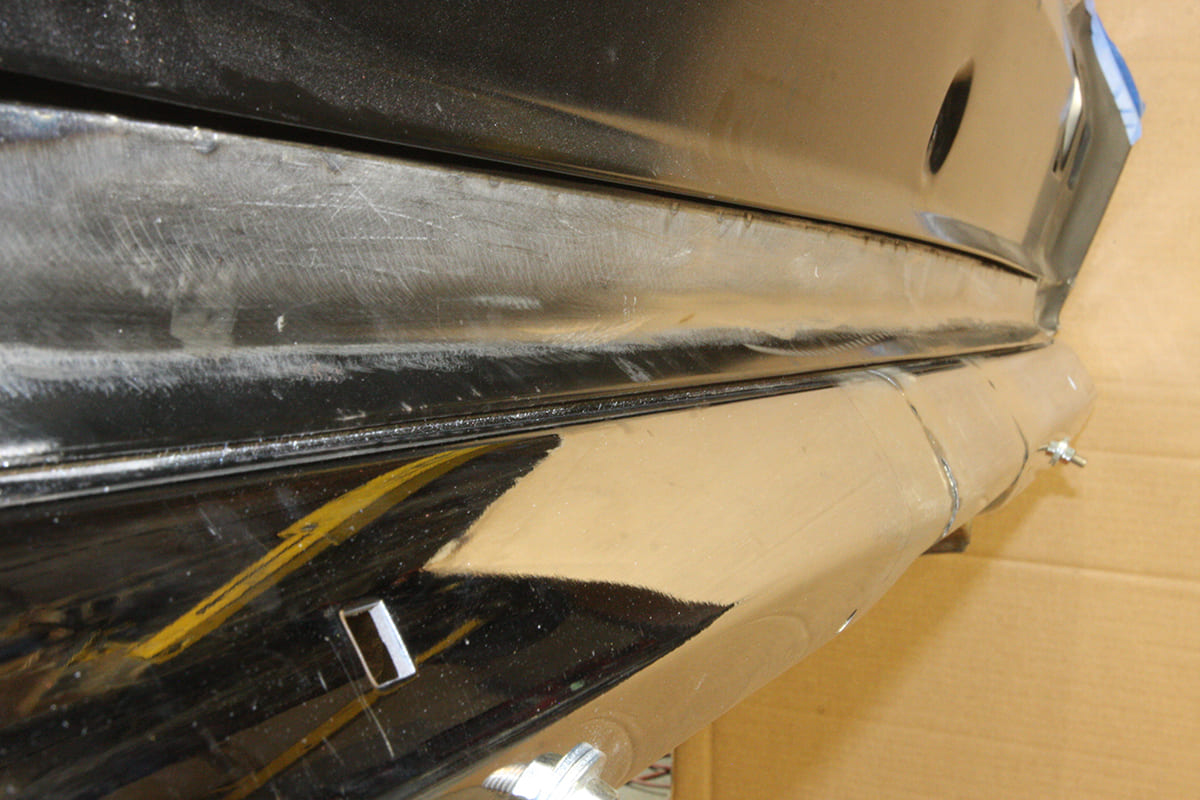
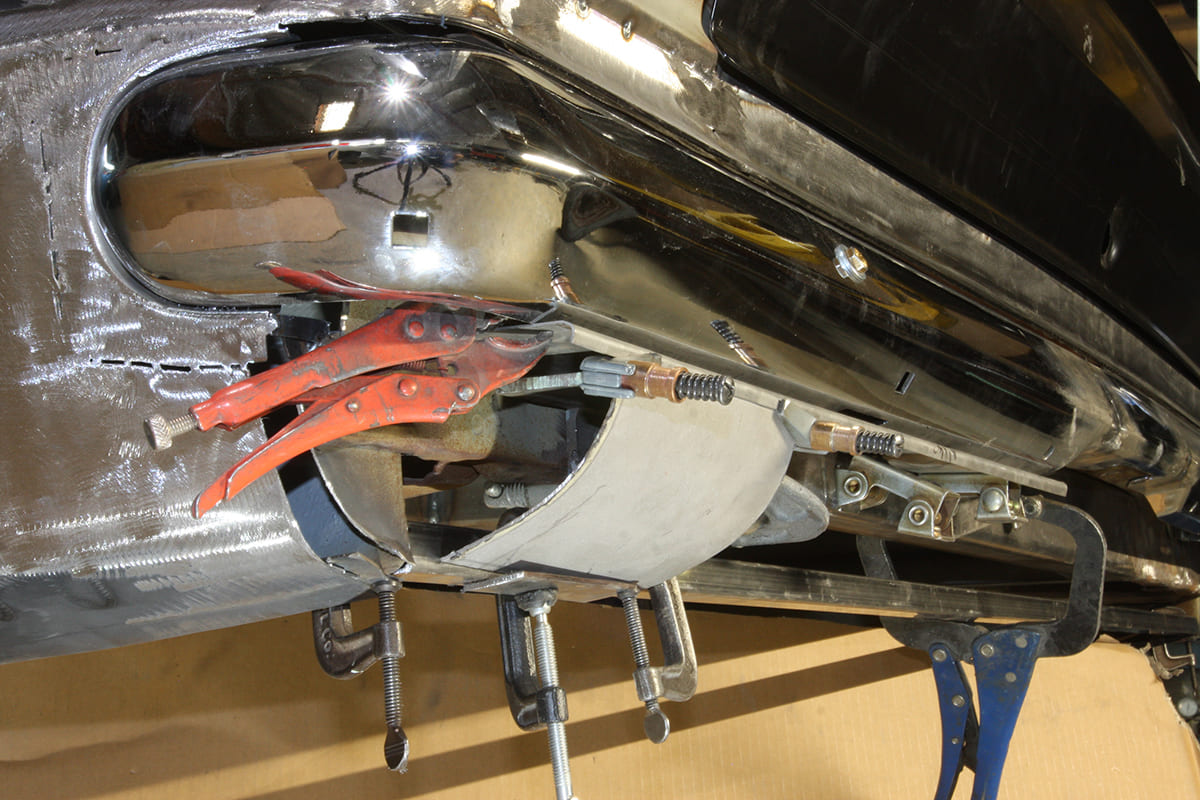
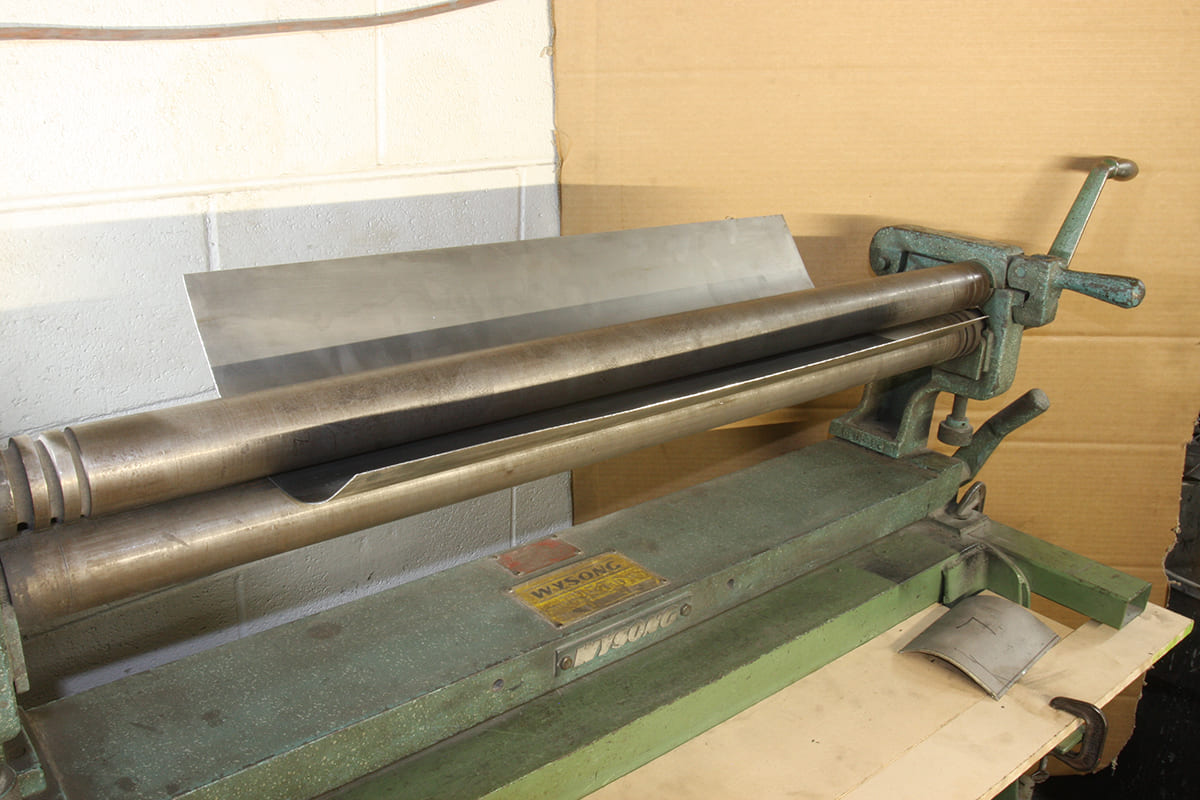
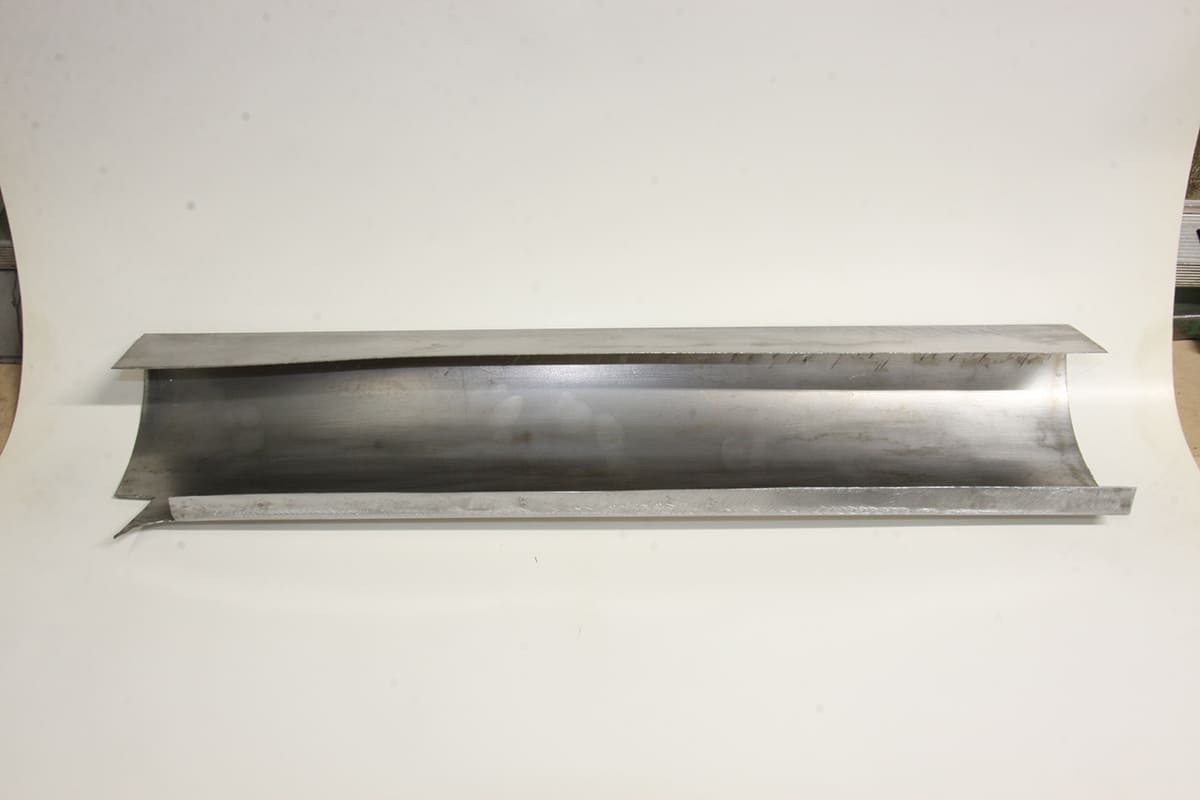
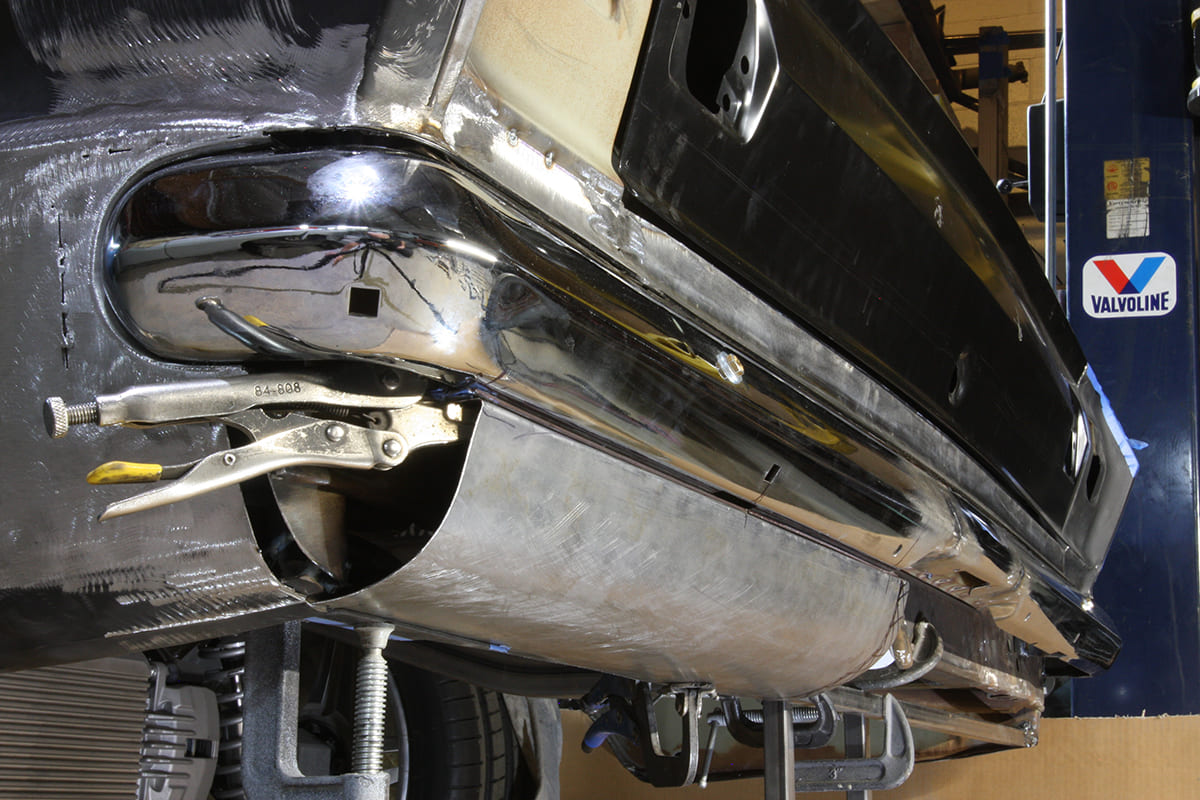
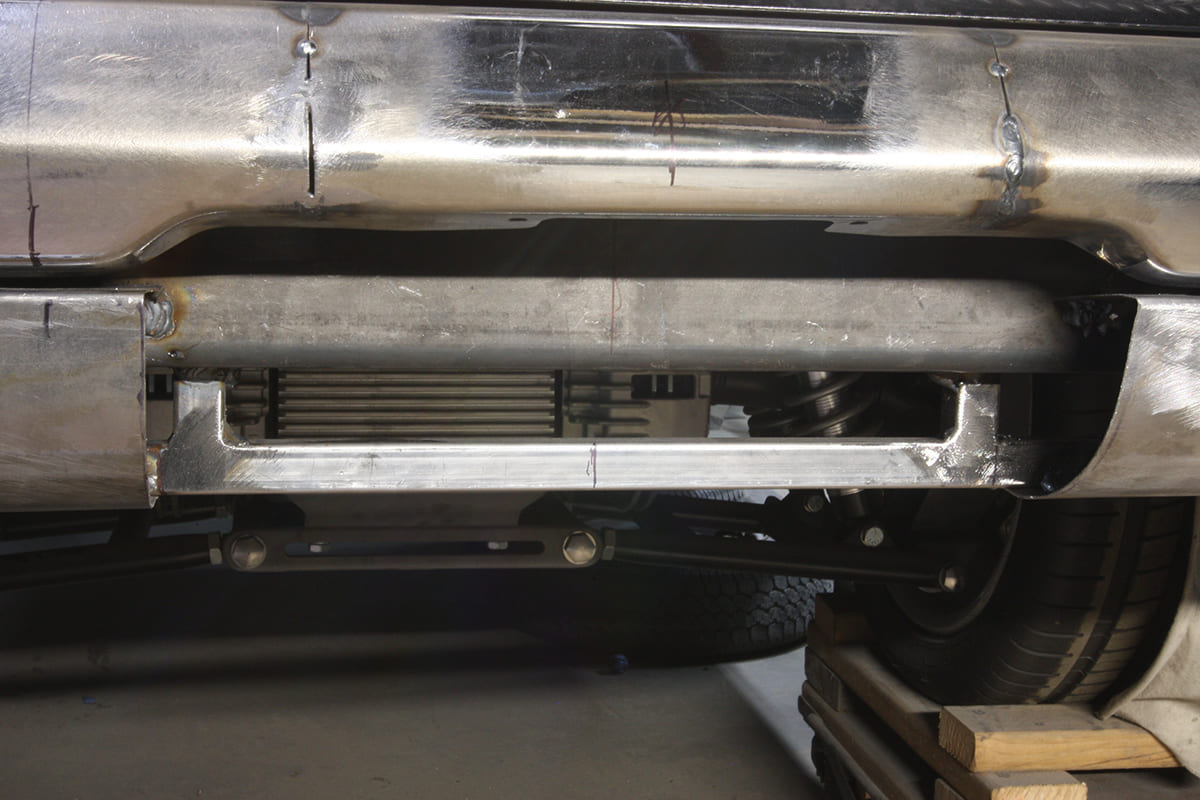
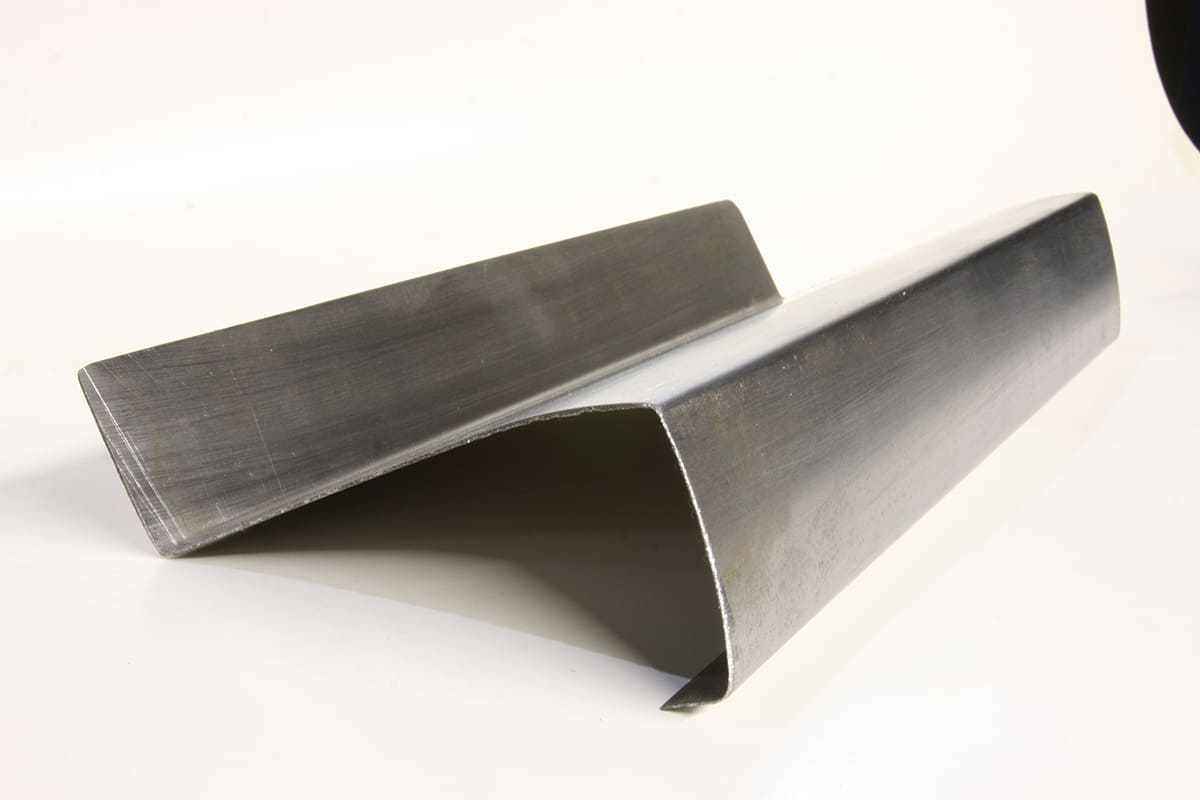
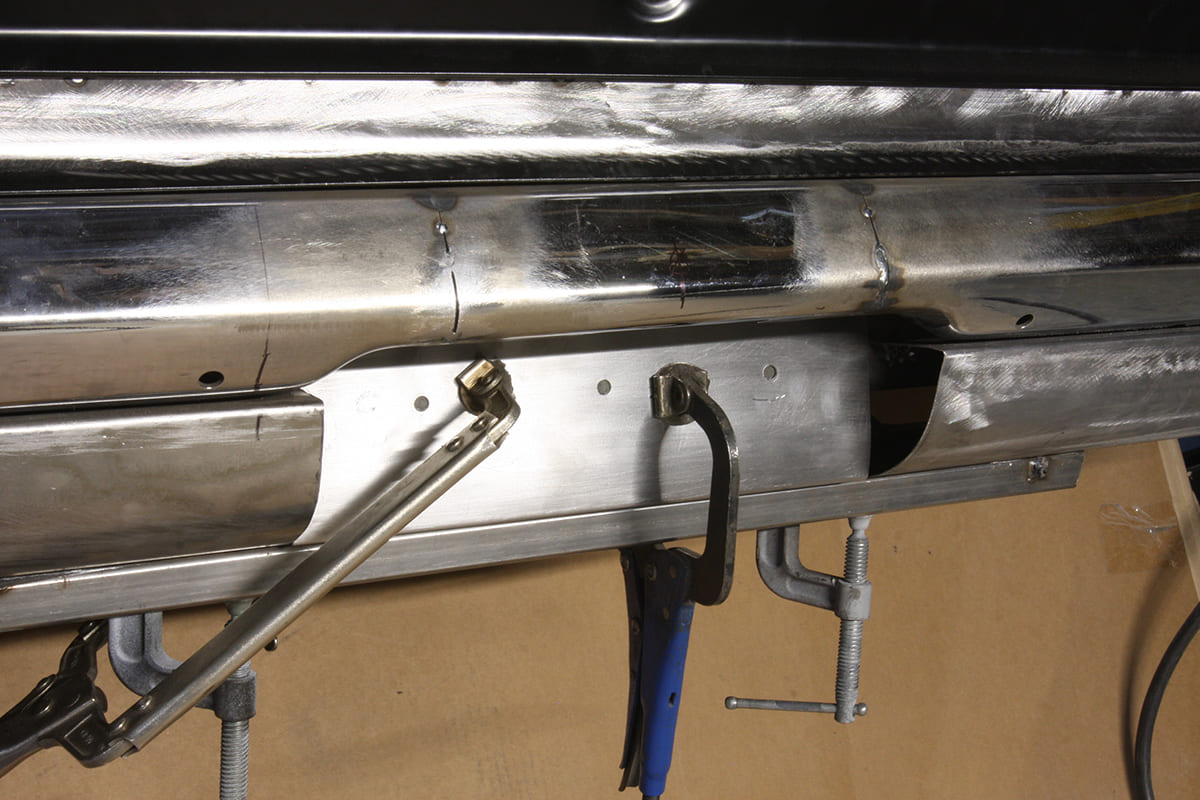
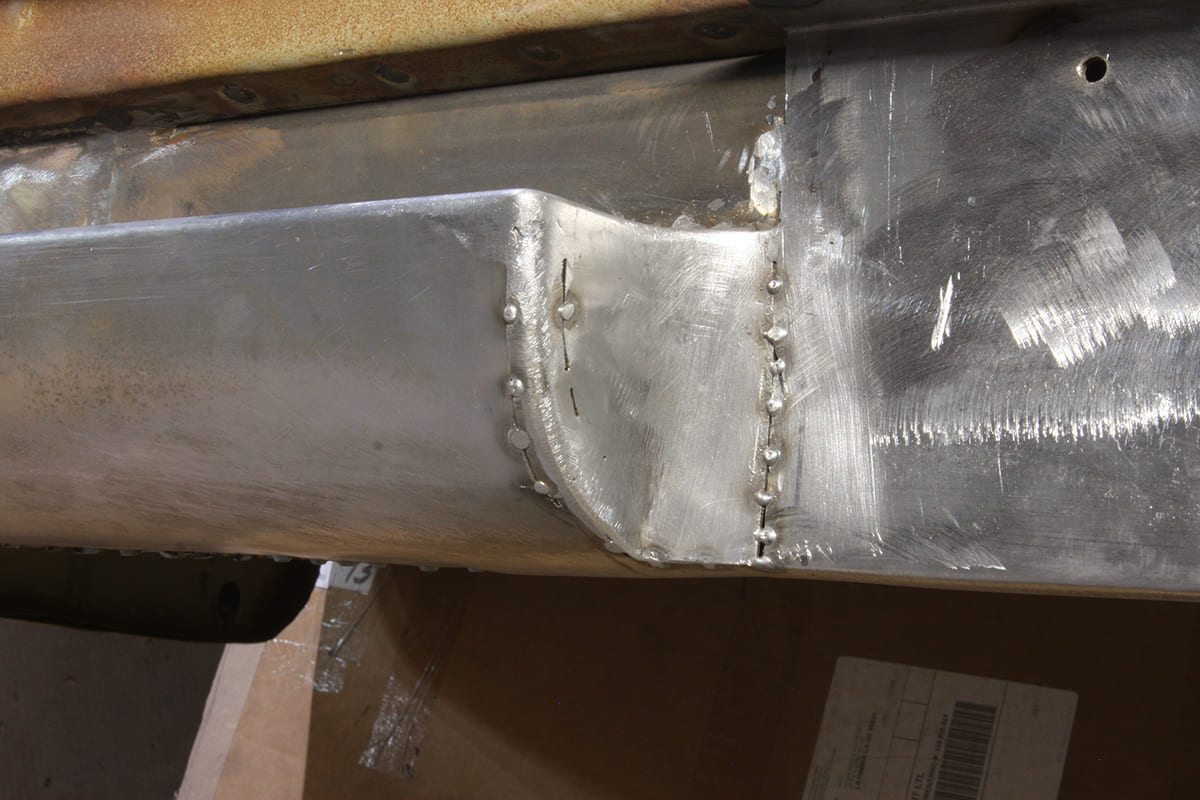
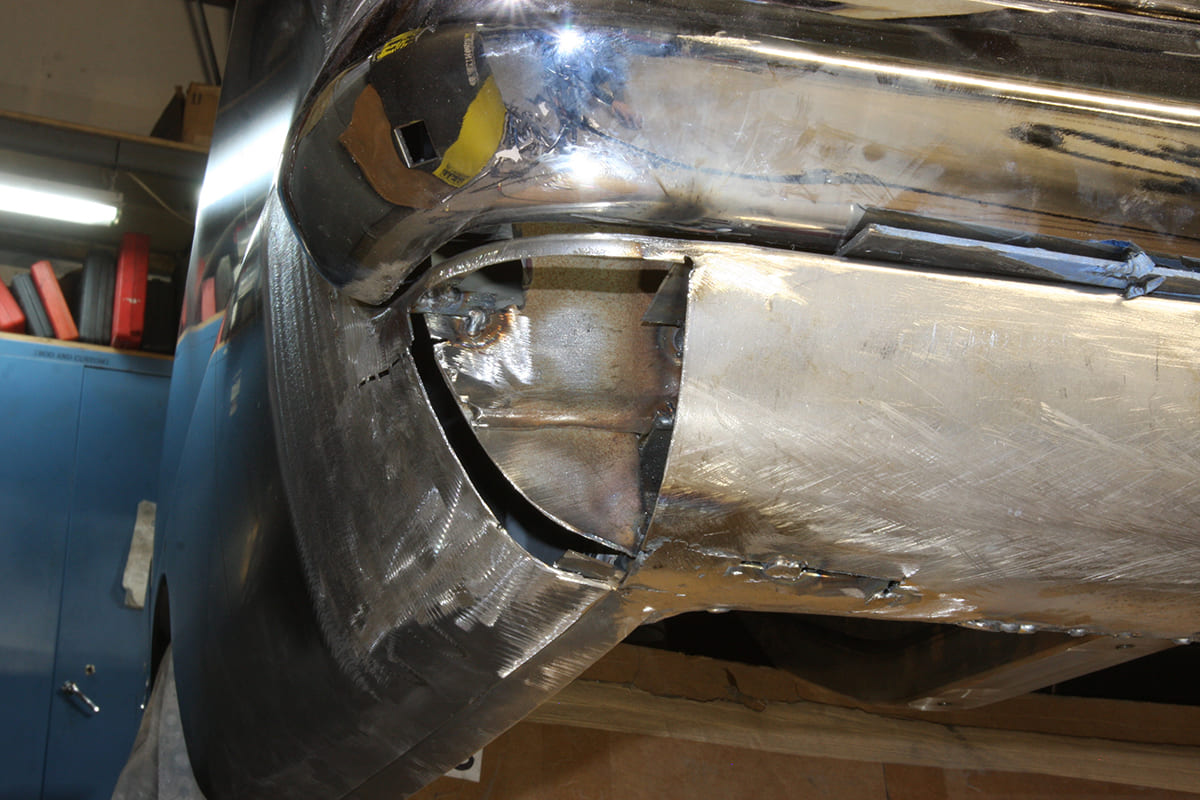
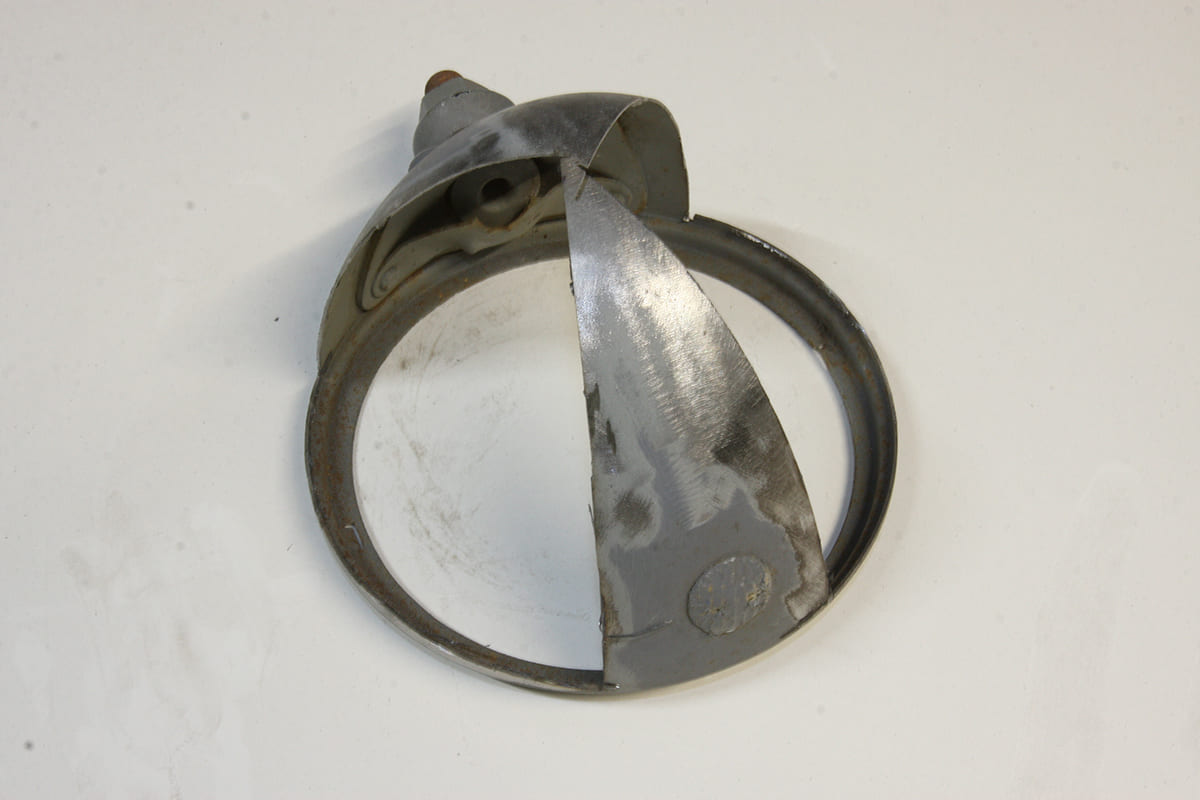
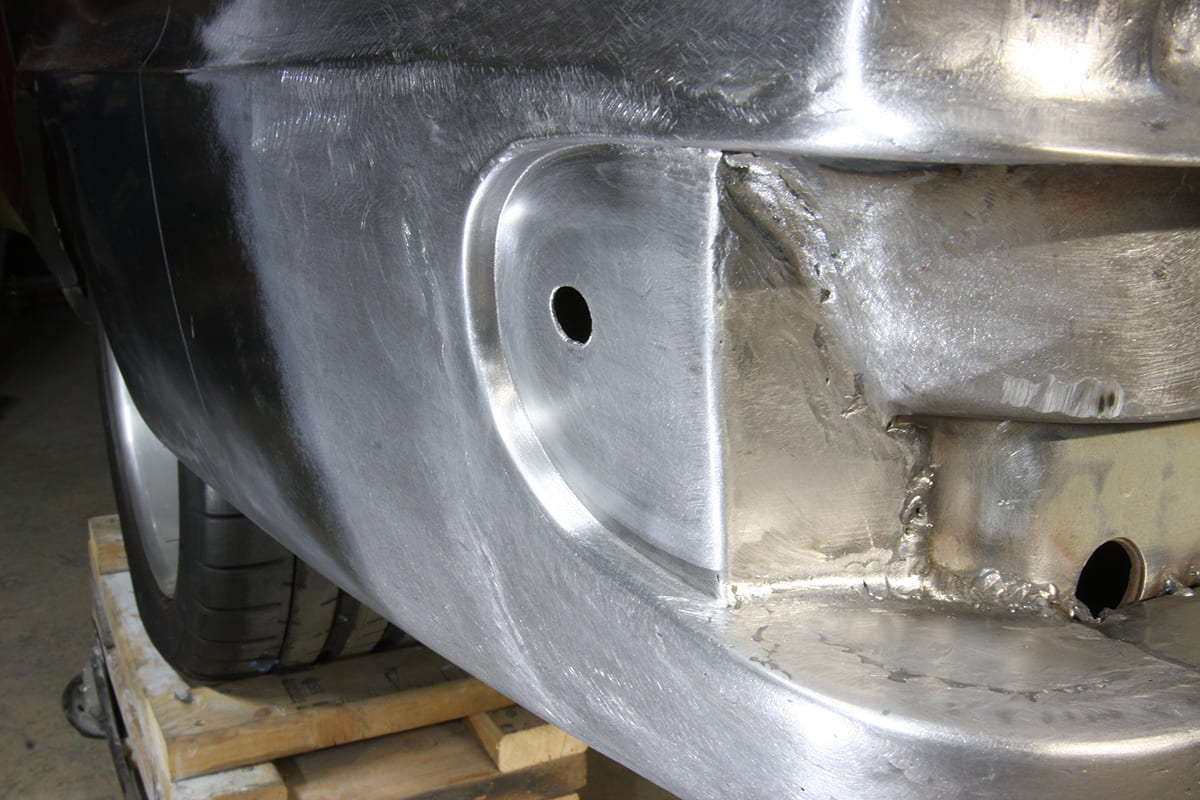
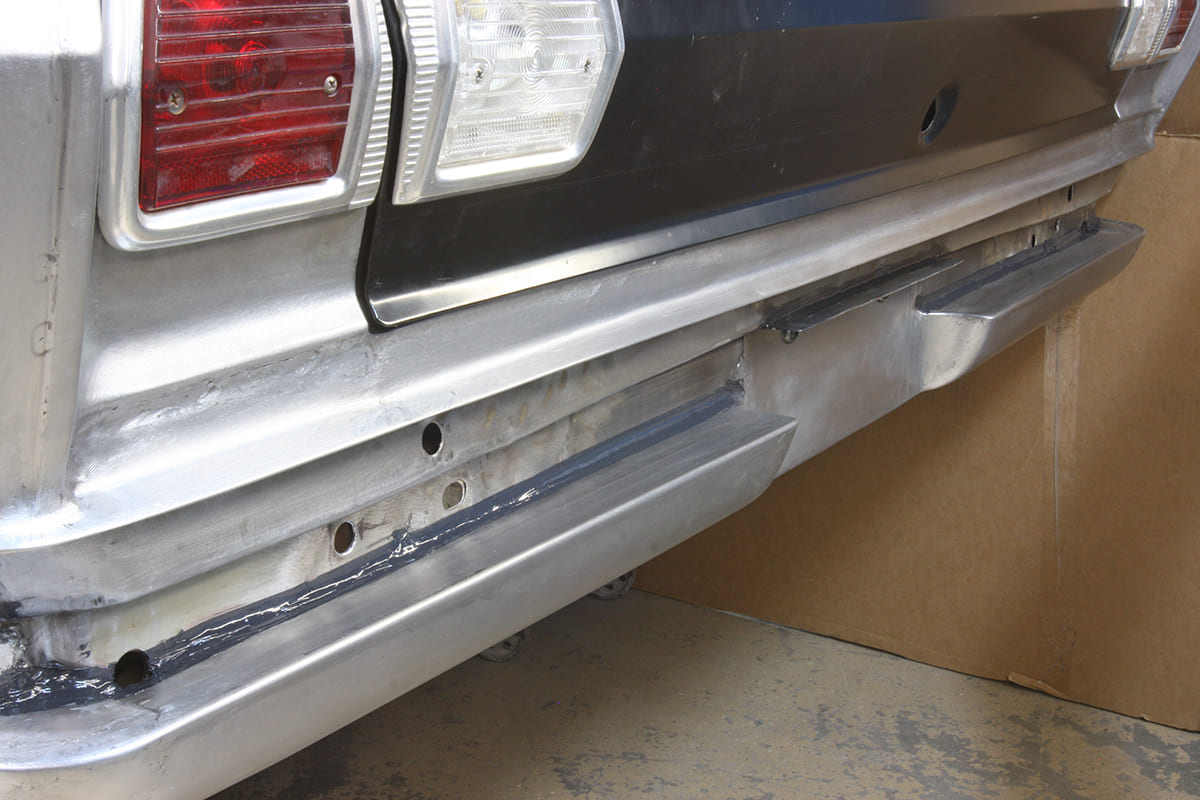
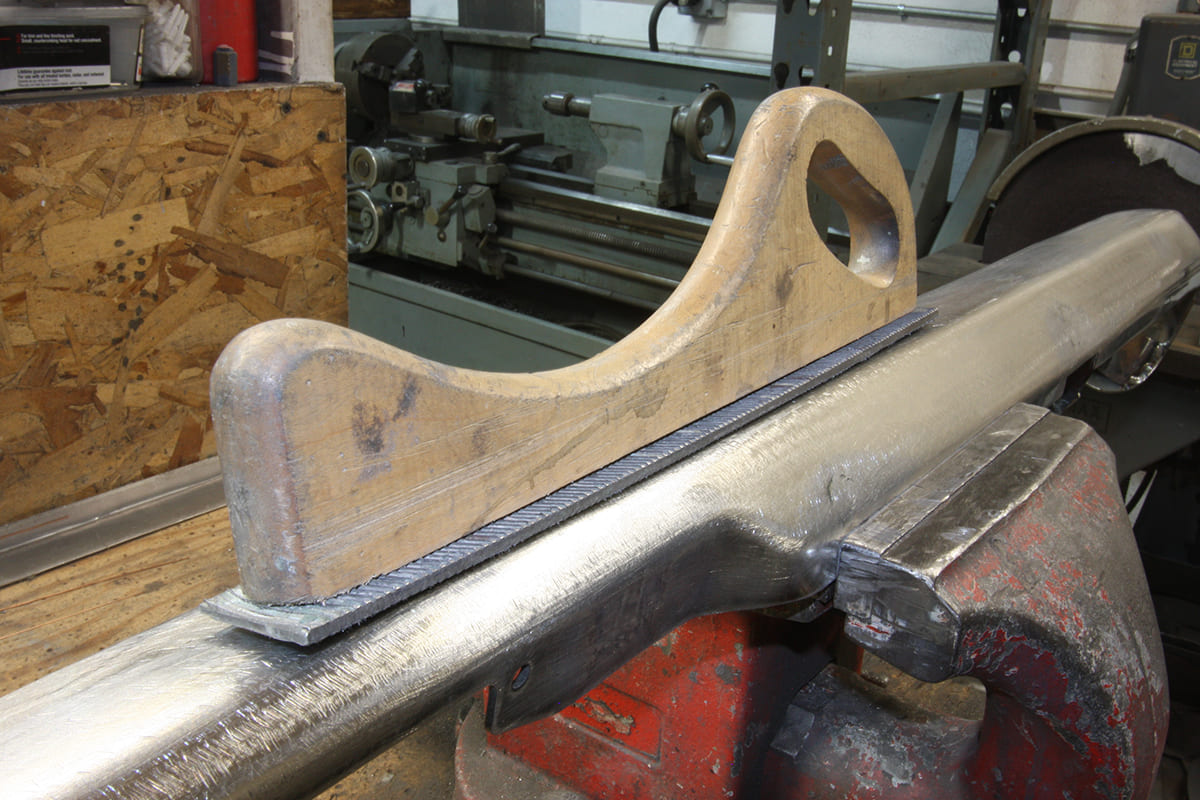
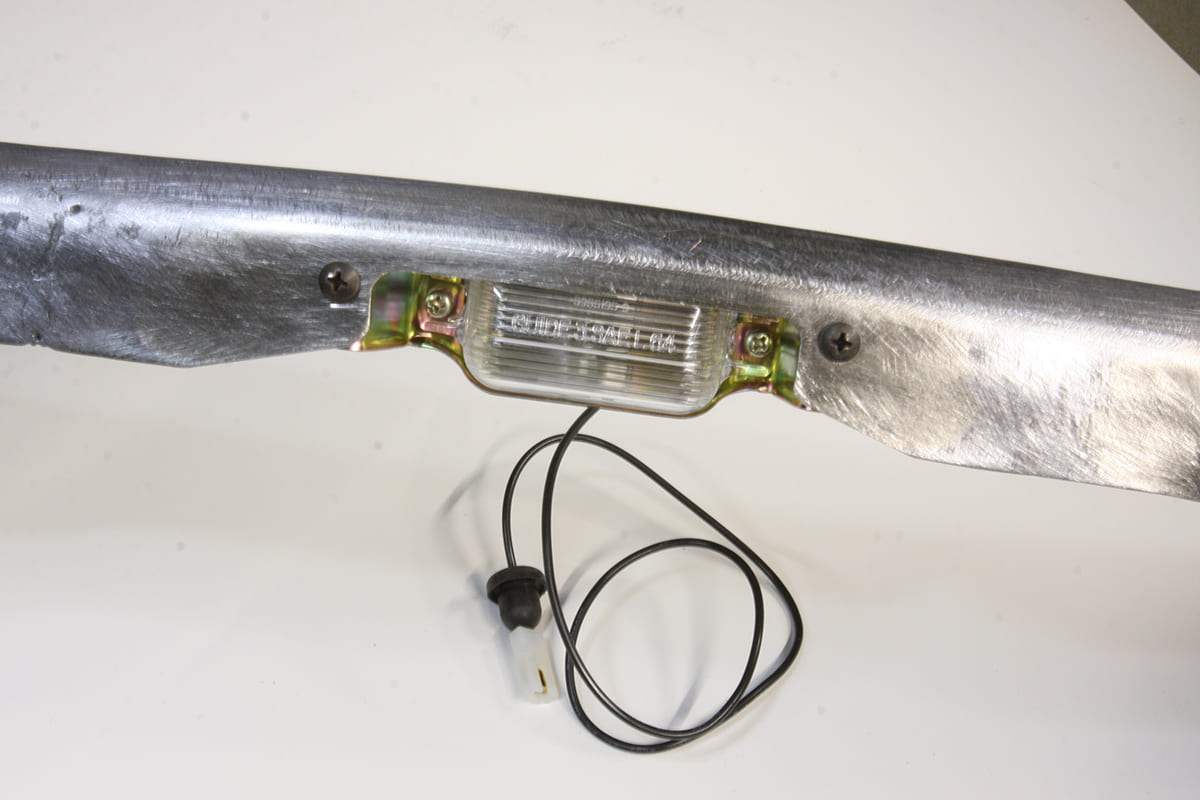
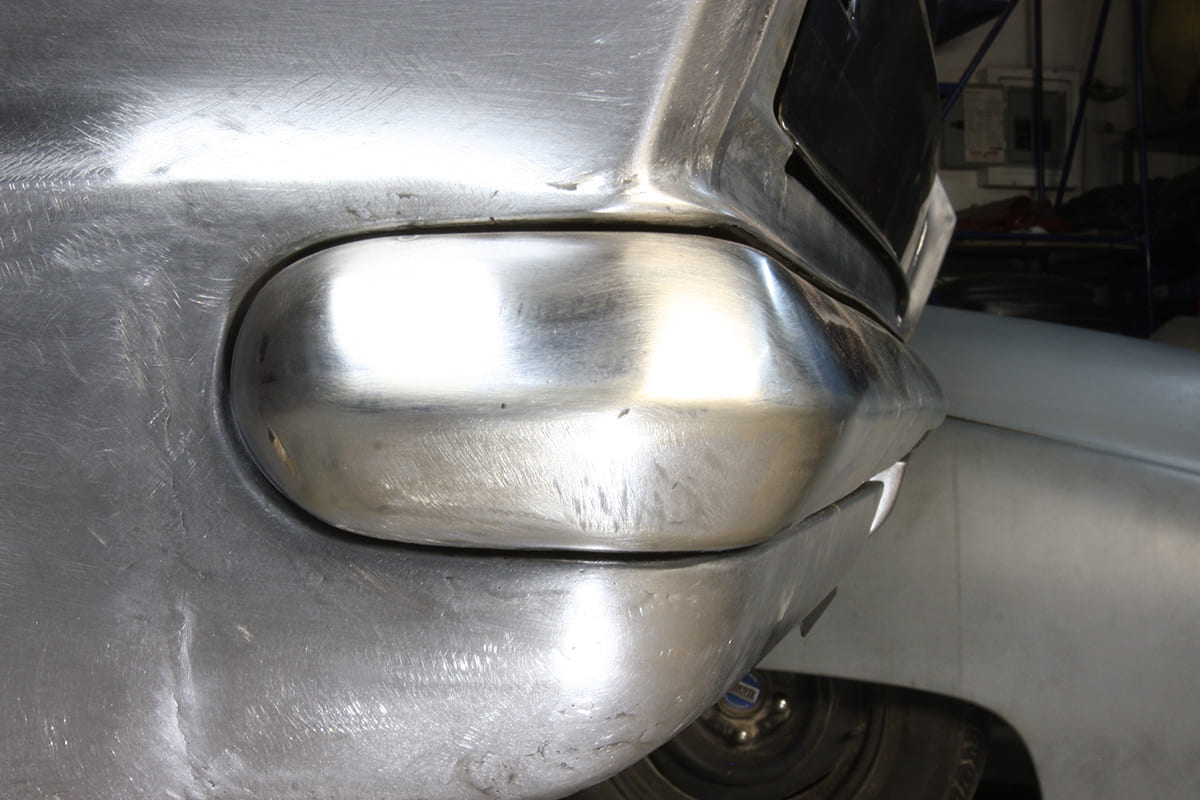
Just to remind ourselves before we start, the stock Nova bumper looks like this.The stock bumper compared to a clamped-in-place Camaro bumper. The latter is certainly a lot cleaner in profile.The stock bumper compared to a clamped-in-place Camaro bumper. The latter is certainly a lot cleaner in profile.From the rear, it’s obvious we’ll now need to fabricate a rear valance, or pan.With the Camaro bumper centered on the Nova it would clearly need to be narrowed to fit.We appreciate it’s difficult to see what’s going on here, but you can’t have too many clamps! Two 1 5/8-inch strips were cut from the bumper, 4 inches either side of the centerline. The remaining three sections were then clamped to a length of box section that had previously been cut and welded to match the “V” of the bumper before tack welding the bumper back together.The now-narrowed bumper was clamped in place in order to fabricate new mounting brackets. As the bumper will be recessed (note the sections of quarter-panel already removed) with 1/16-inch gaps, this has to be done with the bumper on the car.These brackets were fabricated to use one of the original mounting holes, with a stud for easy location, plus a second threaded hole. Tacked to the bumper whilst in position, they were finish-welded once the bumper was removed.Kev’s Rod and Custom makes these panels for recessing Camaro bumper ends, so we grabbed a left and right from stock to use on the Nova.These simple plates with threaded insert were welded to the bumper ends, as with such tight tolerances we don’t want the bumper moving and scratching the paint.Here’s the driver side recessed panel tack-welded in place, with the bumper bolted on to check for fit.We figured we could recess the top edge of the bumper by using the lower section of a second trunk lid to replace the unsightly stock spot-welded seam normally hidden by the bumper, and weld it in place above the new bumper.With 3/4×3/4-inch box section welded in place to attach the lower edge of the new pan to, and a temporary upper return clamped in place, we formed a few radii to determine which would look best.With the radius of the curve selected, a pair of pan halves were formed from 18-gauge steel sheet using a slip roll.The upper and lower return edges were then formed in a brake.The driver side pan half clamped in place. Note how the radius we settled upon matches the angle of the trunk lid at the top and flows neatly into the lower quarter-panel. A length of 1/16-inch steel was clamped between the bumper and pan to maintain an even panel gap.Clamping the passenger pan half in place, a piece of 1/2×1/16-inch strap was clamped across the panels to check alignment and curvature before welding.The reason for forming the pan in two halves is that we’ll be recessing the centersection to mount the license plate below the stock Camaro light in the bumper. Here you can see the box section framework the pan wraps around.The main part of the plate recess was formed in a similar manner to the pan halves.Three holes were drilled in the vertical section to plug weld the panel to the rear body crossmember before it was clamped and then welded in place.Small closing panels were formed then tacked in place …… the radiused corners achieved using a shrinker, like so.The shrinker was also used to form the upper returns on the pan corners.Whilst we could have formed the compound-curved corner pieces using our power hammer, sometimes it’s quicker and easier to use an existing panel in this case sections of an old motorcycle headlight. Saving time saves the customer money!Once all the small open sections were filled in this is what the end of the recess looked like with the bumper removed for smoothing.With a bead of seam sealer taking care of any future water ingress, here’s the completed rear panel and pan.With the old bumper boltholes welded closed and the three bumper sections finish-welded into one, we used a body file to finish our part of the work. The chrome shop will sand, copper plate, sand, and repeat the process until it’s ready for chrome.By not simply cutting a section from the middle of the bumper, we were able to use a stock Camaro license plate light.The smoothed bumper back in place for a final fitment and gap check.
We use cookies to ensure that we give you the best experience on our website. If you continue to use this site we will assume that you are happy with it.