Last month we introduced you to our ’66 Chevy II project, an all-original six-cylinder car that is being treated to a few modern creature comforts. We’re starting the upgrade process with a Vintage Air SureFit A/C system (PN 961166); you’ll see more of this car in future articles. In last month’s installment, we disassembled the cooling system, installed the condenser (and associated lines), installed the Steel-eez compressor bracket and began prepwork inside the cockpit for the new A/C system.
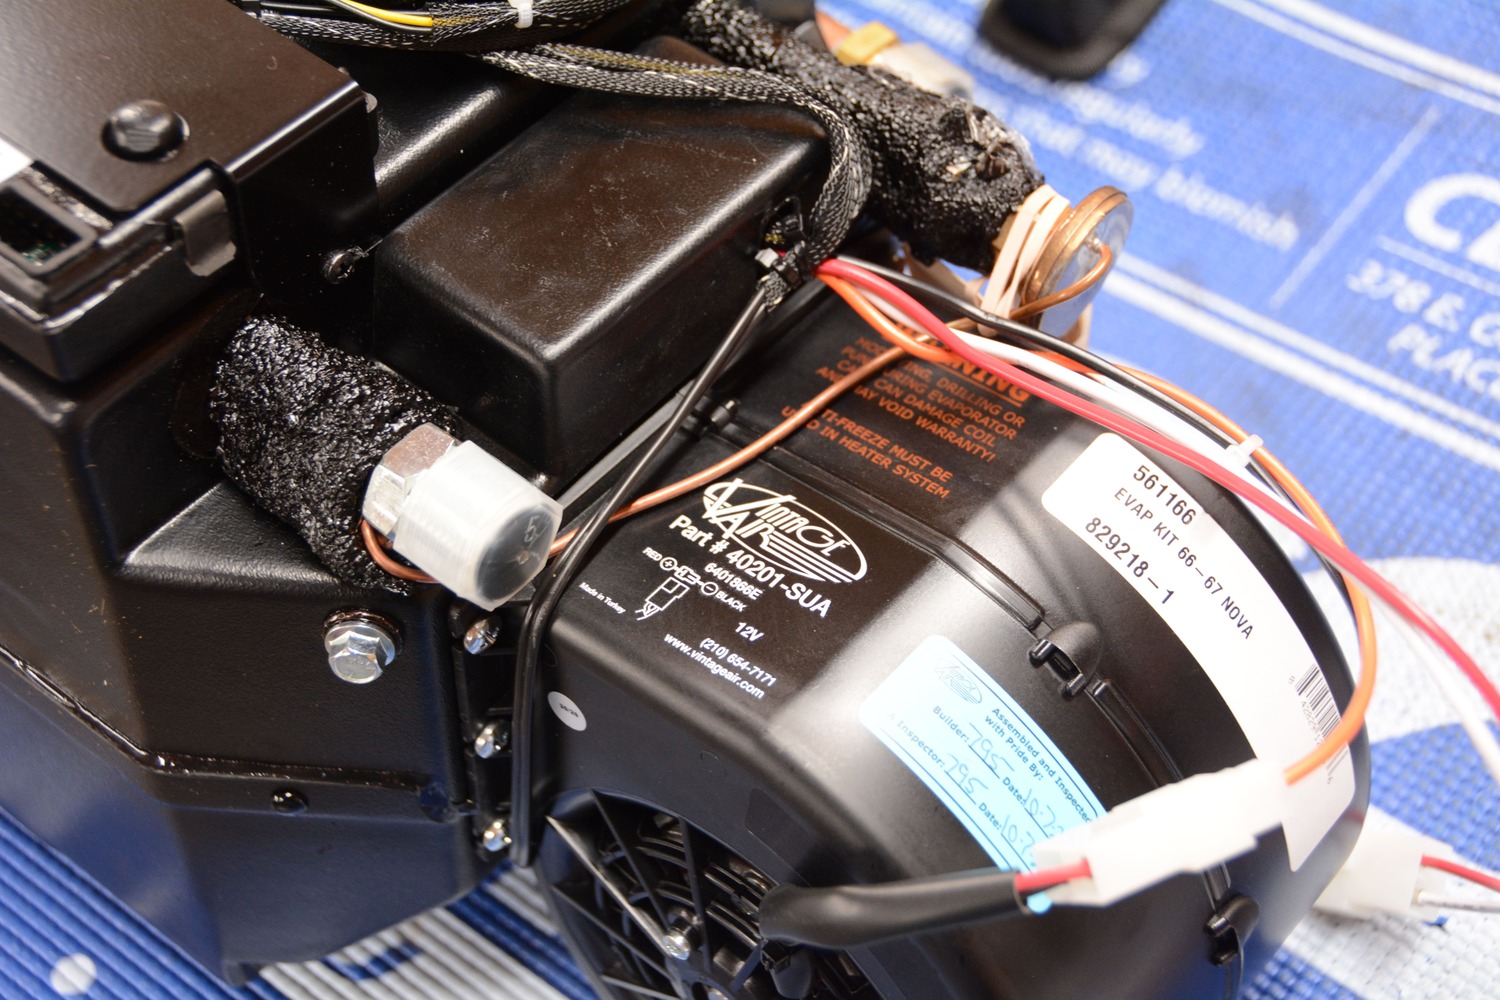
The Vintage Air SureFit kit (PN 961166) fits ’66 and ’67 Chevy II Novas and uses this evaporator to run the system. Its compact design fits beneath the dash and operates both the heat and air conditioning from one unit.
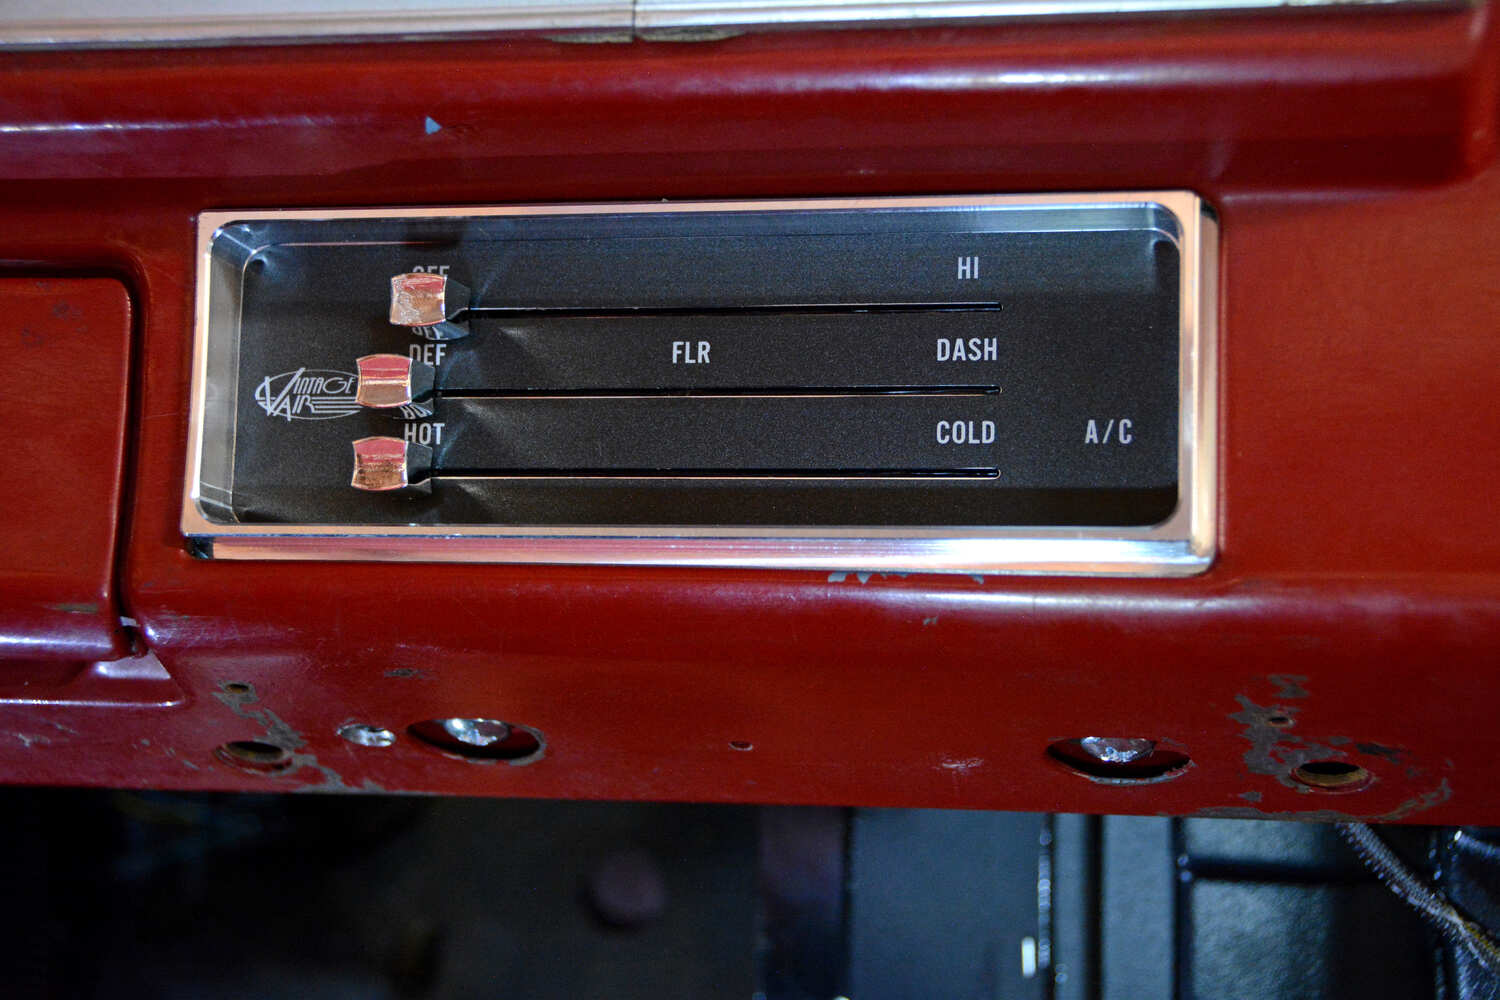
This time, we’re wrapping up the A/C conversion by assembling and installing the Vintage Air evaporator and then completing the system plumbing and wiring. We added Vintage Air’s new Control Panel (PN 473272), which fits in the factory location and makes it completely electronic, instead of having to convert the original sliders to work electronically. The plug-and-play setup simplified the installation greatly, as did the E-Z Clip hose system (PN 547002), which allowed us to build our own refrigerant hoses without the assistance of a hydraulic hose shop.
After we buttoned up the install, we calibrated the new control panel. First, we turned the ignition switch to the “ON” position, then positioned the sliders to “HI,” “DEF,” and “HOT” settings. Then, we connect the white jumper wire to the gray program wire and wait approximately 5 seconds for the blower speed to change. Finally, we slide the controls to “OFF,” “DASH,” and “COLD” and disconnect the jumper wire. The blower speed should change again, indicating completion of the calibration.
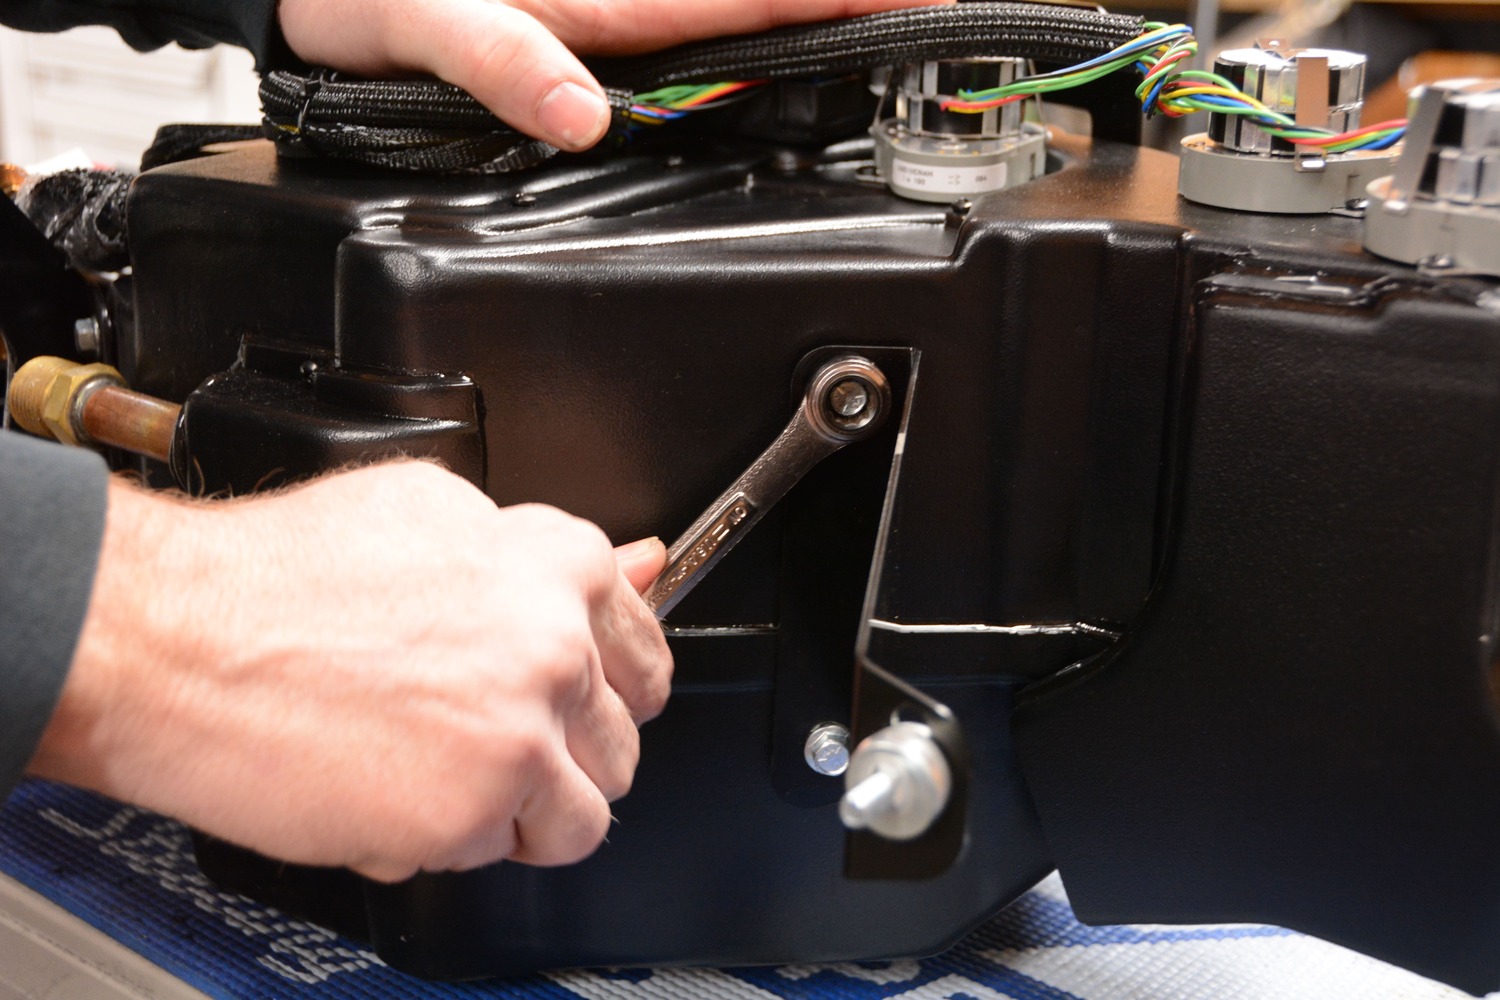
Mounting the evaporator to the firewall and cowl is made possible by these specially designed brackets that bolt to the evaporator with the supplied hardware. The plastic evaporator body has steel threaded inserts, allowing for secure mounting.
The only portion of the install that required the assistance of a shop was filling the system with refrigerant. Vintage Air provides all the specifications in the instruction manual. The system requires 1.8 pounds of R134a refrigerant. Vintage Air suggests evacuating the system for 35-45 minutes when the operating components (compressor, condenser, drier, and evaporator) are at a temperature of at least 85 degrees.
Another evaporator bracket bolts into place and provides a sturdy mounting point. Notice the stud and spacer already in place. This stud will slide through an existing hole in the firewall.
When it was all said and done, the Chevy II is one step closer to cruising in comfort. We have more upgrades planned for this old-school survivor, but for now let’s take a deep dive into the final steps of the Vintage Air SureFit A/C system installation.
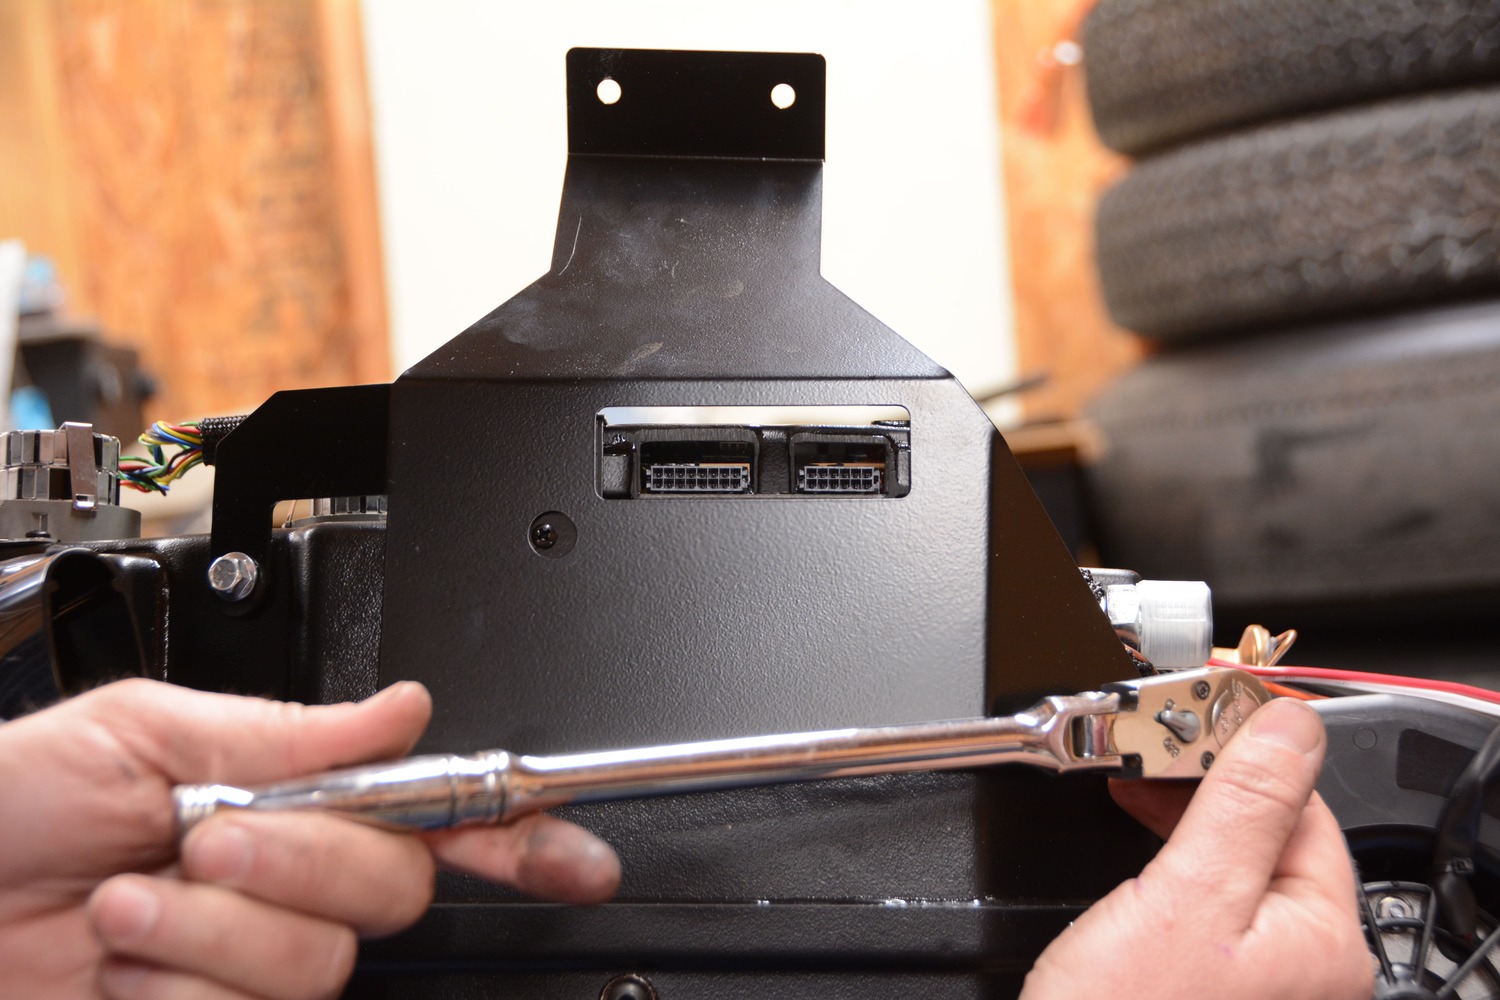
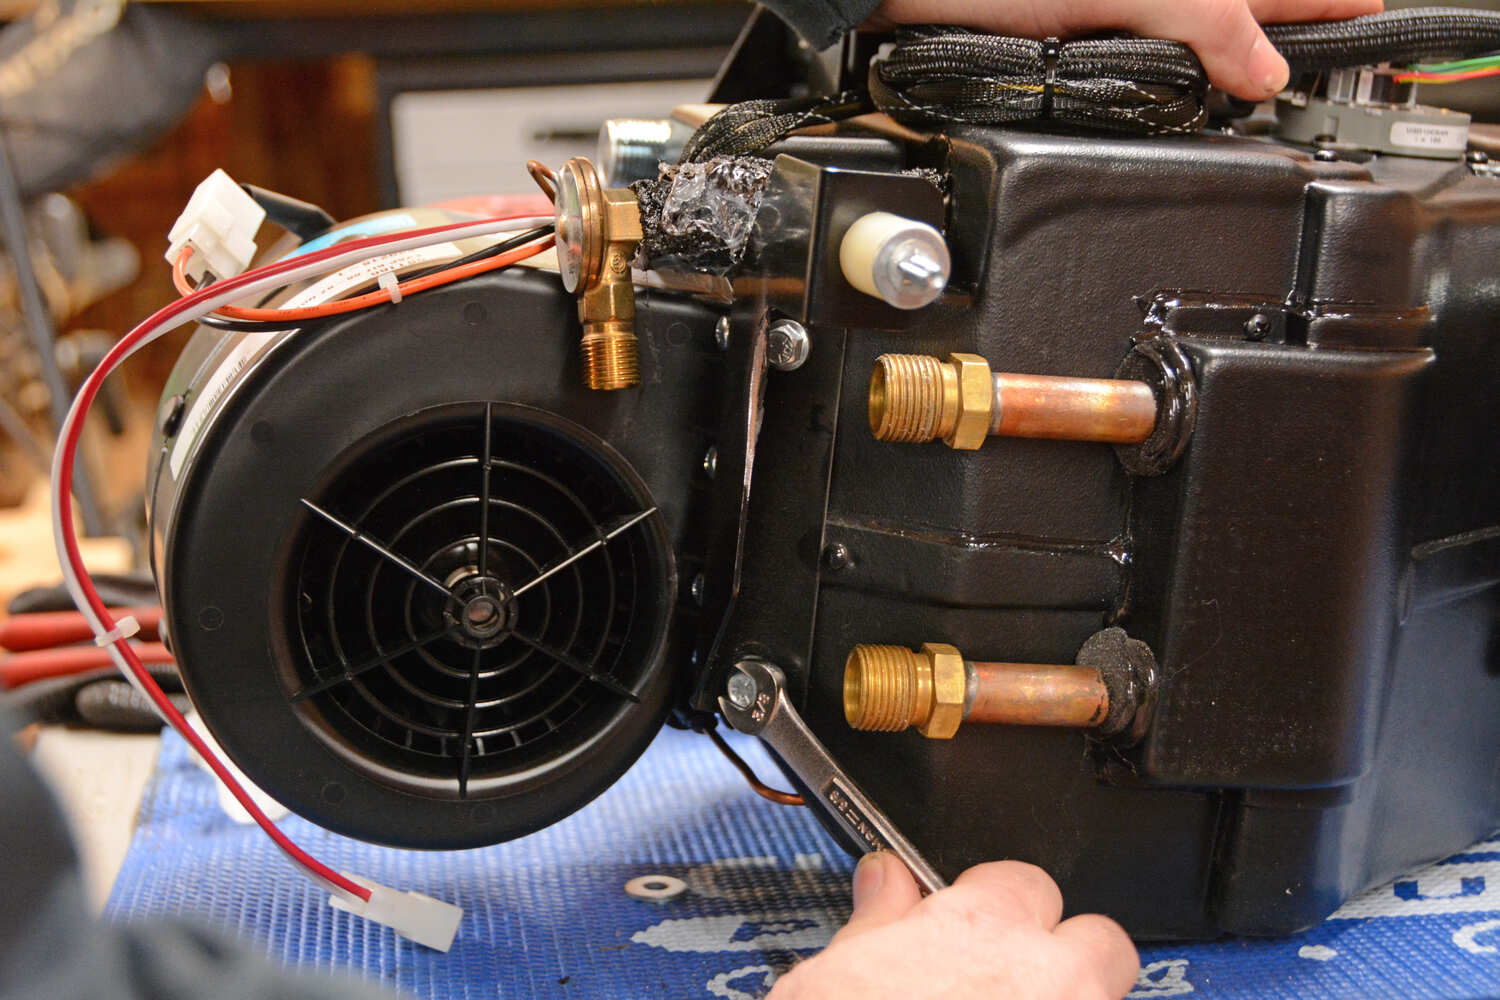
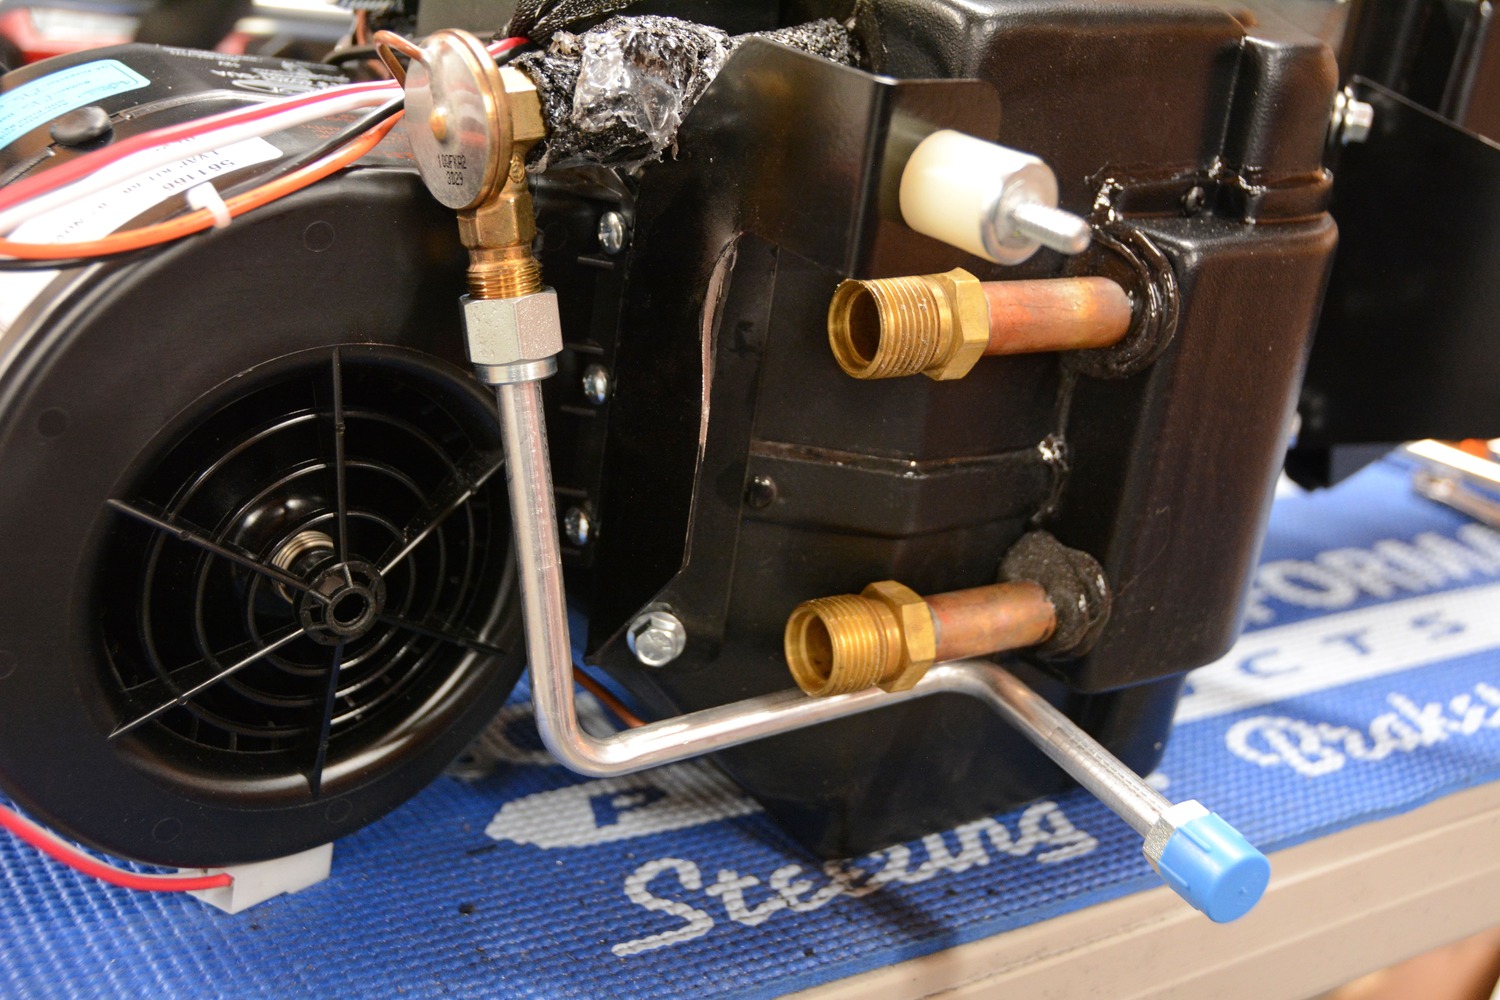
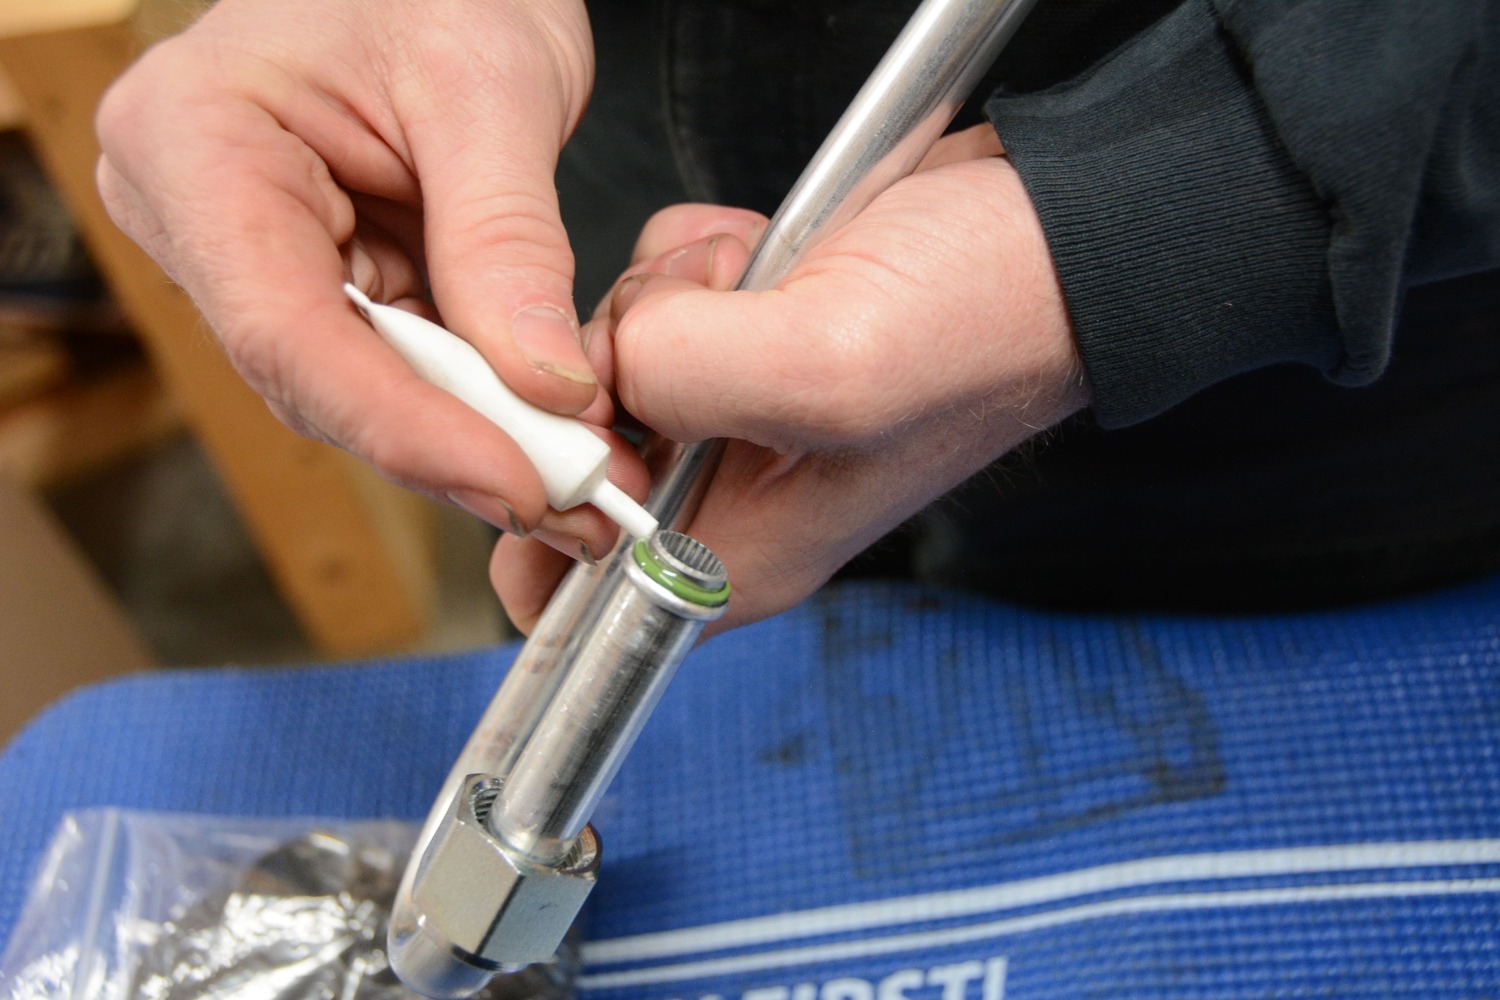
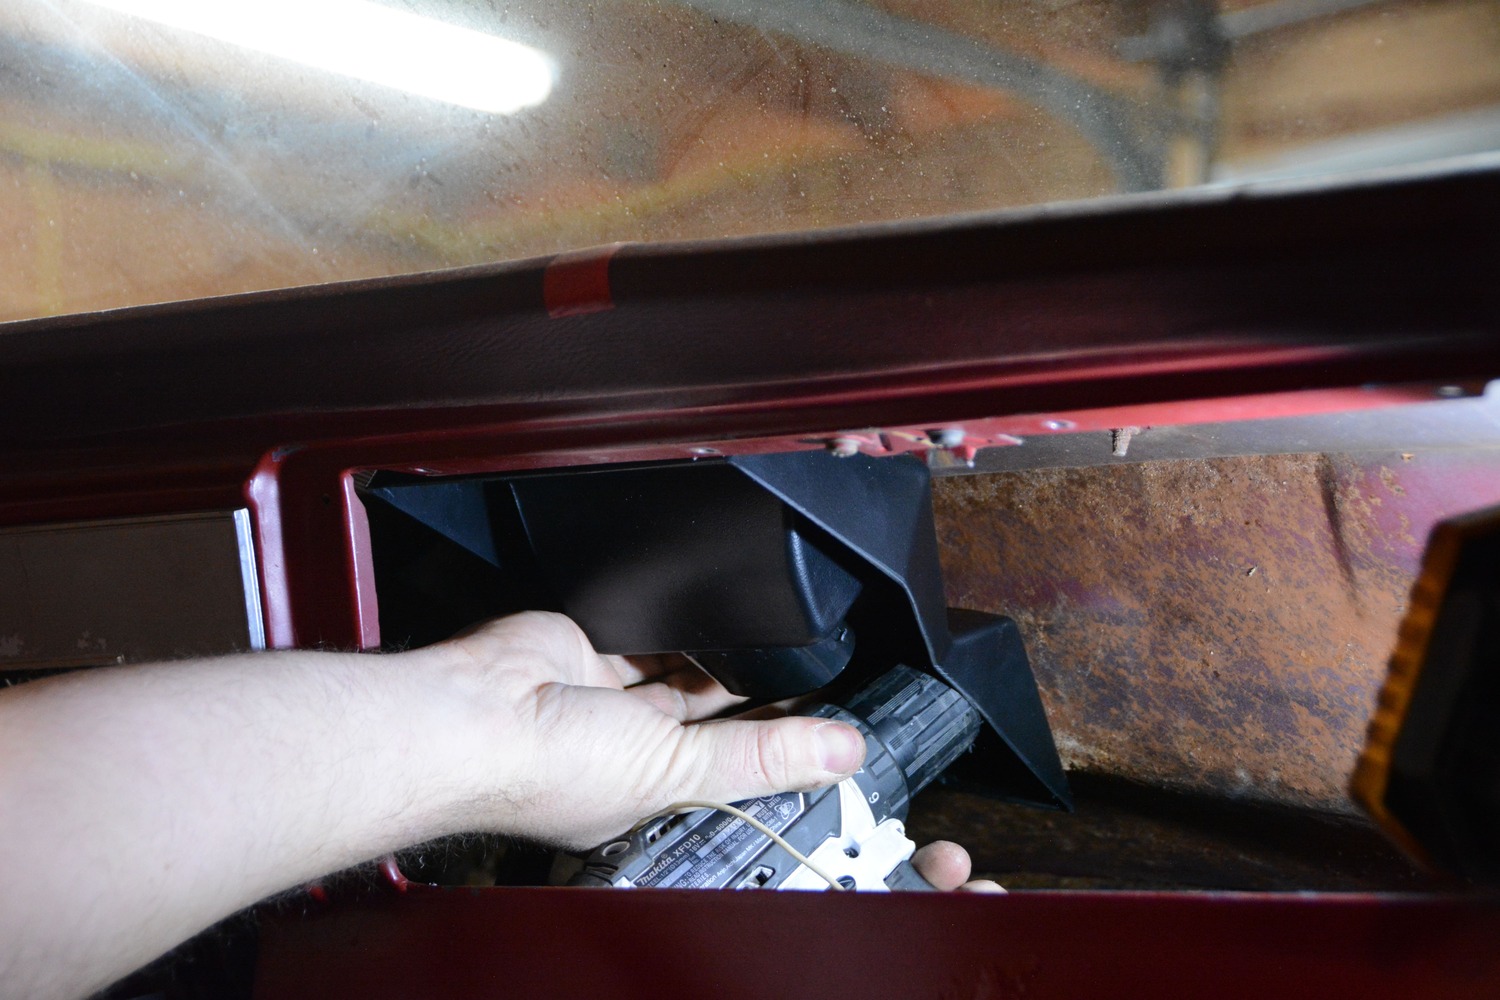
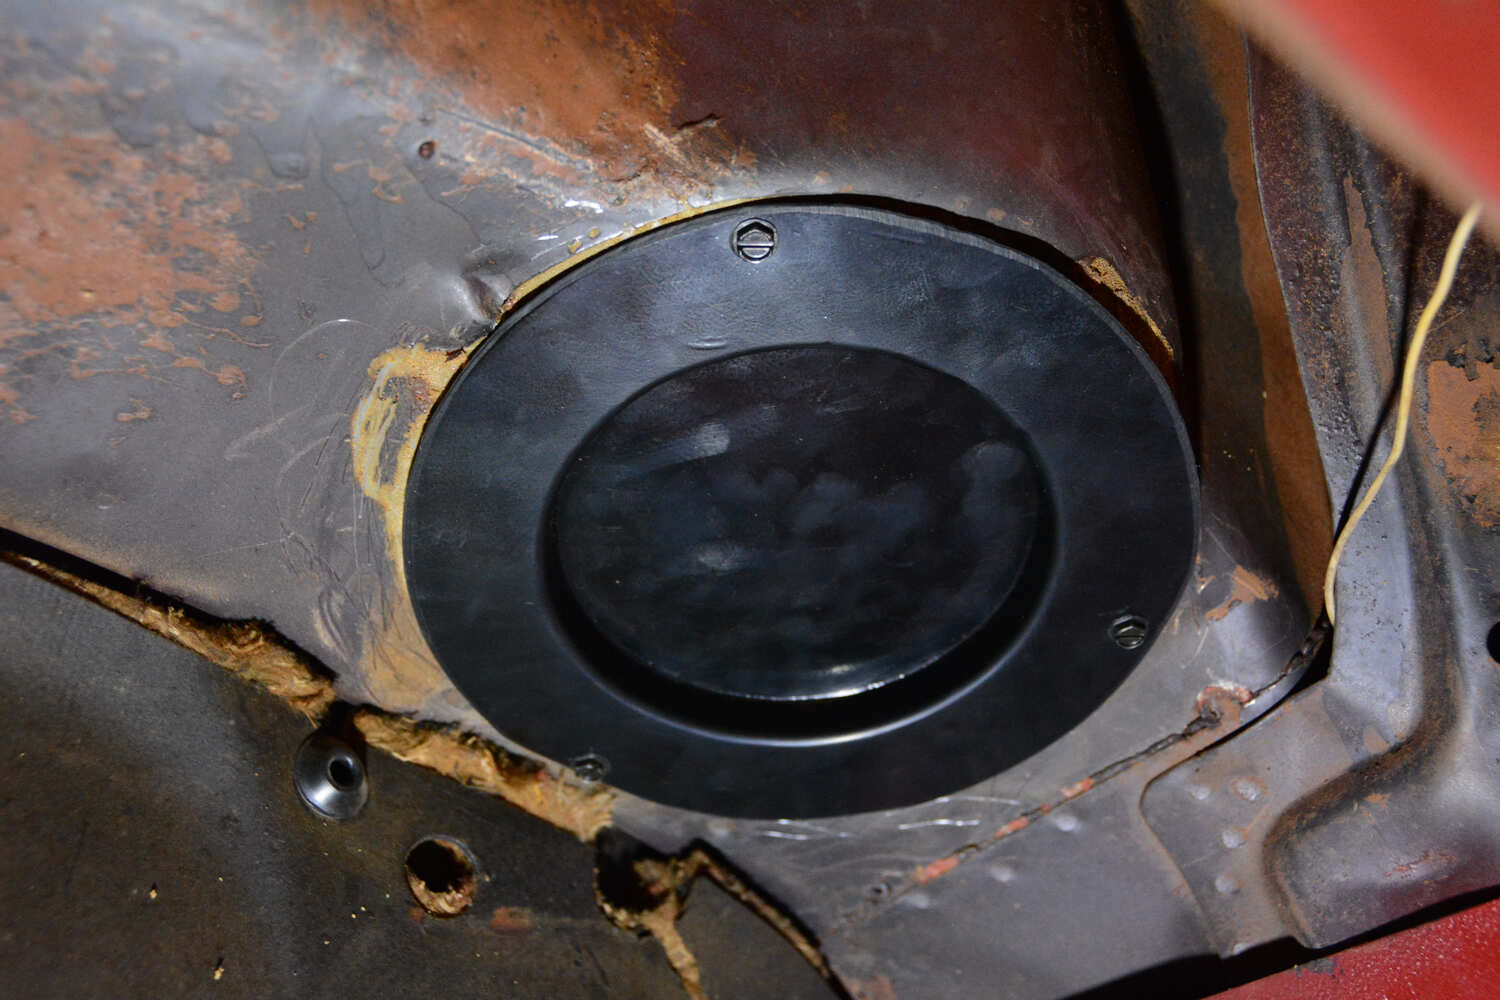
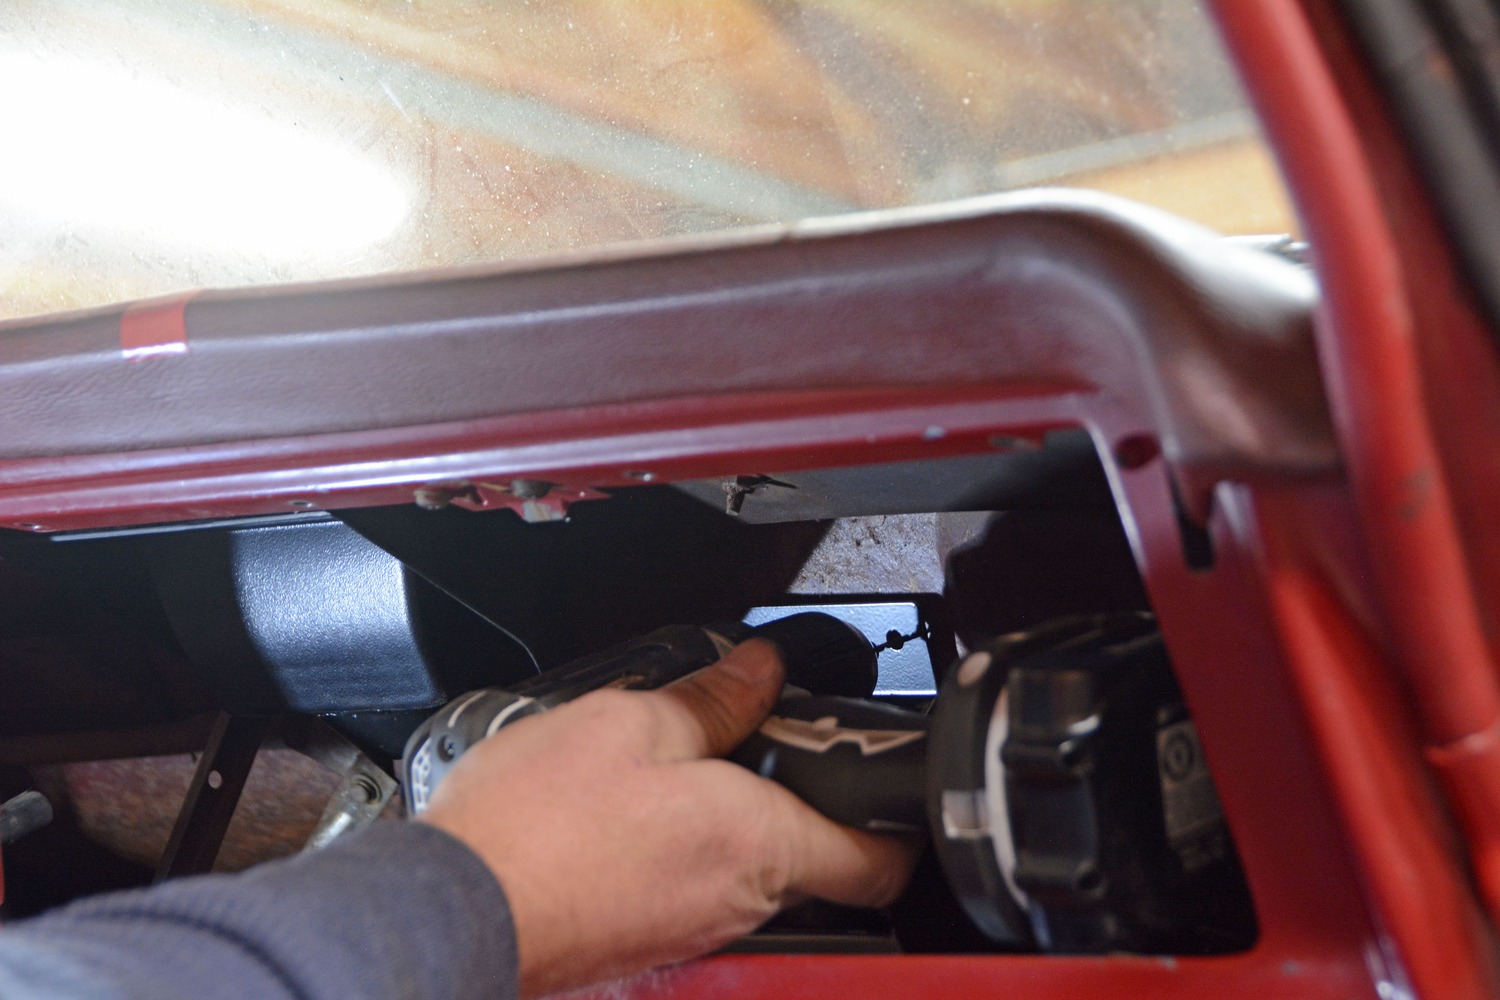
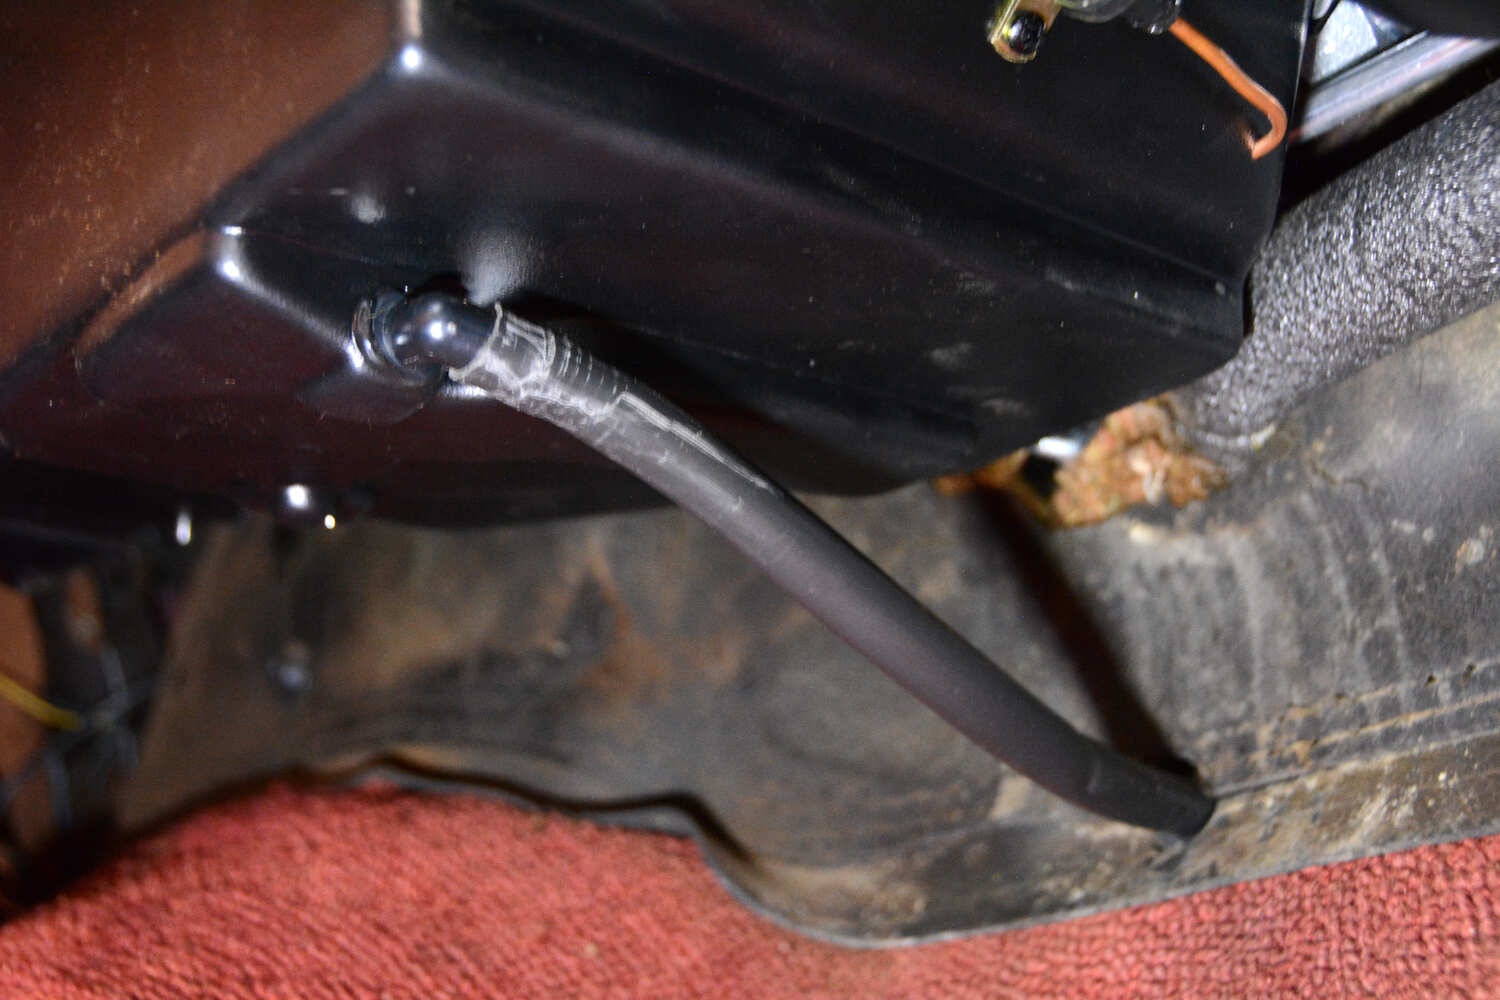
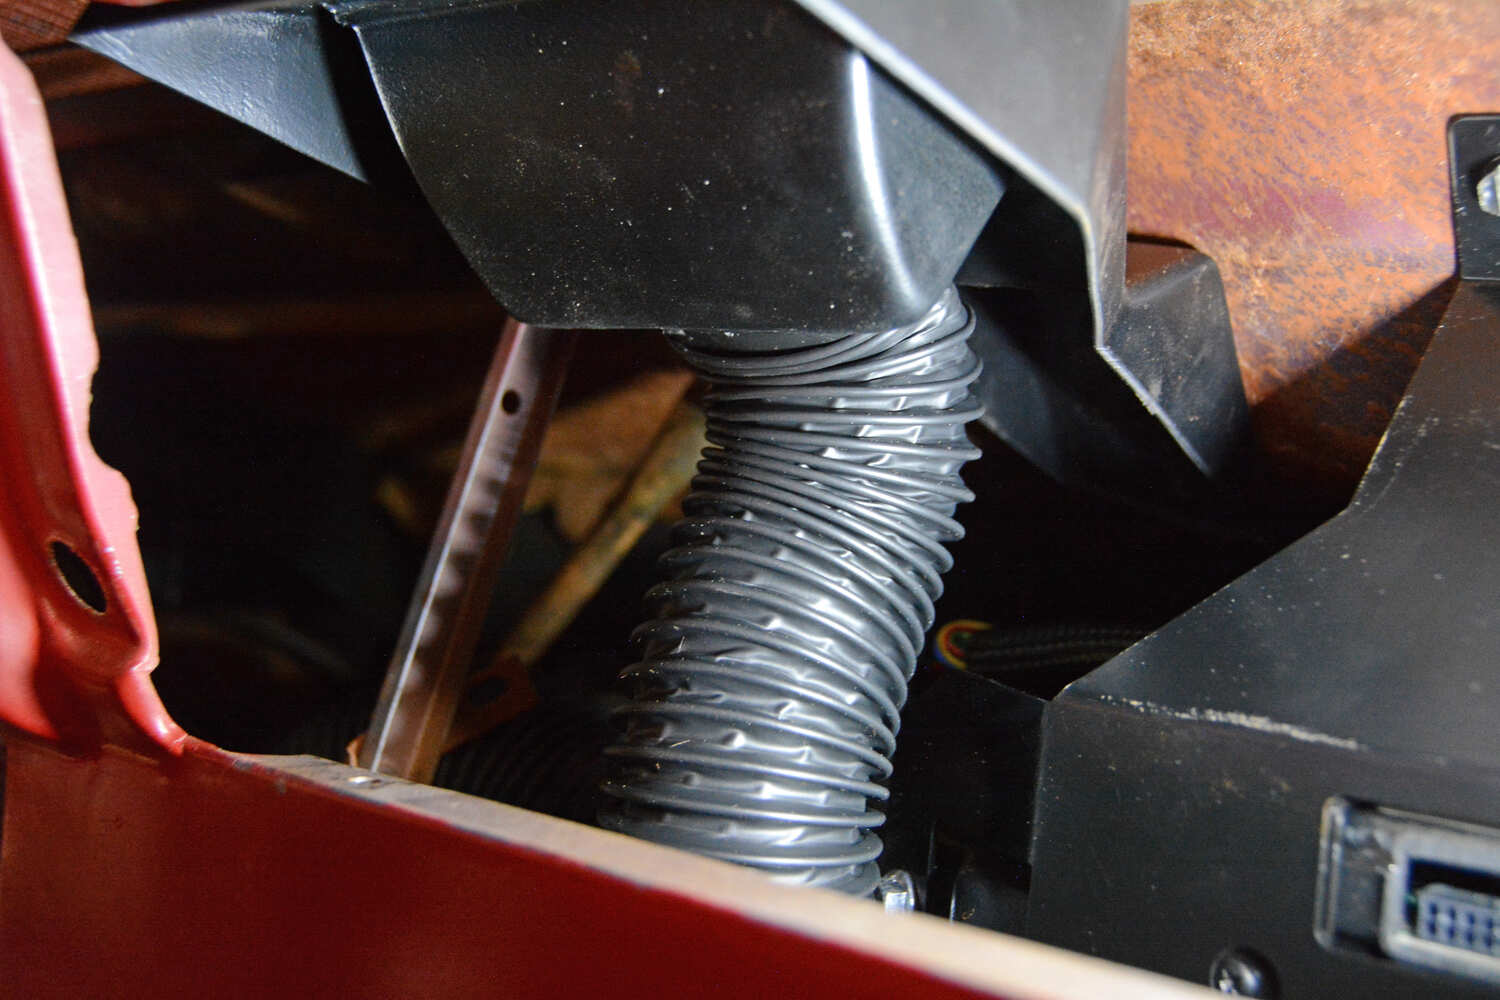
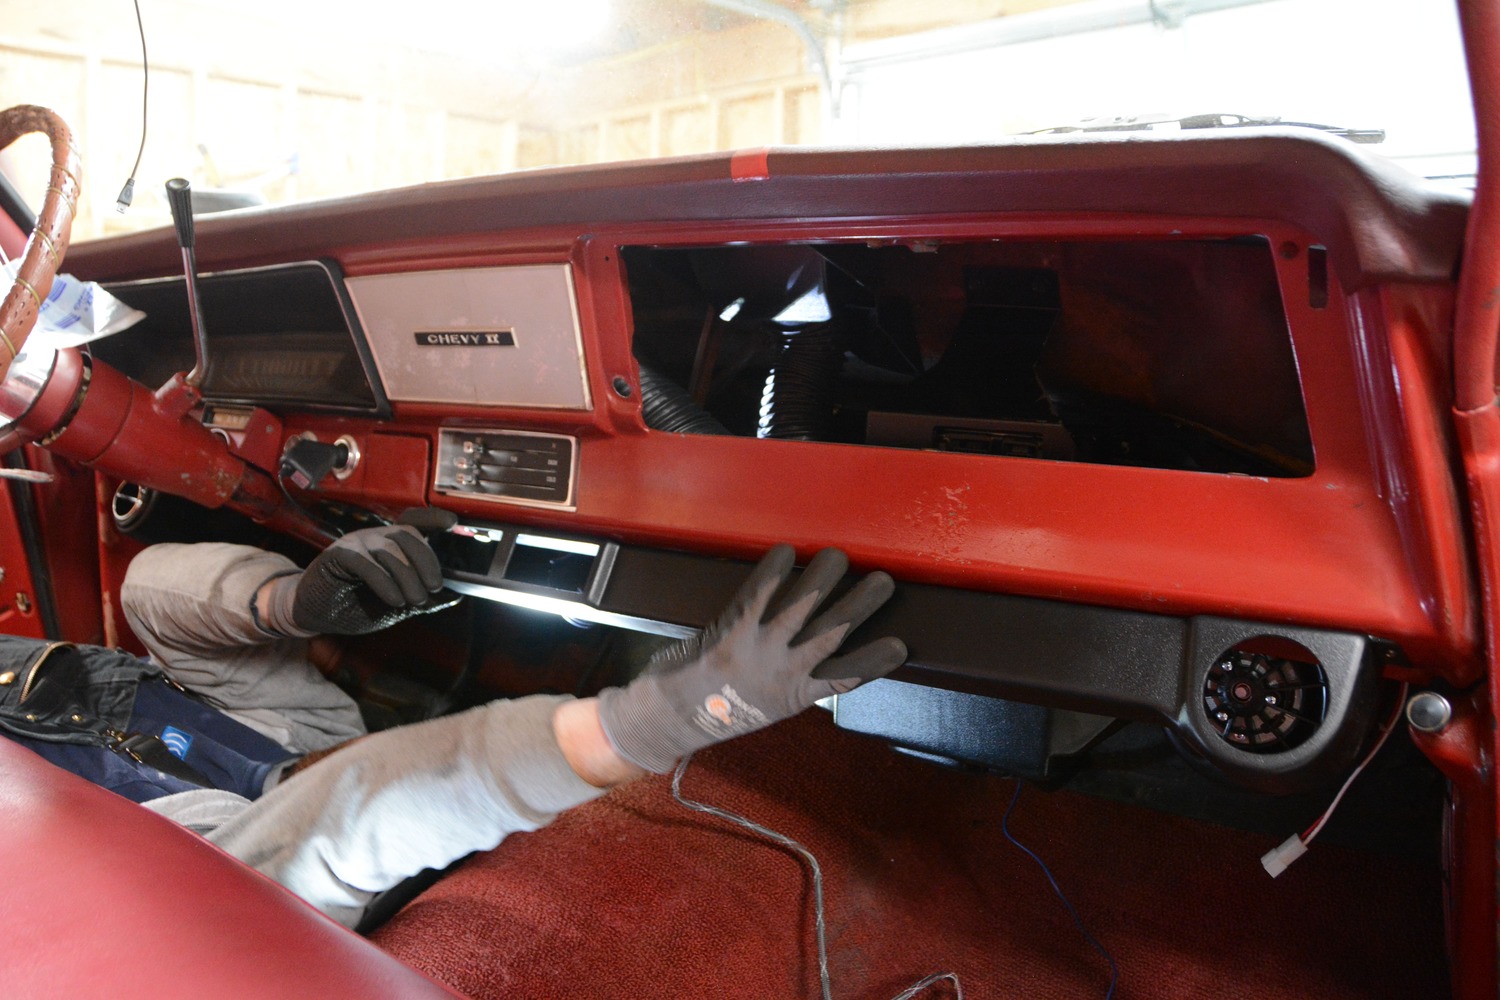
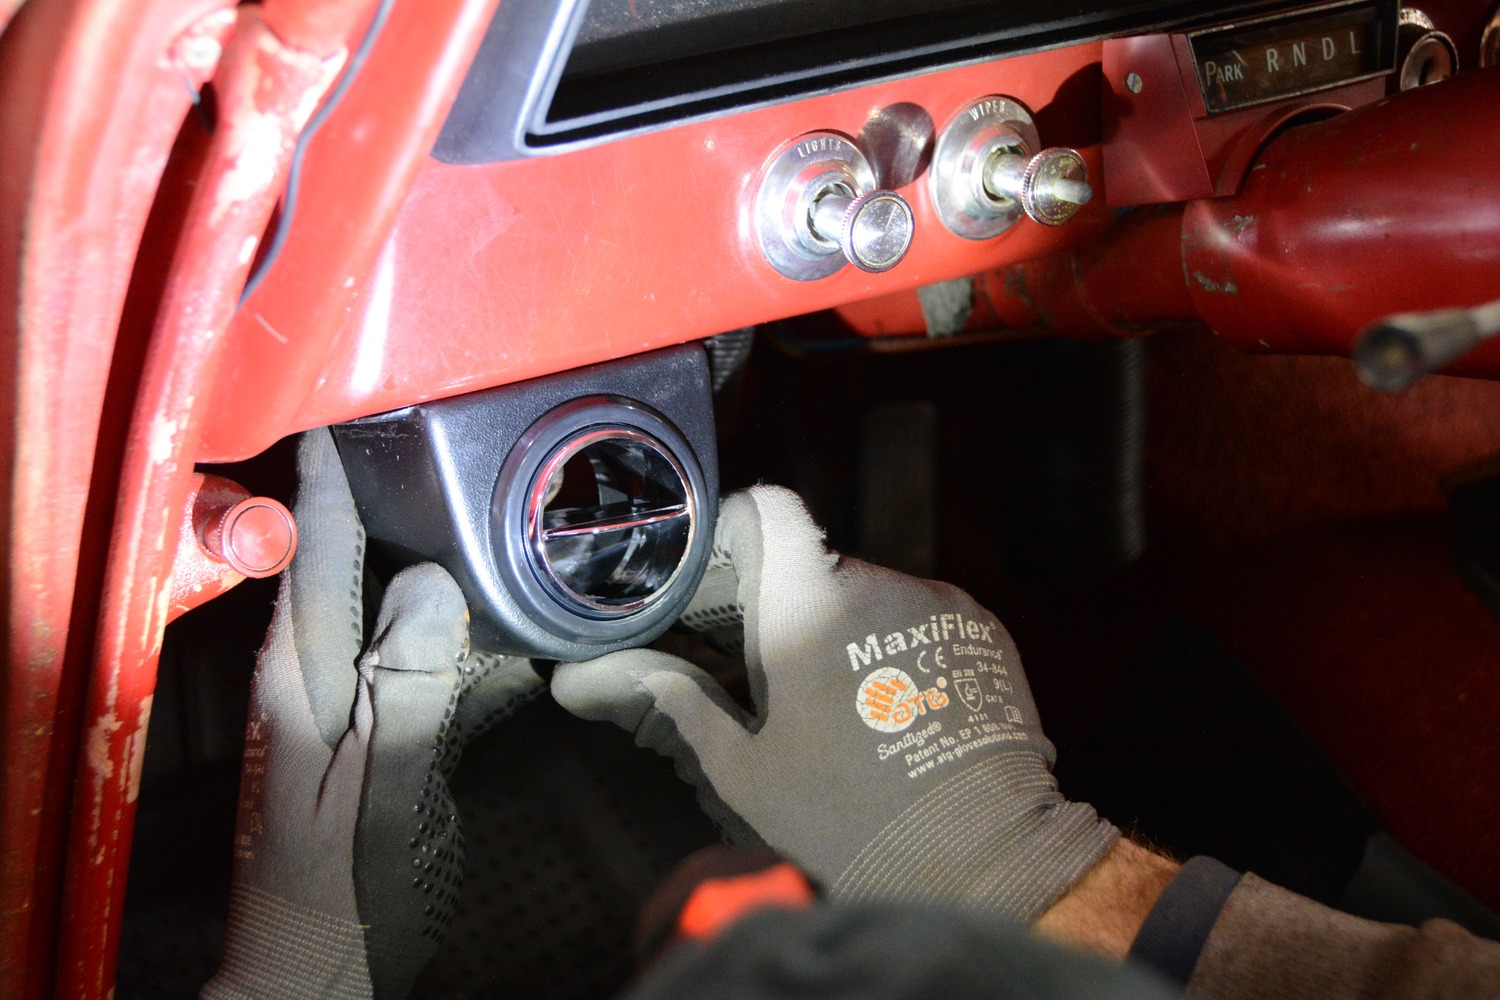
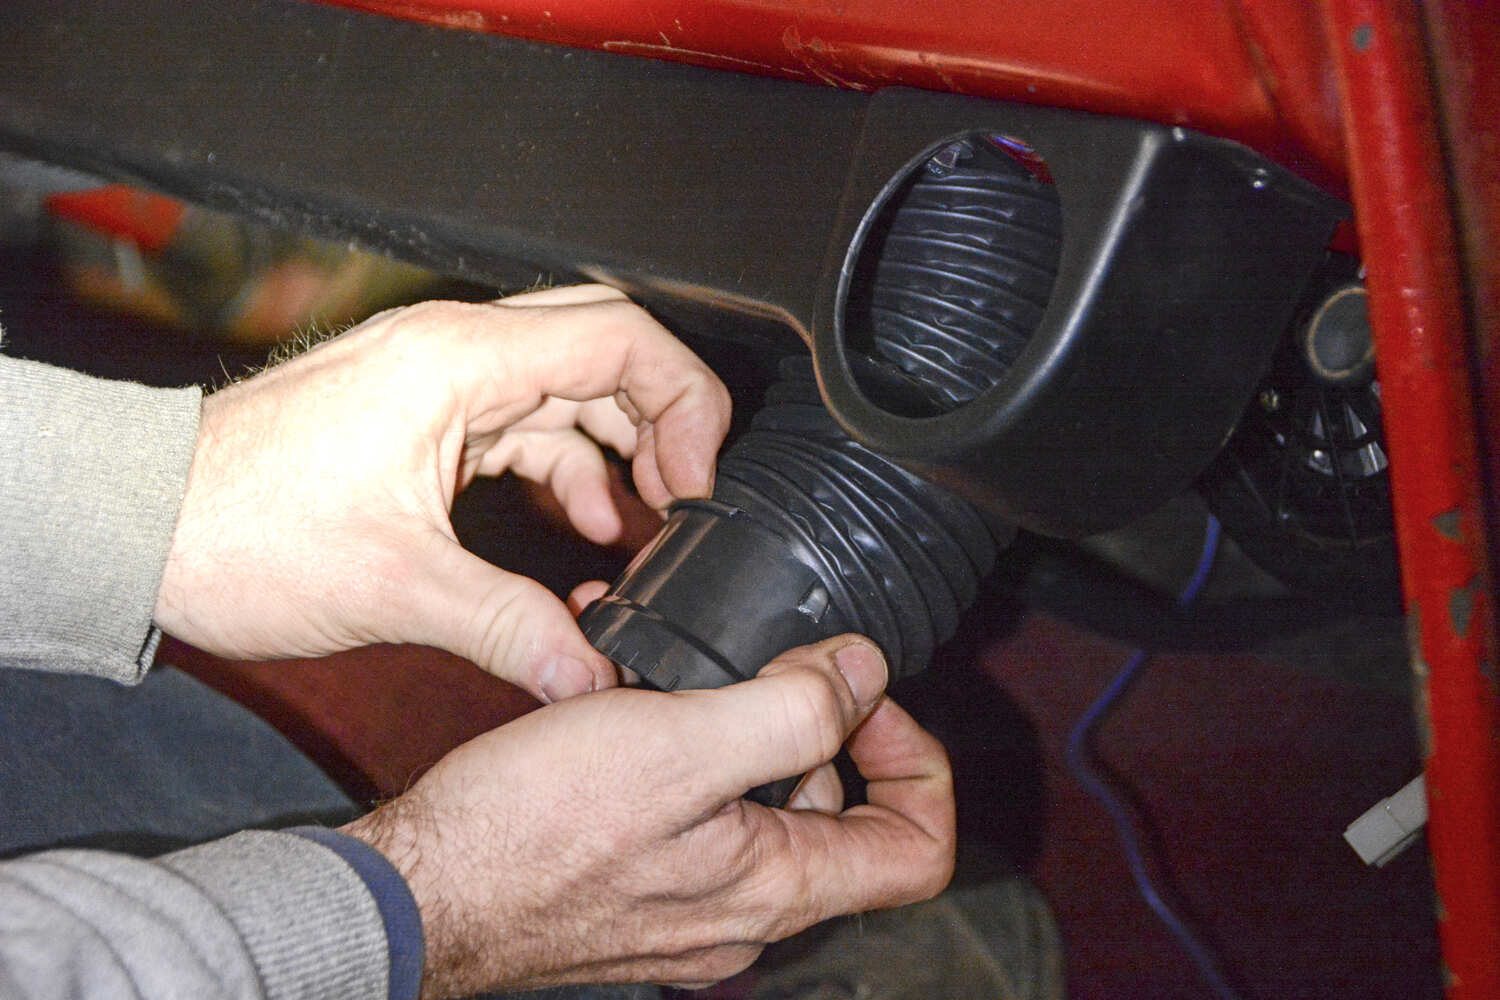
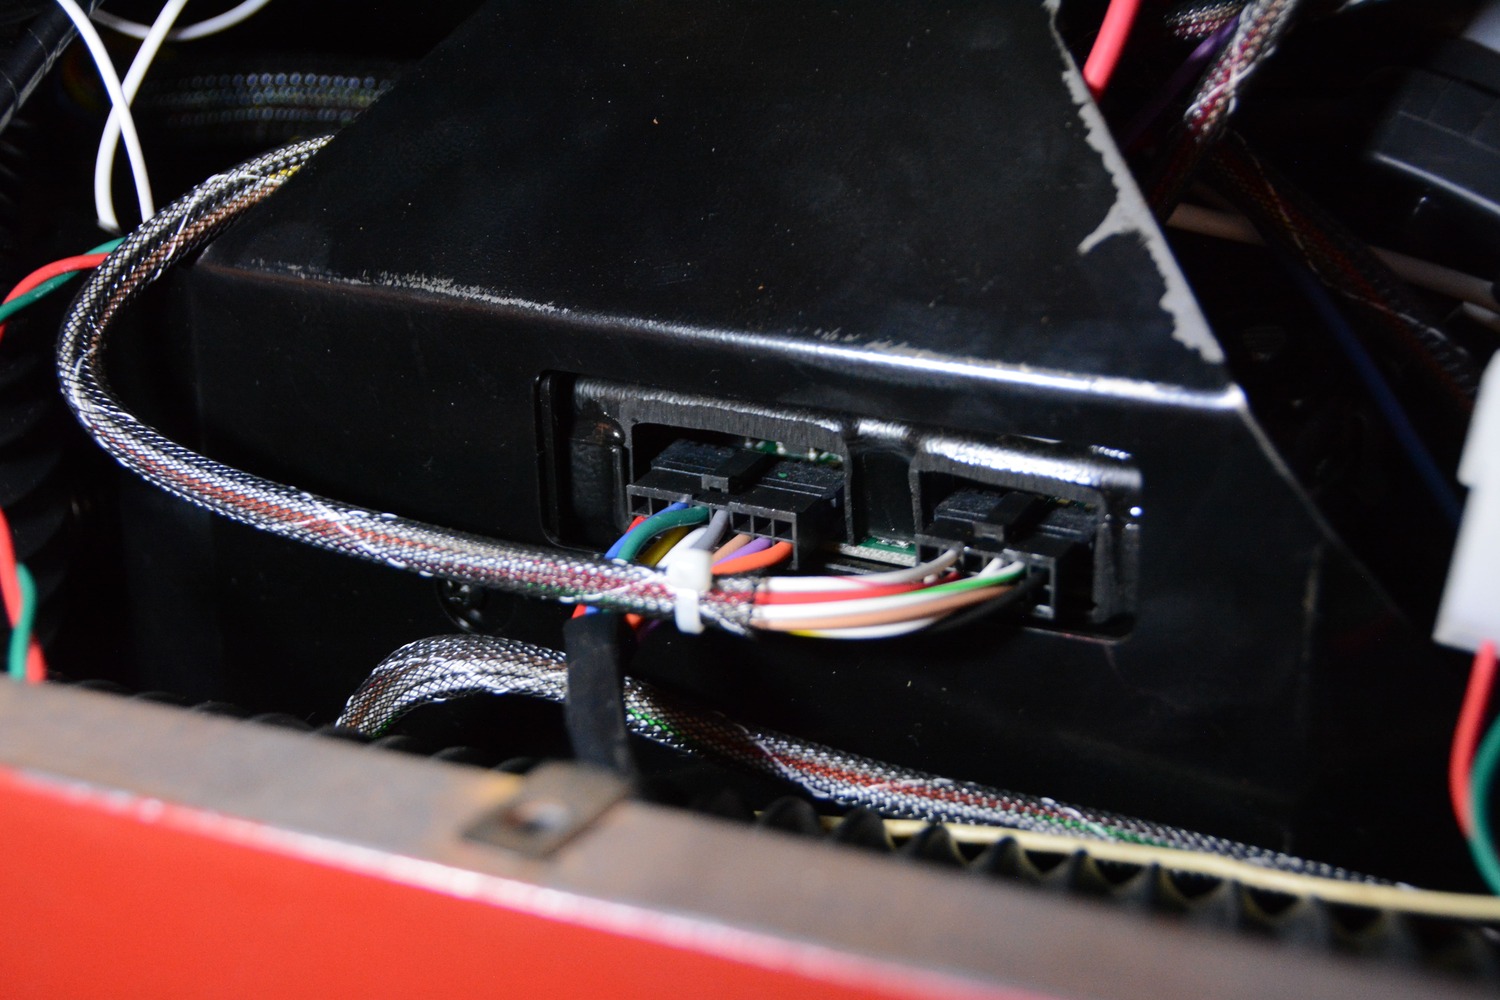
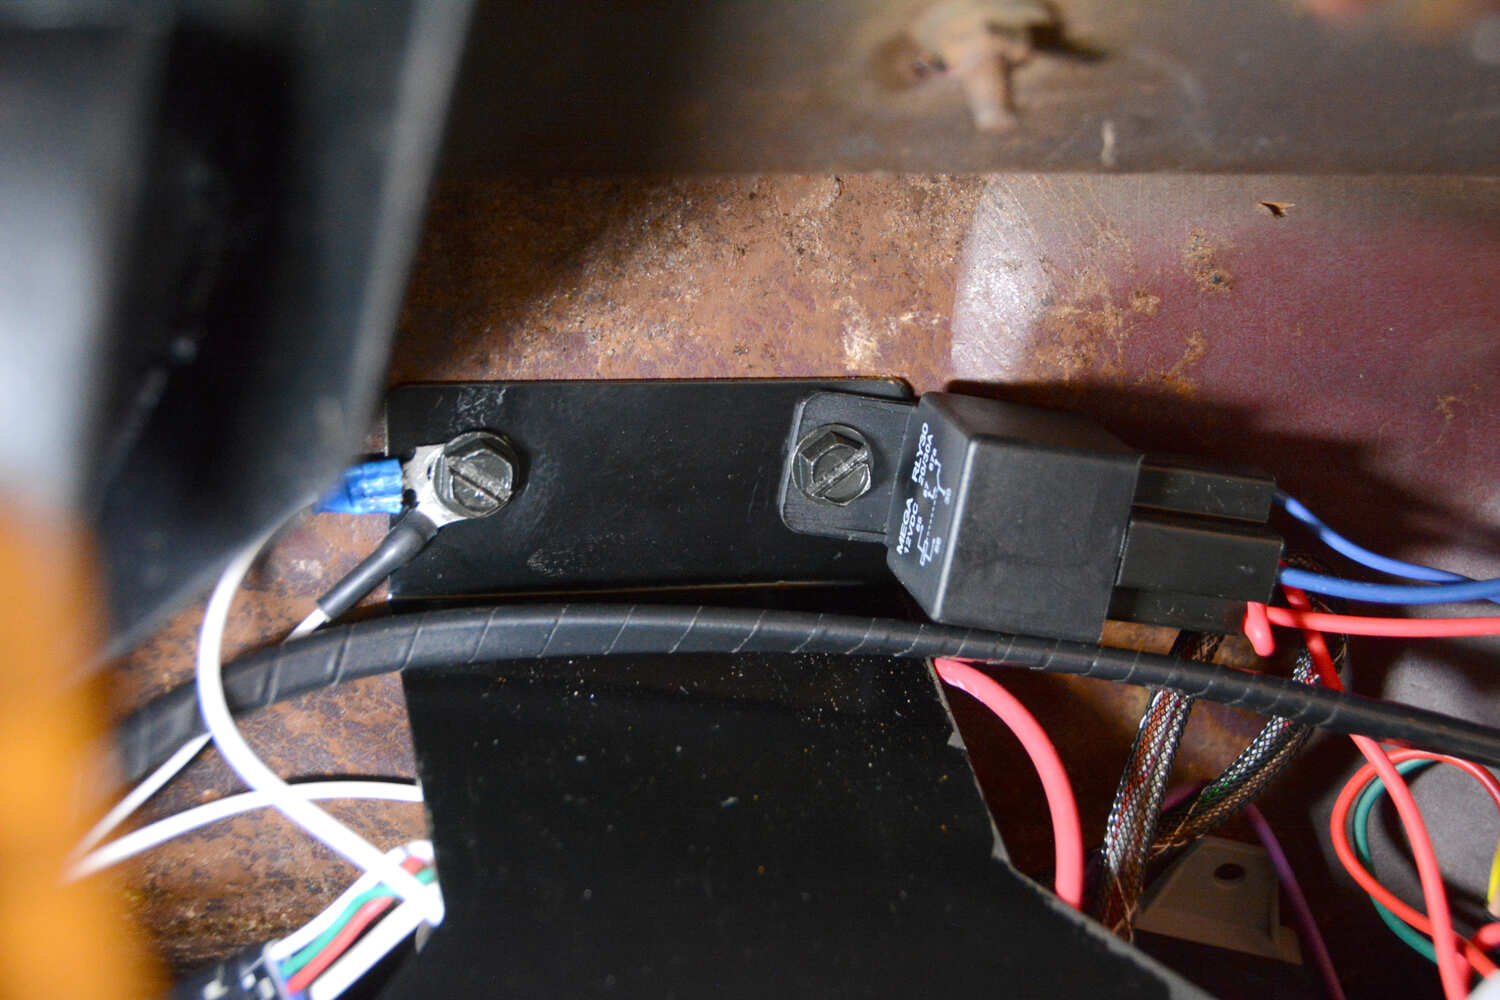
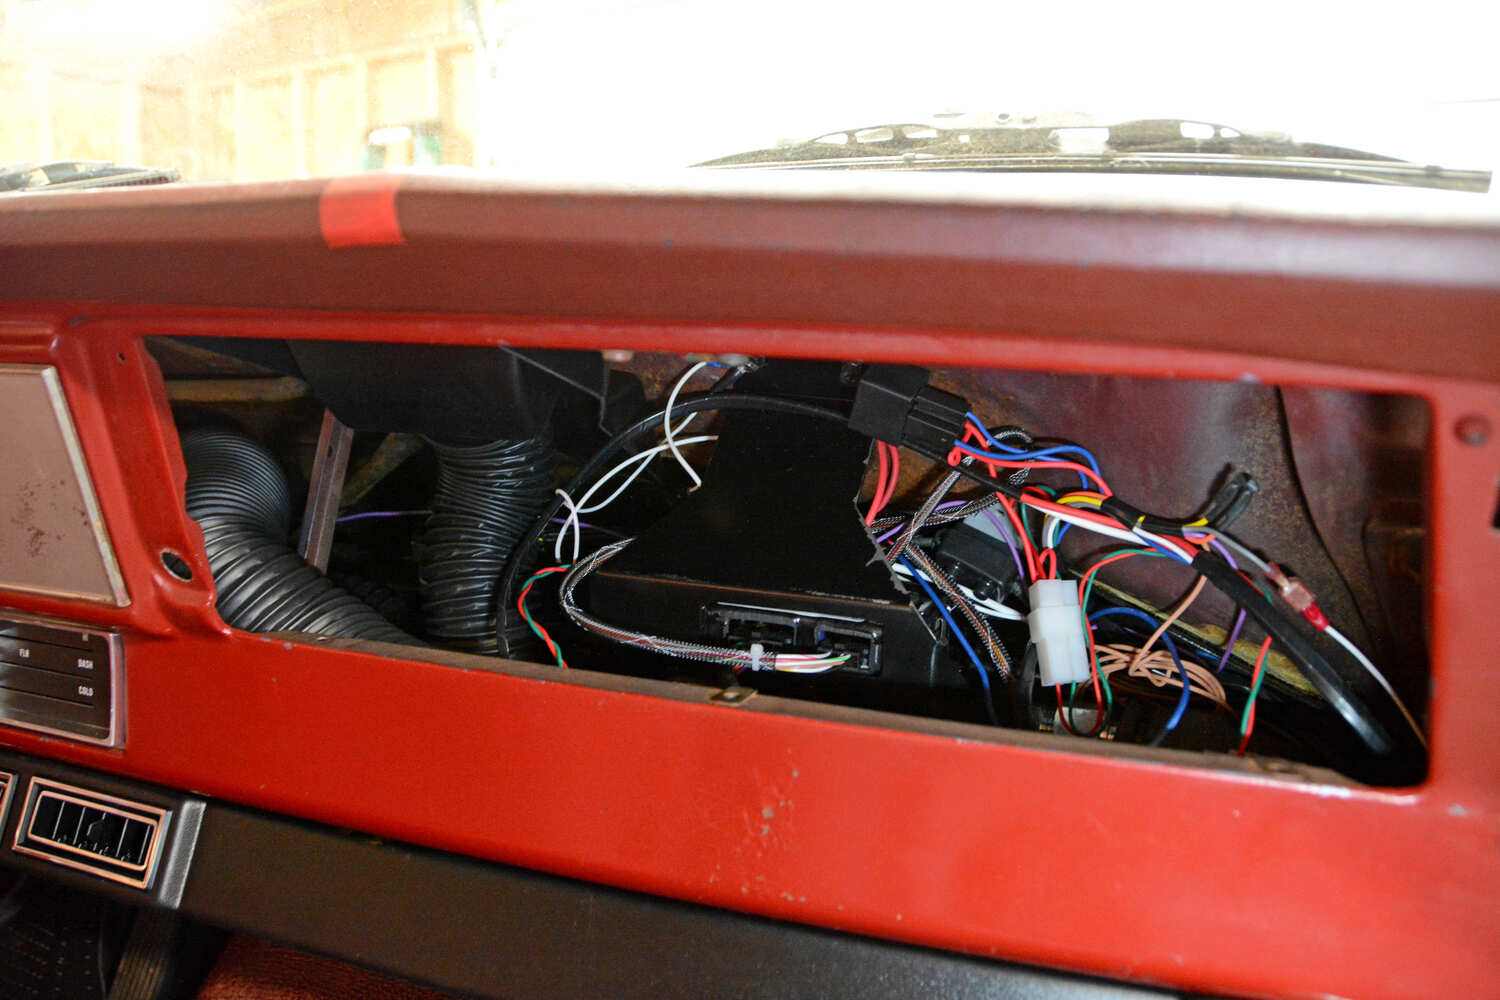
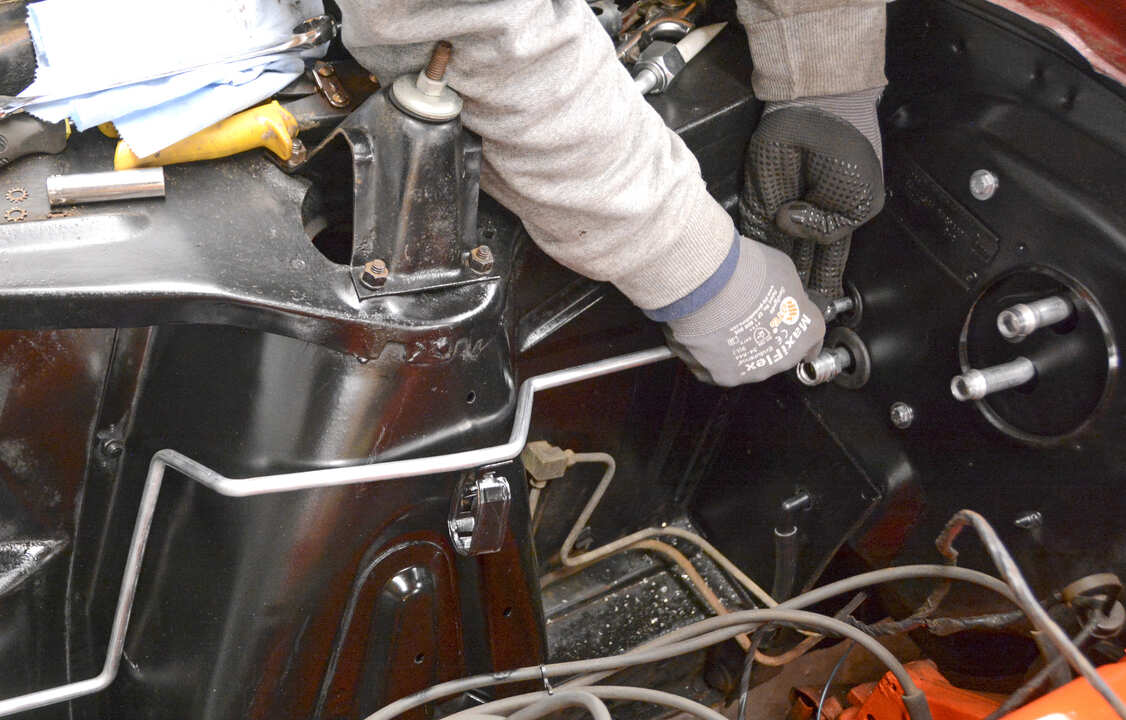
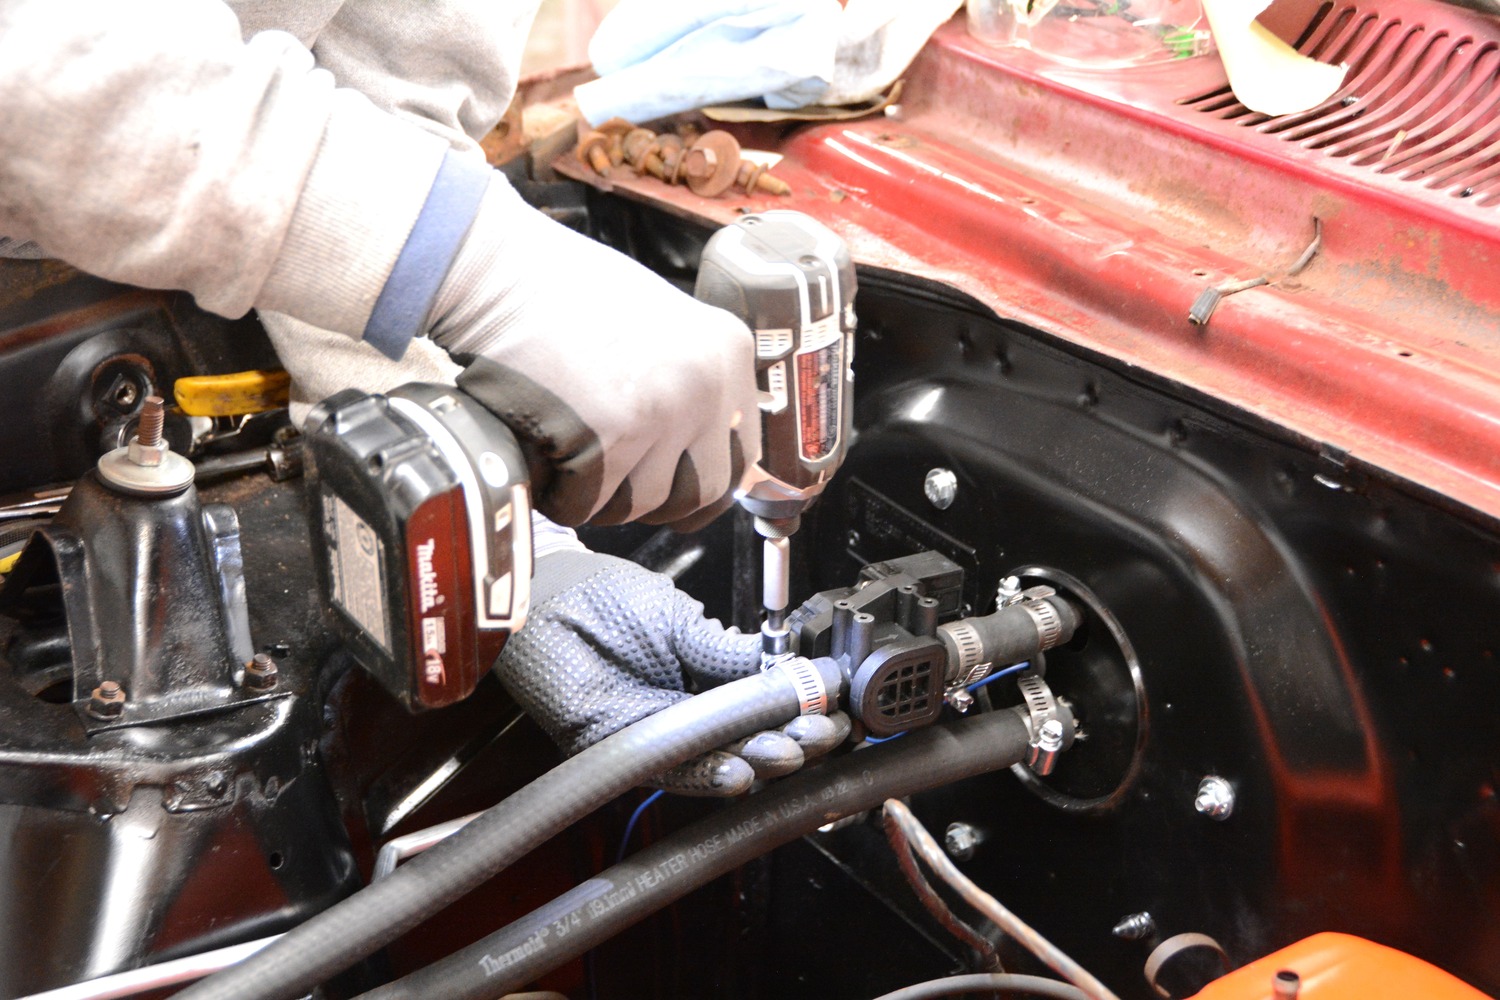
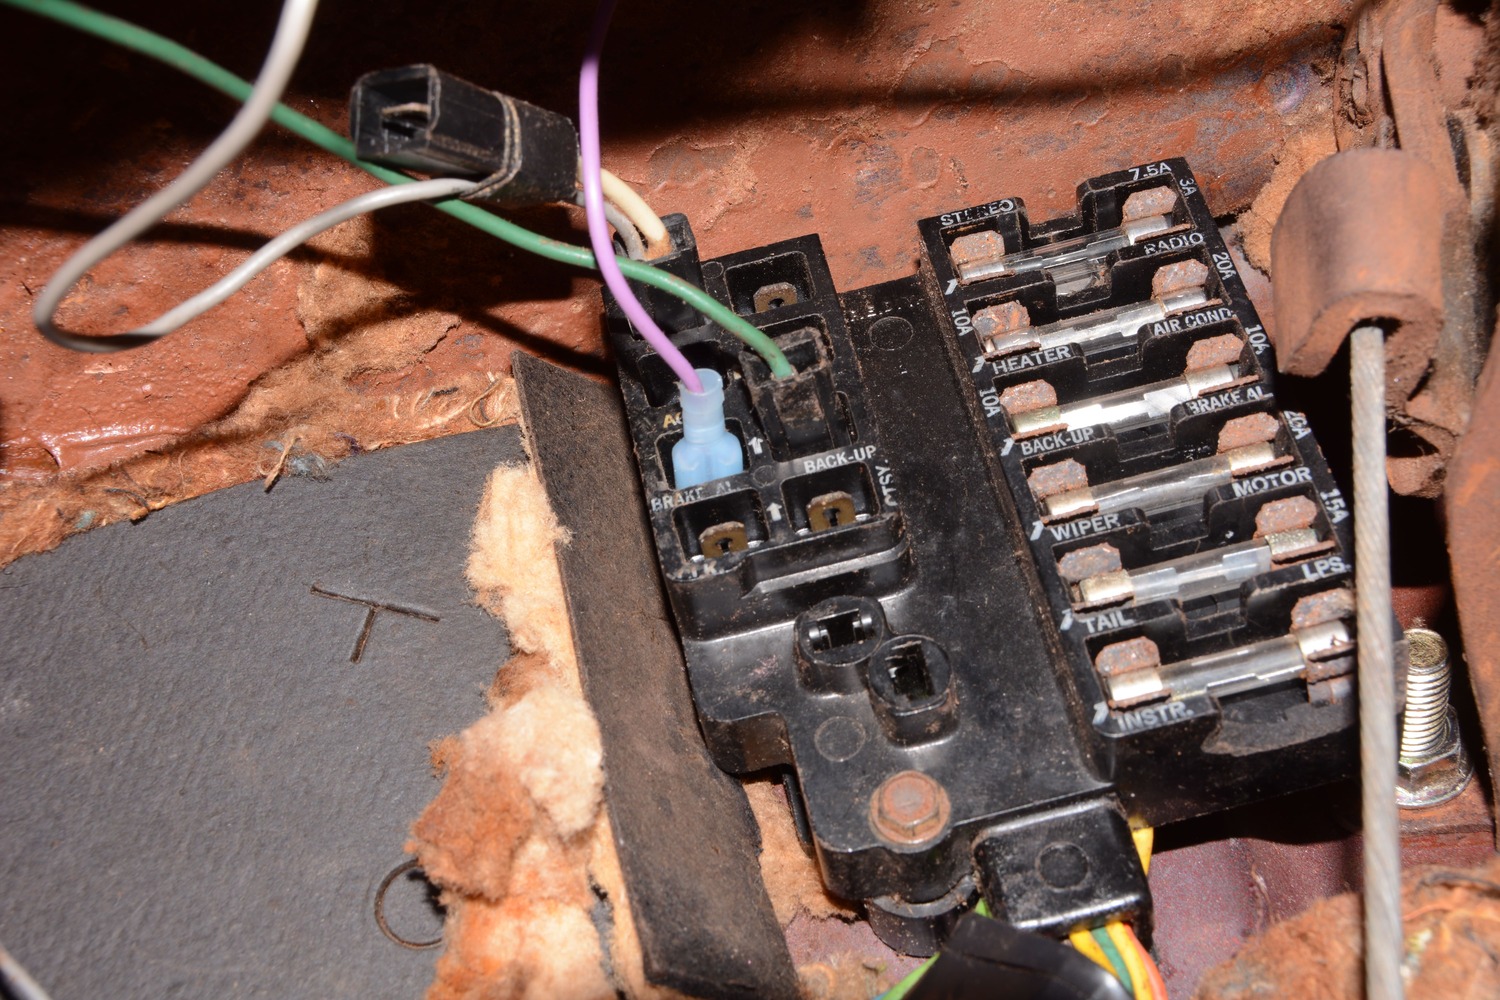
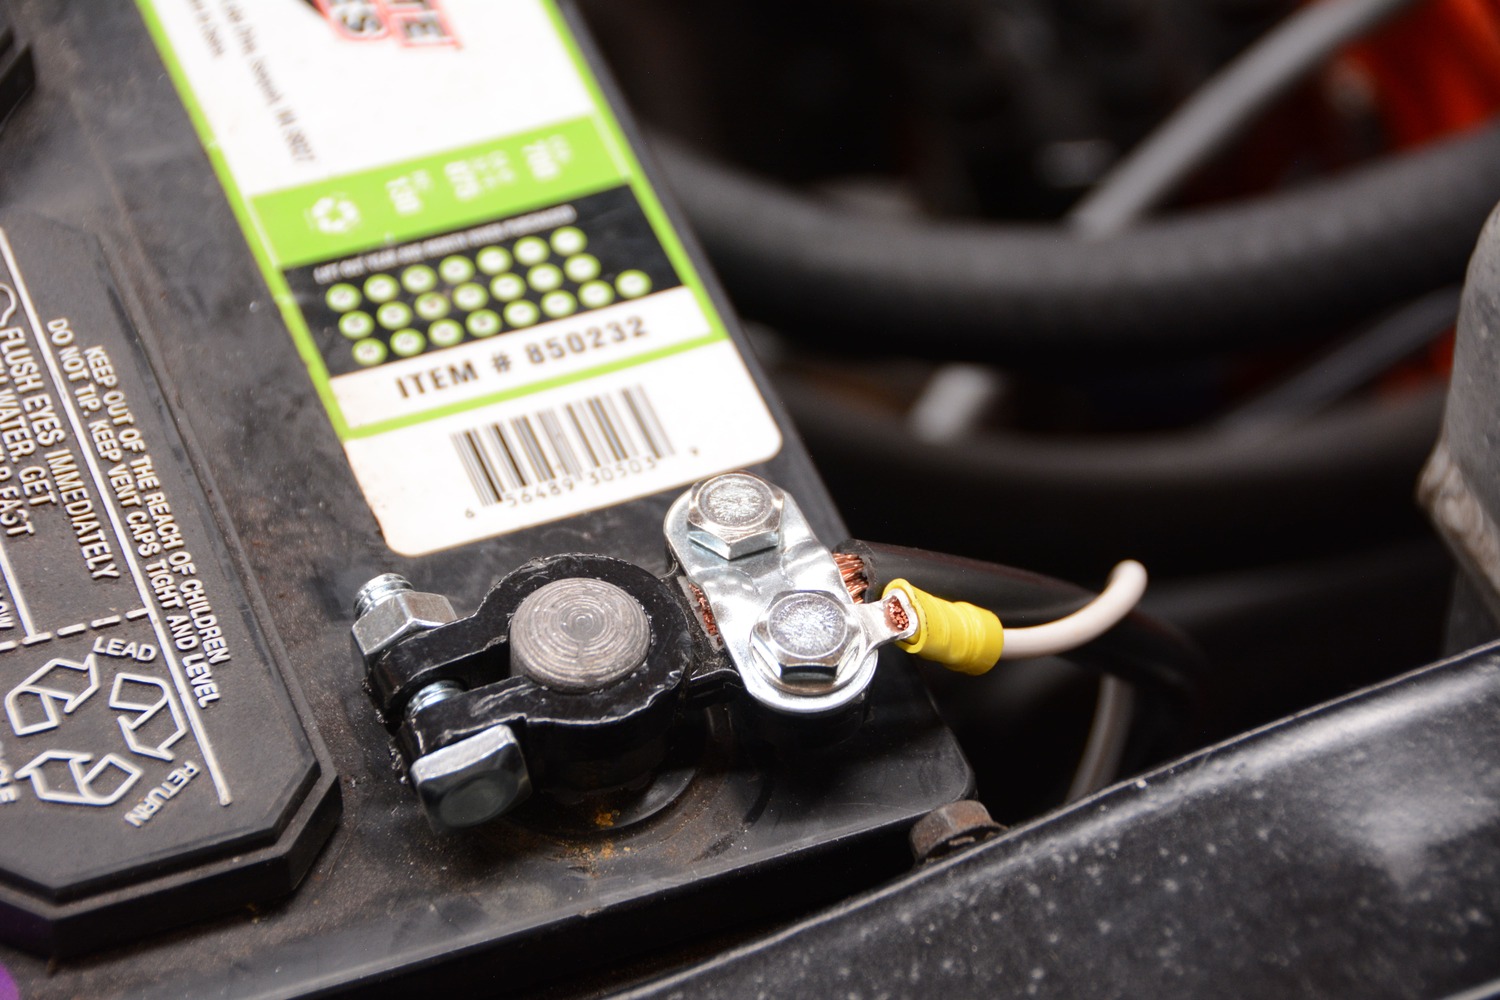
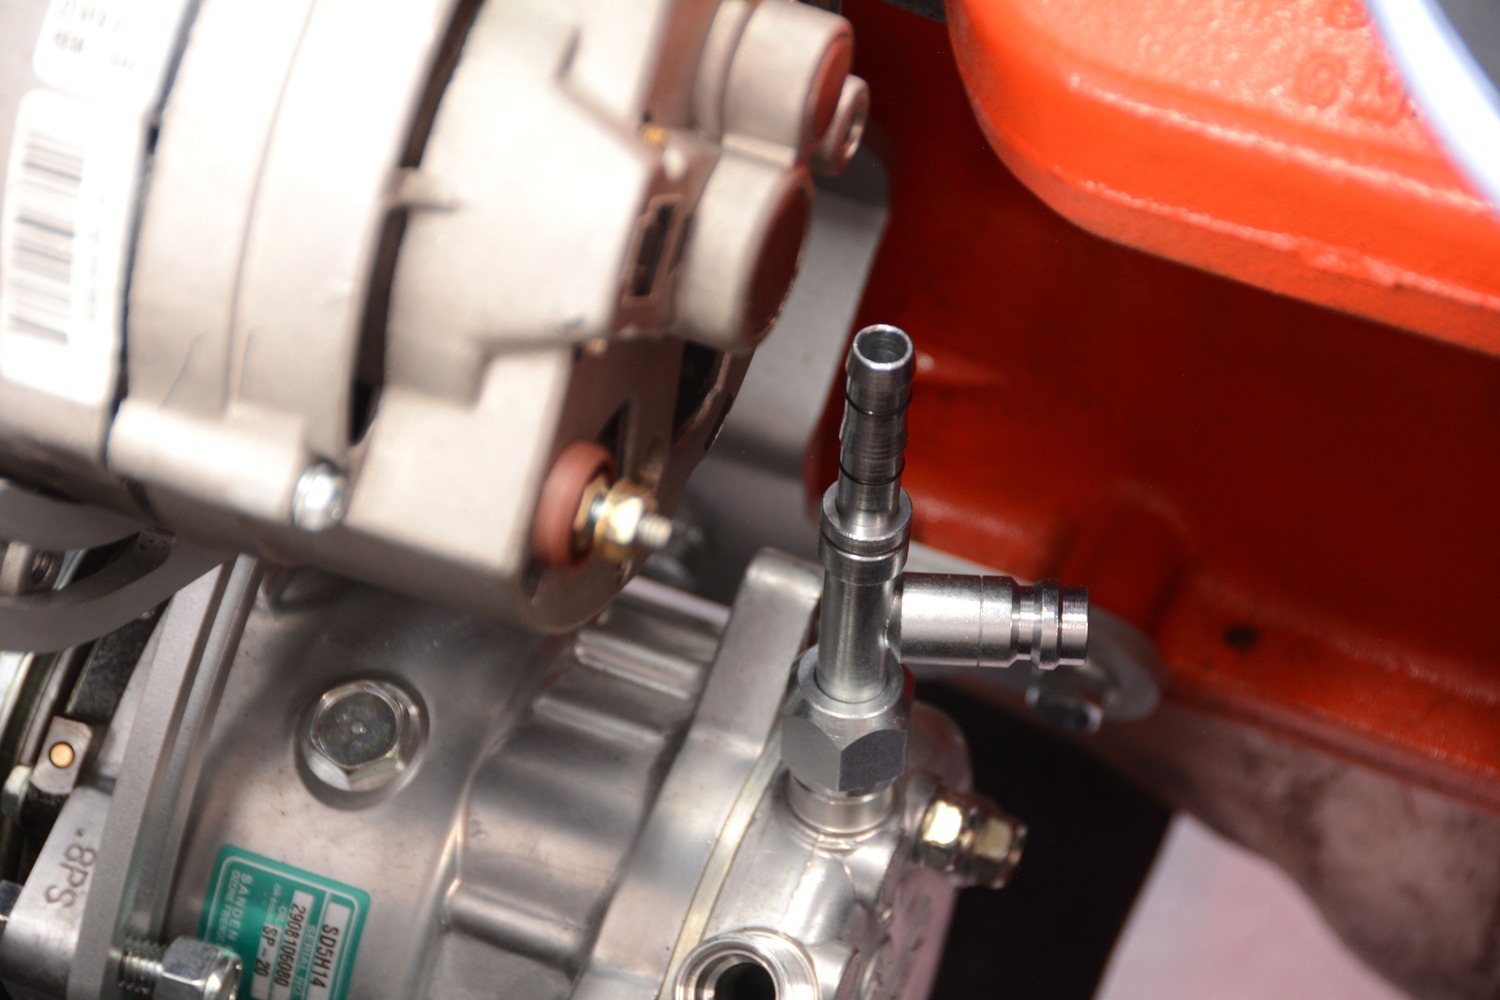
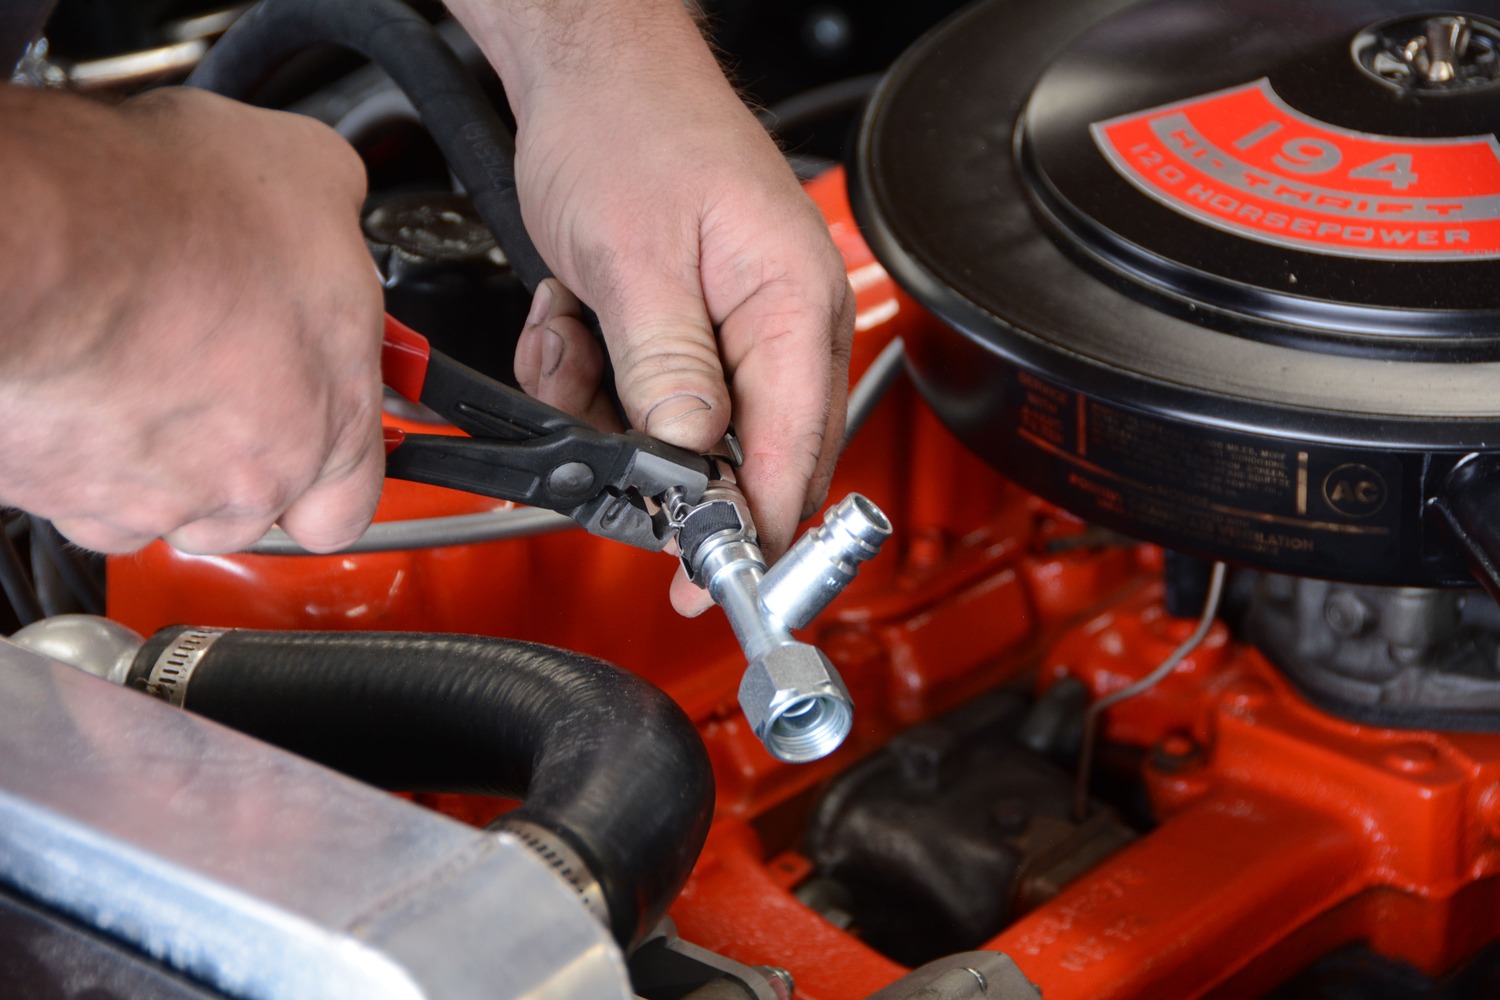
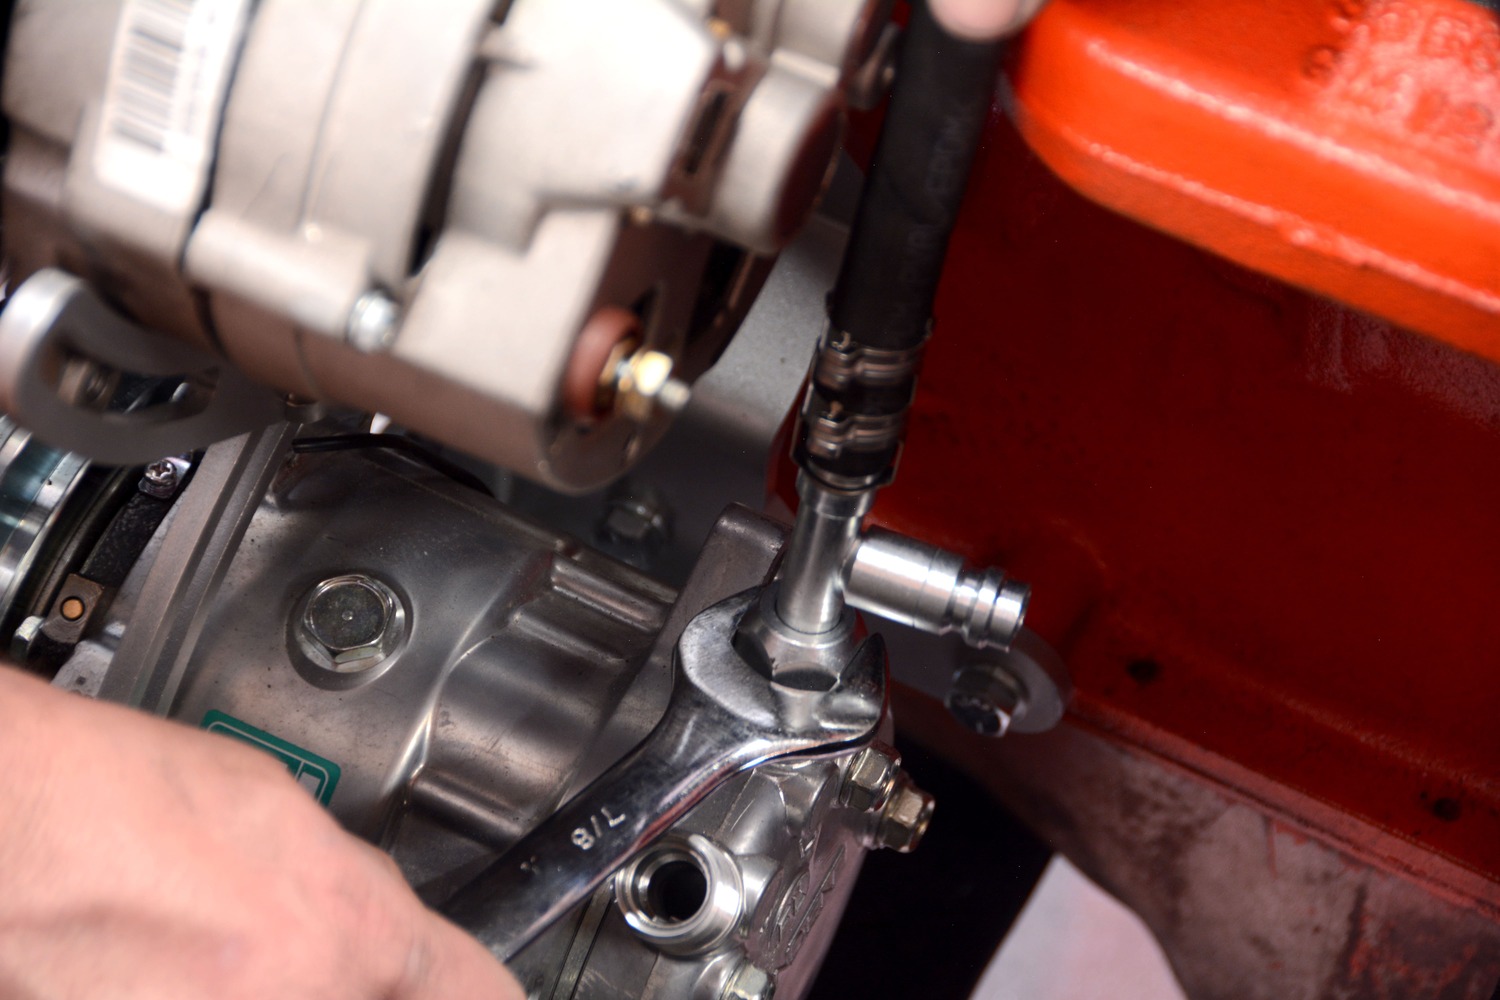
The final bracket is bolted into place before we get started with plumbing the system. This is another bracket that features a single stud, which fits through an original hole in the firewall.Now we can start plumbing the hard lines, which are provided in the kit. These lines are pre-bent and fit tightly against the evaporator.Vintage Air sends a tube of oil with each kit. Be sure to use it on all O-rings in the kit! You will find an assortment of O-ring sizes (#6, #8, and #10) to go with the various lines and fittings.The U-shaped hard lines attach to the heater core and allow convenient placement of the heater hoses. All hard lines feature an O-ring, which we oil before attaching and tightening the fittings.Before we slide the evaporator into place, we take advantage of the wide-open spaces by installing the plastic defrost ducts. The original design was one large piece, but the Vintage Air kit comes with two separate ducts, which are screwed into the cowl, from underneath the dash.This plate seals off the fresh air duct. Vintage Air suggests using silicone to make it an air-tight seal. Then, we zipped three screws into place to hold it securely.Now, we can carefully install the fully assembled evaporator. It fits under the dash nicely and the two studs poke through existing holes in the firewall. We finger-tighten the two nuts to hold the unit in place.The upper evaporator bracket rests against the upper portion of the cowl panel. It has two boltholes in the bracket, which offers a nice guide for drilling holes into the cowl. After drilling the holes, we install the supplied hardware.Beneath the evaporator unit, there is a drain port. Vintage Air supplies a hose to duct the water outside of the cockpit. In our case, we drilled through the firewall insulation and then through the firewall to provide access for the drain hose.The Vintage Air SureFit kit comes with more than enough flexible hose, which can be cut for each piece of ductwork. The first pieces we install are the two smaller hoses for the defrost ducts.After routing the flexible hoses out of the four outlets in the evaporator unit, we can start mocking up the vents. The driver side vent features a small plastic housing, which attaches to the dash with supplied screws.The other three hoses are directed to the vent openings in this underdash panel. Vintage Air manufactures these plastic panels in-house, and it fits nicely after a bit of eye-balling to get it aligned properly.The flexible hoses slide over tabs on the back of the vent housing. We work the wire ring over the tabs and then feed the vent housing into the back of the panel. The outer vent then threads into the housing, sandwiching the vent panel for a snug fit.Vintage Air now manufactures an electronic control panel for the ’66 and ’67 Chevy II. This saves quite a bit of work, as it bolts into the original location and simply plugs into the evaporator wiring harness.The original large Phillips head screws hold the control panel in place. If we had retained the original control panel, we would need to convert the original sliders to work electronically. This new Vintage Air control panel (PN 473272) makes for a much quicker install.The wiring for the system is very simple. There are specific plugs for the evaporator and a small bundle of wires that splits off to the control panel, the fuse block, and the engine bay components.We used one evaporator mounting screw (in the upper bracket) to attach two grounds. We used the other mounting screw to attach the relay.After double-checking our wiring connections and the provided diagram, we can bundle the wires and install the provided (shorter) glovebox. Then, it’s just a matter of re-installing the original glovebox door.Moving out to the engine bay, we can attach the refrigerant lines. First is the prebent hard line that connects to the drier. The rubber refrigerant hose is a Vintage Air E-Z Clip hose, which will be the final step in our install.The Vintage Air kit uses 3/4-inch heater hoses on both ends of the heater core. The kit also uses this inline valve, which controls the flow of coolant when the air conditioning is running. The valve has an arrow cast into it and connects to the upper hose. The wires from the valve are fed into the cockpit and connected into the Vintage Air harness.The purple wire in the Vintage Air wiring harness is plugged into an available terminal on the original fuse block. As you can see, this ’66 Chevy II has a very limited number of terminals and fuses, making it a potential challenge to install additional electronic accessories.Three wires from the Vintage Air wiring harness exit the cockpit and terminate in the engine bay. One connects to the positive battery cable, another (shown) attaches to the ground cable, and the third wire routes to the A/C compressor.When it comes to routing the A/C refrigerant hoses, we wanted to try Vintage Air’s new E-Z Clip hose system. This allows us to build our own hoses in the comfort of our own shop. The special fittings, cages, and clamps are part of the kit (PN 547002).We start the hose construction by first threading the provided fittings into place. Vintage Air offers straight and angled fittings to fit your build. At this point, we’re strictly mocking it up, so there is no need to oil or install the provided O-rings.The E-Z Clip kit comes with plenty of hose, allowing us to fit it to our liking. You’ll also notice that this hose is much smaller diameter than standard refrigerant hoses. The inside diameter is still the same, but the clamping system allows the outside diameter to be smaller.Vintage Air offers special crimping pliers to go along with the E-Z Clip system. First, the clamps are slid onto the hose, then the hose is pushed onto the fitting, and, finally, the clamps are crimped onto the cage. Two clamps per hose end are necessary for proper sealing.Vintage Air offers special crimping pliers to go along with the E-Z Clip system. First, the clamps are slid onto the hose, then the hose is pushed onto the fitting, and, finally, the clamps are crimped onto the cage. Two clamps per hose end are necessary for proper sealing.With the hoses cut to length and assembled, we can now attach the hoses to the A/C compressor, evaporator, and condenser for the final time. We add oil to the O-rings before each fitting is threaded into place and tightened. All that’s left is to drive it to a qualified shop to fill the system with 1.8 pounds of R134a refrigerant.
We use cookies to ensure that we give you the best experience on our website. If you continue to use this site we will assume that you are happy with it.