Change is always a little intimidating, especially when something has been unchanged for 55 years. This ’66 Chevy II has spent most of its years in completely original condition and still has its 194ci six-cylinder engine and Powerglide automatic transmission. Typically, a six-cylinder Chevy II would’ve made an easy candidate for a hot rod, but somehow this one survived. While an LS swap would be a simple transition in the modern sense, we’re embracing the original powertrain. We do have plans to upgrade this car in an effort to make it more comfortable and reliable for road trips. The first step in that process is air conditioning, so we called up the folks at Vintage Air for some guidance.
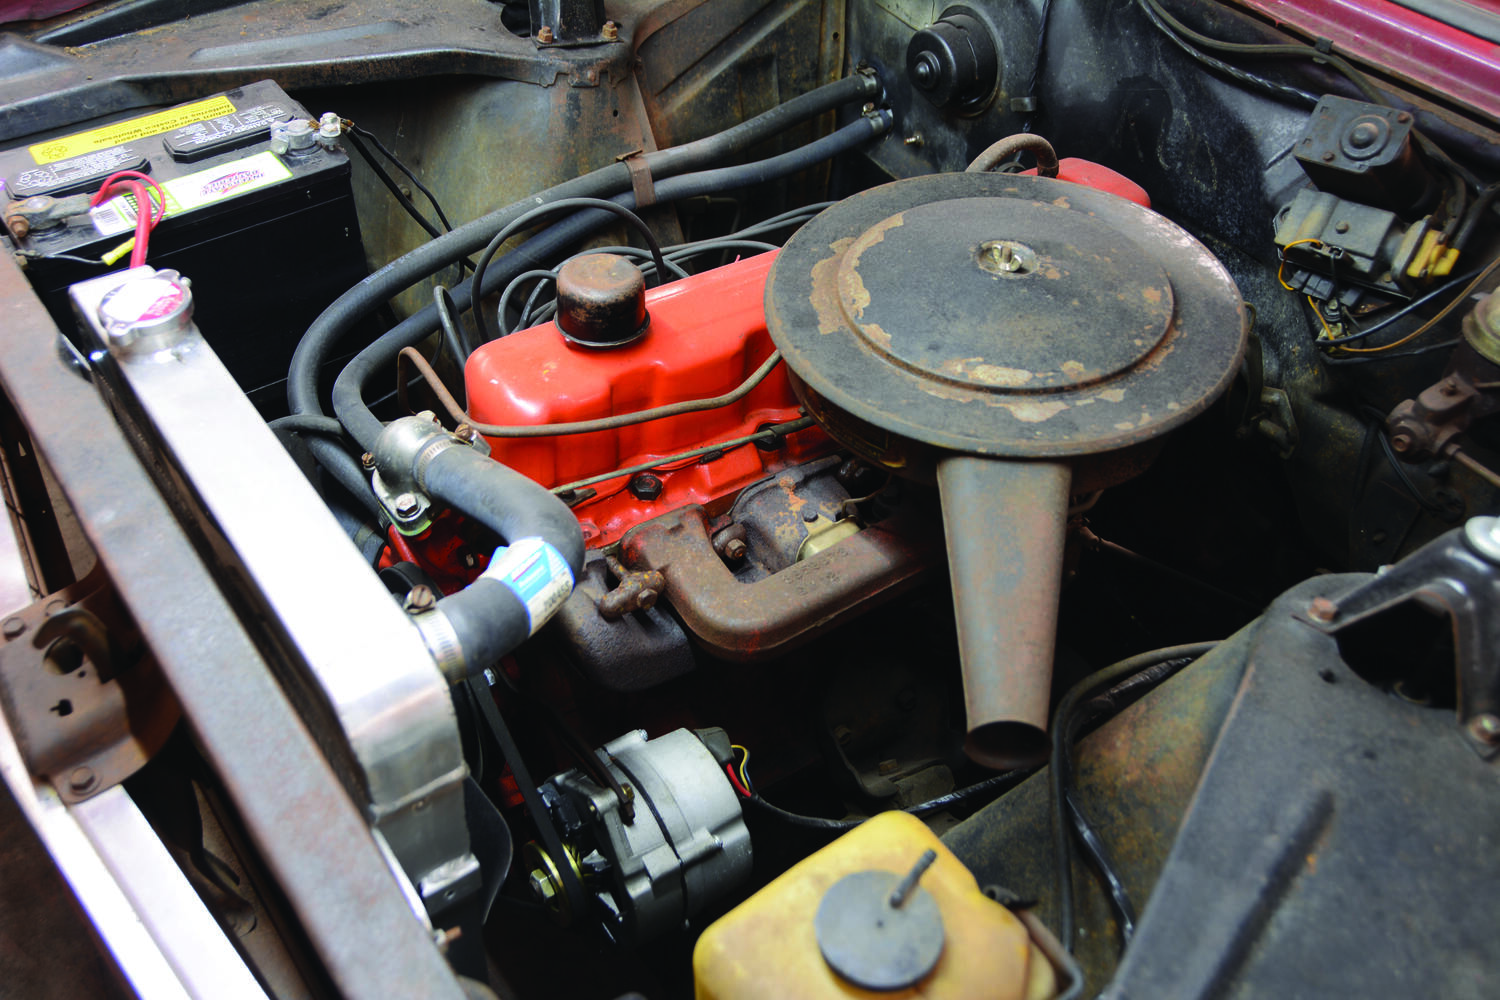
Our starting point is a stock ’66 Chevy II with its original 194ci inline six-cylinder engine. This is not the most likely subject for an air conditioning install but Vintage Air makes a kit for it and we’re willing to take on the challenge.
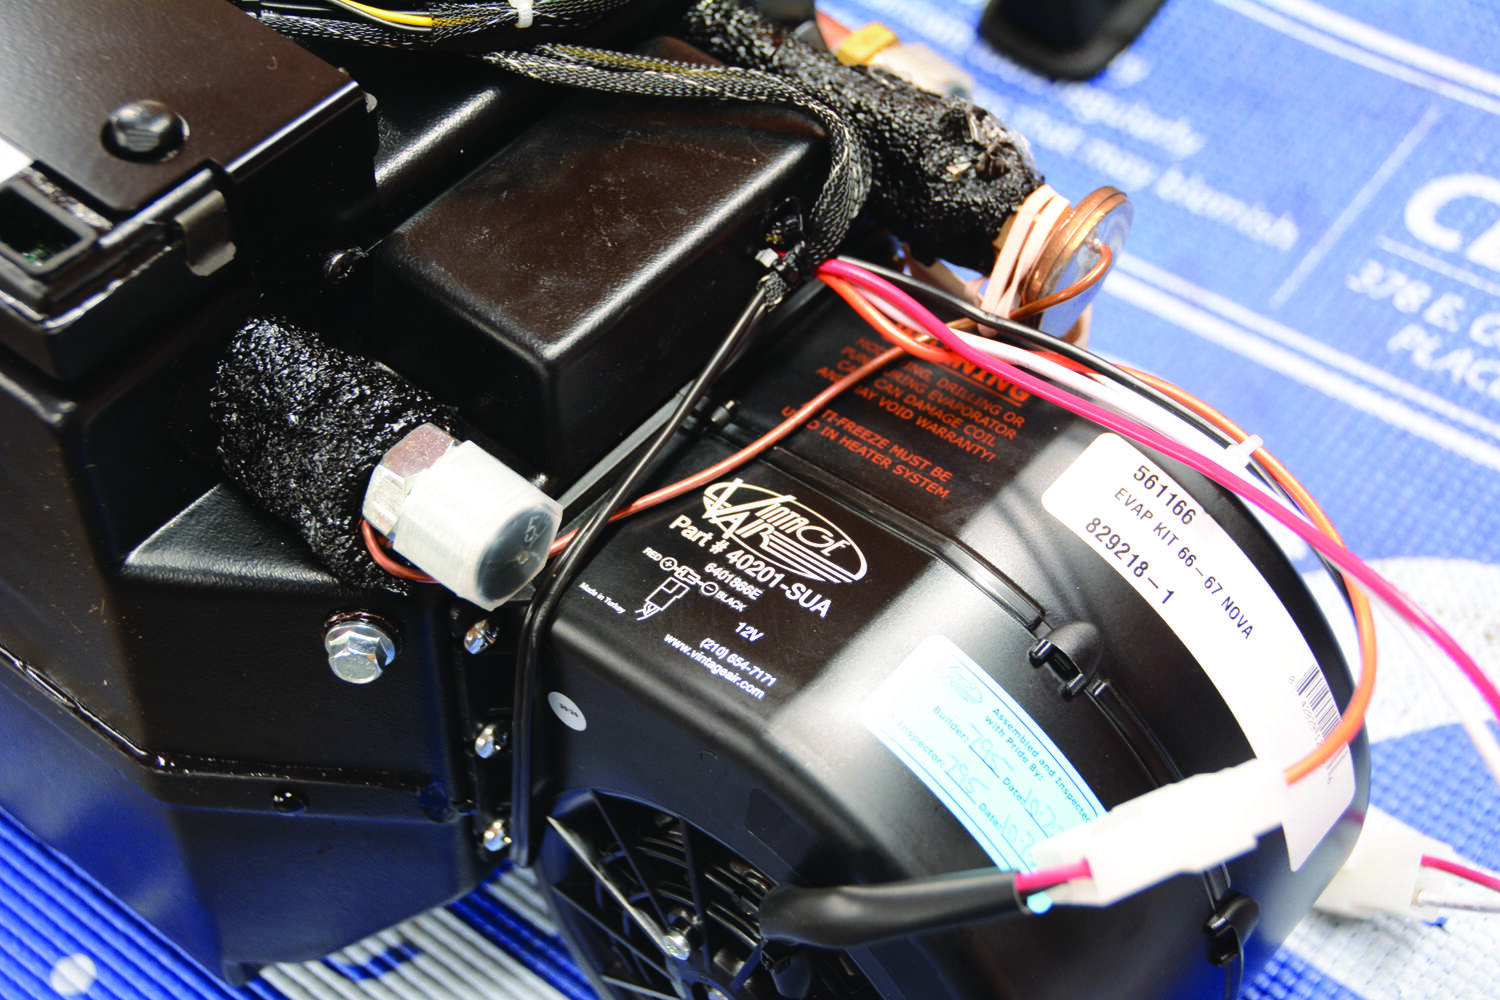
Our original question was in regard to the engine and how we would adapt a Vintage Air kit to the inline-six. As it turns out, Vintage Air makes an exact bracket for the engine, which made for an easy decision. We ordered a Vintage Air SureFit kit (PN 961166), which fits ’66 and ’67 Chevy II/Novas and added the Steel-eez compressor bracket (PN 146037) for direct fitment on the inline six-cylinder. It also fits 230- and 250ci Chevy inline-six engines. We also added Vintage Air’s new Control Panel (PN 473272), which fits in the factory location and makes it completely electronic. The final item on our order was an E-Z Clip hose system (PN 547002), which means that we can easily build our own refrigerant hoses and crimp them in our own shop.
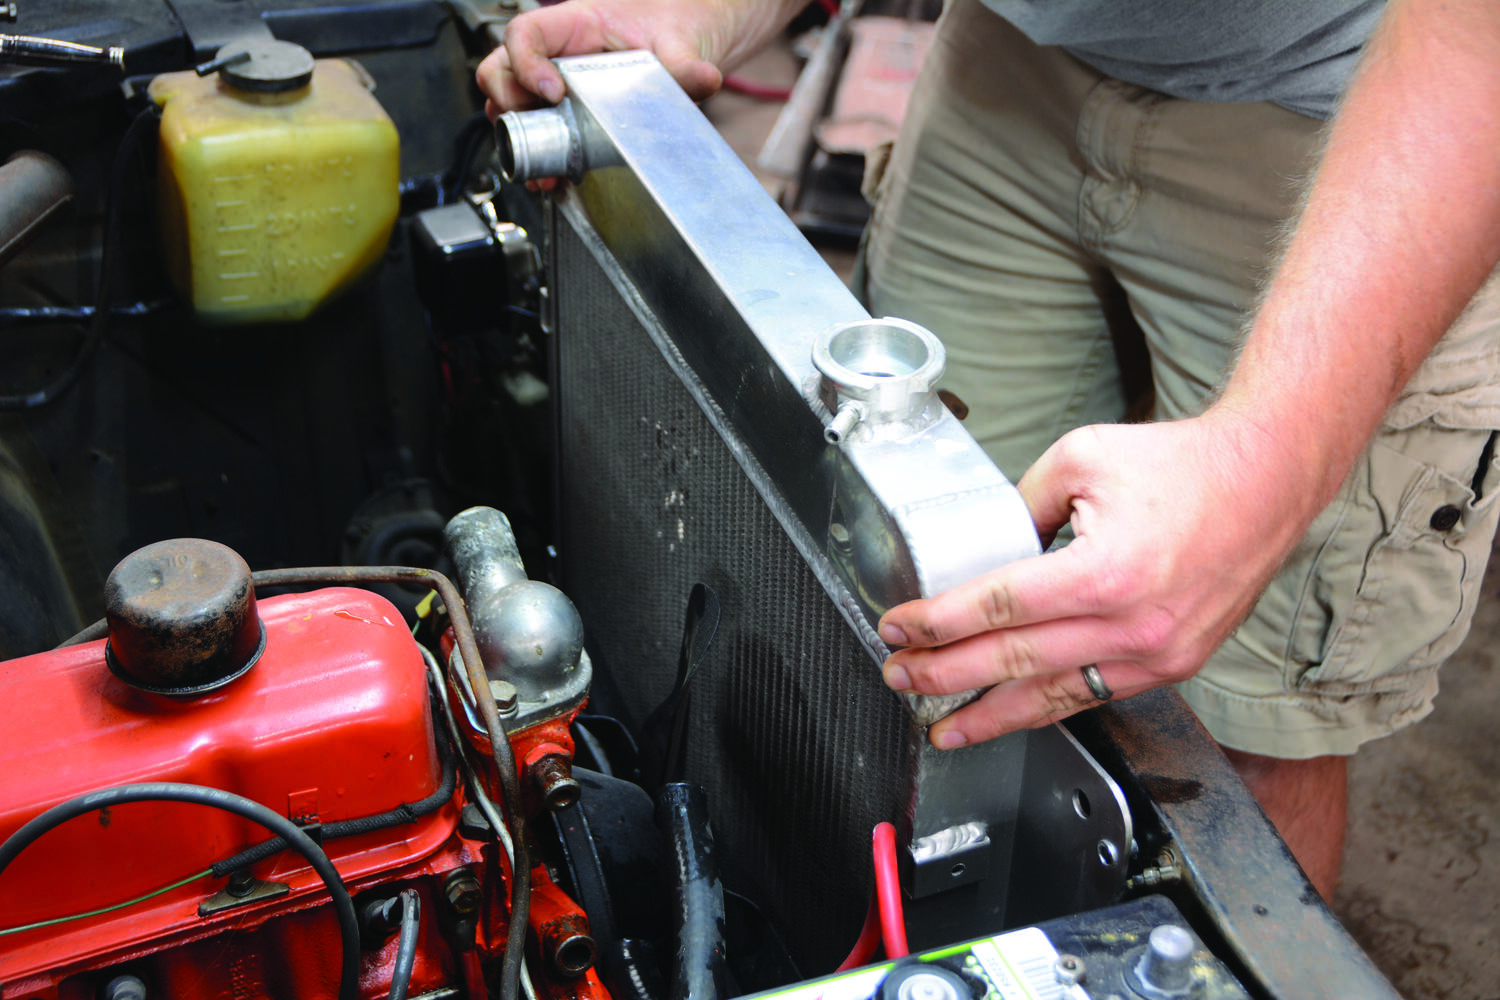
The first step is to drain the cooling system and remove the radiator. The car has already been upgraded to an aluminum radiator, which will benefit the cooling capabilities of the six-cylinder engine.
To install this kit on your Chevy II, you’ll need an assortment of hand tools as well as a cut-off wheel and a step drill bit (or a 1-1/4-inch hole saw bit). Since this installation involves quite a bit of shop time, we split this into two parts. In this article, we’ll cover the Steel-eez brackets, condenser, hard lines, and drier installation. We also begin disassembling the interior components in preparation for the new Vintage Air evaporator. Next month, we’ll wrap it up and have our six-cylinder Chevy II back in action—except now it will be climate controlled and one step closer to enjoying road trips, no matter the weather.
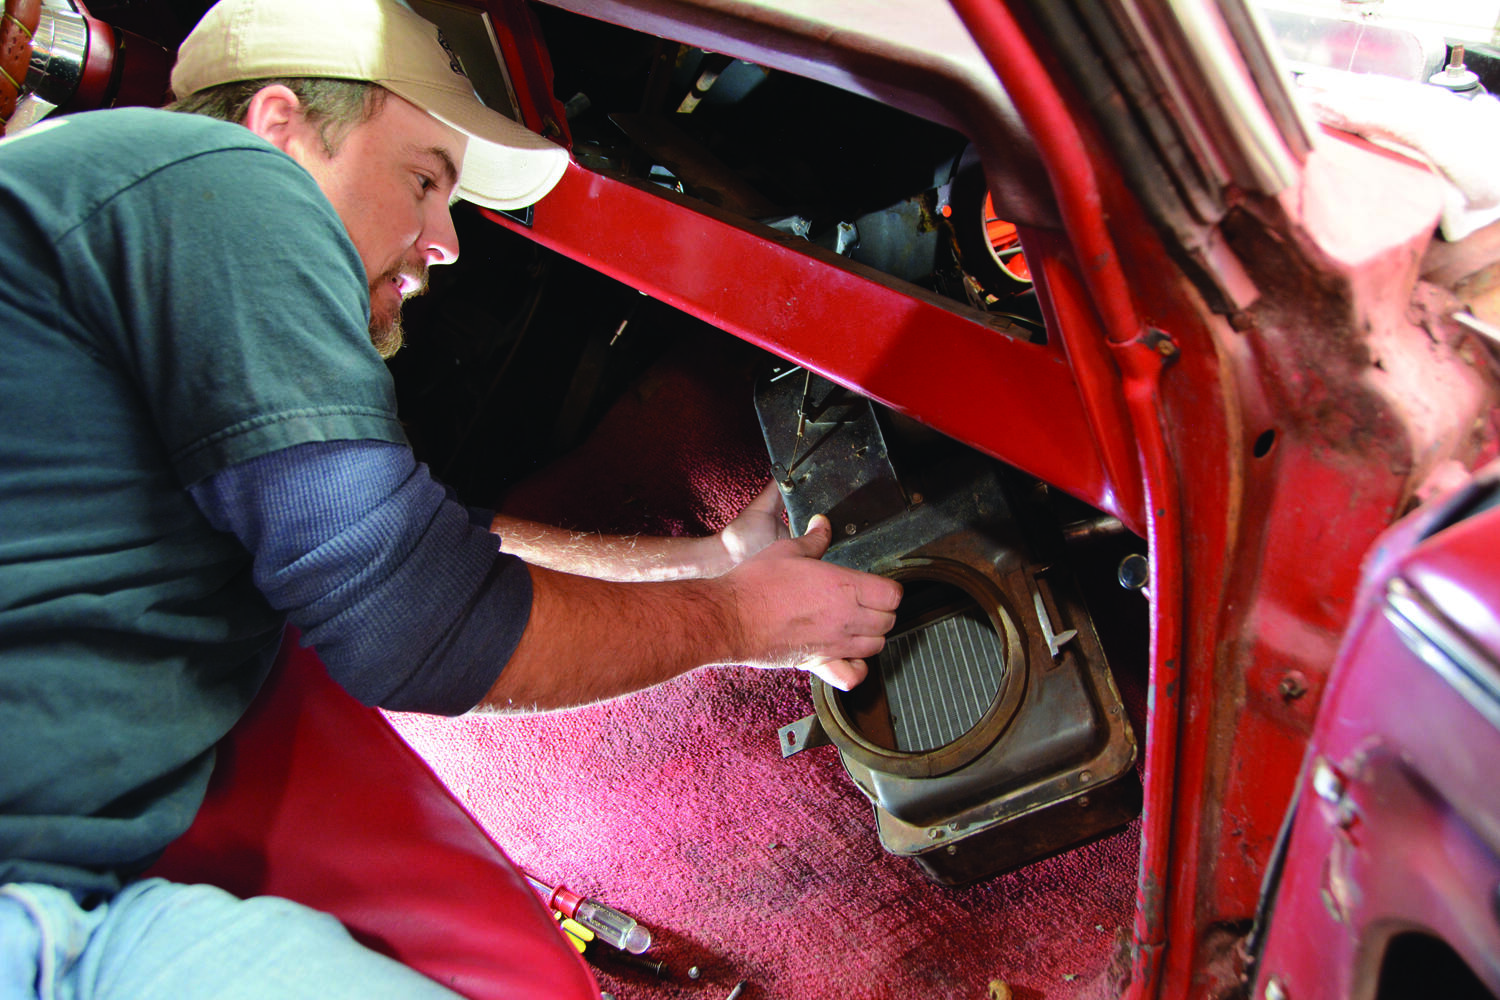
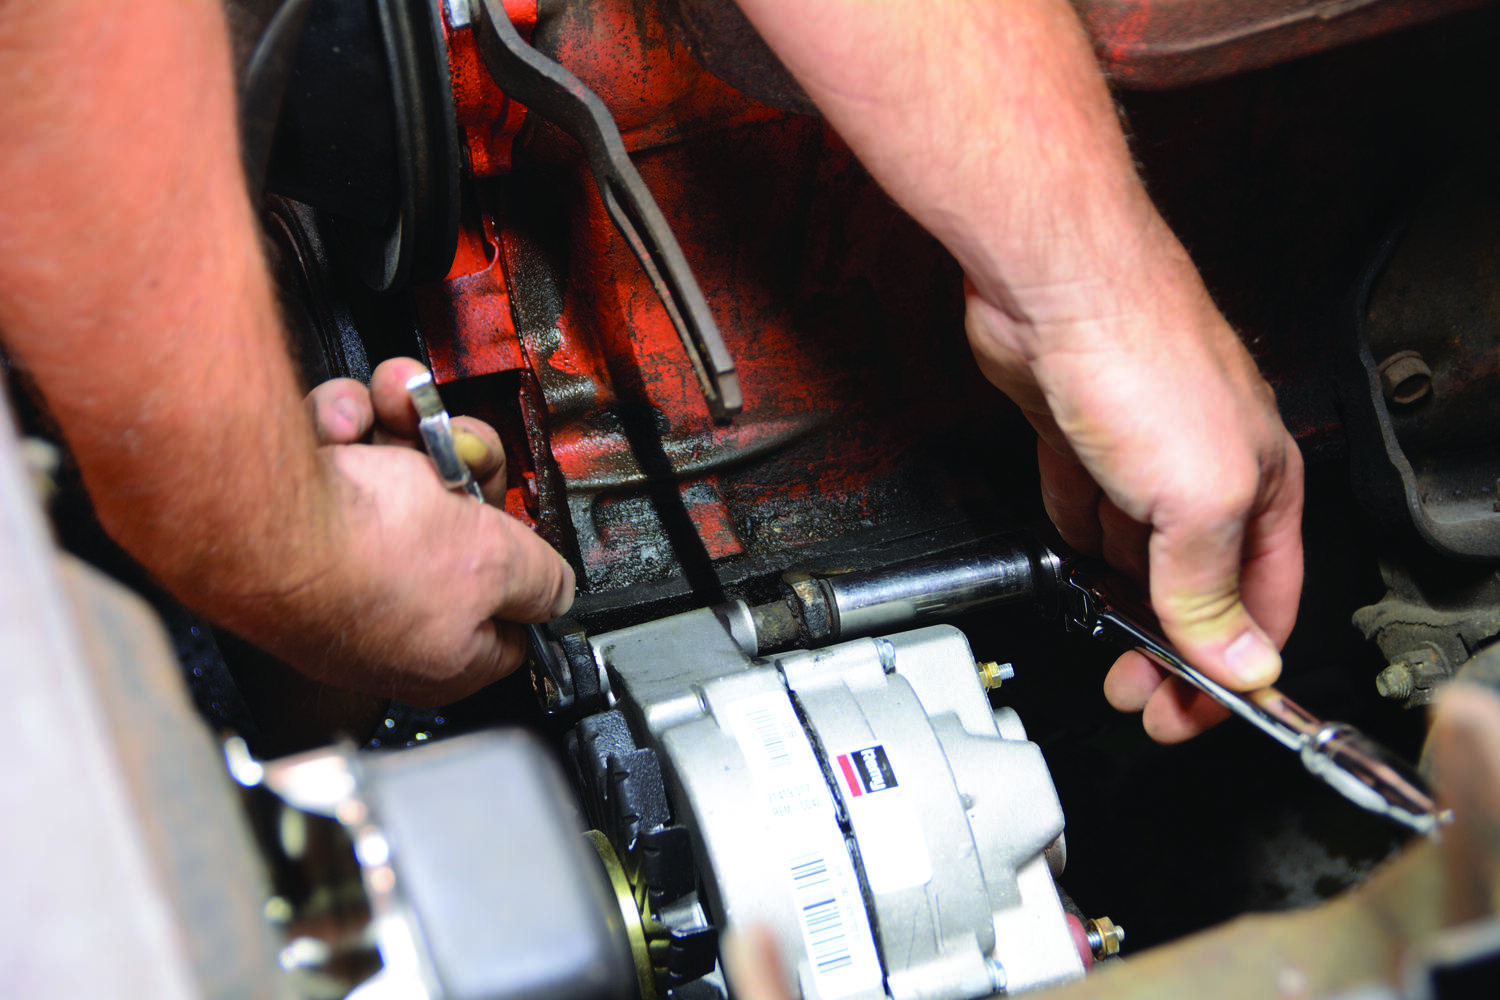
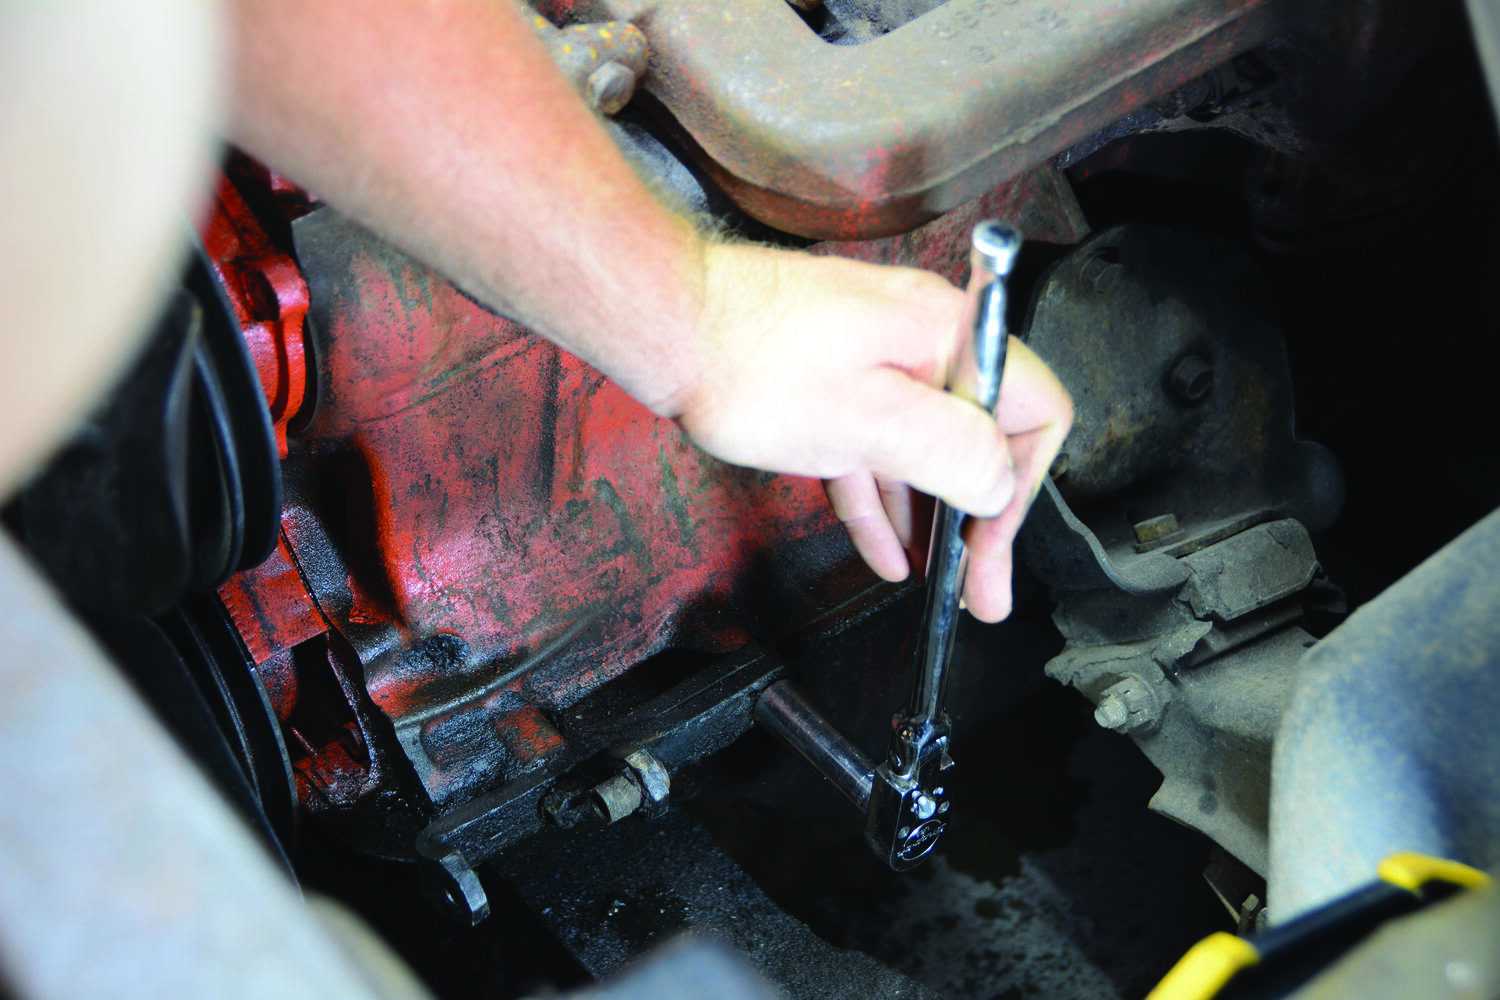
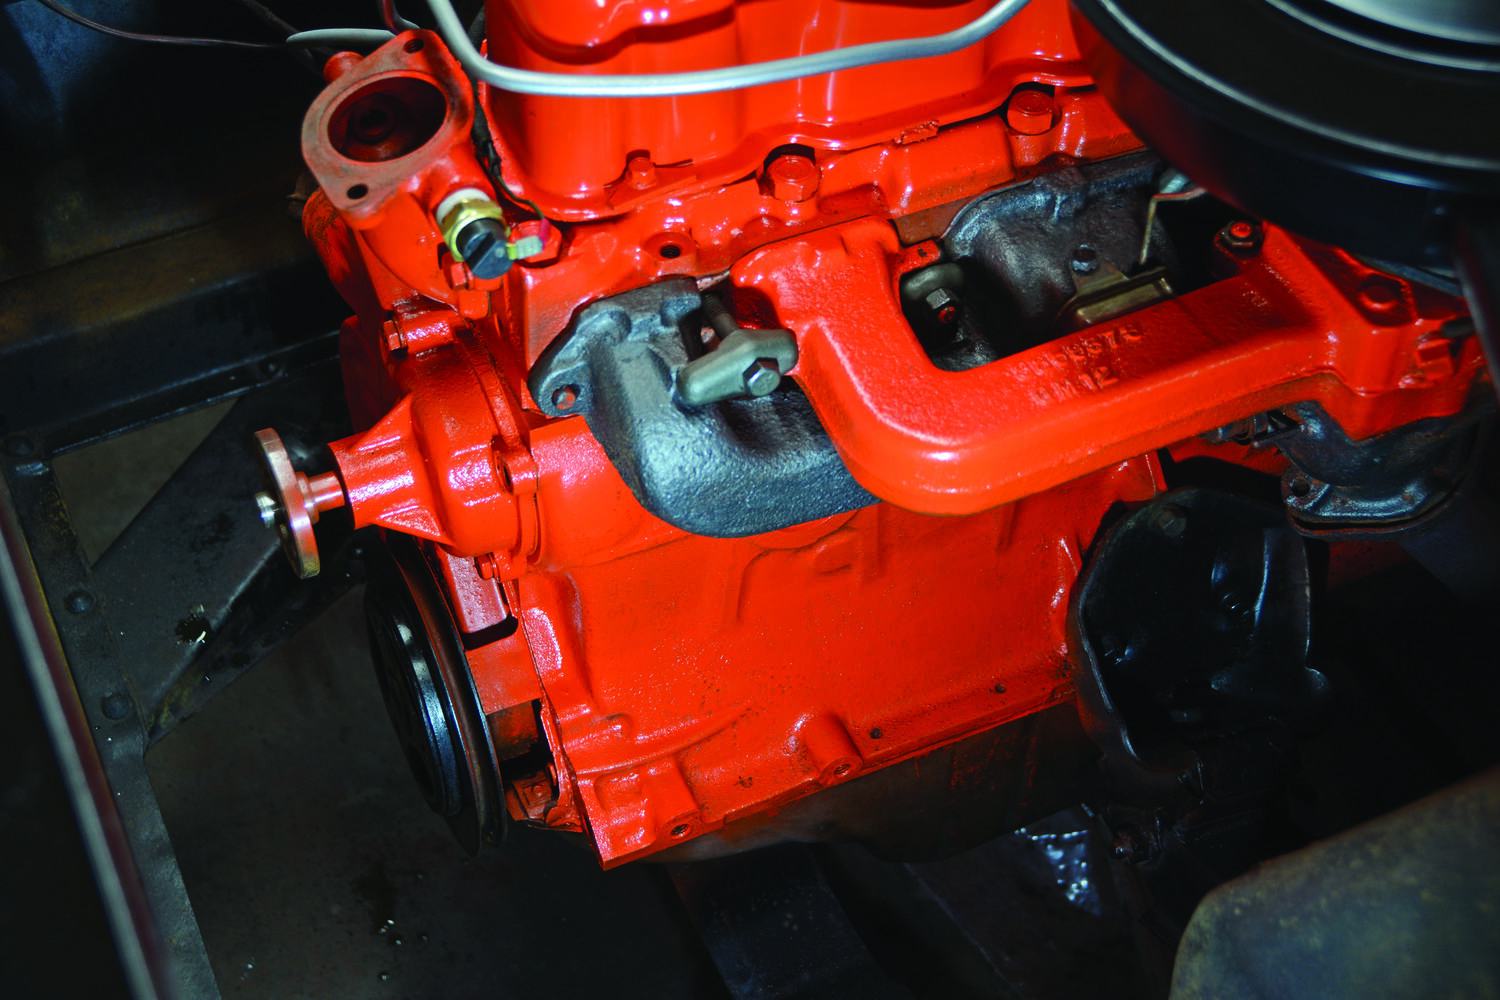
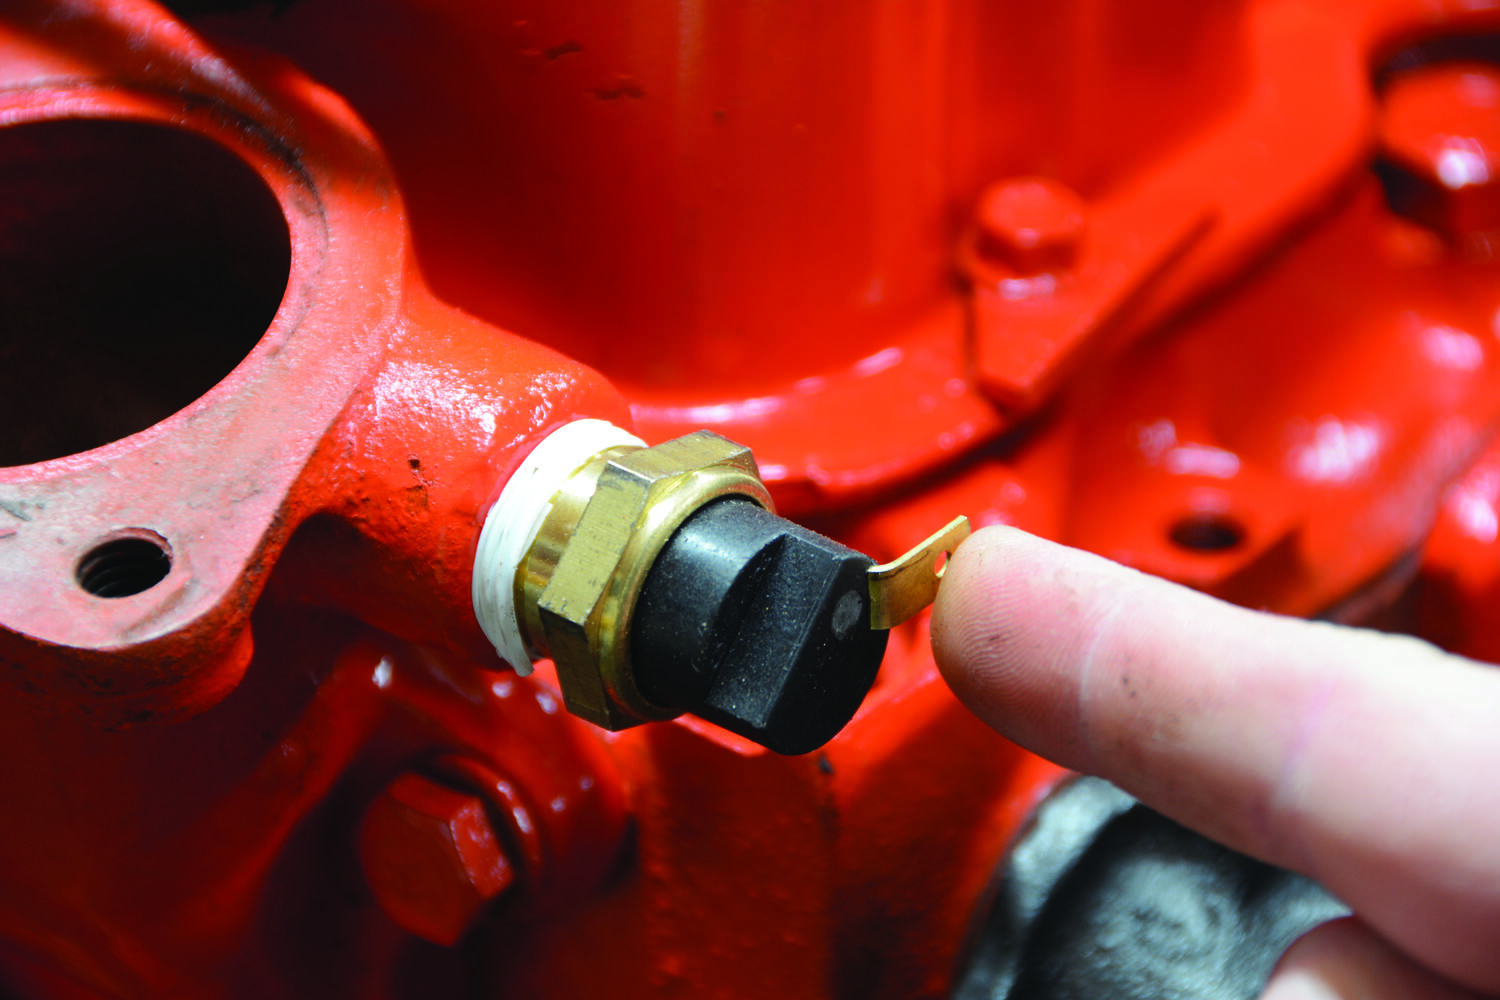
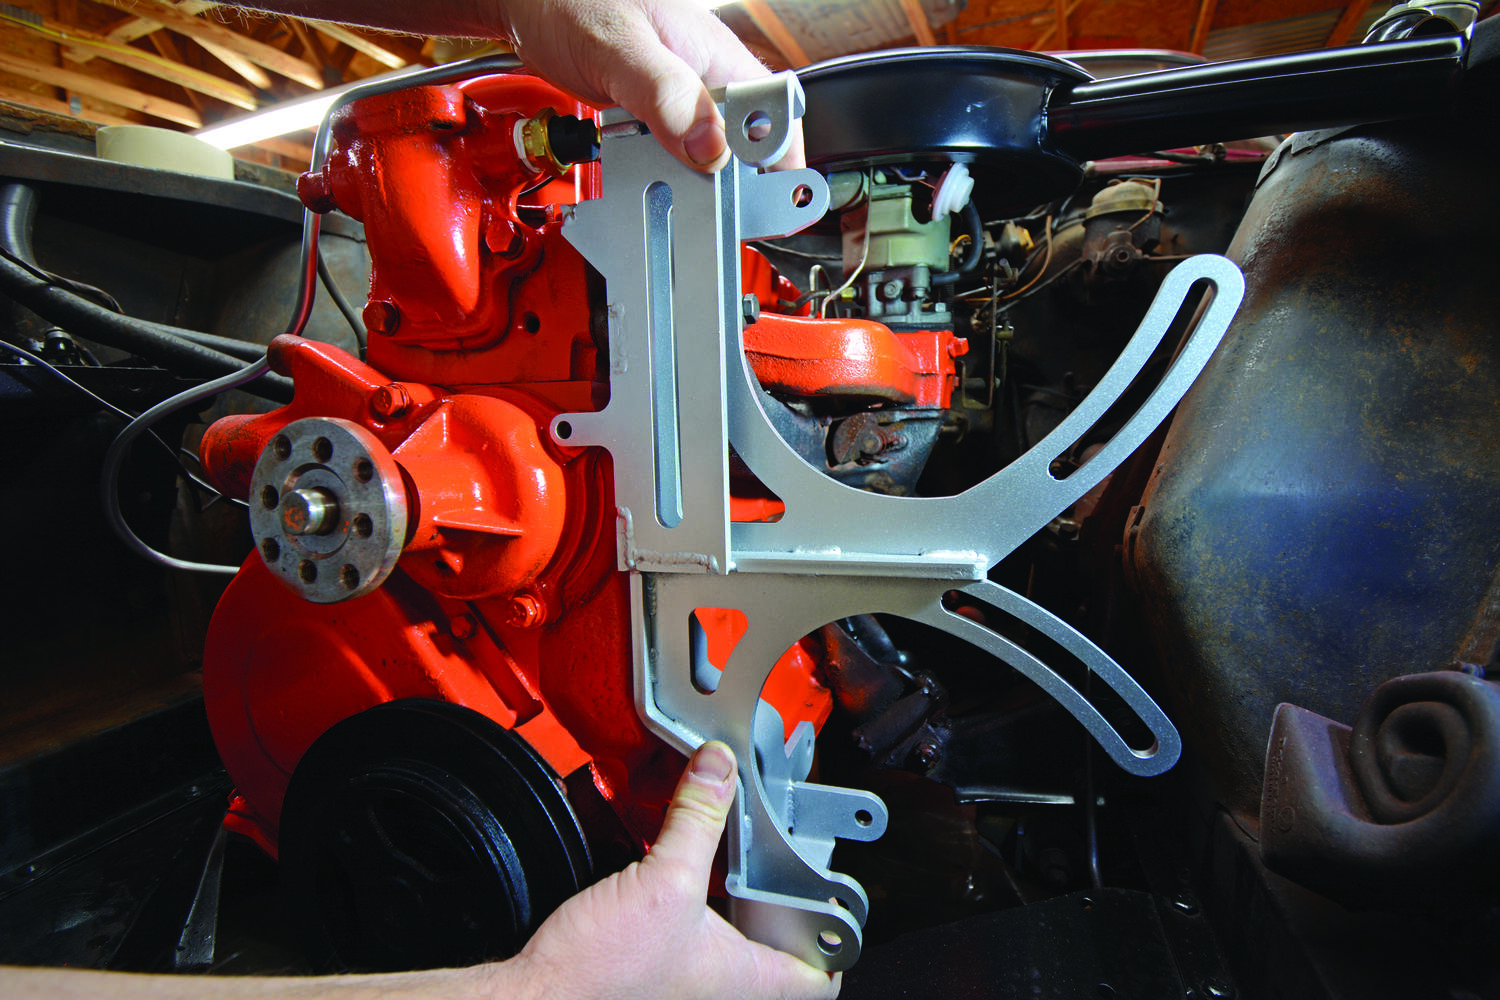
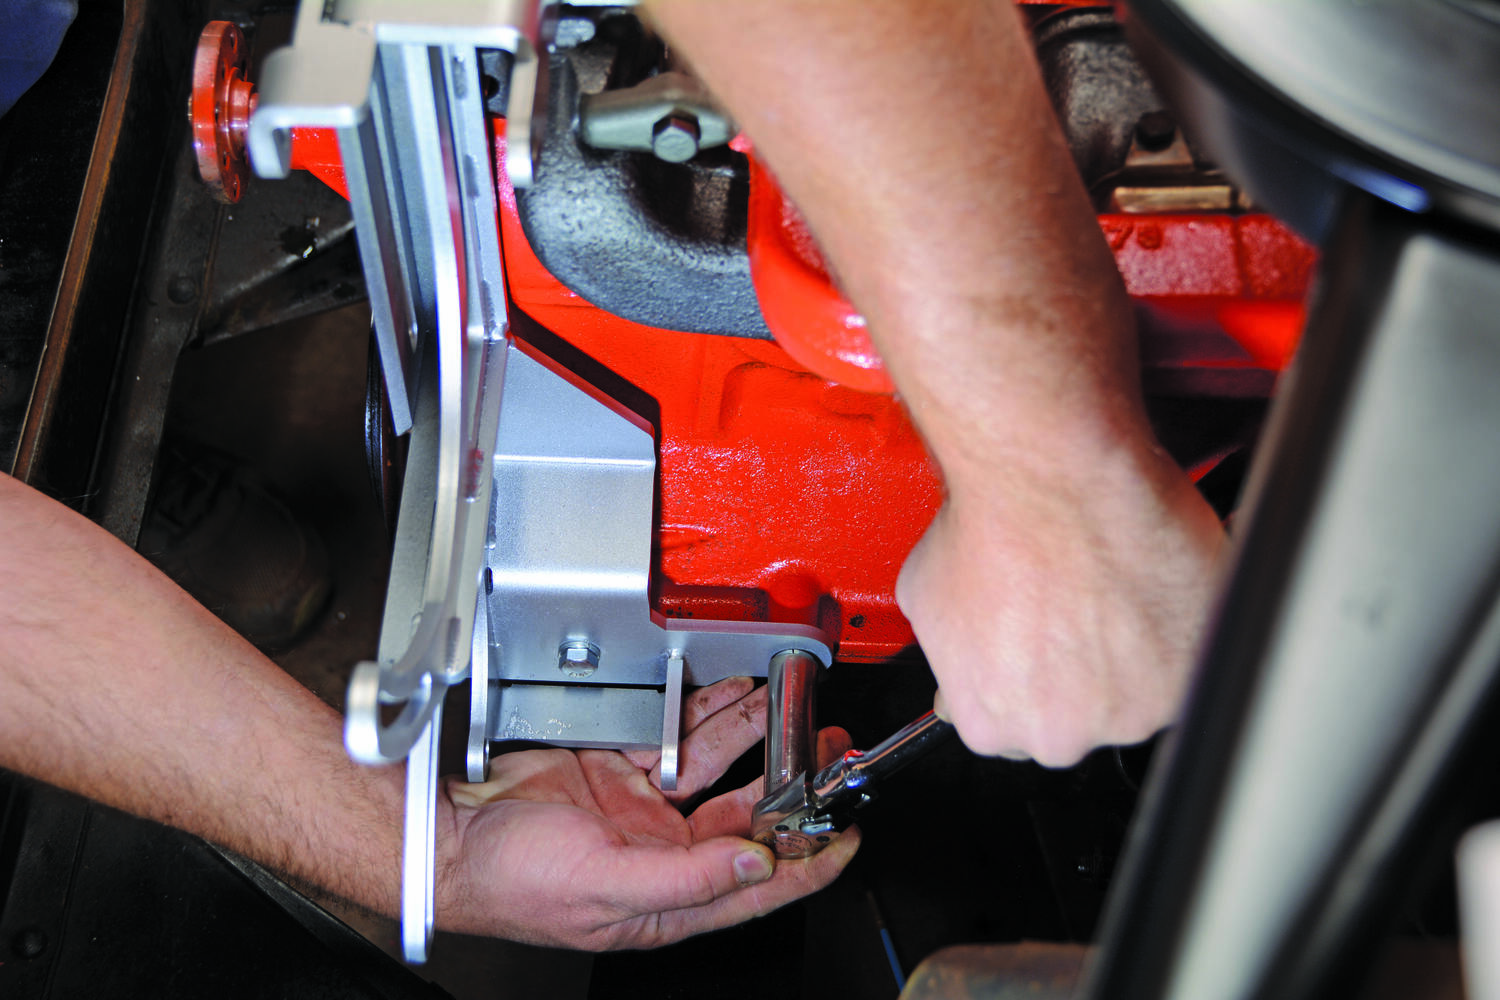
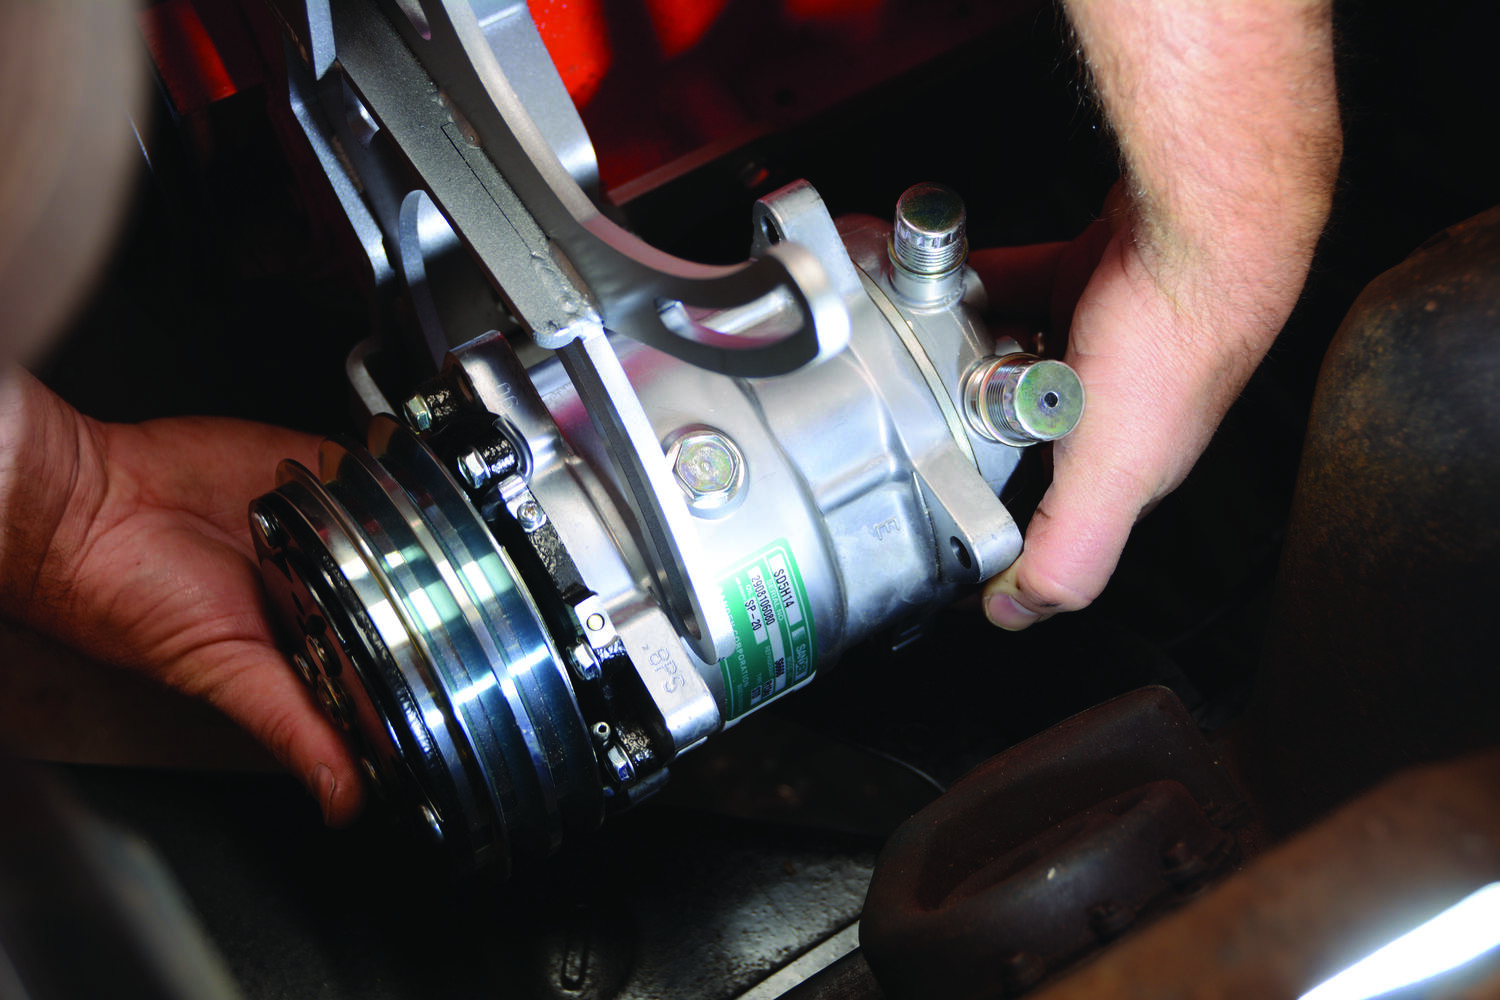
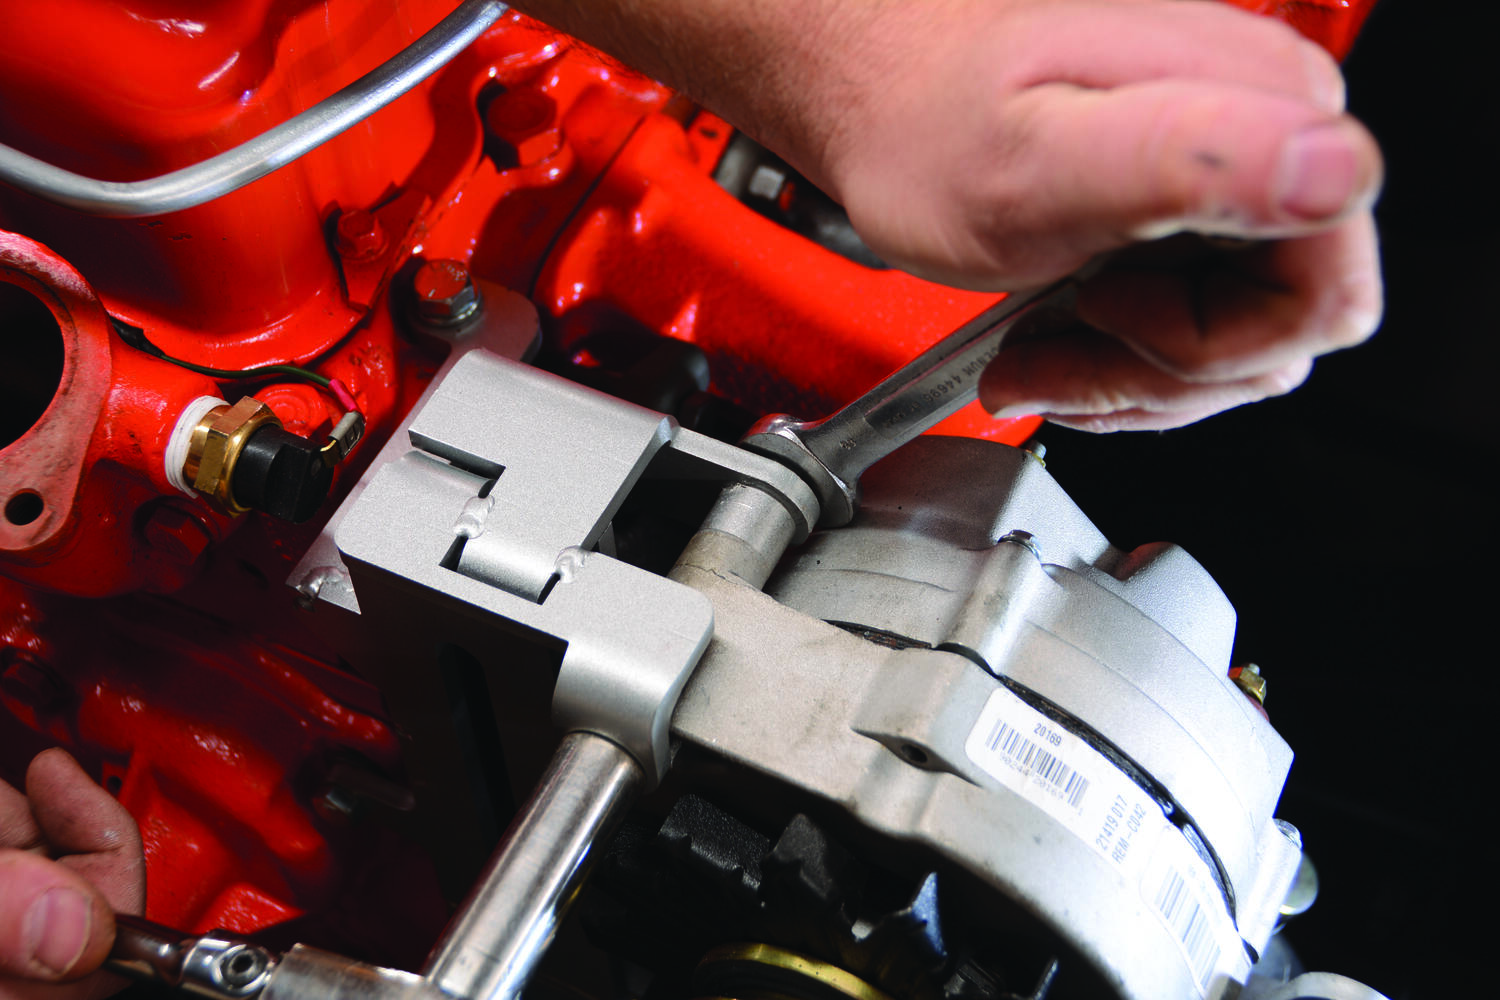
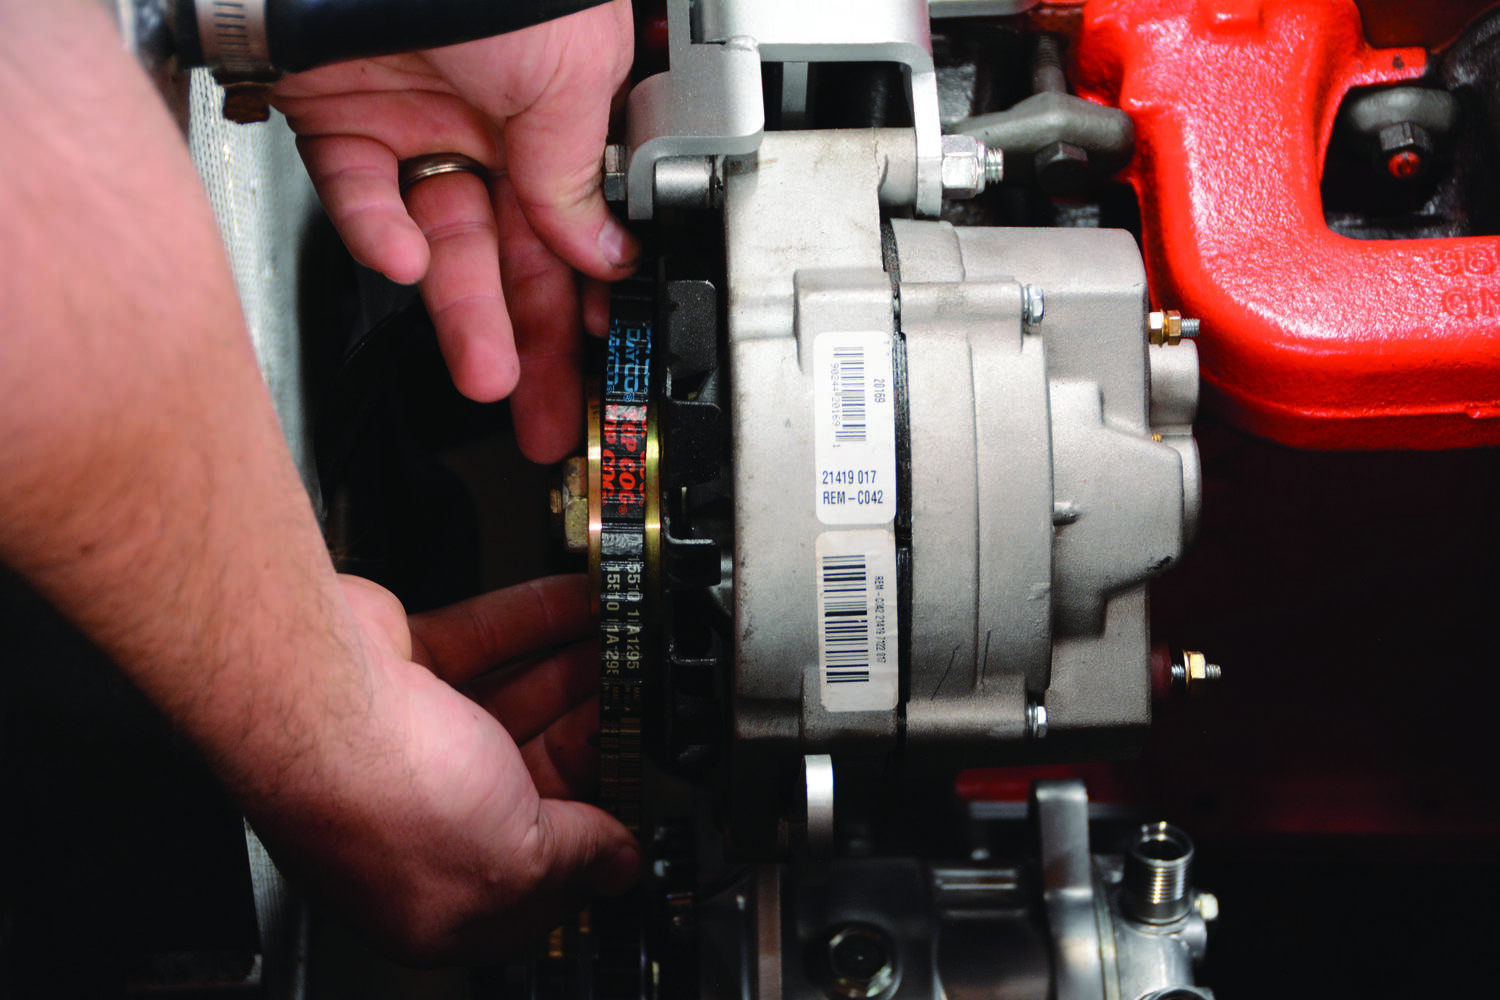
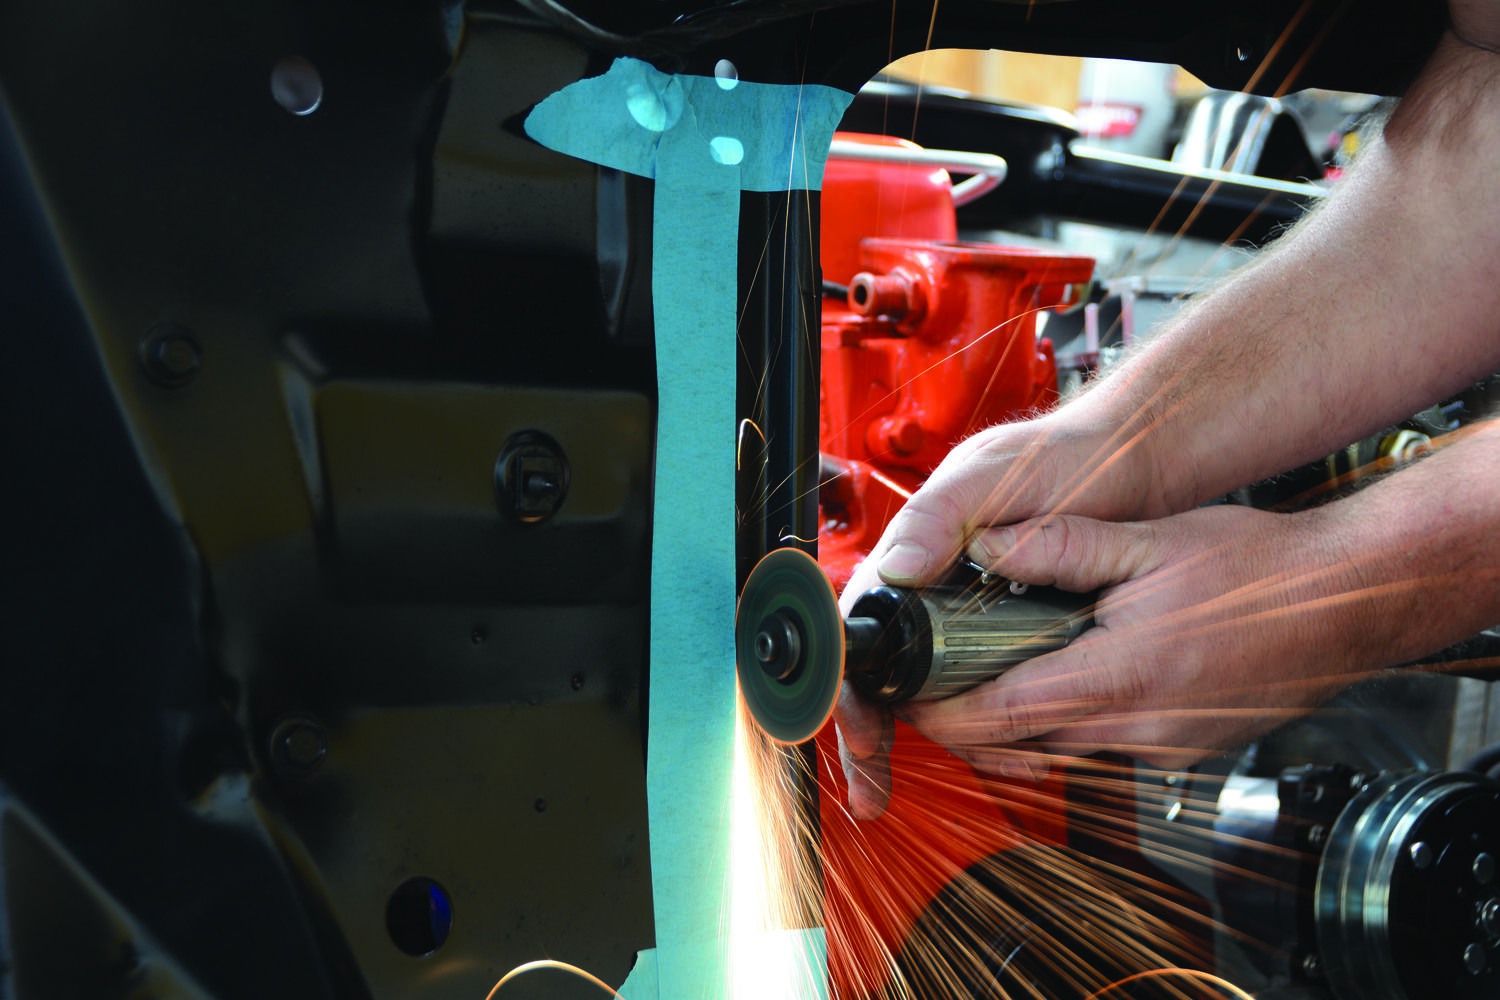
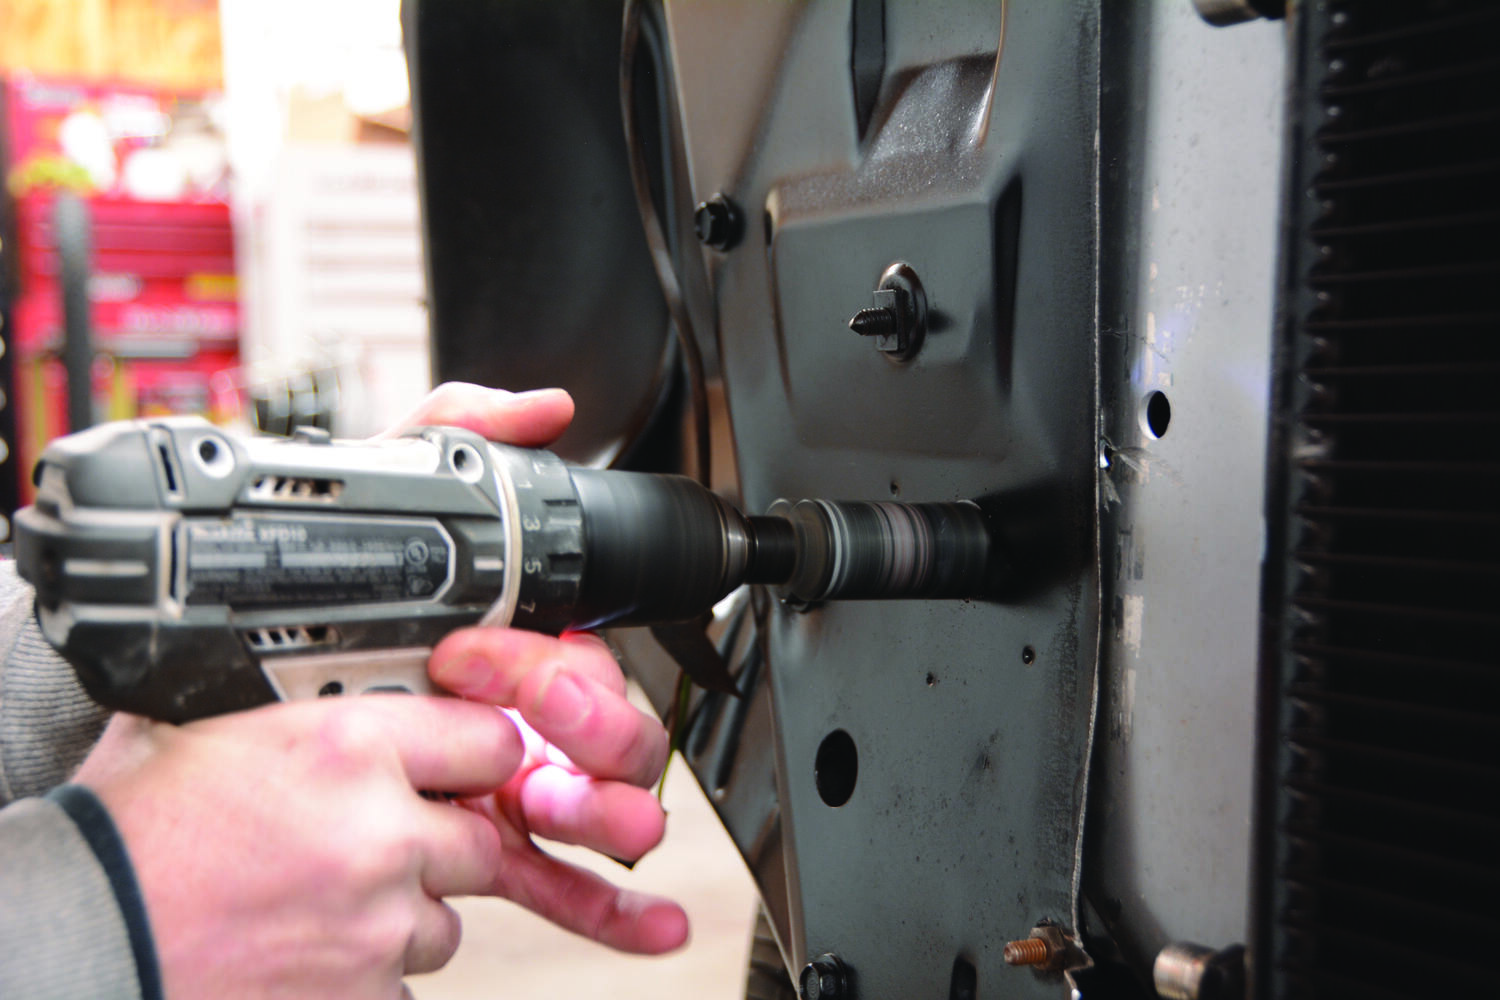
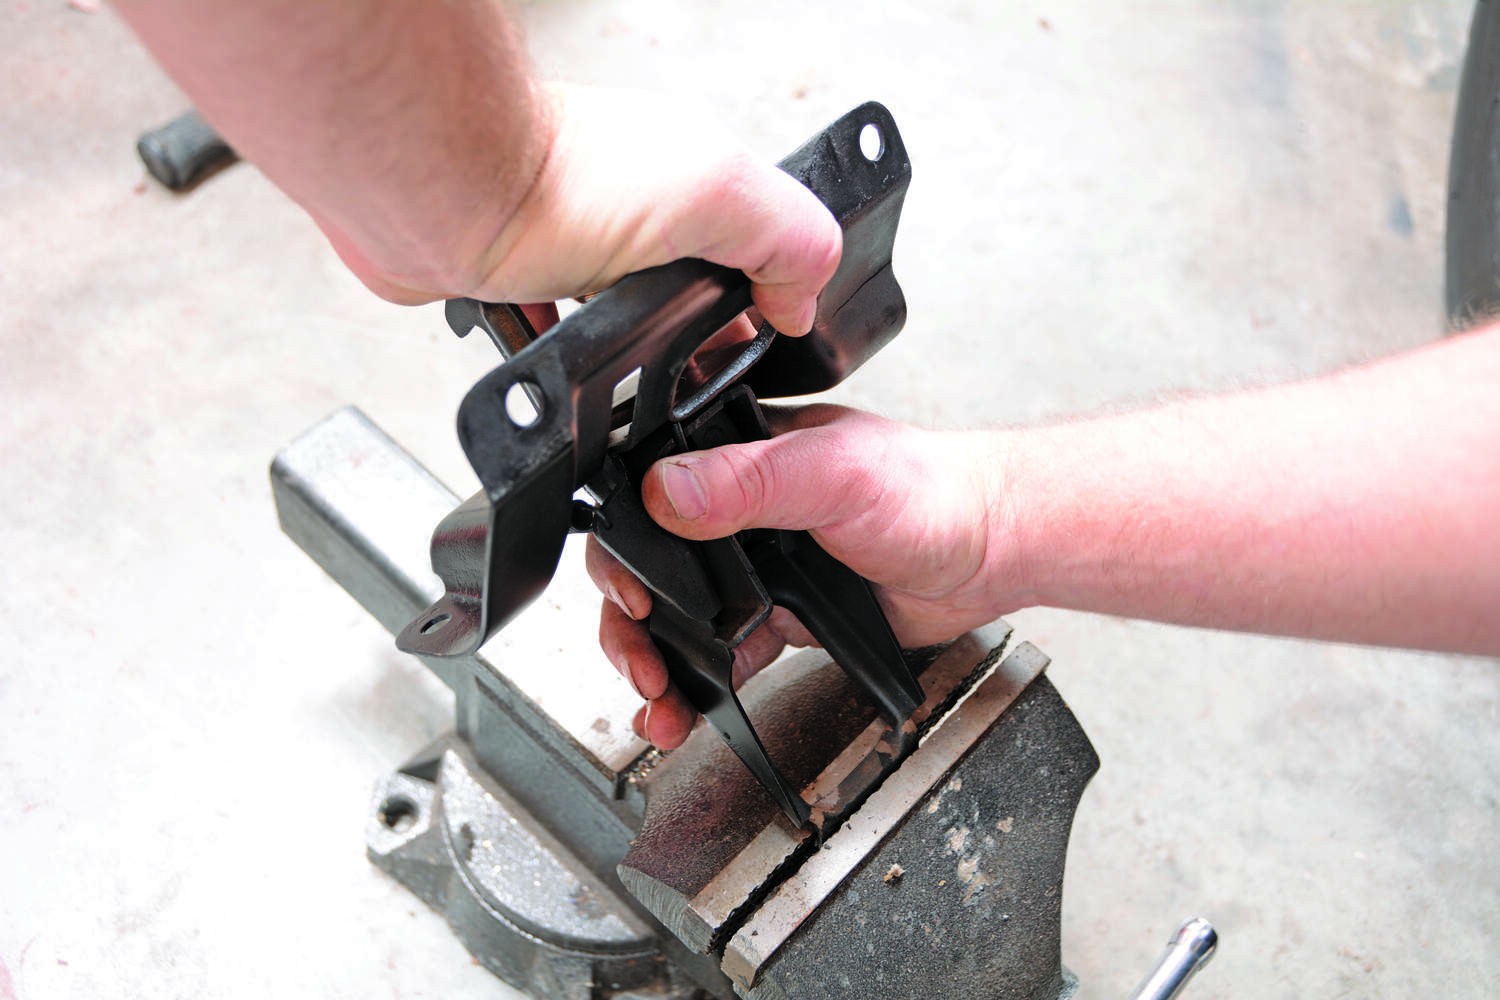
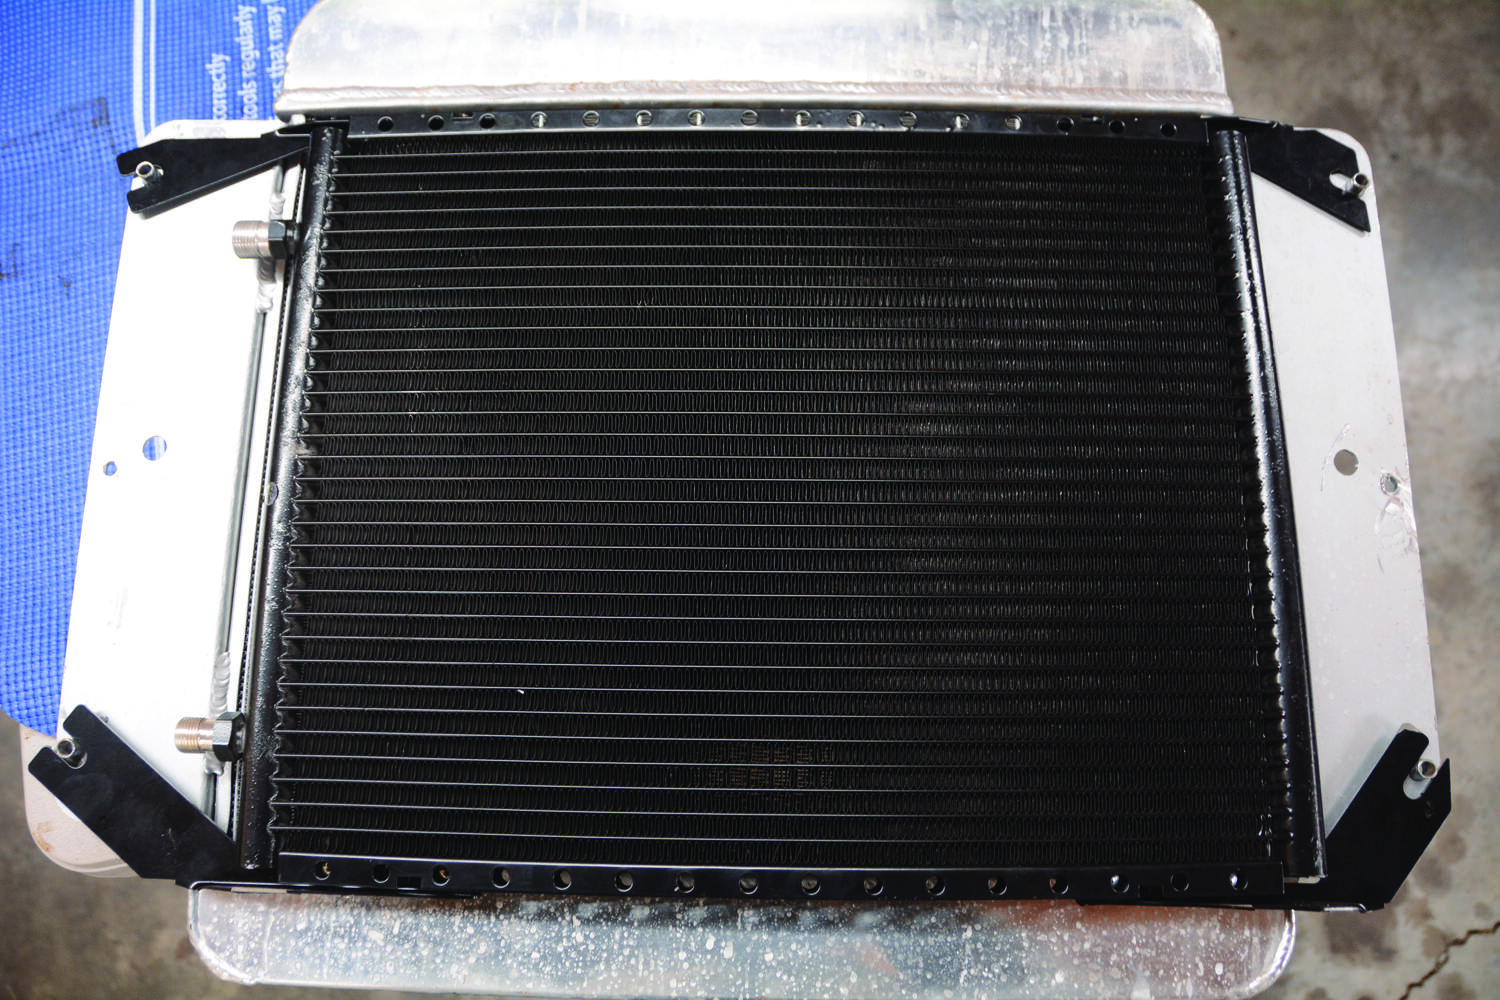
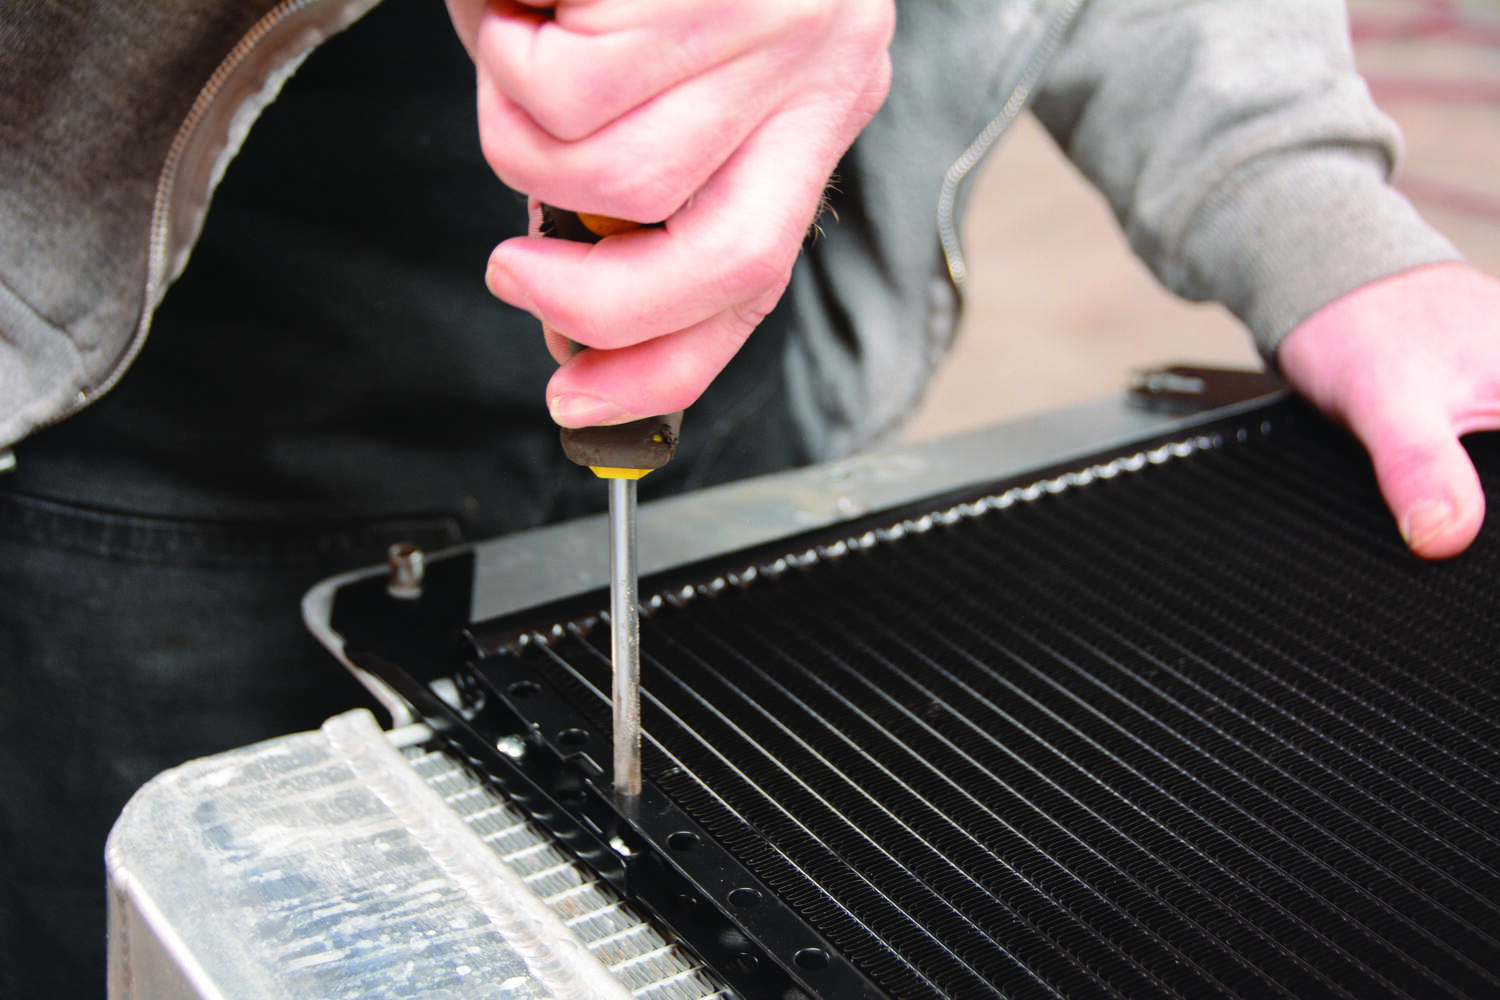
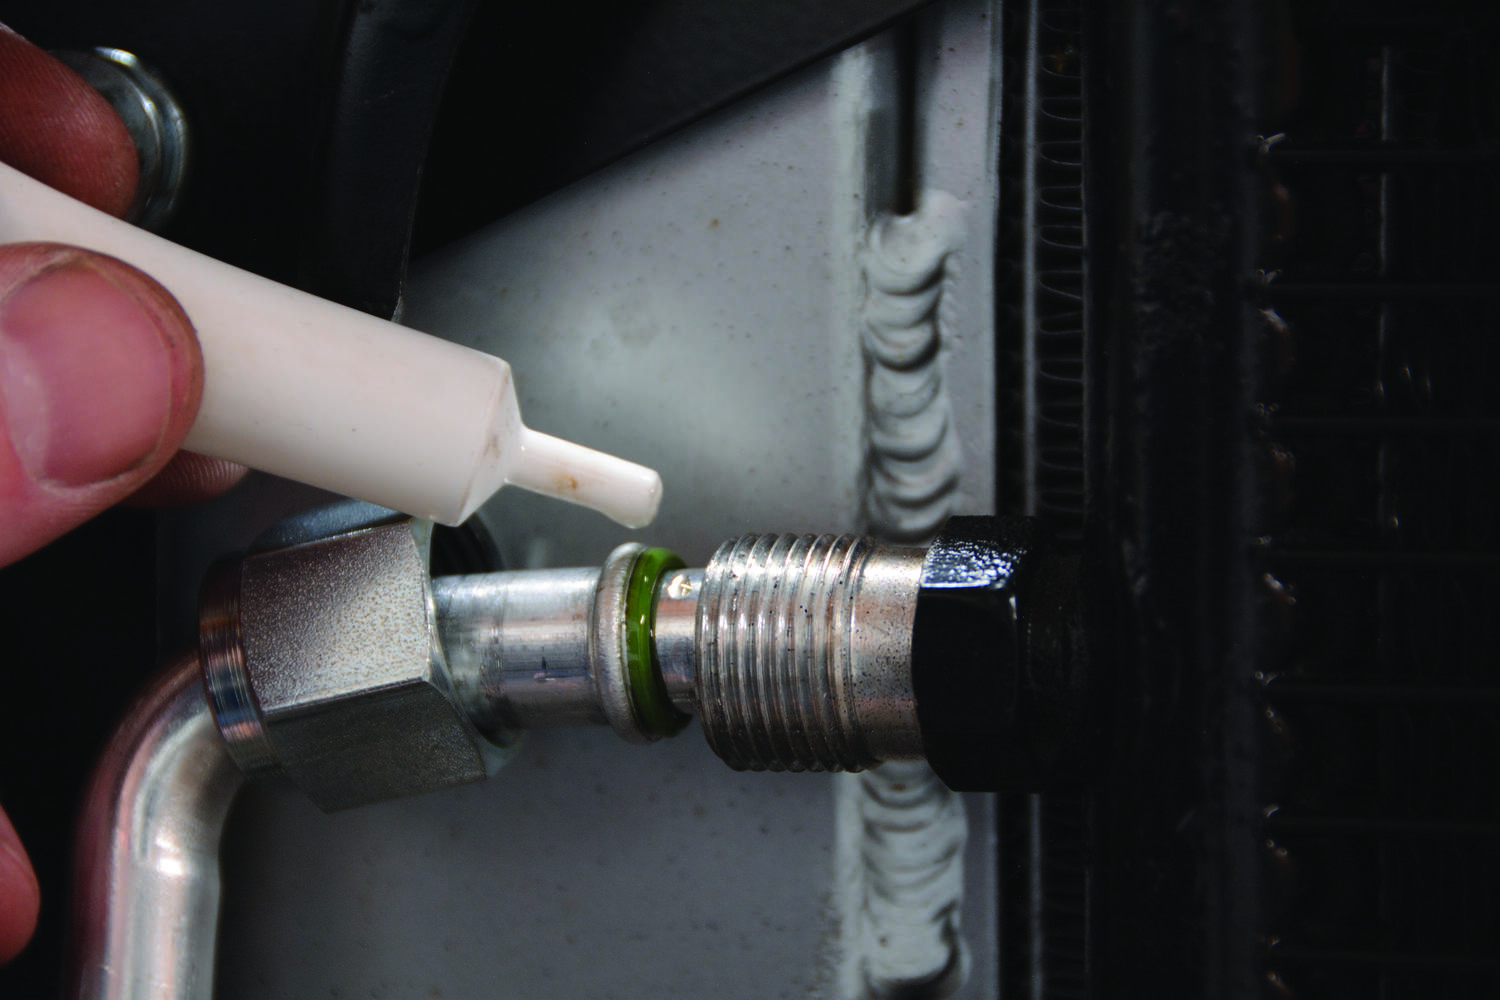
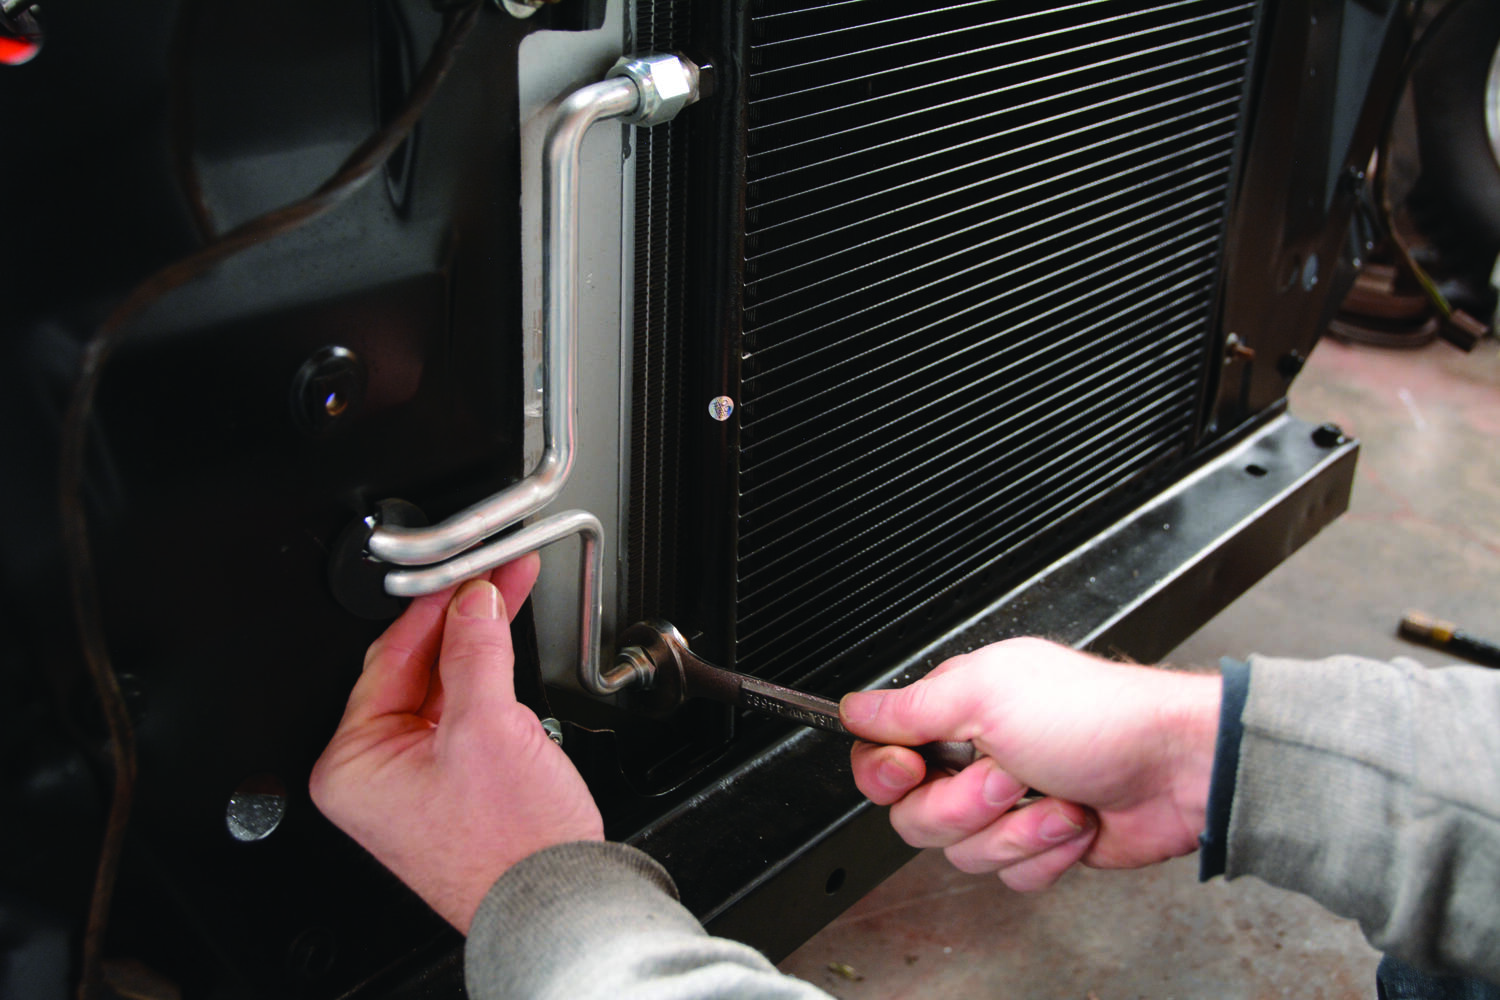
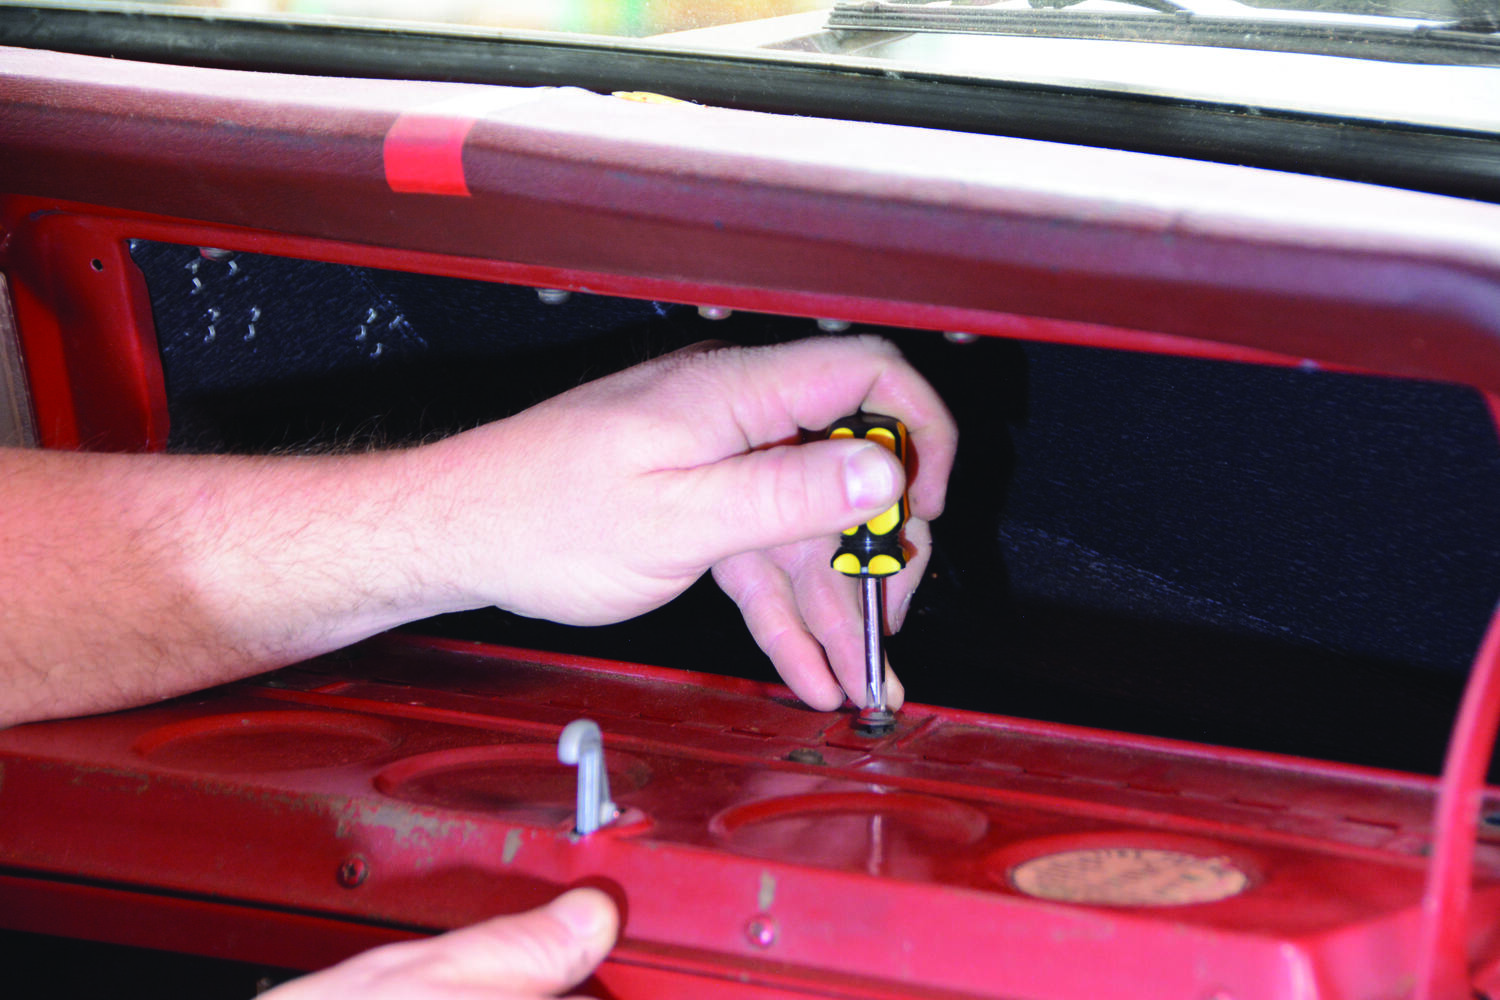
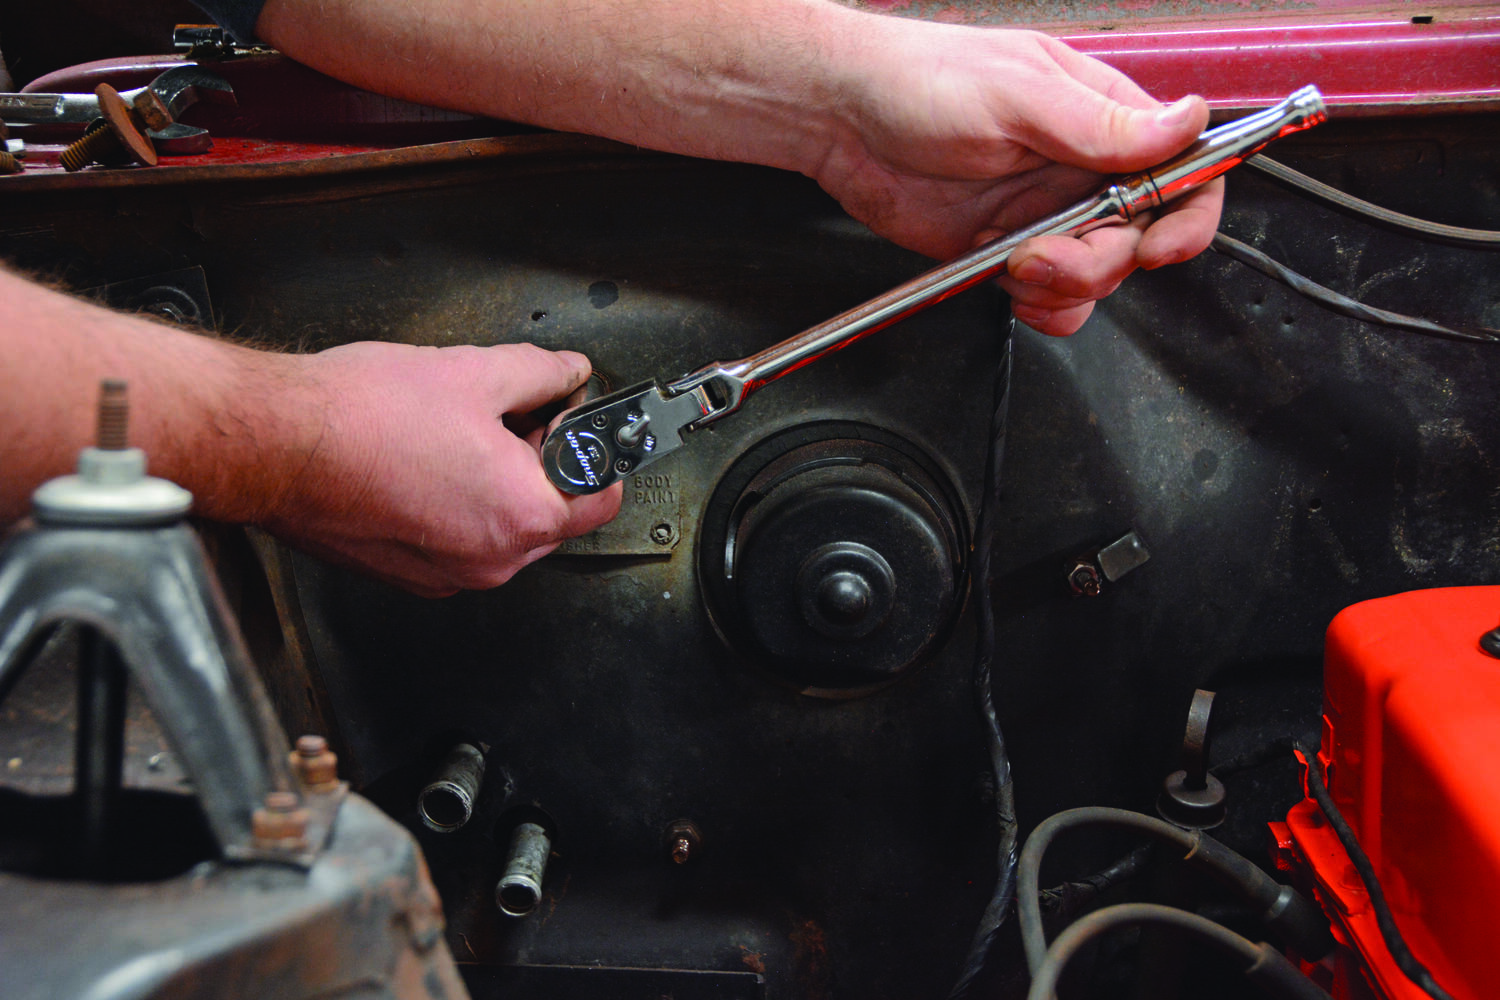
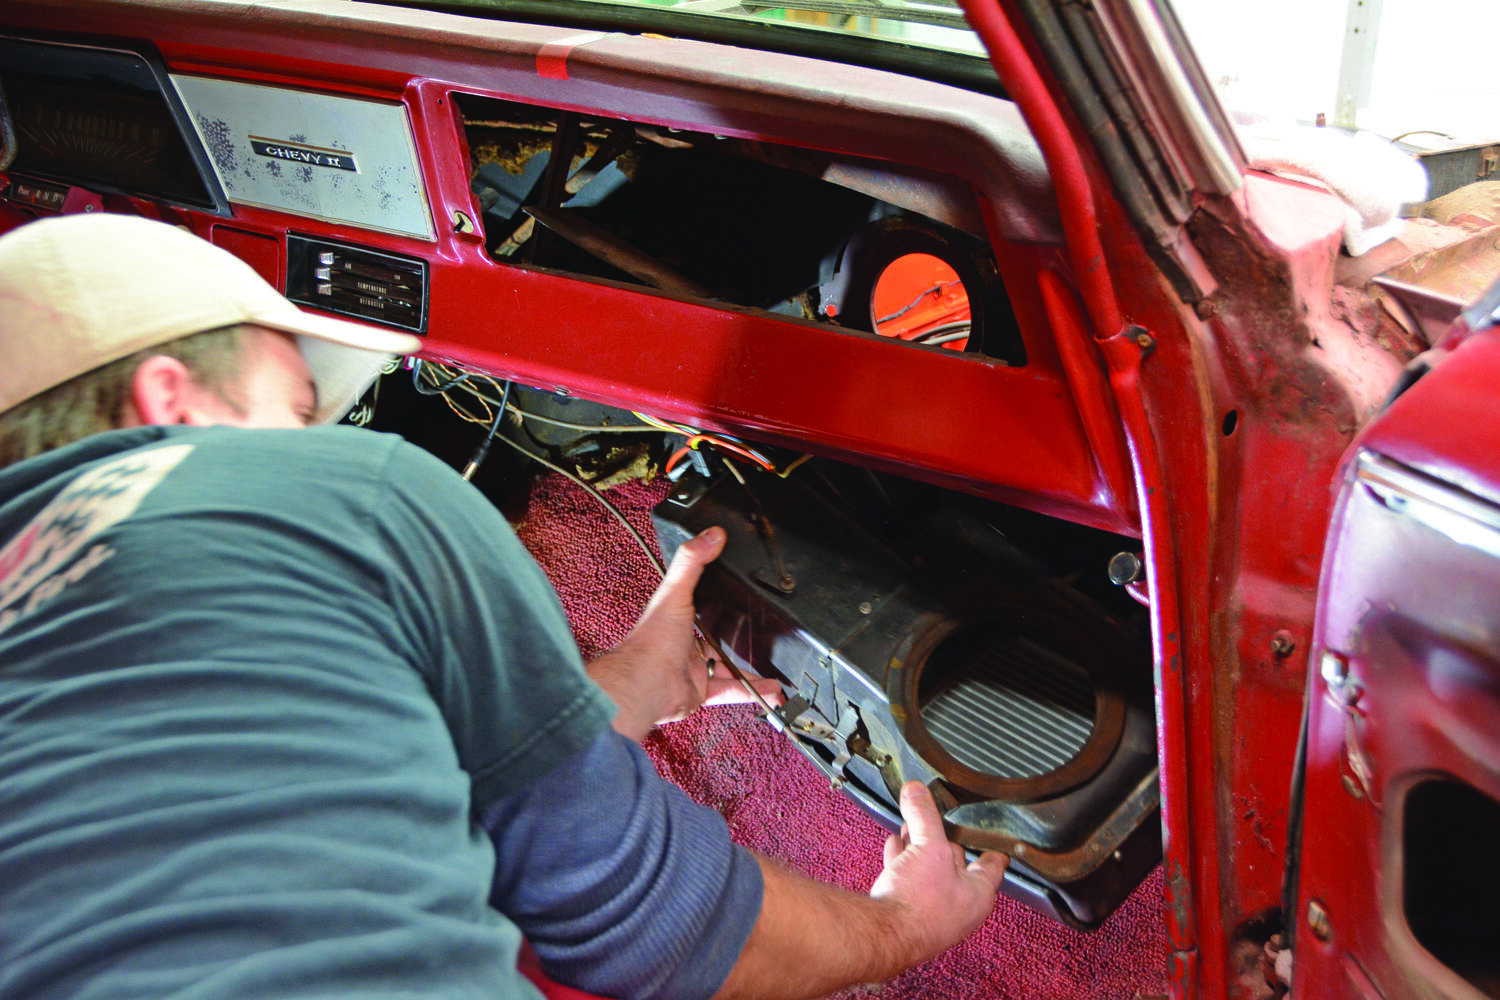
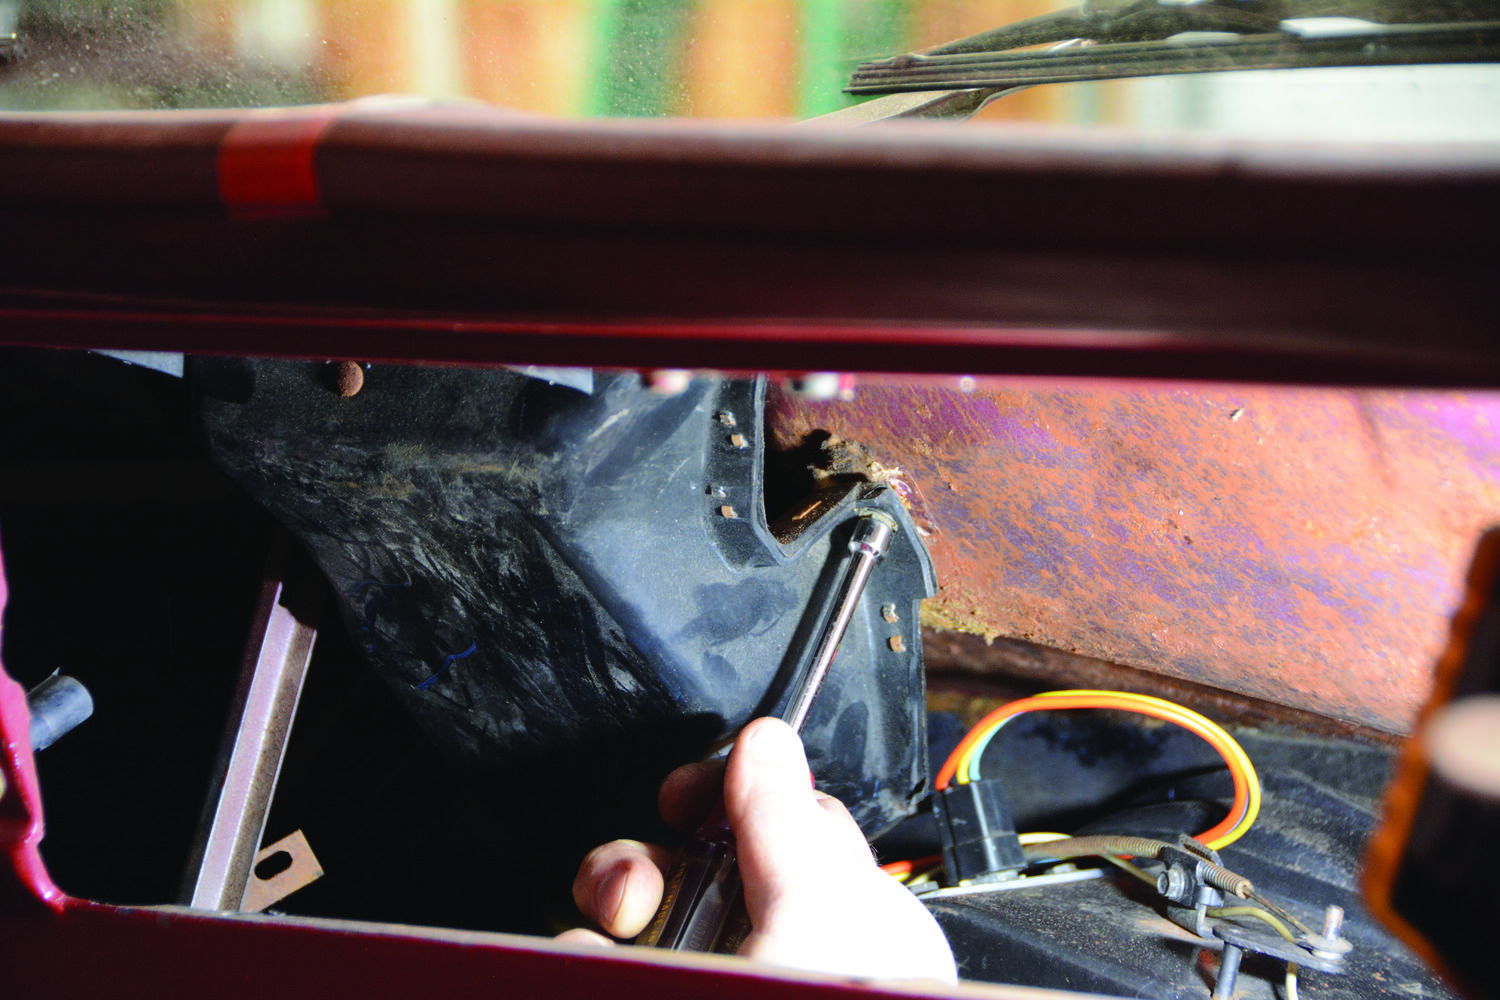
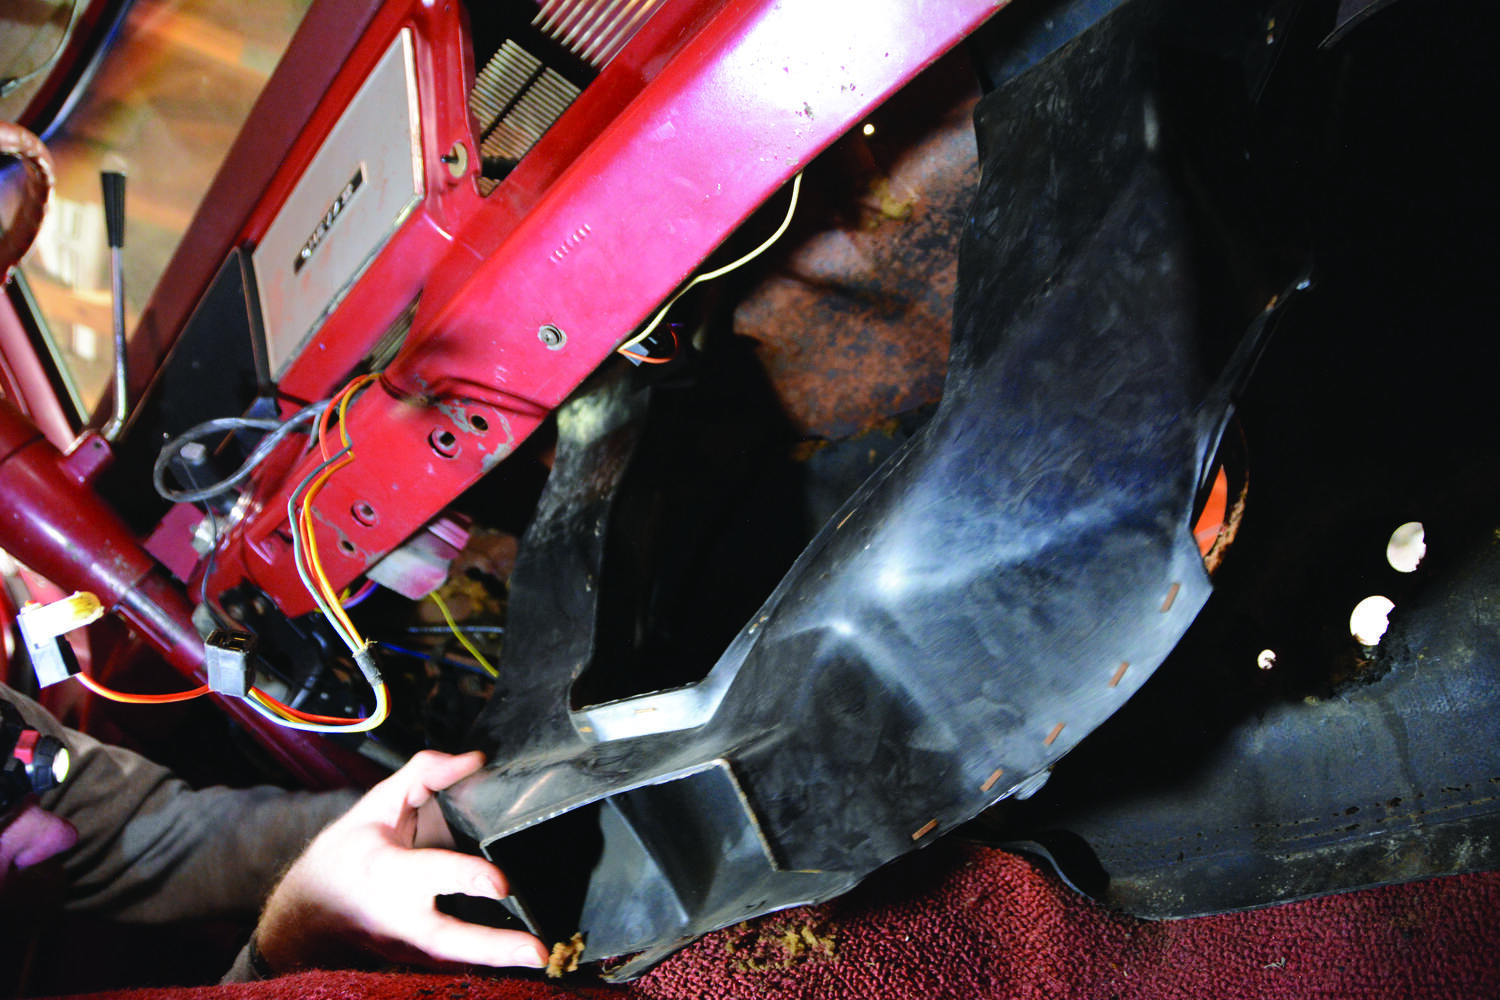
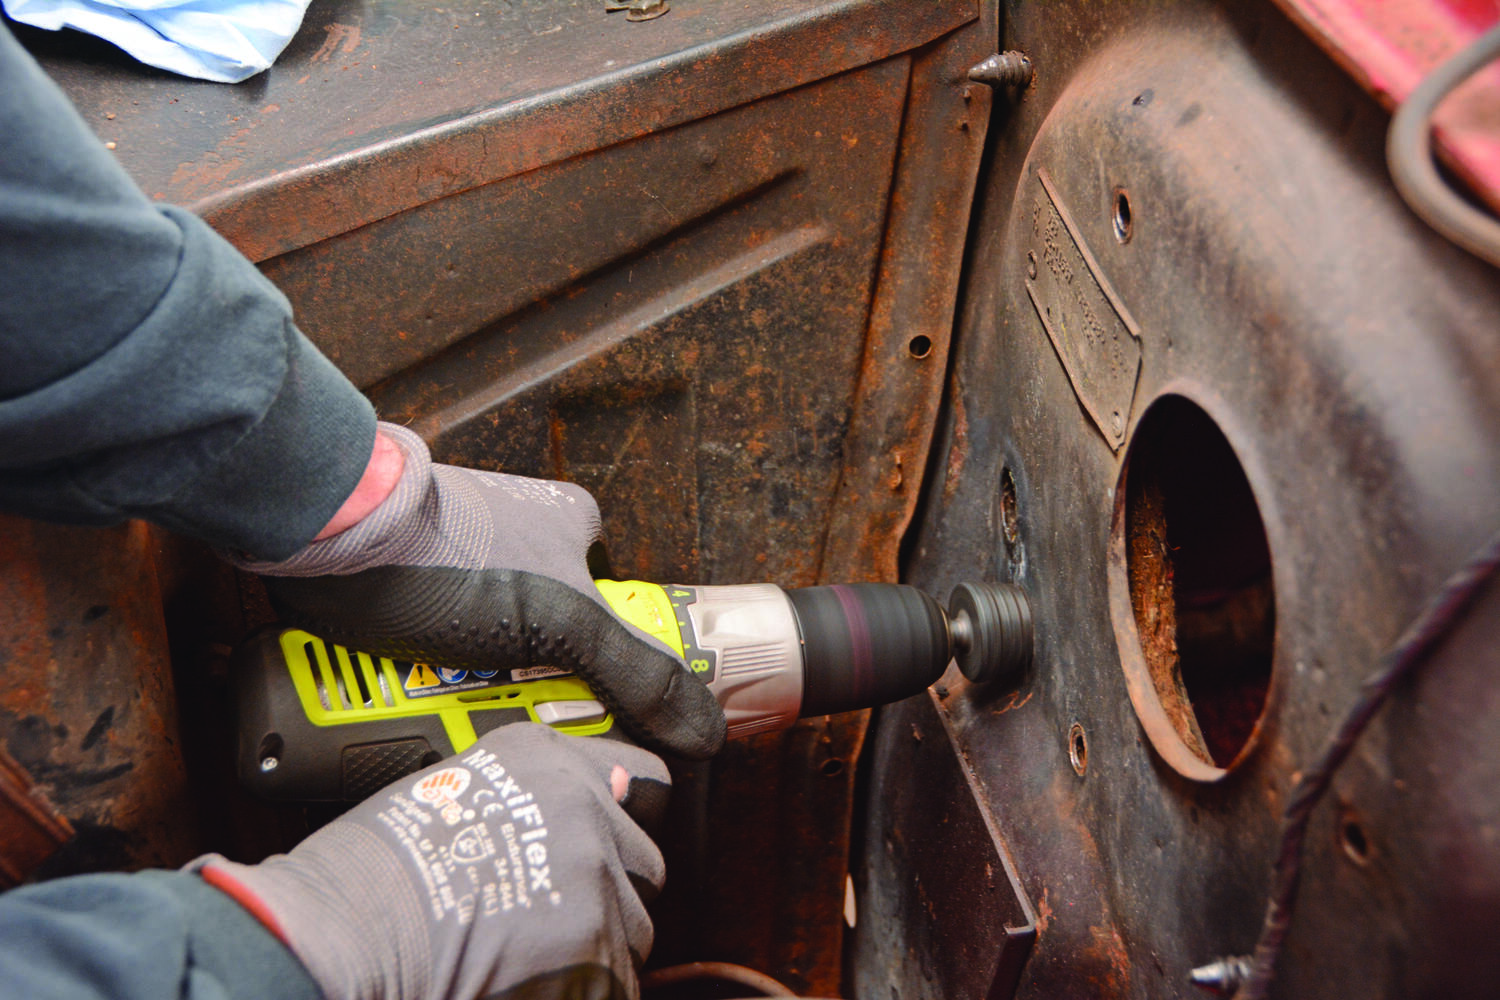
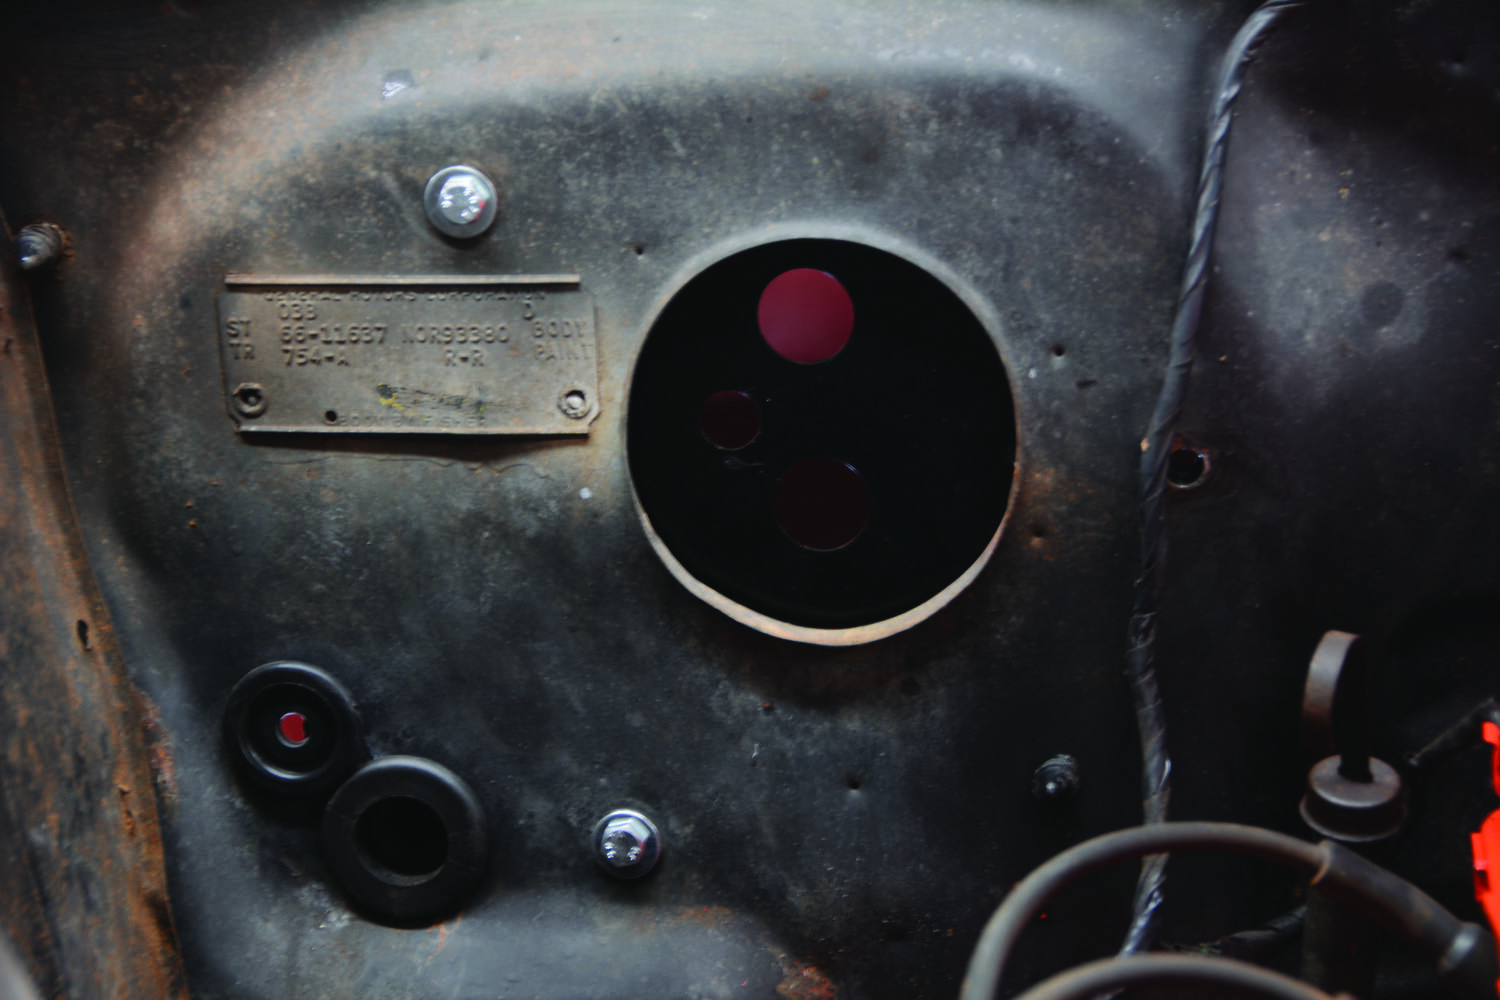
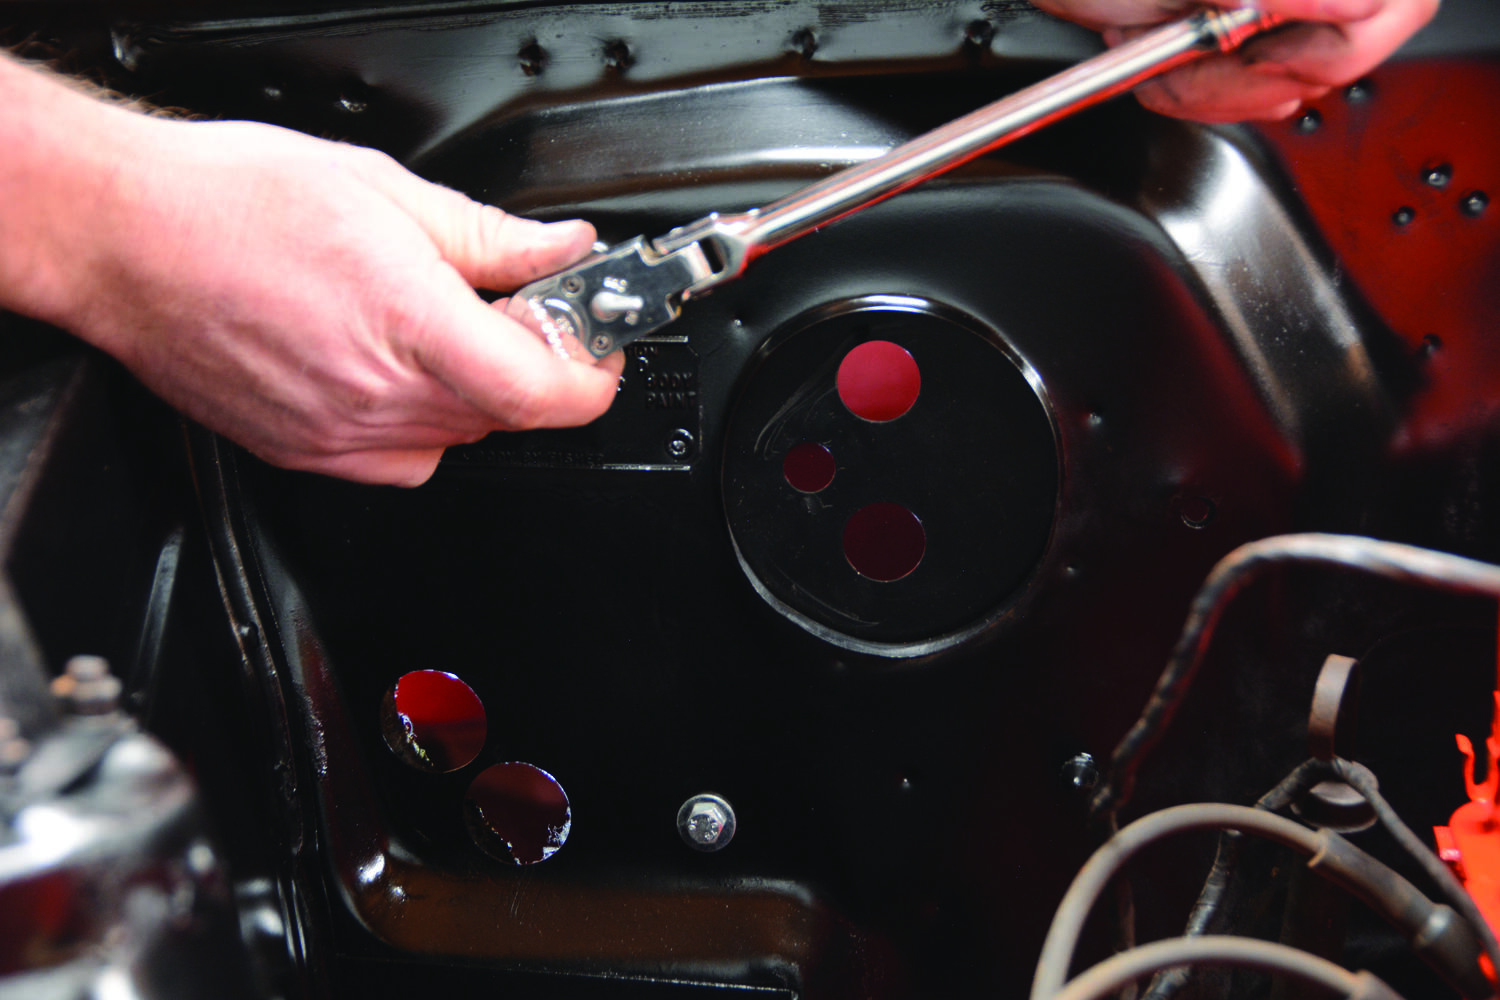
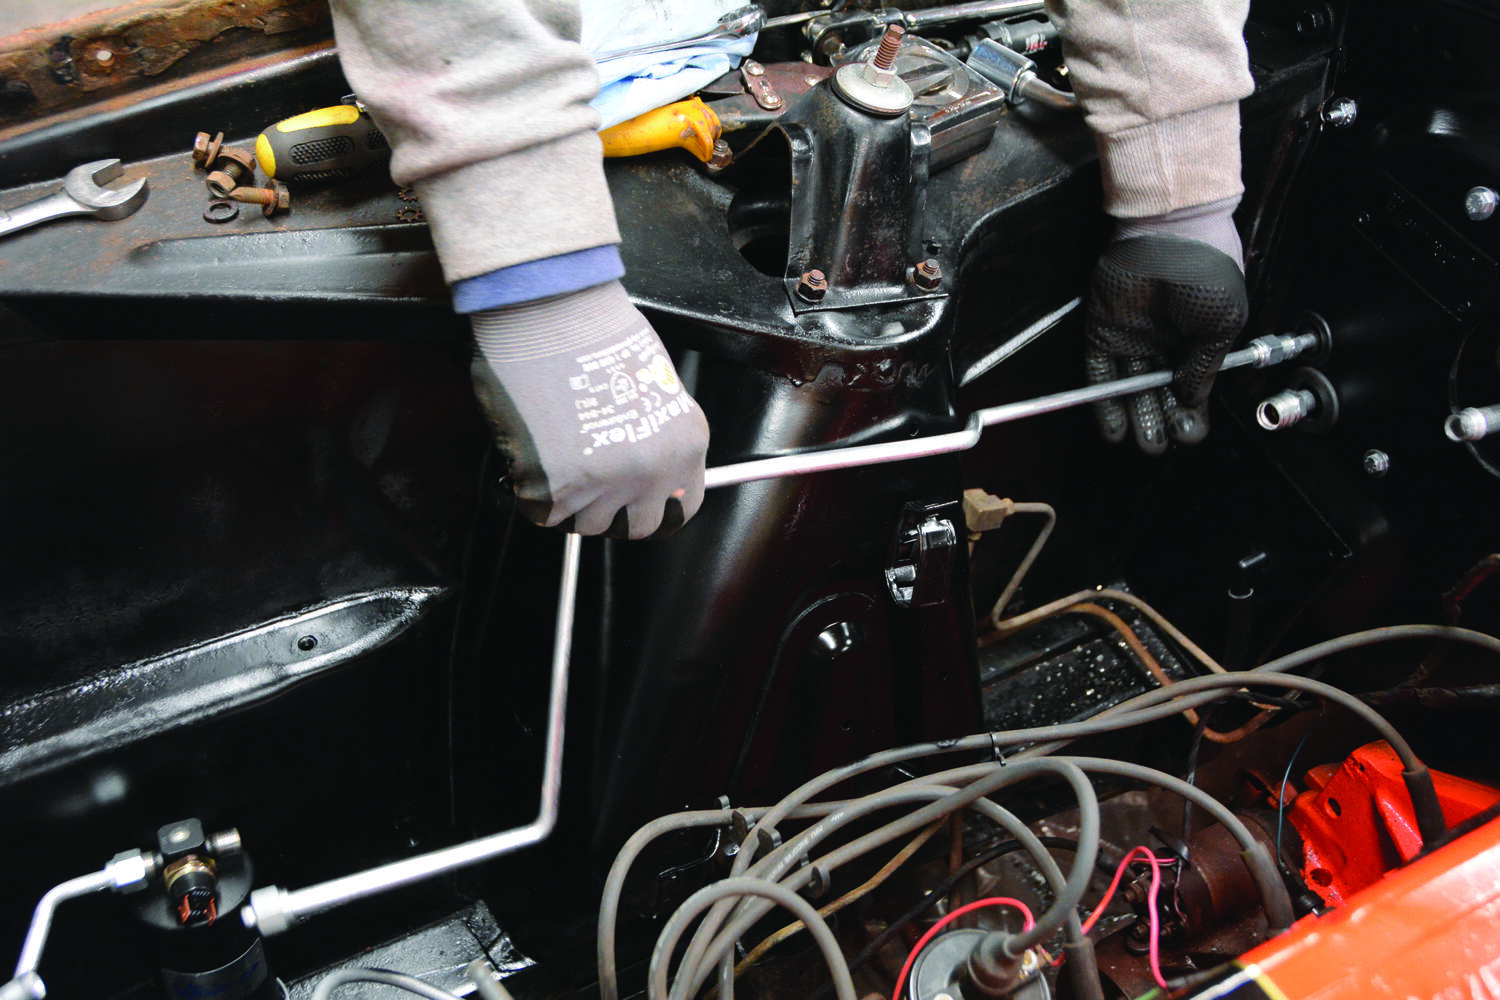
Originally, the alternator was mounted low but the Vintage Air kit relocates the alternator with a special combination bracket. In order to prepare the engine for the new brackets we must first remove the alternator.We continue stripping down the engine by removing the original alternator brackets. Even though this is a low-mileage survivor, 55 years of grease has accumulated beneath the alternator so we degreased the engine and surrounding areas in preparation for some fresh paint.Chevrolet Orange will wake up any old engine. We blasted on a couple of coats and then freshened up the exhaust manifold with Calyx dressing. Now we’re ready to go back together with the new bracket.After mocking up the bracket, we realized that this temperature sender needed to be installed first. We also noticed that the wiring terminal interfered with the bracket, so we bent it over at a 90-degree angle.The Vintage Air Steel-eez bracket (PN 146037) features a heavy-duty steel construction with a wide range of adjustment for the alternator and A/C compressor. The bracket comes in raw steel, so we sanded it and painted it silver.The Steel-eez bracket is designed to bolt directly into place, using existing boltholes in the engine block, cylinder head, and water pump. The two engine block boltholes are the same ones that were used in the original alternator bracket.As part of the Vintage Air SureFit kit (PN 961166), this Sanden SD5H14 A/C compressor offers a double V-belt pulley and a wide range of mounting configurations. We rotate the compressor so the hoses can be routed up and over the top of the engine.Now the alternator can be installed on the Steel-eez bracket, using the supplied bolts, nuts, and washers, as well as a spacer for proper belt alignment.After grabbing a few belts from the parts store to see which one offered the best fitment, we settled in on a 15510 V-belt. Parts stores offer belts in 1/2 inch increments, and the last three digits of the part number typically spell out the measurement. In our case the “510” indicates a 51-inch belt.With the compressor mounted, we can move forward to the condenser. Vintage Air provides detailed instructions, so we marked the area with tape and used a cut-off wheel to make precise cuts. We removed an inch of material from the passenger side of the radiator support to make room for the lines and fittings.After making the necessary cuts, we mocked up the radiator and condenser. Although Vintage Air provided instructions on where to drill, we wanted to be sure since we had an aftermarket radiator. Then, we drilled a pilot hole, and followed that with a 1-1/4-inch hole saw to provide access for the hard lines.We found it easiest to perform the installation with the grille and front bumper removed. While we had those components out of the way, we modified the hood latch, as per the instructions. To achieve proper clearance, we bent the bottom of the latch handle outward.The condenser with Vintage Air’s SureFit kit features brackets that work nicely with our aftermarket radiator, but they’ll also work with a stock radiator.Although the condenser and brackets can fit many makes and models, it offers excellent fitment after we consulted the instructions to find the proper orientation of the brackets. Once we had them located in the correct configuration, we tightened the supplied screws.After the radiator and condenser are installed for the final time, we attach the hard lines. Vintage Air provides a small tube of oil to be used on the various O-rings within the kit.The hard lines are routed through the 1-1/4-inch hole we drilled in the radiator support and the supplied rubber grommet is added. Finally, the fittings can be tightened.Moving to the inside of the car, we can begin the teardown process. First, we need to remove the glovebox door and the inner box to gain access to the original heater components.The original heater box bolts to the firewall from beneath the dash. We remove the old heater hoses and hardware that holds the box in place.The heater box can be pulled out from under the dash, but you’ll notice that cables from the original control panel are still attached. After removing the clips that hold those cables in place, we can remove and discard the old heater box assembly.In order to make room for the Vintage Air evaporator box and associated components, we must remove the original defrost ductwork. The kit comes with new ductwork, so the old pieces can be discarded.The original defrost ductwork is made in one large piece, and it’s held in place with sheetmetal screws. After reviewing the box of Vintage Air parts with the SureFit kit, we noticed the new defrost ducts consist of two pieces.With the heater box and ductwork out of the way, we can prepare the firewall for the new evaporator. Step one in that process is enlarging the original heater hose holes to 1-1/4 inches. A step bit works well to enlarge the holes, which will provide access for the refrigerant lines.The heater hoses will eventually exit through the two holes that are in the supplied plate, which is now bolted to the back side of the firewall. After mocking up the plate, we remove it and then prepare the firewall for some fresh semigloss black paint.Now the plate can be installed for a final time using the provided hardware. We retained the original firewall insulation, but this may also be a good time to replace it with new insulation for even better sealing.The Vintage Air SureFit kit comes with pre-bent hard lines, including this refrigerant line, which bends around the shock tower. It connects the drier to the evaporator.The drier mounts beneath the battery tray, so it’s best to remove the tray for easier access. The hard line from the condenser threads into one side, and the hard line from the evaporator threads into the other side. A binary switch threads into the center port.Next month, we’ll jump back into this Vintage Air install by preparing the evaporator for installation, routing and assembling the E-Z Clip hoses, and wiring the system.
We use cookies to ensure that we give you the best experience on our website. If you continue to use this site we will assume that you are happy with it.