We were wrapping up an oil change on our ’64 Chevelle not long ago and noticed a little top-to-bottom movement in the front wheels, which we took as the wheel bearings needing adjustment. After re-packing the bearings and setting the preload on the bearings the play was still there. Upon closer inspection, we noticed that the original ball joints were the cause of the excessive movement. Updating the front suspension had been on our ”eventual” upgrade list for a while, but this finding moved it a little higher in the queue.
There are no shortage of performance suspension components available for Chevelles, including tubular control arms with improved geometry or versions to accept coilovers, but this old Malibu is your basic cruiser and is going to stay a basic cruiser. We’re talking gen-one small-block, a “one-wheel-peel” 10-bolt with 15-inch rallys wrapped in BFGoodrich radials.
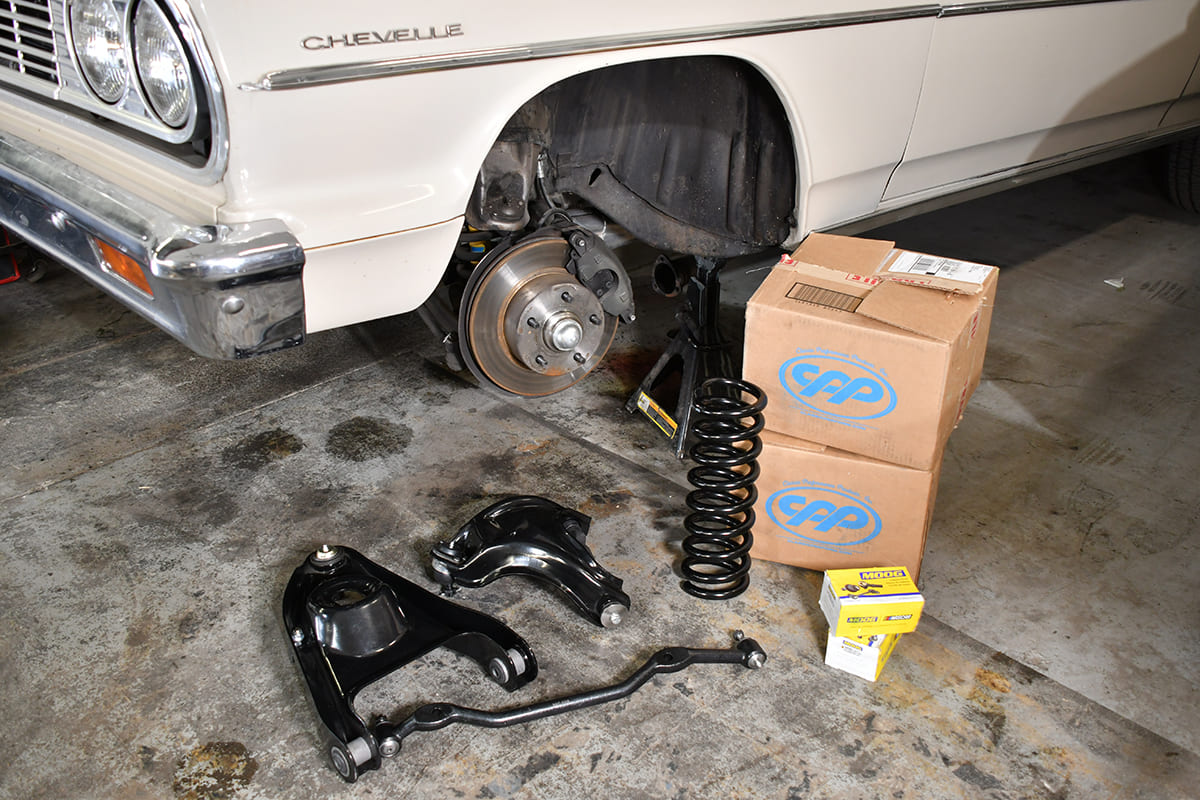
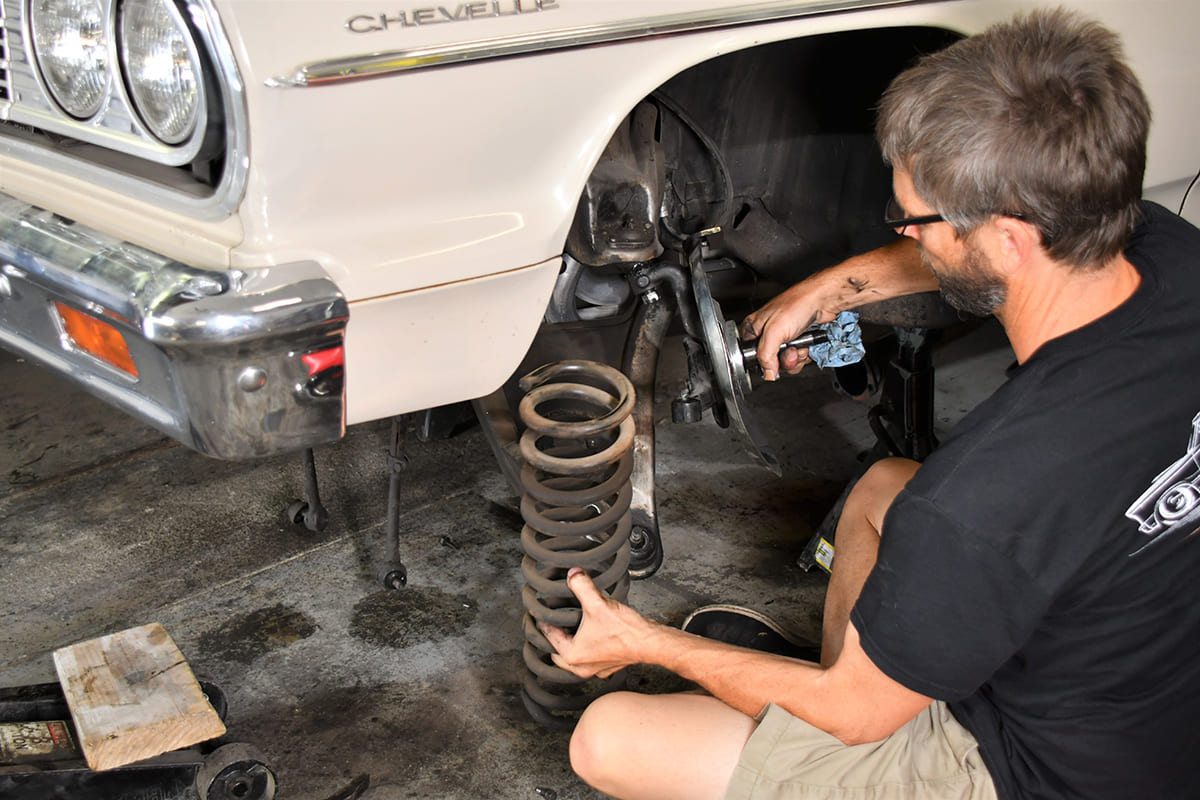
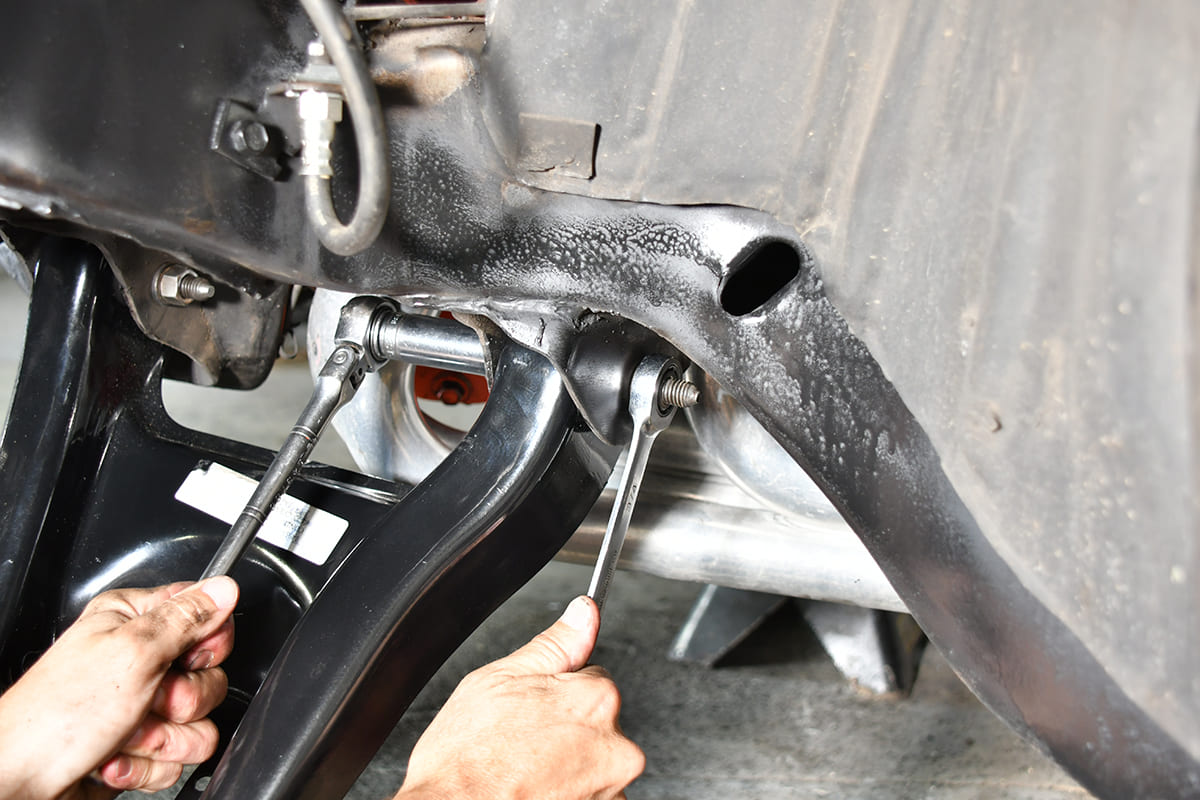
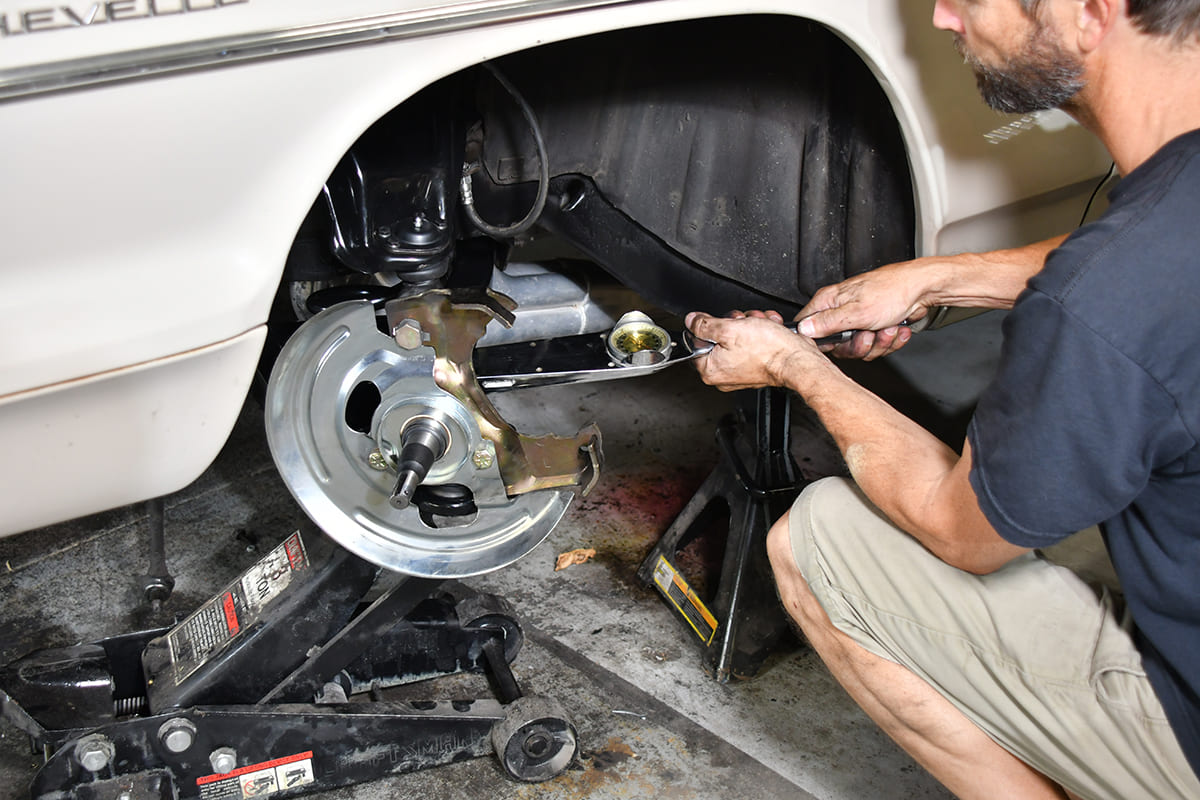
Once the car was secured on a quality set of jackstands, the wheels, shocks, and entire brake assembly was removed (we did a CPP disc brake conversion a couple years ago). We set about removing the cotter pins from the ball joints and tie-rod ends.
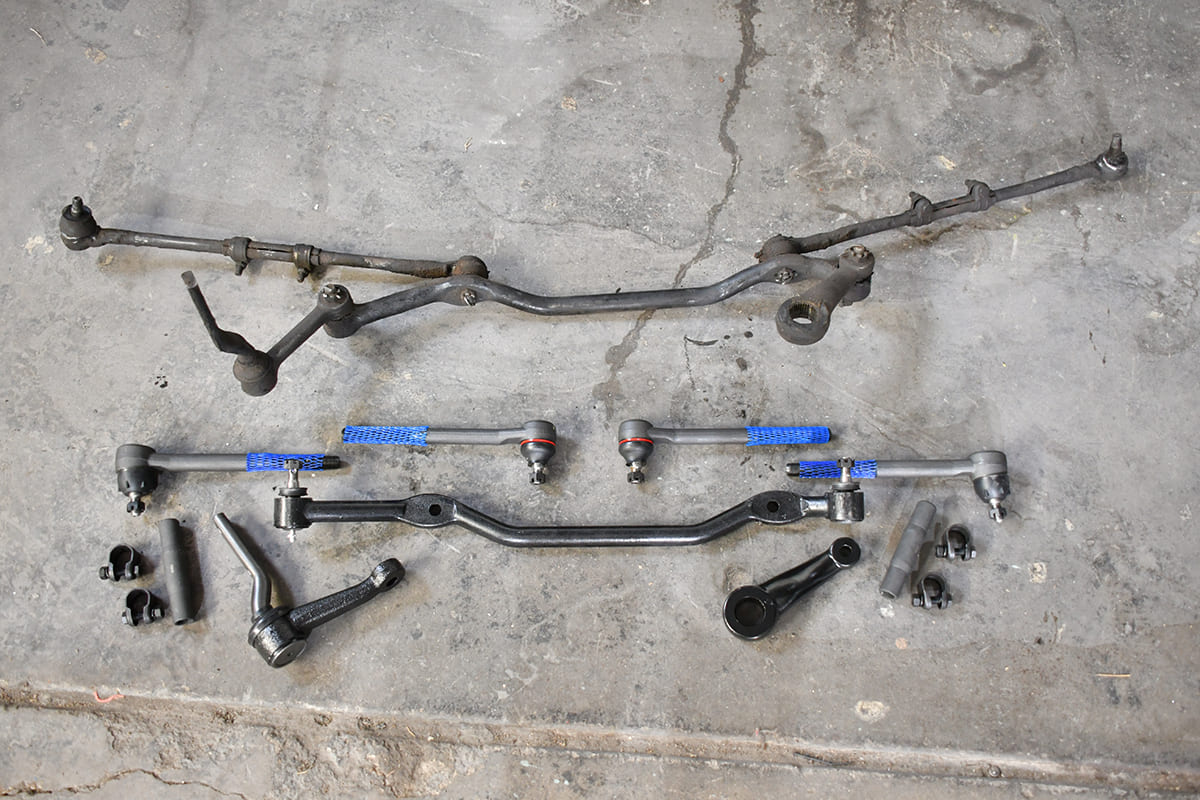
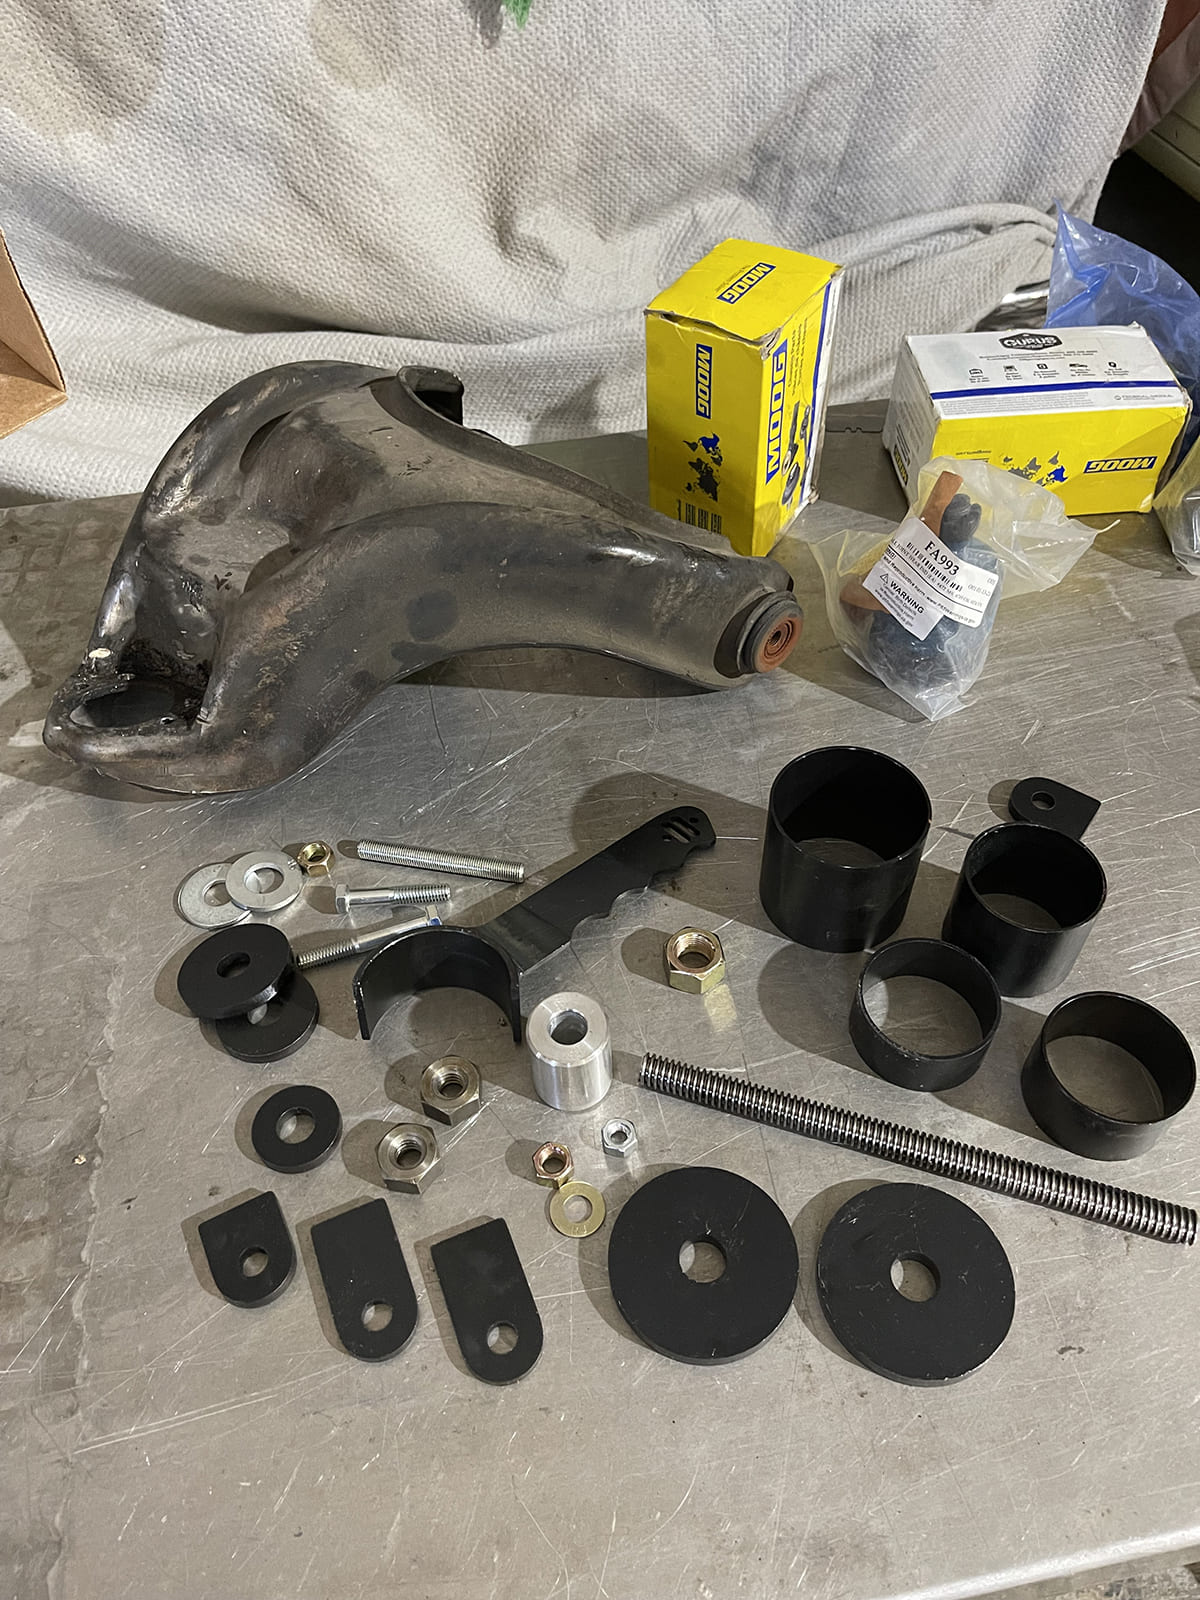
To keep with our basic theme, we decided a stock rebuild of the front suspension was in order and surfed over to classicperform.com to see what Classic Performance Products (CPP) offered for a rebuild. They’re known for their performance coilover swap kits and cool tubular control arms, but they also offer stock replacement ball joints and control arm bushings as well as new stamped steel control arms just like the originals. If you plan to rebuild your stock control arms, you can upgrade from rubber bushings to CPP’s PolyPlus line of polyurethane bushings. Rubber is known for a smoother ride yet polyurethane improves the handling, road feel, and will last longer.
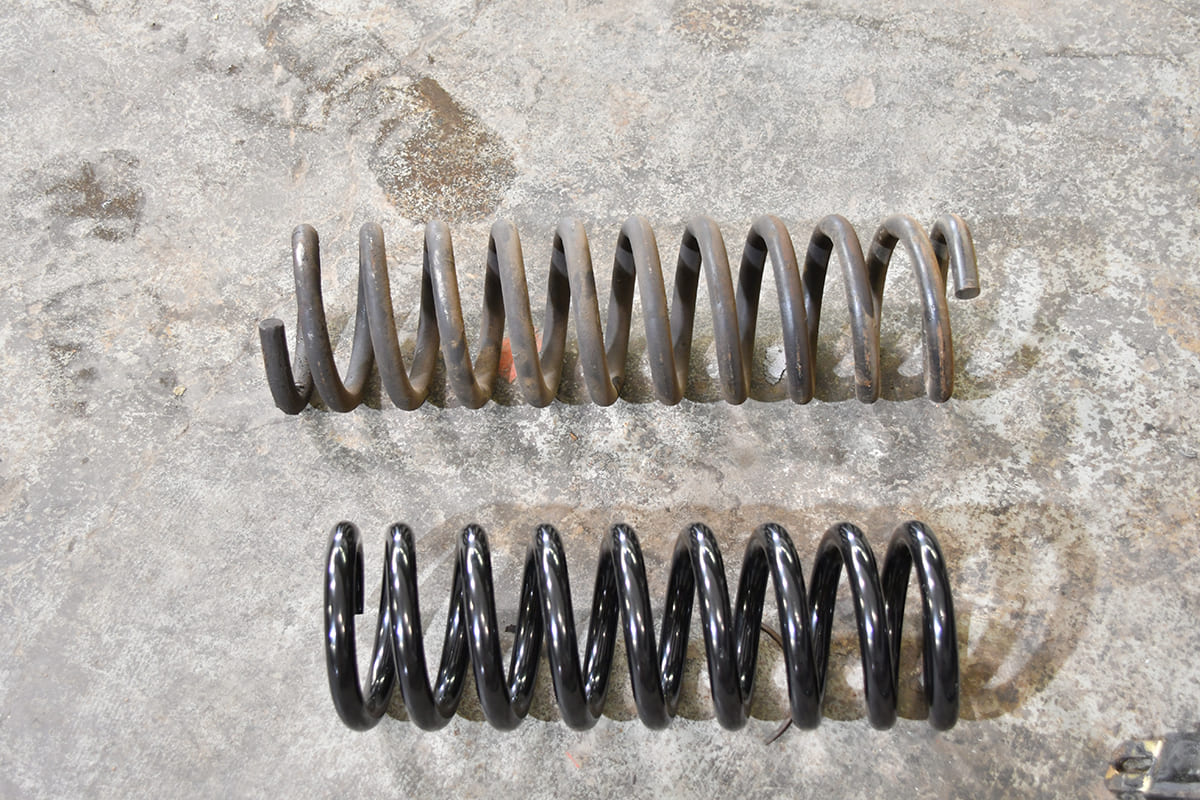
Once again though, we stuck with the basic plan choosing rubber bushings to illustrate how to rebuild the stock upper arms. We also opted to try out their replacement control arms as well as a complete steering rebuild kit. The steering kits are supplied with a new idler arm, tie-rod ends, centerlink, and even a new pitman arm. One update we treated ourselves to was a set of 1-inch drop springs to get the front end down just a smidge.
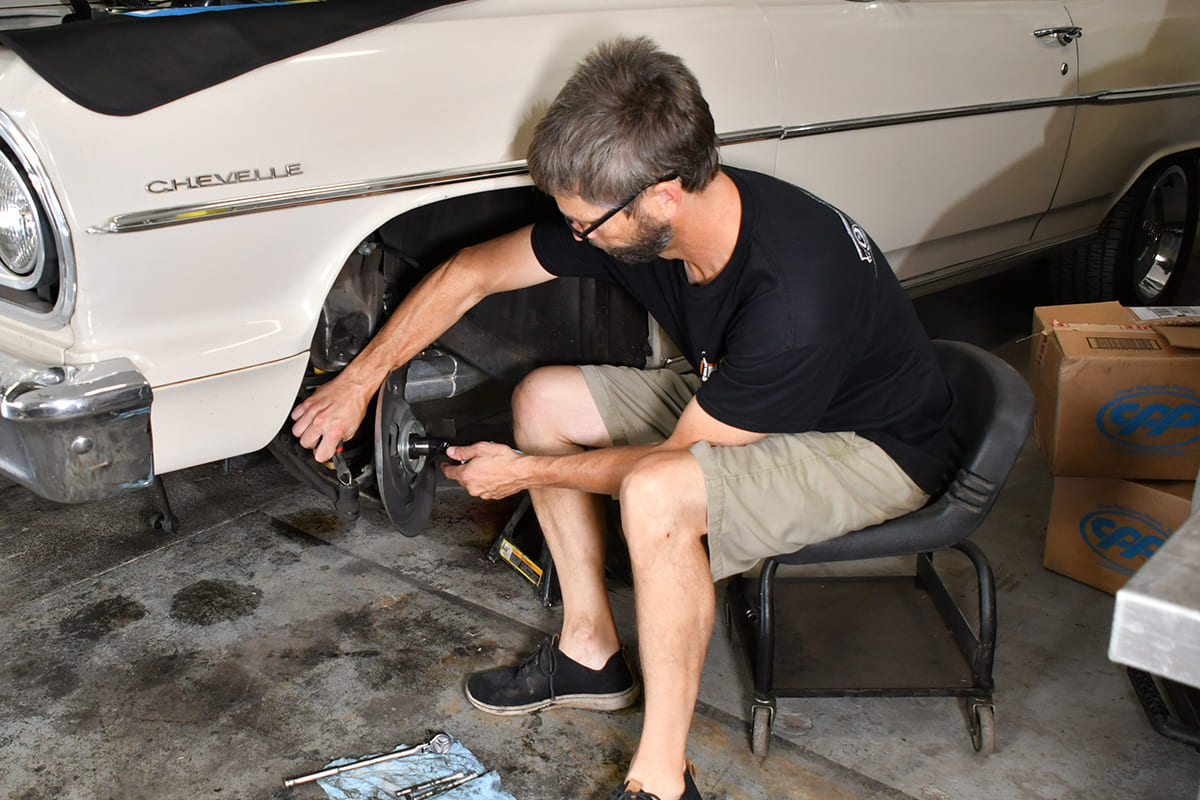
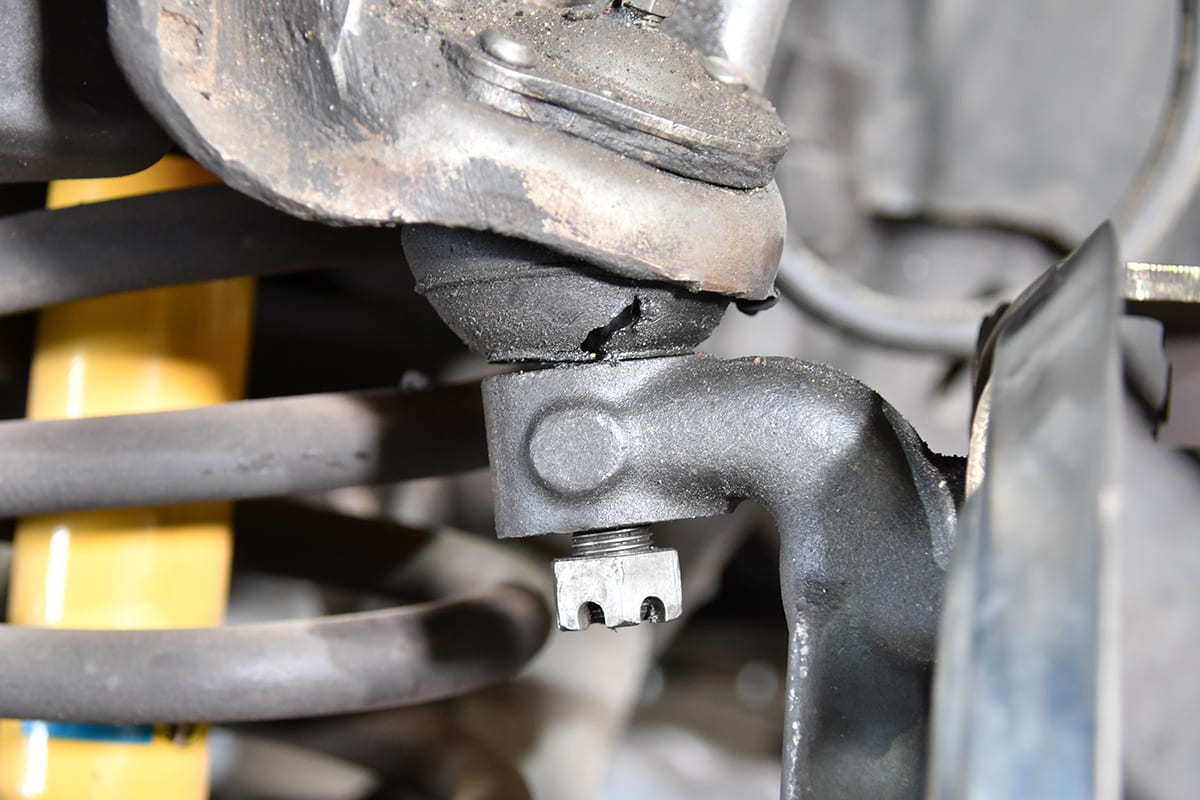
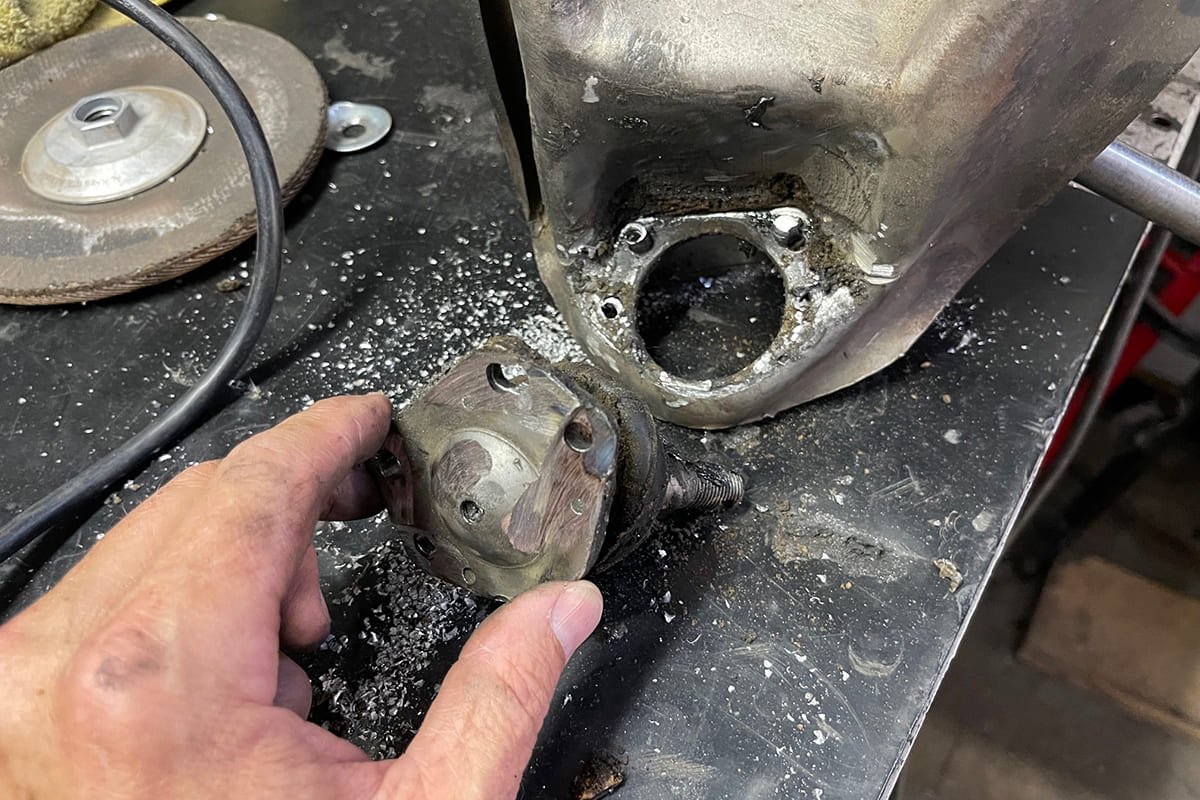
The castle nuts were loosened but left in on the upper and lower ball joints to prepare to separate the spindle. Note the torn boot on the upper ball joint.
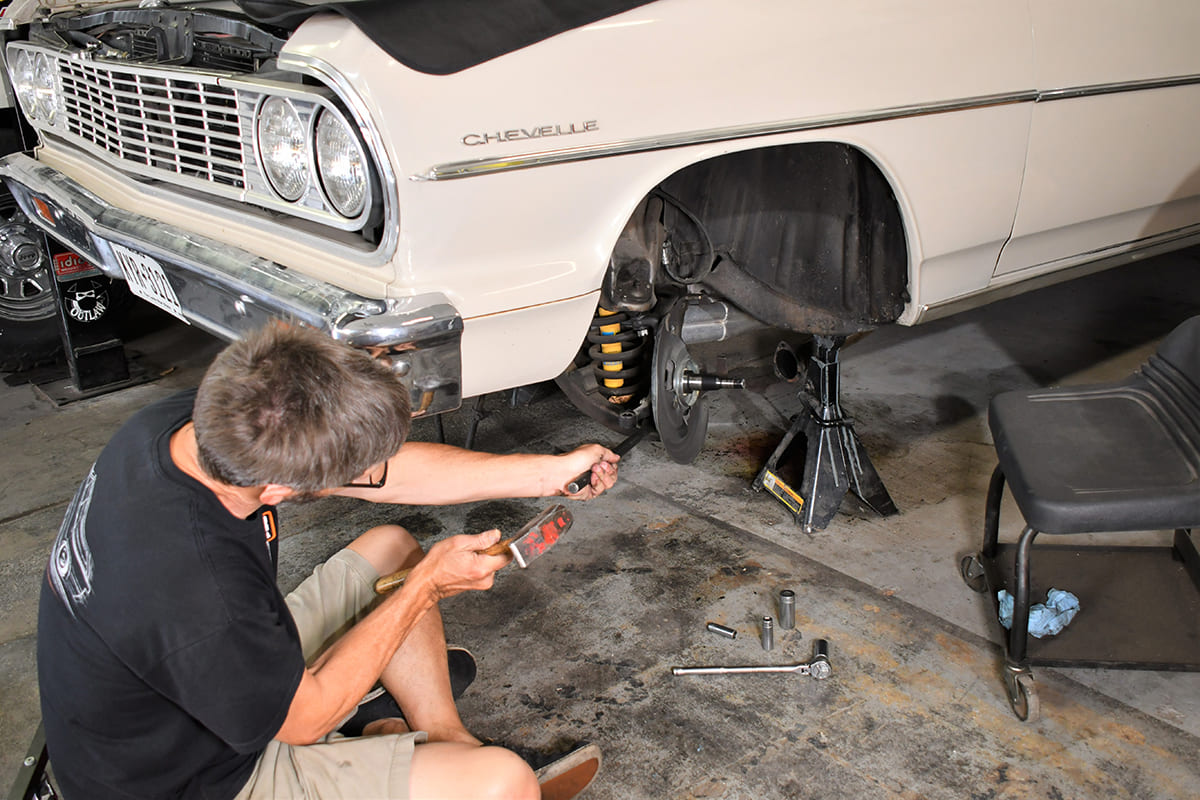
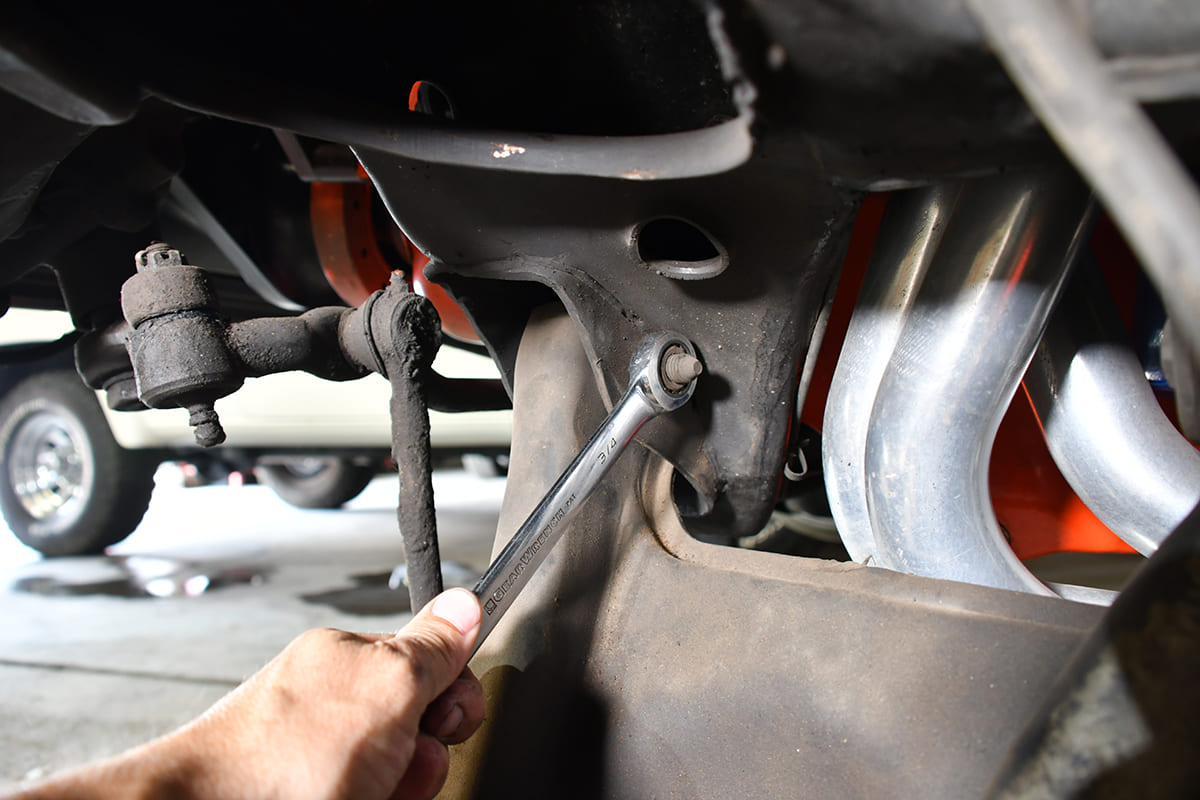
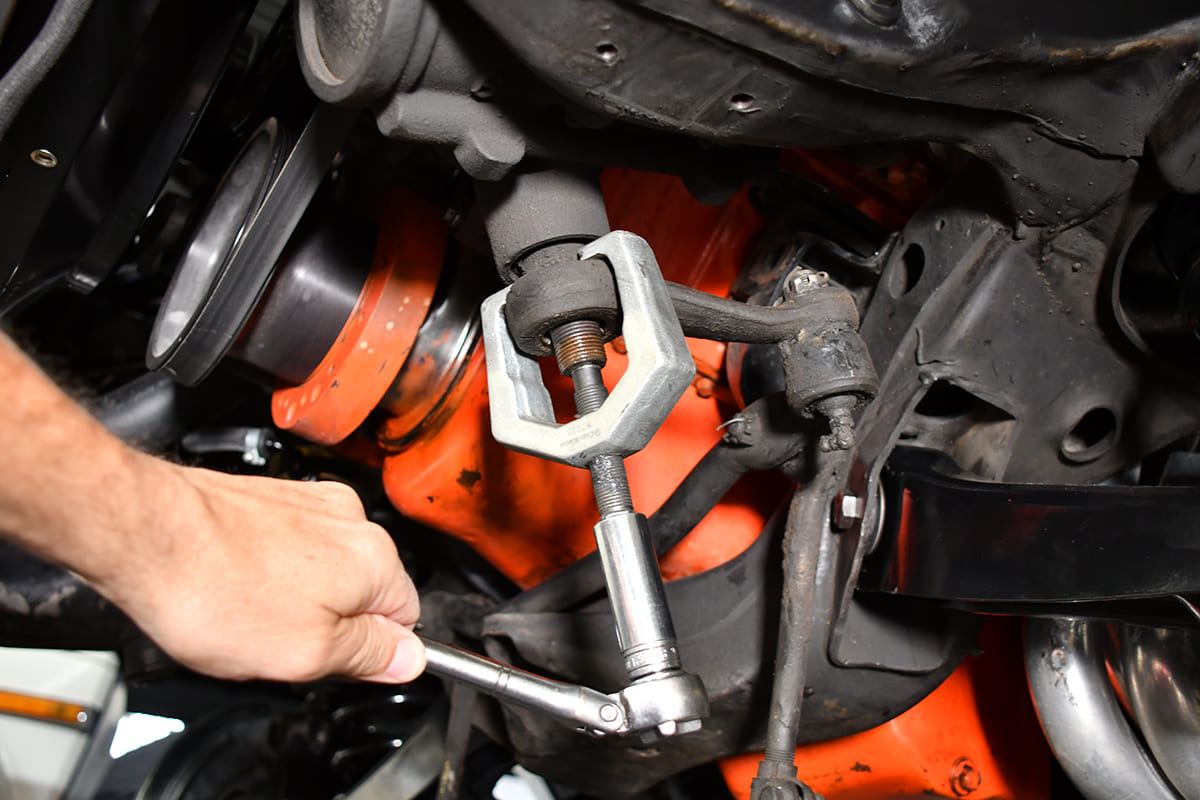
If you’re doing the suspension, you might as well replace the tie rods or even the entire steering linkage. CPP has everything you’ll need to refresh the steering system; we opted for a complete upgrade, including the centerlink and idler arm. Before you get too busy, make sure you have a socket or wrench big enough to remove the pitman arm nut. You’ll also need a puller to get the arm off, which you can borrow from most auto part stores.
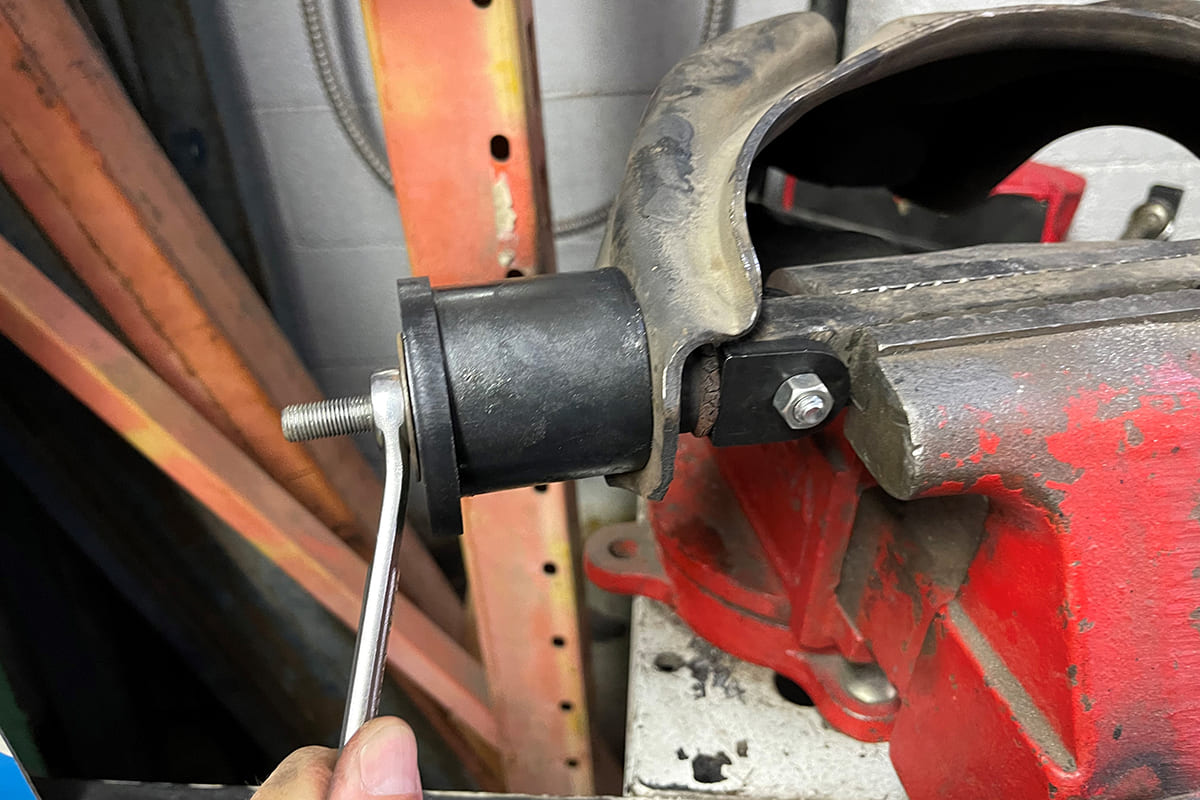
If you’re installing new control arms that already have the ball joints and control bushings installed, you won’t really need any special tools (maybe a ball joint separator), but if you decide to replace the bushings of your stock arms, do yourself a favor and pick up a special tool kit to help. We had a control arm bushing tool from Ridetech and it made the bushing removal and installation on our upper arms a much easier process.
It took some negotiating with a big hammer and pickle fork, but the original ball joints finally gave in and let go of the spindle for the last time.
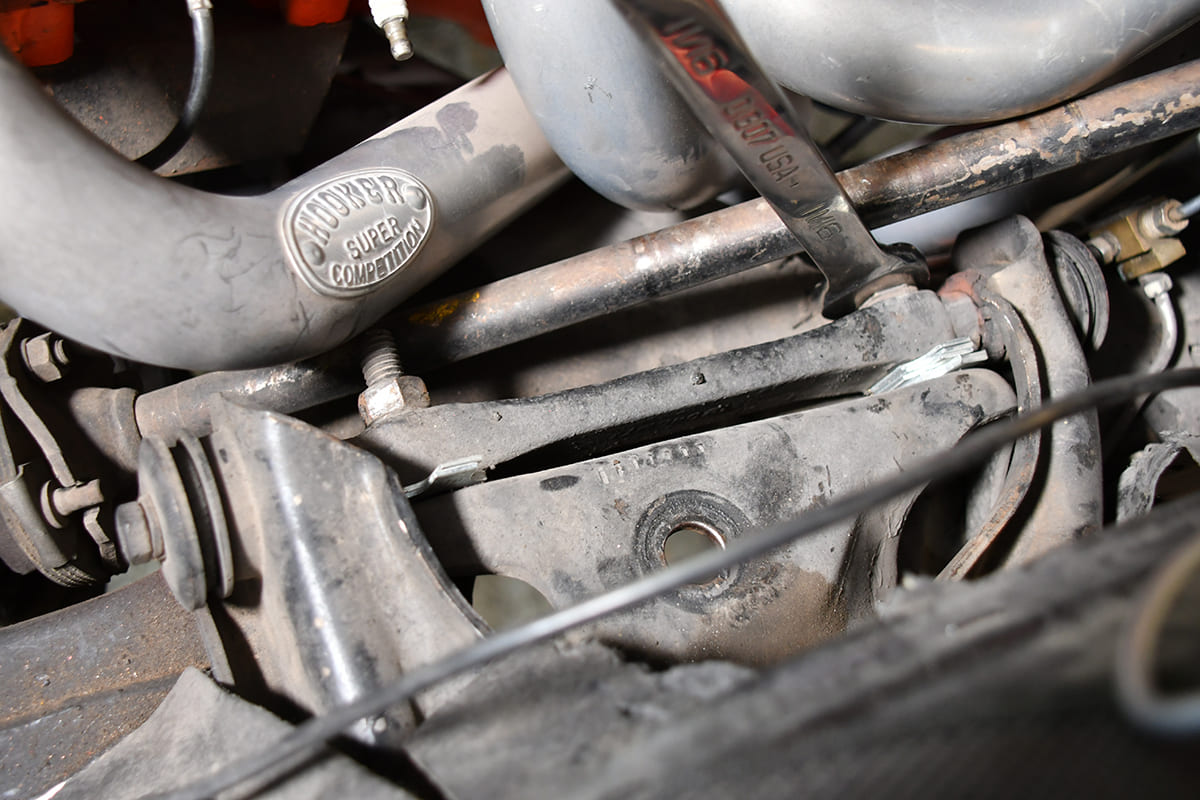
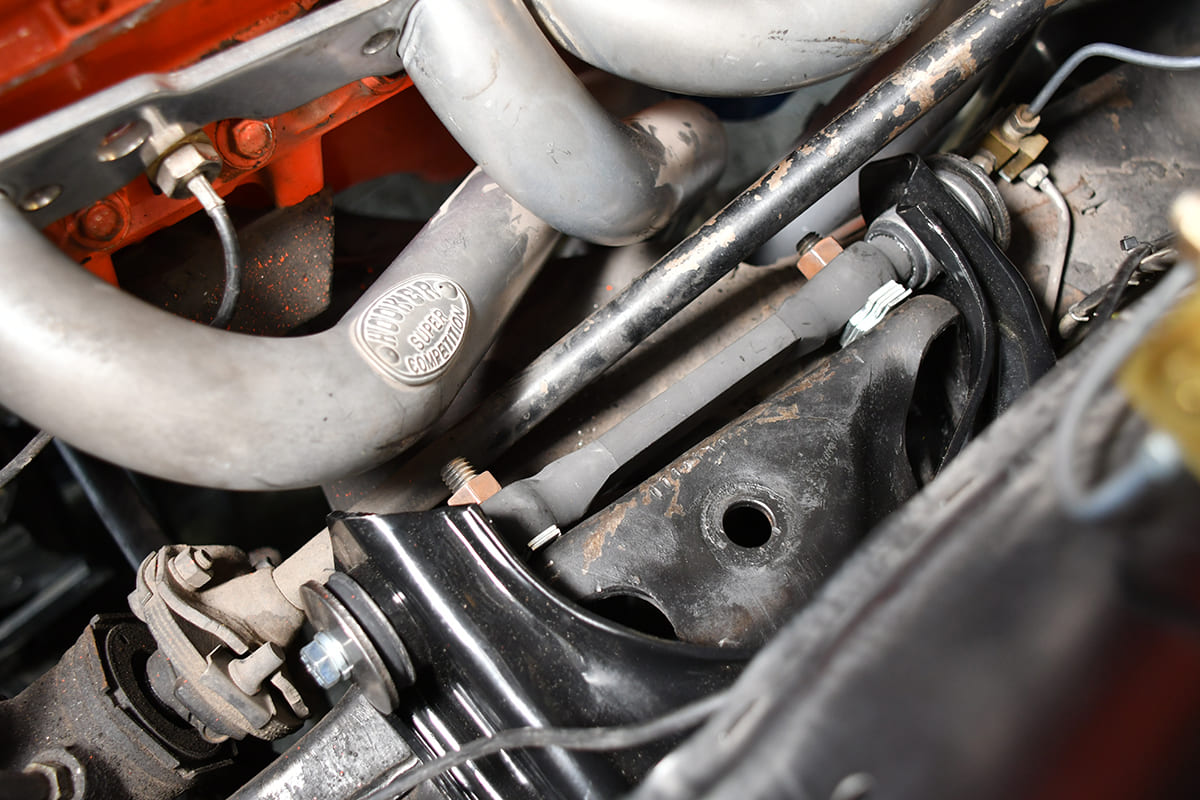
During the R&R process of our control arms, we ran into a slight issue in getting the lower passenger side control arm off due to the header. The equal-length, performance headers didn’t quite allow the control arm to sweep down enough to remove the coil spring! Then, once we unbolted it from the cylinder head there wasn’t enough space clearance to remove the control arm bolts! We had been pondering the move back to a basic cast-iron manifold or a shorty header and this issue solidified that plan. But back to the suspension and steering.
Besides our own self-imposed header clearance issues, the installation of the new suspension and steering components was a straight-forward affair. Unfortunately, we’re unable to report on the handling improvements of our project due to the new exhaust manifolds being back ordered. We can tell you that after a couple days and a few bounces on the front end, the coil springs dropped the ride height down right at 1 inch lower than the stock springs!
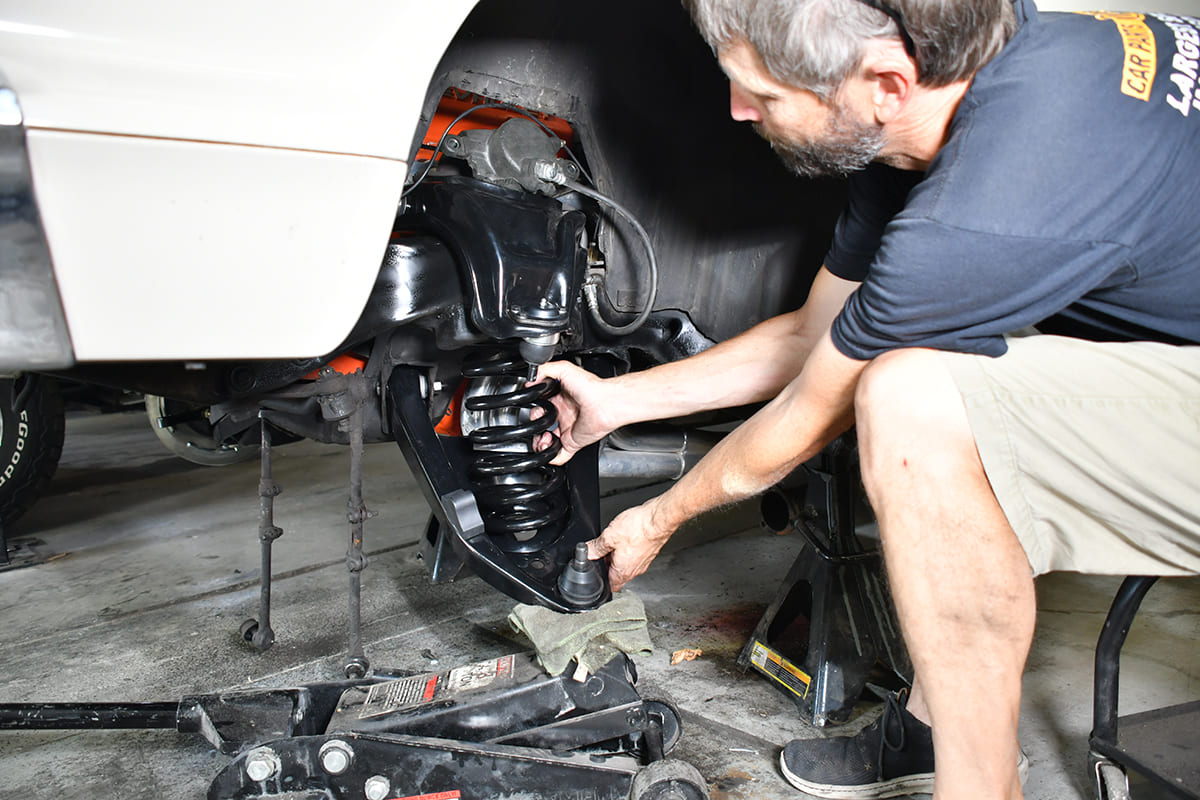
Before removing the spindle, place a floor jack under the lower control arm. The coil spring will be under some serious pressure and you want to support the arm once the spindle is removed. Slowly lower the jack, allowing the spring pressure to release and then pull the spring out.
We’ll follow up on the overall feel of the suspension once we’re back on the road. Until then, follow along through the replacement process.
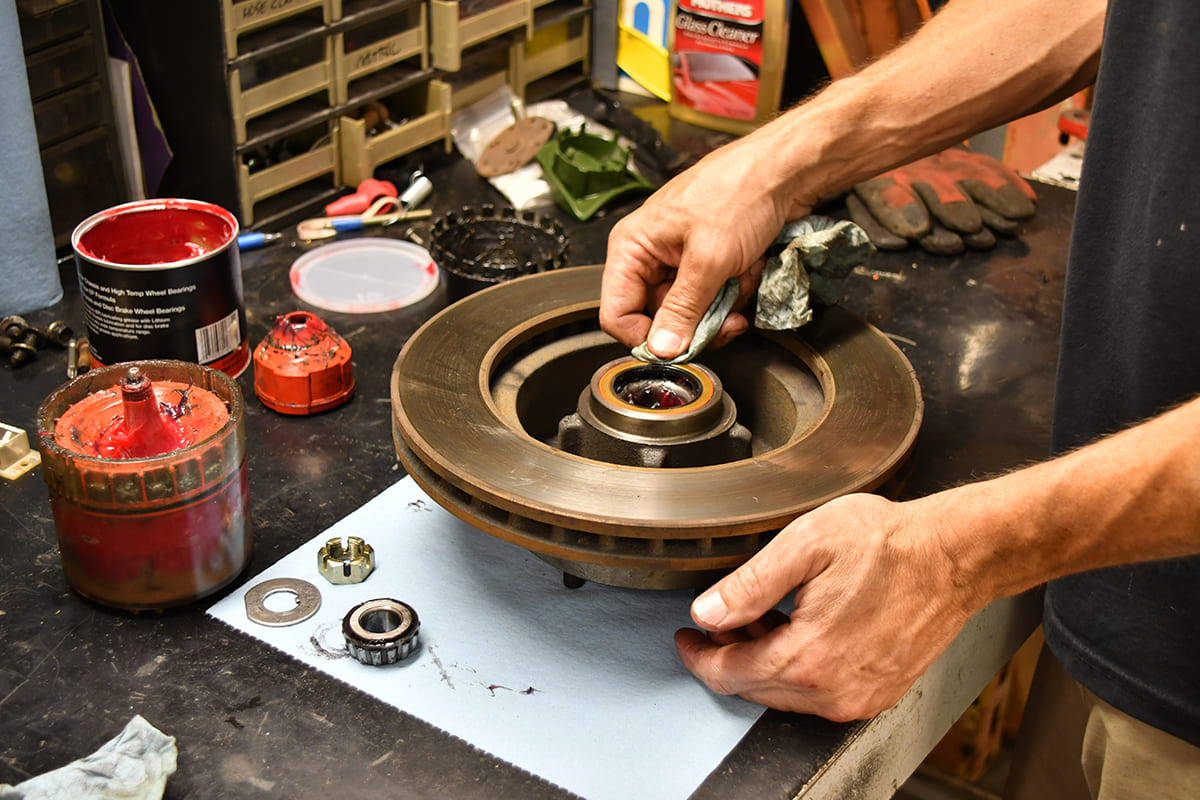
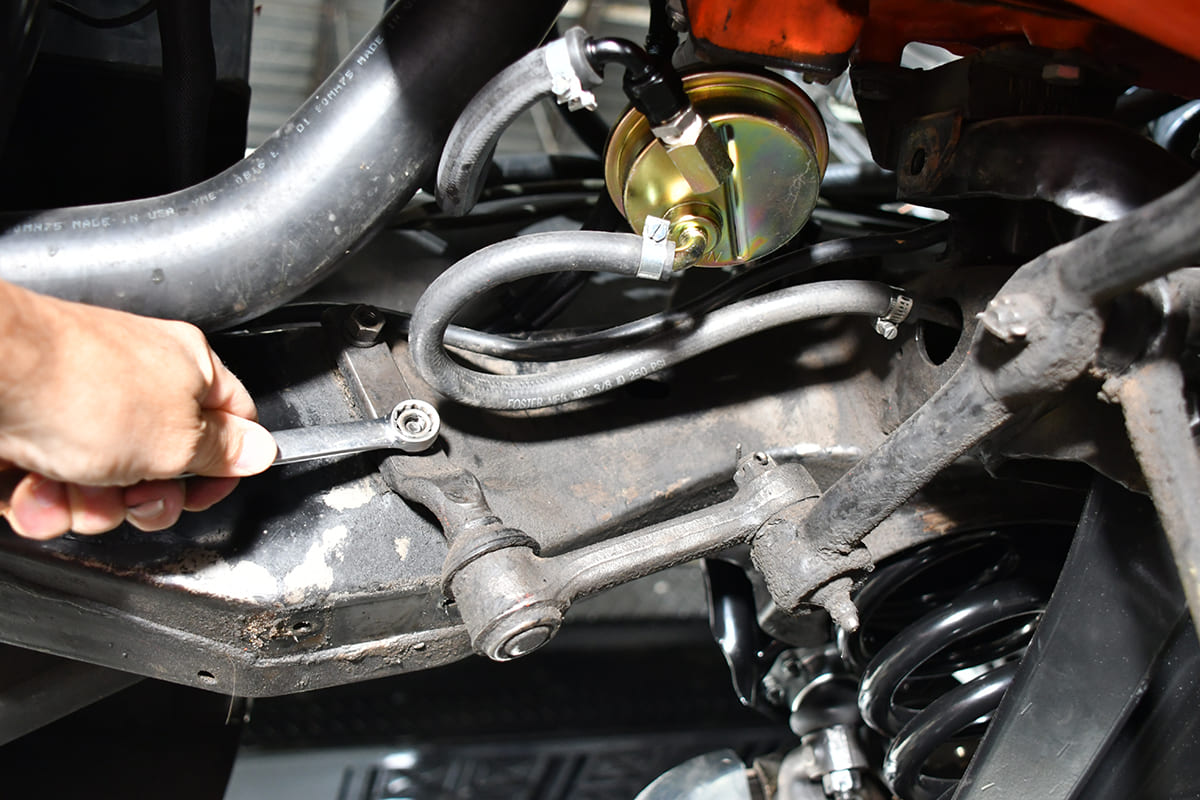
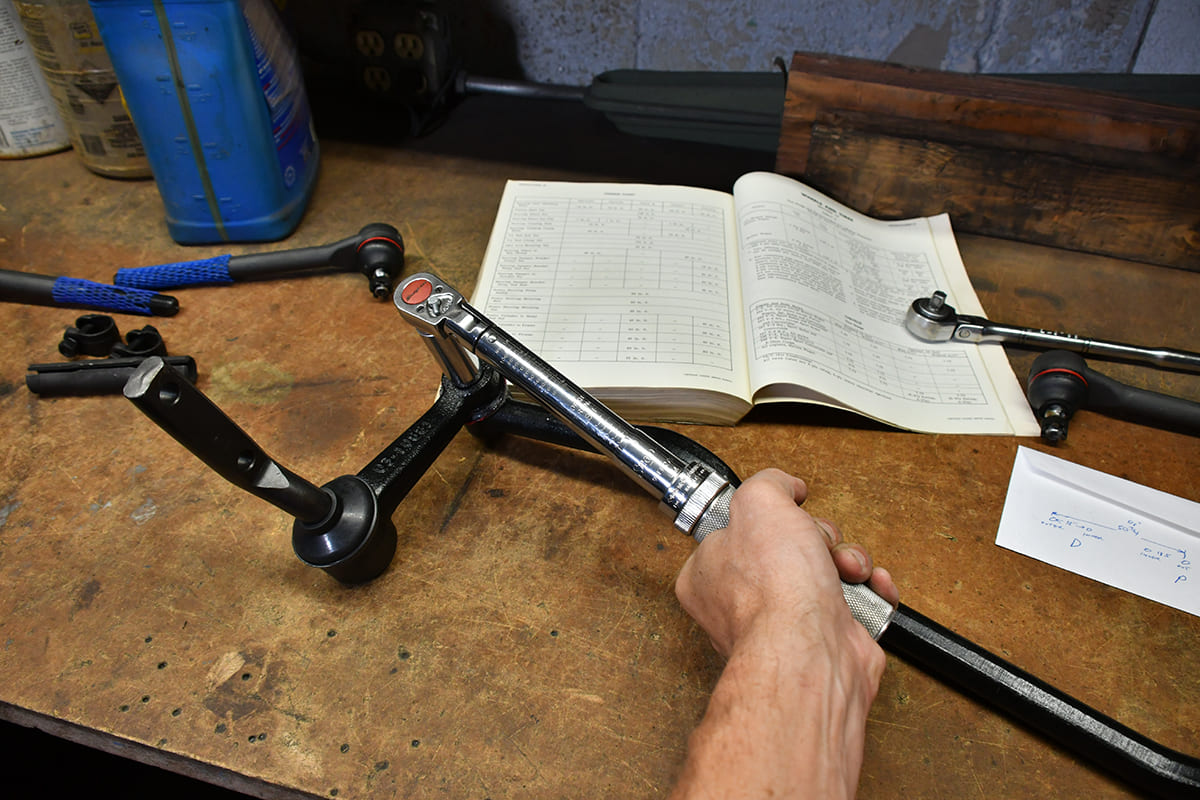
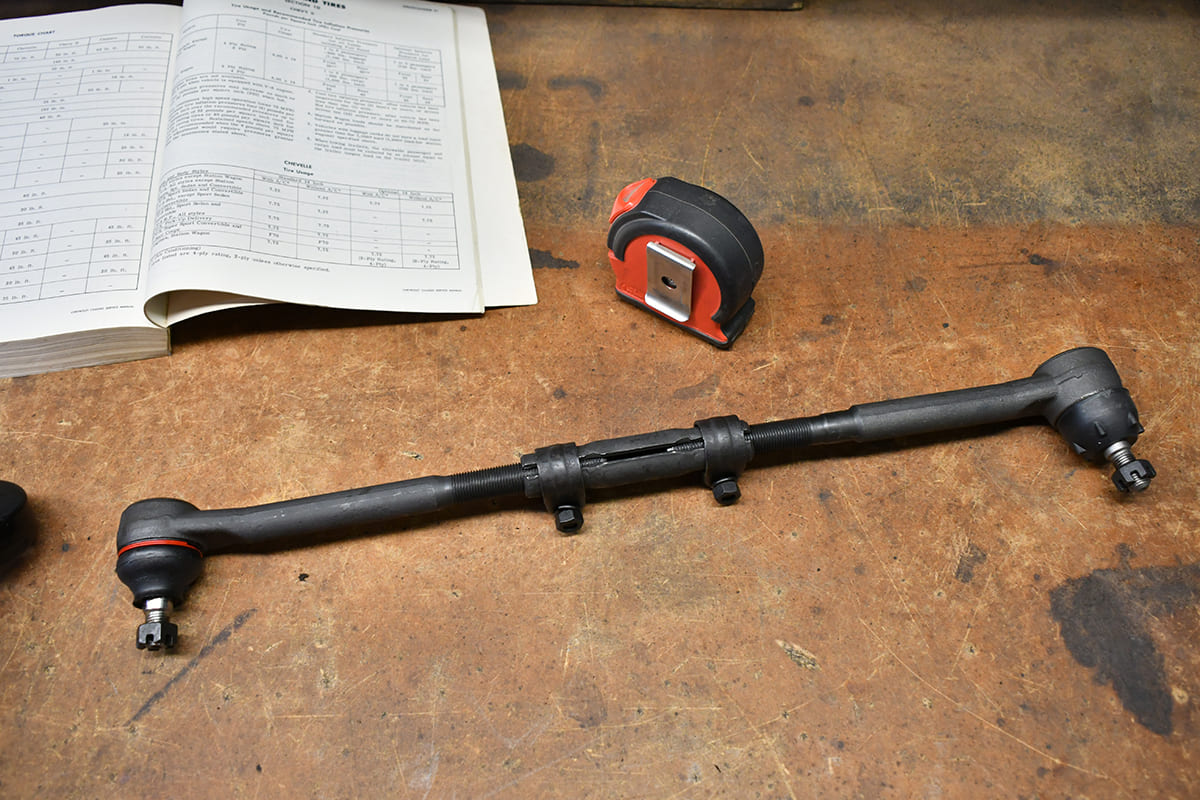
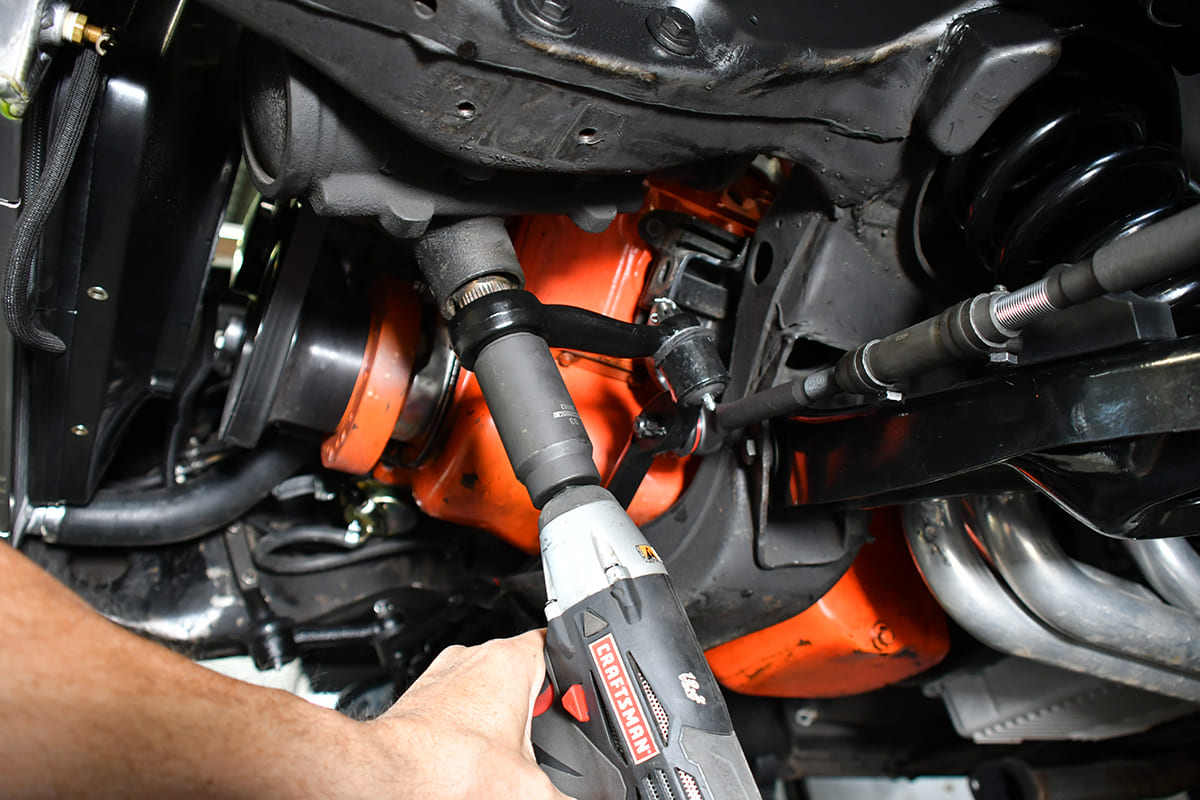
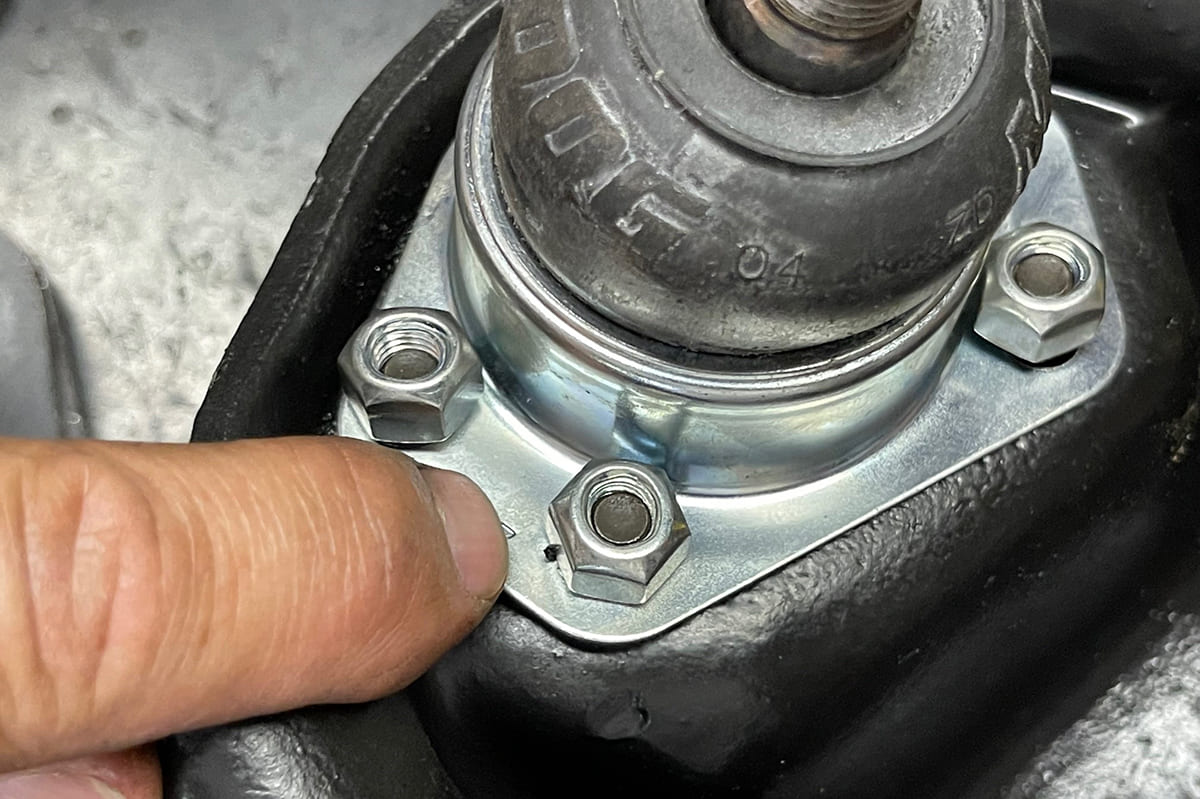
With the spindle and spring removed, it was time to pull off the lower control arm. This is easily accomplished by removing the bolt and nut. (We ran into some header interference issues on the driver side.)Moving to the upper control arm. From the wheelwell you can access the retaining bolts. These bolts have knurls that help keep the bolt from spinning during alignment adjustments so it is recommended to loosen the nut from the engine compartment first. Before fully removing them, it’s always a good idea to remove and note the location of the alignment shims to give you a starting point after the rebuild.The stock spring is on top with the 1-inch drop CPP spring on the bottom. Don’t let the simple coil of wire fool you, there’s a lot of physics at work with spring material to achieve a specific spring rate. Though physically shorter, the drop spring is designed to deliver a comfortable ride and support.Since we’re keeping our old Chevelle as a mellow cruiser we chose CPP’s direct replacement, stamped control arms. They also offer tubular control arms that are designed for more performance applications.We applied a small amount of grease to the bushing surfaces before sliding the new control arm in place. The original retainers were cleaned and used to secure the CPP arms in place (they also offer replacement hardware).The upper arms were put into position along with the original shims to get a starting point on the alignment. You’ll likely need a helper in the wheelwell to hold the bolts from turning as the assembly is tightened.The end of the coil springs align into a pocket on the control arm and were easier to install thanks to the slightly shorter length. A floor jack was positioned under the lower arm and slowly raised to introduce the spindle to the new ball joints.The upper and lower ball joints were torqued to factory specs using the new castle nuts and positioned to get fresh cotter pins in place.Before installing the hub or rotor, you should inspect the bearings and seal. During installation of the assembly, spin the rotor (or hub) as you tighten the castle nut to set the preload on the bearings. Always use a new cotter pin!With the front suspension back together, we set our sights on the tired original steering linkage. The outer tie rods were already removed so we worked on the pitman arm and idler arm. A pitman arm puller can be borrowed or purchased at most big-box parts stores.The idler arm gets its name from being, well, pretty much idle. It is bolted to the inside passenger framerail to support the centerlink. You’ll need an extension and socket to reach the bolt head through the framerail.We pulled the entire steering linkage off in one assembly. CPP offers all new components, including inner and outer tie-rod ends, pitman and idler arm, and centerlink.We decided to assemble the linkage on the work bench then hoist it up into position on the car. Using our original shop manual, the idler arm, pitman arm, and inner tie rods were assembled and torqued to the factory specs.We measured the old tie rod assemblies and set out to assemble the new parts in a close manner. The inner tie rods were recognizable with the red grease seal and new Zerk fittings were also included.With the steering linkage assembled, we lifted it into position aligning the idler arm mount and the pitman arm. Note that the pitman arm has four flat spots so it will only install on the shaft when aligned properly. The pitman arm lock washer goes in place and the nut gets torqued to a stout 120-150 lb-ft.
SIDEBAR
DIY Control Arm Rebuild
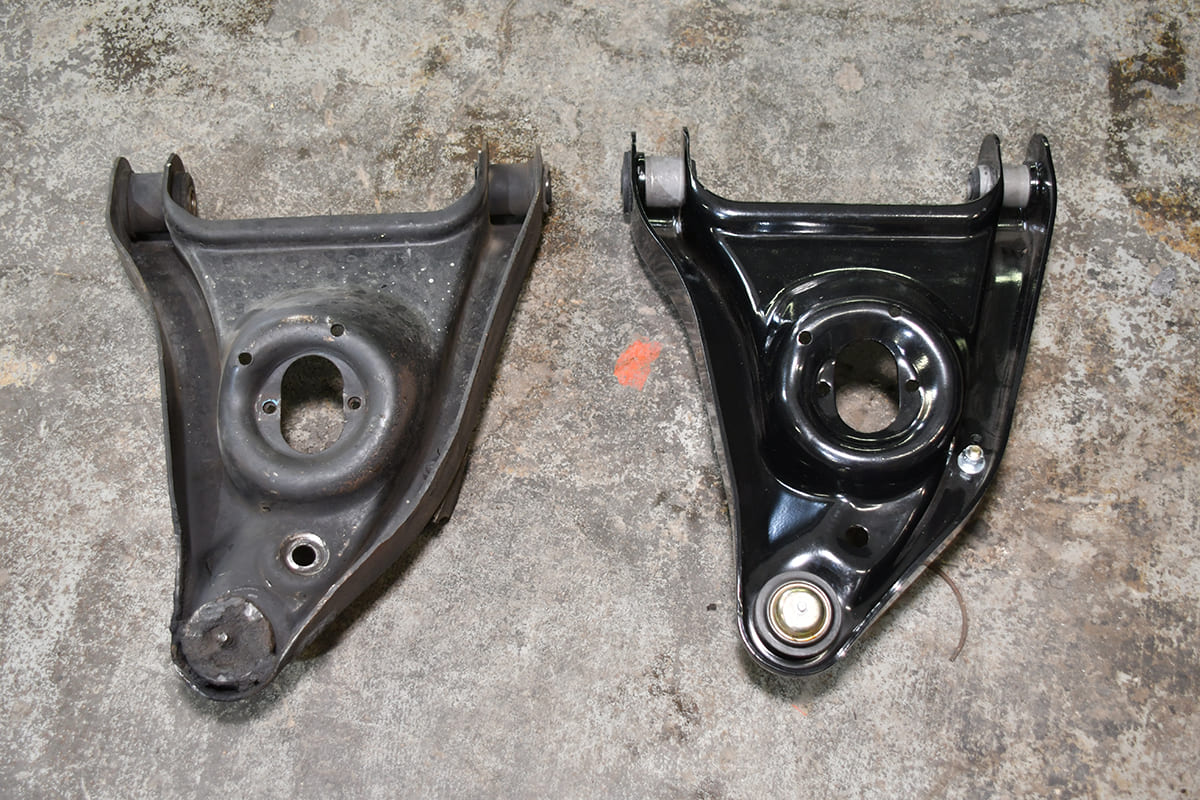
It’s safe to say that if the front suspension on your Chevy hasn’t been updated or replaced yet, it’s probably time to think about it. There are many great choices for new control arms, but remember, it’s not the stamped steel control arm that wears out, it’s the ball joint and bushings. If your control arms aren’t rusty, damaged, or bent, the arms themselves can be rebuilt and CPP has you covered. They offer new control arm bushings and ball joints if you prefer to rebuild your stockers. We decided to rebuild our upper arms to walk you through the process. It will take a little sweat, maybe some blood or tears, and probably a little cussing, but the job can be done in your garage and done right to save a few bucks.
An air hammer is ideal for removing the stock rivets that secure the ball joint, but since we don’t own one (yet), we broke out the grinder and drill bit. It’s amazing how durable these rivets are!
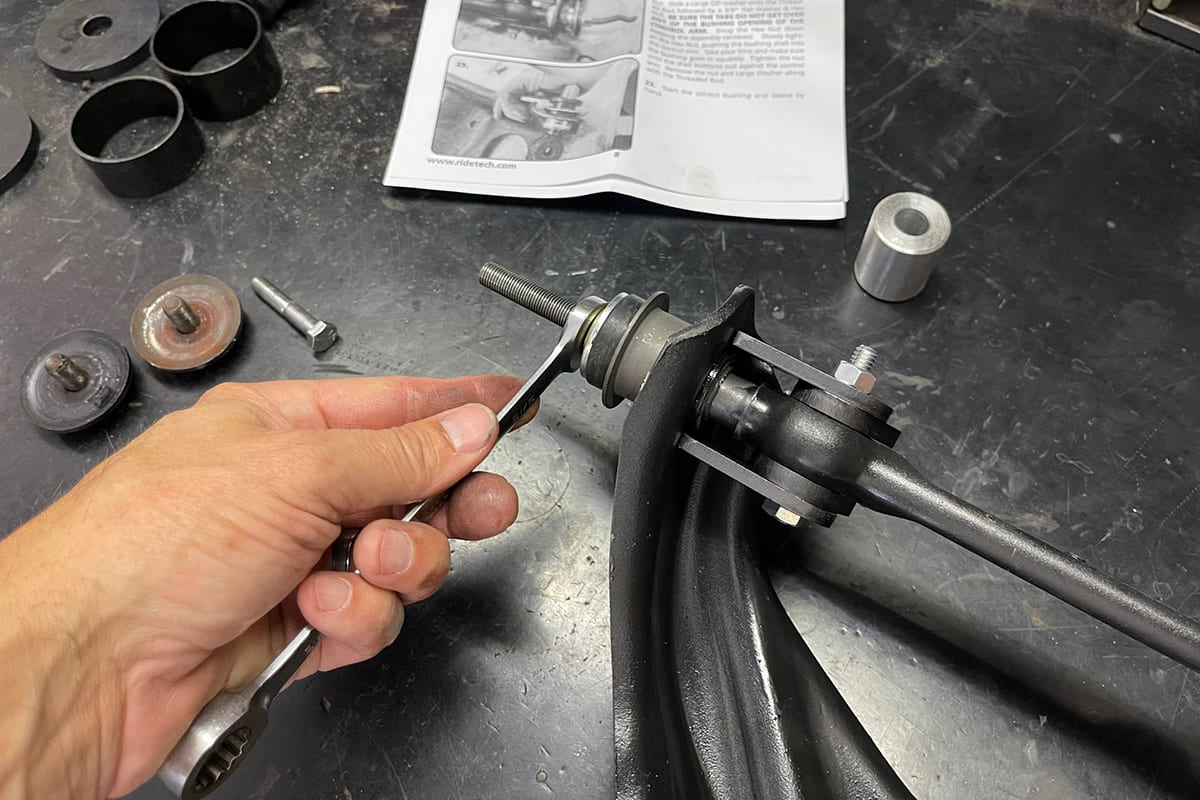
Removing the upper bushings without the proper tools can be a challenge, so we opted to buy a tool kit to help out. RideTech offers a handy kit that helps remove and install the bushings for a number of different applications. It made the job much easier!A trip to the sandblast cabinet followed by a quality rattle can primer and satin black had the arms looking like new.The installation kit came with different length spacers and threaded stock to help guide and push the new bushings into the arms.The new ball joints will be secured by new bolts and nuts rather than rivets. The ball joint fits through the top of the arm then covered by a new boot and cage assembly to hold it in place. Notice that the supplied nuts are locking nuts so no thread locker is required.
We use cookies to ensure that we give you the best experience on our website. If you continue to use this site we will assume that you are happy with it.