


Upgrading the Wiring Harness in an Early Chevelle
By Jeff Smith – Photography by the Author
It’s an unavoidable fact of life. The object of our ’60s and ’70s Bowtie muscle car affections are well past long in the tooth. They are well past silver anniversaries and are sneaking up on 60 years of extended service. Time tends to take its toll on items that we often take for granted—like the electrical system.
Another fact of muscle car life is that electrical systems also suffer some of the greatest abuses. Electrical hacks, botched wiring attempts, cheesy add-on mistreatment, and a host of other sticky black electrical tape exploitation over decades of modifications have left these machines often in need of attention.
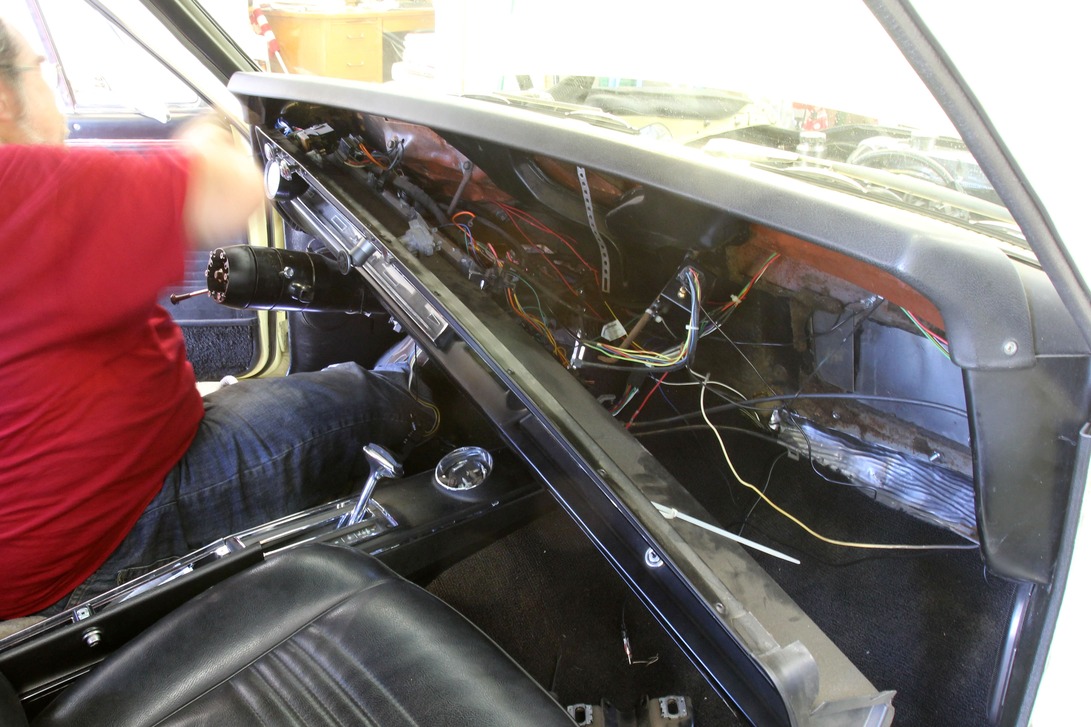
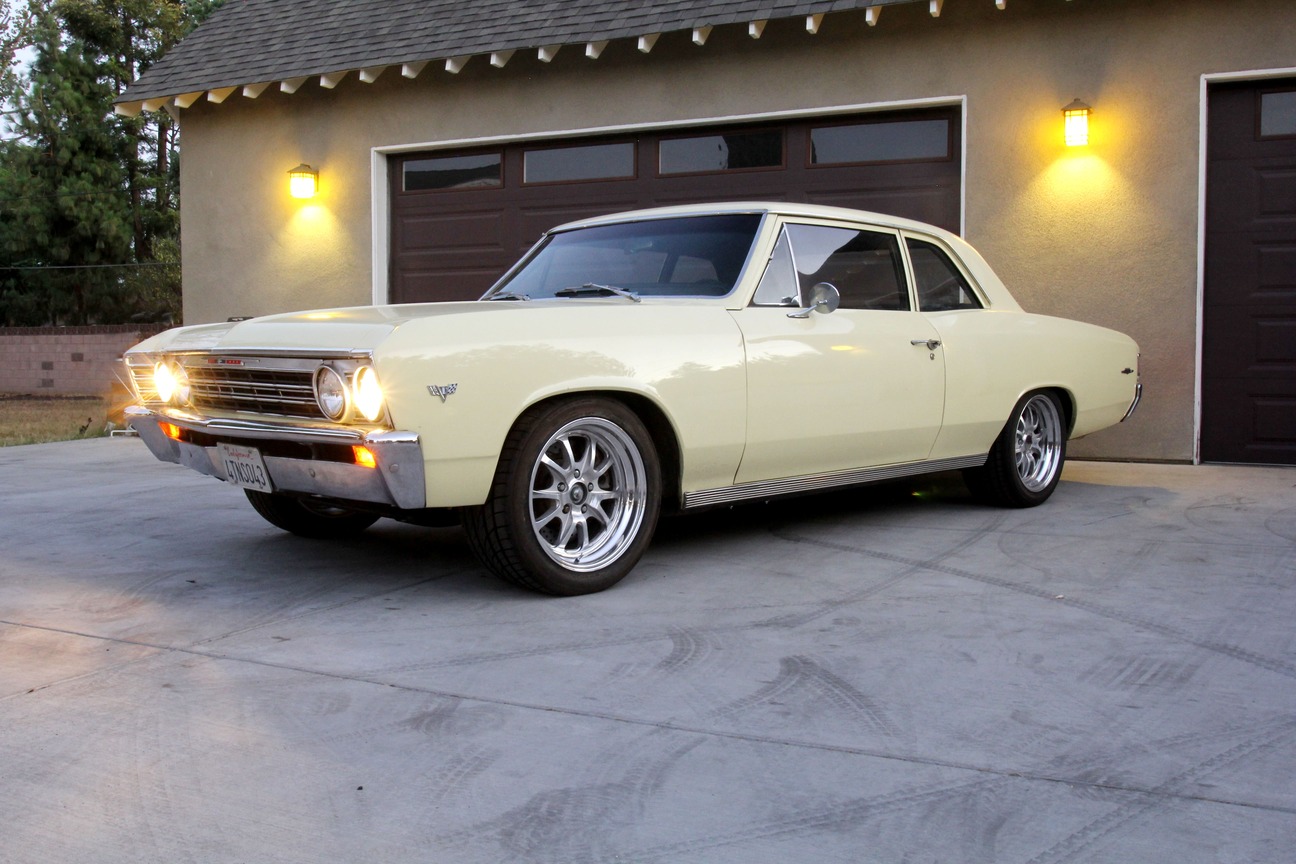
In our case, it was the same ’67 Chevelle that we just finished enhancing with a 5.7L LS engine and 4L60E swap. The mechanical conversion was complete and the car ran sweet, but allowing it to sit for more than six hours would put a serious drain on the battery. While repair was certainly possible, the decision was to delouse the machine completely in favor of a brand-new American Autowire electrical harness.

Read more about this Chevelle: A Rare Big-Block-Powered Two-Door Chevelle Wagon
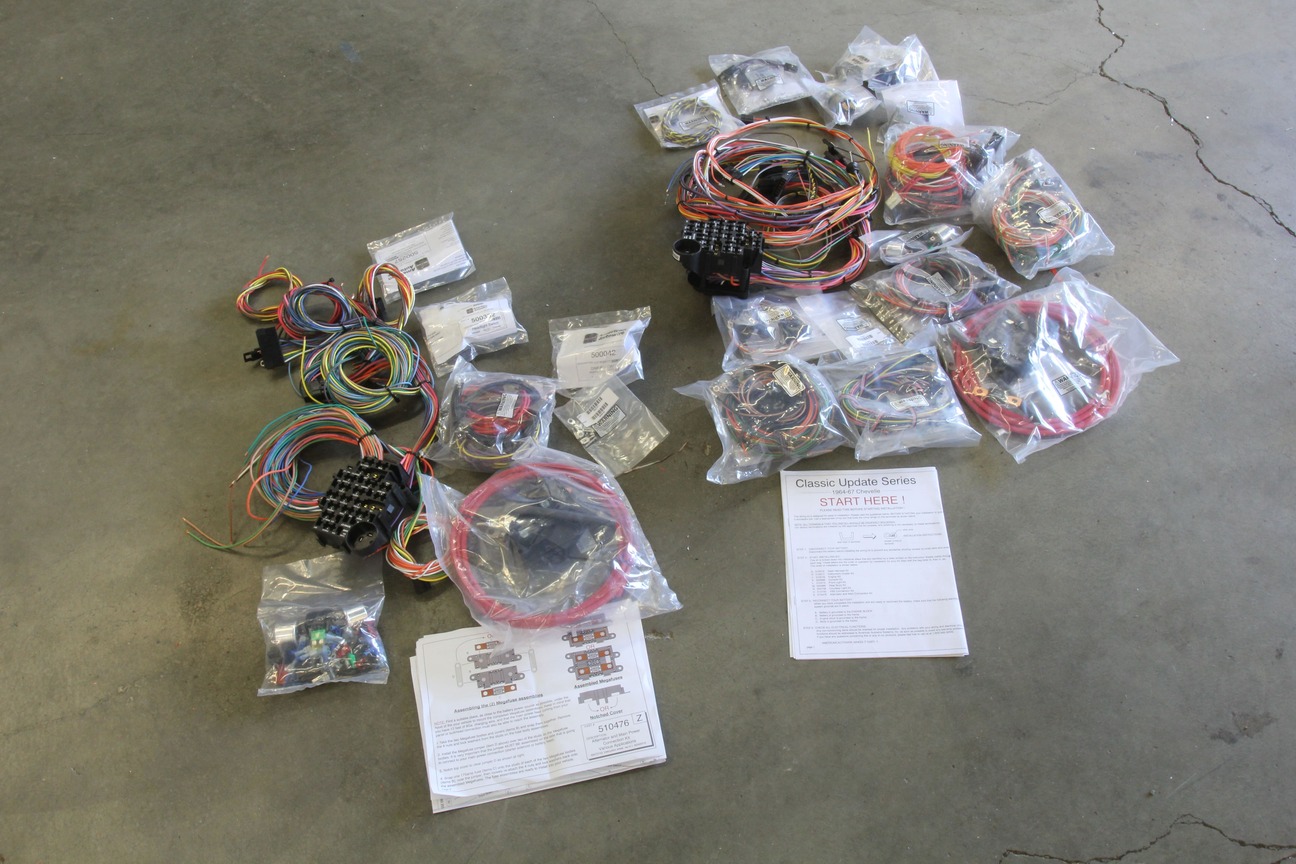
Most car guys abhor electrical work. It’s not difficult but it is time-consuming if you want to do it correctly. Car owner Eric Rosendahl opted for the Power Plus universal American Autowire 20-circuit kit for his Chevelle since he’d already revised so many portions of the electrical system, so that the specific Classic Chevelle kit offered numerous areas that were no longer needed. There are advantages to both systems, so it’s worthwhile to review each before making a decision.
As an example, the Chevelle’s LS swap (detailed in an earlier issue) using a factory GM ECU required separating the starting circuit from the factory harness after the ignition switch and running it through the 4L60E transmission’s integrated neutral safety switch. Plus, the ignition side of the circuit was also changed, so for these and other reasons, Rosendahl elected to go with the Power Plus 20-circuit universal package.
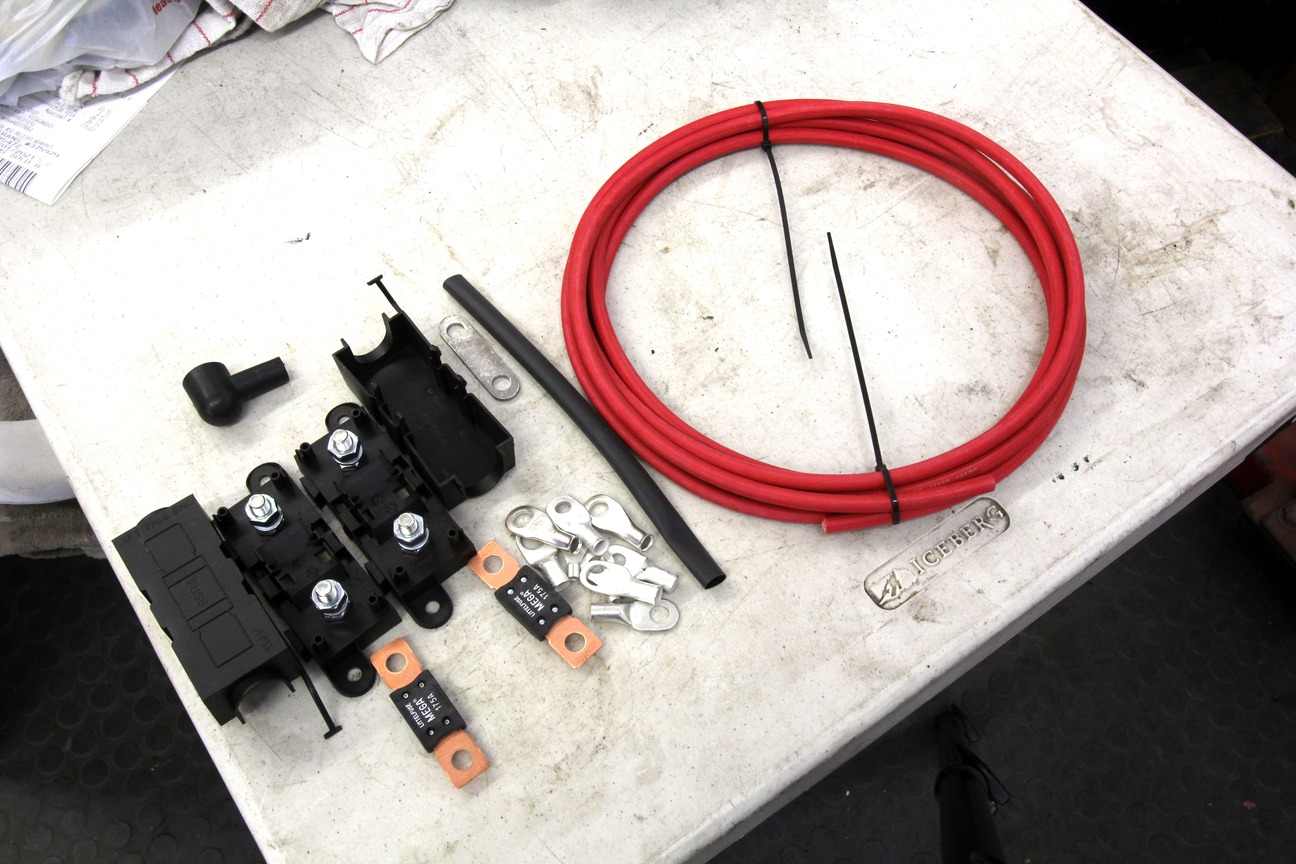
What makes American Autowire’s universal Power Plus and Classic harness systems of greater interest is the inclusion of a pair of large 175-amp fuses. These fuses protect the entire vehicle with one integrated into the alternator output circuit while the second guards the rest of the electrical system. This is far and away superior to the rather minimalistic protection offered by the original factory harness. The large six-gauge wire offers the alternator a more efficient way to charge the battery that will also do a great job of powering all the added electrical items.

The universal kit also includes new headlight and dimmer switches. The universal kit only offers two new headlight plastic connectors, so for an early Chevelle two more new ones would be needed unless you reused the originals. The low beams use a three-pin connector while the highbeams are a two-pin.
There’s also a six-way power accessory plug outlet in both the Power Plus and Classic Update kits that provides six, fuse-protected 15-amp circuits that could be used for any number of different dash or interior aftermarket accessories. For example, if you wanted to power up an adapter for charging a cell phone from the console, this could easily plug into this circuit.

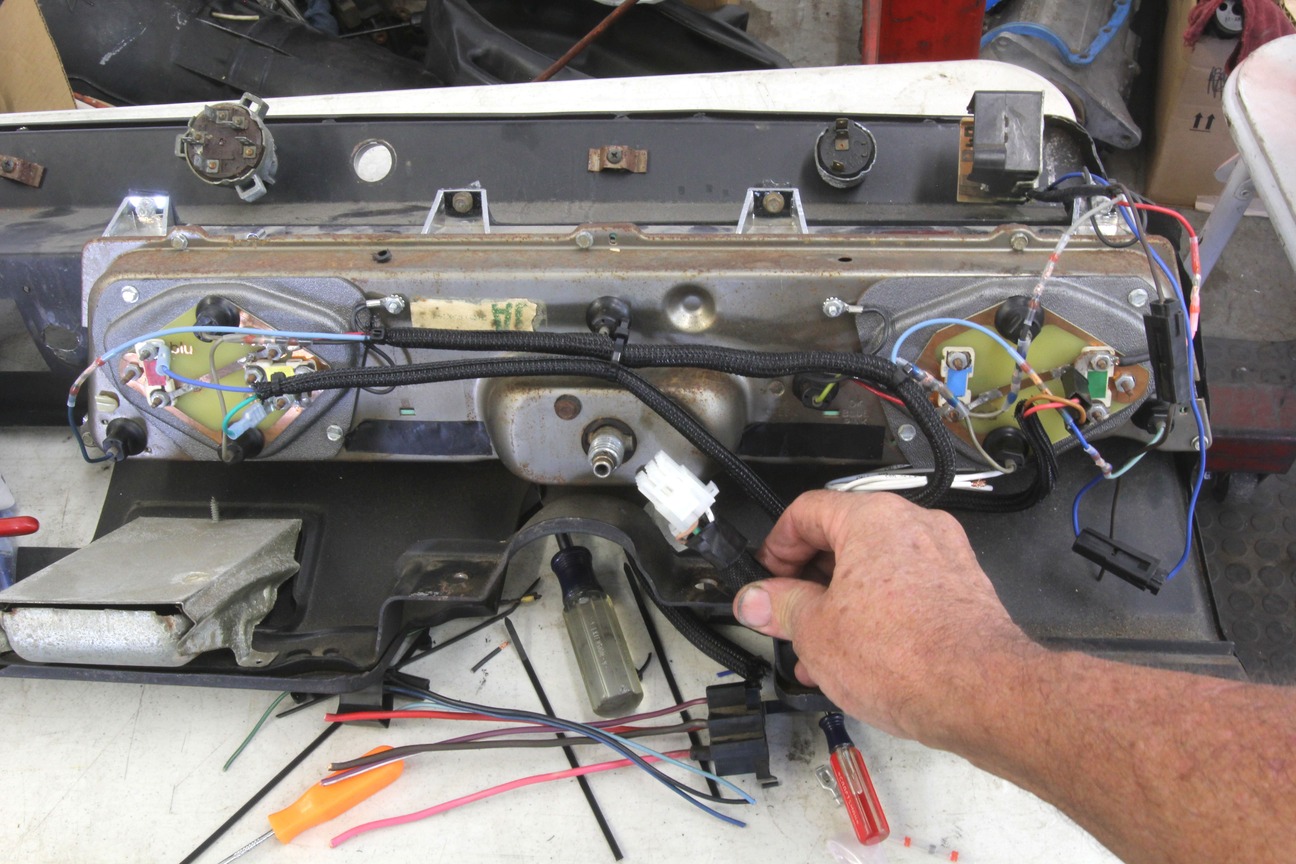
This Chevelle had previously been treated to a Shiftworks electric gauge conversion that duplicates the original ’67 Chevelle dash gauges that are now all electric. Rosendahl decided to add a 12-pin connector to allow simple connection between the instrument cluster and the rest of the harness. This would accommodate all the connections to the rear of the cluster that could also incorporate the dash warning lights. The American Autowire Chevelle Classic Update kit is already pre-wired for an instrument cluster single-disconnect connector as well as a pair of underdash courtesy lights that Rosendahl also added for his car.
Rosendahl had previously added a headlight relay kit from another manufacturer so that required only re-wiring one headlight connector since the other three (the other low beam and the two high beams) were previously re-wired. A headlight relay kit is a great addition to any older Chevy since relays reduce the voltage drop that occurs in the stock circuit where power has to run up to and through the headlight switch and then all the way back to the headlights. With a relay kit, power is fed by the relays directly to the headlights. This means the headlight switch only triggers the relay, which greatly increases voltage to the headlights, making them brighter.
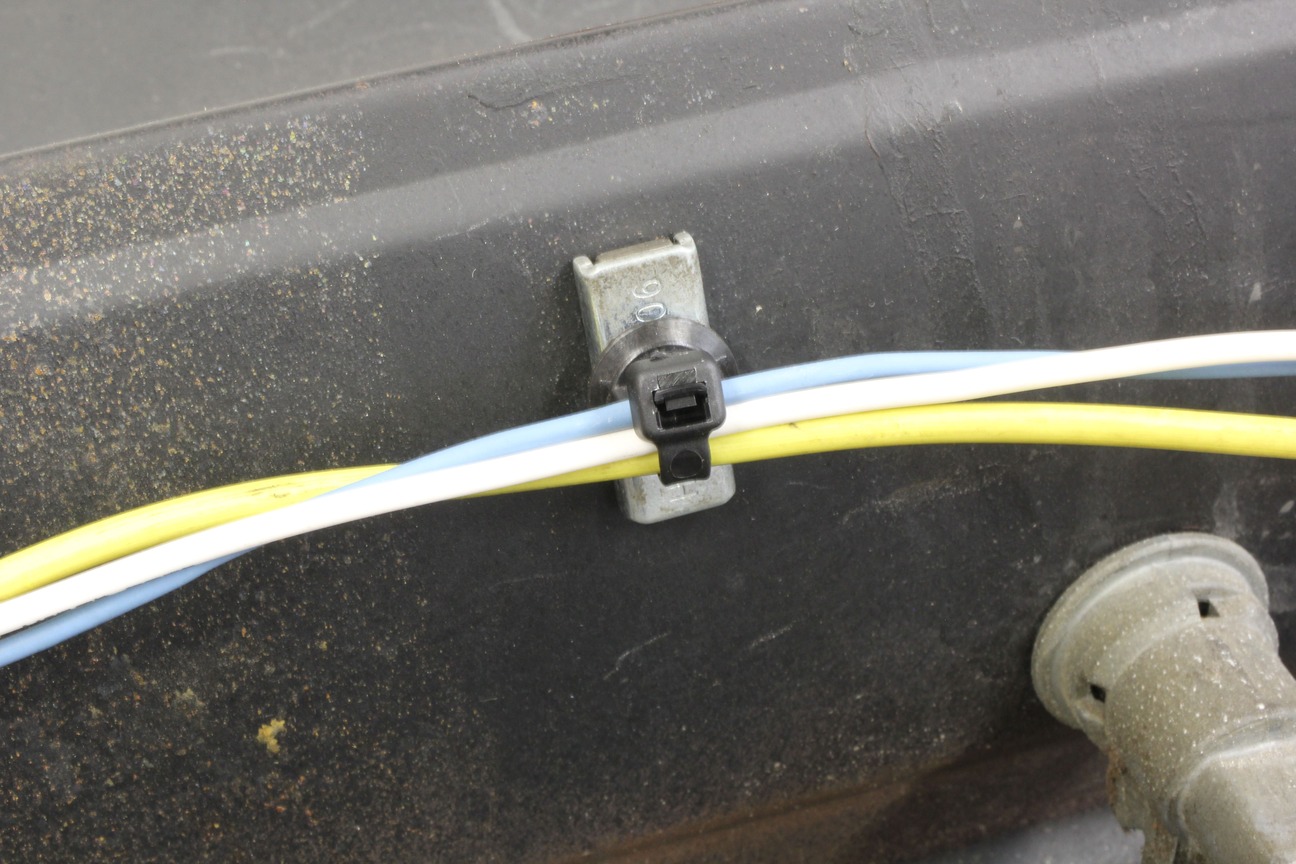
With the fuse box mounted to the firewall, Rosendahl then routed the wires through the firewall with a protective grommet and also directed the wires to the rear of the car. He started by working from the front of the car rearward. This kit offers one power lead for the windshield wipers, so Rosendahl decided to keep the original connectors but added new wires at the wipers. Windshield wipers operate by completing the circuit to ground.
Take a look at this Render by Travis Highlander: 1969 Chevelle – Vehicle Build by Grind Hard Garage
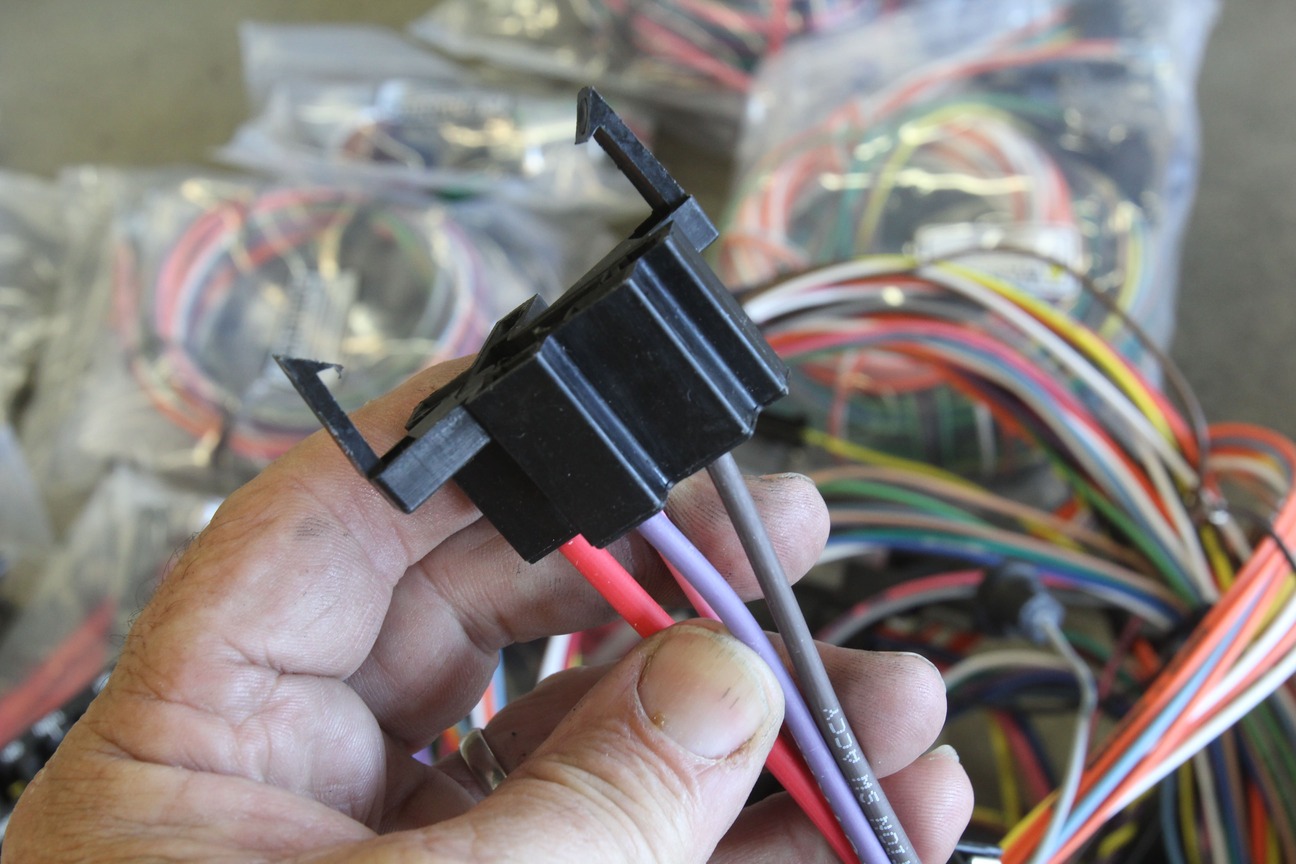
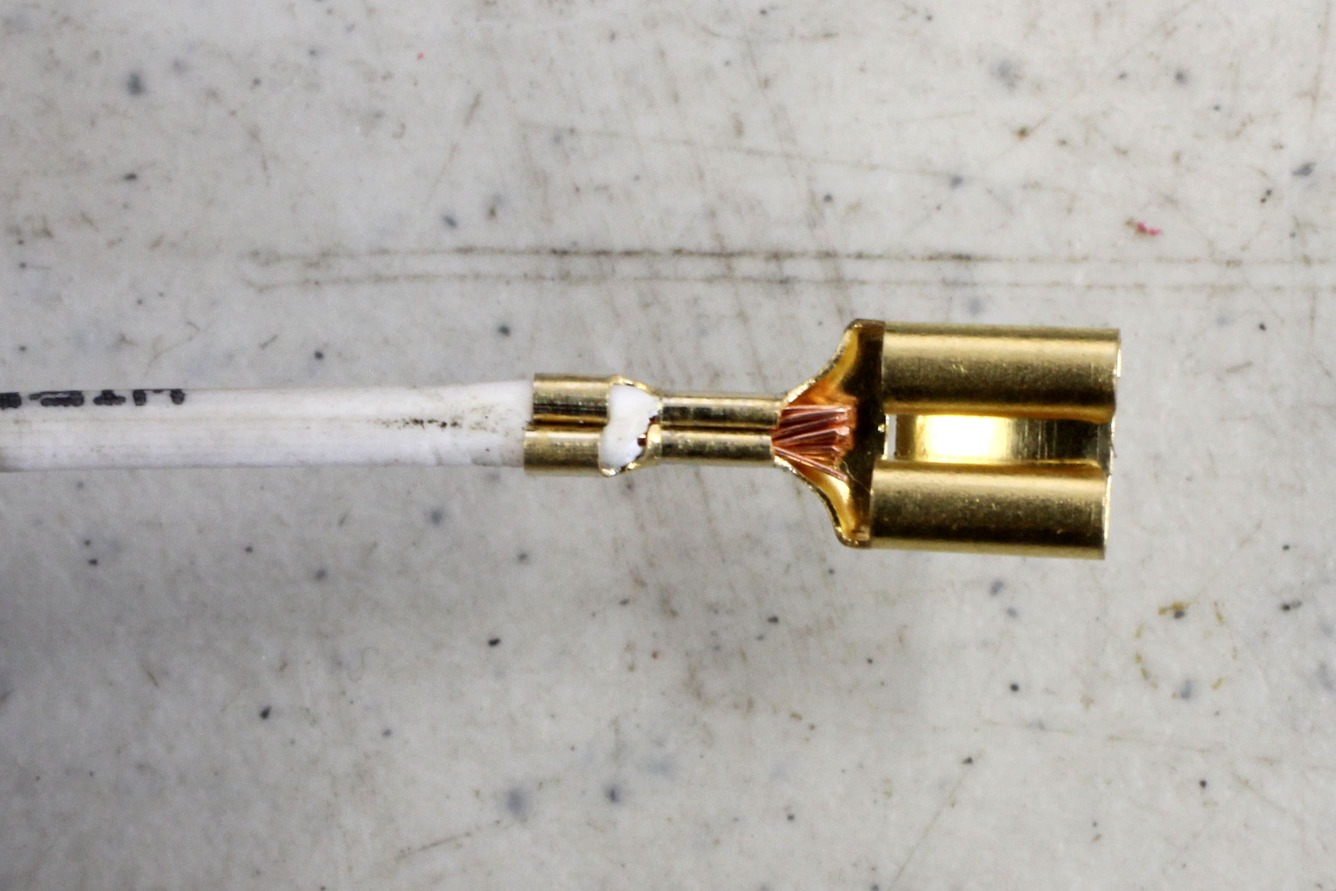
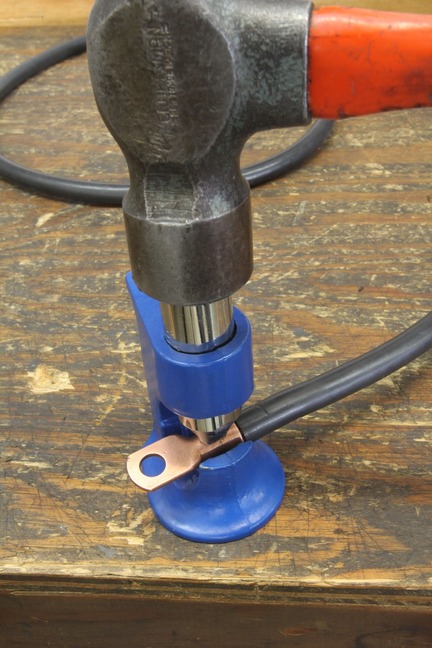
Many of the circuits that will need new connectors, like the headlights, windshield wipers, and other components, such as an HEI distributor (for a small- or big-block Chevy engine, for example), use what is called a Packard Type 56 female connector that fits inside specific holders. These female connectors require two crimps for each wire connector. The first is the wire crimp and then there is a second crimp that captures the wire as a strain relief.
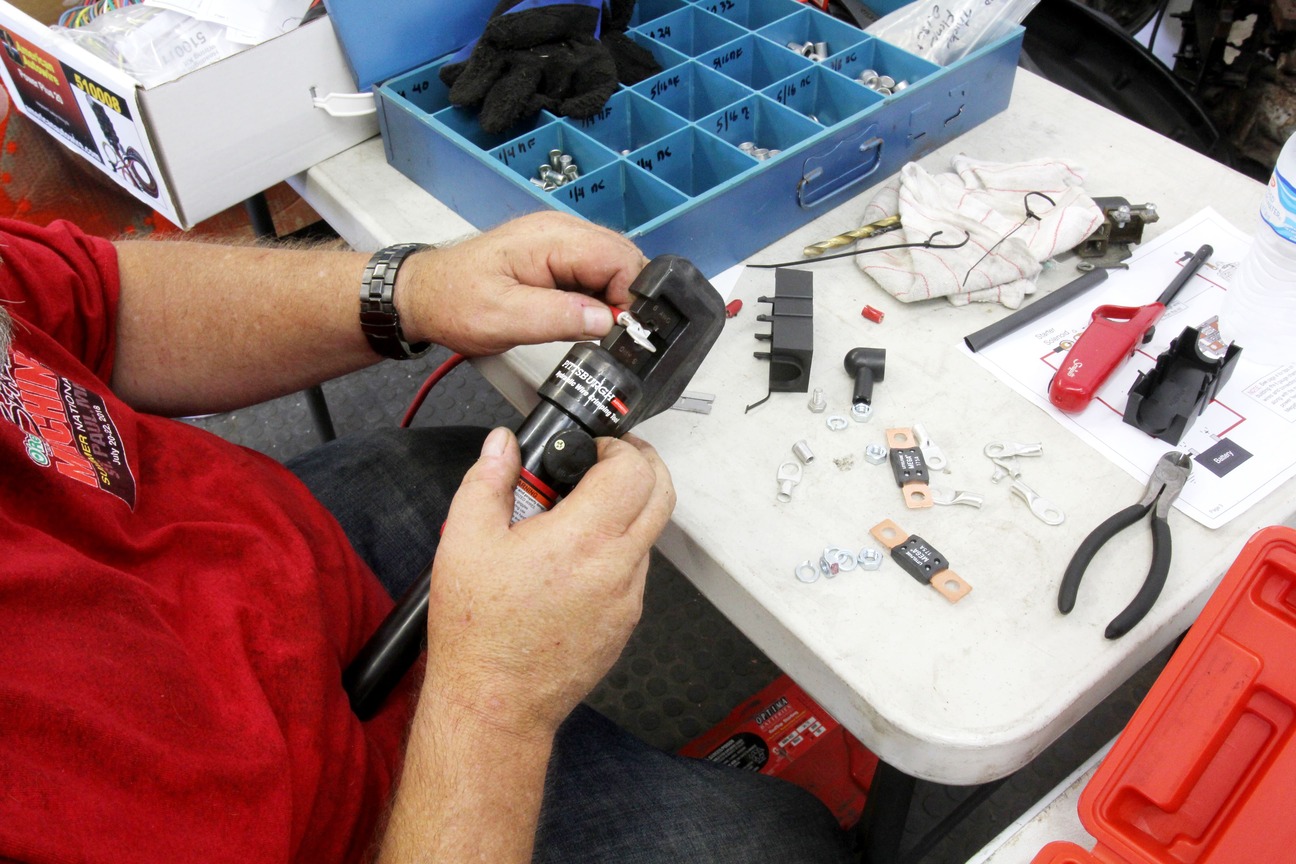
American Autowire sells a single- and double-wire crimping tool but Rosendahl used his blue handle crimping tool purchased online. American Autowire’s website includes a video that runs through the steps necessary to perform a professional wire crimp that is worth the time for details on how to create the proper crimp. These crimps may require a little more effort, but the results are definitely worth the time.
Because Rosendahl is using the universal kit, the rear wiring harness uses long, un-terminated wires to the rear of the car. He elected to reuse the original factory ribbon harness along with the taillight/brake light sockets and other connectors because they were in decent shape. He merely spliced the new harness wires upstream of the factory ribbon harness connector to the rear. American Autowire does offer new taillight sockets individually and are the same ones used in the Chevelle-specific Classic Update kit.
One of the other advantages of the American Autowire kit is that it also eliminates the need for that clunky factory mechanical horn relay since the kit uses a more modern electronic horn relay located under the dash. We’ve found that replacing the factory horn relay with a twin-post, insulated power source for switched power offers a convenient place to pull power from under the engine compartment.
The American Autowire universal Power Plus harness does not come with a pre-wired terminal for the ignition switch, so Rosendahl decided to reuse his original ignition switch plastic connector because it was in good shape. However, many ’60s GM cars we’ve seen suffer from a melted connector as a result of resistance in the starter circuit. In this case, new connectors and a new ignition switch would be worthwhile investments. The American Autowire Classic update kit includes the parts and comes pre-wired.

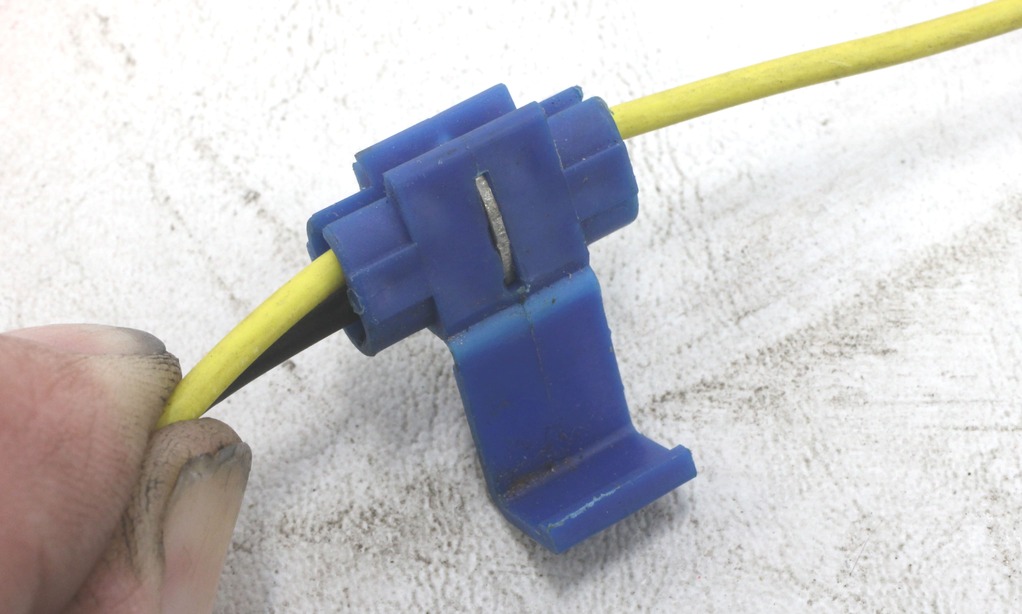
In many cases, it might be advantageous to mate two wires together. The Power Plus universal kit supplied a pile of the blue insulated butt connectors that can be used for this effort. Rosendahl prefers to use a non-insulated butt connector that is insulated with a short length of heat shrink tubing. This produces a much cleaner look and a much more professional appearance.
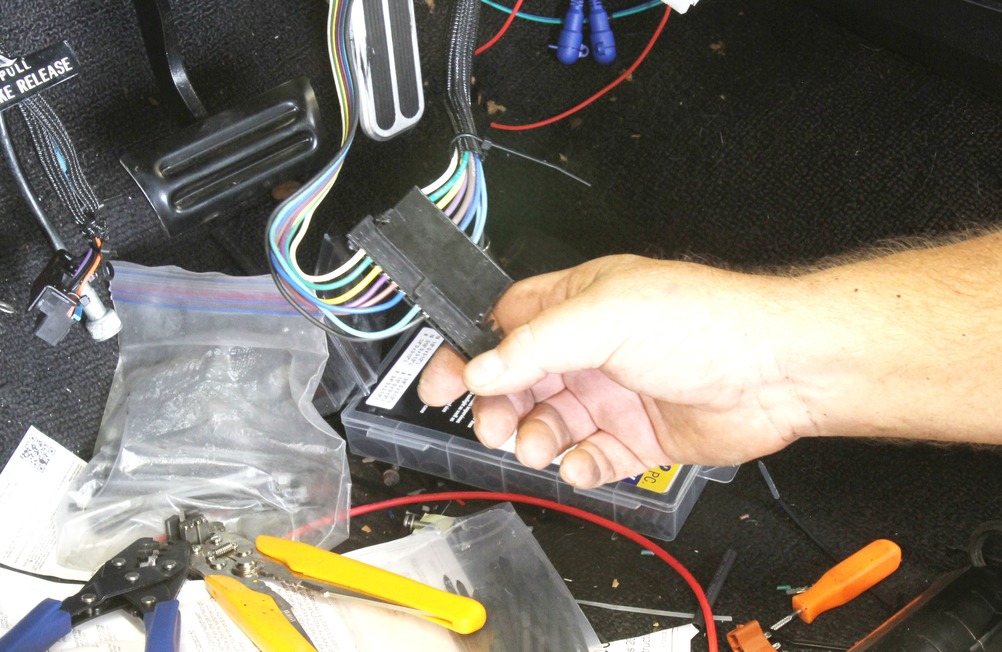
The universal kit supplied a generic steering column adapter so Rosendahl purchased an adapter that should have converted this ’67 column to the later-model column connector used in the Power Plus harness. However, this separate conversion connector also did not work so the ultimate solution was to remove the factory steering column connector and re-pin a long, 16-pin black connector with the small thin pins supplied with the kit to the main harness. This only required another 10 minutes and presented no real challenge.
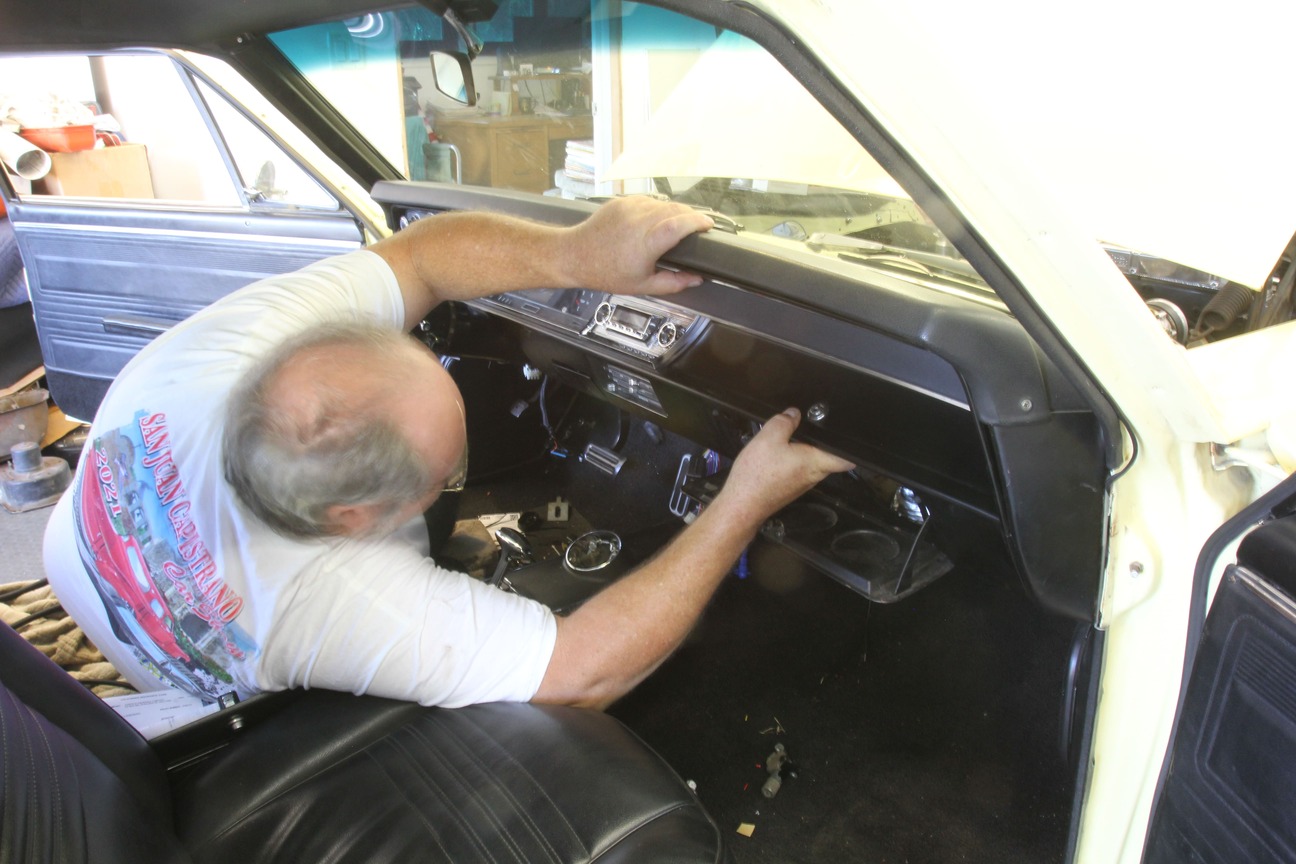
With the dash reinstalled in the car, we connected the battery and instantly discovered a current draw as evidenced by a small spark when connecting the positive battery cable. We used a test light connected between the positive battery cable and the positive post on the battery that will light anytime there is an electrical draw. Rosendahl then began removing individual fuses until we traced the draw to the brake light circuit. At first we thought the brake light switch was misadjusted, but the brake lights were not on.
Check out this LS Chevelle Swap: Part I: Details on Replacing a Small-Block Chevy With an LS and 4L60E
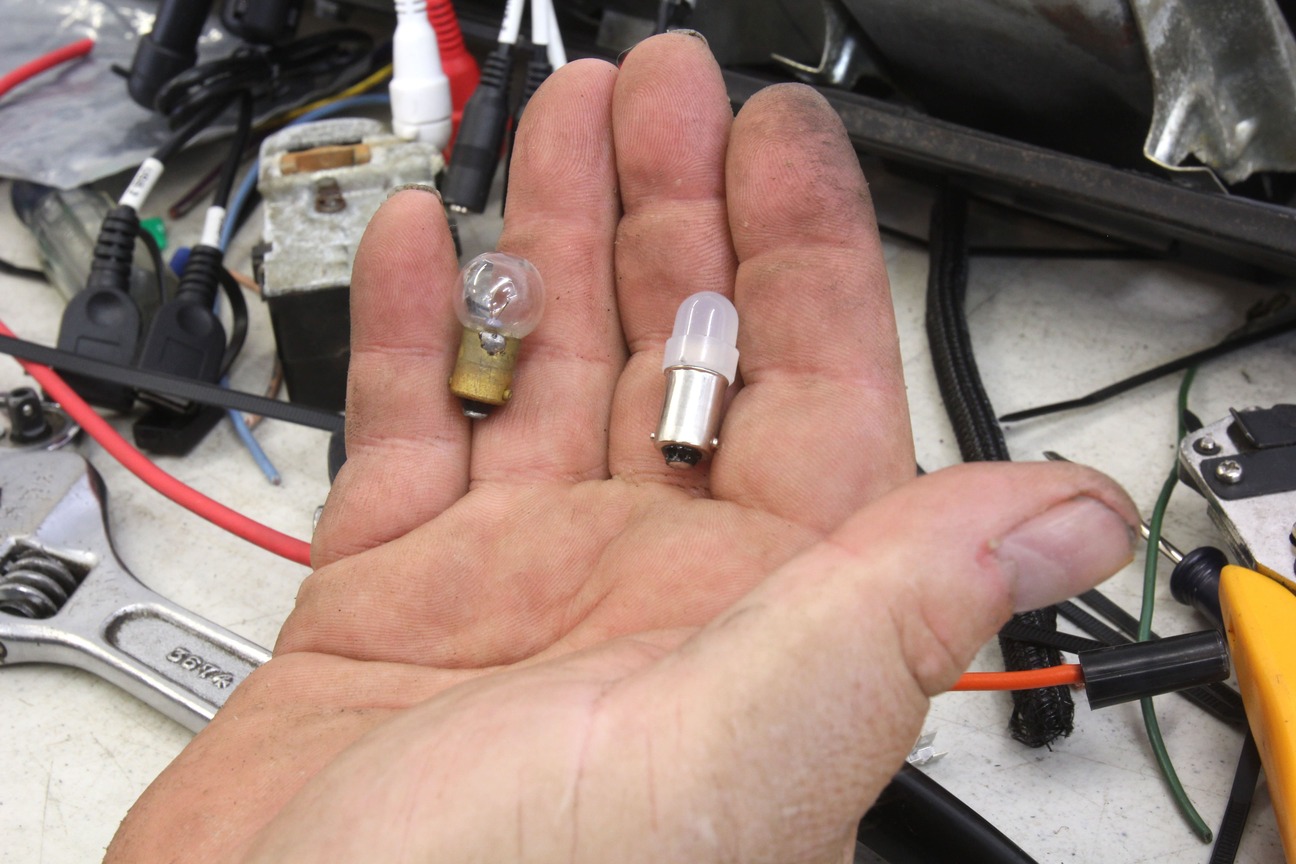
Then Rosendahl discovered that the dome light circuit is tied into the brake light circuit (non-switched power) and since both doors were open that was the source of our current draw. We closed the doors and the test light went out! We felt a little silly but also good because all the other circuits worked perfectly. A couple of days of driving the car now confirm that the battery drain problem and intermittent circuit failures are gone and all the electrical circuits work far more efficiently. Plus, now with new LED dash instrument cluster bulbs, the dash now is more than bright enough to actually read at night.
Rosendahl took his time working on this project mainly by himself and was able to bring the Chevelle back to better than stock in roughly about three days of effort. Beyond just improving the electrical circuits in his Chevelle and not having to stress over forgetting to disconnect the battery, there’s also that sense of accomplishment with a job completed to your own satisfaction. That alone makes the effort and expense worthwhile. ACP
| Parts List | ||
| Description | PN | Source |
| American Power Plus 20 Universal kit | 510008 | American Autowire |
| American ’64-67 Chevelle complete | 500981 | American Autowire |
| American Steering column wiring adapter | 36882 | American Autowire |
| American single-wire crimp tool | 510585 | American Autowire |
| American double-wire crimp tool | 510586 | American Autowire |
| American Autowire courtesy light kit | CH1748 | American Autowire |
| Harbor Freight hyd. wire crimper, 0-14 gauge | 66150 | Harbor Freight |
| Moroso battery cable crimp tool | 62262 | Summit Racing |
| Zip tie kit | 940047 | Speedway Motors |
| Split woven loom, ¼ inch | 910458014 | Speedway Motors |
| Mag Daddy magnetic zip tie holder, set of 5 | 91062422 | Speedway Motors |
| Standard Motor ignition switch | US43 | RockAuto |
| LED dash light bulb | BA9S | Superbrite LED |
| LED dome light bulb | 578 | Superbrite LED |
| Twin post electrical terminal block | 555-10521 | Jegs |
| Moroso battery cable crimp tool | 62262 | Summit Racing |
Sources
American Autowire
(800)482-9473
americanautowire.com
Harbor Freight
harborfreight.com
Magdaddy USA
(847) 719-5600
magdaddyusa.com
Speedway Motors
(855) 313-9173
speedwaymotors.com/allchevyperformance
Superbrite LEDs
(866) 590-3533
superbriteleds.com


