Whether you find yourself restoring a classic truck to its original spec or you’re building a full-custom show truck, one of the first things you’ll be forced to tackle is any underlying damage to the cab and sheetmetal. Be it dings and dents from a previous fender bender or full-on cancer caused by years of gathering debris in dead-end sections of sheetmetal, those imperfections need to be sorted before one can even start thinking about any body- and paintwork.
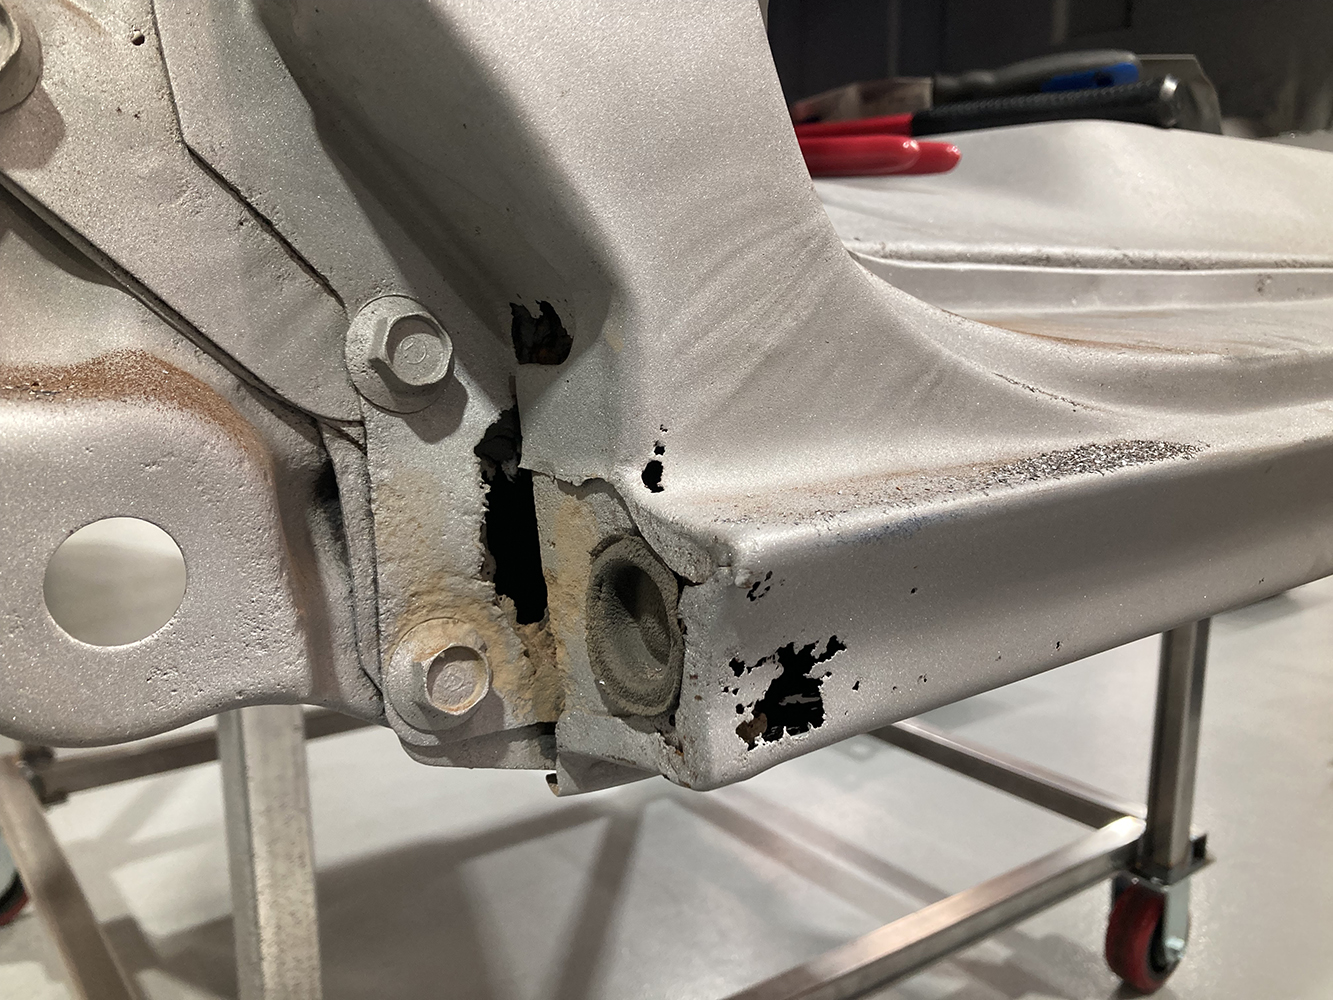
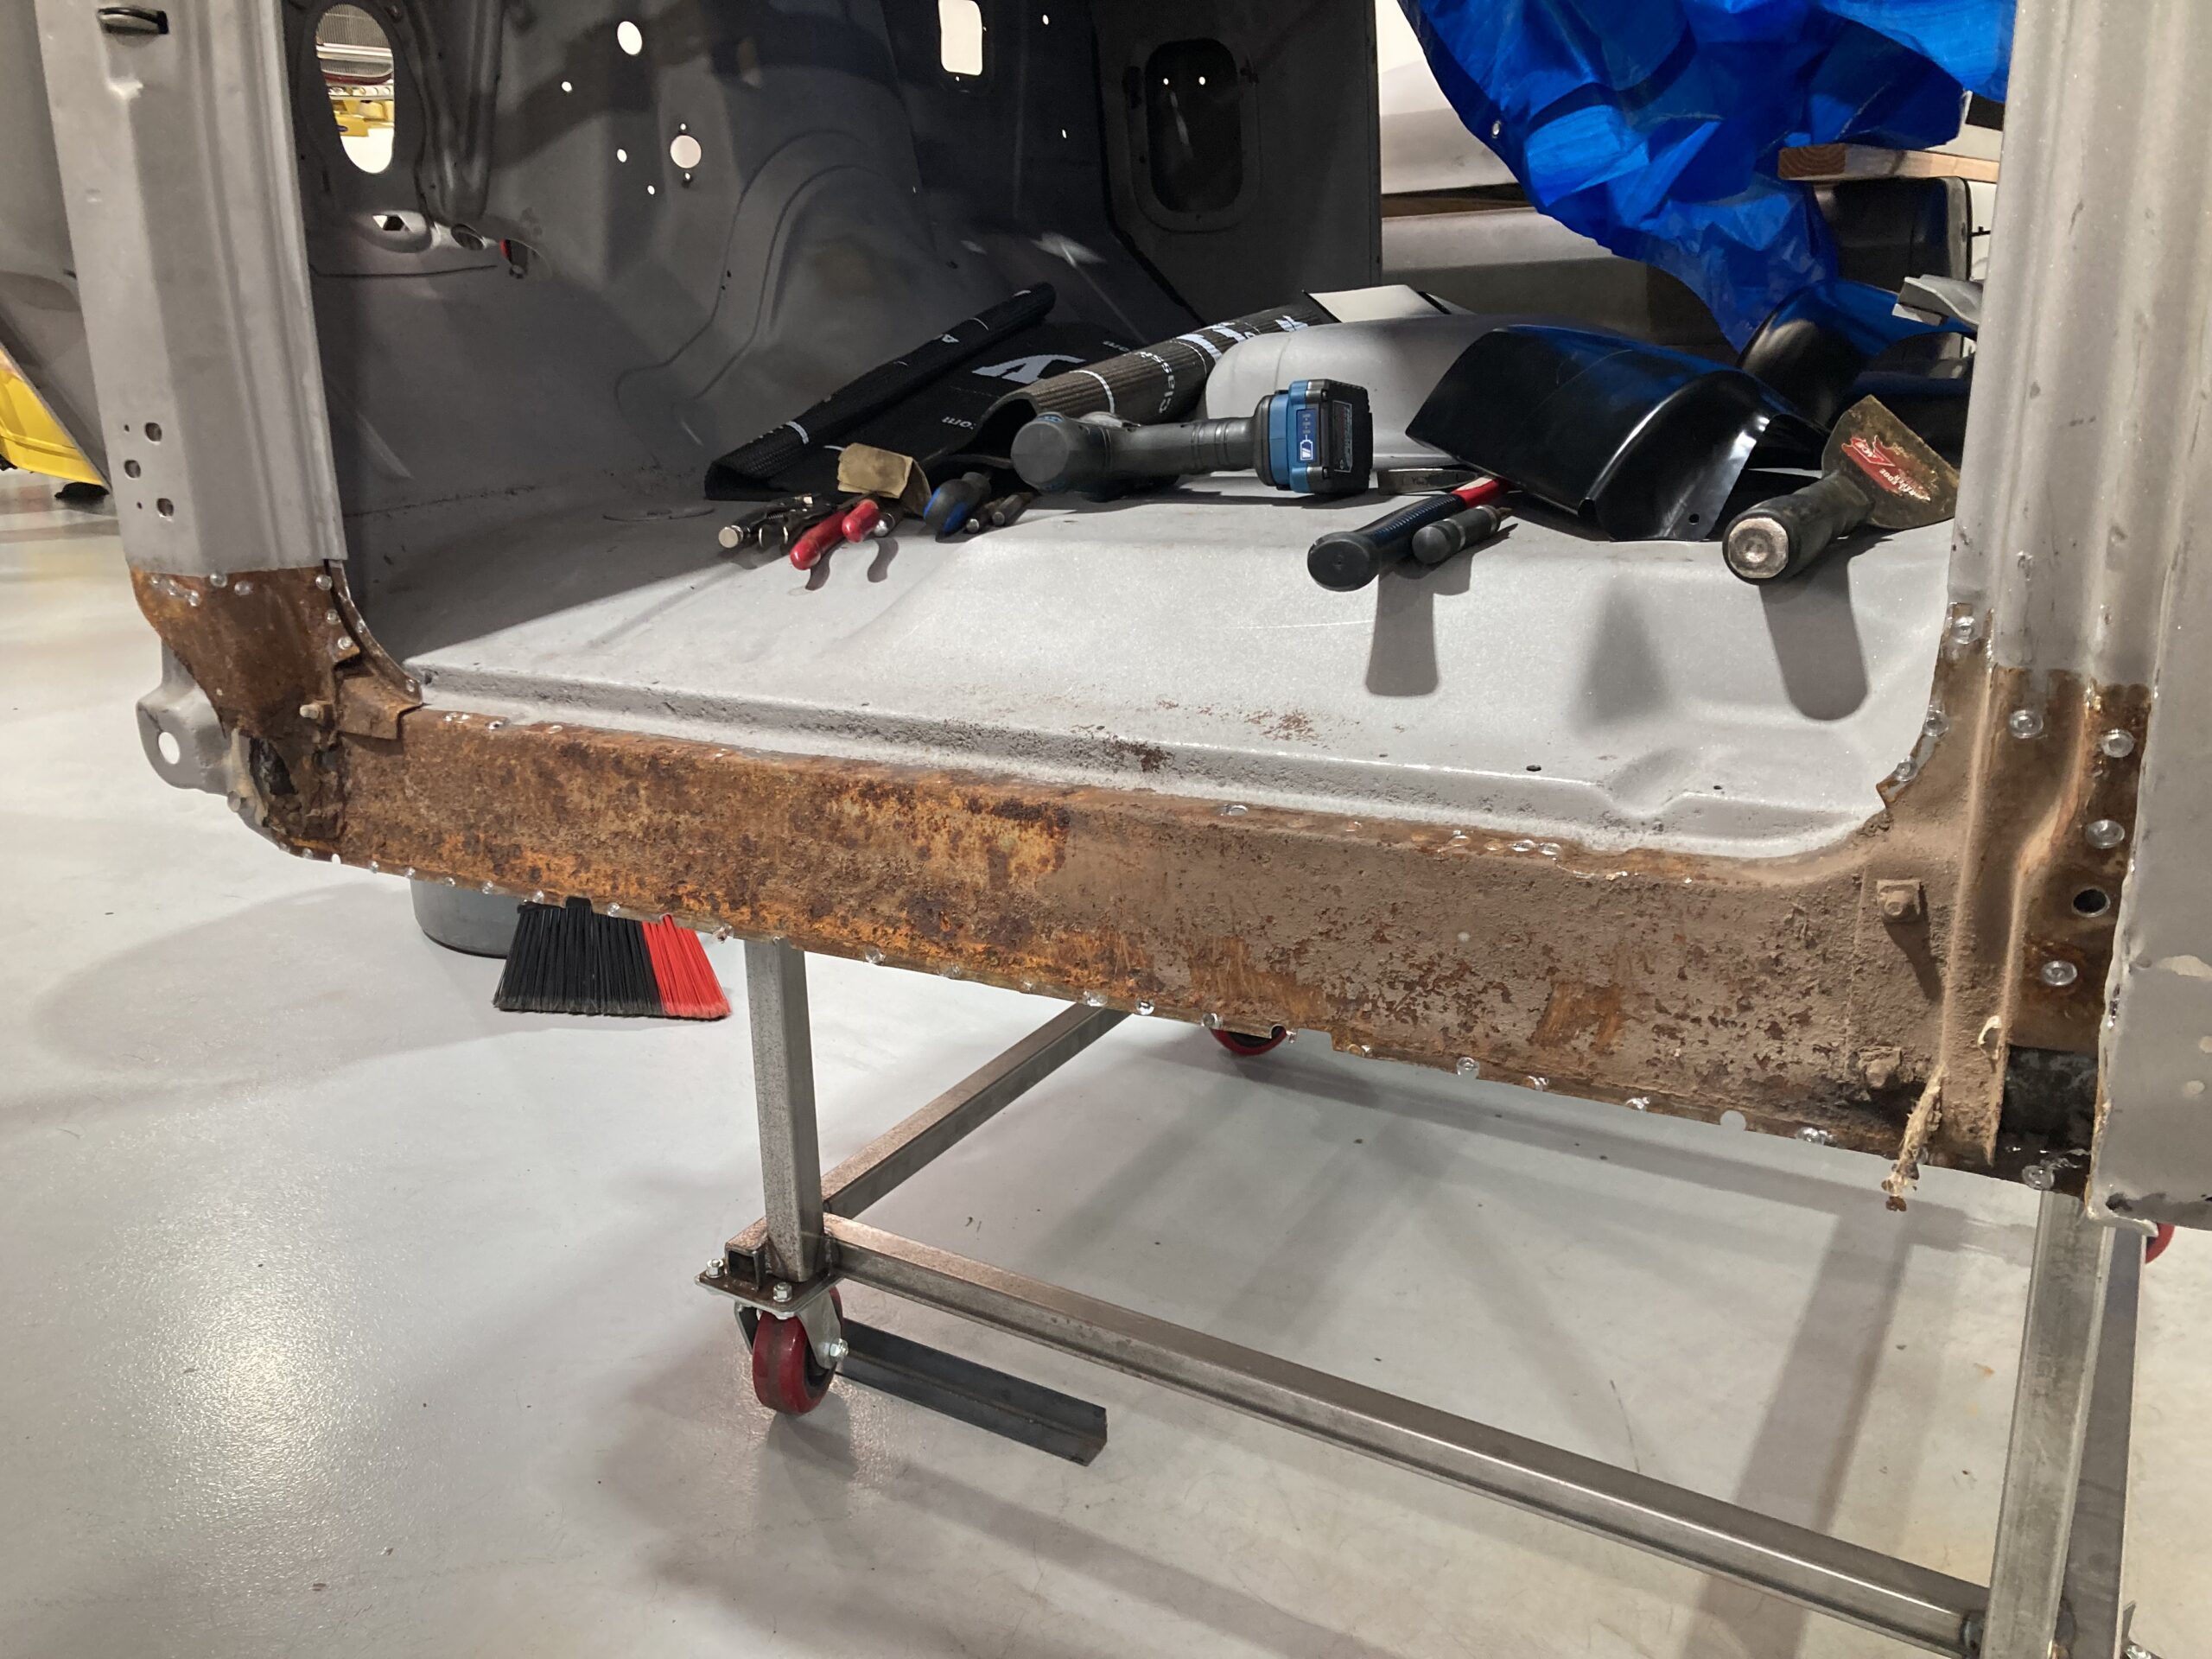
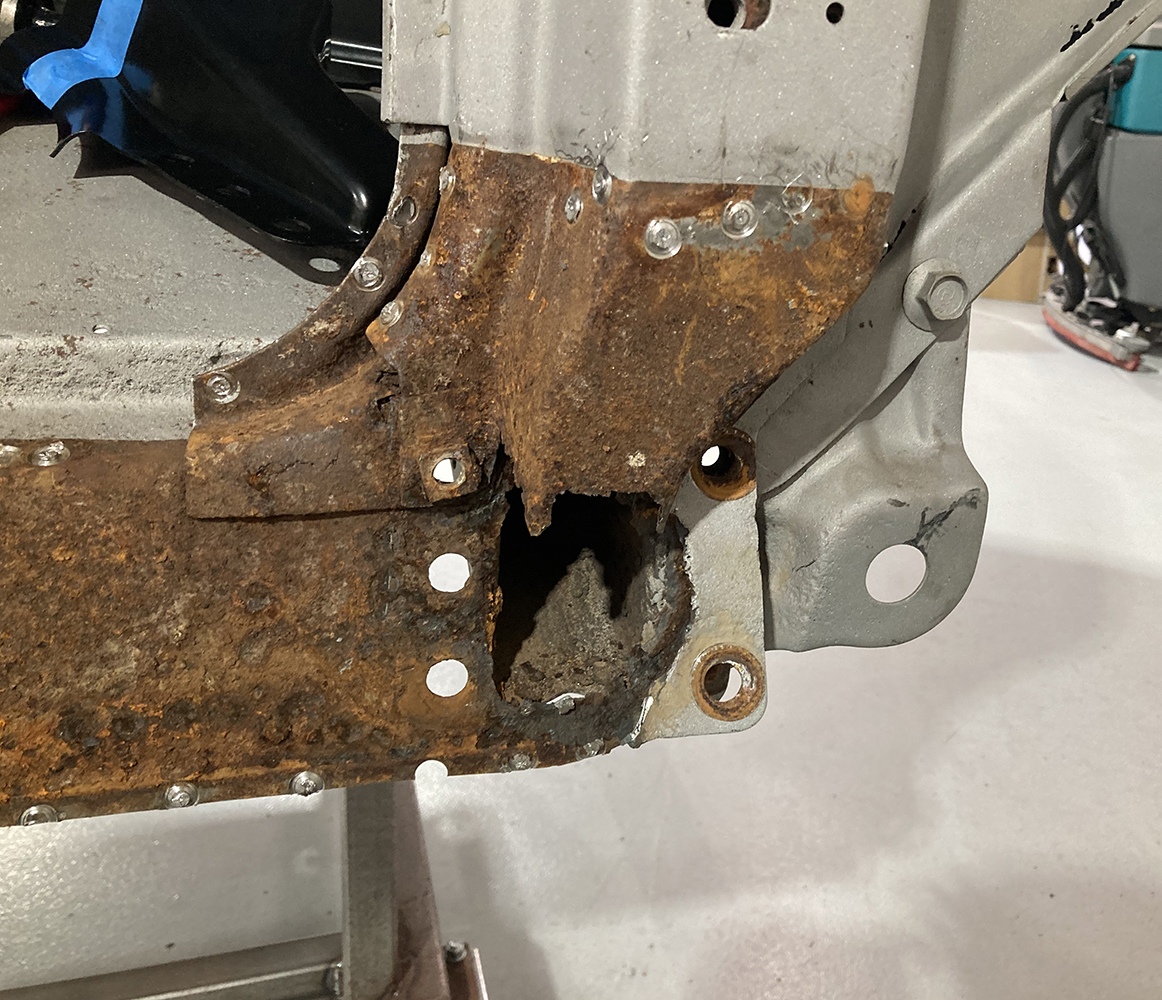
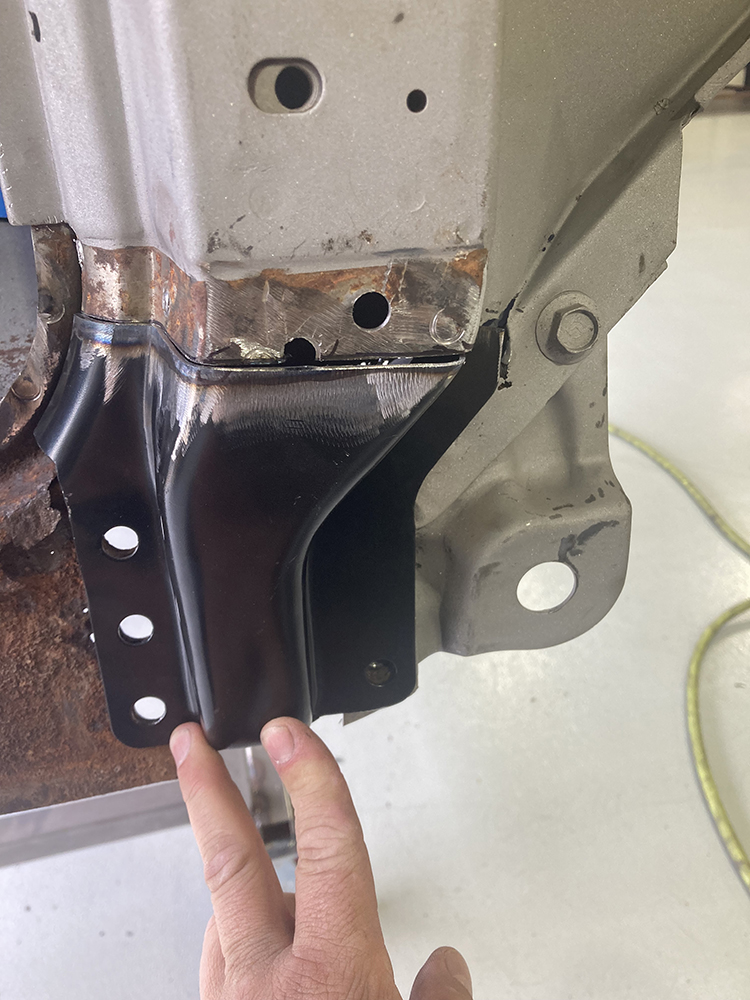
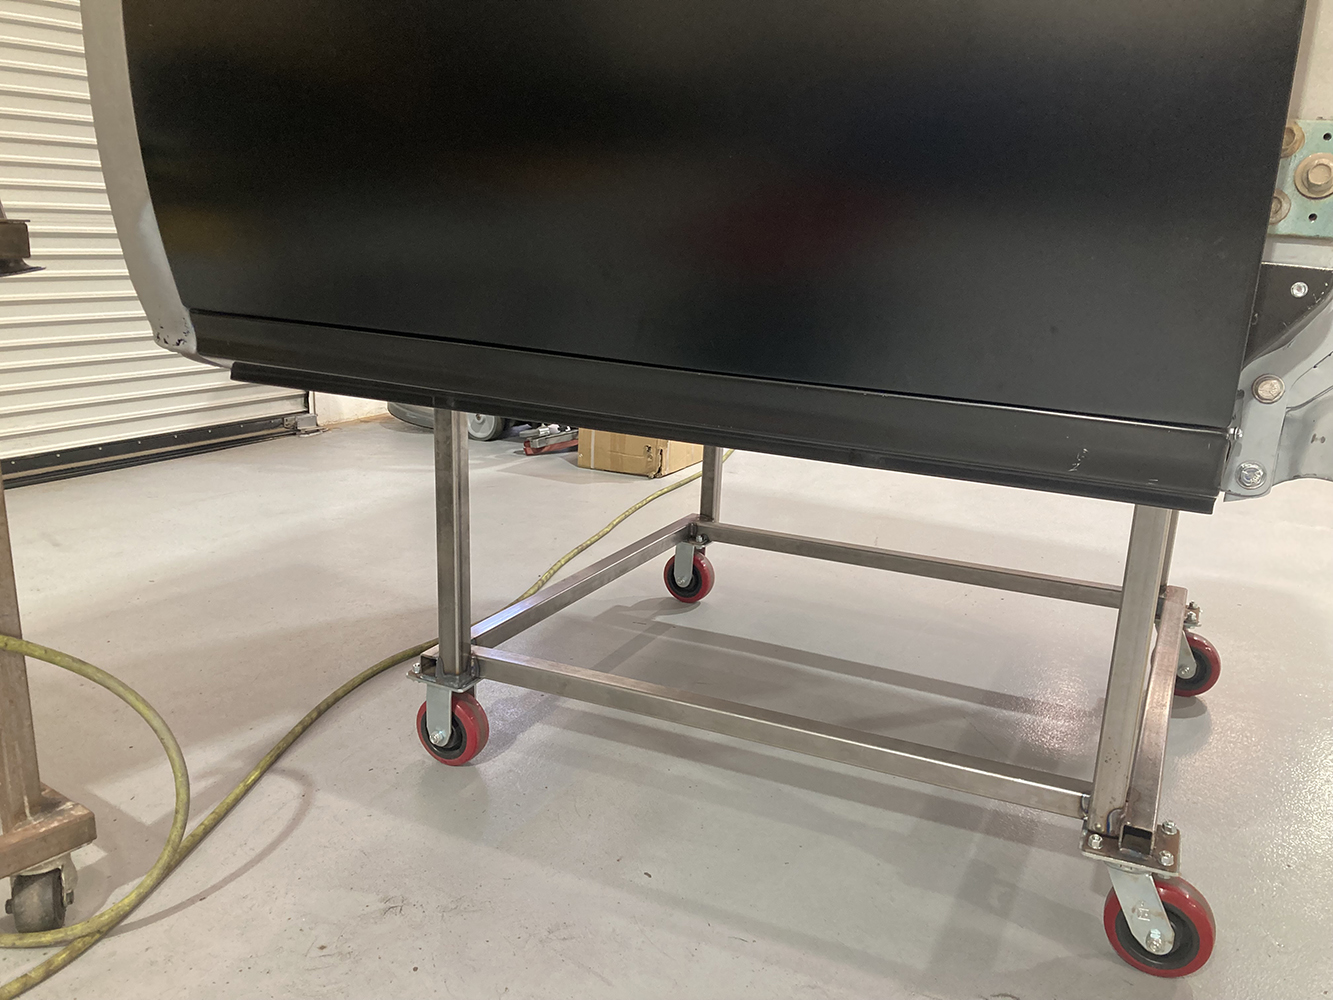
With the cab fresh from the blaster, we can begin to assess the amount of damage that exists. Most of it was visible before blasting, like the cancer that had chewed through both lower A-pillars …
While these sheetmetal repairs are usually fairly simple to tackle, a truck with a large amount of repairs can prove to be daunting to the uninitiated, oftentimes causing one to lose motivation, effectively stalling the project. But if we concentrate on each repair individually, dividing them up into bite-sized, daylong tasks, those demoralizing duties can be tactfully tackled.
… but some damage, like this area that had been previously repaired, wasn’t so obvious. The lower rear cab corner had also received its fair share of cancer rot and damage that will need to be repaired.
The fact that nearly every panel for most makes and models is available in the aftermarket makes for repairing these old trucks even easier. A quick peruse through websites like LMC Truck’s showcases said availability. So, it should come as no surprise that when it came time to start repairing the sheetmetal on our 1964 C10 project we picked up LMC Truck’s catalog and started a wish list of parts and panels. We started at the worst points, which are typically the lower sections of the cab where 70-plus years of crud tend to gather, creating a petri dish of moisture that ends up attacking the iron in the sheetmetal, resulting in rust, which ends up eating away the tin in the form of cancer. This is typically visible on the surface by small bubbles in paint, surface rust, or full-on sections of missing metal. Whatever the method of revelation, Confucius says, “It’s gonna be worse underneath!”
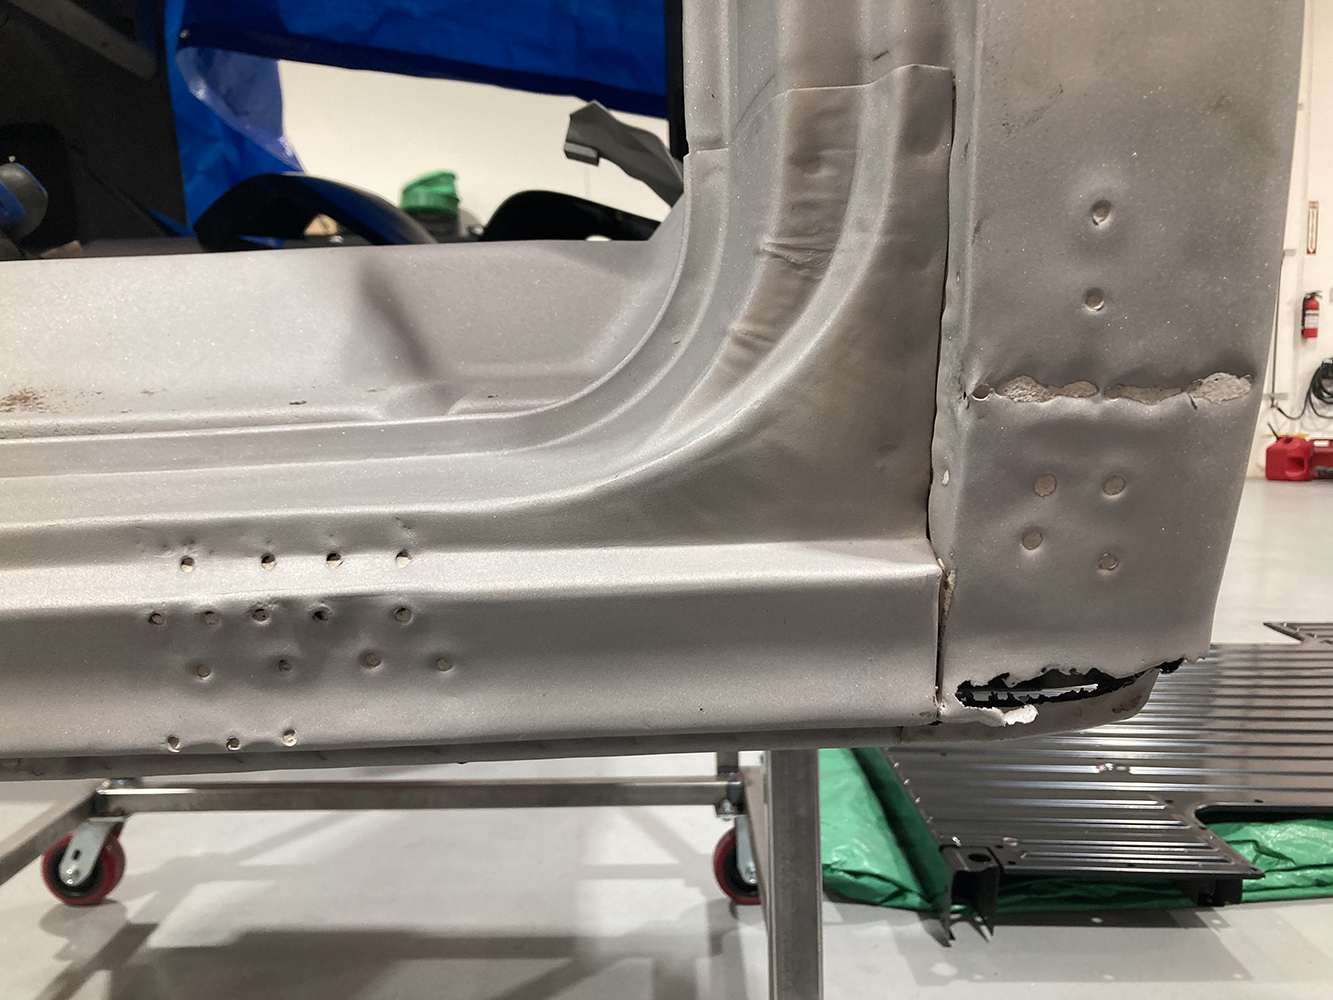
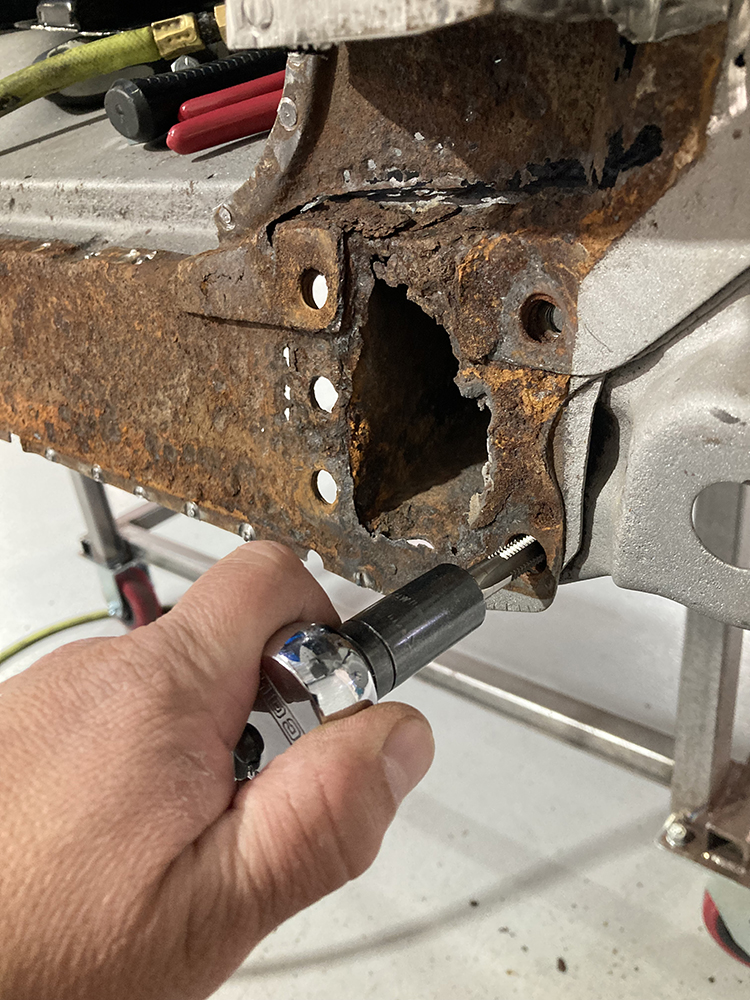
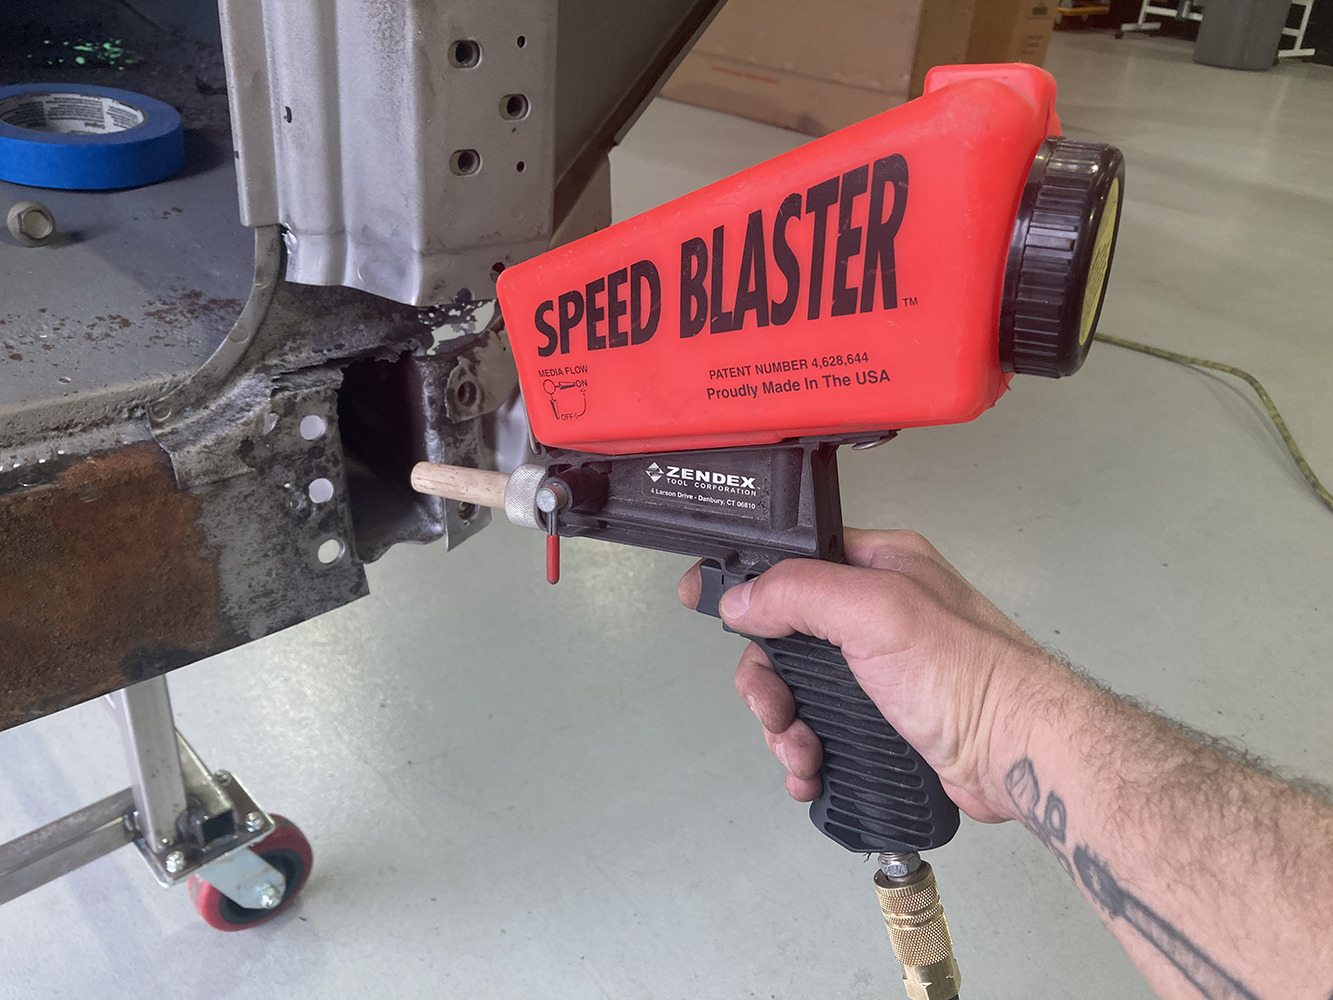
To access the inner area of the lower A-pillar and repair that section, we’ll need to expose it by first removing the outer rocker panel. The factory spot-welded the outer rocker panel to the cab assembly, which means if we’re going to remove this panel we need to tackle those spot welds first. This can be done quickly using a spot weld cutter (LMC Truck PN 38-1307), once the location of said spot welds is revealed.
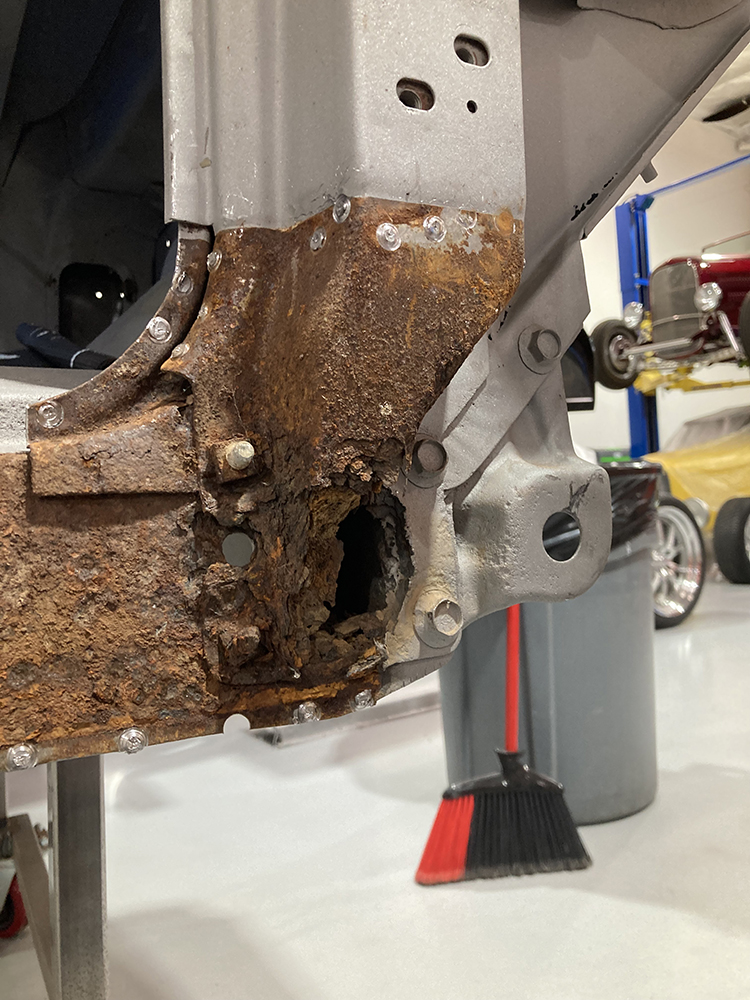
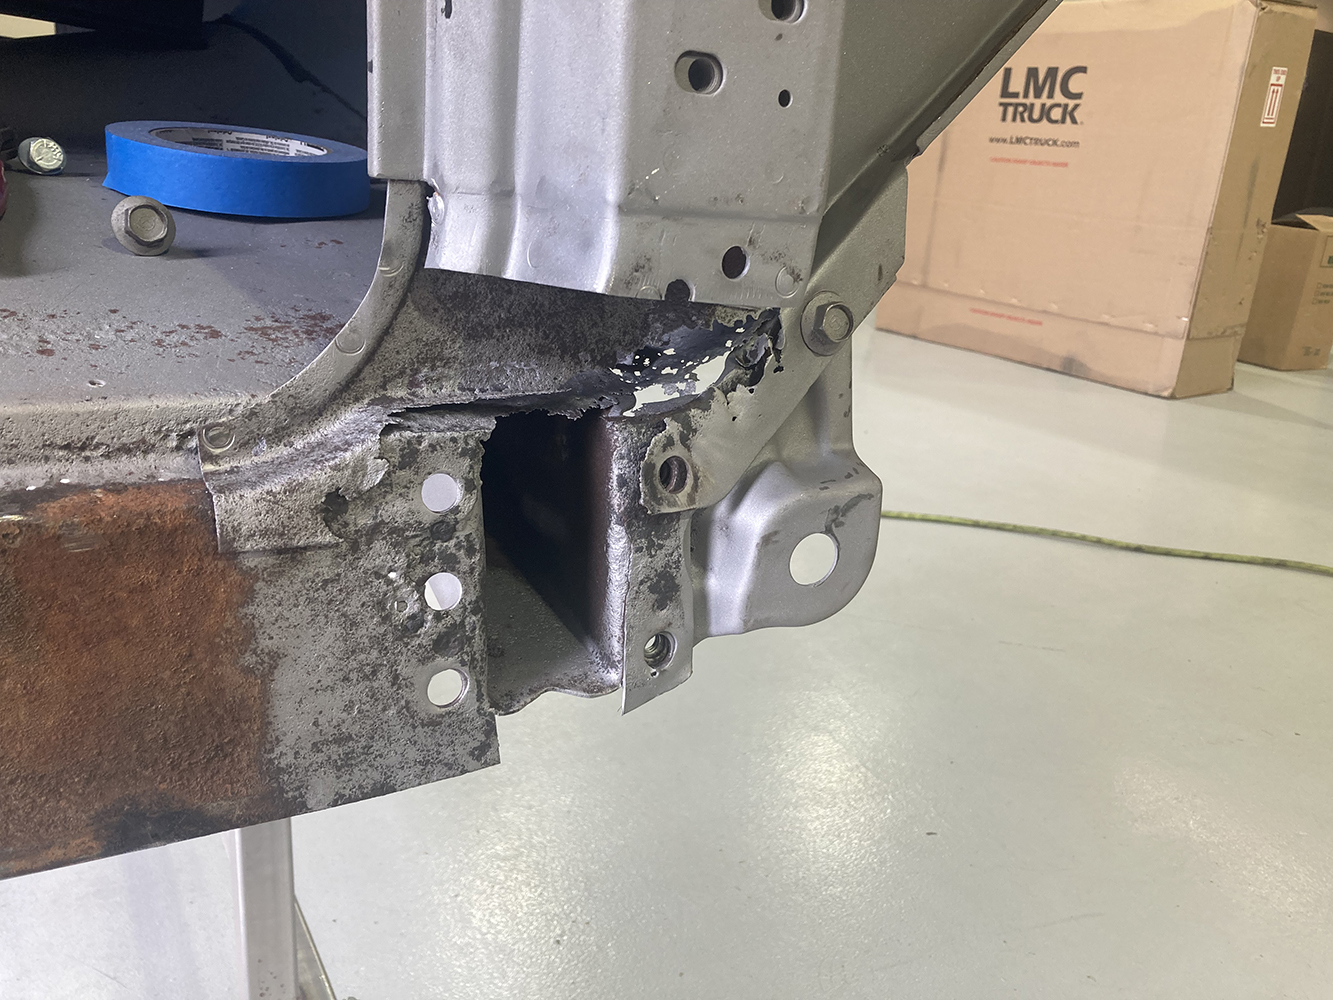
And that’s exactly what we discovered when we began peeling back the layers on our C10 cab. We could tell that the section at the bottom of the A-pillar was pretty bad, but only after removing the outer rocker panel and the lower A-pillar did we realize the amount of damage we were up against. No fear, however, as we had a great source in LMC Truck to help us repair our cab and get our project pushed along further down the road toward completion.
Spot welds tend to reveal themselves as small craters in the sheetmetal, but sometimes they can be difficult to find. One small spot weld can seemingly hold an entire panel in place. A couple passes with a sheet of sandpaper can help reveal the low spots, just like when doing bodywork.
This month, we’re going to start by repairing the A-pillar section and the outer rockers. We’ll follow up in the coming months as we continue the repairs necessary on the C10.
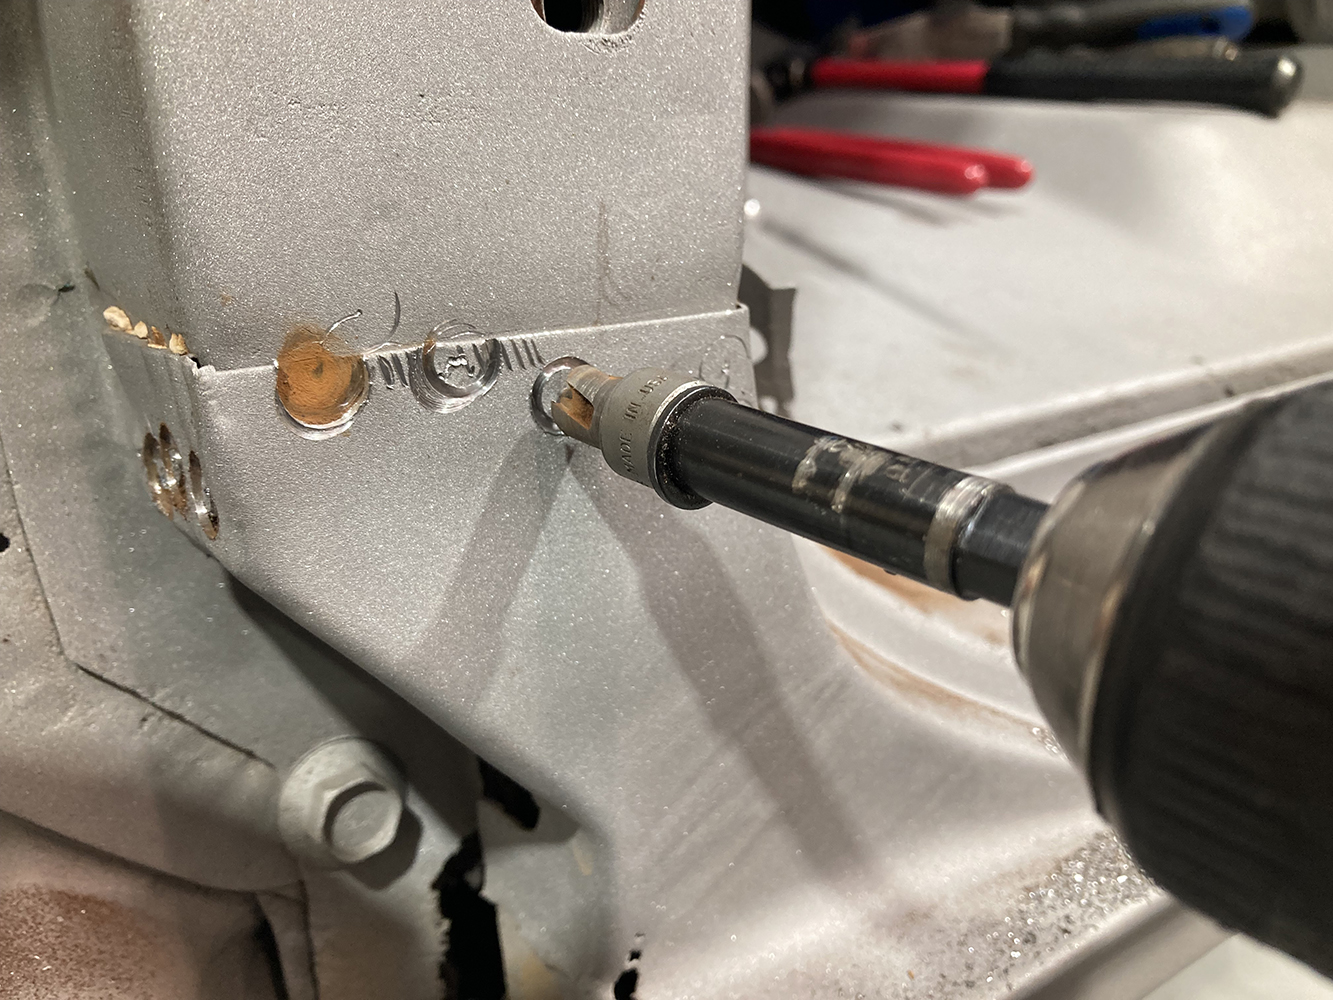
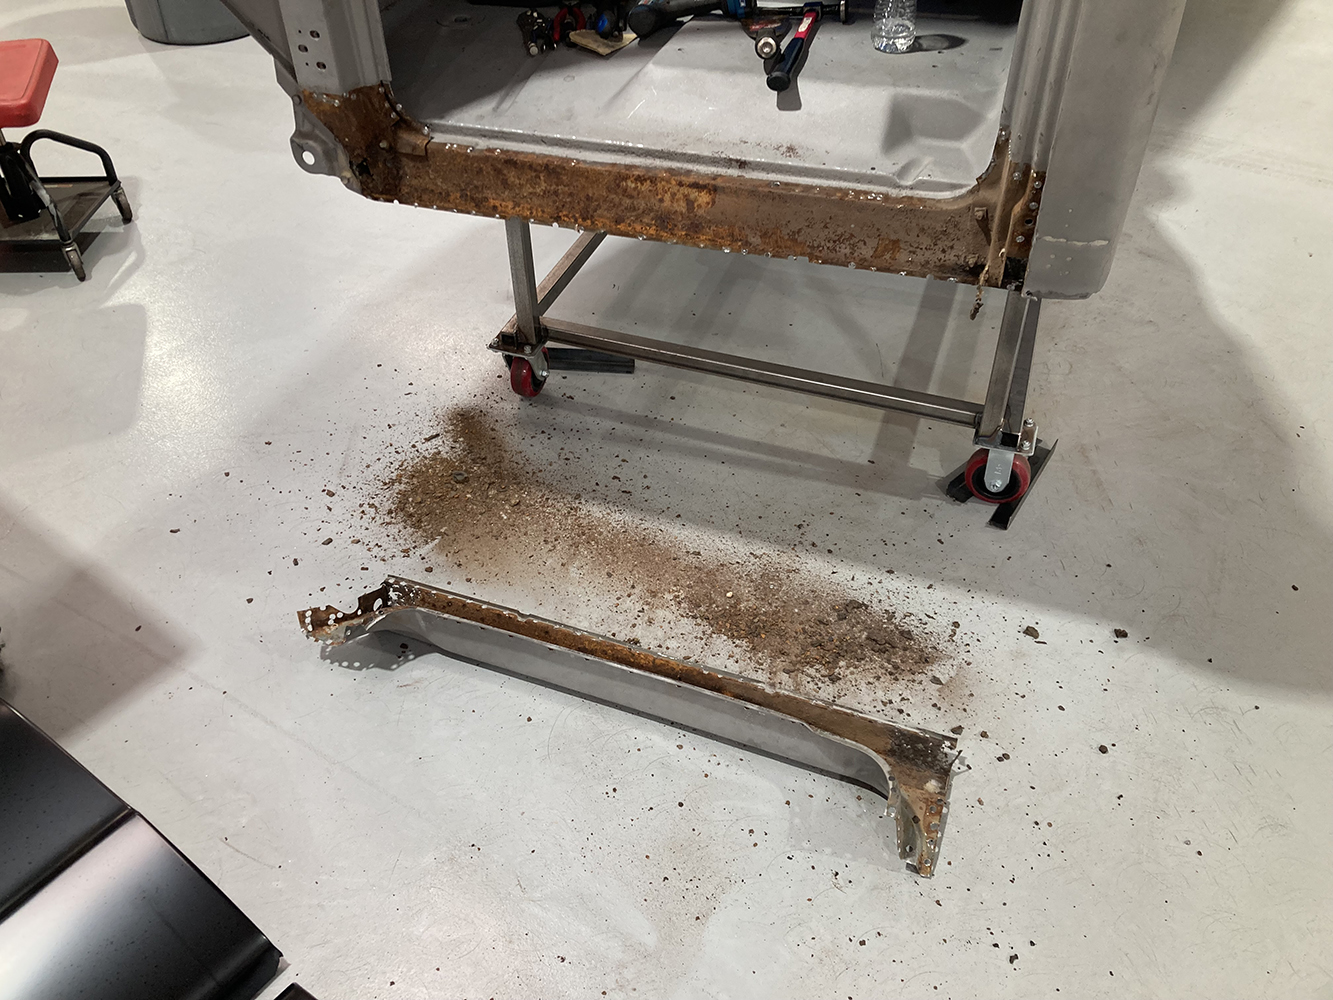
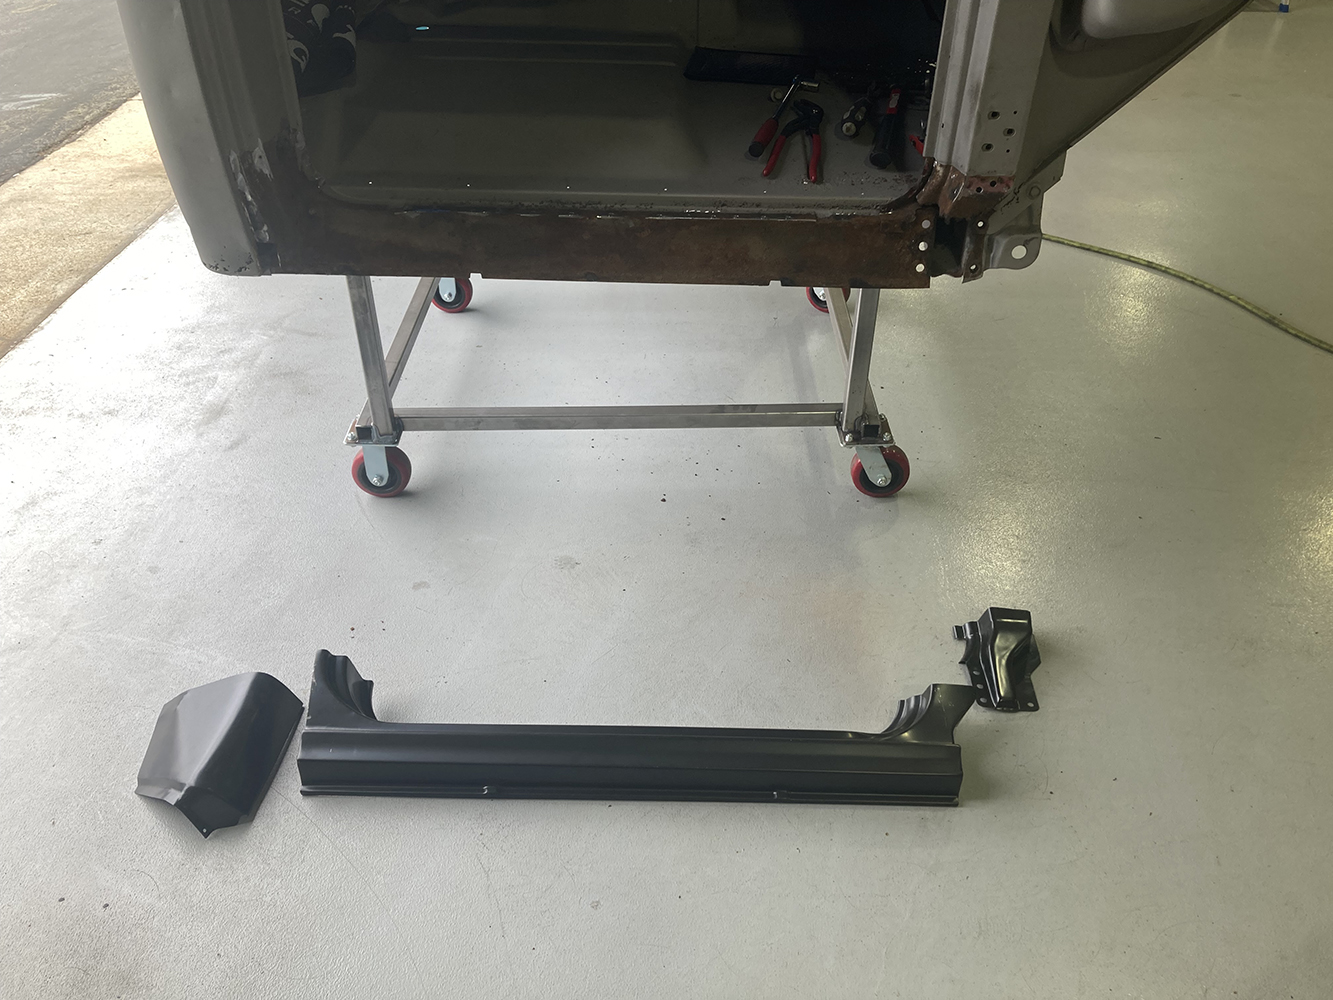
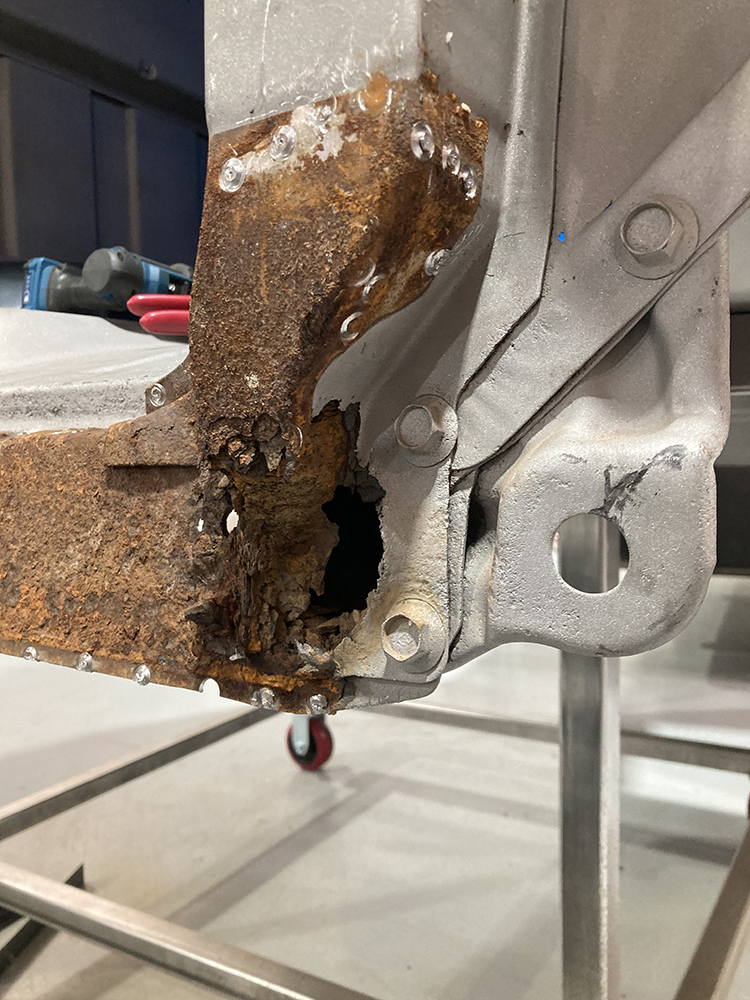
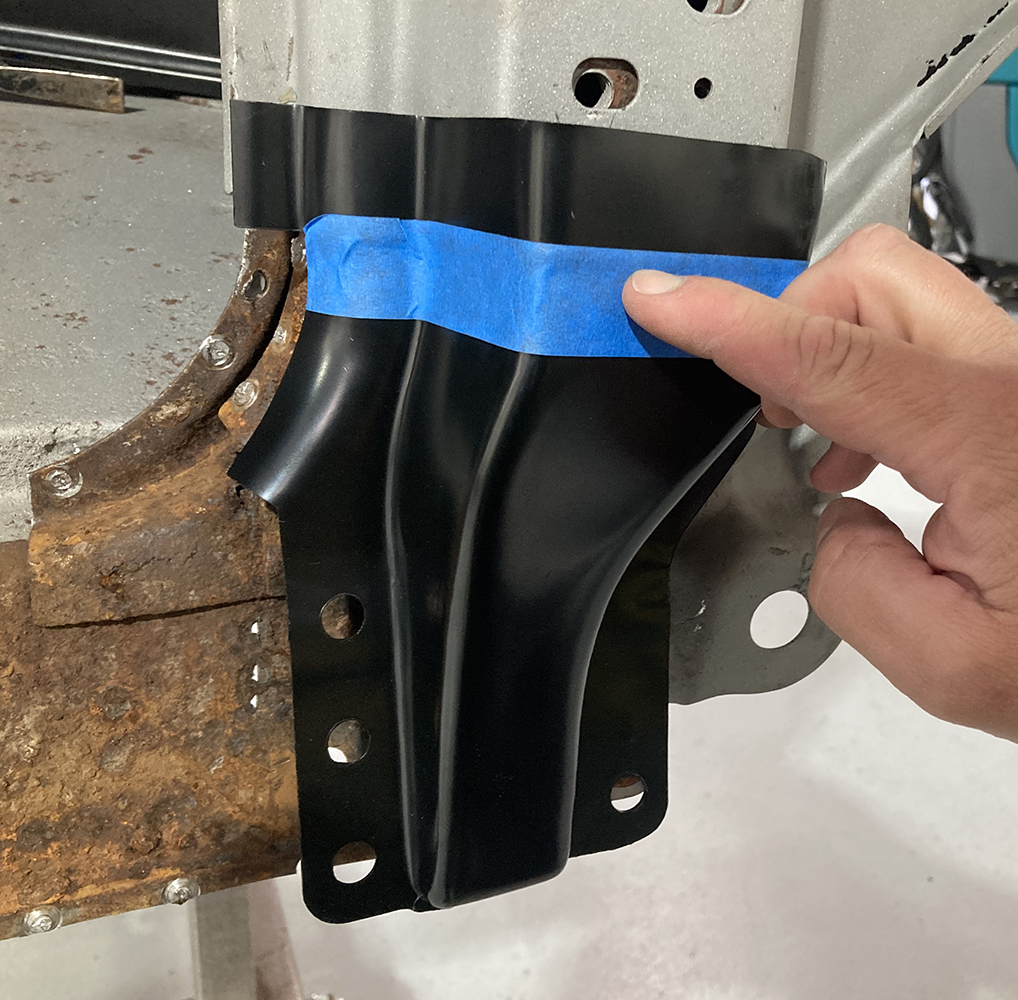
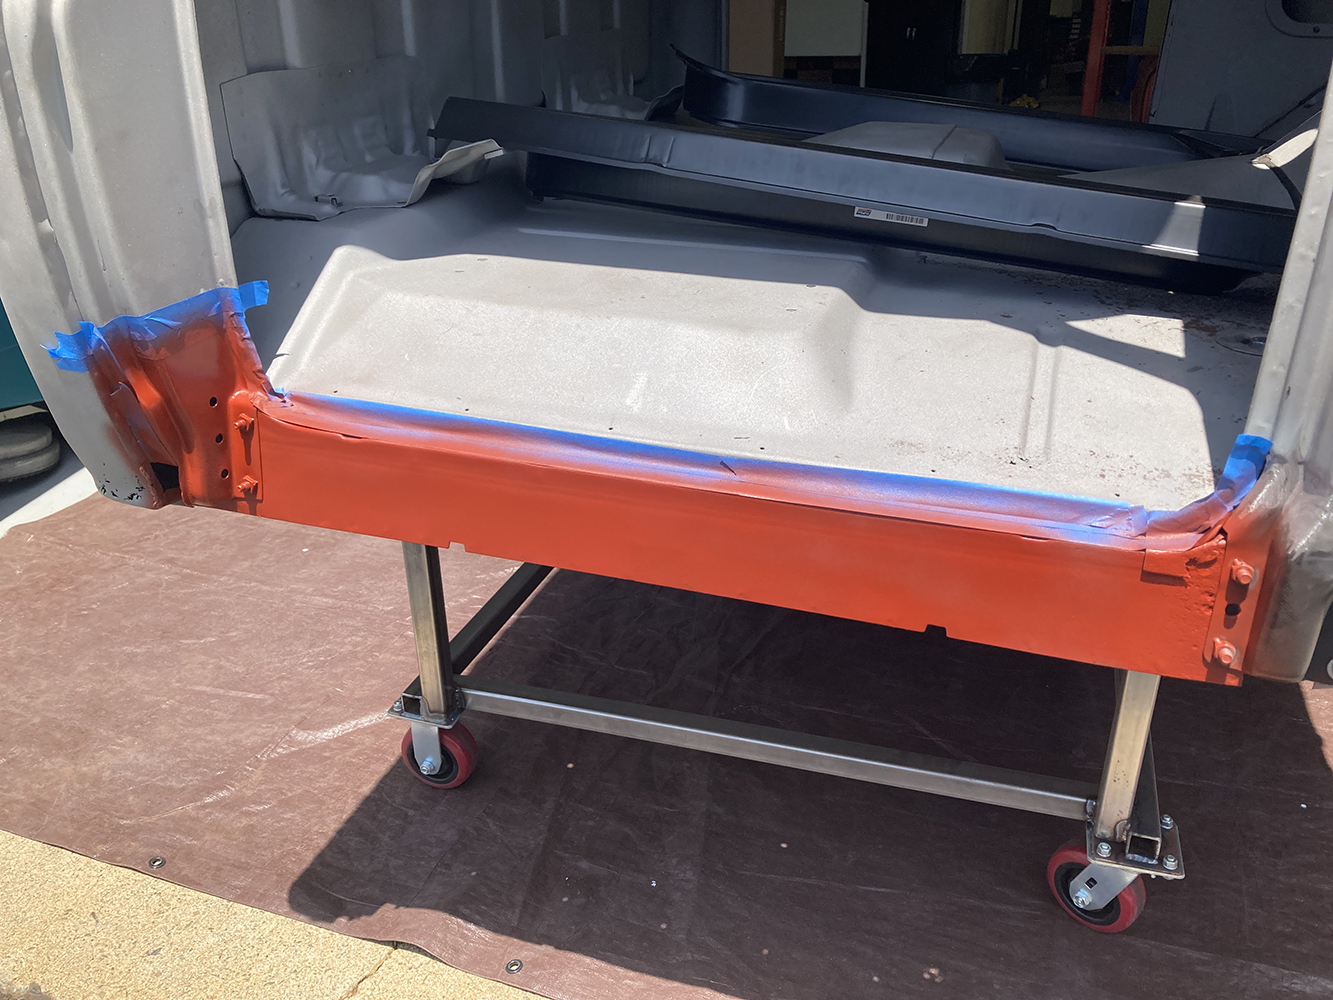
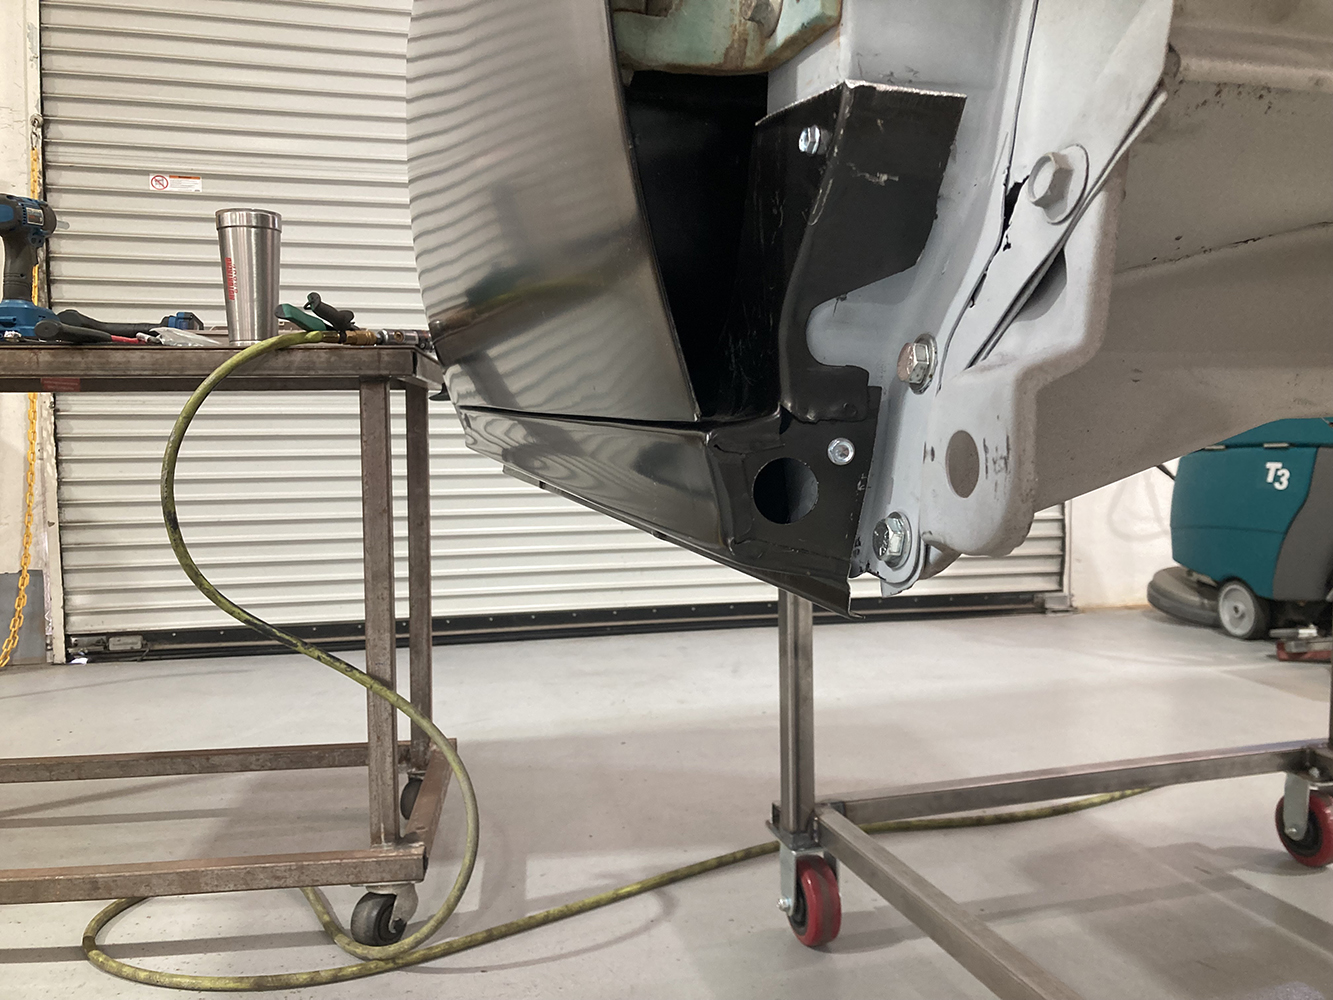
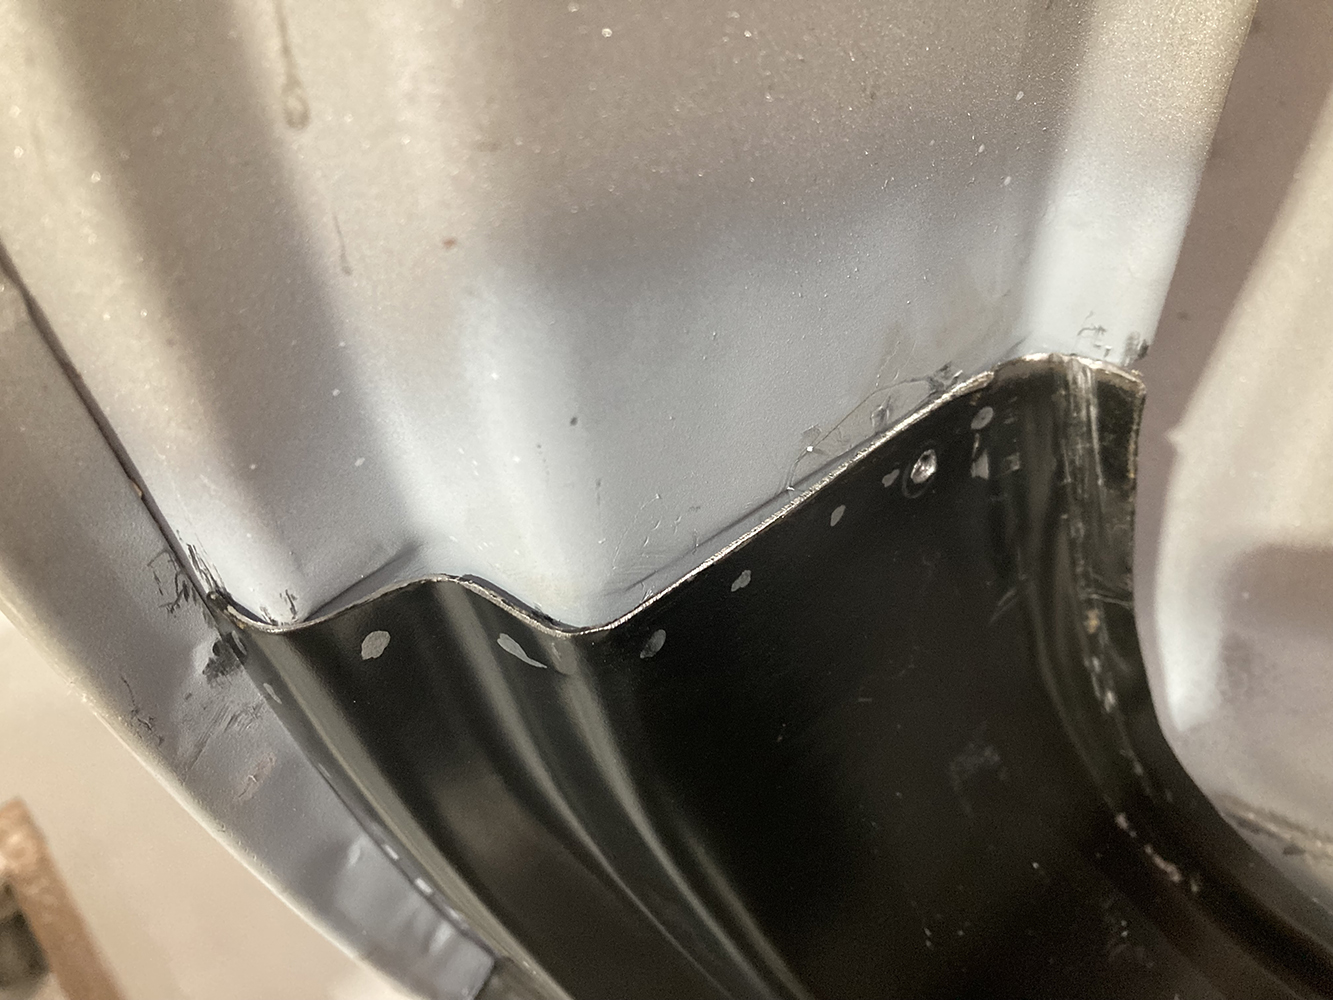
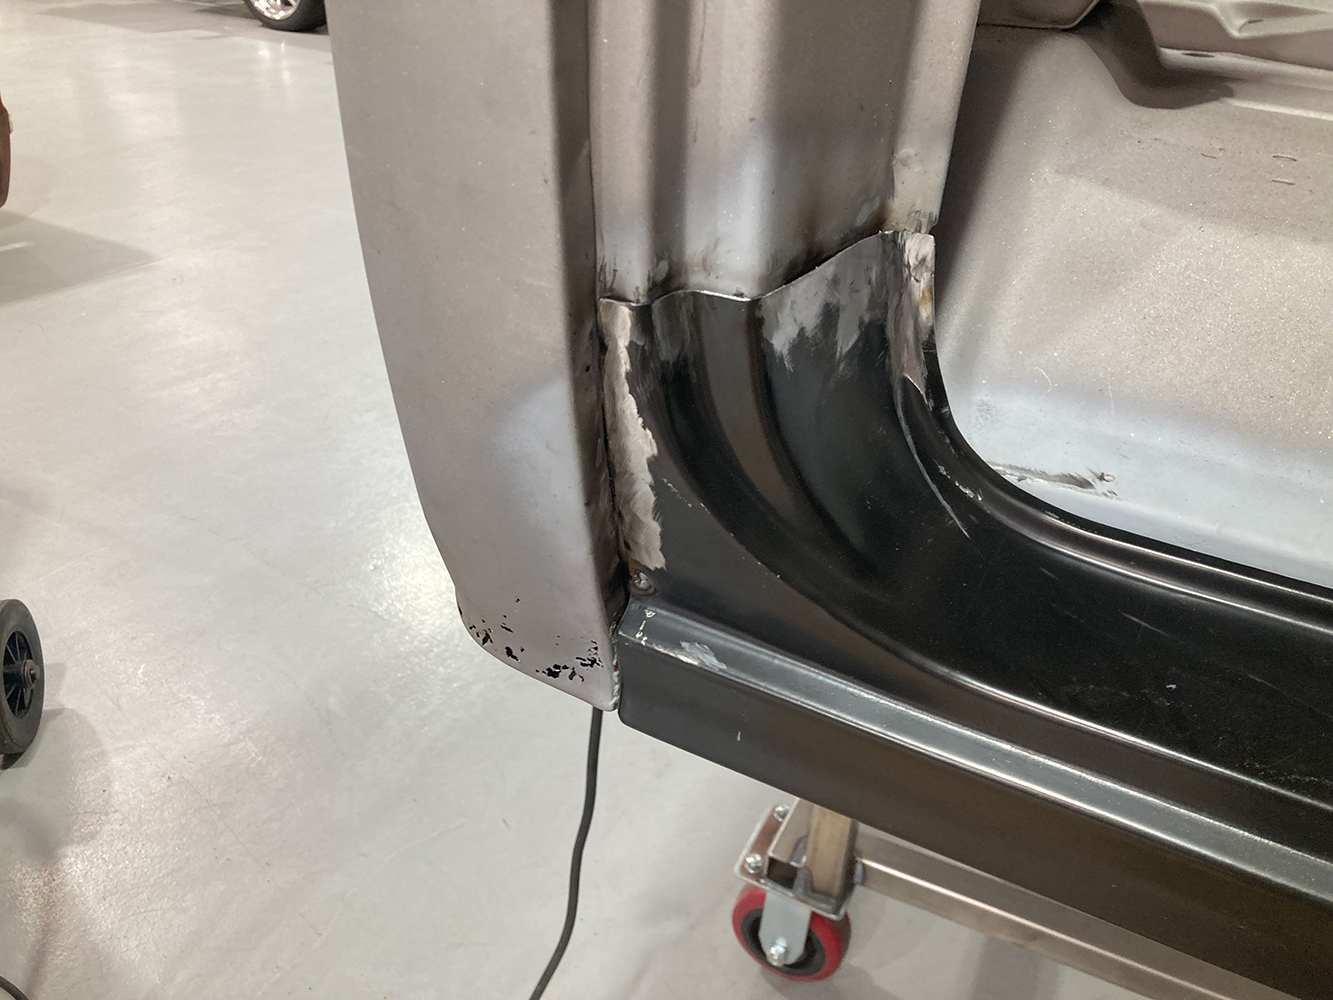
As the spot welds are drilled out, the panel is carefully pried away from the cab.When all the spot welds have been removed, the entire rocker panel is ready for removal.Note the amount of rust and detritus that was trapped between the rocker panel and the cab. Having not removed the entire rocker panel and simply repairing the small areas that required attention, this rust and debris would have continued attacking the surrounding sheetmetal unabated.Instead, we’ve exposed the inner structure and the damage that exists, allowing us to treat that section properly and stop any further damage.We’re going to use four repair panels from LMC Truck to repair the lower section of our cab this month. First, we’re going to repair and replace the inner section of the lower A-pillar of each side of our cab with a new repair section (PNs 38-9200 and 39-9201). Next, we’ll tackle the outer rocker panels (PNs 38-9048 and 38-9049). We’re going to hold off on the cab corners (PNs 38-9050 and 38-9051) for a future story.The lower A-pillar is going to receive our attention first as this section needs to be intact before the outer rocker panel can be installed. As is typical with any rust damage, it’s much worse on the inside than the outside. This is because this type of damage starts with trapped dirt, debris, and moisture inside the panel, rotting its way out. By the time it becomes noticeable on the outside, it’s ran rampant internally (as you can see here).
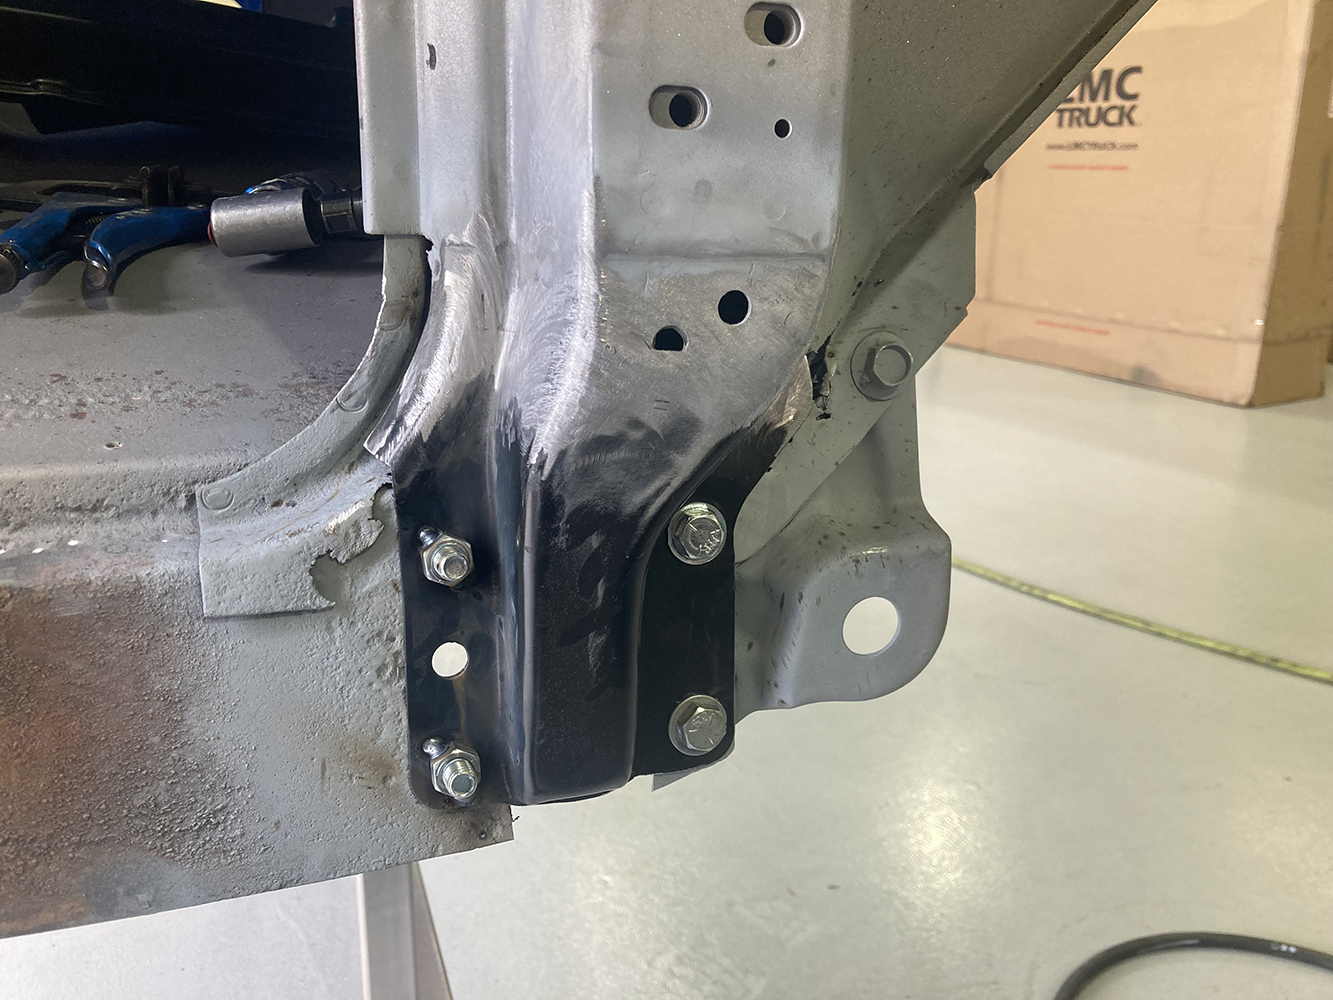
There are four fasteners that attached the lower A-pillar to the cab assembly. We’ll use these same holes to help align the new repair panel, but first the old, rusty fasteners need to be removed, the threaded captured nuts chased, and any offending sheetmetal trimmed away.
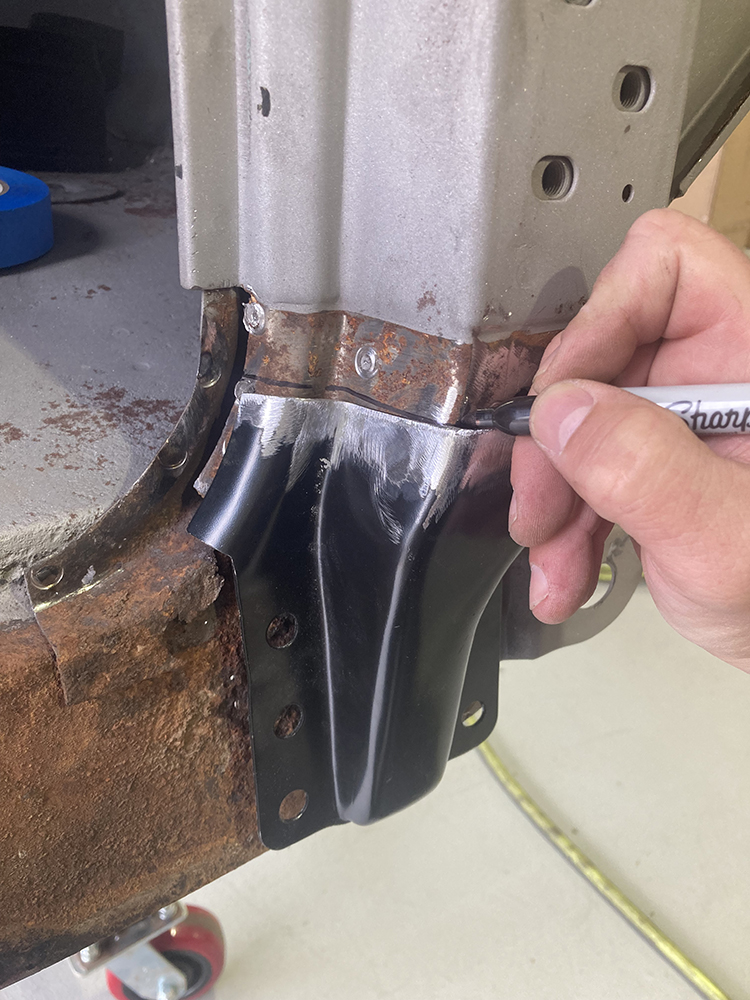
The lower A-pillar repair panels come from LMC Truck with plenty of material to make a successful repair. Upon initial inspection, we found that we could get away with trimming the panel about 1-1/2 inches shorter, which would put the weld seam under the rocker panel, requiring less metal finishing since it won’t be visible.Once trimmed, the panel is placed over the existing lower A-pillar so that the damaged sheetmetal can be cut out. We’re marking the pillar a little low, so that we can slowly remove material until the replacement panel fits perfectly.After trimming away the rotten A-pillar, the new panel is checked for fit.We don’t need to replace every rusty section of sheetmetal on our cab as that might be a life’s worth of work. Instead, we’ll repair the worst and tackle the rest by blasting it away and treating it to prevent further spread. Here, the section of cab that will be covered by the new A-pillar repair panel is being blasted down to clean steel.
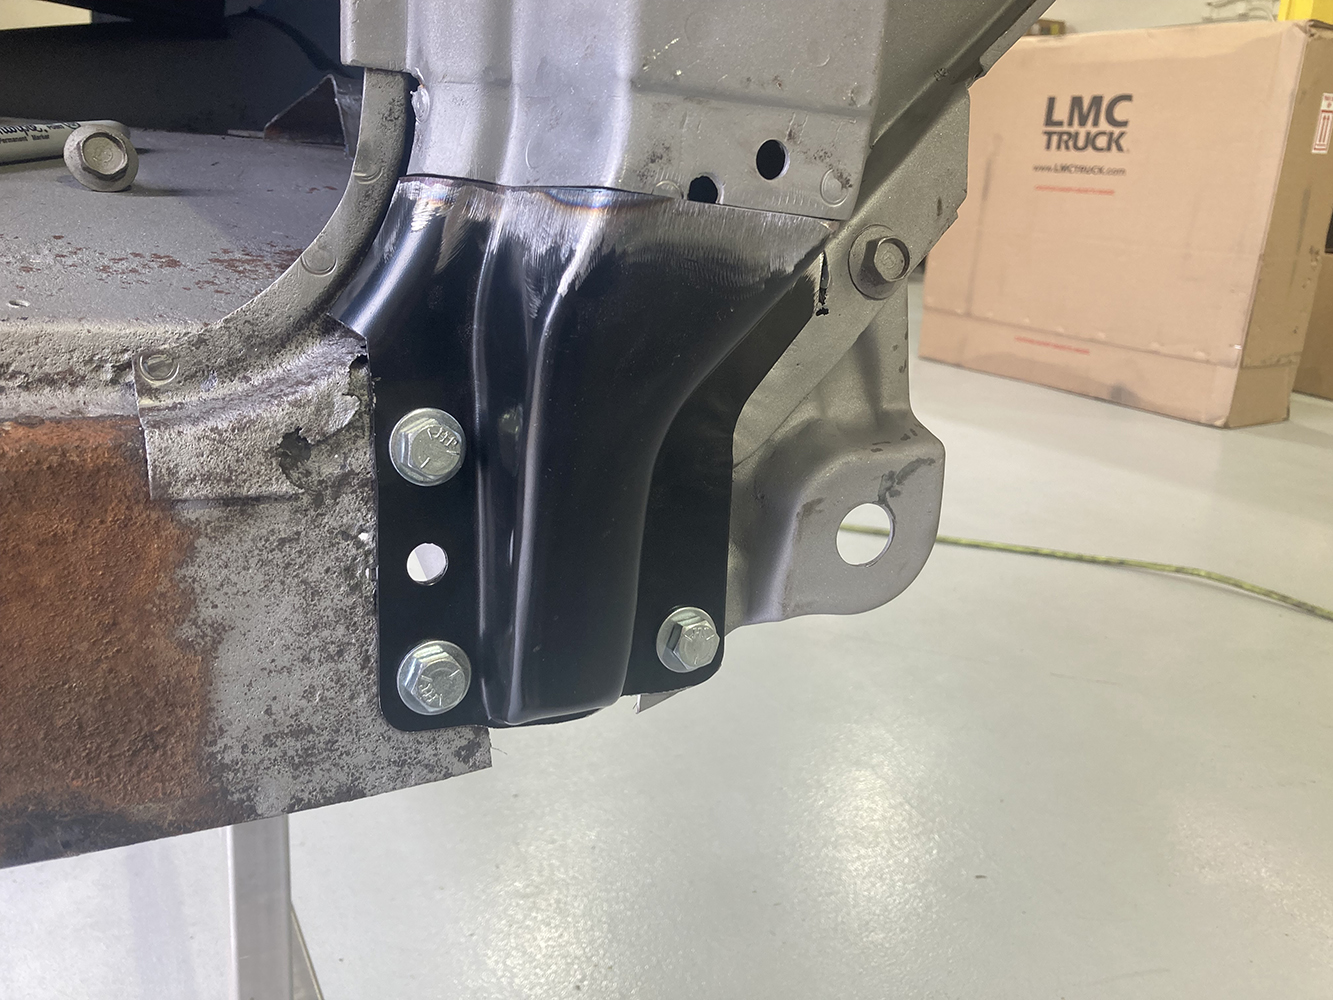
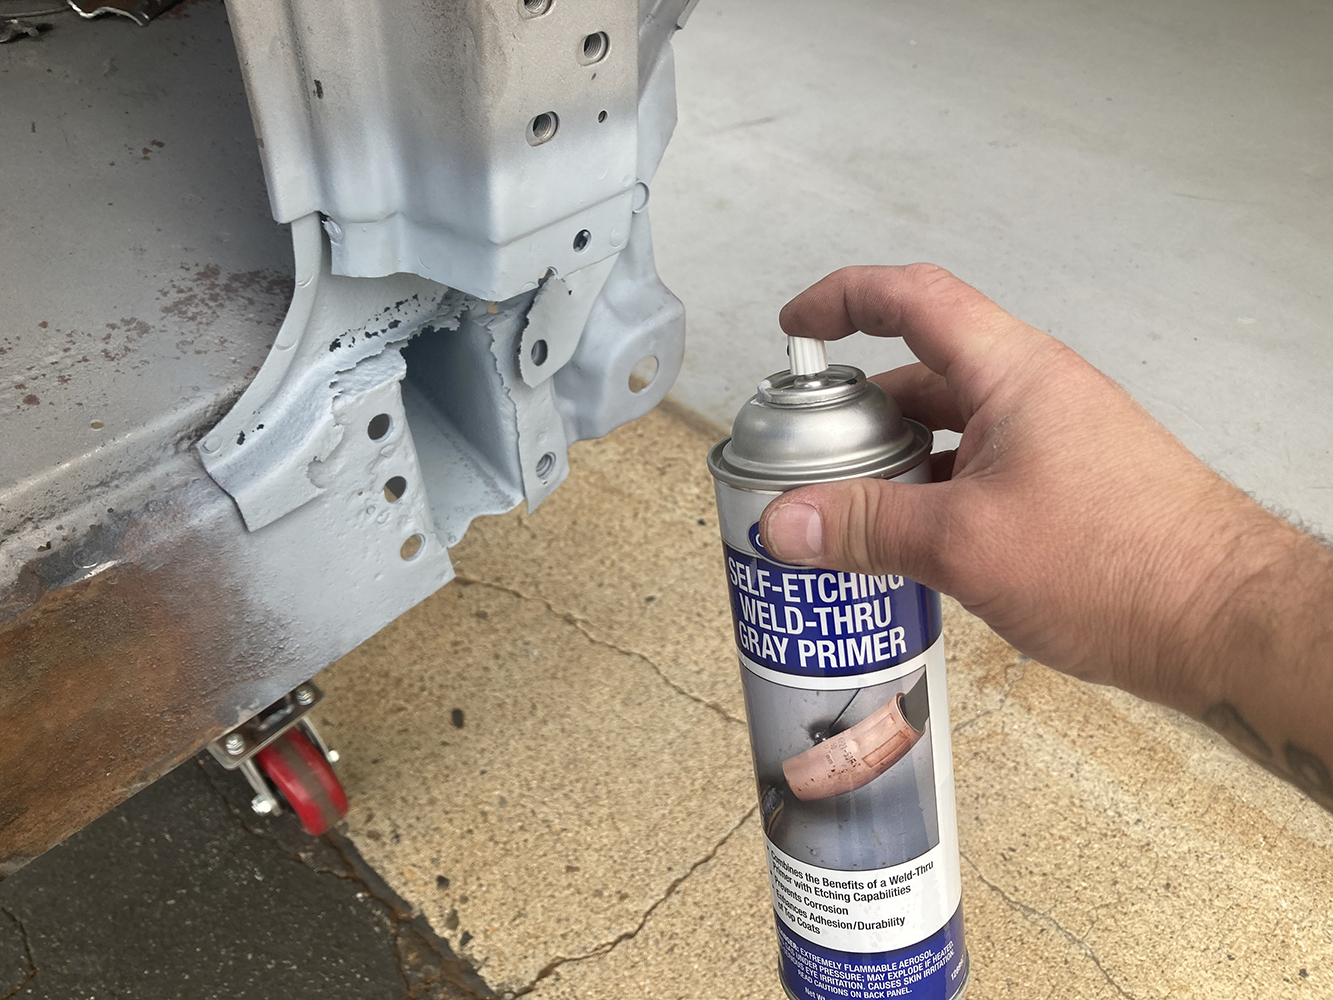
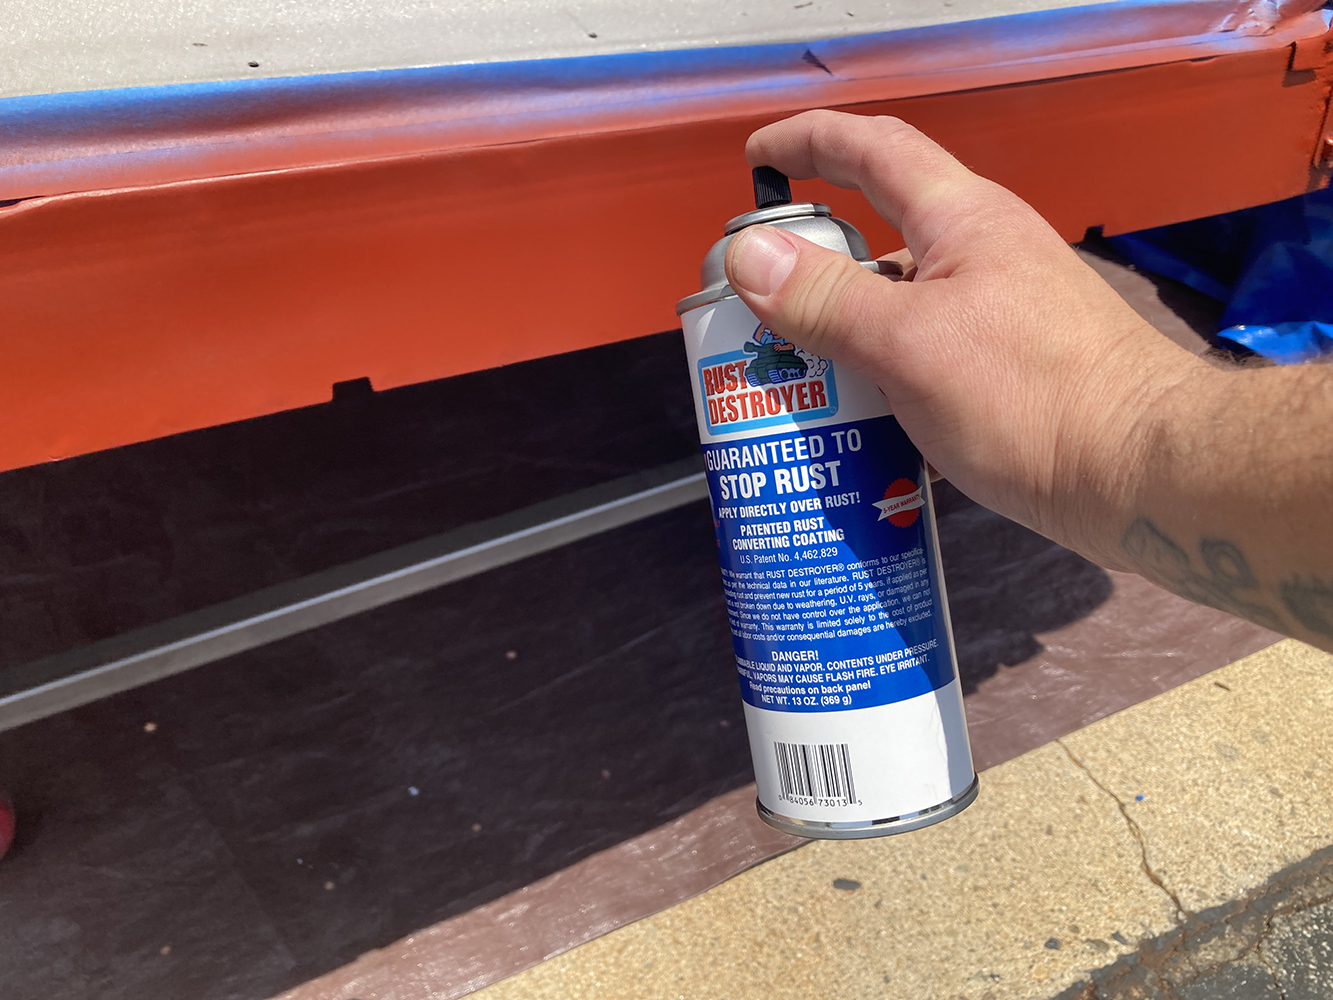
One more test-fit of the new panel bolted in place and we’re ready for final installation.But first, we’re going to treat the inner structure with a couple coats of Self-Etching Weld-Thru Primer to help mitigate any further rust.With the interior structure treated, the lower A-pillar panel is fastened to the cab and the seam welded up and knocked flat, completing this area of our cab repair.The inner structure of the cab’s rockers were just as rusty as that inner section of the A-pillar, and, like the A-pillars, the rockers received the same treatment from the blasting gun. Some further wire wheeling and sanding and they’re looking pretty good.Since this inner section of the rocker won’t be receiving any welding, we can use something slightly more effective to thwart further rust damage. We found this Rust Destroyer at our local hardware store and used it to neutralize the existing rust and minimize any further damage.
After a bit of trimming and initial fit, the new outer rocker panel is temporarily held in place by a couple sheetmetal screws.
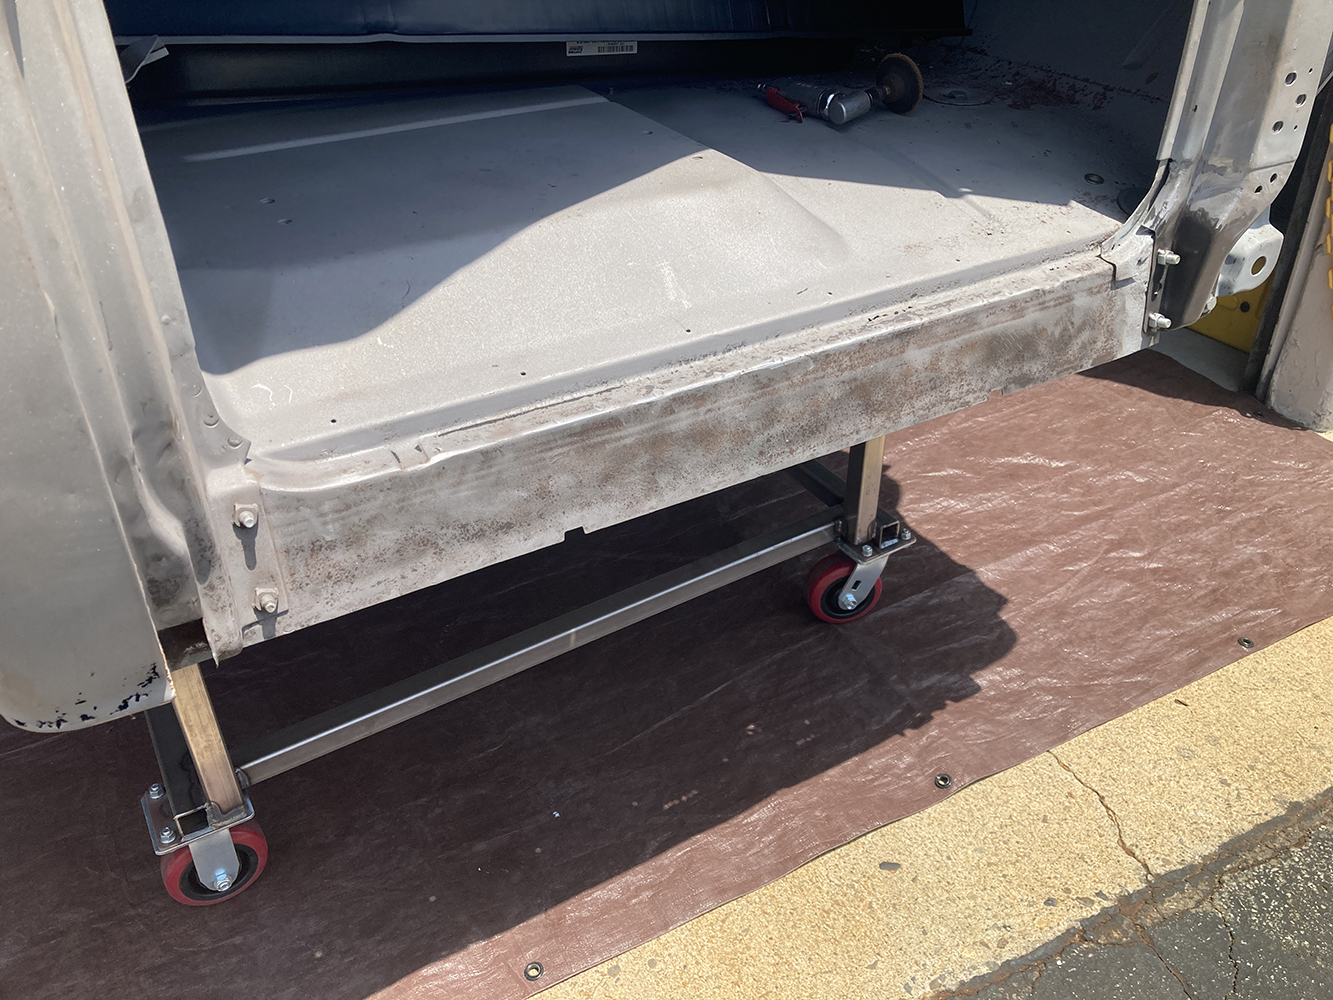
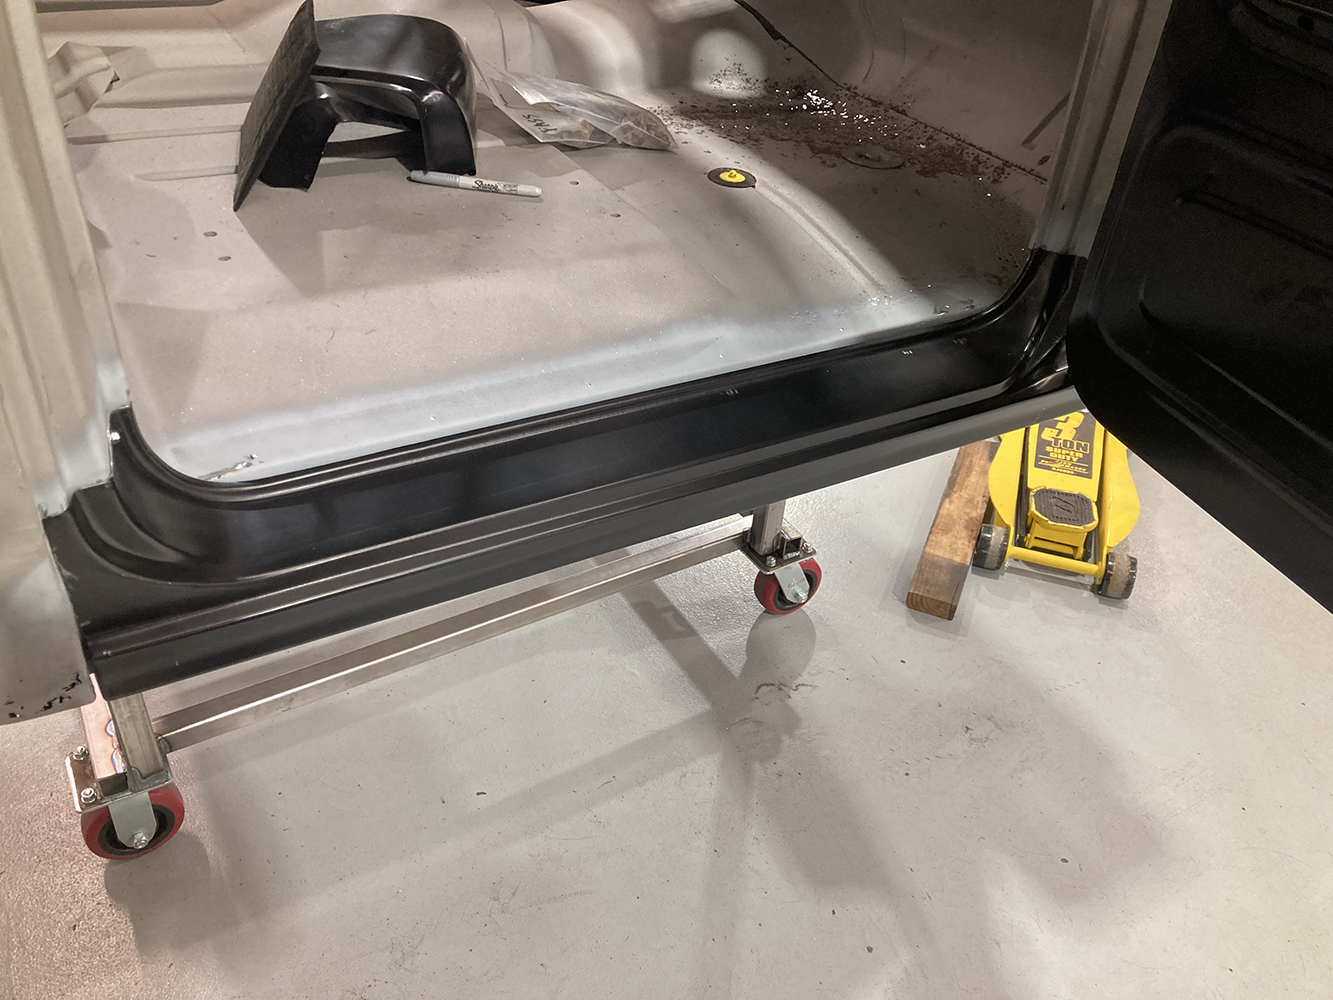
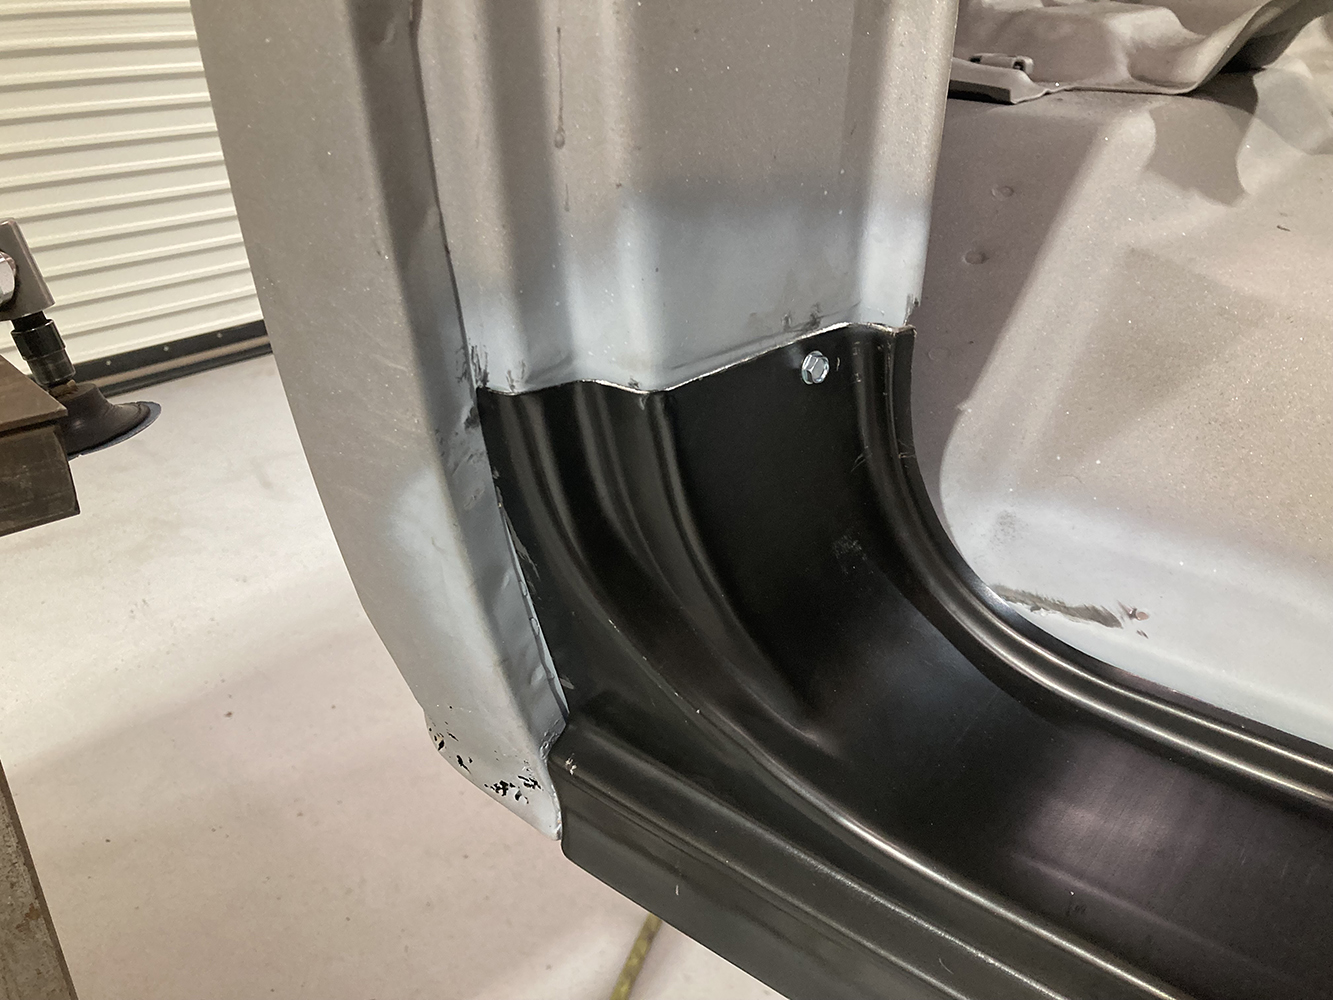
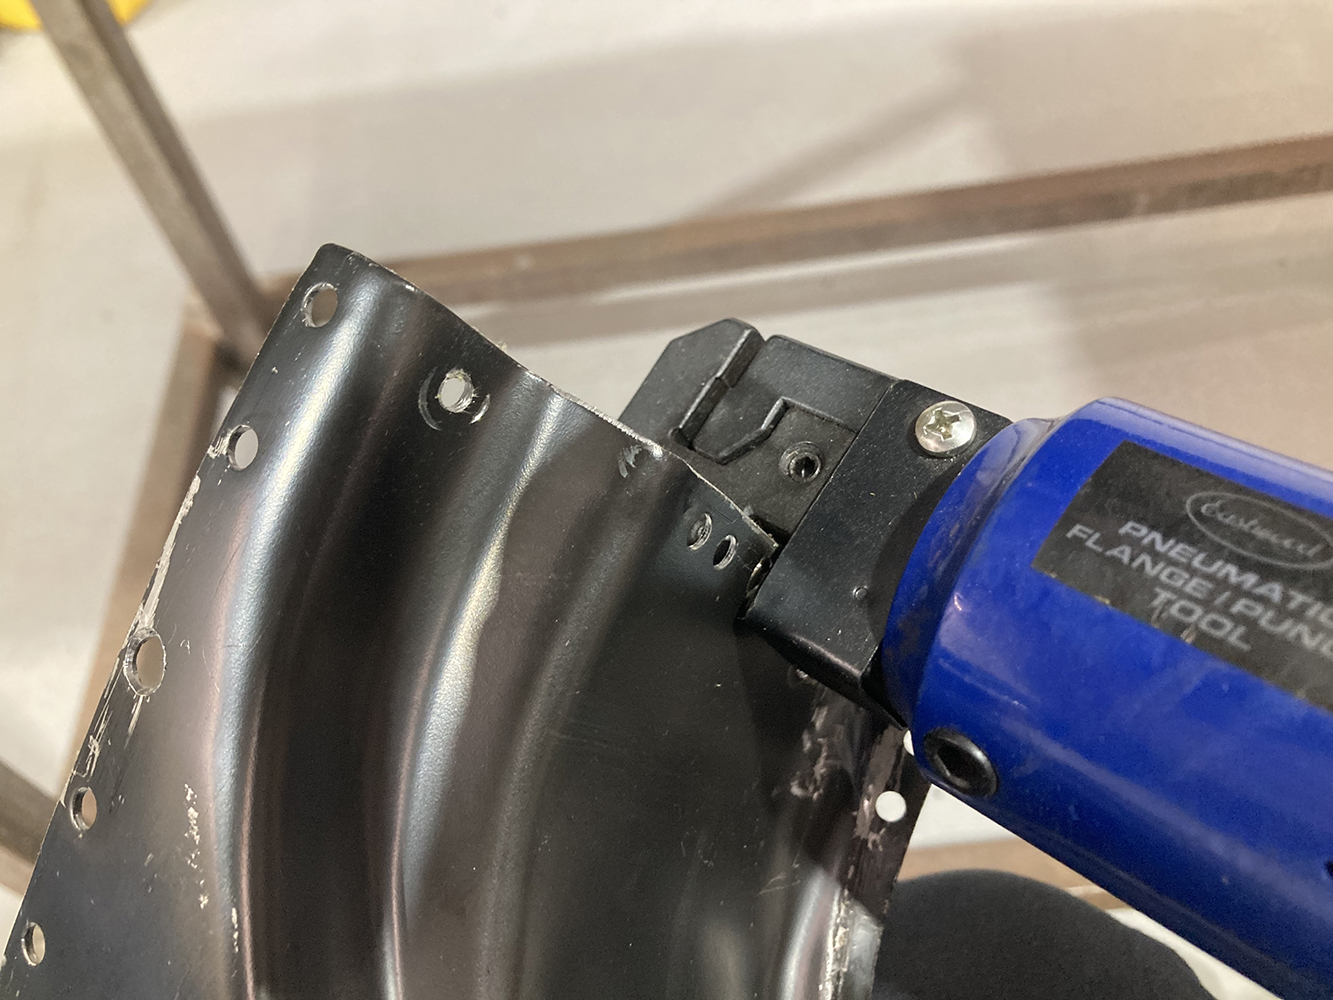
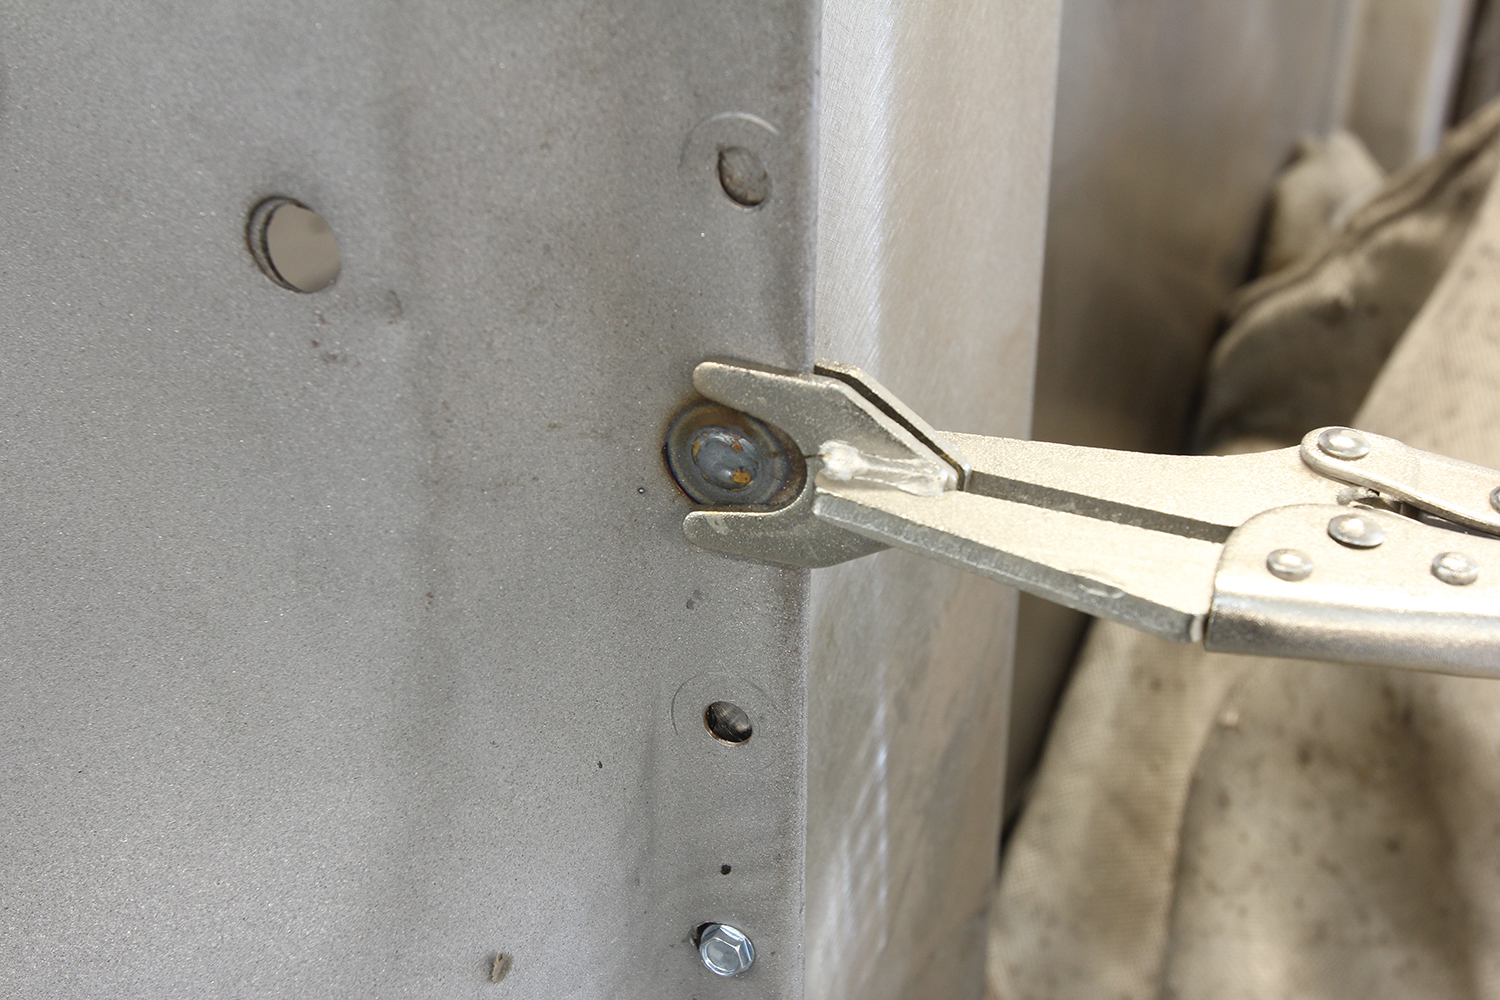
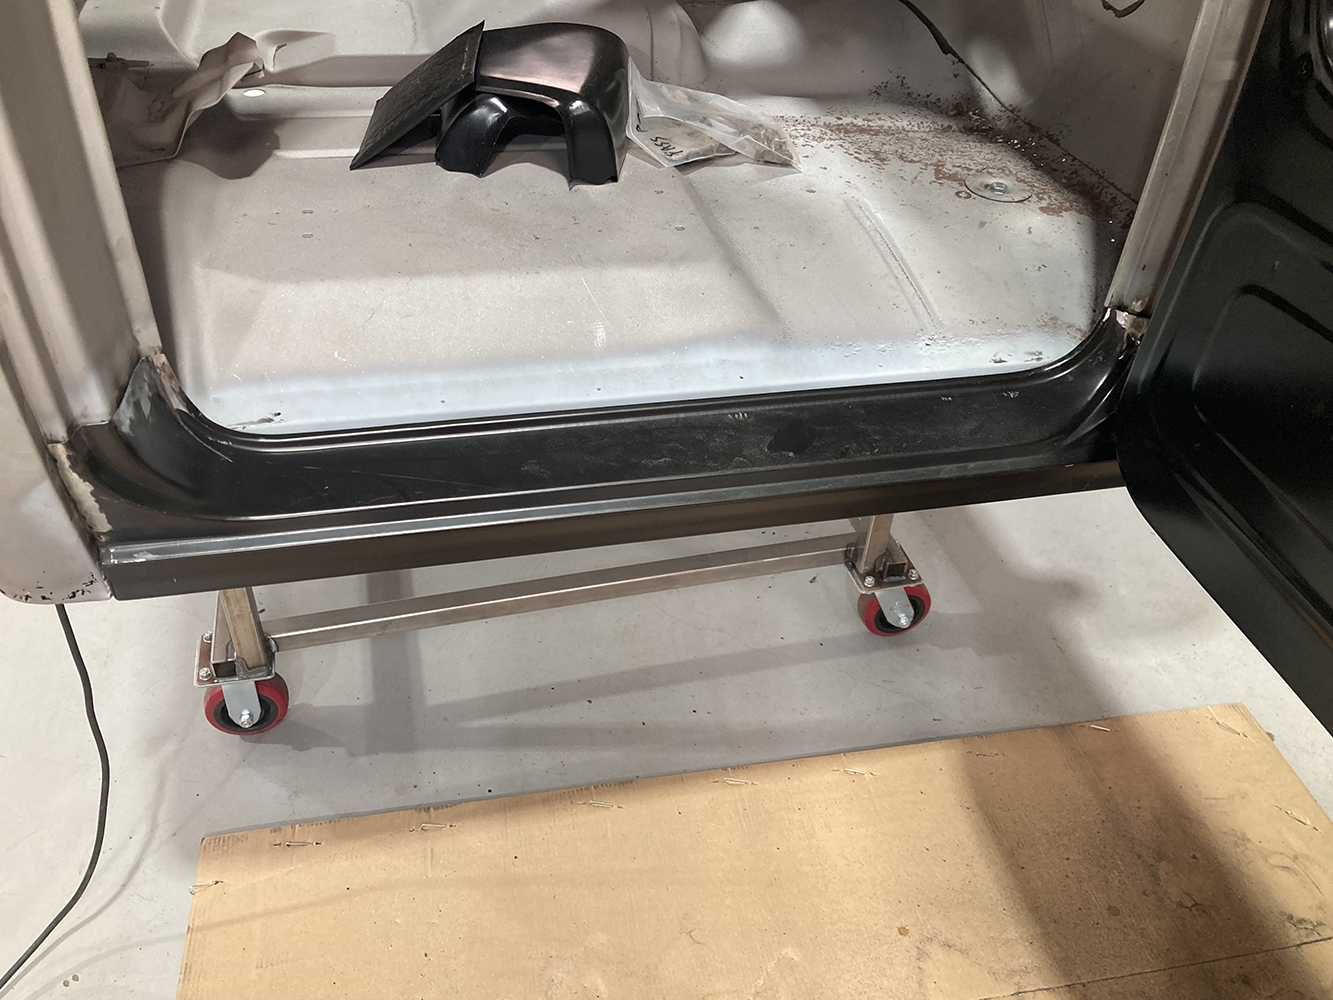
Our passenger side door was too far gone, so a new one was purchased from LMC Truck (PN 38-9170-T) and hung in place. The relationship between the bottom of the door and the rocker panel is one of the most important aspects of the installation of the outer rocker panel. The curvature of the rocker panel and the doorskin should be nice and straight …… while the gap along the bottom of the door is consistent.The outer rocker panel attaches to the cab assembly on top of the inner rocker panel just below a visible step in the sheetmetal. Those silver dots are marks where the panel will be punched so the two panels can be plug welded together.A pneumatic punch makes quick work of making small holes in the outer panel. When the two panels are assembled, each small hole will be plug welded, with the inner panel welded to the outer, effectively joining the two. This is an easy method for the garage builder to replicate the more expensive method of spot welding that the OEs use.Here, two panels have been clamped together and joined via plug welding.The outer rocker panel has been welded to the cab assembly along both ends and along the top, and the plug welds sanded smooth.
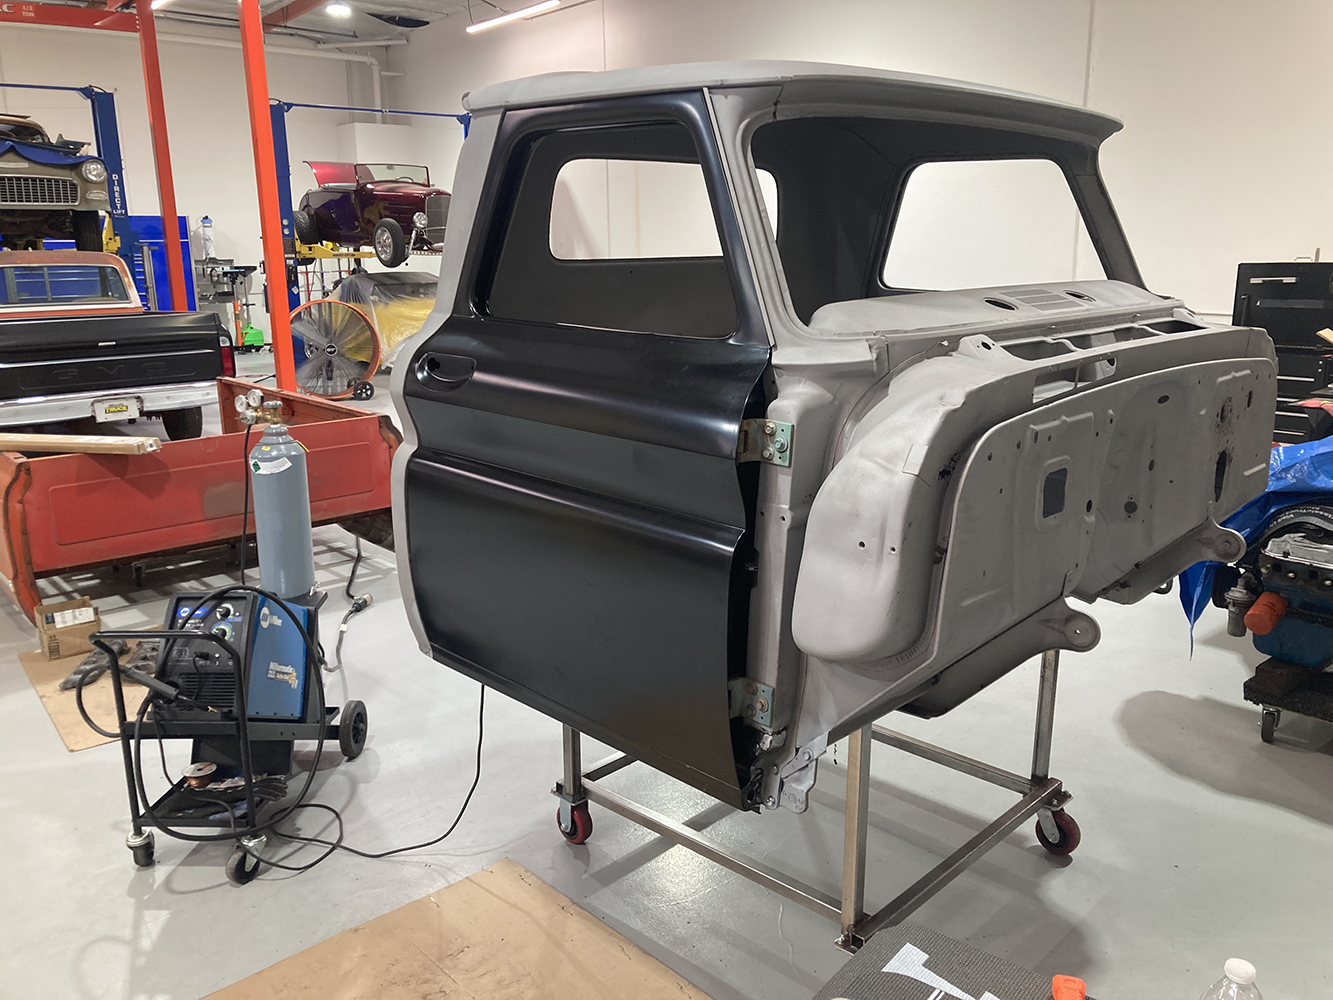
With the first of many repairs to come, our C10 cab is slowly returning to its prior glory.
We use cookies to ensure that we give you the best experience on our website. If you continue to use this site we will assume that you are happy with it.