Plumbing all the different fluid systems in a custom vehicle can be a daunting task. Determining the proper hose for the respectful fluids they’ll be responsible for, and the size for that matter, can be a confusing task for the uninitiated and experienced alike. Add in factors like the various sealing methods, tapers, fittings, thread count, and so on, and it can get overwhelming very quickly. Thankfully, if we don’t mix and match improper fittings and materials, it can be broken down fairly simply.
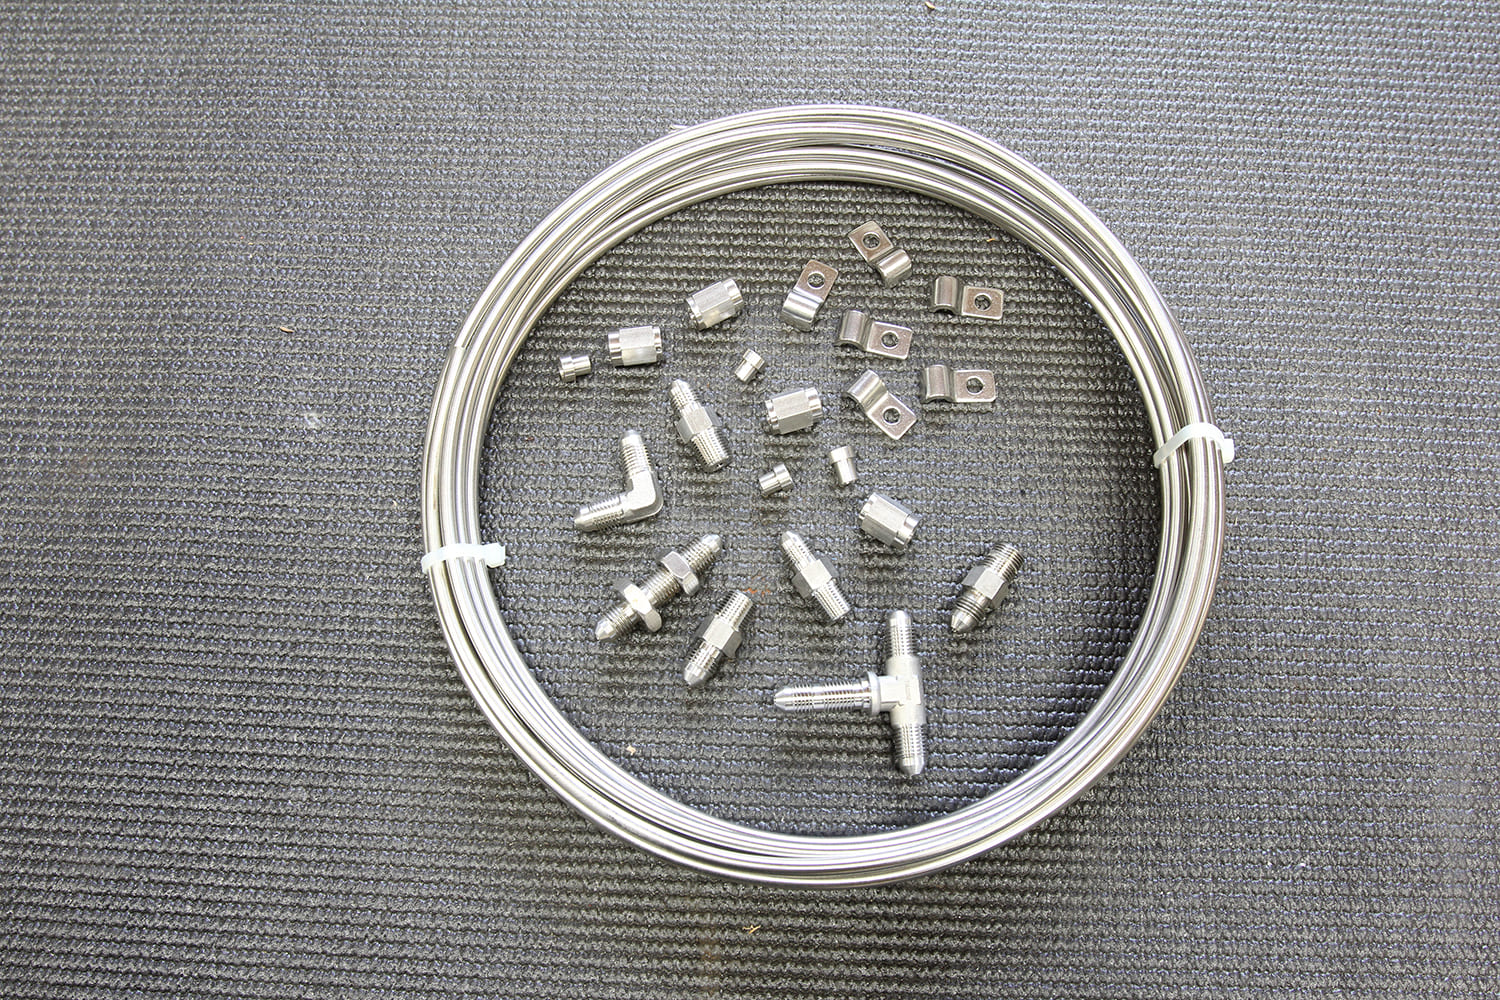
Speedway Motors’ Stainless Steel Brake Line Kit (PN 6178530) provides 20 feet of AN -3 stainless steel line, 19 nuts and sleeves, as well as a variety of different stainless adapters and fittings. A handful of line clamps from Kugel Komponents will ensure all our lines are firmly held in place.
When it comes to the brake system of a classic Chevy there are a couple options for the hard lines as well as the hoses. One common hard line material that has recently gained popularity is a combination of mild steel and some sort of anticorrosive alloy like nickel or copper, commonly referred to as NiCopp. Easier to bend and form than steel tubing, it has the strength and structural integrity of steel lines, with the added benefit of being much more corrosion resistant. In addition to the brake system, NiCopp is also popularly used in transmission and fuel lines.
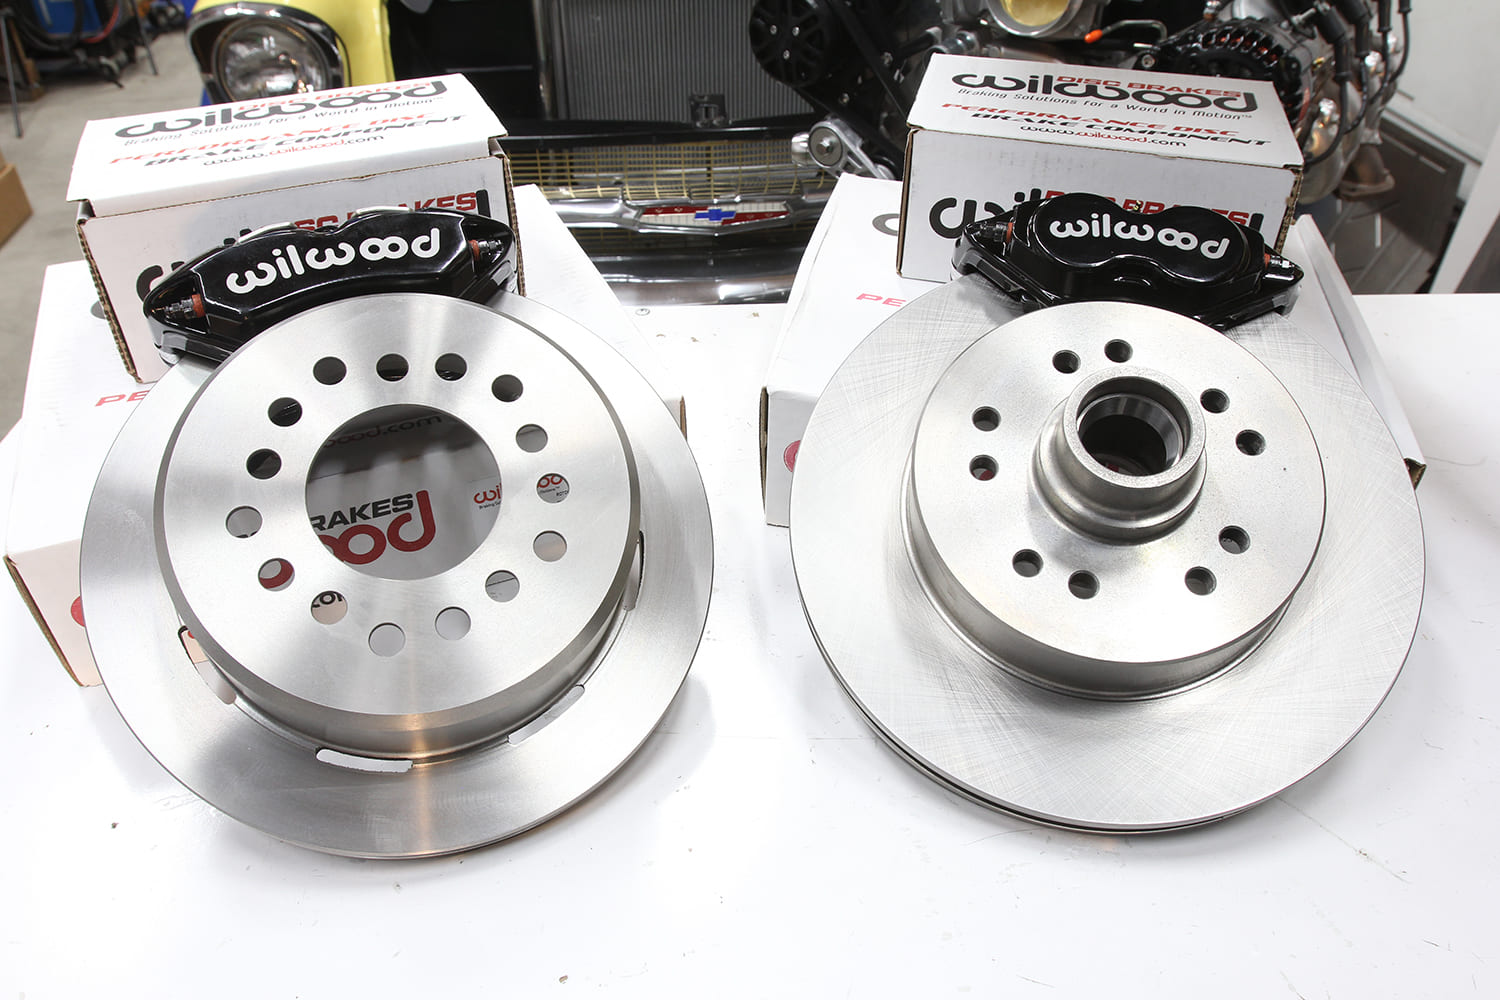
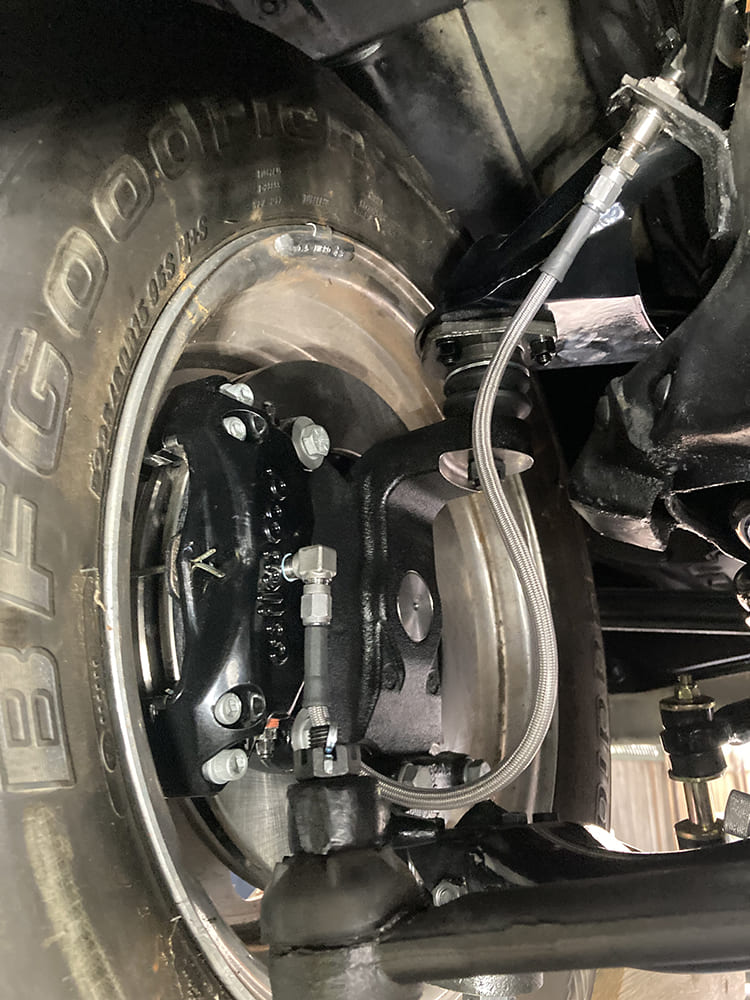
We’ve covered the Wilwood disc brake kit in Bruce Valley’s ’57 in past stories, but it would be remiss if we didn’t include them again as a reminder. Up front, we used Wilwood’s Classic Series Dynalite Kit (PN 140-16906) with a similar setup out back (PN 140-11389).
But why spend half the time bending, flaring, and fabricating NiCopp lines when you could be fighting stainless!? Like NiCopp, stainless steel has similar corrosion resistance, thanks to the addition of various elements, such as chromium, molybdenum, carbon, nickel, and nitrogen. But the addition of some of these elements can also make working with stainless steel difficult, which is why you may have heard the lie about how it’s impossible to double flare stainless steel brake lines. It’s not, but it can be difficult without a proper flaring tool. The aforementioned addition of nickel to stainless steel in sufficient amounts changes the microstructure to “austenite,” the most common grade of which is 304 or 18/8 due to its 18 percent chromium and 8 percent nickel content. This austenitic stainless steel features excellent corrosion resistance, ductility and formability, but can suffer from work hardening with cold work, hence the rumor that 304 stainless tubing can’t be double flared. It turns out that 304 stainless steel tubing is an excellent option for brake and fluid system plumbing, and one that we at the Clampdown Competition headquarters use often.
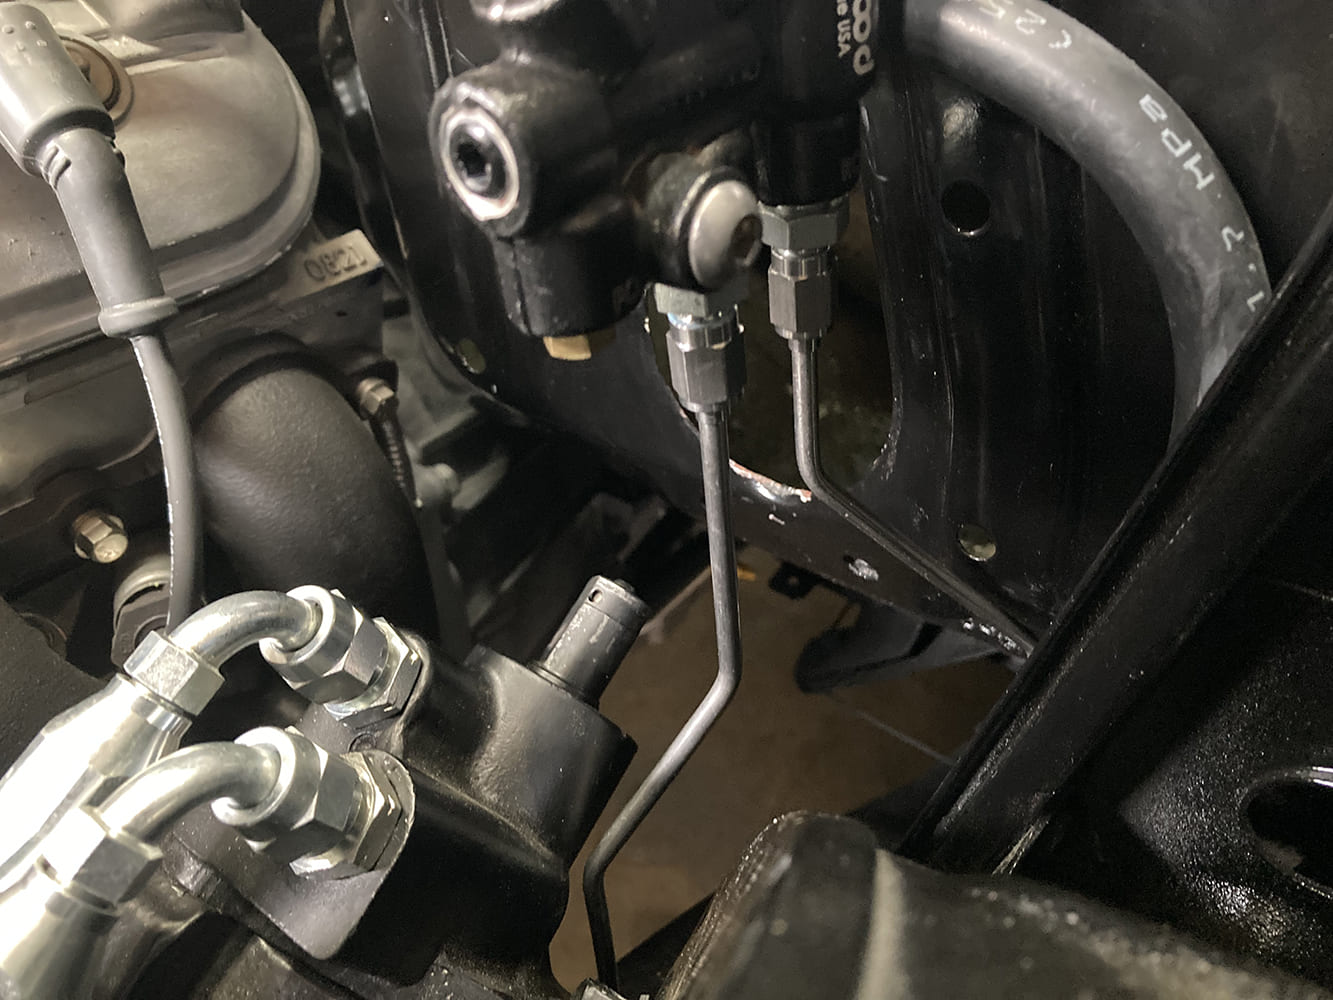
Pressurizing the system will be the responsibility of a Wilwood Remote Tandem Master Cylinder (PN 260-14241-P) coupled with a pair of Lightweight Reservoirs (PN 260-16390). With a bore of 7/8 inch, this manual setup should provide great pedal feel and modulation with excellent feedback. Wilwood’s Combination Proportioning Valve and Bracket Kit (PN 220-14247) will allow the brake bias front/rear to be easily adjusted as required.
It also just so happens that Speedway Motors offers a universal stainless steel brake line kit featuring a variety of 303-grade semi-polished fittings and enough 3/16-inch 304-grade stainless steel hard line to plumb any fullsize Chevy. While it is possible to form a double-inverted flare on this material, it’s much easier to form a single, 37-degree flare, the foundation of the AN family of fittings, which is exactly what the Speedway kit is equipped with.
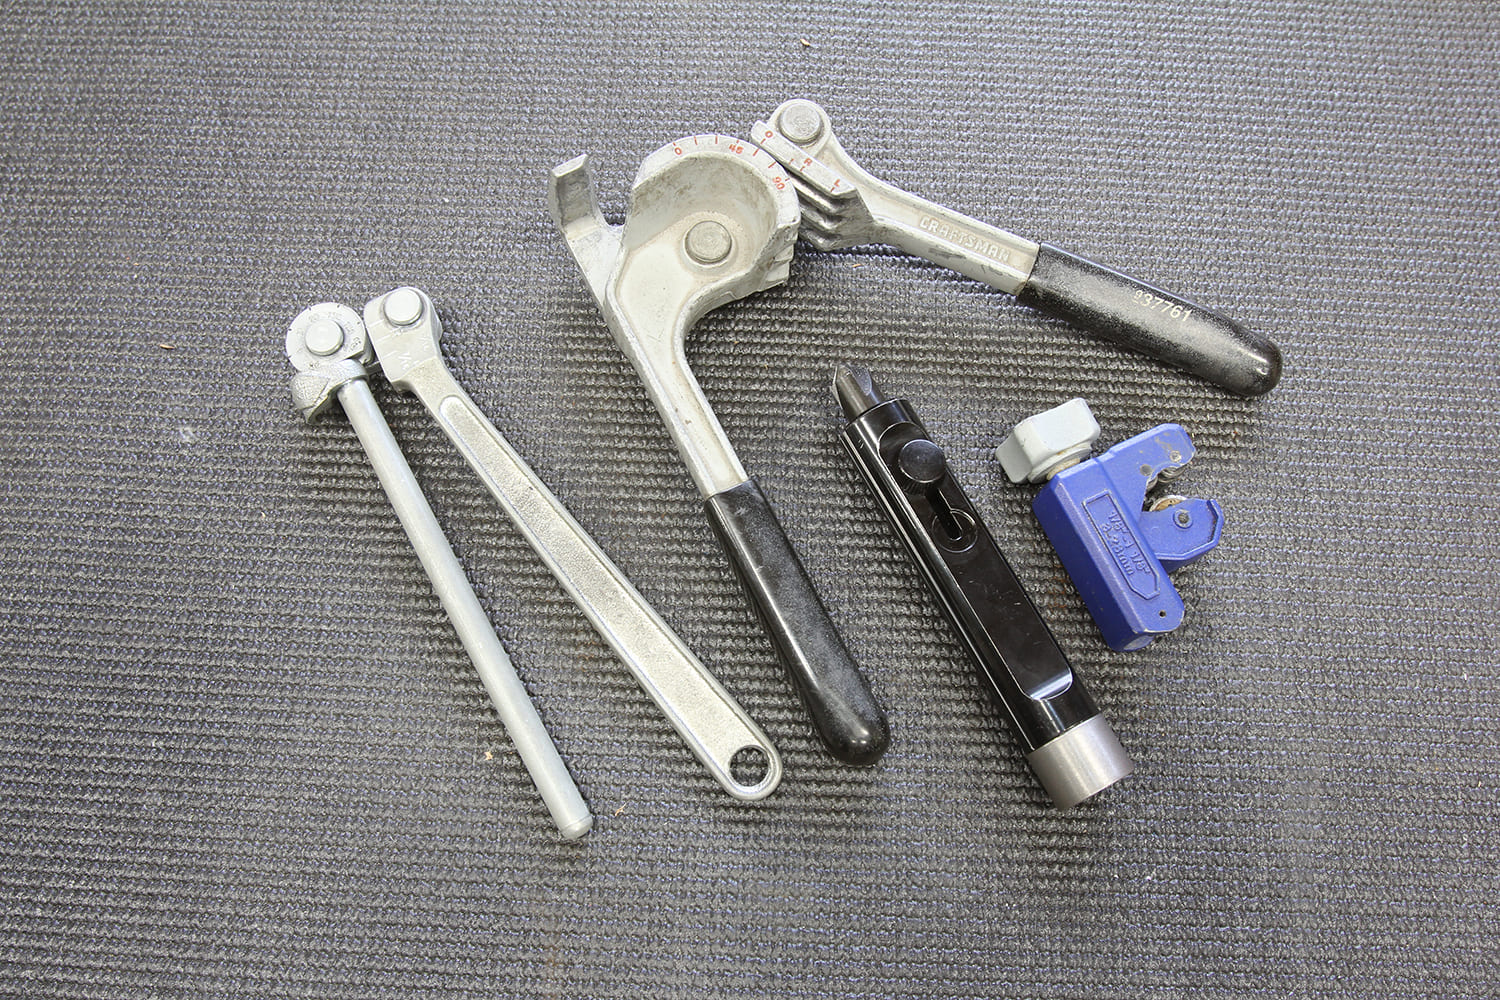
A variety of different radii benders are handy to have on hand, but sometimes one has to improvise and use a welding gas bottle or other random round objects for more sweeping bends. Your knee doesn’t make for a good bender, however. A sharp tubing cutter is a must; I like the small-style sold at most any hardware stores. That Reaming and Deburring Tool is another must-have, this one coming from Speedway Motors (PN 91031624).
All told, the attractive nature of a fully polished or even as-stock stainless steel plumbing job is hard to argue against. Sure, it can be more difficult than working with a more formable material like NiCopp, but you’d be hard pressed to compare the appearance of the two at the end of the day. ACP
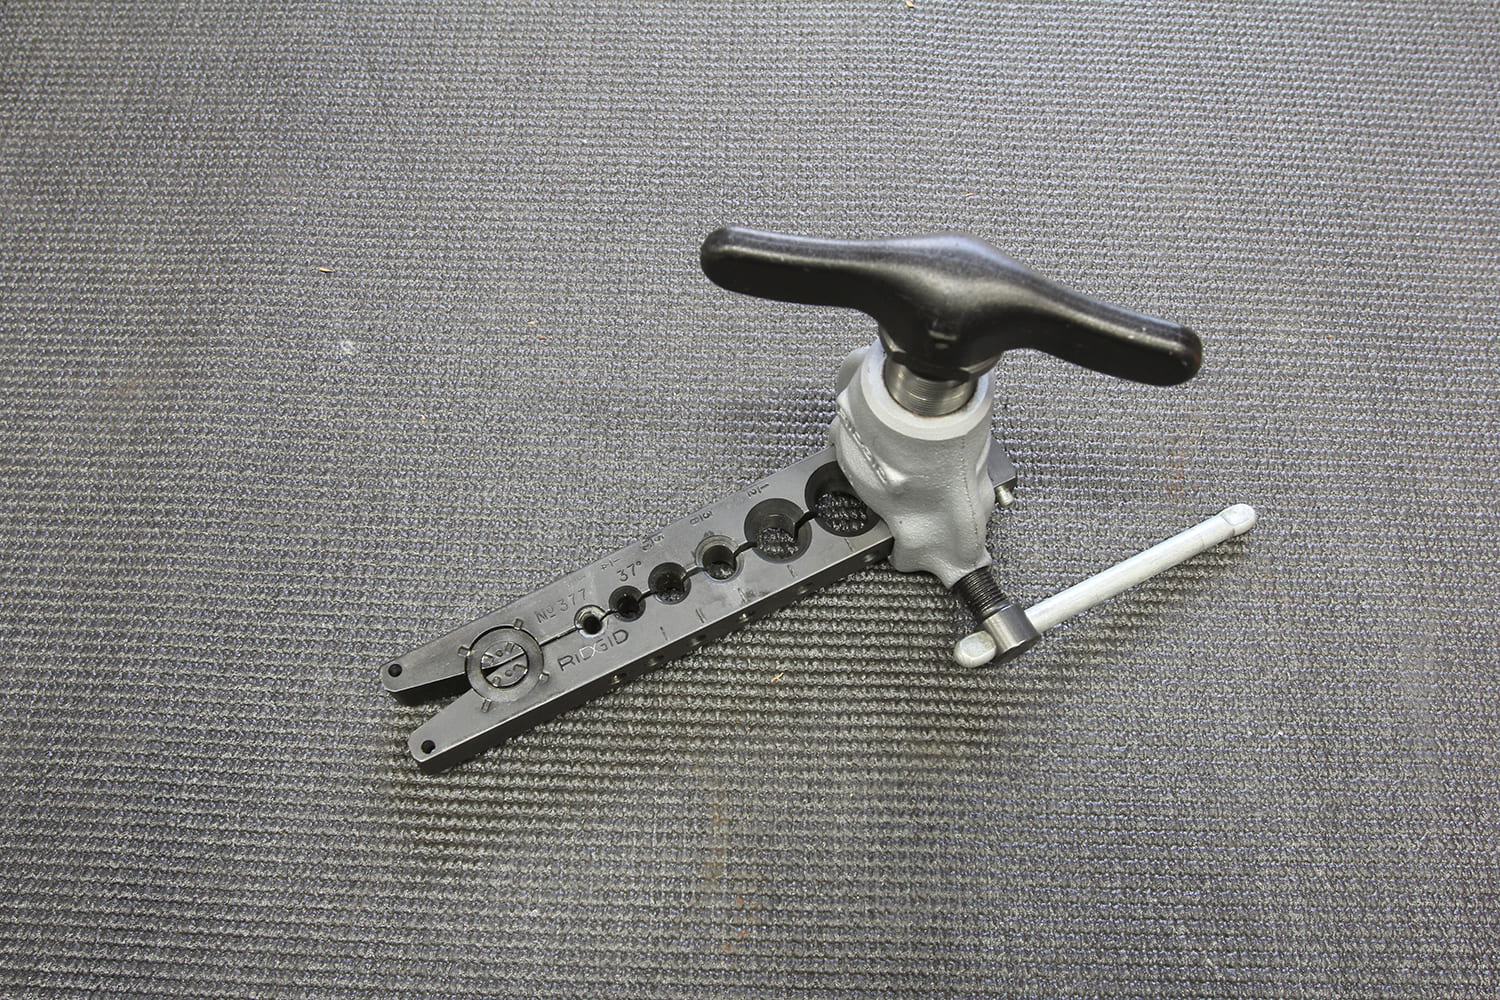
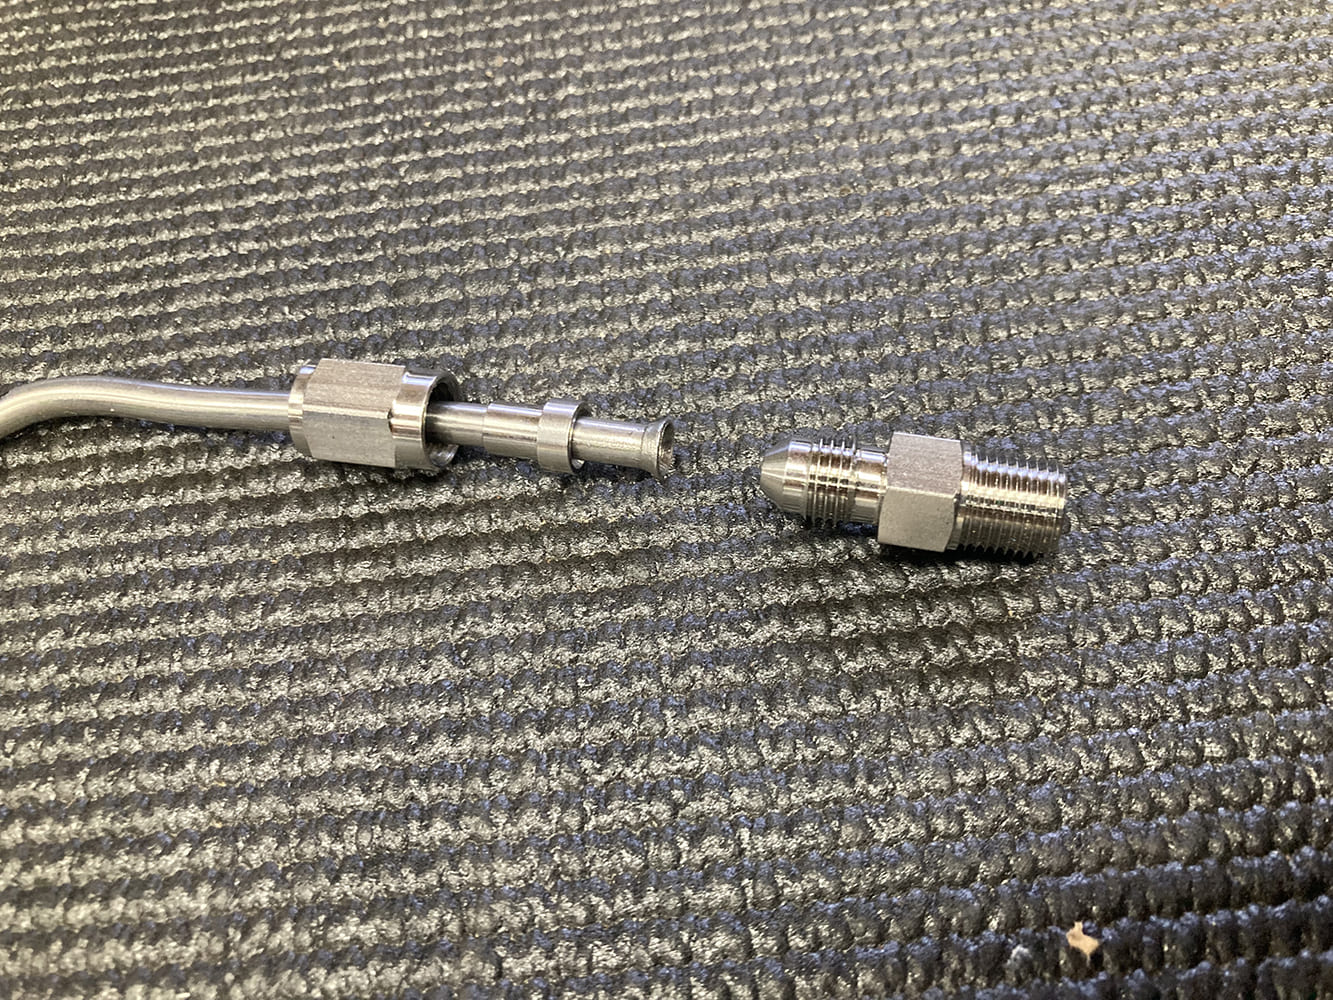
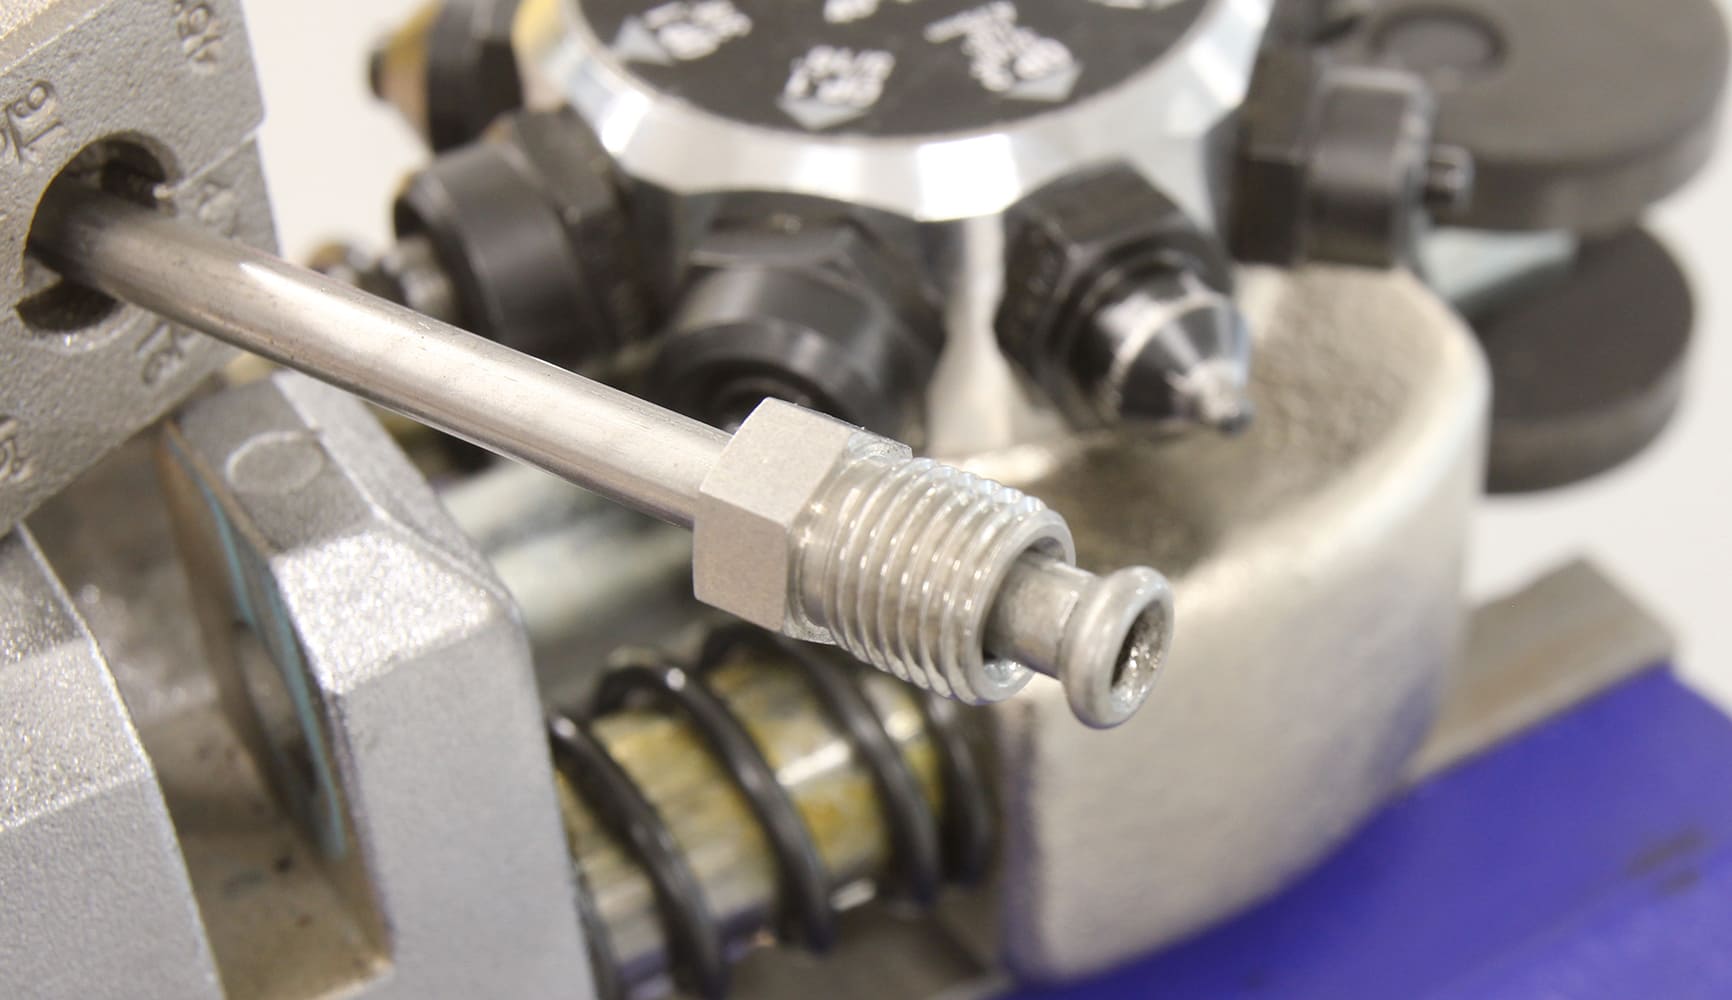
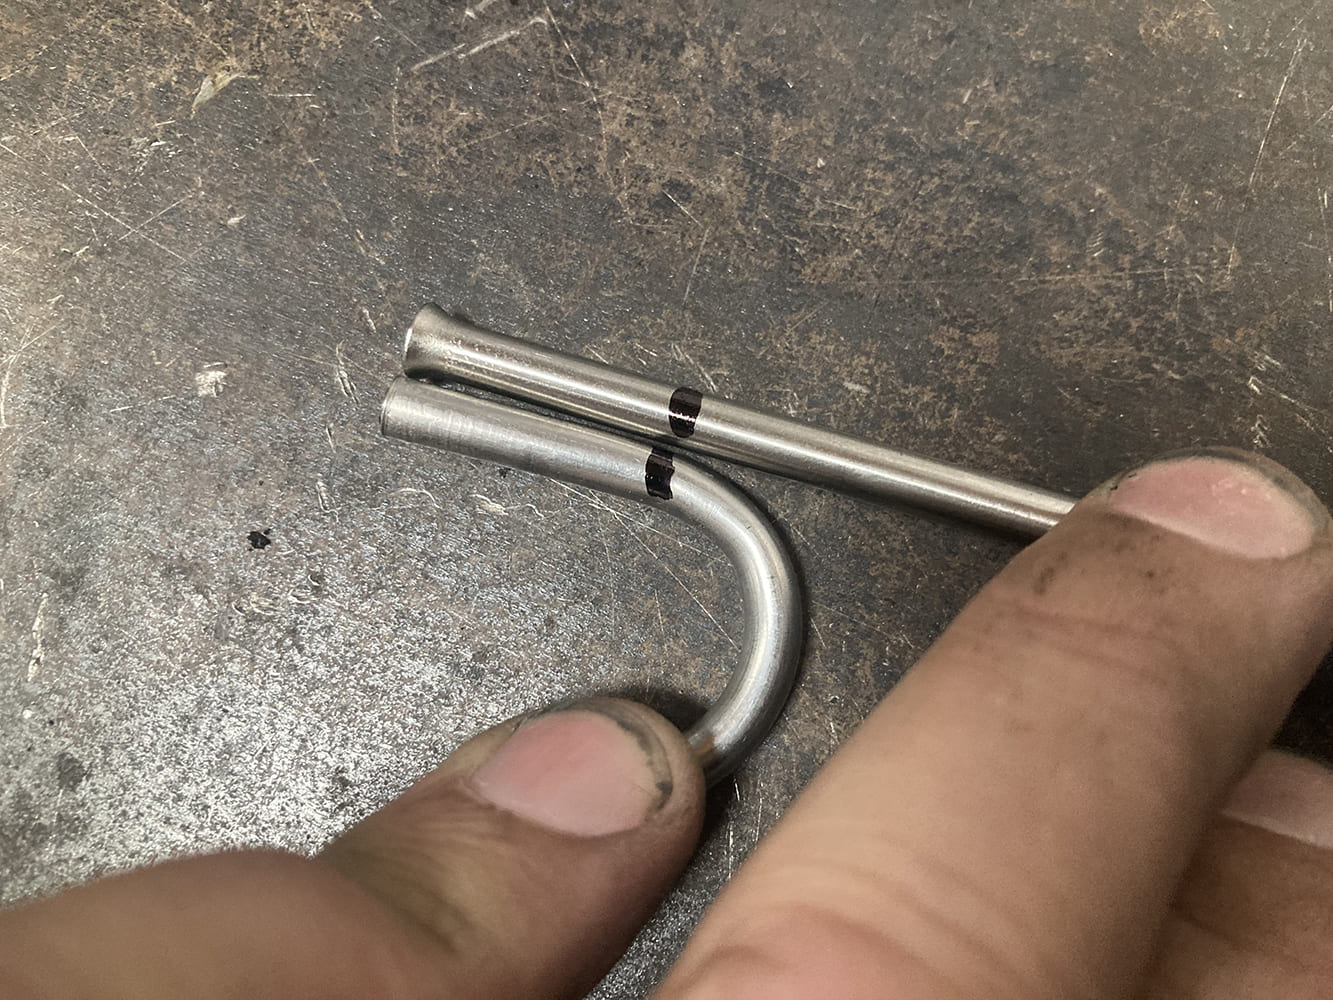
One absolute necessity when flaring tubing is a proper flaring tool. This Ridgid version sold by Speedway Motors (PN 91089524) works great and puts 37-degree flares in tubing ranging from 3/16- to 3/4-inch tubing.The business end of a 3/16-inch brake line with a 37-degree flare consists of the flared tubing, nut and sleeve, and a male fitting, this one being AN -3 by 1/8-inch NPT.
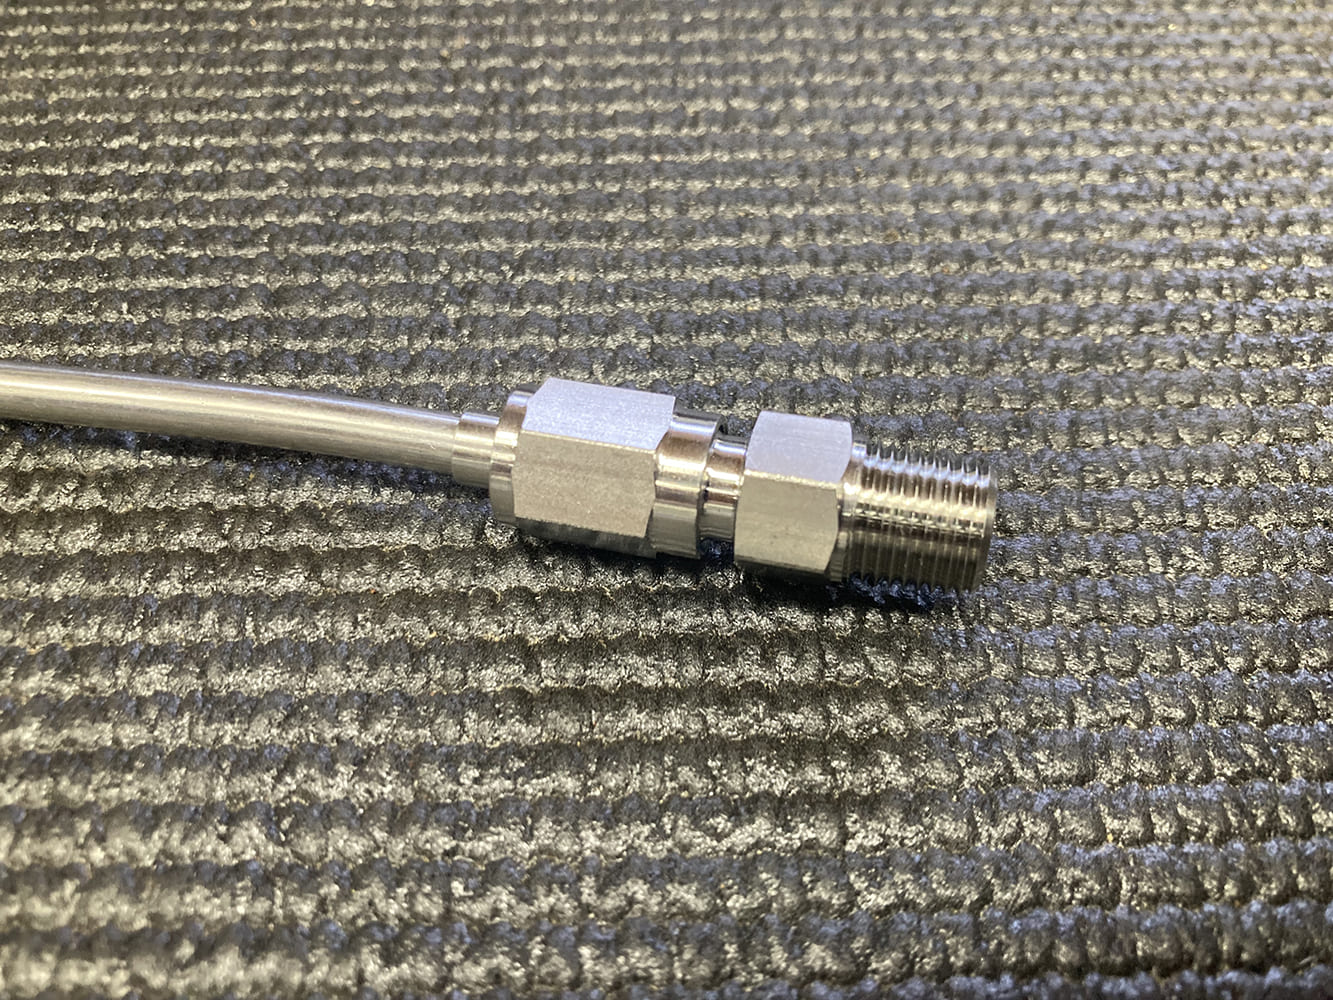
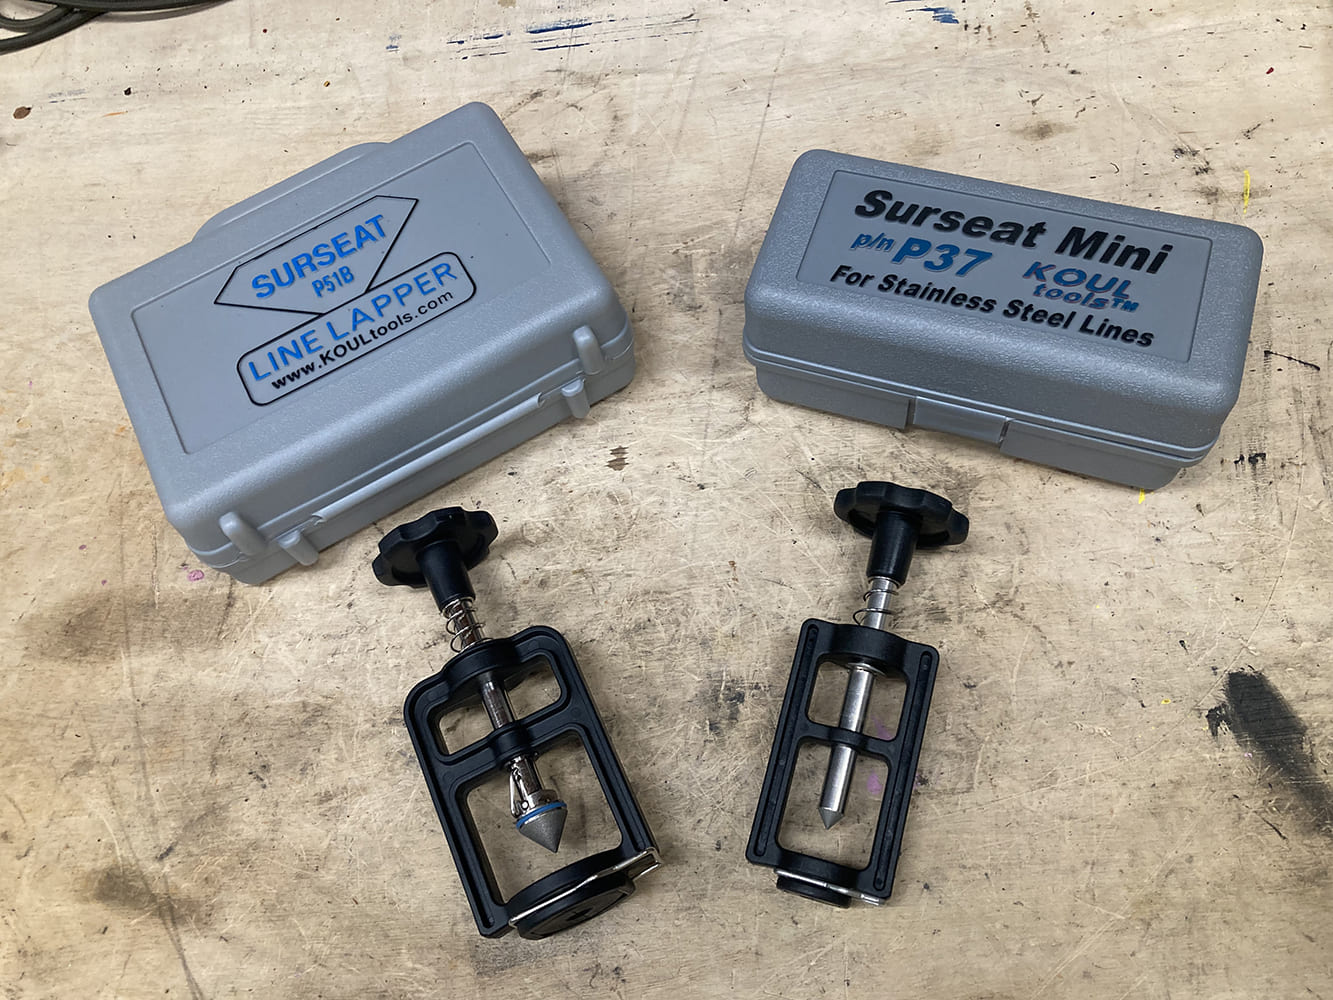
For comparison’s sake, here’s a traditional 45-degree flare made in the same 3/16-inch stainless steel tubing using Speedway’s Deluxe 45-Degree Brake Flaring Tool (PN 91170081). The optional 37-degree Flare Die Set (PN 91170083) allows both style flares to be made using the same flaring tool.If your tubing came in a roll like ours, you’ll want to get yourself a correctly sized Handheld Tubing Straightener like this one (PN 910316), also a Speedway offering.Even the most perfectly formed flares can have imperfections that can result in leaky joints. This Koul Tools P-51B Sure Seat Lapping Tool from Speedway Motors (PN 4695100) ensures that both 45- and 37-degree flares on tubing from 3/16 to 1/2 inch are perfect every time. For 3/16-inch stainless steel tubing with a 37-degree flare, the P-37 (PN 4693700) is a great addition as well.
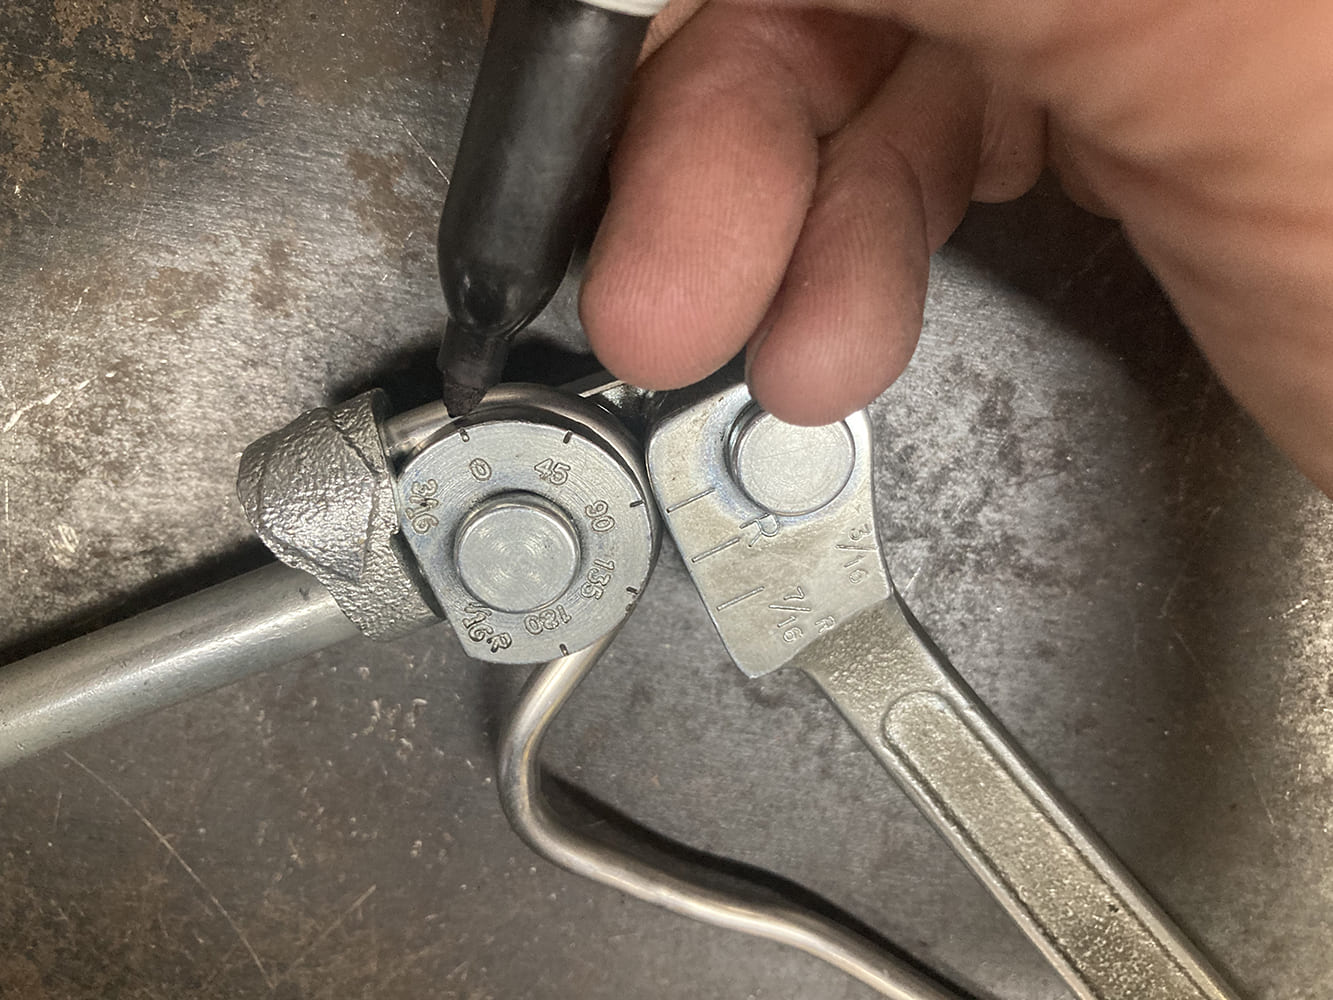
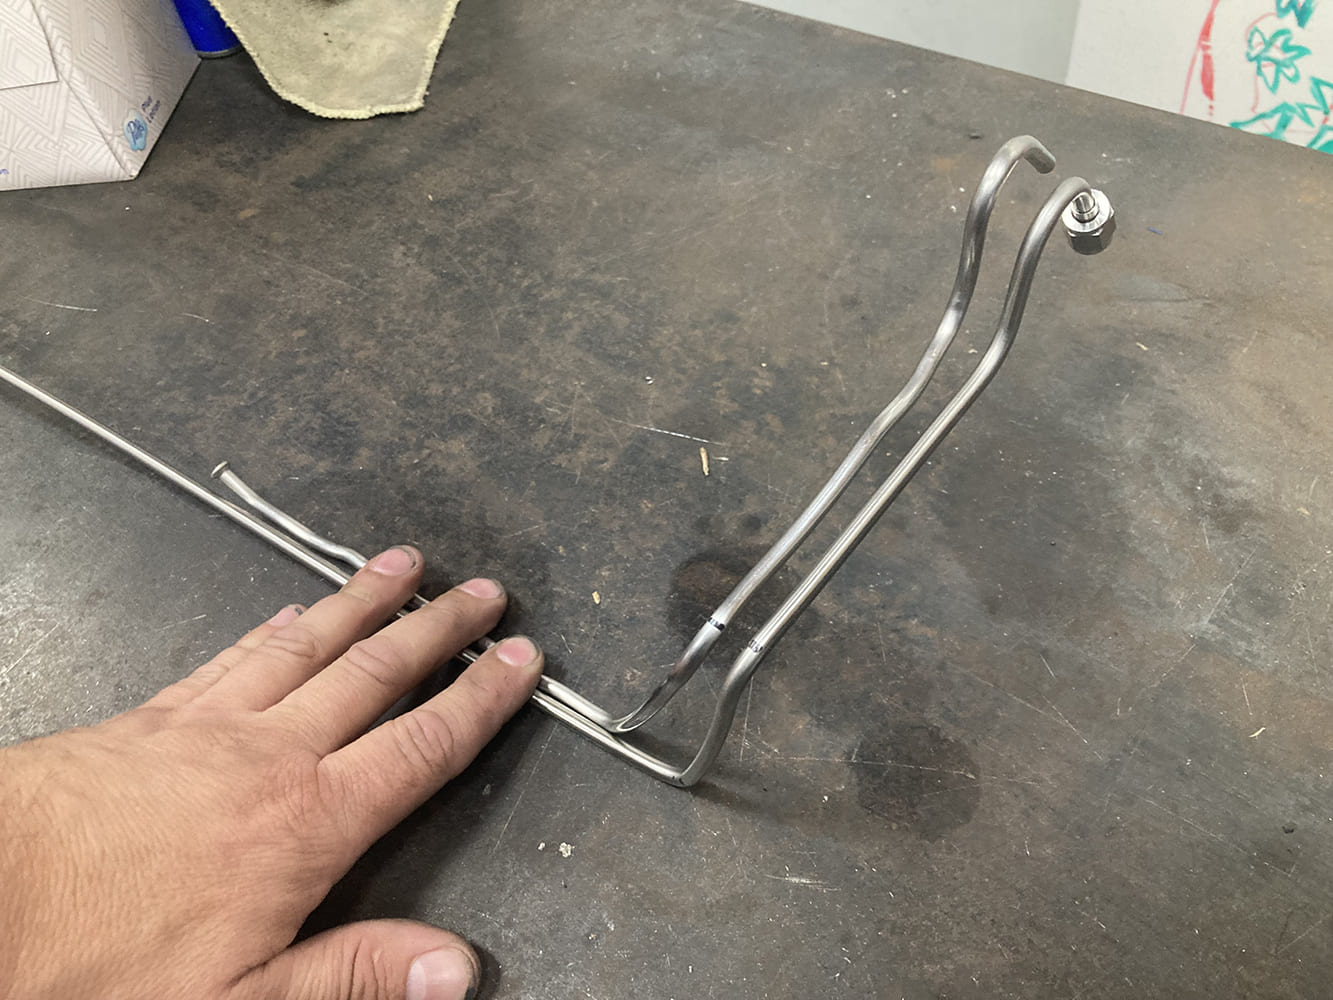
Sometimes even the most well-intentioned brake line fabrications can go pear shaped. Instead of getting frustrated, I like to set them aside and use them as templates or test pieces in the future. Here, one of those failures is being used as a template, marked to help aid in the location of a bend. I first marked 0 on the test piece, aligned using the tubing bender. Transferring that mark to the final piece allows me to make the same bend in the exact location.
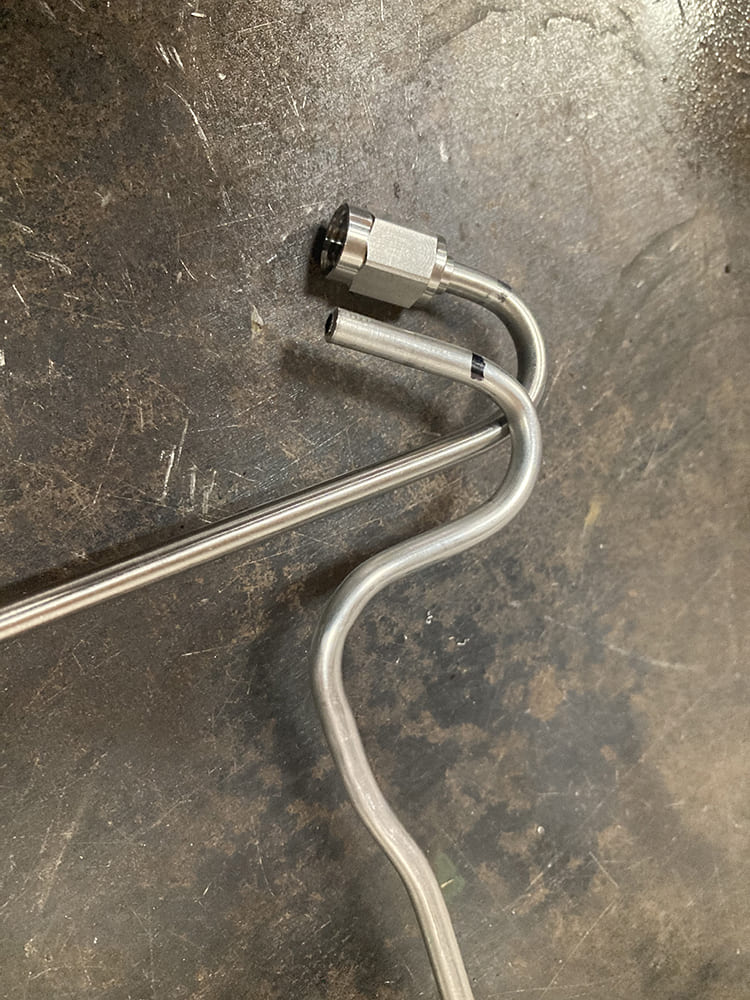
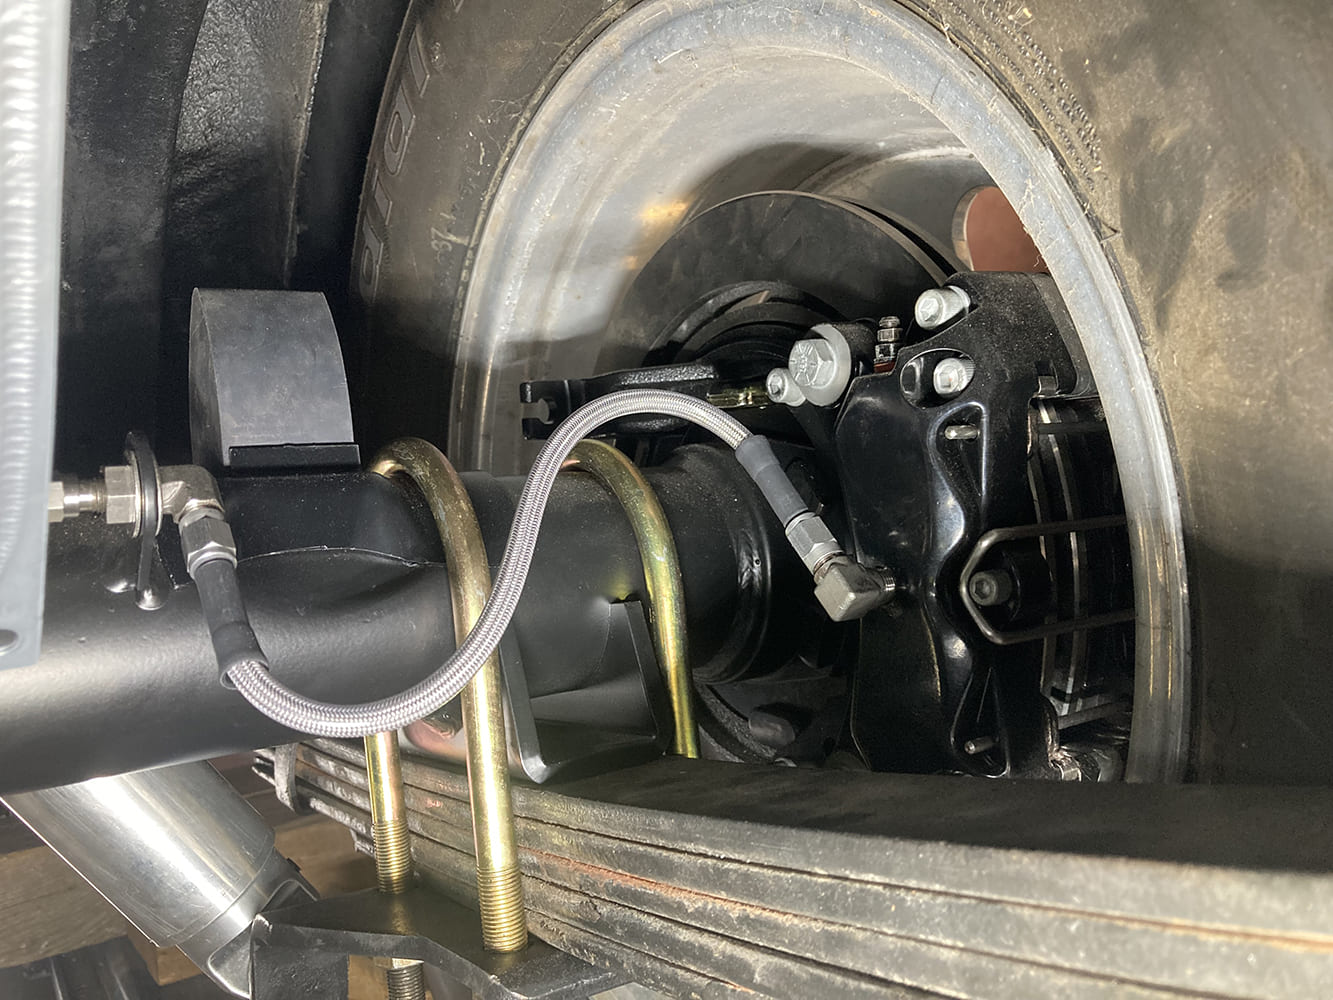
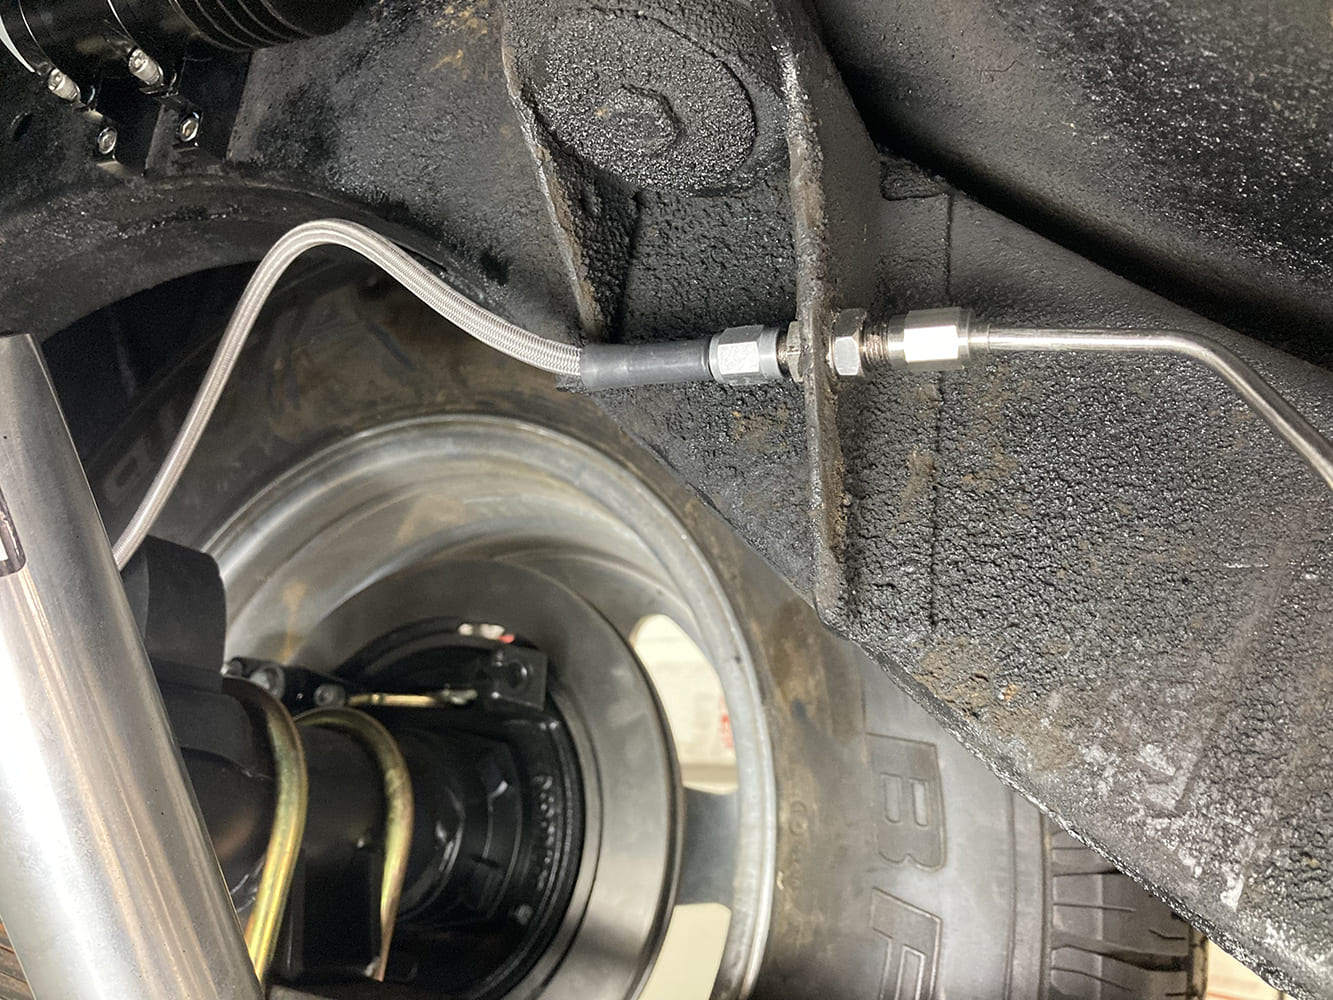
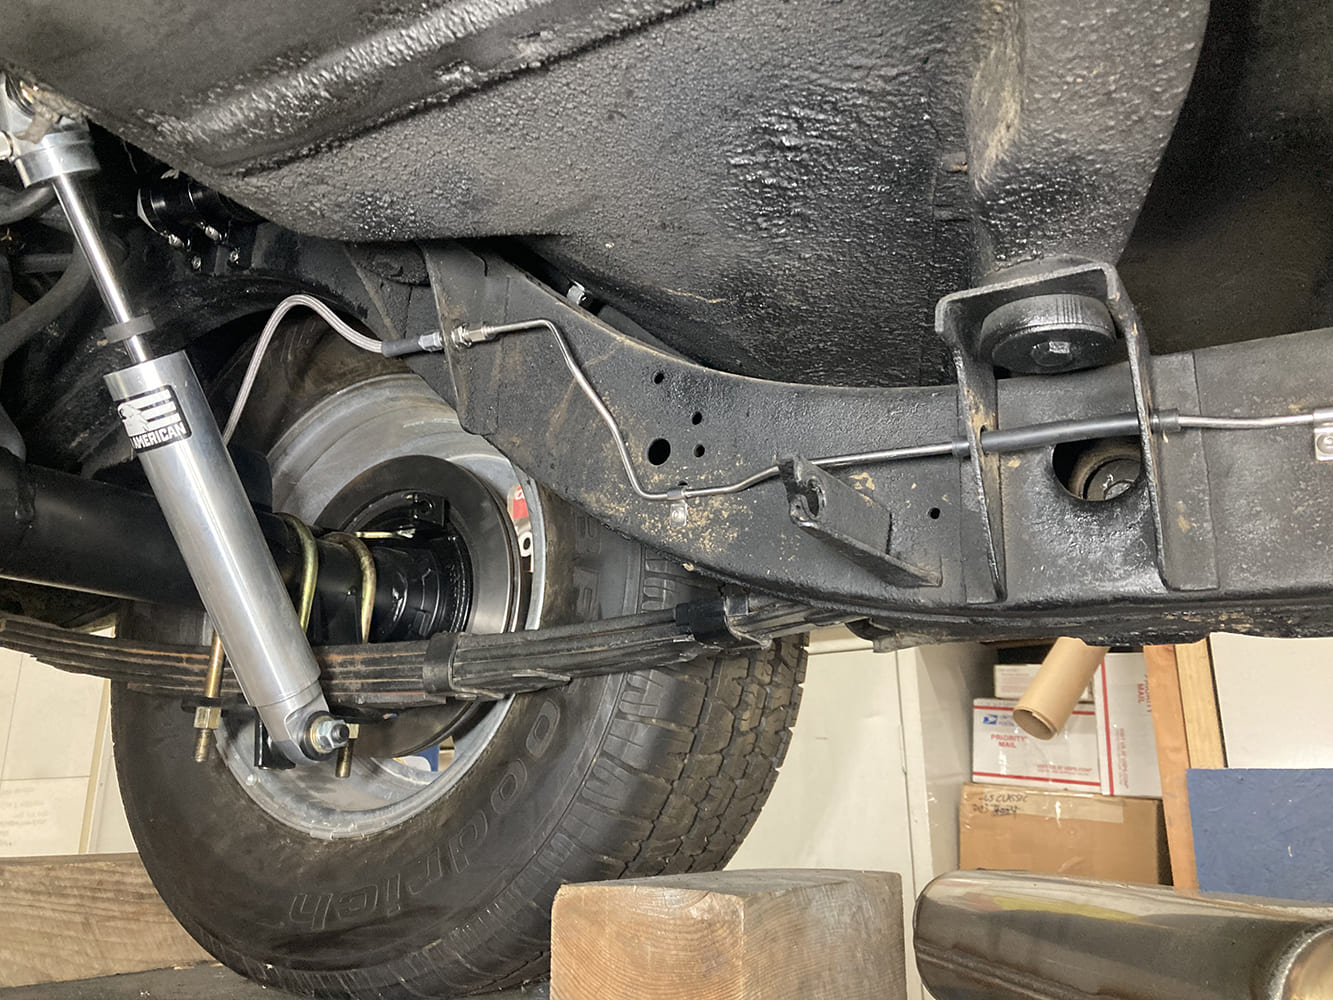
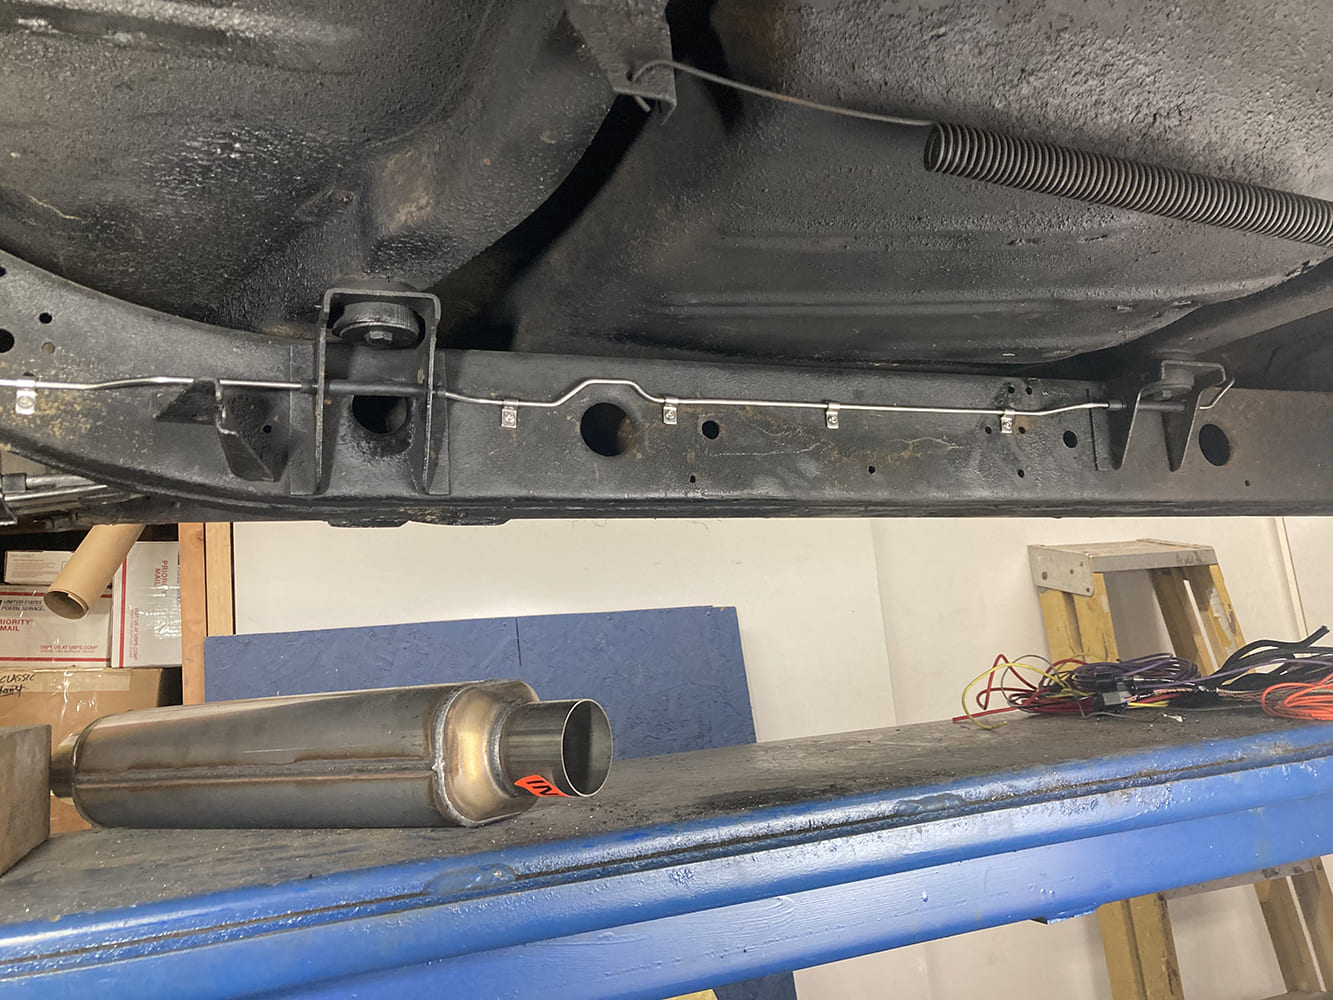
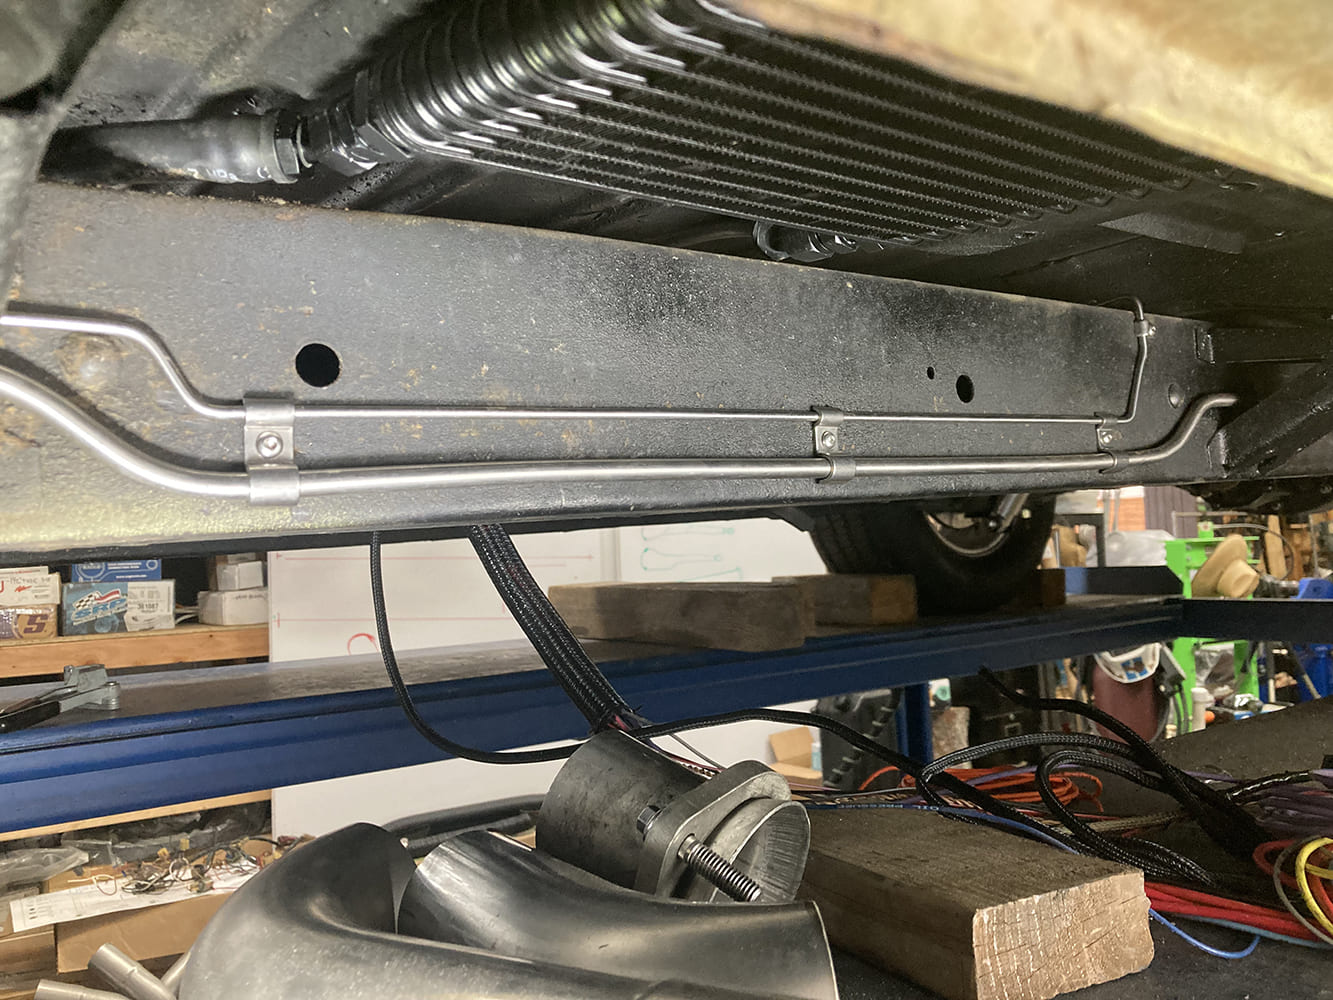
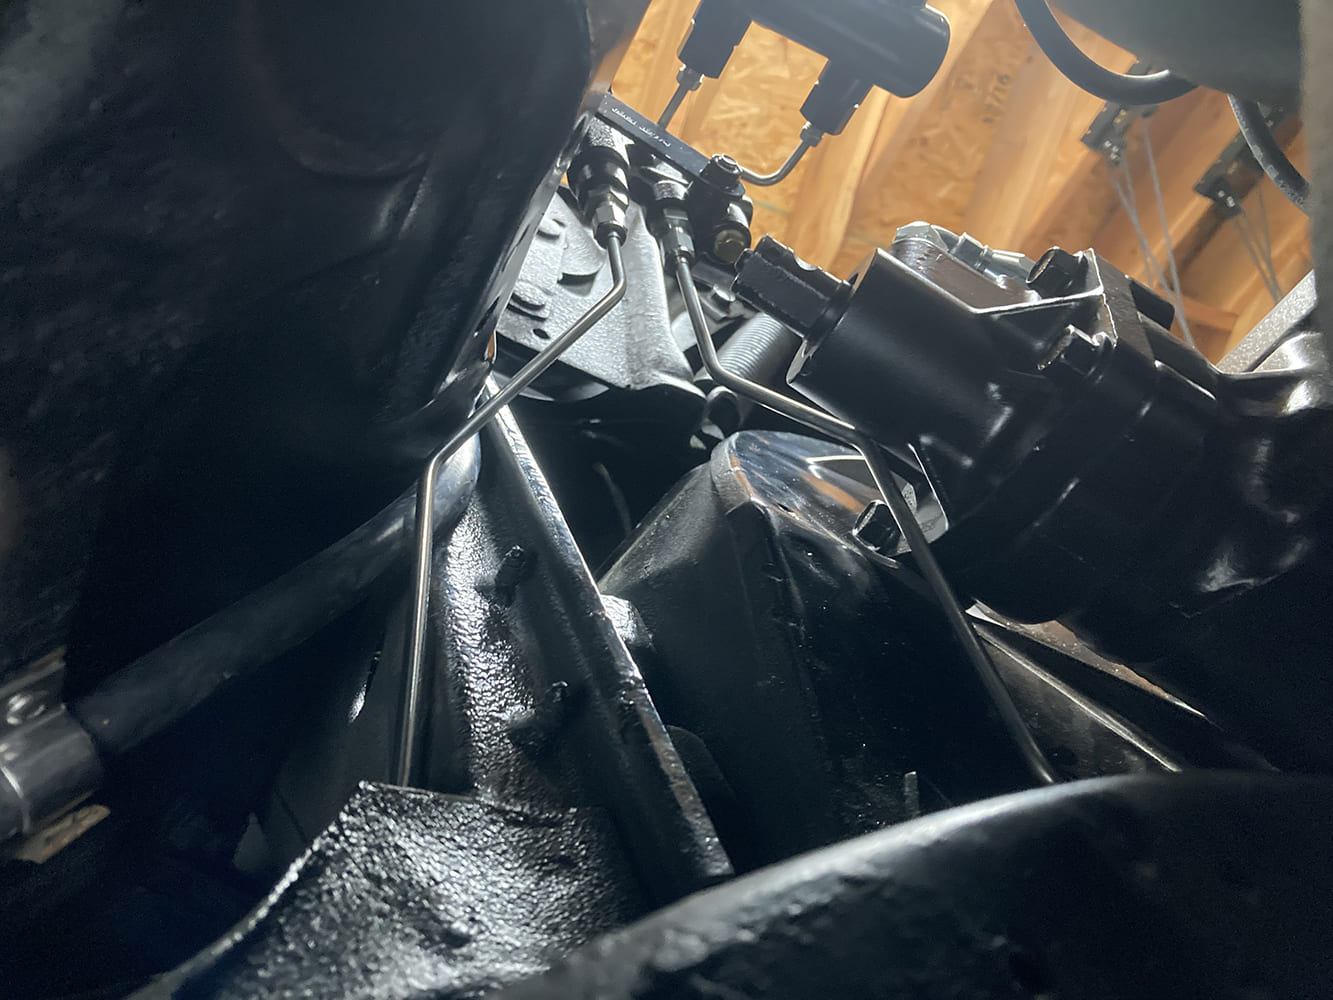
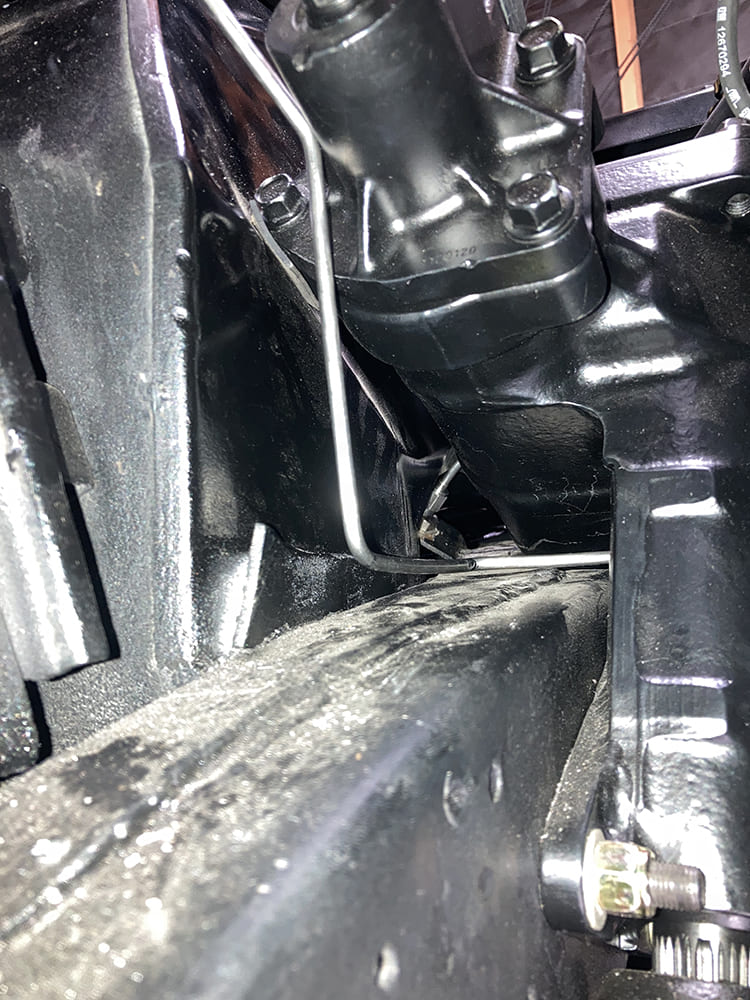
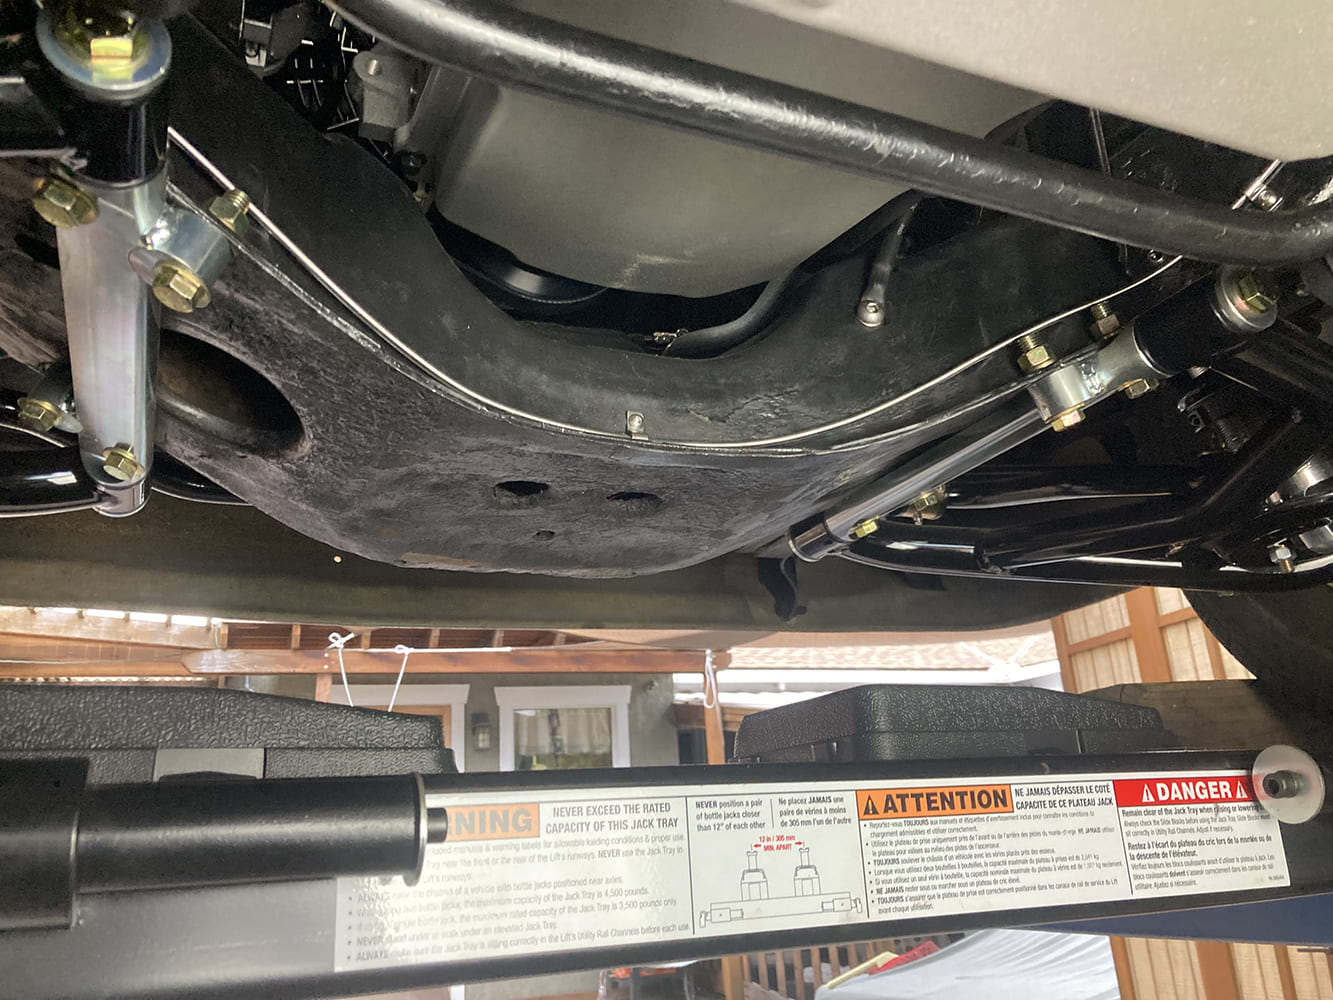
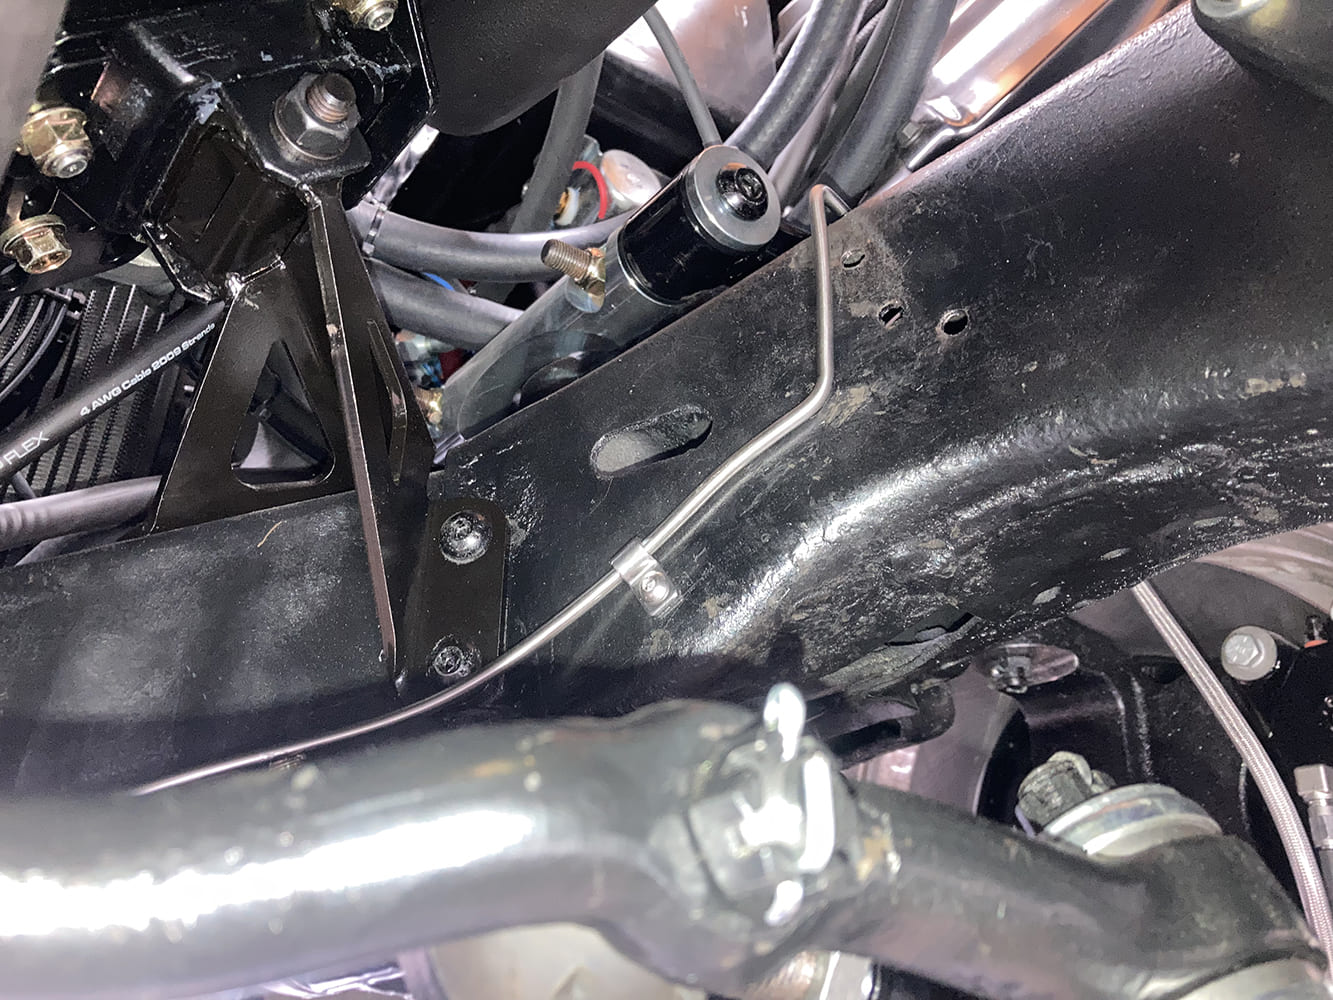
The aborted line went awry toward the very end of the fabrication process, which is typically when it happens. Here, we’ve translated each bend from the trashed test piece to the final section, resulting in the exact shape desired.Before the rearend was installed in Valley’s ’57, we fabricated the line, hooked up the two stainless steel caliper hoses, as well as the hose that will connect the rearend to the chassis side of the brake system. Hoses at either end allow the calipers to be removed and serviced without having to disconnect the line.Shorter hoses were swapped out once the rearend was installed, as the previous ones were too long.A body mounting tab was drilled and a bulkhead fitting installed, serving as the attachment point for the rearend’s hose. The rear brake line begins its journey forward from this point.Here, the first few bends have been made until we hit our first challenge; finding a way past this body mount. As you can see, we’ve opted to go through it but have yet finalized the line’s path.couple bends later and the line has made its way past the first hurdle, held in place by a couple stainless steel line clamps courtesy of Kugel Komponents (PN 6501). For good insurance, a section of hose was used to isolate the line from the body mount to prevent any contact between the two.Another body mount provided another hurdle, defeated in the same fashion. Just past the body mount and the line heads up and over to the outside of the framerail.On the opposite side of the chassis now, the brake line joins the stainless steel fuel line running forward. More Kugel line clamps, this time combination 3/16×3/8-inch clamps (PN 6522).One long line running from one end of the vehicle to the other would be tedious to fabricate, and in our case, mostly impossible as it snaked through those body mounts. Instead, the lines are broken into three separate sections, joined by unions like the one seen here.The rear line follows the lines of the firewall until it terminates at the rear port of the adjustable proportioning valve. The front line follows a similar path, though hugging the steering box instead of the firewall, attaching to the front port of the prop valve.
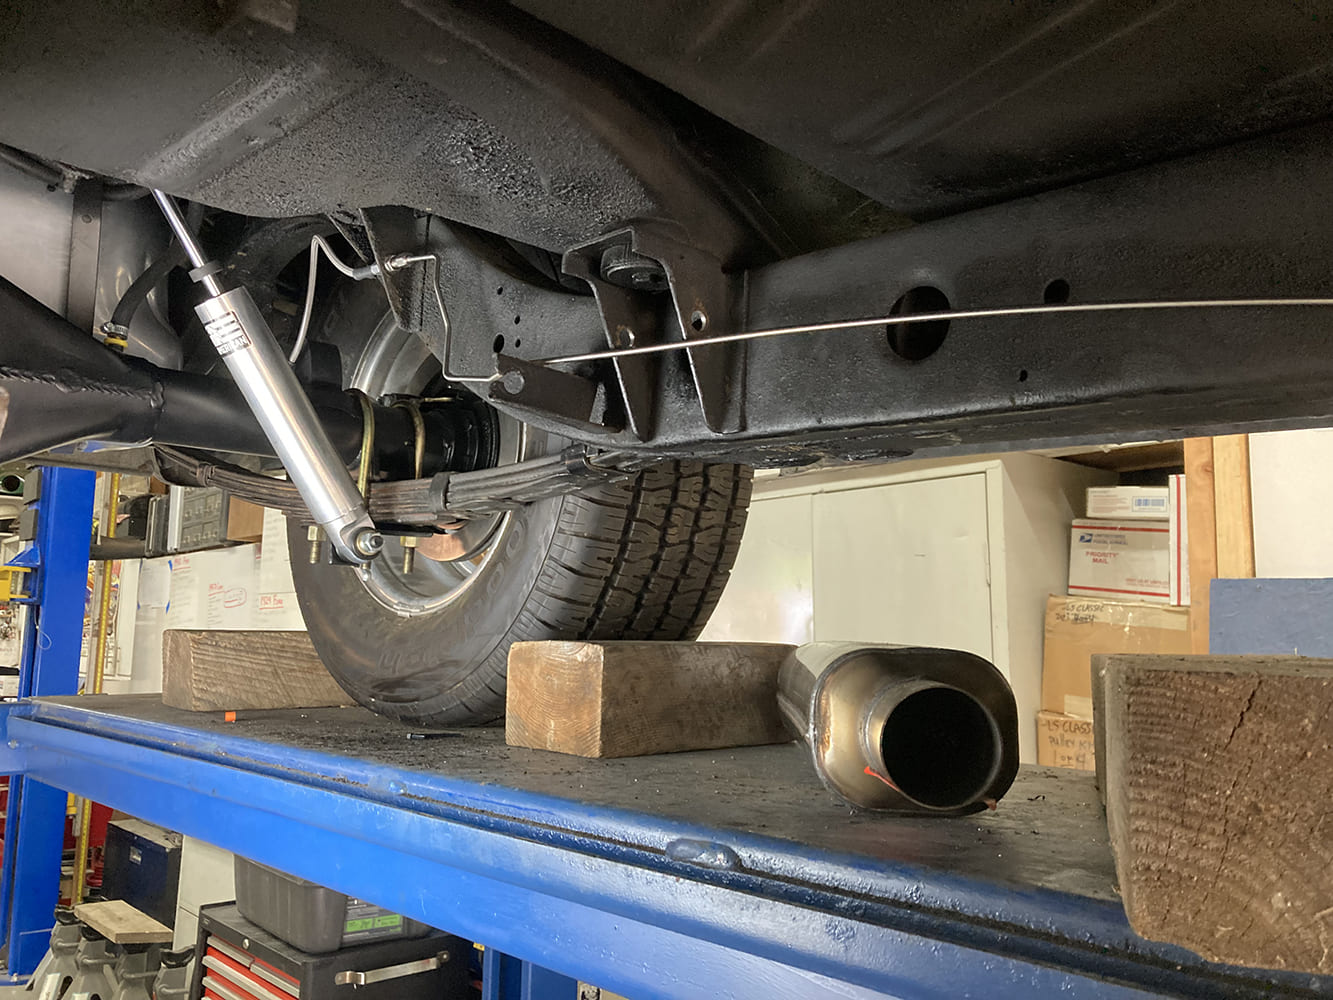
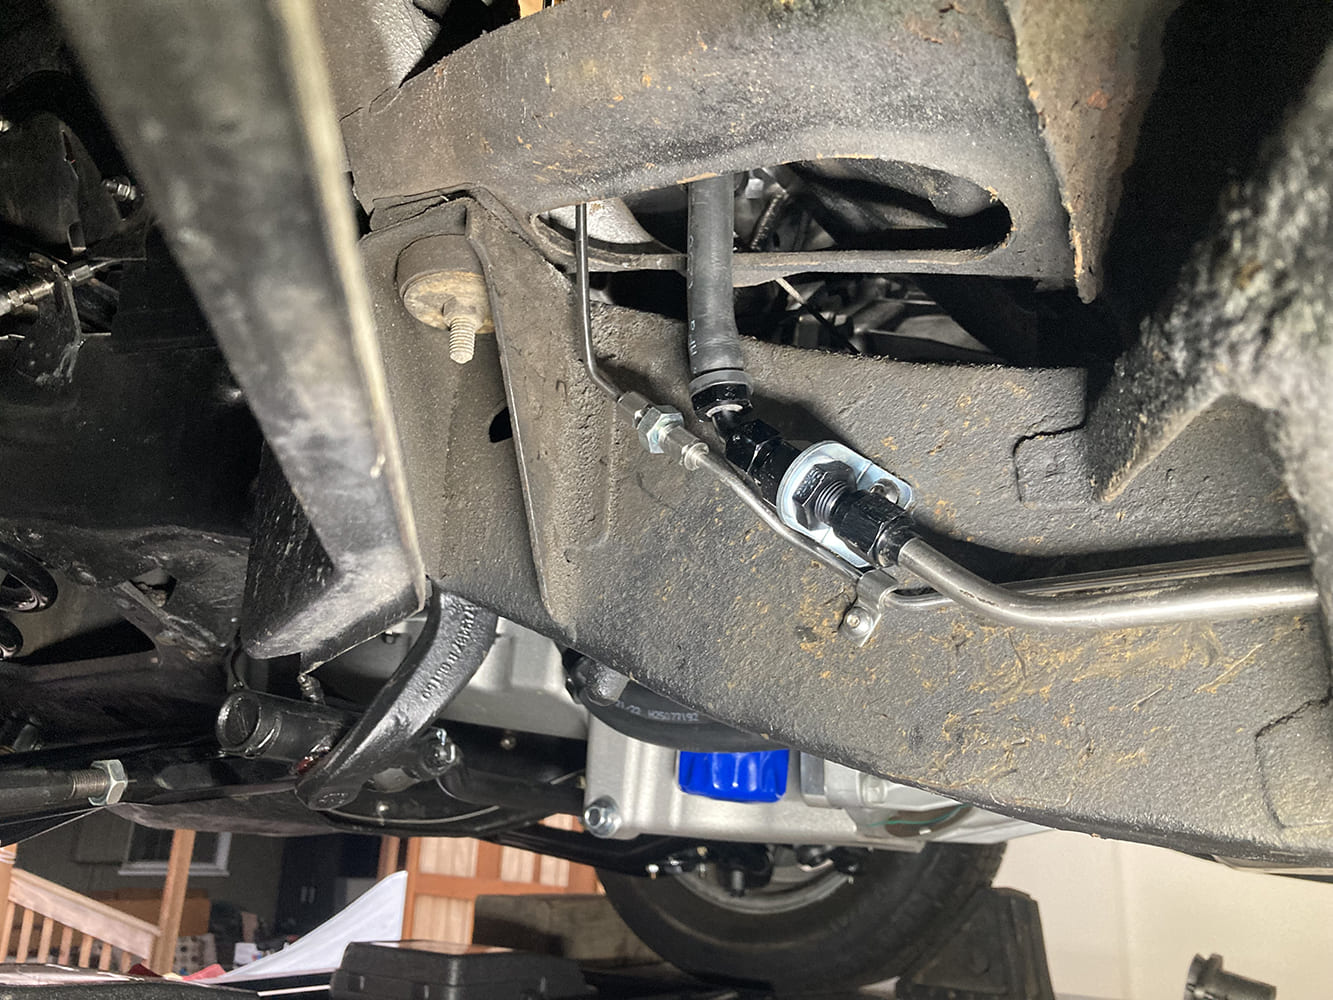
Winding its way under and around the steering box keeps the line well away from the heat generated by the engine’s header and terminates into a T bulkhead fitting mounted to the chassis. The upper line winds up and over the framerail to the driver side caliper while the lower line continues across the front crossmember to the passenger side.With the brake line attached to the chassis tab, the hose is then installed in such a manner to not rub on any suspension components and is of sufficient length to allow for a full range of steering and suspension travel.Here’s a good example where the line needed a more sweeping form as it follows the conforms of the front crossmember.Up and over the frame to the passenger’s side tab where another hose connects line to the caliper, terminating our system.
We use cookies to ensure that we give you the best experience on our website. If you continue to use this site we will assume that you are happy with it.