Cleaning up the Dash, Firewall, and Cowl on a 1967 Chevy II
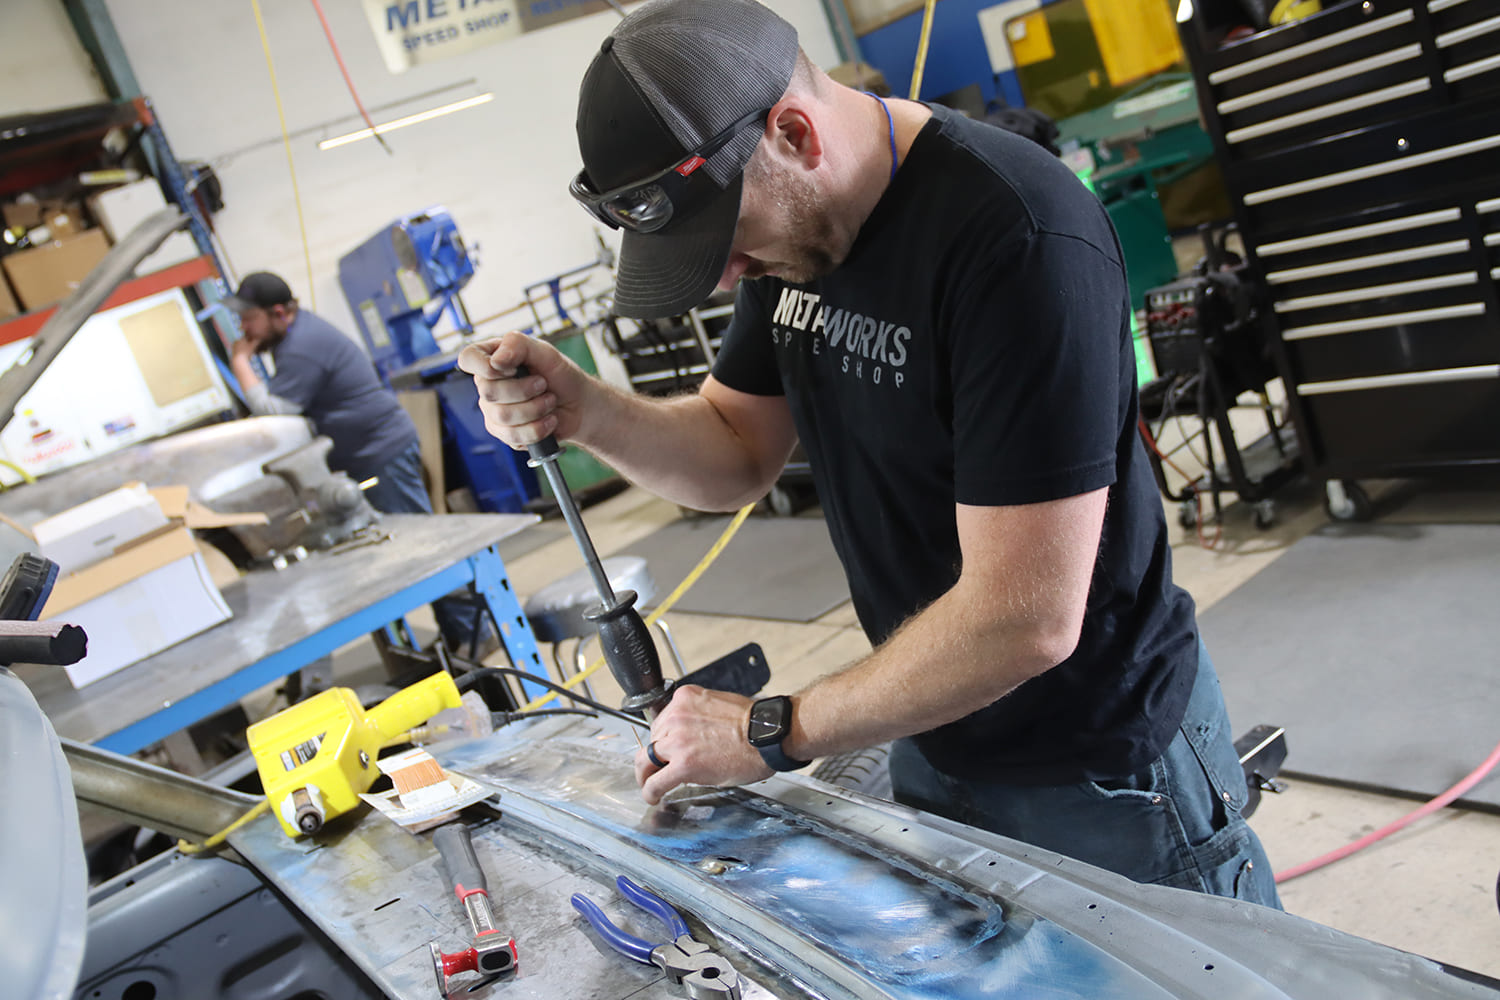
MetalWorks Classic Auto Restoration’s Dayton Eitner was the craftsman responsible for the repairs to the body and modifications made to the firewall, cowl, and dashboard of this 1967 Chevy II.
Walk around any car show or cruise-in and you’ll likely find examples of two distinctly different approaches to construction. Some builders focus on adding eye-catching elements to their cars that are impossible to miss. Others opt for more subtle modifications, coupled with scrupulous attention to detail; those are the cars that always get a second or third look and make gearheads smile. Those are the kind of modifications MetalWorks Classic Auto Restoration in Eugene, Oregon, is known for and will be making to the 1967 Chevy II shown here.
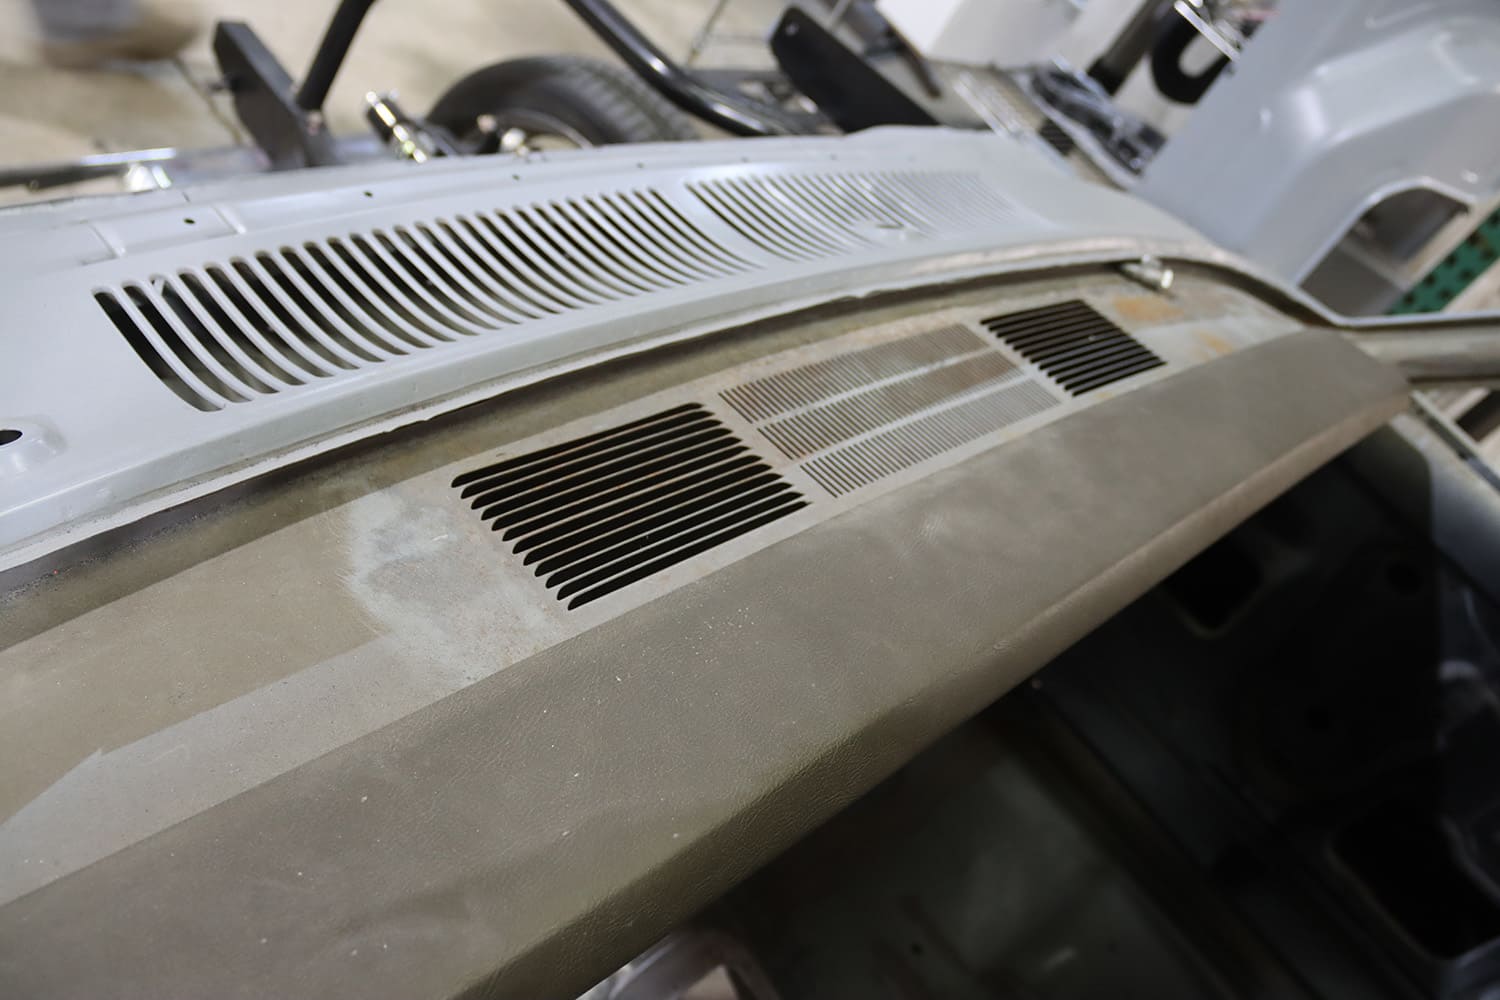
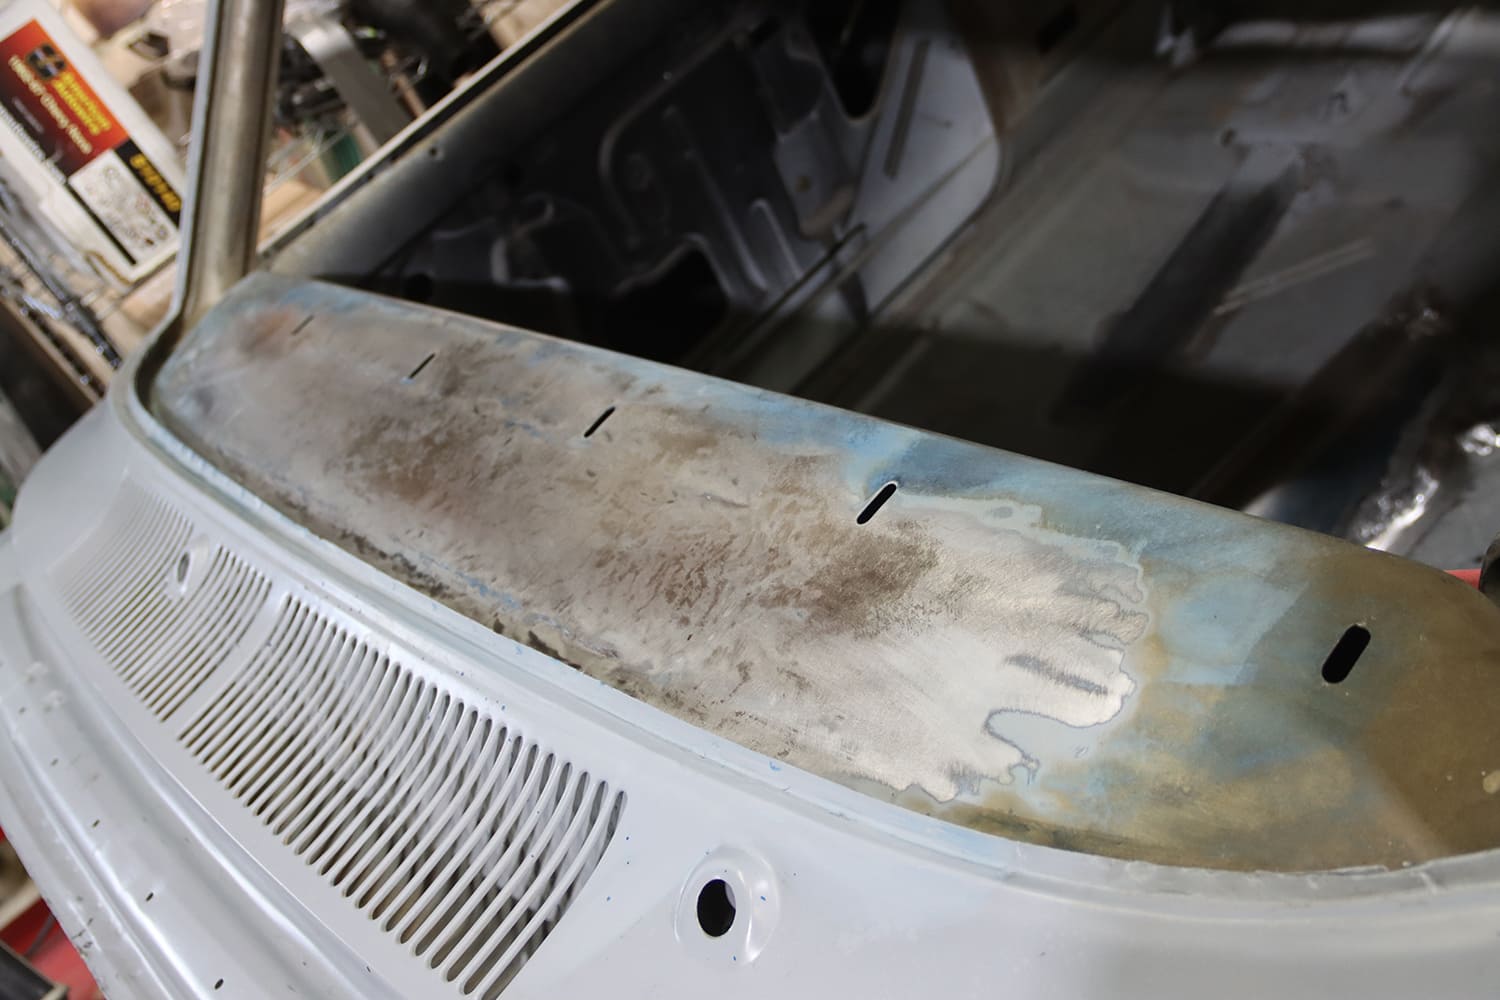
On top of the factory dash, the large defroster vents and a grille for the radio’s speaker will be eliminated.
When the Chevy II was introduced in 1962 it was intended as a reasonably priced, no-nonsense economy car. For the first two years of production, Chevy II engine choices were modest, as economical operation was the goal. Buyers had their choice of two inline engines: a 153ci four-cylinder and a 194ci six-cylinder. But in 1964 Chevrolet saw an opportunity to provide performance enthusiasts a mini muscle car and introduced the 283ci V-8 as an available option. In 1965, both the 250- and 300hp 327 became available, then Chevrolet completely redesigned the second-generation Chevy II for 1966. There were minor trim changes for 1967 and the 350hp 327ci V-8 became available, but those efforts were overshadowed by the introduction of the Camaro that same year. Nonetheless, the first- and second-generation Chevy IIs were popular then and are highly sought-after today.
Eitner removed the section of the dash with the vents and speaker grille. The oblong holes are attachment points for the stock dashpad.
Something we should explain is when a Chevy II is a Nova and when it isn’t. From 1962-67 the Nova designation simply signified the upgraded Chevy II trim level available. In 1968, Chevrolet introduced the Chevy II Nova; the top trim levels were now the Nova 400 and the Nova SS, but these cars carried the name Chevy II in the grille surround. In 1969, the Chevy II name was dropped completely in favor of Chevrolet Nova.
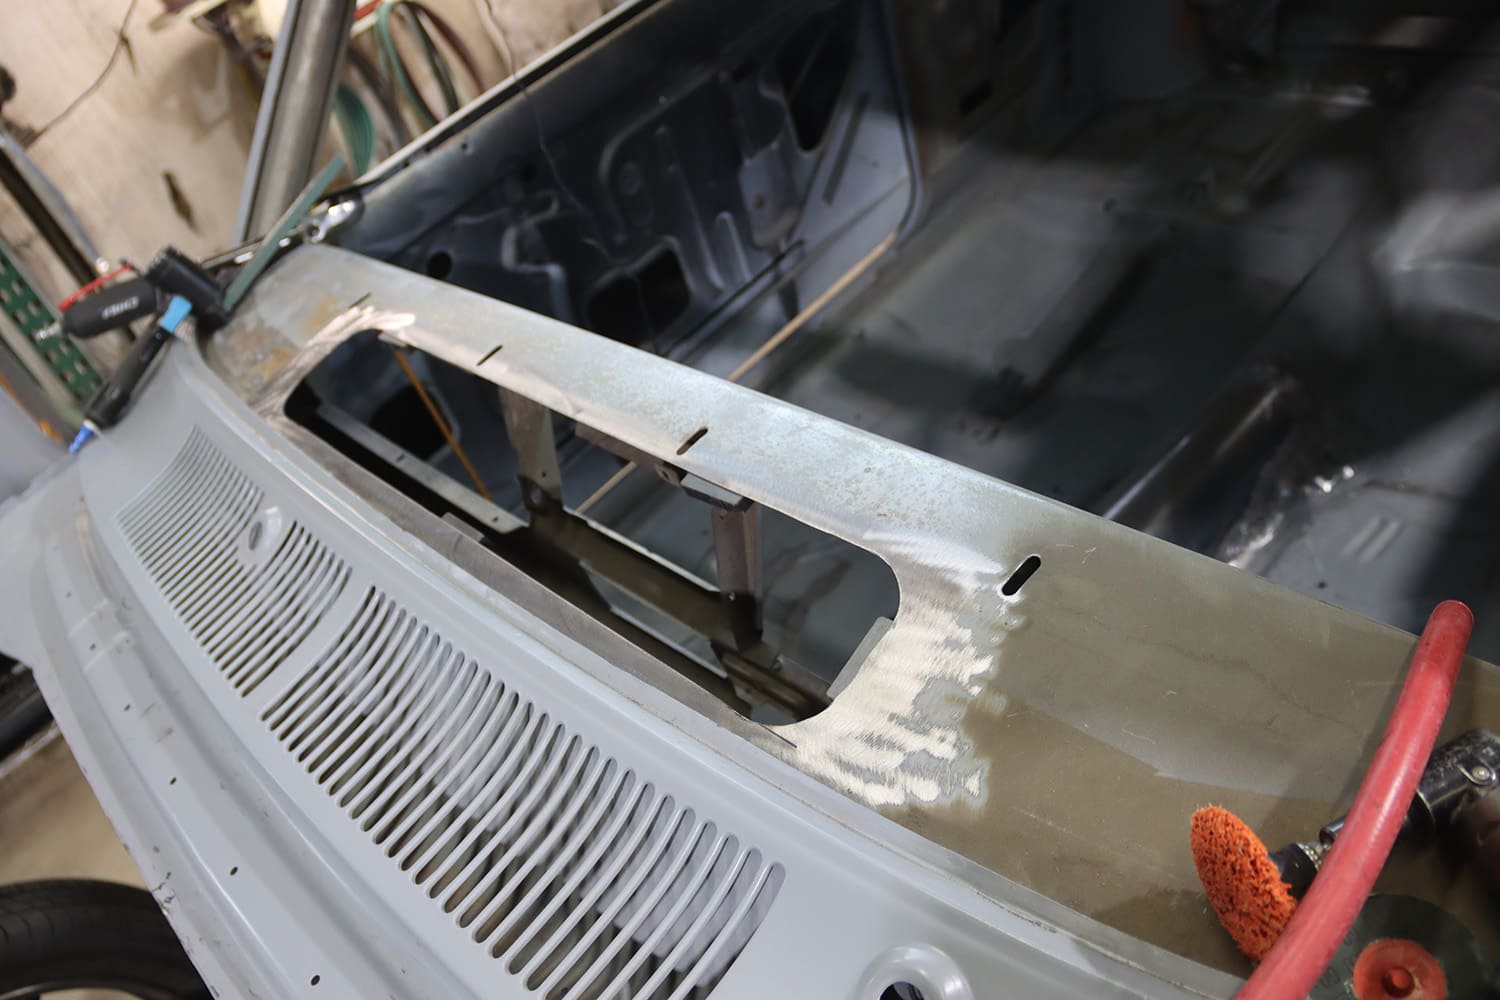
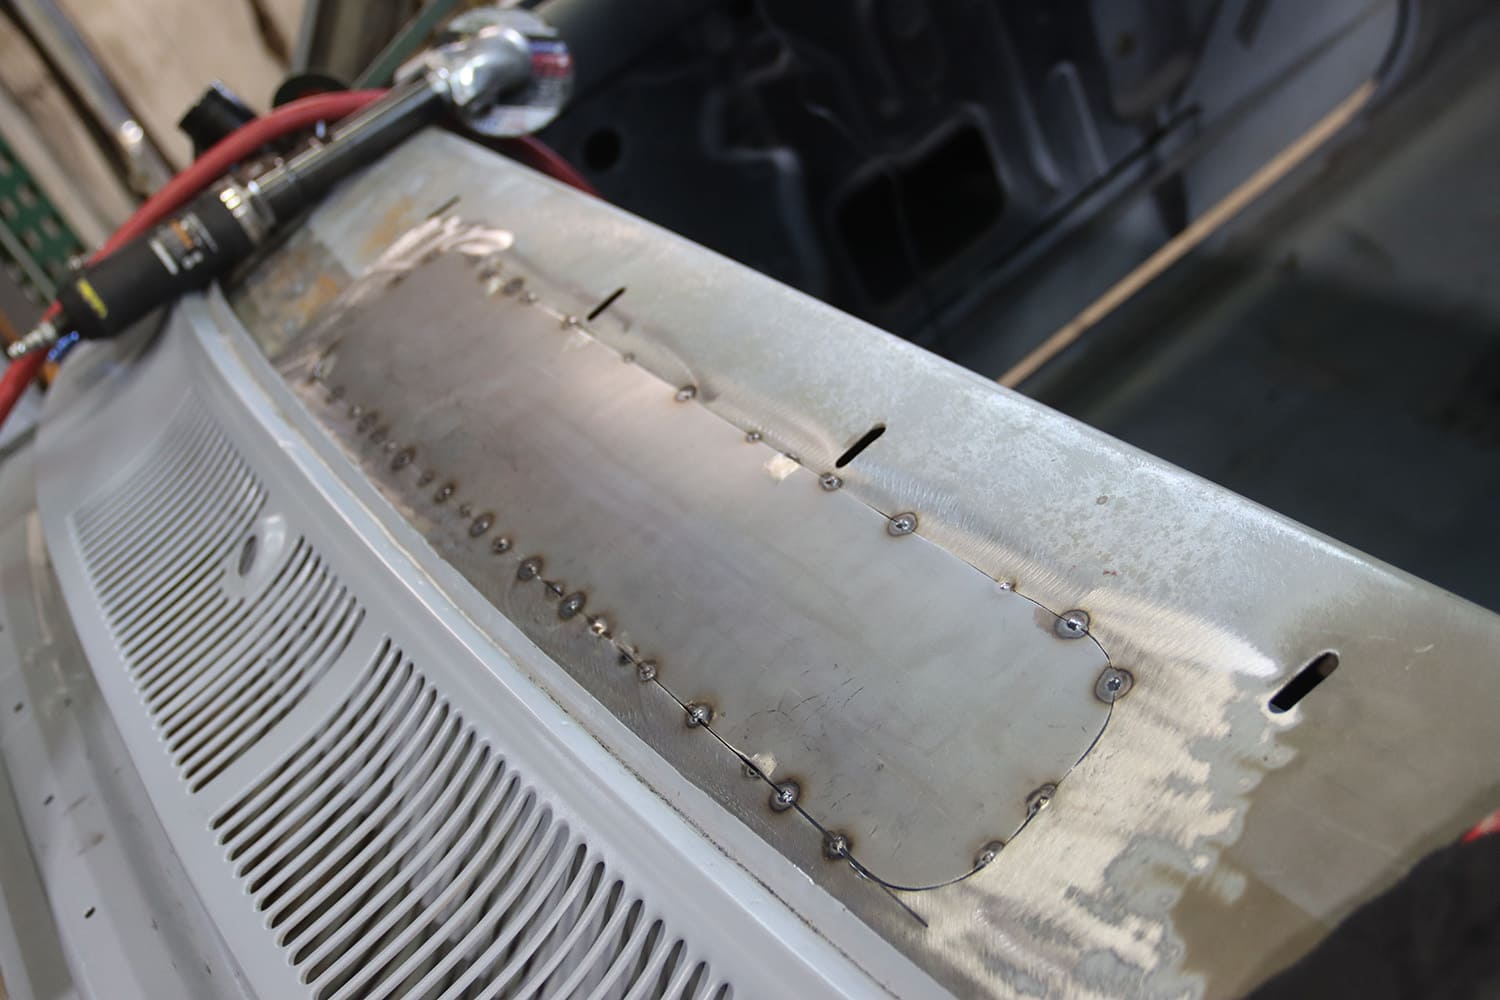
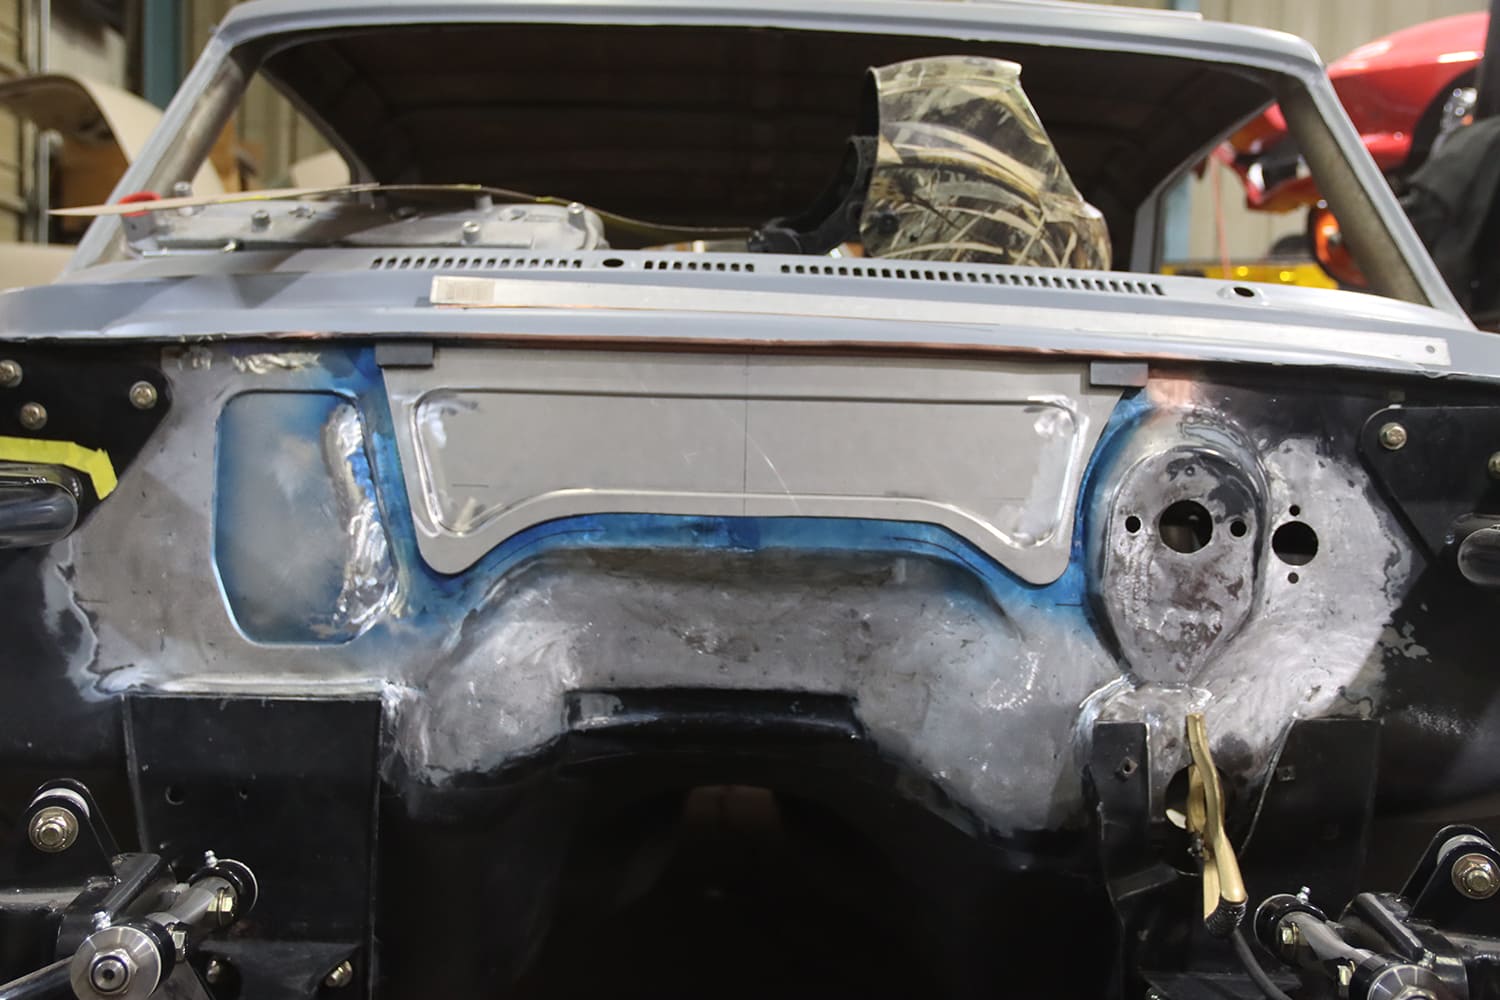
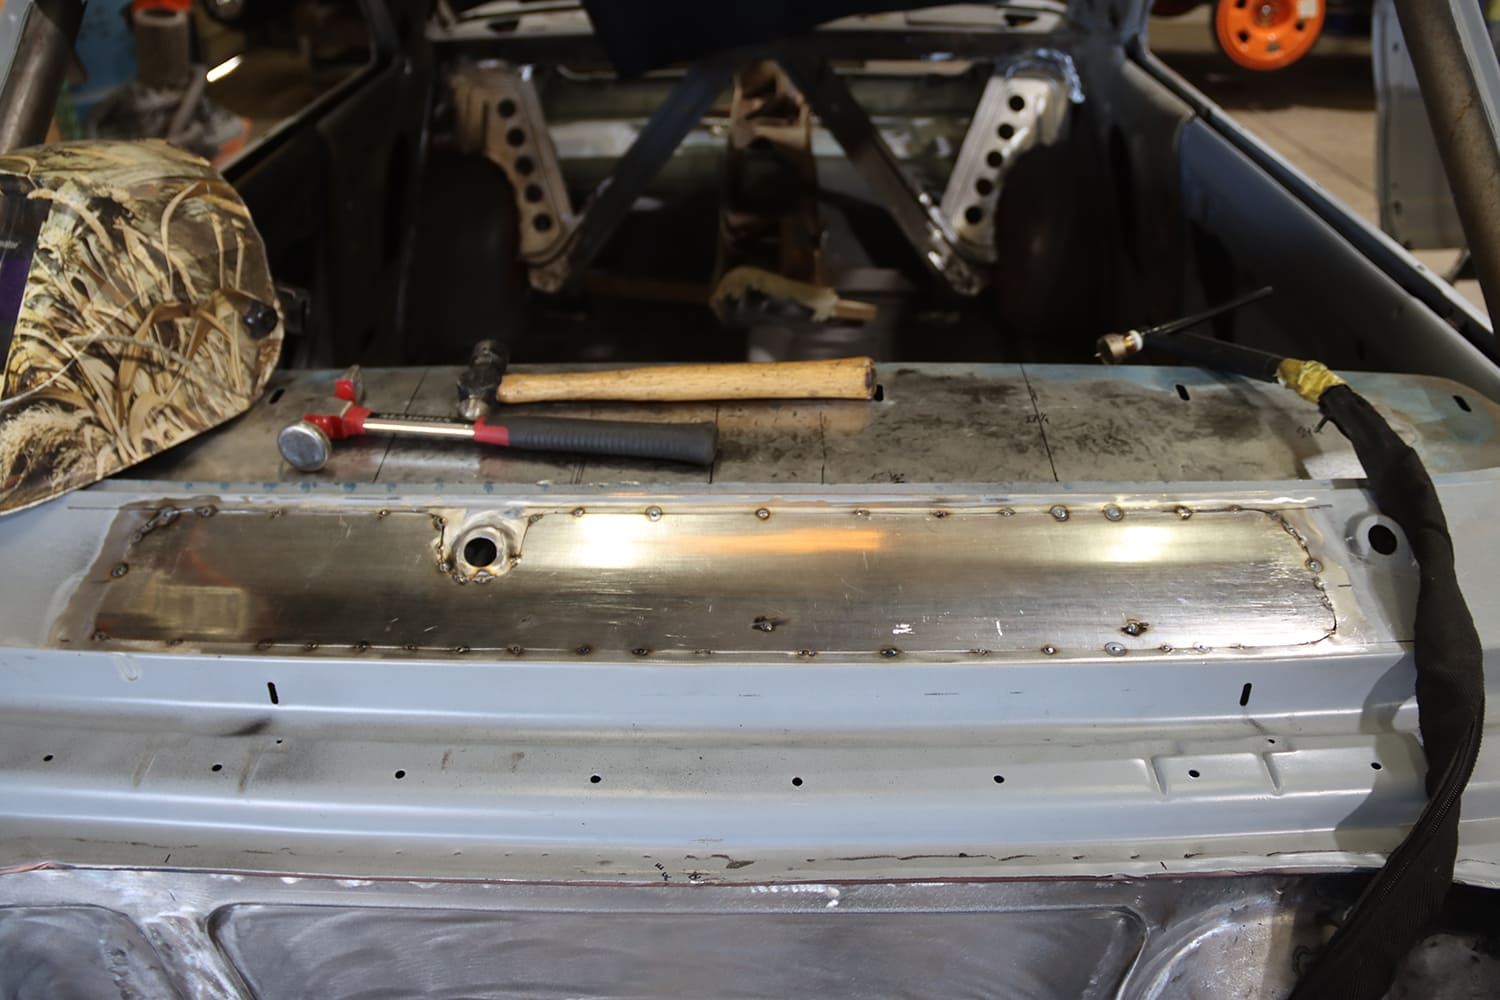
A filler piece for the dashboard was fashioned from 20-gauge mild steel. It was cut to size and tack-welded in place.
The second-generation Chevy II the crew at MetalWorks is building will be getting the full Pro Touring treatment as well as a long list of sheetmetal refinements. Dayton Eitner handled the bodywork, executing subtle modifications so seamlessly that it takes a keen eye and some time to notice exactly what’s been changed. Cleaning up the dash, cowl, and firewall of this second-gen Chevy II is a perfect example of less being more.
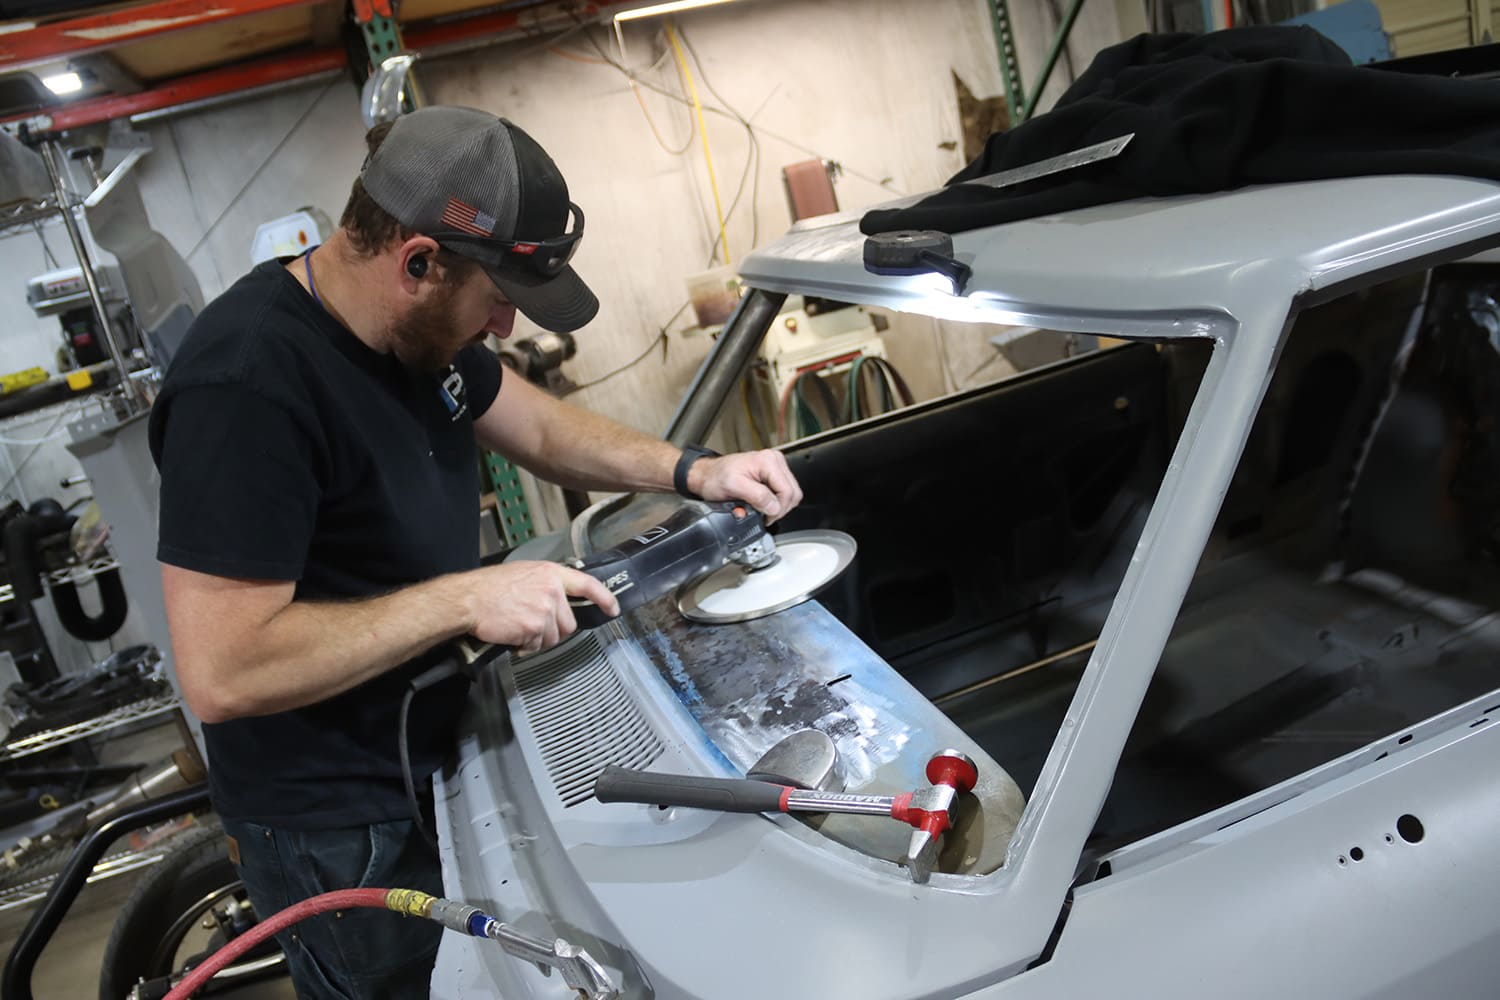
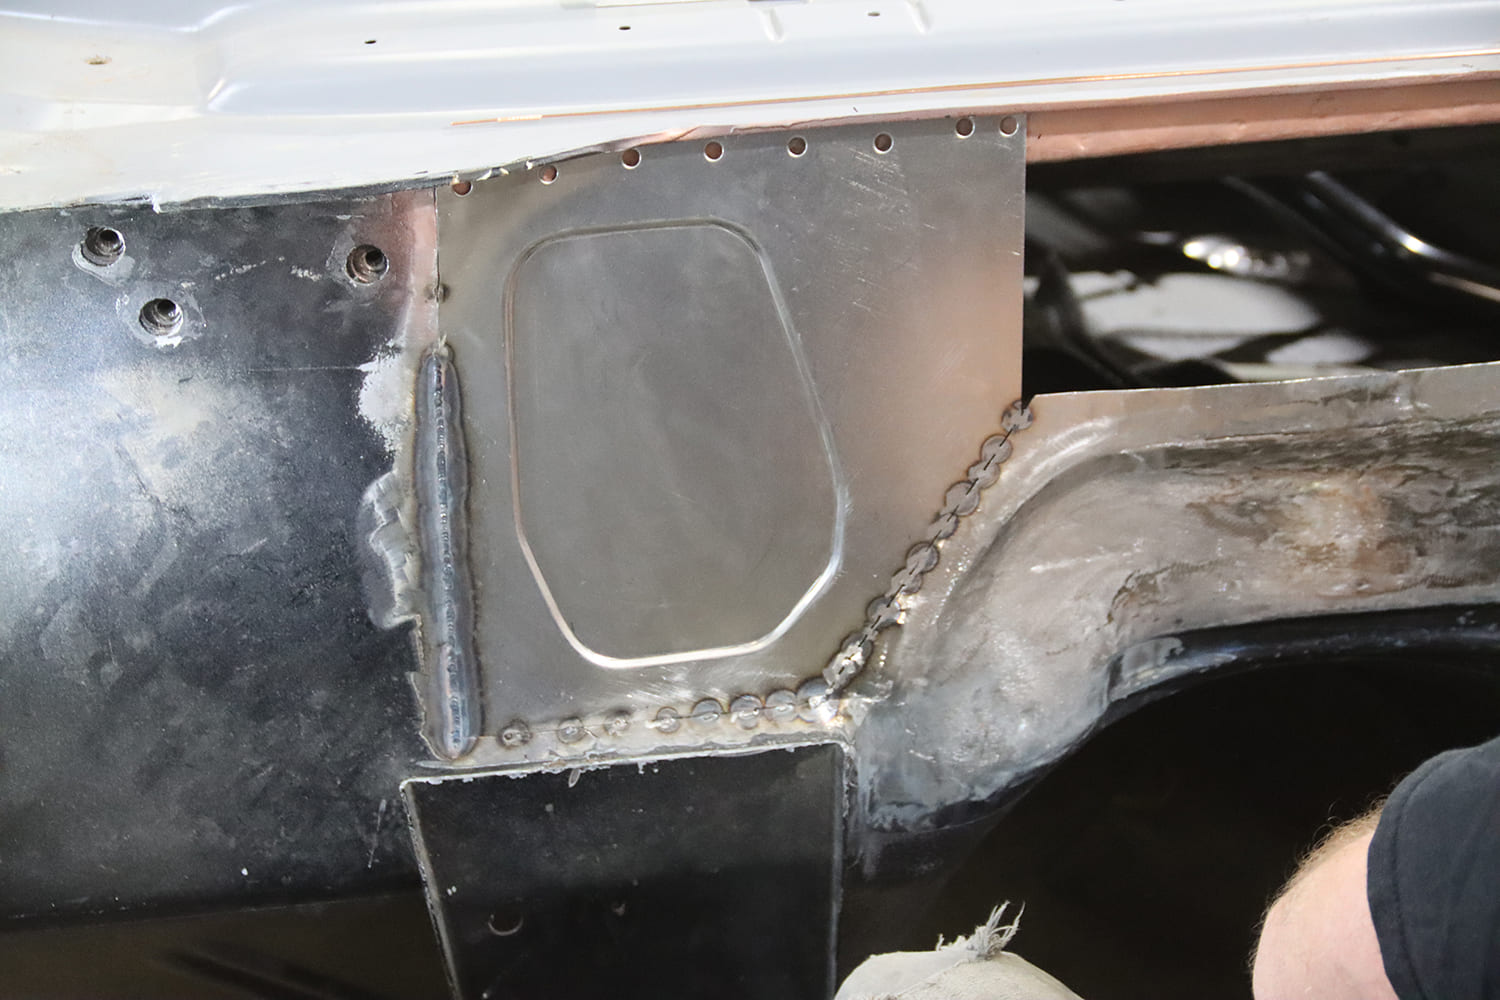
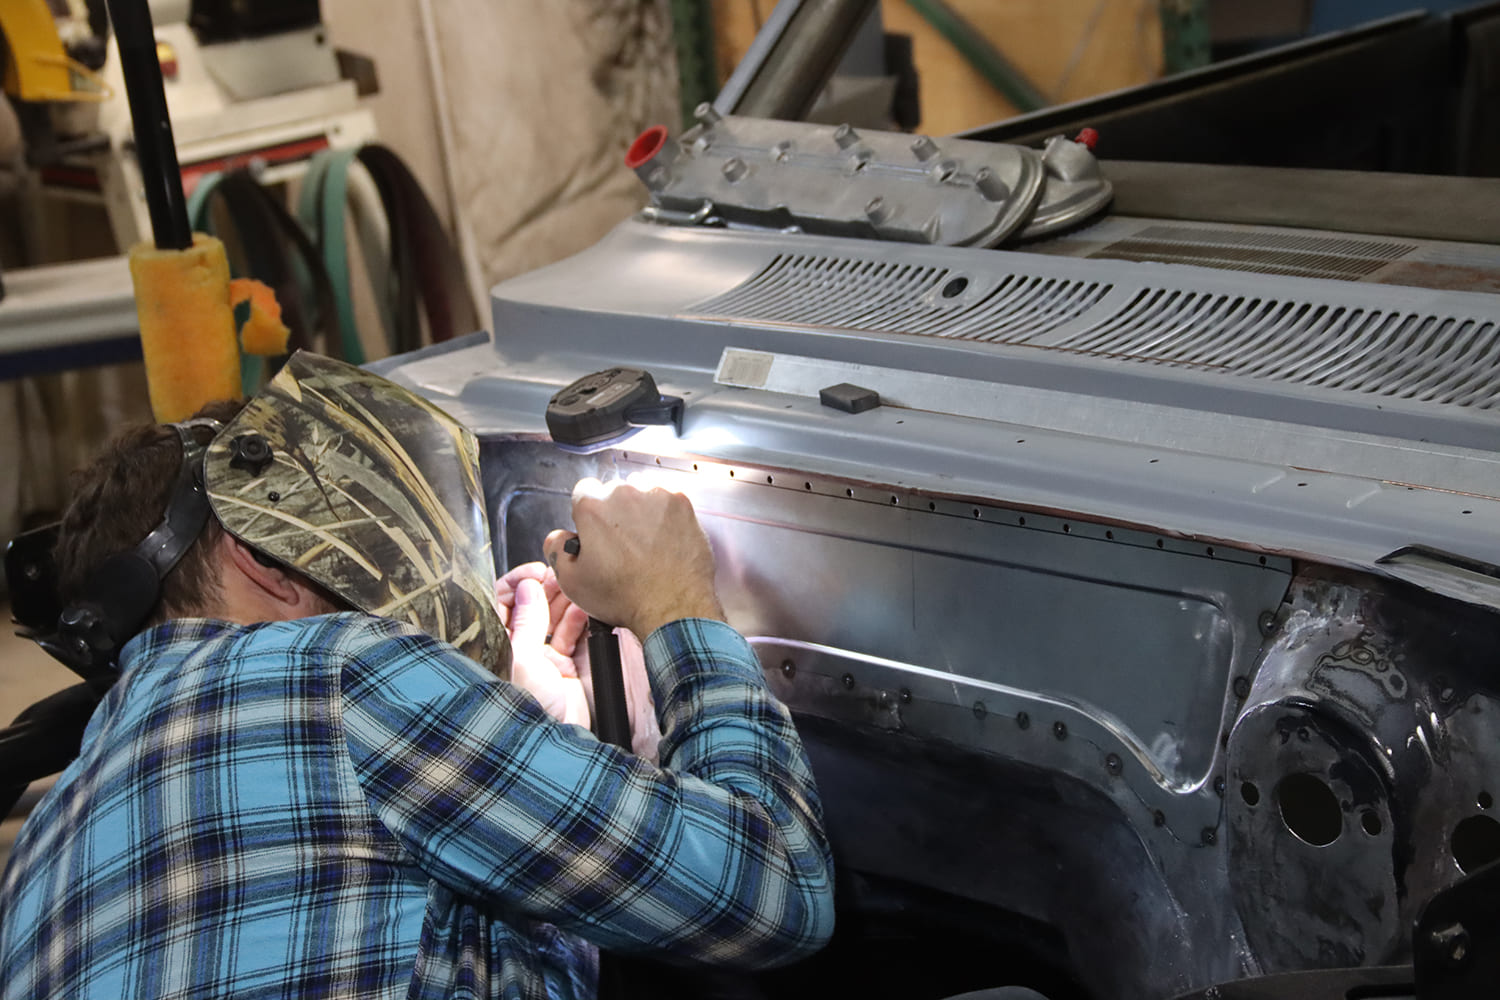
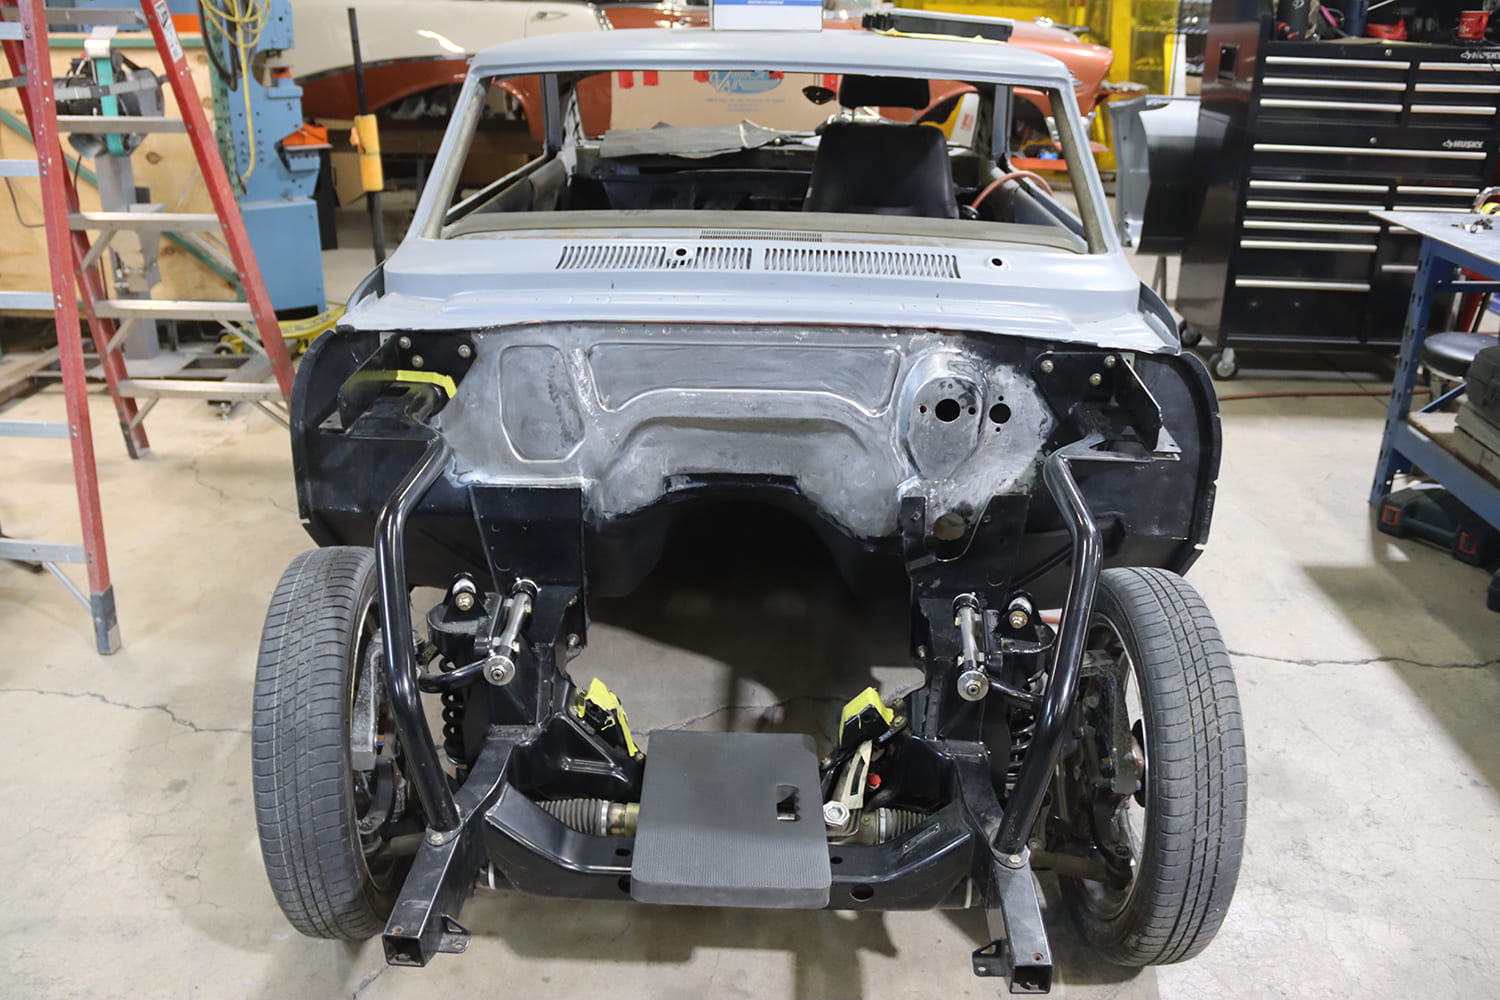
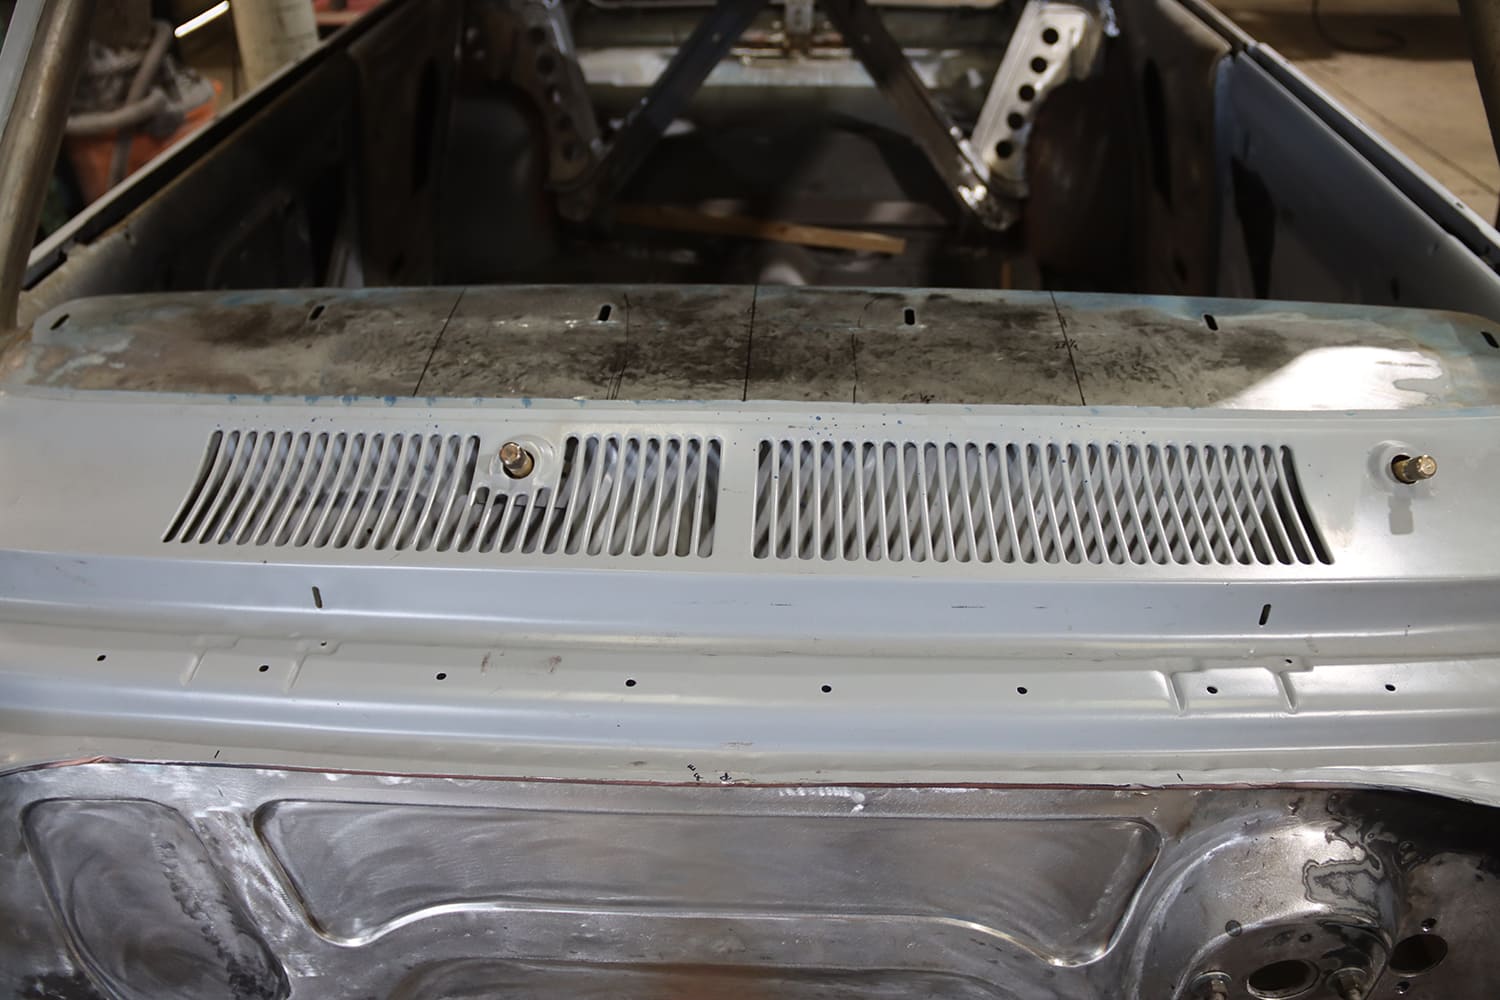
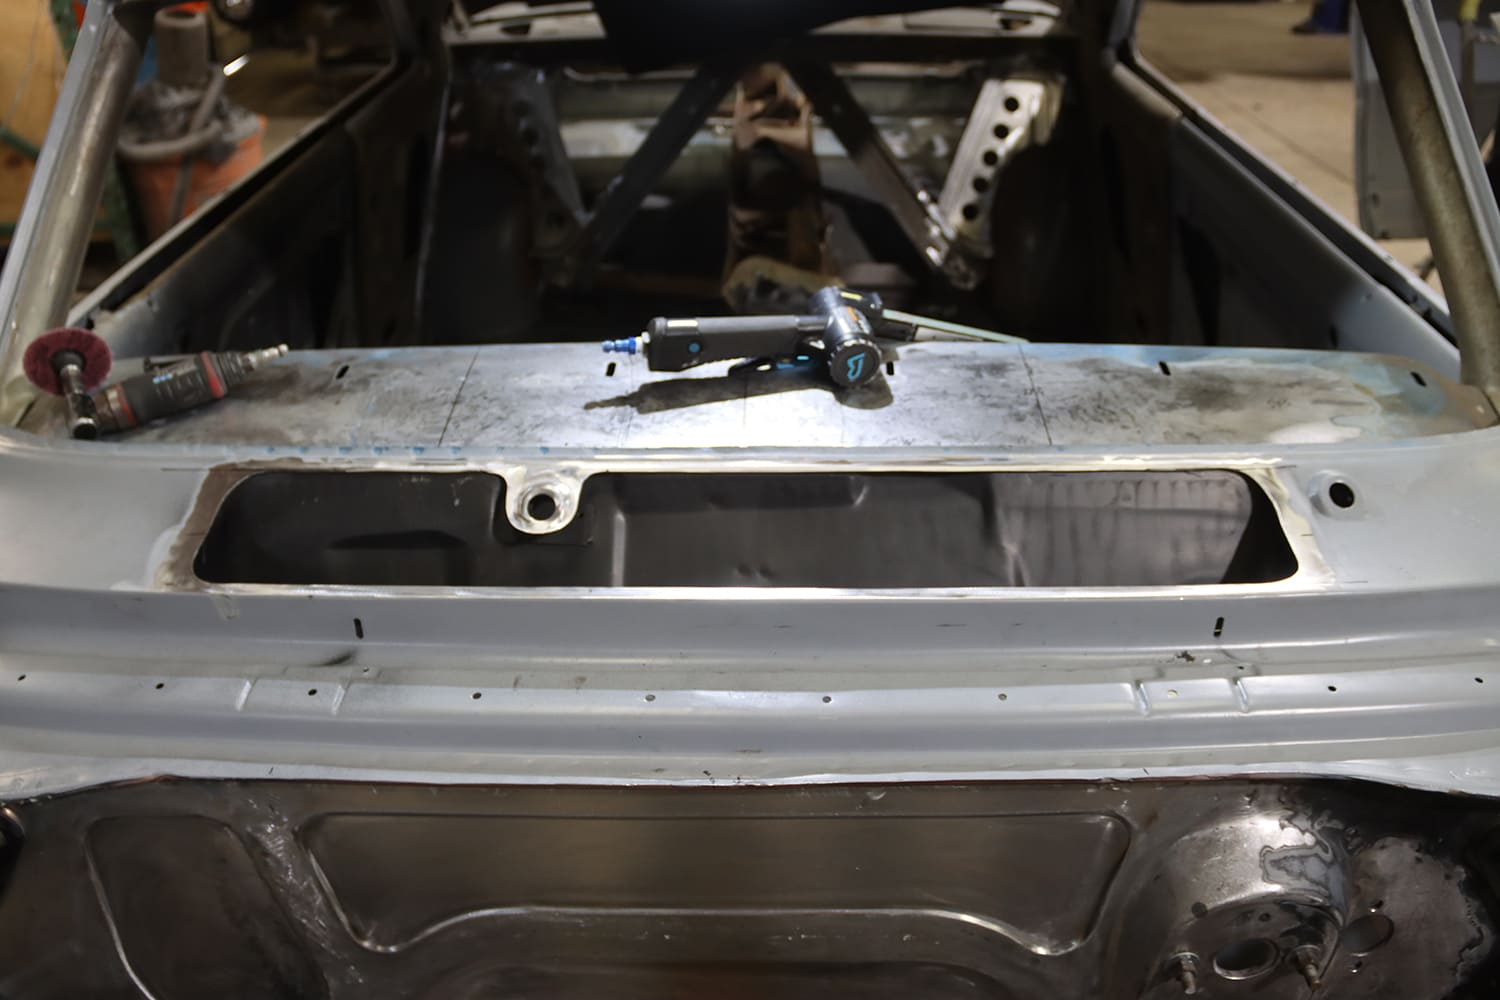
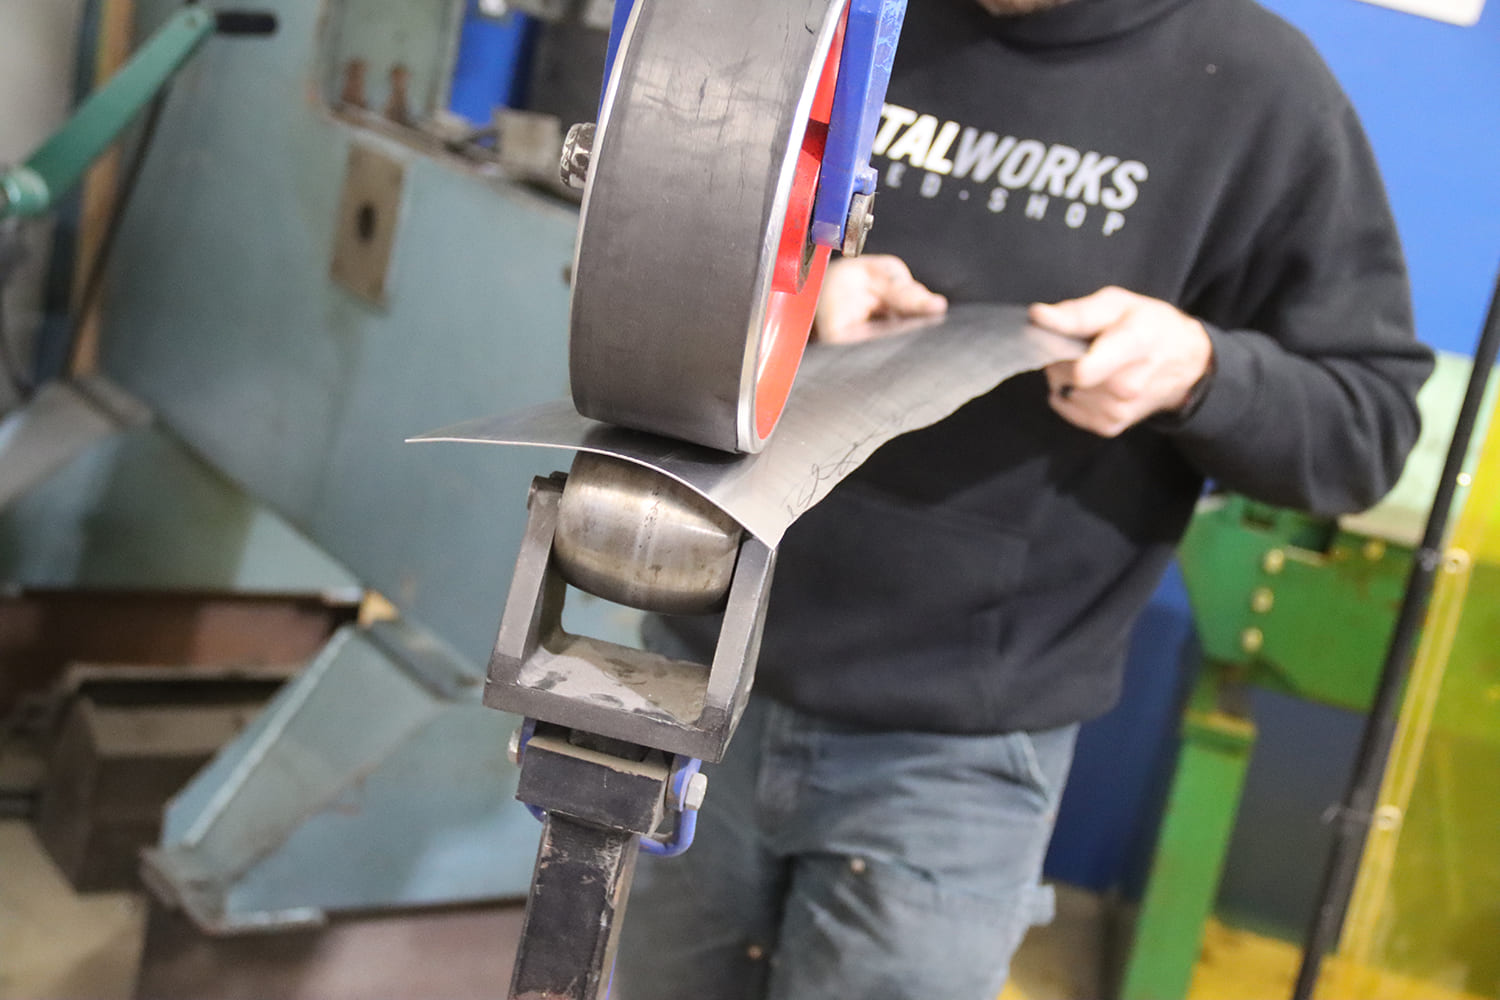
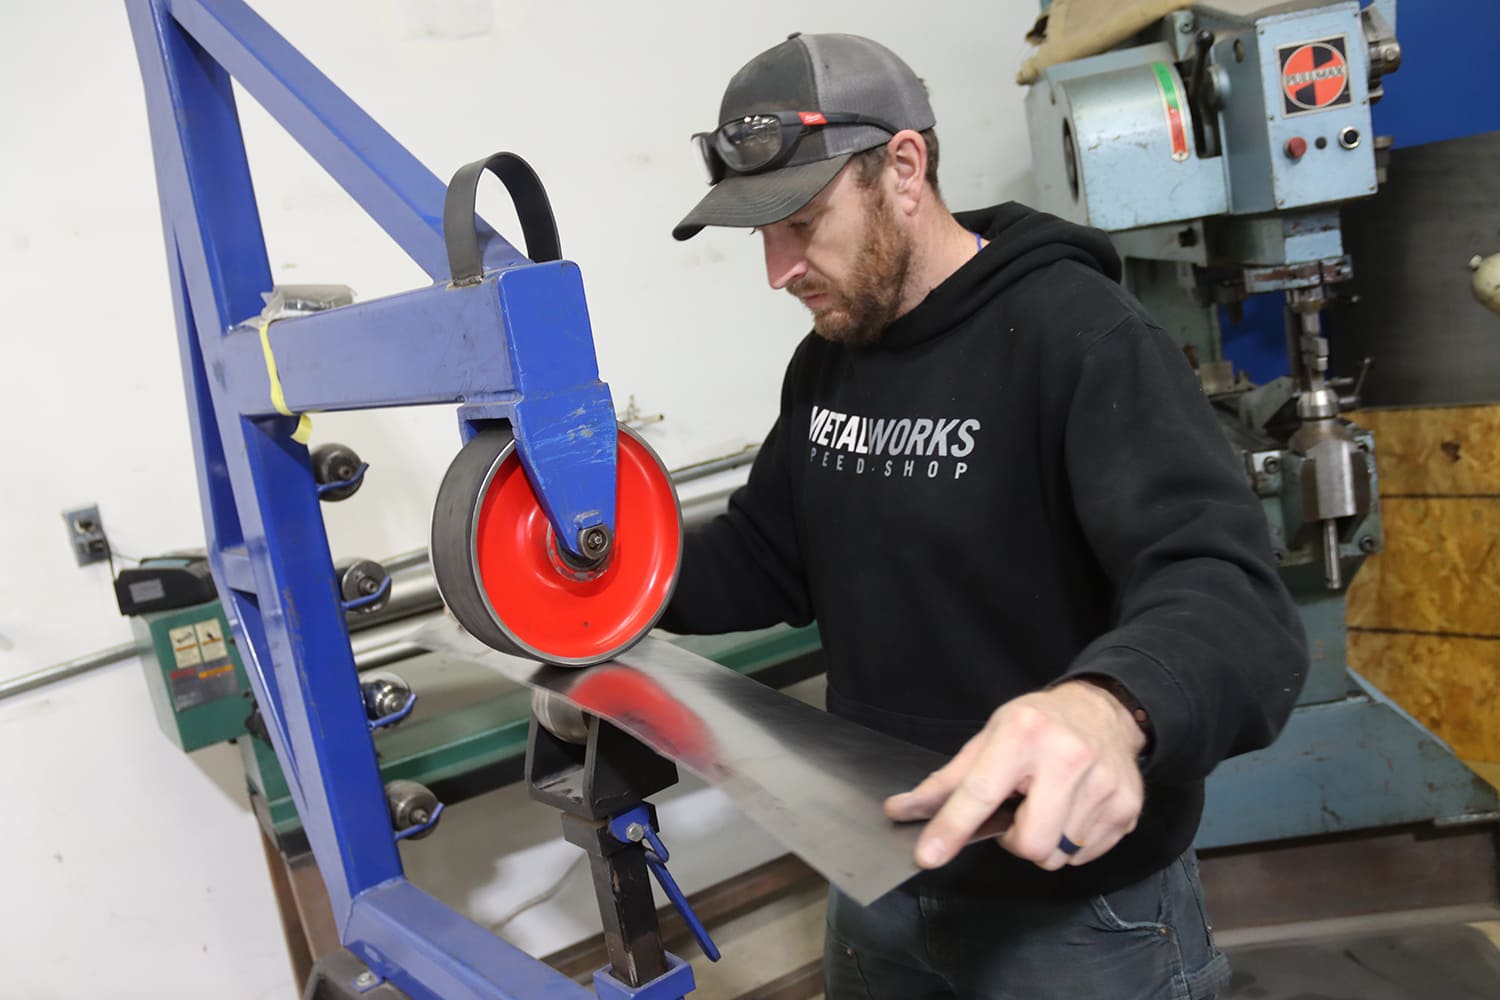
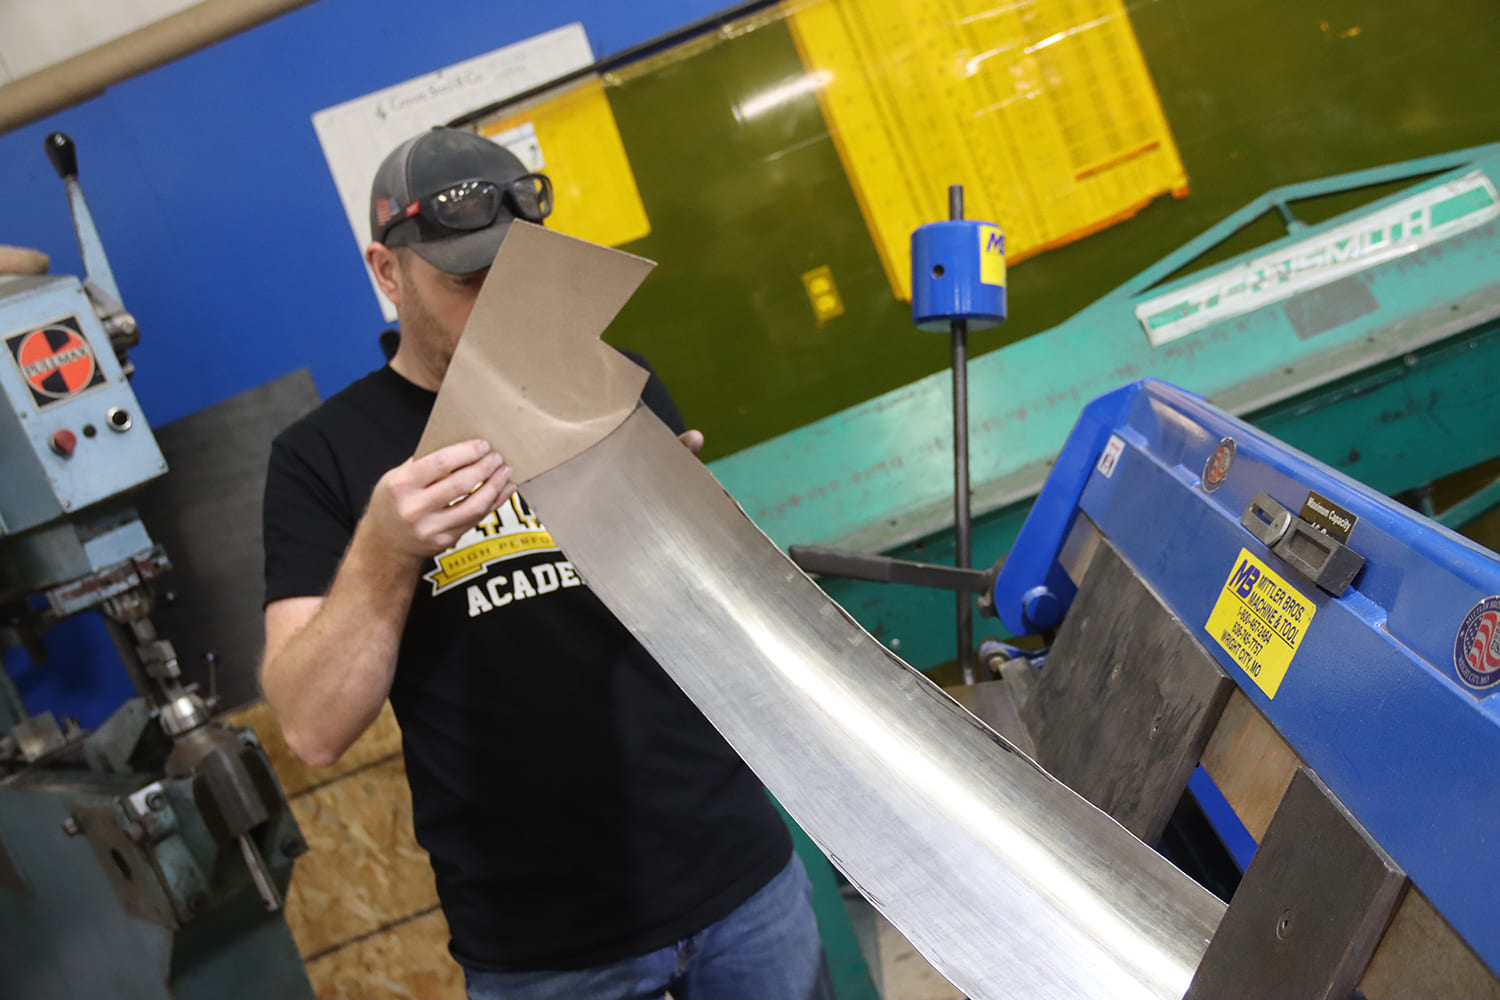
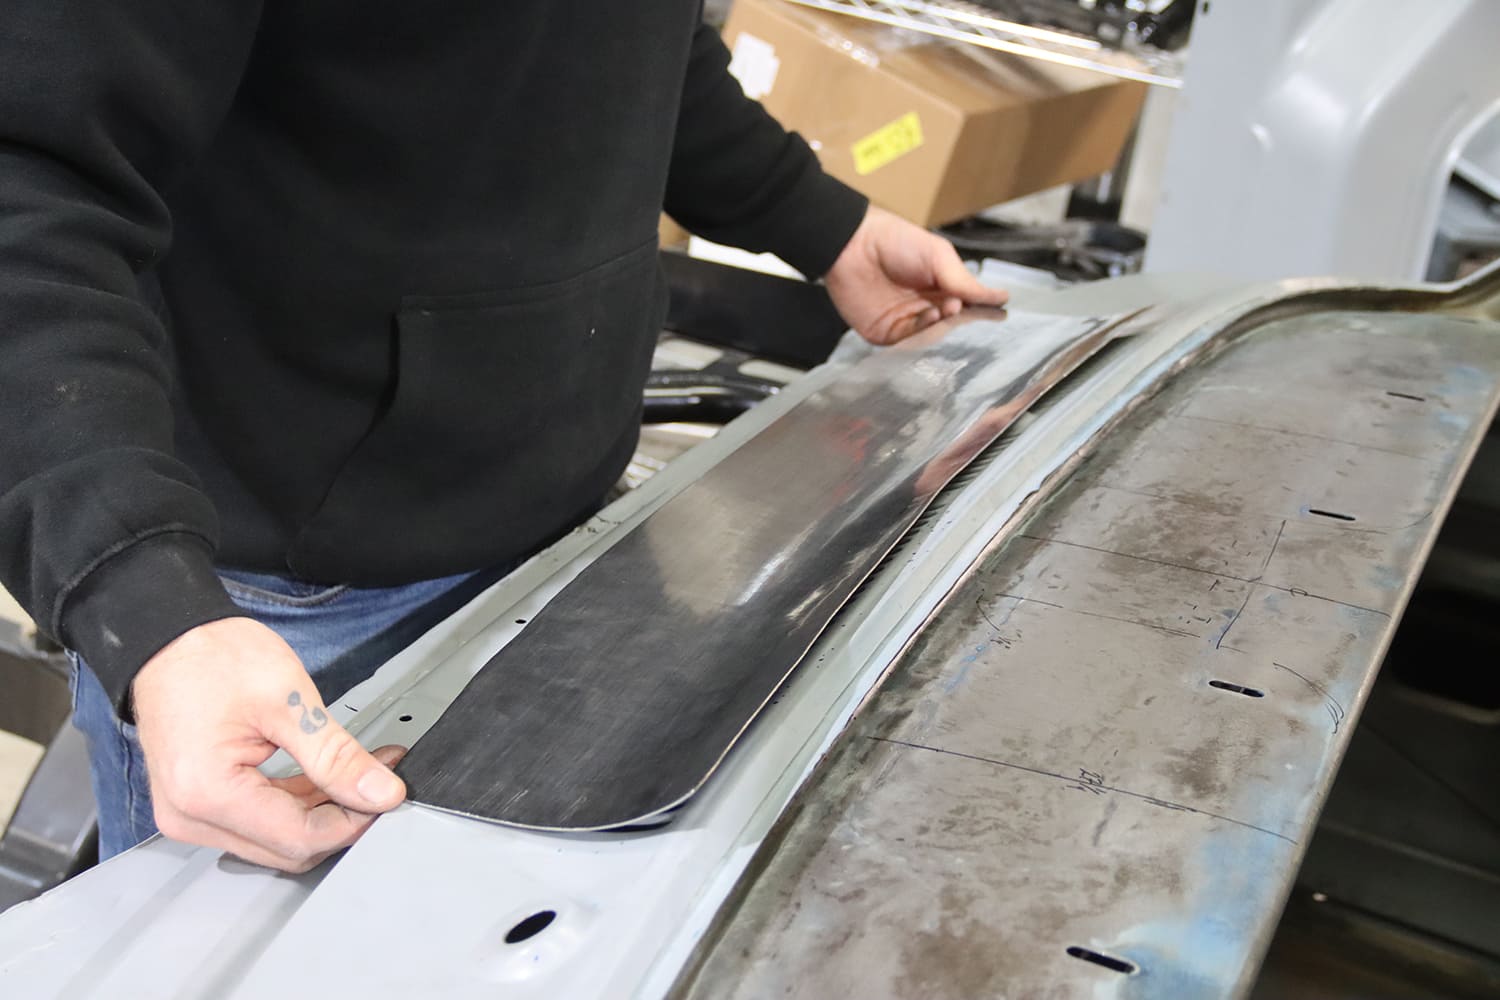
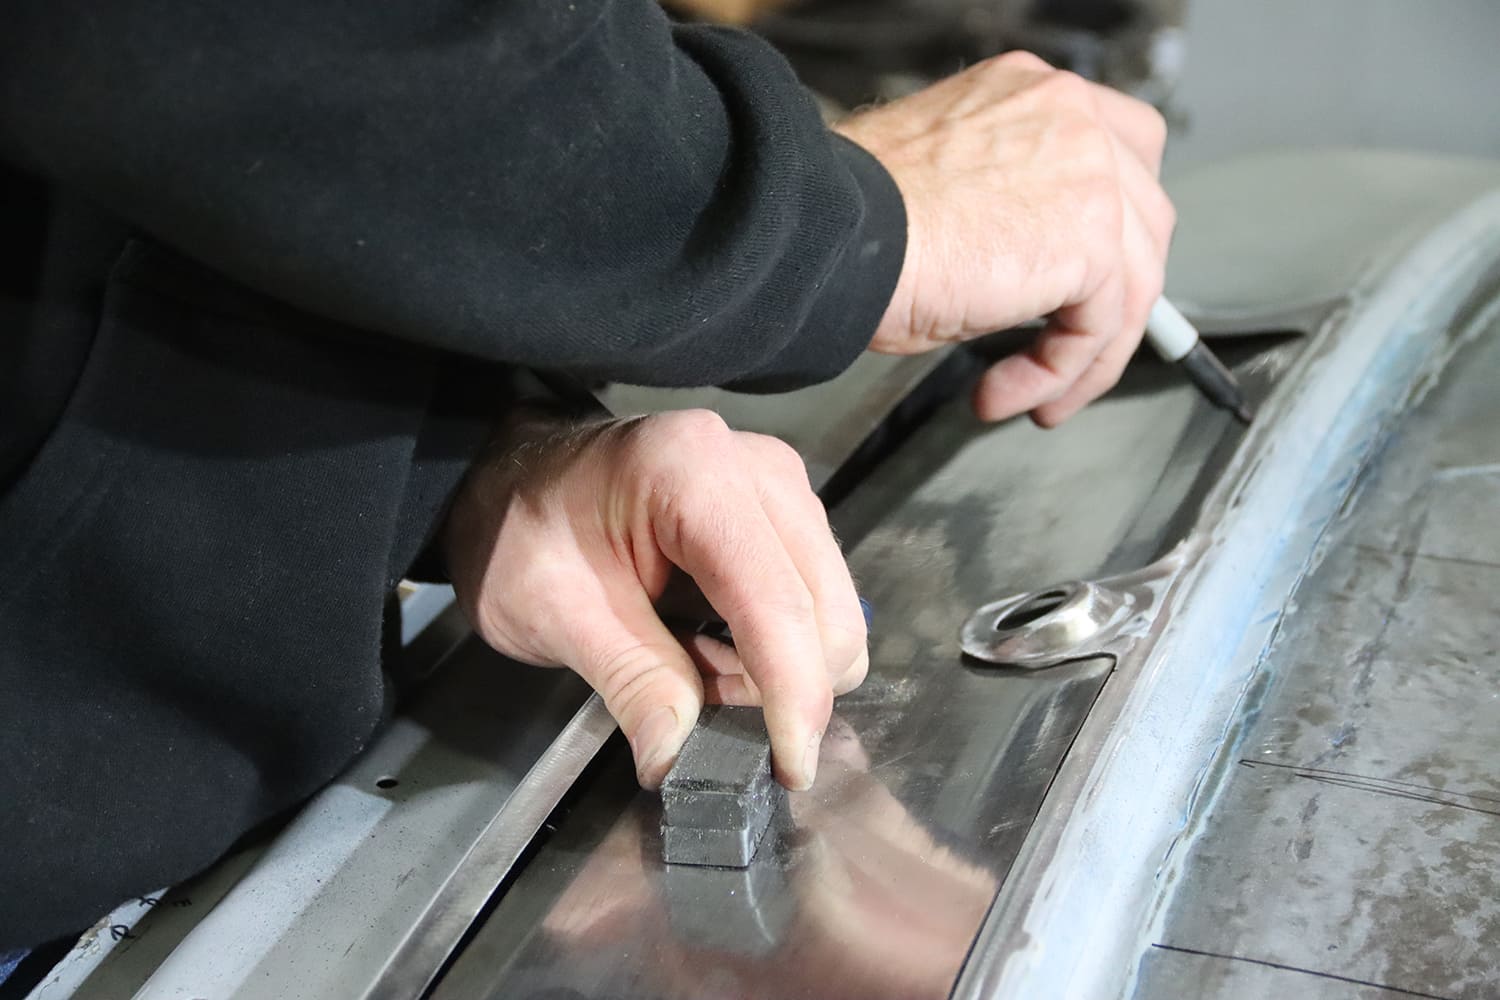
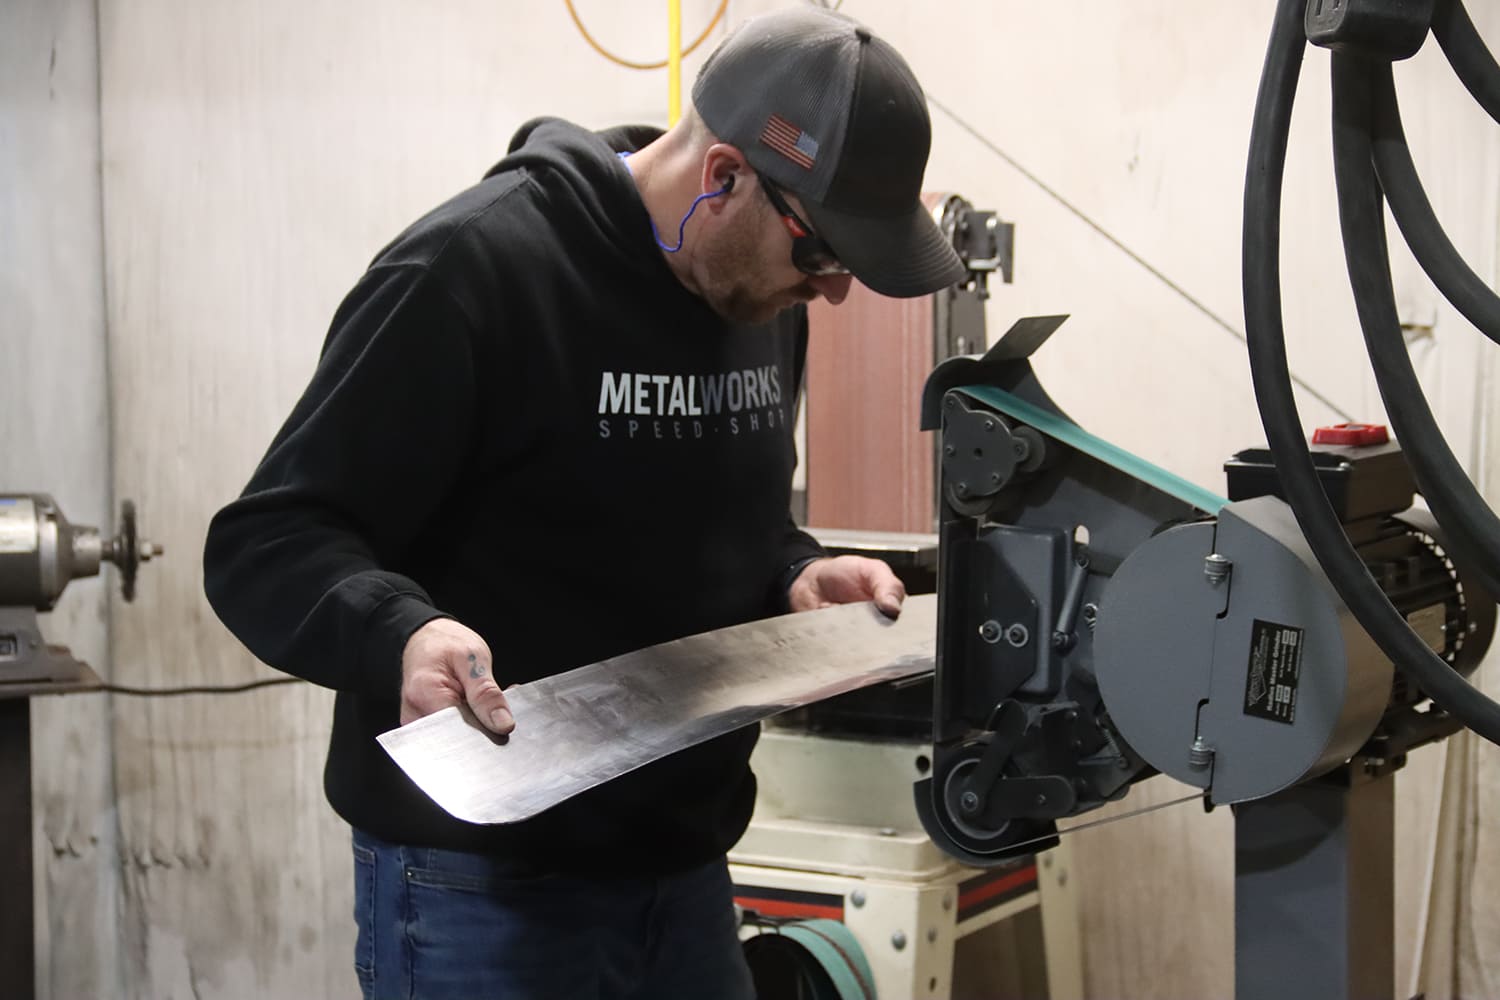
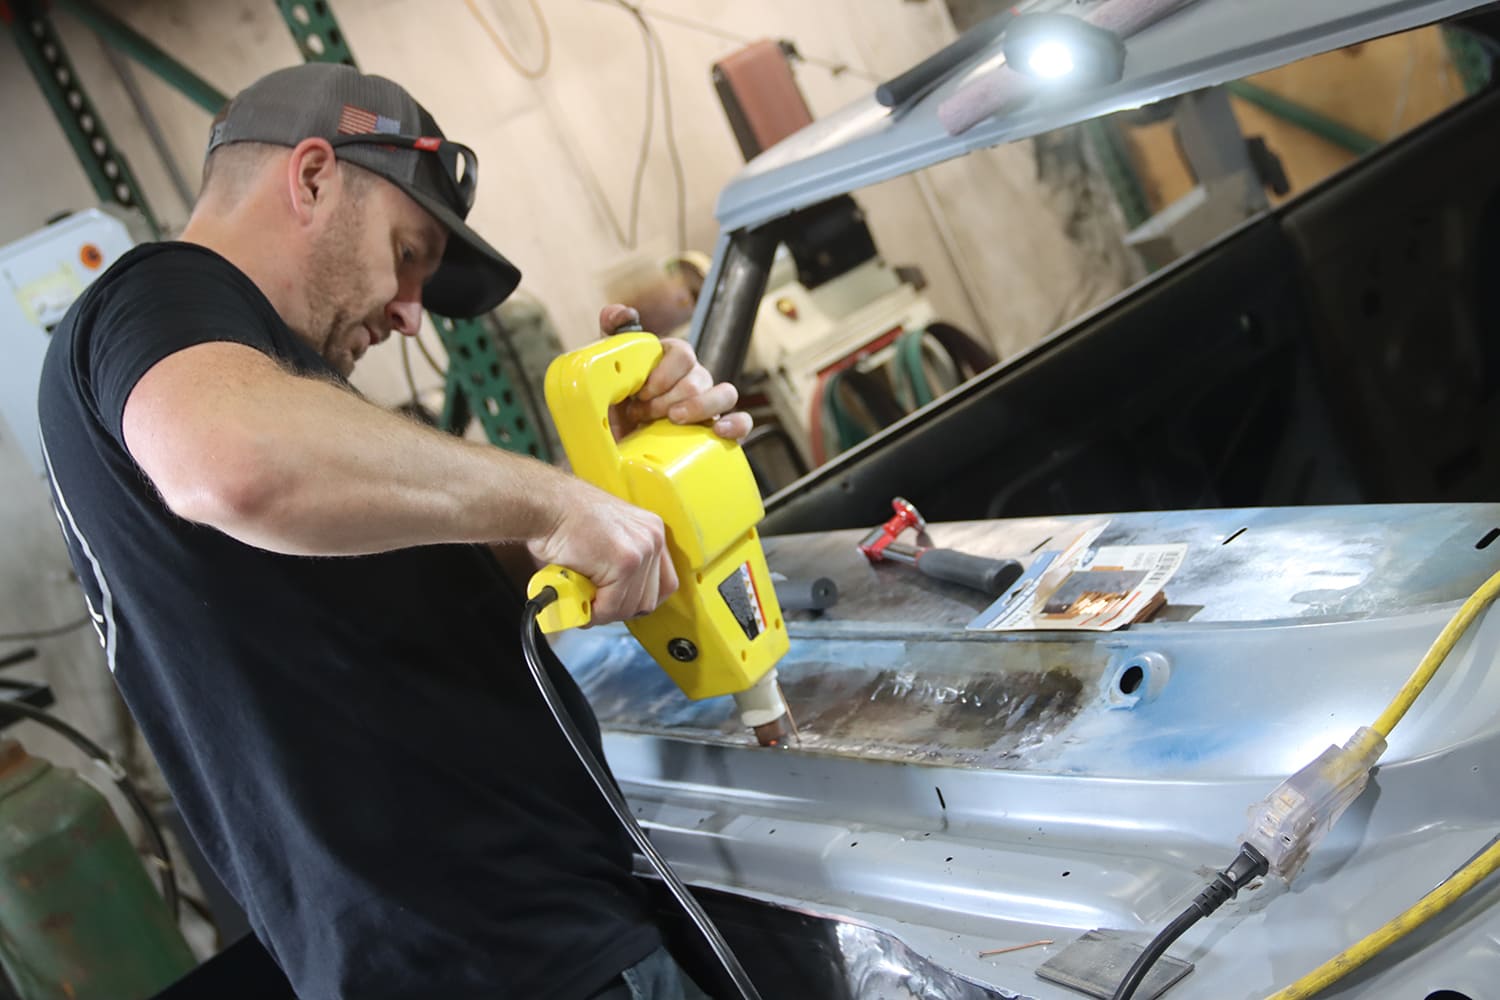
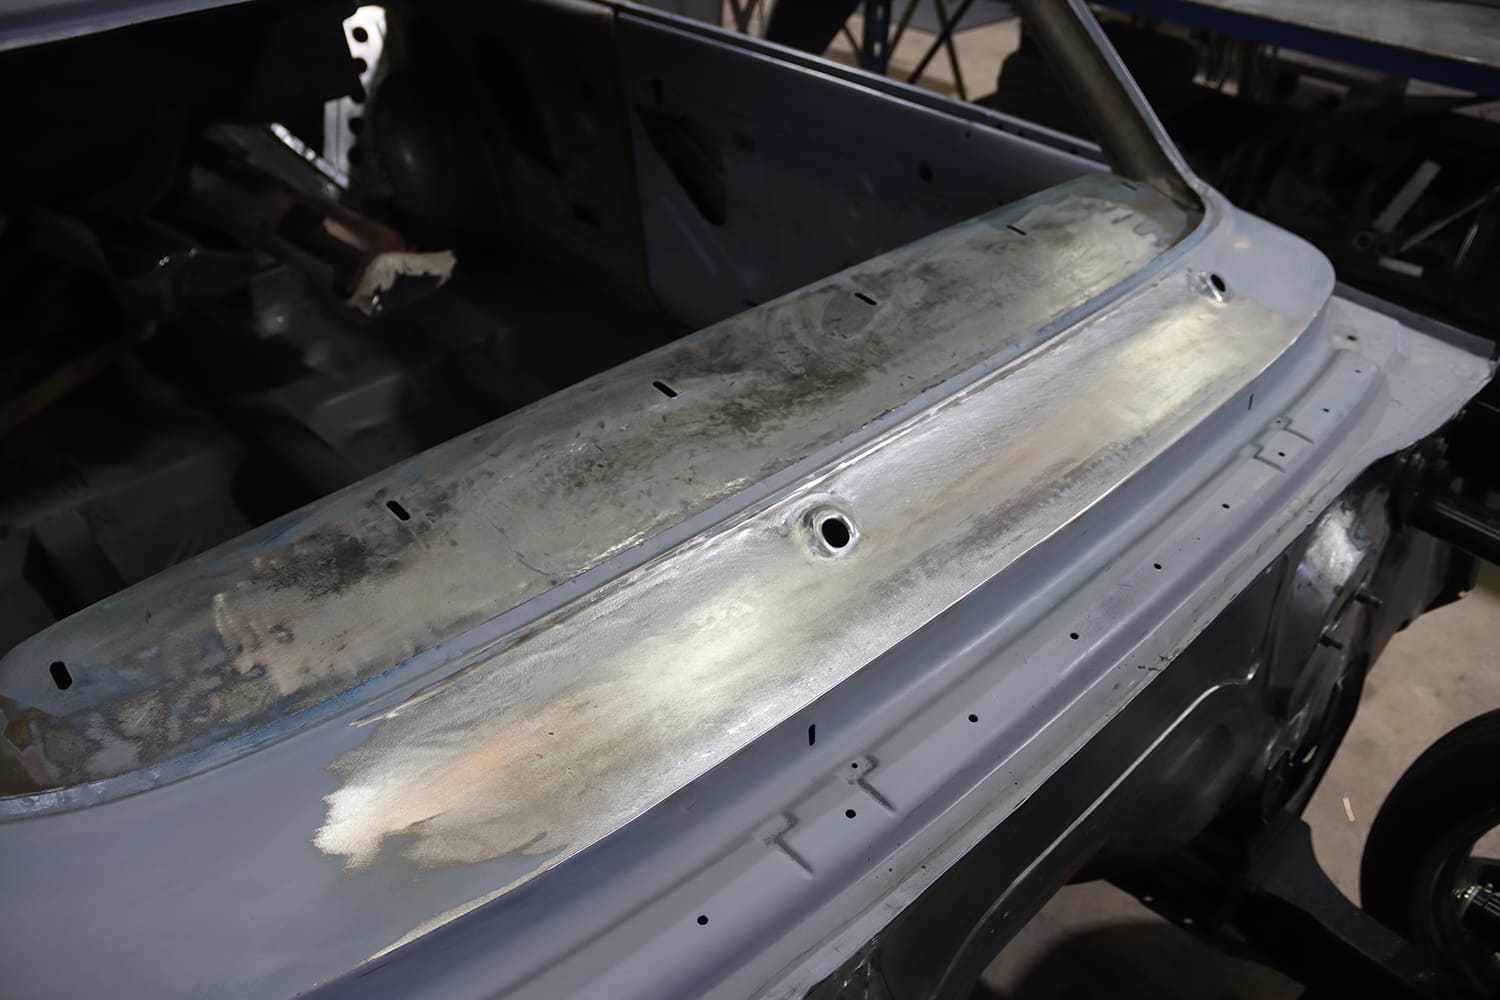
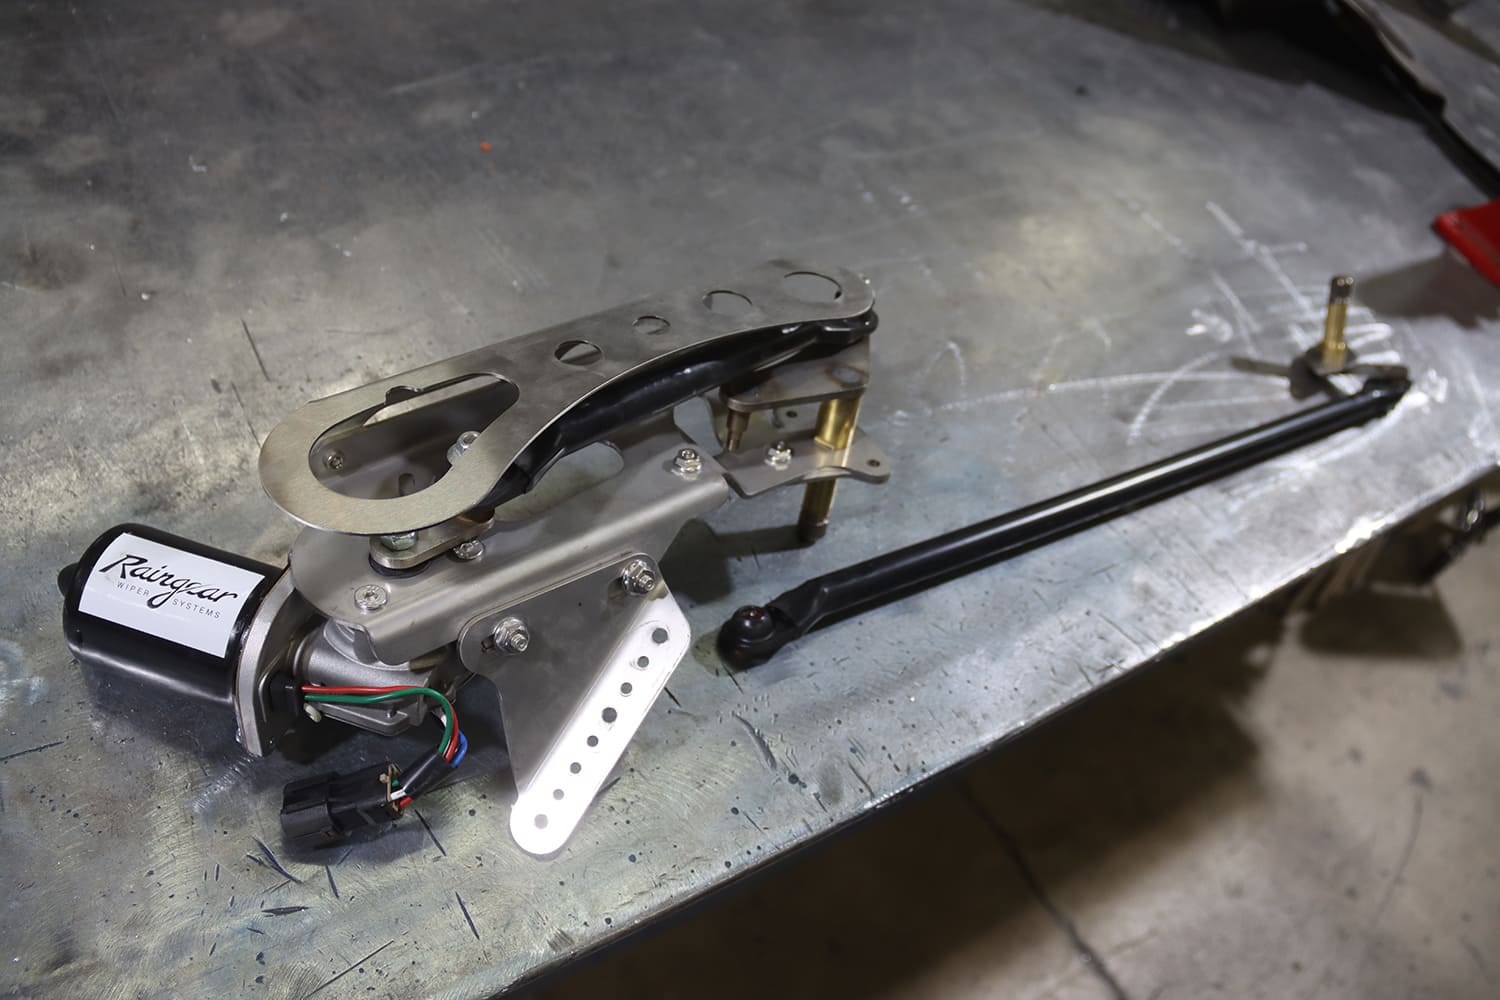
With the filler panel completely welded, a shrinking disc was used to remove any high spots.After running the shrinking disc over the surface, the welds are practically invisible.With the stock heater box and windshield wiper motor removed, the portion of the firewall that mounted those components was removed.For ease of installation and use of a bead roller to add accents, the replacement firewall was made in two pieces. Note the holes at the top of the first panel for plug welds.The second piece of the new firewall fits flush with the surrounding sheetmetal and ties into the original master cylinder mounting point.To prevent warpage, Eitner made a series of widely spaced tack welds to hold the new firewall’s centersection in place. Note it also has holes for plug welds that will secure the panel to the cowl.With the welds blended, the finished firewall is clean and simple. Made from 18-gauge steel, the revamped flat firewall is rigid and makes for a roomier engine compartment.Like most cars of the era, the Chevy II had vents in the cowl to supply outside air to the heater. Since they won’t be needed, they will be eliminated.The grille in the cowl was cut out, leaving the mounting point for the passenger side windshield wiper.An English wheel was used to contour the cowl patch panel to match the slope from the hood to the base of the windshield.The English wheel was used again to make the patch panel’s second contour from one side of the cowl to the other.To eliminate guesswork, Eitner made a template to verify the patch panels fit properly.Made from 20-gauge mild steel, the patch panel was cut slightly oversize to allow trimming for a precise fit.Using magnets as a “handle,” the replacement panel was held under the windshield blister and marked for trimming.A shear was used to rough trim the filler panel to shape.For a precise fit, the final trimming of the filler panel was made with a belt sander. It’s best to take a little at a time than too much at once.Using magnets around the edge, the cowl panel was tack-welded in place. Note the temporary welding rod handle to pull the panel up when necessary, as it’s not accessible from below.Again, widely spaced tack welds were made to prevent warping the new panel.With the spaces between all the tacks welded solid, the edges were ground.Rather than use filler, Eitner used a stud gun to raise a low spot. The gun welds a stud to the surface.A slide hammer is then attached to the stud and is used to up the low spot. Once the repair is made, the stud is ground off.Not only does the smoothed cowl look cleaner, but it also eliminates the possibility of moisture and debris getting inside the cowl that can cause corrosion.A new Raingear wiper system, which mounts beneath the dashboard, was installed to replace the stock components.
We use cookies to ensure that we give you the best experience on our website. If you continue to use this site we will assume that you are happy with it.