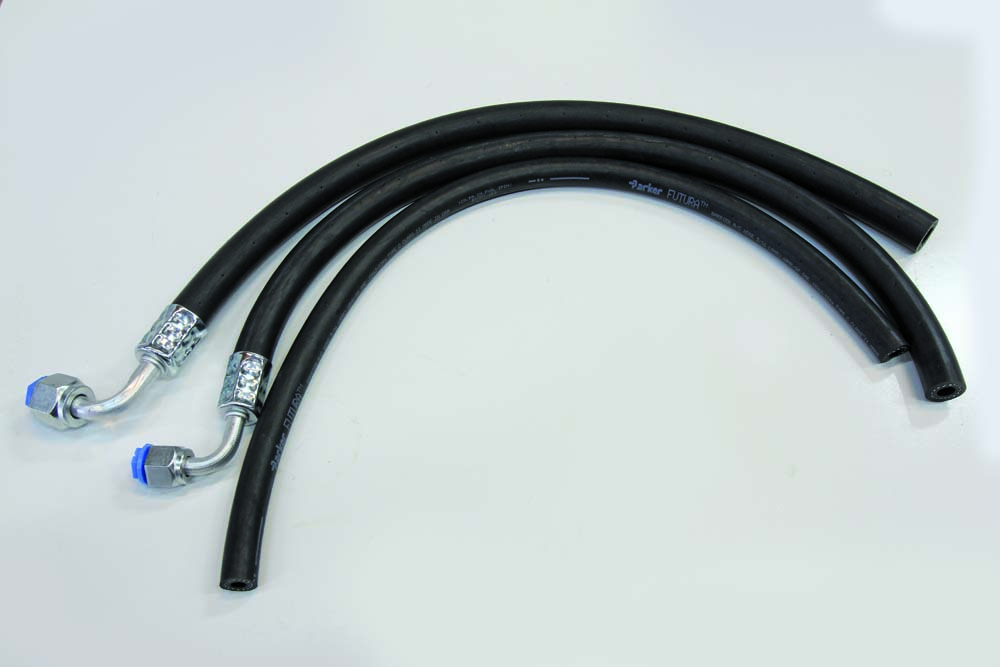
For the homebuilder who wants to DIY his own AC hoses, an expensive crimping tool and dies must be purchased or the crimping of the AC hoses must be outsourced to a local automotive AC shop. But there is an alternative to those bulky, specialty fittings that is actually easier to install, takes up less real estate, looks cleaner, and uses a smaller diameter, more flexible hose: the EZ Clip system.
Traditional beadlock fittings require an expensive crimping tool and a set of dies for each individual hose/fitting size. Due to the nature of the construction of the hose, its od is larger and it’s less flexible than the same-size EZ Clip hose.
When it comes to aftermarket air conditioning systems, the traditional beadlock AC fitting has been the industry standard since the first kit was developed some 40-plus years ago. They provide a reliable, leak-free crimp and are available in a myriad of configurations. But the hose and fittings are bulky and require a single-purpose beadlock hose crimping tool with the corresponding dies for each hose size, of which there are typically three (#6, #8, and #10).
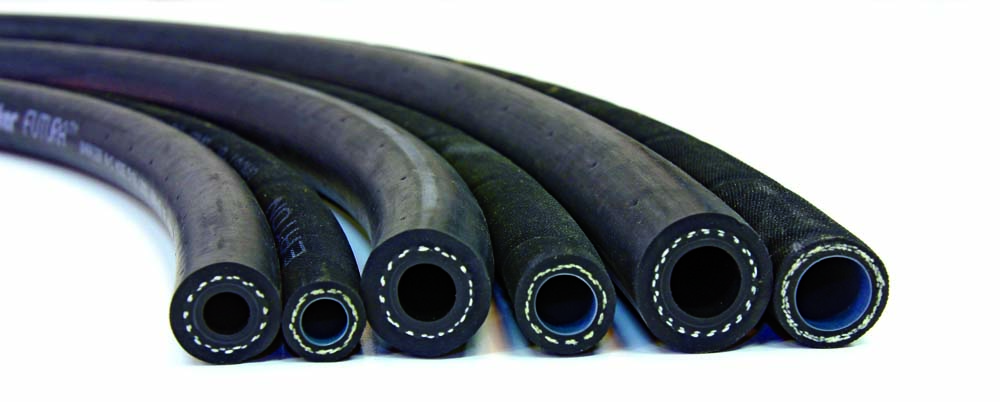
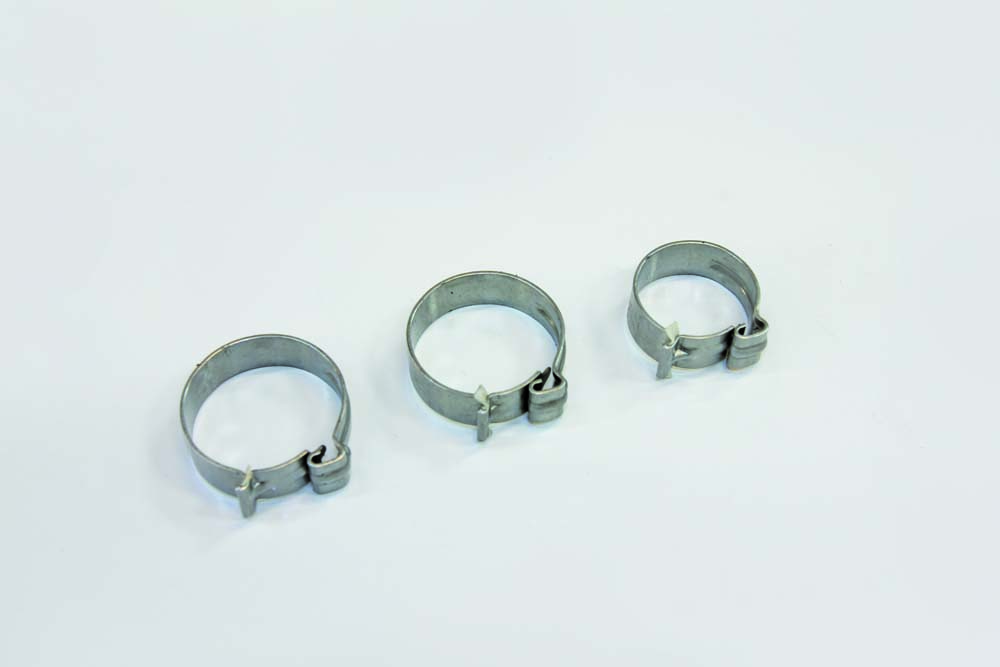
This side-by-side comparison shows the difference between each size beadlock and EZ Clip A/C hose (#6, #8, and #10, respectively). Notice the od of the largest; #10 EZ Clip hose (far right) is very close to the od of the smallest #6 beadlock hose (far left). The EZ Clip hose’s compact size is thanks to its design. An internal, dual Nylon veneer tube is reinforced by a one-textile braid, wrapped in a layer of EPDM that covers and protects the hose. The result is a hose with extremely low permeation, excellent heat, ozone, UV resistance, and minimal moisture ingression.
The EZ Clip system was developed for the heavy truck, agriculture, military, bus, and construction industries in order to repair or replace refrigeration lines easily in the field. Its simplicity in design is what makes it perfect for a DIY car build. Unlike beadlock AC fittings, the EZ Clip system doesn’t require a special set of crimpers and dies for each hose and fitting size. One single, specifically designed set of pliers is the only tool required to install any size EZ clip ac fittings.
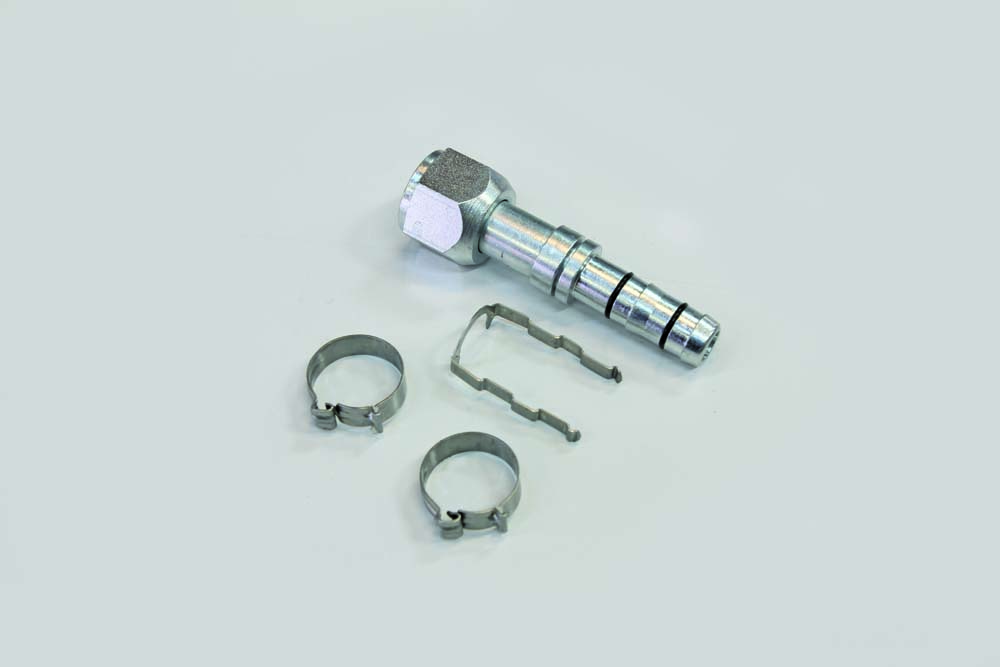
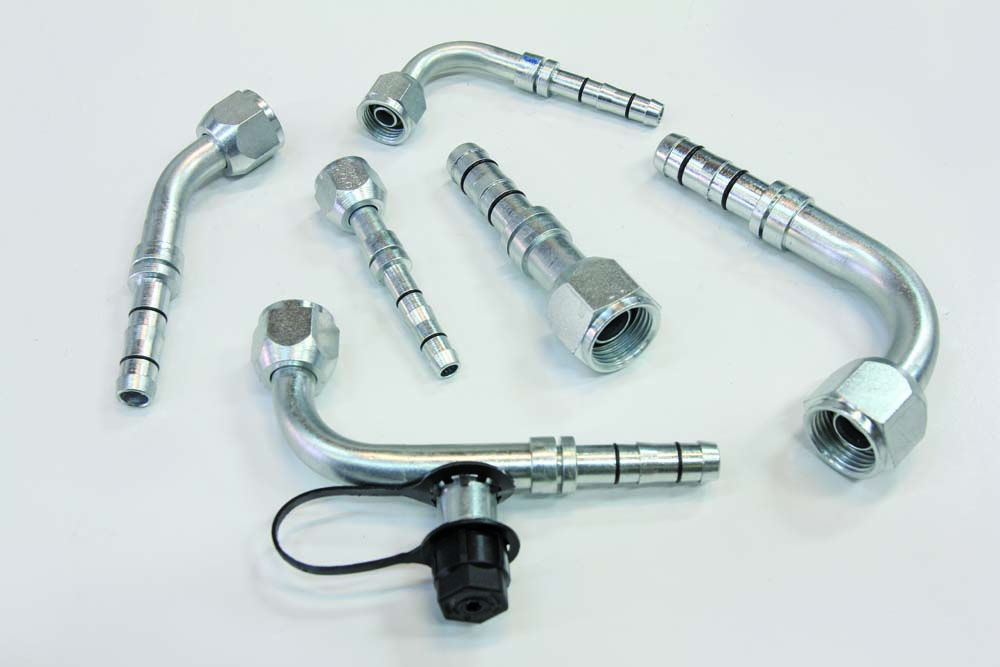
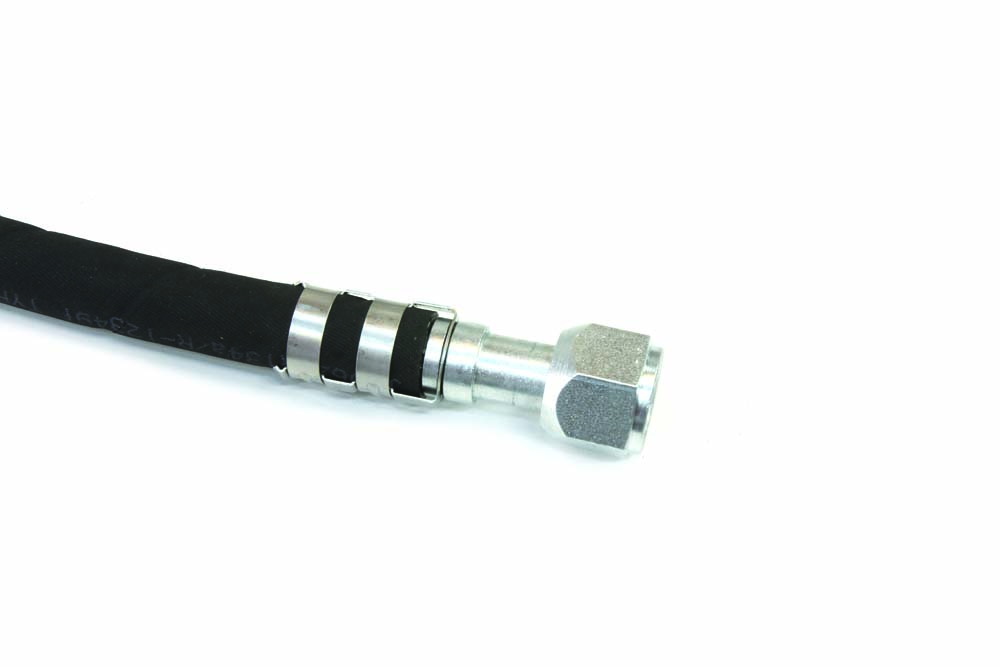
Each EZ Clip fitting consists of three separate components: a hose fitting, cage, and two clips. Coupled with the Nylon veneer tube in the hose, the EZ Clip system gets its sealing ability thanks to the double O-ring design on the hose fitting and the final clamping power of the closed clips, located precisely over each O-ring by the cage.
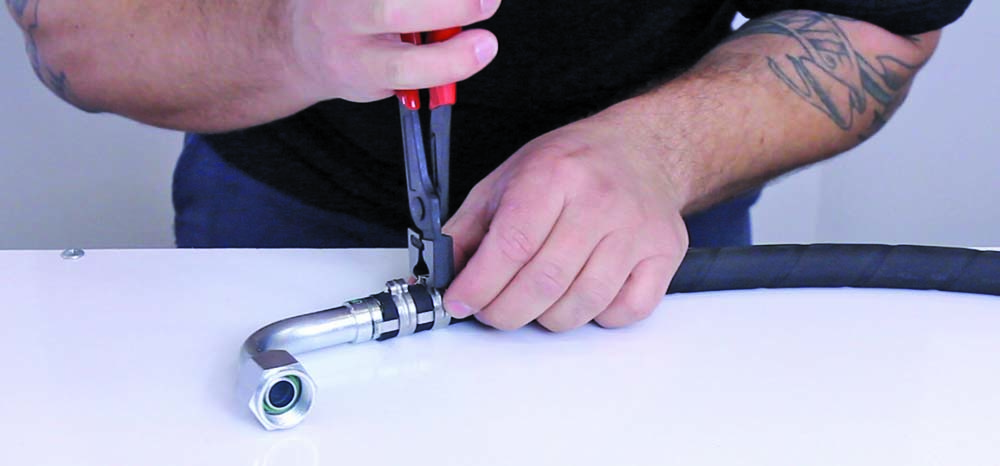
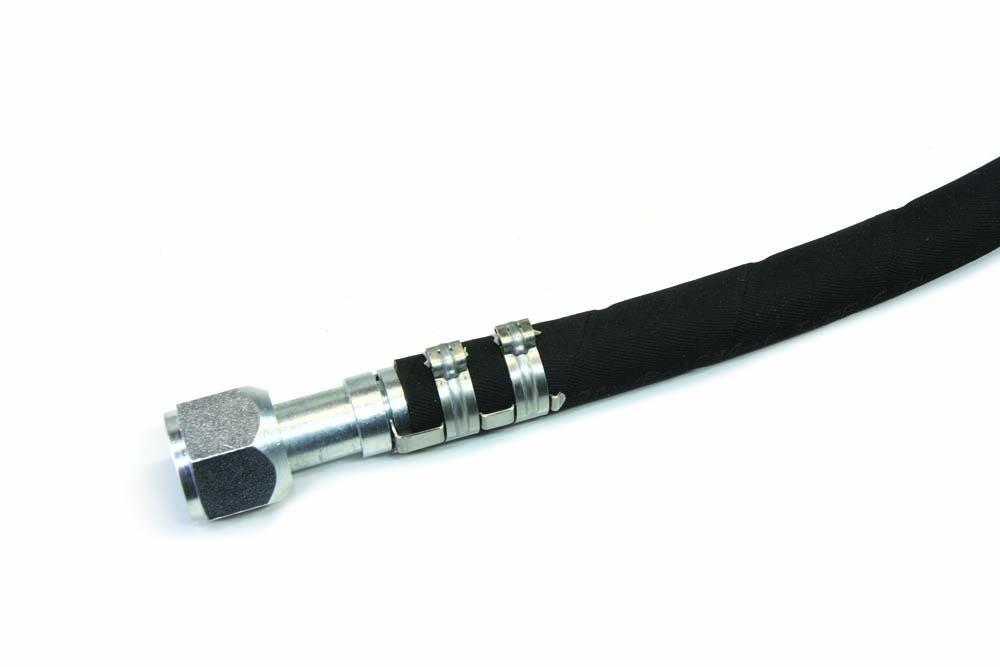
The business end of an EZ Clip hose consists of a hose fitting (of which there are over 300 end configurations available), a cage, and two clips that correspond to the respective hose size (#6, #8, and #10). Assembly is simple: the hose and clips are slid over the hose fitting like a traditional barb and hose connection, the cage is snapped into place on the hose fitting, and the clips closed tight using the EZ Clip pliers. This can be done on a work bench or in place on the vehicle, as the system was originally intended, making it much more flexible than its predecessor.
The hose fittings are size specific (#6, #8, and #10) and available in over 300 different configurations.
Given its simplicity, it’s no wonder the EZ Clip system has become the industry standard in so many different applications. Its ease of installation and flexibility makes it perfect for mobile repairs and custom hose fabrication in the field. For those of us building a custom truck at home, that translates to a better experience and one more thing we can truly check off the list as a DIY task. CTP
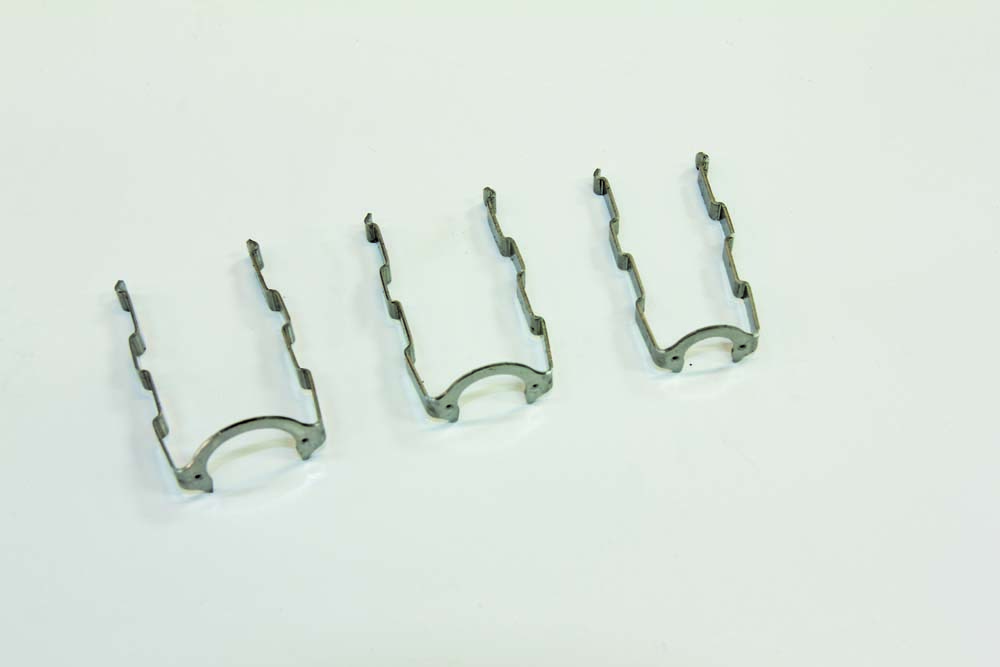
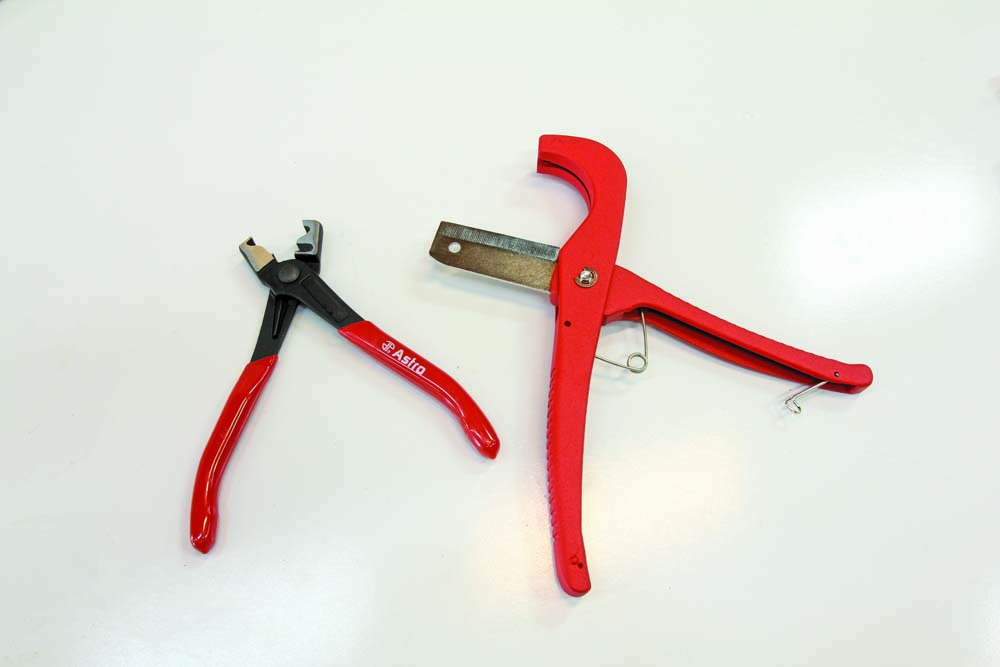
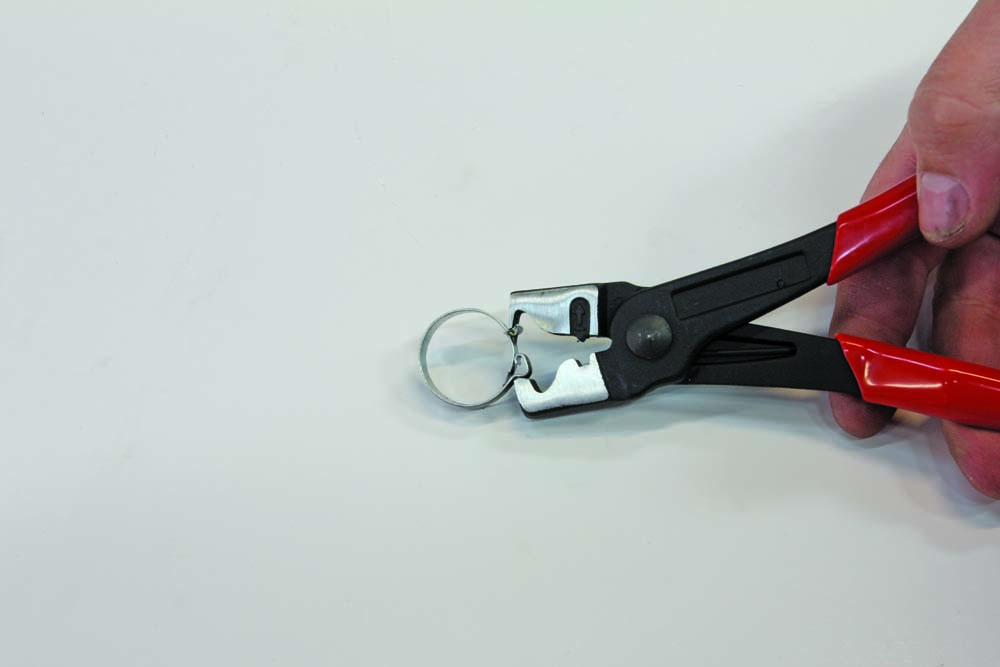
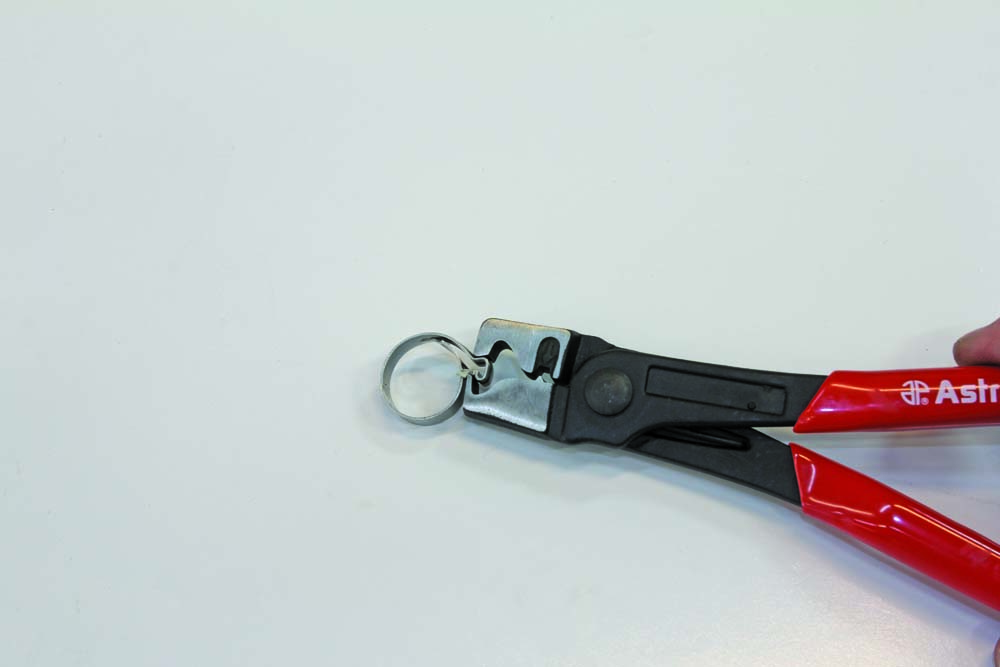
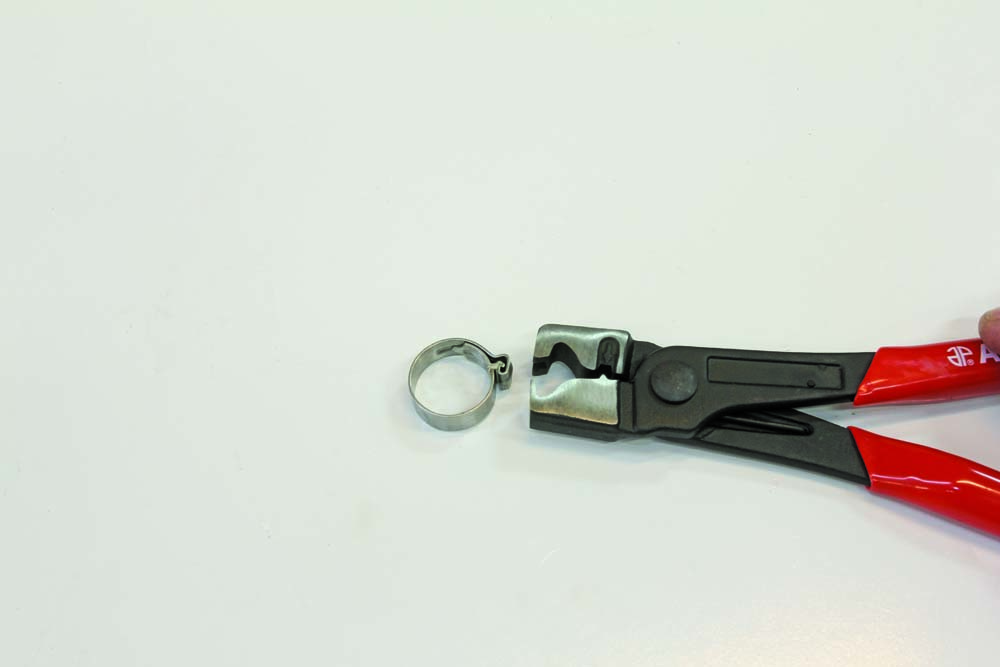
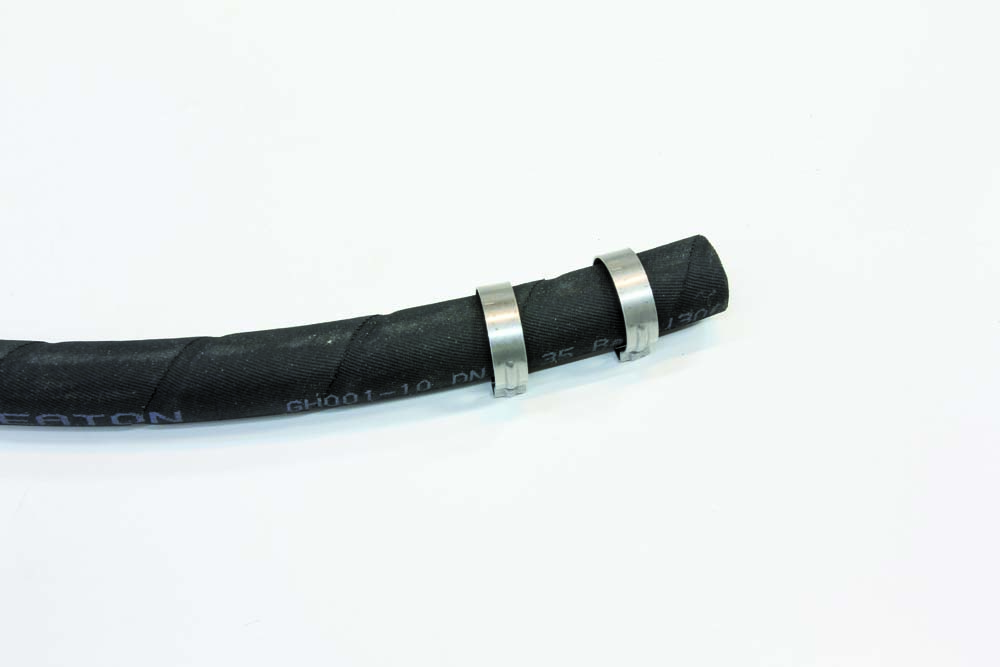
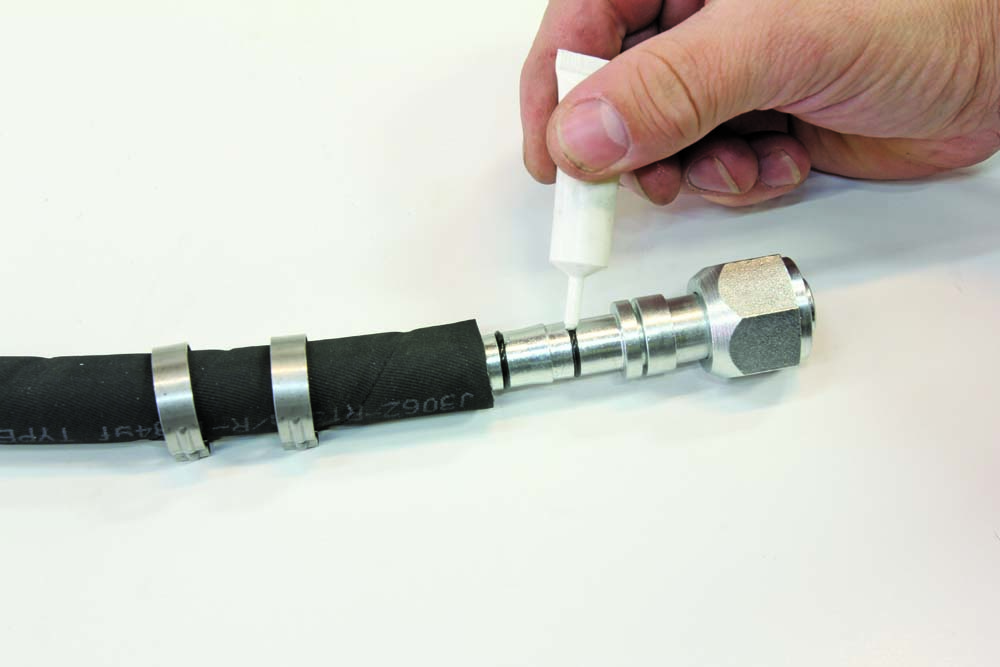
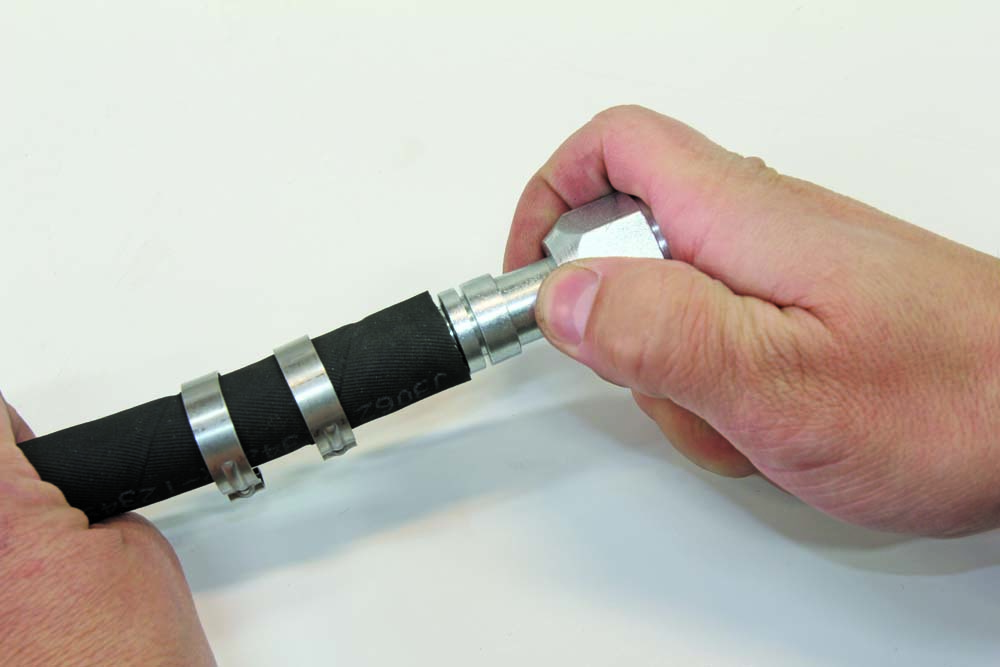
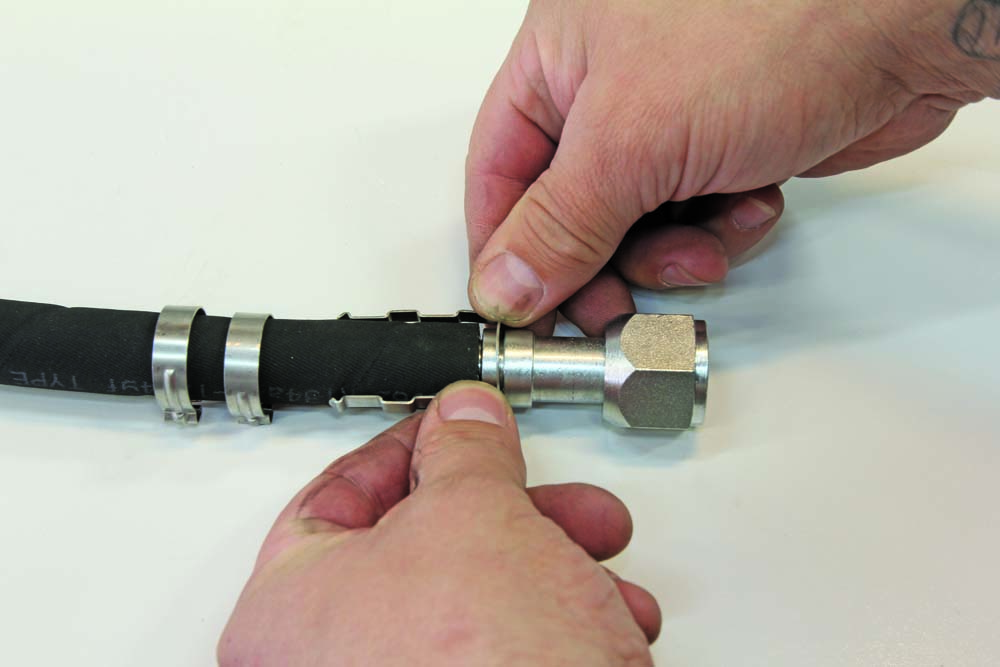
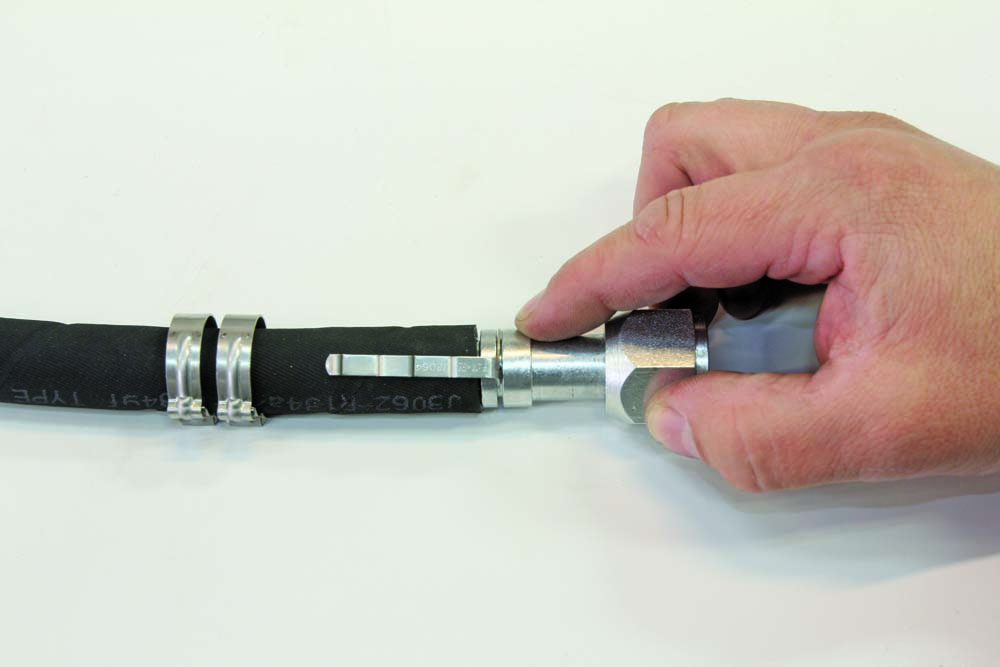
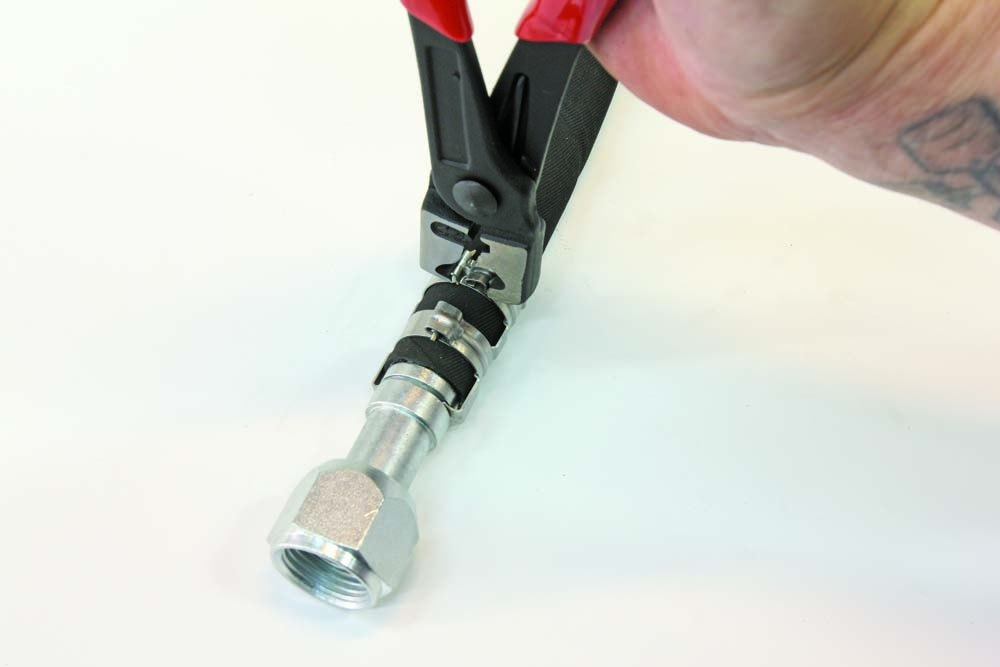
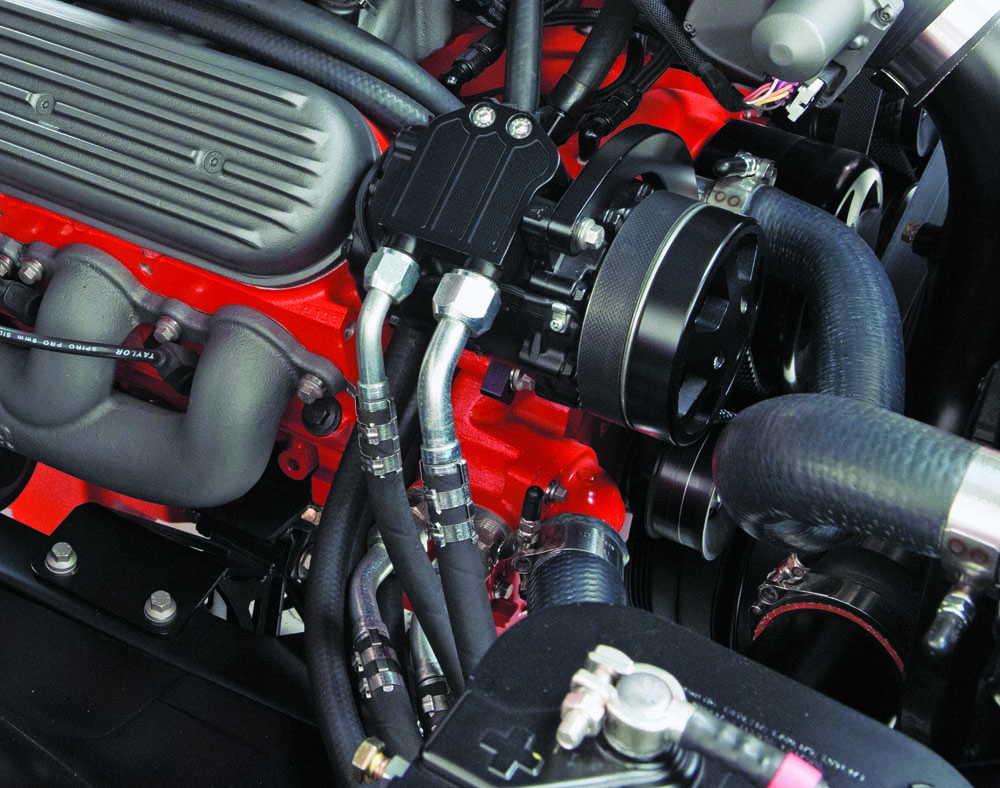
Like the hose fittings, the cage and clips are also size specific. However, thanks to their design, it’s nearly impossible to mix and match components.Like the hose fittings, the cage and clips are also size specific. However, thanks to their design, it’s nearly impossible to mix and match components.While an expensive crimping tool and individual dies are not needed for the EZ Clip system, there are two tools that are necessary. One is a sharp hose cutter that will make a clean, square cut through the hose. The second is a handheld, purpose-built plier designed to close the clips once in place.When closing a clip, the pliers should be positioned squarely on the clip connection points and firmly seated under the assembly bump and lock latch.This alignment ensures that the pliers remain square throughout the closing process.Once closed completely, the clip locks tight and no further closure is needed.The first step to installing an EZ Clip assembly is to first cut the hose square before installing two properly sized clips.Next, a hose fitting is liberally lubricated with refrigeration oil to prevent damage to the O-rings and to ease installation into the hose.The hose fitting is then inserted into the hose until it’s fully seated.Next, a cage is installed on the hose fitting with the arms of the cage extended over the hose.When the cage has been correctly installed in the groove of the hose fitting, it should rotate freely around the hose/fitting.The clips are then slid over the cage arms and into their respective channel before being closed tight using the installation pliers.A properly installed EZ Clip assembly consists of a hose fitting fully inserted in the hose, a cage correctly inserted in its groove, and a pair of clips, fully closed, and located directly over each O-ring as located by the cage’s clip channels.A properly installed EZ Clip assembly consists of a hose fitting fully inserted in the hose, a cage correctly inserted in its groove, and a pair of clips, fully closed, and located directly over each O-ring as located by the cage’s clip channels.Professional shops prefer the EZ Clip system for its flexibility, ease of installation, and less-obtrusive fitting and hose arrangement. This shot of the engine bay of Pete Richmond’s 1968 Chevy C10, built by Cotati Speed Shop, shows the EZ Clip system in its native environment. Photo by Mike Chase.
We use cookies to ensure that we give you the best experience on our website. If you continue to use this site we will assume that you are happy with it.