


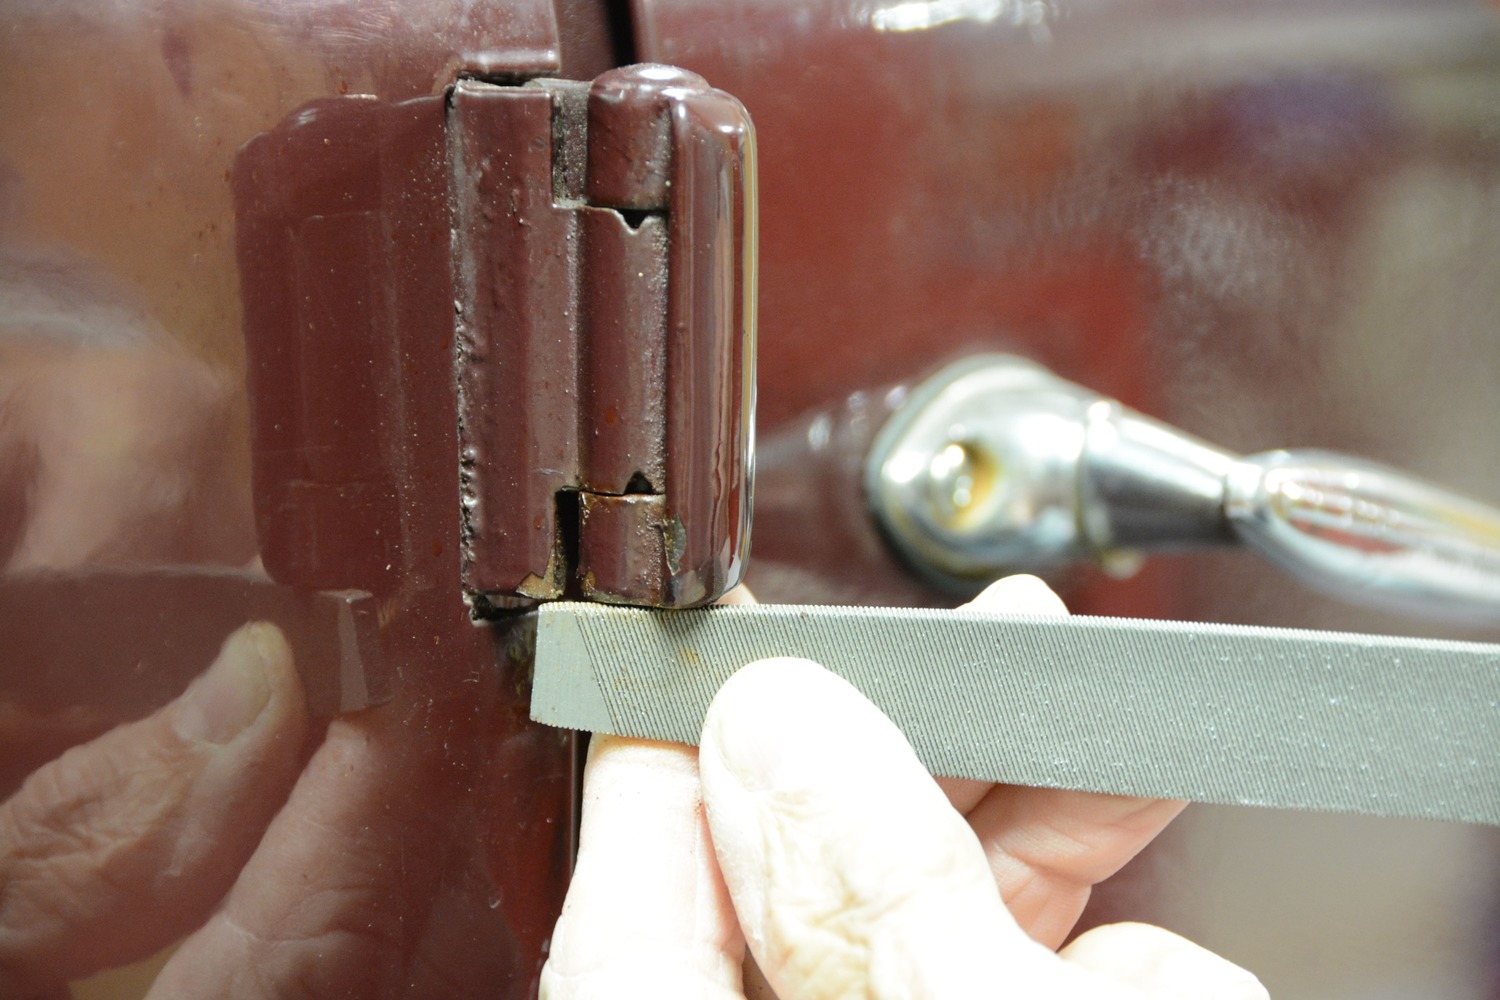
Remove vintage door hinge pins and never touch a hammer
By Gerry Burger – Photography by the Author

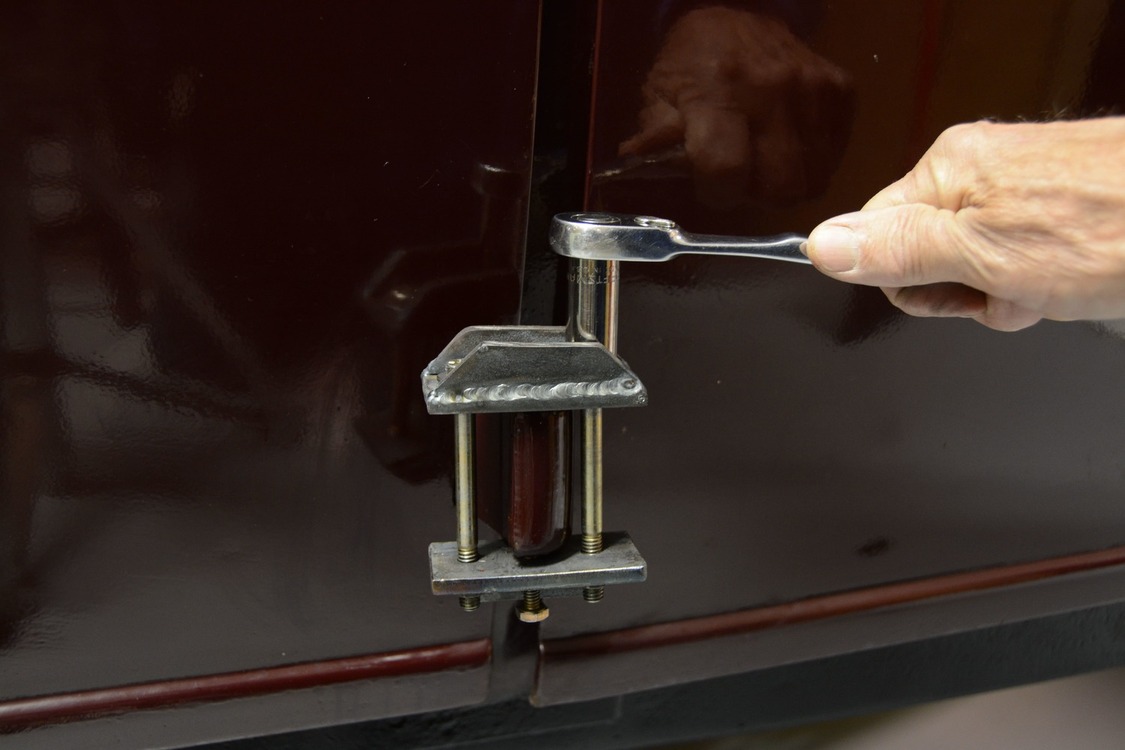
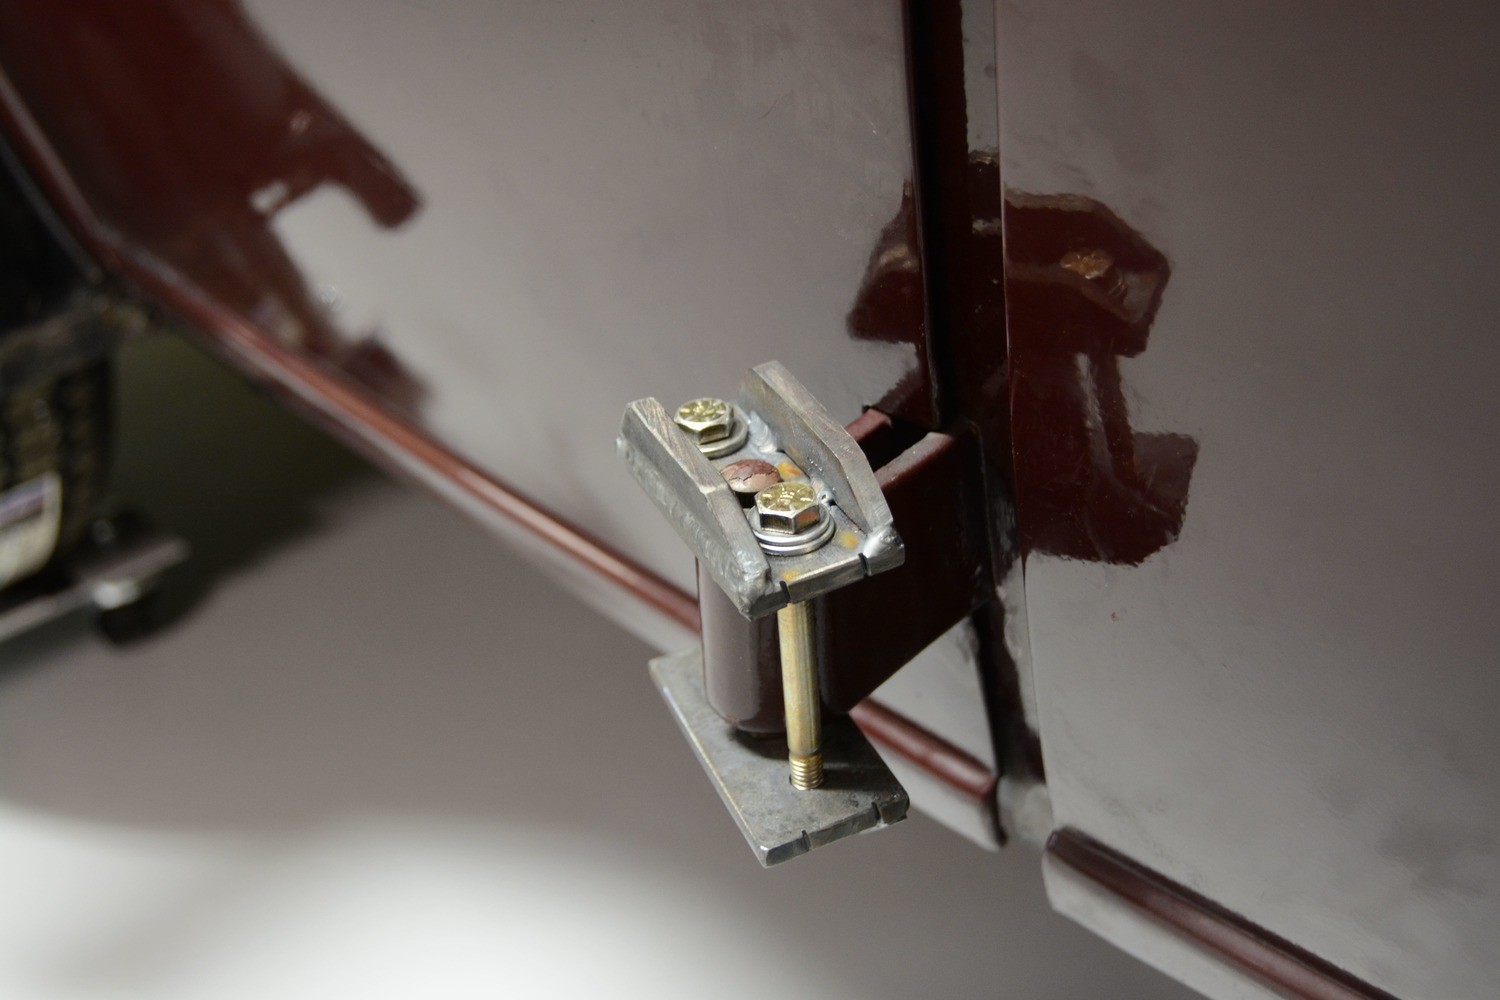
Removing stubborn hinge pins from an 84-old door can be a challenge. We designed and fabricated this hinge pin press to remove the hinge pins on our four doors.
Building a hot rod involves myriad mundane jobs and while this work may not show in the end, they are essential to moving a project along. They can also present challenges along the way. Once such task is removing the doors from a 1936 Ford Phaeton. Now phaetons aren’t exactly the most rigid body ever produced and when you factor in the wood framed doors and A and B-pillars, these bodies can be downright flimsy.

Our project car is a good solid example and the wood appears to be in very nice condition. The doors all fit reasonably well with typical factory gaps. While the wood appears good, we felt it was wise not to attempt to unbolt the hinges from the A and B-pillars as disturbing those mounting points could lead to major problems. If you don’t unbolt the hinges from the body the only other way to remove the doors is to remove the hinge pin and separate the hinge. That sounds simple enough but we are quite certain our Phaeton has never had the doors removed in its 83-year history. We expected them to be stubborn, and as it turns out we would not be disappointed.

Once again due to the structural shortcomings of a Phaeton body we knew hammering the hinge pins out was not an option. And so, we decided what we needed was a hinge pin press. No, it’s not the latest fitness craze, rather it is a small mechanical press we fabricated to effectively jack the pins out of the hinge.

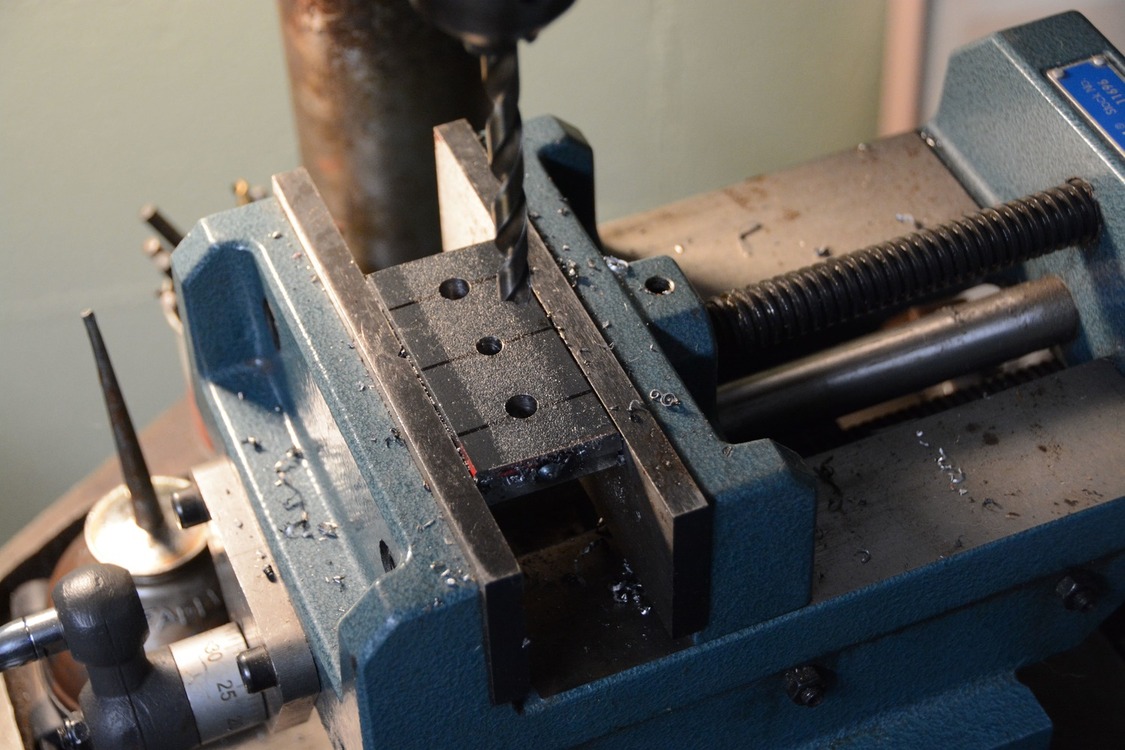
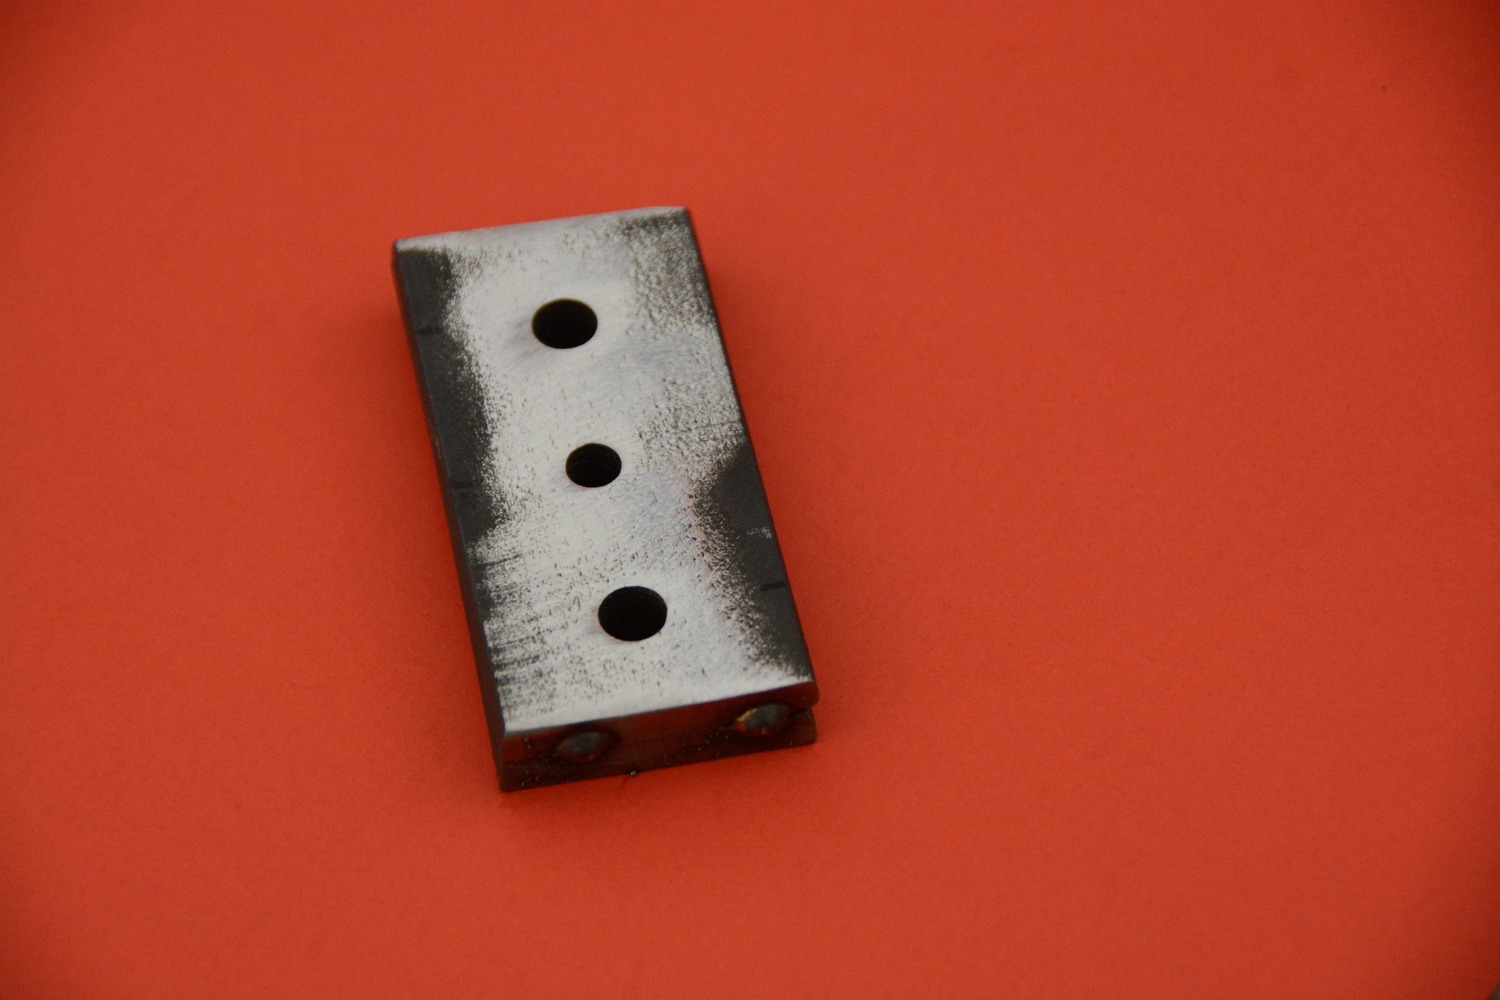
Fabricating the press is straight-forward metal work involving cutting two pieces of ¼ x 1-1/2-inch steel three inches long. To be certain all holes would precisely align, we tack welded the ends of the pieces together and then marked and centerpunched our three holes for drilling. The two outboard holes were drilled for 5/16-inch bolts while the center hole was drilled to ¼-inch. The center hole locates the hinge pin with a ¼-20 bolt that serves as the push pin, while the two outboard bolts exert the jacking pressure.

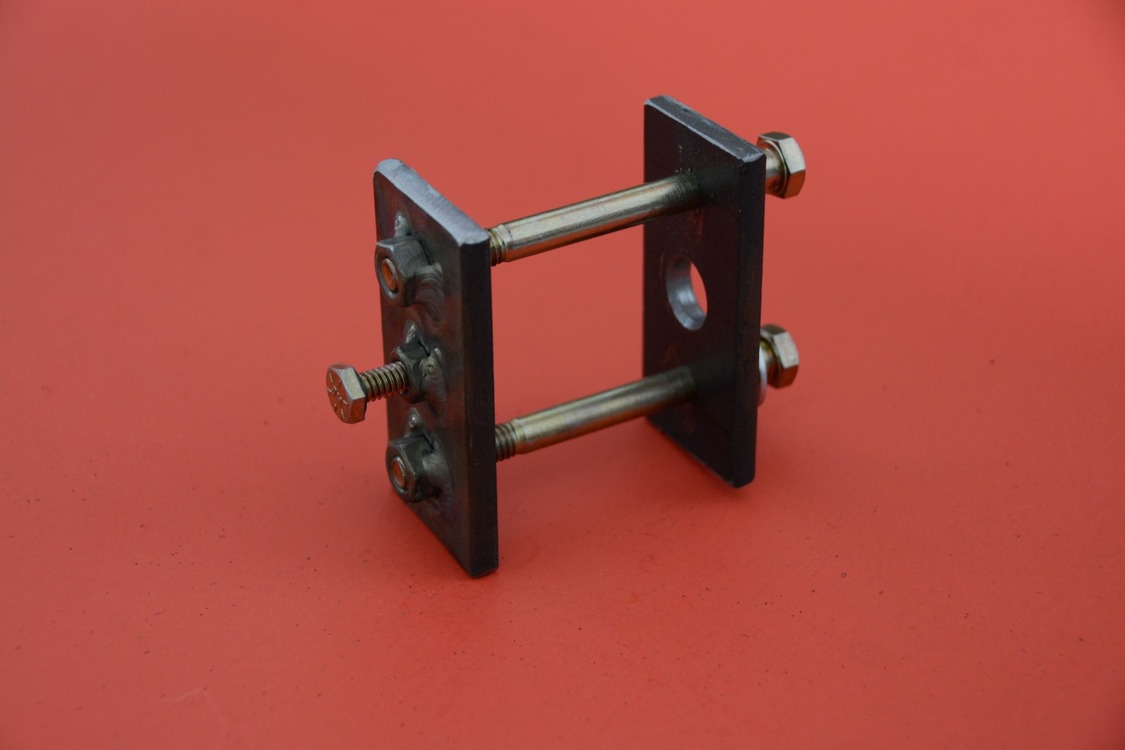
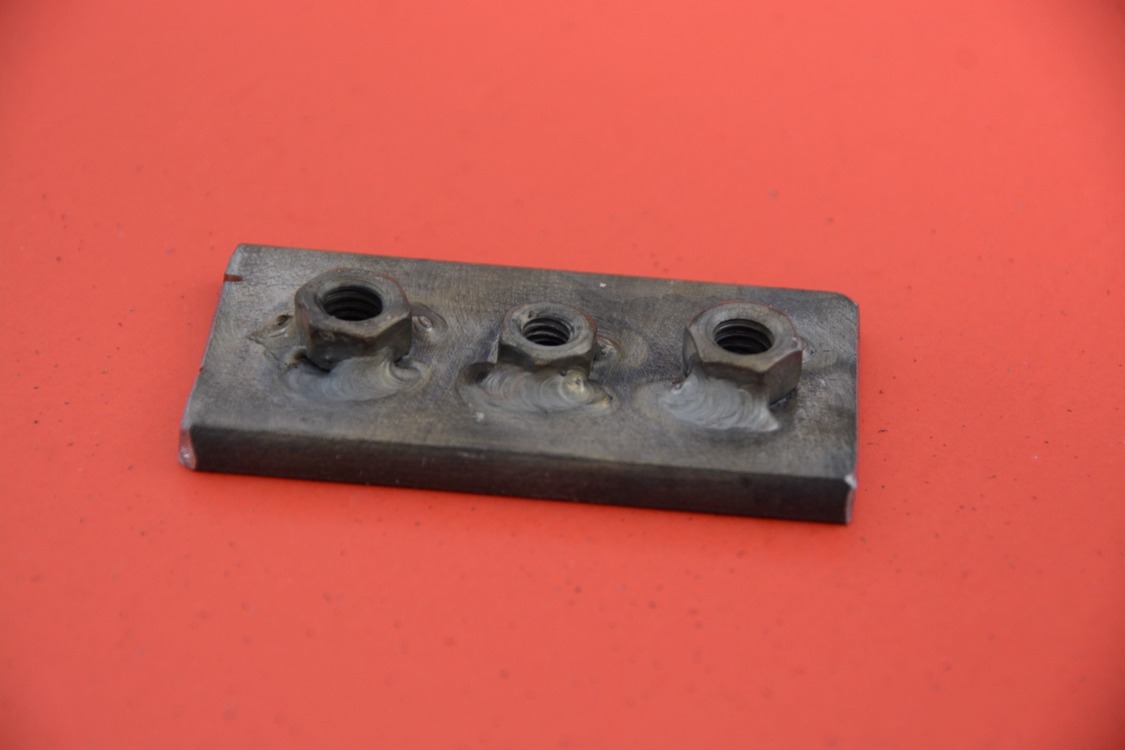
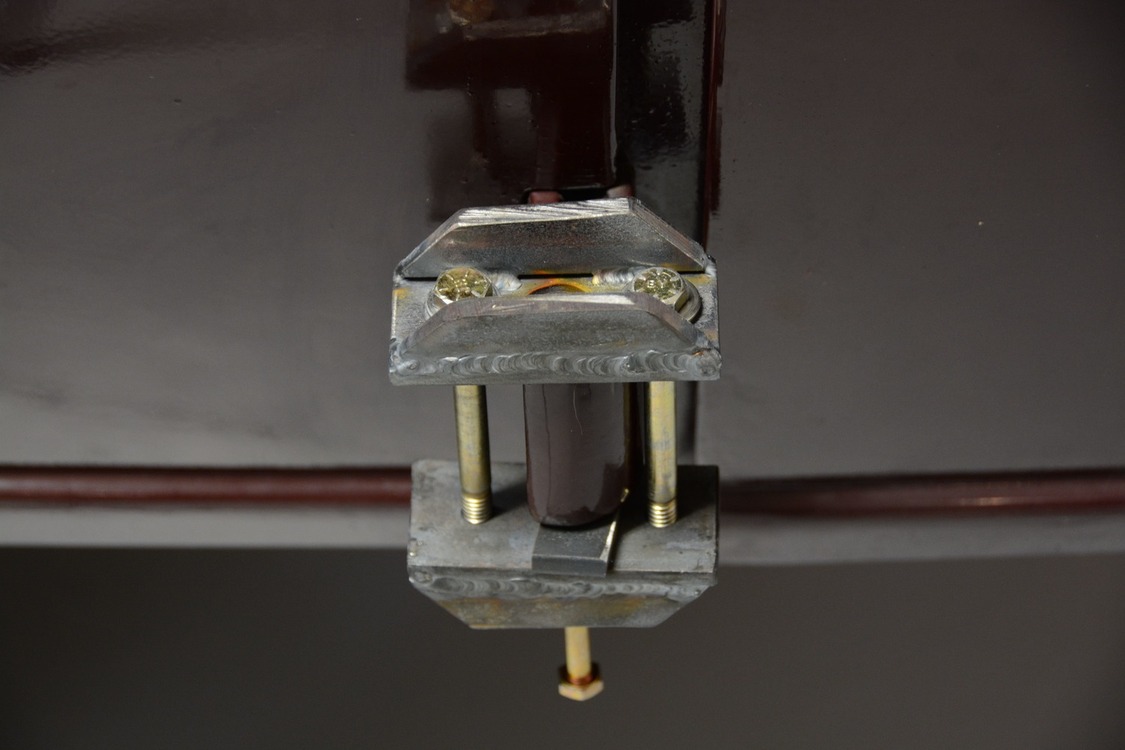
After drilling the three holes we inserted two 5/16-inch bolts in the outboard holes and a ¼-inch bolt in the center hole. We then moved to the welding table and TIG welded the nuts to the bottom plate with our Miller Welding Synchro-wave 200. The bolts were then removed and the end tack welds were ground off to separate the plates. We took the top plate over to the drill press and drilled the center hole out to 9/16-inch. This would allow the top of the hinge pin to pass upward through our press. We then threaded two 5/16 x 3-1/2-inch bolts in the outboard holes while a ¼ x 1-inch bolt was threaded up into the ¼-20 nut we had welded in place, and with that we were ready to go do some pin pressing.

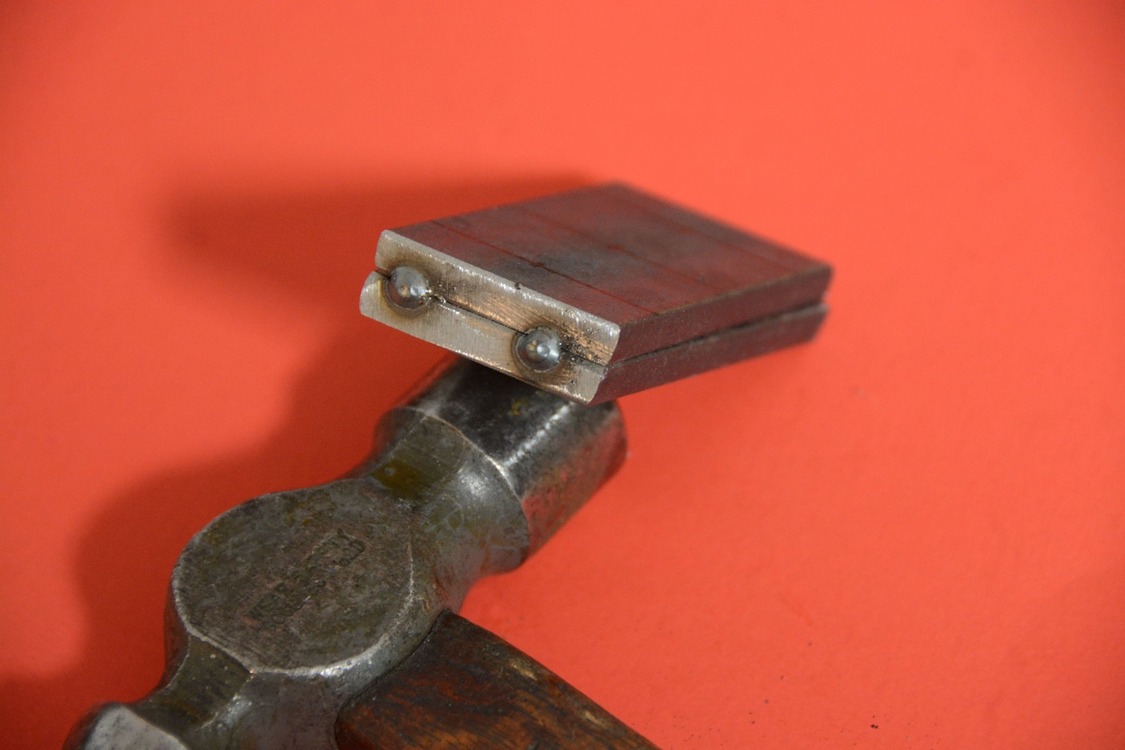
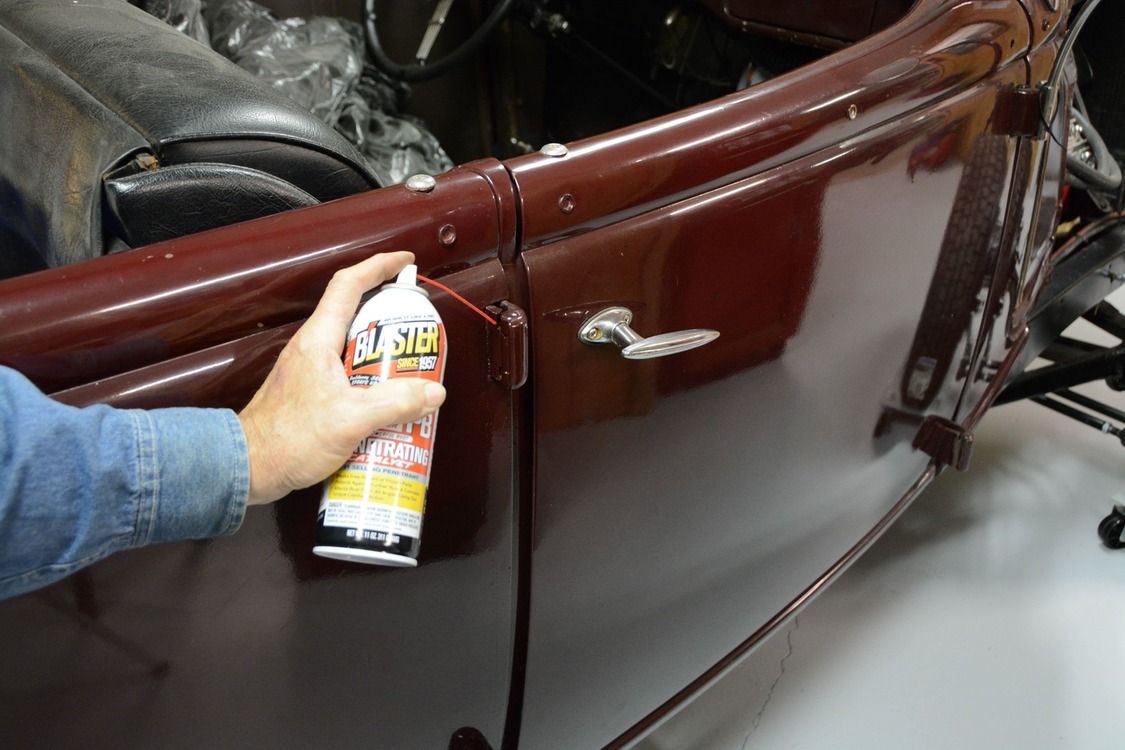
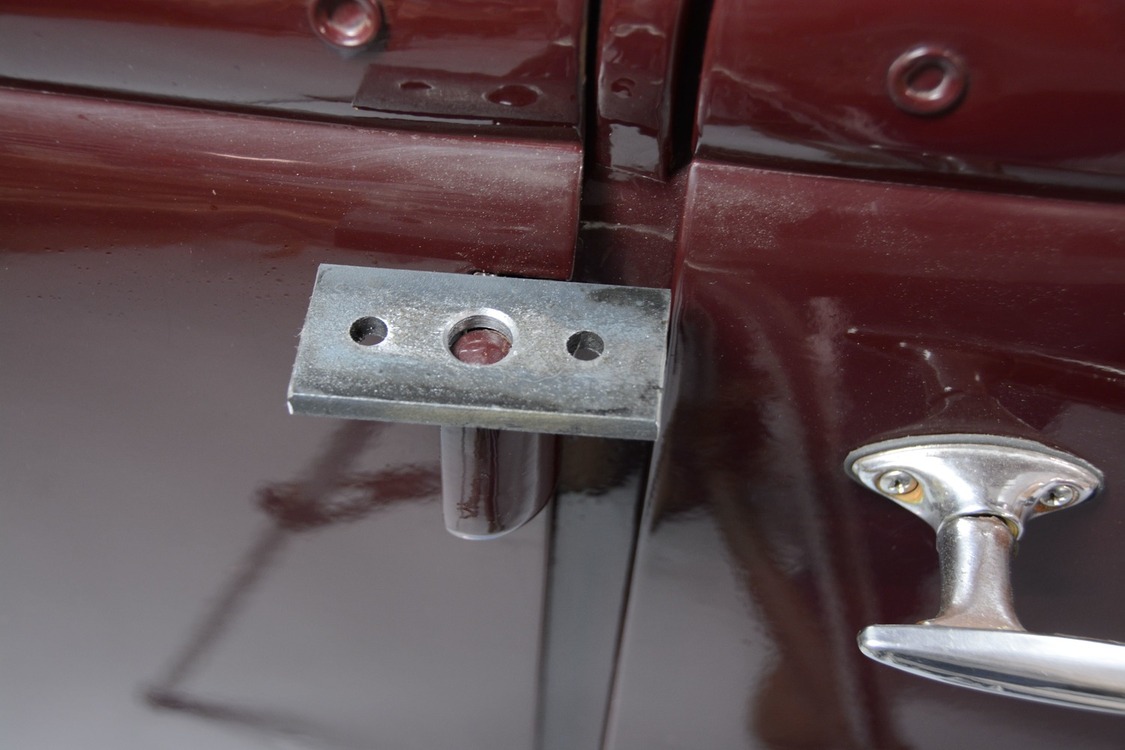
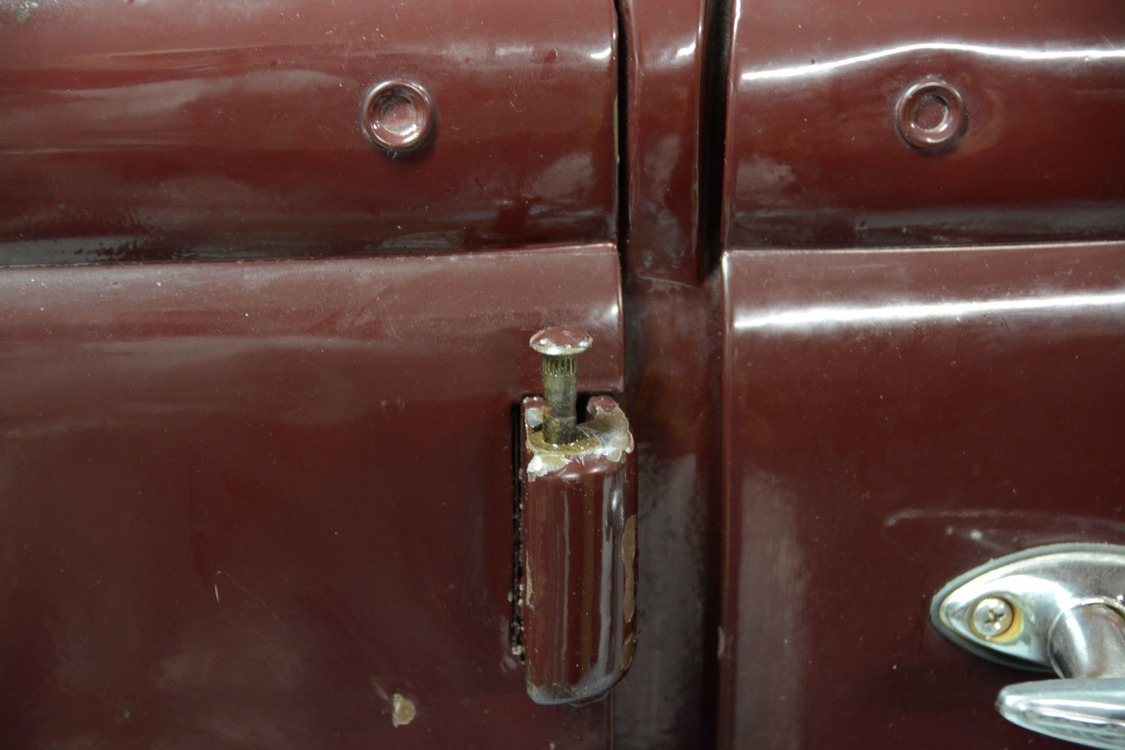
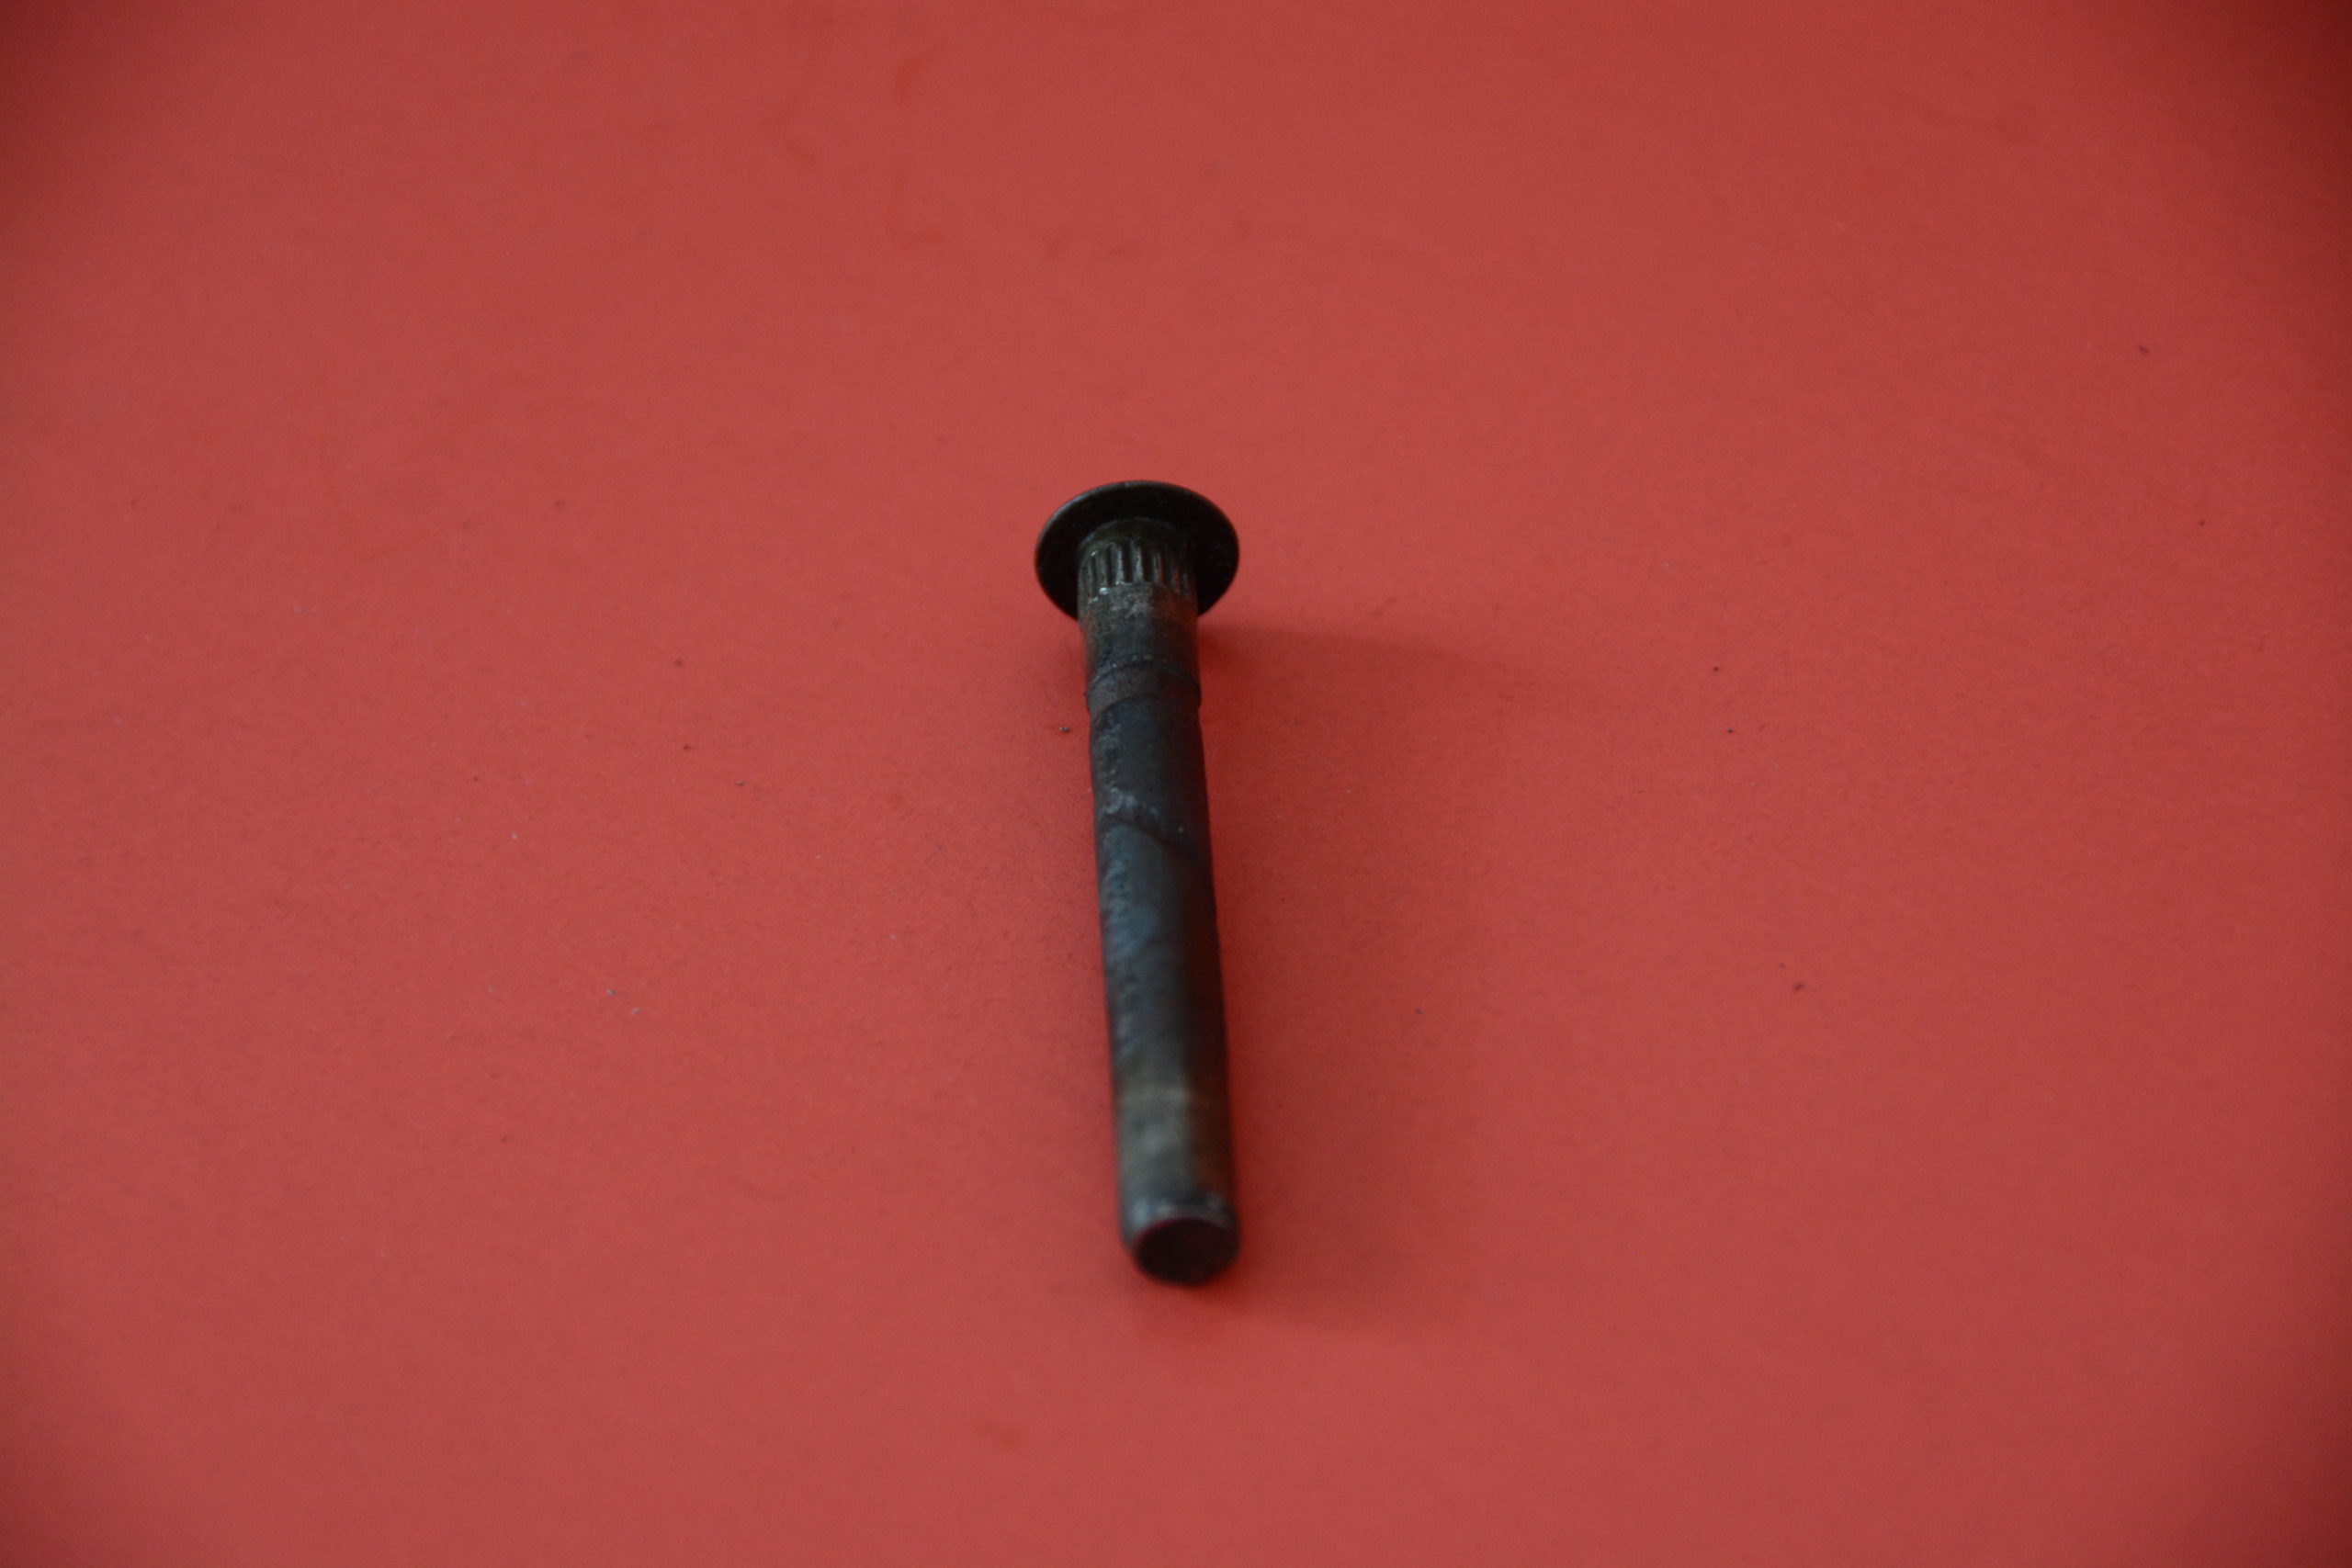
We had been lubricating the hinge with penetrating oil for several days to help free the pin. Hinge pins on early Fords generally protrude through the bottom of the hinge. It is only about 1/16-inch but you don’t want to expand that end of the pin or raise a burr on the pin. With that thought in mind, we used a small piece of ¼-inch steel plate over the center hole in the lower plate. This would only be used to initially move the pin until it was flush with the bottom of the hinge. Next, we began to tighten the two 5/16 bolts to pull the two plates together and thereby push the pin upward. Now that sure sounds easy but it turns out that pin was not going to move easily. We cranked on the bolts until the steel plates were bending when suddenly with an audible snap the pin moved upward 1/16 of an inch. As we all know, that first movement is always the hardest.
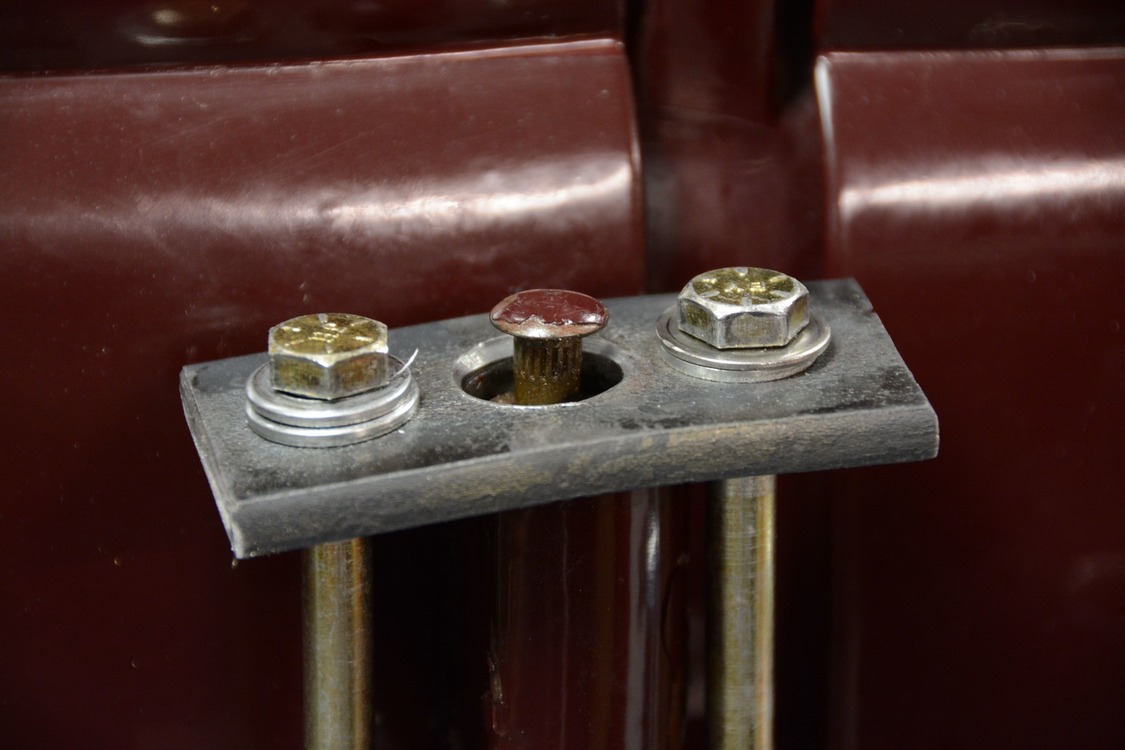
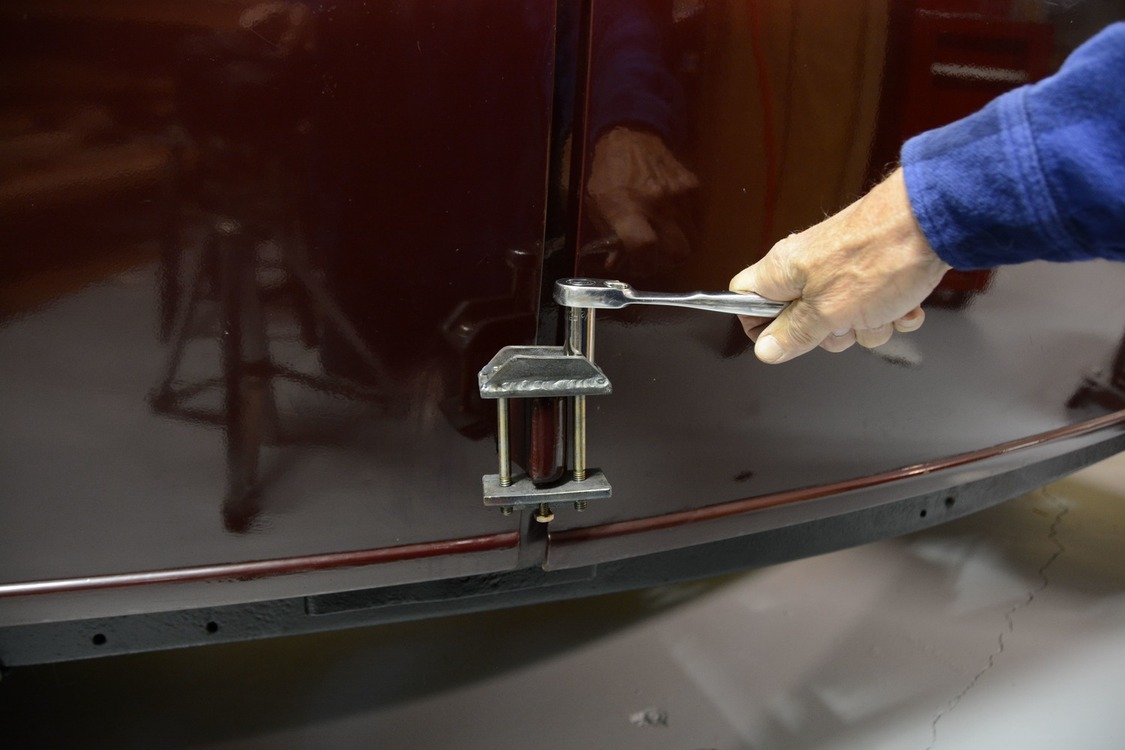
With the hinge pin now flush with the bottom of the hinge we loosened the press, removed the plate and then threaded the ¼-inch bolt in until it protruded above the plate. Taking special care to center the bolt on the bottom of the hinge pin, we carefully tightened the two outboard bolts to pull the pieces together. Do not try to tighten the ¼-inch bolt as a jack as that small bolt will not have the power required to move the hinge pin. Rather, use that small bolt as a locating pin with the actual pressing power coming from the two 5/16-inch bolts.
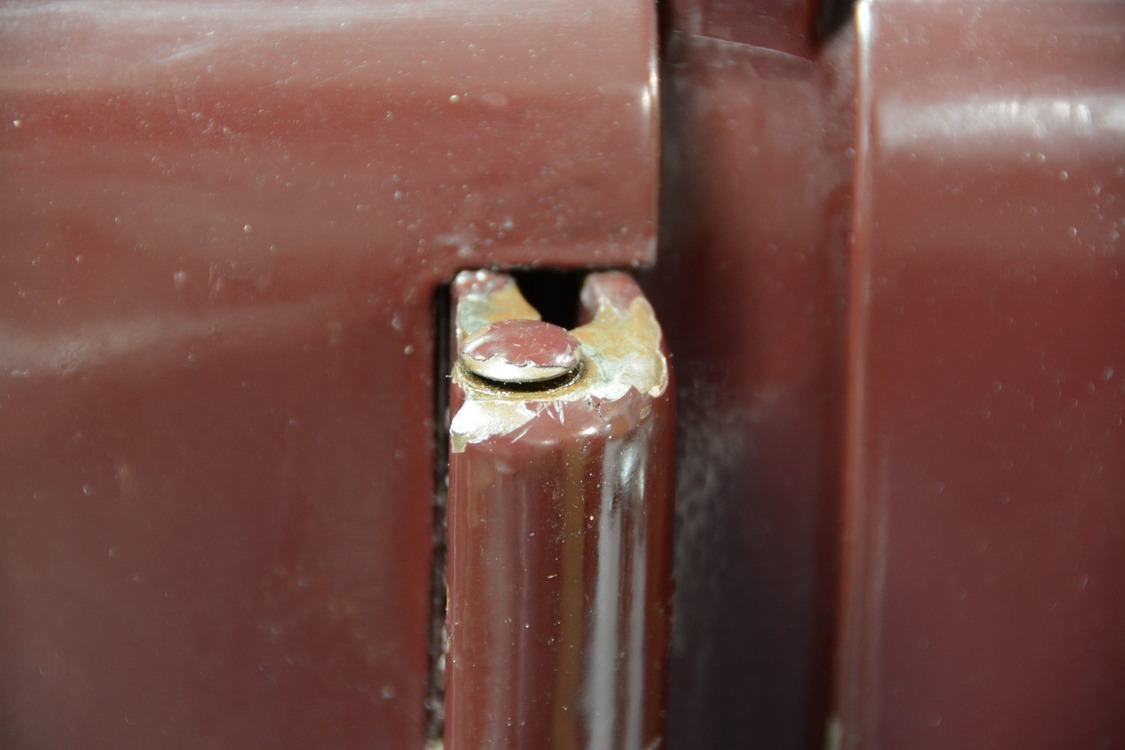
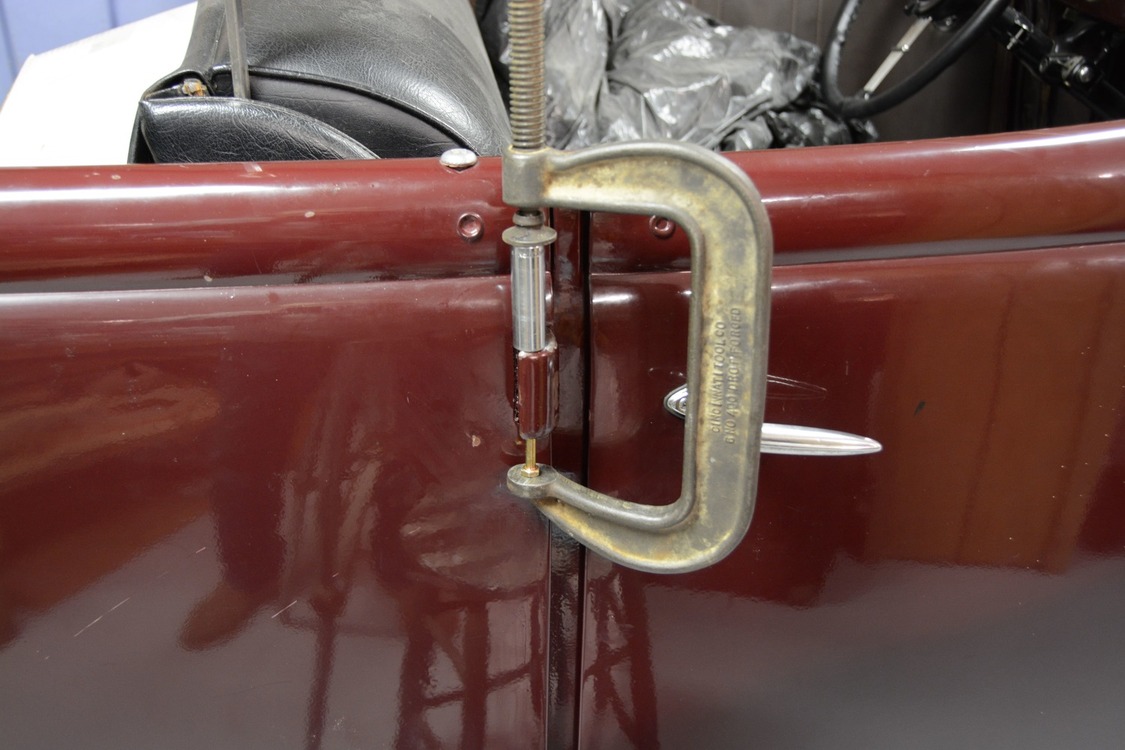
The top ¼-inch of the Ford hinge pin is splined and over the years the splines tend to rust into the hinge. Once again it took considerable effort to move the pin upward. Once the pin was pushed high enough to clear the splines the pressing operation became much easier. We pushed the pin up about ¾-inch and then removed our homebuilt press. We used an 9/16-inch deep socket, along with a 2×4-inch bolt and a large C-clamp to push the pin the rest of the way out of the hinge. And just like that we had removed a hinge pin quite gently with no stress to the structural part of the 1936 Ford body.

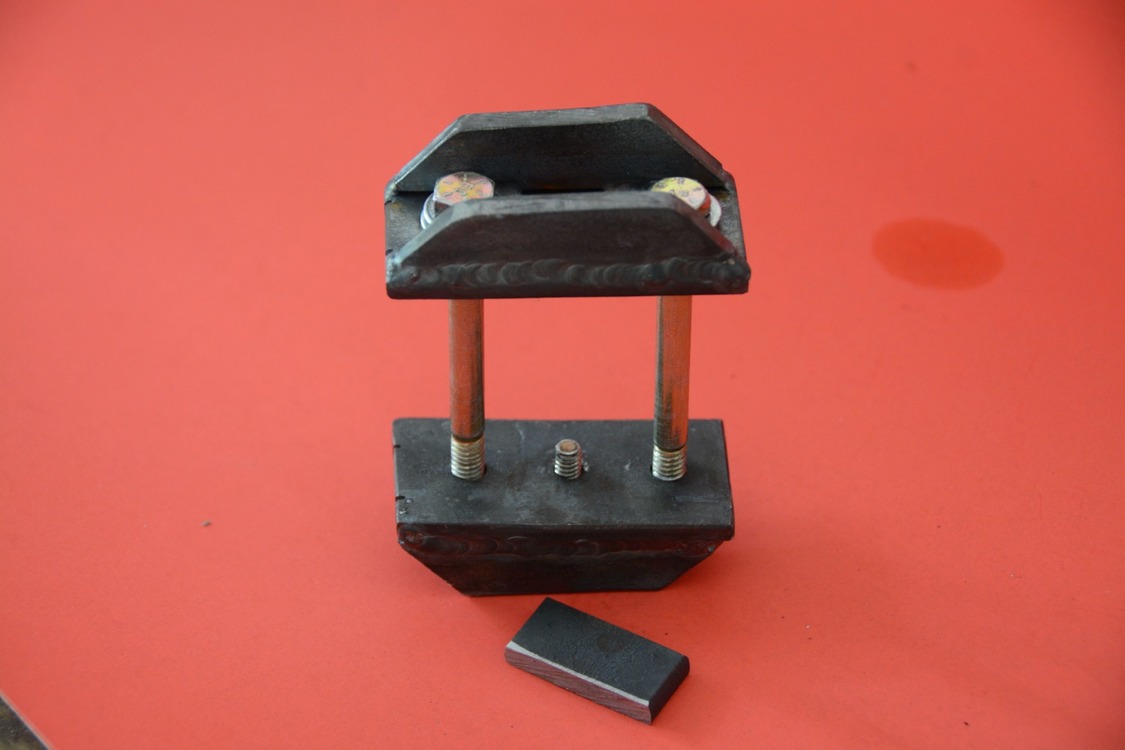
We learned a few things on that first pin. First it seems the ¼-inch steel was a bit too thin to take the stresses of pressing the pin. We modified our hinge pin press with vertical reinforcing plates that effectively stiffened the press and made removing subsequent hinges easier. Also, using a press like this would be easier with two people. It is imperative that the push pin bolt is perfectly aligned with the hinge pin. Having one person locate the push pin on the hinge pin while the second person tightens the bolts would speed things up considerably. Finally, while this method protects the structural integrity of the body, the hinge pin press will definitely damage the paint on the hinges.
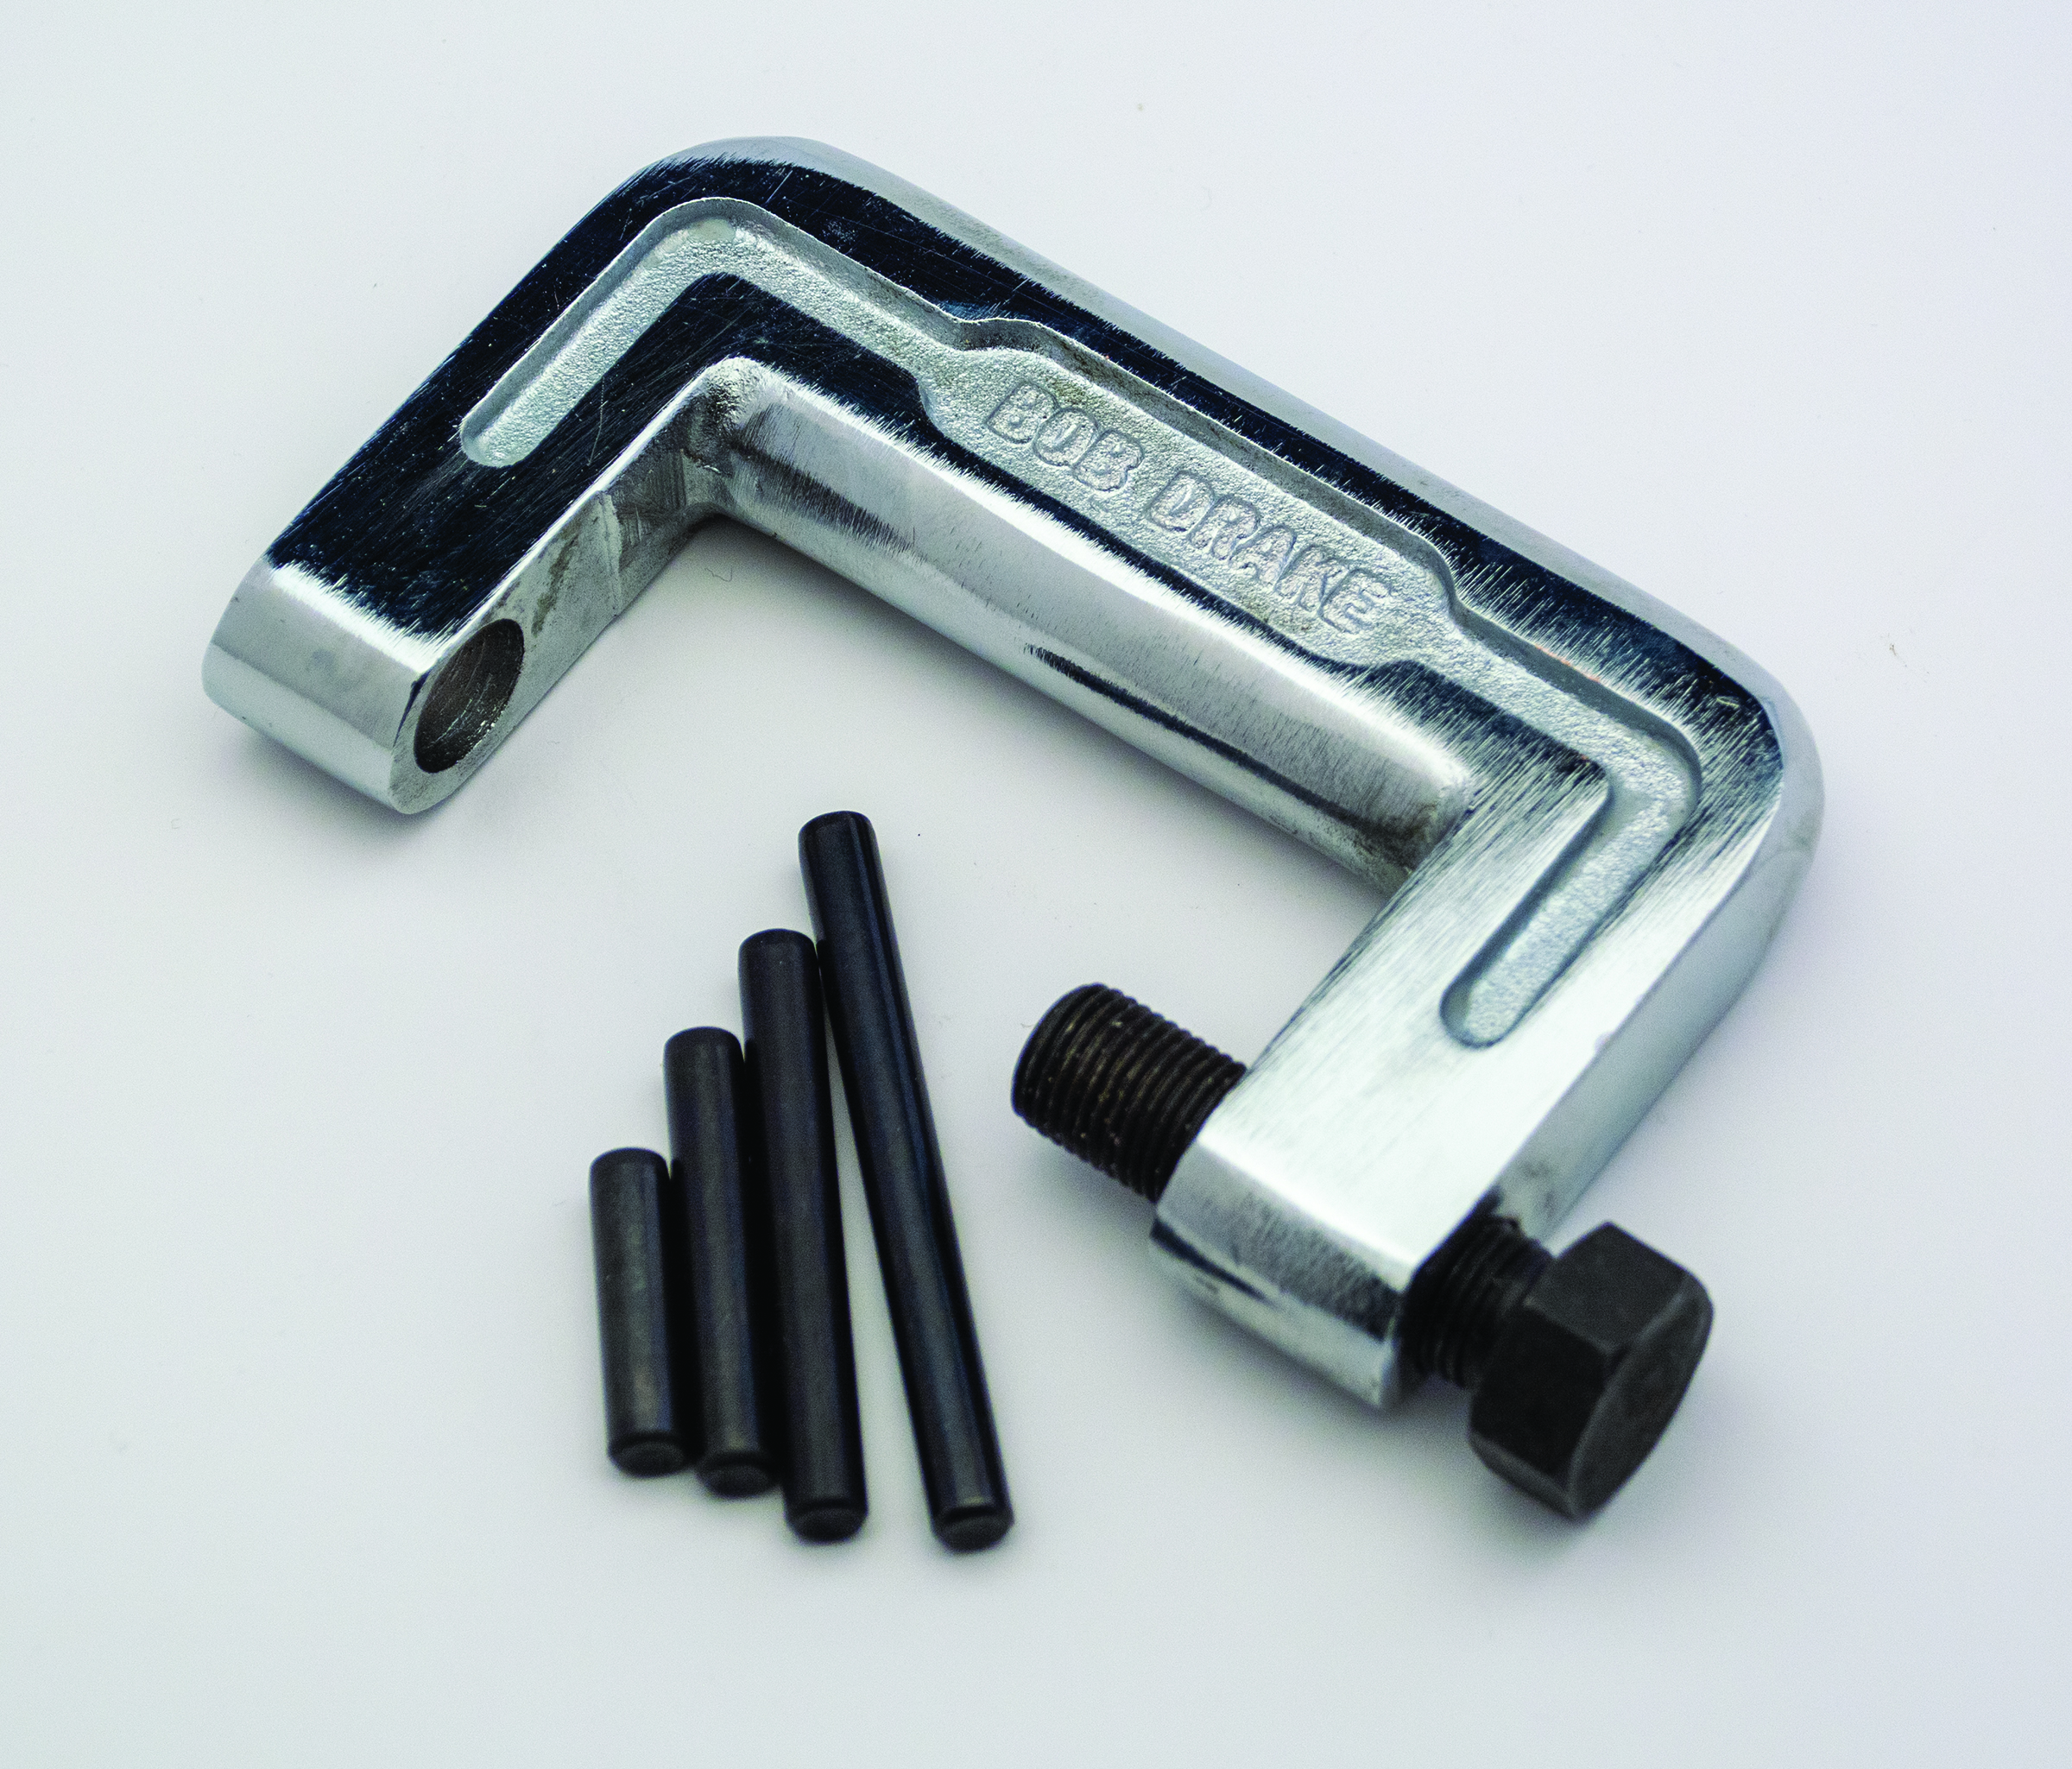
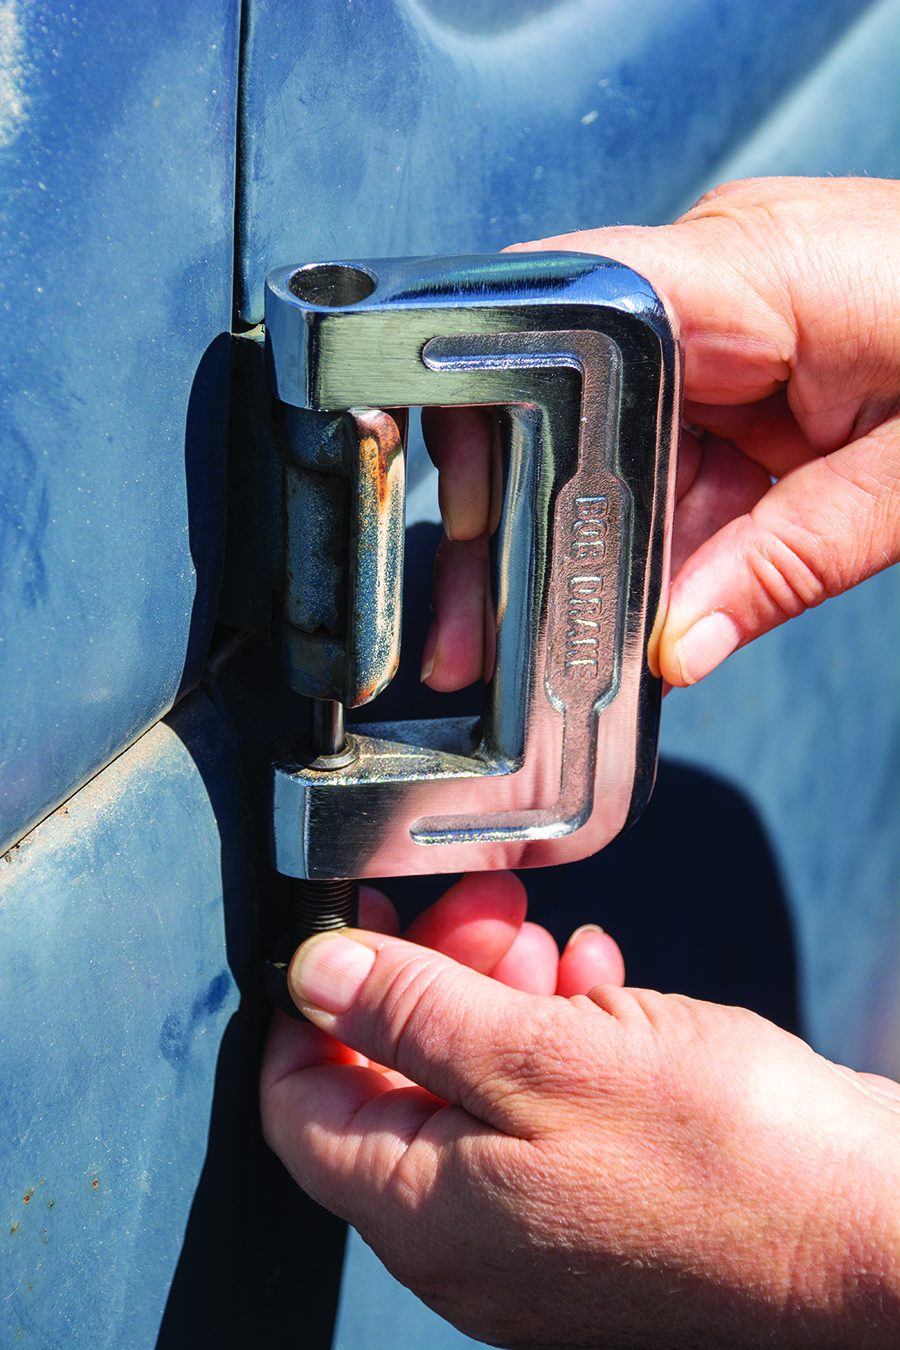
So we have taken one more step toward the completion of our phaeton. We spent the better part of a day to build the press and remove the first pin. After bracing our homebrewed press, subsequent pins were removed in about 15 minutes each. So, we can now remove the doors for bodywork and paint. We managed to do it without creating any structural damage to the car, so we were pleased to have met the challenge. But wait there’s more… of course right after we removed the pins with our homebrewed press a buddy casually mentioned, “You know Bob Drake sells a hinge pin press right?” Well, no, actually we didn’t know but we do now. We have included photos of that press in this story for folks who prefer to save the time of fabricating a press at home. Store-bought or homebrewed it’s still all about being in the garage. MR
SOURCES
Bob Drake
(800) 221-3673
www.bobdrake.com
Harbor Freight
www.harborfreight.com
Miller Welds
www.millerwelds.com


