

F-100 Rust Repair – Filling in the Blanks on this 1959 Ford

By Ron Ceridono   –   Images Courtesy of Izzy’s Metal Fab

F-100 rust repair can be more challenging than most vehicles. For classic truck connoisseurs, rust is the dirtiest word in the English language. The scourge of all things metal, rust can do considerable damage to a vintage vehicle over time. That damage often leads to a common dilemma: how much rust is too much to fix? For Sam Castronova, the decision was easy enough; he wanted this F-100 fixed, so he turned to Izzy Pullings of Izzy’s Metal Fab in Phoenix to reverse the ravages of rust.
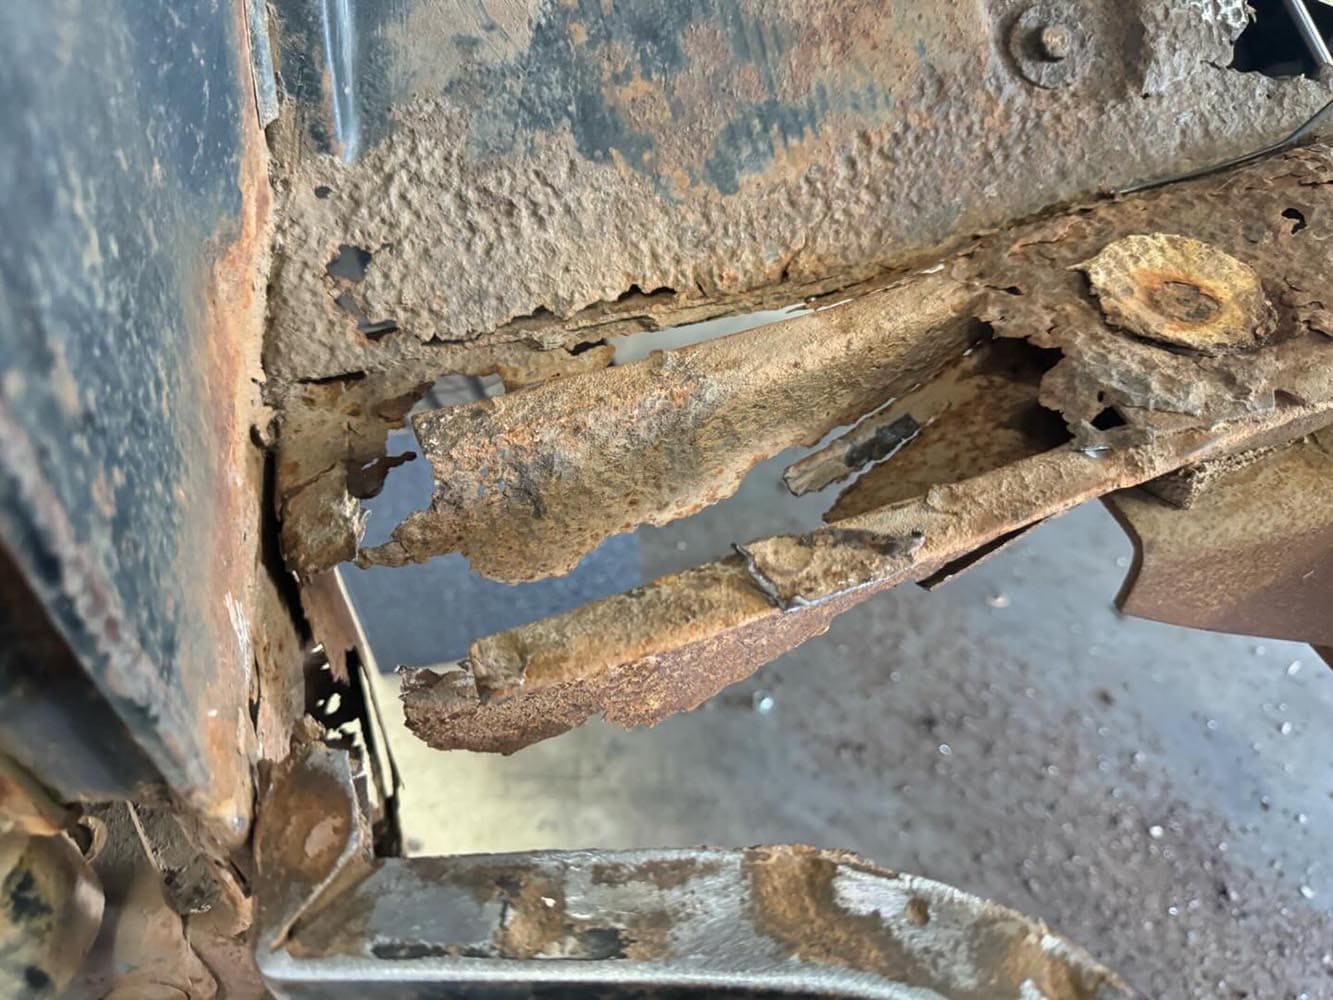
1959 Ford F-100 door post damage
The damage to the floor and door post on the driver’s side was extensive, but there was more below the surface.

Castronova’s 1959 F-100 is a third-generation F-series truck (the first generation was produced from 1948-52, the second series from 1953-56). Introduced in 1957, the third-gen F-Series was produced through 1960. These trucks were “modernized” with a wider cab, front fenders, and a hood that blended into the body. For the first time, two types of pickup boxes were available: the “Flareside“ with separate fenders, or the smooth “Styleside” bed. While the F-100 cabs remained virtually the same during the series production run, there were some styling changes to the front end. 57 F-100s had dual headlights and a plain hood with its centrally located Ford badge; quad headlights and a new hood appeared in 1958; in 1959 there was another new hood with a front air intake that housed Ford lettering; finally for 1960 there was yet another new hood with slots on both sides of the front edge and a mid-mounted Ford emblem along with a redesigned grille and relocated parking lights.
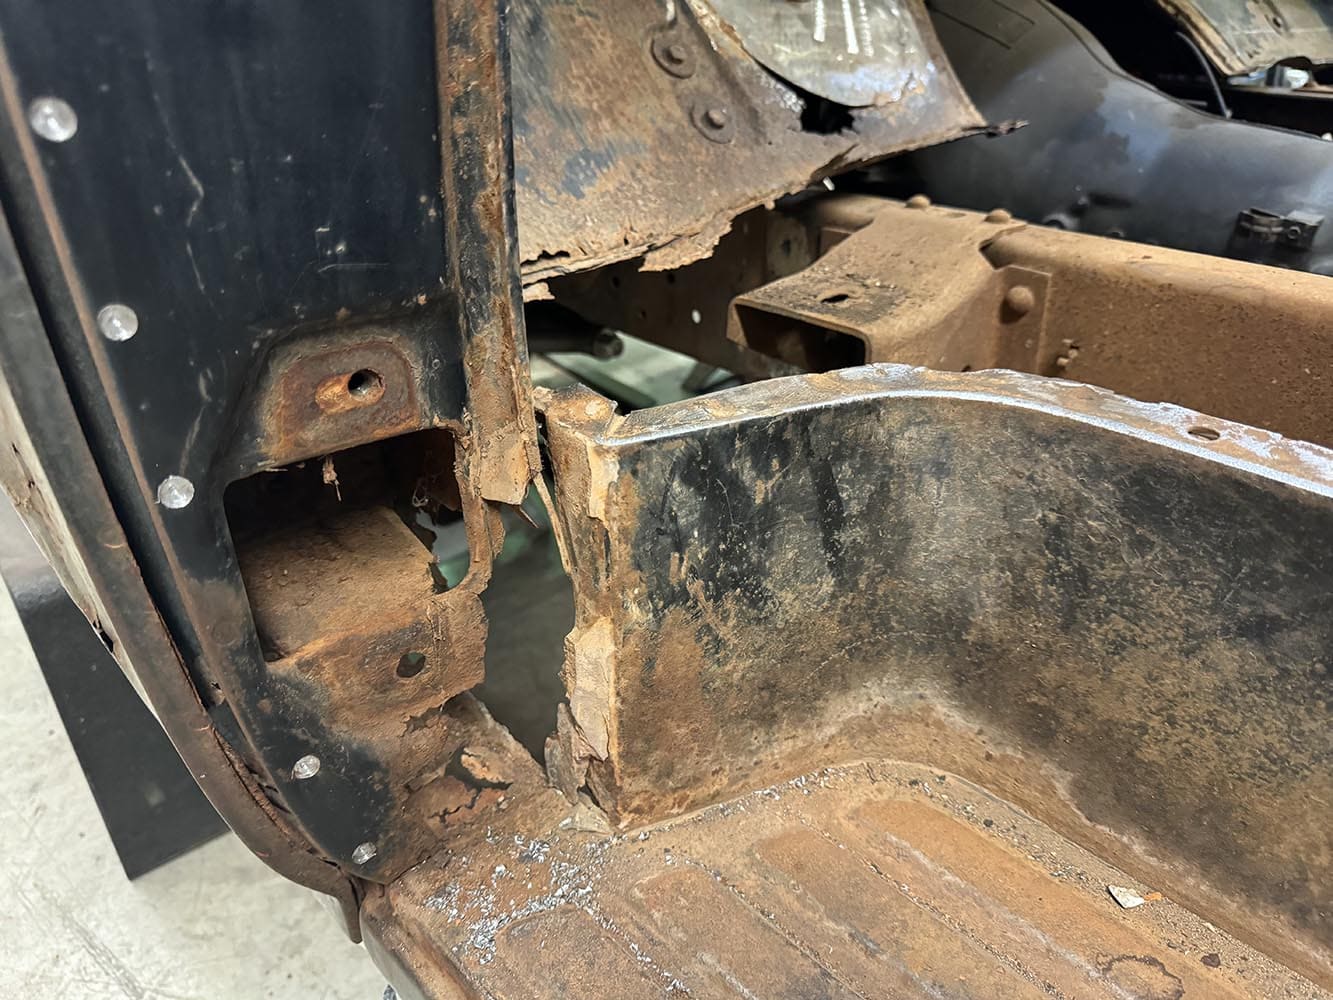
1959 F-100 Front Cab Support Rust Damage
With the floor removed the extent of the damage to the front cab support can be seen, which explains why the cab had to be supported while repairs were made.

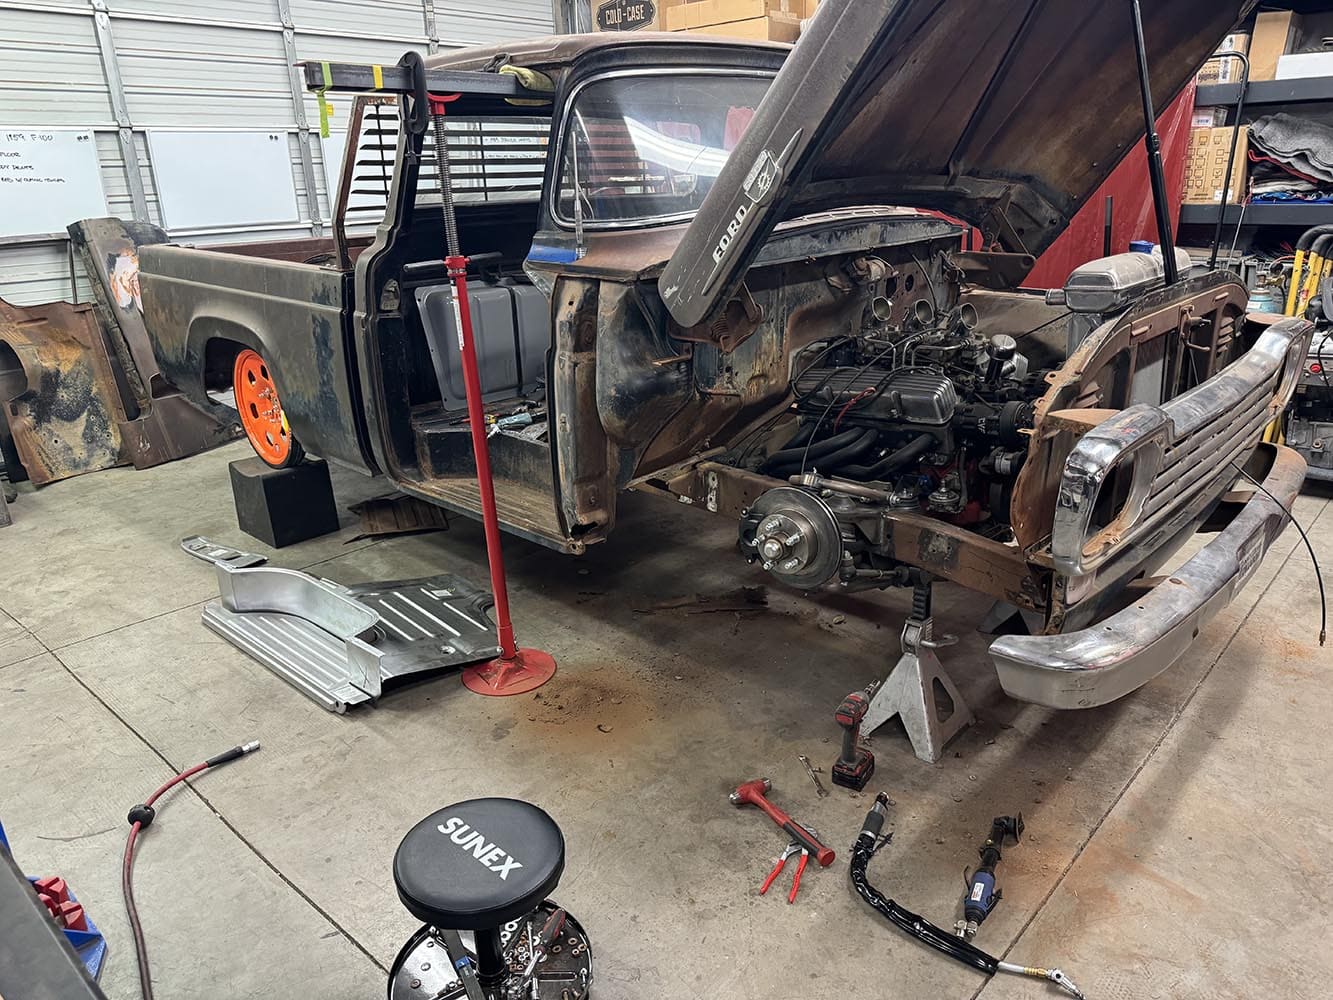
While Castronova’s F-100 was in desperate need of rust repair, the F-100 did have some redeeming qualities. It was equipped with the desirable “big” back window option, the chassis had been updated with an independent front suspension with four bars and airbags in the rear. Under the hood is a small-block Chevy with triple two-barrel carburetors backed by a Turbo 350 automatic transmission. Then there was the truck’s unique history—it had once been an Oklahoma Highway Patrol vehicle of some sort. With all those factors considered, along with Castronova’s appreciation for unusual vehicles, the truck was deemed too cool not to be saved. Luckily, this was not Pullings’ attempt at F-100 rust repair.  It was time to bring the truck back from the brink of extinction.
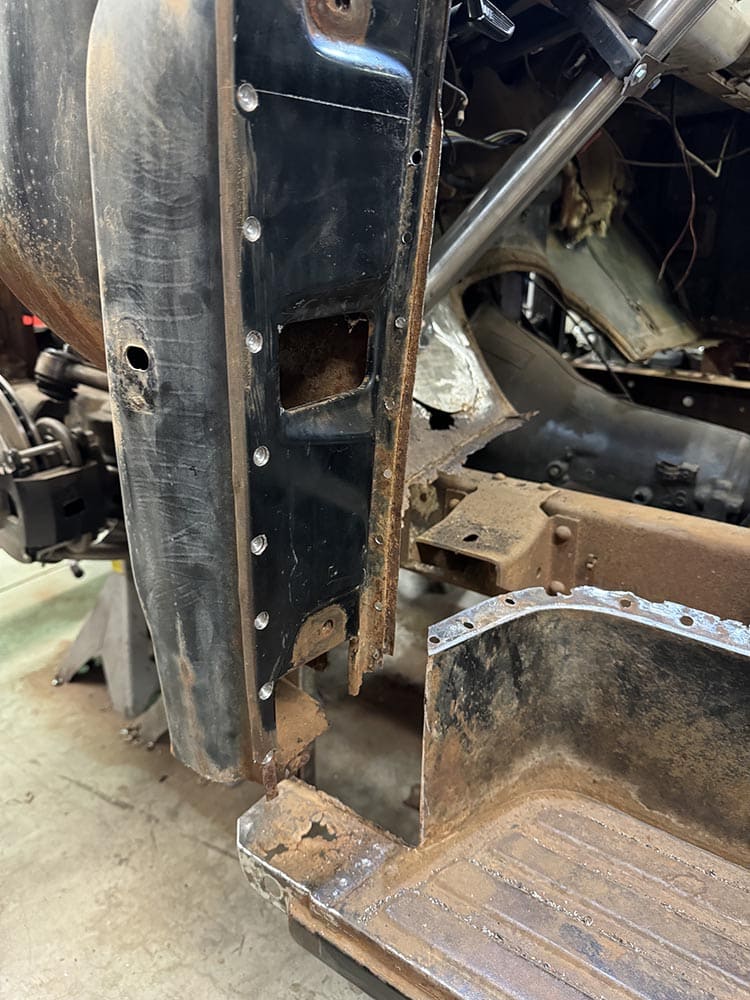
1959 F-100 Rust Repair Step Riser
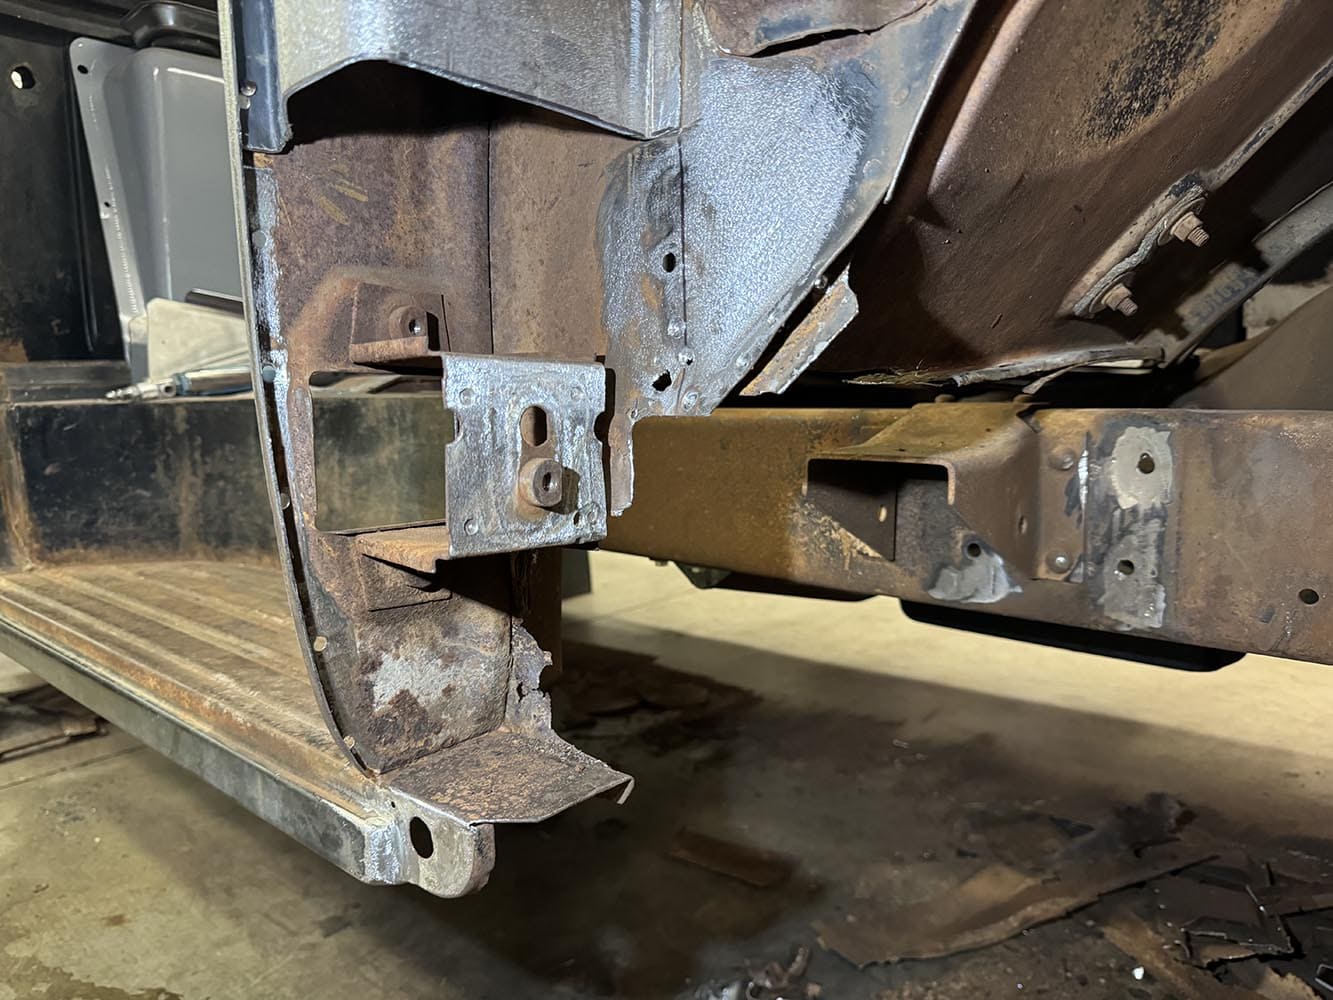
The front of the step riser was completely gone. This panel extends from the front to the rear of the door opening.

Much of what you see here is common in the world of vintage F-100 rust repair. After a quick inspection it was determined that both door posts required repair, the front cab supports would have to be replaced and a new floor would be needed. While the truck was in need of some major repairs  Pullings isn’t easily discouraged and could visualize its potential. An extremely talented craftsman with decades of experience, Pullings took on the project and replaced the corroded sheetmetal with a combination of custom patches and stamped replacements from EMS Automotive. Known for quality sheetmetal components, EMS offers a variety of replacement pieces for third-generation F-100s, all precision-stamped in 18-gauge steel.
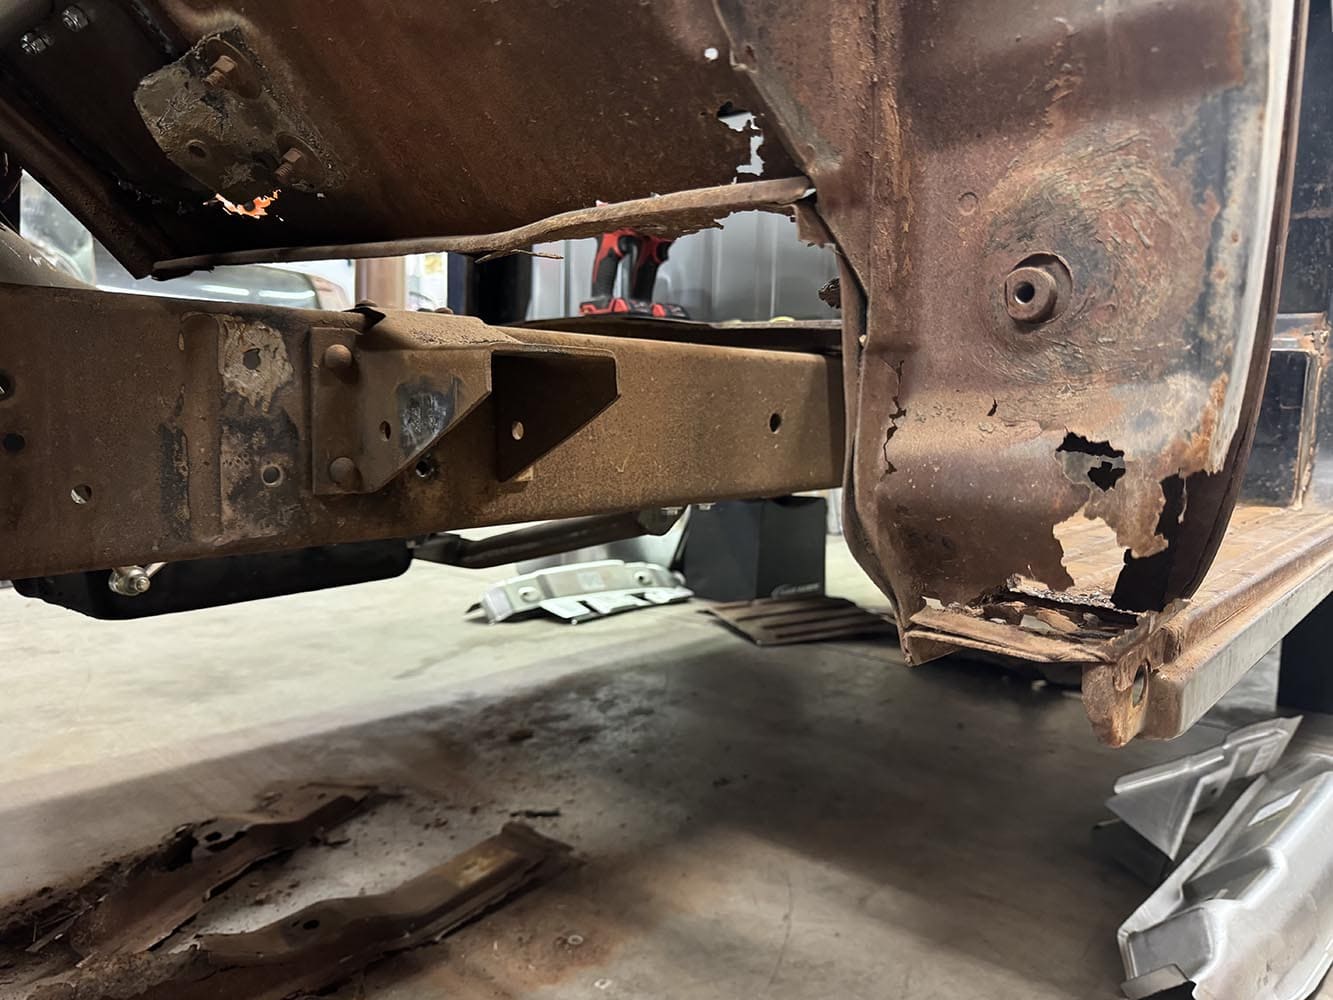
1959 F-100 Rust Repair Step Riser cut away
Here the damaged portion of the step riser has been cut away and the spot welds in the inner door post have been drilled.

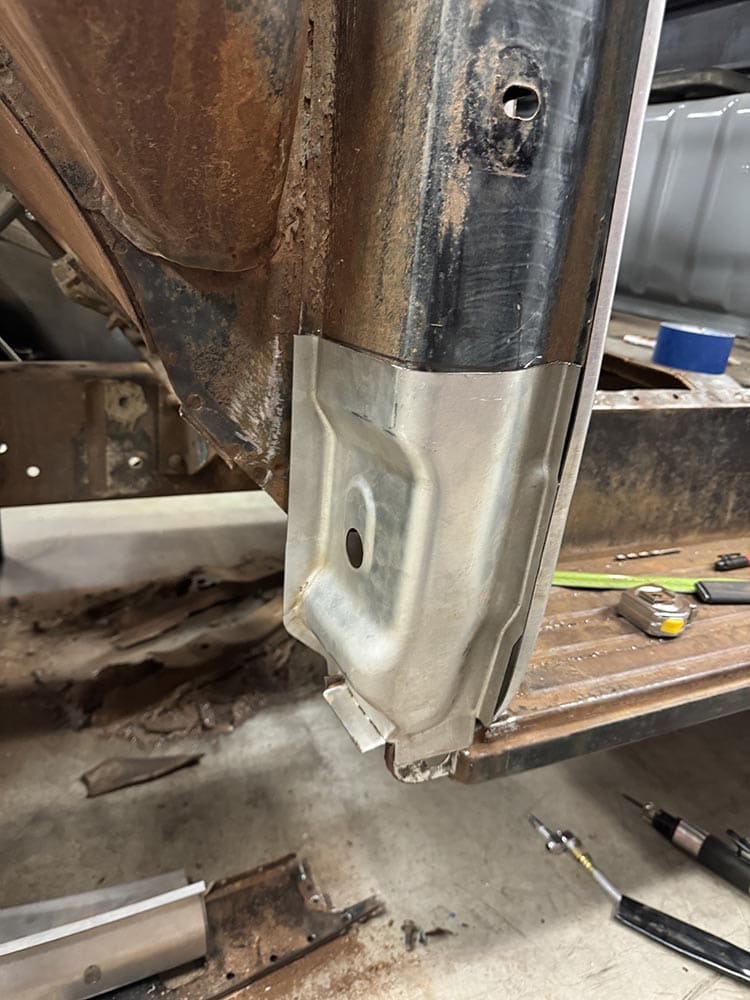
As the truck’s front cab supports were completely destroyed, the body shell had to be held up with a pair of tall stands and a beam through the door openings while repairs were made. To repair the two-piece door post on the left side, Pullings used an inner replacement panel from EMS that extends from the step plate (the running board inside the cab) to just below the upper hinge pocket. The EMS main door post replacement (the front side of the door post) is also a full-length panel. However, because the decision was made to save as much of the original sheetmetal as possible, Pullings elected to shorten the new panel and only replace the lower portion of the damaged door post. In addition, the step plate (the running board hidden by the door) and the step plate riser (the panel that extends from the step plate to the cab floor) needed repair. Again, Pullings used portions of the EMS replacement panels to repair the damaged parts rather than replace them entirely. Fortunately, the rust on the right side wasn’t as severe, with only the main door post requiring repair.
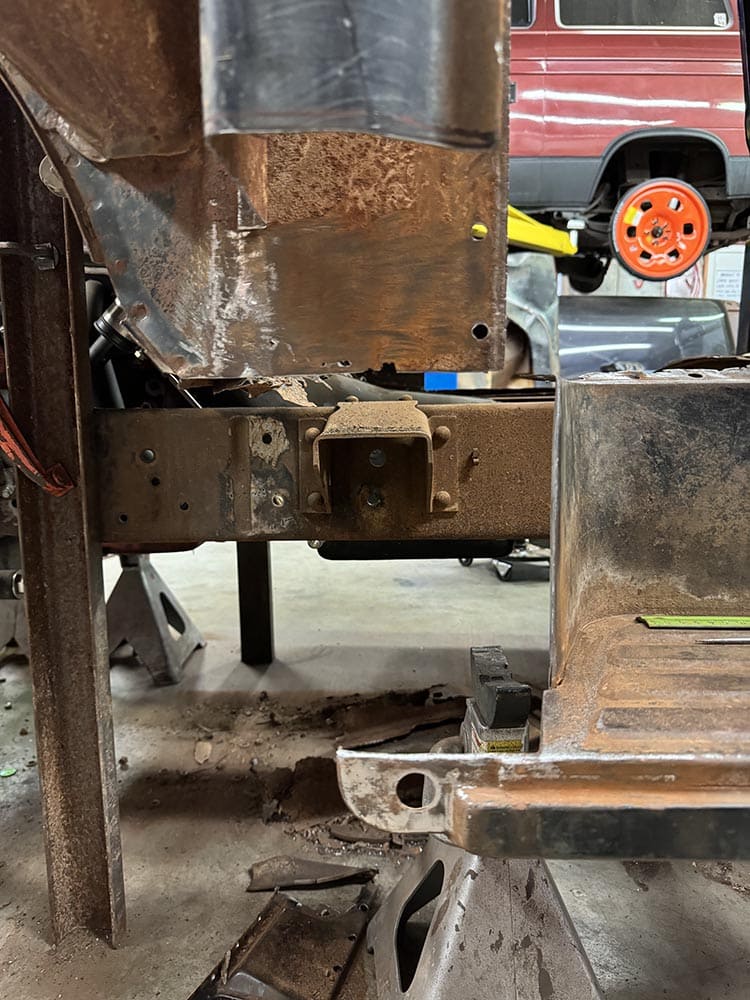
CTP APR 2026 1959 F100 Rust Repair 06
The bottom of the main door post on the left side was rotted at the very bottom. This piece is tied into the cowl and the step plate.

While replacing the damaged sheetmetal was unavoidable, the goal was to make the truck look as though none of the repairs were ever made. To that end, Pullings masterfully blended the new sheetmetal with the old, even in places it would never be seen. Castronova wanted a safe, reliable driver that looked like just what it is, a cool old survivor truck with a colorful past, and that’s just what he got. Dilemma solved.

Check out this story in our digital edition here.
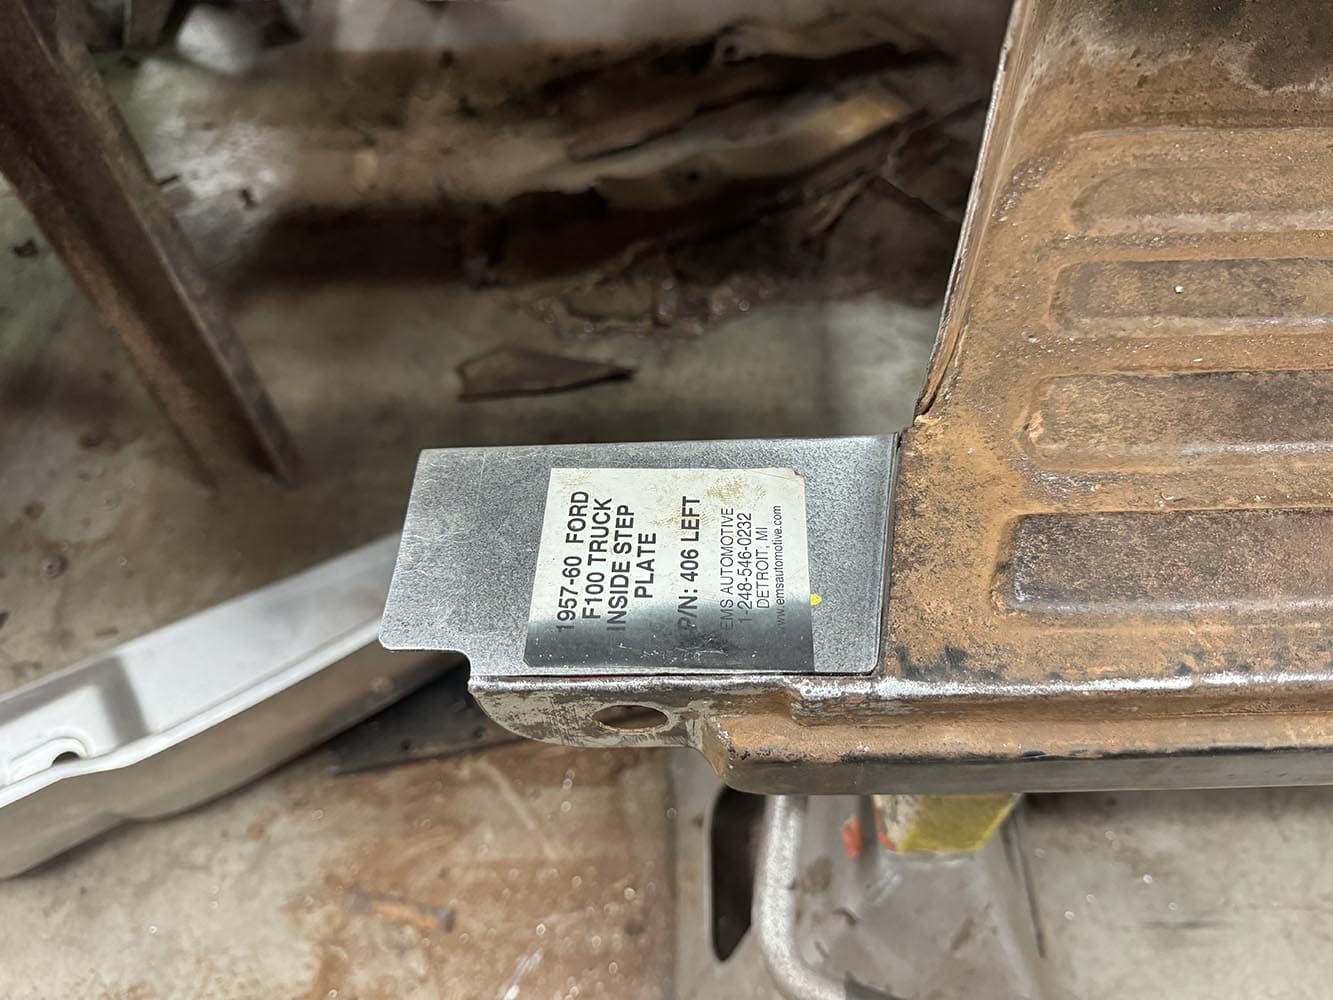
CTP APR 2026 1959 F100 Rust Repair 07
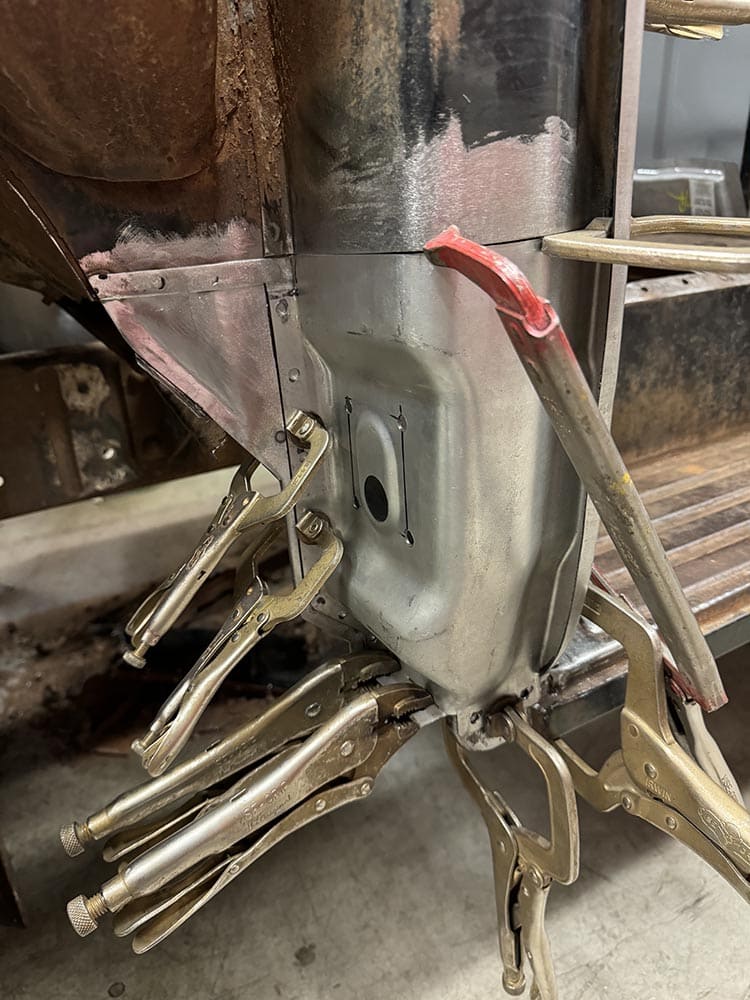
After removing the inner door post, the rotted portion of the main door post was cut off.
CTP APR 2026 1959 F100 Rust Repair 08
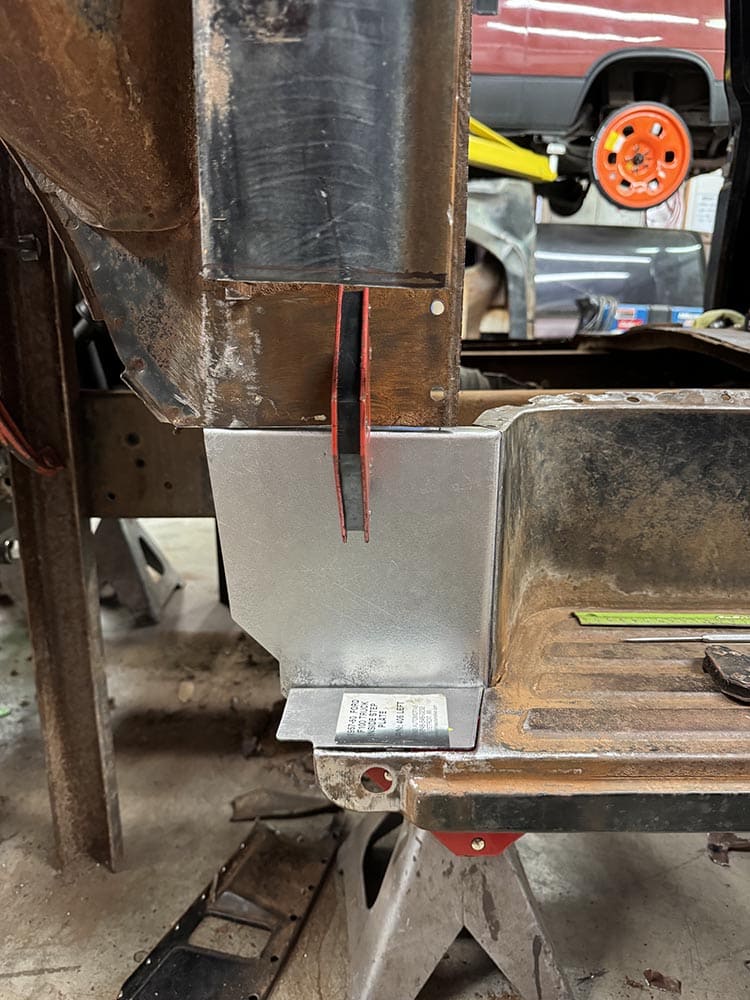
In an effort to retain as much of the original sheetmetal as possible, rather than installing an entirely new piece, the original step plate was repaired with a portion of the EMS replacement.
CTP APR 2026 1959 F100 Rust Repair 09
Like the step plate, the step plate riser was repaired with a portion of an EMS replacement panel.
CTP APR 2026 1959 F100 Rust Repair 10
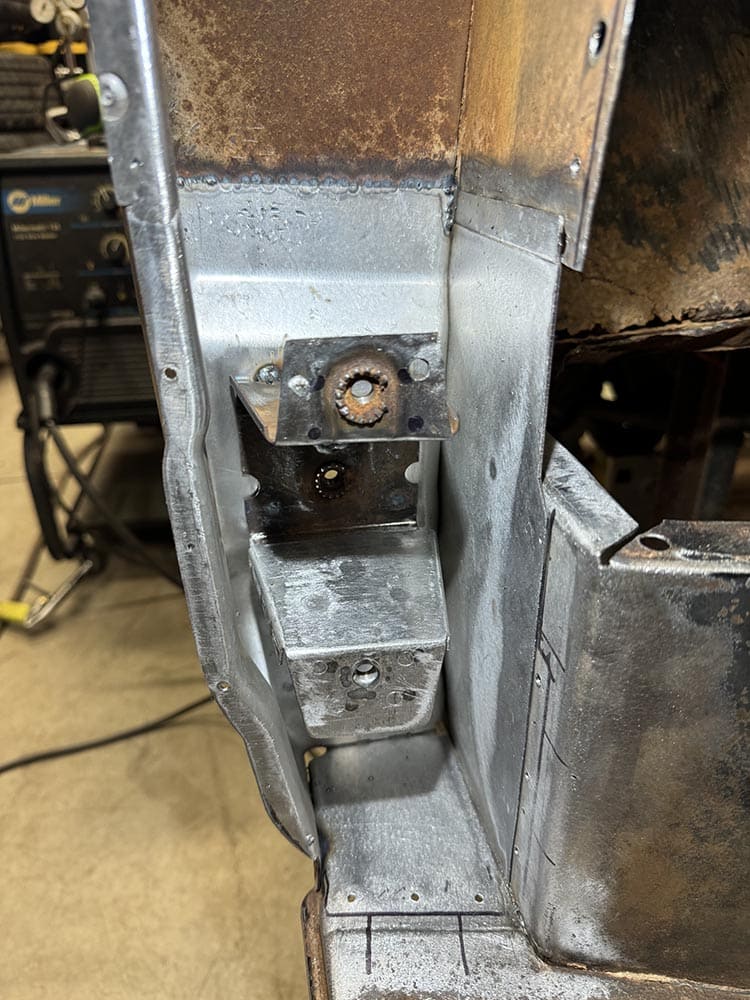
Viewed from the inside, the original lower hinge bracket was put in place. As it was originally, the bracket is spot-welded to the main and inner door posts.
CTP APR 2026 1959 F100 Rust Repair 11
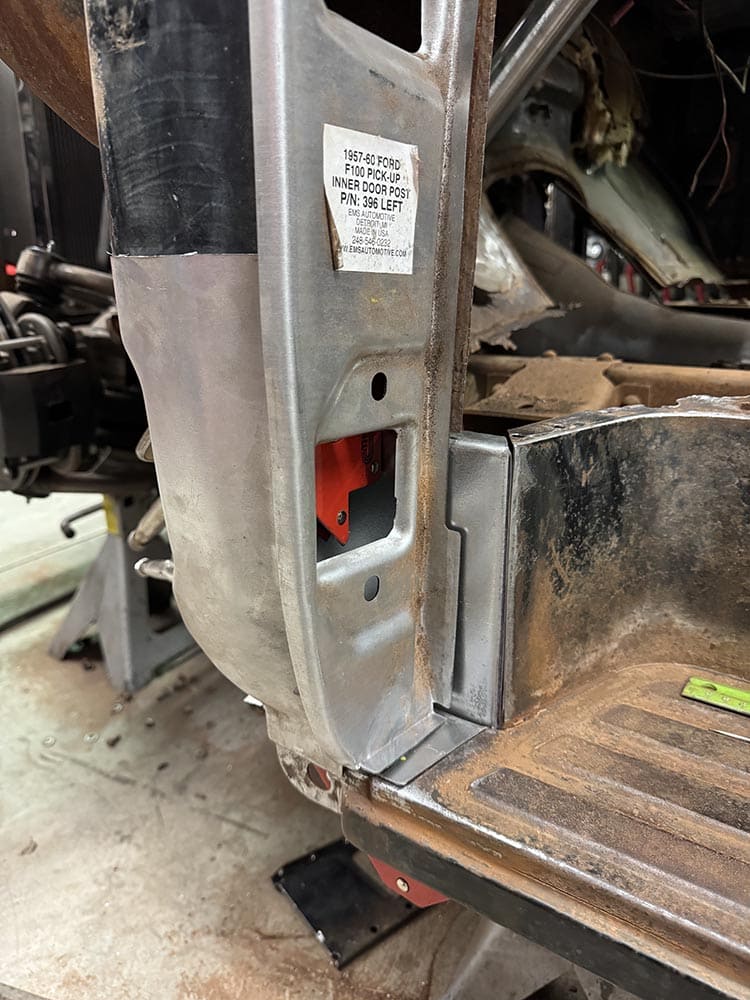
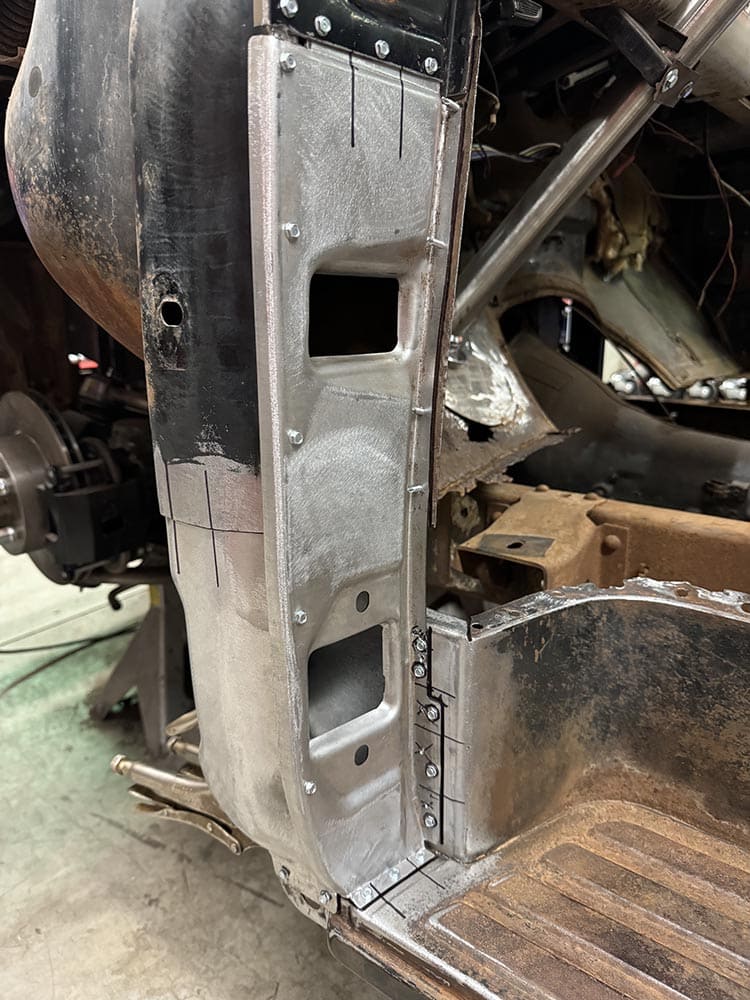
A test-fit of the new inner door post shows how it fits with the step plate, the riser, and overlaps the main door post.
CTP APR 2026 1959 F100 Rust Repair 12
The new inner door post has an offset that fits behind the upper portion of the original sheetmetal after it’s cut (arrow). The gap will be welded and ground smooth.
CTP APR 2026 1959 F100 Rust Repair 13
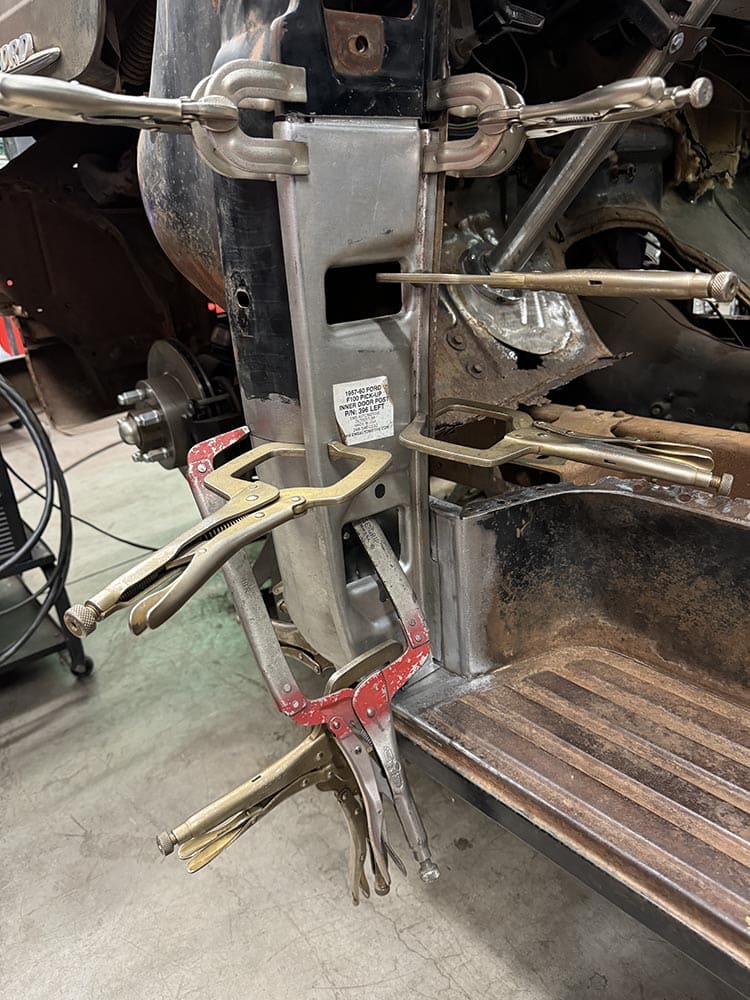
To hold the replacement pieces in place, Pullings prefers sheetmetal screws to Clecos as they pull the panels together for a tighter fit.
CTP APR 2026 1959 F100 Rust Repair 14
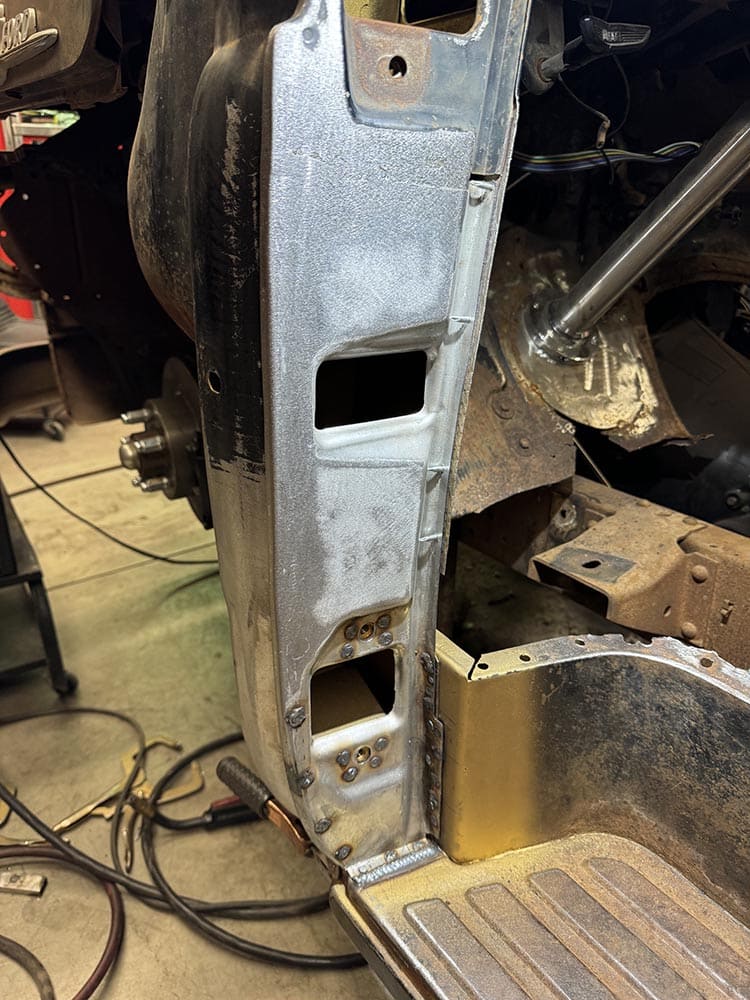
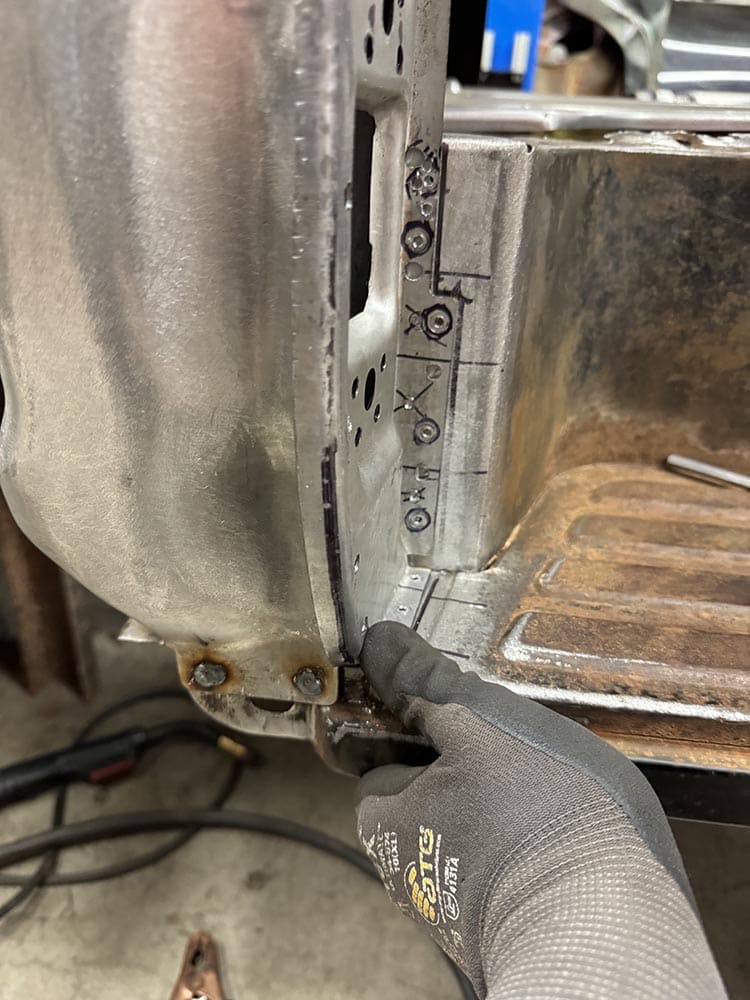
Spot welds are used to secure the new inner door post to the bottom hinge bracket, just as it was done originally.
CTP APR 2026 1959 F100 Rust Repair 15
Pullings began making plug welds securing the inner post to the step late and riser. Note the alignment marks used to ensure that all the pieces are where they should be.
CTP APR 2026 1959 F100 Rust Repair 16
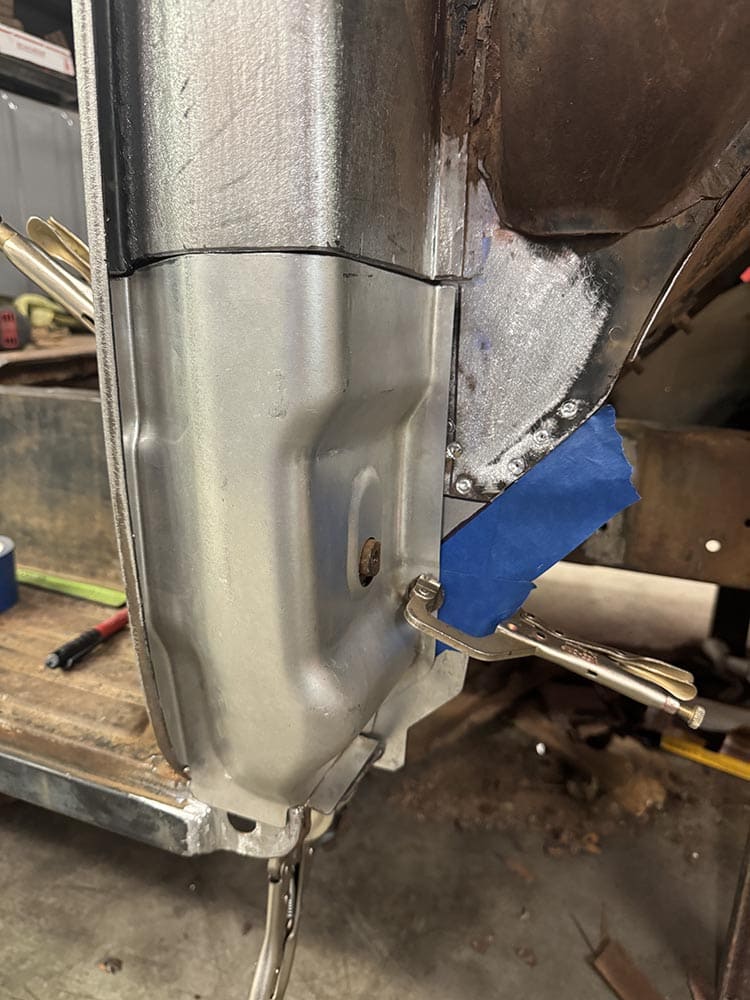
After cutting away the damaged portion of the left main door post, the full-length replacement was trimmed to fit.
CTP APR 2026 1959 F100 Rust Repair 17
With the replacement panel clamped in place, Pullings fabricated the small triangular piece that attaches the door post to the cowl.
CTP APR 2026 1959 F100 Rust Repair 18
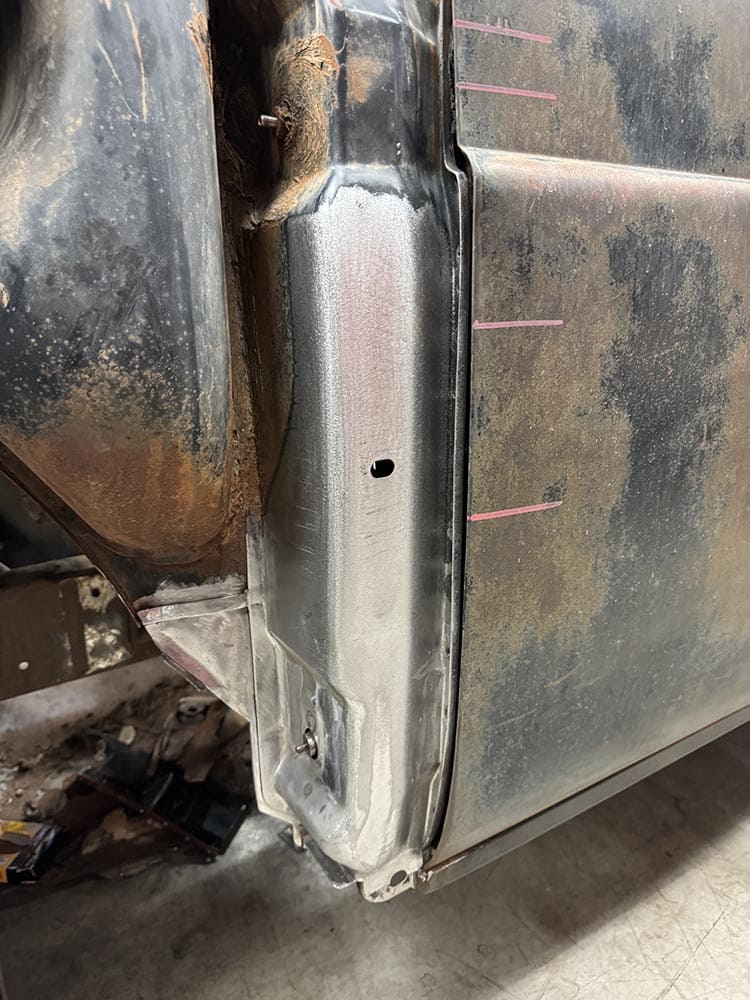
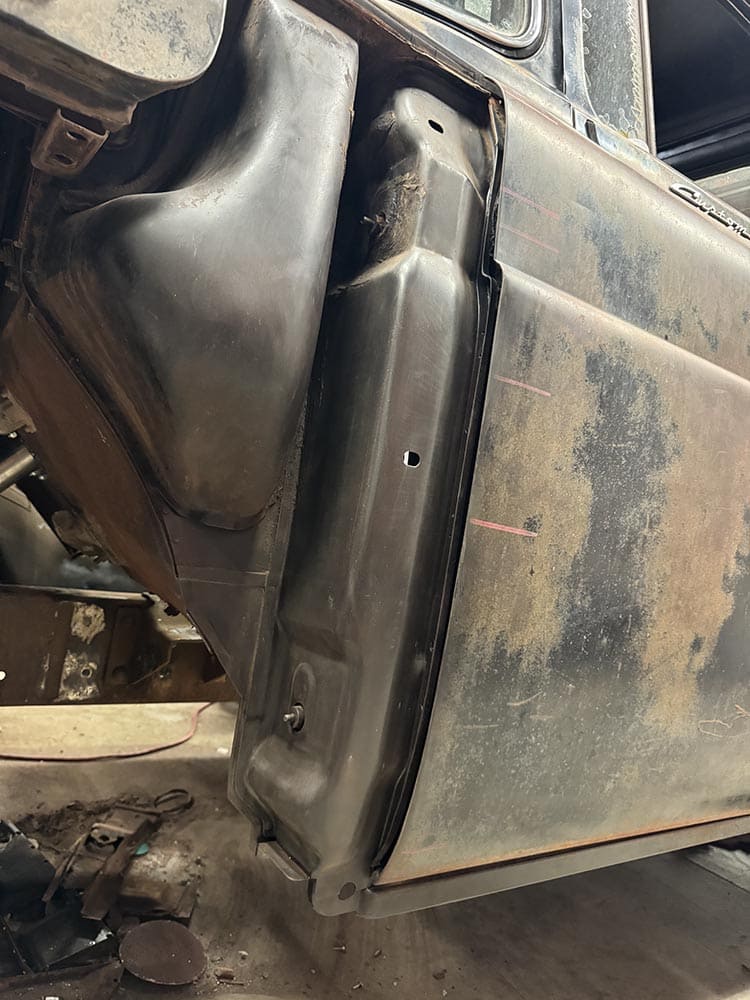
Here is an example of Pullings’ craftsmanship: the complete repair has been ground smooth, making the welds undetectable.
CTP APR 2026 1959 F100 Rust Repair 19
After a coat of flat-black paint a major goal was achieved: the door post looks like it was never repaired.
CTP APR 2026 1959 F100 Rust Repair 20
On the right side of the cab, the damage to the door posts was less severe. Here, the rotted lower portion of the main door post was cut away—the original hinge bracket remained in place.
CTP APR 2026 1959 F100 Rust Repair 21
Again a full-length EMS replacement panel was trimmed to repair just the damaged area of main door post.
CTP APR 2026 1959 F100 Rust Repair 22
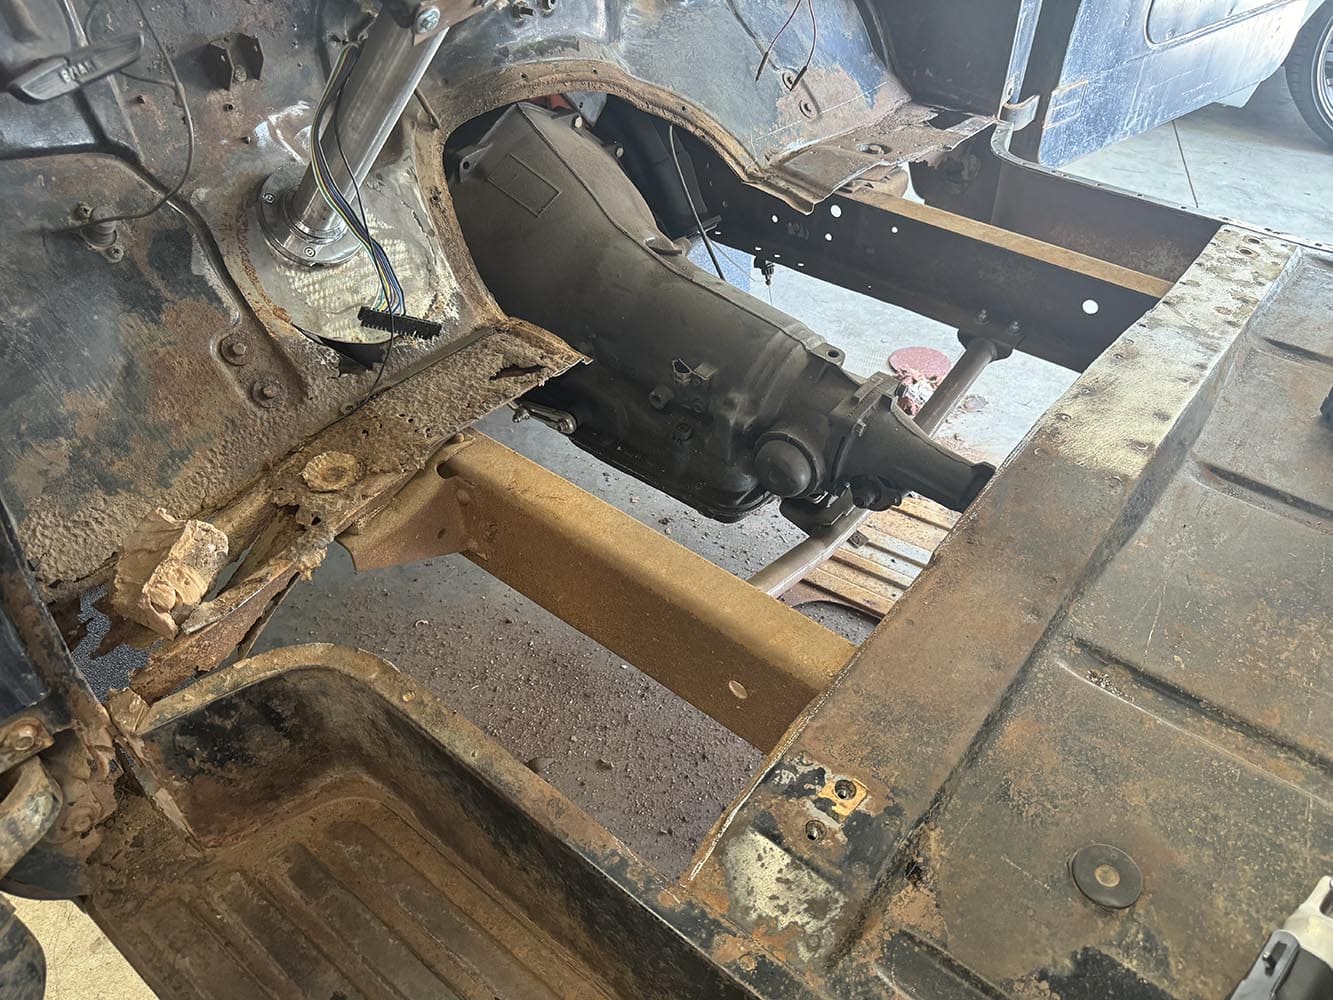
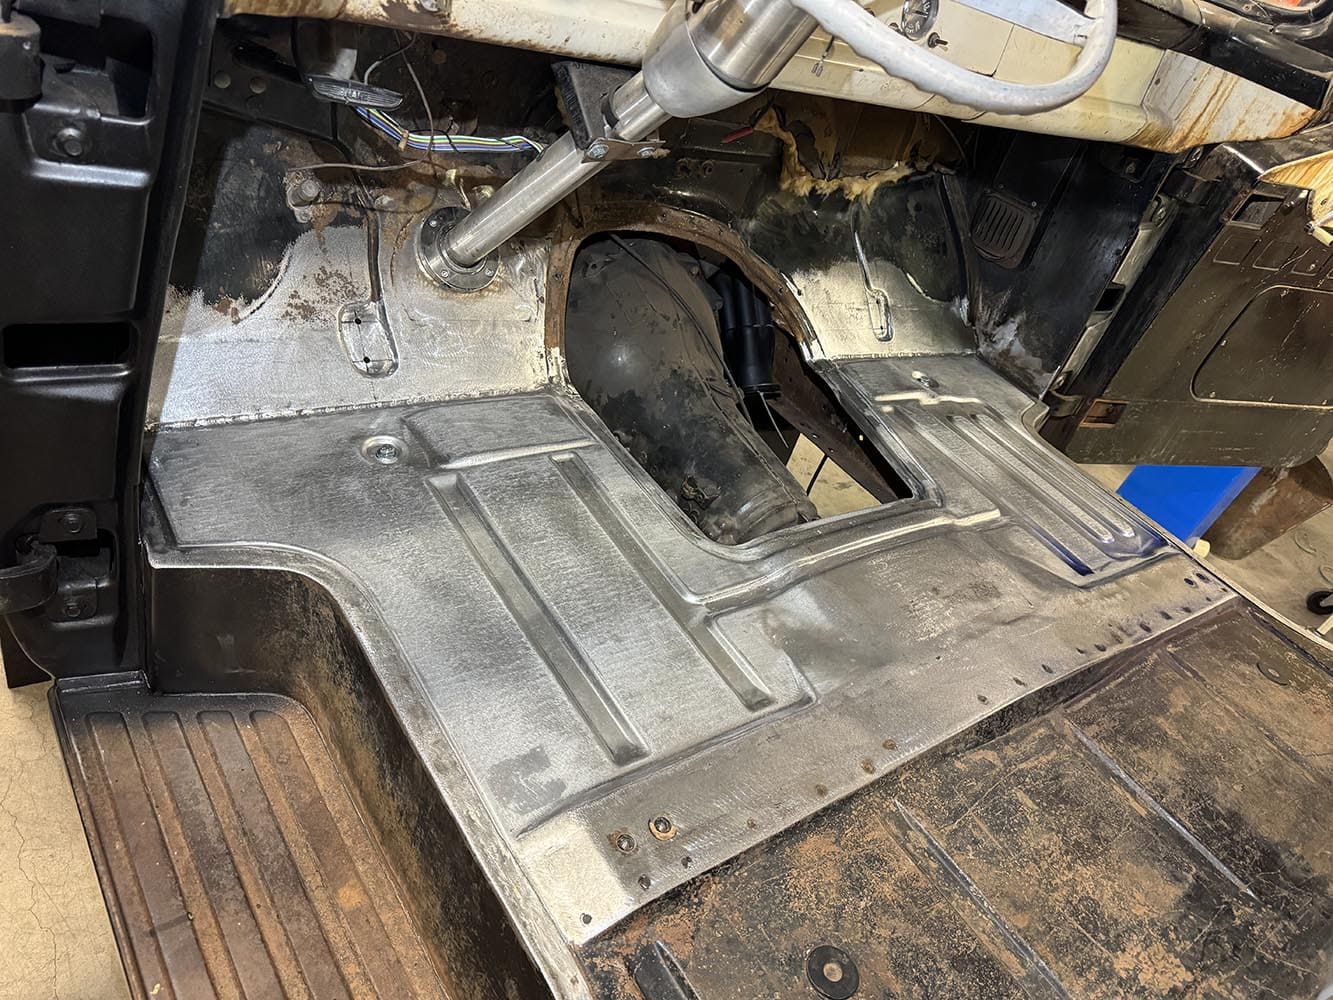
A number of issues were obvious after removing the floor. The toeboards would require repair, the previously patched hole around the steering column would have to be fixed, and a missing bolt in the bellhousing would have to be replaced.
CTP APR 2026 1959 F100 Rust Repair 23
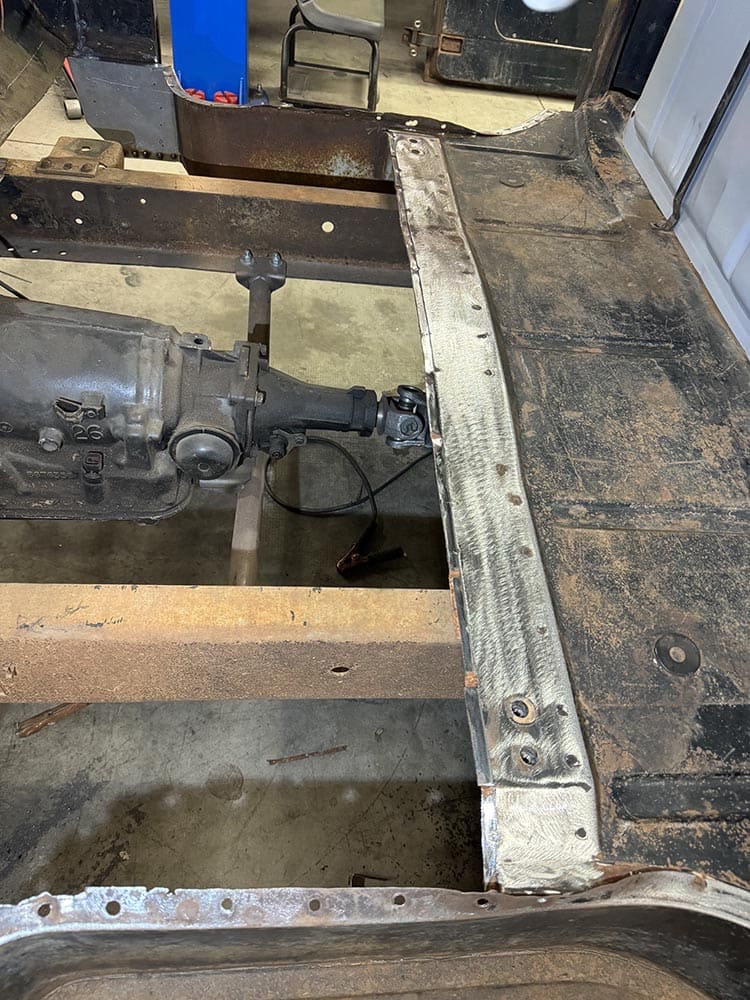
A support for the floor runs the width of the cab, the replacement floorpans overlap this piece and are welded to it.
CTP APR 2026 1959 F100 Rust Repair 24
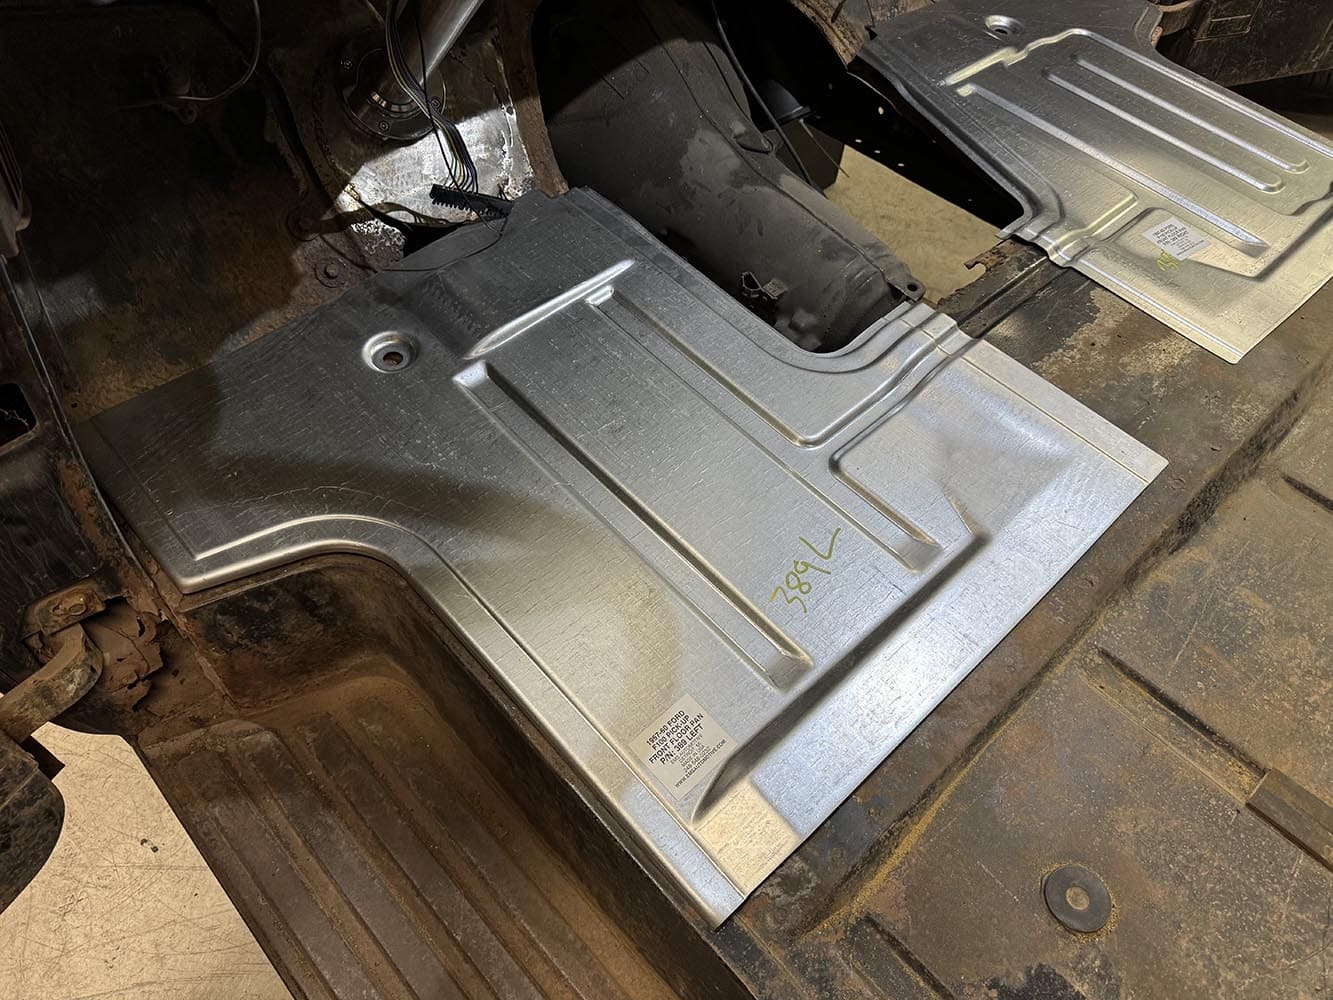
The EMS replacement floorpans are two-piece, which leaves a gap in the center. This is not normally a problem as the area isn’t prone to rust. However, in this case, it had been notched for some reason, so the section was removed.
CTP APR 2026 1959 F100 Rust Repair 25
Even though no one will ever see it, Pullings made the floorpan appear to be one piece by fabricating a new centersection and welding all three pieces together.
CTP APR 2026 1959 F100 Rust Repair 26
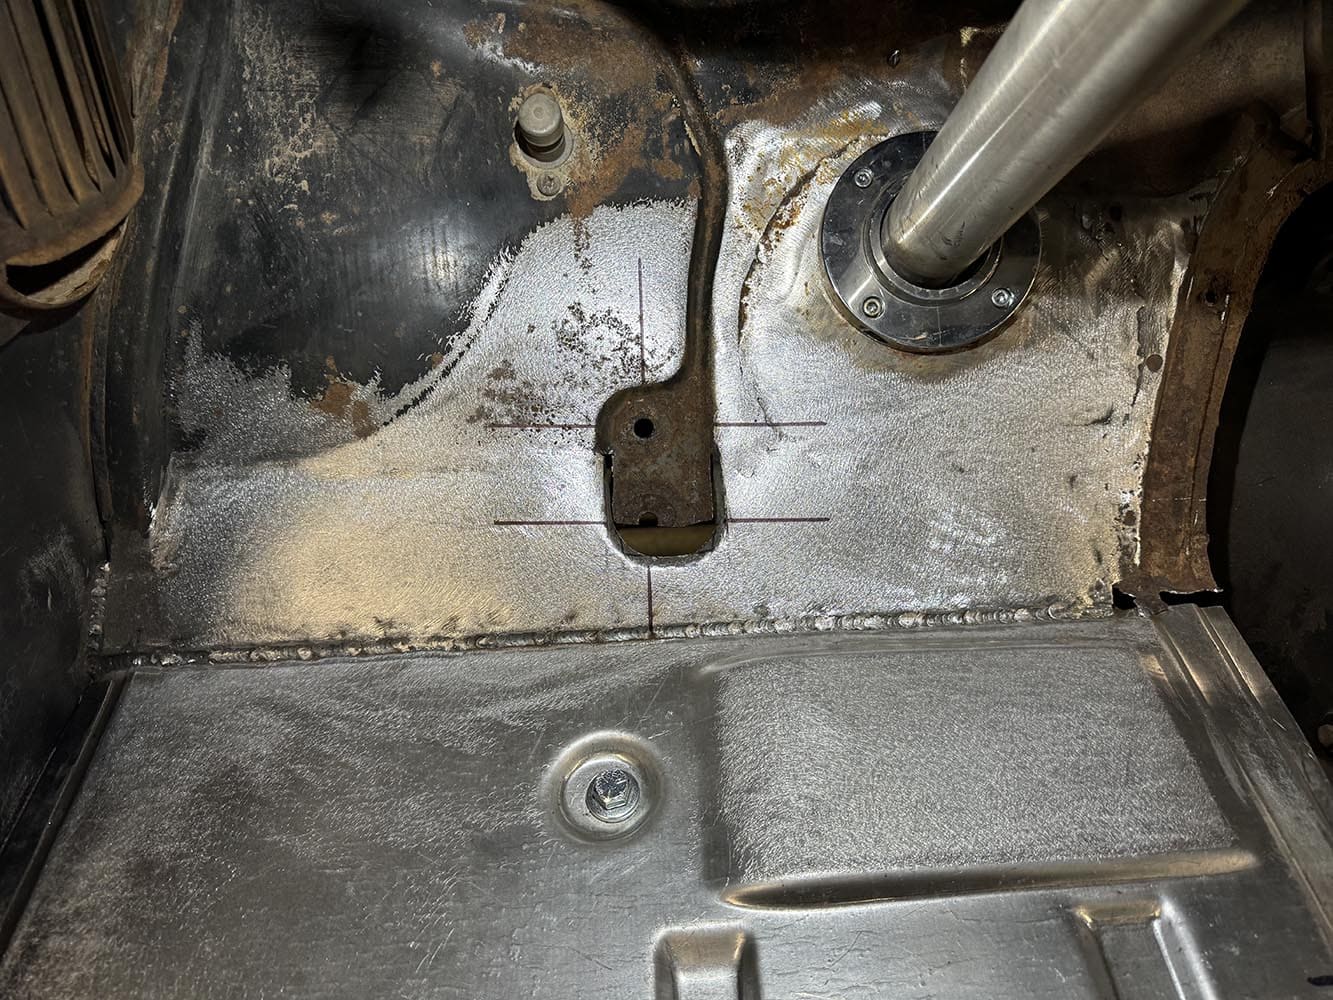
On the left side the new floorpan was welded to the toeboard where the two meet. The hole below the steering column was patched and ground smooth.
CTP APR 2026 1959 F100 Rust Repair 27
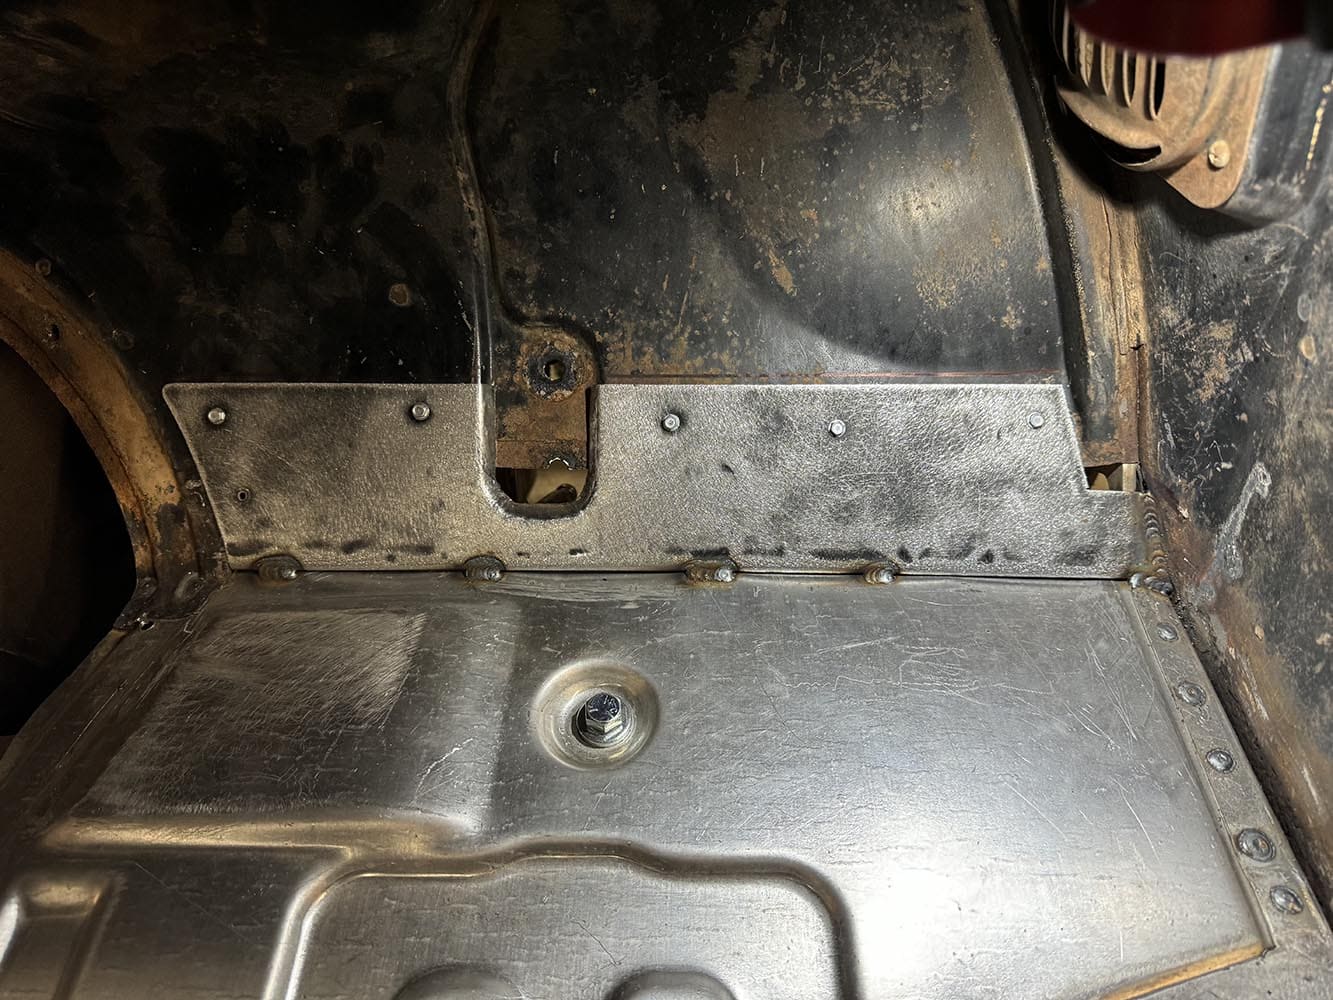
On the right side the toeboard required repair so Pullings fabricated a patch. Here it’s screwed in place at the top and tack-welded to the floorpan at the bottom to be welded later. Note the plug welds that secure the floorpan to the step panel extension.
CTP APR 2026 1959 F100 Rust Repair 28
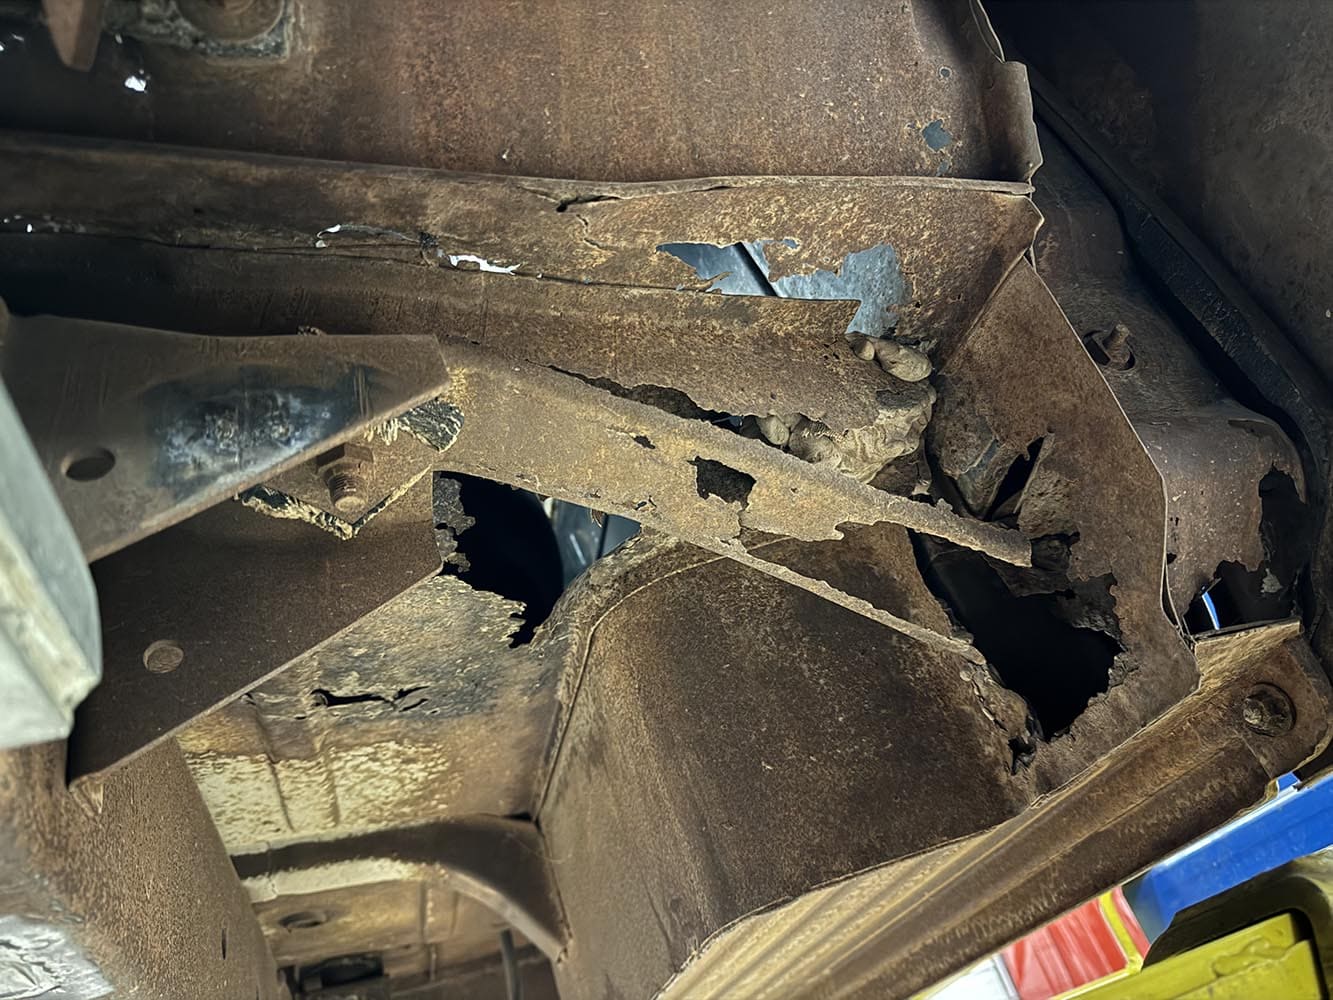
From below, the damage to the left front cab support is obvious and severe. The support on both sides of the truck was replaced.
CTP APR 2026 1959 F100 Rust Repair 29
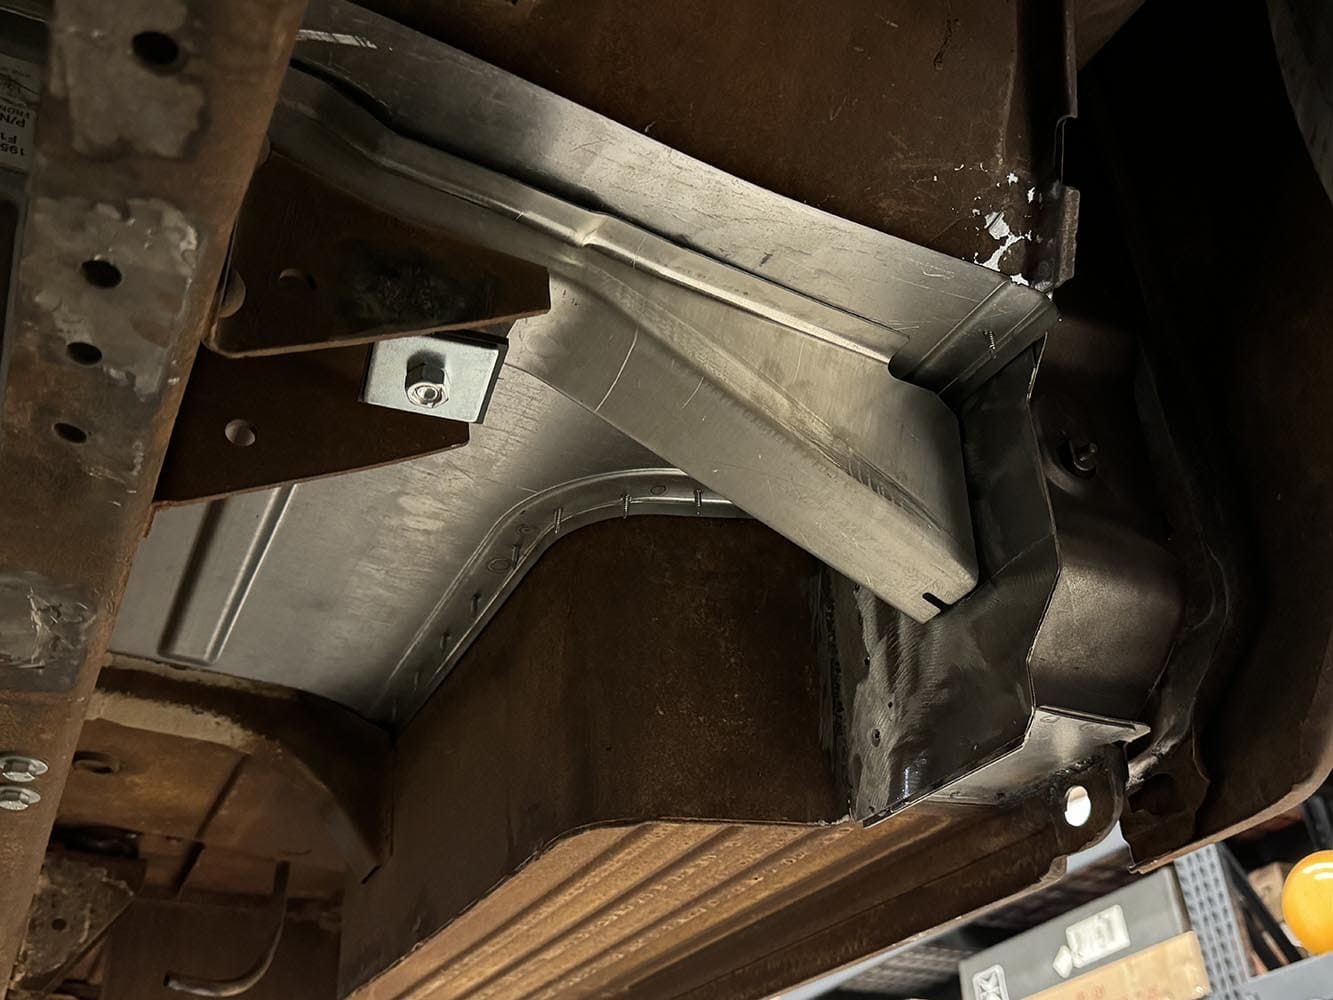
The new cab supports not only make the floor solid they renew the structural integrity of the cab, something that had been lacking for some time.
CTP APR 2026 1959 F100 Rust Repair 30
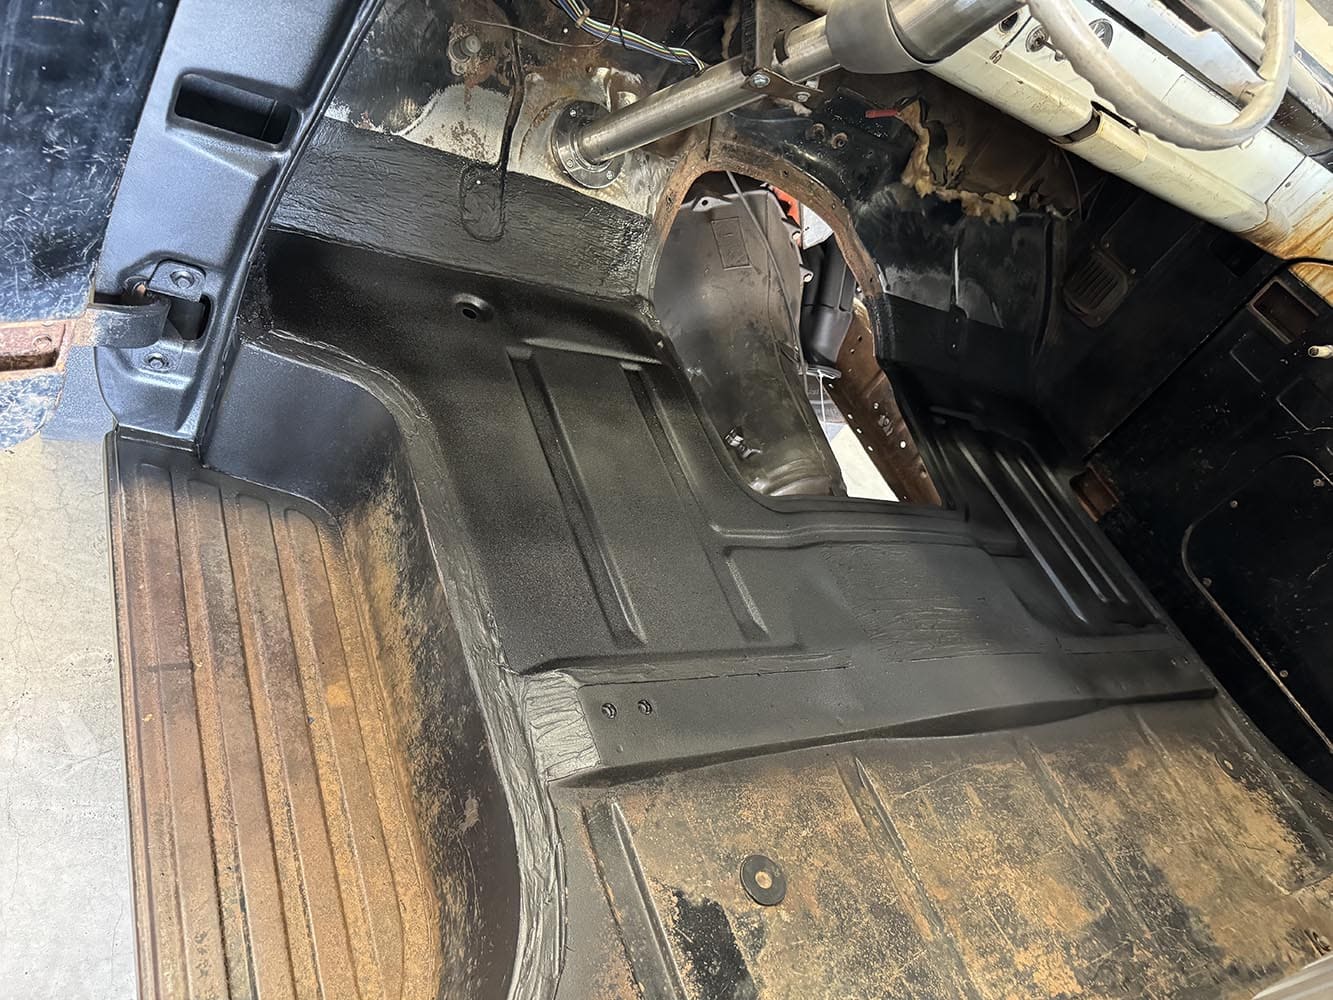
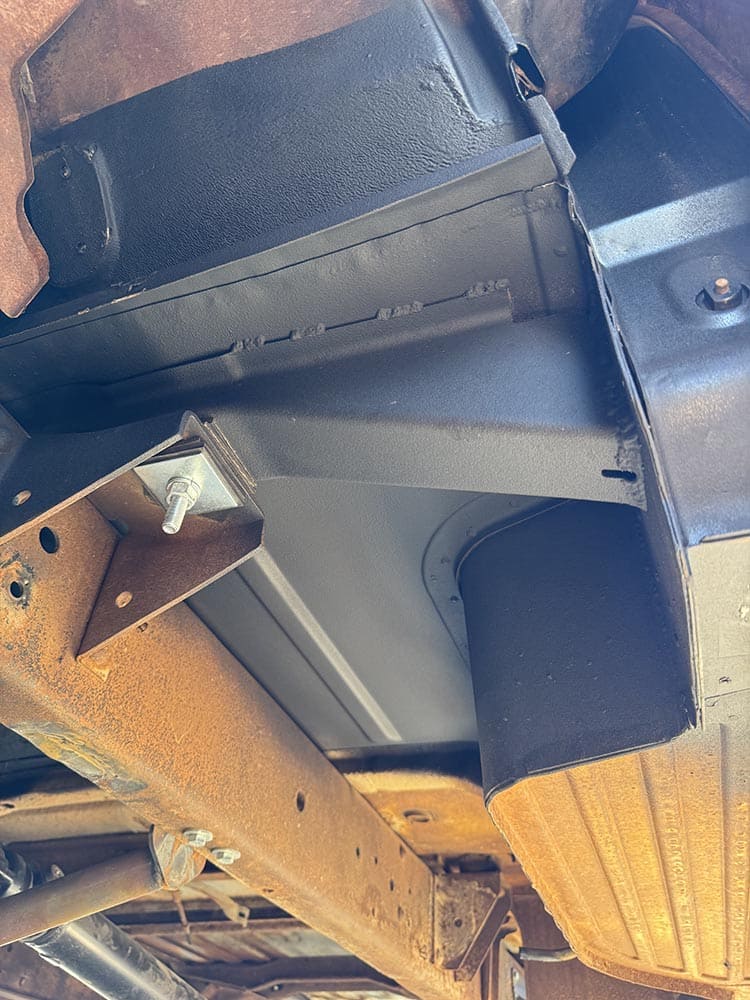
After welding the cab supports to the floor and cowl, they were given a coat of flat-black paint to match the other repairs.


ITGM Source Box Heading

izzys metal fab Web Sourcesems automotive Web Sources

- Advertisement -

Related Articles

Search Our Site