Back in February of 2022, we introduced you to Flaming River’s direct bolt-in 1967-72 C10 cradle-mount rack-and-pinion kit that we installed in a 1969 SWB … with overwhelming results (ease of installation topped by vastly improved steering response/driveability). So, when the opportunity arose to test out their recently released cradle kit for the 1973-87 Chevy/GMC (PN FR318NC), we jumped at it and quickly began searching for a suitable steering swap candidate.
Well, it didn’t take long before Richard Garcia’s 1979 Stepside was brought to our attention. Not only was it in need of a new tilt column, but the factory power steering was worn out as well. Perfect.
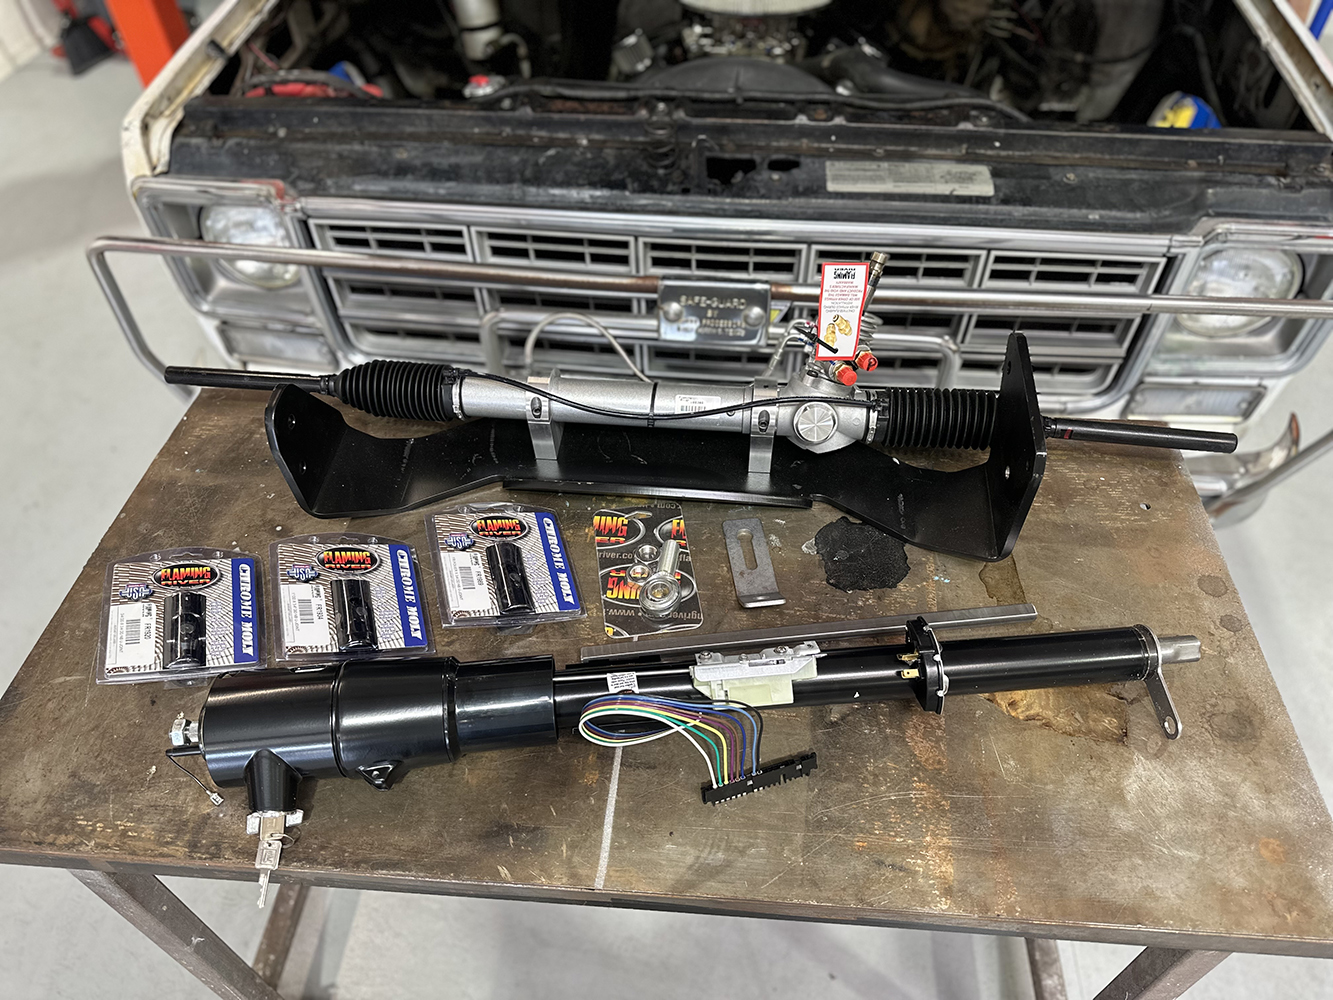
The whole kit and kaboodle: Flaming River’s 1973-87 Chevy/GMC C10 rack-and-pinion conversion kit (PN FR318RC) teamed with their GM-keyed 1973-87 Chevy/GMC C10 tilt steering column kit (PN FR30106-48BK) ready to be installed in Richard Garcia’s 1979 Stepside!
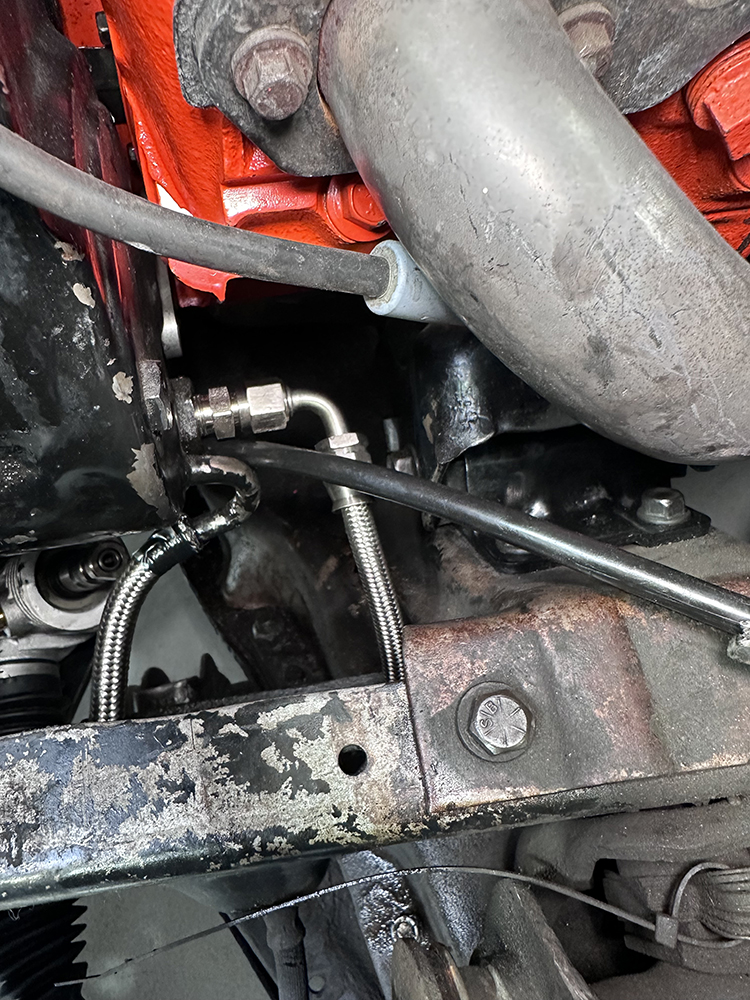
Now, while Flaming River’s “complete” kit includes everything necessary for the installation—one-piece 3/8-inch plate steel cradle mount, Flaming River’s front-steer power rack, U-joints/intermediate shaft with support bearing, and Type 2 pump with pulley, bracket, and reservoir (a free hose kit available at the time of install … check Flaming River’s site for current offer/availability)— Garcia wanted to retain his original power steering pump, so we opted not to take advantage of that upgrade … which would ultimately prove to bite us in the butt (more on that later).
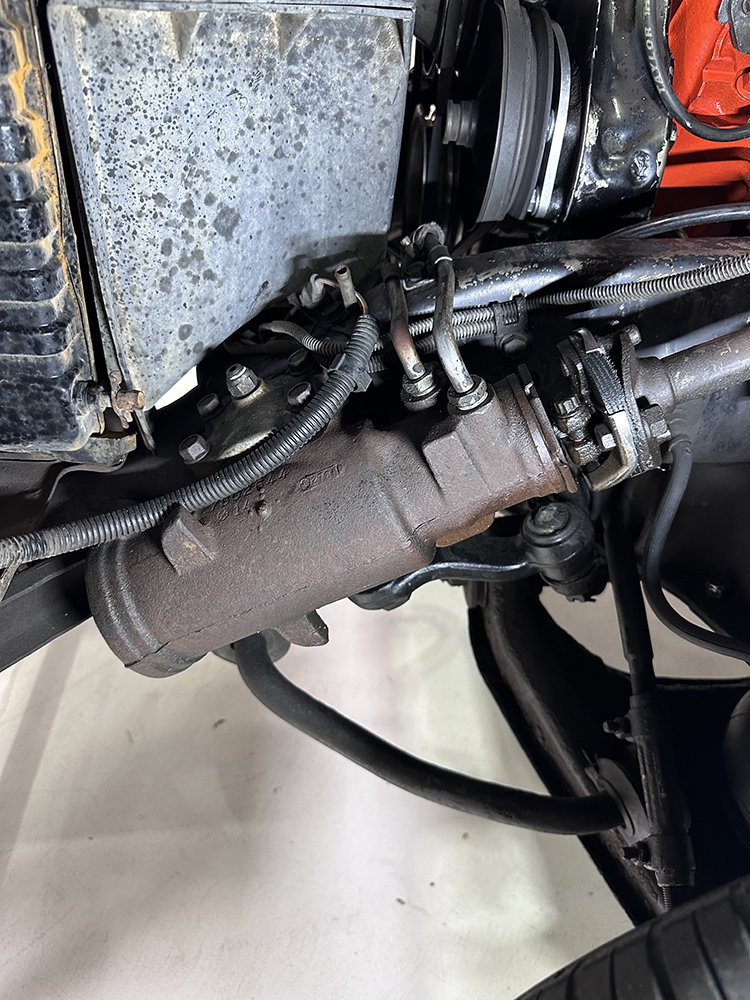
Starting from the bottom and working our way up into the cab, the Chevy’s OE power steering was worn out. Instead of simply replacing the box, rag joint, and all, Garcia agreed to let us use his Stepside to try out Flaming River’s cradle-mount rack-and-pinion kit.
We did, however, utilize Flaming River’s other direct bolt-in for the ’73-87s: their GM-keyed (PN FR30106-48BK) column-shift tilt steering column to swap out Garcia’s broken factory column. A day was then scheduled at In The Garage Media’s Tech Center with Clampdown Competition’s Ryan Manson … and the rest, is in this story!
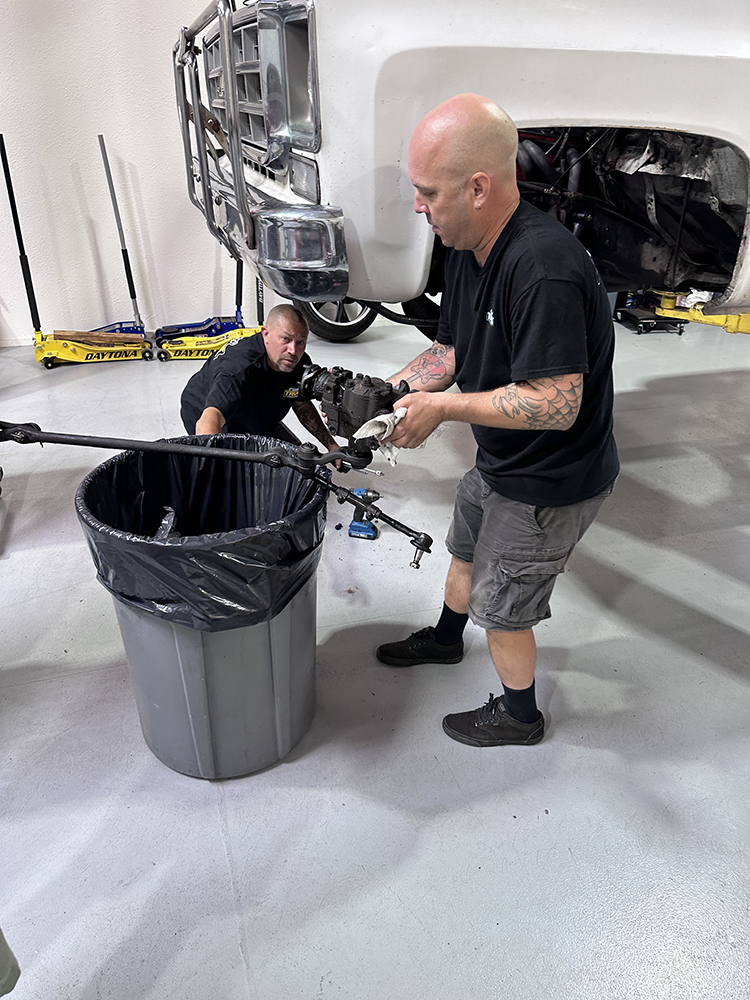
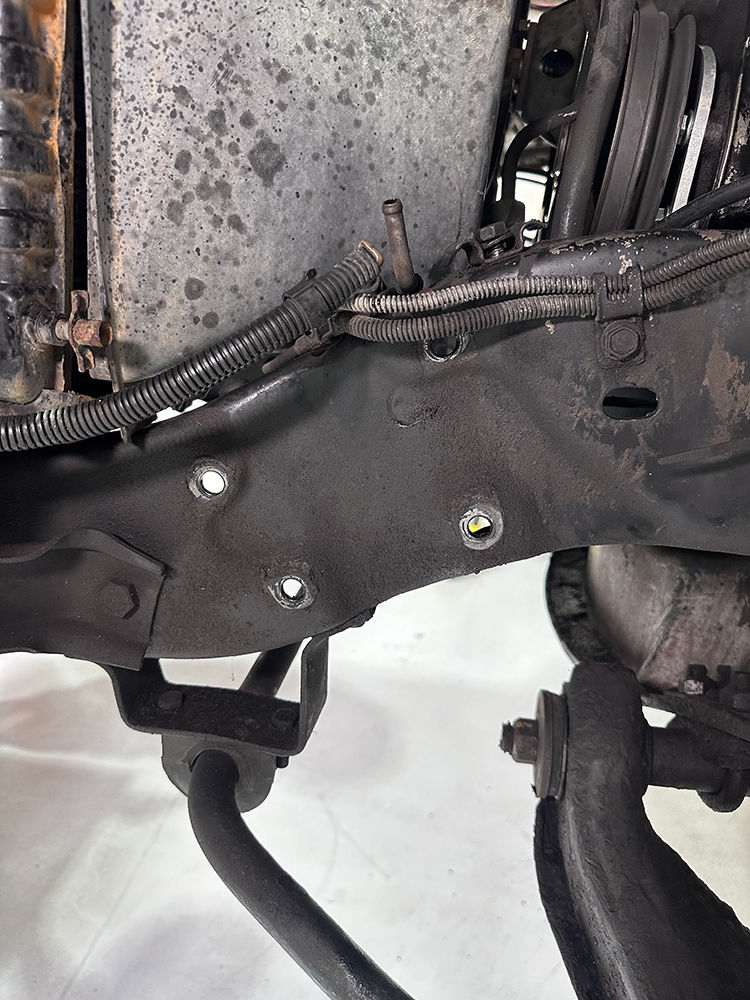
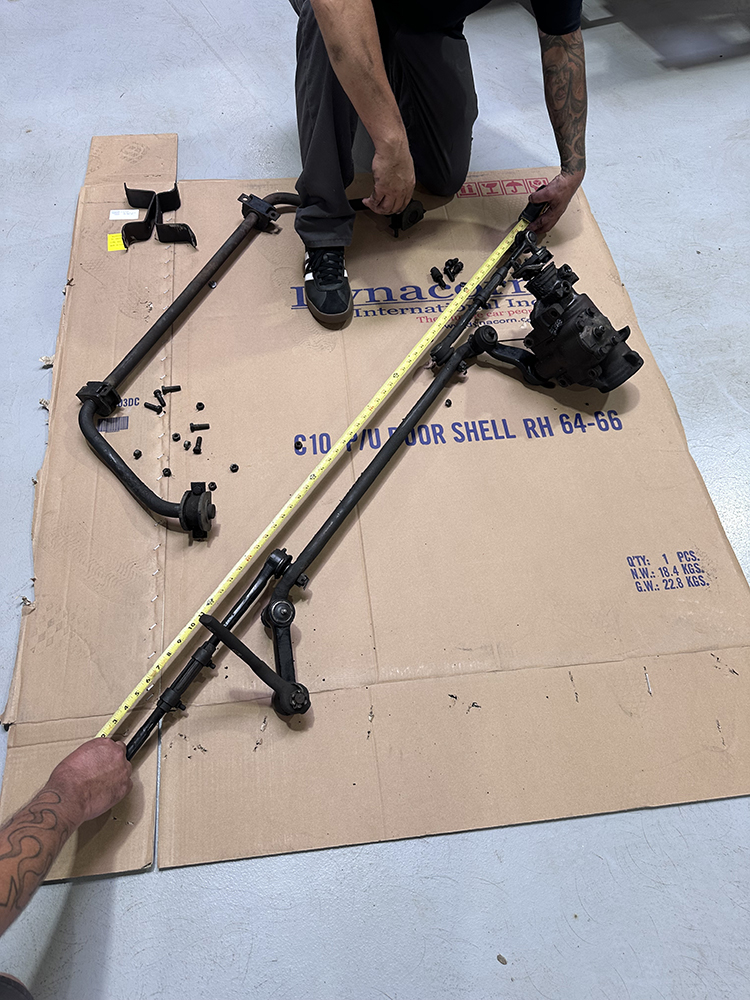
With the truck securely lifted in the air, the entire stock steering system—box, linkage, everything—was removed as one unit, as well as the sway bar. (Note: The OE D-bushing mounts must also be removed from the frame. To reuse the stock sway bar, the brackets will require modification, or an aftermarket torsion or link-style bar can be incorporated.)
(Footnote regarding the initial decision NOT to use Flaming River’s updated Type 2 power steering pump kit: The OE pump (reservoir) not only created cramped quarters for the steering linkage and plumbing, but the worn-out pump itself didn’t put out sufficient pressure, thus creating an overly sensitive steering situation. We followed up shortly thereafter by installing the new pump and, wouldn’t you know it, new-truck steering response! We’ll cover that in part 2.)
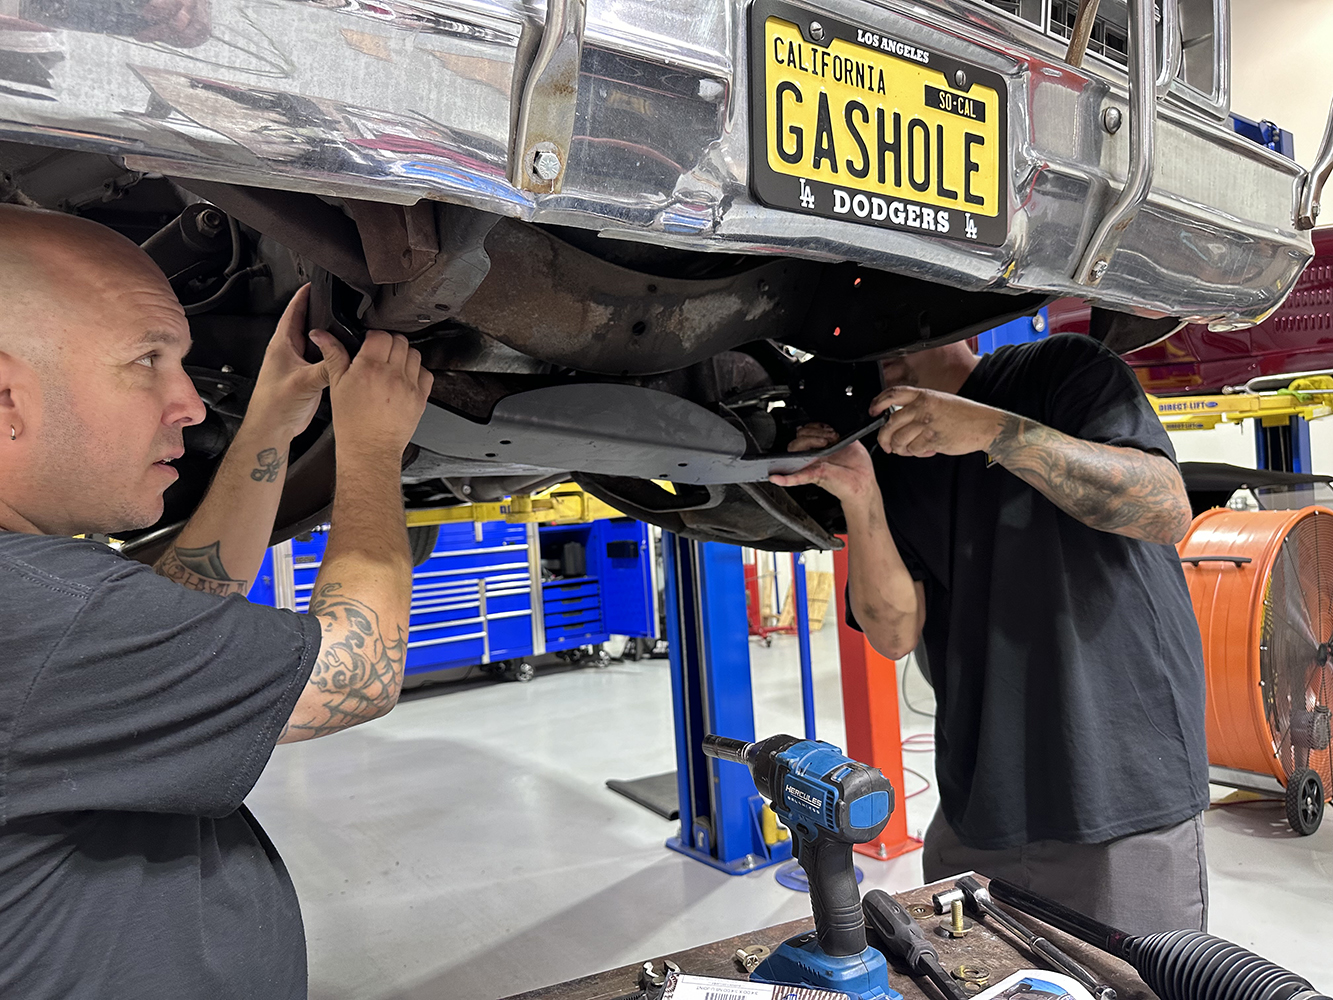
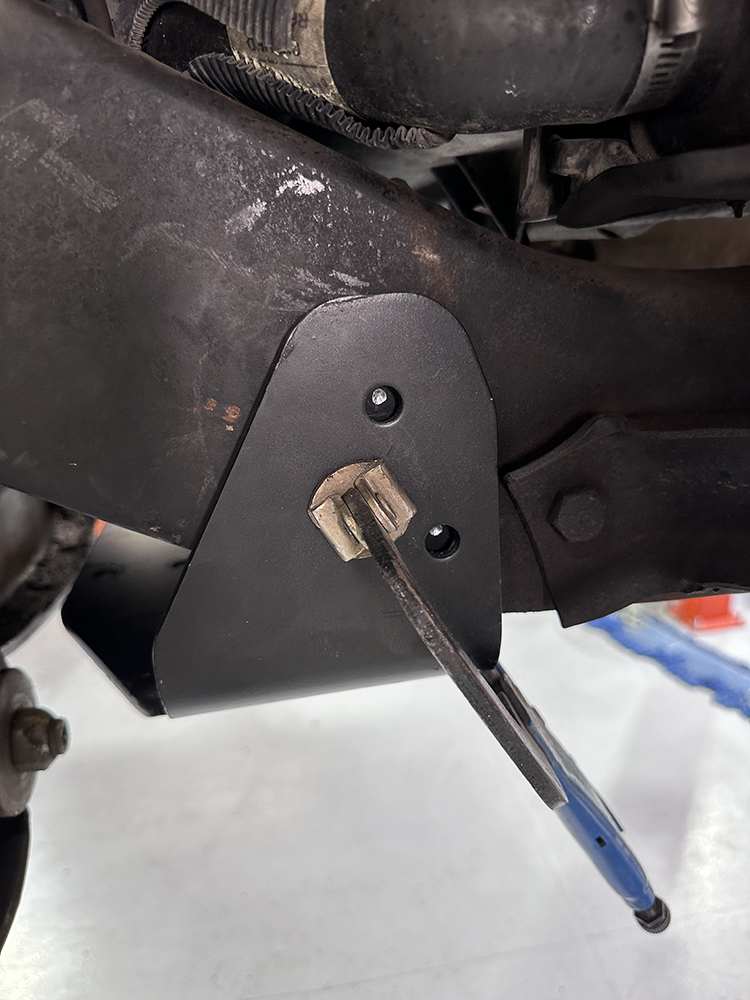
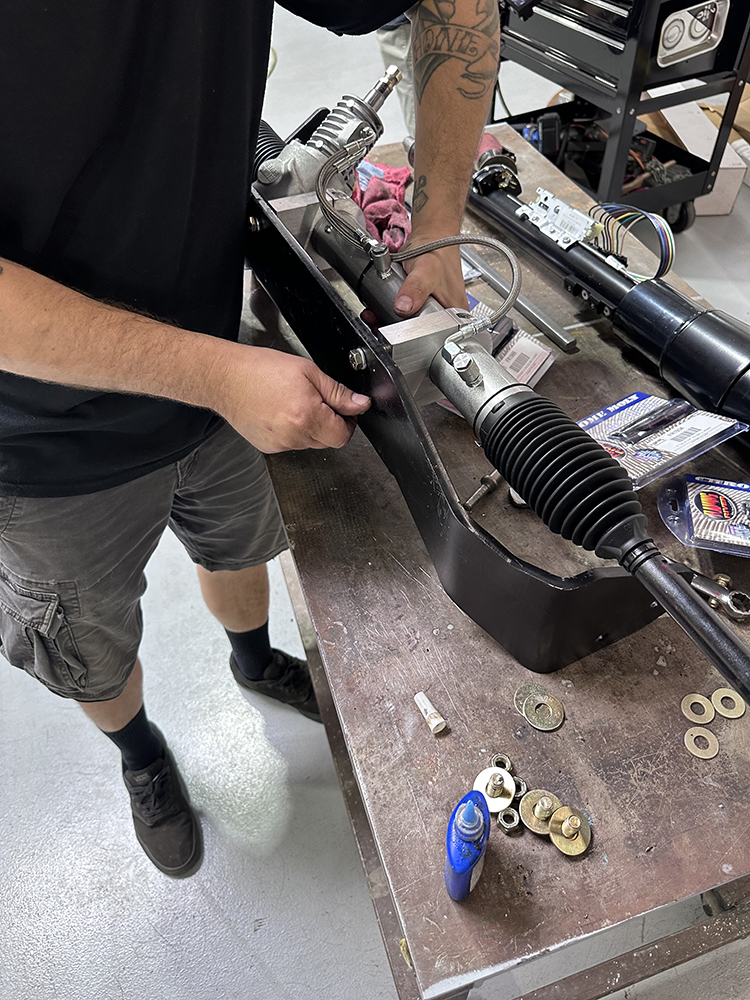
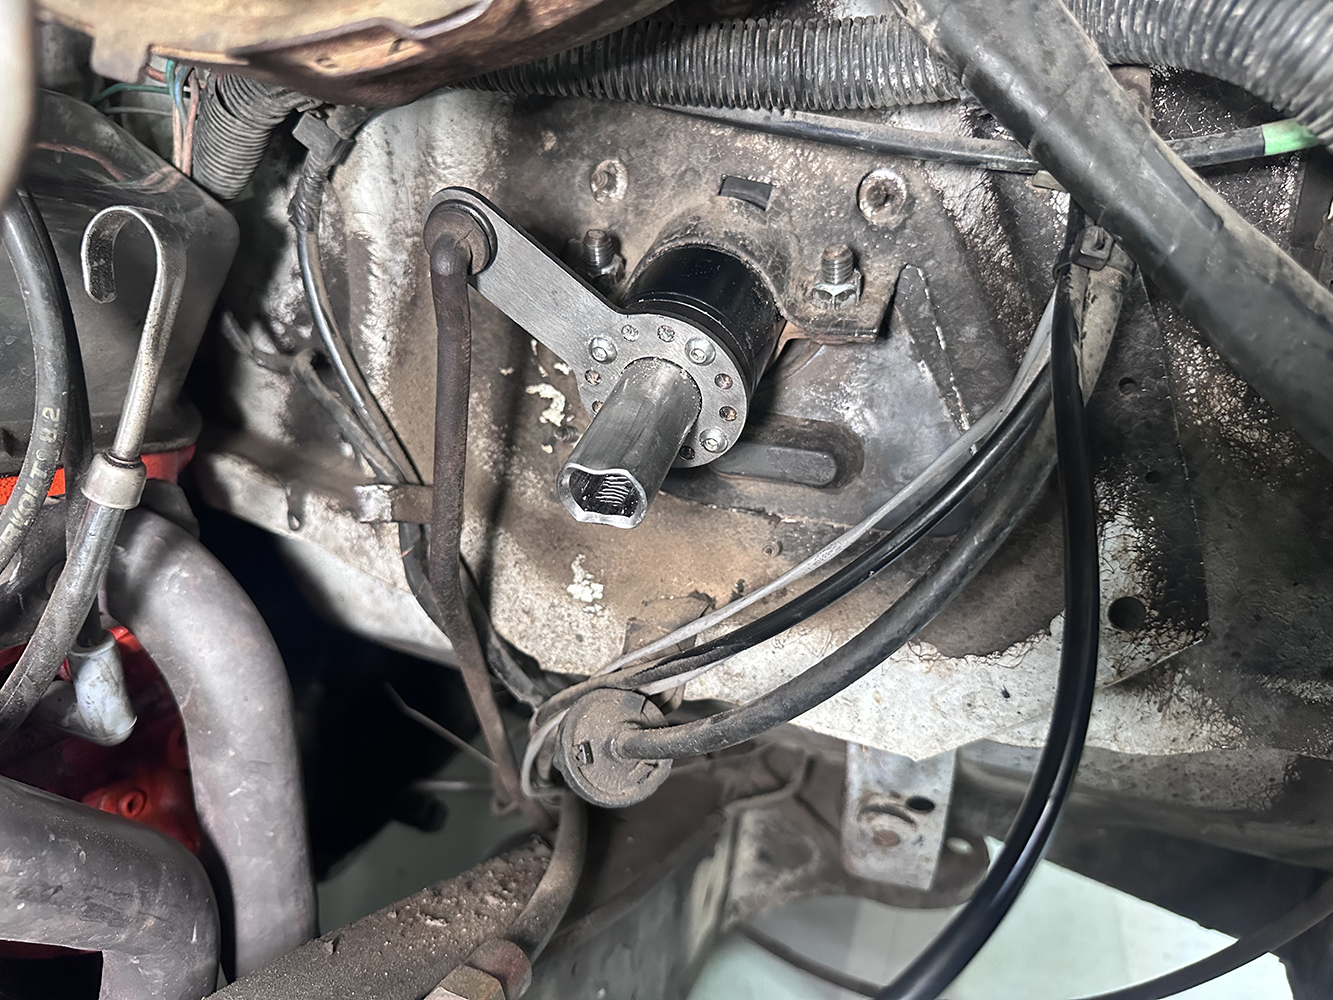
The steering box mounting holes on the driver side of the frame will be used to locate and mount the Flaming River cradle; the passenger-side holes will require locating and drilling.With the power rack unit removed, Ryan Manson and our volunteer helper for the day, Josh Stone, lift the cradle in place to begin the mounting process.Once the driver side is bolted in place (snug, not fully tightened) using the three 7/16-14 bolts, the cradle is leveled with the frame/crossmember before the passenger side is clamped.
The two mounting holes are marked; the cradle is then removed and the subsequent holes drilled for the two (smaller) 3/8-16 bolts.
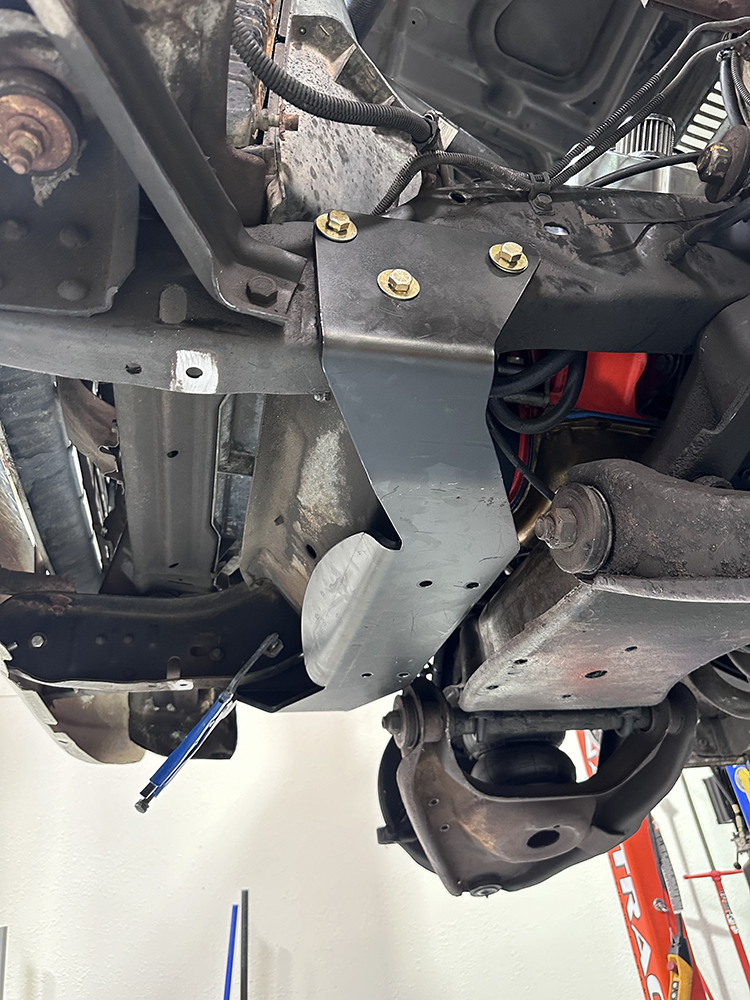
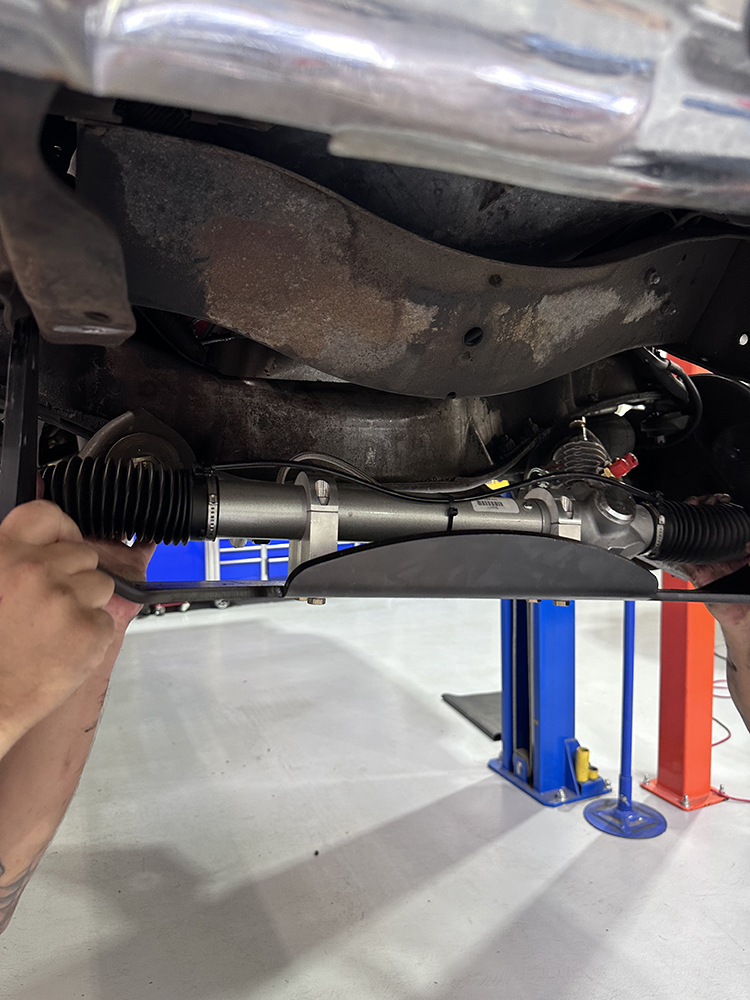
After the cradle has been located/leveled/mounted and all that jazz, it is reunited with its Flaming River power rack-and-pinion unit and reinstalled in the truck for the final time.
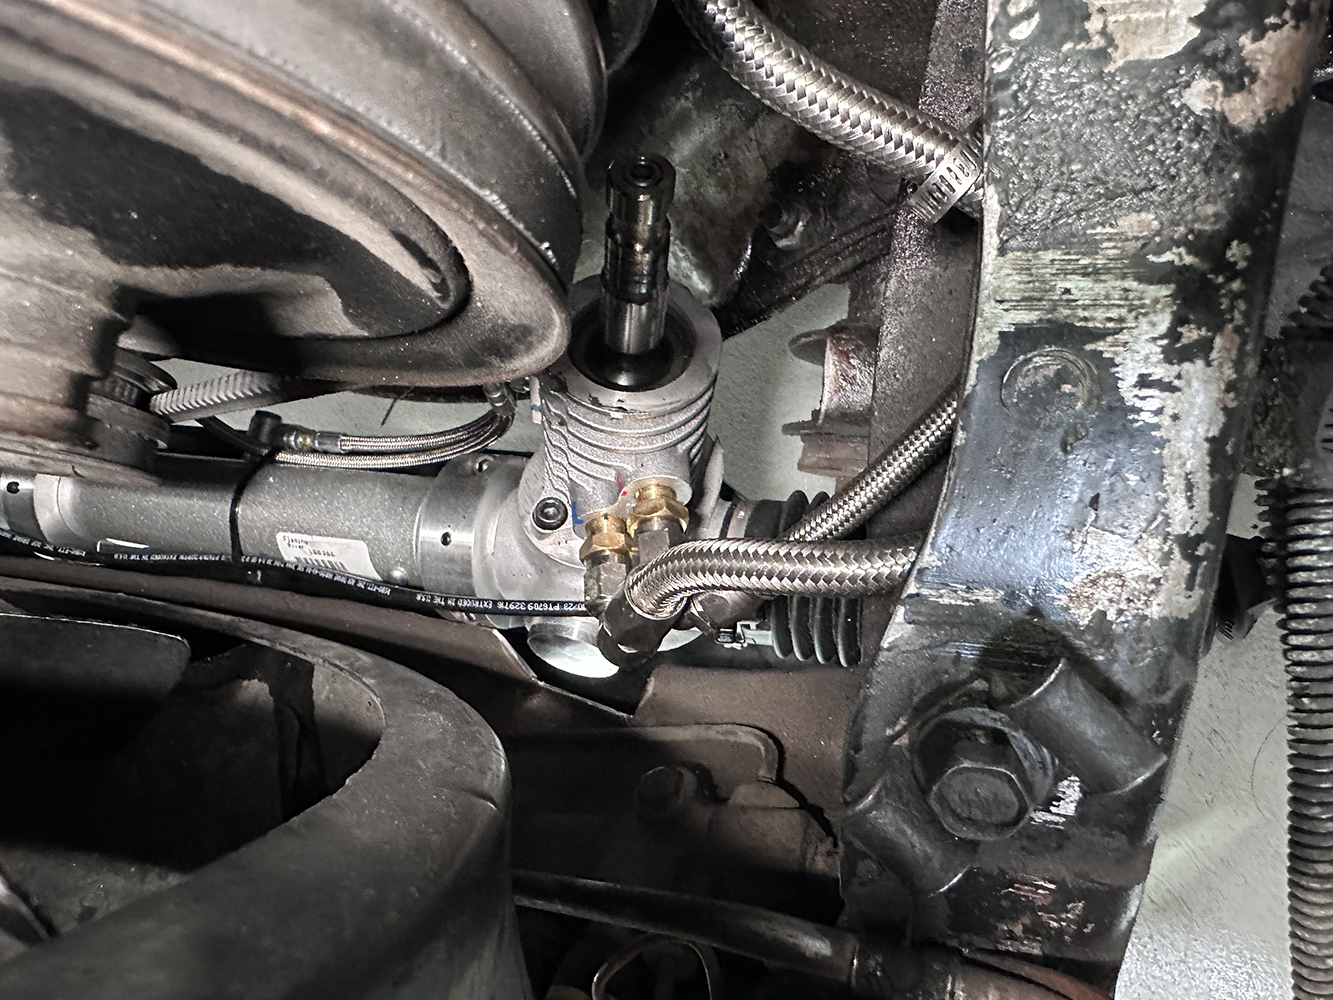
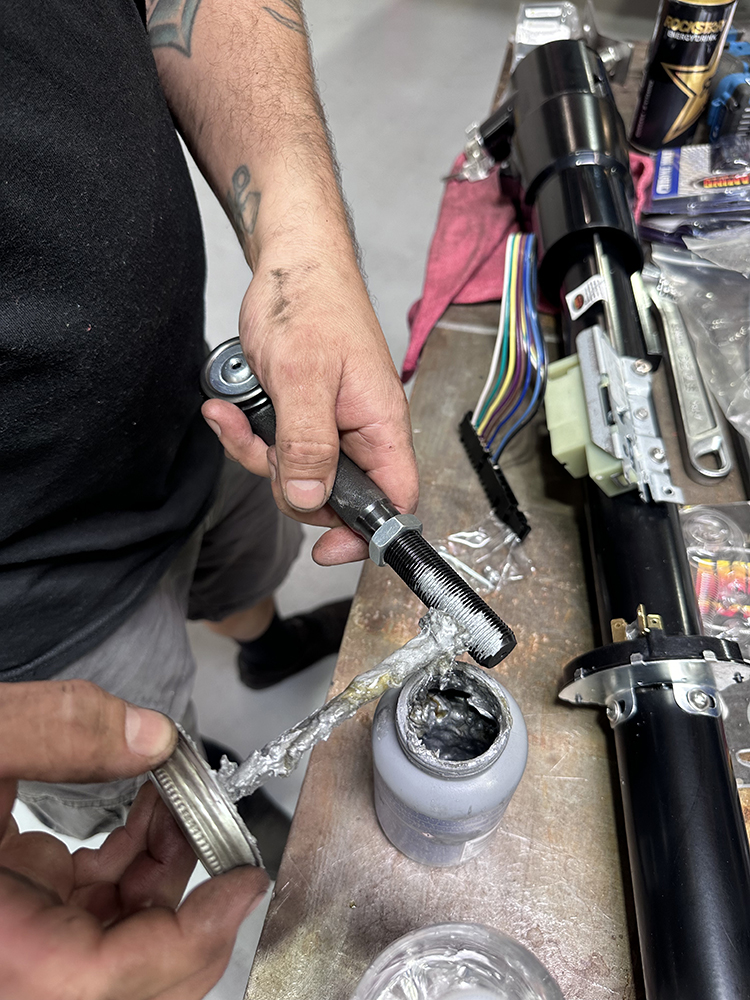
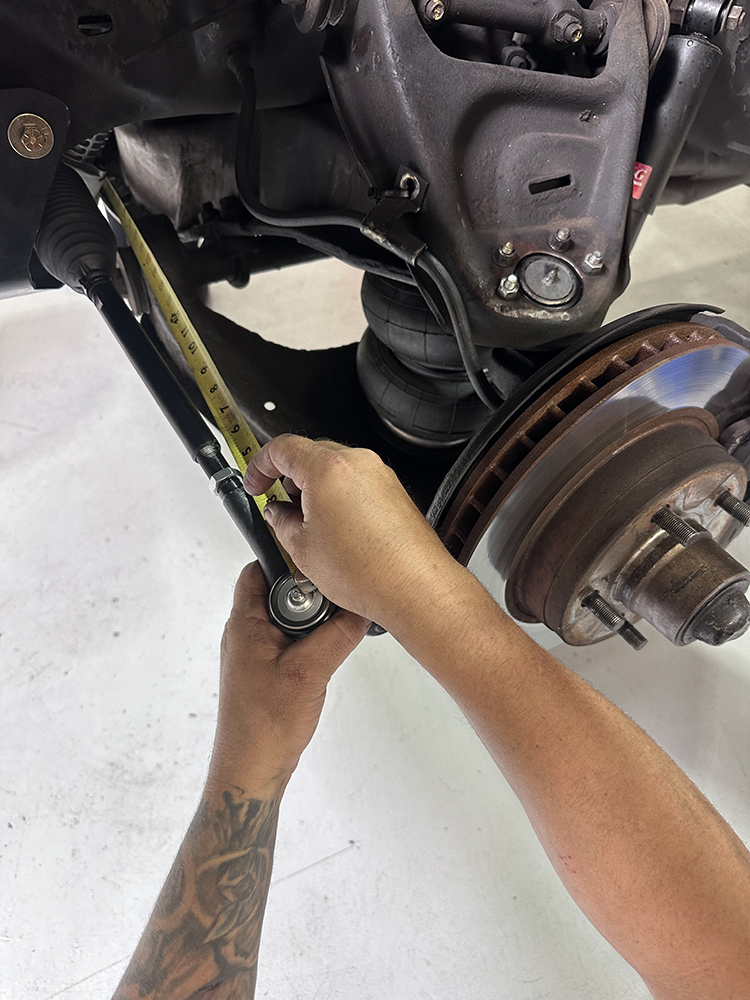
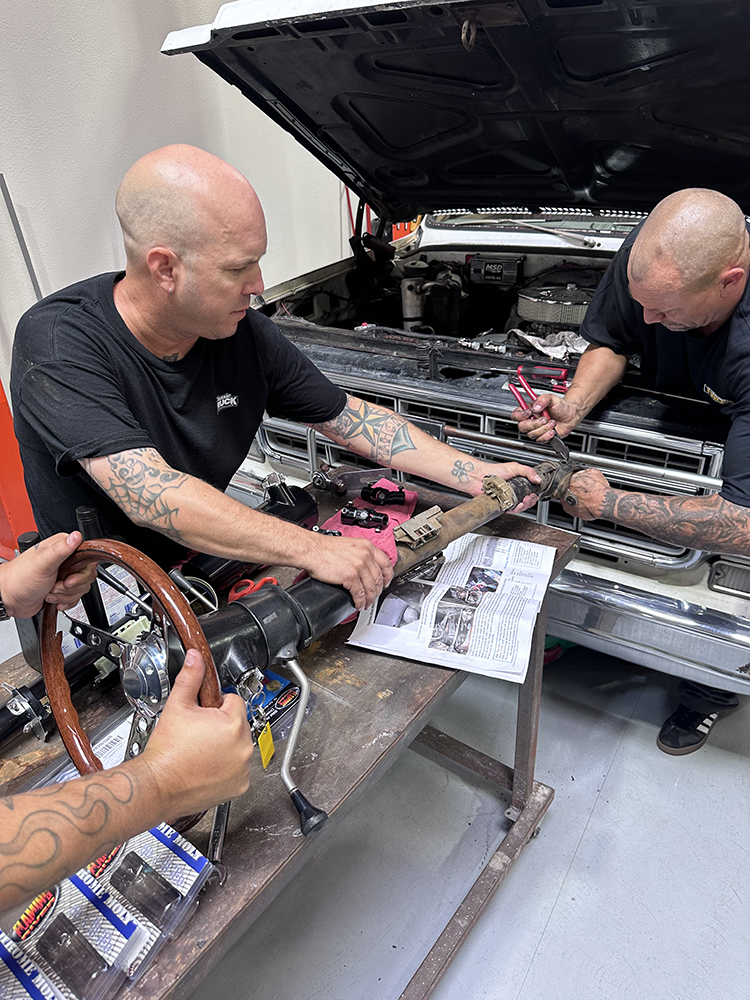
As mentioned in the story, the initial game plan was to retain the Chevy’s stock power steering pump, which was plumbed to the new rack—we found out the hard way that wasn’t a good choice and will be upgrading to the higher-pressure Type 2 pump! Also note that the rack can be rotated within the pillow blocks for steering linkage alignment, clearance, and so on.To finish up the rack portion of the install, we just need to connect the steering arms. Having left the OE steering intact, we measured from tie-rod end to tie-rod end for our initial reference.Instead of reusing two old ones, we grabbed a new set of tie rods at lunch, lubed them up, and installed and adjusted based off our previous measurement. Once all’s said and done, the truck will get a proper alignment.
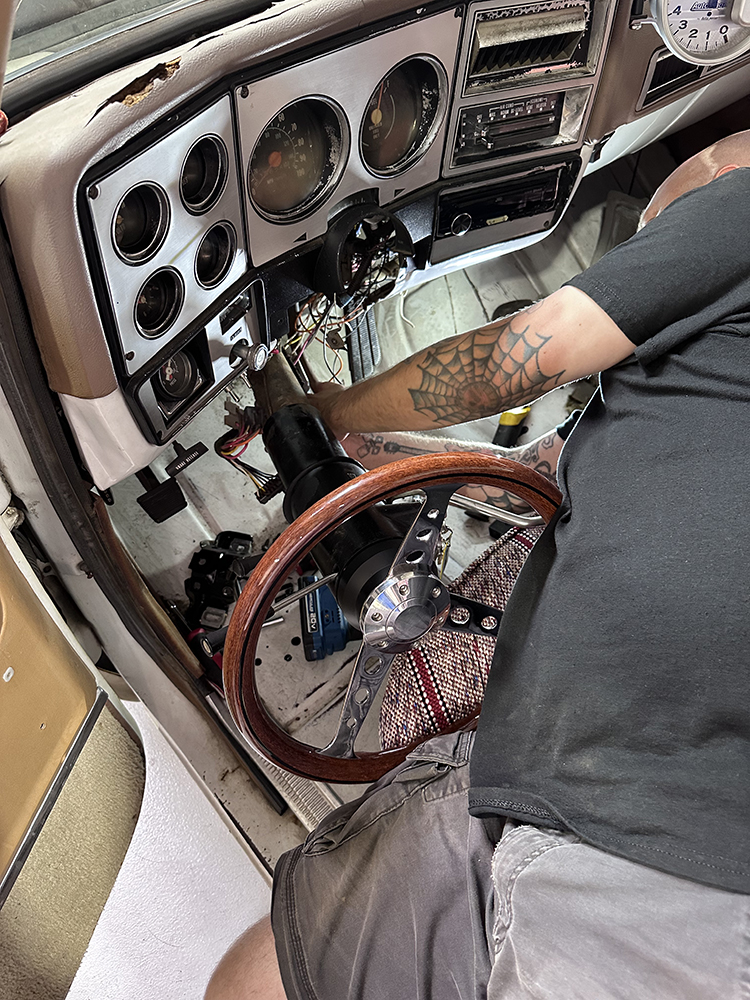
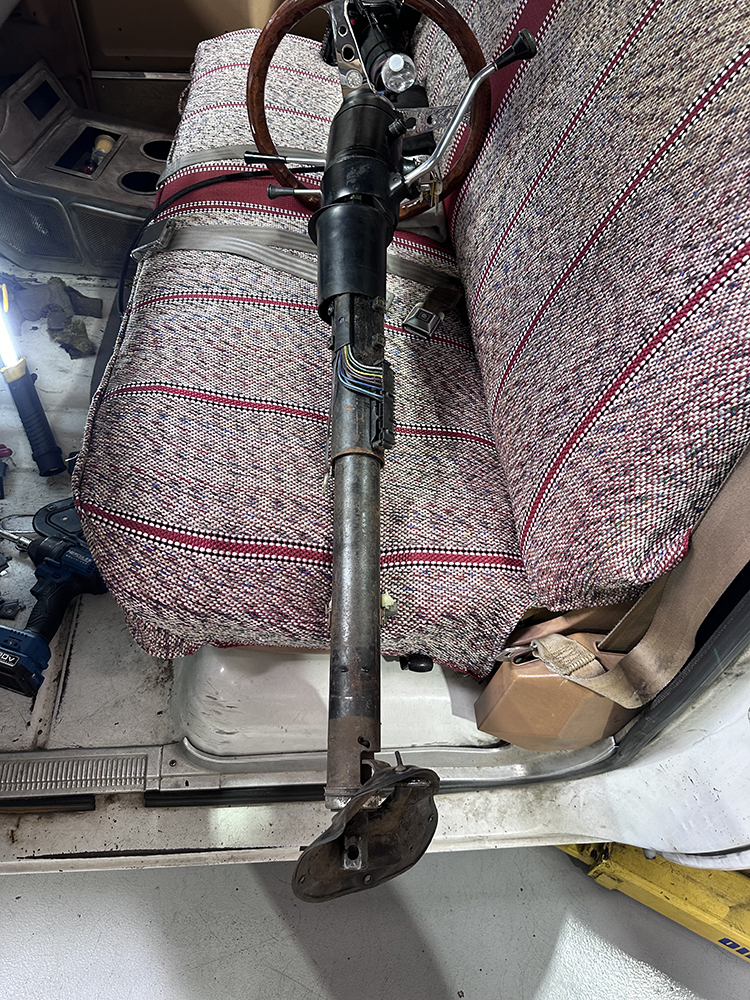
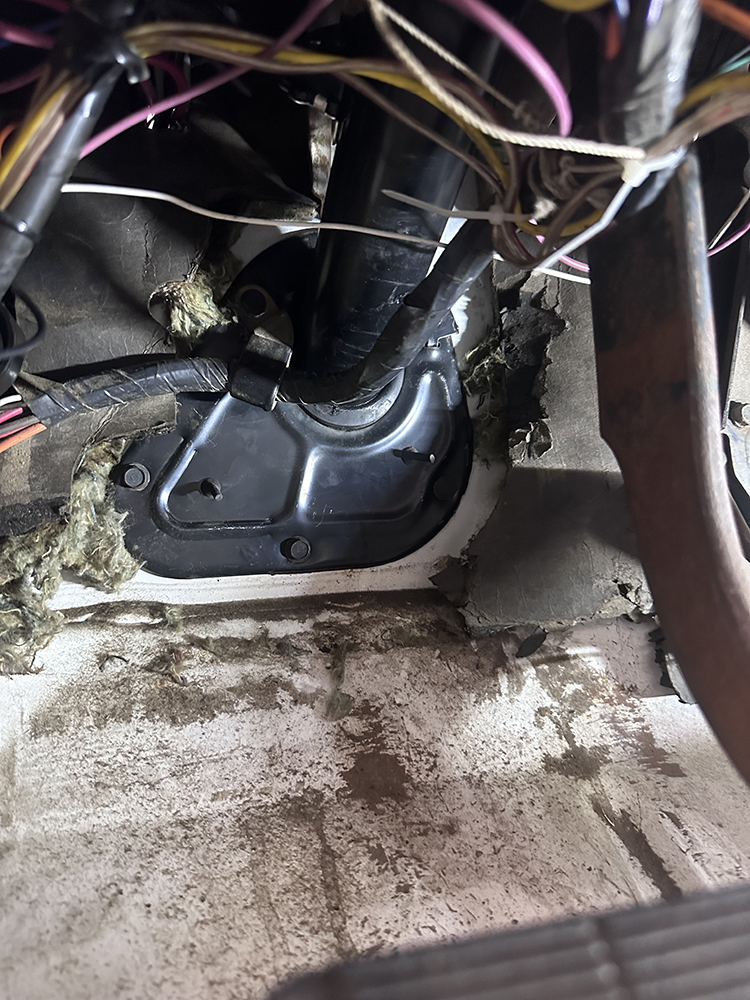
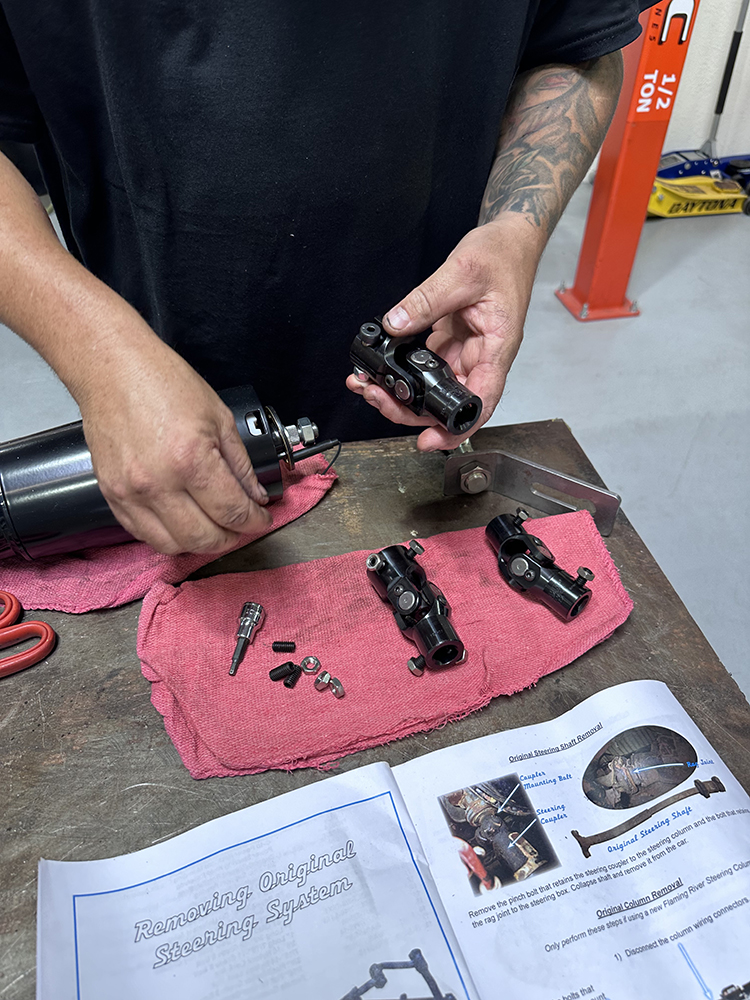
That concludes the rack install, now onto swapping out the tilt steering columns and updating the steering linkage from rag to U-joint.Before ripping the original column out, we verified all the necessary column wiring was intact and in good condition to ensure the blinker, ignition, and all that will function with the new one.
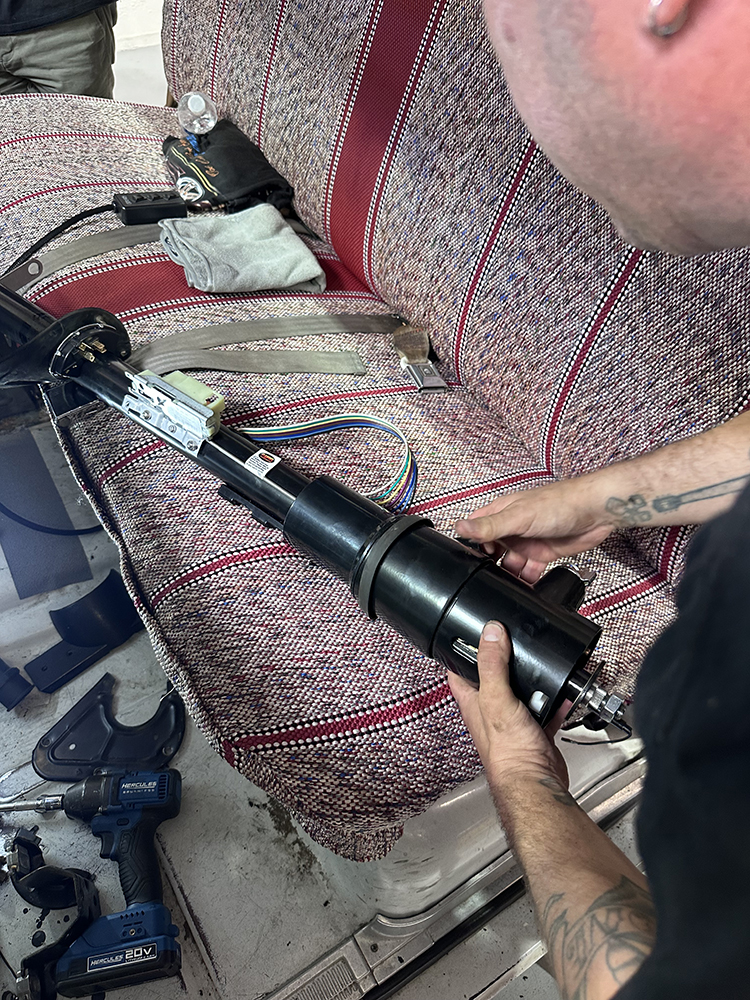
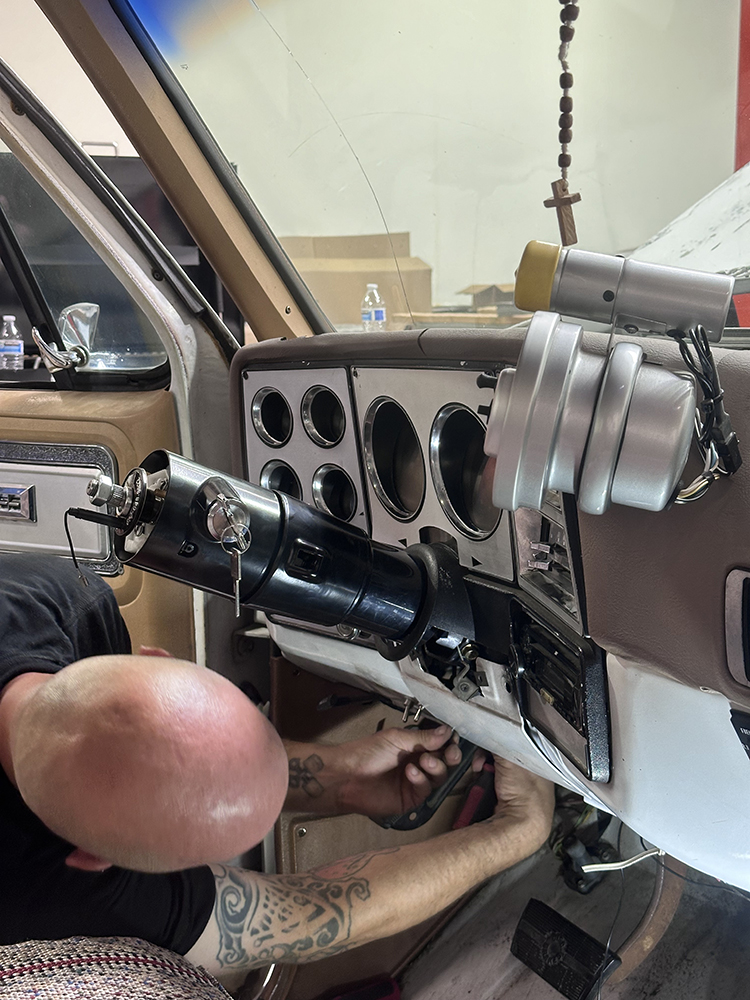
Don’t toss anything yet! Things you will retain from the OE column: dash mount, rubber boots/plastic fascia, floor plate and mount, and of course the steering wheel (unless you chose one of Flaming River’s billet wheels to use instead!).Stone took a break from plumbing inside the engine compartment to assist with removing the reusables from the old column…… so Manson could continue assembling the new Flaming River tilt column in preparation for installation.
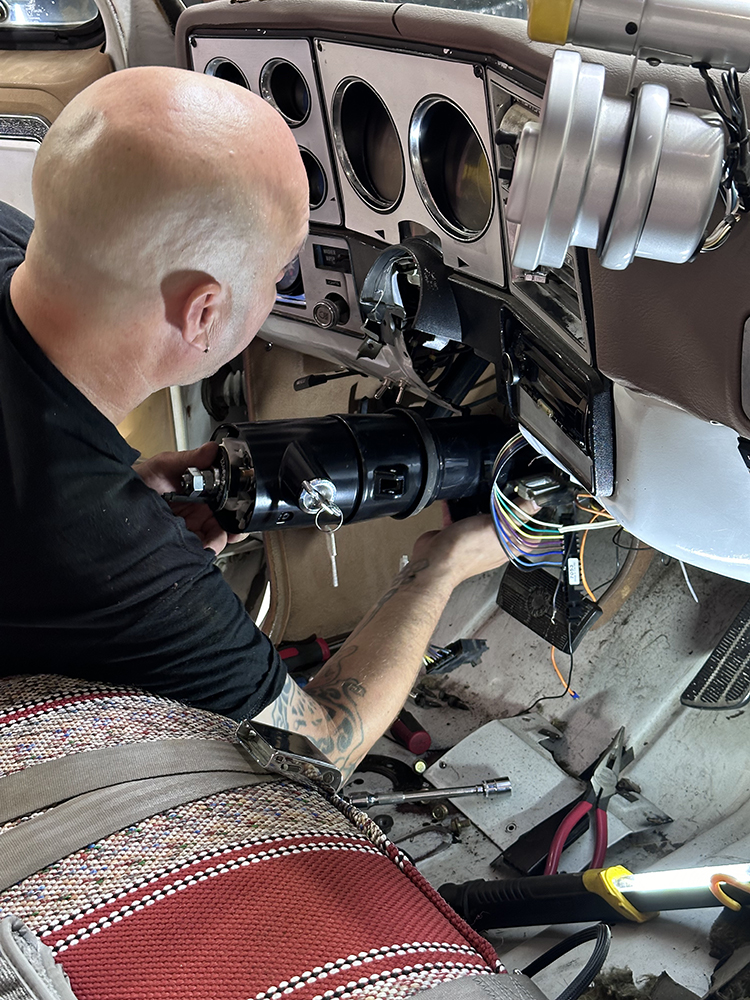
With it mounted and the wiring connected and secured, the OE floor plate is buttoned up and the lower dash panel and fascia reinstalled.
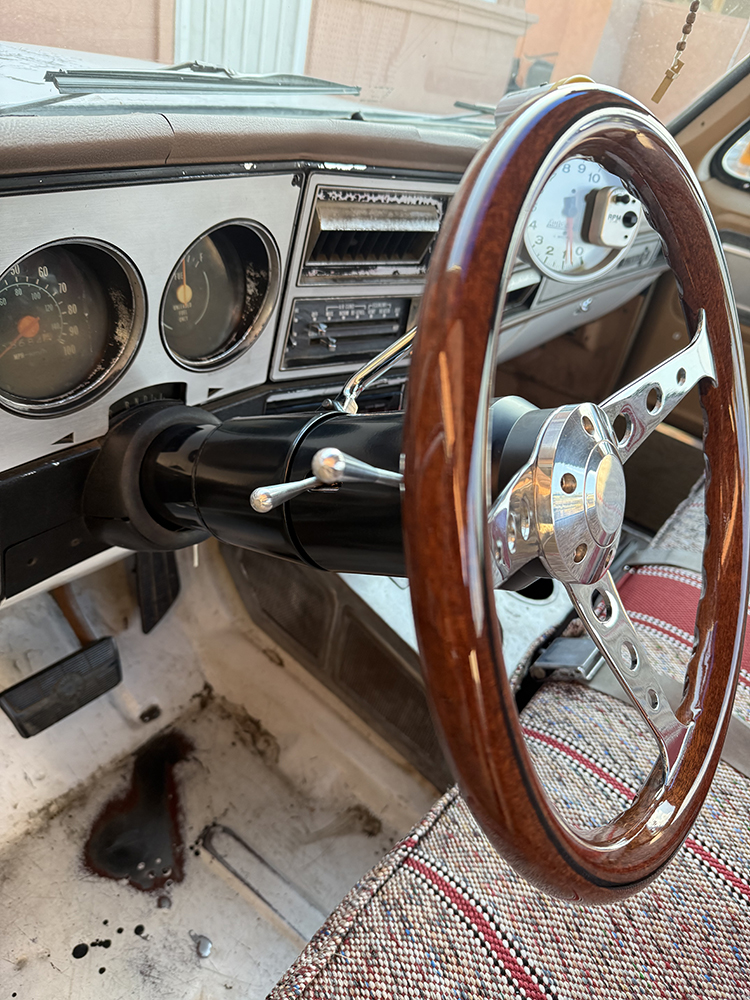
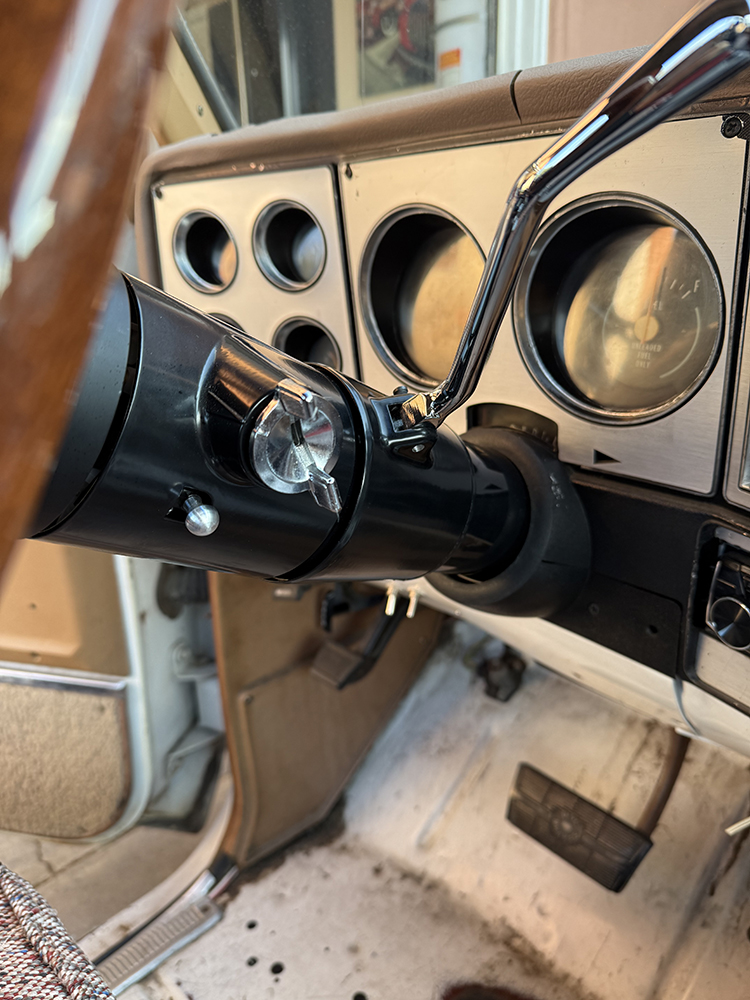
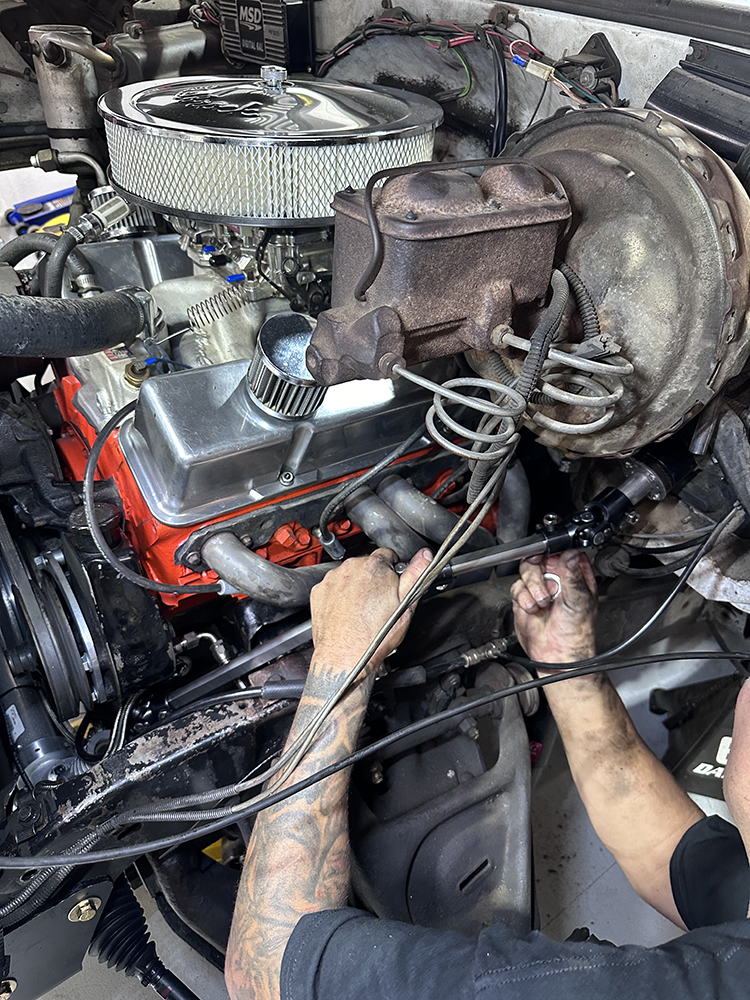
The new Flaming River 1973-87 C10 keyed column not only looks much better with its polished aluminum accessories (shifter, blinker lever, and flasher switch), it will now offer Garcia a fully functioning tilt option now, unlike his broken OE one!Now, to finish up the install inside the engine compartment, the column’s firewall bracket is mounted and the stock transmission shift linkage reattached.
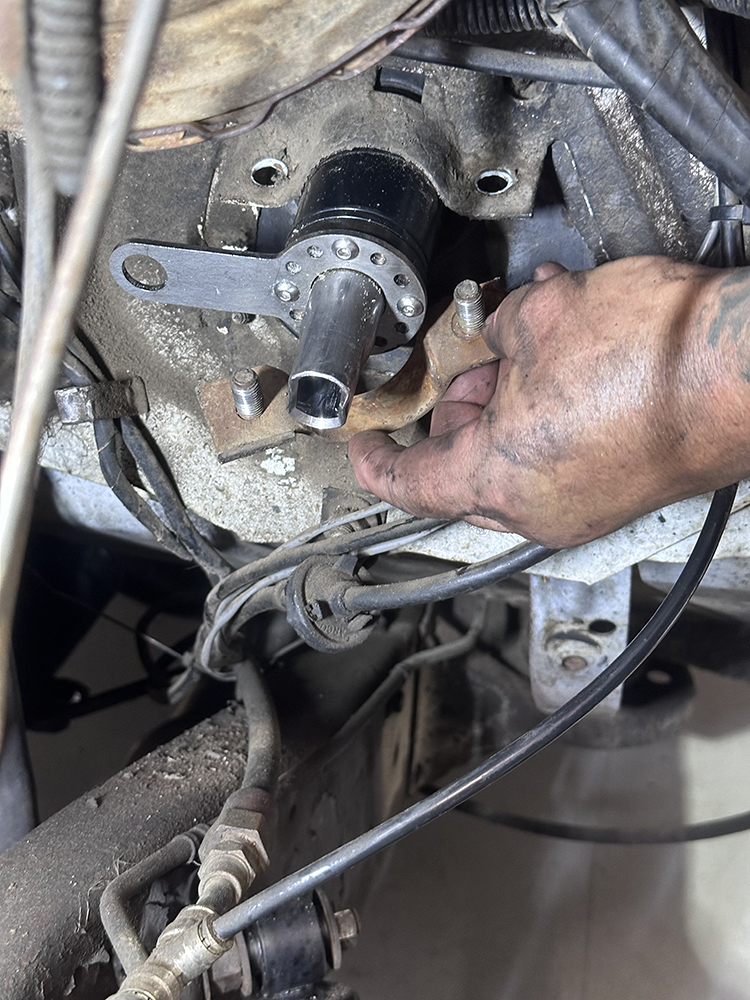
Included with the updated steering linkage: three U-joints, Double-D intermediate shaft, and a bolt-on support bearing (all to eliminate the single steering shaft with rag joints).
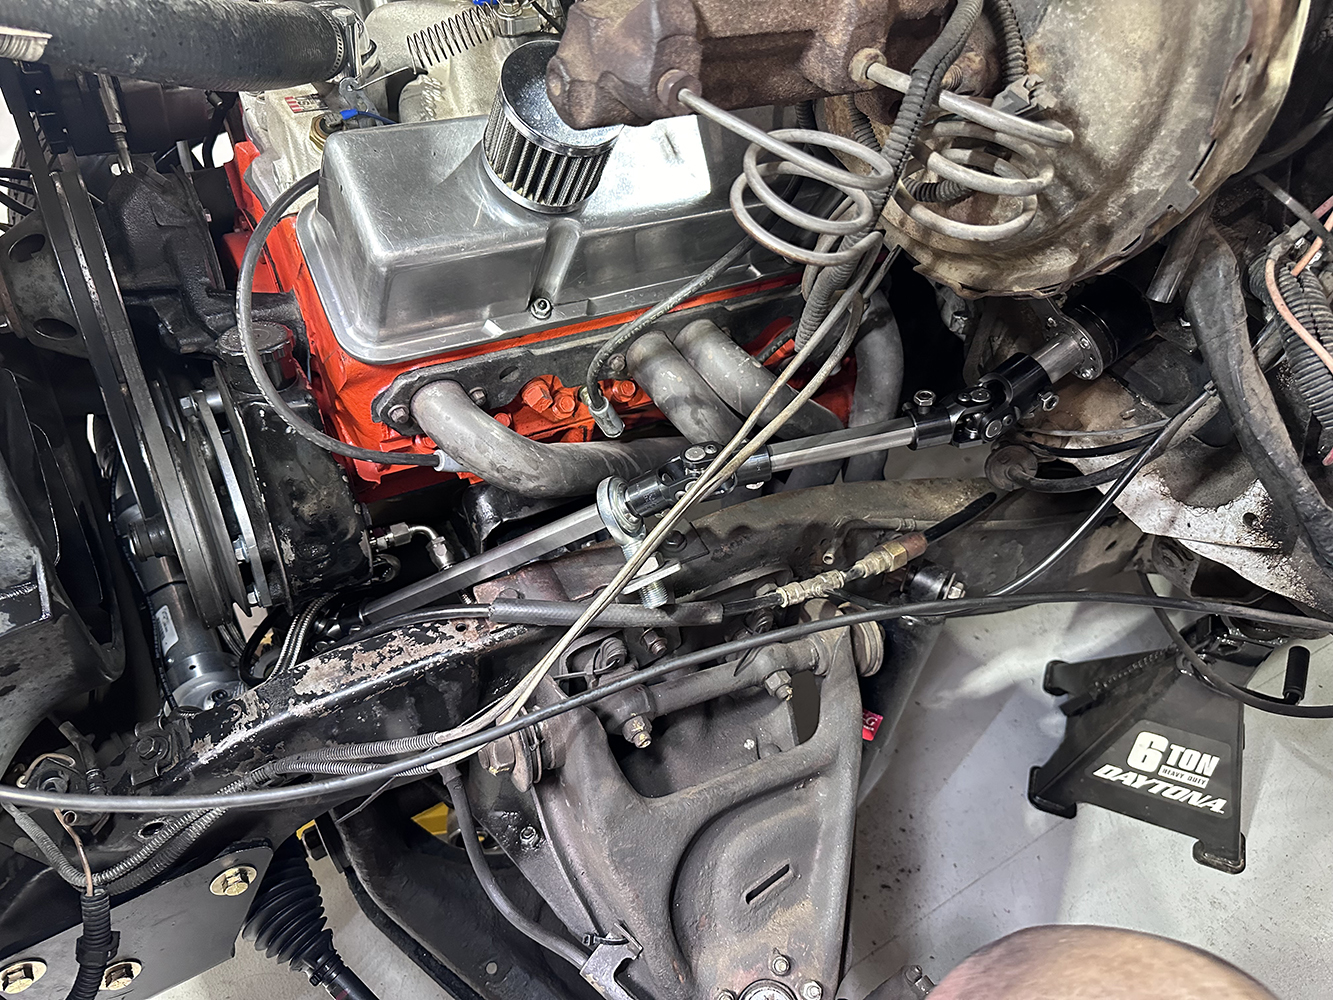
With the linkage configured and secured (with no interference or binding), all that’s left is to refill the power steering fluid and put the truck back on all fours for a good road test. Now, while the new power rack, column, and steering linkage vastly improved the steering, once we realized what a hinderance the stock power steering pump was and swapped out for the Flaming River Type 2 kit, the steering characteristics were like a new truck! Stay tuned for that “faux pas” update next!
We use cookies to ensure that we give you the best experience on our website. If you continue to use this site we will assume that you are happy with it.